KIT 400WS - 500WS - 600WS - AEK sváÅecà technika
KIT 400WS - 500WS - 600WS - AEK sváÅecà technika
KIT 400WS - 500WS - 600WS - AEK sváÅecà technika
- No tags were found...

Create successful ePaper yourself
Turn your PDF publications into a flip-book with our unique Google optimized e-Paper software.
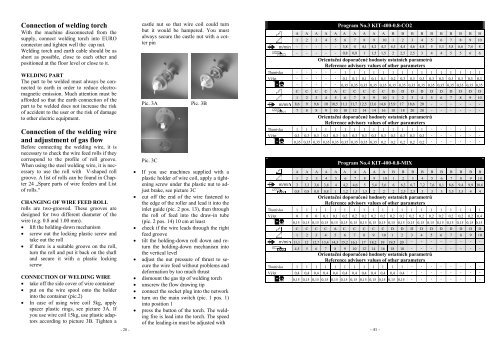
Connection of welding torchWith the machine disconnected from thesupply, connect welding torch into EUROconnector and tighten well the cap nut.Welding torch and earth cable should be asshort as possible, close to each other andpositioned at the floor level or close to it.WELDING PARTThe part to be welded must always be connectedto earth in order to reduce electromagneticemission. Much attention must beafforded so that the earth connection of thepart to be welded does not increase the riskof accident to the user or the risk of damageto other electric equipment.Connection of the welding wireand adjustment of gas flowBefore connecting the welding wire, it isnecessary to check the wire feed rolls if theycorrespond to the profile of roll groove.When using the steel welding wire, it is necessaryto use the roll with V-shaped rollgroove. A list of rolls can be found in Chapter24 „Spare parts of wire feeders and Listof rolls.“CHANGING OF WIRE FEED ROLLrolls are two-grooved. These grooves aredesigned for two different diameter of thewire (e.g. 0.8 and 1.00 mm).• lift the holding-down mechanism• screw out the locking plastic screw andtake out the roll• if there is a suitable groove on the roll,turn the roll and put it back on the shaftand secure it with a plastic lockingscrewCONNECTION OF WELDING WIRE• take off the side cover of wire container• put on the wire spool onto the holderinto the container (pic.2)• In case of using wire coil 5kg, applyspacer plastic rings, see picture 3A. Ifyou use wire coil 15kg, use plastic adaptorsaccording to picture 3B. Tighten a- 28 -castle nut so that wire coil could turnbut it would be hampered. You mustalways secure the castle nut with a cotterpinPic. 3A Pic. 3BPic. 3C• If you use machines supplied with aplastic holder of wire coil, apply a tighteningscrew under the plastic nut to adjustbrake, see picture 3C• cut off the end of the wire fastened tothe edge of the roller and lead it into theinlet guide (pic. 2 pos. 13), then throughthe roll of feed into the draw-in tube(pic. 2 pos. 14) 10 cm at least• check if the wire leads through the rightfeed groove• tilt the holding-down roll down and returnthe holding-down mechanism intothe vertical level• adjust the nut pressure of thrust to securethe wire feed without problems anddeformation by too much thrust• dismount the gas tip of welding torch• unscrew the flow drawing tip• connect the socket plug into the network• turn on the main switch (pic. 1 pos. 1)into position 1• press the button of the torch. The weldingfire is lead into the torch. The speedof the leading-in must be adjusted withProgram No.3 <strong>KIT</strong>-400-0.8-CO2A A A A A A A A A A B B B B B B B B B B1 2 3 4 5 6 7 8 9 10 1 2 3 4 5 6 7 8 9 10- - - - - 3,8 4 4,1 4,2 4,3 4,3 4,4 4,6 4,8 5 5,3 5,8 6,6 7,4 8- - - - - 0,8 0,8 1 1,5 1,5 2 2,5 2,5 3 4 4 5 5 6 6Orientační doporučené hodnoty ostatních parametrůReference advisory values of other parametersTlumivka - - - - - 1 1 1 1 1 1 1 1 1 1 1 1 1 1 1Výlet - - - - - 0,1 0,1 0,1 0,1 0,1 0,2 0,3 0,3 0,3 0,3 0,3 0,3 0,3 0,3 0,3- - - - - 0,35 0,35 0,35 0,35 0,35 0,35 0,35 0,35 0,35 0,35 0,35 0,35 0,35 0,35 0,35C C C C A C C C C C D D D D D D D D D D1 2 3 4 5 6 7 8 9 10 1 2 3 4 5 6 7 8 9 108,6 9 9,6 10 10,5 11,1 11,7 12,5 13,6 14,6 15,9 17 18,6 20 - - - - - -7 8 8 9 10 10 12 14 14 16 18 18 20 20 - - - - - -Orientační doporučené hodnoty ostatních parametrůReference advisory values of other parametersTlumivka 1 1 1 1 1 1 1 1 1 1 1 1 1 1 - - - - - -Výlet 0,3 0,3 0,3 0,3 0,3 0,3 0,3 0,3 0,3 0,3 0,3 0,3 0,3 0,3 - - - - - -0,35 0,35 0,35 0,35 0,35 0,35 0,35 0,35 0,35 0,2 0,2 0,2 0,2 0,2 - - - - - -Program No.4 <strong>KIT</strong>-400-0.8-MIXA A A A A A A A A A B B B B B B B B B B1 2 3 4 5 6 7 8 9 10 1 2 3 4 5 6 7 8 9 103 3,3 3,6 3,8 4 4,2 4,6 5 5,4 5,6 6 6,3 6,7 7,2 7,6 8,1 8,6 9,4 9,9 10,60,8 0,8 0,8 0,8 1 1,2 1,5 1,5 2 2 2 2,5 2,5 3 3 3 3,5 3,5 4 4Orientační doporučené hodnoty ostatních parametrůReference advisory values of other parametersTlumivka 1 1 1 1 1 1 1 1 1 1 1 1 1 1 1 1 1 1 1 1Výlet 0 0 0 0,1 0,1 0,2 0,2 0,2 0,2 0,2 0,2 0,2 0,2 0,2 0,2 0,2 0,2 0,2 0,2 0,40,15 0,15 0,15 0,15 0,15 0,15 0,15 0,15 0,15 0,15 0,15 0,15 0,15 0,15 0,15 0,15 0,15 0,15 0,15 0,15C C C C A C C C C C D D D D D D D D D D1 2 3 4 5 6 7 8 9 10 1 2 3 4 5 6 7 8 9 1011,1 12 12,7 13,4 14,3 15,2 16,1 17 18,2 19 19,5 20 - - - - - - - -4,5 5 6 7 8 9 10 12 14 16 18 18 - - - - - - - -Orientační doporučené hodnoty ostatních parametrůReference advisory values of other parametersTlumivka 1 1 1 1 1 1 1 1 1 1 1 1 - - - - - - - -Výlet 0,4 0,4 0,4 0,4 0,4 0,4 0,4 0,4 0,4 0,4 0,4 0,4 - - - - - - - -0,15 0,15 0,15 0,15 0,15 0,15 0,15 0,15 0,15 0,15 0,15 0,15 - - - - - - - -- 41 -