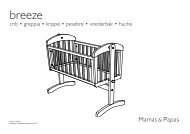
Ultima - 3 in 1 Combination instructions - Mamas & Papas
Ultima - 3 in 1 Combination instructions - Mamas & Papas
Ultima - 3 in 1 Combination instructions - Mamas & Papas
- No tags were found...

You also want an ePaper? Increase the reach of your titles
YUMPU automatically turns print PDFs into web optimized ePapers that Google loves.
3 IN 1 COMBINATIONDear Customer,Thank you for choos<strong>in</strong>g a <strong>Mamas</strong> & <strong>Papas</strong> 3 <strong>in</strong> 1 Comb<strong>in</strong>ation.Flexible, adaptable, stylish. That's the 3 <strong>in</strong> 1 Comb<strong>in</strong>ation. With a Carrycot, apram and a forward or rear fac<strong>in</strong>g Pushchair it’s ideal from birth, right throughyour child’s early years. Simple and practical, it attaches to your choice of Chassisus<strong>in</strong>g our revolutionary G-Matic ‘one click’ system. And with the option of add<strong>in</strong>gthe Primo Viaggio Car Seat to create a total travel System, it’s got every th<strong>in</strong>gyou could need.CONTENTSSubjectPage No.Product Information ................................................................................................. 2Instructions for safe use ........................................................................................ 3Carrycot Features ..................................................................................................... 4Seat Unit Features ................................................................................................... 4Carrycot operationAttach<strong>in</strong>g the carrycot to a chassis ................................................................ 5Adjust<strong>in</strong>g the carrycot backrest ...................................................................... 6Operat<strong>in</strong>g the stabilis<strong>in</strong>g feet .......................................................................... 6Adjust<strong>in</strong>g the ventilation base ......................................................................... 7Fitt<strong>in</strong>g and remov<strong>in</strong>g the hood ........................................................................ 7Attach<strong>in</strong>g and remov<strong>in</strong>g the carrycot apron ............................................... 8Remov<strong>in</strong>g the carrycot ....................................................................................... 8Us<strong>in</strong>g the carry<strong>in</strong>g handles ............................................................................... 9Remov<strong>in</strong>g the base pad and l<strong>in</strong><strong>in</strong>g ................................................................. 9Fitt<strong>in</strong>g the two part ra<strong>in</strong>cover to the carrycot .......................................... 10Seat unit operationAttach<strong>in</strong>g the seat unit to a chassis .............................................................. 11Adjust<strong>in</strong>g the seat unit backrest .................................................................... 12Adjust<strong>in</strong>g the footrest ....................................................................................... 12Us<strong>in</strong>g the safety harness tidy ......................................................................... 13Us<strong>in</strong>g and adjust<strong>in</strong>g the safety harness ....................................................... 13Remov<strong>in</strong>g and attach<strong>in</strong>g the bumper bar .................................................... 14Attach<strong>in</strong>g and remov<strong>in</strong>g the hood .................................................................. 15Fitt<strong>in</strong>g the seat unit apron ................................................................................ 15Remov<strong>in</strong>g the seat unit from the chassis .................................................... 16Remov<strong>in</strong>g the seat cover ................................................................................... 17Fitt<strong>in</strong>g a footmuff or seat pad ........................................................................ 18Fitt<strong>in</strong>g the two part PVC ra<strong>in</strong>cover to the seat unit ................................ 19Care & ma<strong>in</strong>tenanceCare & ma<strong>in</strong>tenance ............................................................................................ 20– 1 –
PRODUCT INFORMATIONThis pushchair has been designed and tested to comply with the latest British andEuropean safety standards.• Both the carrycot and seat unit are suitable from birth when <strong>in</strong> the lie flatposition• Both items can be fitted <strong>in</strong> the forward or rear fac<strong>in</strong>g position on <strong>Mamas</strong> &<strong>Papas</strong> Chassis• Interchangeable draught proof hood for carrycot and seat unit• Adjustable backrest on both the carrycot and seat unitCARRYCOT• Removable apron and l<strong>in</strong>er to keep your baby warm• Ideal for over night stays with the additional Sleepsafe mattress andcarrycot stand (both optional accessories)• Curved rock<strong>in</strong>g/stationary base with flip out stabilis<strong>in</strong>g feet• Adjustable ventilated base to allow air to circulate around your childSEAT UNIT• Adjustable five po<strong>in</strong>t safety harness for security and freedom of movement• Two position footrest for your child’s comfort• Protective and removable bumper bar• Removable and expandable pushchair apron for the comfort of your childACCESSORIESThe <strong>Mamas</strong> & <strong>Papas</strong> range of co-ord<strong>in</strong>at<strong>in</strong>g pram and pushchair accessories areavailable. This range <strong>in</strong>cludes bags, footmuffs, sun canopies, ra<strong>in</strong>covers, prambedd<strong>in</strong>g & mattresses. Also <strong>in</strong>cluded are pram toys.AFTER SALES SERVICE: If when you receive your<strong>Mamas</strong> & <strong>Papas</strong> pushchair you need assistance, spare partsor if you are unhappy with any aspect of the goods pleasecontact our Customer Care Helpl<strong>in</strong>e on: 01484 438222,or e-mail us on customer.care@mamasandpapas.co.ukwhere one of our tra<strong>in</strong>ed advisors will be able to help you. Youcan also visit our website at www.mamasandpapas.co.ukfor the latest product <strong>in</strong>formation.– 2 –
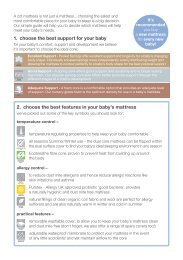
INSTRUCTIONS FOR SAFE USE• WARNING: A CHILD'S SAFETY IS YOUR RESPONSIBILITY.• Always ensure that your pushchair is fully erect and all lock<strong>in</strong>g clips are engaged.(Take particular care if a PVC ra<strong>in</strong>cover is fitted. Check that it is not entangled orprevent<strong>in</strong>g the function of the lock<strong>in</strong>g mechanisms).• Your pushchair is supplied with a five-po<strong>in</strong>t safety harness. We recommend that thesafety harness is worn by your child at all times. Ensure that the safety harness iscorrectly adjusted, provid<strong>in</strong>g a snug fit around your child. Adjustments are made us<strong>in</strong>gthe buckles on the shoulder, waist and crotch straps, please refer to the ‘Fitt<strong>in</strong>g theSafety Harness’ section <strong>in</strong> the <strong>in</strong>struction leaflet. The seat unit is supplied with ‘D’ r<strong>in</strong>gsafety harness attachment po<strong>in</strong>ts. These are located on either side at the base of thebackrests and are for fitt<strong>in</strong>g a separate safety harness conform<strong>in</strong>g to BS 6684 ifrequired.• Always ensure the brakes are correctly engaged whenever the pushchair is left for anyreason, even if only for a short time on a flat surface.• Always fold back the PVC ra<strong>in</strong>cover if you leave your child <strong>in</strong> the pushchair whenbr<strong>in</strong>g<strong>in</strong>g it <strong>in</strong>doors, as your child may become overheated.• Always ensure your child is clear of mov<strong>in</strong>g parts before you adjust the position of thebackrest, footrest, or canopy.• Always manoeuvre your pushchair up and down kerbs and steps gently. Do not letyour pushchair drop. Carry it upstairs wherever possible.• We recommend the use of a carrycot mattress, comply<strong>in</strong>g with BS1877 Part 10,which is available separately. Once the mattress is <strong>in</strong> position, the depth from the topof the mattress to the top of the carrycot should not be less than 140mm at anyposition with<strong>in</strong> 300mm from the harness attachment po<strong>in</strong>ts.• Never leave your child unattended. The safety of your child is your responsibility.Never overload your pushchair with additional goods or children. Your pushchair isdesigned to carry children up to approx. 3 years old. The carrycot is designed to carrychildren from birth to 9 months. Any additional items will damage your pushchair andmake it unsafe. Do not load your shopp<strong>in</strong>g tray with more than 5kgs of goods.• Do not hang shopp<strong>in</strong>g from the handle. Do not use any accessories e.g. bag hooks,child seats, ra<strong>in</strong>covers, stand-on platforms etc, except those recommended by <strong>Mamas</strong> &<strong>Papas</strong>. The use of non-approved accessories may damage or make your pushchair unsafeand render your guarantee void.• Never force your pushchair. Adjustments and locks should be free and easy to operate.Do not store your pushchair <strong>in</strong> a damp place.• Only chassis us<strong>in</strong>g the G-Matic system can be used with these carrycots or seat units. If<strong>in</strong> doubt, contact our Customer Care Helpl<strong>in</strong>e: 01484 438222 and one of our tra<strong>in</strong>edadvisors will be able to help you.• Take care when remov<strong>in</strong>g or revers<strong>in</strong>g the carrycot or seat unit. Always ensure yourchild is correctly harnessed <strong>in</strong> position and is clear of mov<strong>in</strong>g parts.• When us<strong>in</strong>g the carrycot, it is recommended that the child is placed centrally betweenthe head and foot end for maximum stability.• We recommend that you fit a <strong>Mamas</strong> & <strong>Papas</strong> sun canopy to shade your child fromdirect sunlight. We recommend that this be used <strong>in</strong> conjunction with the appropriatesun protection cream and cloth<strong>in</strong>g.• Do not use replacement parts that are not recommended or supplied by <strong>Mamas</strong> & <strong>Papas</strong>.Non-approved parts may make the repair and carrycot/seat unit unsafe.• Some seat units have a net pocket on the back of the seat cover. This pocket is <strong>in</strong>tendedto hold no more than one kilogram <strong>in</strong> weight, excessive weight could damage the fabriccover and net basket.– 3 –
CARRYCOT FEATURESCarrycot /Seat unithoodApronHand grip/ReleasemechanismBackrestadjusterVentilationadjusterLock<strong>in</strong>gcatchesSEAT UNIT FEATURESRemovablefootmuffAdjustablebackrestSafetyharnessHood releasebuttonBumperbarReleasemechanismLock<strong>in</strong>gcatchesAdjustablefootrest– 4 –
ATTACHING THE CARRYCOT TO A CHASSISWARNING: The carrycot hasfour fold out stabilis<strong>in</strong>g feet.These feet must be foldedunder the carrycot before youcan attach it to the chassisThe carrycot can be fitted <strong>in</strong>either the forward or rearfac<strong>in</strong>gposition on any <strong>Mamas</strong>& <strong>Papas</strong> Chassis.FORWARD FACINGFREEDOM CHASSISREAR FACINGCLASSIC STYLE CHASSISLift the carrycot us<strong>in</strong>g the twoplastic grips on the sides (seebelow).Align the lock<strong>in</strong>g clips on theunderside of the carrycot withthe lock<strong>in</strong>g bar on the chassis.Lock<strong>in</strong>gbarLock<strong>in</strong>gcatchSlot the lock<strong>in</strong>g clips over thelock<strong>in</strong>g bar and push downwith both hands. Check thatthe lock<strong>in</strong>g clips have correctlyengaged by attempt<strong>in</strong>g to liftthe carrycot upwards, it shouldnow be firmly attached to thechassis.– 5 –
ADJUSTING THE VENTILATION BASEThe vent holes <strong>in</strong> the base ofthe carrycot can be openedand closed to allow air tocirculate around the carrycotand to keep your baby cool <strong>in</strong>warmer conditions.Turn the lever at the foot endof the carrycot to operate theventilation system. Blue willopen the vents and red willclose them.FITTING AND REMOVING THE HOOD (CARRYCOT)Fitt<strong>in</strong>g the hood: The hood isattached to the carrycot bypush<strong>in</strong>g the clips on the endof the pivots on both sides ofthe hood <strong>in</strong>to the holes <strong>in</strong> thetop edge of the carrycot.F<strong>in</strong>ally attach the press studson the back of the hood tothe back of the carrycot.Remov<strong>in</strong>g the hood: Thehood is removed by push<strong>in</strong>g<strong>in</strong>wards where the clips onthe hood’s pivots enter thecarrycots sides. When the clipis pressed <strong>in</strong> pull the pivotupwards and the clip shouldnow slide out of the carrycotsside.– 7 –
ATTACHING AND REMOVING THE CARRYCOT APRONSlide the elasticated end ofthe apron over the foot endof the carrycot.Aprons with two pressstuds: Attach press stud A tothe stud on the side of thecarrycot body. Then attachpress stud B to the stud onthe outside of the hood.ABAprons with one press stud:Attach the press stud to studA on the side of the carrycotbody.Remov<strong>in</strong>g the apron:Always undo the press studsfirst before lift<strong>in</strong>g the apronoff the carrycot body.REMOVING THE CARRYCOTAPlace your hands on the twoplastic grips on the side of thecarrycot. Slide the levers on theunder sides of the gripstowards the foot end of thecarrycot.Push the lever up <strong>in</strong>to theplastic grip. The carrycot cannow be lifted clear of thechassis.– 8 –
The carry<strong>in</strong>g handles arestored <strong>in</strong> pockets <strong>in</strong> the sidesof the carrycot.The carrycots supplied with‘D’r<strong>in</strong>g safety harnessattachment po<strong>in</strong>ts. These arelocated on either side at thebase of the backrest and arefor fitt<strong>in</strong>g a separate safetyharness conform<strong>in</strong>g to BS6684 if required.USING THE CARRYING HANDLESNever carry the carrycot/seatunit with the hood up whenus<strong>in</strong>g the carry<strong>in</strong>g handles.Always keep the baby centred<strong>in</strong> the carrycot/seat unit toprevent it over balanc<strong>in</strong>g.REMOVING THE BASE PAD AND LININGRemov<strong>in</strong>g the base pad.Place the backrest <strong>in</strong> itshighest sett<strong>in</strong>g then slide thebase cover off the end of thebackrest. The cover can nowbe washed follow<strong>in</strong>g the<strong>in</strong>structions given <strong>in</strong> the Careand Ma<strong>in</strong>tenance section.Remov<strong>in</strong>g the l<strong>in</strong><strong>in</strong>g.Undo the two press studs onthe side of the carrycotbeh<strong>in</strong>d the backrest. Pull theelasticated edge of the l<strong>in</strong><strong>in</strong>goff the edge of the carrycotand lift the l<strong>in</strong><strong>in</strong>g free. Washthe l<strong>in</strong><strong>in</strong>g follow<strong>in</strong>g the<strong>in</strong>structions given <strong>in</strong> the Careand Ma<strong>in</strong>tenance section.– 9 –
SPECIAL FEATURENot all models are supplied with or use this special feature.For more <strong>in</strong>formation please consult your retailer.FITTING THE TWO PART PVC RAINCOVER TO THE CARRYCOTImportant: Not all carrycots come with a two part PVC ra<strong>in</strong>cover.Check with your retailer for more <strong>in</strong>formation.To attach the PVC hood cover,fasten the <strong>in</strong>ner zip on it tothe zip runn<strong>in</strong>g around thefront of the fabric hood.Next, gently pull the PVChood cover down over thefabric hood until all of thehood is covered.Attach the zip on the frontsection to the outer zip onthe PVC hood cover. Once thetwo PVC sections have beenzipped together gently foldthe front section down overthe front of the carrycot andfasten the press studs on thesides to those on the PVChood cover.Open<strong>in</strong>g the front section ofthe hood.When you take the pushchair<strong>in</strong>doors, even fora short time, unzip the frontsection of the PVC ra<strong>in</strong>coverand fold down over the frontof the carrycot, this preventsyour child from becom<strong>in</strong>goverheatedFOLDING THE CHASSIS WITH THE PVC RAINCOVER ATTACHEDBefore fold<strong>in</strong>g the chassis, undo all of the press studs and fold the front sectionof the PVC up onto the top of the carrycots hood. The pushchair can now befolded follow<strong>in</strong>g the <strong>in</strong>structions given <strong>in</strong> these <strong>in</strong>structions. Always take carewhen fold<strong>in</strong>g the chassis with the PVC ra<strong>in</strong>cover fitted, check that the chassis isnot trapp<strong>in</strong>g or damag<strong>in</strong>g any section of the PVC.NEVER FORCE THE CHASSIS TO FOLD.– 10 –
ATTACHING THE SEAT UNIT TO A CHASSISThe seat unit can be fitted <strong>in</strong>either the forward or rearfac<strong>in</strong>gposition on any <strong>Mamas</strong>& <strong>Papas</strong> Chassis.FORWARD FACINGFREEDOM CHASSISREAR FACINGCLASSIC STYLE CHASSISLift the seat unit by the plasticarms on the sides of the seat(see below).Align the lock<strong>in</strong>g clips on theunderside of the seat unit withthe lock<strong>in</strong>g bar on the chassis.Lock<strong>in</strong>gbarLock<strong>in</strong>gcatchSlot the lock<strong>in</strong>g clips over thelock<strong>in</strong>g bar and push downwith both hands. Check thatthe lock<strong>in</strong>g clips have correctlyengaged by attempt<strong>in</strong>g to liftthe carrycot upwards, it shouldnow be firmly attached to thechassis.– 11 –
The backrest can be adjusted<strong>in</strong>to any one of fourpositions.ADJUSTING THE SEAT UNITS BACKREST1234Lift the spr<strong>in</strong>g loaded bar <strong>in</strong>the back of the backrest andlower or raise the backrest<strong>in</strong>to the position you require.The backrest willautomatically lock <strong>in</strong>toposition.Always check that thesafety harness is stillcorrectly tightened andadjusted for your child.ADJUSTING THE FOOTRESTLower<strong>in</strong>g the footrest:Push the lock<strong>in</strong>g bar underthe footrest backwards.Grip the front of the footrestand push it downwards.Lock<strong>in</strong>g barRais<strong>in</strong>g the footrest:Lift the front of the footrestuntil it is vertical.Pull the lock<strong>in</strong>g bar under thefootrest forwards as far as itwill go.Press down on the footrest tocheck it has locked <strong>in</strong> place.– 12 –
USING THE SEAT UNIT HARNESS TIDYIMPORTANT: The harness tidy is designed to only be used to prevent theharness from becom<strong>in</strong>g tangled when not <strong>in</strong> use. Never secure your child<strong>in</strong>to the safety harness whilst it is still held <strong>in</strong> the harness tidy on thepushchairs backrest.Us<strong>in</strong>g the harness tidy:You will f<strong>in</strong>d a tab on theadjustment yoke at the backof the harness where theshoulder straps jo<strong>in</strong> the waiststrap. Place the tab on theadjustment yoke through thefabric loop <strong>in</strong> the middle ofthe backrest when not <strong>in</strong> use.Do not use the harness tidywhilst the harness is fittedto the child.USING AND ADJUSTING THE SEAT UNIT HARNESSLock<strong>in</strong>g the harness:Remove the yoke from theharness tidy, see above.Lock the harness by push<strong>in</strong>gthe tongues on the ends ofthe waist straps <strong>in</strong>to thebuckle on the crotch strap(1). The harness willautomatically lock when thetongues have been fullypushed <strong>in</strong>.1 1Unlock<strong>in</strong>g the harness:Squeeze the ends of thetongues together (2) andthen slide them out of thebuckle (3). Your child cannow be removed from thepushchair.3 2 32IMPORTANT: Every time you place your child <strong>in</strong> the pushchair orwhen ever you alter the position of the backrest always check thatthe harness is correctly fitted and adjusted us<strong>in</strong>g the shoulder andwaist strap buckles. Tighten the harness until it fits snugly aroundyour child.– 13 –
REMOVING AND FITTING THE BUMPER BARIMPORTANT: Ensure the plastic plugs and clips are replaced after the bumperbar is removed.Remov<strong>in</strong>g the bumper bar:Push the ends of the plasticclips off the end of thebumper bar with your f<strong>in</strong>ger.Push the clips upwards out ofthe seat arms.PlasticclipPull the bumper bar out ofthe ends of the armrests.Bumper barRemove the plastic plugsfrom the ends of the bumperbar turn them through 180ºand <strong>in</strong>sert them back <strong>in</strong>to theends of the armrests, <strong>in</strong>sertthe plastic clips.To replace the bumper barreverse the <strong>in</strong>structionabove.Plastic plug– 14 –
ATTACHING AND REMOVING THE HOOD (SEAT UNIT)Attach<strong>in</strong>g the hood:The hood is attached to theseat unit by push<strong>in</strong>g the clipson the ends of the hoodpivots <strong>in</strong>to the holes <strong>in</strong> theback of the armrests. Attachthe press studs on the backof the hood to the studs onthe back of the seat unit.Remov<strong>in</strong>g the hood:Remove the hood by press<strong>in</strong>gthe red buttons on the sidesof the armrests <strong>in</strong> and pull<strong>in</strong>gthe hood pivots upwards.The hood will now come awayfrom the seat unit.FITTING THE SEAT UNIT APRONFitt<strong>in</strong>g the apron with thefootrest horizontal:Fasten the two press studs onthe boxed end of the apron.Slot the boxed end of theapron over the footrest thenfasten the press studs on thefront flap to the studs on thesides of the hood.Boxed endFitt<strong>in</strong>g the apron with thefootrest vertical:Undo the two press studs onthe boxed end of the apron.Slot the boxed end of theapron over the footrest andfront of the seat unit. Fastenthe press studs on the frontflap to the studs on the sidesof the hood.Boxed end– 15 –
REMOVING THE SEAT UNIT FROM THE CHASSISGrip the sides of the seat unitas shown <strong>in</strong> the diagram.Place your f<strong>in</strong>gers on the leveron the underside of thearmrests and slide it towardsthe front of the seatNow press the lever upwards<strong>in</strong>to the seats armrests.The seat unit can now be liftedfree of the chassis.– 16 –
REMOVING THE SEAT COVERUndo the two press studs onthe bottom of the backrest.Slide the buckle hold<strong>in</strong>g thecrotch strap to the seat upthrough its hole and thenthrough the seat cover.Unclip the plastic clips hold<strong>in</strong>gthe seat cover to the arms ofthe seat unit by push<strong>in</strong>g them<strong>in</strong> and then slid<strong>in</strong>g themupwards.Carefully slide the seat coverup off the back of the seatunit.Refitt<strong>in</strong>g the seat cover:Reverse the procedure forremov<strong>in</strong>g it. Make sure thesafety harness is correctlyfitted and has not becometwisted.– 17 –
SPECIAL FEATURENot all models are supplied with or use this special feature.For more <strong>in</strong>formation please consult your retailer.FITTING A FOOTMUFF OR SEAT PADBefore fitt<strong>in</strong>g thefootmuff/seat pad unfastenthe harness and slide theshoulder strap clips off thetwo tongues.Version 1Remove the crotch strap byslott<strong>in</strong>g the buckle on the endof the crotch strap throughthe hole <strong>in</strong> the seat and fabric(see page15).Refit the crotch strap but firstslot the webb<strong>in</strong>g through thelowest hole <strong>in</strong> the footmuffback pad or seat pad.LapStrapShoulderStrapsLapStrapSlot the two shoulder strapsthrough the horizontal hole <strong>in</strong>the middle of the footmuffback pad or seat pad.The two lap straps can eithergo around the outside of theback pad or seat pad, asversion 1.Version 2CrotchStrapOr slot through horizontalslots <strong>in</strong> the sides of thefootmuffs back pad or seatpad, as shown on version 2.F<strong>in</strong>ally, slide the shoulderstrap attachments onto thetongues of the buckle.LapStrapCrotchStrapShoulderStrapsLapStrap– 18 –
SPECIAL FEATURENot all models are supplied with or use this special feature.For more <strong>in</strong>formation please consult your retailer.FITTING THE TWO PART PVC RAINCOVER TO THE SEAT UNITImportant: Not all seat units come with a two part PVC ra<strong>in</strong>cover.Check with your retailer for more <strong>in</strong>formation.To attach the PVC hood cover,fasten the zip on it to the ziprunn<strong>in</strong>g around the front ofthe fabric hood. Next, gentlypull the PVC hood cover downover the fabric hood until allof the hood is coveredAttach the zip on the frontsection to the second zip onthe PVC hood cover. Once thetwo PVC sections have beenzipped together gently foldthe front section down overthe front of the seat unit andfasten the press studs on thesides to those on the PVChood cover.Open<strong>in</strong>g the front section ofthe PVC hood.When you take the pushchair<strong>in</strong>doors, even for a shorttime, unzip the front sectionof the PVC ra<strong>in</strong>cover and folddown over the bumper bar,this prevents your child frombecom<strong>in</strong>g overheated.FOLDING THE PUSHCHAIR WITH THE PVC RAINCOVER ATTACHEDBefore fold<strong>in</strong>g the pushchair, undo all of the press studs and fold the frontsection of the PVC up onto the top of the seat units hood. The pushchair can nowbe folded. Always take care when fold<strong>in</strong>g the pushchair with the PVC ra<strong>in</strong>coverfitted, check that the chassis is not trapp<strong>in</strong>g or damag<strong>in</strong>g any section of the PVC.NEVER FORCE THE CHASSIS TO FOLD.– 19 –
CARE AND MAINTENANCEYour carrycot & seat unit are valuable pieces of equipment and deserve careful handl<strong>in</strong>g.• Regularly check that all safety harnesses and carry<strong>in</strong>g handles are correctly fitted and thatthe webb<strong>in</strong>g/handles have not become frayed or damaged. If the harness/handles aredamaged, we recommend that new ones are fitted. For more <strong>in</strong>formation contact ourCustomer Care Helpl<strong>in</strong>e on:01484 438222.• Clean the plastic parts of the carrycot/seat unit with a damp cloth, do not use abrasives orbleach.• We strongly recommend that you have your carrycot/seat unit serviced regularly, particularlyafter the first six months. To do this contact either your retailer or call ourCustomer Care Helpl<strong>in</strong>e on 01484 438222.Fabric care• All the <strong>Mamas</strong> & <strong>Papas</strong> carrycot and seat unit fabrics are shower resistant. Should yourcarrycot or seat unit become wet do not fold the hood or apron when you take the item<strong>in</strong>side. Always allow the fabrics to dry naturally away from strong heat sourcessuch as fires, radiators and out of direct sunlight.• Whilst fabrics are carefully selected and tested, wash<strong>in</strong>g, wear and normal exposure tobright sunlight may cause their colour to change.• The exposed edges of fabric covers are often the first to wear and fray, remember this whenstor<strong>in</strong>g or transport<strong>in</strong>g your pushchair/carrycot and accessories.• Light soil<strong>in</strong>g to the carrycot and seat unit fabric can be removed with a damp sponge and amild detergent.• Wash<strong>in</strong>g <strong>in</strong>structions: Remove the fabrics follow<strong>in</strong>g the <strong>in</strong>structions given <strong>in</strong> these<strong>in</strong>structions. Hand wash the fabric with a mild detergent at 30ºc, dry the fabric flat awayfrom direct heat and do not tumble dry. Do not use abrasives or bleach to clean the fabric.• Should a fault arise with your carrycot or seat unit please contact either your retailer orphone our Customer Care Helpl<strong>in</strong>e on 01484 438222.I0036: V8/09/03AFTER SALES SERVICE: If when you receive your <strong>Mamas</strong> & <strong>Papas</strong>product you need assistance, spare parts or if you are unhappy withany aspect of the goods please contact our Customer Care Helpl<strong>in</strong>eon: 01484 438222, or e-mail us oncustomer.care@mamasandpapas.co.uk where one of our tra<strong>in</strong>edadvisors will be able to help you. You can also visit our website atwww.mamasandpapas.co.uk for the latest product <strong>in</strong>formation.ALL OUR PRODUCTS ARE MADE FROM THE FINEST QUALITY MATERIALSAND ARE MANUFACTURED UNDER THE STRICTEST QUALITY CONTROLSWe guarantee all our products or part thereof, for a period of six months from the date of purchase aga<strong>in</strong>st faultymanufacture. This guarantee is not effective aga<strong>in</strong>st damage caused as a result of <strong>in</strong>correct usage of the product oraccidental damage. This <strong>in</strong> no way affects your statutory rights.GUARANTEETo validate this guarantee, please fill <strong>in</strong> the coupon and return to:<strong>Mamas</strong> & <strong>Papas</strong> Ltd, Colne Bridge Road, Huddersfield, West Yorkshire, HD5 0RH.Or alternatively, call our Guarantee Registration L<strong>in</strong>e on 01484 438225 with your details,or visit our website at: www.mamasandpapas.co.ukNameAddressPostcodeBaby’s due date/date of birthRetailerHome Phone No.Product Purchased Purchase Date PriceBy validat<strong>in</strong>g your guarantee, your <strong>in</strong>formation will be entered onto our database. If you do not wish to receive <strong>in</strong>formationfrom other reputable companies, please let us know.– 20 –