Mini Pulse PNP Manual - E-flite
Mini Pulse PNP Manual - E-flite
Mini Pulse PNP Manual - E-flite
You also want an ePaper? Increase the reach of your titles
YUMPU automatically turns print PDFs into web optimized ePapers that Google loves.
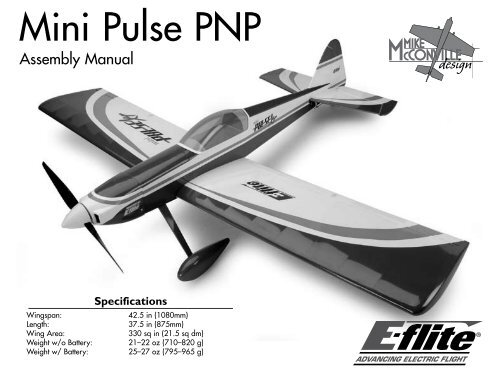
Safety PrecautionsThis is a sophisticated hobby Product and not a toy. It must beoperated with caution and common sense and requires some basicmechanical ability. Failure to operate this Product in a safe andresponsible manner could result in injury or damage to the Productor other property. This Product is not intended for use by childrenwithout direct adult supervision. The Product manual containsinstructions for safety, operation and maintenance. It is essential toread and follow all the instructions and warnings in the manual,prior to assembly, setup or use, in order to operate correctly andavoid damage or injury.Questions, Assistance, and RepairsYour local hobby store and/or place of purchase cannot providewarranty support or repair. Once assembly, setup or use of theProduct has been started, you must contact Horizon directly. Thiswill enable Horizon to better answer your questions and serviceyou in the event that you may need any assistance. For questionsor assistance, please direct your email to productsupport@horizonhobby.com, or call 877.504.0233 toll free to speak to aservice technician.Inspection or RepairsIf this Product needs to be inspected or repaired, please call fora Return Merchandise Authorization (RMA). Pack the Productsecurely using a shipping carton. Please note that original boxesmay be included, but are not designed to withstand the rigorsof shipping without additional protection. Ship via a carrier thatprovides tracking and insurance for lost or damaged parcels, asHorizon is not responsible for merchandise until it arrives andis accepted at our facility. A Service Repair Request is availableat www.horizonhobby.com on the “Support” tab. If you do nothave internet access, please include a letter with your completename, street address, email address and phone number whereyou can be reached during business days, your RMA number,a list of the included items, method of payment for any nonwarrantyexpenses and a brief summary of the problem.Your original sales receipt must also be included for warrantyconsideration. Be sure your name, address, and RMA numberare clearly written on the outside of the shipping carton.Warranty Inspection and RepairsTo receive warranty service, you must include your originalsales receipt verifying the proof-of-purchase date. Providedwarranty conditions have been met, your Product will berepaired or replaced free of charge. Repair or replacementdecisions are at the sole discretion of Horizon Hobby.E-<strong>flite</strong> <strong>Mini</strong> <strong>Pulse</strong> <strong>PNP</strong> Assembly <strong>Manual</strong>
3. Fit the assembly in Step 2 into the wheel pant andinsert the bolt into the landing gear. With the fuselagelevel to the work surface, rotate the wheel pant so it isalso level to your work surface and secure the pant to thelanding gear with a 2mm x 6mm wood screw. Secure thebolt with a 4-40 locknut while using needle-nose pliers tohold the head of the bolt inside the pant.Propeller InstallationRequired PartsFuselage w/motor installedPropellerSpinnerProp adapter (for outrunner motor)Important Information About Your PropellerIt is also very important to check to be sure the propeller isbalanced before installing onto the shaft. An unbalancedpropeller may strip the gears or cause poor flight characteristics.1. Slide the propeller adapter through the hole inthe propeller.4. Repeat Steps 2 and 3 for the remaining wheel andwheel pant.10 E-<strong>flite</strong> <strong>Mini</strong> <strong>Pulse</strong> <strong>PNP</strong> Assembly <strong>Manual</strong>
Center of GravityCaution: Do not inadvertently skip this step!The recommended Center of Gravity (CG) location for the <strong>Mini</strong><strong>Pulse</strong> XT <strong>PNP</strong> is 2 3 / 4" (70mm) behind the leading edge of theupper wing against the fuselage. After the first flights, the throwscan be adjusted for your personal preference.PreflightCheck Your RadioBefore going to the field, be sure that your batteries are fullycharged per the instructions included with your radio. Chargeboth the transmitter and receiver pack for your airplane. Usethe recommended charger supplied with your particular radiosystem, following the instructions provided with the radio. Inmost cases, the radio should be charged the night before goingout flying.Before each flying session, be sure to range check your radio.See your radio manual for the recommended range andinstructions for your radio system. Each radio manufacturerspecifies different procedures for their radio systems. Next, startthe motor. With the model securely anchored, check the rangeagain. The range test should not be significantly affected. If it is,don’t attempt to fly! Have your radio equipment checked out bythe manufacturer.Note: Keep loose items that can get entangled inthe propeller away from the prop. These includeloose clothing, or other objects such as pencils andscrewdrivers. Especially keep your hands away from thepropeller.Double-check that all controls (aileron, elevator, rudder andthrottle) move in the correct direction.Check the radio installation and make sure all the controlsurfaces are moving correctly (i.e. the correct direction and withthe recommended throws). Test run the motor and make sureit transitions smoothly from off to full throttle and back. Alsoensure the engine is installed according to the manufacturer’sinstructions, and it will operate consistently.Check all the control horns, servo horns, and clevises to makesure they are secure and in good condition. Replace any itemsthat would be considered questionable. Failure of any of thesecomponents in flight would mean the loss of your aircraft.E-<strong>flite</strong> <strong>Mini</strong> <strong>Pulse</strong> <strong>PNP</strong> Assembly <strong>Manual</strong>17
2007 Official AMA NationalModel Aircraft Safety CodeGENERAL1) I will not fly my model aircraft in sanctioned events, air showsor model flying demonstrations until it has been proven to beairworthy by having been previously, successfully flight tested.2) I will not fly my model higher than approximately 400 feet within 3miles of an airport without notifying the airport operator. I will giveright-of-way and avoid flying in the proximity of full-scale aircraft.Where necessary, an observer shall be utilized to supervise flyingto avoid having models fly in the proximity of full-scale aircraft.3) Where established, I will abide by the safety rules for the flyingsite I use, and I will not willfully or deliberately fly my models in acareless, reckless and/or dangerous manner.4) The maximum takeoff weight of a model is 55 pounds, exceptmodels flown under Experimental Aircraft rules.5) I will not fly my model unless it is identified with my name andaddress or AMA number on or in the model. (This does not applyto models while being flown indoors.)6) I will not operate models with metal-bladed propellers or withgaseous boosts, in which gases other than air enter their internalcombustion engine(s); nor will I operate models with extremelyhazardous fuels such as those containing tetranitromethane orhydrazine.RADIO CONTROL1) I will have completed a successful radio equipment ground rangecheck before the first flight of a new or repaired model.2) I will not fly my model aircraft in the presence of spectators until Ibecome a qualified flier, unless assisted by an experienced helper.3) At all flying sites a straight or curved line(s) must be establishedin front of which all flying takes place with the other side forspectators. Only personnel involved with flying the aircraft areallowed at or in front of the flight line. Intentional flying behind theflight line is prohibited.4) I will operate my model using only radio control frequenciescurrently allowed by the Federal Communications Commission.(Only properly licensed Amateurs are authorized to operateequipment on Amateur Band frequencies.)5) Flying sites separated by three miles or more are considered safefrom site-to-site interference, even when both sites use the samefrequencies. Any circumstances under three miles separationrequire a frequency management arrangement, which may beeither an allocation of specific frequencies for each site or testingto determine that freedom from interference exists. Allocation plansor interference test reports shall be signed by the parties involvedand provided to AMA Headquarters.Documents of agreement and reports may exist between (1) twoor more AMA Chartered Clubs, (2) AMA clubs and individualAMA members not associated with AMA Clubs, or (3) two ormore individual AMA members.6) For Combat, distance between combat engagement lineand spectator line will be 500 feet per cubic inch of enginedisplacement. (Example: .40 engine = 200 feet.); electric motorswill be based on equivalent combustion engine size. Additionalsafety requirements will be per the RC Combat section of thecurrent Competition Regulations.7) At air shows or model flying demonstrations, a single straight linemust be established, one side of which is for flying, with the otherside for spectators.8) With the exception of events flown under AMA Competition rules,after launch, except for pilots or helpers being used, no poweredmodel may be flown closer than 25 feet to any person.9) Under no circumstances may a pilot or other person touch apowered model in flight.18 E-<strong>flite</strong> <strong>Mini</strong> <strong>Pulse</strong> <strong>PNP</strong> Assembly <strong>Manual</strong>
Building and Flying NotesE-<strong>flite</strong> <strong>Mini</strong> <strong>Pulse</strong> <strong>PNP</strong> Assembly <strong>Manual</strong>19
10046.1© 2007 Horizon Hobby, Inc.4105 Fieldstone RoadChampaign, Illinois 61822(877) 504-0233horizonhobby.comE-<strong>flite</strong>RC.com


