User's Manual - Verizon
User's Manual - Verizon
User's Manual - Verizon

You also want an ePaper? Increase the reach of your titles
YUMPU automatically turns print PDFs into web optimized ePapers that Google loves.
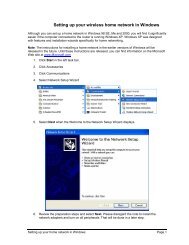
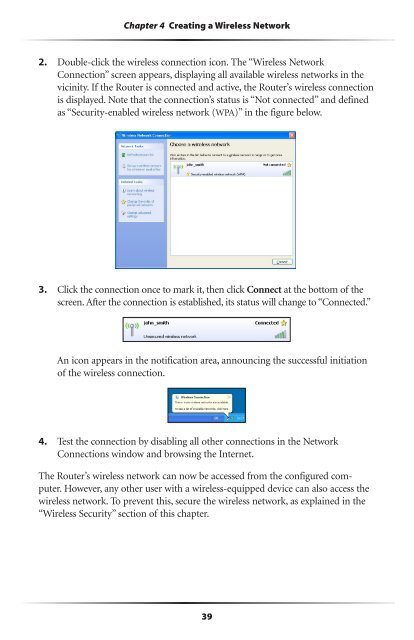
Chapter 4 Creating a Wireless Network<br />
2. Double-click the wireless connection icon. The “Wireless Network<br />
Connection” screen appears, displaying all available wireless networks in the<br />
vicinity. If the Router is connected and active, the Router’s wireless connection<br />
is displayed. Note that the connection’s status is “Not connected” and defined<br />
as “Security-enabled wireless network (WPA)” in the figure below.<br />
3. Click the connection once to mark it, then click Connect at the bottom of the<br />
screen. After the connection is established, its status will change to “Connected.”<br />
An icon appears in the notification area, announcing the successful initiation<br />
of the wireless connection.<br />
4. Test the connection by disabling all other connections in the Network<br />
Connections window and browsing the Internet.<br />
The Router’s wireless network can now be accessed from the configured computer.<br />
However, any other user with a wireless-equipped device can also access the<br />
wireless network. To prevent this, secure the wireless network, as explained in the<br />
“Wireless Security” section of this chapter.<br />
39