Rendering with mental ray®: Tips and Tricks - Autodesk
Rendering with mental ray®: Tips and Tricks - Autodesk
Rendering with mental ray®: Tips and Tricks - Autodesk

You also want an ePaper? Increase the reach of your titles
YUMPU automatically turns print PDFs into web optimized ePapers that Google loves.
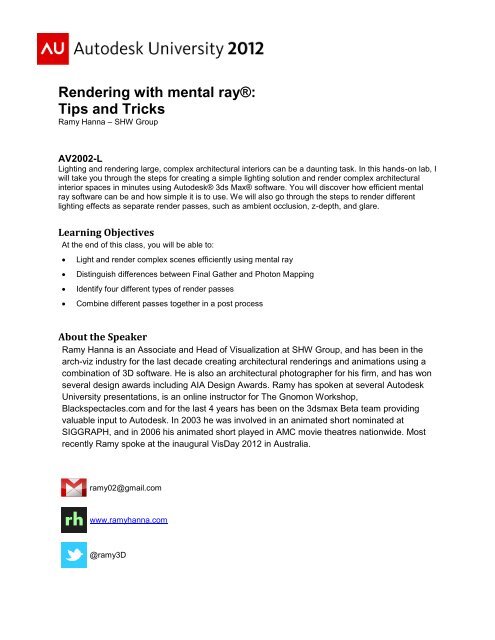
<strong>Rendering</strong> <strong>with</strong> <strong>mental</strong> ray®:<strong>Tips</strong> <strong>and</strong> <strong>Tricks</strong>Ramy Hanna – SHW GroupAV2002-LLighting <strong>and</strong> rendering large, complex architectural interiors can be a daunting task. In this h<strong>and</strong>s-on lab, Iwill take you through the steps for creating a simple lighting solution <strong>and</strong> render complex architecturalinterior spaces in minutes using <strong>Autodesk</strong>® 3ds Max® software. You will discover how efficient <strong>mental</strong>ray software can be <strong>and</strong> how simple it is to use. We will also go through the steps to render differentlighting effects as separate render passes, such as ambient occlusion, z-depth, <strong>and</strong> glare.Learning ObjectivesAt the end of this class, you will be able to:Light <strong>and</strong> render complex scenes efficiently using <strong>mental</strong> rayDistinguish differences between Final Gather <strong>and</strong> Photon MappingIdentify four different types of render passesCombine different passes together in a post processAbout the SpeakerRamy Hanna is an Associate <strong>and</strong> Head of Visualization at SHW Group, <strong>and</strong> has been in thearch-viz industry for the last decade creating architectural renderings <strong>and</strong> animations using acombination of 3D software. He is also an architectural photographer for his firm, <strong>and</strong> has wonseveral design awards including AIA Design Awards. Ramy has spoken at several <strong>Autodesk</strong>University presentations, is an online instructor for The Gnomon Workshop,Blackspectacles.com <strong>and</strong> for the last 4 years has been on the 3dsmax Beta team providingvaluable input to <strong>Autodesk</strong>. In 2003 he was involved in an animated short nominated atSIGGRAPH, <strong>and</strong> in 2006 his animated short played in AMC movie theatres nationwide. Mostrecently Ramy spoke at the inaugural VisDay 2012 in Australia.ramy02@gmail.comwww.ramyhanna.com@ramy3D
<strong>Rendering</strong> <strong>with</strong> <strong>mental</strong> ray: <strong>Tips</strong> <strong>and</strong> <strong>Tricks</strong>Lab OverviewThe intent of this lab is that you will have an underst<strong>and</strong>ing of how to efficiently texture <strong>and</strong> lightan interior scene of a 3D model using 3ds Max 2013. Along <strong>with</strong> creating a good rendering, thislab also goes through the different rendering passes needed to composite in post so yourimages will really shine!MaterialsEvery material is unique, but there are some general qualities about materials that apply tocertain types. In this h<strong>and</strong>out, I chose to highlight 6 different materials that possess uniquetraits, hopefully covering all aspects of materials. The goal in this h<strong>and</strong>out is to simply highlightthe unique settings for each material.BrickThis is perhaps the simplest type of material as it is a matte material, meaning it doesn’t haveany reflective or refractive qualities. However, in real-life, every material has reflectiveproperties, but for the efficiency of a rendering, <strong>and</strong> the way we perceive materials, certainmaterials don’t need reflection such as things like brick, fabrics, or drywall.1. Add Brick Map into Diffuse Slot2. Adjust Size of map to 4’x4’3. Copy <strong>and</strong> paste map into bump slotGlassThis may be the most asked about material, <strong>and</strong> is much simpler than people think it is. Thereare essentially two properties to glass: reflection <strong>and</strong> refraction. That’s it. The factor that comesinto play is the geometry that it is applied to; ie: is it thin geometry (a plane) or is it thick (a box)?1. Diffuse color at 0% (0.0)2. Set reflection to 60% (0.6)3. Refraction to 100% (1.0)4. You can set color of light passingthrough glass by changing therefraction color5. Under Advanced rollout, choosewhether your glass material isapplied to a thin or thick geometry2
<strong>Rendering</strong> <strong>with</strong> <strong>mental</strong> ray: <strong>Tips</strong> <strong>and</strong> <strong>Tricks</strong>Anodized MetalA lot of metal <strong>and</strong> plastic materials have very reflective parameters but not refraction. In thiscase an anodized metal is not only reflective, but because of the grain on the material castsreflections in a certain direction (anisotropy).Any % in the numeric spinner looks to thecolor or map properties. In this example100% of the reflection is looking to thecolor grey (0.3). This would be the sameas setting Reflectivity to 0.3 when thecolor swatch is white.Anisotropy is also set to 0.25, this controlshow the reflections spreads.I also adjusted the reflection falloff to 0.54Perforated MetalThere is nothing different about this material from my anodized metal example except for theway that it is perforated.The only thing that is unique is that I applied atile map into the Cutout slot of the A&Dmaterial. The tile is black / transparent, <strong>and</strong>the grout is white / opaque.TileThis material can be achieved by applying an image map or a 3dsmax procedural tile map intothe diffuse slot. Tile has some interesting characteristics in that the tile itself is typically morereflective than the grout. The tiles are also usually higher in reveal than the grout. To tackle allthese parameters we have to control the reflection, <strong>and</strong> the bump through maps. For thisexample I went <strong>with</strong> an image of tile, plugged this into the diffuse slot. For the reflection <strong>and</strong>bump maps they are best driven by greyscale images. So I used a color correction map to filterthe diffuse map into a greyscale b/w image.3
<strong>Rendering</strong> <strong>with</strong> <strong>mental</strong> ray: <strong>Tips</strong> <strong>and</strong> <strong>Tricks</strong>For the color correction map settings, I set theSaturation to -100, making it a b/w image.However doing this made the tiles black <strong>and</strong>the grout white. I wanted the inverse of this aswhite gives higher reflection <strong>and</strong> bump effects,hence the choosing of “Invert”. I also played<strong>with</strong> the brightness <strong>and</strong> contrast to really pushthe black <strong>and</strong> whites to pop giving the mostamount of control.4
<strong>Rendering</strong> <strong>with</strong> <strong>mental</strong> ray: <strong>Tips</strong> <strong>and</strong> <strong>Tricks</strong>LightThe last material that I wanted to cover is actually a light material. I apply this material to anyobject / geometry that emits light; so a light bulb, or 2 x 4 ceiling lights.For this material, be sure to turn off thediffuse color setting it to 0.0 or black.Leaving a color in the diffuse slot is not somuch a problem for <strong>mental</strong> ray, but tendsto cause fireflies in iray, so it’s goodpractice. Turn on Self Illumination <strong>and</strong>change the Luminance to Physical Units.I also check both “Visible in Reflections”<strong>and</strong> “Illuminates the Scene”. If you want acolor other than white, like a warminc<strong>and</strong>escent bulb, you can change thefilter color to a light yellow orange.Lighting <strong>and</strong> <strong>Rendering</strong> – The Beauty PassThere are many different ways to light a space in 3dsmax using <strong>mental</strong> ray. However there arevery few methods to create a fast efficient <strong>and</strong> impressive rendering. The most efficient methodI’ve found that works for all interior scenes is creating a daylight system, <strong>and</strong> then turning on GI(Global Illumination) <strong>and</strong> FG (Final Gather). Both GI <strong>and</strong> FG are using the default settings, <strong>with</strong>exception to setting the FG Noise Filtering to “None”. This rendering that is the base renderingis called the beauty pass.Beauty Pass5
<strong>Rendering</strong> <strong>with</strong> <strong>mental</strong> ray: <strong>Tips</strong> <strong>and</strong> <strong>Tricks</strong>Below are the steps for creating this beauty pass:1. Create a Daylight SystemWhen you first click on Daylight it will ask tochange your Exposure settings under yourEnvironment dialogue. Choose Yes. Simply click<strong>and</strong> drag to set the scale of the compass. Whenyou release your mouse it will ask to create a mrSky map in the Environment Map slot. ChooseYes. Now when you move your mouse it will movethe height of your Sun. The location is irrelevant,<strong>and</strong> just a visual indicator.2. Adjust ExposureOpen your Environment dialog by goingto <strong>Rendering</strong>->Environment or hitting “8”on your keyboard. Adjust your EV(Exposure Value) to 9. The st<strong>and</strong>ard forinterior daylight is 10, but I prefer 9 togive it a little more light6
<strong>Rendering</strong> <strong>with</strong> <strong>mental</strong> ray: <strong>Tips</strong> <strong>and</strong> <strong>Tricks</strong>3. Adjust Indirect Illumination SettingsFG (Final Gather) is already on bydefault. However the NoiseFiltering default is set to St<strong>and</strong>ard.Set it to None. In all scenariosthis will shoot all of the calculatedrays back to the camera, makingthe render brighter. Sometimesthis does create some artefacts.If so, you can switch back toSt<strong>and</strong>ard.Also Turn on GI (Final Gather).Typically the default values workfor most scenes. If not, checkMaximum Sampling Radius, <strong>and</strong>specify a size that’s very large like30’. When off, the default samplesize is 1/10 th of the scene size.4. Place your LightsOften it’s not the light fixtures in 3D that light your scene butrather the Indirect Illumination. Now that your overall lighting iswhere you want it, we can add lights to show interior lightfixtures your scene. These do cast shadows <strong>and</strong> make yourscene brighter, but are more for the visuals of the render thananything else.7
<strong>Rendering</strong> <strong>with</strong> <strong>mental</strong> ray: <strong>Tips</strong> <strong>and</strong> <strong>Tricks</strong>For lights I always use Photometric lights. For theirShape/Shadow, often I will change it from Point to Disc. Pointrenders the fastest, but the other shapes give nice soft shadowsat the cost of rendering time. So I also lower the ShadowSamples to something like 4. I make the Light Shapes Visible inthe rendering…but it just depends on if you want to visually seethe disc or not.One more setting that I change that is under the <strong>mental</strong> rayIndirect Illumination rollout. I turn off Automatically CalculateEnergy <strong>and</strong> Photons. This eliminates the lights from the GIcalculation, <strong>and</strong> I’ve found turning it off to actually make the GIsolution brighter. GI will also calculate faster as it’s not includingthe lights <strong>and</strong> shadows into the calculation. This still lets FGuse the lights in the FG calculation though.Other Passes – Z Depth, Ambient Occlusion & GlareThere are other passes that can be added in post software such as Photoshop to really makeyour rendering that much better. There are 3 that I believe are essential for creating that wowfactor in your finished image. They are Ambient Occlusion, Glare <strong>and</strong> Z-Depth. Below is adescription on creating these passes.Before jumping into the passes, there was a little scene prep to make the passes as effective aspossible. I set all of my interior glass onto a separate layer, <strong>and</strong> hid the glass before renderingthe passes. Otherwise, Z-Depth <strong>and</strong> Ambient Occlusion would treat the glass just like anotheropaque wall.8
<strong>Rendering</strong> <strong>with</strong> <strong>mental</strong> ray: <strong>Tips</strong> <strong>and</strong> <strong>Tricks</strong>Z-DepthZ-Depth is an image of your rendering that represents 3D space. It assigns a black to whitepixel color based on distance from the camera. This makes the z-depth image extremely usefulfor making selections based on distance, <strong>and</strong> is most commonly used to create effects likeDepth of Field. However, it can also be used to color grade based on distance <strong>and</strong> addatmospheric effects as well.Z-Depth PassThe Z-Depth pass can be created bygoing to the rendering settings <strong>and</strong> goingto the Render Elements tab. Hitting theAdd… button brings up a list of manydifferent passes that can be created.The Z Depth pass is at the very bottomof this list. Choose it <strong>and</strong> hit enter.9
<strong>Rendering</strong> <strong>with</strong> <strong>mental</strong> ray: <strong>Tips</strong> <strong>and</strong> <strong>Tricks</strong>The default settings for Z Depth workgreat for depth of field. However if youneed a more gradual z depth image <strong>with</strong>more information, you can alwaysincrease the Z Max to something like100’ or more depending on the size ofyour model.Ambient OcclusionAmbient Occlusion (AO) is an effect that creates soft shadows based on the distance of objectsfrom each other. It’s a fast way to add detail <strong>and</strong> depth to a rendering. However if usedincorrectly it will make an image appear unnatural.Ambient Occlusion Pass10
<strong>Rendering</strong> <strong>with</strong> <strong>mental</strong> ray: <strong>Tips</strong> <strong>and</strong> <strong>Tricks</strong>Just like Z Depth, theeasiest way to create an AOpass is through RenderElements. There are somany different mr A&Delements, but the one youwant is “mr A&D Raw:Ambient Occlusion”. Acaveat <strong>with</strong> this renderelement though: it will onlycreate AO on objects thathave an Arch & Designmaterial assigned to themwhere AO is turned on.There are maxscripts that can globally set theAO value in all scene materials, if the scene hasAO off <strong>and</strong> hundreds of materials. You canalways use a material in the override materialslot to manually render an AO pass, however theadvantage to using AO Render Elements versusgoing the material override route is that it willrespect material cut-out transparency, which canbe very tricky to overcome when creating an AOpass. This is a script that I like to use thatcontrols AO settings globally. It can be found atwww.ramyhanna.com11
<strong>Rendering</strong> <strong>with</strong> <strong>mental</strong> ray: <strong>Tips</strong> <strong>and</strong> <strong>Tricks</strong>GlareThis is simply the effect of adding a glow or flare to the highlights of an image, <strong>and</strong> stems fromimages taken <strong>with</strong> a camera. If there is dust or grease, or moisture on a lens, then a camerawill create this effect when taking a picture. We intentionally put it in our renderings however toadd realism.Glare PassThis effect can be added toyour rendering simply by turningon the Output in the CameraShaders section. This islocated in the Render Setupdialogue (F10), under theRenderer tab, <strong>and</strong> is foundunder the Camera Effectsrollout.However, the default settings add this to the beauty pass, <strong>and</strong> we want it as aseparate pass. To access the settings of the Glare Map simply click <strong>and</strong> drag it intoa slot in the Material Editor (choose Instance). This gives us access to all thesettings in the Glare Map to customize it to our liking.12
<strong>Rendering</strong> <strong>with</strong> <strong>mental</strong> ray: <strong>Tips</strong> <strong>and</strong> <strong>Tricks</strong>These are the settings Itypically use to create a GlarePass. The important one to payattention to is the Resolution.You always want to keep it thesame size as your render size,otherwise you get strangeeffects.Post ProductionNow that you know how to create all the passes, we will now look at putting them all together.In this example I will use Photoshop, but there are many other post production programs.The essence of post-production <strong>and</strong> layering images comes down to underst<strong>and</strong>ing how theirblending modes work. Blending modes are used to determine how two layers are blendedtogether. These are what I think are the essential blending modes to underst<strong>and</strong>:Multiply:Everything that is white is transparent, <strong>and</strong> everything that is black is opaque.Screen:Everything that is white is opaque, <strong>and</strong> everything that is black is transparent.Overlay:Is a combination of Screen <strong>and</strong> Multiply. Light parts of the picture become lighter, <strong>and</strong> darkparts become darker (S-Curve).13
<strong>Rendering</strong> <strong>with</strong> <strong>mental</strong> ray: <strong>Tips</strong> <strong>and</strong> <strong>Tricks</strong>In Photoshop we will start <strong>with</strong> the beauty pass as your base layer.The next layer to add would be ambient occlusion. Set the blending mode in the layer windowto multiply.14
<strong>Rendering</strong> <strong>with</strong> <strong>mental</strong> ray: <strong>Tips</strong> <strong>and</strong> <strong>Tricks</strong>The third layer is the glare pass. Set the blending mode to Screen.In Photoshop, I create one more mask layer using the gradient tool <strong>and</strong> add it on top. This layergives the illusion of a lens filter working <strong>and</strong> adds some natural vignetting as well. Set the blendmode to Overlay for the mask.15
<strong>Rendering</strong> <strong>with</strong> <strong>mental</strong> ray: <strong>Tips</strong> <strong>and</strong> <strong>Tricks</strong>I will often turn down the opacity to somewhere between 25-50% for the mask layer.After adding all these layers, I will add Adjustment Layers for color correction <strong>and</strong> grading. Start<strong>with</strong> the Levels. Adjustment Layers in Photoshop are a way to make color changes to an image<strong>with</strong>out destroying the original image. For example, if you want to change the Brightness <strong>and</strong>Contrast to an image, after doing that you can only undo in your current session. AdjustmentLayers puts the action of the Brightness <strong>and</strong> Contrast change into its own layer, <strong>and</strong> you canalways go back <strong>and</strong> adjust it.There are two flavors of creating Adjustment Layers. You can create one <strong>with</strong> a clipping mask,<strong>and</strong> one <strong>with</strong>out.No Clipping MaskWith Clipping Mask16
<strong>Rendering</strong> <strong>with</strong> <strong>mental</strong> ray: <strong>Tips</strong> <strong>and</strong> <strong>Tricks</strong>Without the clipping mask, the Adjustment Layer applies the effect to all of the previous,underneath layers. But <strong>with</strong> the clipping mask, the adjustment layer applies only to the layerbeneath it. This can be useful if you want to make adjustments to a transparent layer, but wanteverything else underneath to remain as is.The primary Adjustment Layers I use are Levels, Color Balance <strong>and</strong> Curves. Tweak these toenhance your image.Typically you want your levels to look like a nicebell curve. If you have all of your colorinformation only on one side, then the chancesare your image is either over or under exposed<strong>and</strong> won’t look that good. I also adjust each RGBchannel individually to allow me to control thecolor that I’m looking for. Essentially levels arecontrolling the overall brightness though.I will also tweak the color balance settings.Starting <strong>with</strong> the shadows, I adjust the colors,<strong>and</strong> then move onto the Midtones, then finally theHighlights. Then I will go back to the Shadows,just to make sure that I’m happy <strong>with</strong> the colortones.17
<strong>Rendering</strong> <strong>with</strong> <strong>mental</strong> ray: <strong>Tips</strong> <strong>and</strong> <strong>Tricks</strong>Get to know curves! This is a powerful way tocontrol your brights <strong>and</strong> darks, <strong>and</strong> often is muchmore successful than Brightness & Contrast.Typically an S-Curve is the desired result, butevery image is different.After color grading, I will add a Lens Distortion Filter. Unlike other production programs, filters inPhotoshop are destructive <strong>and</strong> cannot be reversed. My solution for this is to take all of thelayers, copy them <strong>and</strong> flatten them to make a new layer to add the filters. I do this for everyfilter I add, so I can go back later to each filter that was applied.18
<strong>Rendering</strong> <strong>with</strong> <strong>mental</strong> ray: <strong>Tips</strong> <strong>and</strong> <strong>Tricks</strong>In CS5 lens correction has moved simply to Filters->Lens Correction.There are many features here that are helpful for tweaking <strong>and</strong> adjusting images. Typically thistool is used to correct flaws in a photograph, however because we’re making a rendering to looklike a photo, we are adding these “flaws” to our image. Use this tool <strong>with</strong> much discretion asoverdoing this can cause images to look worse not better.Now for the Depth of Field…this can always seem a mystery in Photoshop, <strong>and</strong> can be a bittricky, but it is much faster to create in post than in 3d. Here is the process:Add your Z-depth pass to your composition as a top layer.19
<strong>Rendering</strong> <strong>with</strong> <strong>mental</strong> ray: <strong>Tips</strong> <strong>and</strong> <strong>Tricks</strong>Now click on the Channels tab. This will show you’re the RGB channels for the current layer.Click <strong>and</strong> drag one of your channels into the new layer button to create a new channel.This new channel is an Alpha Channel, <strong>and</strong> is used to control selections of your composition.Name it to stay organized as you will need to reference it in your blur filter later. I usually call itz-depth. Now turn on your RGB channel, <strong>and</strong> turn off the z-depth channel, <strong>and</strong> go back to theLayers tab. You can actually delete the z-depth layer that is in the Layers tab. It will notdelete your z-depth in the channels.20
<strong>Rendering</strong> <strong>with</strong> <strong>mental</strong> ray: <strong>Tips</strong> <strong>and</strong> <strong>Tricks</strong>Now select the layer you want to blur (in this case the top layer that we applied a lens correctionfilter to), <strong>and</strong> choose Filter->Blur->Lens Blur.This gives you a series of settings to create depth of field. Next to Source, choose z-depth (thechannel that you created). You can click your mouse now <strong>and</strong> select the area of the image thatyou want to remain in focus. You can also adjust the amount of blur by changing the Radiussize.21
<strong>Rendering</strong> <strong>with</strong> <strong>mental</strong> ray: <strong>Tips</strong> <strong>and</strong> <strong>Tricks</strong>Because this is a post process I’ve often been unhappy <strong>with</strong> Photoshops lens blur tool. A wayto create believable results that seems to work is to add a Gaussian Blur filter on the z-depthchannel. I have found this to work well for some cases. However, there are other plugins thath<strong>and</strong>le DOF much better such as http://www.frischluft.com/.Lastly, I will sharpen the image <strong>with</strong> an Unsharp Mask, to give the image more clarity.There are plenty of resources on the internet for creating images <strong>with</strong> post work for architecturalvisualization. Some websites that are chalk-full of knowledge are:evermotion.orgarea.autodesk.comjeffpatton.netronenbekerman.combertr<strong>and</strong>-benoit.comYou can also visit my website:http://www.ramyhanna.com/If you ever have any questions, feel free to contact, me <strong>and</strong> I almost always reply 22