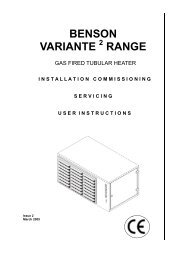
BENSON OUH² OIL UNIT HEATER
Benson OUH2 Range OandM 3365190 Apr2012 issue7 ... - AmbiRad
Benson OUH2 Range OandM 3365190 Apr2012 issue7 ... - AmbiRad
- No tags were found...

You also want an ePaper? Increase the reach of your titles
YUMPU automatically turns print PDFs into web optimized ePapers that Google loves.
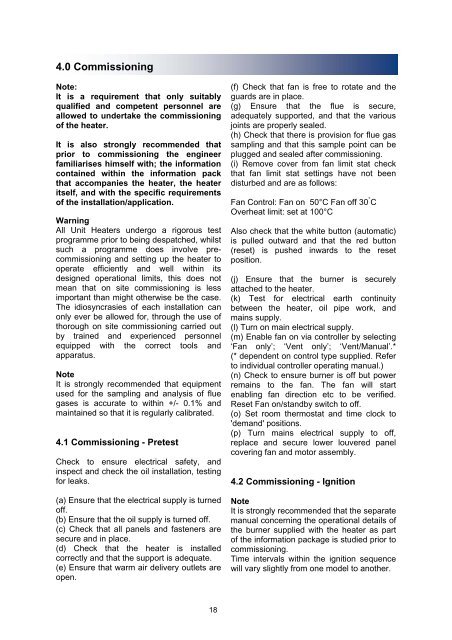
4.0 Commissioning<br />
Note:<br />
It is a requirement that only suitably<br />
qualified and competent personnel are<br />
allowed to undertake the commissioning<br />
of the heater.<br />
It is also strongly recommended that<br />
prior to commissioning the engineer<br />
familiarises himself with; the information<br />
contained within the information pack<br />
that accompanies the heater, the heater<br />
itself, and with the specific requirements<br />
of the installation/application.<br />
Warning<br />
All Unit Heaters undergo a rigorous test<br />
programme prior to being despatched, whilst<br />
such a programme does involve precommissioning<br />
and setting up the heater to<br />
operate efficiently and well within its<br />
designed operational limits, this does not<br />
mean that on site commissioning is less<br />
important than might otherwise be the case.<br />
The idiosyncrasies of each installation can<br />
only ever be allowed for, through the use of<br />
thorough on site commissioning carried out<br />
by trained and experienced personnel<br />
equipped with the correct tools and<br />
apparatus.<br />
Note<br />
It is strongly recommended that equipment<br />
used for the sampling and analysis of flue<br />
gases is accurate to within +/- 0.1% and<br />
maintained so that it is regularly calibrated.<br />
4.1 Commissioning - Pretest<br />
Check to ensure electrical safety, and<br />
inspect and check the oil installation, testing<br />
for leaks.<br />
(a) Ensure that the electrical supply is turned<br />
off.<br />
(b) Ensure that the oil supply is turned off.<br />
(c) Check that all panels and fasteners are<br />
secure and in place.<br />
(d) Check that the heater is installed<br />
correctly and that the support is adequate.<br />
(e) Ensure that warm air delivery outlets are<br />
open.<br />
(f) Check that fan is free to rotate and the<br />
guards are in place.<br />
(g) Ensure that the flue is secure,<br />
adequately supported, and that the various<br />
joints are properly sealed.<br />
(h) Check that there is provision for flue gas<br />
sampling and that this sample point can be<br />
plugged and sealed after commissioning.<br />
(i) Remove cover from fan limit stat check<br />
that fan limit stat settings have not been<br />
disturbed and are as follows:<br />
Fan Control: Fan on 50°C Fan off 30 ° C<br />
Overheat limit: set at 100°C<br />
Also check that the white button (automatic)<br />
is pulled outward and that the red button<br />
(reset) is pushed inwards to the reset<br />
position.<br />
(j) Ensure that the burner is securely<br />
attached to the heater.<br />
(k) Test for electrical earth continuity<br />
between the heater, oil pipe work, and<br />
mains supply.<br />
(l) Turn on main electrical supply.<br />
(m) Enable fan on via controller by selecting<br />
‘Fan only’; ‘Vent only’; ‘Vent/Manual’.*<br />
(* dependent on control type supplied. Refer<br />
to individual controller operating manual.)<br />
(n) Check to ensure burner is off but power<br />
remains to the fan. The fan will start<br />
enabling fan direction etc to be verified.<br />
Reset Fan on/standby switch to off.<br />
(o) Set room thermostat and time clock to<br />
'demand' positions.<br />
(p) Turn mains electrical supply to off,<br />
replace and secure lower louvered panel<br />
covering fan and motor assembly.<br />
4.2 Commissioning - Ignition<br />
Note<br />
It is strongly recommended that the separate<br />
manual concerning the operational details of<br />
the burner supplied with the heater as part<br />
of the information package is studied prior to<br />
commissioning.<br />
Time intervals within the ignition sequence<br />
will vary slightly from one model to another.<br />
18