Sonneboy Impuls englisch - Jungiberica.net
Sonneboy Impuls englisch - Jungiberica.net
Sonneboy Impuls englisch - Jungiberica.net

Create successful ePaper yourself
Turn your PDF publications into a flip-book with our unique Google optimized e-Paper software.
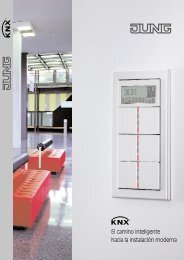
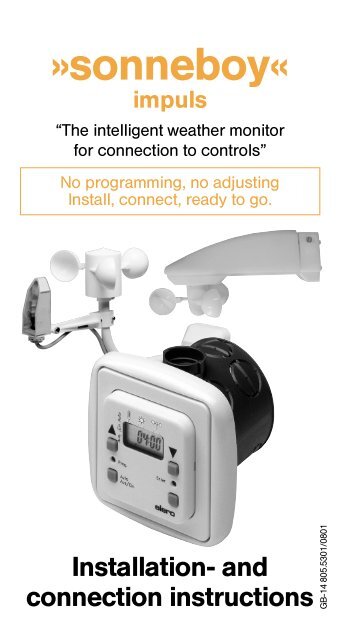
»sonneboy«<br />
impuls<br />
“The intelligent weather monitor<br />
for connection to controls"<br />
No programming, no adjusting<br />
Install, connect, ready to go.<br />
Installation- and<br />
connection instructions<br />
GB-14 805.5301/0801
Contents<br />
Page<br />
Explanation of displays and keys .......................................................................... 3<br />
General .......................................................................................................................... 4<br />
Technical data ............................................................................................................. 4<br />
Assembly and connection ........................................................................................ 5–8<br />
Fitting accessories....................................................................................................... 9–10<br />
Operation ...................................................................................................................... 1<br />
Setting ranges ............................................................................................................ 12<br />
Explanation of Prog key ............................................................................................ 13<br />
Programming................................................................................................................. 13–14<br />
Changing light values ................................................................................................ 13<br />
Changing temperature value ................................................................................... 13–14<br />
Changing the wind value .......................................................................................... 13–14<br />
Changing pulse duration .......................................................................................... 13–14<br />
Programming protection ........................................................................................... 15<br />
View program ............................................................................................................... 15<br />
Delete program ............................................................................................................ 15<br />
Programming intermediate position/turning point ............................................ 15–16<br />
Deleting intermediate position/turning point ...................................................... 16<br />
Automatic test for light value..................................................................................... 16<br />
Troubleshooting ........................................................................................................... 17<br />
2
Explanation of display and keys<br />
No. Function<br />
1 [UP ▲]-command key<br />
a) manual „Up“<br />
b) setting figures in<br />
programming mode (plus)<br />
2 [DOWN ▼]-command key<br />
a) manual „Down“<br />
b) setting figures in<br />
programming mode (minus)<br />
3 [Prog]-key<br />
Calling up and interrupting<br />
program<br />
4 [ENTER]-key<br />
confirmation of programming<br />
(in programming mode)<br />
5 [AUTO]-key<br />
Automatic/manual mode<br />
6 Unassigned key<br />
7 Display<br />
Automatic On/Off<br />
3<br />
Auto<br />
Free<br />
Prog<br />
Auto<br />
Thresholds<br />
Times<br />
Enter<br />
ESO<br />
C<br />
No. Function<br />
8 Display for rain<br />
9 Display for top end position<br />
(TEP)<br />
0 Up/Down command key<br />
ß Display, brightness value<br />
exceeded.<br />
“ [C]-key (in conjunction with<br />
[DOWN▼]-key) to set<br />
thresholds and times in basic<br />
program<br />
„ Display, set wind value<br />
exceeded<br />
” [Free]-key<br />
programming protection<br />
¿ Display for temperature value<br />
(appears only if temperature<br />
control is active)<br />
¸ Display for brightness value<br />
q Display for wind value
1. General<br />
The microprocessor-controlled elero sonneboy impuls with rain<br />
sensor input is a compact control unit for a decentral control.<br />
With the sonneboy impuls with rain-sensor input groups or<br />
subgroups of a decentral control can be controlled. The automatic<br />
control system controls the system automatically as a function of<br />
light intensitiy (sunshine), wind and rain (snow).<br />
There is also the option of controlling shade as a function of<br />
temperature using the integrated temperature sensor (located on<br />
the board).<br />
This is an especially useful facility in conservatories for saving<br />
heating costs.<br />
The wind monitor takes precedence over the light sensor and the<br />
rain monitor and also in automatic and manual operation so that<br />
the sunshade system is reliably protected from damage.The rain<br />
monitor takes precedence only over the light sensor and only<br />
works in automatic mode. If the wind monitor is active, the relais<br />
“run in v" is closed. As long as the wind is active, the control<br />
cannot be actuated manually.<br />
The “sonneboy impuls" has a basic program in which light<br />
value, temperature, wind value, pulse duration and delay time<br />
are all pre-programmed, i.e. the automatic sunshade system<br />
can be started without being programmed.<br />
If you would like to set different values for brightness, temperature,<br />
wind, pulse duration or delay time, proceed as per Section 8.<br />
2. Technical Data<br />
● Voltage: 230 V AC<br />
● Frequency: 50 Hz<br />
● Power draw: 4,5 mA<br />
● Output: 2 relais (closer) potential free<br />
● Input: Light sensor, wind monitor, rainmonitor<br />
and external button<br />
● <strong>Impuls</strong>e duration: 3 sec. (The direction symbols b or v<br />
are indicated for approx 3 min. 15 sec.).<br />
● Ambient temperature: –5°C to + 50°C<br />
● Type of protection: IP 20<br />
● Installation location: Dry areas (do not fit outdoors)<br />
● Basic program: Light value for extend 5, for retract 4,<br />
temperature “- -“, wind value 3 and delay<br />
time for extend 5, for retract 10 are preprogrammed.<br />
These values can also be changed.<br />
4
3. Assembly and connection<br />
Works on the 230 V-mains may be performed only by<br />
authorised specialists<br />
When connecting the wires for mains- and protective low voltage<br />
(sensors, external buttons) VDE 0100 Part 410 and the assemby<br />
instructions should be observed.<br />
Wires must be laid according to regulations:<br />
● Switch off mains power<br />
● Connect as per wiring diagram<br />
● Fit light sensor, wind monitor and rain monitor as per Section 4,<br />
fit following the relevant instructions<br />
● Clip terminal cover onto (8-pin) connecting terminal<br />
● The power unit is fixed in position using 2 expanding binders or<br />
using mounting screws<br />
● Clip cover onto control panel (see series of diagrams below)<br />
● Plug on control panel<br />
● Switch on power<br />
● Set manual mode using “Auto On/Off" key. “Manual" appears on<br />
the display<br />
● Using the v or b key, check direction of rotation of the motors.<br />
Important: Key v sunshade system must retract<br />
Key b sunshade system must extend<br />
● If the direction of rotation of the motors does not agree with the<br />
v and b symbols on the control panel, switch off power and<br />
change over wires at v and b terminals of the power unit, then<br />
switch power back on.<br />
Series of diagrams for assembly (representation applies to any<br />
model)<br />
1: Cover<br />
2: Control panel<br />
3: Adapter frame<br />
4.1: Frame<br />
4.2: Bearing ring<br />
5: Power unit<br />
6: Terminal cover<br />
7.1: Branch box l 60, No. 13 701.5101<br />
7.2: Surface socket, No. 24 843.0103 or No. 24 752.0001<br />
Parts 4.2 and 7.2 replace parts 4.1 and 7.1 in the case of surface mounting.<br />
Always put parts 1 and 2 together first when assembling.<br />
5
Important notes:<br />
When connecting the light sensor check the connection is<br />
(1-1, 3-3) correct!<br />
If the light sensor is connected with incorrect polarity, brightness<br />
value 12 appears in the display.<br />
The connection wires to the light sensor, wind monitor and rain<br />
monitor must always be executed as a shielded cable;<br />
Either a separate 2-wire line or 4-wire shared line, e.g. Siemens<br />
LSYCY MSR control line or JY-ST-Y 2 x 2 x 0.6 telecommunications<br />
line.<br />
● Only 1 wind monitor per “sonneboy" may be connected between<br />
terminals 2 and 3.<br />
● A second light sensor can be connected between terminals 4 and<br />
6 to increase the angle-of incidence. No account need to be<br />
taken of the angle of incidence of the sunlight (for connection,<br />
see Page 8).<br />
● If it is not possible to connect a second light sensor between<br />
terminals 4 and 6 because there are insufficient wires, it is also<br />
possible to connect the second light sensor in parallel with the<br />
first one between terminals 1 and 3. The light sensors may not be<br />
fitted in the same angle of incidence of sunlight, however, they<br />
must be offset by at least 60° (see diagram below). Furthermore,<br />
the light value needs to be set at least 2-3 levels higher than in<br />
the basic programme.<br />
6<br />
light<br />
sensor
Wiring diagram<br />
Exit to<br />
further<br />
controls<br />
Attention:<br />
Connection max. 1 motor!<br />
Mains<br />
230 V/50 Hz<br />
Light<br />
sensor Wind<br />
monitor<br />
Red<br />
White<br />
Black<br />
White<br />
Do not connect with power switched on!<br />
Attention: You must observe the correct polarity when connecting the<br />
light sensor.<br />
Note:<br />
When a temperature level is set, the light sensor only becomes<br />
active once the set level has been exceeded.<br />
A second switching point ( individual switch ) can be connected for<br />
individual operation. This is given equal priority to the functions of<br />
the [UP] and [DOWN] keys on the control panel and is thus also<br />
only active in manual mode ( for connection, see Page 8).<br />
Both relais draw shortly ( stop command at elero WKS) . Please<br />
consider for connection to foreign controls.<br />
7
Connecting a switch<br />
Attention: switch only works in “manual" mode.<br />
Connecting a second light sensor<br />
(to increase angle of incidence)<br />
Note: either a switch or a second light sensor can be connected.<br />
It is not possible to connect both at once.<br />
Connecting a rain monitor<br />
The rain monitor retracts the system if it rains (v).<br />
8<br />
switch<br />
4/5<br />
white<br />
red<br />
v b<br />
Mains<br />
230 V/50 Hz
4. Fitting accessories<br />
Light sensor and wind monitor combined<br />
● Fit light sensor and wind monitor vertically, close to the awning<br />
(see Fig.) where sun shines and not in the lee of the wind.<br />
Ensure that no shadows (e.g. from a tower or masts) and no<br />
reflections fall on the light sensor.<br />
● Connect as per wiring diagram (see page 7).<br />
● Clip on cover.<br />
Wind monitor<br />
Aero<br />
● Wind monitor close to the awning, not in the lee of the wind.<br />
● Please respect correct fixing (see diagram).<br />
● Connect as per wiring diagram (see page 7).<br />
● Clip on cover.<br />
9
Light sensor<br />
● Attach light sensor vertically (cable inlet underneath) above the<br />
awning with two screws (max. diameter 4) in an area where sun<br />
shines.<br />
Ensure that no shadows (e.g. from a tower or masts) and no<br />
reflections fall on the light sensor.<br />
● Connect as per wiring diagram (see page 7/8).<br />
● Clip on hood.<br />
Note: functions only in automatic mode.<br />
Rain monitor<br />
● Fit rain monitor vertically (cable inlet underneath) above the<br />
sunshade system (unprotected).<br />
● Connect as per wiring diagram ( in cover ): make contact 4/6<br />
(see Page 8)<br />
● Screw on cover.<br />
Note: functions only in automatic mode.<br />
10
5. Operation<br />
Operating modes: manual mode (see Section 5.1)<br />
Automatic mode (see Section 5.2)<br />
Numerical display: the first two figures (smaller figures) indicate<br />
the currently-measured temperature value, the<br />
next 2 figures indicate the light value and the<br />
last two figures indicate the currently-measured<br />
wind value.<br />
5.1 Manual mode<br />
The sunshade system cannot be extended manually if the set wind<br />
value is exceeded. In normal conditions, the system can be operated<br />
by hand at any time, as long as the operating mode is set to “Manual”.<br />
It should be noted that when the Up or Down key is operated for less<br />
than 1 second, short pulses are issued (inching mode). If the Up or<br />
Down key is operated for longer than 1 second, the system operates<br />
continuously.<br />
Key: press “Auto Off/On"<br />
“HAnd" and symbol “Auto Off" appears<br />
Function: Up: press ▲ key<br />
Stop: press ▼ key briefly.<br />
Function: Down: press ▼ key<br />
Stop: press ▲ key briefly.<br />
5.2 Automatic mode<br />
Key: Press “Auto Off/On"<br />
“HAnd" (manual) goes out and “Auto On"<br />
symbol comes on<br />
Unless otherwise programmed, the sunshade system is controlled in<br />
accordance with the set light and wind values any by the rain monitor.<br />
If the wind value is exceeded, it is not possible to<br />
execute a manual Stop command.<br />
● If the light or wind value is exceeded, the symbols<br />
for sun or wind appear and flash in the display.<br />
● If the temperature value is exceeded, the first two figures<br />
(smaller figures ) flash in the display.<br />
● If the rain monitor is activated, 7 bars appear and flash in the<br />
display.<br />
The light sensor and the rain monitor only work in automatic<br />
mode. In automatic mode, a command to raise the sunshade is<br />
automatically given for safety reasons after power is reinstated<br />
after a cut.<br />
11
6. Setting ranges<br />
Light value level 1–14 (adjustable)<br />
level 1 approx. 4 klx. – low brightness<br />
level 14 over 50 klx. – bright midday sun<br />
Basic program<br />
retract level 4 approx. 15 klx.<br />
extend level 5 approx. 18 klx.<br />
Note: The light values for extending and retracting can be set<br />
differently, but the level for retracting can never be set to be<br />
greater than the level for extending<br />
Temperature value level 1 – 14 or “- -” (adjustable)<br />
level 1 approx. 17°C<br />
level 14 approx. 30°C<br />
Basic program (not temperature-controlled)<br />
Note: If shade is to be controlled as function of temperature,<br />
select the desired level instead of " – " when programming.<br />
Wind value level 1– 9 (adjustable)<br />
level 1 light breeze<br />
level 9 storm<br />
Basic program level 3<br />
Attention: If the wind value is set too high, there is a risk of the<br />
sunshade system being destroyed<br />
Delay time for level 5 – 30 (adjustable)<br />
the light value level 5 = 5 min.<br />
level 30 = 30 min.<br />
Basic program<br />
extend level 5 = 5 min.<br />
retract level 10 = 10 min.<br />
Note: the delay times for extending/retracting can be set<br />
differently.<br />
12
7. Explanation of Prog key<br />
By pressing the "Prog" key, you can select one after the other the<br />
input options for values which can be altered for menus,<br />
thresholds (sun, temperature and wind) and times ( pulse duration<br />
and delay times).<br />
The “Prog" key only works if the "Free" symbol is being displayed<br />
(see programming protection, Page 15). The "Free" symbol is<br />
displayed on delivery.<br />
Notes:<br />
1. Using the "Prog" key, you can call up at any time a program step<br />
or interrupt programming at any time.<br />
2. It is not possible to initiate any manual “Up" or “Down" commands<br />
during programming.<br />
3. If programming is interrupted for more than 5 min., the operating<br />
state display reappears.<br />
Repeat programming if necessary.<br />
4. Input not confirmed with "Enter" is considered not entered and<br />
the previously entered value is retained.<br />
8. Programming<br />
If the basic program set at the factory is to be changed, the following<br />
steps are required.<br />
Example setting: sun extend 7, sun retract 6, temperature 7, wind<br />
2, pulse duration 1 min 30 sec. delay time extend 10 min., delay<br />
time retract 20 min.<br />
Programming thresholds<br />
Key: press “Prog” 1 x<br />
Thresholds symbol flashed<br />
Key: press “Enter” 1 x<br />
Display is activated<br />
Two right-hand figures: set light value<br />
(extend) flashed<br />
Two left-hand figures: currently-measured<br />
light value<br />
Key: ▲ or ▼ set desired light value for<br />
extend.<br />
Key: “Enter" to confirm light value (extend).<br />
Two right-hand figures: set light value<br />
(retract) flashes<br />
Two left-hand figures: currently-measured<br />
light value<br />
Key: ▲ or ▼ set desired light value for<br />
retract.<br />
13
Key: “Enter" confirms light value (retract).<br />
Two right-hand figures: set<br />
temperature value flashes<br />
Two left-hand figures: currently-measured<br />
temperature value<br />
Key: ▲ or ▼ set desired wind value.<br />
Key: “Enter" to confirm wind value.<br />
Two right-hand figures: set wind<br />
value flashes<br />
Two left-hand figures: currently-measured<br />
wind value<br />
Key: ▲ or ▼ set desired wind value.<br />
Key: “Enter" to confirm wind value.<br />
Currently-measured temperature,<br />
light and wind values appear.<br />
Programming is complete.<br />
Programming times<br />
Key: press “Prog” 3 x<br />
Times symbol flashes<br />
Key: press “Enter" 1x<br />
Display is activated<br />
2 figures: set pulse<br />
duration flashes (retract)<br />
Key: ▲ or ▼ to set desired<br />
pulse duration.<br />
Key: “Enter" to confirm pulse duration (retract)<br />
2 figures: set delay time<br />
(extend) flashes<br />
Key: ▲ or ▼ set desired delay time<br />
for retract<br />
Key: “Enter" to confirm delay time (retract).<br />
Currently-measured temperature,<br />
light and wind values appear.<br />
Programming is complete.<br />
14
9. Menu selection<br />
Identical with the programming point 8, but without modification of<br />
the values.<br />
10. Programming protection<br />
If you would like to protect the control system from<br />
unintentional programming, deactivate the “Free"<br />
symbol.<br />
Key: press “FREE” 1 x<br />
If you like to release the programming, you should<br />
press the “FREE-sign".<br />
Key: press “FREE” 1 x<br />
11. Delete program<br />
Press key “C" with a ball point pen or similar object. The display<br />
fades away. Also press the [DOWN] key. Then release "C" key (full<br />
display appears for approx. 2 sec.). After the full display has gone<br />
out, “cir" appears. Then likewise release the [DOWN] key.<br />
After the program has been deleted, reprogrammed light, temperature,<br />
wind delay values and intermediate position/turning point are<br />
deleted and the basic program is active again (Menu 1).<br />
The currently-measured light and wind value appears.<br />
12. Programming intermediate position<br />
and/or turning point<br />
Note:<br />
Programming an intermediate position or turning point is possible<br />
only in manual mode (for explanation of operation/manual mode, see<br />
Page 11).<br />
Programming an intermediate position<br />
The function "intermediate position" (only possible when straight)<br />
allows the sunshade system to be positioned in an intermediate<br />
position.<br />
● Press [Up]-key and wait for “FTP" symbol<br />
(see explanation on “FTP" Page 16).<br />
● Press [Up]-key and [Down]-key simultaneously<br />
for at least 3 seconds.<br />
● Press [Down]-key until the desired position is reached and then<br />
also press the [Up] key several times in this position. This<br />
angles the slats to the desired oblique angle.<br />
● Release both keys.<br />
15
Programming of the turning point of a ve<strong>net</strong>ian blind<br />
The function “Turning point" serves for adjusting the automatic<br />
inclination of the lamella.<br />
● Press [Up]-key and wait for symbol “FTP" (see explanation) “FTP"<br />
below.<br />
● Press [Up]-key and [Down]-key simultaneously for at least<br />
3 seconds.<br />
● Press [Down]-key, until the desired position is reached and at<br />
this position press additionally the [Up]-key several times<br />
tapping. In doing so the lamella turn in the desired inclination.<br />
● Release both keys (in doing so the programming of the position<br />
follows).<br />
Notes:<br />
– The programmed intermediate position and/or turning point is only<br />
reached from the FTP-position when the DOWN-command is given.<br />
– When the intermediate position/turning point starts up, direction<br />
arrow b or v flashes.<br />
– It is possible to extend the shade completely from the programmed<br />
intermediate position/turning point by giving another “DOWN"<br />
command.<br />
Delete intermediate position/turning point<br />
● Press [Up]-key and wait for " FTP" symbol (see explanation “FTP"<br />
below).<br />
● Press [Up]-key and [Down]-key simultaneously for at least<br />
3 seconds. Relay disconnects already after 3 seconds.<br />
Explanation of “FTP": the symbol "FTP" appears once the pulse<br />
duration of the Up command has elapsed, when the [UP v] key is<br />
pressed (only possible in manual mode) or after an automatic<br />
[UP v] command after approx. 3 min. Relay disconnects already<br />
after 3 seconds.<br />
13. Automatic test for light value<br />
The automatic test is an installation aid and enables the sun function<br />
to be tested quickly. The minutes set as the delay time are converted<br />
into seconds for this purpose.<br />
Start automatic test<br />
The blind must be pulled right up, the control must be on Auto “ON"<br />
and the “FTP" symbol must have appeared ( see explanation of “FTP").<br />
If these conditions are met, the “Unassigned" and [Auto] keys must<br />
be pressed simultaneously. Activation is shown by the “FTP" symbol<br />
flashing.<br />
If the light value for pulling out exceeds the period of the delay time<br />
(in seconds ) the blind extends. When after extending the light value<br />
on the light sensor descends below the programmed light value for<br />
the period of the delay time (in seconds) the blind retracts.<br />
Switch off automatic test<br />
The installation aid is automatically switched off once “FTP" is displayed<br />
again.<br />
16
Troubleshooting<br />
Fault Cause Remedy<br />
Motors of the Incorrect connection Exchange wires<br />
following controls ▲ and ▼on power unit<br />
are running in<br />
wrong direction<br />
(p. 7)<br />
Motors of the Intermediate position Delete intermediate<br />
followings<br />
controls donot<br />
run totally<br />
programmed position (p. 16)<br />
Intermediate 1.) Sunshade system 1.) Move sunshade<br />
position cannot not in top end system up and<br />
be programmed position (FTP). wait until “FTP”<br />
“symbol” is displayed<br />
(p. 16)<br />
2.) Old intermediate 2.) Delete intermediate<br />
position not deleted. position (p. 16)<br />
3.) Manual mode 3.) Switch off automatic<br />
not set. mode (p. 11)<br />
Intermediate Sunshade system is Move sunshade system<br />
position cannot not in top end position up and wait until “FTP”<br />
be deleted (FTP) symbol is displayed<br />
(p. 16)<br />
Sunshade system 1.) Sunshade system 1.) Move sunshade<br />
does not run down is not in top end system up and wait until<br />
although “sun” position (FTP) “FTP” (p. 16)<br />
symbol is flashing 2.) Automatic mode 2.) Switch on Automatic<br />
not switched on. (p. 11)<br />
3.) Delay time is not 3.) Wait for delay time<br />
yet elapsed. (p. 12)<br />
4.) Set temperature 4.) Wait for temperature<br />
value not yet retached. to rise, possibly reduce<br />
or switch off temperature<br />
level (p. 12/13)<br />
Sunshade system 1.) Set wind value 1.) Wait for wind to drop<br />
goes up, although exceeded (p. 12)<br />
the “sun” symbol 2.) Set temperature 2.) Wait for temperature<br />
is flashing value not reached to rise, possibly reduce<br />
or switch of temperature<br />
level (p. 12/13)<br />
Brightness value Light sensor Change connections<br />
in display for sun connections are back (p. 7)<br />
is on 12, although to front<br />
sun is not shining<br />
System does not Light sensor is in Position light sensor<br />
extend in spite<br />
of bright light<br />
shade (too little sun) elsewhere<br />
17
elero GmbH, Linsenhofer Str. 59-63, D-72660 Beuren,<br />
Telefon (0 70 25) 13-01 Telefax (0 70 25) 13-290<br />
info@elero.de http://www.elero.de