

Particle-Playground-3-Next-Manual
Particle-Playground-3-Next-Manual
Particle-Playground-3-Next-Manual

You also want an ePaper? Increase the reach of your titles
YUMPU automatically turns print PDFs into web optimized ePapers that Google loves.
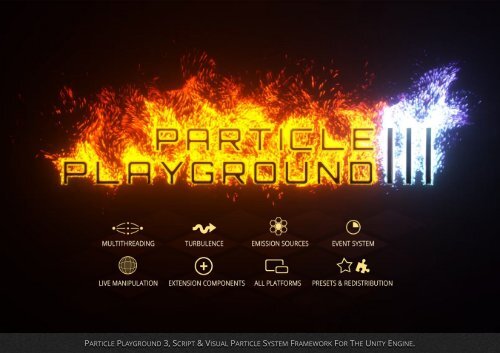
PARTICLE PLAYGROUND 3, SCRIPT & VISUAL PARTICLE SYSTEM FRAMEWORK FOR THE UNITY ENGINE.<br />
1 of 70
NEXT<br />
THE PARTICLE PLAYGROUND 3 MANUAL<br />
2 of 70
INTRODUCTION<br />
BIRTH POSITIONS MADE FROM A MESH. THE PLAYGROUND TRAILS COMPONENT DRAW TRAILS AFTER PARTICLES.
WHAT’S NEXT?<br />
NEXT is a jump-start guide and the manual to<br />
<strong>Particle</strong> <strong>Playground</strong> 3, intended to inspire and<br />
give ideas how to bend particles your way.<br />
WELCOME TO THE PLAYGROUND<br />
<strong>Particle</strong> <strong>Playground</strong> 3 is a versatile particle<br />
effect editor for the Unity Engine which<br />
extends the capabilities of the Shuriken<br />
particle system. Along come abilities to build<br />
particles from skinned, procedural or regular<br />
meshes, images, paint, projection and splines<br />
- all live in the scene.<br />
All settings can be controlled intuitively<br />
through the Unity Inspector where gizmos and<br />
handles are available in Scene View.<br />
Give your particles life through turbulent<br />
forces and let manipulators guide them based<br />
on their position to give them new properties.<br />
The Event system give particles the ability to<br />
talk to other <strong>Particle</strong> <strong>Playground</strong> systems and<br />
game logic in the scene. Through the list of<br />
Snapshots you can load particle settings and<br />
jump through live particle states.<br />
Store your particles in form of presets and<br />
load them whenever needed. Did you create<br />
something amazing? - Use the Preset Wizard<br />
to export presets to share your creations with<br />
others. License includes redistribution.<br />
Under the hood you will find multithreading,<br />
extensive classes, a script mode for emission<br />
with a set of script- and scene examples to get<br />
started. The framework is entirely written in<br />
C# where source code is available and ready<br />
for you to extend.<br />
<strong>Particle</strong> <strong>Playground</strong> 3 is available for all<br />
platforms.<br />
4 of 70
GETTING STARTED<br />
<strong>Particle</strong> <strong>Playground</strong> 3 all starts with the<br />
<strong>Playground</strong> Wizard found through Window ><br />
<strong>Particle</strong> <strong>Playground</strong>. From here you can start<br />
fresh with a new <strong>Particle</strong> <strong>Playground</strong> system<br />
or launch any previously made particle<br />
presets through the Presets list. Example<br />
presets from first install is also available to<br />
give you an idea of the multitude of<br />
capabilities a <strong>Particle</strong> <strong>Playground</strong> system has.<br />
You can create new presets in the Preset Wizard<br />
found by way of the Preset Wizard-button or by<br />
any <strong>Particle</strong> <strong>Playground</strong> system’s Inspector.<br />
Through the Preset Wizard you can also<br />
export your particle systems to a<br />
UnityPackage to publish your presets.<br />
The <strong>Playground</strong> Wizard also serves as a<br />
window to the available <strong>Playground</strong> Manager in<br />
the scene. The <strong>Playground</strong> Manager is the<br />
object driving all active <strong>Particle</strong> <strong>Playground</strong><br />
systems. It also contains all Global Manipulators<br />
and main settings for how you wish your<br />
<strong>Playground</strong> to be presented.<br />
For your convenience the <strong>Playground</strong> Wizard<br />
will notify you if any updates are available and<br />
contains the overall settings where you can<br />
handle languages, Editor limits and project<br />
paths.<br />
5 of 70
PLAYGROUND COMPONENTS<br />
<strong>Particle</strong> <strong>Playground</strong> comes with additional<br />
tools to create advanced particle effects at<br />
your fingertips. These components can be<br />
found in the <strong>Playground</strong> Wizard and added to<br />
any selected GameObject within the<br />
Hierarchy.<br />
Components Overview<br />
<strong>Playground</strong> Spline<br />
The <strong>Playground</strong> Spline lets you draw bezier curves within the<br />
Scene. <strong>Particle</strong>s can birth from splines and Manipulators can target<br />
particles towards them. The <strong>Playground</strong> Spline is not tied to <strong>Particle</strong><br />
<strong>Playground</strong> and lives within the <strong>Playground</strong>Splines namespace, you<br />
can use a <strong>Playground</strong> Spline for other Unity assets.<br />
<strong>Playground</strong> Trails<br />
The <strong>Playground</strong> Trails component will draw flexible mesh trails after<br />
particles within a particle system. This is done by adding Birth-,<br />
Collision- and Death Events onto a particle system to tell the trails<br />
when to be created, create points or stop following a particle.<br />
The trails length is set by the Time parameter, which determines<br />
how long each point in the trail lives. The width is set by the Width<br />
multiplier and the normalized Animation Curve Lifetime Width.<br />
The colors are set by a Gradient which can be applied over Lifetime<br />
or by using the normalized points within the Point Array. The same<br />
modes are available for the UV-mapping.<br />
The trails can billboard towards a Transform position, render flat<br />
horizontally / vertically or use a Custom Render Scale which<br />
determines the direction and its multiplier.<br />
The amount of points in a trail determines how smooth it looks,<br />
more points = more vertices. You can set the Minimum and<br />
Maximum distances for point creation and the Maximum Path<br />
Deviation based on the particle’s current trajectory in angles.<br />
The <strong>Playground</strong> Trails mesh calculations are done in a<br />
multithreaded environment.<br />
<strong>Playground</strong> Follow<br />
The <strong>Playground</strong> Follow component lets GameObjects follow<br />
particles live within the scene. It uses a Reference Object which will<br />
be the blueprint for the objects pooled and reused. Their Lifetime<br />
and pool Cache Size is automatically set unless user specified.<br />
<strong>Playground</strong> Recorder<br />
The <strong>Playground</strong> Recorder can record, playback and time scrub<br />
particles. After a recording is made you can Trim the non desirable<br />
frames. To store recordings over sessions it uses a Scriptable Object<br />
called <strong>Playground</strong> Recorder Data. When using this you can record<br />
in Play Mode and playback whenever. The Recorder Data will not<br />
be serialized at runtime in builds.<br />
You can use playback as an option to otherwise live calculated<br />
heavier particle systems to improve performance.<br />
The <strong>Playground</strong> Recorder will record and playback in a<br />
multithreaded environment.<br />
6 of 70
OVERVIEW<br />
GET READY TO PLAY.<br />
7 of 70
THE INSPECTOR<br />
A <strong>Particle</strong> <strong>Playground</strong> system’s all settings is<br />
available through the Inspector UI once<br />
selected in the Hierarchy.<br />
Quick Overview<br />
Source-tab<br />
The source of which particles are created by.<br />
<strong>Particle</strong> Settings-tab<br />
From here you can set various conditions for your particle system,<br />
for instance how many particles are simulated, their size and their<br />
lifetime.<br />
Forces-tab<br />
Set conditions such as initial movement and movement over<br />
lifetime by pre-set forces and turbulence.<br />
Collision-tab<br />
Determines if particles should detect colliders in the scene.<br />
Rendering-tab<br />
How particles are presented visually.<br />
Manipulators-tab<br />
The list of Manipulators affecting this particle system. A<br />
Manipulator can alter a particle’s behavior based on its position.<br />
Events-tab<br />
The list of Events communicating with other particle systems and<br />
scripts in the scene.<br />
Snapshots-tab<br />
The list of Snapshots with stored settings and particle positions to<br />
load upon request.<br />
Advanced-tab<br />
The in-depth settings for this particle system. Here you can<br />
determine if particles should be simulated in World- or Local space<br />
and enable extensive features such as Rebirth appearance, Auto-<br />
Pause Calculation and apply any Lock values to the particle system.<br />
<strong>Playground</strong> Manager<br />
A window to the <strong>Playground</strong> Manager’s list of <strong>Particle</strong> Systems,<br />
Global Manipulators and Advanced settings is available on any<br />
<strong>Particle</strong> <strong>Playground</strong> system.<br />
8 of 70
THE PLAYGROUND MANAGER<br />
All <strong>Particle</strong> <strong>Playground</strong> systems are driven by<br />
the <strong>Playground</strong> Manager within the scene.<br />
From the Inspector UI you can see all available<br />
<strong>Particle</strong> Systems and Global Manipulators once<br />
selected in the Hierarchy. These serves as<br />
jump-lists to their attached GameObjects. You<br />
can rearrange the lists by up- and down<br />
buttons, where + clones- and - removes an<br />
object. Through the Advanced-tab you can<br />
setup your <strong>Playground</strong> in more detail, here<br />
you can configure how multithreading should<br />
be handled across the Scene.<br />
In terms of scripting the <strong>Playground</strong>C class is<br />
the <strong>Playground</strong> Manager. From here you can<br />
create new <strong>Particle</strong> <strong>Playground</strong> systems and<br />
when scripting towards one you’ll find handy<br />
wrapper functions available. All classes and<br />
functions in <strong>Particle</strong> <strong>Playground</strong> lives in the<br />
<strong>Particle</strong><strong>Playground</strong> namespace.<br />
GOOD TO KNOW<br />
Only one <strong>Playground</strong> Manager can exist within a scene.<br />
9 of 70
SOURCE<br />
PARTICLE EMISSION MADE FROM A LIVE SKINNED MESH WITHIN THE SCENE.
A Source is a way of describing how particle<br />
birth positions will distribute. There are<br />
several options with ability to structure<br />
particles from textures, meshes, paint, image<br />
projection and splines.<br />
Quick Overview<br />
State<br />
Create particles from textures or static meshes. The State Source<br />
serves as a list where you can switch between items. Assign a<br />
Transform to move and rotate the particle positions.<br />
Transform<br />
Emit from chosen Transforms within the scene.<br />
World Object<br />
Structure particles from a mesh vertices in the scene. The mesh can<br />
be procedural where the mesh’s vertices and normals will be<br />
extracted each calculation.<br />
Skinned World Object<br />
Let particles flow from an animated mesh in the scene. With Source<br />
Down Resolution you can skip vertices by dividing the original<br />
mesh’s vertex count.<br />
Script<br />
Create your own emission positions by running your particle<br />
system in script mode. <strong>Playground</strong><strong>Particle</strong>sC.Emit() has a multitude of<br />
overloads for most common emission scenarios.<br />
Paint<br />
Paint source positions by free hand through the Inspector and<br />
Scene View tools or at runtime by the <strong>Playground</strong>C.Paint() functions.<br />
You can use a single point or setup your own brush with a texture,<br />
then apply different properties to how Paint should behave. An<br />
eraser is available which can remove painted positions within<br />
distance of the mouse cursor. Painting by free hand demands that<br />
you paint on colliders within the scene. 3d- and 2d collisions are<br />
available where you can determine collision layers.<br />
All painted positions will have a Transform parent, where moving,<br />
rotating and scaling the Transform will make each source reposition<br />
accordingly.<br />
Projection<br />
Project by letting an image’s pixels flow through the scene from a<br />
Transform. Every collider within layer it hits will create a source<br />
position. From the collision surface’s normal you can offset each<br />
particle’s source position by depth. 3d- and 2d collisions are<br />
available.<br />
Spline<br />
Emit particles along a <strong>Playground</strong> Spline within the scene. The<br />
particle count determines the density. A <strong>Playground</strong> Spline is not<br />
exclusive for particles and can be used with any other type of<br />
component as well.<br />
<br />
GOOD TO KNOW<br />
Using Only Source Positions in the Forces-tab will make particles<br />
stick onto their source position each frame.<br />
11 of 70
PARTICLE SETTINGS<br />
Take control over particle emission, sizes,<br />
rotations, sorting over lifetime and extensive<br />
Source structuring.<br />
Quick Overview<br />
<strong>Particle</strong> Count<br />
How many particles that should be simulated. Every change will<br />
restructure the <strong>Particle</strong> Cache.<br />
Overflow Offset<br />
You can Overflow Offset your particles from its Source origin. Each<br />
overflow iteration is based on how many Source Points your Source<br />
has. With Overflow Mode you determine the offset’s global or local<br />
direction.<br />
Source Scatter<br />
Scramble the Source positions within minimum- and maximum<br />
global X-, Y-, and Z range. Using Local Simulation Space found in<br />
Advanced-tab will make them rotate along the Source.<br />
Emission<br />
In the Emission options you can toggle emission. Disable Loop to<br />
not enter another lifetime cycle and enable Disable On Done to<br />
inactivate or destroy the GameObject once the first loop is done.<br />
Emission Rate determines the percentage of total particles that<br />
should emit.<br />
Size<br />
The size of a particle is set by random within minimum- and<br />
maximum float values. Scale will amp the current given random<br />
size. Lifetime Size will set size (Y) over normalized lifetime (X). Array<br />
Size will set size (Y) over normalized array of particles (X).<br />
Rotation<br />
A particle’s initial rotation and rotation over lifetime is set by<br />
random within minimum- and maximum float values. To make a<br />
particle rotate based on its velocity enable Rotate Towards<br />
Direction. The Rotation Normal determines the vectors to rotate<br />
around. A common operation would be to pass in the forward of<br />
the Main Camera’s Transform to always rotate along the camera’s<br />
perspective.<br />
12 of 70
Lifetime<br />
The Lifetime determines how many seconds a particle will live<br />
during its cycle. Lifetime Sorting will structure the particles<br />
emission pattern with different techniques - use Custom to sort<br />
particles normalized emission (Y) along the normalized lifetime (X).<br />
Lifetime Offset will scrub initial starting point within the range of<br />
the particle’s lifetime. Lifetime Emission will determine the rate of<br />
emission over the specified lifetime.<br />
<strong>Particle</strong> Mask<br />
The <strong>Particle</strong> Mask lets you visually remove set amount of particles.<br />
The Mask Time will determine the duration of fade in/out once the<br />
<strong>Particle</strong> Mask amount changes. The Mask Sorting determines the<br />
mask order in the particle array. All particles will still be simulated<br />
behind the mask and will let you change the amount of particles on<br />
screen over time.<br />
COMBINING LIFETIME SORTING OF NEAREST NEIGHBOR AND OVERFLOW OFFSET ON A WORLD OBJECT SPHERE.<br />
13 of 70
Forces<br />
SIMPLEX TURBULENCE UNLEASHED.
The movement pattern of a particle is<br />
depending on the velocity given at birth and<br />
the surrounding forces during its lifetime. At<br />
birth you can mold its velocity shape, use<br />
Local Velocity to give directions based on the<br />
Source and its current movement in the<br />
scene.<br />
During a particle’s lifetime you can use<br />
animation curves to give exact force at certain<br />
time, give it constant forces through gravity<br />
and bend their velocity path and apply<br />
turbulence.<br />
Should you not want forces - Make particles<br />
attach completely to their Source and rely on<br />
its appearance in the scene by enabling Only<br />
Source Positions. You can also annihilate any<br />
axis to ensure that they live in the correct<br />
dimension and set a maximum velocity to<br />
never exceed.<br />
Quick Overview<br />
Force Annihilation<br />
Disable forces by different techniques. Lifetime Positioning will<br />
make particles move with AnimationCurves. Transition Back To<br />
Source will make particles move back to their origin over time.<br />
Set Axis Constraints to never apply velocity to set axis.<br />
Initial Velocity<br />
Velocity in X-, Y- and Z values. Local Velocity will take Source<br />
direction into account. The Initial Velocity Shape determines the<br />
scale of velocity (Y) to apply depending on when a particle emits in<br />
its normalized Lifetime (X).<br />
Lifetime Velocity<br />
The velocity (Y) to add over normalized Lifetime (X).<br />
Velocity Bending<br />
Make particles bend around their current velocity path depending<br />
on their Source Position or Delta Position from previous frame.<br />
Turbulence<br />
Apply movement patterns by Simplex- or Perlin Noise algorithms.<br />
Strength determines the force applied. Scale determines the noise<br />
resolution in the Scene. Time Scale determines how fast the noise<br />
progresses.<br />
Constant Force<br />
Gravity sets a constant velocity towards X- Y- and Z vectors.<br />
Damping determines the amount of inertia to apply over time.<br />
Velocity Scale will scale the overall forces applied to all particles.<br />
15 of 70
COLLISION<br />
Each particle can look for any colliders in its<br />
way. Once collided you can randomly bounce<br />
within the range of the hit normal, apply<br />
lifetime loss and push any rigidbodies within<br />
the scene. Collision is done by Raycasting<br />
from a particle’s previous position towards its<br />
current. This gives a collision behavior which<br />
is nondependent of the particle’s velocity and<br />
the current frame-rate.<br />
Quick Overview<br />
Collision Type & Collision Mask<br />
The method for detecting colliders in the scene. 3D- and 2D<br />
colliders are available. Use Collision Mask to determine which<br />
layers to detect.<br />
Collide With Rigidbodies, Inverse & Mass<br />
Determine if particles should affect the Rigidbody of a hit collider.<br />
Inverse will reverse the collision effect. Use Mass to scale the force<br />
applied to the Rigidbody.<br />
Collision Radius<br />
The spherical size of the particle’s collider.<br />
Lifetime Loss<br />
The normalized amount to subtract from a colliding particle’s<br />
current lifetime.<br />
Sticky<br />
Collided particles can stick onto their collider’s position and start<br />
following its transform position. Use Surface Offset to offset the<br />
particle from the surface along the collided normal. The Sticky<br />
Mask determines which layers are seen as sticky.<br />
Bounciness & Random Bounce<br />
Bounciness determines the remaining force a particle should have<br />
once reflected from the collider’s surface. Random Bounce will<br />
apply a random value within minimum- and maximum normalized<br />
X-, Y- and Z value from the collider’s hit normal.<br />
Collision Precision<br />
Determines if Vector3.Distance should be used instead of<br />
sqrMagnitude when looking for colliders within the scene.<br />
Force Collision Caching<br />
Collision caching is automatically done when enabling Sticky<br />
particles to keep track of which objects has been hit. If you want to<br />
extend upon that logic without enabling Sticky you need to enable<br />
Force Collision Caching.<br />
Collision Planes<br />
To limit the particles within the world space you can setup collision<br />
planes by Transforms in the scene where Offset in global<br />
coordinates can be applied.<br />
Collision Exclusion<br />
Choose which objects in the scene which are not seen by the<br />
collision.<br />
16 of 70
RENDERING<br />
The visual presentation of a particle’s mesh,<br />
material and color is all determined in the<br />
Rendering-tab.<br />
Quick Overview<br />
Material<br />
The Material to apply to a particle system. A material’s shader<br />
affects how a particle will blend within the scene and the texture<br />
can set its visual shape.<br />
Color Source<br />
Color Source determines what type of coloring should be applied to<br />
the particles. Source means that you will pickup any available color<br />
from a Source’s texture or painted color. Enable Source Uses<br />
Lifetime Alpha to apply the alpha from the Lifetime Color. Lifetime<br />
Color is a gradient which will apply over the particle’s lifetime.<br />
Lifetime Colors are gradients which each particle will pair up with<br />
upon birth. Use the Color Method to determine if color should be<br />
applied over Lifetime or by the <strong>Particle</strong> Array.<br />
Render Mode<br />
Render the particles flat facing different directions (HorizontalVertical<br />
Billboard), Stretch them based on their current velocity or render<br />
them as a Mesh. Rendering can also be turned off from here.<br />
Shadows<br />
Determines if particles should cast- and receive shadows. Note that<br />
you need a shader which handles shadows.<br />
Sorting<br />
Use Sorting Mode to determine the order of particles in the system.<br />
The Sorting Layer and Order In Layer will affect the rendering order<br />
of your particles when using 2D view.<br />
Texture Sheet Animation<br />
Animates the UV of particles. Reference the Shuriken <strong>Particle</strong><br />
System manual for usage.<br />
GO CRAZY WITH LIFETIME COLORS, THEY’RE PERFORMING EQUALLY AS ONE GRADIENT.<br />
17 of 70
MANIPULATORS<br />
18 of 70<br />
COMBINING A VORTEX MANIPULATOR WITH PLAYGROUND TRAILS.
Every particle can be affected by objects the<br />
framework calls Manipulators. Each<br />
Manipulator is connected to a Transform in<br />
the scene and contain settings for how to<br />
influence a particle’s appearance.<br />
There are Local- and Global Manipulators. A<br />
Local Manipulator is attached to a <strong>Particle</strong><br />
<strong>Playground</strong> system and will only affect its own<br />
particles within range. A Global Manipulator is<br />
attached to the <strong>Playground</strong> Manager and will<br />
affect all particle systems within layer and<br />
range. A Local Manipulator will serialize along<br />
with the particle system, a Global Manipulator<br />
will serialize with the <strong>Playground</strong> Manager<br />
within the scene.<br />
There is a multitude of available Manipulators<br />
with different setups and abilities, but they all<br />
share the same goal of bending particles<br />
based on their position to your favor.<br />
A Manipulator is rendered in Scene View as a<br />
sphere or a box with Size- and Strength<br />
handles. Its color shows whether it belongs to<br />
a Local- or Global Manipulator, if the<br />
shape is Inverted or if the shape is Infinite.<br />
Quick Overview<br />
Attractor<br />
Attract particles in a funnel pattern towards center.<br />
Attractor Gravitational<br />
Attract particles in a gravitational pattern towards center.<br />
Repellent<br />
Push particles away from center.<br />
Vortex<br />
Attract particles in a vortex towards center. The rotation of the<br />
Manipulator’s Transform decides the directional flow.<br />
Property<br />
The Property Manipulator contains a list of properties to give<br />
particles within the Manipulator’s range such as Size, Color,<br />
Velocity, Turbulence and different Target methods. You will also see<br />
the main Manipulators in this list which are injected to cooperate<br />
with the Combined Manipulator.<br />
Combined<br />
Combine any Manipulators into one, using the same field area and<br />
main strength.<br />
19 of 70
EVENTS<br />
20 of 70<br />
FLOATING LIGHT PARTICLES WHERE EACH EMIT SMOKE AND POP INTO A SPHERE UPON DEATH.
Through Events particle systems can<br />
communicate with one another and other<br />
game logic in the scene. The particle system<br />
carrying the Event will send its Instructions to<br />
another particle system Target set to Script as<br />
Source or any Event Listeners in your scripts.<br />
Each Target will list their Controller(s) in the<br />
Source-tab where a Target can receive<br />
Instructions from several Controllers.<br />
Quick Overview<br />
Broadcasting Type<br />
The method how an Event is sent. Targets and Event Listeners (see In-<br />
Depth section Deeper Into Events) can receive information from an<br />
Event.<br />
Target<br />
The particle system to get instructions upon the Event.<br />
Type<br />
The action which triggers this Event to send instructions. Available<br />
actions are Birth, Death, Collision and Time.<br />
Position<br />
The Source Instruction to send to the Target. This is where the<br />
Event Target’s emitting particle will appear in world space. Available<br />
Source Instructions are User, <strong>Particle</strong> and Source. User will be a fixed<br />
X- Y and Z vector, <strong>Particle</strong> will be the current particle’s position and<br />
Source will be the Source Position of the controller.<br />
Velocity<br />
The Velocity Instruction to send to the Target. Available Velocity<br />
Instructions are User (behaves like Initial Velocity), <strong>Particle</strong> (inherited<br />
from current particle) and Source (set by Controller’s all Initial<br />
Velocity values in the Forces-tab). Use the Velocity Multiplier to amp<br />
the Velocity Instruction.<br />
Color<br />
The Color Instruction to send to the Target. Available Color<br />
Instructions are User (set by the Instruction’s Color), <strong>Particle</strong> (set by<br />
current particle) and Source (set by the Controller’s Color Source in<br />
the Rendering-tab).<br />
21 of 70
SNAPSHOTS<br />
The list of stored Snapshots ables you to Save<br />
and Load particle system settings and live<br />
particles within the scene. You can toggle<br />
whether to load the stored particles saved in<br />
the scene, the particle system’s settings or<br />
both - and in-between do a transition. The<br />
Snapshots are stored and parented as<br />
separate particle systems to your main<br />
particle system, set to not simulate. Toggle the<br />
Advanced button to edit them after creation.<br />
Quick Overview<br />
Transition Time<br />
A snapshot can transition over time to another. Should your<br />
loading particle system have another particle count then filler- or<br />
fading particles will be handled during transition.<br />
Transition Type<br />
The type of transition over time where Linear (no easing), Ease In<br />
(slow start) and Ease Out (slow finish) is available.<br />
Load From Start<br />
Load the selected snapshot when the particle system’s GameObject<br />
enables.<br />
Snapshot-list<br />
Each snapshot is stored in a list. Enable Transform, toggle Settings<br />
and/or <strong>Particle</strong>s to set what data to load. <strong>Particle</strong>s contains live<br />
particle information within the scene. Enable Advanced for more<br />
control over the assigned components, their name, transition type<br />
and time multiplying. This will also expose the snapshots in<br />
Hierarchy under your particle system for editing.<br />
GOOD TO KNOW<br />
Through script you can save and load particle systems upon<br />
calling <strong>Playground</strong><strong>Particle</strong>sC.Save (”Name”) and<br />
<strong>Playground</strong><strong>Particle</strong>sC.Load (int).<br />
22 of 70
ADVANCED<br />
The Advanced-tab of a <strong>Particle</strong> <strong>Playground</strong><br />
system contains extra- and fine-tuning options<br />
to its functionality and appearance.<br />
Quick Overview<br />
Simulation Space<br />
Determines if the particle system should simulate in Global- or<br />
Local Space. Simulating in Local Space will make all settings and live<br />
particles be based upon the particle system’s movement and<br />
rotation. The particle system must be at zero vectors to not offset<br />
from its globally calculated Source. Enabling Movement<br />
Compensation will make particles follow the movement of its<br />
Source in the scene similar to Shuriken’s original Local Space.<br />
Time<br />
The Update Rate determines the frames to calculate particles.<br />
Time Scale determines the local simulation time, set this to 0 to<br />
pause a particle system within the scene. If you want to alter Unity’s<br />
Time Scale without affecting your particle systems disable<br />
<strong>Playground</strong> Manager > Advanced > Global Time Scale.<br />
Rebirth Options<br />
All particles lives inside cached arrays, these are reused when a<br />
particle enters another lifetime cycle. Sometimes you want them to<br />
appear the same, sometimes you want to mix things up. Set new<br />
random rebirth values to your particles by Size, Rotation, Scatter and<br />
Velocity through this panel. Delta Position Adjustment will ensure a<br />
linear distribution of particles upon rebirth.<br />
Locks<br />
Apply particle system Transform locks for Position, Rotation and Scale<br />
by this panel.<br />
On Enable<br />
Prewarm will ensure live particles within the Scene whenever the<br />
particle system is loaded. Lifetime Cycles determines where in the<br />
particle system lifetime cycle prewarming should finish. Cycles<br />
(Resolution) determines how many calculation loops should be<br />
spent during prewarm, this affects how fine forces will be<br />
computed.<br />
Out Of View<br />
Auto-Pause Calculation will halt calculation when the particle<br />
system is outside the main camera frustum. Use the Calculation<br />
Trigger to set the area of triggering calculation.<br />
Misc<br />
Sync <strong>Particle</strong>s To Main-Thread will sync all threaded particle<br />
positions, rotations and timings to appear correct in the main loop.<br />
You may experience movement tearing and UV animation jitter<br />
having this disabled.<br />
<strong>Particle</strong> Thread Method determines how this particle system should<br />
be handled by the Thread Aggregation.<br />
Multithreaded Startup determines if the particle system should<br />
cache all arrays asynchronously upon initialization.<br />
The <strong>Particle</strong> Pool can Clear out and Rebuild the <strong>Particle</strong> Cache upon<br />
request. Any settings will remain untouched.<br />
23 of 70
IN-DEPTH<br />
POP THE HOOD, LET’S SEE WHAT WE’VE GOT.<br />
GOOD TO KNOW<br />
Convert any Presets you won’t use to Examples through the<br />
<strong>Playground</strong> Wizard to not export any unnecessary<br />
dependency assets to your final build.<br />
24 of 70
THE ASSETS<br />
Let’s take a look at how <strong>Particle</strong> <strong>Playground</strong> 3<br />
will affect your project more physically. Along<br />
with the <strong>Particle</strong> <strong>Playground</strong> 3 package there’s<br />
example scenes, script examples, ready-to-go<br />
particle presets, brushes and a pack of<br />
particle materials and textures.<br />
The <strong>Playground</strong> Structure<br />
Example Scenes<br />
Along with the <strong>Particle</strong> <strong>Playground</strong> 3 package there’s a couple of<br />
example scenes found in <strong>Particle</strong> <strong>Playground</strong>/Examples/Example<br />
Scenes/. These are intended to give ideas of how to setup your<br />
particle systems and to show the different mechanics.<br />
Example Project<br />
Together with the example scenes there’s also a showcase project<br />
called <strong>Particle</strong> <strong>Playground</strong> 2.2 Video Scene. This is the project used for<br />
the 2.2 release video where you’ll find additional particle system<br />
effects.<br />
<br />
Presets<br />
In the folder <strong>Particle</strong> <strong>Playground</strong>/<strong>Playground</strong> Assets/Presets/ you will<br />
find the preinstalled particle system presets. These presets are<br />
seen as Asset by the <strong>Playground</strong> Wizard. When you create your own<br />
presets you can choose to store them in the existing categories, if<br />
Resources is chosen they will be stored in <strong>Particle</strong> <strong>Playground</strong>/<br />
Resources/Presets/. These will be seen as Resources by the <strong>Playground</strong><br />
Wizard. All Resources presets will be exported to your final build so<br />
you can instantiate them by using<br />
<strong>Playground</strong>C.InstantiatePreset(”Name”).<br />
Should you not want a Resources preset to export to the final build<br />
you can convert it to an Asset in the <strong>Playground</strong> Wizard by dragging<br />
the list view slider to the far left and toggle the Convert to Assetbutton.<br />
The preset categories in the <strong>Playground</strong> Wizard is generated by the<br />
folder structure in <strong>Particle</strong> <strong>Playground</strong>/<strong>Playground</strong> Assets/Presets/<br />
where any Resources/Presets/ folder will be listed under the<br />
Resources category. Uncategorized tab will appear if loose presets<br />
are found in <strong>Particle</strong> <strong>Playground</strong>/<strong>Playground</strong> Assets/Presets/.<br />
Every preset can have an icon, these are stored in <strong>Particle</strong><br />
<strong>Playground</strong>/Graphics/Editor/Icons/. They must have the same name as<br />
your preset and be of type PNG and a resolution of 75x75 pixels for<br />
best presentation.<br />
Brushes<br />
The Source Paint can have brushes to paint with. You can create<br />
your own brushes with predefined settings through the Brush<br />
Wizard found in Source > Paint > Brush > Brush Presets > Create inside<br />
the <strong>Particle</strong> <strong>Playground</strong> system’s Inspector. Every brush is stored in<br />
<strong>Particle</strong> <strong>Playground</strong>/<strong>Playground</strong> Assets/Brushes/.<br />
Changing the structure<br />
Should you want to change the folder structure you can edit the<br />
paths in the <strong>Playground</strong> Manager > Settings > Paths.<br />
25 of 70
PERFORMANCE<br />
<strong>Particle</strong> <strong>Playground</strong> 3 is centered around<br />
multithreaded solutions to give good<br />
performance on a wide variety of devices. All<br />
particle systems are running on bundled<br />
thread calls, where some heavy functions calls<br />
for yet another. Inside the calculation loop the<br />
<strong>Playground</strong> is iterating through particle data<br />
stored within built-in arrays, which naturally<br />
gives a great boost to the time spent on each<br />
particle.<br />
What is multithreading?<br />
Threads enables CPUs (Central Processing Units) to manage and<br />
process multiple requests of data at a time. This means a thread<br />
will be processed asynchronously alongside other routines. Often<br />
you’ll see that a CPU has several cores or hyper-threading<br />
techniques. Where available, running data on a second thread in<br />
Unity will relieve the main-thread where most MonoBehaviour and<br />
logic runs.<br />
How <strong>Particle</strong> <strong>Playground</strong> 3 uses threads<br />
Every particle system runs on multithreaded calls to relieve the<br />
main-thread where MonoBehaviour runs. Some functions will<br />
create yet another thread for performance, such as when updating<br />
chunks for the <strong>Particle</strong> Cache, calculating positions for Skinned<br />
World Objects and running the turbulence algorithms.<br />
Certain functions in the <strong>Playground</strong> can’t run on a second thread<br />
due to the non thread-safe Physics class. This affects all methods<br />
relying on Raycasting such as collisions, painting and projections.<br />
Your particle system will still be calculated on a second thread but<br />
leave the non thread-safe calculations to run alongside a particle<br />
system’s Update loop. Every thread causes a small amount of<br />
memory garbage which will need to be collected at some point.<br />
Using threads yourself<br />
The threading solution is very simple and you can make use of the<br />
<strong>Playground</strong>’s multithreading by wrapping your own code in a<br />
lambda expression to <strong>Playground</strong>C.RunAsync(), such as:<br />
<strong>Playground</strong>C.RunAsync(()=>{<br />
// My demanding calculations here<br />
});<br />
Note that you need to work with thread-safe classes in Unity to<br />
send data to another thread.<br />
Changing how threads should work<br />
There are two versions of thread pooling, one that is using the .NET<br />
Thread Pool (previous versions) and the <strong>Playground</strong> Pool<br />
(introduced in version 3). It is recommended to use the <strong>Playground</strong><br />
Pool for increased performance and to reduce memory allocations.<br />
By default all particle system calculations are running in automatic<br />
bundled thread calls. You can change this setup from the<br />
<strong>Playground</strong> Manager in Advanced > Multithreading. You can also set<br />
26 of 70
how an individual particle system should calculate in Advanced ><br />
<strong>Particle</strong> Thread Method. Please see the Reference section for more<br />
details in how every setting will impact how <strong>Playground</strong> perform.<br />
You also have the example scene Multithreading Skinned Meshes to<br />
test the different techniques.<br />
<strong>Particle</strong> pooling<br />
<strong>Particle</strong> <strong>Playground</strong> 3 is running all particle data with built-in arrays,<br />
which is the fastest arrays available in Unity. Each particle is paired<br />
with a position of the arrays within the <strong>Playground</strong>Cache class where<br />
upon calculation these are worked through and reused. The cache<br />
is stored within the particle system's playgroundCache variable.<br />
Should you need to extend any logic from a script you can use the<br />
<strong>Playground</strong> Cache to reach into the particle data.<br />
Pinpointing the bottleneck<br />
In the Unity Editor you will much likely see less performing particles<br />
due to all other logic which needs to be present. There’s a few tricks<br />
that should be considered, when in Play Mode hiding the Scene<br />
View and deselecting any <strong>Particle</strong> <strong>Playground</strong> system to not render<br />
its Inspector can improve performance.<br />
particle systems (script example SwitchCached<strong>Particle</strong>SystemC.cs<br />
included to work with particle system pooling) to get around any<br />
stuttering if your target device has more limited resources.<br />
You can always tweak your particle system to demand less<br />
resources. One way is to change how the multithreaded<br />
calculations should distribute, set from <strong>Playground</strong> Manager ><br />
Advanced > Multithreading. Another way is to skip frames through<br />
Advanced > Update Rate, another is if you’re using a skinned mesh,<br />
use Source > Skinned World Object > Source Down Resolution to<br />
generate fewer Source Positions. The most obvious is to ease the<br />
amount of particles calculated, perhaps you can combine several<br />
particles onto one texture in its material to make it look like more<br />
points are simulated on screen. Also make sure you’re not using<br />
any unnecessary features, such as having Collision enabled where<br />
you don’t have any objects to collide with or projecting with Live<br />
Update onto a static surface where the projection doesn't move.<br />
If you’re a Unity Pro owner, you can always use the Editor’s Profiler<br />
to see how well your game logic is performing.<br />
Use the Hierarchy icon for awareness of simulating- (yellow),<br />
calculation disabled- (grey) or heavy calculated (red) particle<br />
systems. This helps to see which particle system is currently<br />
hogging any performance.<br />
Always consider your end target device(s). Experiment to gain<br />
performance from having many particle systems versus just a<br />
single one, simulating many of your effects on screen. Instantiating<br />
a particle system will create memory garbage and need to initiate<br />
its <strong>Particle</strong> Cache. Many times you can cache and reuse your<br />
27 of 70
DEEPER INTO EVENTS<br />
An Event is a particle’s way of communicating<br />
with other particle systems or scripts within<br />
the scene. Setting up Events with a particle<br />
system Target is very straight forward in the<br />
Inspector UI, but to listen to Events requires a<br />
bit more user contribution. Let’s have a look.<br />
What happens in the broadcast?<br />
Each time an Event gets triggered from a particle, it broadcast data<br />
to a Target (<strong>Playground</strong><strong>Particle</strong>sC object) and/or to any Event<br />
Listeners out there. Sending information to a Target will issue an<br />
Emit() with position, velocity and color included. This opens up for<br />
visual events, but lacks the ability of adding any game logic.<br />
The information sent to an Event Listener will have much richer<br />
data, where a <strong>Playground</strong>Event<strong>Particle</strong> object will be passed to a<br />
corresponding delegate. This ables you to get more exact<br />
information from a particle, for instance its size, the collider it has<br />
hit, if it has been affected by a manipulator property, where it was<br />
the previous frame and what original target (Source) position it has.<br />
The Event Listener<br />
An Event Listener is what you use if you want a particle to affect<br />
any logic in your game, for instance compromise the health of a<br />
player or add points upon collision. Adding an Event Listener to<br />
your script is a simple task, where you call a particle system’s list of<br />
Events and subscribe a function to the Event Delegate of<br />
particleEvent.<br />
Whenever a particle triggers an Event for Event Listeners, it will<br />
send a <strong>Playground</strong>Event<strong>Particle</strong> which can be reached through the<br />
function you’ve added onto the Event Delegate.<br />
Event Listener example:<br />
using UnityEngine;<br />
using System.Collections;<br />
using <strong>Particle</strong><strong>Playground</strong>;<br />
public class AddEventListener : MonoBehaviour {<br />
}<br />
<strong>Playground</strong><strong>Particle</strong>sC particles;<br />
<strong>Playground</strong>EventC playgroundEvent;<br />
void Start () {<br />
particles = GetComponent();<br />
playgroundEvent = <strong>Playground</strong>C.GetEvent (0, particles);<br />
playgroundEvent.particleEvent += OnEvent;<br />
}<br />
void OnEvent (<strong>Playground</strong>Event<strong>Particle</strong> particle) {<br />
Debug.Log (particle.position);<br />
}<br />
In the example above we have a reference to the particle system<br />
(particles) where we fetch the first Event in its Events List and<br />
attach the function OnEvent to the particleEvent Event Delegate.<br />
The function will receive data from any particle triggering the Event<br />
in form of a <strong>Playground</strong>Event<strong>Particle</strong> where you can extract<br />
detailed information. Please see the example scene Event Listener<br />
for a more practical example of how to influence the world around<br />
your particles.<br />
28 of 70
Tracking events from several particle systems<br />
Hooking up event listeners can become a cumbersome task if you<br />
have several particle systems you’d wish to receive events from. In<br />
the settings for an event when having Broadcast Type of<br />
EventListeners or Both you will find the option Send To Manager.<br />
Enabling Send To Manager will broadcast the event to the global<br />
event delegates found in the <strong>Playground</strong>C class (the <strong>Playground</strong><br />
Manager). Available event delegates are:<br />
- <strong>Playground</strong>C.particleEventBirth<br />
- <strong>Playground</strong>C.particleEventDeath<br />
- <strong>Playground</strong>C.particleEventCollision<br />
- <strong>Playground</strong>C.particleEventTime<br />
Adding a function to one of these delegates would look like this:<br />
<strong>Playground</strong>C.particleEventBirth += OnEvent<strong>Particle</strong>Birth;<br />
Where the function could look like this:<br />
void OnEvent<strong>Particle</strong>Birth (<strong>Playground</strong>Event<strong>Particle</strong> particle) {<br />
Debug.Log (particle.position);<br />
}<br />
29 of 70
PARTICLE MANIPULATION<br />
Should you want to alter a particle’s behavior<br />
based on its position rather than time,<br />
Manipulators to the rescue.<br />
The mechanic behind a Manipulator<br />
All Manipulators will calculate inside the particle’s multithreaded<br />
calculation loop. Every particle system will process data from the<br />
assigned Local- as well as the Global Manipulators. Based on a<br />
Manipulator’s settings a particle within the scope of a Manipulator’s<br />
influencing area will be affected in different ways.<br />
Global or Local<br />
If you want to affect several particle systems within the scene, with<br />
the same behavior of a Manipulator you’d create a Global<br />
Manipulator on the <strong>Playground</strong> Manager. You can still determine<br />
which particle systems to affect through layers. A Global<br />
Manipulator will serialize along with the <strong>Playground</strong> Manager<br />
within the scene. Should you on the other hand want to only affect<br />
one particle system and/or make it follow along a preset, you’d<br />
create a Local Manipulator on the particle system. A Local<br />
Manipulator will serialize along with the particle system, which<br />
makes the solution good for stand-alone situations.<br />
Manipulator types<br />
A Manipulator can have a main type, property type or a<br />
combination of property types. The main types are fast and tiny<br />
algorithms for changing a particle’s velocity path. A property type is<br />
a deeper nested structure where you can access a particle’s color,<br />
size, life and give it targets within the scene (where velocity won’t<br />
be taken into account but rather try to dampen it). The Death<br />
property will force the particle to an earlier death, you cannot<br />
extend a single particle’s lifetime as that would break any set<br />
lifetime patterns (due to the pooling structure of reusing particles<br />
for performance). Should you want several properties changed<br />
from one Manipulator you can use the Combined type, where a list<br />
of properties will be iterated for that single Manipulator. Every<br />
main type can be injected into a property, to give access inside the<br />
Combined Manipulator.<br />
A closer look into tweaking<br />
Every Manipulator requires a Transform assigned. It’s not<br />
recommended to use the same Transform or exact position as your<br />
particle system as that will result in an unwanted behavior for<br />
velocity properties - where particles will have a hard time gaining<br />
initial momentum. Based on the type of Manipulator you’ll be<br />
presented with different values in Inspector to tweak. Every<br />
property has its own strength whereas the Manipulator itself has a<br />
main strength. A resemblance would be a mixer table, where the<br />
mixer has a main gain and each channel has an individual volume<br />
parameter. Each property can transition over time using linear<br />
interpolation from its current property value towards the final<br />
Manipulator value. This will have a different effect based on the<br />
selected property. An example would be when using targets, where<br />
if you don’t transition the particle will instantly jump onto the target<br />
position.<br />
The main strength of a Manipulator can apply a Smoothing- and<br />
Distance (from Manipulator origin) effect where the algorithms or<br />
properties will be applied in different manors. You can also inverse<br />
the bounds of the Manipulator’s area effect.<br />
30 of 70
MANIPULATOR EVENTS<br />
A Manipulator can keep track of its particles<br />
and send events to any event listeners you’ve<br />
setup through script.<br />
Start tracking<br />
All Manipulators can track particles within their confined space. To<br />
start tracking you enable Track <strong>Particle</strong>s (found in Manipulator ><br />
Events). Any Manipulator tracking particles will by default send<br />
Enter, Exit, Birth, Death and Collision events. These will send a<br />
<strong>Playground</strong>Event<strong>Particle</strong> onto their respectively event delegate.<br />
The mechanic behind Manipulator Events<br />
The particles are stored within a list which contains the particle’s ID<br />
and its particle system’s ID (for Global Manipulators). Whenever a<br />
particle enters or leaves the Manipulator the list will be altered.<br />
Whenever you call Get<strong>Particle</strong>s() on a Manipulator the list of particles<br />
will convert into a List, which contains<br />
detailed information about each particle currently living inside the<br />
Manipulator’s extents. You can use this to single out particles within<br />
a predetermined area of your scene to apply any logic you need<br />
through script. Tracking particles will require more CPU the more<br />
particles are tracked and will produce memory garbage accordingly.<br />
Please see the example scene Manipulator Events for scripting<br />
examples.<br />
31 of 70
PUBLISHING PRESETS<br />
With the ownership of <strong>Particle</strong> <strong>Playground</strong>,<br />
publishing your own particle systems is<br />
encouraged. Use this to for instance create<br />
particle system packages or apply an effect to<br />
any other assets you may distribute. In short,<br />
feel free to turn your particles into money.<br />
Using the Preset Wizard to prepare a UnityPackage<br />
You will find the Preset Wizard through the <strong>Playground</strong> Wizard by<br />
pressing Preset Wizard or on any <strong>Particle</strong> <strong>Playground</strong> system at the<br />
very top by pressing Create Preset. From here you can create new<br />
presets and Publish presets.<br />
Any preset can be exported as a UnityPackage using the Preset<br />
Wizard to prepare it for publishing. There are some ground rules to<br />
follow, where you may not export a full version of <strong>Particle</strong><br />
<strong>Playground</strong> (where any of the Editor scripts are disallowed) along<br />
your UnityPackage. The Preset Wizard will let you export just what’s<br />
needed without having to second-guess that anything unwanted<br />
tags along your package.<br />
The simple steps of exporting presets<br />
1) Select the Publish toggle in the Preset Wizard.<br />
2) Select your preset(s) in the Preset-list. A preset’s icon will<br />
automatically be included where available.<br />
3) Press Create. The UnityPackage will be stored in your chosen<br />
directory.<br />
Anyone installing the UnityPackage will not need to own the<br />
<strong>Particle</strong> <strong>Playground</strong> framework, but will in that case not be<br />
presented with all settings to tweak the particle system through the<br />
Inspector. Should you have any features to your particle system<br />
you wish anyone to be able to edit, it’s recommended to create a<br />
script which will alter your feature’s behavior.<br />
Publishing<br />
Feel free to publish and sell your asset(s) through any channel you<br />
prefer. You agree that Polyfied cannot be held responsible for the<br />
quality of your asset when publishing assets connected to the<br />
<strong>Particle</strong> <strong>Playground</strong> framework.<br />
Please contact contact@polyfied.com if you have any inquiries.<br />
32 of 70
REFERENCE<br />
EXPLAINING WHY, WHERE AND HOW<br />
33 of 70
PLAYGROUND PARTICLE SYSTEM<br />
<strong>Particle</strong> <strong>Playground</strong> introduces new possibilities<br />
along with some new naming conventions for<br />
particle systems. Let’s have a look at each<br />
individual setting for a particle system,<br />
beginning at the top of the Inspector.<br />
Source<br />
It all starts here, the Source determines from which position particles will emit within the scene. Every Source ranging from Transforms,<br />
Meshes, Textures, Paint and Projections has different settings and approaches for how to structure Source Positions within the scene.<br />
State<br />
Emit from pre-defined positions created from an image or mesh. All <strong>Particle</strong> <strong>Playground</strong> systems uses a list of states to store data from<br />
a mesh's vertices or an image’s pixels. When creating a new State from an image you can define Texture, Depthamp (with Depthmap<br />
Strength), Name, Scale, Offset and a parent Transform. When creating a State from a mesh you can define Mesh, Texture, Name, Scale,<br />
Offset and Transform. Using a Transform will make you able to position, rotate and scale the State.<br />
Name<br />
The name of this State.<br />
Texture<br />
Takes a Texture2D which will structure the State in color and positions from the Texture2D’s pixels. If you use a texture when<br />
creating the State from a mesh, the positions will be colored from the UV-mapping of the mesh.<br />
Depthmap<br />
Takes a Texture2D which will define the Z-value in normalized value by grayscale. A black pixel is 0.0 and a white is 1.0.<br />
Depthmap Strength<br />
34 of 70
The amount the Depthmap will multiply the Z-positioning. A Depthmap Strength of 1.0 will affect the Z-positions one Unit<br />
ranging from black to white.<br />
Mesh<br />
The mesh to construct your State from. Each vertex in the mesh will define a position in the State.<br />
Transform<br />
To be able to position, rotate and scale a State you will need a Transform assigned from the scene.<br />
<br />
Scale<br />
The world scale of this State. Each pixel will originally be a square of 1x1 Units. To make the final size of a State smaller, use a<br />
number below 1.0. Using a number below 0 will invert the State in X- and Y positions.<br />
<br />
Offset<br />
A State will be created in Vector3(0, 0, 0) in world coordinates (or local coordinates if a stateTransform is set) with origin of the<br />
image’s bottom left or a mesh’s pivot. Use the offset to place it elsewhere, with offset from world’s or stateTransform’s Vector3(0,<br />
0, 0) measured in Units.<br />
Chroma Key<br />
Filters out a specific color within Spread range. This is useful if the State’s texture doesn’t have any alpha information.<br />
Transform<br />
Emit from one or several Transform components within your scene.<br />
Treat As One Transform<br />
Determines the birth distribution of particles over the assigned transforms.<br />
World Object<br />
Emit from a Mesh component within your scene.<br />
Mesh Vertices Update<br />
Enable this if the World Object's mesh is procedural and changes vertices over time.<br />
35 of 70
Mesh Normals Update<br />
Enable this if the World Object's mesh is procedural and changes normals over time.<br />
Skinned World Object<br />
Emit from a Skinned Mesh component within your scene.<br />
Force Update On Main-Thread<br />
Enable Main-Thread updating to ensure correct birth positions on the live vertices. This can have a noticeable impact on<br />
performance as the skinned mesh vertex extraction won’t be multithreaded.<br />
Mesh Vertices Update<br />
Enable this if the Skinned World Object's mesh is procedural and changes vertices over time.<br />
Mesh Normals Update<br />
Enable this if the Skinned World Object's mesh is procedural and changes normals over time.<br />
Source Down Resolution<br />
The source vertex skipping. Use this to lower the distribution of particles needed along your complete skinned mesh. Each<br />
position will be determined by jumping over vertices in the vertex list. The amount of calculated positions will be divided by how<br />
many positions you’ve decided to skip. This is in many cases needed to amp performance when using skinned meshes in your<br />
scene, especially when you target mobile platforms.<br />
Script<br />
Control all particle emission behavior through custom scripts (advanced). Use <strong>Playground</strong><strong>Particle</strong>sC.Emit(position, velocity, color) to<br />
create a particle at position. Several overloads are available where you also can emit a number of particles instantly. Please see the Ink<br />
example scene for basic usage. Through the Inspector you’re presented with some basic control to try emission before putting them<br />
into a script call,<br />
Emission Index<br />
The particle’s array position that will emit when you call Emit() on this <strong>Playground</strong><strong>Particle</strong>sC object.<br />
36 of 70
Position<br />
The particle’s initial emission position when you call Emit() on this <strong>Playground</strong><strong>Particle</strong>sC object.<br />
Velocity<br />
The velocity of the particle that will emit when you call Emit() on this <strong>Playground</strong><strong>Particle</strong>sC object.<br />
Color<br />
The color of the particle that will emit when you call Emit() on this <strong>Playground</strong><strong>Particle</strong>sC object.<br />
Paint<br />
Paint positions and color by using your own brushes, or by a single point with color information. Creating your own brushes can be<br />
done through the Brush Wizard, which you’ll find in the Brush Preset menu when selecting Brush as Paint Mode. All painting features<br />
relies on colliders being hit in the scene. To paint live into the scene in script please see the example script PaintAtMousePositionC.<br />
Paint Mode<br />
This is an Editor-specific feature which lets you switch between painting with a single point (Dot), using predefined brushes (Brush)<br />
or erasing paint positions (Eraser).<br />
Brushes<br />
Painting with brushes lets you fill a larger area with a predefined texture rather than a single point (like Paint Mode: Dot). You can<br />
define the texture yourself along with how the brush should function, such as detail, scale and spacing. When painting, each pixel<br />
(depending on chosen Detail level) will represent a ray into the scene at screen position. Each ray need to hit a collider to create a<br />
Paint Position at world point.<br />
Brush Presets<br />
A list of predefined brushes with specific settings which will define current paint settings upon selection. You can create your<br />
own presets by pressing the ”Create”-button which will open the Brush Wizard. A preset is stored in <strong>Particle</strong> <strong>Playground</strong>/<br />
Resources/Brushes and can be edited through the Inspector. To remove a preset from the Brush Preset list either delete the<br />
prefab in the ”Brushes”-folder or change the presentation mode to ”List” instead of ”Icons” and press the button ”-”.<br />
Brush Shape<br />
37 of 70
The texture to project onto the surface where you choose to paint. The texture’s amount of pixels (width and height) will be<br />
calculated for the amount of Paint Positions that will be created (amount is shown in the ”Paint” progress bar). All brush<br />
textures need to have Read/Write Enabled and use True Color (non-compressed) in their Import Settings.<br />
Brush Detail<br />
The detail represents how many of the original pixels that should be read from the Brush Shape texture. This will affect how<br />
many positions that will be created on every brush stroke. Keep in mind that it’s by rare occasions you ever need a perfect<br />
copy of your brush’s full pixel amount onto a surface.<br />
Perfect<br />
Every pixel will be read (100% of existing texture pixels).<br />
High<br />
Every second pixel will be read (50% of existing texture pixels).<br />
Medium<br />
Every forth pixel will be read (25% of existing texture pixels).<br />
Low<br />
Every sixth pixel will be read (16.6% of existing texture pixels).<br />
Brush Scale<br />
The scale of a brush measured by the ratio of the original Brush Shape texture. For instance, a texture with 32x32 pixels and<br />
a scale of 0.5 will represent a screen space area of 16x16 pixels.<br />
Brush Distance<br />
How far the brush sees from its origin position into the scene (in the Editor the origin is the Scene View’s camera). If the<br />
distance is shorter than the target collider you want to paint on then no Paint Positions will be created.<br />
Use Brush Color<br />
Each Paint Position is created along with the Brush Shape’s color information at the ray’s pixel coordinate. Disabling this will<br />
use the Color chosen by you instead, the alpha information will still be used from the Brush Shape texture.<br />
38 of 70
Color<br />
The color to paint with when using the Dot Paint Mode. If you disable ”Use Brush Color” for a brush then Color will determine each<br />
Paint Position color instead.<br />
Paint Mask<br />
Determines which layer of colliders the paint function sees in the scene. Available for all Paint Modes (Dot, Brush and Eraser). Use<br />
this to see through certain objects or mask out a single object in the scene to avoid spilling paint.<br />
Paint Spacing<br />
The space needed for next paint position to occur. This is measured from the last paint position’s world point towards where next<br />
will end up while painting. A transparent green disc will show the spacing area in Scene View while painting. Use this to distribute<br />
paint more evenly along a surface for instance.<br />
Max Paint Positions<br />
The max positions allowed to be stored by this Paint object. Use this to limit the existing Paint Positions within a scene. Exceed Max<br />
Stops Paint will determine if no more painting can occur or if Paint Positions will be removed (ascending from first position in list)<br />
when reaching the max limit.<br />
Paint - Inspector information<br />
The amount of Paint Positions currently in the scene. ”Max Paint Positions” will determine where 100% of the progress bar is. If you<br />
suddenly can’t see all Paint Positions the reason is much likely that you need to extend the <strong>Particle</strong> Count in <strong>Particle</strong> Settings.<br />
Start/Stop Paint<br />
Use this to begin or abort painting into the scene.<br />
Clear<br />
Removes all Paint Positions from the scene.<br />
Projection<br />
Project particles from a transform using a texture. This behaves similarly to the Unity Projector. This can be used to for instance create<br />
fog, dust or splashes on certain surfaces. Choose to offset the origin texture and the projected source position from the surface using<br />
39 of 70
the projected normal’s direction. Use Live Update to update the projection position every frame. You can scale your projection in any<br />
direction with the projection transform.<br />
Projection Texture<br />
The image to use where each pixel will wander through the scene in form of a Raycast.<br />
Transform<br />
The transform to project from.<br />
Live Update<br />
Determines if the projection should update every frame. Enable this if your projection transform moves or you have projected<br />
objects moving inside the projection area.<br />
Origin Offset<br />
Offset the texture’s origin in X- and Y values.<br />
Projection Distance<br />
Determines how far the projection rays can travel into the scene, measured in Units.<br />
Projection Scale<br />
The scale of projection in Units. A scale of one will make each pixel one Unit. When using local simulation space, use this to scale<br />
rather than the projection transform to ensure correct projection depth.<br />
Surface Offset<br />
Determines how far away the source position will be distributed from surface. Using the projected surface normal.<br />
Projection Mask<br />
The layer mask of which colliders within layer can be seen by the projection rays in the scene.<br />
Spline<br />
Emit particles from one or several <strong>Playground</strong> Splines in the scene. A <strong>Playground</strong> Spline is multithreading friendly and can be updated<br />
live during runtime. Each node and bezier handle can be set towards a Transform, for easier live manipulation.<br />
40 of 70
Time Offset<br />
The offset of the spline’s curves. This can be used to move particles over time on the spline.<br />
Treat As One Spline<br />
Determines the birth distribution of particles over the assigned splines.<br />
<strong>Particle</strong> Settings<br />
In the <strong>Particle</strong> Settings you can set the amount of particles within the scene, determine what size and rotation they should have, further tweak<br />
their source position and apply lifetime emission patterns.<br />
<br />
<strong>Particle</strong> Count<br />
The amount of particles that should be actively simulated by the particle system.<br />
Overflow Mode<br />
Use this to set which method to calculate Overflow Offset by. Available methods are Source Transform (transform point), World (global)<br />
and Source Point (normal point direction).<br />
Source Transform<br />
Offset by calculating the source’s transform point.<br />
World<br />
Offset by calculating the world position.<br />
Source Point<br />
Offset by calculating the source position using the source point's normal direction.<br />
Overflow Offset <br />
The offset each overflow iteration from the source’s number of points. This will make the source copy itself in direction, based on the<br />
selected Overflow Mode. For instance, using the Unity Sphere mesh as Source that consists of 525 vertices and using a <strong>Particle</strong> Count of<br />
1050, the Overflow Offset will determine where the later 525 overflowing particles will position in relation to the first. The result is that<br />
you will get a perfect copy of your sphere at the offset position. This can for instance be used intuitively to recreate the lights on a<br />
41 of 70
unway, especially together with a Lifetime Sorting of Linear or Reversed. Using a Transform with your Source will make you able to rotate<br />
and scale the Overflow Offset.<br />
Source Scatter <br />
The spread of source positions within minimum- to maximum range. Use this to scramble your source positions to make them appear<br />
more randomly distributed. The Method determines if the distribution should be rectangular or spherical, where using a linear method<br />
will take the particle array into account. With Scale you can change the size of the scatter area without recalculating the scatter array.<br />
Use Advanced > Rebirth Options > Random Scatter to apply a new scattered position each time a particle is born.<br />
Emit<br />
Determines whether this <strong>Particle</strong> <strong>Playground</strong> system should emit particles or not. A <strong>Particle</strong> <strong>Playground</strong> system reuses each particle in<br />
a cached pool where turning Emit <strong>Particle</strong>s off will make the calculation loop halt upcoming rebirths.<br />
Loop<br />
Determines if this particle system should loop its lifetime cycle or just run the first.<br />
Disable On Done<br />
When loop is set to false, this determines if the GameObject should disable or destroy when the lifetime cycle has run through to the<br />
end of last particle.<br />
Clear On Stop<br />
Determines if any existing particles should be removed when emission stops.<br />
Emission Rate<br />
The percentage of flow (normalized from 0 - 1) in burst sequences. This is calculated with the Lifetime Sorting for a <strong>Particle</strong> <strong>Playground</strong><br />
system to give a linear consistent behavior.<br />
Size<br />
The size of particles within minimum- and maximum float range.<br />
Scale<br />
The scale of minimum- and maximum Size.<br />
42 of 70
Lifetime Size<br />
The particles size over lifetime. This is determined by an AnimationCurve where x-axis 0.0 to x-axis 1.0 is the complete lifetime and y-<br />
axis is the size in Units.<br />
Array Size<br />
The particles size over the particle array. This is determined by an AnimationCurve where x-axis 0.0 to x-axis 1.0 is the complete particle<br />
array and y-axis is the size in Units.<br />
Initial Rotation Speed<br />
The minimum- and maximum initial rotation of a spawned particle.<br />
<br />
Rotation<br />
The minimum- and maximum rotation speed of each particle. To extend above 360 degrees please see <strong>Playground</strong> Manger > Editor Limits<br />
> <strong>Particle</strong> Rotation.<br />
Rotate Towards Direction<br />
Apply rotation based on each particle’s velocity. This creates a direction which the particle will turn towards. To offset the rotation use<br />
Initial Rotation Speed.<br />
Rotation Normal<br />
When using Rotate Towards Direction, the rotation normal determines which vector to rotate around. This is always a normalized value<br />
set in vector coordinates. A common operation would be to rotate around the Main Camera’s (negative or positive) transform's forward<br />
to make the rotation always appear the same for the user. For instance, <strong>Playground</strong><strong>Particle</strong>sC.rotationNormal =<br />
Camera.main.transform.forward.<br />
Lifetime<br />
The particles lifetime in seconds. Toggle between Constant and Random Between Two Values.<br />
Lifetime Sorting<br />
The sorting of how the lifetime initially should be structured in this <strong>Particle</strong> <strong>Playground</strong> system. Use this to create different patterns in<br />
appearance of their source position.<br />
43 of 70
Lifetime Offset<br />
Scrambled<br />
<strong>Particle</strong>s will be randomly distributed.<br />
ScrambledLinear<br />
<strong>Particle</strong>s will be randomly distributed but ensured to never appear at the same time.<br />
Burst<br />
<strong>Particle</strong>s will be created all at once.<br />
Linear<br />
<strong>Particle</strong>s will be distributed linearly over their lifetime with sorting from source positions.<br />
Reversed<br />
<strong>Particle</strong>s will be distributed linearly reversed with sorting from source positions.<br />
Nearest Neighbor<br />
<strong>Particle</strong>s will be distributed by distance to nearestNeighborOrigin. This will create a water ripple effect in their lifetime<br />
appearance from origin and out. Choose method by Source Point, Vector3 or Transform.<br />
Nearest Neighbor Reversed<br />
<strong>Particle</strong>s will be distributed by distance from nearestNeighborOrigin. This will create an inverse water ripple effect in their<br />
lifetime appearance from max distance towards origin. Choose method by Source Point, Vector3 or Transform.<br />
Custom<br />
<strong>Particle</strong>s will be distributed by a normalized AnimationCurve where X is total amount of particles and Y is total lifetime.<br />
Examples when using two positions on the curve: <br />
X1Y1, X0Y0: Linear<br />
X0Y0, X1Y1: Reversed<br />
X1Y1, X1Y1: Burst<br />
44 of 70
Offsets the lifetime cycle. This can be used to set particle systems in sequences to each other. For instance, using the <strong>Playground</strong><br />
Runway preset you can determine if two (or more) runways should be similarly synced or offset in their blinking lights. You can also use<br />
this to annihilate any fade-ins at first particle cycle by setting negative values. This can for instance be useful in a situation where you<br />
want clouds similar to the Cloud preset to be fully visible from first frame in the first particle cycle.<br />
Lifetime Emission<br />
Determines the emission rate over the specified lifetime.<br />
<strong>Particle</strong> Mask<br />
The amount of masked (hidden) particles in current simulation. Due to the <strong>Particle</strong> <strong>Playground</strong>’s caching structure in built-in arrays,<br />
you’re not able to change particle count over time as it must reinitialize the cache. The <strong>Particle</strong> Mask enables you to visually change<br />
particle count where Mask Time will determine a fade until full mask effect is reached.<br />
Mask Time<br />
The time it takes in seconds for <strong>Particle</strong> Mask to reach full effect.<br />
Mask Sorting<br />
The method to sort the particle mask by the particle array. Use linear, reversed or scrambled.<br />
Forces<br />
Here you’ll find methods to move your particles. You can determine initial forces upon birth, forces over lifetime and apply turbulence.<br />
<br />
Only Source Positions<br />
Overrides all velocities and set every particle towards their source position every Update-cycle. This can be a desired behavior when<br />
particles doesn’t move by force, but by their attached source’s Transform. You can still set all other type of lifetime behaviors and<br />
offsets. Please see the example preset Matrix Cube or Holobot for basic usage.<br />
Lifetime Positioning<br />
Overrides all velocities and set every particle to move along three normalized AnimationCurves in X-, Y- and Z values based on their<br />
lifetime. A curve’s X axis represents a particle’s lifetime from 0 to 1, where the Y axis represents units. Each AnimationCurve axis has a<br />
repeat multiplier (starting at value 1), which determines how many times the curve will iterate over a particle’s lifetime. This can be used<br />
to for instance create spiral movements.<br />
45 of 70
Position Scale<br />
Set the scale of the Lifetime Positioning curves along a normalized AnimationCurve based on the particle’s lifetime. This will<br />
control how much each X-, Y-, and Z curve will affect the particles positioning.<br />
Time Scale<br />
Set the scale of the particles lifetime along a normalized AnimationCurve. This will control how fast the particles are moving<br />
along the Lifetime Positioning path.<br />
Scale<br />
The overall scale applied to all curves.<br />
Use Source Normal Direction<br />
This determines whether the source’s normal direction should be the base of direction for the Lifetime Positioning axis curves.<br />
What this basically means is that the direction and rotation of the source will have affect on the direction of the particles<br />
movement. When using Transform as Source, this will behave equally as if the particle system was simulated in local space.<br />
Transition Back To Source<br />
Determines if particles should return to their origin. The rate they should return in is specified by a normalized AnimationCurve.<br />
Axis Constraints<br />
The world axes to constrain forces for a particle. When working with 2D environments you will most likely want to enable constraints<br />
for the Z-axis to hinder particles wandering off into the third dimension.<br />
Max Velocity<br />
The maximum velocity magnitude allowed for a particle.<br />
Calculate Delta Movement<br />
A <strong>Playground</strong> <strong>Particle</strong> system can calculate birth velocity from each Source point’s delta movement. What this practically does is to give<br />
the particle an extra knock in the direction of the Source position’s movement. Use Delta Movement Strength (Constant or Random Between<br />
Two Values) to set the velocity scale that should apply.<br />
46 of 70
Delta Movement Strength<br />
The strength of the calculated Delta Movement. <strong>Particle</strong>s with high Delta Movement Strength will appear lighter than particles with low Delta<br />
Movement Strength. Use the arrow dropdown to determine the value method of either Constant or Random Between Two Values. Using<br />
Random Between Two Values will make the Delta Movement distribute more even and natural when having a high rate of rebirth.<br />
Initial Global Velocity<br />
The initial velocity for each particle. Use this to create a constant initial force towards direction. These are set by minimum- and<br />
maximum vector values to create a spread within range. Use Initial Velocity Shape to control how the Initial Velocity distributes over the<br />
particle birth pattern.<br />
Initial Local Velocity<br />
The initial velocity for each particle in local coordinates. The local coordinates are determined by the Source’s Transform direction and<br />
any normals (where applicable). Use this to emit particles in the direction of the normals of a mesh or in the local position with rotation<br />
of a transform. These are set by minimum- and maximum vector values to create a spread within range. Use Initial Velocity Shape to<br />
control how the Initial Velocity distributes over the particle birth pattern.<br />
Initial Velocity Shape<br />
Shape your own initial velocity by Vector3AnimationCurves. The shape applies to an emitted particle’s force where X is total amount of<br />
Source positions and Y is multiplier for total initial velocity. Use this to create shapes in how your particles spread out in the scene.<br />
For instance, try a transform with overflow offset to see the basics of how this distribute velocities to each particle’s Initial Velocity at<br />
birth with respect to Source positions.<br />
Lifetime Velocity<br />
The particles velocity over time. This is represented by three normalized AnimationCurves in X-, Y- and Z values. Use this to create<br />
controlled movement patterns for your particles.<br />
Velocity Bending<br />
Bend a particle’s velocity path. Depending on the selected Type, the direction from each particle’s Source Position or current <strong>Particle</strong><br />
Position towards their current is seen as a normal plane to set a new direction for the particle. You can use this to create interesting<br />
movement patterns without having to use turbulence or Manipulators (combine them to create a really interesting behavior).<br />
Turbulence<br />
47 of 70
Two types of turbulence algorithms can affect particles velocity pattern, either by Simplex- or Perlin noise. Simplex noise will produce a<br />
natural branch pattern. Perlin noise will produce a more confined, wave-like pattern. These turbulence types keeps iterating over the<br />
whole scene space leaving no particle untouched within the particle system. Fine-tuning how the turbulence affects each particle is<br />
done by Strength, Scale, Time Scale and Lifetime Strength.<br />
Strength<br />
How much the turbulence will affect the current velocity of each particle.<br />
Scale<br />
The resolution scale of the turbulence field. Having a higher scale of resolution will create a denser field, applying more<br />
branches/waves for particle movement.<br />
Time Scale<br />
The time for how fast the turbulence field is moving. Setting Time Scale to 0 will pause the field generation, but not the velocity<br />
within it.<br />
Lifetime Strength<br />
The strength to apply considering the particle’s lifetime. This is done by a normalized AnimationCurve where X is lifetime and Y is<br />
strength.<br />
Gravity<br />
Creates a constant force towards this Vector3.<br />
Damping<br />
The inertia over time of each particle.<br />
Velocity Scale<br />
The overall scale of velocity applied to each particle.<br />
<br />
Collision<br />
Determines whether the particles should collide or not. This will calculate collisions from any 2D- or 3D colliders within your scene using<br />
Raycasts from each particle.<br />
48 of 70
Collision Type<br />
Determines whether a 2D- or 3D collision method should be used.<br />
Collision Mask<br />
A LayerMask which determines which objects these particles can collide with.<br />
Collide With Rigidbodies<br />
Determines whether each collision should affect rigidbodies and apply forces to them. This can only happen if a particle collides with a<br />
GameObject which also has a Rigidbody as component.<br />
Inverse Rigidbody Collision<br />
Determines if the effect on the rigidbody collision should be reversed.<br />
Mass<br />
The mass of each particle. This is used when calculating how much each particle will affect a Rigidbody. A particle with a higher mass<br />
will affect the Rigidbody more than a particle with a lower mass.<br />
Collision Radius<br />
The collision radius of each particle.<br />
<br />
Lifetime Loss<br />
The amount of lifetime (energy) to loose on collision measured by remaining lifetime span in a normalized value. A lifetime loss of 0.5<br />
on a particle in 50% of its lifetime will set it to 25% of its lifetime.<br />
Sticky<br />
Determines if particles should stick to the surface of the collided objects. This option will automatically enable the Collision Cache to<br />
start tracking collision positions internally.<br />
Surface Offset<br />
The offset from the collided surface a particle should stick to.<br />
49 of 70
Sticky Mask<br />
The possible object layers particles can stick onto.<br />
Bounciness<br />
The bounciness of each particle. This value will determine how much of the original force the particle will detain after collision. For<br />
instance, using a value of 0.5 will make the particle loose half its force, using a value of 1.0 will make the particle have all force in<br />
remain. Note that Bounciness will not be available when having Sticky enabled.<br />
<br />
Random Bounce<br />
The random offset bounce determined within minimum- and maximum Vector3-value from the collision surface’s normal. Use this to<br />
simulate uneven surfaces. Note that Random Bounce will not be available when having Sticky enabled.<br />
Collision Precision<br />
When calculating collisions for each particle a Physics.Raycast will be shot in the direction of the particle. The Collision Precision<br />
determines if Vector3.Distance (when enabled) or Vector3.SqrMagnitude (when disabled) should be used for the length of the Raycast.<br />
Enabling this can result in more precise collision positions but will have a slight performance penalty in return.<br />
Force Collision Caching<br />
Every particle system consists of a couple of array caches to remain efficient in the particle simulation loop. The Collision Cache will<br />
store information about each collision to enable the Sticky Collision behavior. When not having the Sticky Collision behavior enabled<br />
the Collision Cache will not store any information due to performance reasons. Should you want to take advantage of the Collision<br />
Cache through scripting when not having Sticky enabled you can enable the Force Collision Caching. In the cache you will find<br />
information such as the latest collision positions, normals and collided transforms.<br />
<br />
Collision Planes<br />
The infinite collision planes. These are created from Transforms within the scene using the Transform’s upward axis to determine if a<br />
particle is within or passed the infinite plane. A particle cannot live outside of the passed plane when using collisions. Use this to<br />
contain particles within a determined space. The planes are updated within the calculation cycle to always match their assigned<br />
Transform.<br />
Collision Exclusion<br />
Add any objects by Transform you wish to exclude from collision calculation in your Scene.<br />
50 of 70
Rendering<br />
From here you can set the visual presentation of the particle. This regards what Material it uses, what Color Source it has, Lifetime Color<br />
gradient(s) and the Render Mode. The Material, Render Mode and Max <strong>Particle</strong> Size is directly inherited from the Shuriken component.<br />
Material<br />
The material of the particle system. Depending on the material’s shader, texture and color you will achieve different visual results how a<br />
particle renders on screen.<br />
Color Source<br />
Choose which type of method to colorize your particles with Color Source. Using a State with a texture, painted positions from a brush<br />
with a texture or assigned color by script is examples of Color Sources. If no Source is used a fallback to Lifetime Color will occur. You can<br />
choose whether to render from the Source, a Lifetime Color or several Lifetime Colors. You also have the possibility to only set alpha from<br />
Lifetime Color while the colors are picked up from the Source.<br />
Color Method<br />
Choose to color the particles by their lifetime or by their linear position in the particle array.<br />
Lifetime Color(s)<br />
The color each particle uses in this <strong>Particle</strong> <strong>Playground</strong> system during their lifetime. This is determined by a gradient. You can also<br />
choose to use a list of Lifetime Colors, where a particle will pair up with a gradient upon birth.<br />
Source Uses Lifetime Alpha<br />
Determines if the Source Color should use alpha from its Source (such as a transparent pixel) or from Lifetime Color.<br />
Render Mode<br />
The presentation of a particle whether it should be billboarded (horizontal and/or vertical), stretch by velocity values or use a custom<br />
mesh. This is directly connected to the Shuriken particle system. Rendering stretched particles will present some fine-tuning options.<br />
Camera Scale<br />
The stretch scale applied by camera movement.<br />
51 of 70
Speed Scale<br />
The stretch scale applied by particle’s speed.<br />
Length Scale<br />
The length scale of the applied stretch.<br />
Stretch Speed<br />
How fast the stretching reacts to all scaling.<br />
Start Stretch<br />
The initial stretching direction and amount.<br />
Lifetime Stretch<br />
The amount of stretching over particles lifetime in normalized values of an Animation Curve. X is lifetime where 1.0 is a full<br />
lifetime cycle and Y is strength of stretch. Having a strength greater than 1 on the curve may result in unexpected behavior.<br />
Max <strong>Particle</strong> Size<br />
The normalized screen size of a particle. This is directly connected to the Shuriken particle system.<br />
Renderer<br />
Determines if the particle system should render.<br />
Cast Shadows<br />
Determines if the particles should cast shadows (a shadow casting shader must be used).<br />
Receive Shadows<br />
Determines if the particles should receive shadows (a shadow receiving shader must be used).<br />
Sorting Mode<br />
The method to sort particles within the particle system. Refer to the Shuriken manual.<br />
Sorting Fudge<br />
Bias of particle sort ordering. Refer to the Shuriken manual.<br />
52 of 70
Sorting Layer<br />
The depth layer of which this particle system is ordered by. This is only applicable when using 2D.<br />
Order In Layer<br />
The order within the Sorting Layer. This is only applicable when using 2D.<br />
Texture Sheet Animation<br />
The UV animation of particles. Refer to the Shuriken manual for further details. Set Minimum Shuriken Lifetime to 0 if you experience<br />
non-rendered tiles on short-lived particles.<br />
Manipulators<br />
The list of Local Manipulators of this particle system. A Manipulator has the ability to change a particle’s properties based on their world<br />
location. A Local Manipulator will only affect the particle system it’s attached to. The benefit of using Local Manipulators is that they will<br />
serialize together with prefabs. To create a Global Manipulator you use <strong>Playground</strong> Manager > Manipulators. A Global Manipulator can affect all<br />
particle systems within the selected layers in the scene.<br />
Enabled<br />
Determines if this Manipulator is active.<br />
Transform<br />
The Transform to assign to this Manipulator. A Manipulator will need a Transform assigned to be able to have an origin position within<br />
the world space. Use a Transform from another GameObject within your scene, this can be moved around freely and intuitively affect<br />
particles within range in realtime.<br />
Type<br />
The behavior of this Manipulator. There are main-, property- and combined types. Main types (such as the Attractor, Vortex and<br />
Repellent) can be injected into property types (such as Color, Size and Target) where a combined type is a container for all properties.<br />
The main types are constructed of fast algorithms to affect a particle’s velocity, the property types are a deeper nested structure where<br />
you can pass more thorough information to alter a particle.<br />
None<br />
53 of 70
The behavior will be inactive.<br />
Attractor<br />
The behavior will attract particles with funnel-like features.<br />
AttractorGravitational<br />
The behavior will attract particles with gravity-like features.<br />
Repellent<br />
The behavior will repel particles with magnetic repellent-like features.<br />
<br />
Property<br />
The behavior will alter the property of each particle within range. A property can be a particle’s color, a predetermined velocity, a<br />
new size, a sooner death or a specified target. All main Manipulator types (such as the Attractor, Vortex and Repellent) can also<br />
inject into a property to let a Combined Manipulator carry their behavior. Each property also has its own Strength value, which<br />
becomes necessary when working with Combined Manipulators. Any property can transition by linear interpolation, to let a<br />
particle fade into the newly inherited property by the Manipulator. Use Transition Lerp/Linear to change a property over time. The<br />
Manipulator’s and property’s Strength will determine how fast the property changes.<br />
None<br />
Don’t alter any properties. This will however flag each particle within range in the <strong>Playground</strong>Cache and set its value of<br />
changedByProperty to true.<br />
<br />
Color & Lifetime Color<br />
Alter the color of a particle within range. Either by a specified color or let it inherit a new Lifetime Color gradient.<br />
Only Color In Range<br />
Determines if the new color will be kept by the particle or go back to its original when out of the Manipulator’s<br />
range.<br />
Keep Color Alphas<br />
54 of 70
Determines if the new color will inherit the original alpha from the particle’s source color or get the alpha from the<br />
new color.<br />
Velocity<br />
Alter the velocity of particle within range.<br />
Local Rotation<br />
Determines if the velocity should be calculated from the Transform direction of the Manipulator.<br />
Additive Velocity<br />
Add velocity to particle’s current velocity.<br />
Size<br />
Alter the size of particle within range.<br />
<br />
Target<br />
Set node targets in form of Transforms for particles. The particles will be moved by linear interpolation when using<br />
Transition where a Zero Velocity Strength parameter will be available to fade out their current velocity.<br />
Death<br />
Force a sooner death upon particles.<br />
Mesh Target<br />
Set a mesh target in form of vertices for particles. The particles will be moved by linear interpolation when using Transition<br />
where a Zero Velocity Strength parameter will be available to fade out their current velocity.<br />
Skinned Mesh Target<br />
Set a skinned mesh target in form of vertices for particles. The particles will be moved by linear interpolation when using<br />
Transition where a Zero Velocity Strength parameter will be available to fade out their current velocity.<br />
Turbulence<br />
55 of 70
Apply turbulence within the range of a manipulator. The same abilities are available as in the Forces > Turbulence except<br />
that a manipulator’s turbulence will respond to the Smoothing- and Distance Effect as well. Having 0 effect on distance will<br />
make the turbulence behave the same over the whole field of the manipulator.<br />
State Target<br />
Target a particle state within the Scene. Use Target Sorting to set how particles get their destination.<br />
Spline Target<br />
Target a <strong>Playground</strong> Spline within the Scene. Use Target Method to set how particles get their destination.<br />
Math<br />
This can be used to apply common math operations to certain particle properties. Available properties to alter is position,<br />
rotation, size, and velocity. Algorithms available is sine, cosine, linear interpolation, add and subtract. You can also clamp the inor<br />
out value. The in value means the particle’s current value where the out value means the new returning value.<br />
Combined<br />
Combine Manipulator properties into one Manipulator call using the same position and radius. This is where any individual<br />
property’s Strength will come in handy to fine-tune how they all affect the particle together.<br />
Vortex<br />
A simulated vortex where particles will spin towards its center. The rotation of the Transform will determine the velocity<br />
direction.<br />
Affects - Global Manipulators only<br />
The layers this Global Manipulator will affect.<br />
Shape<br />
The shape this Manipulator has, either a Sphere or a Box. Use the Scene View along with the handles when a Manipulator is unfolded<br />
from the Manipulator list to see and edit how far it reaches.<br />
Size (Sphere)<br />
56 of 70
The spherical size of this Manipulator in Units. For instance, a spherical Manipulator at the world position Vector3(0, 0, 0) and a<br />
value of 1 will make the spherical extents reach between Vector3(-0.5, -0.5, -0.5) and Vector3(0.5, 0.5, 0.5). All particles outside of<br />
the spherical extent will be ignored (unless if it uses Inverse Bounds).<br />
Bounds (Box)<br />
The bounding box of this Manipulator in form of a Rect measured in Units. The Box is calculated from the Manipulator’s<br />
Transform rotation. Through the Center values you can offset from the Manipulator's origin, where Extents will determine the size<br />
on each axis.<br />
Infinite<br />
The Manipulator will affect all particles within the particle system (or Scene if Global within layer). The distance and bounds<br />
calculations will be ignored on an infinite Manipulator which makes it faster to compute. Use this setting if you want to affect all<br />
particles and no range checks are needed.<br />
Manipulator Strength<br />
The strength of this Manipulator. All particles within the bounding area of this Manipulator will be affected. The outcome of the<br />
behavior is dependent on the selected Type. Use the Scene View along with the handles when a Manipulator is unfolded from the<br />
Manipulator’s list to see and edit their Strength.<br />
Lifetime Filter<br />
Filter particles within a specified lifetime span of normalized minimum- to maximum float value. Using a value of 0 will have immediate<br />
affect upon birth. You can use this to apply properties when a particle has reached a certain lifetime and is within a certain lifetime<br />
span.<br />
<strong>Particle</strong> Filter<br />
Filter particles based on the particle system’s particle count of normalized minimum- to maximum float value. The span is directly<br />
connected to the list position in the <strong>Playground</strong>- and <strong>Particle</strong> Cache.<br />
Inverse Bounds<br />
Invert the bounding space this Manipulator affects.<br />
<br />
Axis Constraints<br />
57 of 70
Constrains the specified axis to be unaffected by the Manipulator. This applies to Manipulators which will alter particle positions and<br />
forces.<br />
Track <strong>Particle</strong>s<br />
Determines if the Manipulator should keep track of the particles within its confined space. This is necessary if you want to extract<br />
information from the particles affected by this Manipulator or if you want the Manipulator to send events.<br />
Tracking Method<br />
The method to track particles with. Using ManipulatorId will be fast, but may not return correct when having overlapping<br />
Manipulators. Using <strong>Particle</strong>Id will be slow, but will ensure correct compare of particles within any overlapping Manipulators.<br />
Send Enter Events<br />
Send information about each particle entering the Manipulator.<br />
Send Exit Events<br />
Send information about each particle exiting the Manipulator.<br />
Send Birth Events<br />
Send information about each particle birth inside the Manipulator.<br />
Send Death Events<br />
Send information about each particle dying inside the Manipulator.<br />
Send Collision Events<br />
Send information about each particle colliding inside the Manipulator.<br />
Events<br />
From the Events-tab you can setup the list of Events a particle will trigger when a specific condition is met, such as particle Birth, Death, Collision<br />
or by Time. You can specify how it will broadcast, towards another particle system Target and/or any Event Listeners by an event delegate which<br />
can be reached from your game logic. Each Event can send different information, either from the particle, particle system or user specified<br />
values. Using an Event Listener will have detailed information about the particle in the occurring Event.<br />
58 of 70
Broadcast Type<br />
The method to send the Event by. Using another Target particle system will send emission information and issue an Emit(). Using Event<br />
Listeners will broadcast information from the triggering particle to an event delegate found inside the Event object by name particleEvent.<br />
Please see the example scene Event Listener for basic usage.<br />
Target<br />
The particle system which will receive information from the occurring Event. The particle system will need to be running in the<br />
Source Script mode to receive information. Please see the example scene Event Targets for basic usage.<br />
Type<br />
The type of condition to trigger this Event. Available conditions are particle Birth, Death, Collision or by a specified Time.<br />
Position<br />
The method which will set position information. Available values are User, <strong>Particle</strong> and Source. User will make the Event pass a<br />
predetermined position set by the user, <strong>Particle</strong> will pass the particle’s position and Source will pass the particle’s Source Position upon<br />
birth.<br />
Velocity<br />
The method which will set velocity information. Available values are User, <strong>Particle</strong> and Source. User will make the Event pass a<br />
predetermined velocity set by the user, <strong>Particle</strong> will pass the particle’s velocity and Source will pass the particle’s initial velocity upon<br />
birth.<br />
Color<br />
The method which will set color information. Available values are User, <strong>Particle</strong> and Source. User will make the Event pass a<br />
predetermined color set by the user, <strong>Particle</strong> will pass the particle’s color and Source will pass the particle’s color upon birth.<br />
Snapshots<br />
A snapshot is a stored particle system state (all its settings and current particle values within the scene). Through the list of Snapshots you can<br />
Load any stored settings at any time. Each stored state is childed to the particle system carrying the snapshot as a separate particle system,<br />
should you want to edit them you can enable <strong>Playground</strong> Manager > Advanced > Show Snapshots. Please see the example scene Snapshots for<br />
basic usage.<br />
59 of 70
Load From Start<br />
Determines if the selected snapshot should load when the particle system enables.<br />
Transition Time<br />
Enable this if you want to transition over time between current and loaded particle values.<br />
Transition Type<br />
The type of transition over time. Linear will transition without easing, Ease In will start slow, Ease Out will end slow.<br />
Transform<br />
The stored snapshot carries information about where the Transform was in the scene when the snapshot was made. Enable this to<br />
make the particle system jump to that position and rotation.<br />
Settings & <strong>Particle</strong>s<br />
Toggle between Settings & <strong>Particle</strong>s, Settings Only and <strong>Particle</strong> Only. Settings indicates that you will load all particle system settings, <strong>Particle</strong>s<br />
indicates that you will load all live particles and their individual values from when the snapshot was made.<br />
Advanced/Simple Snapshots<br />
Toggle the Advanced/Simple button in Inspector to show the particle system snapshots in Hieararchy and expose advanced controls in<br />
the Snapshots-list.<br />
Advanced<br />
The Advanced section will expose some mechanical fine-tuning parts of a particle system. From here you can change the rate of update, the<br />
simulated space and how a particle will behave upon rebirth.<br />
Simulation Space<br />
Determines if particles are simulated in World- or Local space. This is directly connected to the Shuriken particle system. However, it<br />
affects how particles are calculated where world to local space is converted throughout the whole framework.<br />
Movement Compensation<br />
Available when using Local Simulation Space. This emulates the behavior of locally moved particles when moving the Source,<br />
where all particles will follow any repositioning in world space.<br />
60 of 70
Update Rate<br />
The update rate of this <strong>Particle</strong> <strong>Playground</strong> system. This determines how often the calculation loop will run. For instance, 1 will make<br />
the calculation run each frame, 2 will make it run each second frame. The higher the number the more choppy the particles will move<br />
over time, but hog up less of the main thread. Use this to balance quality of appearance with performance.<br />
Time Scale<br />
The local time scale of the particle system. Set this to 0 to pause simulation.<br />
Rebirth Options<br />
Control if certain actions should be run upon particle rebirth.<br />
Random Lifetime<br />
<strong>Particle</strong> will get a new lifetime within minimum- and maximum range of lifetimeMin and lifetime. This is only applicable when using<br />
a Lifetime of Random Between Two Values.<br />
Random Size<br />
<strong>Particle</strong> will get a new size within minimum- and maximum range of sizeMin and sizeMax.<br />
Random Rotation<br />
<strong>Particle</strong> will get a new initial rotation within minimum- and maximum range of initialRotationMin and initialRotationMax.<br />
Random Scatter<br />
<strong>Particle</strong> will get a new scatter position within minimum- and maximum range of sourceScatterMin and sourceScatterMax. This is<br />
only applicable when using Source Scatter.<br />
Random Velocity<br />
<strong>Particle</strong> will get a new initial velocity within minimum- and maximum range of initialVelocityMin and initialVelocityMax.<br />
Force Initial Color<br />
<strong>Particle</strong> will get its initially calculated color. By rare occasions this is needed for any particles that will flicker upon rebirth due to<br />
the multithreading.<br />
61 of 70
Delta Position Adjustment<br />
Determines if the delta time from birth to current should adjust its initial positioning. This will make particles appear linearly, but<br />
naturally create a gap from its birth position.<br />
Calculate Manipulator<br />
Determines if each particle should calculate its affecting Manipulators immediately on rebirth.<br />
Locks<br />
Apply locks for Position, Rotation and Scale for a particle system’s Transform.<br />
Prewarm<br />
Determines if the particle system should start in a predetermined state in its lifetime upon load.<br />
Prewarm Lifetime Cycles<br />
This tells prewarming where to end the simulation time and where particles should be within their lifetime cycle upon load.<br />
Prewarm Cycles (Resolution)<br />
This determines how many calculation cycles should be spent in the prewarming process. Using a higher value will have more<br />
detailed velocity results but requires more computation time.<br />
Auto-Pause Calculation<br />
Determines if a particle system should halt calculations when outside of the main camera’s frustum.<br />
Calculation Trigger<br />
The Transform used to trigger calculation. The particle system transform will be used if null.<br />
Calculation Trigger Size<br />
The area around the Calculation Trigger.<br />
Calculation Trigger Offset<br />
The offset from the Calculation Trigger.<br />
62 of 70
Draw Gizmo<br />
Show the trigger area in Scene View.<br />
Sync <strong>Particle</strong>s To Main-Thread<br />
Due to the multithreading you may sometimes experience movement tearing or other time differentials. Syncing particles onto mainthread<br />
will make particles move inside the MonoBehaviour’s Update loop and even out any visually teared particles.<br />
<strong>Particle</strong> Thread Method<br />
The multithreading method for a single particle system. Use this to bypass the selected <strong>Particle</strong> Thread Method on the <strong>Playground</strong><br />
Manager. You can use this effectively to fine-tune how each particle system should calculate to gain performance on special setups.<br />
Inherit<br />
Makes the particle system calculate as set by the <strong>Playground</strong> Manager’s <strong>Particle</strong> Thread Method. This is the default value.<br />
NoThreads<br />
Makes the particle system calculate on the main-thread.<br />
OnePerSystem<br />
Creates a new thread for this particle system. This makes sure the particle system will have its own calculated thread each<br />
calculated frame. Use this when you wish to give a particle system extra attention in performance.<br />
OneForAll<br />
Creates a bundled thread for all particle systems using this setting. This can be a good alternative when having many similar<br />
particle systems with few particles.<br />
<strong>Particle</strong> Pool<br />
This is an Editor feature where you can Clear out all currently simulated particles (source positions will remain intact) and Rebuild them<br />
towards their Source Positions.<br />
63 of 70
PLAYGROUND MANAGER<br />
Every particle system is driven by the<br />
<strong>Playground</strong> Manager, it also contains the Global<br />
Manipulators and some settings to fine-tune the<br />
<strong>Playground</strong>.<br />
<strong>Particle</strong> Systems<br />
The list of <strong>Particle</strong> <strong>Playground</strong> systems within the scene. Use this list in the Editor to create new, jump between (by pressing the name), to copy,<br />
sort or remove the particle systems. To access a particle system through script you can use <strong>Playground</strong>.Get<strong>Particle</strong>s(int), where int will be the<br />
position in the list. This will return a reference to the particle system in form of a <strong>Playground</strong><strong>Particle</strong>sC object.<br />
<br />
Manipulators<br />
The list of Global Manipulators used within the scene. Please see the <strong>Playground</strong> <strong>Particle</strong> System-section for more details.<br />
Advanced<br />
In the Advanced-tab you’ll be able to fine-tune your <strong>Particle</strong> <strong>Playground</strong>.<br />
Calculate <strong>Particle</strong>s<br />
Turn this off to override calculation settings for all <strong>Particle</strong> <strong>Playground</strong> systems and turn calculation off in the entire scene.<br />
Group Automatically<br />
Determines if a newly created- or non-childed <strong>Particle</strong> <strong>Playground</strong> system should automatically get the <strong>Playground</strong> Manager as parent.<br />
This behavior is only for user convenience where a particle system won’t be affected by the Hierarchy.<br />
Build Zero Alpha Pixels<br />
Determines if an image’s completely transparent pixels should be built as particles or not. Have this setting off if you want to spare the<br />
number of particles. Turn it on if you for instance want to linearly interpolate from one state that has transparent pixels to another<br />
which doesn’t.<br />
64 of 70
Scene Gizmos<br />
Show Gizmos from any <strong>Particle</strong> <strong>Playground</strong> visual helpers within Scene View.<br />
Source Positions<br />
Render the Source Positions in Scene View. This should be considered for debug purposes only where having plenty Source Positions<br />
can be heavy for the Unity Editor to render.<br />
Spline Preview<br />
Render the <strong>Playground</strong> Splines bezier curves in Scene View.<br />
Wireframes<br />
Render wireframes around particles in Scene View.<br />
Paint Toolbox<br />
Show toolbox when painting in Scene View.<br />
Show Shuriken<br />
Show the Shuriken component of each <strong>Particle</strong> <strong>Playground</strong> system.<br />
Advanced Snapshots<br />
Determines if more advanced options should be available for Snapshots. This will make the Snapshot GameObjects visible in the<br />
Hierarchy under the corresponding particle system.<br />
Pixel Filter Mode<br />
The method to filter pixels with when reading textures, either Bilinear or Pixel32.<br />
<br />
Global Time Scale<br />
Determines if Unity’s Time Scale should affect the particle simulations. Disable this if you don’t want to change the simulation speed of<br />
your particle systems while changing Time.timeScale.<br />
Multithreading<br />
65 of 70
<strong>Particle</strong> <strong>Playground</strong> is using multithreading to relieve the CPU’s main-thread from its calculations and to distribute all particle systems,<br />
turbulence and skinned mesh vertex extraction into different thread calls. You can alter how <strong>Particle</strong> <strong>Playground</strong> should distribute<br />
these threads to fine-tune how the calculation performs on your end-platform. This is done in realtime and can be switched through<br />
script (in Editor and runtime), see the Multithreading Skinned Meshes scene for scripting example. To successfully fine-tune performance<br />
you should monitor the number of active threads, your current FPS, GC allocation and how your particle system behaves visually.<br />
Thread Pool Method<br />
Reusing threads can be done either through the standard .NET Thread Pool or the <strong>Playground</strong> Pool (introduced in version 3.0).<br />
The <strong>Playground</strong> Pool is a custom pooling system which generates less memory allocations and improves performance overall<br />
for particle related calculations.<br />
<br />
<strong>Particle</strong> Thread Method<br />
The multithreading method of the simulated particle systems. This determines how particle systems calculate over the CPU, if<br />
their calculations should be bundled, separated or not make use of multithreading. Keep in mind each thread will generate<br />
memory garbage which will be collected at some point.<br />
No Threads<br />
No calculation threads will be created. This will in most cases have a negative impact on performance as <strong>Particle</strong> <strong>Playground</strong><br />
will calculate along all other logic on the main-thread. Use this for debug purposes or if you know there's no multi- or<br />
hyperthreading possibilities on your target platform.<br />
One Per System<br />
One calculation thread per particle system will be created. Use this when having heavy particle systems in your scene.<br />
Note that this method will never bundle calculation calls unless specified in each individual particle system’s <strong>Particle</strong> Thread<br />
Method.<br />
One For All<br />
One calculation thread for all particle systems will be created. Use this if you have other multithreaded logic which has<br />
higher performance priority than <strong>Particle</strong> <strong>Playground</strong> or your project demands strict use of garbage collection. Consider<br />
using Automatic for best performance.<br />
66 of 70
Automatic<br />
Let calculation threads distribute evenly for all particle systems in your scene. This will bundle calculation calls to match<br />
the platform's SystemInfo.processorCount. This is the recommended and overall fastest method to calculate particle<br />
systems. Having fewer particle systems than processing units will create one thread per particle system. Having more<br />
particle systems than processing units will initiate thread bundling.<br />
Turbulence- and Skinned Mesh Thread Method<br />
Determines how turbulence and skinned meshes should be calculated over the CPU.<br />
Inside <strong>Particle</strong> Calculation<br />
No new threads will be created. The calculation will run inside the selected <strong>Particle</strong> Thread Method.<br />
One Per System<br />
Each calculated frame will create a new thread. Use this when having few particle systems with heavy calculations.<br />
One For All<br />
One thread for all particle systems will be created. Use this when having plenty of particle systems with light calculations.<br />
Max Threads<br />
When using a <strong>Particle</strong> Thread Method of Automatic you can use Max Threads to set the highest possible threads created.<br />
Time Simulation Reset<br />
Reset the global time simulation.<br />
67 of 70
PLAYGROUND SETTINGS<br />
In the <strong>Playground</strong> Wizard window you’ll find<br />
overall settings where you can handle<br />
languages, Editor limits and project paths. All<br />
settings are serialized into your project.<br />
Check For Updates<br />
<strong>Playground</strong> will check for new releases having this enabled. When a new release is available you’ll be notified with a message in the<br />
<strong>Playground</strong> Wizard.<br />
Extend Your <strong>Playground</strong><br />
Determines if Extend Your <strong>Playground</strong> should retrieve the list of available extensions and display those in the <strong>Playground</strong> Wizard.<br />
Prefab Connection<br />
Determines if your instantiated presets should have their prefab connection intact.<br />
Hierarchy Icon<br />
Determines if the <strong>Playground</strong> Hierarchy icon should be visible. The icon indicates if a particle system is currently simulating (yellow), inactive<br />
(grey) or has detected a heavy calculation loop (red).<br />
Language<br />
The active language of <strong>Particle</strong> <strong>Playground</strong>. Here you can create new, install, edit and export languages.<br />
Editor Limits<br />
All limits constraining the Editor GUI controls in terms of minimum- and maximum values.<br />
Paths<br />
The different static paths <strong>Particle</strong> <strong>Playground</strong> uses to keep track of its assets.<br />
68 of 70
SUPPORT<br />
Your experience is important, whether it’s to<br />
give feedback or to get help troubleshooting,<br />
make sure to stay in touch.<br />
Opening a support errand<br />
Should you have any inquiries, requests or bug-reports please send a mail to support@polyfied.com.<br />
The support comes free of charge and may have a couple days of wait.<br />
Learning more about the <strong>Playground</strong><br />
Please visit the official <strong>Particle</strong> <strong>Playground</strong> website http://playground.polyfied.com/ for more information.<br />
About this document<br />
<strong>Particle</strong> <strong>Playground</strong> Version: 3.0<br />
Document updated: December 8, 2015<br />
69 of 70
<strong>Particle</strong> <strong>Playground</strong> 3 and the NEXT manual is proudly<br />
presented by Polyfied, Stockholm Sweden 2015.<br />
polyfied.com