
Create successful ePaper yourself
Turn your PDF publications into a flip-book with our unique Google optimized e-Paper software.
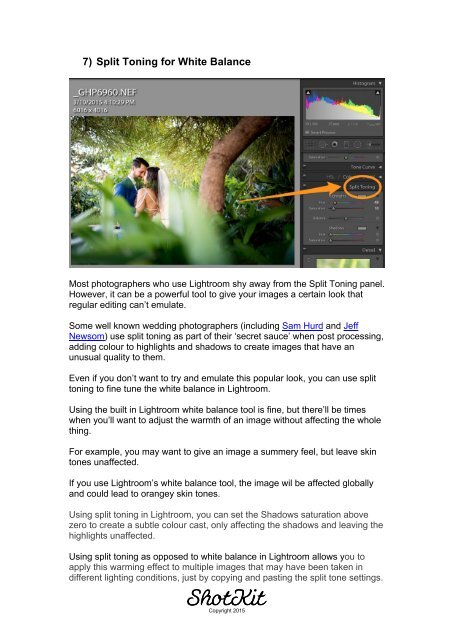
7) Split Toning for White Balance<br />
Most photographers who use <strong>Lightroom</strong> shy away from the Split Toning panel.<br />
However, it can be a powerful tool to give your images a certain look that<br />
regular editing can’t emulate.<br />
Some well known wedding photographers (including Sam Hurd and Jeff<br />
Newsom) use split toning as part of their ‘secret sauce’ when post processing,<br />
adding colour to highlights and shadows to create images that have an<br />
unusual quality to them.<br />
Even if you don’t want to try and emulate this popular look, you can use split<br />
toning to fine tune the white balance in <strong>Lightroom</strong>.<br />
Using the built in <strong>Lightroom</strong> white balance tool is fine, but there’ll be times<br />
when you’ll want to adjust the warmth of an image without affecting the whole<br />
thing.<br />
For example, you may want to give an image a summery feel, but leave skin<br />
tones unaffected.<br />
If you use <strong>Lightroom</strong>’s white balance tool, the image wil be affected globally<br />
and could lead to orangey skin tones.<br />
Using split toning in <strong>Lightroom</strong>, you can set the Shadows saturation above<br />
zero to create a subtle colour cast, only affecting the shadows and leaving the<br />
highlights unaffected.<br />
Using split toning as opposed to white balance in <strong>Lightroom</strong> allows you to<br />
apply this warming effect to multiple images that may have been taken in<br />
different lighting conditions, just by copying and pasting the split tone settings.<br />
Copyright 2015