Create successful ePaper yourself
Turn your PDF publications into a flip-book with our unique Google optimized e-Paper software.
Technical Guide<br />
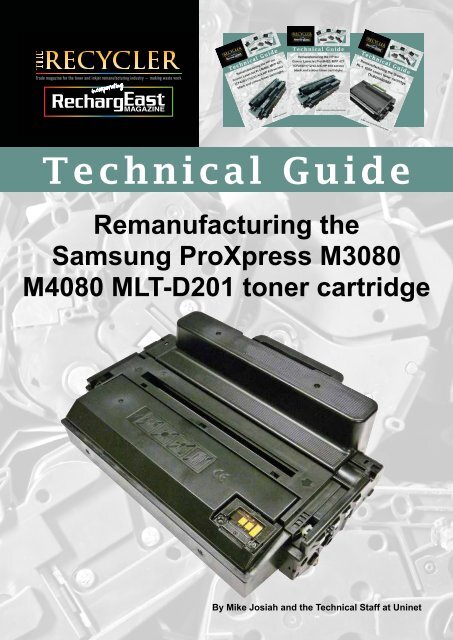
Remanufacturing the<br />
<strong>Samsung</strong> <strong>ProXpress</strong> M3080<br />
M<strong>4080</strong> <strong>MLT</strong>-D201 toner cartridge<br />
By Mike Josiah and the Technical Staff at Uninet
Remanufacturing the <strong>Samsung</strong> <strong>ProXpress</strong> M3080<br />
M<strong>4080</strong> <strong>MLT</strong>-D201 toner cartridge<br />
By Mike Josiah and the Technical Staff at Uninet<br />
The <strong>Samsung</strong> <strong>ProXpress</strong> M3080 series of printers are based on a 42ppm engine with a maximum resolution of 1,200 x<br />
600dpi (1,200 x 1,200dpi enhanced). The first page out is stated to be under six seconds. Depending on the model number,<br />
other options/specs are available.<br />
The <strong>MLT</strong>-D201L/S cartridges do not have a drum cover, and come new with a piece of<br />
heavy paper with a thin sheet of foam on the inside. The protective sheet is held in place by a<br />
shipping lock that holds the PCR roller away from the drum. This lock helps prevent flat spots<br />
that can occur during storage (see Figures A, B and C).<br />
Once again there are no screws in the outside of the cartridge at all. There are plastic<br />
rivets that need to be cut off, holes drilled and screws installed to hold them back on. It’s not<br />
a hard process, and it’s covered completely in the instructions. It is very important however<br />
that all three places on each end cap be drilled and screwed back in place. If this is not done,<br />
print defects such as banding will occur (see Figures 1 and 2).<br />
One new item on these cartridges is a set of metallic labels over one of the rivets. There<br />
is a small amount of adhesive under the second label, we believe for spacing. In the printer<br />
there is a slot for an optical sensor, but in our M3080 machine this slot is empty. It is unknown<br />
if <strong>Samsung</strong> plans to put them in later on, but to be safe the labels should be put back in<br />
place when remanufacturing the cartridge. I used a small amount of silicon under the label to<br />
replace the old adhesive (see Figures 3A and 3B in step one).<br />
The standard cartridge (<strong>Samsung</strong> Part # <strong>MLT</strong>-<strong>D201S</strong>) is rated for 10,000 pages. The highyield<br />
cartridge (<strong>Samsung</strong> Part # <strong>MLT</strong>-D203L) is rated for 20,000 pages. As with pretty much<br />
all cartridges these days the cartridge has a chip, and it has to be replaced each cycle. The<br />
OEM chips are regional, so be sure to get the proper chip for your region.<br />
The <strong>MLT</strong>-<strong>D201S</strong> has a list price of $164.99 (€148.49), while the <strong>MLT</strong>-D203L has a list<br />
price of $195.99 (€176.39). *Pricing as of October 2016<br />
FIGURE A<br />
FIGURE B<br />
FIGURE C<br />
There are both standard laser printers and multifunction machines that use these cartridges<br />
so far:<br />
ML-<strong>M4030</strong>ND<br />
ML-M<strong>4080</strong>FX (Multifunction)<br />
Both printers come with a starter cartridge rated for 6,000 pages. Print troubleshooting will be listed at the end of these<br />
instructions.<br />
FIGURE 1 FIGURE 2<br />
©2016 Recycler Publishing & Events Ltd THE RECYCLER - TECHNICAL GUIDE PAGE 2
TECHNICAL GUIDE<br />
By Mike Josiah and the Technical Staff at Uninet<br />
REQUIRED SUPPLIES<br />
REQUIRED TOOLS<br />
• <strong>Samsung</strong> <strong>M4030</strong> toner<br />
• New <strong>M4030</strong> replacement chip (check for the proper region and cartridge (S/L)<br />
• New OPC drum (optional)<br />
• New developer roller (optional)<br />
• New PCR (optional)<br />
• New wiper blade (optional)<br />
• New doctor blade (optional)<br />
• Conductive grease<br />
• 99 percent Isopropyl alcohol<br />
• Drum-lubricating powder<br />
• #8 x ¼” self-tapping screws<br />
• Small tube of silicon<br />
• Toner-approved vacuum<br />
• A small common screw driver<br />
• A Phillips head screwdriver<br />
• Needle-nose pliers<br />
• Chisel-type razor blade knife<br />
• Hot glue gun<br />
• Electric drill and a #29 drill bit<br />
STEP ONE<br />
On the contact side of the cartridge, slice<br />
off the heads of the three plastic rivets<br />
with a chisel blade knife. Note that on<br />
the outside of the front rivet, there are<br />
two metallic labels and a white adhesive.<br />
Remove them and save, as they need to<br />
be replaced when done.<br />
3A<br />
3B<br />
If your knife is too wide, you<br />
may find it necessary to<br />
drill out the upper recessed<br />
rivets on both sides. Leave<br />
the end cap on for now. On<br />
the outside of the front rivet<br />
there are two metallic labels and a white<br />
adhesive. Remove them and save, as they<br />
need to be replaced when done.<br />
3C<br />
©2016 Recycler Publishing & Events Ltd THE RECYCLER - TECHNICAL GUIDE PAGE 3
TECHNICAL GUIDE<br />
By Mike Josiah and the Technical Staff at Uninet<br />
STEP TWO<br />
On the opposite side end cap, take the chisel blade knife<br />
and slice off the heads of the three plastic rivets. See above<br />
step for recessed rivets. Leave the end cap on for now.<br />
STEP THREE<br />
The drum axle arms on both sides of the cartridge stay with<br />
the end cap. There is no need to remove them.<br />
STEP FOUR<br />
Remove the drum drive gear.<br />
STEP FIVE<br />
While still on the same side, locate the two<br />
tabs. Press in on each tab, and remove the<br />
end cap. The drum axle arm will come off with<br />
the end cap.<br />
A<br />
B<br />
C<br />
©2016 Recycler Publishing & Events Ltd THE RECYCLER - TECHNICAL GUIDE PAGE 4
TECHNICAL GUIDE<br />
By Mike Josiah and the Technical Staff at Uninet<br />
STEP SIX<br />
On the right side end cap, press in on the three tabs and remove the end cap.<br />
D<br />
B<br />
A<br />
C<br />
STEP SEVEN<br />
A<br />
B<br />
Gently pry up on the tabs on both sides of the cartridge<br />
and remove the waste hopper. Be careful to hold the drum<br />
so it does not become damaged. Remove the drum/waste<br />
assembly.<br />
C<br />
©2016 Recycler Publishing & Events Ltd THE RECYCLER - TECHNICAL GUIDE PAGE 5
TECHNICAL GUIDE<br />
By Mike Josiah and the Technical Staff at Uninet<br />
STEP EIGHT<br />
Pry off the middle cover/PCR cleaning assembly<br />
by pressing down on the three top tabs.<br />
STEP NINE<br />
Remove the drum.<br />
STEP TEN<br />
Remove the PCR from the assembly by prying<br />
up the two PCR holders on each side (they will<br />
come out with the PCR).<br />
STEP ELEVEN<br />
Clean the PCR with your normal PCR cleaner.<br />
WARNING: Do not clean the OEM PCR with alcohol, as this will remove the conductive<br />
coating from the roller. If the PCR is an aftermarket, follow the cleaning methods<br />
recommended by the manufacturer. If the PCR is an OEM, we recommend it be cleaned<br />
with your standard PCR cleaner.<br />
©2016 Recycler Publishing & Events Ltd THE RECYCLER - TECHNICAL GUIDE PAGE 6
TECHNICAL GUIDE<br />
By Mike Josiah and the Technical Staff at Uninet<br />
STEP TWELVE<br />
Remove the two screws from the wiper blade, and remove<br />
the blade.<br />
STEP THIRTEEN<br />
Clean out all the waste toner from the hopper.<br />
Make sure the seals are clean.<br />
STEP FOURTEEN<br />
Install the new wiper blade and two screws. It is easier to<br />
install if you slide it in under the PCR holders.<br />
STEP FIFTEEN<br />
Place a small amount of conductive grease<br />
in the holders, and install the PCR and<br />
holders. The holders will fit over their slots<br />
as you align them. Press them down and<br />
check to make sure the springs are working.<br />
©2016 Recycler Publishing & Events Ltd THE RECYCLER - TECHNICAL GUIDE PAGE 7
TECHNICAL GUIDE<br />
By Mike Josiah and the Technical Staff at Uninet<br />
STEP TWENTY SIXTEEN<br />
Install the drum with the large gear to the gear or non-chip<br />
side of the drum into the waste hopper.<br />
STEP SEVENTEEN<br />
On the supply hopper, carefully pry out the fill plug and<br />
dump out any remaining toner. The fill plug can be difficult<br />
to remove, as it is recessed. Take a small common<br />
screwdriver and work it around the edge, lifting slightly<br />
until it comes loose.<br />
STEP EIGHTEEN<br />
Pry off the gear plate, then remove the gears.<br />
©2016 Recycler Publishing & Events Ltd THE RECYCLER - TECHNICAL GUIDE PAGE 8
TECHNICAL GUIDE<br />
By Mike Josiah and the Technical Staff at Uninet<br />
STEP TWENTY NINETEEN<br />
Remove the developer roller bushings from both<br />
sides.<br />
STEP TWENTY<br />
Remove the developer roller.<br />
STEP TWENTY-ONE<br />
Remove the two screws from the doctor blade, then<br />
remove the blade.<br />
STEP TWENTY-TWO<br />
Clean out all the remaining toner from the hopper.<br />
©2016 Recycler Publishing & Events Ltd THE RECYCLER - TECHNICAL GUIDE PAGE 9
TECHNICAL GUIDE<br />
By Mike Josiah and the Technical Staff at Uninet<br />
STEP TWENTY-THREE<br />
Make sure the doctor blade sealing foam and the developer<br />
roller’s seals are clean and intact.<br />
STEP TWENTY-FOUR<br />
Clean the doctor blade edge so there is no evidence of<br />
build-up along the edge. If any build-up exists, the cartridge<br />
will streak. No chemicals should be used. We have found<br />
using a clean ice cream-type wooden stick works great for<br />
scraping the blade clean without damaging it.<br />
STEP TWENTY-FIVE<br />
Install the seal through the developer roller opening.<br />
STEP TWENTY-SIX<br />
Pull the tail of the seal through the seal port.<br />
©2016 Recycler Publishing & Events Ltd THE RECYCLER - TECHNICAL GUIDE PAGE 10
TECHNICAL GUIDE<br />
By Mike Josiah and the Technical Staff at Uninet<br />
STEP TWENTY-SEVEN<br />
Install the doctor blade and two screws.<br />
STEP TWENTY-EIGHT<br />
Clean the developer roller with a dedicated developer<br />
roller cleaner, and replace into the hopper. Place the long<br />
shaft side to the gear side of the cartridge. It should snap<br />
in place if installed correctly.<br />
STEP TWENTY-NINE<br />
Clean and replace the conductive grease on the short shaft<br />
side of the roller.<br />
STEP THIRTY<br />
Fill the hopper with toner for use in the <strong>Samsung</strong> <strong>ProXpress</strong><br />
M3320, replace the fill plug and check for leaks.<br />
©2016 Recycler Publishing & Events Ltd THE RECYCLER - TECHNICAL GUIDE PAGE 11
TECHNICAL GUIDE<br />
By Mike Josiah and the Technical Staff at Uninet<br />
STEP TWENTY THIRTY-ONE<br />
Replace the bushings on both side of the developer roller.<br />
STEP THIRTY-TWO<br />
Install the gears in the order as shown.<br />
STEP THIRTY-THREE<br />
Install the gear axle plate.<br />
STEP THIRTY-FOUR<br />
Blow off or vacuum the PCR cleaner, and install<br />
the assembly back onto the waste chamber. Make<br />
sure the three tabs are locked in place.<br />
©2016 Recycler Publishing & Events Ltd THE RECYCLER - TECHNICAL GUIDE PAGE 12
TECHNICAL GUIDE<br />
By Mike Josiah and the Technical Staff at Uninet<br />
STEP TWENTY THIRTY-FIVE<br />
Fit both sides of the waste hopper tabs into the<br />
toner hopper.<br />
STEP THIRTY-SIX<br />
Clean the contacts on the left-side end cap, and<br />
replace the conductive grease. Snap the end cap<br />
into place.<br />
STEP THIRTY-SEVEN<br />
Drill three small holes that correspond to the screw<br />
size you’re using. Install the three screws into the<br />
end cap.<br />
STEP THIRTY-EIGHT<br />
Clean the hubs on the gear or right-side end cap. Snap<br />
the end cap into place.<br />
©2016 Recycler Publishing & Events Ltd THE RECYCLER - TECHNICAL GUIDE PAGE 13
TECHNICAL GUIDE<br />
By Mike Josiah and the Technical Staff at Uninet<br />
STEP TWENTY THIRTY-NINE<br />
Drill three small holes that correspond to the screw<br />
size you’re using. Install the three screws into the<br />
end cap.<br />
STEP FORTY<br />
Install the drum drive gear.<br />
STEP FORTY-ONE<br />
The drum separators are fixed to the end caps. They<br />
should be set as shown. These arms keep the drum and<br />
developer rollers separated until the cartridge is installed<br />
in the printer.<br />
STEP FORTY-TWO<br />
Place a small amount of silicon on the front rivet hole, and<br />
replace the two metallic labels.<br />
©2016 Recycler Publishing & Events Ltd THE RECYCLER - TECHNICAL GUIDE PAGE 14
TECHNICAL GUIDE<br />
By Mike Josiah and the Technical Staff at Uninet<br />
STEP TWENTY FORTY-THREE<br />
Slice off the two plastic rivets on the chip holder.<br />
STEP FORTY-FOUR<br />
Remove the chip cover and replace the chip.<br />
STEP FORTY-FIVE<br />
You can drill and insert screws into the posts, but I think<br />
using a hot glue gun here will be better and allow the core<br />
to be used many times.<br />
STEP FORTY-SIX<br />
Install both sides of the PCR lock into the PCR holders<br />
as shown. This lock keeps the PCR from touching the<br />
drum, and will help prevent flat spots on the PCR during<br />
storage.<br />
©2016 Recycler Publishing & Events Ltd THE RECYCLER - TECHNICAL GUIDE PAGE 15
TECHNICAL GUIDE<br />
By Mike Josiah and the Technical Staff at Uninet<br />
REPETITIVE DEFECT CHART<br />
Upper heat roller: 77.5mm<br />
OPC drum: 75.6mm<br />
Lower pressure roller: 75.4mm<br />
Supply roller: 49.0mm<br />
Transfer roller: 47.0mm<br />
PCR: 37.5mm<br />
Developer roller: 35.0mm<br />
PRINTING TEST PAGES<br />
Depending on the model of machine you have, there are different control panel configurations. To have test<br />
prints run on the laser printers, press the Menu button and scroll to the INFORMATION menu. From there<br />
you can select the Menu map, configuration, supplies info, demo, fonts etcetera pages.<br />
THE RECYCLER - ISSN 2045-2047 (Print)<br />
THE RECYCLER TEAM<br />
Managing Editor<br />
Stefanie Unland – s.unland@therecycler.com<br />
Deputy Editor<br />
William Roszczyk – w.roszczyk@therecycler.com<br />
Editorial Assistant<br />
Gloria Leverett – g.leverett@therecycler.com<br />
Designer<br />
Ian Winter - production@therecycler.com<br />
Publishing Consultant<br />
Anthony Critchley – a.critchley@therecycler.com<br />
THE SMALL PRINT<br />
Articles may be photocopied for the private use of paid subscribers<br />
only. For other copying or republication please contact The Recycler.<br />
The Recycler (ISSN 2045-2047 (Print)) is published 12 times per year<br />
(every four weeks) by Stefanie Unland. Copyright 1997 – 2016 by<br />
Stefanie Unland. The editorial content does not reflect the opinions of<br />
the publisher or editorial team. The Recycler is printed in the United<br />
Kingdom by Buxton Press Limited. The regular retail price of The<br />
Recycler is £120 for 12 months (12 issues) worldwide, and is delivered<br />
free to your home or office worldwide.<br />
COMPLAINTS & CORRECTIONS<br />
The Recycler’s policy is to correct substantial errors as soon as<br />
possible. Corrections appear on the relevant web page and/or in the<br />
magazine and significant corrections are collated in our corrections<br />
and clarifications column. To complain or advise of a correction<br />
please visit our “How to Complain” web page at<br />
www.therecycler.com/about-us/how-to-complain/<br />
We are a member of the Independent Press Standards Organisation<br />
and commit to abiding to the Editors’ Code. More information about<br />
IPSO and the Code is available at www.ipso.co.uk<br />
THE RECYCLER<br />
Wittas House, Two Rivers,<br />
Station Lane, Witney,<br />
United Kingdom OX28 4BH<br />
Phone: +44 (0) 1993 899 800<br />
Fax: +44 (0) 1993 226 899<br />
Email: info@therecycler.com<br />
Website: www.therecycler.com<br />
Bureau Office – Australia<br />
Graham McCusker<br />
Phone: +61 (0) 416 813 700<br />
Email: g.mccusker@therecycler.com<br />
Bureau Office – Germany<br />
Stefanie Unland<br />
Phone: +49 (0) 2582 9910 701<br />
Email: info@therecycler.com<br />
Bureau Office – United States<br />
Email: usa@therecycler.com<br />
www.therecycler.com/contactus<br />
©2016 Recycler Publishing & Events Ltd THE RECYCLER - TECHNICAL GUIDE PAGE 16


