Front Steps Philly Magazine
The who, what, where, when, how and why from the doers and the go getters. fun, entertainment, food, music, etc
The who, what, where, when, how and why from the doers and the go getters. fun, entertainment, food, music, etc

Create successful ePaper yourself
Turn your PDF publications into a flip-book with our unique Google optimized e-Paper software.
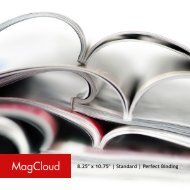
8.25” x 10.75” | Standard | Perfect Binding
Instructions<br />
for Aperture<br />
Learn More:<br />
www.apple.com/aperture
8.25” x 10.75” | Standard | Perfect Binding<br />
Page Count: 20 pages min, 384 pages max, multiple of 2 | PDF Size: 300MB max<br />
• The trim can vary slightly in either direction, so full page images should fill the bleed area, while<br />
text should be kept in the safe zone (0.25” inside the trim line). See examples on the following<br />
pages for more information.<br />
• For the best output, we recommend using images that are 300 dpi. Text should be CMYK with<br />
the fonts embedded. There shouldn’t be any spot colors used in the file.<br />
• Don’t include printer marks in your PDF, and don’t lock it with a password.<br />
• The first page in your PDF will be your front cover and the last page will be the back cover. You<br />
will have the option to upload a spine file separately after your initial PDF upload.<br />
• A 6mm 2D barcode will be added to the lower righthand corner of your back cover (the last<br />
page of the PDF). You can see a preview of this after you upload your PDF to the MagCloud site.<br />
• Check out the “Designing for Perfect Binding” post on the MagCloud Blog for more design tips.
BAD: text placed outside the safe zone may be trimmed off<br />
PDF edge <br />
trim line <br />
safe zone <br />
This is some text in a MagCloud<br />
publication that isn’t kept inside<br />
the safe zone. As a result, some<br />
of the text might be cut off in<br />
the print copy.<br />
This is some text in a MagCloud<br />
publication that isn’t kept inside<br />
the safe zone. As a result, some<br />
of the text might be cut off in<br />
the print copy.<br />
PDF file with text<br />
outside the safe zone<br />
Trimmed print copy<br />
with text cut off
GOOD: text kept inside the safe zone will never get trimmed off<br />
PDF edge <br />
trim line <br />
safe zone <br />
This is some text that is kept<br />
inside the safe zone. Even if<br />
the trim is off, none of the<br />
text will be cut off.<br />
This is some text that is kept<br />
inside the safe zone. Even if<br />
the trim is off, none of the<br />
text will be cut off.<br />
PDF file with text<br />
inside the safe zone<br />
Trimmed print copy<br />
with no text cut off
BAD: images that don’t fill the bleed might have a white edge<br />
PDF edge <br />
trim line <br />
safe zone <br />
PDF file with an image<br />
that stops at the trim line<br />
Trimmed print copy with a<br />
white edge around the image
GOOD: images that fill the bleed will go to the edge of the page<br />
PDF edge <br />
trim line <br />
safe zone <br />
PDF file with an image that<br />
goes to the edge of the PDF<br />
Trimmed print copy with the<br />
image to the edge of the page
Install MagCloud Book Themes:<br />
1. If you haven’t already, go to the Create tab on the MagCloud website, download the PDF<br />
instruction packet for Aperture from the Getting Started page, and unzip the folder<br />
2. Open a new Finder window and select “Go to Folder...” from the Go menu<br />
3. In the text field that appears, type: ~/Library/Application Support/Aperture/Book Themes<br />
4. Click Go<br />
5. Drag the “8.25 x 10.75 Standard or Pamphlet” folder from the unzipped folder into this new<br />
Book Themes window
Option 1: Create a New Book Using the MagCloud Book Theme<br />
1. Open Aperture<br />
2. Click the New icon in the upper left corner, then select Book from the dropdown menu<br />
3. Enter a Book Name for your book<br />
4. Select “Custom” from the Book Type dropdown menu<br />
5. Select the “8.25 x 10.75 Standard or Pamphlet” theme you loaded<br />
6. Click Choose Theme to create your book
Option 2: Create a New Book Using a New Custom Theme<br />
1. Open Aperture<br />
2. Click the New icon in the upper left corner, then select Book from the dropdown menu<br />
3. Choose a Book Name for your book<br />
4. Select “Custom” from the Book Type dropdown menu, then click “New Theme...”<br />
5. Enter a Theme Name and enter 8.5 inches for the Width and 11 inches for the Height<br />
6. Set the Image Spacing to whatever you want (this is the space that will be added between<br />
images in layouts that contain multiple images)<br />
7. Set the Margins: Top: 0.375 in. | Bottom: 0.375 in. | Inside: 0.25 in. | Outside: 0.5 in.<br />
8. Click OK, then click Choose Theme to create your book
Some Tips for Adding Content<br />
• Keep in mind that perfect bound publications can be anywhere from 8 to 384 pages long, but<br />
the total page count needs to be a multiple of 2. You can add and delete pages using the + and<br />
- buttons under the page display.<br />
• When adding text, don’t go beyond the theme margins (the edge of the image in the 1-up<br />
layout). The margins are set to the edge of the safe zone, and any text placed outside this area<br />
is in danger of being trimmed off in the print version.<br />
• If you have a lot of large photos in your publication, or if it is a lot of pages, it’s possible that<br />
your final PDF will be over MagCloud’s 300MB upload limit. If this happens, there are a few<br />
things you can do to reduce the file size after you export the PDF from Aperture.<br />
Using Apple Preview (slight reduction in file size):<br />
1. Open your PDF from Aperture with Apple Preview and go to File > Export (Lion and newer<br />
version) or File > Save As (older versions)<br />
2. Select a name for the new file and select “Create Generic PDFX-3 Document” from the<br />
Quartz Filter dropdown menu. Do not select “Reduce File Size” as this will drastically reduce<br />
the resolution of your images and they will look pixelated in print.<br />
3. Click Save<br />
Using Adobe Acrobat Pro (large reduction in file size):<br />
1. Open your PDF from Aperture with Adobe Acrobat Pro and go to Advanced > PDF Optimizer<br />
2. Select “Retain existing” from the Make Compatible With dropdown menu<br />
3. Check the box next to Images and select “Bicubic Downsampling to” from all three<br />
Downsample dropdown menus and enter 300 ppi in all six text boxes. For both Color and<br />
Grayscale Images select “JPEG” from the Compression dropdown menu, and for Monochome<br />
select “Retain Existing”. Set Quality to “High” for Color and Grayscale images.<br />
4. Leave the box next to Fonts unchecked<br />
5. Check the box next to Transparency and select “High Resolution”<br />
6. Check the boxes for Discard Objects, Discard User Data and Clean Up, and check all the<br />
boxes contained within each of these three tabs<br />
7. Click OK<br />
8. When prompted, select a name for the new smaller file and click Save
Export Your Book as a PDF:<br />
1. After you have finished designing your book, click Print in the upper righthand corner<br />
2. Select “Manage Custom Sizes” from the Paper Size dropdown menu to open the window shown<br />
above (if you aren’t seeing the Paper Size setting, click the “Show Details” button first)<br />
3. Set Page Size: Width = 8.5 in | Height = 11 in<br />
4. Select “User Defined” from the Non-Printable Area dropdown menu and set each of the Top,<br />
Left, Right and Bottom text fields to 0.00 in<br />
5. Click OK<br />
6. From the Color Profile dropdown menu, select a profile that starts with “sRGB...”<br />
7. Click the “PDF” button and select “Save as PDF...” from the dropdown menu<br />
8. Enter a name for your PDF and select where you want it to be saved on your computer<br />
9. Click Save
Your PDF is now ready<br />
to upload to MagCloud!
www.magcloud.com