118_4416655_Rev06

You also want an ePaper? Increase the reach of your titles
YUMPU automatically turns print PDFs into web optimized ePapers that Google loves.
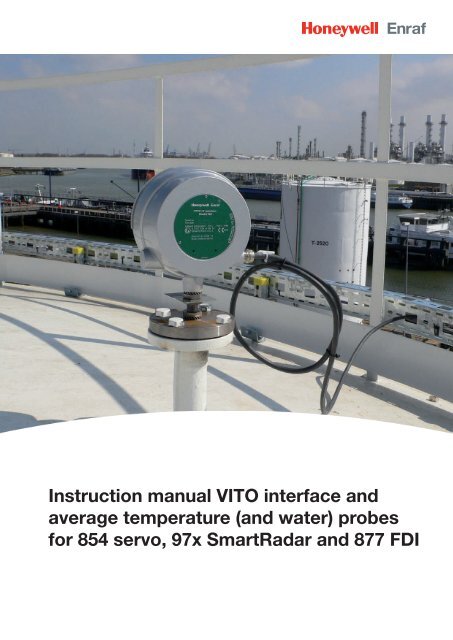
Instruction manual VITO interface and<br />
average temperature (and water) probes<br />
for 854 servo, 97x SmartRadar and 877 FDI
_________________________________________________________________________<br />
Instruction manual VITO interface and<br />
average temperature (and water) probes<br />
for 854 servo, 97x SmartRadar and 877 FDI<br />
April 2013<br />
Part no.: 4416.655<br />
Revision 6<br />
Enraf B.V.<br />
P.O. Box 812<br />
2600 AV Delft<br />
Netherlands<br />
Tel. : +31 15 2701100<br />
Fax : +31 15 2701111<br />
E-mail : enraf-nl@honeywell.com<br />
Website : http://www.honeywellenraf.com<br />
Instruction manual VITO Page 1
___________________________________________________________________________<br />
Copyright 2006 - 2013 Enraf B.V. All rights reserved<br />
Reproduction in any form without the prior consent of Enraf B.V. is not allowed. This manual is for information<br />
only. The contents, descriptions and specifications are subject to change without notice. Enraf B.V. accepts no<br />
responsibility for any errors that may appear in this manual.<br />
The warranty terms and conditions applicable in the country of purchase in respect to Enraf B.V. products are<br />
available from your supplier. Please retain them with your proof of purchase.<br />
Instruction manual VITO Page 2
___________________________________________________________________________<br />
Preface<br />
This manual is intended for technicians involved with the commissioning and service of average temperature<br />
probes, connected via the Honeywell Enraf 762 VITO Interface unit to 854 servo level gauges, the 97x<br />
SmartRadar level gauges or the 877 Field Display & Interface.<br />
A description preceding the technical procedures gives the technical information necessary to understand its<br />
functioning. It is recommended to read this description prior to performing any of the procedures.<br />
Safety and prevention of damage<br />
Refer to the chapter Safety in the instruction manual of the applicable instrument (servo/radar gauge or indicator)<br />
for detailed safety instructions.<br />
“Warnings”, “Cautions”, and Notes have been used throughout this manual to bring special matters to the<br />
immediate attention of the reader.<br />
• A Warning concerns danger to the safety of the technician or user;<br />
• A Caution draws attention to an action which may damage the equipment;<br />
• A Note points out a statement deserving more emphasis than the general text, but does not deserve a<br />
“Warning” or a “Caution”.<br />
The sequence of steps in a procedure may also be important from the point of view of personal safety and<br />
prevention of damage; it is therefore advised not to change the sequence of procedure steps or alter a procedure.<br />
Legal aspects<br />
The commissioning and trouble shooting to the instrument may only be conducted by qualified engineers, trained<br />
by Honeywell Enraf and with knowledge of safety regulations for working in hazardous areas.<br />
The information in this manual is the copyright property of Enraf B.V., Netherlands.<br />
Enraf B.V. disclaims any responsibility for personal injury or damage to equipment caused by :<br />
• Deviation from any of the prescribed procedures;<br />
• Execution of activities that are not prescribed;<br />
• Neglect of the general safety precautions for handling tools and use of electricity.<br />
EC declaration of conformity<br />
The Honeywell Enraf instrument is in conformity with the protection requirements of EC Council Directive<br />
89/336/EC. Refer to EC declaration of conformity delivered with the instrument or to the installation guide of the<br />
instrument.<br />
Additional information<br />
Please do not hesitate to contact Honeywell Enraf or its representative if you require any additional information.<br />
Instruction manual VITO Page 3
___________________________________________________________________________<br />
Table of Contents<br />
Preface ...................................................................................................................................... 3<br />
1 Introduction VITO Interface and average temperature probes ..................................... 6<br />
2 Average temperature measurement with VITO temperature probes ........................... 8<br />
2.1 Introduction VITO temperature probes .................................................................................................... 8<br />
2.2 Commissioning of VITO temperature probe ............................................................................................ 9<br />
2.2.1 Average temperature settings ................................................................................................................ 10<br />
2.2.2 Additional temperature settings for 877 FDI........................................................................................... 14<br />
2.2.3 Temperature verification VITO probes ................................................................................................... 15<br />
2.3 Operation ................................................................................................................................................... 16<br />
2.3.1 Display .................................................................................................................................................... 16<br />
2.3.2 Data items .............................................................................................................................................. 16<br />
2.4 Troubleshooting ....................................................................................................................................... 17<br />
2.4.1 Temperature error request (item EM) .................................................................................................... 17<br />
2.4.2 Temperature status request (item MQ) .................................................................................................. 17<br />
2.4.3 Temperature pointer (items VP and VV) ................................................................................................ 18<br />
3 Average temperature measurement with MRT............................................................. 20<br />
3.1 Introduction MRT ...................................................................................................................................... 20<br />
3.2 Commissioning of Multiple Resistance Thermometer ......................................................................... 21<br />
3.2.1 Temperature related settings ................................................................................................................. 21<br />
3.2.2 Additional settings for and 877 FDI ........................................................................................................ 23<br />
3.2.3 Temperature verification MRT probes .................................................................................................... 23<br />
3.3 Operation ................................................................................................................................................... 24<br />
3.3.1 Display ................................................................................................................................................... 24<br />
3.3.2 Data items .............................................................................................................................................. 24<br />
3.4 Troubleshooting ....................................................................................................................................... 25<br />
3.4.1 Temperature error request HCU/HPI (item EM)..................................................................................... 25<br />
3.4.2 Temperature status request (item MQ) .................................................................................................. 25<br />
3.4.3 Temperature pointer (items VP and VV) ................................................................................................ 26<br />
4 Average temperature measurement with MPT / RTD .................................................. 27<br />
4.1 Introduction MPT / RTD ............................................................................................................................ 27<br />
4.2 Commissioning of MPT / RTD ................................................................................................................. 27<br />
4.2.1 Temperature related settings ................................................................................................................. 27<br />
4.2.2 Additional settings for and 877 FDI ........................................................................................................ 31<br />
4.2.3 Temperature verification MPT probes .................................................................................................... 31<br />
4.3 Operation ................................................................................................................................................... 32<br />
4.3.1 Display ................................................................................................................................................... 32<br />
4.3.2 Data items ............................................................................................................................................. 32<br />
Instruction manual VITO Page 4
___________________________________________________________________________<br />
4.4 Troubleshooting ....................................................................................................................................... 33<br />
4.4.1 Temperature error (item EM).................................................................................................................. 33<br />
4.4.2 Temperature status request (item MQ) .................................................................................................. 33<br />
4.4.3 Temperature pointer (items VP and VV) ................................................................................................ 34<br />
5 Water bottom measurement .......................................................................................... 35<br />
5.1 Introduction water bottom measurement............................................................................................... 35<br />
5.1.1 Water probe versions ............................................................................................................................. 35<br />
5.1.2 Principle of measurement....................................................................................................................... 36<br />
5.2 Commissioning of water bottom probe.................................................................................................. 36<br />
5.2.1 Commissioning measurements .............................................................................................................. 36<br />
5.2.2 Water probe settings ............................................................................................................................ 39<br />
5.3 Operation ................................................................................................................................................... 40<br />
5.3.1 Display .................................................................................................................................................... 40<br />
5.3.2 Water above / below probe warning ....................................................................................................... 40<br />
5.3.3 Data items .............................................................................................................................................. 40<br />
5.4 Troubleshooting ....................................................................................................................................... 41<br />
5.4.1 Water error request (item EW) ............................................................................................................... 41<br />
5.4.2 Water level (ullage) status bytes ............................................................................................................ 41<br />
5.4.3 Water bottom pointer (items VP and VV) ............................................................................................... 42<br />
Appendix A ASCII table ..................................................................................................... 43<br />
Appendix B Configuration procedure for 765/766/768 VITO water probe .................... 44<br />
Appendix C Average product temperature verification procedure ............................... 47<br />
Appendix D Part numbers ................................................................................................ 48<br />
Appendix E Related documents ....................................................................................... 49<br />
Instruction manual VITO Page 5
Introduction VITO Interface and average temperature probes<br />
___________________________________________________________________________<br />
1 Introduction VITO Interface and average temperature probes<br />
An average temperature probe is to be connected to the Honeywell Enraf 762 VITO Interface unit. In turn, the 762<br />
VITO Interface unit is connected to the Honeywell Enraf level gauge. A water bottom probe can be integrated in<br />
the average temperature probe (combi probe).<br />
Figure 1.1 Average temperature probe / VITO Interface configuration<br />
There are three types of VITO Interface units; each for a specific type of average temperature probe:<br />
• 762 VITO MTT Interface for:<br />
- model 764 VITO average temperature probe, or<br />
- model 766 VITO combi probe (average temperature probe with integrated water probe), or<br />
- model 765 VITO water probe.<br />
• 762 VITO LT Interface for:<br />
- model 767 VITO LT average temperature probe, or<br />
- model 768 VITO LT combi probe (average temperature probe with integrated water probe), or<br />
- model 765 VITO water probe.<br />
• 762 VITO MRT Interface for:<br />
- MRT temperature probe (Multiple Resistance Thermometer), or<br />
- MPT temperature probe (Multiple Pt100 spot Thermometer), or<br />
- 2 to 3 individual wired spot elements.<br />
Instruction manual VITO Page 6
Introduction VITO Interface and average temperature probes<br />
___________________________________________________________________________<br />
The 764 and 766 VITO temperature probes have 16 elements. These elements are thermocouples, and at the<br />
cold junction a highly accurate Pt100 resistor is located to measure the absolute temperature.<br />
The 767 and 768 VITO LT temperature probes are similar to the 764 and 766 temperature probes, but only have<br />
9 elements.<br />
An MRT (Multiple Resistance Thermometer) or Variable Length Thermometer comprises a number of resistance<br />
elements of different lengths, all starting close to the bottom end of the temperature probe.<br />
An MPT probe (Multiple Pt100 spots) consisting of 1 through 14 RTD's with 2 common ground wires.<br />
More information about the different temperature probes can be found in the introduction section of chapters 2, 3<br />
and 4.<br />
The Honeywell Enraf level gauge must be equipped with a suitable option board to receive the signal from the<br />
762 VITO Interface:<br />
• HCU option board for Honeywell Enraf 854 servo level gauges and 877 FDI;<br />
• ICU_HPI option board for Honeywell Enraf 97x SmartRadar level gauges<br />
• FII-VT board<br />
for Honeywell Enraf 990 SmartRadar FlexLine<br />
This instruction manual describes the commissioning settings in conjunction with the Honeywell Enraf 854 servo<br />
level gauges, the 877 Field Display & Interface and the 97x SmartRadar level gauges. The commissioning of the<br />
different type of probes is divided over the following chapters:<br />
• Average temperature with VITO (combi) probes: chapter 2<br />
• Average temperature with MRT: chapter 3<br />
• Average temperature with MPT or 2 – 3 spots: chapter 4<br />
• Water bottom measurement: chapter 5<br />
Refer to the Commissioning manual SmartRadar FlexLine for the average temperature commissioning and water<br />
bottom settings with the 990 SmartRadar FlexLine.<br />
Instruction manual VITO Page 7
Average temperature measurement with VITO temperature probes<br />
___________________________________________________________________________<br />
2 Average temperature measurement with VITO temperature probes<br />
2.1 Introduction VITO temperature probes<br />
Honeywell Enraf’s portfolio for average temperature measurement consists of the following probes:<br />
• 764 VITO temperature probe;<br />
• 766 VITO water and temperature probe;<br />
• 767 VITO LT temperature probe;<br />
• 768 VITO LT water and temperature probe.<br />
The 764 and 766 VITO temperature probes have 16 elements and the 767 and 768 VITO LT temperature probes<br />
have 9 elements. These elements are thermocouples, and at the cold junction a highly accurate Pt100 resistor is<br />
located to measure the absolute temperature. Hence, the thermocouples measure the temperature difference in<br />
reference to the Pt100 reference resistor. The Pt100 reference resistor is located at 1 m (39”) from the bottom of<br />
the probe, or, in case water probes are included, located app. 0.5 m (20”) above the water probe (see table 2 – 1).<br />
Position 2 of 766/768<br />
VITO combi probe<br />
Model selection code<br />
Table 2 – 1<br />
Refer to figures 2.1 & 2.2.<br />
Water probe<br />
length<br />
Position reference element<br />
(from the bottom of the<br />
probe)<br />
A 0.5 m (1’ 7” 11 / 16 ) 1.0 m (3’ 3” 6 / 16 )<br />
B 1.0 m (3’ 3” 6 / 16 ) 1.5 m (4’ 11” 1 / 16 )<br />
C 2.0 m (6’ 6” 12 / 16 ) 2.5 m (8’ 2” 7 / 16 )<br />
1. The VITO MTT 764C probe comprises 16 measuring elements and has its lowest element (reference<br />
element) positioned at 1 m (39”) from the bottom of the probe. Its 16 elements are subsequently equally<br />
divided from the reference resistor up to the highest element.<br />
2. The VITO MTT 764D probe comprises 16 measuring elements and has its lowest element positioned at<br />
the bottom of the probe. The remaining 15 elements are subsequently equally divided from the reference<br />
resistor (located at 1 m (39”) from the bottom of the probe) up to the highest element.<br />
3. The VITO MTT 766C probe comprises a water probe & 16 measuring elements and has its lowest<br />
element (reference element) positioned above the water probe (see table 2 – 1). Its 16 elements are<br />
subsequently equally divided from the reference resistor up to the highest element.<br />
4. The VITO MTT 766D probe comprises a water probe & 16 measuring elements and has its lowest<br />
element positioned at the bottom of the probe. Its remaining 15 elements are subsequently equally<br />
divided from the reference resistor positioned above the water probe (see table 2 – 1) up to the highest<br />
element.<br />
5. The VITO LT 767C probe comprises 9 measuring elements and has its lowest element (reference<br />
element) positioned at 1 m (39”) from the bottom of the probe. Its 9 elements are subsequently equally<br />
divided from the reference resistor up to the highest element.<br />
6. The VITO LT 767D probe comprises 9 measuring elements and has its lowest element positioned at the<br />
bottom of the probe. The remaining 8 elements are subsequently equally divided from the reference<br />
resistor (located at 1 m (39”) from the bottom of the probe) up to the highest element.<br />
7. The VITO LT 768C probe comprises a water probe & 9 measuring elements and has its lowest element<br />
(reference element) positioned above the water probe (see table 2 – 1). Its 9 elements are subsequently<br />
equally divided from the reference resistor up to the highest element.<br />
8. The VITO LT 768D probe comprises a water probe & 9 measuring elements and has its lowest element<br />
positioned at the bottom of the probe. The remaining 8 elements are subsequently equally divided from<br />
the reference resistor positioned above the water probe (see table 2 – 1) up to the highest element.<br />
Instruction manual VITO Page 8
Average temperature measurement with VITO temperature probes<br />
___________________________________________________________________________<br />
Average product temperature is calculated from all submerged elements from the reference element and higher<br />
located elements. Before an element is used in the average product temperature calculation, it must be<br />
submerged by a certain amount of product, specified by item MP (product immersion depth; default 0.5 m (20”)).<br />
According to the international recommendations (API and ISO) for temperature measurement in storage tanks,<br />
the lowest element shall be located 1 m (3 ft) from the bottom of the tank. The VITO probe models 764C, 766C,<br />
767C and 768C fulfil this recommendation.<br />
The VITO probe models 764D, 766D, 767D and 768D also fulfil this recommendation, but have in addition one<br />
element at the bottom of the probe. By default, the lowest element at the bottom of the probe is not used for<br />
average product temperature calculations. Only when the level is such low that the reference element is not<br />
selected anymore for average product temperature calculation, the lowest element is used as average product<br />
temperature but with a special temperature status (level below lowest element). That will be shown on the tank<br />
gauging system as a temperature with reduced accuracy.<br />
By means of a ‘switch’ (item MJ) one can also enable the lowest element close to the bottom of the probe for<br />
average product temperature calculation.<br />
For the combi probes (water & temperature probes models 766D and 768D) an additional condition is that the<br />
lowest element is only used when no water is detected.<br />
Note:<br />
When the lowest element close to the bottom of the probe is enabled for average temperature calculation,<br />
the temperature measurement system is not operating according the international recommendations.<br />
2.2 Commissioning of VITO temperature probe<br />
The commissioning of the optional average temperature part should be performed after the basic commissioning<br />
of the level gauge or indicator.<br />
Instruction manual VITO Page 9
Average temperature measurement with VITO temperature probes<br />
___________________________________________________________________________<br />
2.2.1 Average temperature settings<br />
Before programming the temperature data, the sensitive length and the offset of the temperature probe must be<br />
known (refer to figures 2.1 and 2.2).<br />
Sensitive length:<br />
The sensitive length is retrieved from the position of the highest element. This figure is given in the Model<br />
selection code (positions 13, 14, 15 and 16, which are the last four figures) and is in the units of cm. In case the<br />
Model selection code cannot be read, the position of the highest element is also engraved on the coupling of the<br />
adjusting pipe of the VITO probe. The engraved figure is in the units of mm. For the combi probes (water &<br />
temperature probes) the sensitive length depends on the length of the water probe (given in position 2 of the<br />
Model selection code).<br />
Offset:<br />
The offset depends on the model of the temperature probe and is listed in table 2 – 2. When position 8 of the<br />
Model selection code is a ‘D’, the offset to the bottom of the probe is always 0.065 m (2” 9 / 16 ). For combi probes<br />
(water & temperature probes), and with the position 8 of the Models selection code a ‘C’, the offset depends on<br />
the length of the water probe (given in position 2 of the Model selection code).<br />
To the above described offset must be added the distance: tank zero - bottom of probe to obtain the offset figure<br />
needed in item MO.<br />
In case the Model selection code cannot be read, there are several ways to find out the correct model of probe.<br />
• Orange wire present in wire loom of VITO probe: position 8 of Model selection code is D<br />
• Orange wire absent in wire loom of VITO probe: position 8 of Model selection code is C<br />
• During (and after) commissioning, check by the temperature pointer items: VP=03.10 and VV<br />
• Length of water bottom probe can physically be measured<br />
VITO probe model sensitive length offset to bottom of probe<br />
****764C<br />
****764D<br />
****767C<br />
****767D<br />
*A**766C<br />
*A**766D<br />
*A**768C<br />
*A**768D<br />
*B**766C<br />
*B**766D<br />
*B**768C<br />
*B**768D<br />
*C**766C<br />
*C**766D<br />
*C**768C<br />
*C**768D<br />
Table 2 – 2<br />
- 1 m ( - 3’ 3” 6 / 16 )<br />
- 1 m ( - 3’ 3” 6 / 16 )<br />
- 1 m ( - 3’ 3” 6 / 16 )<br />
- 1 m ( - 3’ 3” 6 / 16 )<br />
- 1 m ( - 3’ 3” 6 / 16 )<br />
- 1 m ( - 3’ 3” 6 / 16 )<br />
- 1 m ( - 3’ 3” 6 / 16 )<br />
- 1 m ( - 3’ 3” 6 / 16 )<br />
- 1.5 m ( - 4’ 11” 1 / 16 )<br />
- 1.5 m ( - 4’ 11” 1 / 16 )<br />
- 1.5 m ( - 4’ 11” 1 / 16 )<br />
- 1.5 m ( - 4’ 11” 1 / 16 )<br />
- 2.5 m ( - 8’ 2” 7 / 16 )<br />
- 2.5 m ( - 8’ 2” 7 / 16 )<br />
- 2.5 m ( - 8’ 2” 7 / 16 )<br />
- 2.5 m ( - 8’ 2” 7 / 16 )<br />
1 m (3’ 3” 6 / 16 )<br />
0.065 m (2” 9 / 16 )<br />
1 m (3’ 3” 6 / 16 )<br />
0.065 m (2” 9 / 16 )<br />
1 m (3’ 3” 6 / 16 )<br />
0.065 m (2” 9 / 16 )<br />
1 m (3’ 3” 6 / 16 )<br />
0.065 m (2” 9 / 16 )<br />
1.5 m (4’ 11” 1 / 16 )<br />
0.065 m (2” 9 / 16 )<br />
1.5 m (4’ 11” 1 / 16 )<br />
0.065 m (2” 9 / 16 )<br />
2.5 m (8’ 2” 7 / 16 )<br />
0.065 m (2” 9 / 16 )<br />
2.5 m (8’ 2” 7 / 16 )<br />
0.065 m (2” 9 / 16 )<br />
Note:<br />
In the model selection code given in table 2 – 2 an asterisk ‘*’ represents any character, the notation<br />
means: overall length (4 figures, positions 9-12, units: cm) and the notation means:<br />
position of highest element (4 figures, positions 13-16, units: cm).<br />
Instruction manual VITO Page 10
Average temperature measurement with VITO temperature probes<br />
___________________________________________________________________________<br />
Figure 2.1 Tank and temperature probe data<br />
Instruction manual VITO Page 11
Average temperature measurement with VITO temperature probes<br />
___________________________________________________________________________<br />
Figure 2.2 Tank and temperature probe data<br />
Instruction manual VITO Page 12
Average temperature measurement with VITO temperature probes<br />
___________________________________________________________________________<br />
Item Name Description<br />
W2= Protection level 2 Enter protection level 2<br />
TD= Temperature dimension One character; either ‘C’ or ‘F’. Default set to C.<br />
C : degrees Celsius<br />
F : degrees Fahrenheit<br />
Both dimensions have the same format.<br />
MT= Element type Three ASCII characters. Selects the type of element connected<br />
to the VITO Interface. For VITO probes, set item MT to: ‘ SPL ’.<br />
MK= Sensitive length temperature Format according to item LD (default: +030.000)<br />
probe<br />
Refer to the above description about the sensitive length of the<br />
VITO temperature probe. Enter that value in item MK.<br />
MO= Temperature element offset Format according to item LD (default: +000.0000).<br />
Item MO represents the distance from tank zero (datum plate) to<br />
the lowest element (spot) in the sensor. Refer to the above<br />
description about the offset to bottom of probe and add to this the<br />
distance: tank zero - bottom of probe.<br />
MI= Switch hysteresis Format according to item LD (default: +000.1000 m)<br />
The distance MI is a hysteresis around the switching point of the<br />
temperature elements.<br />
MP= Product immersion depth Format according to item LD (default: +000.5000 m)<br />
The distance MP specifies the minimum required liquid level<br />
above a thermocouple before it is taken in the average product<br />
temperature calculation.<br />
MG= Gas immersion depth Format according to item LD (default: +000.5000 m)<br />
The distance MG specifies the minimum required distance below<br />
a thermocouple before it is taken in the average gas temperature<br />
calculation.<br />
WP= Water probe length Format according to item LD (default: +001.0000 m)<br />
The water probe length is required to calculate the position of the<br />
reference element. Refer also to section 4.1.<br />
If no water probe is present, set item WP to zero (+000.0000).<br />
MJ= Temperature distribution One character (default: ‘F’)<br />
This item is used to enable/disable the lowest element close to<br />
the bottom of the probe (in the probe models 764D/766D/767D/<br />
768D) from average product temperature calculation. Valid from<br />
HCU/HPI software version A1.8 and higher.<br />
F : lowest element disabled for average temp. calc.<br />
C : lowest element enabled for average temp. calc.<br />
TU= Temperature status One character (default: ‘T’)<br />
conversion<br />
This item is used to indicate the temperature status character in<br />
case of a reduced or not guaranteed temperature accuracy. This<br />
is the case when the temperature status is:<br />
• out of specified temperature range<br />
• exceeding differential temperature range<br />
• last valid level used<br />
• manual level used<br />
• level below lowest temperature element<br />
If required, this item can be set to another character.<br />
EX Exit Exit protection level 2.<br />
Instruction manual VITO Page 13
Average temperature measurement with VITO temperature probes<br />
___________________________________________________________________________<br />
With the VITO temperature probes and also with an 864 MTT, it might be required to disable the lowest spot<br />
element from the average temperature calculation. That can be done by setting the first position in item MW to<br />
any other hexa-decimal number than ‘0’, for instance: ‘F’. In fact, with item MW any spot temperature element (or<br />
more spots) can be disabled from average temperature calculation.<br />
Item Name Description<br />
W2= Protection level 2 Enter protection level 2<br />
MW= MTT wiring connection Sixteen hexa-decimal characters; default: 0000000000000000<br />
When one (or more) of the elements must be disabled from<br />
average temperature calculation, set the desired position to a<br />
hexa-decimal value other than ‘0’.<br />
For instance, to disable lowest spot element:<br />
MW=F000000000000000<br />
EX Exit Exit protection level 2<br />
Note:<br />
When entering item MW with the Portable Enraf Terminal,<br />
the display will be cleared after entering the 15 th character.<br />
Continue with entering the last character and press return.<br />
All 16 entered characters will be repeated at the top line of<br />
the PET.<br />
2.2.2 Additional temperature settings for 877 FDI<br />
Item Name Description<br />
W2= Protection level 2 Enter protection level 2<br />
OB= Option board *)<br />
EG= Enable temperature<br />
transmission *)<br />
TF= Temperature source<br />
selection<br />
Three ASCII characters. This item informs the XPU what option<br />
board is installed. That can be:<br />
MPU : for HCU option board in MPU emulation mode<br />
HPU : for HCU option board in HPU emulation mode<br />
One ASCII character; either ‘D’ or ‘E’. With this item can be<br />
selected if the 877 FDI shall answer on a temperature request<br />
(C-record), addressed to the connected level gauge.<br />
E : transmission of temperature record enabled<br />
D : transmission of temperature record disabled<br />
Note:<br />
When item EG is set to ‘E’, make sure the related level gauge<br />
has no temperature option installed.<br />
One ASCII character; either ‘I’ or ‘E’. this item selects if there is<br />
a temperature measurement inside the indicator (internal) or to<br />
be fetched from the Enraf field bus (external).<br />
I : Internal<br />
E : External<br />
EX Exit Exit protection level 2<br />
*) This item is not implemented in the XPU-2.<br />
Instruction manual VITO Page 14
Average temperature measurement with VITO temperature probes<br />
___________________________________________________________________________<br />
2.2.3 Temperature verification VITO probes<br />
After the settings described in section 2.2.1 and, if applicable in section 2.2.2, are entered the temperature<br />
measurement is operational.<br />
The following checks can be made to verify if the settings are made correct and the product temperature reading<br />
is correct.<br />
• Read item AP (Average Product temperature):<br />
This data item is preceded by four status characters. The first status character is a hexa-decimal number,<br />
indicating the highest selected element for average product temperature calculation. This can be judged,<br />
on basis of the product level, and with the items U0 – UF (calculated spot positions), item MO<br />
(temperature element offset), item MP (product immersion depth) and item MI (switch hysteresis).<br />
Refer to Detail A in figure 2.1:<br />
A spot element will be used in the average product temperature calculation if its position is below the<br />
actual level minus the product immersion depth.<br />
A spot element won’t be used in the average product temperature calculation if it is above the actual level<br />
minus the product immersion depth plus the switch hysteresis.<br />
• Verify the average product temperature by manual measurement:<br />
Refer to Appendix C for the procedure to verify the average product temperature reading by using a<br />
portable electronic thermometer.<br />
Instruction manual VITO Page 15
Average temperature measurement with VITO temperature probes<br />
___________________________________________________________________________<br />
2.3 Operation<br />
2.3.1 Display<br />
For operation of the display and the information on it (if applicable), refer tot the instruction manual of the related<br />
level gauge or indicator. Below, only an overview is given which display formats gives information about the<br />
average temperature measurement.<br />
Display format<br />
A<br />
C<br />
D<br />
Displayed information<br />
Product level and average product temperature<br />
Average gas temperature and status<br />
Average product temperature and status<br />
2.3.2 Data items<br />
Table 2 – 3 lists a number of data items. They contain measured data, verification data and error data. The<br />
verification data can be used to check the results of certain steps in the measuring sequence. The temperature<br />
status indicates the validity of the measured data. The error data provides low level error information about the<br />
temperature measurement (refer to section 2.4).<br />
Item<br />
AG<br />
AP<br />
MQ<br />
MU<br />
U0 - UF<br />
V0 - VF<br />
VV<br />
RW<br />
EM<br />
FH<br />
F0<br />
Table 2 – 3<br />
Description<br />
Measured/<br />
Calculated data<br />
Average gas temperature<br />
Average product temperature<br />
Temperature status request (refer to section 2.4.2)<br />
Measured test resistance (floating point format);<br />
Must be: 166.5 Ω ± 0.03%<br />
Calculated spot positions (see below)<br />
Spot temperatures (see below)<br />
Verification data Refer to description at section 2.4.3<br />
Thermocouple wiring connection sequence<br />
Diagnostic data Error request (refer to section 2.4.1).<br />
Fatal errors<br />
Last fatal error<br />
Item V0 is the temperature of the lowest spot element.<br />
The calculated spot position item U0 corresponds with item V0.<br />
Refer to figures 2.1 and 2.2 to locate the lowest spot (L) with each particular temperature probe model.<br />
Instruction manual VITO Page 16
Average temperature measurement with VITO temperature probes<br />
___________________________________________________________________________<br />
2.4 Troubleshooting<br />
2.4.1 Temperature error request (item EM)<br />
This item helps you configuring correctly by the most recent temperature error encountered by the option board.<br />
xx00 No error, value at initialisation<br />
xx11 No reply on initial HART commands Communication error. Check connection level gauge – 762 VITO interface, or<br />
change 762 VITO interface or option board.<br />
xx50 Pt100 (or spot 0) error Brown wire connected to CN1 A-1 (or orange wire connected to CN2B-1) not<br />
connected .<br />
xx51 Spot 1 (or Pt100) error Blue wire to CN2B-1 (or brown wire to CN1A-1) not connected<br />
xx52 Spot 2 error Blue wire to CN2A-2 not connected<br />
xx64 Spot 14 error Blue wire to CN5A-2 not connected<br />
xx65 Spot 15 error Yellow wire to CN5A-1 not connected<br />
xx70 Sub-system error Data from 762 VITO not valid. Reset instrument; if error persist, replace<br />
762 VITO interface<br />
or, open Pt100 wiring (red – brown wires)<br />
xx71 Wrong probe connection Thermocouple wires of VITO sensor connected wrongly (blue and yellow wires)<br />
or, isolation resistance VITO sensor too low (replace VITO probe)<br />
xx77 Wrong Pt100 connection Brown and red wires of VITO sensor connected wrongly<br />
xx80 R test error Measurement on test resistor failed. Reset instrument; if error persist<br />
replace 762 VITO interface or VITO probe<br />
xx84 Standard deviation too large EMC influence (check cable shields) or defective 762 VITO interface<br />
xx92 No data available Communication error between 762 VITO interface and level gauge. Check<br />
wiring; replace 762 VITO interface or option board.<br />
xx98 No temperature sources found No VITO temperature probe (and no RTD) connected<br />
xx: 22 for MPU emulation With error codes xx50 to xx65, connector numbers are mentioned<br />
24 for HPU emulation Refer to Installation guide 762 VITO Interfaces & VITO, MTT, LT and MRT probes<br />
30 for HCU emulation for the location of these connectors.<br />
2.4.2 Temperature status request (item MQ)<br />
Temperature status request item contains four status bytes (Byte 0, Byte 1, Byte 2, Byte 3) of the option board.<br />
For decoding, refer to the ASCII table in appendix A.<br />
Status byte 0:<br />
Contains the characters ‘0’ ÷ ‘F’, indicating the highest submersed spot element of the temperature probe.<br />
At start up: ‘I’.<br />
Status byte 1: Status byte 2:<br />
Bit 0: General temperature fail<br />
Bit 0: Last valid level used<br />
1: Fail in average product temperature 1: Manual level used<br />
2: Fail in average gas temperature 2: Level time out<br />
3: Level exceeds lowest spot element 3: Device not calibrated<br />
4: Level exceeds highest spot element 4: Exceeding differential temp, range<br />
5: Spot element fail (one or more spots defect) 5: Out of specified temperature range<br />
6: 1 6: 1<br />
7: 0 7: 0<br />
Status byte 3:<br />
Bit 0: No previous store command<br />
1-5: 0<br />
6: 1<br />
7: 0<br />
Note:<br />
Only the bits which are set to ‘1’ have an active status.<br />
Instruction manual VITO Page 17
Average temperature measurement with VITO temperature probes<br />
___________________________________________________________________________<br />
2.4.3 Temperature pointer (items VP and VV)<br />
By means of the value pointer (item VP) a vector can be loaded to the HCU or ICU_HPI option board. Next, with<br />
item VV, the selected data is returned. Item VP consists of 4 positions, in the middle separated by a ‘.’ or ‘,’ :<br />
v w . x y (or v w , x y). The values for the value pointer are listed in table 2 – 4 together with the obtained data.<br />
v w , x y Selected data Example / Dimension<br />
0 0<br />
0 0<br />
0 0<br />
0 0<br />
,<br />
,<br />
,<br />
,<br />
0 0<br />
0 1<br />
0 2<br />
0 3<br />
HCU / ICU_HPI Emulation & Function<br />
Emulation: MPU, HSU, HPU, HCU<br />
Function: HC: HART channel installed<br />
AO: analog output<br />
ST: spot temperature<br />
MT: VITO average temperature<br />
WS: external water bottom probe<br />
WT: VITO water bottom probe<br />
PR: pressure transmitters<br />
Configuration boot code<br />
Sales code option: C boot code: 0A<br />
J<br />
2E<br />
W<br />
1A<br />
X 12<br />
Y<br />
3F<br />
HCU / ICU_HPI hardware version<br />
Boot code software version<br />
VV=HCU HCAOMT- - PR<br />
VV=HCU CONFIG: 3F<br />
VV=HW VERSION: 00<br />
VV=BOOTSW VERS:01<br />
0 2<br />
0 2<br />
:<br />
0 2<br />
0 2<br />
0 2<br />
0 2<br />
0 2<br />
0 2<br />
,<br />
,<br />
,<br />
,<br />
,<br />
,<br />
,<br />
,<br />
0 0<br />
0 1<br />
:<br />
1 5<br />
2 0<br />
2 5<br />
2 6<br />
2 7<br />
2 8<br />
Calculated temperature of spot connected to CN1A-1<br />
Calculated temperature of spot connected to CN2B-1<br />
:<br />
Calculated temperature of spot connected to CN5A-1<br />
Measured Pt100 resistance<br />
Standard deviation<br />
Vtest<br />
Leak current I1<br />
Leak current I2<br />
(floating point format)<br />
(floating point format)<br />
(floating point format)<br />
(floating point format)<br />
(floating point format)<br />
(floating point format)<br />
(floating point format)<br />
(floating point format)<br />
according to item TD<br />
according to item TD<br />
according to item TD<br />
Ω<br />
< 0.5E-10<br />
V<br />
A<br />
A<br />
0 3<br />
0 3<br />
0 3<br />
0 3<br />
0 3<br />
0 3<br />
0 3<br />
,<br />
,<br />
,<br />
,<br />
,<br />
,<br />
,<br />
0 1<br />
0 2<br />
0 9<br />
1 0<br />
1 1<br />
1 2<br />
2 0<br />
Error counters HART addresses 3, 4 and 5<br />
Error counters HART addresses 6, 7 and 8<br />
(762 VITO: HART address 5; 762 VITO LT: HART address 6)<br />
Detected HART device addresses<br />
(5 for VITO Interface)<br />
(6 for VITO LT Interface)<br />
Initial detected VITO device type<br />
Description:<br />
764 : VITO temperature probe with 16 temperature elements<br />
766 : VITO water and temperature probe with 16 temperature<br />
elements<br />
767 : VITO LT temperature probe with 9 temperature<br />
elements<br />
768 : VITO LT water and temperature probe with 9<br />
temperature elements<br />
C : lowest element is the reference element (with 764/767<br />
probes: 1 m from the bottom of the probe; with 766/768<br />
probes: above the water probe)<br />
D : lowest element at the bottom of the probe<br />
PT : Pt100<br />
W : water probe<br />
Real active functions of VITO Interface (refer to description of VP=03,10)<br />
Actual executed HART commands from 762 VITO Interface<br />
Averaging constant 762 VITO Interface<br />
(floating point format)<br />
VV=0000:0000:0013<br />
VV= - - - - 5 - - - - - - - - -<br />
VV= - - - - - 6 - - - - - - - -<br />
VV=766 C PT W<br />
VV=764 D PT<br />
Table 2 – 4<br />
Note:<br />
With VP=03,10 and VP=03,11 an 864 MTT would be detected as: 764C, but then the lowest element (which is<br />
the reference element) is located at the bottom of the probe.<br />
Instruction manual VITO Page 18
Average temperature measurement with VITO temperature probes<br />
___________________________________________________________________________<br />
Item Name Description<br />
VP= Temperature value pointer Temperature value pointer; format: 2 digits, separator, 2 digits<br />
(refer to table 2 – 4).<br />
Example: VP=02.20: value pointer loaded to request the Pt100<br />
element resistance.<br />
VV Temperature pointer value Temperature pointer value.<br />
This item holds the value requested by item VP<br />
(refer to table 2 – 4).<br />
Example: the requested Pt100 element resistance<br />
(standard floating point format).<br />
Instruction manual VITO Page 19
Average temperature measurement with MRT<br />
___________________________________________________________________________<br />
3 Average temperature measurement with MRT<br />
3.1 Introduction MRT<br />
An MRT (Multiple Resistance Thermometer) or Variable Length Thermometer comprises a number of resistance<br />
elements of different lengths, all starting close to the bottom end of the temperature probe. Refer to figure 3.1. To<br />
measure the average product temperature, the longest fully submersed element is automatically selected and its<br />
temperature measured.<br />
The average gas temperature is calculated by measuring the temperature of the longest resistance thermometer<br />
element and subtracting the contribution of the average product temperature.<br />
The 762 VITO MRT Interface is used for interfacing an MRT. This unit is basically a solid state electronic element<br />
selector, containing all hardware necessary for selecting and measuring an MRT with up to 13 temperature<br />
elements with one spot element.<br />
The operational board located in the 854 level gauge, 877 FDI or 97x radar, selects the longest submerged<br />
element for the average product temperature calculation.<br />
There is a fixed table with element lengths (see figure 3.1), which are used with the Honeywell Enraf MRT’s. If<br />
another make of MRT is used with different element lengths, then these element lengths are to be entered in a<br />
separate table (refer to the description of items J0 – JD and item MJ).<br />
Figure 3.1 MRT tank and probe data<br />
Instruction manual VITO Page 20
Average temperature measurement with MRT<br />
___________________________________________________________________________<br />
3.2 Commissioning of Multiple Resistance Thermometer<br />
The commissioning of the optional average temperature part should be performed after the basic commissioning<br />
of the level gauge or indicator.<br />
3.2.1 Temperature related settings<br />
Refer to figure 3.1<br />
Item Name Description<br />
W2= Protection level 2 Enter protection level 2<br />
TD= Temperature dimension One character; either ‘C’ or ‘F’. Default set to C.<br />
C : degrees Celsius<br />
F : degrees Fahrenheit<br />
Both dimensions have the same format.<br />
MJ= Multi temperature distribution One character; either ‘F’ or ‘T’. Default set to F.<br />
This item determines whether fixed element positions are taken<br />
or configurable element positions via the items J0 .. JD.<br />
F : Fixed element positions (default)<br />
T : Configurable element positions (as per items J0 .. JD)<br />
The fixed element positions are described at section 3.3.2.<br />
J0 – JD= MRT element position. Format according to item LD (default: +000.0000 m).<br />
J0 through JD represent the distance from the end of the probe<br />
(nearest to tank zero level) to the MRT element if selected by<br />
item MJ.<br />
MT= Element type Three ASCII characters (C3 C2 C1). Selects the element type<br />
connected to the 762 VITO MRT, with its characteristics.<br />
C3 R refers to an MRT without spot element<br />
Q refers to an MRT with spot element<br />
C2 C1 CB R th = 90.2935 + T x 0.38826<br />
range : -100 ÷ +250 °C (-148 ÷ +482 °F)<br />
CN R th = 90.4778 + T x 0.38090<br />
range : -100 ÷ +250 °C (-148 ÷ +482 °F)<br />
CS R th = 90.5000 + T x 0.38730<br />
range : -100 ÷ +250 °C (-148 ÷ +482 °F)<br />
where : R th = resistance MRT element [Ω]<br />
T = temperature MRT element [°C]<br />
PS *) Pt100 small range<br />
range: -20 ÷ +120 °C (-4 ÷ +248 °F)<br />
PL *) Pt100 large range<br />
range : -200 ÷ +250 °C (-328 ÷ +482 °F)<br />
NI *) Ni191 mid temp/tri temp<br />
range: -20 ÷ +120 °C (-4 ÷ +248 °F)<br />
*) From HCU/ICU_HPI software version A1.9 and higher<br />
MN= Number of elements Two ASCII digits. This item specifies the number of elements<br />
from the MRT, inclusive the spot element. The maximum number<br />
of elements is 14.<br />
Instruction manual VITO Page 21
Average temperature measurement with MRT<br />
___________________________________________________________________________<br />
Item Name Description<br />
MO= Temperature element offset Format according to item LD (default: +000.0000 m).<br />
The offset represents the distance from the tank zero level to the<br />
lowest position of the MRT.<br />
Note:<br />
In case of ullage measurement, distance MO is taken from the<br />
upper reference point.<br />
MI= Switch hysteresis Format according to item LD (default: +000.1000 m).<br />
The distance MI is a hysteresis around the switching point of the<br />
temperature elements.<br />
MP= Product immersion depth Format according to item LD (default: +000.5000 m).<br />
The distance MP specifies the minimum required liquid level<br />
above an element before it is selected for the average product<br />
temperature calculation.<br />
MG= Gas immersion depth Format according to item LD. (default: +000.5000 m).<br />
The distance MG specifies the minimum required distance before<br />
the resistance value of the longest element is taken in the<br />
average gas temperature calculation<br />
TU=<br />
Temperature status conversion One character (default: ‘T’)<br />
This item is used to indicate the temperature status character in<br />
case of a reduced or not guaranteed temperature accuracy. This<br />
is the case when the temperature status is:<br />
• out of specified temperature range<br />
• exceeding differential temperature range<br />
• last valid level used<br />
• manual level used<br />
• level below lowest temperature element<br />
If required, this item can be set to another character.<br />
EX Exit Exit protection level 2<br />
Instruction manual VITO Page 22
Average temperature measurement with MRT<br />
___________________________________________________________________________<br />
3.2.2 Additional settings for and 877 FDI<br />
Item Name Description<br />
W2= Protection level 2 Enter protection level 2<br />
OB= Option board *) Three ASCII characters. This item informs the XPU what option<br />
board is installed. That can be:<br />
MPU : for HCU option board in MPU emulation mode<br />
HPU : for HCU option board in HPU emulation mode<br />
EG= Enable temperature One ASCII character; either ‘D’ or ‘E’. With this item can be<br />
transmission *)<br />
selected if the 877 FDI shall answer on a temperature request<br />
(C-record), addressed to the connected level gauge.<br />
E : transmission of temperature record enabled<br />
D : transmission of temperature record disabled<br />
Note:<br />
When item EG is set to ‘E’, make sure the related level gauge<br />
has no temperature option installed.<br />
TF= Temperature source One ASCII character; either ‘I’ or ‘E’. this item selects if there is<br />
selection<br />
a temperature measurement inside the indicator (internal) or to<br />
be fetched from the Enraf field bus (external).<br />
I : Internal<br />
E : External<br />
EX Exit Exit protection level 2<br />
*) This item is not implemented in the XPU-2.<br />
3.2.3 Temperature verification MRT probes<br />
After the settings described in section 3.2.1 and, if applicable in section 3.2.2, are entered the temperature<br />
measurement is operational.<br />
The following checks can be made to verify if the settings are made correct and the product temperature reading<br />
is correct.<br />
• Read item AP (Average Product temperature):<br />
This data item is preceded by four status characters. The first status character is a hexa-decimal number,<br />
indicating the longest submerged element, selected for average product temperature calculation. This can<br />
be judged, on basis of the product level, and with the items U0 – UF (calculated element lengths), item<br />
MO (temperature element offset), item MP (product immersion depth) and item MI (switch hysteresis).<br />
Refer to figure 3.1:<br />
An element will be used for the average product temperature calculation if its length is below the actual<br />
level minus the product immersion depth.<br />
An element won’t be used in the average product temperature calculation if its length is above the actual<br />
level minus the product immersion depth plus the switch hysteresis.<br />
• Verify the average product temperature by manual measurement:<br />
Refer to Appendix C for the procedure to verify the average product temperature reading by using a<br />
portable electronic thermometer.<br />
Instruction manual VITO Page 23
Average temperature measurement with MRT<br />
___________________________________________________________________________<br />
3.3 Operation<br />
3.3.1 Display<br />
For operation of the display and the information on it (if applicable), refer tot the instruction manual of the related<br />
level gauge or indicator. Below, only an overview is given which display formats gives information about the<br />
average temperature measurement.<br />
Display format<br />
A<br />
C<br />
D<br />
Displayed information<br />
Product level and average product temperature<br />
Average gas temperature and status<br />
Average product temperature and status<br />
3.3.2 Data items<br />
Table 3 – 1 lists a number of data items. They contain measured data, verification data and error data. The<br />
verification data can be used to check the results of certain steps in the measuring sequence. The temperature<br />
status indicates the validity of the measured data. The error data provides low level error information about the<br />
temperature measurement (refer to section 3.4).<br />
Item<br />
AG<br />
AP<br />
MQ<br />
MU<br />
U0 - UF<br />
V0 - VF<br />
Description<br />
Measured/<br />
Calculated data<br />
Average gas temperature<br />
Average product temperature<br />
Temperature status request (refer to section 3.4.2)<br />
Measured test resistance (floating point format);<br />
Must be: 166.5 Ω ± 0.03%<br />
Calculated element length with respect to lowest point of MRT (see below)<br />
Element temperatures (see below)<br />
VV Verification data Refer to description at section 3.4.3<br />
EM<br />
FH<br />
F0<br />
Table 3 – 1<br />
Diagnostic data Error request (refer to section 3.4.1).<br />
Fatal errors<br />
Last fatal error<br />
Items U0 – UD gives the position of each element with respect to the lowest part of the MRT:<br />
U0 : position of 1 st element (0.25 m (9” 13 / 16 ) or 0.65 m (2’ 1” 9 / 16 ) or J0)<br />
U1 : position of 2 nd element (0.65 m (2’ 1” 9 / 16 ) or 1.25 m (4’ 1” 3 / 16 ) or J1)<br />
U2 : position of 3 rd element (1.25 m (4’ 1” 3 / 16 ) or 1.95 m (6’ 4” 12 / 16 ) or J2)<br />
U3 : position of 4 th element (1.95 m (6’ 4” 12 / 16 ) or 2.85 m (9’ 4” 3 / 16 ) or J3)<br />
U4 : position of 5 th element (2.85 m (9’ 4” 3 / 16 ) or 4.15 m (13’ 7” 6 / 16 ) or J4)<br />
U5 : position of 6 th element (4.15 m (13’ 7” 6 / 16 ) or 5.65 m (18’ 6” 7 / 16 ) or J5)<br />
U6 : position of 7 th element (5.65 m (18’ 6” 7 / 16 ) or 7.35 m (24’ 1” 6 / 16 ) or J6)<br />
U7 : position of 8 th element (7.35 m (24’ 1” 6 / 16 ) or 9.25 m (30’ 4” 3 / 16 ) or J7)<br />
U8 : position of 9 th element (9.25 m (30’ 4” 3 / 16 ) or 11.65 m (38’ 2” 11 / 16 ) or J8)<br />
U9 : position of 10 th element (11.65 m (38’ 2” 11 / 16 ) or 14.65 m (48’ 0” 12 / 16 ) or J9)<br />
UA : position of 11 th element (14.65 m (48’ 0” 12 / 16 ) or 18.45 m (60’ 6” 6 / 16 ) or JA)<br />
UB : position of 12 th element (18.45 m (60’ 6” 6 / 16 ) or 22.95 m (75’ 3” 9 / 16 ) or JB)<br />
UC : position of 13 th element (22.95 m (75’ 3” 9 / 16 ) or 29.65 m (97’ 3” 5 / 16 ) or JC)<br />
UD : position of 14 th element (29.65 m (97’ 3” 5 / 16 ) or JD)<br />
Items V0 – VD gives the temperature of each element:<br />
V0 : temperature of 1 st element<br />
V1 : temperature of 2 nd element<br />
|<br />
VD : temperature of 14 th element<br />
Instruction manual VITO Page 24
Average temperature measurement with MRT<br />
___________________________________________________________________________<br />
3.4 Troubleshooting<br />
3.4.1 Temperature error request HCU/HPI (item EM)<br />
This item helps you configuring correctly by showing the most recent temperature error encountered by the option<br />
board.<br />
xx00 No error xx70 Sub-system error. Check or replace VITO Interface board<br />
xx50 Element 1 detected absent xx72 Not supported element type. Check item MT<br />
xx51 Element 2 detected absent xx73 Wrong element configuration. Check item MN<br />
xx52 Element 3 detected absent xx80 R_test error (out of limits)<br />
xx53 Element 4 detected absent xx81 R_cable error (out of limits) or isolation resistance to ground too low<br />
xx54 Element 5 detected absent xx84 Standard deviation too high or isolation resistance to ground too low<br />
xx55 Element 6 detected absent xx91 Wrong J0 .. JD setting. Check these items.<br />
xx56 Element 7 detected absent xx92 No data available. Check wiring or connection with VITO Interface<br />
xx57 Element 8 detected absent<br />
xx58 Element 9 detected absent<br />
xx59 Element 10 detected absent<br />
xx60 Element 11 detected absent<br />
xx61 Element 12 detected absent<br />
xx62 Element 13 detected absent<br />
xx63 Element 14 detected absent<br />
xx<br />
22 for MPU emulation<br />
24 for HPU emulation<br />
30 for HCU emulation<br />
3.4.2 Temperature status request (item MQ)<br />
Four bytes status information (B0 B1 B2 B3) with the following meaning:<br />
For decoding of the status bytes, refer to the ASCII table in appendix A.<br />
Status byte 0:<br />
Contains the characters ‘0’ ÷ 'D', indicating the highest submersed element of the MRT. At start up this is: ‘I’.<br />
Status byte 1: Status byte 2:<br />
Bit 0: general temperature fail<br />
Bit 0: last valid level used<br />
1: fail in average product temperature 1: manual level used<br />
2: fail in average gas temperature 2: 0<br />
3: level exceeds lowest element 3: 0<br />
4: level exceeds highest element 4: 0<br />
5: element fail (one or more elements defect) 5: 0<br />
6: 1 6: 1<br />
7: 0 7: 0<br />
Status byte 3:<br />
Bit 0: no previous store command<br />
1: alternative (lower) element selected<br />
2÷5: 0<br />
6: 1<br />
7: 0<br />
Note:<br />
Only the bits which are set to ‘1’ have an active status.<br />
Instruction manual VITO Page 25
Average temperature measurement with MRT<br />
___________________________________________________________________________<br />
3.4.3 Temperature pointer (items VP and VV)<br />
By means of the value pointer (item VP) a vector can be loaded to the HCU or ICU_HPI option board. Next, with<br />
item VV, the selected data is returned. Item VP consists of 4 positions, in the middle separated by a ‘.’ or ‘,’ :<br />
v w . x y (or v w , x y). The values for the value pointer are listed in table 3 – 2 together with the obtained data.<br />
v w , x y Selected data Example / Dimension<br />
0 0<br />
,<br />
0 0<br />
HCU / ICU_HPI Emulation & Function<br />
Emulation: MPU, HSU, HPU, HCU<br />
Function: HC: HART channel installed<br />
AO: analog output<br />
ST: spot temperature<br />
MR: VITO average MRT/multi spot probe<br />
WS: external water bottom probe<br />
PR: pressure transmitters<br />
VV=HCU HCAOMR- - PR<br />
0 0<br />
0 0<br />
0 0<br />
,<br />
,<br />
,<br />
0 1<br />
0 2<br />
0 3<br />
Configuration boot code<br />
Sales code option: C boot code: 0A<br />
J<br />
2E<br />
W<br />
1A<br />
X 12<br />
Y<br />
3F<br />
HCU / ICU_HPI hardware version<br />
Boot code software version<br />
VV=HCU CONFIG: 3F<br />
VV=HW VERSION: 00<br />
VV=BOOTSW VERS:01<br />
0 2<br />
0 2<br />
:<br />
0 2<br />
0 2<br />
0 2<br />
0 2<br />
0 2<br />
:<br />
0 2<br />
,<br />
,<br />
,<br />
,<br />
,<br />
,<br />
,<br />
,<br />
0 0<br />
0 1<br />
:<br />
1 3<br />
2 6<br />
2 9<br />
8 2<br />
8 3<br />
:<br />
9 5<br />
Calculated temperature of 1 st element<br />
Calculated temperature of 2 nd element<br />
:<br />
Calculated temperature of 14 th element<br />
Standard deviation<br />
Calculated I_ref<br />
Calculated resistance 1 st element<br />
Calculated resistance 2 nd element<br />
:<br />
Calculated resistance 14 th element<br />
(floating point format)<br />
(floating point format)<br />
(floating point format)<br />
(floating point format)<br />
(floating point format)<br />
(floating point format)<br />
(floating point format)<br />
(floating point format)<br />
according to item TD<br />
according to item TD<br />
according to item TD<br />
< 0.5E-10<br />
1.0275 mA ±0.05<br />
Ω<br />
Ω<br />
Ω<br />
0 3<br />
0 3<br />
0 3<br />
0 3<br />
0 3<br />
,<br />
,<br />
,<br />
,<br />
,<br />
Table 3 – 2<br />
0 1<br />
0 9<br />
1 0<br />
1 1<br />
1 2<br />
Error counters HART addresses 3, 4 and 5<br />
(762 VITO MRT Interface has HART address 5)<br />
Detected HART device addresses<br />
(5 for VITO Interface)<br />
Initial detected VITO device type & software version<br />
Description: 763 : 762 VITO MRT/multiple RTD interface<br />
MRT : MRT element<br />
10 : software version 1.0<br />
Real active functions of VITO Interface (refer to description of VP=03,10)<br />
Actual executed HART commands from 762 VITO Interface<br />
VV=0000:0000:0013<br />
VV= - - - - 5 - - - - - - - - -<br />
VV=763 MRT 10<br />
Item Name Description<br />
VP= Temperature value pointer Temperature value pointer; format: 2 digits, separator, 2 digits<br />
(refer to table 3 – 2).<br />
Example: VP=02.00: value pointer loaded to request the<br />
calculated temperature of the 1 st element.<br />
VV Temperature pointer value Temperature pointer value.<br />
This item holds the value requested by item VP<br />
(refer to table 3 – 2).<br />
Example: the requested temperature of the 1 st element<br />
(standard floating point format).<br />
Instruction manual VITO Page 26
Average temperature measurement with MPT / RTD<br />
___________________________________________________________________________<br />
4 Average temperature measurement with MPT / RTD<br />
4.1 Introduction MPT / RTD<br />
The 762 VITO MRT Interface can be used for interfacing 1 through 3 separate RTD spots which are in a 3 wire<br />
configuration or an MPT probe (Multiple Pt100 spots) consisting of 1 through 14 RTD's with 2 common ground<br />
wires (refer to figures 4.1 and 4.2).<br />
The RTD elements below the product level are used to determine the average product temperature, in respect to<br />
product immersion depth and hysteresis mechanisms and to actual valid level, last valid level or manual level.<br />
The RTD elements above the product level are used to determine the average gas temperature, in respect to gas<br />
immersion depth and hysteresis mechanisms and to actual valid level, last valid level or manual level.<br />
4.2 Commissioning of MPT / RTD<br />
The commissioning of the optional board should be performed after the basic commissioning of the level gauge,<br />
or indicator.<br />
4.2.1 Temperature related settings<br />
Figure 4.1 Multiple spot and tank data (1)<br />
Instruction manual VITO Page 27
Average temperature measurement with MPT / RTD<br />
___________________________________________________________________________<br />
Figure 4.2 Multiple spot and tank data (2)<br />
Before programming the temperature data, the element positions must be known (refer to figures 4.1 and 4.2).<br />
The element positions of an MPT (Multiple Pt100 spot) element are listed on the test certificate of the MPT<br />
element. If the test certificate is not at hand, the element positions can also be calculated from the Model<br />
selection code on the identification label.<br />
Position 11 of the Model selection code defines the ‘Position of the lowest element’, and Positions 16 through 19<br />
list the ‘Position of the highest element’ (unit is cm).<br />
VITO probe<br />
model<br />
Position 11 Model<br />
selection code<br />
Position of lowest element<br />
361 C 1.00 m (3’ 3” 6 / 16 )<br />
361 D 0.15 m (5” 15 / 16 )<br />
Table 4-1<br />
Positions 9 and 10 of the Model selection code show the number of Pt100 elements of the MPT probe.<br />
Alternatively, the number of elements can be obtained by counting the number of wires of the MPT probe (not<br />
counting the two black wires).<br />
Instruction manual VITO Page 28
Average temperature measurement with MPT / RTD<br />
___________________________________________________________________________<br />
The elements are located at equal distances, hence the spacing is found:<br />
Then the element positions are found by:<br />
J0 = Position lowest element<br />
J1 = Position lowest element + 1 x element spacing<br />
J2 = Position lowest element + 2 x element spacing<br />
etc.<br />
For example:<br />
Position lowest element is 0.15 m (5.9”)<br />
Position highest element is 17.300 m (681.1 ”)<br />
Number of elements: 9<br />
Step 1:<br />
Element spacing:<br />
Step 2:<br />
Element positions:<br />
J0 = 0.150 m (or 5.9 ”)<br />
J1 = 2.294 m (or 90.3 ”)<br />
J2 = 4.438 m (or 174.7 ”)<br />
J3 = 6.581 m (or 259.1 ”)<br />
J4 = 8.725 m (or 343.5 ”)<br />
J5 = 10.869 m (or 427.9 ”)<br />
J6 = 13.013 m (or 512.3 ”)<br />
J7 = 15.156 m (or 596.7 ”)<br />
J8 = 17.300 m (or 681.1 ”)<br />
Instruction manual VITO Page 29
Average temperature measurement with MPT / RTD<br />
___________________________________________________________________________<br />
Refer to figures 4.1 and 4.2<br />
Item Name Description<br />
W2= Protection level 2 Enter protection level 2<br />
TD= Temperature dimension One character; either ‘C’ or ‘F’. Default set to C.<br />
C : degrees Celsius<br />
F : degrees Fahrenheit<br />
Both dimensions have the same format.<br />
MT= Element type Three ASCII characters. Selects the element type connected to<br />
the 762 VITO MRT Interface. For 1 – 3 RTD’s and MPT probe,<br />
set this item to: ‘ SPL ’ (Pt100 large);<br />
range : -200 ÷ +250 °C (-328 ÷ +482 °F)<br />
MN= Number of elements Two ASCII digits. This item specifies the number of elements<br />
of the MPT probe.<br />
• 01 through 03 means RTD spot in a 3 wire connection<br />
• 04 through 14 means an MPT probe.<br />
MO= Temperature element offset Format according to item LD. The offset represents the distance<br />
from the tank zero level to the lowest position of the MPT probe.<br />
In case of the RTD spots this item should be left at 0.<br />
Note:<br />
In case of ullage measurement, distance MO is taken from<br />
the upper reference point.<br />
J0 – JD= RTD element position. Format according to item LD. In case of the RTD spots items<br />
J0 .. J2 represent the distance from tank zero level to the RTD<br />
spot.<br />
In case of a MPT probe items J0 .. JD represent the distance<br />
from the bottom of the probe (nearest to tank zero level) to the<br />
RTD elements. Refer to the description above to obtain the<br />
values for J0 .. JD.<br />
Note:<br />
Only enter as much element positions as specified by the number<br />
of elements, starting from J0 (see item MN).<br />
MI= Switch hysteresis Format according to item LD. The distance MI is a hysteresis<br />
around the switching point of the temperature elements.<br />
MP= Product immersion depth Format according to item LD. The distance MP specifies the<br />
minimum required liquid level above a spot before it is selected<br />
for the average product temperature calculation<br />
MG= Gas immersion depth Format according to item LD. The distance MG specifies the<br />
minimum required distance below a spot before it is taken in the<br />
average gas temperature calculation<br />
TU=<br />
Temperature status conversion One character (default: ‘T’)<br />
This item is used to indicate the temperature status character in<br />
case of a reduced or not guaranteed temperature accuracy. This<br />
is the case when the temperature status is:<br />
• out of specified temperature range<br />
• last valid level used<br />
• manual level used<br />
• level below lowest temperature element<br />
If required, this item can be set to another character.<br />
EX Exit Exit protection level 2<br />
Instruction manual VITO Page 30
Average temperature measurement with MPT / RTD<br />
___________________________________________________________________________<br />
4.2.2 Additional settings for and 877 FDI<br />
Item Name Description<br />
W2= Protection level 2 Enter protection level 2<br />
OB= Option board *) Three ASCII characters. This item informs the XPU what option<br />
board is installed. That can be:<br />
MPU : for HCU/ICU option board in MPU emulation mode<br />
HPU : for HCU/ICU option board in HPU emulation mode<br />
EG= Enable temperature One ASCII character; either ‘D’ or ‘E’. With this item can be<br />
transmission *)<br />
selected if the 877 FDI shall answer on a temperature request<br />
(C-record), addressed to the connected level gauge.<br />
E : transmission of temperature record enabled<br />
D : transmission of temperature record disabled<br />
Note:<br />
When item EG is set to ‘E’, make sure the related level gauge<br />
has no temperature option installed.<br />
TF= Temperature source One ASCII character; either ‘I’ or ‘E’. this item selects if there is<br />
Selection<br />
a temperature measurement inside the indicator (internal) or to<br />
be fetched from the Enraf field bus (external).<br />
E : Internal<br />
D : External<br />
EX Exit Exit protection level 2<br />
*) This item is not implemented in the XPU-2.<br />
4.2.3 Temperature verification MPT (Multiple Pt100 spots) probes<br />
After the settings described in section 4.2.1 and, if applicable in section 4.2.2, are entered the temperature<br />
measurement is operational.<br />
The following checks can be made to verify if the settings are made correct and the product temperature reading<br />
is correct.<br />
• Read item AP (Average Product temperature):<br />
This data item is preceded by four status characters. The first status character is a hexa-decimal number,<br />
indicating the highest selected element for average product temperature calculation. This can be judged,<br />
on basis of the product level, and with the items U0 – UF (calculated spot positions), item MO<br />
(temperature element offset), item MP (product immersion depth) and item MI (switch hysteresis).<br />
Refer to figure 4.2:<br />
A spot element will be used in the average product temperature calculation if its position is below the<br />
actual level minus the product immersion depth.<br />
A spot element won’t be used in the average product temperature calculation if it is above the actual level<br />
minus the product immersion depth plus the switch hysteresis.<br />
• Verify the average product temperature by manual measurement:<br />
Refer to Appendix C for the procedure to verify the average product temperature reading by using a<br />
portable electronic thermometer.<br />
Instruction manual VITO Page 31
Average temperature measurement with MPT / RTD<br />
___________________________________________________________________________<br />
4.3 Operation<br />
4.3.1 Display<br />
For operation of the display and the information on it (if applicable), refer tot the instruction manual of the related<br />
level gauge or indicator. Below, only an overview is given which display formats gives information about the<br />
average temperature measurement.<br />
Display format<br />
A<br />
C<br />
D<br />
Displayed information<br />
Product level and average product temperature<br />
Average gas temperature and status<br />
Average product temperature and status<br />
4.3.2 Data items<br />
Table 4 – 1 lists a number of data items. They contain measured data, verification data and error data. The<br />
verification data can be used to check the results of certain steps in the measuring sequence. The temperature<br />
status indicates the validity of the measured data. The error data provides low level error information about the<br />
temperature measurement (refer to section 4.4).<br />
Item<br />
AG<br />
AP<br />
MQ<br />
MU<br />
U0 - UF<br />
V0 - VF<br />
Description<br />
Measured/<br />
Calculated data<br />
Average gas temperature<br />
Average product temperature<br />
Temperature status request (refer to section 4.4.2)<br />
Measured test resistance (floating point format);<br />
must be: 166.5 Ω ± 0.03%<br />
Position of each spot; U0 = position of lowest spot.<br />
Spot temperatures; V0 = temperature of lowest spot.<br />
VV Verification data Refer to description at section 4.4.3<br />
EM<br />
FH<br />
F0<br />
Table 4 – 2<br />
Diagnostic data Error request (refer to section 4.4.1).<br />
Fatal errors<br />
Last fatal error<br />
Instruction manual VITO Page 32
Average temperature measurement with MPT / RTD<br />
___________________________________________________________________________<br />
4.4 Troubleshooting<br />
4.4.1 Temperature error (item EM)<br />
This item helps you configuring correctly by showing the most recent temperature error encountered by the option<br />
board.<br />
xx00 No error xx70 Sub-system error. Check or replace VITO<br />
xx50 Element 1 detected absent xx72 Not supported element type. Check item MT<br />
xx51 Element 2 detected absent xx73 Wrong element configuration. Check item MN<br />
xx52 Element 3 detected absent xx80 R test error (out of limits)<br />
xx53 Element 4 detected absent xx81 R cable error (out of limits)<br />
xx54 Element 5 detected absent xx84 Standard deviation too high<br />
xx55 Element 6 detected absent xx91 Wrong J0 .. JD setting. Check these items.<br />
xx56 Element 7 detected absent xx92 No data available. Check wiring or connection with VITO<br />
xx57 Element 8 detected absent<br />
xx58 Element 9 detected absent<br />
xx59 Element 10 detected absent<br />
xx60 Element 11 detected absent<br />
xx61 Element 12 detected absent<br />
xx62 Element 13 detected absent<br />
xx63 Element 14 detected absent<br />
xx = 22 for MPU emulation<br />
xx = 24 for HPU emulation<br />
xx = 30 for HCU emulation<br />
4.4.2 Temperature status request (item MQ)<br />
Four bytes status information (B0 B1 B2 B3) with the following meaning:<br />
For decoding of the status bytes, refer to the ASCII table in appendix A.<br />
Status byte 0:<br />
Contains the characters ‘0’ ÷ 'D', indicating the highest submersed spot of the MPT element. At start up this is: ‘I’.<br />
Status byte 1: Status byte 2:<br />
Bit 0: general temperature fail<br />
Bit 0: last valid level used<br />
1: fail in average product temperature 1: manual level used<br />
2: fail in average gas temperature 2: 0<br />
3: level exceeds lowest spot element 3: 0<br />
4: level exceeds highest spot element 4: 0<br />
5: spot element fail (one or more spots defect) 5: 0<br />
6: 1 6: 1<br />
7: 0 7: 0<br />
Status byte 3:<br />
Bit 0: no previous store command<br />
1: alternative (lower) element selected<br />
2÷5: 0<br />
6: 1<br />
7: 0<br />
Note:<br />
Only the bits which are set to ‘1’ have an active status.<br />
Instruction manual VITO Page 33
Average temperature measurement with MPT / RTD<br />
___________________________________________________________________________<br />
4.4.3 Temperature pointer (items VP and VV)<br />
By means of the value pointer (item VP) a vector can be loaded to the HCU or ICU_HPI option board. Next, with<br />
item VV, the selected data is returned. Item VP consists of 4 positions, in the middle separated by a ‘.’ or ‘,’ :<br />
v w . x y (or v w , x y). The values for the value pointer are listed in table 4 – 2 together with the obtained data.<br />
v w , x y Selected data Example / Dimension<br />
0 0<br />
,<br />
0 0<br />
HCU / ICU_HPI Emulation & Function<br />
Emulation: MPU, HSU, HPU, HCU<br />
Function: HC: HART channel installed<br />
AO: analog output<br />
ST: spot temperature<br />
MR: VITO average MRT/multi spot probe<br />
WS: external water bottom probe<br />
PR: pressure transmitters<br />
VV=HCU HCAOMR- - PR<br />
0 0<br />
0 0<br />
0 0<br />
,<br />
,<br />
,<br />
0 1<br />
0 2<br />
0 3<br />
Configuration boot code<br />
Sales code option: C boot code: 0A<br />
J<br />
2E<br />
W<br />
1A<br />
X 12<br />
Y<br />
3F<br />
HCU / ICU_HPI hardware version<br />
Boot code software version<br />
VV=HCU CONFIG: 3F<br />
VV=HW VERSION: 00<br />
VV=BOOTSW VERS:01<br />
0 2<br />
0 2<br />
:<br />
0 2<br />
0 2<br />
0 2<br />
0 2<br />
0 2<br />
:<br />
0 2<br />
,<br />
,<br />
,<br />
,<br />
,<br />
,<br />
,<br />
,<br />
0 0<br />
0 1<br />
:<br />
1 3<br />
2 6<br />
2 9<br />
8 2<br />
8 3<br />
:<br />
9 5<br />
Calculated temperature of 1 st spot element<br />
Calculated temperature of 2 nd spot element<br />
:<br />
Calculated temperature of 14 th spot element<br />
Standard deviation<br />
Calculated I_ref<br />
Calculated resistance 1 st spot element<br />
Calculated resistance 2 nd spot element<br />
:<br />
Calculated resistance 14 th spot element<br />
(floating point format)<br />
(floating point format)<br />
(floating point format)<br />
(floating point format)<br />
(floating point format)<br />
(floating point format)<br />
(floating point format)<br />
(floating point format)<br />
according to item TD<br />
according to item TD<br />
according to item TD<br />
< 0.5E-10<br />
1.0275 mA ±0.05<br />
Ω<br />
Ω<br />
Ω<br />
0 3<br />
0 3<br />
0 3<br />
0 3<br />
0 3<br />
,<br />
,<br />
,<br />
,<br />
,<br />
Table 4 – 2<br />
0 1<br />
0 9<br />
1 0<br />
1 1<br />
1 2<br />
Error counters HART addresses 3, 4 and 5<br />
(762 VITO MRT Interface has HART address 5)<br />
Detected HART device addresses<br />
(5 for VITO Interface)<br />
Initial detected VITO device type & software version<br />
Description: 763 : 762 VITO MRT/multiple RTD interface<br />
RTD PRB : Multiple RTD’s<br />
RTD : 2 or 3 RTD’s<br />
3-W : 3-wire configuration<br />
10 : software version 1.0<br />
Real active functions of VITO Interface (refer to description of VP=03,10)<br />
Actual executed HART commands from 762 VITO Interface<br />
VV=0000:0000:0013<br />
VV= - - - - 5 - - - - - - - - -<br />
VV=763 RTD 3-W 10<br />
VV=763 RTD 3-WIRE<br />
Item Name Description<br />
VP= Temperature value pointer Temperature value pointer; format: 2 digits, separator, 2 digits<br />
(refer to table 4 – 2).<br />
Example: VP=02.00: value pointer loaded to request the<br />
calculated temperature of the 1 st spot element.<br />
VV Temperature pointer value Temperature pointer value.<br />
This item holds the value requested by item VP<br />
(refer to table 4 – 2).<br />
Example: the requested temperature of the 1 st spot element<br />
(standard floating point format).<br />
Instruction manual VITO Page 34
Water bottom measurement<br />
___________________________________________________________________________<br />
5 Water bottom measurement<br />
5.1 Introduction water bottom measurement<br />
The water bottom probe is based on a capacitive measurement principle. The probe is one plate of the capacitor<br />
and earthed, electrically conducting parts as water and the tank shell, is the other plate. A change in water level is<br />
detected by the water bottom probe as a change in capacitance.<br />
5.1.1 Water probe versions<br />
There are three different water probe versions which can be interfaced:<br />
• The 765 VITO water probe;<br />
• The 766 VITO combi probe;<br />
• The 768 VITO combi probe<br />
The 765 VITO water probe, the 766 VITO combi probe and the 768 VITO combi probe are connected to the 762<br />
VITO Interface, which is connected to the HCU board or ICU-HPI board in the level gauge or indicator.<br />
Figure 5.1 VITO water probes<br />
Instruction manual VITO Page 35
Water bottom measurement<br />
___________________________________________________________________________<br />
Refer to figure 5.1<br />
• 765 VITO water probe. Can be delivered in three sensitive lengths for the water measurement: 0.5 m<br />
(1’ 7” 11 / 16 ), 1.0 m (3’ 3” 6 / 16 ) and 2.0 m (6’ 6” 12 / 16 ).<br />
• 766 / 768 combi probe; lowest temperature element above water probe (position 8 of Model selection<br />
code is a ‘C’). There are three possible sensitive lengths for the water measurement: 0.5 m (1’ 7” 11 / 16 ),<br />
1.0 m (3’ 3” 6 / 16 ) and 2.0 m (6’ 6” 12 / 16 ).<br />
• 766 / 768 combi probe; lowest temperature element inside water probe (position 8 of Model selection<br />
code is a ‘D’). There are three possible sensitive lengths for the water measurement: 0.5 m (1’ 7” 11 / 16 ),<br />
1.0 m (3’ 3” 6 / 16 ) and 2.0 m (6’ 6” 12 / 16 ).<br />
5.1.2 Principle of measurement<br />
Factory calibration values for the maximum capacity and minimum capacity are listed on the “CheckList<br />
765/766/768 Final Assembly”, delivered with every VITO probe.<br />
The value at VR is the minimum capacity (capacitance measured in air). This is an approximate value and<br />
depends on the dielectric property of the stored product. This value needs to be adjusted. Refer to : Calibration of<br />
water probe in Appendix B.<br />
The value at VT is the maximum capacity (capacitance measured in water) and needs no adjustement.<br />
The measured capacitance by the water probe has a linear function with the water level. Hence, the water level is<br />
calculated as:<br />
If LW > WS otherwise LW = 0<br />
Where:<br />
LW = water level<br />
MX = measured capacitance<br />
VR = minimum capacitance (probe fully covered by product)<br />
VT = maximum capacitance (probe fully covered by water)<br />
WP = water probe length<br />
WB = water probe bottom position<br />
WS = alarm hysteresis<br />
For example:<br />
Minimum capacitance (item VR) = 121.34 pF<br />
Maximum capacitance (item VT) = 432.49 pF<br />
Measured capacitance (item MX) = 268.92 pF<br />
Water probe length (item WP) = 0.4850 m (or 19.09 inch or 1.591 ft)<br />
Water probe bottom position (item WB) = 0.0000 m (or 0.00 inch or 0.000 ft)<br />
Then the water level (item LW) becomes: 0.2300 m (or 9.05 inch or 0.755 ft)<br />
5.2 Commissioning of water bottom probe<br />
5.2.1 Commissioning measurements<br />
The purpose of these calibration measurements is to determine the water probe offset and a control<br />
measurement for the water level.<br />
With these measurements the product level is used as a horizontal line between the point where the tank zero<br />
point is located and the point where the water probe is installed.<br />
Instruction manual VITO Page 36
Water bottom measurement<br />
___________________________________________________________________________<br />
Figure 5.2 Calibration measurements for water probe<br />
If the commissioning takes place directly after installation, the measurements at the probe position in figure 5.2<br />
have already been made if the instructions are followed from the installation guide. Otherwise, that measurement<br />
should be made now, by partly removing the probe to enable a measuring tape to be lowered from the nozzle.<br />
The following values are obtained:<br />
• Nozzle height<br />
• Product level at water probe location<br />
• Water level at water probe location<br />
From these measurements, calculate the ‘ullage’ value ‘A’:<br />
A = nozzle height – product level at water probe location<br />
The next step is to fetch the product level with respect to the tank zero point. This can be done in several ways:<br />
• Read the level from the level gauge if that has recently been checked (calibrated);<br />
• Take a manual ‘innage’ measurement to the datum plate of the tank;<br />
• Take a manual ‘ullage’ measurement from the Upper Reference Point and calculate the level by: level =<br />
URP – ‘ullage’.<br />
Refer to figure 5.2. At the bottom part of the probe there is an inactive metal part with a height of 25mm (1”).<br />
That is represented as distance ‘B’.<br />
The offset, which had to be programmed in item WB, can be found from:<br />
WB = (A + product level at reference point) – (Nozzle height – B)<br />
For example:<br />
Nozzle height =<br />
18.375 m (or 723.43 inch or 60.285 ft)<br />
Product level at water probe location = 13.832 m (or 544.57 inch or 45.381 ft)<br />
Then ‘ A ’ becomes:<br />
4.543 m (or 178.86 inch or 14.904 ft)<br />
The product level (innage dip) = 13.823 m (or 544.21 inch or 45.351 ft)<br />
The inactive metal part at bottom probe= 0.025 m (or 0.98 inch or 0.082 ft)<br />
Instruction manual VITO Page 37
Water bottom measurement<br />
___________________________________________________________________________<br />
The offset (water probe bottom position) item WB then becomes:<br />
WB = (‘ A ’ + product level) - (nozzle height – ‘ B ’) = 0.016 m (or 0.62 inch or 0.052 ft)<br />
Note:<br />
If WB is a negative figure then it is possible to have a negative water level reading.<br />
Water probe length :<br />
The 765 VITO water probe and 766 / 768 VITO combi probe can have different water probe lengths. The actual<br />
water probe length can be found from the Model selection code of the probe. This length must be entered in item<br />
WP (water probe length). Table 5 – 1 gives an overview:<br />
Position 2 Model<br />
selection code<br />
(765/766/768)<br />
Item WP<br />
(LD=M)<br />
[metres]<br />
Item WP<br />
(LD=F)<br />
[feet]<br />
Item WP<br />
(LD=I)<br />
[inch]<br />
Item WP<br />
(LD=P)<br />
[fractions]<br />
A +000.4850 +0001.591 +00019.09 +01’07”02<br />
B +000.9850 +0003.232 +00038.78 +03’02”12<br />
C +001.9850 +0006.512 +00078.15 +06’06”02<br />
Table 5 – 1<br />
Minimum and Maximum capacitance :<br />
Factory calibration values for the maximum capacity and minimum capacity are listed on the “CheckList<br />
765/766/768 Final Assembly”, delivered with every VITO probe.<br />
The value at VR is the minimum capacity (capacitance measured in air). This is an approximate value and<br />
depends on the dielectric property of the stored product. This value needs to be adjusted.<br />
The value at VT is the maximum capacity (capacitance measured in water) and needs no adjustement.<br />
Calibrating the water probe :<br />
Refer to Appendix B for information about calibrating the water probe. Where the water dip is mentioned, please<br />
refer to the measured water level at the probe position as described before.<br />
Instruction manual VITO Page 38
Water bottom measurement<br />
___________________________________________________________________________<br />
5.2.2 Water probe settings<br />
Item Name Description<br />
W2= Protection level 2 Enter protection level 2<br />
VR= Minimum water capacity<br />
VT= Maximum water capacity<br />
Floating point format; default: +.00000000E+00. Enter the value<br />
obtained from the calculations in Appendix B. As an alternative,<br />
the value from VR as listed on the “CheckList 765/766/768 Final<br />
Assembly” can be used.<br />
Floating point format; default: +.00000000E+00. Enter the value<br />
from VT as listed on the “CheckList 765/766/768 Final Assembly”.<br />
WB= Water probe bottom position Format according to item LD (default: + 000.0000 m)<br />
This item gives the offset to the water probe zero point in<br />
relation with the tank zero point. Refer to section<br />
5.2.1 how to obtain this offset value.<br />
WP= Water probe length Format according to item LD (default: + 001.0000 m)<br />
The water probe length (together with the water probe<br />
bottom position) is required to calculate the water level. Refer to<br />
section 5.2.1 which value needs to be entered.<br />
WF= Water level field communication<br />
One character: ‘S’ or ‘D’. Only valid with 854 level gauges.<br />
This item selects from which source the water level is measured<br />
and transmitted in the level record (B-record) to the system.<br />
S : from the water probe (VITO water sensor or side<br />
mounted water probe)<br />
D : from water dip (displacer)<br />
Select ‘S’ for 854 the gauges (default: D).<br />
WH= Water high alarm Format according to item LD (default: +000.0000 m)<br />
With this item a water high alarm set point can be given.<br />
When active, the water high alarm condition is signalled on the<br />
instrument display in display format K (if display is available).<br />
The water alarm information is also transmitted in the water level<br />
record (M-record).<br />
WL= Water low alarm Format according to item LD (default: +000.0000 m)<br />
With this item a water low alarm set point can be given.<br />
When active, the water low alarm condition is signalled on the<br />
instrument display in display format K (if display is available).<br />
The water alarm information is also transmitted in the water level<br />
record (M-record).<br />
WS= Water alarm hysteresis<br />
Format according to item LD (default: + 000.0100 m).<br />
The water alarm hysteresis prevents the water alarm to be<br />
switched on and off when the water level is around the water<br />
high or water low alarm set point.<br />
EX Exit Exit protection level<br />
Instruction manual VITO Page 39
Water bottom measurement<br />
___________________________________________________________________________<br />
5.3 Operation<br />
5.3.1 Display<br />
For operation of the display and the information on it, refer to the instruction manual of the applicable level gauge<br />
or 877 FDI. Below, only an overview is given which display format gives information about the water bottom<br />
measurement.<br />
Display format<br />
K<br />
Displayed information<br />
Water level and status<br />
5.3.2 Water above / below probe warning<br />
Automatically a warning is given when the water level is too low or too high for the probe to measure correctly.<br />
• The water above probe status (AP) is displayed and signalled in the water level record when the water<br />
level is within 1% of the probe length (item WP) from the top of the water probe.<br />
• The water below probe status (BP) is displayed and signalled in the water level record when the water<br />
level is within 1% of the probe length (item WP) from the bottom of the water probe.<br />
Around these warnings there is a hysteresis of 0.5 % of the probe length (item WP).<br />
5.3.3 Data items<br />
Table 5 – 2 lists a number of data items. They contain measured data, verification data and error data. The<br />
verification data can be used to check the results of certain steps in the measuring sequence. The diagnostic data<br />
provides low level error information about the water level measurement (refer to section 5.4).<br />
Item Description<br />
LW<br />
LH<br />
MX<br />
Measured / Water level, preceded by two status bytes (refer to section 5.4.2)<br />
Calculated data Water ullage, preceded by two status bytes (refer to section 5.4.2)<br />
Measured capacitance from 765/766/768 VITO water probe<br />
VV Verification data Refer to description at section 5.4.3<br />
EW<br />
FH<br />
H0<br />
Table 5 – 2<br />
Diagnostic data Error water request (refer to section 5.4.1)<br />
Fatal HCU/ICU_HPI errors<br />
Last fatal HCU/ICU_HPI error<br />
Instruction manual VITO Page 40
Water bottom measurement<br />
___________________________________________________________________________<br />
5.4 Troubleshooting<br />
5.4.1 Water error request (item EW)<br />
Data item EW contains the most recent error code concerning the water probe measurement, encountered by the<br />
optional HCU/ICU_HPI board.<br />
xx00 No error, value at initialisation<br />
xx01 C test error Either defective 762 VITO interface or defective (leaking) water probe<br />
xx02 Linearity error Should be within 1% of the test capacitance, if too large, change 762 VITO interface<br />
xx03 No water probe available Measured capacitance is >4000 pF; check water probe wiring (green wire and coax<br />
cable) to 762 VITO interface terminals<br />
xx04 Sub system error Defective 762 VITO interface<br />
xx05 Capacitance too low Measured capacitance 3000pF;check water probe wiring or change 765/766/768 VITO<br />
probe<br />
xx07 Capacitance shortcut Either water probe error or internal 762 VITO interface error<br />
xx11 No reply on initial HART commands Communication error. Check connection level gauge – 762 VITO interface, or change<br />
762 VITO interface or HCU/ICU_HPI board<br />
xx79 Not calibrated Check items VR and VT (set to zero or are equal to each other)<br />
xx98 No water sources found No water probe connected<br />
xx:<br />
24 for HPU emulation;<br />
28 for HSU emulation;<br />
30 for HCU emulation<br />
5.4.2 Water level (ullage) status bytes<br />
The water level and ullage, items LW and LH, are constructed as follows: s 0 s 1 IIIIIIIII<br />
For decoding of the status bytes, refer to the ASCII table in appendix A.<br />
IIIIIIIII : water level (or ullage) value; format according the level dimension LD.<br />
s 0 s 1 : two status bytes, bit coded; containing the following information:<br />
status byte s0<br />
status byte s1<br />
bit 0: general probe fail<br />
bit 0: water probe (0=present; 1= absent)<br />
1: low water alarm 1: 0 (not used)<br />
2: high water alarm 2: 0 (not used)<br />
3: water below probe warning 3: 0 (not used)<br />
4: water above probe warning 4: 0 (not used)<br />
5: 0 5: 0<br />
6: 1 6: 1<br />
7: 0 7: 0<br />
Note:<br />
Only the bits which are to set to ‘1’ have an active status.<br />
Instruction manual VITO Page 41
Water bottom measurement<br />
___________________________________________________________________________<br />
5.4.3 Water bottom pointer (items VP and VV)<br />
By means of the value pointer (item VP) a vector can be loaded to the HCU or ICU_HPI option board. Next with<br />
item VV, the selected data is returned. Item VP consists of 4 positions, in the middle separated by a ‘.’ or ‘,’; v w ,<br />
x y (or v w, x y). The values for the value pointer are listed in table 5 – 3 together with the obtained data.<br />
v w , x y Selected data Example/dimension<br />
0 0 , 0 0 HCU/ICU_HPI emulation & Function VV=HCU HCAOMTWTPR<br />
Emulation: MPU, HSU, HPU, HCU<br />
Function: HC: HART channel installed<br />
AO: analog output<br />
ST: spot temperature<br />
MT: VITO average temperature<br />
WS: external water bottom probe<br />
WT: VITO water bottom probe<br />
PR: pressure transmitters<br />
MR: VITO average temperature MRT<br />
0 0 , 0 1 Configuration boot code<br />
VV=HCU CONF 1G: 3F<br />
Sales code option: C boot code: 0A<br />
J<br />
2E<br />
W<br />
1A<br />
X 12<br />
Y<br />
3F<br />
0 0<br />
0 0<br />
,<br />
,<br />
0 2<br />
0 3<br />
HCU/ICU_HPI hardware version<br />
Boot code software version<br />
VV= HW VERSION: 00<br />
VV= BOOTSW VERS:01<br />
0 3<br />
,<br />
0 1<br />
Error counters HART addresses 3.4 and 5<br />
VV= 0000:0000:0013<br />
0 3<br />
0 3<br />
0 3<br />
0 3<br />
0 3<br />
,<br />
,<br />
,<br />
,<br />
,<br />
0 9<br />
1 0<br />
1 1<br />
1 2<br />
2 0<br />
Detected HART device addresses<br />
762 VITO-MTT and VITO-MRT have HART address 5)<br />
762 VITO-LT has HART address 6)<br />
See 2.4.3 Average temperature settings<br />
Real active functions of VITO interface (refer to description of VP=03,10)<br />
Actual executed HART commands from 762 VITO interface<br />
Averaging constant 762 VITO interface<br />
(floating point format)<br />
VV=----5---------------<br />
0 4<br />
0 4<br />
,<br />
,<br />
Table 5 – 3<br />
0 0<br />
0 1<br />
C test from 762 VITO interface<br />
C linearity form 762 VITO interface<br />
(floating point format)<br />
(floating point format)<br />
Item Name Description<br />
VP= Water bottom value pointer Water bottom value pointer; format: 2 digits, separator,<br />
Digits (refer to table 5 – 3).<br />
Example: VP=04.00: value pointer loaded to request the<br />
Measured test capacitor.<br />
VV Water bottom pointer value Water bottom pointer value.<br />
This item holds the value requested by item VP<br />
(refer to table 5 – 3)<br />
Instruction manual VITO Page 42
Appendix<br />
___________________________________________________________________________<br />
Appendix A ASCII table<br />
HEX MSB 0 1 2 3 4 5 6 7<br />
BIT 654 654 654 654 654 654 654 654<br />
LSB 3 2 1 0 000 001 010 011 100 101 110 111<br />
0 0 0 0 0 NUL DLE SP 0 @ P ‘ p<br />
1 0 0 0 1 SOH DC1 ! 1 A Q a q<br />
2 0 0 1 0 STX DC2 “ 2 B R b r<br />
3 0 0 1 1 ETX DC3 # 3 C S c s<br />
4 0 1 0 0 EOT DC4 $ 4 D T d t<br />
5 0 1 0 1 ENQ NAK % 5 E U e u<br />
6 0 1 1 0 ACK SYN & 6 F V f v<br />
7 0 1 1 1 BEL ETB ‘ 7 G W g w<br />
8 1 0 0 0 BS CAN ( 8 H X h x<br />
9 1 0 0 1 HT EM ) 9 I Y i y<br />
A 1 0 1 0 LF SUB * : J Z j z<br />
B 1 0 1 1 VT ESC + ; K [ k {<br />
C 1 1 0 0 FF FS ‘ < L \ l l<br />
D 1 1 0 1 CR GS - = M ] m }<br />
E 1 1 1 0 SO RS . > N ^ n ~<br />
F 1 1 1 1 SI US / ? O - o DEL<br />
Table A – 1<br />
Instruction manual VITO Page 43
Appendix<br />
___________________________________________________________________________<br />
Appendix B<br />
Configuration procedure for 765/766/768 VITO water probe<br />
Make sure the VITO water (and temperature) probe is installed properly (refer to installation guide VITO).<br />
The test certificate, supplied with the probe, contains factory values for the minimum capacitance (probe in air)<br />
and the maximum capacitance (probe in water).<br />
The measured capacitance depends on the dielectric properties of the product. The dielectric constant for air is 1.<br />
A general value for the dielectric constant of oil products is in the area of 1.8 – 2.5. For a 0.5 m (1’ 7” 11 / 16 ) long<br />
water probe that results in a change in minimum capacitance of 3 – 6 pF, which will cause 5 – 9 mm ( 3 / 16 – 6 / 16 )<br />
water level deviation. Therefore, the value for the minimum capacitance must be determined when the probe is<br />
installed and completely, or partly, covered by product.<br />
In the following 3 situations the water probe can be calibrated:<br />
1. Some product in the tank (probe partly covered with product and partly covered by air)<br />
2. Product in the tank (probe fully covered with product and no water)<br />
3. Product and water in the tank (probe partly covered by water and partly covered by product)<br />
In all other situations, no calibration can be made and the values from the test certificate shall be used.<br />
Situation 1 (probe partly covered by product)<br />
Refer to the figure: Manual measurement of water level, but read for the water level: product level and read for<br />
the product: air.<br />
In items VR and VT must be entered the values from the “CheckList 765/766/768 Final Assembly”.<br />
Measure the product level and calculate the immersed part of the probe.<br />
Read the measured capacitance by item MX.<br />
Then, the value for VR can be calculated as follows:<br />
VR cal. represents the value from VR listed on the “CheckList 765/766/768 Final Assembly”.<br />
Enter the value from VR new into item VR.<br />
For example:<br />
VR cal = 120.0 pF<br />
VT = 430.4 pF<br />
MX = 120.786 pF<br />
WP = 0.485 m (or 19.09 inch or 1.591 ft)<br />
WB = 0.025 m (or 0.98 inch or 0.082 ft)<br />
Product level (measured by manual dip) = 0.122 m (or 4.80 inch or 0.400 ft)<br />
Step 1:<br />
Immersed part of probe becomes:<br />
0.122 – 0.025 = 0.097 m (or 4.80 – 0.98 = 3.82 inch or 0.400 – 0.082 = 0.318 ft)<br />
Step 2:<br />
calculate value for VR new<br />
Instruction manual VITO Page 44
Appendix<br />
___________________________________________________________________________<br />
Situation 2 (probe fully covered with product)<br />
Read the measured capacitance by item MX.<br />
Enter this value into item VR.<br />
Situation 3 (probe partly covered by water and partly covered by product)<br />
Check the water level by means of a manual measurement.<br />
An interpolation is applied on the measured capacitance to find the capacitance value at zero water level.<br />
Refer to figure: manual measurement of water level.<br />
The interpolation of the capacitance value is done as follows:<br />
Round off the % water value to 0.1%.<br />
To calculate the value for item VR (minimum capacitance), the actual<br />
measured capacitance (item MX) and the maximum capacitance (item VT)<br />
should be known. These two values can be read by the PET or via the<br />
service program from the instrument.<br />
The minimum capacitance value is then calculated as follows:<br />
For example:<br />
Water level (measured by manual dip)<br />
= 0.122 m (or 4.80 inch or 0.400 ft)<br />
WB = 0.025 m (or 0.98 inch or 0.082 ft)<br />
MX = 185.224 pF<br />
VT = 430.4 pF (obtained from “CheckList<br />
765/766/768 Final Assembly”)<br />
Manual measurement of water level<br />
Step 1:<br />
% water (rounded off to 0.1%):<br />
Instruction manual VITO Page 45
Appendix<br />
___________________________________________________________________________<br />
Step 2:<br />
calculate value for VR new<br />
Instruction manual VITO Page 46
Appendix<br />
___________________________________________________________________________<br />
Appendix C Average product temperature verification procedure<br />
The average temperature measurement from VITO temperature probes, MRT’s and MPT’s can be verified by<br />
means of a manual temperature measurement with a calibrated portable electronic thermometer. The calibration<br />
certificate shall be available and lists the eventually temperature deviation from the instrument.<br />
Warning<br />
In hazardous areas it is compulsory to use personal protection and safety gear such as:<br />
hard hat, fire-resistive overall, safety shoes, safety glasses and working gloves.<br />
Avoid possible generation of static electricity.<br />
Use non-sparking tools and explosion-proof testers.<br />
Make sure no dangerous quantities of combustible gas mixtures are present in the working area.<br />
Never start working before the work permit has been signed by all parties.<br />
Pay attention to the kind of product in the tank. If any danger for health,<br />
wear a gas mask and take all necessary precautions.<br />
When situated at an open gauge hatch, always stay upwind (vapours blowing away from you).<br />
Before lowering the portable temperature probe into the tank,<br />
make sure the portable electronic thermometer is properly grounded to the tank.<br />
1) Read the product level from the level gauge or by manual dip. Round off this value to the nearest 0.5 m<br />
(1 ft). For a proper verification, the product level shall be at least 4 m (13 ft).<br />
2) The manual temperature will be taken at 5 points. Calculate the interval as follows:<br />
Interval = (product level [m] – 2 m) / (5 – 1)<br />
or (product level [ft] – 6 ft) / (5 – 1)<br />
3) Locate a gauge hatch, closest to the average temperature element and open it. Slowly lower the probe<br />
from the portable electronic thermometer till 1 m (3 ft) above the bottom.<br />
4) Wait till the temperature reading on the portable electronic thermometer is stabilized. Note the<br />
temperature reading from the portable electronic thermometer, corrected for eventually deviations<br />
according to the calibration certificate.<br />
5) Pull up the probe for the Interval value and repeat step 4.<br />
Note:<br />
Make sure that with the last (5 th ) measurement, the probe of the portable electronic thermometer<br />
is at least 1m (3 ft) below the liquid surface.<br />
6) When all 5 measurements are completed, average the 5 manual temperature values and compare it with<br />
the average product temperature reading from the gauge. The difference in temperature shall be less than<br />
0.5 °C (1.0 °F).<br />
Note:<br />
In the case the 5 manual temperature reading differs more than 1 °C (2 °F) from each other, it is likely the<br />
temperature in the storage tank is not homogeneous. In that case 10 measurements shall be taken<br />
(Interval to be calculated by dividing by (10 – 1)).<br />
For product levels below 4 m (13 ft) the number of measurements is according to table C-1:<br />
Product level<br />
Measurement location<br />
3 – 4 m (10 – 13 ft) 1 m (3ft) above tank bottom, half way liquid level, 1 m (3 ft) below liquid surface<br />
1.5 – 3 m (5 – 10 ft) Half way liquid level<br />
Notes<br />
___________________________________________________________________________<br />
Appendix D Part numbers<br />
For VITO family:<br />
Refer to figure: 762 VITO interface<br />
Item Description Part no.<br />
1 Protective cover over HART terminals 0186.901<br />
2a<br />
2b<br />
2c<br />
Printed circuit board 762 VITO MTT<br />
Interface<br />
Printed circuit board 762 VITO MRT<br />
Interface<br />
Printed circuit board 762 VITO LT<br />
Interface<br />
0762.950<br />
0762.960<br />
0762.970<br />
3 O-ring, 190.18 x 2.62, NBR70 2132.991<br />
4 Cover 762 VITO interface 0186.798<br />
Table D – 1<br />
762 VITO interface<br />
Instruction manual VITO Page 48
Notes<br />
___________________________________________________________________________<br />
Appendix E Related documents<br />
Instruction manual series 854 ATG level gauge<br />
Instruction manual series 854 XTG level gauge<br />
Instruction manual 877 Field Display & Interface<br />
Instruction manual 97x SmartRadar series<br />
Installation guide 762 VITO Interfaces & VITO, MTT, LT, MRT and MPT probes<br />
Installation guide 864 MTT Multi Thermo sensor Thermometer<br />
Instruction manual VITO Page 49
Honeywell Enraf<br />
Delftechpark 39<br />
2628 XJ Delft<br />
The Netherlands<br />
Tel: +31 (0)15-2701 100<br />
Email: enraf-nl@honeywell.com<br />
www.honeywellenraf.com<br />
<strong>4416655</strong> - Revision 6<br />
April 2013<br />
© 2013 Honeywell International Inc.