Dell OpenManage Server Administrator Version 7.1 ... - Dell Support
Dell OpenManage Server Administrator Version 7.1 ... - Dell Support
Dell OpenManage Server Administrator Version 7.1 ... - Dell Support
Create successful ePaper yourself
Turn your PDF publications into a flip-book with our unique Google optimized e-Paper software.
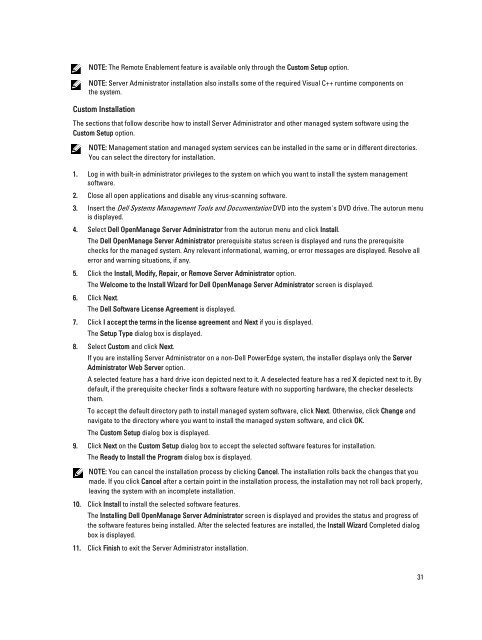
NOTE: The Remote Enablement feature is available only through the Custom Setup option.<br />
NOTE: <strong>Server</strong> <strong>Administrator</strong> installation also installs some of the required Visual C++ runtime components on<br />
the system.<br />
Custom Installation<br />
The sections that follow describe how to install <strong>Server</strong> <strong>Administrator</strong> and other managed system software using the<br />
Custom Setup option.<br />
NOTE: Management station and managed system services can be installed in the same or in different directories.<br />
You can select the directory for installation.<br />
1. Log in with built-in administrator privileges to the system on which you want to install the system management<br />
software.<br />
2. Close all open applications and disable any virus-scanning software.<br />
3. Insert the <strong>Dell</strong> Systems Management Tools and Documentation DVD into the system's DVD drive. The autorun menu<br />
is displayed.<br />
4. Select <strong>Dell</strong> <strong>OpenManage</strong> <strong>Server</strong> <strong>Administrator</strong> from the autorun menu and click Install.<br />
The <strong>Dell</strong> <strong>OpenManage</strong> <strong>Server</strong> <strong>Administrator</strong> prerequisite status screen is displayed and runs the prerequisite<br />
checks for the managed system. Any relevant informational, warning, or error messages are displayed. Resolve all<br />
error and warning situations, if any.<br />
5. Click the Install, Modify, Repair, or Remove <strong>Server</strong> <strong>Administrator</strong> option.<br />
The Welcome to the Install Wizard for <strong>Dell</strong> <strong>OpenManage</strong> <strong>Server</strong> <strong>Administrator</strong> screen is displayed.<br />
6. Click Next.<br />
The <strong>Dell</strong> Software License Agreement is displayed.<br />
7. Click I accept the terms in the license agreement and Next if you is displayed.<br />
The Setup Type dialog box is displayed.<br />
8. Select Custom and click Next.<br />
If you are installing <strong>Server</strong> <strong>Administrator</strong> on a non-<strong>Dell</strong> PowerEdge system, the installer displays only the <strong>Server</strong><br />
<strong>Administrator</strong> Web <strong>Server</strong> option.<br />
A selected feature has a hard drive icon depicted next to it. A deselected feature has a red X depicted next to it. By<br />
default, if the prerequisite checker finds a software feature with no supporting hardware, the checker deselects<br />
them.<br />
To accept the default directory path to install managed system software, click Next. Otherwise, click Change and<br />
navigate to the directory where you want to install the managed system software, and click OK.<br />
The Custom Setup dialog box is displayed.<br />
9. Click Next on the Custom Setup dialog box to accept the selected software features for installation.<br />
The Ready to Install the Program dialog box is displayed.<br />
NOTE: You can cancel the installation process by clicking Cancel. The installation rolls back the changes that you<br />
made. If you click Cancel after a certain point in the installation process, the installation may not roll back properly,<br />
leaving the system with an incomplete installation.<br />
10. Click Install to install the selected software features.<br />
The Installing <strong>Dell</strong> <strong>OpenManage</strong> <strong>Server</strong> <strong>Administrator</strong> screen is displayed and provides the status and progress of<br />
the software features being installed. After the selected features are installed, the Install Wizard Completed dialog<br />
box is displayed.<br />
11. Click Finish to exit the <strong>Server</strong> <strong>Administrator</strong> installation.<br />
31


