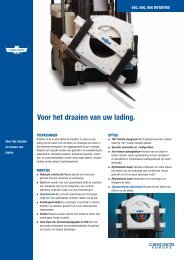
150H Fork Positioner - Cascade Corporation
150H Fork Positioner - Cascade Corporation
150H Fork Positioner - Cascade Corporation

You also want an ePaper? Increase the reach of your titles
YUMPU automatically turns print PDFs into web optimized ePapers that Google loves.
S<br />
ERVICE<br />
5.3-4 Cylinder Reassembly<br />
Piston Nut<br />
1 Lubricate new seals and O-rings with petroleum jelly.<br />
2 Polish the piston and retainer chamfer angles with 400grit<br />
emery cloth to ease seal installation.<br />
3 Install a new rod seal, wiper seal, O-rings and back-up<br />
rings on the retainer (see illustration below).<br />
4 Using a soft-jawed vise, clamp the cylinder rod on the<br />
flats at the end. CAUTION: Do not clamp on the<br />
cylinder rod sealing surface.<br />
5 Install the piston on the rod. Apply Loctite 242 (Blue)<br />
and tighten the piston nut to 55 ft.-lbs. (75 Nm).<br />
6 Install a new pressure seal on the piston. NOTE: Two<br />
types used (see illustration below).<br />
Three-Piece<br />
Piston Seal<br />
Piston<br />
5.4 <strong>Fork</strong> Carrier<br />
5.4-1 <strong>Fork</strong> Carrier Bushing Service<br />
The fork carrier bushings can be replaced with the fork<br />
carriers in place. No disassembly is required. Refer to<br />
illustration in Section 5.3-1.<br />
1 Remove the grease fitting and snap rings from the<br />
bushing ends.<br />
2 Spread the new split bushings and install on the cylinder<br />
OD. Displace the old bushing in the fork carrier with the<br />
new bushing.<br />
3 Reinstall the snap rings.<br />
OR<br />
Piston-to-Rod O-Ring<br />
(if equipped)<br />
6<br />
Spacer<br />
U-Cup Piston<br />
Seal<br />
Retainer<br />
O-Ring<br />
7 Apply petroleum jelly to the ID of the retainer and slide<br />
the retainer onto the cylinder rod. Use a piston/seal<br />
loader as required to prevent damage to the seals.<br />
8 Apply petroleum jelly to the cylinder shell and piston<br />
OD and install the rod assembly into the cylinder shell.<br />
Use a piston/seal loader as required to prevent<br />
damage to the seals.<br />
9 Apply anti-seize compound to the retainer threads and<br />
screw the retainer into the shell. Using a pin wrench<br />
tighten the retainer to 55 ft.-lbs. (75 Nm).<br />
Back-Up Ring Back-Up Ring<br />
Retainer<br />
Back-Up<br />
Ring<br />
Cylinder-to-<br />
Manifold<br />
O-Rings (2)<br />
Rod Seal<br />
3Retainer<br />
Wiper Seal<br />
219473 Rev. 1 21<br />
FP0516.ill