CVS 1200 Pneumatic Positioner Linear and Rotary - CVS Controls
CVS 1200 Pneumatic Positioner Linear and Rotary - CVS Controls
CVS 1200 Pneumatic Positioner Linear and Rotary - CVS Controls

You also want an ePaper? Increase the reach of your titles
YUMPU automatically turns print PDFs into web optimized ePapers that Google loves.
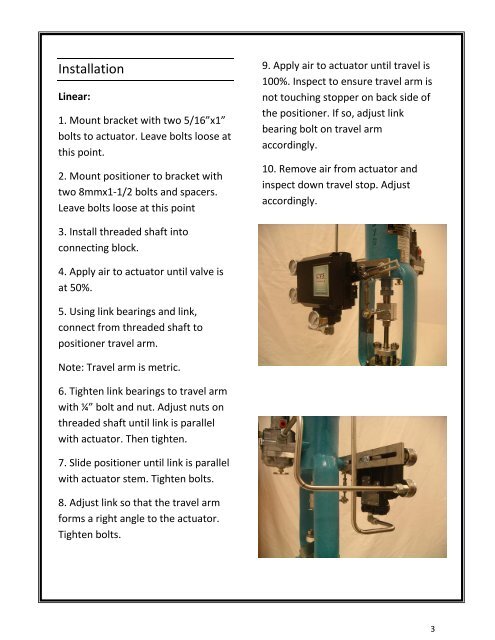
Installation<br />
<strong>Linear</strong>:<br />
1. Mount bracket with two 5/16”x1”<br />
bolts to actuator. Leave bolts loose at<br />
this point.<br />
2. Mount positioner to bracket with<br />
two 8mmx1-1/2 bolts <strong>and</strong> spacers.<br />
Leave bolts loose at this point<br />
3. Install threaded shaft into<br />
connecting block.<br />
4. Apply air to actuator until valve is<br />
at 50%.<br />
5. Using link bearings <strong>and</strong> link,<br />
connect from threaded shaft to<br />
positioner travel arm.<br />
Note: Travel arm is metric.<br />
6. Tighten link bearings to travel arm<br />
with ¼” bolt <strong>and</strong> nut. Adjust nuts on<br />
threaded shaft until link is parallel<br />
with actuator. Then tighten.<br />
7. Slide positioner until link is parallel<br />
with actuator stem. Tighten bolts.<br />
8. Adjust link so that the travel arm<br />
forms a right angle to the actuator.<br />
Tighten bolts.<br />
9. Apply air to actuator until travel is<br />
100%. Inspect to ensure travel arm is<br />
not touching stopper on back side of<br />
the positioner. If so, adjust link<br />
bearing bolt on travel arm<br />
accordingly.<br />
10. Remove air from actuator <strong>and</strong><br />
inspect down travel stop. Adjust<br />
accordingly.<br />
3