NovDec_2012

Create successful ePaper yourself
Turn your PDF publications into a flip-book with our unique Google optimized e-Paper software.
Holiday<br />
By<br />
Barbara<br />
“BeBe”<br />
Carter<br />
Face Painting<br />
It’s almost here! The holidays bring out the best in<br />
each of us. The office parties, the community events<br />
and the family food days ... they all keep us wellrounded.<br />
Each year when planning what to paint for the<br />
holidays I choose a feature design to offer at most<br />
of my events. The more you paint it the better and<br />
faster you get. Over the years here are some of the<br />
designs I have chosen: Christmas lights, snowflakes,<br />
snow princes and princesses, the gingerbread twins<br />
and the ever popular reindeer. I offer all of these as<br />
full face designs.<br />
Full face painting is the rage these days, and<br />
the customers love it, the children experience the<br />
transformation and it sells. It sells, means that<br />
you will probably get more work. So, if you haven’t<br />
started painting full faces I challenge you to convert<br />
a couple of your cheek art designs into full face and<br />
see what happens! Oh, and be sure to let me know<br />
how it works out for you.<br />
This year my features for Christmas will be the<br />
Santa hat and the Elf hat. They both are painted on<br />
the forehead, so that the little squinters won’t have<br />
to close their eyes. The fun of these designs is that<br />
they are gender neutral and they only call for three<br />
to four colors. So, let’s get started painting.<br />
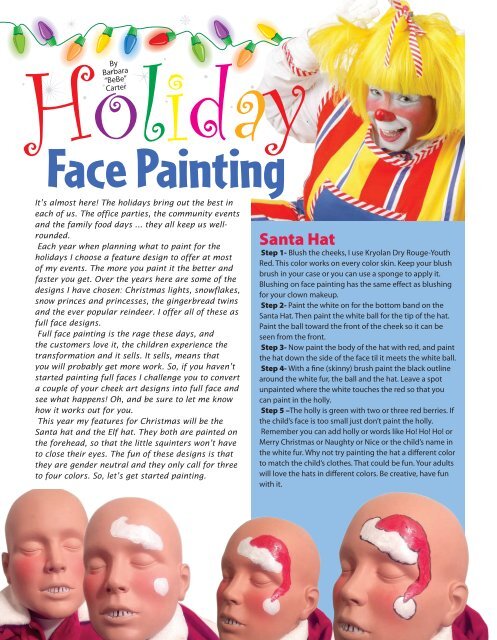
Santa Hat<br />
Step 1- Blush the cheeks, I use Kryolan Dry Rouge-Youth<br />
Red. This color works on every color skin. Keep your blush<br />
brush in your case or you can use a sponge to apply it.<br />
Blushing on face painting has the same effect as blushing<br />
for your clown makeup.<br />
Step 2- Paint the white on for the bottom band on the<br />
Santa Hat. Then paint the white ball for the tip of the hat.<br />
Paint the ball toward the front of the cheek so it can be<br />
seen from the front.<br />
Step 3- Now paint the body of the hat with red, and paint<br />
the hat down the side of the face til it meets the white ball.<br />
Step 4- With a fine (skinny) brush paint the black outline<br />
around the white fur, the ball and the hat. Leave a spot<br />
unpainted where the white touches the red so that you<br />
can paint in the holly.<br />
Step 5 –The holly is green with two or three red berries. If<br />
the child’s face is too small just don’t paint the holly.<br />
Remember you can add holly or words like Ho! Ho! Ho! or<br />
Merry Christmas or Naughty or Nice or the child’s name in<br />
the white fur. Why not try painting the hat a different color<br />
to match the child’s clothes. That could be fun. Your adults<br />
will love the hats in different colors. Be creative, have fun<br />
with it.<br />
Page 18<br />
The New Calliope