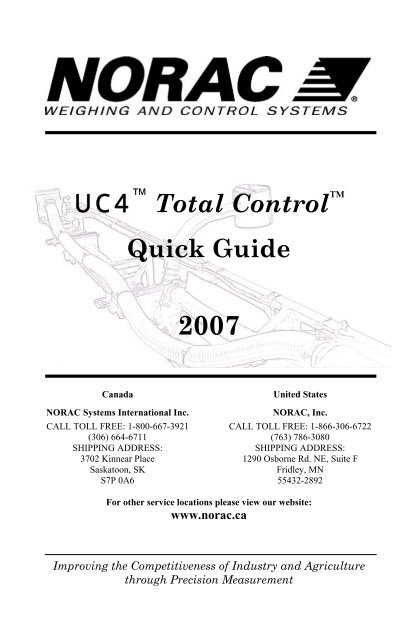
UC4™ Total Control™ Quick Guide - NORAC Systems
UC4™ Total Control™ Quick Guide - NORAC Systems
UC4™ Total Control™ Quick Guide - NORAC Systems

You also want an ePaper? Increase the reach of your titles
YUMPU automatically turns print PDFs into web optimized ePapers that Google loves.
UC4 <strong>Total</strong> Control <br />
Canada<br />
<strong>NORAC</strong> <strong>Systems</strong> International Inc.<br />
CALL TOLL FREE: 1-800-667-3921<br />
(306) 664-6711<br />
SHIPPING ADDRESS:<br />
3702 Kinnear Place<br />
Saskatoon, SK<br />
S7P 0A6<br />
<strong>Quick</strong> <strong>Guide</strong><br />
2007<br />
United States<br />
<strong>NORAC</strong>, Inc.<br />
CALL TOLL FREE: 1-866-306-6722<br />
(763) 786-3080<br />
SHIPPING ADDRESS:<br />
1290 Osborne Rd. NE, Suite F<br />
Fridley, MN<br />
55432-2892<br />
For other service locations please view our website:<br />
www.norac.ca<br />
Improving the Competitiveness of Industry and Agriculture<br />
through Precision Measurement
Printed in Canada<br />
Copyright ©2006 <strong>NORAC</strong> <strong>Systems</strong> International Inc.<br />
Reorder P/N: 446BC-MAN5-2 Revision A<br />
NOTICE<br />
<strong>NORAC</strong> <strong>Systems</strong> International Inc. reserves the right to improve products<br />
and their specifications without notice and without the requirement to update<br />
products sold previously. Every effort has been made to ensure the accuracy<br />
of the information contained in this manual. The technical information in this<br />
manual was reviewed at the time of approval for publication.
TABLE OF CONTENTS<br />
1 INTRODUCTION.................................................................................................... 1<br />
2 OPERATOR SAFETY ............................................................................................ 2<br />
3 BASIC UC4 OPERATION ..................................................................................... 3<br />
3.1 NORMAL OPERATING SCREEN ............................................................... 3<br />
3.2 CHANGING TO AUTOMATIC OR MANUAL MODE .................................... 4<br />
3.3 ADJUSTING THE TARGET HEIGHT (SETPOINT) ....................................... 5<br />
3.4 VIEWING THE ACTUAL BOOM HEIGHT .................................................. 5<br />
3.5 CHANGE THE SYSTEM SENSITIVITY (SENSI) ........................................ 6<br />
3.6 CHANGING BETWEEN SOIL AND CROP MODE ...................................... 6<br />
3.7 PERFORMING A RETUNE ........................................................................ 7<br />
4 COMMON SYMPTOMS AND SOLUTIONS ...................................................... 8<br />
4.1 GENERAL OPERATION ........................................................................... 8<br />
4.2 SENSOR RELATED ISSUES .................................................................... 10<br />
4.3 HYDRAULIC RELATED ISSUES ............................................................. 14<br />
4.4 BOOM INSTABILITY AND MAIN LIFT .................................................... 18<br />
4.5 ACTIVE AND PASSIVE ROLL ................................................................ 19<br />
5 UC4 ERROR MESSAGES .................................................................................... 21<br />
5.1 SYSTEM SETUP ERROR MESSAGES ...................................................... 21<br />
5.2 OPERATIONAL ERROR MESSAGES ....................................................... 23<br />
6 SENSOR AND ROD ALIGNMENT .................................................................... 25<br />
6.1 WING SENSORS.................................................................................... 25<br />
6.2 PASSIVE ROLL SYSTEMS ...................................................................... 26<br />
6.3 ACTIVE ROLL SYSTEMS ....................................................................... 28<br />
7 QUICK REFERENCE .......................................................................................... 30<br />
8 STATEMENT OF LIMITED WARRANTY ....................................................... 33
1 INTRODUCTION<br />
This booklet is a quick on-site reference for the operator of the UC4<br />
automatic boom height control system.<br />
This booklet is intended to be used in conjunction with the:<br />
• UC4 <strong>Total</strong> Control Automatic Boom Height Technical Manual<br />
(UC4 Technical Manual)<br />
• UC4 <strong>Total</strong> Control Automatic Boom Height System Installation<br />
Manual (UC4 Installation Manual)<br />
It is important for the operator to be familiar with the UC4 Technical<br />
Manual before attempting operation. As well, it is assumed that the<br />
operator is familiar with navigating through the UC4 control panel menu<br />
structure and with making setting adjustments.<br />
Section 3 outlines basic operation of the UC4 control system.<br />
Section 4 describes solutions for common symptoms regarding the UC4<br />
system operation. Irregular behavior is sometimes a combination of several<br />
causes. Please take time to read this section thoroughly.<br />
Section 5 presents common error messages on the UC4 control panel’s<br />
LCD screen.<br />
Section 6 discusses detailed information regarding the sensor and rod<br />
alignment. This information will be useful to operate and maintain the<br />
system efficiently.<br />
Section 7 is a quick reference to the common symptoms. It guides you to<br />
find a proper solution quickly when experiencing difficulty during System<br />
Setup or field operation.<br />
This guide is based on UC4 software Version 5<br />
If you can not determine the cause of your problem, contact your dealer or<br />
<strong>NORAC</strong> for assistance.<br />
1<br />
Phone: 1-800-667-3921 in Canada (Toll Free)<br />
1-866-306-6722 in the United States (Toll Free)<br />
0-800-404-8389 in the United Kingdom (Toll Free)<br />
E-mail:<br />
1-306-664-6711 all other regions<br />
service@norac.ca<br />
Web Site: www.norac.ca
2 OPERATOR SAFETY<br />
DANGER<br />
STEP 1: Always ensure that the UC4 system is powered<br />
down or in MANUAL mode:<br />
• before leaving the operator’s seat<br />
• while the machine is not moving<br />
• or when transporting the machine<br />
STEP 2: Under no circumstances should any service work<br />
be performed on the machinery while the UC4 system is<br />
in the AUTOMATIC mode.<br />
STEP 3: Before working on any part of the booms:<br />
• set the UC4 system to MANUAL mode<br />
• turn the sprayer engine off<br />
STEP 4: Do not operate this system before:<br />
• reading and understanding the UC4 Technical<br />
Manual<br />
• thoroughly understanding your machine operation<br />
STEP 5: The UC4 system will greatly improve your<br />
spraying height accuracy and protect the boom against<br />
damage in a wide variety of field conditions. However,<br />
under some circumstances performance may be limited.<br />
The OPERATOR of the sprayer must remain ALERT at<br />
all times and override the automatic control when<br />
necessary. Refer to the warranty statement in Section 0<br />
for more details.<br />
2
3 BASIC UC4 OPERATION<br />
• Upon power-up a sequence of messages are temporarily displayed on<br />
the control panel LCD screen<br />
3<br />
- the system is ready for use once the Normal Operating Screen<br />
(Figure 1) is displayed<br />
• To access either the SENSOR DISPLAY or SETUP menus ensure<br />
you are at the Normal Operating Screen<br />
- toggle toward the menu you wish to access<br />
- adjust the menu settings using the " +/- " switch while the prompt<br />
is displayed<br />
• After 30 seconds menu prompts will return to the Normal Operating<br />
Screen<br />
• To return to the Normal Operating Screen toggle and hold the "SETUP<br />
(NO)" switch for two seconds<br />
• New settings take effect once the Normal Operating Screen is displayed<br />
SENSOR<br />
DISPLAY<br />
UC4<br />
BO OM<br />
BOOM<br />
CO NTROL CONTROL<br />
SENSOR<br />
DISPLAY<br />
+<br />
(YES)<br />
AUT O<br />
SETUP MANUAL<br />
(NO)<br />
Figure 1 – SENSOR DISPLAY / SETUP Switch and Normal Operationg<br />
Screen<br />
3.1 NORMAL OPERATING SCREEN<br />
SETUP<br />
UC4<br />
• In AUTOMATIC mode the digits represent target boom height in<br />
inches<br />
• In MANUAL mode the digits represent actual boom height in inches<br />
SENSOR<br />
DISPLAY<br />
SETUP<br />
(NO)<br />
+<br />
(YES)<br />
AUTO<br />
MANUAL
Table 1 – Examples of Normal Operating Screens<br />
3.2 CHANGING TO AUTOMATIC OR MANUAL MODE<br />
• From the Normal Operating Screen toggle the control panel "AUTO"<br />
switch to change between MANUAL and AUTO modes<br />
• In MANUAL mode, the boom may be controlled as usual with the<br />
boom control switches on the sprayer’s multifunction handgrip<br />
• Operating the sprayer’s left or right boom control switches while in<br />
AUTO mode immediately causes that boom to revert to MANUAL<br />
mode.<br />
- the sprayer’s joystick switches override automatic height control<br />
on either the left, right, or both sides<br />
• To return to AUTO mode the "AUTO (YES)" switch must be<br />
activated.<br />
• The target height (Section 3.3) can be adjusted by momentarily<br />
pressing the sprayer’s main lift control switches (main up or main<br />
down).<br />
• Pressing and holding the sprayer’s main up or down switches for more<br />
4
5<br />
than two seconds reverts ALL booms (left, right, main and roll) to<br />
MANUAL mode.<br />
- this is a convenient method for switching to MANUAL mode<br />
when folding for transport<br />
3.3 ADJUSTING THE TARGET HEIGHT (SETPOINT)<br />
36 AA 36<br />
36 34 36<br />
The system is in AUTO and can have the<br />
target height adjusted<br />
• Use the " +/- " switch in AUTO mode to adjust the target height<br />
setting.<br />
• Alternately, adjust the main boom target height by momentarily<br />
pressing the sprayer’s main lift control switch while in AUTO mode<br />
- each press of the up/down switch increases/decreases the target<br />
height by one inch, respectively<br />
• The smallest target height setting is called the minimum height<br />
override.<br />
• Default minimum height settings are factory programmed before<br />
shipping.<br />
3.4 VIEWING THE ACTUAL BOOM HEIGHT<br />
Left boom is at 36”, right center section is<br />
at 34” and right boom is at 36”<br />
• Toggle the "SENSOR DISPLAY" switch to view actual boom heights.<br />
- the left, main (center) and right boom heights are displayed on this<br />
screen<br />
• To view additional sensor heights (if installed) toggle the "SENSOR<br />
DISPLAY" switch again.<br />
• To lock the currently viewed sensor heights on the screen indefinitely<br />
toggle the " + " switch once<br />
• Height menus can be viewed in both AUTO and MANUAL mode.<br />
• More information on sensor height menus is available in the UC4<br />
Technical Manual.
3.5 CHANGING THE SYSTEM SENSITIVITY (SENSI)<br />
Sensi 5<br />
Crop on<br />
Soil on<br />
A sensitivity setting of 5 (default setting)<br />
• Toggle the "SETUP” switch to view the current Sensi setting<br />
- while viewing this menu, toggle the " +/- " switch to adjust the<br />
Sensi value.<br />
- lower numbers reduce system sensitivity and improve stability<br />
- increasing the number will speed up the response (five is the<br />
default setting)<br />
• If the Sensi setting is modified, the panel will return to the Normal<br />
Operating screen after 3 seconds.<br />
• A lower Sensi setting may be required for stable control at the start<br />
of operation (before sprayer is warmed up).<br />
• As the sprayer warms up increase the Sensi setting until the<br />
performance reaches an optimum level.<br />
• Refer to the UC4 Technical Manual for a discussion of performance<br />
issues<br />
3.6 CHANGING BETWEEN SOIL AND CROP MODE<br />
System is in CROP mode<br />
System is in SOIL mode<br />
• SOIL or CROP mode can be adjusted in both MANUAL and AUTO<br />
modes.<br />
• To view the current setting, toggle the "SETUP (NO)" switch twice.<br />
• While viewing this menu, use the " +/- " switch to change between<br />
SOIL and CROP mode.<br />
- wait five seconds for the change to take effect on all sensors<br />
• If the mode is modified the panel will return to the Normal Operating<br />
screen after 3 seconds.<br />
6
3.7 PERFORMING A RETUNE<br />
NOTE: Sensors are not adjusted or calibrated by<br />
performing a ReTune. A retune recalibrates the hydraulic valve<br />
parameters.<br />
Perform a system return when:<br />
• When a hydraulic solenoid valve is changed.<br />
• When the hydraulic pump is changed or adjusted.<br />
• When the normal working temperature of the hydraulic oil has shifted<br />
significantly from when the system was previously calibrated.<br />
• If you are running a pull type sprayer and use different tractors to<br />
operate the sprayer, you should perform a ReTune each time the<br />
tractor is changed.<br />
• If you have a flow control for the boom hydraulics, set it prior to<br />
tuning. If you change the flow setting by more than 20 percent, you<br />
should perform a ReTune.<br />
Before starting a ReTune:<br />
• Prepare the equipment and select an appropriate location (refer to the<br />
UC4 Technical Manual for more details)<br />
Performing a ReTune:<br />
• Navigate to the "ReTune?" menu prompt in the SETUP menu.<br />
• To start a ReTune, confirm with the "AUTO (YES)" switch.<br />
• Follow the instructions on the LCD screen.<br />
NOTE: If an error occurs during a ReTune, refer to Section 4 and 5.<br />
If the solution is not listed, contact <strong>NORAC</strong>. During the<br />
ReTune, progress will be displayed on the LCD screen. Please<br />
record these displayed messages before or while the error<br />
occurs. Providing us with these messages will help determine<br />
the problem.<br />
7
4 COMMON SYMPTOMS AND SOLUTIONS<br />
• This section discusses common symptoms and suggested solutions<br />
when the UC4 control system is being installed or operated.<br />
• It is recommended that you use Section 7 to identify your problem and<br />
use that reference to navigate to the details within this section.<br />
4.1 GENERAL OPERATION<br />
4.1.1<br />
• LCD screen does not light up<br />
• System resets itself when a boom valve is turned on<br />
Possible Cause(s) Suggested Solution(s)<br />
a) Inadequate power a-1) Ensure the UC4 power cable is connected<br />
supply<br />
to the UC4 control panel<br />
NOTE:<br />
a-2) Ensure the UC4 power cable is connected<br />
If your system is operating below<br />
+12 volts, this may cause a<br />
problem. If you have a low<br />
voltage problem, it could be due<br />
to the sprayer’s power supply properly.<br />
a-3) Ensure the sprayer’s power supply<br />
voltage is high enough (more than +12V).<br />
to the sprayer’s electrical system<br />
(e.g. faulty alternator, battery, or<br />
poor ground connection).<br />
Measure the supply voltage when the<br />
valve is being used, since the valve action<br />
may cause a voltage drop.<br />
b) Defective power cable b) Follow a-1) to a-3). Wiggle cables/wires<br />
around. If the symptom continues, the<br />
cable may need repairing.<br />
c) Damaged LCD screen c) Follow a) and b). If the symptom<br />
continues, the screen may need replacing.<br />
4.1.2<br />
• Part of the LCD screen is black<br />
• Some of the digits do not appear on the LCD screen<br />
• LCD screen turns black (high contrast) temporarily<br />
Possible Cause(s) Suggested Solution(s)<br />
The control panel is High temperature causes the LCD screen to<br />
mounted so that direct turn black (high contrast). This symptom will<br />
sunlight hits the front panel<br />
(LCD screen)<br />
disappear when the LCD cools down.<br />
8
4.1.3<br />
• UC4 randomly switches between AUTO and MANUAL modes<br />
• LCD screen display changes erratically<br />
• UC4 system unintentionally goes into MANUAL mode<br />
9<br />
Possible Cause(s) Suggested Solution(s)<br />
a) Poor cable connection<br />
NOTE:<br />
Connectors used to interface<br />
with sprayer hydraulics are often<br />
located outside and are<br />
susceptible to moisture.<br />
a-1) Ensure that all cables are correctly<br />
connected according to the UC4<br />
Installation Manual. The connections<br />
should be tight and free of corrosion.<br />
a-2) Wiggle cables/wires around while in<br />
AUTO mode. This will detect any<br />
interruptions, as it will change the system<br />
into MANUAL mode.<br />
b) Defective cable(s) b) Follow a-1) and a-2). If the symptom<br />
continues, the cable may need repairing.<br />
c) Electrical noise on the<br />
sprayer’s D.C. system<br />
4.1.4<br />
• Height increases/decreases unintentionally<br />
c) Add a power line filter or freewheeling<br />
diodes on one or more of the sprayer’s<br />
solenoid valves.<br />
Possible Cause(s) Suggested Solution(s)<br />
Intermittent electrical<br />
noise on the main lift<br />
interface cable(s).<br />
NOTE:<br />
This is similar to when the<br />
operator momentarily presses<br />
main up/down buttons to<br />
increase/decrease the spray<br />
height setpoint (Section 3.3).<br />
4.1.5<br />
• UC4 system does not go into AUTO mode<br />
a) Try installing a power line filter<br />
b) Diodes may have to be installed in the<br />
main lift lines (these must be sized<br />
appropriately for the sprayer ex. IN5408<br />
for a 3 Amp or smaller coil)<br />
Contact <strong>NORAC</strong> for more information<br />
Possible Cause(s) Suggested Solution(s)<br />
a) Incomplete System<br />
Setup (Install)<br />
b) Accidentally initiated<br />
an Install and aborted<br />
it before completion<br />
Perform an Install successfully (see Section 4.1<br />
of the UC4 Technical Manual)
4.1.6<br />
• Boom does not appear to be sufficiently level after System Setup<br />
Possible Cause(s) Suggested Solution(s)<br />
a) Sensitivity (Sensi)<br />
setting is low<br />
b) Improper System<br />
Setup<br />
4.2 SENSOR RELATED ISSUES<br />
a-1) Check the nozzle heights on LCD screen in<br />
MANUAL mode<br />
a-2) If the displayed heights differ from the<br />
target heights (setpoints), check Sensi<br />
setting and adjust it, if necessary.<br />
NOTE: The default tolerate distance between the<br />
actual nozzle heights and the target heights is<br />
±2.5" at Sensi setting of 5.<br />
b-1) Repeat the Automatic System Setup<br />
(Section 8.2 of the UC4 Technical Manual)<br />
b-2) Confirm sensor height readings manually<br />
by referring to “Calibrating the Sensor’s<br />
Height Reading (Zero Height)” in the UC4<br />
Technical Manual.<br />
4.2.1<br />
• Display stuck at “"Mot’n Dly" or "KP Stp 9"<br />
Possible Cause(s) Suggested Solution(s)<br />
a) Sensor is too close to<br />
the boom<br />
a) Move the sensor to a better location. It<br />
should be 9” of front of and 9” above the<br />
spray nozzle. The sensor requires a 12”<br />
diameter clear view of the ground<br />
b) The target is too weak b) Move to a new location with either dirt or<br />
gravel on the ground<br />
c) Make sure there is no grass or other plants<br />
under the sprayer boom<br />
d) Verify the sensor is approximately parallel<br />
to the ground<br />
10
4.2.2<br />
• Sensor appears not to work: Displaying "NC"<br />
• Wrong number of sensors displayed during System Setup<br />
• Displaying "Absent" during System Setup – Sensor Detect<br />
11<br />
Possible Cause(s) Suggested Solution(s)<br />
a) Serial number (SN)<br />
entered in the control<br />
panel does not match<br />
the connected<br />
sensor’s SN<br />
b) Poor cable connection<br />
or defective cable(s)<br />
a) Check SNs entered in the control panel and<br />
verify numbers with each sensor in the<br />
respective boom location. Reenter the<br />
correct SN, if necessary.<br />
b) Follow a), 4.1.3a-1) and perform Sensor<br />
Swapping described in 4.2.6. If the<br />
symptom continues, the cable(s) may need<br />
repairing.<br />
c) Ensure the sensor cables are not strained or<br />
pinched by boom fold actions<br />
c) Damaged sensor d) Follow b). If the symptom appears in the<br />
moved boom location, the sensor may need<br />
repairing.<br />
4.2.3<br />
• Invalid sensor measurement: Displaying "NR"<br />
Possible Cause(s) Suggested Solution(s)<br />
a) Sensor is out of range<br />
or reading a target<br />
closer than 7"<br />
b) Protective foam shield<br />
is contaminated<br />
a-1) Move the boom(s) until sensor(s) is<br />
between 30 and 60 inches above the<br />
ground.<br />
a-2) Check sensor alignment (Section 6).<br />
NOTE: If the sensor is facing forward/backward too<br />
far, the signal cannot echo back to the sensor.<br />
a-3) Check for obstructions between the sensor<br />
and the ground.<br />
NOTE: Any object between them can deflect the signal<br />
such that it cannot echo back to the sensor.<br />
b) Inspect and clean the foam shield. Remove<br />
the foam and clean with compressed air.<br />
NOTE: Do not blow out the foam while it is still in the<br />
sensor. Sensor damage will result.
4.2.2 continues<br />
c) Protective Weather<br />
Caps are not removed.<br />
* Prior to 2004 shipped<br />
sensors only<br />
d-1) Moisture in sensor<br />
d-2) Direct exposure to<br />
rain<br />
NOTE:<br />
It may cause this error<br />
especially if the sensor mouth<br />
points upward while sprayer<br />
booms are folded to transport<br />
position. Measures should be<br />
taken to minimize rain<br />
exposure to sensors.<br />
e) Ultrasonic transducer<br />
is damaged or<br />
contaminated<br />
c) Remove the Protective Weather Caps that<br />
fit over the mouth of the sensor.<br />
d-1) Remove the protective foam shield and<br />
check the sensor’s transducer foil.<br />
d-2) Allow the transducer to dry.<br />
NOTE: The foil is the gold-colored material beneath<br />
the metal screen. The foil should be clean, dry<br />
and wrinkle free.<br />
NOTE: Running the sensor will accelerate the drying<br />
effect.<br />
e) Follow a) to d-1), and listen to the sensor<br />
for a ticking sound. If the sensor is not<br />
ticking or the transducer is contaminated,<br />
the sensor may need repairing.<br />
4.2.4<br />
• Sensor not working: Displaying "##" or "-#" (too high or low)<br />
Possible Cause(s) Suggested Solution(s)<br />
a) Boom section is too<br />
high ("##").<br />
b) Sensor Zero Height<br />
setting is incorrect<br />
c) Sensor is facing very<br />
strong sonic targets<br />
(e.g. concrete)<br />
NOTE:<br />
This may cause measurement<br />
errors, flashing from a valid<br />
height reading to "0","##" or<br />
"-#"<br />
a) Lower the boom section<br />
NOTE: The sensor is reporting a reading that has too<br />
many digits to display on the LCD screen.<br />
When the boom returns to normal heights, the<br />
reading should reappear on the screen.<br />
b) Check the sensor Zero Height. Calibrate it,<br />
if necessary.<br />
NOTE: Refer to Section 8.5.3.1.2 Calibrating the<br />
Sensor’s Height Reading in the UC4 Technical<br />
Manual.<br />
NOTE: This symptom may occur when sensors have<br />
been “swapped” from different mounting<br />
locations.<br />
c) Try a different/adequate target.<br />
12
4.2.5<br />
• Displaying "SNR xxxx" during Automatic System<br />
13<br />
Possible Cause(s) Suggested Solution(s)<br />
a) Improper sensor<br />
alignment<br />
NOTE:<br />
Sensor is not reading the<br />
ground or the target properly<br />
b) Poor targets such as<br />
wet gravel or stubble<br />
a) Check sensor alignment (Section 6),<br />
primarily the sensor involved with the<br />
error. For example, if the System Setup is<br />
performing a "LftDet" and this message<br />
appears, check the Left wing sensor(s).<br />
b) Try a different target.<br />
4.2.6 Sensor Swapping<br />
Swapping Sensors is a useful procedure for determining whether a sensor<br />
error message (e.g. "LO NR") is due to the sensor or the wiring to the<br />
sensor.<br />
NOTE: A sensor may have power and emit a ticking sound, but have broken<br />
communication wire(s), which would cause this error. Performing Sensor<br />
Swapping would help determining the cause.<br />
The procedure is as follows:<br />
i) Exchange the affected sensor with one that is reporting correctly<br />
(e.g. "LO" and "RO").<br />
ii) Swap (input) their respective location serial numbers into the control<br />
panel (Refer to Section 8.5.3.1.1 “Entering Sensor Serial<br />
Numbers” in the UC4 Technical Manual).<br />
iii) If the problem still exists in the same location ("LO NR"), and the<br />
sensor on the "RO" is reporting correctly, the wiring from the left<br />
outer ("LO") branch may have a fault and the sensor itself is<br />
functional.<br />
iv) If the error appears on the right outer sensor ("RO NR"), the sensor<br />
may not be functioning.
4.3 HYDRAULIC RELATED ISSUES<br />
• Determine whether the problem is hydraulic or electrical<br />
• If your hydraulic valve has an override pin, use it to manually open the<br />
valve<br />
• If there is no reaction the problem is hydraulic, if the boom moves the<br />
problem may be electrical<br />
NOTE: If there is a bypass valve with the hydraulic system, the bypass valve is also<br />
needed to open at same time as with the tested valve.<br />
• Hydraulic<br />
4.3.1<br />
• Boom(s) will not raise or lower<br />
Possible Cause(s) Suggested Solution(s)<br />
a) Hydraulic oil is not<br />
being supplied to the<br />
<strong>NORAC</strong> valve block<br />
b) Hydraulic quick<br />
couplers are not<br />
properly connected<br />
c) Not enough backpressure<br />
to activate<br />
the check valves in<br />
the <strong>NORAC</strong> valve<br />
block<br />
NOTE: Some Single Acting<br />
valve systems only<br />
4.3.2<br />
• Booms will not lower<br />
a) Ensure that oil is being supplied to the<br />
<strong>NORAC</strong> valve block in the proper<br />
direction (Tank and Pressure lines).<br />
NOTE: If the direction is wrong, the check valve may<br />
prevent oil from flowing through the valve.<br />
b) Ensure that all quick couplers in the<br />
hydraulic system are properly connected.<br />
c) Place orifices in the “A” lines going to<br />
Tank (“T”) in order to create sufficient<br />
back-pressure to activate the pilot-operated<br />
check valves in the <strong>NORAC</strong> valve block.<br />
Possible Cause(s) Suggested Solution(s)<br />
Insufficient back-pressure<br />
to activate the pilotoperated<br />
check valves in<br />
the <strong>NORAC</strong> valve block<br />
Some single acting circuits may require orifices<br />
be placed in the “A” lines going to the tank<br />
14
4.3.3<br />
• "Timeout!" error during System Setup<br />
15<br />
Possible Cause(s) Suggested Solution(s)<br />
a) Hydraulic cylinder<br />
has reached the end of<br />
its stroke but the<br />
system is still trying<br />
to move in that<br />
direction<br />
b) Boom is moving too<br />
slow<br />
c) Not enough pressure<br />
to the hydraulic<br />
circuits at main lift<br />
("MlfDet") Boom<br />
Geometry Tuning<br />
NOTE: This is for sprayers<br />
with load-sensing hydraulic<br />
circuits.<br />
d) The sensor may be<br />
reading off the boom<br />
a-1) Ensure the hydraulic cylinders are not<br />
being prevented from moving by a cylinder<br />
cap.<br />
a-2) If a cylinder is fully extended or retracted,<br />
manually reposition the boom into the<br />
middle of the cylinder stroke and resume<br />
the setup with the "AUTO (YES)" switch.<br />
a-3) For left and right booms that do not adjust<br />
below the level of the main boom, ensure<br />
that the main boom is within 50 inches<br />
above ground before attempting an Install<br />
or ReTune (System Setup).<br />
b) Ensure the hydraulic oil is at working<br />
temperature.<br />
c-1) Ensure the solution pump is running.<br />
c-2) Put the hydraulic system into high pressure<br />
manually.<br />
NOTE: On a John Deere sprayer, this can be<br />
accomplished by pressing and holding the<br />
brake.<br />
d-1) Move the sensor to a location where the<br />
boom will not interfere with the sensor<br />
readings<br />
4.3.4<br />
• Boom raises when it should lower, or vice versa<br />
Possible Cause(s) Suggested Solution(s)<br />
a) Wrong valve cable a) Ensure cable connection to the <strong>NORAC</strong><br />
connection<br />
valve block<br />
b) Wrong plumbing b) Ensure the plumbing is correct:<br />
• The boom raise line(s) connect(s) to the “B” port(s)<br />
on the <strong>NORAC</strong> valve block.<br />
• The boom lower line(s) connect(s) to the “A” port(s)<br />
on the <strong>NORAC</strong> valve block.<br />
• The Tank and Pressure lines connect to the Tank<br />
(“T”) port and Pressure (“P”) port on the <strong>NORAC</strong><br />
valve block, respectively.
4.3.5<br />
• Boom(s) creep up or down in MANUAL mode<br />
• Boom will not stay level or settle over a long period of time<br />
Possible Cause(s) Suggested Solution(s)<br />
a) Internal problem with<br />
the <strong>NORAC</strong> valve<br />
block (e.g. a sticking<br />
or worn valve)<br />
a) The valve block may need repairing or<br />
replacing.<br />
b) Cylinder leakage b) The cylinder sealsmay need replacing.<br />
c) Faulty check valve(s) c) The check valve(s) may need replacing.<br />
in the <strong>NORAC</strong> valve<br />
block<br />
d) Foreign object stuck<br />
in an internal port of<br />
the <strong>NORAC</strong> valve<br />
e) Not enough backpressure<br />
to activate<br />
the check valves in<br />
the <strong>NORAC</strong> valve<br />
block<br />
NOTE: Some Single Acting<br />
valve systems only<br />
f) Problem within the<br />
sprayer’s hydraulic<br />
network (system)<br />
d) If possible, remove the foreign object or<br />
the valve block may need repairing.<br />
e) Follow 4.3.1c).<br />
f) Check the sprayer’s hydraulic network.<br />
4.3.6<br />
• Boom(s) creep(s) upwards when in the transport position<br />
Possible Cause(s) Suggested Solution(s)<br />
a) Valve leakage a) The valve block may need repairing or<br />
replacing.<br />
b) Faulty check valve(s) b) The check valve(s) may need replacing.<br />
in the <strong>NORAC</strong> valve<br />
block<br />
16
4.3.7<br />
• Hydraulic oil overheat<br />
• Sprayer shuts down or alarm sounds due to the hydraulic oil overheat<br />
17<br />
Possible Cause(s) Suggested Solution(s)<br />
a) High performance<br />
automatic boom<br />
leveling system<br />
requiring elevated<br />
amounts of hydraulic<br />
power to constantly<br />
maintain proper<br />
setpoint is increasing<br />
oil temperature<br />
b) Plumbing single<br />
acting systems as<br />
double acting with<br />
both A ports orificed<br />
may reduce heating<br />
a) Lowering the Sensitivity ("Sensi")<br />
setting may reduce the system activity and<br />
lower the temperature as a result.<br />
b) Contact <strong>NORAC</strong> for more information<br />
c) Depending on your type of system, other adjustments may be made.<br />
• Electrical<br />
4.3.8<br />
• Boom(s) will not raise or lower<br />
Possible Cause(s) Suggested Solution(s)<br />
a) Poor cable<br />
connection, defective<br />
cable(s) or defect in<br />
the <strong>NORAC</strong> valve<br />
block<br />
a-1) Check all cable connections between the<br />
control panel and the valve block. Ensure<br />
that they are tight and free of corrosion.<br />
a-2) Check the LCD screen in which the valve<br />
command arrows ("�" or "�") appear.<br />
a-3) Measure the voltage at the valve<br />
connection.<br />
a-4) If there is no voltage, the cable(s) may<br />
need repairing or replacing.<br />
a-5) If there is sufficient voltage (+12V), and<br />
the valve is not reacting, the valve may<br />
need repairing or replacing
4.4 BOOM INSTABILITY AND MAIN LIFT<br />
4.4.1<br />
• Erratic or “jumpy” boom behavior (in CROP mode)<br />
• Bouncing boom(s)<br />
Possible Cause(s) Suggested Solution(s)<br />
a) Sensor readings from<br />
the crop canopy are<br />
less uniform than<br />
from soil<br />
b) Inappropriate<br />
accumulator(s) on lift<br />
hydraulics<br />
a) Tune the hydraulic system properly.<br />
NOTE: This symptom occasionally appears on the<br />
main lift control. If so desired, the main lift<br />
control may be disabled (Passive Roll control<br />
will still be functional).<br />
b) Check the accumulator(s). Replace it<br />
(them) to adequate one(s), if necessary.<br />
4.4.2<br />
• Boom unintentionally moves all the way up in CROP mode<br />
Possible Cause(s) Suggested Solution(s)<br />
Improper sensor alignment Check sensor alignment (Section 6). Ensure the<br />
sensor is not reading off part of the boom.<br />
4.4.3<br />
• Irregular boom movement or boom instability<br />
• Control panel interferes with auto steer or rate controller operation<br />
Possible Cause(s) Suggested Solution(s)<br />
a) Improper sensor<br />
alignment<br />
b) System conflict<br />
between certain<br />
devices (such as other<br />
automatic control<br />
devices) and the UC4<br />
system<br />
c) Wear in boom damper<br />
shocks<br />
a) Follow 4.2.3.<br />
NOTE: Boom instability is often associated with poor<br />
readings from the target rods.<br />
b) May need plumbing changes or adjusting<br />
pump pressure settings.<br />
NOTE: This symptom may occur on sprayers that use<br />
load-sensing hydraulic systems.<br />
c) Check the boom damper shocks. Replace<br />
them, if necessary.<br />
NOTE: Without adequate mechanical damping, the<br />
system may become unstable.<br />
18
19<br />
Possible Cause(s) Suggested Solution(s)<br />
d) Wear in a mast-style<br />
lift system<br />
4.5 ACTIVE AND PASSIVE ROLL<br />
d) Apply shims or filler strips to the<br />
mechanism, or adjust it, if applicable.<br />
NOTE: Some sprayer designs use a mast-style lift<br />
rather than parallel links. The sliding surfaces<br />
on some of these machines are susceptible to<br />
wear which leads to this symptom. The UC4<br />
Passive Roll control cannot take into account<br />
error on the lift mechanism.<br />
4.5.1<br />
• Poor performance of Active/Passive Roll control<br />
Possible Cause(s) Suggested Solution(s)<br />
Weak or intermittent rod Check and adjust sensor alignment (Section 6).<br />
readings – Improper<br />
sensor alignment<br />
4.5.2<br />
• Incomplete Setup of the Roll section during Boom Geometry Tuning<br />
• Poor performance or improper action of Active Roll control<br />
Possible Cause(s) Suggested Solution(s)<br />
Wear in pins and linkages<br />
of main lift section<br />
NOTE: This is commonly<br />
found on sprayers equipped<br />
with Active Roll control.<br />
Check the pins and linkages. Adjust or replace<br />
them, if necessary.<br />
4.5.3<br />
• Poor performance or improper action of Passive Roll control<br />
Possible Cause(s) Suggested Solution(s)<br />
a) Target rod is not<br />
detected during<br />
System Setup.<br />
b) Main lift sensor and<br />
target rod are installed<br />
on a common frame<br />
a-1) Verify that the system is using passive roll<br />
("P"), as indicated by type "Roll OnP"<br />
found in the Roll channel SETUP menu.<br />
a-2) Perform a ReTune.<br />
b-1) Install them properly (Section 6.2).<br />
b-2) Perform a ReTune.
4.5.4<br />
• Main section tends to lower into the crop in CROP mode<br />
Possible Cause(s) Suggested Solution(s)<br />
Target rod is installed on Follow 4.5.3 b-1) and b-2).<br />
the boom too low (too<br />
close to the crop canopy)<br />
20
5 UC4 ERROR MESSAGES<br />
5.1 SYSTEM SETUP ERROR MESSAGES<br />
• During an Install or ReTune if any of the following messages appear<br />
on the LCD screen the system will halt any valve action and wait for<br />
operator acknowledgement<br />
• Some of these messages appear after the operator is prompted to<br />
"Release" "Switch" while holding the "AUTO (YES)" switch<br />
21<br />
release the switch and correct the problem using Table 2<br />
• Exit the procedure by toggling the "SETUP (NO)" switch<br />
Table 2 – System Setup Error Messages<br />
↓TimeOut!↓ ⇒ ↓Retry ?↓<br />
Explanation Possible Causes Required Action<br />
Boom Geometry a. Hydraulic cylinder has a. Follow 4.3.2 a).<br />
Tuning has taken too reached the end of its<br />
long to complete.<br />
stroke, but the system is<br />
still trying to move in that<br />
direction.<br />
b. Boom<br />
slow.<br />
is moving too b. Follow 4.3.2 b).<br />
c. There is not enough c. Follow 4.3.2 c).<br />
hydraulic pressure to<br />
d.<br />
move the boom.<br />
If the boom was moving d. Some booms will take longer<br />
before this message than others to calibrate,<br />
appeared, this is probably<br />
not an error of concern.<br />
triggering a "Timeout!".<br />
↓Wiring!↓ ⇒ ↓Retry ?↓<br />
Explanation Possible Causes Required Action<br />
Setup cannot proceed a. Wrong or poor cable a. Follow 4.1.3 a).<br />
because the control connection.<br />
panel cannot receive<br />
appropriate signal from<br />
a sensor.<br />
b.<br />
c.<br />
Defective cable(s).<br />
Pressing the wrong<br />
switch on the sprayer’s<br />
hand-control.<br />
b.<br />
c.<br />
Follow 4.1.3 b)<br />
Toggle the "AUTO (YES)"<br />
switch to restart the wiring test.
↓SNR 2521↓ ⇒ ↓Retry ?↓<br />
Explanation Possible Causes Required Action<br />
Setup cannot proceed a. Improper sensor a. Follow 4.2.5<br />
because the indicated alignment<br />
sensor is not returning<br />
a valid height reading.<br />
* The number is<br />
arbitrary<br />
b.<br />
c.<br />
Sensor is not reading the<br />
ground or the target<br />
properly.<br />
Faulty sensor.<br />
b.<br />
c.<br />
Follow 4.2.5.<br />
Replace sensor.<br />
↓↓SN=0 det↓ ⇒ ↓Retry ?↓<br />
Explanation Possible Causes Required Action<br />
At least one sensor has The sensor(s) was not set up Replace sensor(s).<br />
been detected with properly at the factory.<br />
improper<br />
programming.<br />
factory<br />
↓Too Many↓ ⇒ ↓Retry ?↓<br />
Explanation Possible Causes Required Action<br />
The system has<br />
detected that too many<br />
sensors are connected.<br />
Too many sensors have been<br />
connected to the system.<br />
↓Bakwards↓ ⇒ ↓Retry ?↓<br />
Remove sensors, or setup the system<br />
manually.<br />
Explanation Possible Causes Required Action<br />
Boom moves in the a. Wiring or hydraulic a. Follow 4.3.3, 4.3.7<br />
wrong direction.<br />
plumbing problem.<br />
b. Extremely under-damped b. Add mechanical damping to<br />
boom.<br />
the boom and/or consult<br />
<strong>NORAC</strong>.<br />
↓TooHigh!↓ or ↓TooLow!↓ .⇒ ↓Retry ?↓<br />
Explanation Possible Causes Required Action<br />
Boom is positioned System Setup was started with Follow 4.2.3 a), 4.2.4 and 4.3.2 a-3).<br />
higher than 60" or the boom positioned too high<br />
lower than 30" or too low.<br />
22
5.2 OPERATIONAL ERROR MESSAGES<br />
• The following messages are non-critical messages that appear on the<br />
LCD screen during operation<br />
23<br />
they usually require some simple adjustment or setting changes<br />
Table 3 – Operational System Error Messages<br />
↓NR MA 35↓<br />
Explanation Possible Causes Required Action<br />
"NR" indicates the a. Sensor is out of range or a. Follow 4.2.3 a).<br />
sensor is communicating reading a target closer than 7".<br />
but Not Reading a valid<br />
measurement.<br />
b. Protective foam<br />
contaminated.<br />
shield is b. Follow 4.2.3 b).<br />
c. Moisture in sensor. c. Follow 4.2.3 d-1), d-2).<br />
d. Transducer is damaged or<br />
contaminated.<br />
↓NC MA 35↓<br />
d. Follow 4.2.3 e).<br />
Explanation Possible Causes Required Action<br />
"NC" indicates No a. Serial number entered in a. Follow 4.2.1 a).<br />
Communication from control panel does not match<br />
the sensor.<br />
connected sensor.<br />
b. Poor cable connection or b. Follow 4.2.1 b).<br />
defective cable(s).<br />
c. Damaged sensor. c. Follow 4.2.1 c).<br />
↓## MM 35↓<br />
Explanation Possible Causes Required Action<br />
"##" is displayed if the a. Boom section is too high. a. Follow 4.2.4 a).<br />
sensor is reading a<br />
height greater than 99<br />
inches. It is commonly<br />
mistaken as an error.<br />
b.<br />
c.<br />
Sensor Zero Height setting is<br />
incorrect.<br />
Sensor is facing very strong<br />
sonic targets (e.g. concrete).<br />
b.<br />
c.<br />
Follow 4.2.4 b).<br />
Follow 4.2.4 c).<br />
↓-# MM 35↓<br />
Explanation Possible Causes Required Action<br />
"-#" is displayed if the a. Sensor Zero Height setting is a. Follow 4.2.4 b).<br />
sensor is reading a incorrect.
height lower than -9<br />
inches. It is commonly<br />
mistaken as an error.<br />
b. Sensor is facing very strong<br />
sonic targets (e.g. concrete).<br />
↓BF NoRdg↓<br />
b. Follow 4.2.4 c).<br />
Explanation Possible Causes Required Action<br />
The Roll reading is not<br />
being measured<br />
properly. Similar error<br />
screens may replace the<br />
"BF" reading identifier<br />
with "LO", "ML", "RI",<br />
"CY", "SP", "IF",<br />
"RF", etc.<br />
This is commonly a sensorrod<br />
alignment issue.<br />
* If this message is displayed<br />
very briefly, it may not be a<br />
problem.<br />
↓Minimum↓ ↓Override↓<br />
Investigate the source of reading<br />
error with the identified sensor / rod.<br />
Refer to Section 6 for more<br />
information.<br />
Explanation Possible Causes Required Action<br />
This message is<br />
displayed when a target<br />
height setpoint is lower<br />
than allowed (minimum<br />
height override).<br />
Operator is proceeding to use<br />
a lower target height setpoint<br />
than allowed.<br />
↓Disabled↓<br />
Adjust the boom height setpoint<br />
greater than the minimum height<br />
override (Section 3.3).<br />
Explanation Possible Causes Required Action<br />
Access to System Setup<br />
features (Install,<br />
ReTune) have been<br />
locked out.<br />
Access to these features was<br />
disabled by installer to avoid<br />
unintentional system changes.<br />
Contact <strong>NORAC</strong> for instructions to<br />
enable feature access.<br />
24
6 SENSOR AND ROD ALIGNMENT<br />
Proper sensor and rod alignment is critical in order for UC4 performance.<br />
The majority of problems reported by operators in the field are due to<br />
improper rod alignment and sensor mounting.<br />
6.1 WING SENSORS<br />
• When the boom is in its lowest position, the sensor mouth must be nine<br />
inches or more above the spray nozzles.<br />
• The bottom of the sensor must be at least nine inches in front of the<br />
nozzles.<br />
• The sensor must be approximately vertical at normal operating heights.<br />
• Ensure that there are no obstructions within a six-inch diameter circle<br />
projected directly below the sensor.<br />
• When mounting or relocating sensor brackets, ensure they do not<br />
interfere with boom folding operation.<br />
• When mounting to the top part of the boom (as shown in Figure 2),<br />
check that the sensor can not read off the bottom part of the boom.<br />
- This is most common in CROP mode (refer to Section 4.2.3)<br />
25<br />
Sensor field<br />
of view<br />
Figure 2 – Sensor Reading of the Boom
6.2 PASSIVE ROLL SYSTEMS<br />
The following is a checklist for troubleshooting Passive Roll systems.<br />
• Ensure the rod is mounted perpendicular (90°) to the sensor.<br />
- if the sensor is straight vertical, the rod must be horizontal<br />
(Figure 5)<br />
• Distance from the sensor to the target should be 20 (± 2) inches (Figure<br />
5).<br />
• The target rod should cross the sensor’s central axis. The sensor<br />
alignment tube (Figure 3) will help make these adjustments.<br />
• Ensure none of the parts collide with any part of the machine during<br />
folding or operation.<br />
- if desired, the Passive Roll rod may be trimmed, but no shorter<br />
than 2 inches past the center of the sensor.<br />
• Ensure the adjustable target mount is tight to prevent rotation.<br />
• Ensure the sensor cable does not pull tight during operation or folding,<br />
causing the sensor to be pulled out of alignment.<br />
Sensor Alignment<br />
Tube<br />
Target Rod<br />
Cut Rod Portion<br />
(2" Past Alignment Tube)<br />
Figure 3 – Sensor Alignment Tube<br />
26
27<br />
Figure 4 – Sensor Alignment Tube (Top)<br />
Figure 5 – Sensor Alignment Tube (Side)
ACTIVE ROLL SYSTEMS<br />
An additional target rod is used on Active Roll systems. The following<br />
includes additional details for mounting and adjusting the second rod.<br />
• Before installing or adjusting, ensure sprayer is level and the booms are<br />
level.<br />
• The spring target should cross directly below the sensor centerline<br />
(Figure 7).<br />
• The frame target should be located 1/2" off the centerline (Figure 7).<br />
• Trim spring target flush with the central axis of the sensor (Figure 8).<br />
• Both the spring and frame target should be perpendicular (90°) to the<br />
central axis of the sensor (Figure 8).<br />
• Ensure the sensor view of the ground is not obstructed by anything<br />
other than the targets (e.g. hydraulic hoses from the wheel motor or the<br />
lower parallel lift arm).<br />
- a 12" diameter clear view of the ground is usually sufficient.<br />
Figure 6 – 47XX Active Roll Setup<br />
28
Figure 7 – Active Roll Rod and Sensor Details for a John Deere 47XX<br />
(Front View)<br />
Sensor Alignment Tube<br />
NOTE: Spring target cut 2”<br />
past alignment tube<br />
Figure 8 – Active Roll Rod and Sensor Details for a John Deere 47XX<br />
(Side View)<br />
29<br />
NOTE: Both targets are<br />
perpendicular to<br />
sensor axis
7 QUICK REFERENCE<br />
7.1 ISSUES DURING SYSTEM SETUP<br />
Table 4 – During System Setup (Install or ReTune)<br />
Symptom See<br />
Section<br />
See<br />
Page<br />
• During Control Panel Power Up<br />
Wrong number of sensors shown 4.2.1 10<br />
Number of sensors are "Absent" 4.2.1 10<br />
"Scanning" or ">>>>" stuck on display 4.2.1 10<br />
• During Wiring Test<br />
"Wiring!" Displayed 4.1.3a) b)<br />
,5.1<br />
9, 21<br />
Control panel displayed "OK" but the wrong<br />
boom moved<br />
4.3.3 14<br />
Control panel displayed "OK" but the boom<br />
moved wrong direction<br />
4.3.3 14<br />
Booms do not move 4.3.1, 4.3.7 14, 16<br />
• During Sensor Detect<br />
"SN=0 det" "Retry" displayed 5.1 21<br />
"Too Many" "Retry" displayed 5.1 21<br />
"SNR xxxx" "Retry" 4.2.5 13<br />
Stuck at "Exit Cab" "push"… 4.5.1, 4.5.2,<br />
4.5.3<br />
19, 19<br />
• During Boom Geometry Tuning<br />
Timeout Error at "LftDet" or "RgtDet" 4.3.3 a), b),<br />
4.3.8<br />
14, 17<br />
Timeout Error at "MlfDet" 4.3.3 a), b),<br />
c) , 4.3.8<br />
14, 17<br />
Timeout Error at "MrlDet" 4.3.2a), b),<br />
4.3.8<br />
14, 17<br />
Timeout Error at "DZ Stp 1" 4.3.3 a) 14<br />
Timeout Error at "KP Stp 4" 4.3.3 a) 14<br />
Timeout Error at "Adj 255" 4.3.3 a) 14<br />
Timeout Error at "Adj 4" 4.4 18<br />
"Too High" or "Too Low" message 4.2.3 a),<br />
4.3.3 a-3)<br />
11, 14<br />
"Backwards" "Retry" displayed 5.1 21<br />
30
31<br />
Symptom See<br />
Section<br />
See<br />
Page<br />
ReTune procedure stalls at "DZ" or "KP" screen 4.4 18<br />
Incomplete System Setup of the Roll section 4.5.2 19<br />
• During Control System Test<br />
Boom does not appear to be sufficiently level<br />
after System Setup<br />
7.2 OPERATIONAL ISSUES<br />
Table 5 – During Operation<br />
Symptom See<br />
Section<br />
4.1.6 10<br />
See<br />
Page<br />
• LCD Screen Issues (General Operation)<br />
LCD screen does not light up 4.1.1 8<br />
System resets itself when the valve is turned on 4.1.1 8<br />
Part of the LCD screen is black 4.1.2 8<br />
Some of the digits do not appear on the LCD<br />
screen<br />
4.1.2 8<br />
LCD screen turns black (high contrast)<br />
temporarily<br />
4.1.3 8<br />
• UC4 Problems (General Operation)<br />
UC4 system switches between AUTO and<br />
MANUAL modes randomly<br />
4.1.3 9<br />
LCD screen display changes erratically 4.1.3 9<br />
UC4 system unintentionally goes into 4.1.3 9<br />
MANUAL mode from AUTO mode<br />
Target height on the main lift boom 4.1.4 9<br />
unintentionally increases/decreases over time<br />
UC4 system does not go into AUTO mode 4.1.5 9<br />
• Sensor Related Issues<br />
Sensor appears not to work. Displaying:<br />
"NC" 4.2.1 10<br />
"NR" 4.2.3 11<br />
"##" or "-#" 4.2.4 12<br />
• Hydraulic Related Issues<br />
Boom(s) will not raise or lower 4.3.1,4.3.<br />
7<br />
14, 16
Symptom See See<br />
Section Page<br />
Boom(s) raise(s) when it should lower, or vice<br />
versa<br />
4.3.3 14<br />
Boom(s) keep(s) raising or lowering in<br />
MANUAL mode (creeping up or down)<br />
4.3.4 15<br />
Boom will not stay level or settle over a long<br />
period of time<br />
4.3.4 15<br />
Boom(s) creep(s) upwards when in the 4.3.6 16<br />
transport position<br />
Hydraulic oil overheats 4.3.6 16<br />
Sprayer system shuts down or alarm sounds due<br />
to the hydraulic oil overheat<br />
4.3.6 16<br />
• Boom Instability and Main Lift Problems<br />
Erratic or "jumpy" boom behavior (in CROP<br />
mode)<br />
4.4.1 18<br />
Bouncing boom(s) 4.4.1 18<br />
Boom unintentionally moves all the way up in<br />
CROP mode<br />
4.4.2 18<br />
Irregular boom movement or boom instability 4.4.3 18<br />
Control panel in AUTO mode interferes with<br />
auto steer or rate controller operation<br />
4.4.3 b) 18<br />
• Active and Passive Roll Issues<br />
Poor performance of Active/Passive Roll<br />
control<br />
4.5.1 19<br />
Poor performance or improper action of Active<br />
Roll control<br />
4.5.2 19<br />
Poor performance or improper action of Passive<br />
Roll control<br />
4.5.3 19<br />
Main section tends to lower into the crop in<br />
CROP mode<br />
4.5.4 19<br />
"SP NoRdg" displayed 5.2 23<br />
"Minimum" "Override" displayed 5.2 23<br />
"Disabled" displayed 5.2 23<br />
32
Notes:<br />
33
Statement of Limited Warranty<br />
<strong>NORAC</strong> SYSTEMS INTERNATIONAL INC., also known as <strong>NORAC</strong>,<br />
warrants all equipment of its manufacture to be free of defects in<br />
material and workmanship for a period of one year. This warranty<br />
period is for a period of twelve months from the date the equipment is<br />
delivered by <strong>NORAC</strong> or its authorized dealer to the purchaser. Items<br />
include weighing systems, instrumentation, and control systems<br />
manufactured by <strong>NORAC</strong>. Auxiliary components not manufactured by<br />
<strong>NORAC</strong> such as tires, axles, pumps, or rebuilt parts are covered by a<br />
6 month warranty only.<br />
<strong>NORAC</strong> will repair free of charge items returned within the warranty<br />
period to one of <strong>NORAC</strong>’s authorized service centers. Freight will be<br />
paid one way and returned by the same carrier unless instructed<br />
differently.<br />
<strong>NORAC</strong> or its authorized Service Center will repair or replace, at its<br />
option, any defective part or component at no cost to the purchaser<br />
during the Warranty period. If service in the field is required <strong>NORAC</strong><br />
will authorize on-site repairs at no charge for parts and labor. Travel<br />
time, travel costs and per diem expenses to and from the place where<br />
repairs are made will be charged to the purchaser at prevailing rates.<br />
For the nearest Service Center visit our website at www.norac.ca or call<br />
306-664-6711.<br />
Any evidence of, negligent or abnormal use, alteration of serial<br />
numbers, or repairs attempted by other than <strong>NORAC</strong> authorized<br />
personnel using <strong>NORAC</strong> certified or recommended parts,<br />
automatically voids the warranty. Normal wear is not covered under<br />
this warranty.<br />
<strong>NORAC</strong> will not warranty any complaints relating to inadequate<br />
installation (unless the installation was performed by <strong>NORAC</strong>),<br />
adjustments or calibration.<br />
The forgoing states the entire liability of <strong>NORAC</strong> regarding the<br />
purchase and use of its equipment. <strong>NORAC</strong> will not be held<br />
responsible for any consequential loss or damage of any kind.<br />
This warranty is in lieu of all other warranties, except as set forth<br />
above. Any implied warranty merchantability or fitness for a particular<br />
purpose is hereby disclaimed. This warranty is in lieu of all other<br />
warranties, expressed or implied.<br />
36
MAIN MENU<br />
Navigating past the end of the menu will return the control panel to the Normal<br />
Operating Screen<br />
More ?<br />
25 29<br />
31 31 32<br />
30 MM 35<br />
Sensi 5<br />
Soil ON<br />
Or<br />
Crop ON<br />
ReTune?<br />
More ?<br />
Toggle the "AUTO (YES)" switch to edit or view more sensor<br />
settings.<br />
Displays readings from optional boom sensors (left inner and right<br />
inner). This menu prompt may not be displayed.<br />
Displays the current boom heights in inches. The heights are adjusted<br />
for the offset between the sensor and nozzles. If any sensor errors are<br />
detected the type of error will be displayed here.<br />
SENSOR<br />
DISPLAY Menu<br />
↑<br />
SENSOR DISPLAY /<br />
SETUP (NO) Switch<br />
↓<br />
SETUP Menu<br />
The Normal Operating Screen is normally<br />
displayed. While at other menu prompts, if no<br />
switch has been pressed for 30 seconds, the<br />
control panel will revert to this screen. Also,<br />
from any menu prompt, if you toggle and hold<br />
the "SETUP (NO)" switch for two seconds, the<br />
control panel will return to this screen.<br />
To navigate to the other menu prompts in this<br />
table, toggle the "SENSOR DISPLAY /<br />
SETUP (NO)" switch in the indicated<br />
direction<br />
A higher number means more control actions and quicker response. A<br />
lower number will tend to stabilize the boom and make it less active.<br />
Use the " +/- " switch to set the sensor target to SOIL or CROP mode.<br />
The ReTune will optimize your system for the best performance<br />
possible.<br />
Toggle the "AUTO (YES)" switch to edit or view more control<br />
settings<br />
Navigating past the end of the menu will return the control panel to the Normal<br />
Operating Screen