
Create successful ePaper yourself
Turn your PDF publications into a flip-book with our unique Google optimized e-Paper software.
<strong>SGH</strong>-<strong>Z370</strong><br />
User’s <strong>Gui<strong>de</strong></strong>
Important<br />
safety<br />
precautions<br />
Failure to comply with the following<br />
precautions may be dangerous or<br />
illegal.<br />
Drive safely at all times<br />
Do not use a hand-held phone while driving.<br />
Park the vehicle first.<br />
Switch off the phone when refuelling<br />
Do not use the phone at a refuelling point<br />
(service station) or near fuels or chemicals.<br />
Switch off in an aircraft<br />
Wireless phones can cause interference.<br />
Using them in an aircraft is both illegal and<br />
dangerous.<br />
Switch off the phone near all medical<br />
equipment<br />
Hospitals or health care facilities may be<br />
using equipment that could be sensitive to<br />
external radio frequency energy. Follow any<br />
regulations or rules in force.<br />
Interference<br />
All wireless phones may be subject to<br />
interference, which could affect their<br />
performance.
Be aware of special regulations<br />
Meet any special regulations in force in any<br />
area and always switch off your phone<br />
whenever it is forbid<strong>de</strong>n to use it, or when it<br />
may cause interference or danger.<br />
Water resistance<br />
Your phone is not water-resistant. Keep it<br />
dry.<br />
Sensible use<br />
Use only in the normal position (held to the<br />
ear). Avoid unnecessary contact with the<br />
antenna when the phone is switched on.<br />
Emergency calls<br />
Key in the emergency number for your<br />
present location, then press .<br />
Keep your phone away from small<br />
children<br />
Keep the phone and all its parts, including<br />
accessories, out of the reach of small<br />
children.<br />
Accessories and batteries<br />
Use only Samsung-approved batteries and<br />
accessories, such as headsets and PC data<br />
cables. Use of any unauthorised accessories<br />
could damage you or your phone and may<br />
be dangerous.<br />
• The phone could explo<strong>de</strong> if the battery is<br />
replaced with an incorrect type.<br />
• Dispose of used batteries according to the<br />
manufacturer’s instructions.<br />
At very high volumes, prolonged<br />
listening to a headset can damage your<br />
hearing.<br />
Qualified service<br />
Only qualified service personnel may repair<br />
your phone.<br />
For more <strong>de</strong>tailed safety information, see<br />
"Health and safety information" on page<br />
105.<br />
1<br />
Important safety precautions
2<br />
About this <strong>Gui<strong>de</strong></strong><br />
This User’s <strong>Gui<strong>de</strong></strong> provi<strong>de</strong>s you with<br />
con<strong>de</strong>nsed information about how to use<br />
your phone. To quickly learn the basics for<br />
your phone, please refer to “Get started”<br />
and “Step outsi<strong>de</strong> the phone.”<br />
In this gui<strong>de</strong>, the following instruction icons<br />
appear:<br />
Indicates that you need to pay<br />
careful attention to the subsequent<br />
information regarding safety or<br />
phone features.<br />
� Indicates that you can get more<br />
information on the referenced page.<br />
→ Indicates that you need to press the<br />
Navigation keys to scroll to the<br />
specified option and then select it.<br />
[ ] Indicates a key on the phone.<br />
For example, [ ]<br />
< > Indicates a soft key, whose function<br />
is displayed on the phone screen.<br />
For example, <br />
• 3G<br />
Your phone is capable of<br />
operating in a 3G<br />
environment, allowing much<br />
greater data transfer speed,<br />
vi<strong>de</strong>o streaming, and vi<strong>de</strong>o<br />
conferencing.<br />
Special features of your phone<br />
• Camera and camcor<strong>de</strong>r<br />
Use the camera module on<br />
your phone to take a photo<br />
or record a vi<strong>de</strong>o.<br />
• Media player<br />
Play media files on your<br />
phone. You can enjoy high<br />
quality vi<strong>de</strong>os and music.<br />
• Photo printing<br />
Print your photos to<br />
preserve your best<br />
moments forever.
• Bluetooth<br />
Transfer media files and<br />
personal data and connect<br />
to other <strong>de</strong>vices using free,<br />
wireless Bluetooth<br />
technology.<br />
• File viewer<br />
Open documents in various<br />
formats on the phone<br />
without corruption.<br />
• Web browser<br />
Access the wireless web to<br />
get up-to-the-minute<br />
information and a wi<strong>de</strong><br />
variety of media content.<br />
• Name card<br />
Create name cards with<br />
your number and profile.<br />
Whenever introducing<br />
yourself to others, use this<br />
convenient electronic name<br />
card.<br />
• Multimedia Message<br />
Service (MMS)<br />
Send and receive MMS<br />
messages with a<br />
combination of text,<br />
images, vi<strong>de</strong>o, and audio.<br />
• Email<br />
Send and receive e-mails<br />
with images, vi<strong>de</strong>o, and<br />
audio attachments.<br />
• Java<br />
Enjoy Java-based<br />
embed<strong>de</strong>d games and<br />
download new games.<br />
• Calendar<br />
Keep track of your daily,<br />
weekly, and monthly<br />
schedule.<br />
• Voice recor<strong>de</strong>r<br />
Record memos or sounds.<br />
3<br />
Special features of your phone
4<br />
Contents<br />
Unpack 6<br />
Make sure you have each item<br />
Your phone 6<br />
Keys, features, and locations<br />
Get started 7<br />
First steps to operating your phone<br />
Install and charge the phone ...................... 7<br />
Power on or off......................................... 8<br />
Keys and display ...................................... 9<br />
Access menu functions ............................ 11<br />
Customise your phone............................. 12<br />
Make/Answer calls .................................. 14<br />
Step outsi<strong>de</strong> the phone 15<br />
Begin with your camera, the media player, the<br />
web, and other special features<br />
Use the camera ...................................... 15<br />
Play music ............................................. 16<br />
Browse the web...................................... 18<br />
Use Phonebook ....................................... 18<br />
Send messages....................................... 20<br />
View messages ....................................... 21<br />
Use Bluetooth ......................................... 22<br />
Switch applications .................................. 23<br />
Use a memory card ................................. 24<br />
Enter text 26<br />
ABC, T9, Number, and Symbol mo<strong>de</strong>s<br />
Call functions 29<br />
Advanced calling features<br />
Menu functions 35<br />
All menu options listed<br />
Solve problems 103<br />
Help and personal needs<br />
Health and safety information 105<br />
In<strong>de</strong>x 113
Overview of menu functions<br />
To access Menu mo<strong>de</strong>, press in Idle mo<strong>de</strong>.<br />
1 Call log �p. 35<br />
2 Phonebook �p. 37<br />
1 Search for contacts<br />
2 Create contact<br />
3 Groups<br />
4 My namecard<br />
5 Copy all<br />
6 Service number 1<br />
7 Phonebook settings<br />
8 Memory status<br />
�p. 37<br />
�p. 38<br />
�p. 39<br />
�p. 40<br />
�p. 40<br />
�p. 41<br />
�p. 41<br />
�p. 42<br />
3 Multimedia �p. 42<br />
1 Media player<br />
2 Voice recor<strong>de</strong>r<br />
�p. 42<br />
�p. 46<br />
4 Browser �p. 47<br />
1 Home<br />
2 Enter URL<br />
3 Bookmarks<br />
4 Saved pages<br />
5 History<br />
6 Advanced<br />
7 Browser settings<br />
�p. 47<br />
�p. 49<br />
�p. 49<br />
�p. 50<br />
�p. 50<br />
�p. 50<br />
�p. 50<br />
5 Messages �p. 50<br />
1 Create message<br />
2 Inbox<br />
3 Email inbox<br />
4 Drafts<br />
5 Outbox<br />
6 Sentbox<br />
7 Templates<br />
8 Voice mail<br />
9 Delete all<br />
10 Message settings<br />
11 Memory status<br />
�p. 50<br />
�p. 55<br />
�p. 57<br />
�p. 58<br />
�p. 58<br />
�p. 59<br />
�p. 59<br />
�p. 60<br />
�p. 61<br />
�p. 61<br />
�p. 66<br />
6 My files �p. 67<br />
Images<br />
Vi<strong>de</strong>os<br />
Sounds<br />
Games & more<br />
Other files<br />
Memory card 2<br />
Memory status<br />
�p. 67<br />
�p. 69<br />
�p. 70<br />
�p. 71<br />
�p. 72<br />
�p. 73<br />
�p. 73<br />
7 Organiser �p. 74<br />
1 Calendar<br />
2 Applications<br />
3 Alarms<br />
�p. 74<br />
�p. 77<br />
�p. 80<br />
8 Camera �p. 81<br />
9 Settings �p. 88<br />
1 Phone settings<br />
2 Display settings<br />
3 Message settings<br />
4 Call settings<br />
5 Phonebook settings<br />
6 Network settings<br />
7 Bluetooth<br />
8 Security<br />
9 Memory settings<br />
10 Master reset<br />
�p. 88<br />
�p. 91<br />
�p. 92<br />
�p. 92<br />
�p. 94<br />
�p. 94<br />
�p. 96<br />
�p. 99<br />
�p. 101<br />
�p. 102<br />
1. Shows only if supported by your<br />
USIM/SIM card.<br />
2. Shows only if a memory card is<br />
inserted into your phone.<br />
5
6<br />
Unpack<br />
Make sure you have each item<br />
• Phone<br />
• Travel Adapter<br />
• Battery<br />
• User’s <strong>Gui<strong>de</strong></strong><br />
You can obtain various<br />
accessories from your local<br />
Samsung <strong>de</strong>aler.<br />
The items supplied with<br />
your phone and the<br />
accessories available at<br />
your Samsung <strong>de</strong>aler may<br />
vary, <strong>de</strong>pending on your<br />
country or service provi<strong>de</strong>r.<br />
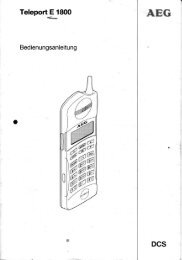
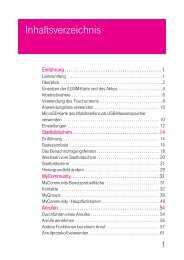
Your phone<br />
Keys, features, and locations<br />
Front camera<br />
lens<br />
Earpiece<br />
Display<br />
Volume keys<br />
Headset/<br />
Adapter jack<br />
Left soft key<br />
Vi<strong>de</strong>o call key<br />
Dial key<br />
Alphanumeric<br />
keys<br />
Special<br />
function keys<br />
Web access/<br />
Confirm key<br />
Right soft key<br />
Application switch key<br />
Power on/off/ Menu exit key<br />
Navigation keys<br />
(Up/Down/Left/Right)<br />
Delete key<br />
Microphone<br />
Rear camera<br />
lens<br />
Mirror<br />
Memory card<br />
slot<br />
Camera key
Get started<br />
First steps to operating your phone<br />
SIM card information<br />
When you subscribe to a cellular network,<br />
you receive a plug-in SIM (Subscriber<br />
I<strong>de</strong>ntity Module) card loa<strong>de</strong>d with your<br />
subscription <strong>de</strong>tails, such as your PIN, and<br />
available optional services. For 3G services,<br />
you can purchase a USIM (Universal<br />
Subscriber I<strong>de</strong>ntity Module) card.<br />
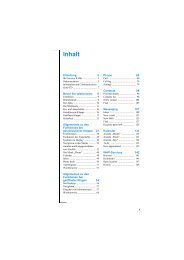
Install and charge the phone<br />
Remove the<br />
battery cover.<br />
If the phone is<br />
already on, first turn<br />
it off by pressing and<br />
holding [ ].<br />
Insert the USIM/<br />
SIM card.<br />
Make sure that the<br />
gold-coloured<br />
contacts on the<br />
card are face down.<br />
Install the battery. Reattach the<br />
cover.<br />
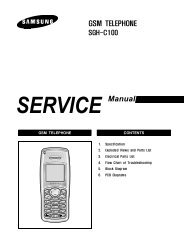
Plug the travel adapter into the phone.<br />
Plug the adapter into a standard AC<br />
power outlet.<br />
7
8<br />
Get started<br />
When the phone is completely charged<br />
(the battery icon becomes still), unplug<br />
the adapter from the power outlet.<br />
Remove the adapter from the phone.<br />
Low battery indicator<br />
When the battery is low:<br />
• a warning tone sounds,<br />
• the low battery message displays, and<br />
• the empty battery icon blinks.<br />
If the battery level becomes too low, the<br />
phone automatically turns off. Recharge<br />
your battery.<br />
Power on or off<br />
Switch on<br />
Do not turn on<br />
the phone<br />
when mobile<br />
phone use is<br />
prohibited.<br />
1. Press and hold [ ].<br />
2. If necessary, enter the<br />
PIN and press<br />
.<br />
Switch off Press and hold [ ].<br />
Keypad lock<br />
You can lock the keypad to prevent<br />
acci<strong>de</strong>ntal key presses from affecting phone<br />
operations.<br />
In Idle mo<strong>de</strong>, press and hold [ ] and press<br />
. To unlock the keypad, press<br />
and then [ ].
Keys and display<br />
Keys<br />
Perform the function indicated<br />
on the bottom line of the display.<br />
In Idle mo<strong>de</strong>, access your<br />
favourite menus directly.�p. 89<br />
In Menu mo<strong>de</strong>, scroll through<br />
menu options.<br />
In Idle mo<strong>de</strong>, launch the web<br />
browser.<br />
In Menu mo<strong>de</strong>, select the<br />
highlighted menu option or<br />
confirm input.<br />
Make a vi<strong>de</strong>o call.<br />
Open the application switch<br />
window to access other<br />
applications without exiting the<br />
current application.<br />
Make or answer a call.<br />
In Idle mo<strong>de</strong>, retrieve numbers<br />
recently dialled, missed, or<br />
received.<br />
Press and hold to switch the<br />
phone on or off.<br />
End a call.<br />
In Menu mo<strong>de</strong>, cancel input and<br />
return the phone to Idle mo<strong>de</strong>.<br />
Delete characters from the<br />
display or items in an<br />
application.<br />
Enter numbers, letters, and<br />
some special characters.<br />
In Idle mo<strong>de</strong>, press and hold [1]<br />
to access your voicemail server.<br />
Press and hold [0] to enter an<br />
international call prefix.<br />
Enter special characters.<br />
In Idle mo<strong>de</strong>, press and hold<br />
[ ] to activate or <strong>de</strong>activate the<br />
Silent profile. Press and hold [ ]<br />
to enter a pause between<br />
numbers.<br />
Adjust the phone volume.<br />
In Idle mo<strong>de</strong>, adjust the key<br />
tone volume.<br />
9<br />
Get started
10<br />
Get started<br />
Display<br />
Layout<br />
In Idle mo<strong>de</strong>, press and hold to<br />
turn on the camera.<br />
In Camera mo<strong>de</strong>, take a photo<br />
or record a vi<strong>de</strong>o.<br />
Menu Contacts<br />
Icons<br />
display various icons.<br />
Text and graphics<br />
display messages,<br />
instructions, and<br />
information you enter.<br />
Soft key function<br />
indicators<br />
show the current<br />
functions assigned<br />
to the soft keys.<br />
Icons 1 Received signal strength<br />
2.5G (GPRS) network<br />
Accessing services in a<br />
2.5G (GPRS) network;<br />
when transferring data,<br />
this icon animates<br />
2.5G (GPRS) network<br />
unavailable<br />
3G (UMTS) network<br />
Accessing services in a<br />
3G (UMTS) network;<br />
when transferring data,<br />
this icon animates<br />
3G (UMTS) network<br />
unavailable<br />
Roaming network<br />
Voice call in progress<br />
Out of your service area;<br />
you cannot make or<br />
receive voice calls<br />
Vi<strong>de</strong>o call in progress<br />
Bluetooth active�p. 96<br />
Connected to Bluetooth<br />
hands-free car kit or<br />
headset<br />
Connected to secured<br />
web page
Browsing Internet on PC<br />
using phone as mo<strong>de</strong>m<br />
New message:<br />
• : SMS<br />
• : MMS<br />
• : Email<br />
• : Voicemail<br />
• : Push<br />
• : Configuration<br />
message<br />
Alarm set�p. 80<br />
Sound profile setting<br />
�p. 88<br />
• : Normal<br />
• : Silent<br />
• : Car<br />
• : Meeting<br />
• : Outdoor<br />
• : Offline<br />
Battery power level<br />
1. Depending on your country or service provi<strong>de</strong>r,<br />
the icons shown on the display may vary.<br />
Access menu functions<br />
Use the soft<br />
keys<br />
The roles of the soft keys<br />
vary <strong>de</strong>pending on the<br />
function you are using. The<br />
bottom line of the display<br />
indicates their current role.<br />
Select Back<br />
Press the left<br />
soft key to<br />
select the<br />
highlighted<br />
option.<br />
Press the right<br />
soft key to<br />
return to the<br />
previous<br />
menu level.<br />
11<br />
Get started
12<br />
Get started<br />
Select an<br />
option<br />
Use<br />
shortcuts<br />
1. Press a <strong>de</strong>sired soft key.<br />
2. Press the Navigation<br />
keys to move to the<br />
next or previous option.<br />
3. Press or [ ]<br />
to confirm the function<br />
displayed or option<br />
highlighted.<br />
4. To exit, choose either of<br />
the following methods.<br />
• Press to<br />
move up one level.<br />
• Press [ ] to return<br />
to Idle mo<strong>de</strong>.<br />
Press the number key<br />
corresponding to the option<br />
you want.<br />
Customise your phone<br />
Display<br />
language<br />
Call ringer<br />
melody<br />
1. In Idle mo<strong>de</strong>, press<br />
and select<br />
Settings → Phone<br />
settings → Language →<br />
Screen text.<br />
2. Select a language.<br />
3. Press .<br />
You can change the call<br />
ringer by changing the<br />
properties of the currently<br />
active sound profile.<br />
To change the profile<br />
properties:<br />
1. In Idle mo<strong>de</strong>, press<br />
and select<br />
Settings → Phone<br />
settings → Phone<br />
profiles.<br />
2. Scroll to the sound<br />
profile you are using.
3. Press and<br />
select Edit.<br />
4. Select Voice call<br />
ringtone and select a<br />
ringtone for voice calls.<br />
5. Select V-call ringtone<br />
and select a ringtone for<br />
vi<strong>de</strong>o calls.<br />
6. Press and<br />
select Save.<br />
To change the sound profile:<br />
1. In Idle mo<strong>de</strong>, press<br />
and select<br />
Settings → Phone<br />
settings → Phone<br />
profiles.<br />
2. Select the profile you<br />
want.<br />
3. Press [ ].<br />
Idle mo<strong>de</strong><br />
wallpaper<br />
Menu<br />
shortcuts<br />
You can set wallpaper for the<br />
idle screen.<br />
1. In Idle mo<strong>de</strong>, press<br />
and select<br />
Settings → Display<br />
settings → Main<br />
display → Wallpaper.<br />
2. Scroll to an image fol<strong>de</strong>r.<br />
3. Select an image and<br />
press .<br />
You can set the Navigation<br />
keys to function as shortcuts<br />
to access your favourite<br />
menus.<br />
1. In Idle mo<strong>de</strong>, press<br />
and select<br />
Settings → Phone<br />
settings → Shortcuts.<br />
2. Select a key.<br />
3. Select a menu to be<br />
assigned to the key.<br />
4. Press .<br />
13<br />
Get started
14<br />
Get started<br />
Silent<br />
profile<br />
Phone lock<br />
You can activate the Silent<br />
profile to avoid disturbing<br />
other people.<br />
In Idle mo<strong>de</strong>, press and hold<br />
[ ].<br />
You can protect the phone<br />
against unauthorised use<br />
with a phone password. The<br />
phone will require the<br />
password on power-up.<br />
1. In Idle mo<strong>de</strong>, press<br />
and select<br />
Settings → Security →<br />
Change phone<br />
password.<br />
2. Enter the <strong>de</strong>fault<br />
password, 00000000,<br />
and press .<br />
3. Enter a new 4- to 8-digit<br />
password and press<br />
.<br />
Make/Answer calls<br />
Make a call<br />
4. Enter the new password<br />
again and press<br />
.<br />
5. Select Phone lock.<br />
6. Select Enable.<br />
7. Enter the password and<br />
press .<br />
To make a voice call:<br />
1. Enter an area co<strong>de</strong> and<br />
phone number.<br />
2. Press [ ].<br />
3. To end the call, press<br />
[ ].<br />
To make a vi<strong>de</strong>o call:<br />
1. Enter an area co<strong>de</strong> and<br />
phone number.<br />
2. Press [ ], and if their<br />
phone is compatible, the<br />
other person appears on<br />
the screen.
Answer<br />
a call<br />
Adjust the<br />
volume<br />
during a call<br />
1. When the phone rings,<br />
press [ ].<br />
2. For a vi<strong>de</strong>o call, press<br />
to allow<br />
the other person to see<br />
you.<br />
3. To end the call, press<br />
[ ].<br />
Press [Volume].<br />
Step outsi<strong>de</strong> the phone<br />
Begin with your camera, the media player, the<br />
web, and other special features<br />
Use the camera<br />
Take a<br />
photo<br />
1. In Idle mo<strong>de</strong>, press and<br />
hold [Camera] to turn on<br />
the camera.<br />
2. Press [Volume] to switch<br />
between the front<br />
camera lens and the rear<br />
camera lens.<br />
3. Aim the lens at the<br />
subject and make any<br />
<strong>de</strong>sired adjustments.<br />
4. Press [ ] or [Camera] to<br />
take a photo. The photo<br />
is saved automatically.<br />
5. Press < > to take<br />
another photo.<br />
15
16<br />
Step outsi<strong>de</strong> the phone<br />
View a<br />
photo<br />
Record a<br />
vi<strong>de</strong>o<br />
1. In Idle mo<strong>de</strong>, press<br />
and select My<br />
files → Images.<br />
2. Select the photo you<br />
want from the Photos<br />
fol<strong>de</strong>r.<br />
1. In Idle mo<strong>de</strong>, press and<br />
hold [Camera] to turn on<br />
the camera.<br />
2. Press [1] to switch to<br />
Record mo<strong>de</strong>.<br />
3. Press [Volume] to switch<br />
between the front<br />
camera lens and the rear<br />
camera lens.<br />
4. Press [ ] or [Camera] to<br />
start recording.<br />
5. Press < > or [Camera]<br />
6.<br />
to stop recording. The<br />
vi<strong>de</strong>o is saved<br />
automatically.<br />
Press to record<br />
another vi<strong>de</strong>o.<br />
Play a vi<strong>de</strong>o<br />
Play music<br />
Copy music<br />
files to the<br />
phone<br />
1. In Idle mo<strong>de</strong>, press<br />
and select My<br />
files → Vi<strong>de</strong>os.<br />
2. Select the vi<strong>de</strong>o clip you<br />
want from the My vi<strong>de</strong>o<br />
clips fol<strong>de</strong>r.<br />
Use these methods:<br />
• Download from the<br />
wireless web�p. 47<br />
• Download from a<br />
computer using the<br />
optional Samsung PC<br />
Studio�Samsung PC<br />
Studio User’s <strong>Gui<strong>de</strong></strong><br />
• Receive via Bluetooth<br />
�p. 96<br />
• Copy files to a memory<br />
card and insert the card<br />
into the phone�p. 24
Create a<br />
play list<br />
1. In Idle mo<strong>de</strong>, press<br />
and select<br />
Multimedia → Media<br />
player → Music.<br />
2. Press and<br />
select Add to playlist →<br />
Selected or All.<br />
3. For All, select Sounds or<br />
Memory card, press [ ]<br />
to select the files you<br />
want and press .<br />
Then press to<br />
return to the file list.<br />
4. Press [Left] or [Right] to<br />
access the play list.<br />
Play music<br />
files<br />
1. From the Playlist screen,<br />
press [ ].<br />
2. During playback, use the<br />
following keys:<br />
• : pauses or<br />
resumes playback.<br />
• Left: returns to the<br />
previous file. Moves<br />
backward in a file<br />
when held down, if it<br />
is an mp3 file.<br />
• Right: skips to the<br />
next file. Skips<br />
forward in a file when<br />
held down, if it is an<br />
mp3 file.<br />
• Up: opens the play<br />
list.<br />
• Down: changes the<br />
repeat mo<strong>de</strong>.<br />
• Volume: adjusts the<br />
volume.<br />
3. Press to stop<br />
playback.<br />
17<br />
Step outsi<strong>de</strong> the phone
18<br />
Step outsi<strong>de</strong> the phone<br />
Browse the web<br />
Using a built-in web browser, you can easily<br />
access the wireless web to get a variety of<br />
up-to-date services and information and to<br />
download web content.<br />
Launch the<br />
web<br />
browser<br />
Navigate<br />
the web<br />
In Idle mo<strong>de</strong>, press [ ].<br />
• To scroll through browser<br />
items, press [Up] or<br />
[Down].<br />
• To select an item, press<br />
[ ].<br />
• To return to the previous<br />
page, press .<br />
• To move to the next<br />
page, press <br />
and select Go →<br />
Forward.<br />
• To access options, press<br />
.<br />
Use Phonebook<br />
Add a<br />
contact<br />
To the phone’s memory:<br />
1. In Idle mo<strong>de</strong>, enter a<br />
phone number and press<br />
.<br />
2. Select Add to<br />
phonebook → Phone →<br />
New → a number type.<br />
3. Specify contact<br />
information: First name,<br />
Last name, Mobile,<br />
Home, Office, Fax<br />
number, Other, Email,<br />
Group, URL, Note,<br />
Birthday, Postal address<br />
1/Postal address 2.<br />
4. Press and<br />
select Save to save the<br />
contact.
Find a<br />
contact<br />
To the USIM/SIM card:<br />
1. In Idle mo<strong>de</strong>, enter a<br />
phone number and press<br />
.<br />
2. Select Add to<br />
phonebook → SIM →<br />
New.<br />
3. Specify contact<br />
information: Name,<br />
Mobile, Group (for USIM),<br />
and Location number.<br />
4. Press , or press<br />
and select<br />
Save to save the contact.<br />
1. In Idle mo<strong>de</strong>, press<br />
.<br />
2. Enter the first few letters<br />
of the name you want.<br />
Create and<br />
send a<br />
name card<br />
3. Select a contact.<br />
4. Scroll to a number and<br />
press [ ] to dial, or<br />
press [ ] to edit contact<br />
information.<br />
1. In Idle mo<strong>de</strong>, press<br />
and select<br />
Phonebook → My<br />
namecard.<br />
2. Specify your contact<br />
information.<br />
3. Press and<br />
select Save to save the<br />
name card.<br />
4. To send the name card,<br />
access My namecard<br />
again.<br />
5. Press and<br />
select Send namecard<br />
via → a sending method.<br />
19<br />
Step outsi<strong>de</strong> the phone
20<br />
Step outsi<strong>de</strong> the phone<br />
Send messages<br />
Send a text<br />
message<br />
(SMS)<br />
Send a<br />
multimedia<br />
message<br />
(MMS)<br />
1. In Idle mo<strong>de</strong>, press<br />
and select<br />
Messages → Create<br />
message → Text<br />
message.<br />
2. Enter the message text<br />
and press [ ].<br />
3. Enter <strong>de</strong>stination<br />
numbers.<br />
4. Press [ ] to send the<br />
message.<br />
1. In Idle mo<strong>de</strong>, press<br />
and select<br />
Messages → Create<br />
message → Multimedia<br />
message.<br />
2. Enter the message<br />
subject.<br />
3. Select Image or vi<strong>de</strong>o<br />
or Sound.<br />
4. Add an image, vi<strong>de</strong>o clip,<br />
or sound clip.<br />
5. Select Text.<br />
6. Enter the message text<br />
and press [ ].<br />
7. Press and<br />
select Add file(s) → an<br />
item type.<br />
8. Press [ ] to select the<br />
9.<br />
items you want to be<br />
attached.<br />
Press and<br />
select Attach.<br />
10. Press [ ].<br />
11. Enter <strong>de</strong>stination<br />
numbers or addresses.<br />
12. Press [ ] to send the<br />
message.
Send an<br />
e-mail<br />
1. In Idle mo<strong>de</strong>, press<br />
and select<br />
Messages → Create<br />
message → Email.<br />
2. Enter the e-mail subject.<br />
3. Move to the Message<br />
field.<br />
4. Enter the e-mail text.<br />
5. Select Attach file(s) →<br />
Add → an item type.<br />
6. Press [ ] to select the<br />
7.<br />
items you want to be<br />
attached.<br />
Press and<br />
select Attach.<br />
8. Press [ ].<br />
9. Enter e-mail addresses.<br />
10. Press [<br />
e-mail.<br />
] to send the<br />
View messages<br />
View a text<br />
message<br />
View a<br />
multimedia<br />
message<br />
When a notification appears:<br />
1. Press .<br />
2. Select the message from<br />
the Inbox.<br />
From the Inbox:<br />
1. In Idle mo<strong>de</strong>, press<br />
and select<br />
Messages → Inbox.<br />
2. Select an SMS message<br />
( ).<br />
When a notification appears:<br />
1. Press .<br />
2. Select the message from<br />
the Inbox.<br />
From the Inbox:<br />
1. In Idle mo<strong>de</strong>, press<br />
and select<br />
Messages → Inbox.<br />
2. Select an MMS message<br />
( ).<br />
21<br />
Step outsi<strong>de</strong> the phone
22<br />
Step outsi<strong>de</strong> the phone<br />
View an<br />
e-mail<br />
1. In Idle mo<strong>de</strong>, press<br />
and select<br />
Messages → Email<br />
inbox.<br />
2. Press and<br />
select Download to<br />
download new e-mails or<br />
hea<strong>de</strong>rs.<br />
3. Select an e-mail or a<br />
hea<strong>de</strong>r.<br />
4. If you selected a hea<strong>de</strong>r,<br />
press and<br />
select Retrieve to view<br />
the body of the e-mail.<br />
Use Bluetooth<br />
Your phone is equipped with Bluetooth<br />
technology, enabling you to connect the<br />
phone wirelessly to other Bluetooth <strong>de</strong>vices<br />
and exchange data with them, talk handsfree,<br />
or control the phone remotely.<br />
Turn on<br />
Bluetooth<br />
Search for<br />
and pair<br />
with a<br />
Bluetooth<br />
<strong>de</strong>vice<br />
1. In Idle mo<strong>de</strong>, press<br />
and select<br />
Settings → Bluetooth →<br />
Activation → On.<br />
2. Select My phone’s<br />
visibility → On to allow<br />
other <strong>de</strong>vices to find your<br />
phone.<br />
1. In Idle mo<strong>de</strong>, press<br />
and select<br />
Settings → Bluetooth →<br />
My <strong>de</strong>vices → Search<br />
for new <strong>de</strong>vices.<br />
2. Select a <strong>de</strong>vice.
Send data<br />
3. Enter a Bluetooth PIN or<br />
the other <strong>de</strong>vice’s<br />
Bluetooth PIN, if it has<br />
one, and press .<br />
When the owner of the<br />
other <strong>de</strong>vice enters the<br />
same co<strong>de</strong>, pairing is<br />
complete.<br />
1. Access an application,<br />
Phonebook, My files,<br />
Calendar, Task, or<br />
Memo.<br />
2. Scroll to an item.<br />
3. Press and<br />
select Send namecard<br />
via/Send via →<br />
Bluetooth.<br />
4. Select a <strong>de</strong>vice.<br />
5. If necessary, enter the<br />
Bluetooth PIN and press<br />
.<br />
Receive<br />
data<br />
Switch applications<br />
1. When a <strong>de</strong>vice attempts<br />
to access your phone,<br />
press to permit<br />
the connection.<br />
2. If necessary, press<br />
to confirm that<br />
you are willing to receive.<br />
You can switch to other applications from a<br />
menu, without closing the menu screen you<br />
were using.<br />
Switch to an<br />
application<br />
Available<br />
applications<br />
1. While using a menu,<br />
press [ ].<br />
2. Select an application.<br />
• Call: opens the dialling<br />
screen.<br />
• Messages: accesses the<br />
Messages menu.<br />
• Browser: accesses the<br />
Browser menu.<br />
23<br />
Step outsi<strong>de</strong> the phone
24<br />
Step outsi<strong>de</strong> the phone<br />
Close all<br />
running<br />
applications<br />
1. Press [ ].<br />
2. Scroll to End all?.<br />
3. Press .<br />
Use a memory card<br />
You can use an optional microSD memory<br />
card to increase your phone’s memory<br />
capacity.<br />
Important<br />
memory<br />
card<br />
information<br />
• Frequent erasing and<br />
writing will shorten a<br />
card’s lifespan.<br />
• Do not remove a card<br />
from the phone or turn<br />
off the phone while data<br />
is being accessed or<br />
transferred. This could<br />
result in loss of data and/<br />
or damage to the card or<br />
phone.<br />
• Do not subject cards to<br />
strong shocks.<br />
Insert a<br />
memory<br />
card<br />
• Do not touch card<br />
terminals with your<br />
fingers or metal objects.<br />
If dirty, wipe the card<br />
with a soft cloth.<br />
• Keep cards away from<br />
small children or pets.<br />
• Do not expose cards in a<br />
place subject to electrostatic<br />
discharge and/or<br />
electrical noise.<br />
1. Insert a memory card<br />
into the card slot, with<br />
the label si<strong>de</strong> face down.<br />
2. Press the card until it<br />
locks into place.
Remove the<br />
memory<br />
card<br />
Use a card<br />
adapter<br />
1. Press the memory card<br />
so that it is disengaged<br />
from the phone.<br />
2. Remove the card from<br />
the slot.<br />
Using a card adapter and a<br />
USB card rea<strong>de</strong>r/writer, you<br />
can read the card on a PC.<br />
1. Insert a memory card<br />
into a card adapter, and<br />
then the adapter into a<br />
card rea<strong>de</strong>r/writer.<br />
2. Plug the USB connecter<br />
of the card rea<strong>de</strong>r/writer<br />
into the USB port on your<br />
PC.<br />
3. Access the appropriate<br />
memory disk and copy to<br />
and from the card.<br />
25<br />
Step outsi<strong>de</strong> the phone
26<br />
Enter text<br />
ABC, T9, Number, and Symbol mo<strong>de</strong>s<br />
You can enter text for some features, such<br />
as Messages, Phonebook, or Calendar, using<br />
ABC mo<strong>de</strong>, T9 mo<strong>de</strong>, Number mo<strong>de</strong>, and<br />
Symbol mo<strong>de</strong>.<br />
Changing the text input mo<strong>de</strong><br />
• Press and hold [ ] to switch between T9<br />
mo<strong>de</strong> ( ) and ABC mo<strong>de</strong> ( ).<br />
Depending on your country, you may<br />
also be able to access an input mo<strong>de</strong> for<br />
your specific language.<br />
• Press [ ] to change case or switch to<br />
Number mo<strong>de</strong> ( ).<br />
• Press and hold [ ] to switch to Symbol<br />
mo<strong>de</strong> ( ).<br />
Using T9 mo<strong>de</strong><br />
T9 is a predictive text input mo<strong>de</strong> that<br />
allows you to key in any character using<br />
single keystrokes.<br />
Entering a word in T9 mo<strong>de</strong><br />
1. Press [2] to [9] to start entering a word.<br />
Press each key once for each letter.<br />
For example, press [4], [3], [5], [5],<br />
and [6] to enter Hello in T9 mo<strong>de</strong>.<br />
T9 predicts the word that you are typing,<br />
and it may change with each key that<br />
you press.<br />
2. Enter the whole word before editing or<br />
<strong>de</strong>leting characters.<br />
3. When the word displays correctly, go to<br />
step 4. Otherwise, press [0] to display<br />
alternative word choices for the keys<br />
that you have pressed.<br />
For example, Of and Me use [6] and [3].<br />
4. Press [ ] to insert a space and enter the<br />
next word.<br />
Other T9 mo<strong>de</strong> operations<br />
• Press [1] to enter periods or apostrophes<br />
automatically.<br />
• Press [ ] to insert a space.
• Press the Navigation keys to move the<br />
cursor.<br />
• Press [C] to <strong>de</strong>lete characters one by<br />
one. Press and hold [C] to clear the<br />
entire display.<br />
Adding a new word to the T9<br />
dictionary<br />
This feature may not be available for some<br />
languages.<br />
1. Enter the word that you want to add.<br />
2. Press [0] to display alternative words for<br />
your key presses. When there are no<br />
more alternative words, Spell appears<br />
on the bottom line.<br />
3. Press .<br />
4. Enter the word you want using ABC<br />
mo<strong>de</strong> and press .<br />
Using ABC mo<strong>de</strong><br />
Press the appropriate key until the character<br />
you want appears on the display.<br />
Key<br />
Characters in or<strong>de</strong>r displayed<br />
Upper case Lower case<br />
(Creating an SMS message with GSM alphabet<br />
encoding)<br />
27<br />
Enter text
28<br />
Enter text<br />
Other ABC mo<strong>de</strong> operations<br />
• To enter the same letter twice or to enter<br />
a different letter on the same key, wait<br />
for the cursor to move to the right<br />
automatically or press [Right]. Then,<br />
enter the next letter.<br />
• Press [ ] to insert a space.<br />
• Press the Navigation keys to move the<br />
cursor.<br />
• Press [C] to <strong>de</strong>lete characters one by<br />
one. Press and hold [C] to clear the<br />
entire display.<br />
Using Number mo<strong>de</strong><br />
Number mo<strong>de</strong> enables you to enter<br />
numbers.<br />
Press the keys corresponding to the digits<br />
you want.<br />
Using Symbol mo<strong>de</strong><br />
Symbol mo<strong>de</strong> enables you to insert symbols.<br />
To Press<br />
scroll to a symbol<br />
set<br />
the Navigation keys.<br />
select a symbol the corresponding<br />
number key.<br />
clear the entered [C].<br />
symbols<br />
insert the symbols .
Call functions<br />
Advanced calling features<br />
Making a call<br />
1. In Idle mo<strong>de</strong>, enter the area co<strong>de</strong> and<br />
phone number.<br />
• Press [C] to clear the last digit or<br />
press and hold [C] to clear the whole<br />
display. You can move the cursor to<br />
edit an incorrect digit.<br />
• Press and hold [ ] to enter a pause<br />
between numbers.<br />
2. Press [ ].<br />
3. When you want to end the call, press<br />
[ ].<br />
Making an international call<br />
1. In Idle mo<strong>de</strong>, press and hold [0]. The +<br />
character appears.<br />
2. Enter the country co<strong>de</strong>, area co<strong>de</strong>, and<br />
phone number, then press [<br />
Redialling recent numbers<br />
].<br />
1. In Idle mo<strong>de</strong>, press [<br />
list of recent numbers.<br />
] to display the<br />
2. Scroll to the number you want and press<br />
[ ].<br />
Making a call from Phonebook<br />
Once you have stored a number in<br />
Phonebook, you can dial the number by<br />
selecting it from Phonebook.�p. 37<br />
You can also use the speed dial feature to<br />
assign your most frequently dialled numbers<br />
to specific number keys.�p. 41<br />
You can quickly dial a number from the<br />
USIM/SIM card using its location number<br />
assigned when stored.<br />
1. In Idle mo<strong>de</strong>, enter a location number<br />
and press [ ].<br />
2. Scroll through other numbers, if<br />
necessary.<br />
3. Press or [<br />
voice call.<br />
] to make a<br />
Answering a call<br />
When you receive a call, the phone rings and<br />
displays the incoming call image.<br />
Press or [ ] to answer the call.<br />
29
30<br />
Call functions<br />
Tips for answering a call<br />
• When Any key answer is active, you<br />
can press any key, except for <br />
and [ ].�p. 91<br />
• Press or [ ] to reject a call.<br />
• Press and hold [Volume] to reject a call<br />
or mute the ringer, <strong>de</strong>pending on the<br />
Volume key in incoming call setting.<br />
�p. 91<br />
Viewing missed calls<br />
If you have missed calls, the screen displays<br />
how many calls you have missed.<br />
1. Press .<br />
2. If necessary, scroll through the missed<br />
calls.<br />
3. Press [ ] to dial the number you want.<br />
Using the headset<br />
Use the headset to make or answer calls<br />
without holding the phone.<br />
Connect the headset to the jack on the left<br />
si<strong>de</strong> of the phone. The button on the<br />
headset works as follows:<br />
To Press<br />
redial the last call and hold the button<br />
twice.<br />
answer a call the button.<br />
end a call the button.<br />
Options during a call<br />
You can access a number of functions during<br />
a call.<br />
Adjusting the volume during a call<br />
Use [Volume] to adjust the earpiece volume<br />
during a call.<br />
Press [Volume up] to increase the volume<br />
level and [Volume down] to <strong>de</strong>crease the<br />
volume level.<br />
Placing a call on hold/Retrieving<br />
Press to place a call on hold, or<br />
press to retrieve the call.
Making a second call<br />
You can make another call if your network<br />
supports this function.<br />
1. Press to put the call on hold.<br />
2. Make the second call in the normal way.<br />
3. Press to switch between the<br />
calls.<br />
4. Press and select End →<br />
Held call to end the call on hold.<br />
5. To end the current call, press [ ].<br />
Answering a second call<br />
You can answer an incoming call while<br />
already on the phone, if your network<br />
supports this function and you have<br />
activated the call waiting feature.�p. 93<br />
1. Press [ ] to answer the call. The first<br />
2.<br />
call is automatically put on hold.<br />
Press to switch between the<br />
calls.<br />
3. Press and select End →<br />
Held call to end the call on hold.<br />
4. To end the current call, press [ ].<br />
Using the speakerphone feature<br />
Use the phone as a speakerphone to talk<br />
and listen with the phone a short distance<br />
away.<br />
Press [ ] and then activate the<br />
speakerphone feature. Press [ ] to switch<br />
back to the earpiece.<br />
Using In-call options<br />
Press to access the following<br />
options during a call:<br />
• Speaker on/Normal: turn on the<br />
speakerphone feature or switch back to<br />
Normal mo<strong>de</strong>.<br />
• Switch to headset/Switch to phone:<br />
switch the call to a Bluetooth headset or<br />
hands-free car kit or back to the phone.<br />
To use this feature, you first need to<br />
connect your headset to the phone.<br />
�p. 97<br />
• Join: set up a multi-party call by adding<br />
a caller on hold to a currently active call.<br />
You can inclu<strong>de</strong> up to 5 people on a<br />
multi-party call.<br />
31<br />
Call functions
32<br />
Call functions<br />
• Split: have a private conversation with<br />
one multi-party call participant. The<br />
other participants can converse with<br />
each other. After the private<br />
conversation, select Join to return both<br />
private participants to the multi-party<br />
call.<br />
• Transfer: transfer the currently active<br />
call to a caller on hold. The two callers<br />
can talk to each other, but you are<br />
disconnected from the call.<br />
• Whisper mo<strong>de</strong> on/Whisper mo<strong>de</strong> off:<br />
turn on or off Whisper mo<strong>de</strong>. Whisper<br />
mo<strong>de</strong> automatically increases the<br />
microphone's sensitivity to allow the<br />
other person to hear your voice even<br />
though you may be whispering.<br />
• Mute/Unmute: switch off the phone's<br />
microphone so that the other person on<br />
the phone cannot hear you, or switch it<br />
back on.<br />
• Mute key tone/Unmute key tone:<br />
switch the key tones off or on.<br />
To communicate with answering<br />
machines or computerised telephone<br />
systems, Unmute key tone must be<br />
selected.<br />
• New call: make a new call.<br />
• Phonebook: access the contact list.<br />
• Add to phonebook: add the other<br />
person’s phone number to Phonebook.<br />
• Create message: create a new SMS<br />
message.<br />
• Send DTMF: send DTMF (Dual tone<br />
multi-frequency) tones as a group. The<br />
DTMF tones are the tones used in phones<br />
for tone dialling, sounding when you<br />
press the number keys. This option is<br />
helpful for entering a password or an<br />
account number when you call an<br />
automated system, like a banking<br />
service.<br />
• Memo: create a memo.
• SIM service: access special services,<br />
such as news, weather forecasts,<br />
entertainment, and location services,<br />
provi<strong>de</strong>d by your SIM card. This option is<br />
available when you use a SIM card<br />
supporting SIM Application Toolkit<br />
menus, and may be differently displayed<br />
<strong>de</strong>pending on your service provi<strong>de</strong>r.<br />
• End call: end a call.<br />
• End: disconnect the call currently on<br />
hold, active call, or all calls.<br />
• Save as memo: save the entered<br />
number as a memo.<br />
Using the vi<strong>de</strong>o call feature<br />
In a 3G (UMTS) service area, your phone<br />
can make or receive a vi<strong>de</strong>o call, allowing<br />
you to see the other person on the screen<br />
during a conversation. The other person’s<br />
phone must support the vi<strong>de</strong>o call feature.<br />
Making a vi<strong>de</strong>o call<br />
1. In Idle mo<strong>de</strong>, enter the area co<strong>de</strong> and<br />
phone number.<br />
2. Press [ ].<br />
Answering a vi<strong>de</strong>o call<br />
When you receive a vi<strong>de</strong>o call, answer as<br />
you would when receiving a voice call. Press<br />
to allow the caller to see you.<br />
Using vi<strong>de</strong>o call options<br />
During a vi<strong>de</strong>o call, press to<br />
access the following options:<br />
• Speaker on/Normal: turn on the<br />
speakerphone feature or switch back to<br />
Normal mo<strong>de</strong>.<br />
• Switch to headset/Switch to phone:<br />
switch the call to a Bluetooth headset or<br />
hands-free car kit or back to the phone.<br />
To use this feature, you first need to<br />
connect your headset to the phone.<br />
�p. 97<br />
• Mute: turn off the camera, microphone,<br />
or key tone.<br />
• Switch camera: switch between the<br />
front camera lens and the rear camera<br />
lens.<br />
• Display options: change the camera<br />
image settings.<br />
33<br />
Call functions
34<br />
Call functions<br />
Brightness: display the brightness<br />
control bar and adjust the brightness by<br />
pressing [Left] or [Right].<br />
Effects: change the colour tone of the<br />
image.<br />
Vi<strong>de</strong>o quality: change the image<br />
quality.<br />
Zoom: display the zoom control bar and<br />
zoom in or out by pressing [Up] or<br />
[Down].<br />
Show caller ID/Hi<strong>de</strong> caller ID: display<br />
or hi<strong>de</strong> caller information.<br />
• More options: access the following<br />
options:<br />
Phonebook: access the contact list.<br />
View contact <strong>de</strong>tails: access contact<br />
information, if the number is saved in<br />
Phonebook.<br />
Add to phonebook: add the other<br />
person’s phone number to Phonebook.<br />
Create message: send an SMS<br />
message to the person with whom you<br />
are talking.<br />
Message inbox: access the received<br />
message list.<br />
Use media from my files/Revert to<br />
previous status: show another image<br />
instead of your camera image on the<br />
other person’s phone, or restore the<br />
display to the camera image.<br />
Send DTMF: send DTMF (Dual tone<br />
multi-frequency) tones as a group. The<br />
DTMF tones are the tones used in phones<br />
for tone dialling, sounding when you<br />
press the number keys. This option is<br />
helpful for entering a password or an<br />
account number when you call an<br />
automated system, like a banking<br />
service.<br />
Calendar: access the calendar.<br />
Memo: create a memo.<br />
• End call: end the vi<strong>de</strong>o call.
Menu functions<br />
All menu options listed<br />
Call log (Menu 1)<br />
Use this menu to view the calls you have<br />
dialled, received, or missed, and the length<br />
of the calls. You can also check the cost of<br />
your calls, if your USIM/SIM card supports<br />
this function.<br />
To access this menu, press in Idle<br />
mo<strong>de</strong> and select Call log.<br />
Accessing a call log<br />
1. From the Call log menu, select a call<br />
type.<br />
2. Press [Left] or [Right] to move to<br />
another call type.<br />
3. Press [Up] or [Down] to scroll through<br />
the call list.<br />
4. Press [ ] to view the <strong>de</strong>tails of a call, or<br />
press [ ] to dial a number.<br />
Using call log options<br />
While viewing call <strong>de</strong>tails, press <br />
to access the following options:<br />
• Voice call: make a voice call to the<br />
number.<br />
• Vi<strong>de</strong>o call: make a vi<strong>de</strong>o call to the<br />
number, if the 3G service is available.<br />
• Add to phonebook: save the number to<br />
Phonebook.<br />
• Create message: send an SMS or MMS<br />
message to the selected number.<br />
• Delete: <strong>de</strong>lete the selected call log or all<br />
logs.<br />
• View contact <strong>de</strong>tails: access contact<br />
information, if the caller is saved in<br />
Phonebook.<br />
Viewing the data counter<br />
From the call log list, press and<br />
select Call manager → Data counter to<br />
view the total amount of sent or received<br />
data.<br />
35
Menu functions<br />
The following counters are available:<br />
• Total sent: check the total amount of<br />
data you have sent.<br />
• Total received: check the total amount<br />
of data you have received.<br />
To reset a counter or all of the counters,<br />
press and select Reset or<br />
Reset all.<br />
If the phone is locked, it will require the<br />
password. The password is preset to<br />
00000000. You can change this password.<br />
�p. 100<br />
Viewing call cost<br />
From the call log list, press and<br />
select Call manager → Call costs to view<br />
the cost of calls. This option is available only<br />
if supported by your USIM/SIM card. Note<br />
that this is not inten<strong>de</strong>d to be used for billing<br />
purposes.<br />
The following counters are available:<br />
• Total cost: check the total cost of all<br />
your calls. If the total cost exceeds the<br />
maximum cost set in Edit cost limit,<br />
you must reset the counter before you<br />
can make another call.<br />
36<br />
• Last call cost: check the cost of your<br />
last call.<br />
• Cost limit: check the maximum cost<br />
set.<br />
Press to access the following<br />
options:<br />
• Reset call cost: reset the cost counters.<br />
• Edit cost limit: set the maximum cost<br />
authorised for your calls.<br />
• Setup currency: set the currency that<br />
is applied when the cost of your call is<br />
calculated.<br />
Viewing call times<br />
From the call log list, press and<br />
select Call manager → Call times to view<br />
the time log for calls ma<strong>de</strong> and received.<br />
The actual time invoiced by your service<br />
provi<strong>de</strong>r will vary.<br />
The following counters are available:<br />
• Total dialled: check the total length of<br />
all the calls you have dialled.<br />
• Total received: check the total length<br />
of all the calls you have received.
• Dialled voice calls: check the total<br />
length of voice calls dialled.<br />
• Dialled vi<strong>de</strong>o calls: check the total<br />
length of vi<strong>de</strong>o calls dialled.<br />
• Received voice calls: check the total<br />
length of voice calls received.<br />
• Received vi<strong>de</strong>o calls: check the total<br />
length of vi<strong>de</strong>o calls received.<br />
To reset a counter or all of the counters,<br />
press and select Reset or<br />
Reset all.<br />
If the phone is locked, it will require the<br />
password. The password is preset to<br />
00000000. You can change this password.<br />
�p. 100<br />
Phonebook (Menu 2)<br />
You can store phone numbers on your USIM/<br />
SIM card and in your phone’s memory. The<br />
USIM/SIM card and phone’s memory are<br />
physically separate, but they are used as a<br />
single entity called Phonebook.<br />
To access this menu, press in Idle<br />
mo<strong>de</strong> and select Phonebook.<br />
Search for contacts (Menu 2.1)<br />
Use this menu to search for contacts in<br />
Phonebook.<br />
You can quickly access this menu by pressing<br />
in Idle mo<strong>de</strong>.<br />
Finding a contact<br />
1. Enter the first few letters of the name<br />
that you want to find.<br />
2. Select a contact from the list.<br />
3. Scroll to a number and press [ ] to<br />
dial, or press [<br />
information.<br />
] to edit contact<br />
Using Phonebook options<br />
While viewing contact <strong>de</strong>tails, press<br />
to access the following options:<br />
• Edit: edit contact information.<br />
• Voice call: make a voice call to the<br />
selected number.<br />
• Vi<strong>de</strong>o call: make a vi<strong>de</strong>o call to the<br />
number, if the 3G service is available.<br />
37<br />
Menu functions Phonebook (Menu 2)
38<br />
Menu functions<br />
• Send message: send an SMS or MMS<br />
message to the selected number, or an<br />
MMS message or e-mail to the selected<br />
e-mail address.<br />
• Duplicate: make a copy of the contact.<br />
• Delete: <strong>de</strong>lete the contact.<br />
• Mark <strong>de</strong>fault number: set the selected<br />
number as the <strong>de</strong>fault for the contact.<br />
• Send namecard via: send the contact<br />
<strong>de</strong>tails via MMS, e-mail, or Bluetooth.<br />
• Special options: set the following<br />
options:<br />
Image: assign a caller ID image to alert<br />
you to a call from the person.<br />
Ringtone: assign a ringtone to alert you<br />
to a call from the person.<br />
Msg. alert tone: select a ringtone to<br />
alert you to an incoming message from<br />
the person.<br />
• Add to group: add the number to a<br />
caller group.<br />
• Add to speed dial: set the selected<br />
number as a speed dial entry.<br />
• Copy to SIM/Copy to phone: copy the<br />
contact from the phone’s memory to the<br />
USIM/SIM card, or vice versa.<br />
• Print via Bluetooth: print contact<br />
information by connecting the phone to a<br />
printer via Bluetooth. Some printers may<br />
not be compatible with the phone.<br />
Create contact (Menu 2.2)<br />
Use this menu to add a new contact to<br />
Phonebook.<br />
Storing a contact in the phone’s<br />
memory<br />
1. Select Phone.<br />
2. Change the settings or enter information<br />
about the contact.<br />
• First name/Last name: assign a<br />
name.<br />
• Mobile/Home/Office/Fax number/<br />
Other: add a number in any type.<br />
To mark an ad<strong>de</strong>d number for making<br />
vi<strong>de</strong>o calls, press and<br />
select Mark vi<strong>de</strong>o call.<br />
• Email: assign an e-mail address.
• Group: assign the contact to a caller<br />
group.<br />
• URL: enter a homepage address.<br />
• Note: add a memo about the person.<br />
• Birthday: enter the person’s<br />
birthday.<br />
• Postal address 1/Postal address<br />
2: enter the person’s postal address.<br />
3. Press and select Special<br />
options to add additional information:<br />
• Image: assign a caller ID image to<br />
alert you to a call from the person.<br />
• Ringtone: assign a ringtone to alert<br />
you to a call from the person.<br />
• Msg. alert tone: select a ringtone to<br />
alert you to an incoming message<br />
from the person.<br />
4. Press and select Save to<br />
save the contact.<br />
Storing a contact on the USIM/SIM<br />
card<br />
1. Select SIM.<br />
2. Enter information about the contact.<br />
• Name: assign a name.<br />
• Mobile: add a phone number.<br />
• Group: (for USIM) assign a caller<br />
group.<br />
• Location number: enter a location<br />
number.<br />
3. If you are using a USIM card, press<br />
to add additional<br />
information:<br />
• Add item: add a number type to the<br />
contact.<br />
• Delete item: remove the selected<br />
category from the contact.<br />
4. Press , or press and<br />
select Save to save the contact.<br />
Groups (Menu 2.3)<br />
Use this menu to organise your contacts in<br />
caller groups.<br />
Creating a caller group<br />
1. Press and select Create<br />
group.<br />
2. Enter a name for the group.<br />
3. Press to save the group.<br />
39<br />
Menu functions Phonebook (Menu 2)
40<br />
Menu functions<br />
Adding members to a caller group<br />
1. Select a group.<br />
2. Press [<br />
ad<strong>de</strong>d.<br />
] to select the contacts to be<br />
3. Press .<br />
Managing caller groups<br />
While viewing the group list, press<br />
to access the following options:<br />
• Add member: add members to the<br />
selected group, if the group does not<br />
have any.<br />
• View members: display the members<br />
of the selected group.<br />
• Create group: add a new group.<br />
• Delete: <strong>de</strong>lete the selected group or all<br />
groups. Group members, however, will<br />
not be <strong>de</strong>leted from Phonebook.<br />
• Rename group: change the group<br />
name.<br />
My namecard (Menu 2.4)<br />
Use this menu to create a name card and<br />
send it to other people.<br />
Saving your name card<br />
The procedure for creating your name card<br />
is the same as the one for saving a phone<br />
number in the phone’s memory.�p. 38<br />
Using name card options<br />
After saving your name card, press<br />
to access the following options:<br />
• Edit: edit the name card.<br />
• Send namecard via: send the name<br />
card via MMS, e-mail, or Bluetooth.<br />
• Delete: <strong>de</strong>lete the name card.<br />
• Exchange namecard: exchange name<br />
cards with another person via Bluetooth.<br />
• Print via Bluetooth: print contact<br />
information by connecting the phone to a<br />
printer via Bluetooth. Some printers may<br />
not be compatible with the phone.<br />
Copy all (Menu 2.5)<br />
Use this menu to copy all of the contacts<br />
stored on the USIM/SIM card to the phone’s<br />
memory, or vice versa.
Service number (Menu 2.6)<br />
Use this menu to view the list of Service<br />
Dialling Numbers (SDN) assigned by your<br />
service provi<strong>de</strong>r, including emergency<br />
numbers and numbers for directory<br />
enquiries. This menu is available if your<br />
USIM/SIM card supports SDN.<br />
Scroll to the number you want and press<br />
[ ].<br />
Phonebook settings (Menu 2.7)<br />
Use this menu to change the <strong>de</strong>fault settings<br />
for Phonebook.<br />
Speed dial (Menu 2.7.1)<br />
Use this menu to assign a speed dial number<br />
(2 to 9) for 8 of your most frequently dialled<br />
numbers.<br />
Assigning speed dial numbers<br />
1. Select a key location from 2 to 9. Key 1<br />
is reserved for your voicemail server.<br />
2. Select a contact from the contact list.<br />
3. Select a number.<br />
Managing speed dial entries<br />
From the Speed dial screen, press<br />
to access the following options:<br />
• Assign: assign a number to an<br />
unassigned key.<br />
• View: check the name and number<br />
assigned to a key.<br />
• Voice call: make a voice call to the<br />
number assigned to a key.<br />
• Vi<strong>de</strong>o call: make a vi<strong>de</strong>o call to the<br />
number assigned to a key, if the 3G<br />
service is available.<br />
• Change: assign a different number to a<br />
key.<br />
• Remove: clear the speed dial setting for<br />
a key.<br />
Dialling speed dial numbers<br />
In Idle mo<strong>de</strong>, press and hold the appropriate<br />
key.<br />
Sort contacts by (Menu 2.7.2)<br />
Use this menu to change the sort or<strong>de</strong>r of<br />
the contact list.<br />
41<br />
Menu functions Phonebook (Menu 2)
42<br />
Menu functions<br />
Save new contacts to (Menu 2.7.3)<br />
Use this menu to select a <strong>de</strong>fault memory<br />
location for saving contacts. If you select<br />
Always ask, the phone will ask you to<br />
select a memory location each time you save<br />
a number.<br />
View contacts in (Menu 2.7.4)<br />
Use this menu to set the memory location<br />
from which Phonebook shows entries.<br />
Own number (Menu 2.7.5)<br />
Use this menu to check your phone<br />
numbers, or to assign a name to each of the<br />
numbers. Changes ma<strong>de</strong> here do not affect<br />
the actual subscriber numbers on your<br />
USIM/SIM card.<br />
Memory status (Menu 2.8)<br />
Use this menu to check the number of<br />
contacts you have stored in the phone’s<br />
memory and on the USIM/SIM card.<br />
Multimedia (Menu 3)<br />
This menu provi<strong>de</strong>s you with access to<br />
options for the media player and voice<br />
recor<strong>de</strong>r.<br />
To access this menu, press in Idle<br />
mo<strong>de</strong> and select Multimedia.<br />
Media player (Menu 3.1)<br />
You can enjoy music and vi<strong>de</strong>o files from the<br />
phone’s memory. First, you need to save<br />
files to your phone’s memory.<br />
To enjoy high quality music, you can use an<br />
optional Bluetooth stereo headset.<br />
Downloading or receiving music or<br />
vi<strong>de</strong>o files<br />
You can play the following types of files on<br />
your phone.<br />
• Music: *.mp3, *.aac, *.m4a, *.mmf<br />
• Vi<strong>de</strong>o: *.mp4, *.3gp<br />
Use the following methods to save music or<br />
vi<strong>de</strong>o files to your phone’s memory:<br />
• Download from the wireless web�p. 47
• Download from a computer using the<br />
optional Samsung PC Studio�Samsung<br />
PC Studio User’s <strong>Gui<strong>de</strong></strong><br />
• Receive via an active Bluetooth<br />
connection�p. 99<br />
• Copy files to a memory card and insert<br />
the card into the phone�p. 24<br />
Downloa<strong>de</strong>d or received files are stored in<br />
the Music fol<strong>de</strong>r in Sounds, or the<br />
Downloads fol<strong>de</strong>r in Vi<strong>de</strong>os.<br />
Music (Menu 3.1.1)<br />
Use this menu to arrange and play your<br />
music. You need to add files to the play list.<br />
Creating a play list<br />
1. From the My music list, press<br />
and select Add to playlist<br />
→ Selected or All.<br />
2. For All, select Sounds or Memory card,<br />
press [ ] to select the files you want<br />
and press .<br />
3. Press to return to the file list.<br />
4. Press [Left] or [Right] to access the play<br />
list.<br />
Playing music files<br />
1. From the Playlist screen, press<br />
and select Play via.<br />
2. Select Phone to use the phone speaker.<br />
Select Bluetooth stereo headset to<br />
use a Bluetooth stereo headset and then<br />
search for and connect the phone to the<br />
headset.<br />
During playback, use the following keys:<br />
Key Function<br />
Pauses or resumes playback.<br />
Left Returns to the previous file.<br />
Moves backward in a file when<br />
held down, if it is an mp3 file.<br />
Right Skips to the next file. Skips<br />
forward in a file when held<br />
down, if it is an mp3 file.<br />
Up Opens the play list.<br />
Down Changes the repeat mo<strong>de</strong>.<br />
Volume Adjusts the volume.<br />
5 Changes the playback<br />
animation.<br />
43<br />
Menu functions Multimedia (Menu 3)
44<br />
Menu functions<br />
Using music player options<br />
While playing a file, press to<br />
access the following options:<br />
• Pause/Play: pause or begin playback.<br />
• Bluetooth stereo headset/Transfer<br />
to phone: switch sound output to a<br />
Bluetooth stereo headset or phone<br />
speaker.<br />
• Stop: stop playback.<br />
• Open playlist: access the play list.<br />
• Send via: send the current file via MMS,<br />
e-mail, or Bluetooth.<br />
• Set as: set the file as your ringtone for<br />
voice calls or vi<strong>de</strong>o calls, or as a ringtone<br />
for a Phonebook entry.<br />
• Activate/Reactivate: get a new licence<br />
key for the selected DRM files.<br />
• Details: access the file properties.<br />
• Settings: change the <strong>de</strong>fault settings for<br />
playing music files:<br />
Repeat mo<strong>de</strong>: select a repeat mo<strong>de</strong>.<br />
Shuffle: set the music player to play<br />
tracks in random or<strong>de</strong>r.<br />
Visualisation: change the playback<br />
animation.<br />
Backlight: set whether or not the<br />
display backlight stays on during<br />
playback.<br />
Hi<strong>de</strong> controller: set the music player to<br />
hi<strong>de</strong> the controller image.<br />
Volume: select a volume level.<br />
• Key management: manage the licence<br />
keys you have acquired.<br />
Editing the play list<br />
You can edit the play list by adding or<br />
removing files or changing the play or<strong>de</strong>r.<br />
1. From the My music list, press [Left] or<br />
[Right] to access the play list.<br />
2. Press to access the options<br />
for editing the play list.<br />
• Add: add new music files.<br />
• Move track in playlist: move the<br />
selected file to the position you want<br />
within the play list.<br />
• Remove: remove the selected file or<br />
all files from the play list.
3. When you have finished, press<br />
and select Play via → a<br />
sound output mo<strong>de</strong> to begin playback.<br />
Vi<strong>de</strong>os (Menu 3.1.2)<br />
Use this menu to access and play vi<strong>de</strong>o files.<br />
Playing vi<strong>de</strong>o clips<br />
Select a vi<strong>de</strong>o file from the list. The vi<strong>de</strong>o<br />
player opens and the vi<strong>de</strong>o plays.<br />
During playback, use the following keys:<br />
Key Function<br />
Pauses or resumes playback.<br />
Left Returns to the previous file.<br />
Moves backward in a file when<br />
held down.<br />
Right Skips to the next file. Moves<br />
forward in a file when held<br />
down.<br />
Up Opens the file list.<br />
Down Changes the repeat mo<strong>de</strong>.<br />
Volume Adjusts the volume.<br />
Using vi<strong>de</strong>o player options<br />
While playing a file, press to<br />
access the following options:<br />
• Play/Pause: begin or pause playback.<br />
• Stop: stop playback.<br />
• Full screen view/Normal view: view<br />
the vi<strong>de</strong>o on a full screen, or return to<br />
the normal screen.<br />
• Show controller/Hi<strong>de</strong> controller:<br />
display or hi<strong>de</strong> the controller image.<br />
• Send via: send the current file via MMS,<br />
e-mail, or Bluetooth.<br />
• Activate/Reactivate: get a new licence<br />
key for the selected DRM files.<br />
• Details: access the file properties.<br />
• Settings: change the <strong>de</strong>fault settings for<br />
playing vi<strong>de</strong>o files.<br />
Repeat mo<strong>de</strong>: select a repeat mo<strong>de</strong>.<br />
Shuffle: set the vi<strong>de</strong>o player to play<br />
tracks in random or<strong>de</strong>r.<br />
Hi<strong>de</strong> controller: set the music player to<br />
hi<strong>de</strong> the controller image.<br />
Volume: select a volume level.<br />
45<br />
Menu functions Multimedia (Menu 3)
46<br />
Menu functions<br />
• Streaming settings: select a<br />
connection profile to be used to access<br />
streaming servers. You can also create or<br />
edit a profile.�p. 95<br />
• Key management: manage the licence<br />
keys you have acquired.<br />
Voice recor<strong>de</strong>r (Menu 3.2)<br />
Use this menu to record voice memos.<br />
Recording a voice memo<br />
1. Press [ ] to start recording.<br />
2. Speak into the microphone.<br />
Press [ ] to pause or resume recording.<br />
3. Press or [Down] to end<br />
recording. The voice memo is saved<br />
automatically.<br />
4. Press [ ] to review the memo, or press<br />
[Up] to record additional memos.<br />
Playing a voice memo<br />
1. From the voice recor<strong>de</strong>r screen, press<br />
and select My voice clips.<br />
2. Select a voice memo from the My voice<br />
clips fol<strong>de</strong>r. The memo plays.<br />
During playback, use the following keys:<br />
Key Function<br />
Pauses or resumes playback.<br />
Left Returns to the previous file.<br />
Moves backward in a file when<br />
held down.<br />
Right Skips to the next file. Moves<br />
forward in a file when held down.<br />
Volume Adjusts the volume.<br />
Down Stops playback.<br />
Using voice recor<strong>de</strong>r options<br />
After playback, press the to<br />
access the following options:<br />
• Play: play the selected voice memo in<br />
Review mo<strong>de</strong>.<br />
• Record: record a new voice memo.<br />
• My voice clips: access the voice memo<br />
list.<br />
• Send via: send the file via MMS, e-mail,<br />
or Bluetooth.
• Settings: customise the <strong>de</strong>fault settings<br />
for the voice recor<strong>de</strong>r:<br />
Default name: set the <strong>de</strong>fault prefix for<br />
file names.<br />
Recording time: set the maximum<br />
recording time.<br />
Visualiser skin: change the skin type of<br />
the voice recor<strong>de</strong>r.<br />
Changing voice recor<strong>de</strong>r settings<br />
You can change the <strong>de</strong>fault settings for the<br />
voice recor<strong>de</strong>r. Before recording a voice<br />
memo, press and select<br />
Settings to access the following options:<br />
• Default name: set the <strong>de</strong>fault prefix for<br />
file names.<br />
• Recording time: set the maximum<br />
recording time.<br />
• Visualiser skin: change the skin type of<br />
the voice recor<strong>de</strong>r.<br />
Browser (Menu 4)<br />
The web browser on your phone allows you<br />
to access the wireless web. From the<br />
wireless web, you can access up-to-date<br />
information and a wi<strong>de</strong> variety of media<br />
content, such as games, wallpapers,<br />
ringtones, and music files.<br />
To access this menu, press in Idle<br />
mo<strong>de</strong> and select Browser.<br />
Home (Menu 4.1)<br />
Use this menu to connect your phone to the<br />
network and load the homepage of the<br />
wireless web service provi<strong>de</strong>r. You can also<br />
press [ ] in Idle mo<strong>de</strong>.<br />
Navigating the web browser<br />
To Press<br />
scroll through<br />
browser items<br />
select a browser<br />
item<br />
[Up] or [Down].<br />
[ ], or <br />
and select Go to.<br />
47<br />
Menu functions Browser (Menu 4)
48<br />
Menu functions<br />
To Press<br />
return to the<br />
previous page<br />
move to the next<br />
page<br />
Using browser options<br />
, or<br />
and<br />
select Go →<br />
Backward.<br />
and<br />
select Go →<br />
Forward.<br />
From any web page, press to<br />
access the following options:<br />
• Go to: access the linked web page.<br />
• Go: move backward or forward through<br />
pages in history.<br />
• Reload: reload the current page with<br />
updated information.<br />
• To DesktopView/To SmartFitView:<br />
change the display mo<strong>de</strong> of the browser.<br />
• Page size: change to large, normal, or<br />
small page size.<br />
• Go to homepage: return to the<br />
homepage.<br />
• Bookmarks: bookmark the current<br />
page or access the bookmark list.<br />
• Enter URL: enter a URL address<br />
manually.<br />
• Send URL: send the URL of the current<br />
page via SMS or e-mail.<br />
• Save: save the selected image or the<br />
current page.<br />
• Saved pages: access the list of the web<br />
pages you have saved.<br />
• History: access the list of web pages<br />
you have accessed.<br />
• Advanced: change the various settings<br />
for the browser.<br />
Empty cache: clear the cache. The<br />
cache is a temporary memory site that<br />
stores recently accessed web pages.<br />
Empty cookie: <strong>de</strong>lete cookies. Cookies<br />
are pieces of personal information sent<br />
to a web server while navigating the<br />
web.<br />
Cookies options: set whether or not<br />
cookies are stored.<br />
Preferences: change the browser<br />
display, sound, other settings.
Page <strong>de</strong>tails: access the page<br />
properties.<br />
About browser: access version and<br />
copyright information about the browser.<br />
Exiting the browser<br />
Press [ ] to end the network connection<br />
and exit the browser.<br />
Enter URL (Menu 4.2)<br />
Use this menu to manually enter a URL<br />
address and access the associated web<br />
page.<br />
You can add the entered URL address to the<br />
bookmark list by selecting Add bookmark.<br />
Bookmarks (Menu 4.3)<br />
Use this menu to save URL addresses in<br />
or<strong>de</strong>r to quickly access web pages, or access<br />
the preset bookmarks.<br />
Adding a bookmark<br />
1. Press and select Add<br />
bookmark.<br />
2. Enter a title for the bookmark and press<br />
[Down].<br />
3. Enter a URL address and press .<br />
Accessing a bookmarked page<br />
Selecting a bookmark item launches the web<br />
browser and accesses the associated web<br />
page.<br />
Using bookmark options<br />
After saving an item, press to<br />
access the following options:<br />
• Go to: access the bookmarked web<br />
page.<br />
• Go to homepage: return to the<br />
homepage.<br />
• Enter URL: enter a URL address<br />
manually.<br />
• Bookmark: add a new bookmark or edit<br />
the URL address and title of the<br />
bookmark, if you selected an ad<strong>de</strong>d one.<br />
• Send URL: send the URL address of the<br />
bookmark via SMS.<br />
• Delete: <strong>de</strong>lete the selected bookmark or<br />
all bookmarks.<br />
49<br />
Menu functions Browser (Menu 4)
50<br />
Menu functions<br />
Saved pages (Menu 4.4)<br />
You can access the list of pages you have<br />
saved while online.<br />
If you select a link on the page, the phone<br />
goes online to access the linked page.<br />
History (Menu 4.5)<br />
You can access the list of pages you have<br />
accessed recently.<br />
Select a URL from the list to access the<br />
corresponding web page.<br />
Advanced (Menu 4.6)<br />
Use this menu to clear the cache or <strong>de</strong>lete<br />
cookies or to change the browser display<br />
settings.<br />
• Empty cache: clear the cache. The<br />
cache is a temporary memory site that<br />
stores recently accessed web pages.<br />
• Empty cookie: <strong>de</strong>lete cookies. Cookies<br />
are pieces of personal information sent<br />
to a web server while navigating the<br />
web.<br />
• Cookie options: set whether or not<br />
cookies are stored.<br />
• Preferences: change the browser<br />
display and sound settings.<br />
• About browser: access version and<br />
copyright information about the browser.<br />
Browser settings (Menu 4.7)<br />
Use this menu to select a connection profile<br />
to be used for accessing the wireless web.<br />
You can also create or edit a profile.�p. 95<br />
Messages (Menu 5)<br />
Use the Messages menu to send and<br />
receive text messages, multimedia<br />
messages, and e-mails. You can also access<br />
voicemails, push messages, and broadcast<br />
messages.<br />
To access this menu, press in Idle<br />
mo<strong>de</strong> and select Messages.<br />
Create message (Menu 5.1)<br />
Use this menu to create and send messages.
Text message (Menu 5.1.1)<br />
Short Message Service (SMS) allows you to<br />
send or receive text messages.<br />
Creating and sending an SMS<br />
message<br />
1. Enter your message.<br />
• The maximum number of characters<br />
allowed in a message varies by service<br />
provi<strong>de</strong>r. If your message exceeds the<br />
maximum number of characters, the<br />
phone will split the message.<br />
• Depending on the file type or DRM<br />
(Digital Rights Management) system,<br />
some files may not be able to be<br />
forwar<strong>de</strong>d.<br />
• You can use various options by<br />
pressing .�next section<br />
2. Press [ ].<br />
3. Enter a <strong>de</strong>stination number.<br />
To send the message to more than one<br />
recipient, fill in additional <strong>de</strong>stination<br />
fields.<br />
4. Press [ ] to send the message.<br />
Using options while composing an<br />
SMS message<br />
While composing a message, press<br />
to access the following options:<br />
• Send: send the message.<br />
• View as vivid message: view the<br />
message in 3D view mo<strong>de</strong>. The phone<br />
converts message text to 3D vivid<br />
graphics. This option is available only<br />
when the message consists of a single<br />
page.<br />
• Input method: change the text input<br />
mo<strong>de</strong>.<br />
• Input language: change the language<br />
to be used in T9 input mo<strong>de</strong>.<br />
• Insert: insert a text template,<br />
Phonebook entry, or bookmarked URL<br />
address into text.<br />
• Save to drafts: save the message in the<br />
Drafts fol<strong>de</strong>r.<br />
Multimedia message (Menu 5.1.2)<br />
Multimedia Message Service (MMS) <strong>de</strong>livers<br />
messages containing a combination of text,<br />
image, vi<strong>de</strong>o, and audio, from phone to<br />
phone or from phone to e-mail.<br />
51<br />
Menu functions Messages (Menu 5)
52<br />
Menu functions<br />
Creating and sending an MMS<br />
message<br />
1. Enter the message subject.<br />
2. Select Image or vi<strong>de</strong>o or Sound and<br />
add an image, a vi<strong>de</strong>o, or a sound file.<br />
• The maximum size allowed for a<br />
message can differ, <strong>de</strong>pending on your<br />
service provi<strong>de</strong>r.<br />
• You can use various options by<br />
pressing in each field.<br />
�next section<br />
3. Select Text.<br />
4. Enter the message text and press [ ].<br />
5. Press and select Add file(s)<br />
→ an item type.<br />
• Namecard: add Phonebook entries<br />
as name cards.<br />
• Appointment/Anniversary/Task/<br />
Memo: add calendar items, tasks, or<br />
memos.<br />
• Other files: add a document file<br />
stored in the Other files fol<strong>de</strong>r.<br />
6. Press [ ] to select Phonebook entries,<br />
7.<br />
calendar items, tasks, memos, or<br />
document files.<br />
Press and select Attach.<br />
8. When you have finished, press [ ], or<br />
9.<br />
press and select Send.<br />
Enter a phone number or an e-mail<br />
address.<br />
To send the message to more than one<br />
recipient, fill in additional <strong>de</strong>stination<br />
fields.<br />
10. Press [ ] to send the message.<br />
Using options while composing an<br />
MMS message<br />
While composing an MMS message, press<br />
to access the following options:<br />
• Input: enter the message text.<br />
• Send: send the message.<br />
• Preview: view the message as it will be<br />
shown on the recipient’s phone.<br />
• Insert: insert a text template,<br />
Phonebook entry, or bookmarked URL<br />
address into text.
• Input method: change the text input<br />
mo<strong>de</strong>.<br />
• Input language: change the language<br />
to be used in T9 input mo<strong>de</strong>.<br />
• Insert text template: insert a text<br />
template into text.<br />
• Add image/Add vi<strong>de</strong>o/Add: add an<br />
image, vi<strong>de</strong>o, or sound clip.<br />
• Edit style: set the page duration and<br />
change the font colour and style for the<br />
selected page or all pages.<br />
• Text on top/Image on top: choose to<br />
display the text or image at the<br />
beginning of the message on the<br />
recipient’s phone.<br />
• Change image/Change vi<strong>de</strong>o/Change<br />
sound: replace an ad<strong>de</strong>d item.<br />
• Edit text: edit the text of your message.<br />
• Remove image/Remove vi<strong>de</strong>o/<br />
Remove sound/Remove text: remove<br />
an ad<strong>de</strong>d item.<br />
• Add page: add pages. Move to each<br />
page by pressing [Left] or [Right].<br />
• Delete page: <strong>de</strong>lete a page.<br />
• Move page: move the current page<br />
forward or backward one page with the<br />
message.<br />
• Save to drafts: save the message in the<br />
Drafts fol<strong>de</strong>r.<br />
• Save as multimedia message<br />
template: save the message as a<br />
template.<br />
• Add file(s): attach a Phonebook entry<br />
as a name card or calendar data as a<br />
data format attachment, or a document<br />
file stored in the Other files fol<strong>de</strong>r.<br />
• Attached file list: access the list of the<br />
files you attached.<br />
Email (Menu 5.1.3)<br />
You can create and send e-mails that inclu<strong>de</strong><br />
text, audio, and images. To use this feature,<br />
you need to subscribe to an e-mail service<br />
and set up your e-mail account and profile.<br />
�p. 65<br />
Creating and sending an e-mail<br />
1. Enter the subject of your e-mail.<br />
2. Move to the Message field.<br />
3. Enter the e-mail text.<br />
53<br />
Menu functions Messages (Menu 5)
54<br />
Menu functions<br />
4. Select the Attach file(s) line and select<br />
Add → an item type.<br />
• File(s): add media or document<br />
files.<br />
• Namecard: add Phonebook entries<br />
as name cards.<br />
• Appointment/Anniversary/Task/<br />
Memo: add calendar items, tasks, or<br />
memos.<br />
5. Press [<br />
ad<strong>de</strong>d.<br />
] to select the items to be<br />
Depending on the DRM (Digital Rights<br />
Management) system, some files may<br />
not be able to be forwar<strong>de</strong>d.<br />
6. Press and select Attach.<br />
To review the files you have attached,<br />
press and select Attached<br />
file list.<br />
7. When you have finished, press [ ], or<br />
8.<br />
press and select Send.<br />
Enter an e-mail address.<br />
To send the e-mail to more than one<br />
recipient, fill in additional <strong>de</strong>stination<br />
fields.<br />
9. Press [ ] to send the e-mail.<br />
Using options while composing an<br />
e-mail<br />
While composing an e-mail, press<br />
to access the following options:<br />
• Send: send the e-mail.<br />
• Input method: change the text input<br />
mo<strong>de</strong>.<br />
• Input language: change the language<br />
to be used in T9 input mo<strong>de</strong>.<br />
• Insert text template: insert a text<br />
template into text.<br />
• Insert: insert a text template,<br />
Phonebook entry, or bookmarked URL<br />
address into text.<br />
• Attached file list: access the list of the<br />
files you attached.<br />
• Add: add a media file, or attach a<br />
Phonebook entry as a name card,<br />
calendar data as a data format<br />
attachment, or a document file stored in<br />
the Other files fol<strong>de</strong>r.<br />
• Save to drafts: save the e-mail in the<br />
Drafts fol<strong>de</strong>r.
Inbox (Menu 5.2)<br />
Use this menu to store all of the messages<br />
you have received, except for e-mails.<br />
Viewing a message<br />
The following icons may appear on the<br />
message list to show the message type:<br />
• SMS<br />
• MMS<br />
• Push message from web servers<br />
• Configuration message, containing<br />
network parameters from your<br />
service provi<strong>de</strong>r<br />
• Broadcast message from your<br />
service provi<strong>de</strong>r<br />
• Depending on the DRM (Digital Rights<br />
Management) system, messages having<br />
web content may not be able to be<br />
forwar<strong>de</strong>d.<br />
• A ! icon next to a message means that the<br />
message is of high priority. A greycoloured<br />
message icon indicates low<br />
priority.<br />
Using message options<br />
While viewing a message, press <br />
to access the following options:<br />
SMS messages<br />
• Voice call/Vi<strong>de</strong>o call: dial the<br />
highlighted phone number.<br />
• Create message: send an SMS or MMS<br />
message to the selected number, or an<br />
MMS or e-mail to the selected e-mail<br />
address.<br />
• Go to URL: connect to the URL specified<br />
in the message.<br />
• Add to phonebook: save the sen<strong>de</strong>r's<br />
phone number to Phonebook. If a phone<br />
number, e-mail address, or URL address<br />
within the message is selected, you can<br />
also save it to Phonebook.<br />
• Add to: save the highlighted web link to<br />
the bookmark list or Phonebook.<br />
• Reply: reply to the sen<strong>de</strong>r via SMS or<br />
MMS.<br />
• Forward: forward the message to other<br />
people.<br />
55<br />
Menu functions Messages (Menu 5)
56<br />
Menu functions<br />
• Zoom view: zoom in or out on the text<br />
by pressing [Volume]. To switch back to<br />
normal view, press .<br />
• View as vivid message/View as: view<br />
the message in 3D view mo<strong>de</strong> or switch<br />
back to normal view mo<strong>de</strong>. This option is<br />
available only when the message<br />
consists of a single page.<br />
• Delete: <strong>de</strong>lete the message.<br />
• Move to phone/Move to SIM: move<br />
the message between the USIM/SIM<br />
card and the phone’s memory.<br />
• Print via Bluetooth: print the message<br />
by connecting the phone to a printer via<br />
Bluetooth. Some printers may not be<br />
compatible with the phone.<br />
MMS messages<br />
• Retrieve: retrieve the MMS message<br />
from the MMS server.<br />
• Play: play the message.<br />
• Reply: reply to the sen<strong>de</strong>r via SMS or<br />
MMS.<br />
• Reply to all: reply to the sen<strong>de</strong>r and all<br />
of the other recipients.<br />
• Forward: forward the message to other<br />
people.<br />
• Activate/Reactivate: get a new licence<br />
key for the selected DRM files.<br />
• Delete: <strong>de</strong>lete the message.<br />
• Save as multimedia message<br />
template: save the message as a<br />
template.<br />
• Attached items: save media content<br />
from the message to your phone’s<br />
memory.<br />
• Add to phonebook: save the sen<strong>de</strong>r's<br />
phone number to Phonebook. If a phone<br />
number, e-mail address, or URL address<br />
within the message is selected, you can<br />
also save it to Phonebook.<br />
• Print via Bluetooth: print the message<br />
by connecting the phone to a printer via<br />
Bluetooth. Some printers may not be<br />
compatible with the phone.<br />
• Details: access the message properties.<br />
• Key management: manage the licence<br />
keys you have acquired.
Configuration messages<br />
• Install: apply the configuration specified<br />
in the message to your phone.<br />
• Delete: <strong>de</strong>lete the message.<br />
Push messages<br />
• Go to URL: connect to the URL specified<br />
in the message.<br />
• Delete: <strong>de</strong>lete the message.<br />
Broadcast messages<br />
• Save: save the message to the phone’s<br />
memory.<br />
• Delete: <strong>de</strong>lete the message.<br />
Email inbox (Menu 5.3)<br />
Use this menu to store e-mails that you<br />
have received.<br />
Viewing an e-mail<br />
1. Press and select Download.<br />
The phone checks the e-mail server and<br />
downloads new e-mails.<br />
2. Select an e-mail or a hea<strong>de</strong>r.<br />
3. Press [Volume] to view other pages in<br />
the e-mail.<br />
4. Press [ ] or [ ] to view the previous or<br />
next e-mail.<br />
Depending on the DRM (Digital Rights<br />
Management) system, messages having web<br />
content may not be able to be forwar<strong>de</strong>d.<br />
Using e-mail options<br />
While viewing the e-mail or hea<strong>de</strong>r, press<br />
to access the following options:<br />
• Retrieve: retrieve the body of the<br />
e-mail from the e-mail server.<br />
• Reply: send a reply to the sen<strong>de</strong>r.<br />
• Reply to all: send a reply to the sen<strong>de</strong>r<br />
and all of the other recipients.<br />
• Forward: forward the e-mail to other<br />
people.<br />
• Delete: <strong>de</strong>lete the e-mail only from the<br />
phone’s memory, or both from the<br />
phone’s memory and from the e-mail<br />
server.<br />
• Attached items: save the attached files<br />
from the e-mail to your phone’s memory.<br />
• Activate/Reactivate: get a new licence<br />
key for the selected DRM files.<br />
57<br />
Menu functions Messages (Menu 5)
58<br />
Menu functions<br />
• Add to phonebook: save the sen<strong>de</strong>r's<br />
phone number to Phonebook. If a phone<br />
number, e-mail address, or URL address<br />
within the e-mail is selected, you can<br />
also save it to Phonebook.<br />
• Print via Bluetooth: print the message<br />
by connecting the phone to a printer via<br />
Bluetooth. Some printers may not be<br />
compatible with the phone.<br />
• Block by: add the sen<strong>de</strong>r’s e-mail<br />
address or subject to the Block list to<br />
reject e-mails from that address or<br />
containing that subject.<br />
• Details: access the e-mail properties.<br />
• Key management: manage the licence<br />
keys you have acquired.<br />
Drafts (Menu 5.4)<br />
Use this menu to store messages you have<br />
saved to send at a later time.<br />
From the message list, press to<br />
access the following options:<br />
• Edit: edit the selected message.<br />
• Send: send the message.<br />
• View: open the selected MMS message.<br />
• Delete: <strong>de</strong>lete the selected message or<br />
all messages.<br />
• Sort by: change the sort or<strong>de</strong>r of the<br />
message list.<br />
• Lock/Unlock: lock the message to<br />
prevent it from being <strong>de</strong>leted, or unlock<br />
the message.<br />
• Details: access the message properties.<br />
Outbox (Menu 5.5)<br />
Use this menu to store messages the phone<br />
is attempting to send or has failed to send.<br />
The following icons are available to show the<br />
message status:<br />
• Being sent<br />
• Failed to be sent<br />
From the message list, press to<br />
access the following options:<br />
• View: open the selected message.<br />
• Send again: resend the message.<br />
• Edit: edit the selected message.<br />
• Delete: <strong>de</strong>lete the message or all<br />
messages.<br />
• Sort by: change the sort or<strong>de</strong>r of the<br />
message list.
• Lock/Unlock: lock the message to<br />
prevent it from being <strong>de</strong>leted, or unlock<br />
the message.<br />
• Details: access the message properties.<br />
Sentbox (Menu 5.6)<br />
Use this menu to store messages that you<br />
have sent.<br />
While viewing a message, press <br />
to access the following options:<br />
• View/Play: open the selected file.<br />
• Voice call/Vi<strong>de</strong>o call: dial the<br />
highlighted phone number.<br />
• Create message: send an SMS or MMS<br />
message to the selected number, or an<br />
e-mail to the selected e-mail address.<br />
• Add to phonebook: save the sen<strong>de</strong>r's<br />
phone number to Phonebook. If a phone<br />
number, e-mail address, or URL address<br />
within the message is selected, you can<br />
also save it to Phonebook.<br />
• Go to URL: access the highlighted web<br />
link.<br />
• Add to: save the highlighted web link to<br />
the bookmark list or Phonebook.<br />
• Play: play the message.<br />
• Forward: forward the message to other<br />
people.<br />
• Zoom view: zoom in or out on the text<br />
by pressing [Volume]. To switch back to<br />
normal view, press .<br />
• Delete: <strong>de</strong>lete the message.<br />
• Move to phone/Move to SIM: move<br />
the message between the USIM/SIM<br />
card and the phone’s memory.<br />
• Attached items: save media content<br />
from the message to your phone’s<br />
memory.<br />
• Print via Bluetooth: print the message<br />
by connecting the phone to a printer via<br />
Bluetooth. Some printers may not be<br />
compatible with the phone.<br />
• Details: access the message properties.<br />
Templates (Menu 5.7)<br />
Use this menu to make and use templates of<br />
frequently used messages or passages.<br />
59<br />
Menu functions Messages (Menu 5)
60<br />
Menu functions<br />
Text templates (Menu 5.7.1)<br />
You can create SMS templates with the<br />
sentences you use frequently so that you<br />
can retrieve and insert them when<br />
composing an SMS message.<br />
Creating a template<br />
1. Press , or press <br />
and select Add new, if one has already<br />
been stored.<br />
2. Enter a message and press [ ].<br />
Using template options<br />
From the template list, press to<br />
access the following options:<br />
• Send: create and send an SMS, MMS, or<br />
e-mail using the template.<br />
• Add new: add a new template.<br />
• Edit: edit the selected template.<br />
• Delete: <strong>de</strong>lete the selected template or<br />
all templates.<br />
MMS templates (Menu 5.7.2)<br />
You can create MMS templates so that you<br />
can use them in composing an MMS<br />
message.<br />
Creating a template<br />
1. Press , or press <br />
and select Add new, if one has already<br />
been stored.<br />
2. Create a template as you would when<br />
creating an MMS message.<br />
3. Press and select Save as<br />
multimedia message template.<br />
Using template options<br />
From the template list, press to<br />
access the following options:<br />
• View: open the selected template.<br />
• Edit: edit the selected template.<br />
• Send: send a new message using the<br />
template.<br />
• Add new: add a new template.<br />
• Delete: <strong>de</strong>lete the selected template or<br />
all templates.<br />
Voice mail (Menu 5.8)<br />
Use this menu to connect to your voicemail<br />
server and access your voicemails.<br />
You can quickly access the voicemail server<br />
by pressing and holding [1] in Idle mo<strong>de</strong>.
Delete all (Menu 5.9)<br />
Use this menu to <strong>de</strong>lete messages in each<br />
message type all at once.<br />
1. Press [ ] to select the message types to<br />
2.<br />
be cleared.<br />
Press .<br />
3. Press to confirm the <strong>de</strong>letion.<br />
Message settings (Menu 5.10)<br />
Use this menu to set up various options for<br />
using the messaging services.<br />
Text message (Menu 5.10.1)<br />
You can configure SMS settings.<br />
• Settings x (where x is the setting profile<br />
number): set the properties of each<br />
profile:<br />
Centre address: store or change the<br />
number of your SMS server.<br />
Expiration: set the length of time your<br />
messages are stored in the SMS server.<br />
Default type: set the <strong>de</strong>fault message<br />
type. The network can convert messages<br />
into the selected format.<br />
Name: enter a profile name.<br />
• Sending options: set up the options for<br />
sending SMS messages:<br />
Reply path: allow recipients to reply to<br />
you through your SMS server.<br />
Delivery report: set the network to<br />
inform you when your messages have<br />
been <strong>de</strong>livered.<br />
Network selection: select either CS<br />
only (GSM) or PS preferred (GPRS),<br />
<strong>de</strong>pending on your network.<br />
Keep a copy: leave copies of your<br />
messages in the Sentbox fol<strong>de</strong>r after<br />
sending.<br />
Character support: select a character<br />
encoding type. When you select<br />
Automatic, the phone switches the<br />
encoding type from GSM alphabet to<br />
Unico<strong>de</strong> if you enter a Unico<strong>de</strong> character.<br />
Use of Unico<strong>de</strong> encoding will reduce the<br />
maximum number of characters in a<br />
message to about half. If this menu is<br />
not shown, your phone provi<strong>de</strong>s<br />
automatic character encoding by <strong>de</strong>fault.<br />
61<br />
Menu functions Messages (Menu 5)
62<br />
Menu functions<br />
• Receiving options: activate 3D view<br />
mo<strong>de</strong> for displaying received messages.<br />
The phone will convert message text to<br />
3D vivid graphics. This option is available<br />
only when the message consists of a<br />
single page.<br />
Multimedia message (Menu 5.10.2)<br />
You can configure MMS settings.<br />
• Sending options: set up the options for<br />
sending MMS messages:<br />
Priority: set the priority level of<br />
messages.<br />
Validity period: set the length of time<br />
messages are stored in the MMS server.<br />
Delivery time: set a time <strong>de</strong>lay before<br />
messages are sent.<br />
Hi<strong>de</strong> address: set your address to be<br />
hid<strong>de</strong>n from the recipient’s phone.<br />
Delivery report: set the network to<br />
inform you when your messages have<br />
been <strong>de</strong>livered.<br />
Read report: send a read-reply request<br />
along with your messages.<br />
Keep a copy: leave copies of your<br />
messages in the Sentbox fol<strong>de</strong>r after<br />
sending.<br />
• Receiving options: set up the options<br />
for receiving MMS messages:<br />
Home network: <strong>de</strong>termine if your<br />
phone retrieves new messages<br />
automatically when you are in your<br />
home service area.<br />
Roaming network: <strong>de</strong>termine if your<br />
phone retrieves new messages<br />
automatically when you are roaming on<br />
another network.<br />
Reception within your home network or<br />
while roaming has the following options:<br />
- Autodownload: the phone<br />
automatically retrieves messages from<br />
the server.<br />
- Manual: the phone displays<br />
notifications. Use the Retrieve option<br />
to manually retrieve new messages.<br />
- Restricted: the phone receives<br />
notifications first from the server. When<br />
you attempt to retrieve messages, the<br />
phone informs you of additional<br />
charges.
Delivery report: set the network to<br />
inform the sen<strong>de</strong>r when a message has<br />
been <strong>de</strong>livered to you.<br />
Read report: <strong>de</strong>termine whether or not<br />
the phone sends a read-reply when an<br />
incoming message has been read.<br />
Anonymous reject: reject messages<br />
from unknown sen<strong>de</strong>rs.<br />
• MMS profiles: select a connection<br />
profile to be used for MMS. You can also<br />
create or edit a profile.�p. 95<br />
• Message class: set up the options for<br />
creating MMS messages:<br />
Message class: select the type of<br />
message content you will add or the<br />
message size.<br />
- Vi<strong>de</strong>o rich: you can add any type of<br />
items of up to 300 KB.<br />
- Text: you can add only text of up to 30<br />
KB.<br />
- Image basic: you can add any type of<br />
item, except for vi<strong>de</strong>o, of up to 30 KB.<br />
- Image rich: you can add any type of<br />
item, except for vi<strong>de</strong>o, of up to 100 KB.<br />
- Vi<strong>de</strong>o basic: you can add any type of<br />
item of up to 100 KB.<br />
Creation mo<strong>de</strong>: select an MMS creation<br />
mo<strong>de</strong>.<br />
- Free: you can create a message with<br />
any type of contents and of any size.<br />
- Restricted: you can create a message<br />
with the type of content and size<br />
specified in Message class.<br />
- Warning: you can create a message<br />
with any type of content and of any<br />
size, but the phone will inform you<br />
when the content and size exceeds the<br />
maximum.<br />
• Default style: set the <strong>de</strong>fault page<br />
properties, such as page duration, font<br />
colour or style, or background colour.<br />
Email (Menu 5.10.3)<br />
You can configure e-mail settings.<br />
You cannot change e-mail profile and<br />
account settings while e-mails are being sent<br />
or retrieved.<br />
• Sending options: set up the options for<br />
sending e-mails:<br />
63<br />
Menu functions Messages (Menu 5)
64<br />
Menu functions<br />
From: set the sen<strong>de</strong>r name.<br />
Sending account: select the <strong>de</strong>fault<br />
e-mail account.<br />
Priority: select the priority level of<br />
e-mails.<br />
Keep a copy: leave copies of your<br />
e-mails in the Sentbox fol<strong>de</strong>r after<br />
sending.<br />
Send confirmation: set the network to<br />
inform you when your e-mails have been<br />
<strong>de</strong>livered.<br />
Read reply: send a read-reply request<br />
along with e-mails.<br />
Add my contact <strong>de</strong>tails: allow your<br />
contact information to be attached to<br />
e-mails.<br />
Add signature: attach a tag line to new<br />
e-mails or all e-mails including replies.<br />
• Receiving options: set up the options<br />
for receiving e-mails:<br />
Retrieving option: set whether the<br />
phone downloads e-mail hea<strong>de</strong>rs only or<br />
the complete e-mail.<br />
Reject if over: <strong>de</strong>termine the maximum<br />
size for incoming e-mails. Your phone<br />
will reject e-mails that exceed the<br />
specified size.<br />
Check interval: <strong>de</strong>termine how often<br />
the phone checks the server for incoming<br />
e-mails. If you select Do not use, use<br />
the Download option to receive new<br />
e-mails manually.<br />
Read reply: <strong>de</strong>termine whether or not<br />
the phone sends a read-reply when an<br />
incoming e-mail has been read.<br />
Block address: specify e-mail<br />
addresses to reject e-mails from those<br />
addresses, and activate or <strong>de</strong>activate<br />
mail blocking.<br />
Block subject: reject e-mails which<br />
contain subjects you specify, and<br />
activate or <strong>de</strong>activate mail blocking.<br />
• Email profiles: select a connection<br />
profile to be used for e-mail services. You<br />
can also create or edit a profile.�p. 95
• Email accounts: set up an e-mail<br />
account and select an account to be<br />
used. Press and select Edit<br />
to access the following options for<br />
setting up an account:<br />
Account name: enter a name for the<br />
currently selected account.<br />
SMTP server: enter the IP address or<br />
host name of the outgoing e-mail server.<br />
SMTP port: enter the SMTP port<br />
number.<br />
SMTP use SSL: activate the use of the<br />
SSL (Secured Sockets Layer) protocol.<br />
Retrieve server type: select the<br />
protocol for the incoming e-mail server.<br />
The remaining options <strong>de</strong>pend on the<br />
protocol type setting.<br />
Retrieve server: enter the IP address<br />
or host name of the POP3 or IMAP4<br />
server.<br />
Retrieve port: enter the POP3 or IMAP4<br />
port number.<br />
Retrieving SSL...: activate the use of<br />
the SSL (Secured Sockets Layer)<br />
protocol.<br />
Retrieving option: (IMAP4 protocol<br />
only) set whether the phone retrieves<br />
messages with attachments or not.<br />
Retrieving count: (IMAP4 protocol<br />
only) set the number of e-mail hea<strong>de</strong>rs<br />
the phone retrieves from the server at<br />
any one time.<br />
Keep in server: leave copies of e-mails<br />
on the e-mail server after retrieving.<br />
My address: set your e-mail address.<br />
User name: enter the POP3 or IMAP4<br />
user name.<br />
Password: enter the POP3 or IMAP4<br />
password.<br />
POP3/IMAP4 before SMTP: connect<br />
to the POP3 or IMAP4 server for<br />
authentication before connecting to the<br />
SMTP server to send e-mails.<br />
Use SMTP authentication: enable<br />
SMTP authentication, which requires the<br />
user to log in before sending e-mails.<br />
Same as POP3/IMAP4: select if you<br />
want the SMTP server to have the same<br />
parameters as the POP3 or IMAP4 server.<br />
65<br />
Menu functions Messages (Menu 5)
66<br />
Menu functions<br />
User name: enter the SMTP user name.<br />
Password: enter the SMTP password.<br />
Voice mail (Menu 5.10.4)<br />
Use this menu to set the number of your<br />
voicemail server.<br />
You must store the voicemail server number<br />
before accessing the server. Your service<br />
provi<strong>de</strong>r can give you the number.<br />
Push message (Menu 5.10.5)<br />
You can change the settings for receiving<br />
push messages from the wireless web<br />
server.<br />
• Receive: set how your phone receives<br />
push messages.<br />
• Service centre: specify the server from<br />
which the phone receives push<br />
messages, if you selected Optional in<br />
the Receive option.<br />
Broadcast (Menu 5.10.6)<br />
You can change the settings for receiving<br />
broadcast messages.<br />
• Receive: set whether or not to receive<br />
broadcast messages.<br />
• Channel list: indicate the channels from<br />
which you wish to receive broadcast<br />
messages. To add a new channel,<br />
remove the check mark from All<br />
channels and press . Select<br />
New and set the channel ID information.<br />
Please contact your service provi<strong>de</strong>r for<br />
further <strong>de</strong>tails.<br />
• Language: select the preferred<br />
languages in which broadcast messages<br />
display.<br />
Memory status (Menu 5.11)<br />
Use this menu to view the number of<br />
messages or the amount of memory<br />
currently in use for each message type in<br />
each fol<strong>de</strong>r.<br />
You can also access a message box by<br />
selecting it from this menu.
My files (Menu 6)<br />
The My files menu allows you to access<br />
images, vi<strong>de</strong>os, music files, sound files,<br />
games, and documents stored in the phone’s<br />
memory and on a memory card.<br />
To access this menu, press in Idle<br />
mo<strong>de</strong> and select My files.<br />
Tips for Digital Rights Management<br />
As a result of the Digital Rights Management<br />
(DRM) system, some of the media items you<br />
download from the Internet or receive by<br />
MMS may require a licence key to access<br />
them. You can acquire the key from the<br />
website which owns the rights to the<br />
content; use the Activate option.<br />
Note the following icons on the list:<br />
• : Forwardable item with a valid key.<br />
• : Forwardable item without a valid<br />
key.<br />
• : Unforwardable item with a valid<br />
key.<br />
• : Unforwardable item without a valid<br />
key.<br />
Your service provi<strong>de</strong>r supports only countbased<br />
or unlimited-access DRM files.<br />
Images<br />
Use this menu to access photos you have<br />
taken and images you have downloa<strong>de</strong>d,<br />
received in messages, or imported from your<br />
computer.<br />
Viewing an image<br />
1. Scroll to an image fol<strong>de</strong>r.<br />
2. Select an image.<br />
Viewing a sli<strong>de</strong> show<br />
You can view your images as a sli<strong>de</strong> show, a<br />
sequential presentation of each image in the<br />
current fol<strong>de</strong>r.<br />
1. Select an image fol<strong>de</strong>r.<br />
2. While viewing an image, press<br />
and select Sli<strong>de</strong> show.<br />
3. Press . The sli<strong>de</strong> show begins.<br />
4. Press to stop the sli<strong>de</strong> show.<br />
Editing a photo<br />
1. Select a photo.<br />
2. Press and select Edit.<br />
67<br />
Menu functions My files (Menu 6)
68<br />
Menu functions<br />
3. Press and edit the photo<br />
using the following options:<br />
• Resize: change the image size.<br />
• Effects: change the colour tone or<br />
apply a special effect to the photo.<br />
• Insert: add a <strong>de</strong>corative frame, an<br />
image, or text.<br />
• Flip: flip the photo vertically or<br />
horizontally.<br />
4. When you have finished, press .<br />
5. Press and select Save as.<br />
6. Enter a photo name and press .<br />
Using image options<br />
While viewing an image, press <br />
to access the following options:<br />
• Send via: send the file via MMS, e-mail,<br />
or Bluetooth.<br />
• Set as: set the image as wallpaper for<br />
the display or as a caller ID image for a<br />
Phonebook entry.<br />
• Activate/Reactivate: get a new licence<br />
key when the key for the selected DRM<br />
file expires.<br />
• Sli<strong>de</strong> show: view all images as a sli<strong>de</strong><br />
show.<br />
• Edit: edit the image and save it as a<br />
different name.<br />
• Delete: <strong>de</strong>lete the selected file.<br />
• Rename: change the file name.<br />
• Bluetooth visibility: share the selected<br />
file with other Bluetooth <strong>de</strong>vices.<br />
• Print via: print the image by connecting<br />
the phone to a printer via USB or<br />
Bluetooth. Some printers may not be<br />
compatible with the phone.<br />
• Lock/Unlock: lock the file to prevent it<br />
from being <strong>de</strong>leted, or unlock the file.<br />
• Details: access the file properties.<br />
• Key management: manage the licence<br />
keys you have acquired.<br />
Downloading images<br />
1. Scroll to the Downloads fol<strong>de</strong>r.<br />
2. Select More photos. You are connected<br />
to the website preset by your service<br />
provi<strong>de</strong>r.<br />
3. Search for the file you want and follow<br />
the onscreen instructions to download it.
Vi<strong>de</strong>os<br />
Use this menu to access vi<strong>de</strong>o clips you have<br />
recor<strong>de</strong>d, downloa<strong>de</strong>d, received in<br />
messages, or imported from your computer.<br />
Vi<strong>de</strong>o clips recor<strong>de</strong>d on other <strong>de</strong>vices, such<br />
as camcor<strong>de</strong>rs, may not play correctly.<br />
Playing a vi<strong>de</strong>o clip<br />
1. Scroll to a vi<strong>de</strong>o fol<strong>de</strong>r.<br />
2. Select a vi<strong>de</strong>o clip. The vi<strong>de</strong>o player<br />
opens and the vi<strong>de</strong>o plays.�p. 45<br />
Using vi<strong>de</strong>o options<br />
From the vi<strong>de</strong>o list, press to<br />
access the following options:<br />
• Play: play the selected file.<br />
• Send via: send the file via MMS, e-mail,<br />
or Bluetooth.<br />
• Copy: copy the selected file or all files to<br />
another fol<strong>de</strong>r.<br />
• Move: move the selected file or all files<br />
to another fol<strong>de</strong>r.<br />
• Activate/Reactivate: get a new licence<br />
key when the key for the selected DRM<br />
file expires.<br />
• Delete: <strong>de</strong>lete the selected file or all<br />
files.<br />
• Rename: change the file name.<br />
• Create fol<strong>de</strong>r: add a new fol<strong>de</strong>r.<br />
• Bluetooth visibility: share the selected<br />
file or all of the files in the current fol<strong>de</strong>r<br />
with other Bluetooth <strong>de</strong>vices.<br />
• Lock/Unlock: lock the file to prevent it<br />
from being <strong>de</strong>leted, or unlock the file.<br />
• Details: access the file properties.<br />
• Key management: manage the licence<br />
keys you have acquired.<br />
Downloading vi<strong>de</strong>o clips<br />
1. Scroll to the Downloads fol<strong>de</strong>r.<br />
2. Select More vi<strong>de</strong>os. You are connected<br />
to the website preset by your service<br />
provi<strong>de</strong>r.<br />
3. Search for the file you want and follow<br />
the onscreen instructions to download it.<br />
69<br />
Menu functions My files (Menu 6)
70<br />
Menu functions<br />
Sounds<br />
Use this menu to access voice memos you<br />
have recor<strong>de</strong>d, and ringtones and sound<br />
files you have downloa<strong>de</strong>d, received in<br />
messages, or imported from your computer.<br />
Playing a sound clip<br />
1. Select a sound fol<strong>de</strong>r.<br />
2. Select a sound clip. The music player<br />
opens and the selected sound plays.<br />
�p. 43<br />
For a voice memo, see Voice recor<strong>de</strong>r.<br />
�p. 46<br />
Using sound options<br />
While viewing a sound list, press<br />
to access the following options:<br />
• Play via: play the selected music file via<br />
the phone speaker or a Bluetooth stereo<br />
headset.<br />
• Play: play the selected ringtone or voice<br />
memo.<br />
• Send via: send the file via MMS, e-mail,<br />
or Bluetooth.<br />
• Set as: set the sound as your ringtone<br />
for voice calls or vi<strong>de</strong>o calls, or as a<br />
ringtone for a Phonebook entry.<br />
• Copy: copy the selected file or all files to<br />
another fol<strong>de</strong>r.<br />
• Move: move the selected file or all files<br />
to another fol<strong>de</strong>r.<br />
• Activate/Reactivate: get a new licence<br />
key when the key for the selected DRM<br />
file expires.<br />
• Delete: <strong>de</strong>lete the selected file or all<br />
files.<br />
• Add to playlist: add the file to the<br />
current play list.<br />
• Rename: change the file name.<br />
• Create fol<strong>de</strong>r: add a new fol<strong>de</strong>r.<br />
• Bluetooth visibility: share the selected<br />
file or all of the files in the current fol<strong>de</strong>r<br />
with other Bluetooth <strong>de</strong>vices.<br />
• Lock/Unlock: lock the file to prevent it<br />
from being <strong>de</strong>leted, or unlock the file.<br />
• Details: access the file properties.<br />
• Key management: manage the licence<br />
keys you have acquired.
Downloading sound files<br />
1. Scroll to the Music or Ringtones fol<strong>de</strong>r.<br />
2. Select More music or More ringtones.<br />
You are connected to the website preset<br />
by your service provi<strong>de</strong>r.<br />
3. Search for the file you want and follow<br />
the onscreen instructions to download it.<br />
Games & more<br />
Use this menu to access the embed<strong>de</strong>d Java<br />
games and downloa<strong>de</strong>d Java applications.<br />
Accessing a game<br />
Select a game from the game list and follow<br />
the onscreen instructions. The procedure<br />
may differ from game to game.<br />
Using Java application options<br />
While viewing the application list, press<br />
to access the following options:<br />
• Start: launch the selected application.<br />
• Move: move the application to another<br />
fol<strong>de</strong>r.<br />
• Activate/Reactivate: get a new licence<br />
key when the key for the selected DRM<br />
file expires.<br />
• Delete: <strong>de</strong>lete the selected application<br />
or all applications, except for embed<strong>de</strong>d<br />
games.<br />
• Create fol<strong>de</strong>r: add a new fol<strong>de</strong>r.<br />
• Lock/Unlock: lock the application to<br />
prevent it from being <strong>de</strong>leted, or unlock<br />
the application.<br />
• Details: access the application<br />
properties.<br />
• Permissions: set the permission<br />
settings for services charging you<br />
additional costs, such as network access<br />
and SMS.<br />
• Settings: select a connection profile to<br />
be used for applications requiring<br />
network access. You can also create or<br />
edit a profile.�p. 95<br />
• Key management: manage the licence<br />
keys you have acquired.<br />
71<br />
Menu functions My files (Menu 6)
72<br />
Menu functions<br />
Downloading applications<br />
1. Select More games. You are connected<br />
to the website preset by your service<br />
provi<strong>de</strong>r.<br />
2. Search for the application you want and<br />
follow the onscreen instructions to<br />
download it.<br />
Other files<br />
Use this menu to access any other files than<br />
image, vi<strong>de</strong>o, music, and sound files. Your<br />
phone provi<strong>de</strong>s you with Picsel File Viewer to<br />
allow you to view, without corruption,<br />
various document files. Available file formats<br />
are *.doc, *.xls, *.ppt, *.pdf, and *.txt.<br />
Viewing a document<br />
1. Scroll to a document fol<strong>de</strong>r.<br />
2. Select a file. Picsel File Viewer runs to<br />
open the document.<br />
• Depending on the file size or memory<br />
capacity of Picsel File Viewer, some files<br />
may not open properly.<br />
• If a document file contains languages<br />
unsupported by Picsel File Viewer, the<br />
content of the document will not display<br />
correctly.<br />
Use the following keys to view the<br />
document:<br />
Key Function<br />
Up/Down/<br />
Left/Right<br />
Pans around the page.<br />
Volume Zooms in or out.<br />
Fits the document to the page<br />
size.<br />
2 Returns to the first page.<br />
4 Returns to the previous page.<br />
5 Rotates the document.<br />
6 Moves to the next page.<br />
8 Moves to the last page.<br />
Changes the display to Full<br />
screen view or Normal screen<br />
view.
Using file options<br />
While viewing a document, press<br />
or < > to access the<br />
following options:<br />
• Full screen view/Normal view:<br />
change the view mo<strong>de</strong>.<br />
• Zoom: zoom in or out.<br />
• Fit to: fit the document to the page size,<br />
screen width, or screen height.<br />
• Go to: move to another page of the<br />
document.<br />
• Rotate: rotate the document.<br />
• Screen panning/Normal panning:<br />
change the panning mo<strong>de</strong> to by screen<br />
or by preset pixel.<br />
• Hi<strong>de</strong> controller/Show controller: hi<strong>de</strong><br />
or display the shortcut tool bar in Full<br />
screen view.<br />
• Send via: send the file via MMS, e-mail,<br />
or Bluetooth.<br />
• Delete: <strong>de</strong>lete the selected file.<br />
• Rename: change the file name.<br />
• Bluetooth visibility: share the selected<br />
file with other Bluetooth <strong>de</strong>vices.<br />
• Lock/Unlock: lock the file to prevent it<br />
from being <strong>de</strong>leted, or unlock the file.<br />
• Details: access the file properties.<br />
• Shortcuts: view the functions of the<br />
keys you can use in Picsel File Viewer.<br />
Memory card<br />
Use this menu to access the files stored in a<br />
memory card. This menu is shown only<br />
when a memory card is inserted into the<br />
phone.<br />
Memory status<br />
Use this menu to check the amount of<br />
memory currently in use in each media<br />
fol<strong>de</strong>r. You can also access a fol<strong>de</strong>r by<br />
selecting it from this menu.<br />
73<br />
Menu functions My files (Menu 6)
74<br />
Menu functions<br />
Organiser (Menu 7)<br />
The Organiser menu enables you to use<br />
various convenient features.<br />
To access this menu, press in Idle<br />
mo<strong>de</strong> and select Organiser.<br />
Calendar (Menu 7.1)<br />
Use this menu to keep track of your<br />
schedule.<br />
Selecting a day on the calendar<br />
When you enter the Calendar menu, the<br />
calendar appears with today’s date indicated<br />
by a grey box.<br />
• Press [Left] or [Right] to move by day.<br />
• Press [Up] or [Down] to move by week.<br />
• Press [Up] until the month field is<br />
highlighted and then [Left] or [Right] to<br />
move by month.<br />
Creating an item<br />
You can store appointments and<br />
anniversaries on the calendar. More than one<br />
item per day can be stored.<br />
Entering an appointment<br />
1. Select a date on the calendar.<br />
2. Press and select Create →<br />
Appointment.<br />
3. Enter information or change the settings:<br />
• Title: enter a title for the<br />
appointment.<br />
• Details: enter appointment <strong>de</strong>tails.<br />
• Start date and Start time: enter<br />
the starting time and date for the<br />
appointment.<br />
• End date and End time: enter the<br />
ending date and time for the<br />
appointment.<br />
• Location: enter information about<br />
the appointment location.<br />
• Alarm: set an alarm for the<br />
appointment.<br />
• before: set how long before the<br />
appointment the alarm is to alert<br />
you.<br />
• Alarm tone: select an alarm tone.<br />
• Repeat: set the appointment to<br />
recur and select a repeat option.
• every: set how often you are alerted<br />
to the appointment.<br />
• Expiry: set the ending date, if the<br />
appointment will recur.<br />
4. Press and select Save to<br />
save the appointment.<br />
Entering an anniversary<br />
1. Select a date on the calendar.<br />
2. Press and select Create →<br />
Anniversary.<br />
3. Enter information or change the settings:<br />
• Title: enter a title for the<br />
anniversary.<br />
• Details: enter information about the<br />
anniversary.<br />
• Date: enter the date for the<br />
anniversary.<br />
• Alarm: select to set an alarm for the<br />
anniversary.<br />
• before: set how long before the<br />
anniversary the alarm is to alert you.<br />
• Alarm time: enter the time for the<br />
alarm to sound.<br />
• Alarm tone: select an alarm tone.<br />
• Repeat every year: set the phone<br />
to remind you of the anniversary<br />
every year.<br />
4. Press and select Save to<br />
save the anniversary.<br />
Consulting the calendar<br />
Once you have created items, the square<br />
brackets appear on the corners of the date<br />
box.<br />
Viewing an item<br />
1. Select a date on the calendar to display<br />
the items for the day.<br />
2. Select an item to view its <strong>de</strong>tails.<br />
While viewing an item, press to<br />
access the following options:<br />
• Edit: edit the item.<br />
• Send via: send the item via MMS,<br />
e-mail, or Bluetooth.<br />
• Delete: <strong>de</strong>lete the selected item.<br />
• Settings: change the display settings<br />
for the calendar. You can set the starting<br />
day of the week and the <strong>de</strong>fault view<br />
mo<strong>de</strong>.<br />
75<br />
Menu functions Organiser (Menu 7)
76<br />
Menu functions<br />
• Missed alarm events: view items<br />
whose alarms you have missed.<br />
• Memory status: access memory<br />
information for the items stored on the<br />
calendar.<br />
Using calendar options<br />
From the calendar, press to<br />
access the following options:<br />
• View: display the items stored for the<br />
selected date.<br />
• View by: change the view mo<strong>de</strong> of the<br />
calendar.<br />
• Create: create a new item.<br />
• Go to: go to today’s date or enter the<br />
specific date you want to access.<br />
• Event list: sort items by type of item.<br />
• Delete: <strong>de</strong>lete the items stored for the<br />
selected date or all items.<br />
• Settings: change the display settings<br />
for the calendar. You can set the starting<br />
day of the week and the <strong>de</strong>fault view<br />
mo<strong>de</strong>.<br />
• Missed alarm events: view items<br />
whose alarms you have missed.<br />
• Memory status: access memory<br />
information for the items stored on the<br />
calendar.<br />
Viewing items in a different mo<strong>de</strong><br />
You can change the calendar display to Day<br />
view or Week view. On the calendar, press<br />
and select View by → a view<br />
mo<strong>de</strong>.<br />
Day view<br />
You can view items for the selected date.<br />
The following icons may display to indicate<br />
the type:<br />
• Appointment<br />
• Anniversary<br />
If you have set the Repeat and Alarm<br />
options, the and icons display. Select<br />
an item to view its <strong>de</strong>tails.<br />
Week view<br />
You can view items for the selected week. A<br />
cell on the timetable indicates the presence<br />
of an appointment.<br />
Select a cell for the date you want.
Applications (Menu 7.2)<br />
Use this menu to use your phone as a world<br />
clock, calculator, converter, timer,<br />
stopwatch, task list, or memo pad.<br />
World clock (Menu 7.2.1)<br />
Use this menu to set your local time zone<br />
and find out the current time in another part<br />
of the world.<br />
Setting the local time zone<br />
1. From the world map, press [Left] or<br />
[Right] to scroll to the city you want on<br />
the upper line ( ). As the time line<br />
moves, the time and date of the given<br />
zone display.<br />
2. Press [ ] to save the city as your local<br />
time zone.<br />
Viewing world time<br />
1. From the world map, move to the lower<br />
line ( ).<br />
2. Press [Left] or [Right] to scroll to the city<br />
you want.<br />
3. Press [ ] to save the time zone.<br />
Using world clock options<br />
From the world map, press to<br />
access the following options:<br />
• Save: save the selected foreign time<br />
zone.<br />
• Daylight saving: apply daylight saving<br />
time to the time zone you want.<br />
• Dual time display: set the following<br />
options for the dual clock display:<br />
Dual time: set whether the dual clock is<br />
displayed on the idle screen.<br />
Dual time type: select a dual clock<br />
type.<br />
• Select display city: select a city for<br />
each clock. This option is only available<br />
when you activate the dual clock setting<br />
in Dual time display.<br />
Calculator (Menu 7.2.2)<br />
Use this menu to perform basic arithmetic<br />
functions, such as addition, subtraction,<br />
multiplication, and division.<br />
77<br />
Menu functions Organiser (Menu 7)
78<br />
Menu functions<br />
1. Enter the first number.<br />
• Press to insert a <strong>de</strong>cimal point<br />
or bracket.<br />
• Press [ ] or [ ] to move the cursor.<br />
2. Press one of the Navigation keys to<br />
access the math function you want.<br />
3. Enter the second number.<br />
4. Press [ ] to view the result.<br />
5. If necessary, repeat from step 2 to<br />
continue the calculation.<br />
Converter (Menu 7.2.3)<br />
Use this menu for common conversions,<br />
such as currency and temperature.<br />
Performing a conversion<br />
1. Select a converter.<br />
2. Press [Left] or [Right] to select the<br />
original unit and press [Down].<br />
3. Enter the value to be converted and<br />
press [Down].<br />
• Press [ ] to insert a <strong>de</strong>cimal point.<br />
• Press [ ] to change the temperature<br />
to above zero (+) or below zero (-).<br />
4. Press [Left] or [Right] to select the unit<br />
to which you want to convert.<br />
The equivalent value for the amount you<br />
entered displays.<br />
Using converter options<br />
Press to access the following<br />
options:<br />
• Clear: clear the current values.<br />
• Reverse: reverse the conversion.<br />
• Currency rates: display the currency<br />
rate list.<br />
Timer (Menu 7.2.4)<br />
Use this menu to set a period of time for the<br />
phone to count down. The phone sounds an<br />
alarm when the specified period of time<br />
expires.<br />
Starting the timer<br />
1. Press .<br />
2. Enter the length of time you want to<br />
count down and press .<br />
3. Press [ ] to start counting down.
Stopping the timer<br />
• Press when the timer sounds.<br />
• Press [ ] on the Timer screen to stop<br />
the timer before it sounds.<br />
Stopwatch (Menu 7.2.5)<br />
Use this menu to measure elapsed time.<br />
1. Press [ ] to start the stopwatch.<br />
2. Press [ ] to check an interval. You can<br />
repeat this step for a total of 10<br />
intervals.<br />
Task (Menu 7.2.6)<br />
You can create a list of tasks you need to<br />
complete.<br />
Entering a task<br />
1. Press and select Create.<br />
2. Enter information or change the settings:<br />
• Title: enter a subject of the task.<br />
• Details: enter information about the<br />
task.<br />
• Start date: enter the starting date.<br />
• Due date: enter the ending date.<br />
• Priority: select a priority level.<br />
3. Press to save the task.<br />
Viewing a task<br />
From the task list, the triangle icons on the<br />
right indicate the importance; the lower the<br />
number on the icon, the higher the priority.<br />
A check mark appears in the status check<br />
box if the task has been completed.<br />
Select a task from the list.<br />
Using task options<br />
From the task list, press to<br />
access the following options:<br />
• View: access the selected task.<br />
• Create: add a new task.<br />
• Send via: send the task as a data file<br />
via MMS, e-mail, or Bluetooth.<br />
• Done/Not done: change the status of<br />
the task.<br />
• Delete: <strong>de</strong>lete the selected task or all<br />
tasks.<br />
• Memory status: access memory<br />
information for tasks and memos you<br />
have stored.<br />
79<br />
Menu functions Organiser (Menu 7)
80<br />
Menu functions<br />
Memo (Menu 7.2.7)<br />
You can create a list of memos.<br />
Creating a memo<br />
1. Press and select Create.<br />
2. Enter the memo contents and press<br />
.<br />
Viewing a memo<br />
Select a memo from the list.<br />
Using memo options<br />
From the memo list, press to<br />
access the following options:<br />
• View: access the selected memo.<br />
• Create: add a new memo.<br />
• Send via: send the memo as a data file<br />
via MMS, e-mail, or Bluetooth.<br />
• Delete: <strong>de</strong>lete the selected memo or all<br />
memos.<br />
• Memory status: access memory<br />
information for tasks and memos you<br />
have stored.<br />
SIM AT (Menu 7.2.8)<br />
This menu is available if you use a SIM AT<br />
card that supports SIM Application Toolkit<br />
menus and provi<strong>de</strong>s additional services,<br />
such as news, weather, sports,<br />
entertainment, and location services.<br />
Available services may vary, <strong>de</strong>pending on<br />
your service provi<strong>de</strong>r’s plans. For <strong>de</strong>tails,<br />
see your USIM/SIM card instructions or<br />
contact your service provi<strong>de</strong>r.<br />
Memory status (Menu 7.2.9)<br />
You can access memory information for<br />
tasks and memos you have stored.<br />
Alarms (Menu 7.3)<br />
Use this menu to set alarms to sound at<br />
specified times to remind you of important<br />
events or wake you up in the morning.<br />
Setting an alarm<br />
1. Select an alarm. If necessary, press<br />
and select Create alarm to<br />
add a new alarm.<br />
2. Set each alarm option:<br />
• Alarm name: enter the alarm name.
• Alarm activation: activate the<br />
alarm.<br />
• Alarm time: enter the time for the<br />
alarm to sound.<br />
• Alarm type: select an alert type.<br />
• Alarm tone: select an alarm tone.<br />
• Alarm volume: set the alarm<br />
volume.<br />
• Recurrence: select the days on<br />
which you want the alarm to sound.<br />
If you select Once only, the alarm<br />
sounds at the specified time and then<br />
is <strong>de</strong>activated.<br />
• Snooze: set the alarm to sound<br />
again after 5 minutes.<br />
• Repeat: select a snooze interval.<br />
• Auto power-up: set the alarm to<br />
sound when the phone is off.<br />
3. Press .<br />
Stopping an alarm<br />
When the time for an alarm comes and the<br />
alarm sounds:<br />
• Press any key.<br />
• For the alarms with the snooze feature<br />
enabled, press any key, except for <br />
and [ ], to cause it to sound again after<br />
5 minutes.<br />
Deactivating an alarm<br />
1. Select the alarm you want to <strong>de</strong>activate.<br />
2. Select Off on the Alarm activation line.<br />
3. Press .<br />
Camera (Menu 8)<br />
You can use the camera module embed<strong>de</strong>d<br />
in your phone to take photos and record<br />
vi<strong>de</strong>os.<br />
To access this menu, press in Idle<br />
mo<strong>de</strong> and select Camera, or press and hold<br />
[Camera].<br />
• Do not take photos of people without their<br />
permission.<br />
• Do not take photos in a place where<br />
cameras are not allowed.<br />
• Do not take photos in a place where you<br />
may interfere with another person’s<br />
privacy.<br />
81<br />
Menu functions Camera (Menu 8)
82<br />
Menu functions<br />
Taking a photo<br />
You can take photos in various mo<strong>de</strong>s. The<br />
camera produces JPEG photos.<br />
When you take a photo in direct sunlight or<br />
in bright conditions, shadows may appear on<br />
the photo.<br />
1. Access the Camera menu or press and<br />
hold [Camera] to turn on the camera.<br />
2. Press [Volume] to switch between the<br />
front camera lens and the rear camera<br />
lens.<br />
3. Make any <strong>de</strong>sired adjustments.<br />
• Press < > to access camera<br />
•<br />
options.�next section<br />
Use the keypad to change the camera<br />
settings or switch to other mo<strong>de</strong>s.<br />
�p. 84<br />
4. Press [ ] or [Camera] to take a photo.<br />
The photo is automatically saved in the<br />
Photos fol<strong>de</strong>r.<br />
5. To Press<br />
access photo<br />
options<br />
send the photo via<br />
MMS<br />
< > or<br />
.<br />
�p. 84<br />
[ ].�p. 51<br />
<strong>de</strong>lete the photo [C] and then<br />
.<br />
return to Capture<br />
mo<strong>de</strong><br />
< > or .<br />
Using camera options in Capture<br />
mo<strong>de</strong><br />
In Capture mo<strong>de</strong>, press < > to access the<br />
following options:<br />
• Record vi<strong>de</strong>o: switch to Record mo<strong>de</strong>.<br />
• Switch camera: switch between the<br />
front camera lens and the rear camera<br />
lens.<br />
• Shooting mo<strong>de</strong>: take a photo in the<br />
following mo<strong>de</strong>s:<br />
Single shot: take a photo in normal<br />
mo<strong>de</strong>.
Multi-shot: take a series of action stills.<br />
You can select the number of photos the<br />
camera will take.<br />
Mosaic shot: take several stills and<br />
save them in one frame. You can select<br />
the layout.<br />
• Effects: change the colour tone or apply<br />
a special effect.<br />
• Frames: apply a <strong>de</strong>corative frame.<br />
• Timer: set a time <strong>de</strong>lay before the<br />
camera takes a photo.<br />
• Zoom: display the zoom control bar and<br />
zoom in or out by pressing [Up] or<br />
[Down].<br />
• Brightness: display the brightness<br />
control bar and adjust the brightness by<br />
pressing [Left] or [Right].<br />
• Go to My photos: access the Photos<br />
fol<strong>de</strong>r.<br />
• Settings: change the <strong>de</strong>fault settings for<br />
taking a photo. Press [Left] or [Right] to<br />
scroll through the following setting<br />
options:<br />
Size: select an image size.<br />
Quality: select an image quality setting.<br />
Viewfin<strong>de</strong>r: select a preview screen.<br />
White balance: adjust the colour<br />
balance of the image. You can make your<br />
photo appear warmer or cooler.<br />
Shutter sound: select the sound that<br />
you hear when you press the shutter<br />
release.<br />
Multi-shot speed: select the shooting<br />
speed in Multi Shot mo<strong>de</strong>.<br />
Zoom sound: turn the sound effect for<br />
zooming on or off.<br />
Brightness sound: turn the sound<br />
effect for brightness adjustment on or<br />
off.<br />
Default storage: select the memory<br />
location to store photos, if a memory<br />
card is inserted.<br />
Night shot: set whether or not to use<br />
Night shot mo<strong>de</strong>.<br />
Default name: change the <strong>de</strong>fault<br />
prefix of file names.<br />
• Camera shortcuts: view the functions<br />
of the keys you can use in Capture<br />
mo<strong>de</strong>.<br />
83<br />
Menu functions Camera (Menu 8)
84<br />
Menu functions<br />
Using the keypad in Capture mo<strong>de</strong><br />
You can use the keypad to customise your<br />
camera settings in Capture mo<strong>de</strong>.<br />
Key Function<br />
Left/Right Adjusts the brightness.<br />
Up/Down Zooms in or out.<br />
Volume Switches the camera lens.<br />
1 Switches to Record mo<strong>de</strong>.<br />
�p. 85<br />
2 Changes the image size.<br />
3 Changes the image quality.<br />
4 Changes the shooting mo<strong>de</strong>.<br />
5 Changes the colour tone or<br />
applies a special effect.<br />
6 Changes the white balance.<br />
7 Adds a <strong>de</strong>corative frame.<br />
8 Sets the timer.<br />
9 Selects the memory location<br />
to save photos.<br />
Key Function<br />
Determines the use of the<br />
Night shot mo<strong>de</strong>.<br />
0 Goes to the Photos fol<strong>de</strong>r.<br />
Changes the preview screen.<br />
Using photo options<br />
After saving a photo, press < > or<br />
to access the following options:<br />
• Send via: send the file via MMS, e-mail,<br />
or Bluetooth.<br />
• Delete: <strong>de</strong>lete the file, or all of the<br />
multi-shot photos.<br />
• View: access one of the multi-shot<br />
photos.<br />
• Viewfin<strong>de</strong>r: return to Capture mo<strong>de</strong>.<br />
• Set as: set the photo as wallpaper for<br />
the display or as a caller ID image for a<br />
Phonebook entry.<br />
• Edit: edit the photo by using various<br />
tools.�p. 67<br />
• Rename: change the file name.
• Go to My photos: access the Photos<br />
fol<strong>de</strong>r.�p. 67<br />
• Lock/Unlock: lock the file to prevent it<br />
from being <strong>de</strong>leted, or unlock the file.<br />
• Bluetooth visibility: share the selected<br />
file with other Bluetooth <strong>de</strong>vices.<br />
• Details: access the file properties.<br />
Recording a vi<strong>de</strong>o<br />
You can record a vi<strong>de</strong>o of what is displayed<br />
on the screen and save it.<br />
1. In Capture mo<strong>de</strong>, press [1].<br />
2. Press [Volume] to switch between the<br />
front camera lens and the rear camera<br />
lens.<br />
3. Make any <strong>de</strong>sired adjustments.<br />
• Press < > to access camera<br />
•<br />
options.�next section<br />
Use the keypad to change the camera<br />
settings or switch to other mo<strong>de</strong>s.<br />
�p. 86<br />
4. Press [ ] or [Camera] to start recording.<br />
5. Press < > or [Camera] to stop<br />
recording. The vi<strong>de</strong>o is automatically<br />
saved in the My vi<strong>de</strong>o clips fol<strong>de</strong>r.<br />
6. To Press<br />
play back the vi<strong>de</strong>o<br />
clip<br />
[ ].<br />
access vi<strong>de</strong>o options .<br />
�p. 87<br />
<strong>de</strong>lete the vi<strong>de</strong>o [C] and then<br />
.<br />
return to Record .<br />
mo<strong>de</strong><br />
Using camcor<strong>de</strong>r options in Record<br />
mo<strong>de</strong><br />
In Record mo<strong>de</strong>, press < > to access the<br />
following options:<br />
• Take photo: switch to Capture mo<strong>de</strong>.<br />
• Switch camera: switch between the<br />
front camera lens and the rear camera<br />
lens.<br />
• Effects: change the colour tone or apply<br />
a special effect.<br />
85<br />
Menu functions Camera (Menu 8)
86<br />
Menu functions<br />
• Timer: set a time <strong>de</strong>lay before the<br />
camera starts recording.<br />
• Zoom: display the zoom control bar and<br />
zoom in or out by pressing [Up] or<br />
[Down].<br />
• Brightness: display the brightness<br />
control bar and adjust the brightness by<br />
pressing [Left] or [Right].<br />
• Go to My vi<strong>de</strong>o clips: access the My<br />
vi<strong>de</strong>o clips fol<strong>de</strong>r.<br />
• Settings: change the <strong>de</strong>fault settings for<br />
recording a vi<strong>de</strong>o. Press [Left] or [Right]<br />
to scroll through the following settings<br />
for recording a vi<strong>de</strong>o:<br />
Recording mo<strong>de</strong>: select a vi<strong>de</strong>o<br />
recording mo<strong>de</strong>. Selecting Limit for<br />
MMS allows you to record a vi<strong>de</strong>o for<br />
adding an MMS message.<br />
Size: select a frame size.<br />
Quality: select an image quality setting.<br />
White balance: adjust the colour<br />
balance of the image. You can make your<br />
photo appear warmer or cooler.<br />
Record audio: record a vi<strong>de</strong>o with<br />
audio.<br />
Brightness sound: turn the sound<br />
effect for brightness adjustment on or<br />
off.<br />
Zoom sound: turn the sound effect for<br />
zooming on or off.<br />
Default storage: select the memory<br />
location to store vi<strong>de</strong>os, if a memory<br />
card is inserted.<br />
Default name: change the <strong>de</strong>fault<br />
prefix of file names.<br />
• Camcor<strong>de</strong>r shortcuts: view the<br />
functions of the keys you can use in<br />
Record mo<strong>de</strong>.<br />
Using the keypad in Record mo<strong>de</strong><br />
You can use the keypad to customise your<br />
camera settings in Record mo<strong>de</strong>.<br />
Key Function<br />
Left/Right Adjusts the brightness.<br />
Up/Down Zooms in or out.
Key Function<br />
Volume Switches the camera lens.<br />
1 Switches to Capture mo<strong>de</strong>.<br />
�p. 82<br />
2 Changes the frame size.<br />
3 Changes the image quality.<br />
4 Changes the vi<strong>de</strong>o recording<br />
mo<strong>de</strong>.<br />
5 Changes the colour tone or<br />
applies a special effect.<br />
6 Changes the white balance.<br />
7 Mutes or unmutes audio.<br />
8 Sets the timer.<br />
9 Selects the memory location<br />
to save photos.<br />
0 Goes to the My vi<strong>de</strong>o clips<br />
fol<strong>de</strong>r.<br />
Using vi<strong>de</strong>o options<br />
After saving a vi<strong>de</strong>o clip, press <br />
to access the following options:<br />
• Play: play back the vi<strong>de</strong>o clip.<br />
• Send via: send the file via MMS, e-mail,<br />
or Bluetooth.<br />
• Delete: <strong>de</strong>lete the file.<br />
• Viewfin<strong>de</strong>r: return to Record mo<strong>de</strong>.<br />
• Rename: change the file name.<br />
• Go to My vi<strong>de</strong>o clips: access the My<br />
vi<strong>de</strong>o clips fol<strong>de</strong>r.�p. 69<br />
• Lock/Unlock: lock the file to prevent it<br />
from being <strong>de</strong>leted, or unlock the file.<br />
• Bluetooth visibility: share the file with<br />
other Bluetooth <strong>de</strong>vices.<br />
• Details: access the file properties.<br />
87<br />
Menu functions Camera (Menu 8)
88<br />
Menu functions<br />
Settings (Menu 9)<br />
The Settings menu provi<strong>de</strong>s you with<br />
various setting options to customise the<br />
phone to your preferences and needs. You<br />
can also reset the settings to their <strong>de</strong>fault<br />
status.<br />
To access this menu, press in Idle<br />
mo<strong>de</strong> and select Settings.<br />
Phone settings (Menu 9.1)<br />
Many different features of your phone’s<br />
system can be customised to suit your<br />
preferences.<br />
Some menus may not be available,<br />
<strong>de</strong>pending on your service provi<strong>de</strong>r.<br />
Phone profiles (Menu 9.1.1)<br />
Your phone provi<strong>de</strong>s you with sound profiles<br />
that allow you to quickly and easily change<br />
the sound settings of the phone for different<br />
events or situations. Use this menu to adjust<br />
the properties of each profile and activate<br />
the profile you need.<br />
Editing a profile<br />
1. Scroll to the profile you want.<br />
2. Press and select Edit.<br />
3. Change the sound settings:<br />
• Call alert type: select an alert type<br />
for the call ringer.<br />
• Voice call ringtone: select a<br />
ringtone for voice calls.<br />
• V-call ringtone: select a ringtone<br />
for vi<strong>de</strong>o calls.<br />
• Tone volume: adjust the volume for<br />
the call ringer.<br />
• Msg. alert type: select an alert type<br />
for the message ringer.<br />
• Msg. alert tone: select a ringtone<br />
for the message ringer.<br />
• Msg. alert repetition: select if the<br />
phone repeatedly reminds you of a<br />
new message.<br />
• Phone sounds: turn the various<br />
sounds on the phone on or off:<br />
All: enable all tones.<br />
Popup box alerts: set the phone to<br />
beep when a pop-up window<br />
displays.
Minute min<strong>de</strong>r: set the phone to<br />
beep every minute during an<br />
outgoing call to keep you informed of<br />
the length of your call.<br />
Call connect tone: set the phone to<br />
beep when an outgoing call is<br />
connected to the system.<br />
Call end tone: set the phone to<br />
beep when a call is disconnected by<br />
the other person or due to a fa<strong>de</strong>d<br />
signal.<br />
Power on: set the phone to beep<br />
when you turn it on.<br />
Sound effect: cause the phone to<br />
beep when you move between main<br />
menus in Menu mo<strong>de</strong>.<br />
Alerts on call: set the phone to<br />
beep when you receive a new<br />
message or when the time for an<br />
alarm comes during a call.<br />
• Keytones: select a tone which<br />
sounds when you press a key.<br />
• Keytone volume: adjust the volume<br />
of the key tones.<br />
• Call answer mo<strong>de</strong>: (for Car) select<br />
how to answer an incoming call.<br />
4. When you have finished, press .<br />
Changing the active profile<br />
From the profile list, select the profile you<br />
want and press [ ].<br />
Language (Menu 9.1.2)<br />
Use this menu to select one of the several<br />
languages for the display text and T9 input<br />
mo<strong>de</strong>, separately. If you select Automatic,<br />
the phone uses the same language as the<br />
USIM/SIM card.<br />
Shortcuts (Menu 9.1.3)<br />
You can use the Navigation keys as<br />
shortcuts to access specific menus directly<br />
from Idle mo<strong>de</strong>. Use this menu to assign a<br />
shortcut to a key.<br />
Assigning a shortcut menu<br />
1. Select a key to be used as a shortcut<br />
key.<br />
2. Select a menu to be assigned to the key.<br />
3. Press .<br />
89<br />
Menu functions Settings (Menu 9)
90<br />
Menu functions<br />
Using shortcut options<br />
Press to access the following<br />
options:<br />
• Assign: assign a shortcut menu.<br />
• Change: change a shortcut menu<br />
assignment.<br />
• Remove: <strong>de</strong>activate the shortcut<br />
assignment to the selected key.<br />
• Remove all: <strong>de</strong>activate all shortcut<br />
assignments.<br />
Time & date (Menu 9.1.4)<br />
Use this menu to change the time and date<br />
displayed on your phone. Before setting the<br />
time and date, specify your time zone in the<br />
World clock menu.�p. 77<br />
• Time zone updating: select a mo<strong>de</strong> for<br />
updating the current time and date.<br />
Prompt first: the phone will read the<br />
MCC (Mobile Country Co<strong>de</strong>) from the<br />
network and automatically update the<br />
current time for the country that you are<br />
in when you travel abroad. Before<br />
updating, the phone will ask if you want<br />
to update time information.<br />
Time information may not be updated<br />
when you move to one time zone to<br />
another within a country.<br />
Automatic: your phone will receive time<br />
information from the network.<br />
Manual only: you can set the time and<br />
date manually.<br />
• Date: enter the current date.<br />
• Time: enter the current time. To select<br />
AM or PM for 12-hour time format, press<br />
[Right].<br />
• Time format: select a time format.<br />
• Date format: select a date format.<br />
• Daylight saving: select to apply<br />
daylight saving time.<br />
Auto redial (Menu 9.1.5)<br />
Use this menu to set the phone to make up<br />
to ten attempts to redial a phone number<br />
after an unsuccessful call.<br />
Auto keypad lock (Menu 9.1.6)<br />
Use this menu to set the phone to lock the<br />
keypad automatically when the display turns<br />
off.
Any key answer (Menu 9.1.7)<br />
Use this menu to answer an incoming call by<br />
pressing any key, except for and<br />
[ ].<br />
Volume key in incoming call<br />
(Menu 9.1.8)<br />
Use this menu to set whether the phone<br />
mutes the call ringer or rejects a call if you<br />
press and hold [Volume] when a call comes<br />
in.<br />
Display settings (Menu 9.2)<br />
Use this menu to change settings for the<br />
display and backlight.<br />
Main display (Menu 9.2.1)<br />
Use this menu to customise the properties of<br />
the display.<br />
• Greeting message: enter the greeting<br />
that is displayed briefly when the phone<br />
is switched on.<br />
• Wallpaper: select an image to be<br />
displayed on the display.<br />
• Brightness: adjust the brightness of the<br />
display for varying lighting conditions.<br />
Backlight time (Menu 9.2.2)<br />
You can select the length of time the<br />
backlight or display stays on.<br />
• On: select the length of time the<br />
backlight stays on.<br />
• Dim: select the length of time the<br />
display stays on in Dim mo<strong>de</strong> after the<br />
backlight turns off. After a specified time,<br />
the display turns off.<br />
Keypad light (Menu 9.2.3)<br />
Use this menu to select a keypad backlight<br />
mo<strong>de</strong>. Select one of the following options<br />
from the top line:<br />
• Any time: flash the backlight when you<br />
press any key.<br />
• Night time: use the backlight only<br />
between 5:00 PM and 9:00 AM. Doing<br />
this saves the battery power.<br />
• Custom time: you can specify the time<br />
period that the keypad light is used.<br />
91<br />
Menu functions Settings (Menu 9)
92<br />
Menu functions<br />
Dialling display (Menu 9.2.4)<br />
Use this menu to customise the settings for<br />
the numbers entered and the background<br />
colour of the display while dialling.<br />
Show caller ID (Menu 9.2.5)<br />
Use this menu to block caller ID information<br />
on all incoming calls.<br />
Message settings (Menu 9.3)<br />
Use this menu to change the <strong>de</strong>fault settings<br />
for using the message services.�p. 61<br />
Call settings (Menu 9.4)<br />
Use this menu to access network services.<br />
Please contact your service provi<strong>de</strong>r to<br />
check their availability and subscribe to<br />
them, if you wish.<br />
Show my number (Menu 9.4.1)<br />
This network service allows you to hi<strong>de</strong> your<br />
phone number from the person you are<br />
calling. If you select By network, the phone<br />
will use the <strong>de</strong>fault setting provi<strong>de</strong>d by the<br />
network.<br />
Some networks may not allow you to change<br />
this setting.<br />
Diverts (Menu 9.4.2)<br />
This network service reroutes incoming calls<br />
to a phone number that you specify.<br />
1. Select the type of calls to be diverted.<br />
2. Select a call diverting option:<br />
• Always: divert all calls.<br />
• Busy: divert calls when you are on<br />
another call.<br />
• No reply: divert calls when you do<br />
not answer the phone.<br />
• Not reachable: divert calls when<br />
you are not in your service area or<br />
when your phone is switched off.<br />
• Cancel all: cancel all call diverting<br />
options.<br />
3. Enter the number to which calls are to be<br />
diverted on the Diverts to line.<br />
4. If you selected No reply, move to the<br />
Waiting time line and select the length<br />
of time the network <strong>de</strong>lays before<br />
diverting a call.
5. Press and select Activate.<br />
To <strong>de</strong>activate call diverting, select<br />
Deactivate.<br />
Barring (Menu 9.4.3)<br />
This network service allows you to restrict<br />
your calls.<br />
1. Select the type of calls to be barred.<br />
2. Select a call barring option:<br />
• All outgoing calls: prohibit all<br />
outgoing calls.<br />
• Outgoing int’l calls: prohibit<br />
international calls.<br />
• Int’l call exc. Home: only allow<br />
calls to numbers within the current<br />
country, and to your home country<br />
when you are abroad.<br />
• All incoming calls: prohibit all<br />
incoming calls.<br />
• Incoming calls when roaming:<br />
prohibit incoming calls when you use<br />
your phone outsi<strong>de</strong> of your service<br />
area.<br />
• Cancel all: cancel all call barring<br />
settings, allowing calls to be sent and<br />
received normally.<br />
3. Enter the call barring password supplied<br />
by your service provi<strong>de</strong>r.<br />
4. Press and select Activate.<br />
To <strong>de</strong>activate call barring, select<br />
Deactivate.<br />
You can change the call barring password<br />
obtained from your service provi<strong>de</strong>r. Press<br />
from the call type list and select<br />
Change password.<br />
Waiting (Menu 9.4.4)<br />
This network service informs you when<br />
someone is calling you while you are on<br />
another call.<br />
1. Select the type of calls to which call<br />
waiting option will apply.<br />
2. Press and select Activate.<br />
To <strong>de</strong>activate call waiting, select<br />
Deactivate.<br />
Vi<strong>de</strong>o call settings (Menu 9.4.5)<br />
Use this menu to change the <strong>de</strong>fault settings<br />
for using the vi<strong>de</strong>o call feature.<br />
• Show me: change the vi<strong>de</strong>o camera<br />
settings for receipt of vi<strong>de</strong>o calls.<br />
93<br />
Menu functions Settings (Menu 9)
94<br />
Menu functions<br />
Optionally: you can select whether or<br />
not the vi<strong>de</strong>o camera is used each time<br />
you answer a vi<strong>de</strong>o call.<br />
Always: the camera is always used.<br />
• Retry with: set what to do when a vi<strong>de</strong>o<br />
call does not connect.<br />
Voice call: the phone retries with a<br />
voice call.<br />
Vi<strong>de</strong>o call: the phone retries with a<br />
vi<strong>de</strong>o call.<br />
Camera: the phone turns on the camera<br />
and switches to Record mo<strong>de</strong> so that you<br />
can record a vi<strong>de</strong>o and send it as an MMS<br />
message.<br />
None: the phone does not retry.<br />
Phonebook settings (Menu 9.5)<br />
Use this menu to change the settings for<br />
using Phonebook.�p. 41<br />
Network settings (Menu 9.6)<br />
This menu allows you to customise settings<br />
for connecting to a network.<br />
Select network (Menu 9.6.1)<br />
This network service allows you to manually<br />
select the network to be used while roaming<br />
outsi<strong>de</strong> of your home area, or to let the<br />
network be chosen automatically. You can<br />
select a network other than your home<br />
network only if there is a valid roaming<br />
agreement between the two.<br />
Network mo<strong>de</strong> (Menu 9.6.2)<br />
Use this menu to select the network you<br />
use.<br />
• Automatic: the phone scans for<br />
available networks.<br />
• GSM900/1800: the phone operates in<br />
the combined GSM 900/1800 network.<br />
• GSM1900: the phone operates in the<br />
GSM 1900 network. This option is only<br />
available in the U.S.A.<br />
• UMTS: the phone operates in UMTS (3G<br />
network) networks. You can get a higher<br />
speed connection than on lower<br />
generation networks, and use advanced<br />
data and information services, such as<br />
vi<strong>de</strong>o calls.
Connections (Menu 9.6.3)<br />
Use this menu to create and customise the<br />
profiles containing the settings for<br />
connecting your phone to the network. You<br />
need these settings to use the web browser<br />
or send MMS messages or e-mails.<br />
Your phone is set up by <strong>de</strong>fault connecting to<br />
the network. If you change the settings<br />
without first checking with your service<br />
provi<strong>de</strong>r, the web browser, MMS, and<br />
e-mail features may not work properly.<br />
Creating a profile<br />
1. Press and select New.<br />
2. Specify profile parameters:<br />
• Set name: enter a profile name.<br />
• Access name: edit the access point<br />
name used for the address of the<br />
GPRS network gateway.<br />
• Auth type: choose the type of<br />
authentication used.<br />
• User ID: enter the user ID.<br />
• Password: enter the user password.<br />
• Protocol: select the protocol from<br />
among HTTP, WAP, and Other.<br />
• Home URL: enter the URL address<br />
of the page to be used as your<br />
homepage.<br />
• Gateway address: (WAP only) enter<br />
the gateway address of the proxy<br />
server.<br />
• Proxy address/Port: (HTTP only)<br />
set the proxy server address and<br />
port.<br />
• Secure connection: (WAP only)<br />
turn the secure mo<strong>de</strong> on or off.<br />
• Linger time(sec.): set a time period<br />
after which the network is<br />
disconnected if there has been no<br />
new data traffic in that time.<br />
• Advanced settings: provi<strong>de</strong> you<br />
with the following options:<br />
Static IP: specify if you want to<br />
manually enter an IP address; see<br />
the Local phone IP option. If you<br />
want the IP address to be<br />
automatically assigned by the server,<br />
remove the check mark.<br />
95<br />
Menu functions Settings (Menu 9)
96<br />
Menu functions<br />
Local phone IP: enter the IP<br />
address obtained from the network<br />
operator, if you checked the Static<br />
IP option.<br />
Static DNS: specify if you want to<br />
manually enter the Domain Name<br />
Server (DNS) address; see the<br />
Server1/Server2 option.<br />
If you want the address to be<br />
automatically assigned by the server,<br />
remove the check mark.<br />
Server1/Server2: enter the<br />
Domain Name Server (DNS)<br />
addresses.<br />
Traffic class: select the traffic class.<br />
3. Press to save the profile.<br />
Using profile options<br />
From the profile list, press to<br />
access the following options:<br />
• Edit: edit the selected profile.<br />
• New: add a new profile.<br />
• Rename: change the profile name.<br />
• Delete: <strong>de</strong>lete the profile.<br />
Browser settings (Menu 9.6.4)<br />
Use this menu to select a connection profile<br />
to be used for accessing the Internet. You<br />
can also create or edit a profile.�p. 95<br />
Streaming settings (Menu 9.6.5)<br />
Use this menu to activate a connection<br />
profile to be used for accessing streaming<br />
servers. You can also create or edit a profile.<br />
�p. 95<br />
Bluetooth (Menu 9.7)<br />
Using the Bluetooth feature, you can<br />
connect the phone wirelessly to other<br />
Bluetooth <strong>de</strong>vices and exchange data with<br />
them, talk hands-free, or control the phone<br />
remotely.<br />
Bluetooth technology allows free wireless<br />
connections between all Bluetooth-compliant<br />
<strong>de</strong>vices within a range of 10 metres. Since<br />
the <strong>de</strong>vices communicate using radio waves,<br />
they do not need to be in line of sight to<br />
each other.
• If there are obstacles between the <strong>de</strong>vices,<br />
the operating distance may be reduced.<br />
• It is recommen<strong>de</strong>d that you don’t use the<br />
Bluetooth feature while using multimedia<br />
features, such as voice recor<strong>de</strong>r, camera,<br />
and media player, or vice versa, for better<br />
performance.<br />
• Some <strong>de</strong>vices, especially those that are<br />
not tested or approved by Bluetooth SIG,<br />
may be incompatible with your phone.<br />
Setting up the Bluetooth feature<br />
The Bluetooth menu provi<strong>de</strong>s the following<br />
options:<br />
• Activation: activate or <strong>de</strong>activate the<br />
Bluetooth feature.<br />
• My <strong>de</strong>vices: search for connectable<br />
Bluetooth <strong>de</strong>vices.<br />
• My phone’s visibility: allow other<br />
Bluetooth <strong>de</strong>vices to locate your phone,<br />
or not.<br />
• My phone’s name: assign a Bluetooth<br />
<strong>de</strong>vice name to your phone, which is<br />
then displayed on other <strong>de</strong>vices.<br />
• Secure mo<strong>de</strong>: <strong>de</strong>termine if the phone<br />
asks for your confirmation when other<br />
<strong>de</strong>vices access your data.<br />
• Bluetooth services: display available<br />
Bluetooth services.<br />
Searching for and pairing with a<br />
Bluetooth <strong>de</strong>vice<br />
1. From the Bluetooth menu, select My<br />
<strong>de</strong>vices.<br />
2. Select Search for new <strong>de</strong>vices.<br />
After searching, a list of <strong>de</strong>vices to which<br />
you can connect displays. The following<br />
icons indicate the type of <strong>de</strong>vice:<br />
• Headset<br />
• Hands-free car kit<br />
• Computer<br />
• Printer<br />
• Mobile phone<br />
• PDA<br />
• Unknown <strong>de</strong>vice<br />
The colour of the icon indicates the<br />
status of the <strong>de</strong>vice:<br />
• Grey for unpaired <strong>de</strong>vices<br />
• Blue for paired <strong>de</strong>vices<br />
• Orange for <strong>de</strong>vices that are currently<br />
connected to your phone<br />
3. Select a <strong>de</strong>vice.<br />
97<br />
Menu functions Settings (Menu 9)
98<br />
Menu functions<br />
4. Enter a Bluetooth PIN and press .<br />
This co<strong>de</strong> is used just once and you don’t<br />
need to memorise it.<br />
When the owner of the other <strong>de</strong>vice<br />
enters the same co<strong>de</strong>, pairing is<br />
complete.<br />
Some <strong>de</strong>vices, especially headsets or handsfree<br />
car kits, may have a fixed Bluetooth PIN,<br />
such as 0000. If the other <strong>de</strong>vice has a<br />
co<strong>de</strong>, you must enter it.<br />
Using <strong>de</strong>vice options<br />
From the <strong>de</strong>vice list, press to<br />
access the following options:<br />
• Connect: connect to a headset or<br />
hands-free car kit.<br />
• Disconnect: end the connection with<br />
the connected <strong>de</strong>vice.<br />
• Browse files: search for data from the<br />
<strong>de</strong>vice and import data directly to your<br />
phone.<br />
• Service list: access the Bluetooth<br />
service list of the <strong>de</strong>vice.<br />
• Rename: rename the paired <strong>de</strong>vice.<br />
• Authorise <strong>de</strong>vice/Unauthorised<br />
<strong>de</strong>vice: <strong>de</strong>termine whether or not the<br />
phone asks you to permit connection<br />
when other <strong>de</strong>vices try to connect to<br />
your phone.<br />
• Delete: remove the selected <strong>de</strong>vice or<br />
all <strong>de</strong>vices from the list.<br />
Sending data via Bluetooth<br />
1. Activate the Bluetooth feature.<br />
2. Select the application in which the item<br />
you want to send is stored.<br />
3. Scroll to the item you want and press<br />
.<br />
4. Select Send namecard via/Send via →<br />
Bluetooth.<br />
The phone searches for <strong>de</strong>vices within<br />
range and displays a list of available<br />
<strong>de</strong>vices.<br />
5. Select a <strong>de</strong>vice.<br />
6. If necessary, enter the Bluetooth PIN<br />
nee<strong>de</strong>d for pairing and press .
Receiving data via Bluetooth<br />
To receive data via Bluetooth, your phone’s<br />
Bluetooth feature must be active and its<br />
visibility must be enabled.<br />
1. If an unauthorised Bluetooth <strong>de</strong>vice<br />
sends data to your phone, press <br />
to allow the <strong>de</strong>vice to access your phone.<br />
2. Press to receive data.<br />
Security (Menu 9.8)<br />
Use this menu to protect the phone against<br />
unauthorised use by managing the several<br />
access co<strong>de</strong>s of your phone and USIM/SIM<br />
card.<br />
If you enter an incorrect PIN/PIN2 three<br />
times, the USIM/SIM card is blocked. To<br />
unblock it you need to enter your PUK/PUK2<br />
(Personal Unblocking Key). The co<strong>de</strong>s are<br />
supplied by your service provi<strong>de</strong>r.<br />
Phone lock (Menu 9.8.1)<br />
Use this menu to protect the phone from<br />
unauthorised use. When this feature is<br />
enabled, you must enter a 4- to 8-digit<br />
phone password each time the phone is<br />
switched on.<br />
The password is preset to 00000000. To<br />
change the password, use the Change<br />
phone password menu.<br />
SIM lock (Menu 9.8.2)<br />
This menu allows your phone to work only<br />
with the current USIM/SIM by assigning a<br />
SIM lock co<strong>de</strong>. You must enter the SIM lock<br />
co<strong>de</strong> to use a different USIM/SIM card.<br />
PIN lock (Menu 9.8.3)<br />
The 4- to 8-digit PIN (Personal I<strong>de</strong>ntification<br />
Number) protects your USIM/SIM card<br />
against unauthorised use. When this feature<br />
is enabled, the phone requires your PIN each<br />
time it is switched on.<br />
Fixed dialling mo<strong>de</strong> (Menu 9.8.4)<br />
If supported by your USIM/SIM card, Fixed<br />
Dialling Number (FDN) mo<strong>de</strong> restricts your<br />
outgoing calls to a limited set of phone<br />
numbers. When this feature is enabled, you<br />
can make calls only to phone numbers<br />
stored on the USIM/SIM card.<br />
99<br />
Menu functions Settings (Menu 9)
100<br />
Menu functions<br />
Change phone password (Menu 9.8.5)<br />
Use this menu to change your phone<br />
password.<br />
Privacy lock (Menu 9.8.6)<br />
Use this menu to lock access to messages,<br />
media files, call logs, or Phonebook entries.<br />
When a lock option is enabled, you must<br />
enter the phone password to access the<br />
locked items.<br />
Change PIN co<strong>de</strong> (Menu 9.8.7)<br />
Use this menu to change your PIN. The PIN<br />
lock feature must be enabled to change the<br />
PIN.<br />
Change PIN2 co<strong>de</strong> (Menu 9.8.8)<br />
If supported by your USIM/SIM card, use<br />
this menu to change your current PIN2.<br />
Mobile tracker (Menu 9.8.9)<br />
When someone tries to use your phone with<br />
another USIM/SIM card, the phone will<br />
automatically send the preset tracking<br />
message to your family or friends. You can<br />
check the phone number from which the<br />
messages are sent and then track your<br />
phone. This feature is useful when the phone<br />
is stolen or lost.<br />
Sending of the tracking message will be<br />
billed to the user of the unauthorised USIM/<br />
SIM card. To use your phone with any other<br />
USIM/SIM card, you must first <strong>de</strong>activate the<br />
Mobile Tracker feature.<br />
1. Enter the phone password and press<br />
.<br />
2. Specify the following options:<br />
• Mobile tracker: activate or<br />
<strong>de</strong>activate the Mobile tracker feature.<br />
• Recipients: specify phone numbers<br />
to which you want to send the<br />
tracking messages.
• Sen<strong>de</strong>r: enter the sen<strong>de</strong>r’s name.<br />
• Message: check the preset tracking<br />
message text.<br />
3. When you have finished, press .<br />
4. Press if you agree to the<br />
terms and conditions of service listed on<br />
the screen.<br />
Memory settings (Menu 9.9)<br />
Use this menu to clear data or to view<br />
memory information in your phone’s<br />
memory. You can also manage the licence<br />
keys you have acquired to activate media<br />
contents locked by DRM systems.<br />
Clear memory (Menu 9.9.1)<br />
You can <strong>de</strong>lete messages, media contents,<br />
contacts, and calendar items. You can also<br />
<strong>de</strong>lete all data at one time.<br />
1. Press [ ] to select the data you want to<br />
<strong>de</strong>lete.<br />
2. Press .<br />
3. Enter the phone password and press<br />
.<br />
The password is preset to 00000000.<br />
You can change this password.<br />
�p. 100<br />
4. Press .<br />
Key management (Menu 9.9.2)<br />
Use this menu to manage the licence keys<br />
you have acquired to activate media<br />
contents locked by DRM systems.<br />
Press to access the following<br />
options:<br />
• View: open the corresponding item.<br />
• Delete: <strong>de</strong>lete the selected licence key.<br />
• Go to My Messages: access the<br />
message that contains the media<br />
content.<br />
• Go to File manager: access the<br />
corresponding file fol<strong>de</strong>r.<br />
• Details: access the properties of the<br />
licence key.<br />
101<br />
Menu functions Settings (Menu 9)
102<br />
Menu functions<br />
Memory card (Menu 9.9.3)<br />
Use this menu to check the memory<br />
information of the inserted memory card,<br />
format the memory card, or change the<br />
name.<br />
Memory status (Menu 9.9.4)<br />
Use this menu to check the amount of<br />
memory being used for storing data, such as<br />
messages, media and document files,<br />
calendar items, or Phonebook entries.<br />
Master reset (Menu 9.10)<br />
You can reset the phone’s settings and clear<br />
all data that you have ad<strong>de</strong>d.<br />
1. Enter the phone password and press<br />
.<br />
The password is preset to 00000000.<br />
You can change this password.�p. 100<br />
2. Press . The phone automatically<br />
turns itself off and then back on.
Solve problems<br />
Help and personal needs<br />
To save the time and expense of an<br />
unnecessary service call, perform the simple<br />
checks in this section before contacting a<br />
service professional.<br />
When you switch on your phone, the<br />
following messages may appear:<br />
“Please insert SIM card”<br />
• Be sure that the USIM/SIM card is<br />
correctly installed.<br />
“Phone lock Password”<br />
• The automatic locking function has been<br />
enabled. You must enter the phone’s<br />
password before you can use the phone.<br />
“PIN lock PIN co<strong>de</strong>”<br />
• You are using your phone for the first<br />
time. You must enter the PIN supplied<br />
with the USIM/SIM card.<br />
• The PIN lock feature is enabled. Every<br />
time the phone is switched on, the PIN<br />
has to be entered. To disable this<br />
feature, use the PIN lock menu.<br />
“Enter PUK”<br />
• The PIN has been entered incorrectly<br />
three times, and the USIM/SIM card is<br />
now blocked. Enter the PUK supplied by<br />
your service provi<strong>de</strong>r.<br />
“No service” or “Network failure”<br />
displays<br />
• The network connection has been lost.<br />
You may be in a weak signal area. Move<br />
and try again.<br />
• You are trying to access an option for<br />
which you have no subscription with your<br />
service provi<strong>de</strong>r. Contact the service<br />
provi<strong>de</strong>r for further <strong>de</strong>tails.<br />
You have entered a number but it<br />
was not dialled<br />
• Be sure that you have pressed [ ].<br />
• Be sure that you have accessed the right<br />
cellular network.<br />
• Be sure that you have not set an<br />
outgoing call barring option.<br />
103
104<br />
Solve problems<br />
Your correspon<strong>de</strong>nt cannot reach you<br />
• Be sure that your phone is switched on.<br />
([ ] pressed for more than one<br />
second.)<br />
• Be sure that you are accessing the right<br />
cellular network.<br />
• Be sure that you have not set an<br />
incoming call barring option.<br />
Your correspon<strong>de</strong>nt cannot hear you<br />
speaking<br />
• Be sure that you have switched on the<br />
microphone.<br />
• Be sure that you are holding the phone<br />
close enough to your mouth. The<br />
microphone is located at the bottom of<br />
the phone.<br />
The phone starts beeping and “Low<br />
battery” flashes on the display<br />
• Your battery is insufficiently charged.<br />
Recharge the battery.<br />
The audio quality of the call is poor<br />
• Check the signal strength indicator on<br />
the display ( ). The number of bars<br />
indicates the signal strength from strong<br />
( ) to weak ( ).<br />
• Try moving the phone slightly or moving<br />
closer to a window if you are in a<br />
building.<br />
No number is dialled when you re-call<br />
a Phonebook entry<br />
• Use the Search for contacts menu to<br />
ensure the number has been stored<br />
correctly.<br />
• Re-store the number, if necessary.<br />
The battery does not charge properly<br />
or the phone sometimes turns itself<br />
off<br />
• Wipe the charging contacts both on the<br />
phone and on the battery with a clean<br />
soft cloth.
If the above gui<strong>de</strong>lines do not help<br />
you to solve the problem, take note<br />
of:<br />
• The mo<strong>de</strong>l and serial numbers of your<br />
phone<br />
• Your warranty <strong>de</strong>tails<br />
• A clear <strong>de</strong>scription of the problem<br />
Then contact your local <strong>de</strong>aler or Samsung<br />
after-sales service.<br />
Health and safety information<br />
SAR certification information<br />
This phone meets European Union (EU)<br />
requirements concerning exposure to radio<br />
waves.<br />
Your mobile phone is a radio transmitter and<br />
receiver. It is <strong>de</strong>signed and manufactured to<br />
not exceed the limits for exposure to radiofrequency<br />
(RF) energy, as recommen<strong>de</strong>d by<br />
the EU Council. These limits are part of<br />
comprehensive gui<strong>de</strong>lines and establish<br />
permitted levels of RF energy for the general<br />
population. The gui<strong>de</strong>lines were <strong>de</strong>veloped<br />
by in<strong>de</strong>pen<strong>de</strong>nt scientific organisations<br />
through the periodic and thorough<br />
evaluation of scientific studies. The limits<br />
inclu<strong>de</strong> a substantial safety margin <strong>de</strong>signed<br />
to ensure the safety of all persons,<br />
regardless of age and health.<br />
The exposure standard for mobile phones<br />
employs a unit of measurement known as<br />
Specific Absorption Rate (SAR). The SAR<br />
limit recommen<strong>de</strong>d by the EU Council is<br />
2.0W/kg. 1<br />
105
106<br />
Health and safety information<br />
The highest SAR value for this mo<strong>de</strong>l phone<br />
was 0.987 W/kg.<br />
SAR tests are conducted using standard<br />
operating positions with the phone<br />
transmitting at its highest certified power<br />
level in all tested frequency bands. Although<br />
the SAR is <strong>de</strong>termined at the highest<br />
certified power level, the actual SAR level of<br />
the phone while operating can be well below<br />
the maximum value. This is because the<br />
phone is <strong>de</strong>signed to operate at multiple<br />
power levels so as to use only the power<br />
required to reach the network. In general,<br />
the closer you are to a base station, the<br />
lower the power output of the phone.<br />
1. The SAR limit for mobile phones used by the public is<br />
2.0 watts/kilogram (W/kg) averaged over ten grams of<br />
body tissue. The limit incorporates a substantial margin<br />
of safety to give additional protection for the public and<br />
to account for any variations in measurements. The SAR<br />
values may vary, <strong>de</strong>pending on national reporting<br />
requirements and the network band.<br />
Before a new mo<strong>de</strong>l phone is available for<br />
sale to the public, compliance with the<br />
European R&TTE Directive must be shown.<br />
This directive inclu<strong>de</strong>s as one of its essential<br />
requirements the protection of the health<br />
and safety of the user and any other person.<br />
Precautions when using batteries<br />
• Never use a charger or battery that is<br />
damaged in any way.<br />
• Use the battery only for its inten<strong>de</strong>d<br />
purpose.<br />
• If you use the phone near the network’s<br />
base station, it uses less power. Talk and<br />
standby time are greatly affected by the<br />
signal strength on the cellular network<br />
and the parameters set by the network<br />
operator.<br />
• Battery charging time <strong>de</strong>pends on the<br />
remaining battery charge, the type of<br />
battery, and the charger used. The<br />
battery can be charged and discharged<br />
hundreds of times, but it will gradually<br />
wear out. When the operation time is<br />
noticeably shorter than normal, it is time<br />
to buy a new battery.
• If left unused, a fully charged battery will<br />
discharge itself over time.<br />
• Use only Samsung-approved batteries,<br />
and recharge your battery only with<br />
Samsung-approved chargers. Disconnect<br />
the charger from the power source when<br />
it is not in use. Do not leave the battery<br />
connected to a charger for more than a<br />
week, since overcharging may shorten<br />
its life.<br />
• Extreme temperatures will affect the<br />
charging capacity of your battery: it may<br />
require cooling or warming first.<br />
• Do not leave the battery in hot or cold<br />
places because the capacity and lifetime<br />
of the battery will be reduced. Try to<br />
keep the battery at room temperature. A<br />
phone with a hot or cold battery may not<br />
work temporarily, even when the battery<br />
is fully charged.<br />
Li-ion batteries are particularly affected<br />
by temperatures below 0°C (32°F).<br />
• Do not short-circuit the battery.<br />
Acci<strong>de</strong>ntal short-circuiting can occur<br />
when a metallic object like a coin, clip or<br />
pen causes a direct connection between<br />
the + and – terminals of the battery<br />
(metal strips on the battery). For<br />
example, do not carry a spare battery in<br />
a pocket or bag where the battery may<br />
contact metal objects. Short-circuiting<br />
the terminals may damage the battery or<br />
the object causing the short-circuiting.<br />
• Dispose of used batteries in accordance<br />
with local regulations. Always recycle. Do<br />
not dispose of batteries in a fire.<br />
Road safety<br />
Your wireless phone gives you the powerful<br />
ability to communicate by voice, almost<br />
anywhere, anytime. But an important<br />
responsibility accompanies the benefits of<br />
wireless phones, one that every user must<br />
uphold.<br />
When you are driving a car, driving is your<br />
first responsibility. When using your wireless<br />
phone while driving, follow local regulations<br />
in the country or region you are in.<br />
107<br />
Health and safety information
108<br />
Health and safety information<br />
Operating environment<br />
Remember to follow any special regulations<br />
in force in the area you are in, and always<br />
switch off your phone whenever it is<br />
forbid<strong>de</strong>n to use it, or when it may cause<br />
interference or danger.<br />
When connecting the phone or any<br />
accessory to another <strong>de</strong>vice, read its user’s<br />
gui<strong>de</strong> for <strong>de</strong>tailed safety instructions. Do not<br />
connect incompatible products.<br />
As with other mobile radio transmitting<br />
equipment, users are advised that for the<br />
satisfactory operation of the equipment and<br />
for the safety of personnel, it is<br />
recommen<strong>de</strong>d that the equipment should<br />
only be used in the normal operating<br />
position (held to your ear with the antenna<br />
pointing over your shoul<strong>de</strong>r).<br />
Electronic <strong>de</strong>vices<br />
Most mo<strong>de</strong>rn electronic equipment is<br />
shiel<strong>de</strong>d from radio frequency (RF) signals.<br />
However, certain electronic equipment may<br />
not be shiel<strong>de</strong>d against the RF signals from<br />
your wireless phone. Consult the<br />
manufacturer to discuss alternatives.<br />
Pacemakers<br />
Pacemaker manufacturers recommend that<br />
a minimum distance of 15 cm (6 inches) be<br />
maintained between a wireless phone and a<br />
pacemaker to avoid potential interference<br />
with the pacemaker. These<br />
recommendations are consistent with the<br />
in<strong>de</strong>pen<strong>de</strong>nt research and recommendations<br />
of Wireless Technology Research. If you<br />
have any reason to suspect that interference<br />
is taking place, switch off your phone<br />
immediately.<br />
Hearing aids<br />
Some digital wireless phones may interfere<br />
with some hearing aids. In the event of such<br />
interference, you may wish to consult your<br />
hearing aid manufacturer to discuss<br />
alternatives.
Other medical <strong>de</strong>vices<br />
If you use any other personal medical<br />
<strong>de</strong>vices, consult the manufacturer of your<br />
<strong>de</strong>vice to <strong>de</strong>termine if it is a<strong>de</strong>quately<br />
shiel<strong>de</strong>d from external RF energy.<br />
Your physician may be able to assist you in<br />
obtaining this information.<br />
Switch off your phone in health care facilities<br />
when regulations posted in these areas<br />
instruct you to do so.<br />
Vehicles<br />
RF signals may affect improperly installed or<br />
ina<strong>de</strong>quately shiel<strong>de</strong>d electronic systems in<br />
motor vehicles. Check with the<br />
manufacturer or its representative regarding<br />
your vehicle.<br />
You should also consult the manufacturer of<br />
any equipment that has been ad<strong>de</strong>d to your<br />
vehicle.<br />
Posted facilities<br />
Switch off your phone in any facility where<br />
posted notices require you to do so.<br />
Potentially explosive environments<br />
Switch off your phone when in any area with<br />
a potentially explosive atmosphere, and<br />
obey all signs and instructions. Sparks in<br />
such areas could cause an explosion or fire<br />
resulting in bodily injury or even <strong>de</strong>ath.<br />
Users are advised to switch off the phone<br />
while at a refuelling point (service station).<br />
Users are remin<strong>de</strong>d of the need to observe<br />
restrictions on the use of radio equipment in<br />
fuel <strong>de</strong>pots (fuel storage and distribution<br />
areas), chemical plants, or where blasting<br />
operations are in progress.<br />
Areas with a potentially explosive<br />
atmosphere are often but not always clearly<br />
marked. They inclu<strong>de</strong> the areas below <strong>de</strong>cks<br />
on boats, chemical transfer or storage<br />
facilities, vehicles using liquefied petroleum<br />
gas, such as propane or butane, areas<br />
where the air contains chemicals or<br />
particles, such as grain, dust or metal<br />
pow<strong>de</strong>rs, and any other area where you<br />
would normally be advised to turn off your<br />
vehicle engine.<br />
109<br />
Health and safety information
110<br />
Health and safety information<br />
Emergency calls<br />
This phone, like any wireless phone,<br />
operates using radio signals, wireless, and<br />
landline networks as well as userprogrammed<br />
functions, which cannot<br />
guarantee connection in all conditions.<br />
Therefore, you should never rely solely on<br />
any wireless phone for essential<br />
communications like medical emergencies.<br />
To make or receive calls, the phone must be<br />
switched on and in a service area with<br />
a<strong>de</strong>quate signal strength. Emergency calls<br />
may not be possible on all wireless phone<br />
networks or when certain network services<br />
and/or phone features are in use. Check<br />
with local service provi<strong>de</strong>rs.<br />
To make an emergency call:<br />
1. Switch on the phone.<br />
2. Key in the emergency number for your<br />
present location. Emergency numbers<br />
vary by location.<br />
3. Press [ ].<br />
Certain features like Call Barring may need<br />
to be <strong>de</strong>activated before you can make an<br />
emergency call. Consult this document and<br />
your local cellular service provi<strong>de</strong>r.<br />
Other important safety information<br />
• Only qualified personnel should service<br />
the phone or install the phone in a<br />
vehicle. Faulty installation or service may<br />
be dangerous and may invalidate any<br />
warranty applicable to the <strong>de</strong>vice.<br />
• Check regularly that all wireless phone<br />
equipment in your vehicle is mounted<br />
and operating properly.<br />
• Do not store or carry flammable liquids,<br />
gases, or explosive materials in the same<br />
compartment as the phone, its parts, or<br />
accessories.<br />
• For vehicles equipped with an air bag,<br />
remember that an air bag inflates with<br />
great force. Do not place objects,<br />
including installed or portable wireless<br />
equipment, in the area over the air bag<br />
or in the air bag <strong>de</strong>ployment area.<br />
Improperly installed wireless equipment<br />
could result in serious injury if the air<br />
bag inflates.
• Switch off your phone before boarding an<br />
aircraft. It is dangerous and illegal to use<br />
wireless phones in an aircraft because<br />
they can interfere with the operation of<br />
the aircraft.<br />
• Failure to observe these instructions may<br />
lead to the suspension or <strong>de</strong>nial of<br />
telephone services to the offen<strong>de</strong>r, or<br />
legal action, or both.<br />
Care and maintenance<br />
Your phone is a product of superior <strong>de</strong>sign<br />
and craftsmanship and should be treated<br />
with care. The suggestions below will help<br />
you fulfill any warranty obligations and allow<br />
you to enjoy this product for many years.<br />
• Keep your phone and all its parts and<br />
accessories out of the reach of small<br />
children and pets. They may acci<strong>de</strong>ntally<br />
damage these things or choke on small<br />
parts.<br />
• Keep the phone dry. Precipitation,<br />
humidity, and liquids contain minerals<br />
that corro<strong>de</strong> electronic circuits.<br />
• Do not use the phone with a wet hand.<br />
Doing so may cause an electric shock to<br />
you or damage to the phone.<br />
• Do not use or store the phone in dusty,<br />
dirty areas, as its moving parts may be<br />
damaged.<br />
• Do not store the phone in hot areas.<br />
High temperatures can shorten the life of<br />
electronic <strong>de</strong>vices, damage batteries,<br />
and warp or melt certain plastics.<br />
• Do not store the phone in cold areas.<br />
When the phone warms up to its normal<br />
operating temperature, moisture can<br />
form insi<strong>de</strong> the phone, which may<br />
damage the phone’s electronic circuit<br />
boards.<br />
• Do not drop, knock, or shake the phone.<br />
Rough handling can break internal circuit<br />
boards.<br />
• Do not use harsh chemicals, cleaning<br />
solvents, or strong <strong>de</strong>tergents to clean<br />
the phone. Wipe it with a soft cloth.<br />
111<br />
Health and safety information
112<br />
Health and safety information<br />
• Do not paint the phone. Paint can clog<br />
the <strong>de</strong>vice’s moving parts and prevent<br />
proper operation.<br />
• Do not put the phone in or on heating<br />
<strong>de</strong>vices, such as a microwave oven,<br />
stove, or radiator. The phone may<br />
explo<strong>de</strong> when overheated.<br />
• When the phone or battery gets wet, the<br />
label indicating water damage insi<strong>de</strong> the<br />
phone changes colour. In this case,<br />
phone repairs are no longer guaranteed<br />
by the manufacturer's warranty, even if<br />
the warranty for your phone has not<br />
expired.<br />
• If your phone has a flash or light, do not<br />
use it too close to the eyes of people or<br />
animals. This may cause damage to their<br />
eyes.<br />
• Use only the supplied or an approved<br />
replacement antenna. Unauthorised<br />
antennas or modified accessories may<br />
damage the phone and violate<br />
regulations governing radio <strong>de</strong>vices.<br />
• If the phone, battery, charger, or any<br />
accessory is not working properly, take it<br />
to your nearest qualified service facility.<br />
The personnel there will assist you, and<br />
if necessary, arrange for service.
In<strong>de</strong>x<br />
A<br />
ABC mo<strong>de</strong>, text input • 27<br />
Alarm • 80<br />
Answering<br />
call • 29<br />
second call • 31<br />
Anykey answer • 91<br />
Auto redial • 90<br />
B<br />
Background image • 91<br />
Backlight time, set • 91<br />
Barring, calls • 93<br />
Battery<br />
charging • 7<br />
low indicator • 8<br />
precautions • 106<br />
Bluetooth<br />
receiving, data • 99<br />
sending, data • 98<br />
settings • 97<br />
Broadcast messages • 57, 66<br />
Browser, web • 47<br />
C<br />
Calculator • 77<br />
Calendar • 74<br />
Call cost • 36<br />
Call log • 35<br />
Call time • 36<br />
Caller groups • 39<br />
Caller ID • 92<br />
Calls<br />
answering • 29<br />
barring • 93<br />
diverting • 92<br />
holding • 30<br />
making • 29<br />
redialling • 29<br />
rejecting • 30<br />
transferring • 32<br />
waiting • 93<br />
Camera<br />
photos • 82<br />
vi<strong>de</strong>os • 85<br />
Characters, enter • 26<br />
Configuration messages • 55, 57<br />
Connect tone • 89<br />
Connection settings • 95<br />
Converter • 78<br />
Creating messages<br />
e-mail • 53<br />
MMS • 52<br />
SMS • 51<br />
D<br />
Date, set • 90<br />
Deleting<br />
calendar data • 75<br />
call log • 35<br />
e-mail • 57, 59, 60<br />
events • 76<br />
MMS • 56, 59, 60<br />
phonebook • 38<br />
SMS • 56, 59, 60<br />
Dialling display, set • 92<br />
Display<br />
backlight, set • 91<br />
brightness • 91<br />
icons • 10<br />
language • 89<br />
layout • 10<br />
settings • 91<br />
Diverting, calls • 92<br />
Document files • 72<br />
DRM (Digital Rights Management)<br />
• 67<br />
DTMF tones, send • 32<br />
E<br />
E-mails<br />
creating/sending • 53<br />
<strong>de</strong>leting • 57<br />
setting • 63<br />
viewing • 57<br />
Emergency calls • 110<br />
113
114<br />
In<strong>de</strong>x<br />
F<br />
FDN (Fixed Dialling Number)<br />
mo<strong>de</strong> • 99<br />
File viewer • 72<br />
G<br />
Games • 71<br />
Greeting message • 91<br />
H<br />
Health and safety • 105<br />
Holding, call • 30<br />
I<br />
Icons, <strong>de</strong>scription • 10<br />
Images, downloa<strong>de</strong>d • 67<br />
Inbox, messages<br />
e-mail • 57<br />
MMS/SMS • 55<br />
International calls • 29<br />
Internet • 47<br />
J<br />
Java applications • 71<br />
K<br />
Keypad tones<br />
selecting • 89<br />
volume • 88<br />
L<br />
Language, select • 89<br />
Last number, redial • 29<br />
Locking<br />
media content • 100<br />
phone • 99<br />
SIM card • 99<br />
Low battery indicator • 8<br />
M<br />
Memory card<br />
accessing files • 73<br />
installing • 24<br />
Memory status<br />
downloa<strong>de</strong>d items • 73<br />
messages • 66<br />
My files • 73<br />
phonebook 42<br />
Message tone • 88<br />
Messages<br />
broadcast • 57, 66<br />
configuration • 57<br />
e-mail • 53, 57<br />
greeting • 91<br />
MMS • 51, 56<br />
push • 57, 66<br />
SMS • 51, 55<br />
Minute min<strong>de</strong>r • 89<br />
Missed calls • 37<br />
MMS messages<br />
creating/sending • 52<br />
<strong>de</strong>leting • 56<br />
setting • 62<br />
viewing • 55<br />
Mobile tracker • 100<br />
Multimedia<br />
files • 67<br />
player • 42<br />
Multiparty-call • 31<br />
Music player • 43<br />
My files • 67<br />
N<br />
Name card • 40<br />
Names<br />
entering • 26<br />
searching • 37<br />
Network band, select • 94<br />
Network selection • 94<br />
Numbers<br />
searching • 37<br />
storing • 38<br />
P<br />
Password<br />
call barring • 93<br />
phone • 100<br />
Phone<br />
care and maintenance • 111<br />
display • 10<br />
icons • 10<br />
locking • 99<br />
password • 100<br />
resetting • 102<br />
switching on/off • 8<br />
unpacking • 6
Phonebook<br />
adding • 38<br />
<strong>de</strong>leting • 38<br />
finding • 37<br />
options • 37<br />
setting • 41<br />
speed dialling • 41<br />
Photos<br />
editing • 67<br />
viewing • 67<br />
PIN, change • 100<br />
PIN2, change • 100<br />
Power on/off tone • 89<br />
Privacy • 100<br />
Problems, solve • 103<br />
Profiles • 88<br />
Push messages • 57, 66<br />
R<br />
Received messages<br />
e-mail • 57<br />
MMS/SMS • 55<br />
Recording<br />
vi<strong>de</strong>os • 85<br />
voice memos • 46<br />
Redialling<br />
automatically • 90<br />
manually • 29<br />
Resetting phone • 102<br />
Ringer<br />
incoming calls • 88<br />
messages • 88<br />
Road safety • 107<br />
Roaming • 94<br />
S<br />
Safety<br />
information • 105<br />
precautions • 1<br />
Security, calls • 99<br />
Sent messages • 59<br />
Shortcut • 89<br />
Silent mo<strong>de</strong> • 14<br />
SIM card<br />
inserting • 7<br />
locking • 99<br />
SMS messages<br />
creating/sending • 51<br />
<strong>de</strong>leting • 56<br />
setting • 61<br />
viewing • 55<br />
Sound profiles • 88<br />
Sounds, downloa<strong>de</strong>d • 70<br />
Speakerphone • 31<br />
Speed dial • 41<br />
Switching on/off<br />
microphone • 32<br />
phone • 8<br />
T<br />
T9 mo<strong>de</strong>, text input • 26<br />
Templates, message • 59<br />
Text, enter • 26<br />
Time, set • 90<br />
V<br />
Vi<strong>de</strong>o calls<br />
answering • 33<br />
making • 33<br />
options • 33<br />
Vi<strong>de</strong>o player • 45<br />
Vi<strong>de</strong>os<br />
playing • 69<br />
recording • 85<br />
Voice recor<strong>de</strong>r<br />
playing • 46<br />
recording • 46<br />
Voicemail server • 66<br />
W<br />
Waiting call • 93<br />
Wallpaper • 91<br />
Web browser<br />
access • 47<br />
bookmarks • 49<br />
World time • 77<br />
115<br />
In<strong>de</strong>x
* Depending on the software installed or your service provi<strong>de</strong>r or country, some of the <strong>de</strong>scriptions<br />
in this gui<strong>de</strong> may not match your phone exactly.<br />
* Depending on your country, your phone and accessories may appear different from the<br />
illustrations in this gui<strong>de</strong>.<br />
World Wi<strong>de</strong> Web<br />
http://www.samsungmobile.com<br />
Printed in Korea<br />
Co<strong>de</strong> No.:GH68-12867A<br />
English (EU). 10/2006. Rev. 1.0