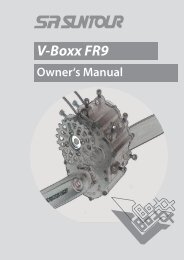
Instruction Manual Hub Dynamo - dbap GmbH
Instruction Manual Hub Dynamo - dbap GmbH
Instruction Manual Hub Dynamo - dbap GmbH

Create successful ePaper yourself
Turn your PDF publications into a flip-book with our unique Google optimized e-Paper software.
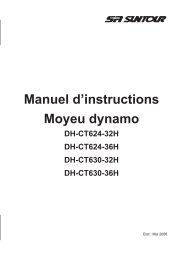
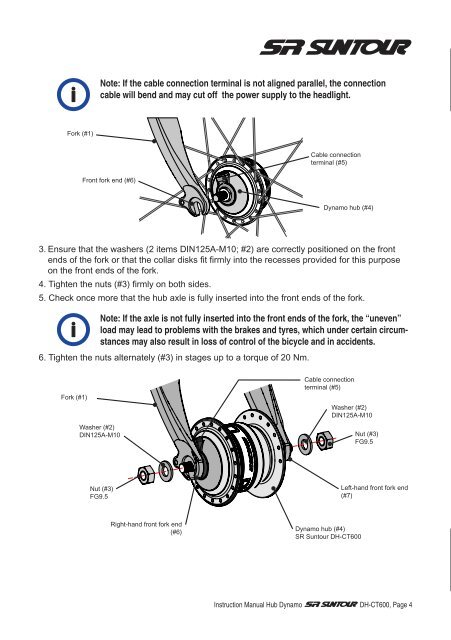
Fork (#1)<br />
Note: If the cable connection terminal is not aligned parallel, the connection<br />
cable will bend and may cut off the power supply to the headlight.<br />
3. Ensure that the washers (2 items DIN125A-M10; #2) are correctly positioned on the front<br />
ends of the fork or that the collar disks fi t fi rmly into the recesses provided for this purpose<br />
on the front ends of the fork.<br />
4. Tighten the nuts (#3) fi rmly on both sides.<br />
5. Check once more that the hub axle is fully inserted into the front ends of the fork.<br />
Note: If the axle is not fully inserted into the front ends of the fork, the “uneven”<br />
load may lead to problems with the brakes and tyres, which under certain circumstances<br />
may also result in loss of control of the bicycle and in accidents.<br />
6. Tighten the nuts alternately (#3) in stages up to a torque of 20 Nm.<br />
Fork (#1)<br />
Front fork end (#6)<br />
Washer (#2)<br />
DIN125A-M10<br />
Nut (#3)<br />
FG9.5<br />
Right-hand front fork end<br />
(#6)<br />
Cable connection<br />
terminal (#5)<br />
<strong>Dynamo</strong> hub (#4)<br />
Cable connection<br />
terminal (#5)<br />
Washer (#2)<br />
DIN125A-M10<br />
<strong>Dynamo</strong> hub (#4)<br />
SR Suntour DH-CT600<br />
Nut (#3)<br />
FG9.5<br />
Left-hand front fork end<br />
(#7)<br />
<strong>Instruction</strong> <strong>Manual</strong> <strong>Hub</strong> <strong>Dynamo</strong> DH-CT600, Page 4