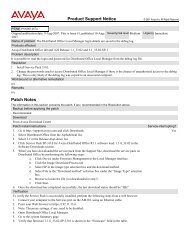
Intecom E / PointSpan 6880 - Avaya Support
Intecom E / PointSpan 6880 - Avaya Support
Intecom E / PointSpan 6880 - Avaya Support

You also want an ePaper? Increase the reach of your titles
YUMPU automatically turns print PDFs into web optimized ePapers that Google loves.
<strong>Intecom</strong> E 8<br />
3. Playback Volume = 2 (Default)<br />
4. Number of Ports = Enter the number of ports in your system<br />
- Enable the port(s) by checking the Box field next to the Port field<br />
- Extension = Enter the proper ext # assigned to each port<br />
- Incoming Ring Count = 1<br />
- Primary ID = Enter Logical Terminal Number (LTN) for that port (normally<br />
LTN starts with 0001 for first port, 0002 for second port, 0003)<br />
- Secondary ID = Enter 001 Message Desk (MD) number for all ports.<br />
NOTE: The Secondary ID must be 3 digits in length (standard SMDI protocol),<br />
however the actual value could be different then “001” (i.e. 002, 999, etc.)<br />
� Select OK and Save changes<br />
� Return to the Voice Servers section and access PBX Integration.<br />
1. Access the General tab.<br />
2. Select Serial as the Integration Type.<br />
3. Maximum Time to Wait for Serial and Remote Integration<br />
Data = 6<br />
NOTE: In some cases we have set this value from 4 to 18. Adjusting this value<br />
too high will delay the call integration. Too low if the data is not<br />
present the call will not integrate.<br />
� Access the Serial General tab and set the following values:<br />
- Packet Format = SMDI<br />
- Extension Field Length in Packet = Number of digits in extension<br />
- Maximum Number of Remote Service Sessions = 0<br />
IMPORTANT: This must be the number of MAS’s in system minus MAS #1<br />
- Log Serial Packets = Enable by checking the box<br />
NOTE: If installing multiple MASs, enter the correct value. Example, if you have 2 MASs<br />
then enter 1; if you have 3 MASs then enter 2, etc.. The default is 0 if only 1 MAS.<br />
IMPORTANT: The MAS service must be restarted to allow port enabling<br />
� Next access the Serial Settings button<br />
1. Line Speed (Bits per Second) = 1200 (modem dependant)<br />
2. Data Bits = 7<br />
3. Stop Bits = 1<br />
4. Parity = Even<br />
5. Flow Control = None<br />
6. Connector = COM1<br />
7. Select OK to save changes<br />
After making these changes, return to “Configuring the voicemail system”<br />
within the Message Application Server Installation guide. Ensure you are<br />
prompted to restart the Message Application Server services to apply<br />
these changes.<br />
The above information is provided by AVAYA Inc. as a guideline. See disclaimer on page 1