


Create successful ePaper yourself
Turn your PDF publications into a flip-book with our unique Google optimized e-Paper software.
MAINTENANCE<br />
General inspection<br />
In order to check the proper operation of the filter, close the low pressure 1/4" valve to the pressure differential switch for a period of<br />
5 seconds. This will initiate the self-cleaning cycle: Check that the exhaust valve opens, that the scanner moves forwards, and<br />
when it reaches limit switch "B" - verify that the exhaust valve closes.<br />
Weekly maintenance<br />
1. Check that the filter operates properly, following a general inspection.<br />
2. Clean the 3/4" filter (close the 3/4" valve and operate a flushing cycle in order to release pressure and then open the bowl).<br />
3. Check that there is grease on the drive shaft, and drive bushing. Add grease if necessary.<br />
4. Take care of any leakage from the scanner shaft. If necessary, tighten the sealing nut (32) or replace the sealing nut internal Oring<br />
(32.1)<br />
Changing the sealing nut internal O-ring:<br />
1. Close the inlet valve to the filter and release the pressure.<br />
2. If the Suction Scanner is in the outer position, operate a flushing cycle and bring it to the inner position.<br />
3. Remove the Split pin (34) and pull out the connecting pin (33).<br />
4. Operate a flushing cycle.<br />
5. Stop the motor operation when the drive shaft reaches half way of its movement. The drive shaft is now separated from the<br />
Suction Scanner.<br />
6. Unscrew the sealing nut (32).<br />
7. Remove the used internal O-ring and clean the O-ring seat.<br />
8. Insert a new O-ring (32.1)<br />
9. Tighten the sealing nut (32).<br />
10. Re-connect the drive shaft to the suction scanner shaft.<br />
11. Operate the control board and open the filter inlet valve.<br />
Maintenance prior to long term cessation of filter operation<br />
The following must be done if the filter will not operate for more than a month.<br />
1. Operate flushing cycle (If possible, with a closed downstream valve).<br />
2. Disconnect the control board from the power.<br />
3. Release pressure from the filter.<br />
4. Grease the drive shaft and the drive bushing.<br />
5. Clean the 3/4" control filter.<br />
6. Clean the coarse screen through the service port.<br />
Maintenance prior to re-operation<br />
1. Connect the control board to the mains.<br />
2. Check proper operation of the filter.<br />
3. Grease the drive shaft and the drive bushing.<br />
4. If necessary change the sealing nut internal O-ring.<br />
IMPORTANT !!<br />
THE DRIVE SHAFT MUST BE LUBRICATED WITH HEAVY-DUTY, WATER RESISTANT GREASE, THAT WILL NOT OXIDIZE.<br />
(SHELL, DARINA EP-2 OR SIMILAR).<br />
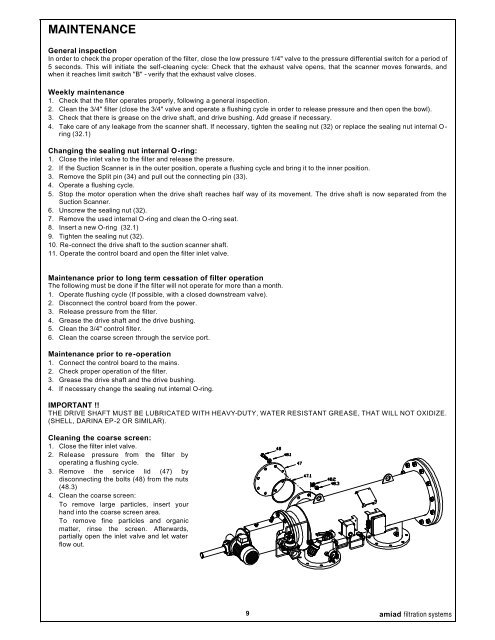
Cleaning the coarse screen:<br />
1. Close the filter inlet valve.<br />
2. Release pressure from the filter by<br />
operating a flushing cycle.<br />
3. Remove the service lid (47) by<br />
disconnecting the bolts (48) from the nuts<br />
(48.3)<br />
4. Clean the coarse screen:<br />
To remove large particles, insert your<br />
hand into the coarse screen area.<br />
To remove fine particles and organic<br />
matter, rinse the screen. Afterwards,<br />
partially open the inlet valve and let water<br />
flow out.<br />
9<br />
amiad filtration systems


