hdd & dvd / video cassette recorder rdxv60kb owner's ... - UK - Toshiba
hdd & dvd / video cassette recorder rdxv60kb owner's ... - UK - Toshiba
hdd & dvd / video cassette recorder rdxv60kb owner's ... - UK - Toshiba
Create successful ePaper yourself
Turn your PDF publications into a flip-book with our unique Google optimized e-Paper software.
E3TK6BD_EN.book Page 64 Wednesday, February 17, 2010 10:18 AM<br />
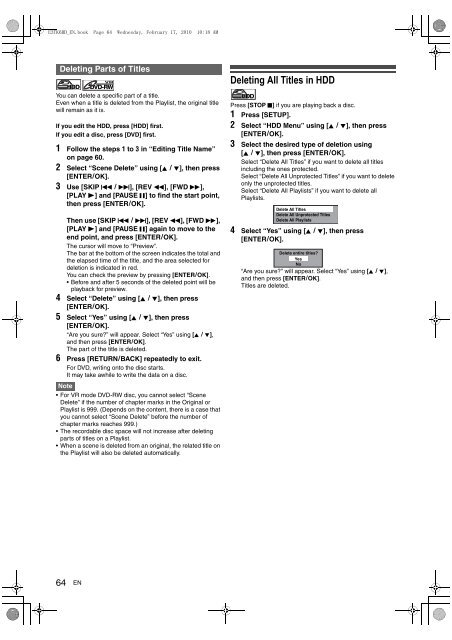
Deleting Parts of Titles<br />
HDD DVD-RW<br />
You can delete a specific part of a title.<br />
Even when a title is deleted from the Playlist, the original title<br />
will remain as it is.<br />
If you edit the HDD, press [HDD] first.<br />
If you edit a disc, press [DVD] first.<br />
1 Follow the steps 1 to 3 in “Editing Title Name”<br />
on page 60.<br />
2 Select “Scene Delete” using [K \ L], then press<br />
[ENTER\OK].<br />
3 Use [SKIP H \ G], [REV E], [FWD D],<br />
[PLAY B] and [PAUSE F] to find the start point,<br />
then press [ENTER\OK].<br />
Then use [SKIP H \ G], [REV E], [FWD D],<br />
[PLAY B] and [PAUSE F] again to move to the<br />
end point, and press [ENTER\OK].<br />
The cursor will move to “Preview”.<br />
The bar at the bottom of the screen indicates the total and<br />
the elapsed time of the title, and the area selected for<br />
deletion is indicated in red.<br />
You can check the preview by pressing [ENTER\OK].<br />
Before and after 5 seconds of the deleted point will be<br />
playback for preview.<br />
4 Select “Delete” using [K \ L], then press<br />
[ENTER\OK].<br />
5 Select “Yes” using [K \ L], then press<br />
[ENTER\OK].<br />
“Are you sure?” will appear. Select “Yes” using [K \ L],<br />
and then press [ENTER\OK].<br />
The part of the title is deleted.<br />
6 Press [RETURN\BACK] repeatedly to exit.<br />
For DVD, writing onto the disc starts.<br />
It may take awhile to write the data on a disc.<br />
Note<br />
For VR mode DVD-RW disc, you cannot select “Scene<br />
Delete” if the number of chapter marks in the Original or<br />
Playlist is 999. (Depends on the content, there is a case that<br />
you cannot select “Scene Delete” before the number of<br />
chapter marks reaches 999.)<br />
The recordable disc space will not increase after deleting<br />
parts of titles on a Playlist.<br />
When a scene is deleted from an original, the related title on<br />
the Playlist will also be deleted automatically.<br />
64 EN<br />
VR<br />
Deleting All Titles in HDD<br />
HDD<br />
Press [STOP C] if you are playing back a disc.<br />
1 Press [SETUP].<br />
2 Select “HDD Menu” using [K \ L], then press<br />
[ENTER\OK].<br />
3 Select the desired type of deletion using<br />
[K \ L], then press [ENTER\OK].<br />
Select “Delete All Titles” if you want to delete all titles<br />
including the ones protected.<br />
Select “Delete All Unprotected Titles” if you want to delete<br />
only the unprotected titles.<br />
Select “Delete All Playlists” if you want to delete all<br />
Playlists.<br />
Delete All Titles<br />
Delete All Unprotected Titles<br />
Delete All Playlists<br />
4 Select “Yes” using [K \ L], then press<br />
[ENTER\OK].<br />
Delete entire titles?<br />
Yes<br />
No<br />
“Are you sure?” will appear. Select “Yes” using [K \ L],<br />
and then press [ENTER\OK].<br />
Titles are deleted.


