54023 Lemon Clock Manual(v5) - Imaginarium
54023 Lemon Clock Manual(v5) - Imaginarium
54023 Lemon Clock Manual(v5) - Imaginarium

You also want an ePaper? Increase the reach of your titles
YUMPU automatically turns print PDFs into web optimized ePapers that Google loves.
(EN) Produce your own clean electricity! Using just the energy of<br />
a lemon and this kit you can make a clock work. Enjoy science!<br />
WARNING: Certain experiments require adult supervision. Be<br />
careful when using parts with sharp points or edges. The<br />
Magnesium ribbin included in your kit is highly flammable. Do not<br />
use this material in any way other than described in the<br />
experiments! Keep it away from any source of heat. If for any<br />
reason this material burns, DO NOT INHALE THE FUMES!<br />
PARTS LIST<br />
Experiment console ● Electrodes- Magnesium strip ● Electrodes-<br />
Aluminum ● Electrodes- Brass ● Electrodes- Copper ●<br />
Electrodes- Zinc ● Electrodes- Carbon ● <strong>Clock</strong> module ● Led ●<br />
Wires ● Rubber (latex) tube ● Plastic tube ● Steel wool ● pH<br />
paper (indicator paper) ● Funnel ● Instruction manual ●<br />
Measuring spoon ● Paper clip ● Polystyrene square ● One and a<br />
half volt (1½ V) AA batteries required (not included) ● Certain<br />
household substances required<br />
INTRODUCTION<br />
This kit is called “Nature´s Electricity” because it shows how<br />
electricity can be produced from several materials containing<br />
chemicals that react when they come in contact with various<br />
metals, just like a battery.<br />
A battery is made of Zinc and a Carbon rod, which are placed<br />
between a chemical paste. When you make your own natural<br />
battery, the same process occurs as in the ordinary batteries you<br />
are familiar with. The electric current flows because a chemical<br />
reaction takes place between the metals and the acids in the<br />
vegetables, fruits, soaps, etc.<br />
In some experiments, you may find that one piece of fruit, such as<br />
a lemon, can produce lots of electricity, enough to light up a LED<br />
or the clock module. In other cases, you may have to use 3 or 4<br />
or even more pieces of fruit to get good results. This is very much<br />
the same as with batteries. In certain cases, 1 battery will be<br />
enough, and in others, you may need 2 or 3 or even 4 batteries.<br />
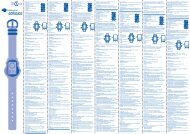
THE EXPERIMENT CONSOLE<br />
1 Wires from clock<br />
2 Test tubes<br />
3 Petri dish lid with LCD clock module already in place<br />
4 Small test tube<br />
5 Rectangular container<br />
6 Wires from clock<br />
7 Rectangular container<br />
8 Test tubes<br />
9 Legs to stand console upright (Snap in place)<br />
10 Petri dish lid with LCD clock module already in place<br />
11 Small test tube<br />
12 Top console cover<br />
Preparing the electrodes<br />
Become familiar with the parts of the experiment console. Be very<br />
careful when handling the clock module. Keep the petri dish<br />
covered so that the clock will not get wet.<br />
Abbreviations<br />
You will use electrodes made from various materials. Chemists<br />
use recognised abbreviations for most of these.<br />
Aluminium al magnesium mg<br />
Iron fe zinc zn<br />
Carbon c copper cu<br />
Test tube t.T.<br />
Note: the carbon electrode is black, the aluminum one is shiny<br />
silver, and the zinc electrode is a dull greyish silver. The<br />
magnesium ribbon is similar in color to the zinc electrode, but is<br />
thinner and has no holes.<br />
Caution: this activity must be performed with adult supervision.<br />
Be very careful when slicing the rubber and plastic tubing!<br />
Your kit includes rubber and plastic tubing. These need to be cut<br />
into pieces about 1/4 of a inch (6-7 mm) lengths. Each cut piece<br />
should look like this:<br />
Cut the tubing very carefully with a good pair of scissors. These<br />
pieces of rubber and plastic are necessary to attach wires to the<br />
electrodes.<br />
Preparing carbon electrodes<br />
Step 1 : take a slice of the rubber tubing and slip it over the<br />
carbon electrode.<br />
4<br />
Step 1: Carbon electrode with rubber slice<br />
Step 2 : take a wire and push its exposed end into the rubber<br />
tubing so that touches the carbon.<br />
Step 2: Insert exposed end of wire into rubber slice<br />
Step 3 : bend the end of the exposed wire upwards to prevent the<br />
wire from pulling out.<br />
Step 3: Bend exposed end of wire over rubber slice<br />
PREPARING MAGNESIUM ELECTRODES<br />
WARNING: The Magnesium ribbon included in your<br />
kit is highly flammable. Do not use this material in any<br />
way other than described in the experiments! Keep it<br />
away from any source of heat. If for any reason this<br />
material burns.<br />
FLAMMABLE<br />
DO NOT INHALE THE FUMES!<br />
Divide the Magnesium strip into<br />
Thumbtack<br />
three parts, and cut careflly<br />
with a pair of scissors. Each<br />
piece should be about one inch<br />
(33 mm) long.<br />
On one end of each of the<br />
Piece of magnesium<br />
Magnesium electrodes, pierce<br />
two holes as shown in the<br />
illustration. Use a thumbtack<br />
very carfully to do this.<br />
Exposed end of wire<br />
Thread the exposed end of one threaded through piece of<br />
of your wires through both magnesium<br />
holes as illustrated.<br />
Cover the wire and Magnesium<br />
strips with the rubber tubing.<br />
Now your Magnesium<br />
Wire and magnesium covered<br />
electrode is also ready for use. by rubber tubing<br />
Preparing All Other Electrodes<br />
For the Zinc and all other electrodes, use the plastic tubing. Use<br />
it in the same way as explained and illustrated above.<br />
NOTE: The two kinds of tubing serve three important functions:<br />
a) Like an elastic band, the tubing holds the wire to the<br />
electrode, ensuring good electrical contact.<br />
b) It shields this contact from unnecessary contamination.<br />
c) It helps to prevent one electrode from touching the other,<br />
when both are immersed, one above the other, in the same<br />
test tube.<br />
The drawing here<br />
shows you how to<br />
use the LED attached<br />
to electrodes.<br />
Mg ribbon<br />
Experiment 1 Coloring Indicator Solution<br />
Led<br />
Equipment: Empty, clean glass, Table salt, Zinc<br />
electrode, Carbon electrode, Magnesium ribbon, pH<br />
paper, Measuring spoon<br />
Carbon electrode<br />
FLAMMABLE