INSTALLATION MANUAL - Daikin AC
INSTALLATION MANUAL - Daikin AC
INSTALLATION MANUAL - Daikin AC

Create successful ePaper yourself
Turn your PDF publications into a flip-book with our unique Google optimized e-Paper software.
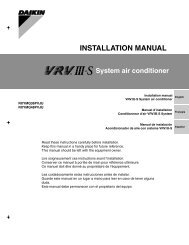
TYPICAL APPLICATION EXAMPLES<br />
The application examples given below are for illustration purposes<br />
only.<br />
Application 1<br />
Application 2<br />
Space heating only application without room thermostat connected to<br />
the indoor unit. The temperature in each room is controlled by a valve<br />
on each water circuit. Domestic hot water is provided through the<br />
domestic hot water tank which is connected to the indoor unit.<br />
Space heating only application with the room thermostat connected<br />
to the indoor unit.<br />
1<br />
2<br />
3<br />
4<br />
5<br />
8 6 9<br />
T1<br />
T2<br />
T3<br />
M<br />
T<br />
M1<br />
M2<br />
M3<br />
1<br />
2<br />
3<br />
4<br />
5 6<br />
7<br />
11<br />
12<br />
FHL1<br />
FHL2<br />
FHL3<br />
10<br />
1 Outdoor unit 6 Collector (field supply)<br />
2 Indoor unit 7 Shut-off valve<br />
3 Heat exchanger FHL1..3 Floor heating loop<br />
4 Pump T Room thermostat<br />
5 Shut-off valve<br />
(optional)<br />
Pump operation and space heating<br />
7<br />
FHL1<br />
FHL2<br />
FHL3<br />
When the room thermostat (T) is connected to the indoor unit, the<br />
pump (4) will operate when there is a heating request from the room<br />
thermostat, and the outdoor unit will start operating to achieve the<br />
target leaving water temperature as set on the user interface.<br />
When the room temperature is above the thermostat set point, the<br />
outdoor unit and pump will stop operating.<br />
Make sure to connect the thermostat wires to the correct<br />
terminals (see "Connection of the thermostat cable" on<br />
page 18) and to configure the DIP switch toggle switches<br />
correctly (see "Room thermostat installation configuration"<br />
on page 22).<br />
1 Outdoor unit 9 By-pass valve<br />
2 Indoor unit<br />
(field supply)<br />
3 Heat exchanger 10 Domestic hot water tank<br />
4 Pump<br />
(optional)<br />
5 Shut-off valve 11 Booster heater<br />
6 Collector (field supply) 12 Heat exchanger coil<br />
7 Shut-off valve FHL1..3 Floor heating loop<br />
8 Motorised 3-way valve<br />
(delivered with<br />
domestic hot water<br />
tank)<br />
Pump operation<br />
T1..3<br />
M1..3<br />
Individual room<br />
thermostat (optional)<br />
Individual motorised<br />
valve to control loop<br />
FHL1 (field supply)<br />
With no thermostat connected to the indoor unit (2), the pump (4) can<br />
be configured to operate either as long as the indoor unit is on, or<br />
until the required water temperature is reached.<br />
NOTE<br />
Details on pump configuration can be found under<br />
"Pump operation configuration" on page 23.<br />
Space heating<br />
The outdoor unit (1) will operate to achieve the target leaving water<br />
temperature as set on the user interface.<br />
NOTE<br />
When circulation in each space heating loop (FHL1..3)<br />
is controlled by remotely controlled valves (M1..3), it is<br />
important to provide a by-pass valve (9) to avoid the<br />
flow switch safety device from being activated.<br />
The by-pass valve should be selected as such that at<br />
all time the minimum water flow as mentioned under<br />
"Water pipework" on page 14 is guaranteed.<br />
It is recommended to select a pressure difference<br />
controlled by-pass valve.<br />
Installation manual<br />
4<br />
EKHBH/X054BA<br />
Indoor unit for air to water heat pump system<br />
4PW54216-1