UNIVERSAL REMOTE CONTROL USER'S GUIDE CONTROL ...
UNIVERSAL REMOTE CONTROL USER'S GUIDE CONTROL ...
UNIVERSAL REMOTE CONTROL USER'S GUIDE CONTROL ...

Create successful ePaper yourself
Turn your PDF publications into a flip-book with our unique Google optimized e-Paper software.
M7820_rev_2-18-05.qxd 2/18/2005 8:07 AM Page 1<br />
<strong>UNIVERSAL</strong> <strong>REMOTE</strong> <strong>CONTROL</strong><br />
USER’S <strong>GUIDE</strong><br />
<strong>CONTROL</strong> REMOTO <strong>UNIVERSAL</strong><br />
GUíA DEL USARIO
M7820_rev_2-18-05.qxd 2/18/2005 8:07 AM Page 2<br />
TABLE OF CONTENTS<br />
Introduction. . . . . . . . . . . . . . . . . . . . . . . . . . . . 3<br />
Features And Functions . . . . . . . . . . . . . . . . . . . 4<br />
Key Chart. . . . . . . . . . . . . . . . . . . . . . . . . . . . . . 5<br />
Installing Batteries . . . . . . . . . . . . . . . . . . . . . . 8<br />
Programming Device Control. . . . . . . . . . . . . . . 9<br />
Programming TV/VCR Combo Control . . . . . . . 10<br />
Searching For Your Code. . . . . . . . . . . . . . . . . 12<br />
Checking The Codes . . . . . . . . . . . . . . . . . . . . 13<br />
Programming ID Lock . . . . . . . . . . . . . . . . . . . 14<br />
Programming Channel Control Lock . . . . . . . . 15<br />
Using Master Power . . . . . . . . . . . . . . . . . . . . 16<br />
Re-Assigning Device Keys . . . . . . . . . . . . . . . . 17<br />
Changing Volume Lock . . . . . . . . . . . . . . . . . . 18<br />
Troubleshooting . . . . . . . . . . . . . . . . . . . . . . . 19<br />
Additional Information . . . . . . . . . . . . . . . . . . . 20<br />
Manufacturer’s Codes . . . . . . . . . . . . . . . . . . . 40<br />
TABLA DE CONTENIDOS<br />
Introducción . . . . . . . . . . . . . . . . . . . . . . . . . . . . 21<br />
Características y Funciones . . . . . . . . . . . . . . . . 22<br />
Cuadros de Teclas . . . . . . . . . . . . . . . . . . . . . . . . 23<br />
Instalación de las Baterías . . . . . . . . . . . . . . . . 26<br />
Programación de Control de Dispositivos . . . . . 27<br />
Programación de Control de Combos TV/VCR . . 29<br />
Búsqueda de su Código . . . . . . . . . . . . . . . . . . . 30<br />
Comprobación de los Códigos . . . . . . . . . . . . . . 31<br />
Programación del Bloqueo de ID . . . . . . . . . . . . 32<br />
Programación del Bloqueo del Control de Canal 32<br />
Utilización del Botón de Encendido Principal . . 33<br />
Reasignación de Teclas de Dispositivos . . . . . . . 34<br />
Cambio del Bloqueo de Volumen. . . . . . . . . . . . . 36<br />
Resolución de Problemas . . . . . . . . . . . . . . . . . . 37<br />
Información Adicional . . . . . . . . . . . . . . . . . . . . . 39<br />
Códigos del Fabricante . . . . . . . . . . . . . . . . . . . 40<br />
2
M7820_rev_2-18-05.qxd 2/18/2005 8:07 AM Page 3<br />
INTRODUCTION<br />
The Cox Universal Remote Control by Universal<br />
Electronics is our latest generation universal remote<br />
control. It is designed with sophisticated technology that<br />
will allow you to consolidate the clutter of all of the<br />
original remote controls in your home entertainment<br />
system. Moreover, it’s packed with easy-to-use features<br />
such as:<br />
• Preprogrammed to operate the cable converter<br />
supplied by Cox Communications<br />
• Preprogrammed interactive technology links hot keys<br />
to your interactive service<br />
• Master Power key for master on/off control of all your<br />
equipment with a single keystroke<br />
• Cable ID Lock to lock your remote control for use<br />
only with the cable converter<br />
• Channel Lock to lock channel selection only to the<br />
cable converter<br />
• Code Search to help you program control of older or<br />
discontinued components<br />
• Code library for video and audio devices<br />
• Color-coded keys to quickly locate popular functions<br />
• Dedicated keys to control popular functions on your<br />
DVR (Digital Video Recorder)<br />
Before using the product, you will need to program it to<br />
operate the specific home entertainment devices you<br />
wish to control. Follow the instructions detailed in this<br />
manual to set up your unit, and then start enjoying your<br />
new remote control.<br />
3
M7820_rev_2-18-05.qxd 2/18/2005 8:07 AM Page 4<br />
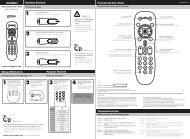
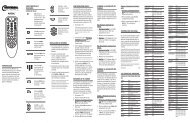
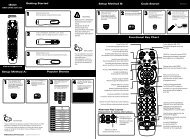
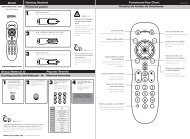
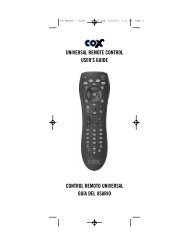
FEATURES AND FUNCTIONS<br />
Use the illustration below to locate features on the Cox<br />
Universal Remote Control and then study the Key Charts (on<br />
the next three pages) to learn how they function.<br />
4
M7820_rev_2-18-05.qxd 2/18/2005 8:07 AM Page 5<br />
KEY CHARTS<br />
Use SETUP for all programming<br />
sequences.<br />
Press POWER once to turn on or<br />
off a home entertainment device.<br />
Press and hold MASTER POWER for<br />
3 seconds to turn on or off all<br />
home entertainment devices (see<br />
Using Master Power on page 16).<br />
Press AUX, DVD, TV, or CABLE once<br />
to select a home entertainment<br />
device to control. Each key has an<br />
embedded LED (red light) that<br />
blinks upon selection and indicates<br />
that the remote control is<br />
working and is sending signals.<br />
In the DVD and TV modes, use REW,<br />
PLAY, FFWD, STOP, and PAUSE to control<br />
your VCR, DVD player, or PVR.<br />
To record a program in the DVD or<br />
AUX mode, press RECORD twice.<br />
In the CABLE mode:<br />
REW: Rewinds in 3 speeds.<br />
PLAY: Plays a recorded program.<br />
(Press once while watching live TV<br />
or a recorded program for slow<br />
motion).<br />
FFWD: Fast forwards in 3 speeds.<br />
STOP: Stops recording a program.<br />
PAUSE: Pauses the program or<br />
recording you are watching.<br />
RECORD: Records a program.<br />
Use these keys (except RECORD) to<br />
control VOD (Video On Demand).<br />
Press to replay the last<br />
8 seconds of a program or record<br />
ing (Instant Replay).<br />
Press ON DEMAND once to access<br />
Cox Communications<br />
On DEMAND Menu.<br />
Press DVR LIST once to display a<br />
list of the recorded shows on your<br />
PVR.<br />
5
M7820_rev_2-18-05.qxd 2/18/2005 8:07 AM Page 6<br />
Press LIVE to return to watching<br />
live TV.<br />
Use INFO to display the current<br />
channel and program information.<br />
Use PAGE+ to page up through<br />
menu screens and program guide.<br />
Press HD ZOOM to change the<br />
aspect ratio on your Scientific<br />
Atlanta or Motorola HD receiver.<br />
(Not available on all receivers.)<br />
Use the Cursor keys to move the<br />
cursor in the program guide and<br />
menu screens, and to navigate<br />
within the interactive service.<br />
Use SELECT to choose options and<br />
PPV events, and to tune programs<br />
from the program guide.<br />
Use <strong>GUIDE</strong> to display the program<br />
guide.<br />
Use PAGE- to page down through<br />
menu screens and program guide.<br />
Use EXIT to exit your cable<br />
converter’s menu and guide.<br />
Use A, B, or C to access additional<br />
cable features (see your cable<br />
converter’s manual).<br />
Use SETTINGS to access additional<br />
cable features (see your cable<br />
converter’s manual).<br />
Press MENU once to display the<br />
available interactive services.<br />
Use VOL+ (or VOL–) to raise (or<br />
lower) the sound volume.<br />
Press LAST once to recall the<br />
last channel.<br />
Use FAV to cycle through your<br />
favorite channels stored in your<br />
cable converter.<br />
6
M7820_rev_2-18-05.qxd 2/18/2005 8:07 AM Page 7<br />
Press MUTE once to turn the<br />
sound<br />
off or on.<br />
Use CH+ (or CH–) to select the<br />
next higher (or lower) channel.<br />
Use INPUT to control the input<br />
select feature on most TVs.<br />
In CABLE mode, use INPUT to view<br />
other video sources (A or B) instead of<br />
cable.<br />
In all other modes, use INPUT to watch<br />
TV or video programs on a desired<br />
device. For amplifiers/receivers, use<br />
INPUT to select an input source.<br />
Press ENTER once after entering<br />
channel numbers on some televi<br />
sions.<br />
Use the keypad (0 ~ 9) to<br />
directly select channels<br />
(e.g., 09 or 31).<br />
Use Picture in Picture SWAP to<br />
switch images and sound between<br />
the main and window pictures.<br />
Use Picture in Picture ON-OFF to<br />
switch the Picture-In-Picture feature<br />
on or off (if available on your<br />
TV or cable service).<br />
Use Picture in Picture MOVE to move<br />
the window picture to different<br />
positions in the main picture.<br />
Use Picture in Picture CH+ (or CH-)<br />
to select the next higher (or lower)<br />
PIP channel.<br />
7
M7820_rev_2-18-05.qxd 2/18/2005 8:07 AM Page 8<br />
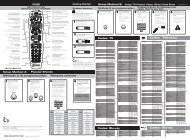
INSTALLING BATTERIES<br />
❶<br />
❷<br />
❸<br />
1. On the back of the remote control, push the<br />
tab and lift off the battery cover.<br />
2. Obtain two (2) fully-charged AA alkaline<br />
batteries. Match the + and – marks on the<br />
batteries to the + and – marks in the battery<br />
case, then insert the new batteries.<br />
3. Align the cover’s keys with the case’s holes<br />
and press the cover back into place. The tab<br />
should click when the cover is locked.<br />
4. Test the unit by pressing POWER and any mode<br />
key (for example, AUX, DVD, TV, or CABLE). If the<br />
batteries are inserted correctly, the selected mode<br />
key will blink once.<br />
NOTE: Whenever batteries need replacement, the remote<br />
control will cease to operate. Simply replace the batteries and<br />
the remote control will be restored to its full functionality,<br />
complete with your favorite settings.<br />
8
M7820_rev_2-18-05.qxd 2/18/2005 8:07 AM Page 9<br />
PROGRAMMING DEVICE <strong>CONTROL</strong><br />
The Cox Universal Remote Control is preprogrammed to<br />
operate your cable converter, an RCA TV, a SONY DVD,<br />
and a Pioneer audio receiver. To control devices other<br />
than the default brands, perform the following steps;<br />
otherwise skip this section:<br />
DEVICE KEY:<br />
CABLE<br />
TV<br />
DVD<br />
AUX<br />
<strong>CONTROL</strong>S THESE TYPES<br />
OF DEVICES:<br />
CABLE CONVERTERS,<br />
CABLE/PVR COMBO<br />
TELEVISIONS<br />
DVD, VCR, PVR,<br />
TV/VCR COMBO,<br />
TV/DVD COMBO,<br />
TV/VCR/DVD COMBO,<br />
DVD/PVR COMBO<br />
AUDIO AMPLIFIER,<br />
AUDIO TUNER, VCR<br />
NOTES: To control a VCR player, or a PVR, program the DVD key.<br />
To control a stereo amplifier or receiver, program the AUX key. For<br />
TV/VCR Combo control, skip this section and perform the<br />
instructions on the next page.<br />
If you have another brand of cable converter and interactive<br />
service you would like to control, you’ll first need to unlock<br />
the cable ID Lock before changing the converter code—see<br />
Programming ID Lock on page 14.<br />
1. Turn on a device and, if applicable, insert<br />
video media (e.g., cassette or disc).<br />
NOTE: Please read steps 2–4 completely before<br />
proceeding. Highlight or write down the codes<br />
and device you wish to program before moving<br />
on to step 2.<br />
2. On the remote control, press a device key once<br />
(e.g., AUX, DVD, TV, or CABLE). Press and hold<br />
SETUP until the selected mode key blinks<br />
twice, then release SETUP.<br />
3. Use the Manufacturer’s Codes (starting on<br />
page 40) to locate the the type of device and<br />
brand name, then enter the first four-digit<br />
code for your device. If performed correctly,<br />
the selected mode key will blink twice.<br />
9
M7820_rev_2-18-05.qxd 2/18/2005 8:07 AM Page 10<br />
NOTE: If the selected mode key emits a long<br />
blink, the code is invalid. Repeat steps 2 through 3<br />
and try entering the same code again.<br />
4. Aim the remote control at the device and press<br />
POWER once. The device should turn off. If it<br />
does not, repeat steps 2–3, trying each code for<br />
your brand until you find one that works. If it<br />
still does not work, try searching for the code<br />
(see Searching For Your Code on page 12).<br />
NOTE: If the device does not have a POWER key,<br />
press the (Play) key.<br />
5. Repeat steps 1–4 for each device you want the<br />
the remote control to control. For future reference,<br />
write down each working device code in<br />
the following boxes:<br />
AUX<br />
AUX Device ____________________<br />
VCR<br />
TV<br />
CABLE<br />
PROGRAMMING TV/VCR COMBO <strong>CONTROL</strong><br />
If you own a TV/VCR Combo, perform the following<br />
instructions to control this device:<br />
1. Turn on your TV/VCR Combo and insert a<br />
video cassette.<br />
2. On the remote control, press DVD once.<br />
Press and hold SETUP until the DVD key<br />
blinks twice, then release SETUP.<br />
3. Use the setup codes for TV/VCR combos on<br />
page 50 to locate the brand name and then enter<br />
the first four-digit code for your TV/VCR<br />
10
M7820_rev_2-18-05.qxd 2/18/2005 8:07 AM Page 11<br />
Combo. If you perform this procedure correctly,<br />
the DVD key will blink twice.<br />
NOTE: If the DVD key did not blink twice after<br />
entering the code’s last digit, then repeat steps 2<br />
through 3 and try entering the same code again.<br />
4. Aim the remote control at your TV/VCR<br />
Combo and press POWER once. The device<br />
should turn off. If it does not respond, repeat<br />
steps 2-3, trying each code listed for your brand<br />
until you find one that works. If it still does not<br />
work, try searching for the code (see Searching<br />
For Your Code on page 12).<br />
5. If you’ve located a TV/VCR setup code that<br />
works your TV/VCR Combo and a separate<br />
TV code is also listed, you’ll need to program<br />
this code into the remote control to access<br />
volume control (see Programming Device<br />
Control on page 9).<br />
If there is no separate TV code listed, you will<br />
need to perform the following steps to access<br />
volume control:<br />
a. Press and hold SETUP until the DVD key<br />
blinks twice, then release SETUP.<br />
b. Enter 9 - 9 - 3. The DVD key will blink<br />
twice.<br />
c. Press DVD once. The DVD key will blink<br />
twice.<br />
6. For future reference, write down each working<br />
device code in the boxes below:<br />
TV/VCR<br />
TV (if used)<br />
11
M7820_rev_2-18-05.qxd 2/18/2005 8:07 AM Page 12<br />
SEARCHING FOR YOUR CODE<br />
IIf your home entertainment device does not respond to<br />
the COX Custom DVR Universal Remote Control after<br />
trying all the codes listed for your brand, or if your<br />
brand is not listed at all, try searching for your code.<br />
For example, to search for a code for your TV:<br />
1. Turn on your TV.<br />
2. On the remote control, press TV once;<br />
Then press and hold SETUP until the<br />
TV key blinks twice, then release SETUP.<br />
3. Enter 9 - 9 - 1. The TV key will blink twice.<br />
4. Aim the remote control at the TV and press<br />
POWER once.<br />
5. Press CH+ (or CH-) one or more times and<br />
stop when the TV turns off.<br />
NOTE: In the search mode, the remote control<br />
will send IR codes from its library to the selected<br />
device, starting with the most popular code first.<br />
NOTE: If while pressing CH+, and you inadvertently<br />
pass the code, press CH- one or more times<br />
until the TV turns on.<br />
6. Press SETUP once to lock in the code. The TV<br />
key will blink twice.<br />
7. To search for the codes of your other devices,<br />
repeat steps 1 through 5, but substitute the<br />
appropriate key (e.g., AUX, DVD, AUD, or CABLE)<br />
for the device you are searching for.<br />
12
M7820_rev_2-18-05.qxd 2/18/2005 8:07 AM Page 13<br />
CHECKING THE CODES<br />
If you have set up the Cox Universal Remote Control<br />
using the Searching For Your Code procedure on the<br />
previous page, you may need to find out which fourdigit<br />
code is operating your equipment. For example, to<br />
find out which code is operating your TV:<br />
1. Turn on your TV.<br />
2. On the remote control, press TV once.<br />
Then press and hold SETUP until the<br />
TV key blinks twice, then release SETUP.<br />
3. Enter 9 - 9 - 0. The TV key will blink twice.<br />
4. To view the code for the first digit, press<br />
1 once. Wait 3 seconds and count the number<br />
of times the TV key blinks (for example,<br />
3 blinks = 3) and write down the number in<br />
the leftmost TV Code box (see below).<br />
NOTE: If a code digit is “0”, the selected mode key<br />
will not blink.<br />
5. Repeat step 4 three more times for remaining<br />
digits. Use 2 for the second digit, 3 for the<br />
third digit, and 4 for the fourth digit. Write<br />
down the remaining digits in the boxes below.<br />
6. To check for other device codes, repeat steps<br />
1–5, but substitute the appropriate key (that<br />
is, AUX, DVD, or CABLE) for the (Auxiliary,<br />
DVD, or Cable) device you are checking.<br />
Write down the codes in the appropriate<br />
boxes below.<br />
AUX Code<br />
Aux Device ____________________<br />
DVD Code<br />
TV Code<br />
CABLE Code<br />
13
M7820_rev_2-18-05.qxd 2/18/2005 8:07 AM Page 14<br />
PROGRAMMING ID LOCK<br />
The Cox Universal Remote Control is preprogrammed and<br />
locked at the factory to operate the cable converter and<br />
interactive service given to you by your cable company.<br />
However, if you have another brand or model of cable<br />
converter and interactive service that you would like to<br />
control, then you’ll need to perform the following steps<br />
to unlock the cable ID Lock, enter a new manufacturer’s<br />
code, and lock the ID Lock again.<br />
1. Turn on the Cable Converter.<br />
2. On the remote control, press CABLE once.<br />
Then press and hold SETUP until the<br />
CABLE key blinks twice, then release SETUP.<br />
3. Enter 9 - 8 - 2. The CABLE key will blink<br />
four times.<br />
4. Perform the instructions in Programming<br />
Device Control on page 9 to program device<br />
control for the desired cable converter and<br />
interactive service. Upon completion, perform<br />
the remaining steps (5 and 6 on this page) to<br />
again lock the ID lock.<br />
5. On the remote control, press CABLE once.<br />
Then press and hold SETUP until the<br />
CABLE key blinks twice, then release SETUP.<br />
6. Enter 9 - 8 - 2. The CABLE key will blink twice.<br />
14
M7820_rev_2-18-05.qxd 2/18/2005 8:07 AM Page 15<br />
PROGRAMMING CHANNEL <strong>CONTROL</strong> LOCK<br />
By default, the remote control’s channel-control capabilities<br />
are locked to the cable converter. The affected keys are<br />
0~9, CH+, CH–, ENTER, and LAST. This will guarantee that<br />
you do not inadvertently change a channel on your TV or<br />
VCR. However, you can de-activate this feature to allow full<br />
access to these keys in the TV and VCR modes.<br />
To De-Activate Channel Control Lock:<br />
1. On the remote control, press CABLE once.<br />
Then press and hold SETUP until the<br />
CABLE key blinks twice, then release SETUP.<br />
2. Enter 9 - 7 - 3. The CABLE key will blink twice.<br />
3. Press CH– once. The CABLE key will blink<br />
four times.<br />
4. Now, the remote control will provide TV and<br />
VCR channel-control capabilities while in TV<br />
or VCR mode.<br />
NOTE: This feature does not affect the AUX mode.<br />
To Re-Activate Channel Control Lock:<br />
1. On the remote control, press CABLE once.<br />
Then press and hold SETUP until the<br />
CABLE key blinks twice, then release SETUP.<br />
2. Enter 9 - 7 - 3. The CABLE key will blink twice.<br />
3. Press CH+ once. The CABLE key will blink twice.<br />
4. Now, regardless of what mode you select<br />
(that is, TV, DVD, or CABLE), only the channel<br />
control capability of your cable converter will<br />
be accessible.<br />
NOTE: This feature does not affect the AUX mode.<br />
15
M7820_rev_2-18-05.qxd 2/18/2005 8:07 AM Page 16<br />
USING MASTER POWER<br />
The Cox Universal Remote Control is equipped with a<br />
unique feature that allows you to sequentially turn all<br />
home entertainment devices on or off with a single key.<br />
To execute the master power control:<br />
1. Press and hold MASTER POWER for 1.5 seconds.<br />
This will start the power macro sequence.<br />
2. Keep the remote pointed at your devices until<br />
all have turned on or offf.<br />
NOTE: MASTER POWER is preprogrammed to turn your<br />
home entertainment devices on/off.<br />
PROGRAMMING MASTER POWER<br />
MASTER POWER Macro Setup<br />
The steps below let you customize the sequence in<br />
which your devices turn on or off when you use the<br />
MASTER POWER key feature:<br />
1. Press and hold the SETUP key until the LED<br />
blinks twice.<br />
2. Enter 9 - 9 - 5. The LED will blink twice<br />
again.<br />
3. Press the POWER key.<br />
4. Press the device keys (AUX, DVD and/or TV) in<br />
the sequence in which you want them to<br />
power up or down.<br />
NOTE: The last mode selected should always be CABLE<br />
5. Press and hold the SETUP key again until the<br />
LED blinks twice.<br />
Clear MASTER POWER Macro Setup<br />
To clear the MASTER POWER macro programming:<br />
1. Press and hold the SETUP key until the LED<br />
blinks twice.<br />
2. Enter 9 - 9 - 5. The LED will blink twice.<br />
3. Press the POWER key.<br />
4. Press and hold the SETUP key again until the<br />
LED blinks twice.<br />
16
M7820_rev_2-18-05.qxd 2/18/2005 8:07 AM Page 17<br />
RE-ASSIGNING DEVICE KEYS<br />
The Cox Universal Remote Control can be set up to<br />
control a VCR or second TV, or any combination of up to<br />
four home entertainment devices. For example, to have<br />
the unit control a TV, a Cable Converter, a DVD player<br />
and a VCR, you will need to re-assign the unused AUX<br />
key to operate the VCR as follows:<br />
1. On the remote control, press AUX once.<br />
Then press and hold SETUP until the AUX key<br />
blinks twice, then release SETUP.<br />
2. Enter 9 - 9 - 2. The AUX key will blink twice.<br />
3. Press DVD once, then press AUX. The AUX key<br />
will blink twice.<br />
4. The AUX key is now ready to be programmed<br />
for your VCR. See Programming Device<br />
Control on page 9.<br />
To re-assign other device keys, repeat steps 1–4, but<br />
substitute the key sequence using the following chart:<br />
To Re-Assign<br />
Perform Key Sequence<br />
TV as 2nd DVD key SETUP - 9 - 9 - 2 - DVD - TV<br />
TV as 2nd Auxiliary key SETUP - 9 - 9 - 2 - AUX - TV<br />
TV as 2nd Cable key SETUP - 9 - 9 - 2 - CABLE - TV<br />
TV back to TV<br />
SETUP - 9 - 9 - 2 - TV - TV<br />
DVD as 2nd TV key SETUP - 9 - 9 - 2 - TV - DVD<br />
DVD as 2nd Auxiliary key SETUP - 9 - 9 - 2 - AUX - DVD<br />
DVD as 2nd Cable key SETUP - 9 - 9 - 2 - CABLE - DVD<br />
DVD back to DVD SETUP - 9 - 9 - 2 - DVD - DVD<br />
AUX as 2nd TV key SETUP - 9 - 9 - 2 - TV - AUX<br />
AUX as 2nd VCR key SETUP - 9 - 9 - 2 - DVD - AUX<br />
AUX as 2nd Cable key SETUP - 9 - 9 - 2 - CABLE - AUX<br />
AUX back to AUX SETUP - 9 - 9 - 2 - AUX - AUX<br />
Upon completion of a re-assignment, the selected mode<br />
key will blink twice to confirm your selection. You will<br />
then need to program device control (see Programming<br />
Device Control on page 9).<br />
17
M7820_rev_2-18-05.qxd 2/18/2005 8:07 AM Page 18<br />
CHANGING VOLUME LOCK<br />
The Cox Universal Remote Control is set to control volume<br />
of a device through your TV while in TV, DVD, or Cable<br />
mode. However, in the Auxiliary mode, you will still have<br />
separate control of of your auxiliary device’s volume.<br />
If your TV is not remote-controllable, or if you would like<br />
the volume to be controlled by a different device, you can<br />
change the Volume Lock setting to control a volume<br />
through a non-associated mode (for example, through the<br />
cable in the TV mode).<br />
To change Volume Lock to CABLE mode:<br />
1. On the remote control, press CABLE once.<br />
Then press and hold SETUP until the<br />
CABLE key blinks twice, then release SETUP.<br />
2. Enter 9 - 9 - 3. The CABLE key will blink twice.<br />
3. Press CABLE once. It will blink twice.<br />
4. Now, whenever you press VOL+, VOL–, or<br />
MUTE, volume will be controlled by your<br />
Cable Converter.<br />
To change Volume Lock to TV mode:<br />
1. On the remote control, press TV once.<br />
Then press and hold SETUP until the TV key<br />
blinks twice, then release SETUP.<br />
2. Enter 9 - 9 - 3. The TV key will blink twice.<br />
3. Press TV once. It will blink twice.<br />
4. Now, whenever you press VOL+, VOL–, or<br />
MUTE, volume will be controlled by your TV.<br />
To change Volume Lock to AUX mode:<br />
NOTE: Performing these steps will allow you to access the<br />
volume control of your auxiliary device in all modes.<br />
1. On the remote control, press AUX once.<br />
Then press and hold SETUP until the<br />
AUX key blinks twice, then release SETUP.<br />
18
M7820_rev_2-18-05.qxd 2/18/2005 8:07 AM Page 19<br />
2. Enter 9 - 9 - 3. The AUX key will blink twice.<br />
3. Press AUX once. It will blink twice.<br />
4. Now, whenever you press VOL+, VOL–, or<br />
MUTE, the volume will be controlled by your<br />
auxiliary device.<br />
TROUBLESHOOTING<br />
PROBLEM: Mode key does not blink when you press a key.<br />
SOLUTION: Replace the batteries with two (2) new AA<br />
alkaline batteries (see page 8).<br />
PROBLEM: Mode key blinks when you press a key, but<br />
home entertainment device does not respond.<br />
SOLUTION: Make sure you are aiming the remote control<br />
at your home entertainment device and that<br />
you are within 15 feet of the device you are<br />
trying to control.<br />
PROBLEM: The remote control does not control home<br />
entertainment devices or commands are not<br />
performing properly.<br />
SOLUTION: Try all listed codes for the device brand being<br />
set up. Make sure all devices can be operated<br />
with an infrared remote control.<br />
PROBLEM: TV/VCR combo does not respond properly.<br />
SOLUTION: Use the VCR codes for your brand. Some<br />
combo units may require both a TV code and<br />
a VCR code for full operation (see page 10).<br />
PROBLEM: No volume on a second TV.<br />
SOLUTION: Follow instructions in Changing Volume Lock<br />
(see previous page).<br />
PROBLEM: CH+ , CH – , and LAST do not work for your<br />
RCA TV.<br />
SOLUTION: Due to RCA design (1983–1987), only the<br />
original remote control will operate these<br />
functions.<br />
PROBLEM: Changing channels does not work properly.<br />
SOLUTION: If original remote control required pressing<br />
ENTER to change channels, press ENTER on<br />
the remote control after entering a channel<br />
number.<br />
19
M7820_rev_2-18-05.qxd 2/18/2005 8:07 AM Page 20<br />
PROBLEM: Tried “Search For Your Code” and still could<br />
not find a working code.<br />
SOLUTION: Try the “Search For Your Code” again after<br />
clearing out the device key as follows: Press<br />
and hold SETUP until mode key blinks twice,<br />
then release. Next enter 9 - 9 - 2. Then press<br />
and<br />
release the mode key to be cleared twice.<br />
PROBLEM: Remote control does not turn on Sony or<br />
Sharp TV/VCR Combo.<br />
SOLUTION: For power on, these products require<br />
programming TV codes on the remote control.<br />
For Sony, use TV code 0000 and VCR<br />
code 0032. For Sharp, use TV code 0093 and<br />
VCR code 0048.<br />
ADDITIONAL INFORMATION<br />
This product does not have any user-serviceable parts.<br />
Opening the case, except for the battery cover, may cause<br />
permanent damage to your Cox Universal Remote Control.<br />
Copyright 2005 by Universal Electronics Inc. No part of<br />
this publication may be reproduced, transmitted, transcribed,<br />
stored in any retrieval system, or translated to any<br />
language, in any form or by any means, electronic,<br />
mechanical, magnetic, optical, manual, or otherwise, without<br />
prior written permission of Universal Electronics Inc.<br />
20
M7820_rev_2-18-05.qxd 2/18/2005 8:07 AM Page 21<br />
INTRODUCCIÓN<br />
El Control remoto universal Cox de Universal<br />
Electronics es nuestro control remoto universal de<br />
última generación. Está diseñado con una sofisticada<br />
tecnología que le permitirá reunir las funciones de<br />
todos los controles a distancia de su hogar en un solo<br />
aparato. Además, viene incluido con funciones de fácil<br />
uso como:<br />
• Preprogramación para operar el convertidor de cable<br />
suministrado por Cox Communications<br />
• Teclas de vínculos interactivos preprogramados<br />
• Botón de encendido principal para encender o apagar<br />
todos sus equipos con una sola tecla<br />
• Bloqueo de ID de cable para utilizar su control remoto<br />
únicamente con el convertidor de cable<br />
• Bloqueo de canal para bloquear la selección de canal<br />
sólo en el convertidor de cable<br />
• Búsqueda de códigos para programar controles de<br />
componentes antiguos o descatalogados<br />
• Biblioteca de códigos para dispositivos de audio y<br />
video<br />
• Teclas de colores para ubicar rápidamente los funciones<br />
más utilizadas<br />
• Teclas dedicado at control los funciones populares en<br />
su DVR (Digital Video Recorder)<br />
Antes de comenzar a utilizar el producto, deberá programarlo<br />
para que funcione con los dispositivos de<br />
entretenimiento doméstico con los que usted desee utilizar<br />
el control. Siga las instrucciones que se detallan en<br />
este manual para configurar su unidad y comenzar a<br />
disfrutar de su nuevo control remoto.<br />
21
M7820_rev_2-18-05.qxd 2/18/2005 8:07 AM Page 22<br />
CARACTERÍSTICAS Y FUNCIONES<br />
Refiérase a la ilustración mostrada más adelante para<br />
ubicar las funciones del Control remoto universal Cox<br />
y estudie a continuación los Cuadros de teclas (en las<br />
dos páginas siguientes) para aprender a usar cada una<br />
de ellas.<br />
22
M7820_rev_2-18-05.qxd 2/18/2005 8:07 AM Page 23<br />
CUADROS DE TECLAS<br />
Use SETUP para todas las secuecias<br />
de programación.<br />
Presione POWER una vez para<br />
encender o apagar un dispositivo<br />
de entretenimiento doméstico.<br />
Presione y mantenga presionado<br />
MASTER POWER durante 3 segundos<br />
para apagar o encender todos<br />
los dispositivos de entretenimiento<br />
doméstico (consulte Utilización<br />
del Botón de encendido principal<br />
en la página 33)<br />
Presione CABLE DVD, TV, o AUX<br />
para seleccionar el dispositivo que<br />
desea controlar. Cada tecla cuenta<br />
con un LED (luz roja) que<br />
parpadea cuando ésta es usada e<br />
indica que el control remoto está<br />
funcionando y enviando señales.<br />
Presione On DEMAND una vez<br />
para tener acceso al menú ONDE-<br />
MAND de COX Communications.<br />
En los modos DVD y TV, use REW,<br />
PLAY, FFWD, STOP y PAUSE para<br />
controlar su reproductor VCR, DVD<br />
o PVR. Para grabar un programa<br />
en los modos DVD o AUX, presione<br />
RECORD dos veces.<br />
Use estas teclas (excepto RECORD)<br />
en el modo CABLE para controlar<br />
el VOD (Video on Demand).<br />
Presione DVR LIST una vez para<br />
exhibir una lista de programas<br />
registrados en su PVR.<br />
Presione LIVE para volver a ver<br />
TV en vivo.<br />
Use INFO para mostrar la información<br />
sobre el canal y el programa<br />
actual.<br />
23
M7820_rev_2-18-05.qxd 2/18/2005 8:07 AM Page 24<br />
Use PAGE+ para desplazarse<br />
por las pantallas de menú y la<br />
guía de programas.<br />
Oprima HD ZOOM para cambiar la<br />
proporción dimensional en su<br />
recpetor Scientific Atlanta or<br />
Motorola HD. (No disponible en<br />
todos los receptores).<br />
Use las Teclas de cursor para mover<br />
el cursor dentro de la guía de programas<br />
y las pantallas de menú y<br />
para navegar dentro del servicio<br />
interactivo.<br />
Utilice SELECT para elegir opciones,<br />
eventos PPV y para sintonizar<br />
programas de la guía de programas.<br />
Use <strong>GUIDE</strong> para mostrar la guía<br />
de programas.<br />
Use PAGE- para desplazarse por las<br />
pantallas de menú y la guía de<br />
programas.<br />
Use EXIT para salir del menú y<br />
la guía del convertidor de cable.<br />
Use A, B o C para acceder a funciones<br />
adicionales de cable (consulte el manual<br />
de su convertidor de cable).<br />
Use SETTINGS para acceder a funciones<br />
adicionales de cable (consulte el manual<br />
de su convertidor de cable).<br />
Pulse MENU una vez para mostrar<br />
los servicios interactivos<br />
disponibles.<br />
Use VOL+ (o VOL–) para subir<br />
(o bajar) el volumen del sonido.<br />
Presione LAST una vez para volver<br />
al último canal.<br />
Use FAV para rotar por sus canales<br />
favoritos almacenados en el<br />
convertidor de cable.<br />
24
M7820_rev_2-18-05.qxd 2/18/2005 8:07 AM Page 25<br />
Presione MUTE una vez para anular<br />
o restablecer el sonido.<br />
Use CH+ (o CH–) para seleccionar<br />
el canal siguiente (o anterior).<br />
Use INPUT para operar con la<br />
función de selección de entrada<br />
dela mayoría de TVs.<br />
En la funcion de CABLE, utilice INPUT<br />
para ver otras fuentes de video (A o B)<br />
en vez del cable.<br />
En el resto de las funciones, utilice<br />
INPUT para ver la TV o programas<br />
video sobre el dispositivo deseado. Para<br />
amplificadores/receptores, utilice INPUT<br />
para seleccionar una fuente de ingreso.<br />
Presione ENTER después de intro<br />
ducir los números del canal en<br />
algunas marcas de TV.<br />
Use el teclado numérico (0 ~ 9)<br />
para seleccionar directamente los<br />
canales.<br />
Utilice Cuadro-En-Cuadro SWAP<br />
para cambiar imagenes y sonidos<br />
entre el cuadro principal y los<br />
recuadros.<br />
Utilice Cuadro-En-Cuadro ON-OFF<br />
para encender o apagar la funcion<br />
de Cuadro-En-Cuadro encendido<br />
(si esta disponible en su TV o en su<br />
servicio de cable).<br />
Utilice Cuadro-En-Cuadro MOVE<br />
para mover el recuadro a diversas<br />
posiciones en el cuadro principal.<br />
Utilice Cuadro-En-Cuadro CH+ (or<br />
CH -) para seleccionar el siguiente<br />
canal PIP más alto (o mas bajo).<br />
25
M7820_rev_2-18-05.qxd 2/18/2005 8:07 AM Page 26<br />
INSTALACIÓN DE LAS BATERÍAS<br />
❶<br />
❷<br />
❸<br />
1. En el reverso del control remoto, presione la<br />
pestaña y levante la tapa de las baterías.<br />
2. Adquiera dos (2) baterías alcalinas AA cargadas.Coloque<br />
los polos positivo (+) y negativo<br />
(-) de las baterías con las marcas + y –<br />
indicadas en el compartimiento de las<br />
baterías.<br />
3. Alinee las teclas de la cubierta con los orificios<br />
de la carcasa. Coloque de nuevo la tapa.<br />
La pestaña hará clic cuando la cubierta esté<br />
ajustada.<br />
4. Pruebe la unidad presionando la tecla POWER<br />
o la de modo (p. ej. AUX, DVD, TV, CABLE). Si<br />
las baterías han sido introducidas correctamente,<br />
la tecla de modo seleccionada<br />
parpadeará una vez.<br />
NOTA: El control remoto dejará de funcionar cuando las<br />
bater íastengan que ser sustituidas. Sustituya las baterías y<br />
el control remoto recuperará todas sus funciones y su configuración<br />
personal.<br />
26
M7820_rev_2-18-05.qxd 2/18/2005 8:07 AM Page 27<br />
PROGRAMACIÓN DE <strong>CONTROL</strong> DE<br />
DISPOSITIVOS<br />
El Control remoto universal Cox está preprogramado<br />
para funcionar con su convertidor de cable, con una TV<br />
RCA, con un DVD SONY y con un receptor de audio<br />
Pioneer. Para controlar dispositivos de marcas diferentes<br />
a las predeterminadas, siga los siguientes pasos; en caso<br />
contrario, ignore esta sección.<br />
DISPOSITIVOS TECLAS:<br />
CABLE<br />
TV<br />
DVD<br />
AUX<br />
<strong>CONTROL</strong>AR ESTOS TIPOS<br />
DE DISPOSITIVOS:<br />
CONVERTIDOR<br />
CABLE,CABLE/PVR<br />
COMBO<br />
TELEVISIÓNS<br />
DVD, VCR, PVR,<br />
TV/VCR COMBO,<br />
TV/DVD COMBO,<br />
TV/VCR/DVD COMBO,<br />
DVD/PVR COMBO<br />
ESTÉRO AMPLIFICADO<br />
O RECEPTOR, VCR<br />
NOTAS: Para controlar un reproductor de VCR, programe la<br />
tecla DVD. Para controlar un PVR, programe la tecla AUX.<br />
Para controlar un amplificador o receptor estéreo, programe<br />
la tecla AUX. Para controlar un Combo TV/VCR, ignore esta<br />
sección y siga las instrucciones detalladas en la página siguiente.<br />
Si posee otra marca de convertidor de cable o servicio interactivo<br />
con la que desea utilizar el control, deberá en primer<br />
lugar desactivar el Bloqueo de ID de cable antes de cambiar<br />
el código de convertidor. Consulte Programación del<br />
Bloqueo de ID en la página 32).<br />
1. Encienda un dispositivo e introduzca en su<br />
casoun medio audiovisual (p. ej., cassette o<br />
video).<br />
NOTA: Por favor, lea íntegramente los pasos del 2<br />
al 4 antes de empezar.Subraye o anote los códigos<br />
y dispositivo que desea programar antes de seguir<br />
con el paso número 2.<br />
2. Presione una tecla de dispositivo cualquiera<br />
dos veces en el control remoto (p. ej. AUX,<br />
DVD, TV o CABLE). Presione y mantenga pre-<br />
27
M7820_rev_2-18-05.qxd 2/18/2005 8:07 AM Page 28<br />
sionado SETUP hasta que el modo seleccionado<br />
parpadee dos veces. A continuación,<br />
suelte el botón.<br />
3. Utilice los códigos del fabricante (a partir de<br />
la página 40) para determinar el tipo de dispositivo<br />
y marca y a continuación introduzca<br />
el primer dígito del código de cuatro dígitos<br />
de su dispositivo. Si lo ha hecho correctamente,<br />
el modo seleccionado parpadeará dos<br />
veces.<br />
NOTA: Si la tecla de modo seleccionada emite<br />
una luz prolongada, elcódigo es inválido. Repita<br />
los pasos 2 y 3 e intenteintroducir el mismo código<br />
de nuevo.<br />
4. Dirija el control remoto hacia el dispositivo<br />
y presione POWER una vez. El dispositivo<br />
debería apagarse. Si no ocurre así, repita los<br />
pasos 2 y 3, inténtelo con cada código de su<br />
marca hasta encontrar uno que funcione. Si aún<br />
así no funciona, intente buscar el código (consulte<br />
Búsqueda de su código en la página 30).<br />
NOTA: Si el dispositivo no tiene botón POWER,<br />
presione el botón (Play).<br />
5. Repita los pasos del 1–4 para cada uno de<br />
los dispositivos con los que desea utilizar<br />
el control remoto. Anote los códigos correctos<br />
de cada dispositivo en los siguientes espacios<br />
para referencias futuras:<br />
AUX<br />
AUX Device _____________________<br />
VCR<br />
TV<br />
CABLE<br />
28
M7820_rev_2-18-05.qxd 2/18/2005 8:07 AM Page 29<br />
PROGRAMACIÓN DE <strong>CONTROL</strong> DE<br />
COMBOS TV/VCR<br />
Si usted posee un combo TV/VCR, siga las siguientes<br />
instrucciones para utilizar el control con este dispositivo:<br />
1. Encienda su combo TV/VCR e introduzca<br />
una cinta de video.<br />
2. En el control remoto, presione DVD una vez.<br />
Presione y mantenga presionado SETUP hasta<br />
que la tecla DVD parpadee dos veces. A continuación,<br />
suelte el botón SETUP.<br />
3. Utilice los códigos de configuración para<br />
combos TV/VCR (página 40) para ubicar el<br />
nombre de la marca y después introducir el<br />
primer código de cuatro dígitos para su<br />
combo TV/VCR. Si ha seguido este procedimiento<br />
correctamente, la tecla DVD<br />
parpadeará dos veces.<br />
NOTA: Si la tecla VCR no parpadeó dos veces tras<br />
introducir el último dígito del código, repita los<br />
pasos del 2 al 3 e intente introducir el mismo<br />
código de nuevo.<br />
4. Dirija el control remoto hacia su combo<br />
TV/VCR y presione POWER una vez. El dispositivo<br />
debería apagarse. Si no ocurre así,<br />
repita los pasos 2 y 3, inténtelo con cada código<br />
enumerado para su marca hasta encontrar<br />
uno que funcione. Si aún así no funciona,<br />
intente buscar el código (consulte Búsqueda<br />
de su Código en la página 30).<br />
5. Si localiza un código de configuración que<br />
funcione con su combo TV/VCR y encuentra<br />
también un código independiente para TV,<br />
deberá programar este código en el control<br />
remoto para acceder al control de volumen<br />
(consulte Programación de Control de<br />
Dispositivos en la página 27).<br />
Si no existe un código independiente para la<br />
TV, deberá seguir los siguientes pasos para<br />
acceder al control de volumen:<br />
a. Presione y mantenga presionado SETUP<br />
hasta que la tecla DVD parpadee dos veces.<br />
A continuación, suelte el botón SETUP.<br />
29
M7820_rev_2-18-05.qxd 2/18/2005 8:07 AM Page 30<br />
b. Presione 9-9-3. La tecla DVD parpadeará<br />
dos veces.<br />
c. Presione DVD una vez. La tecla DVD<br />
parpadeará dos veces.<br />
6. Anote los códigos correctos de cada dispositivo<br />
en los siguientes espacios para referencias<br />
futuras:<br />
TV/VCR<br />
TV (if used)<br />
BÚSQUEDA DE SU CÓDIGO<br />
Si el dispositivo de su centro de entretenimiento no<br />
responde al control remoto Universal COX DVR después<br />
de intentar todos los códigos enumerados para su marca<br />
de fábrica, o si su marca de fábrica no se menciona,<br />
intente encontrar su código.<br />
Por ejemplo, para encontrar el código para su TV:<br />
1. Encienda su TV.<br />
2. Presione TV una vez en su control remoto; va a<br />
parpadear una vez. Oprima y sostenga SETUP<br />
hasta que parpadee dos veces.<br />
3. Oprima 9 - 9 - 1. El boton TV parpadeara dos<br />
veces.<br />
4. Apunte el control remoto hacia la TV y presione<br />
PWR una vez<br />
5. Presione CH+ (o el CH -) una o más veces y<br />
pare cuando la TV se apague<br />
NOTA: En la funcion de búsqueda, el control<br />
remoto enviará códigos IR desde su biblioteca al<br />
dispositivo seleccionado, comenzando por el código<br />
más popular.<br />
NOTA: Si mientras usted presiona CH +, pasa el<br />
código inadvertidamente, presione el CH- una o<br />
más veces hasta que la TV se encienda.<br />
6. Presione SETUP una vez para asegurar el codigo.<br />
El boton TV parpadeara dos veces.<br />
30
M7820_rev_2-18-05.qxd 2/18/2005 8:07 AM Page 31<br />
7. Para buscar los códigos de sus otros dispositivos,<br />
repita los pasos 1 a 5, pero substituya el<br />
boton correspondiente (e.g., AUX., DVD, AUD, o<br />
CABLE) al dispositivo que usted necesita.<br />
COMPROBACIÓN DE LOS CÓDIGOS<br />
Si usted ha configurado el control remoto universal Cox<br />
siguiendo el procedimiento Búsqueda de su Código<br />
(página anterior), es probable que deba averiguar qué<br />
código de cuatro dígitos funciona con su dispositivo. Por<br />
ejemplo, para averiguar qué código funciona con su TV:<br />
1. Encienda su TV.<br />
2. En el control remoto, presione TV una<br />
vez.Presione y mantenga presionada SETUP<br />
hasta que la tecla TV parpadee dos veces.<br />
A continuación, suelte el botón SETUP.<br />
3. Presione 9-9-0. La tecla TV parpadeará dos veces.<br />
4. Para ver el primer dígito del código, presione<br />
1 una vez. Espere 3 segundos y cuente el<br />
número de veces que parpadea la tecla TV<br />
(p. ej., 3 parpadeos = 3) y anote el número en<br />
el primer espacio de los destinados al código<br />
de su TV (ver más adelante).<br />
NOTA: Si el dígito del código es “0”, la tecla de<br />
modo seleccionada no parpadeará.<br />
5. Repita el paso 4 tres veces más para los dígitos<br />
restantes. Use el 2 para el segundo dígito, el 3<br />
para el tercer dígito y el 4 para el cuarto dígito.<br />
Termine de escribir el código en los espacios<br />
destinados al código de su TV más adelante.<br />
6. Para comprobar los códigos de otros dispositivos,<br />
repita los pasos del 1 al 4 sustituyendo<br />
la tecla apropiada (p. ej., AUX, DVD o CABLE)<br />
por la del dispositivo que esté comprobando.<br />
Anote los códigos en los espacios pertinentes,<br />
más adelante.<br />
AUX<br />
AUX Device ____________________<br />
VCR<br />
31
M7820_rev_2-18-05.qxd 2/18/2005 8:07 AM Page 32<br />
TV<br />
CABLE<br />
PROGRAMACIÓN DEL BLOQUEO DE ID<br />
El Control remoto universal Cox viene preprogramado y<br />
bloqueado de fábrica para funcionar con el convertidor<br />
de cable y el servicio interactivo que le proporciona su<br />
compañía de cable.<br />
Sin embargo, si usted tiene otra marca o modelo de<br />
convertidor de cable y servicio interactivo con los que le<br />
gustaría utilizar su control remoto, deberá entonces<br />
seguir los siguientes pasos para desbloquear el ID de<br />
cable, introducir un nuevo código de fabricante y<br />
bloquear el ID de nuevo.<br />
1. Encienda el Convertidor de cable.<br />
2. En el control remoto, presione CABLE una vez.<br />
Presione y mantenga presionada SETUP<br />
hasta que la tecla TV parpadee dos veces.<br />
A continuación, suelte el botón SETUP.<br />
3. Presione 9-8-2. La tecla CABLE parpadeará dos<br />
veces.<br />
4. Siga las instrucciones detalladas en<br />
Programación del Control de Dispositivo en la<br />
página 27 para programar el control de dispositivo<br />
para el convertidor de cable y servicio<br />
interactivo deseados. Hecho esto, siga los<br />
pasos restantes (5 y 6, en esta página)<br />
para bloquear de nuevo el ID.<br />
5. En el control remoto, presione CABLE una vez.<br />
Presione y mantenga presionada SETUP<br />
hasta que la tecla TV parpadee dos veces.<br />
A continuación, suelte el botón SETUP.<br />
6. Presione 9-8-2. La tecla CABLE parpadeará dos<br />
veces.<br />
PROGRAMACIÓN DEL BLOQUEO DEL<br />
<strong>CONTROL</strong> DE CANAL<br />
Las funciones de control de canal del control remoto<br />
están por defecto bloqueadas en relación al convertidor<br />
de cable. Las teclas afectadas son 0~9, CH+, CH–, ENTER<br />
32
M7820_rev_2-18-05.qxd 2/18/2005 8:07 AM Page 33<br />
y LAST. Esto evitará que usted cambie sin querer el canal<br />
de su TV o DVD. No obstante, puede desactivar esta<br />
función para permitir un acceso total a estas teclas en<br />
los modos TV y DVD.<br />
Desactivación del Bloqueo del control de canal:<br />
1. En el control remoto, presione CABLE una vez.<br />
Presione y mantenga presionado SETUP hasta<br />
que CABLE parpadee dos veces. A continuación,<br />
suelte el botón SETUP.<br />
2. Presione 9-7-3. La tecla CABLE parpadeará dos<br />
veces.<br />
3. Presione CH– una vez. La tecla CABLE<br />
parpadeará cuatro veces.<br />
4. Ahora el control remoto proporcionará funciones<br />
de control de canal de TV y VCR siempre<br />
que esté en los modos TV o VCR.<br />
NOTA: Esta función no afecta al modo AUX.<br />
Reactivación del Bloqueo del control de canal:<br />
1. En el control remoto, presione CABLE una vez.<br />
Presione y mantenga presionada SETUP<br />
hasta que la tecla TV parpadee dos veces.<br />
A continuación, suelte el botón SETUP.<br />
2. Presione 9-7-3. La tecla CABLE parpadeará dos<br />
veces.<br />
3. Presione CH+ una vez. La tecla CABLE<br />
parpadeará dos veces.<br />
4. En este momento, sólo estará disponible<br />
la función de control de canal de su convertidor<br />
de cable, independientemente del modo<br />
que seleccione (p. ej. TV, DVD o CABLE).<br />
NOTA: Esta función no afecta al modo AUX.<br />
UTILIZACIÓN DEL BOTÓN DE ENCENDIDO<br />
PRINCIPAL<br />
El Control remoto universal Cox está equipado con una<br />
función exclusiva que le permite encender o apagar de<br />
manera secuencial todos sus dispositivos de entretenimiento<br />
doméstico con un único botón:<br />
33
M7820_rev_2-18-05.qxd 2/18/2005 8:07 AM Page 34<br />
1. Dirija el control remoto hacia los dispositivos.<br />
2. Presione y mantenga presionado MASTER<br />
POWER durante 3 segundos para apagar o<br />
encender todos los dispositivos de entretenimiento<br />
doméstico de manera secuencial.<br />
Dependiendo del modo que esté seleccionado,<br />
el control remoto enviará señales infrarrojas<br />
a los dispositivos en el siguiente orden:<br />
Modo de Dispositivo Encendido Modo de<br />
inicio Apagado finalización<br />
AUX Cable, TV, DVD CABLE<br />
DVD Auxiliar, Cable, TV CABLE<br />
TV DVD, Auxiliar, Cable CABLE<br />
CABLE TV, DVD, Auxiliar CABLE<br />
Por ejemplo, si está seleccionado TV, al presionar<br />
y mantener presionado MASTER POWER<br />
durante 3 segundos, se apagarán el DVD, un<br />
dispositivo auxiliar y el convertidor de cable.<br />
NOTA: El control remoto queda por defecto en el modo<br />
CABLE una vez todos los dispositivos hayan sido apagados.<br />
Así pues, la secuencia de encendido inicial será<br />
siempre TV, VCR y dispositivo auxiliar, siempre que no<br />
se presione otra tecla de dispositivo antes.<br />
REASIGNACIÓN DE TECLAS DE<br />
DISPOSITIVOS<br />
El Control remoto universal Cox puede configurarse<br />
para su utilización con un segundo dispositivo de TV o<br />
VCR, o cualquier otra combinación de cuatro dispositivos<br />
de entretenimiento doméstico.<br />
Por ejemplo, para utilizar el control con una TV, un convertidor<br />
de cable y dos VCR, deberá reasignar la tecla<br />
AUX fuera de uso para utilizarla con el segundo VCR, de<br />
la siguiente manera:<br />
1. En el control remoto, presione DVD una vez.<br />
Presione y mantenga presionada SETUP<br />
hasta que la tecla TV parpadee dos veces.<br />
A continuación, suelte el botón SETUP.<br />
2. Presione 9-9-2. La tecla DVD parpadeará dos<br />
veces.<br />
34
M7820_rev_2-18-05.qxd 2/18/2005 8:07 AM Page 35<br />
3. Presione DVD una vez y, a continuación, presione<br />
AUX también una vez. La tecla AUX<br />
parpadeará dos veces.<br />
4. La tecla AUX podrá ya ser programada para su<br />
VCR. Consulte Programación de Control de<br />
dispositivos en la página 27.<br />
Para reasignar otras teclas de dispositivos,<br />
repita los pasos del 1 al 4 sustituyendo la secuencia de<br />
teclas tal y como se indica en el siguiente cuadro:<br />
Presione la secuencia de teclas indicada para reasignar:<br />
TV como tecla para VCR:<br />
SETUP - 9 - 9 - 2 - DVD - TV<br />
TV como tecla para 2nd Dispositivo auxiliar:<br />
SETUP - 9 - 9 - 2 - AUX - TV<br />
TV como tecla para 2nd Cable:<br />
SETUP - 9 - 9 - 2 - CABLE - TV<br />
TV de nuevo como TV:<br />
SETUP - 9 - 9 - 2 - TV - TV<br />
DVD como tecla para 2nd TV:<br />
SETUP - 9 - 9 - 2 - TV - DVD<br />
DVD como tecla para 2nd Dispositivo auxiliar:<br />
SETUP - 9 - 9 - 2 - AUX - DVD<br />
DVD como tecla para 2nd Cable:<br />
SETUP - 9 - 9 - 2 - CABLE - DVD<br />
DVD de nuevo como DVD:<br />
SETUP - 9 - 9 - 2 - VCR - DVD<br />
AUX como tecla para 2nd TV:<br />
SETUP - 9 - 9 - 2 - TV - AUX<br />
AUX como tecla para 2nd VCR:<br />
SETUP - 9 - 9 - 2 - DVD - AUX<br />
AUX como tecla para 2nd Cable:<br />
SETUP - 9 - 9 - 2 - CABLE - AUX<br />
AUX de nuevo como AUX:<br />
SETUP - 9 - 9 - 2 - AUX - AUX<br />
Una vez completada la reasignación, el modo seleccionado<br />
parpadeará dos veces para confirmar su selección.<br />
A continuación, programe el control de dispositivos<br />
(consulte Programación de Control de Dispositivos<br />
en la página 27).<br />
35
M7820_rev_2-18-05.qxd 2/18/2005 8:07 AM Page 36<br />
CAMBIO DEL BLOQUEO DE VOLUMEN<br />
El Control remoto universal Cox está configurado para<br />
controlar el volumen de un dispositivo a partir de su TV,<br />
siempre que esté en el modo TV, DVD, o CABLE.<br />
No obstante, en el modo Auxiliar, deberá utilizar un control<br />
diferente para el volumen de su dispositivo auxiliar.<br />
Si su TV no puede recibir señales de un control remoto<br />
o si desea que el volumen esté controlado por un dispositivo<br />
diferente, puede cambiar la configuración de<br />
bloqueo de volumen para controlar un volumen a través<br />
de un modo no asociado (p. ej., a través del cable en el<br />
modo TV).<br />
Cambio del Bloqueo de volumen a modo CABLE:<br />
1. En el control remoto, presione CABLE una vez. A<br />
continuación, presione y mantenga presionado<br />
SETUP hasta que la tecla CABLE parpadee dos<br />
veces. A continuación, suelte el botón SETUP.<br />
2. Presione 9-9-3. La tecla CABLE parpadeará dos<br />
veces.<br />
3. Presione CABLE una vez. Parpadeará dos<br />
veces.<br />
4. Ahora, cuando presione VOL+, Vol– o MUTE, el<br />
volumen estará siendo controlado por su convertidor<br />
de cable.<br />
Cambio del Bloqueo de volumen a modo TV:<br />
1. En el control remoto, presione TV una vez.<br />
Presione y mantenga presionado SETUP<br />
hasta que la tecla TV parpadee dos veces.<br />
A continuación, suelte el botón SETUP.<br />
2. Presione 9-9-3. La tecla TV parpadeará dos<br />
veces.<br />
3. Presione TV una vez. Parpadeará dos veces.<br />
4. Ahora, cuando presione VOL+, Vol– o MUTE, el<br />
volumen estará siendo controlado por su TV.<br />
36
M7820_rev_2-18-05.qxd 2/18/2005 8:07 AM Page 37<br />
Cambio del Bloqueo de volumen a modo AUX:<br />
NOTA: Estas instrucciones le permitirán acceder al control<br />
de volumen de su dispositivo auxiliar en cualquier modo.<br />
1. En el control remoto, presione AUX una vez.<br />
Presione y mantenga presionado SETUP<br />
hasta que la tecla AUX parpadee dos veces.<br />
A continuación, suelte el botón SETUP.<br />
2. Presione 9-9-3. La tecla AUX parpadeará dos<br />
veces.<br />
3. Presione AUX una vez. Parpadeará dos veces.<br />
4. Ahora, cuando presione VOL+, Vol– o MUTE, el<br />
volumen estará siendo controlado por su dispositivo<br />
auxiliar.<br />
RESOLUCIÓN DE PROBLEMAS<br />
PROBLEMA: La tecla de modo no parpadea cuando presiona<br />
una tecla.<br />
SOLUCIÓN: Sustituya las baterías gastadas por dos (2)<br />
baterías alcalinas nuevas del tipo<br />
AA (consulte la página 8).<br />
PROBLEMA:<br />
SOLUCIÓN:<br />
PROBLEMA:<br />
SOLUCIÓN:<br />
PROBLEMA:<br />
SOLUCIÓN:<br />
La tecla de modo parpadea cuando presiona<br />
una tecla, pero el dispositivo de<br />
entretenimiento doméstico no responde.<br />
Asegúrese de que está dirigiendo el control<br />
remoto el dispositivo de entretenimiento<br />
doméstico y que está usted situado<br />
a no más de 5 metros del dispositivo<br />
que desea utilizar.<br />
El control remoto no funciona con los<br />
dispositivos de entretenimiento doméstico<br />
o las órdenes no se ejecutan<br />
correctamente.<br />
Pruebe todos los códigos enumerados<br />
para la marca del dispositivo que está<br />
siendo configurado. Asegúrese de que<br />
todos los dispositivos pueden recibir<br />
señal de un control remoto.<br />
El combo TV/VCR no responde correctamente.<br />
Utilice los códigos de VCR para su<br />
marca. Algunos combos necesitan un<br />
código de TV y otro de VCR para funcionar<br />
correctamente (consulte la<br />
página 46).<br />
37
M7820_rev_2-18-05.qxd 2/18/2005 8:07 AM Page 38<br />
PROBLEMA:<br />
SOLUCIÓN:<br />
No hay volumen en la segunda TV.<br />
Siga las instrucciones expuestas en<br />
Cambio del Bloqueo de volumen<br />
(ver página anterior).<br />
PROBLEMA: CH+, CH– y LAST no funcionan en su<br />
TV RCA.<br />
SOLUCIÓN: Debido a los diseños RCA (1983–1987),<br />
solo funciona con estas TVs su control<br />
remoto original.<br />
PROBLEMA: El cambio de canales no funciona correctamente.<br />
SOLUCIÓN: Si en el control original era necesario presionar<br />
ENTER para cambiar los canales, presione<br />
ENTER en el control remoto después de<br />
introducir el número de canal.<br />
PROBLEMA:<br />
SOLUCIÓN:<br />
PROBLEMA:<br />
SOLUCIÓN:<br />
Probó el “Búsqueda de su Codigo” pero aún<br />
así no pudo encontrar un código que funcionara.<br />
Pruebe el “Búsqueda de su Codigo” de nuevo<br />
tras borrar la tecla de dispositivo de la manera<br />
siguiente: Presione y mantenga presionado<br />
SETUP hasta que la tecla de modo<br />
parpadee dos veces y presione 9-9-2. A continuación<br />
presione y suelte la tecla de modo<br />
dos veces para borrarla.<br />
El control remoto no enciende combos<br />
TV/VCR de las marcas Sony o Sharp.<br />
Para encender estos equipos, es necesario<br />
programar los códigos de TV en el control<br />
remoto. Para Sony, utilice el código de TV<br />
0000 y el código de VCR 0032.Para Sharp,<br />
utilice el código de TV 0093 y el código de<br />
VCR 0048.<br />
38
M7820_rev_2-18-05.qxd 2/18/2005 8:07 AM Page 39<br />
INFORMACIÓN ADICIONAL<br />
Este producto no tiene ninguna parte que pueda ser de<br />
otra utilidad para el usuario.<br />
Abrir la carcasa, a excepción del compartimiento de las<br />
baterías, puede ocasionar daños permanentes en el<br />
Control remoto universal Cox.<br />
Copyright 2005 por Universal Electronics Inc. Queda<br />
prohibida la reproducción, transmisión, transcripción,<br />
almacenamiento en cualquier sistema de recuperación o<br />
traducción a cualquier idioma de parte o totalidad de<br />
esta publicación, en ninguna forma o medio, ya sea electrónico,<br />
mecánico, magnético, óptico, manual o de otro<br />
tipo, sin el consentimiento previo por escrito de<br />
Universal Electronics Inc.<br />
39
M7820_rev_2-18-05.qxd 2/18/2005 8:07 AM Page 40<br />
MANUFACTURER’S CODES /<br />
CÓDIGOS DEL FABRICANTE<br />
SETUP CODES FOR Audio Amplifiers<br />
Bose 0674<br />
Denon 0160<br />
JVC 0331<br />
Luxman 0165<br />
Optimus 0395<br />
Panasonic 0308<br />
Panasonic 0308<br />
Pioneer 0013<br />
Realistic 0395<br />
Technics 0308<br />
Victor 0331<br />
Wards 0013<br />
Yamaha 0354<br />
SETUP CODES FOR Cable Converters<br />
ABC 0003, 0008<br />
Director 0476<br />
General Instrument 0476, 0003<br />
GoldStar 0144<br />
Jerrold 0476, 0003<br />
Memorex 0000<br />
Motorola 1376, 0476<br />
Pace 1877<br />
Panasonic 0000<br />
Paragon 0000<br />
Pioneer 1877, 0877, 0144, 0533<br />
Pioneer 0533<br />
Pulsar 0000<br />
Quasar 0000<br />
Runco 0000<br />
Samsung 0144<br />
Scientific Atlanta 1877, 0877, 0008<br />
Starcom 0003<br />
Torx 0003<br />
Toshiba 0000<br />
Zenith 0000<br />
SETUP CODES FOR Audio Amp/Tuners<br />
ADC 0531<br />
Admiral 0209, 0048<br />
Aiwa 0037, 1405<br />
Akai 1255<br />
40
M7820_rev_2-18-05.qxd 2/18/2005 8:07 AM Page 41<br />
Alco 1390<br />
American High 0035<br />
Asha 0240<br />
Audiotronic 1189<br />
Audiovox 0037, 1390<br />
Beaumark 0240<br />
Bell & Howell 0104<br />
Bose 1229<br />
Broksonic 0121, 0184, 0209<br />
Calix 0037<br />
Canon 0035<br />
Capetronic 0531<br />
Carver 0081, 1189<br />
Citizen 0037<br />
Craig 0047, 0240, 0037<br />
Curtis Mathes 0060, 0162, 0035<br />
Cybernex 0240<br />
Daewoo 0045<br />
Denon 0042<br />
Durabrand 0039<br />
Electrohome 0037<br />
Electrophonic 0037<br />
Emerex 0032<br />
Emerson 0043, 0209, 0121, 0184, 0037<br />
Fisher 0104, 0047<br />
Fuji 0035, 0033<br />
GE 0060, 0240, 0035<br />
GoldStar 0037<br />
HI-Q 0047<br />
Harman/Kardon 0081, 0110<br />
Hitachi 0042, 1273<br />
Hughes Network Systems 0042<br />
JBL 0110<br />
JVC 0067, 0074<br />
KEC 0037<br />
KLH 1390<br />
Kenwood 0067, 1313, 1570, 1569<br />
Kodak 0037, 0035<br />
LG 0037<br />
LXI 0037<br />
MEI 0035<br />
MGA 0240, 0043<br />
MGN Technology 0240<br />
MTC 0240<br />
Magnavox 0039, 0081, 0035, 1189, 1269, 0531<br />
Magnin 0240<br />
Marantz 0081, 0035, 1189, 1269<br />
Marta 0037<br />
Matsushita 0162, 0035<br />
Memorex 0035, 0037, 0039, 0047, 0048, 0104, 0209, 0162, 0240<br />
Minolta 0042<br />
41
M7820_rev_2-18-05.qxd 2/18/2005 8:07 AM Page 42<br />
Mitsubishi 0067, 0043<br />
Motorola 0048, 0035<br />
NEC 0104, 0067<br />
Nikko 0037<br />
Noblex 0240<br />
Olympus 0035<br />
Optimus 0048, 1062, 0104, 0162, 0037, 1023, 0531<br />
Orion 0184, 0209<br />
Panasonic 1062, 0162, 0035, 1518, 0309<br />
Penney 0037, 0042, 0240, 0035<br />
Pentax 0042<br />
Philco 0209, 0035, 1390<br />
Philips 0081, 0035, 1189, 1269<br />
Pilot 0037<br />
Pioneer 0067, 1023, 0531<br />
Polk Audio 0081<br />
Profitronic 0240<br />
Proscan 0060, 1254<br />
Pulsar 0039<br />
Quasar 0162, 0035<br />
RCA 0060, 0240, 0042, 1023, 1254, 0531, 1390<br />
Radix 0037<br />
Randex 0037<br />
Realistic 0037, 0047, 0048, 0104, 0035<br />
Runco 0039<br />
STS 0042<br />
Samsung 0240, 0045<br />
Sanky 0048, 0039<br />
Sansui 0209, 0067<br />
Sanyo 0104, 0240, 0047<br />
Scott 0045, 0121, 0184, 0043<br />
Sears 0037, 0042, 0047, 0104, 0035<br />
Semp 0045<br />
Sharp 0048<br />
Shogun 0240<br />
Sony 0033, 0035, 0032, 1058, 1441, 1258, 1759<br />
Stereophonics 1023<br />
Sunfire 1313<br />
Sylvania 0043, 0081, 0035<br />
TMK 0240<br />
Teac 1267, 1390<br />
Technics 0162, 0035, 1518, 0309<br />
Teknika 0037, 0035<br />
Thorens 1189<br />
Toshiba 0045, 0043<br />
Totevision 0240, 0037<br />
Unitech 0240<br />
Vector 0045<br />
Venturer 1390<br />
Victor 0074<br />
Video Concepts 0045<br />
42
M7820_rev_2-18-05.qxd 2/18/2005 8:07 AM Page 43<br />
Videomagic 0037<br />
Videosonic 0240<br />
Wards 0042, 0047, 0048, 0060, 0081, 0240, 0035<br />
White Westinghouse 0209<br />
XR-1000 0035<br />
Yamaha 0176<br />
Zenith 0039, 0209, 0033<br />
SETUP CODES FOR TVs<br />
AOC 0030, 0019<br />
Admiral 0093, 0463<br />
Advent 0761, 0842<br />
Aiko 0092<br />
Akai 0702, 0672, 0030, 0812<br />
Alaron 0179<br />
Albatron 0700<br />
Alfide 0672<br />
America Action 0180<br />
Anam 0180<br />
Anam National 0055<br />
Apex Digital 0748, 0765, 0879, 0767<br />
Audinac 0180<br />
Audiovox 0451, 0180, 0092, 0623<br />
Baysonic 0180<br />
Belcor 0019<br />
Bell & Howell 0154<br />
Bradford 0180<br />
Brockwood 0019<br />
Broksonic 0236, 0463<br />
CXC 0180<br />
Candle 0030, 0056<br />
Carnivale 0030<br />
Carver 0054<br />
Celebrity 0000<br />
Celera 0765<br />
Changhong 0765<br />
Cineral 0451, 0092<br />
Citizen 0060, 0030, 0092, 0056, 0039<br />
Clarion 0180<br />
Concerto 0056<br />
Contec 0180<br />
Craig 0180<br />
Crosley 0054<br />
Crown 0180, 0672, 0039<br />
Crown Mustang 0672<br />
Curtis Mathes 0047, 0054, 0154, 0451, 0093, 0060, 0702, 0030, 0145,<br />
0166, 0056, 0039<br />
Daewoo 0451, 1661, 0672, 0092, 0623, 0019, 0039<br />
Daytron 0019<br />
Denon 0511, 0145<br />
43
M7820_rev_2-18-05.qxd 2/18/2005 8:07 AM Page 44<br />
Dumont 0017, 0019<br />
Durabrand 0463, 0180, 0178, 0171<br />
Electroband 0000<br />
Elektra 0017, 1661<br />
Emerson 0154, 0236, 0463, 0180, 0178, 0171, 0623, 0179, 0019,<br />
0282, 0039<br />
Envision 0030<br />
Fisher 0154<br />
Fujitsu 0179<br />
Funai 0180, 0171, 0179<br />
Futuretech 0180<br />
GE 0047, 0051, 0451, 0178, 0055, 0282<br />
Gateway 1755, 1756<br />
Gibralter 0017, 0030, 0019<br />
GoldStar 0030, 0178, 0019<br />
Goodmans 0360<br />
Gradiente 0053, 0056<br />
Grundig 0672<br />
Grunpy 0180, 0179<br />
Hallmark 0178<br />
Harley Davidson 0179<br />
Harman/Kardon 0054<br />
Harvard 0180<br />
Havermy 0093<br />
Hello Kitty 0451<br />
Himitsu 0180<br />
Hisense 0748<br />
Hitachi 0145, 0056, 0151<br />
IRT 0451, 1661<br />
Infinity 0054<br />
Inteq 0017<br />
JBL 0054<br />
JCB 0000<br />
JVC 0463, 0053, 1253<br />
Jensen 0761<br />
KEC 0180<br />
KLH 0765, 0767<br />
KTV 0180, 0030, 0039<br />
Kenwood 0030, 0019<br />
Kioto 0054, 0706<br />
LG 0030, 0178, 0056<br />
LXI 0047, 0054, 0154, 0156, 0178<br />
Loewe 0136<br />
Luxman 0056<br />
M & S 0054<br />
MGA 0150, 0030, 0178, 0019<br />
MTC 0060, 0030, 0056, 0019<br />
Magnavox 0054, 0706, 0030, 0179, 0187<br />
Marantz 0054, 0030<br />
Matsushita 0250<br />
Megapower 0700<br />
44
M7820_rev_2-18-05.qxd 2/18/2005 8:07 AM Page 45<br />
Megatron 0178, 0145<br />
Memorex 0154, 0463, 0150, 0178, 0179<br />
Midland 0047, 0017, 0051, 0039<br />
Mitsubishi 0093, 0150, 0178, 0019<br />
Monivision 0700<br />
Motorola 0093, 0055<br />
Multitech 0180<br />
NAD 0156, 0178, 0866<br />
NEC 0030, 1704, 0056, 0019<br />
NTC 0092<br />
Nikko 0030, 0178, 0092<br />
Noblex 0154<br />
Norcent 0748<br />
Onwa 0180<br />
Optimus 0154, 0250, 0166<br />
Optonica 0093<br />
Orion 0236, 0463, 0179<br />
Panasonic 051, 0250, 0055<br />
Penney 0047, 0156, 0051, 0060, 0030, 0178, 0019, 0039<br />
Philco 0054, 1661, 0463, 0030, 0145, 0019<br />
Philips 0054<br />
Pilot 0030, 0019, 0039<br />
Pioneer 0166, 0866<br />
Portland 0092, 0019, 0039<br />
Prima 0761<br />
Princeton 0700<br />
Prism 0051<br />
Proscan 0047<br />
Proton 0178<br />
Pulsar 0017, 0019<br />
Quasar 0051, 0250, 0055<br />
RCA 0090, 0047, 0060, 0019<br />
RadioShack 0047, 0154, 0180, 0030, 0178, 0056, 0019, 0039<br />
Realistic 0154, 0180, 0030, 0178, 0056, 0019, 0039<br />
Runco 0017, 0030<br />
SSS 0180, 0019<br />
SVA 0748<br />
Sampo 0030, 1755, 0039<br />
Samsung 0060, 0702, 0030, 0178, 1060, 0812, 0056, 0019<br />
Samsux 0039<br />
Sansei 0451<br />
Sansui 0463<br />
Sanyo 0088, 0154<br />
Scimitsu 0019<br />
Scotch 0178<br />
Scott 0236, 0180, 0178, 0179, 0019<br />
Sears 0047, 0054, 0154, 0156, 0178, 0171, 0179, 0056<br />
Semivox 0180<br />
Semp 0156, 1356<br />
Sharp 0093, 0039<br />
Sheng Chia 0093<br />
45
M7820_rev_2-18-05.qxd 2/18/2005 8:07 AM Page 46<br />
Shogun 0019<br />
Simpson 0187<br />
Sony 0000, 1100<br />
Soundesign 0180, 0178, 0179<br />
Squareview 0171<br />
Starlite 0180<br />
Supreme 0000<br />
Sylvania 0054, 0030, 0171<br />
Symphonic 0180, 0171<br />
TMK 0178, 0056<br />
TNCi 0017<br />
TVS 0463<br />
Tandy 0093<br />
Tatung 1756, 0055<br />
Technics 0051, 0250<br />
Technol Ace 0179<br />
Techwood 0051, 0056<br />
Teknika 0054, 0180, 0150, 0060, 0092, 0179, 0056, 0019, 0039<br />
Telefunken 0702, 0056<br />
Tophouse 0180<br />
Toshiba 0154, 0156, 0093, 0060, 1356, 1704<br />
Totevision 0039<br />
V Inc. 1756<br />
Vector Research 0030<br />
Victor 0053<br />
Vidikron 0054<br />
Vidtech 0178, 0019<br />
ViewSonic 1755<br />
Wards 0054, 0030, 0178, 0866, 0179, 0056, 0019<br />
Waycon 0156<br />
White Westinghouse 0463, 0623<br />
Yamaha 0030, 0019<br />
Zenith 0017, 0463, 0178, 0092<br />
SETUP CODES FOR VCRs<br />
Admiral 0048, 0209<br />
Adventura 0000<br />
Aiwa 0000, 0037<br />
American High 0035<br />
Asha 0240<br />
Audiovox 0037<br />
Beaumark 0240<br />
Bell & Howell 0104<br />
Broksonic 0184, 0121, 0209<br />
CCE 0072<br />
Calix 0037<br />
Canon 0035<br />
Carver 0081<br />
Citizen 0037<br />
46
M7820_rev_2-18-05.qxd 2/18/2005 8:07 AM Page 47<br />
Colt 0072<br />
Craig 0037, 0047, 0240, 0072<br />
Curtis Mathes 0035, 0060<br />
Cybernex 0240<br />
Daewoo 0045<br />
Denon 0042<br />
Durabrand 0039<br />
Dynatech 0000<br />
Electrohome 0037<br />
Electrophonic 0037<br />
Emerex 0032<br />
Emerson 0000, 0037, 0184, 0121, 0043, 0209<br />
Fisher 0047, 0104<br />
Fuji 0035<br />
Funai 0000<br />
GE 0035, 0060, 0240<br />
Garrard 0000<br />
GoldStar 0037<br />
Gradiente 0000<br />
HI-Q 0047<br />
Harley Davidson 0000<br />
Harman/Kardon 0081<br />
Harwood 0072<br />
Hitachi 0000, 0042<br />
Hughes Network Systems 0042<br />
JVC 0067<br />
KEC 0037<br />
KLH 0072<br />
Kenwood 0067<br />
Kodak 0035, 0037<br />
LG 0037<br />
LXI 0037<br />
Lloyd's 0000<br />
Logik 0072<br />
MEI 0035<br />
MGA 0240, 0043<br />
MGN Technology 0240<br />
MTC 0000, 0240<br />
Magnavox 1781, 0000, 0035, 0039, 0081<br />
Magnin 0240<br />
Marantz 0035, 0081<br />
Marta 0037<br />
Matsushita 0035<br />
Memorex 0000, 0035, 0037, 0048, 0039, 0047, 0240, 0104, 0209<br />
Minolta 0042<br />
Mitsubishi 0067, 0043<br />
Motorola 0035, 0048<br />
Multitech 0000, 0072<br />
NEC 0067, 0104<br />
Nikko 0037<br />
Noblex 0240<br />
47
M7820_rev_2-18-05.qxd 2/18/2005 8:07 AM Page 48<br />
Olympus 0035<br />
Onkyo 0222<br />
Optimus 0037, 0048, 0104<br />
Orion 0184, 0209<br />
Panasonic 0225, 0035<br />
Penney 0035, 0037, 0042, 0240<br />
Pentax 0042<br />
Philco 0035, 0209<br />
Philips 0035, 0081<br />
Pilot 0037<br />
Pioneer 0067<br />
Polk Audio 0081<br />
Profitronic 0240<br />
Proscan 0060<br />
Protec 0072<br />
Pulsar 0039<br />
Quasar 0035<br />
RCA 0060, 0042, 0240<br />
RadioShack 0000<br />
Radix 0037<br />
Randex 0037<br />
Realistic 0000, 0035, 0037, 0048, 0047, 0104<br />
Runco 0039<br />
STS 0042<br />
Samsung 0045, 0240<br />
Sanky 0048, 0039<br />
Sansui 0000, 0067, 0209<br />
Sanyo 0047, 0240, 0104<br />
Scott 0184, 0045, 0121, 0043<br />
Sears 0000, 0035, 0037, 0047, 0042, 0104<br />
Semp 0045<br />
Sharp 0048<br />
Shintom 0072<br />
Shogun 0240<br />
Singer 0072<br />
Sony 0000, 0035, 0032<br />
Sylvania 1781, 0000, 0035, 0081, 0043<br />
Symphonic 0000<br />
TMK 0240<br />
Teac 0000<br />
Technics 0035<br />
Teknika 0000, 0035, 0037<br />
Thomas 0000<br />
Toshiba 0045, 0043<br />
Totevision 0037, 0240<br />
Unitech 0240<br />
Vector 0045<br />
Video Concepts 0045<br />
Videomagic 0037<br />
Videosonic 0240<br />
Villain 0000<br />
48
M7820_rev_2-18-05.qxd 2/18/2005 8:07 AM Page 49<br />
Wards 0000, 0035, 0060, 0048, 0047, 0081, 0042, 0240, 0072<br />
White Westinghouse 0209, 0072<br />
XR-1000 0000, 0035, 0072<br />
Zenith 0000, 0039, 0209<br />
SETUP CODES FOR DVD Players<br />
Advent 1016<br />
Aiwa 0641<br />
Allegro 0869<br />
Apex Digital 0672, 1020, 0794, 0796, 0797, 1004, 0755, 1056, 0717,<br />
1061, 0830<br />
Audiovox 1072<br />
Axion 1072<br />
Blaupunkt 0717<br />
Blue Parade 0571<br />
Broksonic 0868<br />
Cinevision 0876, 0869<br />
CyberHome 1024<br />
DVD2000 0521<br />
Daewoo 1172, 0869<br />
Denon 0490, 0634<br />
Emerson 0591, 0675<br />
Enterprise 0591<br />
Fisher 0670<br />
Funai 0675<br />
GE 0522, 0815, 0717<br />
GPX 0699<br />
Gateway 1158, 1073<br />
Go Video 0869, 0715, 0744<br />
Gradiente 0651<br />
Greenhill 0717<br />
Hitachi 0573, 0664<br />
Hiteker 0672<br />
Initial 0717<br />
JVC 0558, 0623<br />
Jensen 1016<br />
KLH 1020, 0717<br />
Kenwood 0490, 0534, 0682<br />
Koss 0651<br />
Lite-On 1158<br />
Loewe 0511<br />
Magnavox 0503, 0675<br />
Marantz 0539<br />
Microsoft 0522<br />
Mintek 0717<br />
Mitsubishi 0521, 1521<br />
NEC 0785<br />
Nesa 0717<br />
Onkyo 0792, 0503<br />
Oritron 0651<br />
Panasonic 0490, 1490, 0632<br />
49
M7820_rev_2-18-05.qxd 2/18/2005 8:07 AM Page 50<br />
Philips 0503, 0539, 0646<br />
Pioneer 0525, 0571, 0632<br />
Polaroid 1061<br />
Polk Audio 0539<br />
Prima 1016<br />
Proscan 0522<br />
Qwestar 0651<br />
RCA 0522, 0571, 0717<br />
Rio 0869<br />
Rotel 0623<br />
Sampo 0752<br />
Samsung 0490, 0573, 0744<br />
Sanyo 0670<br />
Semp 0503<br />
Sharp 0752, 0630<br />
Shinsonic 0533<br />
Sonic Blue 0869<br />
Sony 0533, 1033, 1533<br />
Sylvania 0675<br />
Symphonic 0675<br />
Teac 0809<br />
Technics 0490<br />
Theta Digital 0571<br />
Toshiba 0503, 1154<br />
Urban Concepts 0503<br />
XBox 0522<br />
Yamaha 0490, 0539, 0545<br />
Zenith 0503, 0591, 0869<br />
SETUP CODES FOR Cable/PVR Combination<br />
General Instrument 0476<br />
Jerrold 0476<br />
Motorola 0476, 1376<br />
Pace 1877<br />
Pioneer 0877, 1877<br />
Scientific Atlanta 0877, 1877<br />
SETUP CODES FOR TV/VCR Combination<br />
Colt 0072<br />
Funai 0000<br />
GE 0240<br />
Harley Davidson 0000<br />
Hitachi 0000<br />
Lloyd's 0000<br />
Magnavox 0000, 1781<br />
Magnin 0240<br />
MGA 0240<br />
Penney 0240<br />
50
M7820_rev_2-18-05.qxd 2/18/2005 8:07 AM Page 51<br />
RadioShack 0000<br />
RCA 0240<br />
Sansui 0000<br />
Sanyo 0240<br />
Sears 0000<br />
Sony 0000<br />
Sylvania 1781<br />
Symphonic 0000<br />
Thomas 0000<br />
Zenith 0000<br />
SETUP CODES FOR TV/DVD Combination<br />
Advent 1016<br />
Apex Digital 0830<br />
Jensen 1016<br />
Panasonic 1490<br />
Prima 1016<br />
Sylvania 0675<br />
SETUP CODES FOR TV/VCR/DVD Combination<br />
Broksonic 0868<br />
Sharp 0630<br />
SETUP CODES FOR DVD/PVR Combination<br />
Panasonic 0490<br />
RCA 0522<br />
M7820 02/05<br />
51
M7820_rev_2-18-05.qxd 2/18/2005 8:07 AM Page 52<br />
52