Estetica Magazine ESPAÑA (1/2020 COLLECTION)
Estetica Magazine es la revista de peluquería líder en el mundo. Fundada en Italia en 1946 y publicada, actualmente, en 60 países de todo el mundo, se ha convertido en el punto de referencia internacional para todos los peluqueros y profesionales que trabajan en el campo de la belleza. Técnicas, moda, formación y tendencias están en el centro de cada número de Estetica Magazine. Encontrarás más información sobre las ediciones impresas y digitales en www.esteticanetwork.com
Estetica Magazine es la revista de peluquería líder en el mundo. Fundada en Italia en 1946 y publicada, actualmente, en 60 países de todo el mundo, se ha convertido en el punto de referencia internacional para todos los peluqueros y profesionales que trabajan en el campo de la belleza. Técnicas, moda, formación y tendencias están en el centro de cada número de Estetica Magazine. Encontrarás más información sobre las ediciones impresas y digitales en www.esteticanetwork.com
- No tags were found...

You also want an ePaper? Increase the reach of your titles
YUMPU automatically turns print PDFs into web optimized ePapers that Google loves.
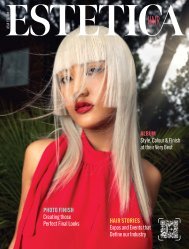
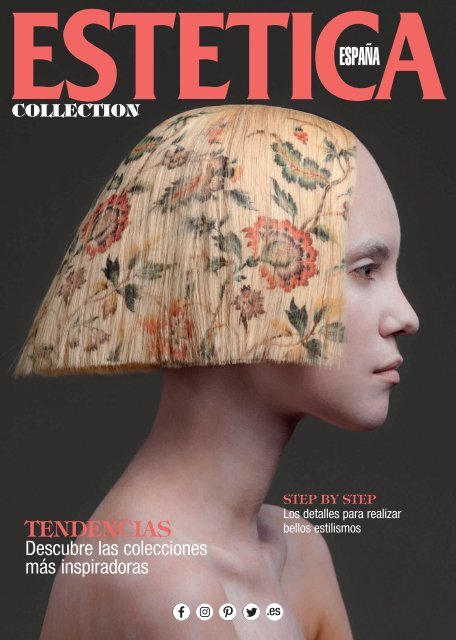
<strong>ESPAÑA</strong><br />
<strong>COLLECTION</strong><br />
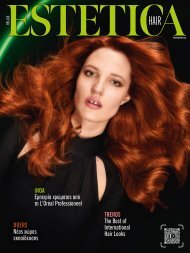
TENDENCIAS<br />
Descubre las colecciones<br />
más inspiradoras<br />
STEP BY STEP<br />
Los detalles para realizar<br />
bellos estilismos
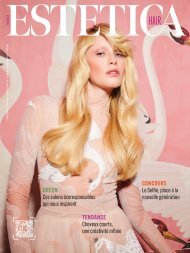
ESTAS FIESTAS<br />
QUEDA<br />
COMO<br />
UNA REINA<br />
Disponible en las mejores peluquerías.<br />
Para más información y pedidos contacta con<br />
tu asesor de marca o llama al 902 523 536.
Regala un mágico “good hair day” con la nueva colección<br />
de edición limitada ghd wish upon a star. Incluye nuestra<br />
exclusiva colección de sets de regalo con las herramientas<br />
más icónicas y elegantes accesorios, de edición limitada.<br />
#quedacomounareina #ghdwishuponastar
CURSOS FUNDAMENTALES<br />
www.toniandguy.es<br />
NEVER STOP<br />
LEARNING<br />
FUTURE<br />
FOUNDATION<br />
Curso para convertir a un<br />
estilista en gran estilista.<br />
Hazte maestro del peine y<br />
la tijera conociendo las<br />
técnicas de los mejores.<br />
ENERO<br />
MARZO<br />
25-26-27-29<br />
1-2-3-4-5<br />
COLOUR<br />
FOUNDATION<br />
Curso destinado para aquel<br />
que quiera conocer todos los<br />
secretos y técnicas sobre el<br />
color y su aplicación.<br />
Iluminarás<br />
FEBRERO<br />
8-9-10-11-12<br />
Para más información<br />
lama al 96 206 20 96<br />
o escríbenos un mail a<br />
pboix@toniandguy.es<br />
Para aquellos que aún no os hayáis iniciado en el mundo del estilismo, pregunta por nuestro curso "BEGINNERS". Prepárate de la mano de los mejores.
ROYAL BEE<br />
Proteína suavizante<br />
con veneno de abeja<br />
gamcosmetics.eu
<strong>ESPAÑA</strong><br />
<strong>COLLECTION</strong><br />
Hair: Alexis Ferrer – Peluquero Español del Año<br />
@ Premios Figaro <strong>2020</strong><br />
Photo: Rafa Andreu<br />
Make-up: Mary Torres<br />
contents<br />
PUBLISHER AND MANAGING DIRECTOR<br />
Roberto Pissimiglia<br />
INTERNATIONAL<br />
EDITORIAL DIRECTOR<br />
Sergi Bancells<br />
INTERNATIONAL<br />
EDITOR-IN-CHIEF<br />
Laura Castelli<br />
EDITORIAL STAFF<br />
Sara El Basyony, Serena Monachesi<br />
LAYOUT<br />
Manuela Artosi, Davide Cardente<br />
ESTETICA MODACABELLO <strong>ESPAÑA</strong><br />
Sergi Bancells, Elisabet Parra, Leticia Niubó,<br />
Marta Dubé, Bel M. Dolla, Elena Lorán<br />
COLABORADORES<br />
Lucia Preziosi,<br />
Cristina Hernández, Marie Scarano<br />
Published by Edizioni Esav Srl<br />
Via Cavour, 50 - 10123 Torino (Italy)<br />
Tel. +39 011 83921111 - Fax +39 011 836964<br />
www.esteticanetwork.com<br />
info@estetica.it<br />
PRINTED IN ITALY BY<br />
GrafArt<br />
Venaria Reale (TO)<br />
ad index<br />
AIPP<br />
GAM COSMETICS<br />
GHD<br />
MILLASOL<br />
NIRVEL<br />
SALERM<br />
SHE HAIR<br />
TONI&GUY<br />
Tendencias<br />
Las propuestas que<br />
te ayudarán a crear<br />
los looks más actuales<br />
Step-by-Steps<br />
Paso a paso, consigue los cortes<br />
y colores más favorecedores<br />
ADVERTISING HEAD OFFICE<br />
Corso Cairoli 16 - 10123 Turin - Italy<br />
Tel: 011 83921.113<br />
adv@estetica.it<br />
Authorization n. 3057 of 5/20/1981, Turin Law Court - Printed in<br />
Italy - Articles and photos, even unpublished, are not returned.<br />
AVISO A LOS SUSCRIPTORES<br />
(ART. 13 DEL REGLAMENTO UE 679/2016)<br />
De conformidad con el art. 13 del Reglamento 679/2016 de la UE,<br />
nuestra empresa procesará los datos personales proporcionados por<br />
usted en cumplimiento de las normas sobre la protección del procesamiento<br />
de datos personales y en cumplimiento de las obligaciones<br />
y garantías de la ley, contractuales y reglamentarias.<br />
Los datos del suscriptor solo pueden ser conocidos por personas<br />
específicamente autorizadas e instruidas por nuestra Compañía y<br />
por terceros para la realización de actividades organizativas y<br />
económicas relacionadas con la suscripción (por ejemplo, administración<br />
de envío, preparar sobres y envío de correspondencia) y no<br />
serán divulgados. a terceros para fines no permitidos por la ley o sin<br />
consentimiento expreso; se mantendrá con el propósito de enviar<br />
nuestras publicaciones y durante el tiempo necesario para lograr los<br />
fines de la actualización profesional para lo que fueron recopilados.<br />
El controlador de datos es Edizioni Esav S.r.l. - Via Cavour 50, 10123<br />
Turín. El interesado puede ejercer en cualquier momento los derechos<br />
previstos por el Reglamento de la UE (Artículo 15 Derecho de<br />
acceso, Artículo 16 Corrección, Artículo 17 Cancelación) escribiendo<br />
a Edizioni Esav - edizioniesav@pec.it.<br />
All rights reserved. Total or partial reproduction is prohibited<br />
in accordance with Italian legislation dated 11 March 1975<br />
PARA SUSCRIBIRSE<br />
Tel: 93 226 59 10<br />
Fax: 93 419 64 98<br />
e-mail: difusion@esteticamodacabello.es<br />
online: www.esteticamagazine.es
SK Style Barcelona<br />
La Favorite, la<br />
colección de Alexis<br />
Ferrer, combina<br />
artesanía y destreza<br />
técnica para decorar el<br />
cabello con preciosas<br />
ilustraciones.<br />
Premios Fígaro<br />
Entregados por Club Fígaro y patrocinados por Revlon<br />
Professional, los Premios Fígaro <strong>2020</strong> se celebraron en<br />
formato digital bajo el hashtag #TodosSomosFígaro.<br />
De izquierda a derecha:<br />
Alexis Ferrer (Peluquero<br />
Español del Año y Vídeo<br />
Producción), David<br />
Pastor de Salones Carlos<br />
Valiente (Peluquero<br />
Revelación), Daniel<br />
Gallego (Colección<br />
Comercial Masculina),<br />
Jose Siero de Sile<br />
Peluqueros (Colección<br />
de Vanguardia) y<br />
Alexander Kiryliuk de<br />
SK Style Barcelona<br />
(Colección Comercial<br />
Femenina).
Daniel Gallego<br />
Sile Peluqueros<br />
David Pastor<br />
El pasado 25 de octubre se desvelaron los nombres de los ganadores de los Premios de la Peluquería Española en su undécima<br />
edición. Debido a las circunstancias excepcionales que vivimos, la gala se celebró en formato digital y respetando todas las<br />
medidas de seguridad desde la sede de Revlon Professional en Barcelona. Alexis Ferrer fue el gran vencedor de la noche al recibir<br />
el codiciado título de Peluquero Español del Año <strong>2020</strong> y hacerse también con el premio Vídeo Producción, que sustituía a la<br />
categoría Pasarela Fígaro. David Pastor, de Salones CV by Carlos Valiente, logró el premio Peluquero Revelación, mientras que<br />
Daniel Gallego hizo lo propio con el premio Colección Comercial Masculina. Tras varios años llegando a la final, las firmas SK<br />
Style Barcelona y Sile Peluqueros vieron recompensados sus esfuerzos, con los premios Colección Comercial Femenina y<br />
Colección de Vanguardia, respectivamente. El jurado encargado de votar las colecciones en esta edición estaba compuesto por:<br />
Jean-Baptiste Mazella (Francia), Laura Betato (España), Mark Leeson (Reino Unido), Miguel Griñó (España) y Sharon Blain<br />
(Australia), todos ellos reconocidas personalidades de la peluquería nacional e internacional. Asimismo, los encargados de valorar<br />
la nueva categoría Vídeo Producción fueron: Franx de Cristal, Laura Betato y Miguel Griñó. La edición más desafiante de los<br />
Premios Fígaro ha resultado ser la segunda mejor edición de los premios en toda su historia, siendo superada solamente por la<br />
pasada edición y coincidiendo con el décimo aniversario. Así, este <strong>2020</strong> se recibieron 145 colecciones presentadas por 86 firmas.<br />
eventos
Tendencias<br />
Glitz the season<br />
Stylers, secadores y cepillos son<br />
indispensables para el trabajo<br />
profesional. ghd nos lo pone fácil<br />
y nos explica con cuáles de ellos<br />
se han conseguido estos looks.<br />
Las texturas son las<br />
protagonistas esta<br />
temporada. Ángeles<br />
Valdivieso, educadora<br />
y miembro del equipo<br />
artístico de ghd, nos da<br />
los principales tips de los looks<br />
más glamurosos, vistos en las<br />
pasarelas de las cuatro capitales<br />
de la moda: Londres, Nueva York,<br />
París y Milán.<br />
Beau Waves<br />
BEFORE<br />
AFTER<br />
Los lazos negros continúan<br />
adornando el pelo de las<br />
pasarelas. En la pasarela<br />
de Brandon Maxwell,<br />
vimos colas de caballo<br />
suavemente atadas con<br />
lazos de tela transparente.<br />
Chanel estilizó a todas<br />
las modelos de pelo largo<br />
con ondas, adornándolo<br />
con lazos negros. Las de<br />
Giambattista Valli llevaban<br />
moños con lazos negros<br />
en lo alto de la cabeza y<br />
los de las modelos de los<br />
desfiles de Cynthia Rowley<br />
diferían en la posición y en<br />
el acabado del peinado.<br />
Para este look, se ha<br />
utilizado el rizador ghd<br />
creative curl wand y el<br />
peine de púas anchas ghd<br />
detangling.<br />
Las cintas, diademas y<br />
bandas para la cabeza han<br />
sido reinventadas para<br />
ofrecer una alternativa a<br />
lo clásico. En sus desfiles,<br />
Fendi mostró diademas<br />
con volantes rosas, mientras<br />
que McQueen optó<br />
por diademas rojas sobre el<br />
cabello, que se mezclaban<br />
con su color natural.<br />
La pasarela de Giambattista<br />
Valli presentó una versión<br />
más clásica de la tendencia<br />
en contraste con Gucci que<br />
creó una banda con piezas<br />
art decó colgadas. Para este<br />
peinado se ha utilizado<br />
el cepillo eléctrico ghd Rise<br />
y el cepillo ghd oval.<br />
BEFORE<br />
AFTER<br />
Modern Bee Hive
Disco luxe<br />
BEFORE<br />
AFTER<br />
En sus pasarelas<br />
internacionales, la firma<br />
de moda británica JW<br />
Anderson propuso un look<br />
en el que se potenciaba la<br />
textura natural del cabello,<br />
tendencia que abrazan<br />
los principales fashionistas<br />
de todo el mundo.<br />
ghd, que apuesta por un<br />
cabello natural, reduciendo<br />
el encrespamiento. Para<br />
conseguir este look, ghd se<br />
ayuda del secador ghd helios<br />
con difusor y el fijador del<br />
rizo ghd curl hold spray, con<br />
lo que potencia los rizos y la<br />
textura original del cabello.<br />
En la zona superior, usa el<br />
cepillo eléctrico ghd glide<br />
para controlar el encrespamiento<br />
para que el acabado<br />
sea más pulido. Acaba con el<br />
spray fijador ghd final fix.<br />
Durante las semanas de<br />
la moda, la tendencia<br />
de ghd Lived in Luxe<br />
estuvo muy presente<br />
en las pasarelas de<br />
Molly Goddard, Chanel,<br />
Rodarte y Dior.<br />
Una tendencia que fue<br />
un verdadero éxito, que<br />
sobrevive a lo largo de<br />
las diferentes estaciones.<br />
ghd propone este valor<br />
seguro para melenas<br />
midi y largas. Para<br />
conseguirlo se han<br />
utilzado la styler ghd<br />
platinum+ y el cepillo<br />
ghd paddle brush.<br />
BEFORE<br />
AFTER<br />
Lived in luxe<br />
Slick back knotted pony<br />
BEFORE<br />
AFTER<br />
Un acabado de apariencia<br />
húmeda que ha sido<br />
tendencia en las cuatro<br />
principales ciudades<br />
de la moda. Marni fue<br />
la más vanguardista<br />
presentando cabellos<br />
enteros de gelatina<br />
y luego agregando<br />
accesorios de color y<br />
metálicos. 16Arlington,<br />
la marca de las chicas<br />
cool, también arriesgó<br />
con este look. Prada<br />
y Brandon Maxwell<br />
ofrecieron una versión<br />
más suave y más fácil de<br />
llevar de este look.<br />
Para conseguirlo se ha<br />
utilizado la styler ghd<br />
platinum+.<br />
tendencias
THE WORLD’S<br />
MOST<br />
RENOWNED<br />
AWARDS<br />
IN THE<br />
HAIRDRESSING<br />
INDUSTRY<br />
Association Internationale Presse<br />
Professionnelle Coiffure<br />
5, Rue Boudreau<br />
75009 PARIS (France)<br />
Don’t miss the opportunity... visit now<br />
www.aipp.net<br />
www.aippcoiffure.com
UN LOOK PER OGNI OCCASIONE.<br />
L’AUTUNNO / INVERNO È UN<br />
PERIODO DI CONTRASTI...COLORE E<br />
STILE SI UNISCONO IN UNA CALDA<br />
LUMINOSITÀ PER SCRIVERE LA LORO<br />
STORIA PIÙ GLAMOUR.<br />
A look for<br />
every occasion.<br />
Autumn/winter is a<br />
as colour & style<br />
unite in a warm glow<br />
to tell their own<br />
subtle story.<br />
Creative Director: Simon Ellis/Hair: Schwarzkopf Professional Team Essential Looks<br />
Photo: Simon Emmett, Kapturing/Make-up: Helge Branscheidt/Styling: Adelaida Cue Bär<br />
EIN LOOK FÜR JEDE GELEGENHEIT.<br />
HERBST UND WINTER LIEBEN<br />
KONTRASTE. FARBE & STYLING<br />
VERSCHMELZEN ZU EINEM<br />
WARMEN GLOW UND ERZÄHLEN<br />
IHRE EIGENE, FEINE GESCHICHTE.<br />
UN LOOK POUR CHAQUE OCCASION.<br />
L’AUTOMNE-HIVER EST UNE SAISON<br />
TOUT EN CONTRASTES. COULEURS<br />
ET STYLES S’UNISSENT EN UNE<br />
CHALEUREUSES LUMINOSITÉ POUR<br />
ÉCRIRE LEUR HISTOIRE LA PLUS<br />
GLAMOUR.<br />
UN LOOK PARA CADA OCASIÓN.<br />
OTOÑO/INVIERNO ES UNA ÉPOCA DE<br />
CONTRASTES, CON EL COLOR Y EL<br />
ESTILO UNIDOS EN UN CÁLIDO<br />
RESPLANDOR PARA CONTAR SU<br />
PROPIA Y SUTIL HISTORIA.
Art Director: Yuri Coppari/Hair: La Biosthétique Artistic Team Italia
Corkscrew curls!<br />
They’re always all about the texture.<br />
Hair: Alexander Kiryliuk/Photo: David Arnal/Make-up: Miguel Silva/Styling: Ángel Cabezuelo
Hair: Franck Provost<br />
Hair: Saint Algue<br />
Hair: Evos/Photo: Ivan Genasi<br />
Make-up: Alessio Giovannelli<br />
The streetscape tells another story...
Hair: Alfaparf Milano/Photo: Paul Maffi/Make-up: Martina D’Andrea
Hair: Alfaparf Milano/Photo: Paul Maffi/Make-up: Martina D’Andrea<br />
...with choppy end to be totally ‘in’.
Hair: Angelo Seminara, Goldwell Global Ambassador/Colour: Angelo Seminara and Takashi Kurokawa<br />
Photo: Txema Yeste/Make-up: Daniel Kolaric/Stylist: Niccolo Torelli/Products: Goldwell
Hair: Adam Reed for ghd/Photo: Claire Rothstein/Make-up: Claudine Blythman/Styling: Ozzy Shah
Hair: Gio TheNewKid Rotterdam @ Wahl Artistic Team Germany/Photo: Pierre Heinemann @ Wahl Germany/Styling: Artisan the Label<br />
Could this be the<br />
first Tango in Paris<br />
(post Covid)?
Sleek or Ultra Chic<br />
Will the enigma ever get solved?<br />
Hair: Stefano Lorenzi @ Aldo Coppola/Photo: Giacomo Licheri
Hair: Hannah Lennon, Charlie Miller/Photo: Jason Miller, Charlie Miller/Make-up: Ebony Smith, Glam Candy<br />
Hair & Art Direction: Gianluca Grechi/Photo: Leonardo Bigagli/Make-up: Lorenzo Zavatta<br />
Hair: Groupe VOG – Mon Coiffeur Exclusif
Hair: Groupe VOG – Vog Coiffure
Hair: Giovanni Iovino for Cotril/Photo: Andrea Varano<br />
It’s the<br />
perfect<br />
hold...<br />
...to feel the wind<br />
in her hair.
Hair: Salvo Filetti for Compagnia della Bellezza
Hair & Art Direction: Carlo Di Donato, Dario Manzan for Mitù/Photo: Lorenzo Sampaolesi<br />
Make-up: Michela Bonafoni/Styling: Mirko Burin @ Freelance Fashion agency/Products: Wella Professionals<br />
Careful, you’ll be<br />
dazzled by chic.
Hair: Mickael Ribeiro for Olivia Garden/Photo: Gael Thill<br />
There is only one true desire:
Hair: Osmo Creative Team/Photo: Tony Le-Britton/Make-up: Justine Collins<br />
Hair: Osmo Creative Team<br />
Photo: Tony Le-Britton/Make-up: Justine Collins<br />
Hair: Antoine @ Art de l’âme/Photo: Ghost Vision Production/Make-up: École Michel Dumas
Hair: Thomas Hills, Lauren Killick @ TH1 Hair/Photo: Richard Miles/Make-up: Claire DeGraft/Styling: Bernard Connolly
And that’s talking<br />
about the hair!<br />
Hair: Eric Maurice/Photo: Latil Pascal/Make-up: Ambre Thomas/Styling: Patrice Catanzaro
Hair: John Paul Mitchell Systems Artistic Team<br />
Hit the<br />
highway...<br />
...without a hair<br />
out of place.
Hair: D. Machts Group/Photo: Natascha Lindemann/Make-up: MUD Studio Berlin<br />
Hair: Adrián Pardo Hair Studio/Photo: Dani Durán/Make-up: Naiara Blánquez<br />
Styling: Jarvy Blánquez/Products: Pulp Riot, Living Proof, Nyx, L’Oréal<br />
Hair: Xavier Arcarons @ Xavier Arcarons Perruquers/Photo: Esteban Roca/Make-up: Nacho Sanz
Hair: Laetitia Guenaou/Photo: Przemysław Choła/Make-up: Karolina Supernak/Styling: Patrycja Dziewit<br />
The ultimate finish in<br />
shades of copper.<br />
So bright they<br />
almost look polished.
Hair: Christian Ríos/Photo: Esteban Roca /Make-up: Nacho Sanz /Styling: Christian Ríos/Products: Revlon Professional España, Kevin Murphy Spain
Art Direction: Mauro Galzignato for Kemon/Hair: Davide Carlucci, Maurizio Di Saverio, Riccardo Rogari @ Kemon Crew<br />
Photo: Gosha Pavlenko/Make-up: Eleonora Juglair/Styling: Alessia Caliendo/Products: Kemon
...on the trail of the<br />
blonde bombshells.<br />
Art director: Miquel García Cotado/Hair: Revlon Professional Artistic Team/Photo: Miguel Reveriego/Make-up: Dani Rull
Creative Director: Simon Ellis/Hair: Schwarzkopf Professional Team Essential Looks<br />
Photo: Simon Emmett, Kapturing/Make-up: Helge Branscheidt<br />
Hair: Alcina/Photo: Jette Stolte Hair: Paul Stafford/Photo: Lee Mitchell/Make-up: DJ Griffin/Products: Denman
Hair & Art Direction:/Tom Connell for Davines/Colour: Ashleigh Hodges/Photo: Stefano Galuzzi/Make-up: Victoria Martin<br />
A short response...<br />
...to anyone who believes<br />
that long hair reigns.
Hair: Rudy Mostarda, Creative Styling Director Wella Professionals Italy/Photo: Stratis Kas/Make-up: Claudia Zambello/Styling: Chiara Condoleo<br />
He just happened<br />
to be there as<br />
you were passing:
Creative Director: Toni Pellegrino/Hair: The Club/Photo: Danilo Falà/Make-up: Fausto Cavaleri<br />
Styling: Eleonora Papetti, Riccardo Rubino/Products: Wella Professionals
Art Direction: Sara Vaccarecci/Hair: Michele Minciotti and Sens.ùs Creative Team <strong>2020</strong>/21<br />
Photo: Mauro Mancioppi/Make-up: Vania Cesarato/Styling: Veronica Spadaro<br />
Mid-length, long-length... always<br />
check out the finish.
Hair: Lucca & Yvan Estatoff/Photo: Bruno Estatoff/Make-up: Morgane Guillet<br />
Hair: Nadia Bouchikhi/Photo: Daniel Pister/Make-up: Kathleen Henocque<br />
Hair: Mica Academy for Farmagan
Hair: Jonathan Andrew for Fudge Professional/Photo: Simon Songhurst<br />
Make-up: Mario Brooksbank/Styling: Oliver Vaugyhn<br />
Veronica Lake<br />
knew her stuff.
step by step<br />
technical steps<br />
YOUR <strong>COLLECTION</strong> OF<br />
SO YOU CAN CREATE<br />
SOME OF THE LATEST<br />
SEASONAL HAIR LOOKS
MOSER<br />
Hair: Kathrin Eissler, Fatih Hairdressing<br />
Photo: Miriam Nickel<br />
Make-up: Deborah Hörz
1 2<br />
3<br />
4 5<br />
6<br />
7<br />
ENGLISH 1- Starting with the sides at temple level, divide out a line backwards and evenly shorten the lower section. 2- Evenly shorten the hair at the nape of the neck with<br />
Genio Pro Fading Edition and a 4.5mm lift. 3- Make all hair a uniform length in the lower third of the back of the head. 4- Remove hair from the nape and trim the<br />
contours precisely with the cutting head closed, along the neck and around the ears. 5- Shape the beard with the freehand technique and shave off any excess around the<br />
neck with Mobile Shaver MOSER. 6- Before drying off, precisely define the line with a comb. Then, dry the upper part of the hair carefully, proceeding from the side<br />
towards the back. 7- Finally, finish the hair with styling products, such as a fixing cream.<br />
ITALIANO 1- Partendo dai lati (al livello delle tempie), dividere la linea di riferimento all’indietro e accorciare uniformemente i lati inferiori. 2- Accorciare uniformemente i<br />
capelli sulla nuca con Genio Pro Fading Edition e un rialzo da 4,5 mm. 3- Riportare tutti i capelli alla stessa lunghezza nel terzo inferiore del retro della testa. 4- Rimuovere<br />
il rialzo e lavorare i contorni con precisione con la testina di taglio chiusa, lungo il collo e intorno alle orecchie. 5- Modellare la barba con la tecnica a mano libera e rasare<br />
l’eccesso sul collo con Mobile Shaver MOSER. 6- Prima di procedere all’asciugatura, definire con precisione la riga con un pettine. In seguito, asciugare la parte superiore<br />
dei capelli con cura, procedendo dal lato verso dietro. 7- Infine, sistemare i capelli con dei prodotti per lo styling, ad esempio una crema fissante.<br />
DEUTSCH 1- Von den Seiten ausgehend (auf Schläfenhöhe) die Bezugslinie nach hinten abteilen und die unteren Seiten gleichmäßig kürzen. 2- Die Haare im Nackenbereich<br />
mit Genio Pro Fading Edition und dem Aufsatz für 4,5 mm gleichmäßig kürzen. 3- Alle Haare im unteren Drittel des Hinterkopfes auf die gleiche Länge bringen. 4- Den<br />
Aufsatz entfernen und die Konturen im Nacken und um die Ohren herum mit geschlossenem Schneidkopf präzise nacharbeiten. 5- Den Bart in Freihandtechnik in Form<br />
bringen und die restlichen Haare am Hals mit dem Mobile Shaver MOSER rasieren. 6- Vor dem Trocknen mit dem Kamm genau den Scheitel definieren. Danach den oberen<br />
Teil des Haares vorsichtig von der Seite nach hinten trocknen. 7- Abschließend das Haar mit Stylingprodukten, wie beispielsweise einer Fixiercreme, fixieren.<br />
FRANÇAIS 1- En partant des côtés (au niveau des tempes), divisez la ligne de guidage vers l’arrière et raccourcissez uniformément les côtés inférieurs. 2- Raccourcissez<br />
uniformément la nuque avec la Genio Pro Fading Edition et le contre-peigne de 4,5 mm. 3- Ensuite, ramenez les cheveux à la même longueur dans le tiers inférieur de<br />
l’arrière de la tête. 4- Retirez le contre-peigne et travaillez les contours avec précision avec la tête de coupe fermée, le long du cou et dans la zone des oreilles. 5- Façonnez la<br />
barbe en utilisant la technique à main levée et rasez proprement l’excès de poils sur le cou avec le Mobile Shaver MOSER. 6- Avant le brushing, redéfinissez la raie<br />
précisément avec le peigne. Ensuite, coiffez les cheveux du haut soigneusement du côté vers l’arrière. 7- Enfin, mettez les cheveux en forme avec des produits coiffant<br />
comme la pommade par exemple.<br />
ESPAÑOL 1- Comenzar por los lados (al nivel de las sienes), dividir la línea guía hacia atrás y acortar uniformemente la parte inferior. 2- Acortar uniformemente el cabello<br />
en la nuca con Genio Pro Fading Edition regulado a 4.5 mm. 3- A continuación, llevar todo el cabello a la misma longitud en el tercio inferior de la parte posterior de la<br />
cabeza. 4- Quitar el contrapeine y trabajar los contornos con precisión con el cabezal de corte cerrado, a lo largo del cuello y en la zona de las orejas. 5- Dar forma a la<br />
barba con la técnica de mano libre y afeitar el exceso de pelo en el cuello con la afeitadora Mobile Shaver MOSER. 6- Antes de continuar con el secado, definir con<br />
precisión la línea con el peine. Luego peinar cuidadosamente la parte superior del cabello, trabajando del lado hacia atrás. 7- Terminar modelando con productos para el<br />
estilismo, como una crema fijadora.<br />
step by step 1
Coiffeur en France<br />
Art Direction: Raphaël Perrier<br />
Hair: Equipe Coiffeur en France<br />
Photo: Duy Ha Minh
1 2 3 4<br />
5 6 7 8 9<br />
10 11 12<br />
ENGLISH CUT 1- Start by tracing a separation from one ear tip to the other, passing through the central point of the head. Then trace another separation from the temporal bone to the parietal<br />
bone on both sides. 2- Draw a separation on the centre line at the nape of the neck, then define the length at 180 °. Continue in the same way across the entire nape area. 3- Divide the middle<br />
zone into 5 vertical separations. Starting from the median, project the entire area horizontally and cut at 45 °. Project the median onto the nearest side section, then cut at a 45 ° angle. Blend in<br />
the entire area. 4- Add texture to the area with diagonal sections using a razor. Also add texture over the occipital bone to soften the volume. 5- Cut diagonally with a razor to keep more length<br />
in the front. Repeat on the other side. 6- Create a rectangle from one temporal bone to another through the centre. Draw a central line from the bridge of the nose on each side, project the<br />
entire area horizontally and cut 180 ° with a razor. Finish with the side sections by creating a seam between the centre and the sides. 7- Trace a separation from the parietal bone to the centre<br />
point on each side. Starting with the triangles near the edges, project each of the areas perpendicular to the ground. Take a reference section from the marginal area and cut at 180 °. Proceed in<br />
the same way across both areas. Twist the entire area in the centre in one smooth motion, then cut 180° to the ground. COLOUR 8/9- Apply 20 vol. Iridescent copper blonde mixture to the<br />
roots. Make a section in a circle, 2 cm from the frontal point to the occipital bone, passing under the parietal bones. Spread the root mixture on the lower part. 10- Draw a section parallel to<br />
the 2cm section. Work on the tips by brushing with a 20 vol. whitening mixture. 11- Create a section, parallel to the previous one, then apply the root dye mixture over the tips. Continue<br />
alternating between light and dark tones. 12- Develop. Rinse and apply a golden copper or light blond patina as desired. Develop, then rinse off with a post-colour shampoo.<br />
ITALIANO TAGLIO 1- Tracciare una separazione da una punta dell’orecchio all’altra, passando per il vertice. Tracciare una separazione dall’osso temporale all’osso parietale su entrambi i lati.<br />
2- Tracciare sezioni sulla linea centrale all’altezza della nuca, poi definire la lunghezza a 180°. Proseguire allo stesso modo su tutta la zona della nuca. 3- Dividere la zona intermedia in 5<br />
separazioni verticali. Partire dalla mediana, proiettare l’intera area parallela e tagliare a 45 °. Proiettare la mediana sulla sezione laterale più vicina, quindi tagliare con un angolo a 45 °. Sfumare<br />
l’intera area. 4- Texturizzare l’area con sezioni diagonali usando la tecnica del taglio a rasoio. Texturizzare anche sull’osso occipitale per ammorbidire il volume. 5- Proiettare l’intera area<br />
perpendicolare al terreno, quindi tagliare in diagonale con un rasoio per mantenere più lunghezza nella parte anteriore. Ripetere sull’altro lato. 6- Creare un rettangolo da un osso temporale<br />
all’altro passando per il vertice. Disegnare una riga centrale a metà del sopracciglio su ciascun lato, proiettare l’intera area perpendicolare al pavimento e tagliare a 180 ° con un rasoio. Terminare<br />
con le sezioni laterali creando una giunzione tra il centro e il lato. 7- Disegnare una separazione dell’osso parietale fino al punto centrale su ciascun lato. Iniziare con i triangoli vicino ai margini,<br />
proiettare ciascuna delle aree perpendicolarmente al suolo. Prendere una ciocca di riferimento dalla zona marginale e tagliare a 180 °. Procedere allo stesso modo su entrambe le aree. Sul<br />
triangolo in cima proiettare l’intera perpendicolare al suolo. Torcere l’intera area al centro con un movimento uniforme, quindi tagliare a 180 °. COLORE 8/9- Applicare alle radici la miscela<br />
biondo rame cangiante a 20 vol. Creare una sezione in un cerchio, a 2 cm dal punto frontale all’osso occipitale, passando sotto le ossa parietali. Stendere il composto delle radici nella parte<br />
inferiore. 10- Disegnare una sezione parallela ai primi 2 cm di spessore. Lavorare sulle punte pennellando con una miscela sbiancante a 20 vol. 11- Creare una sezione, parallela alla precedente,<br />
quindi allungare sulle punte la miscela colorante delle radici. Continuare alternando toni chiari e scuri. 12- Lasciare in posa. Risciacquare e applicare la patina rame dorato o biondo chiaro<br />
secondo il riflesso desiderato. Lasciare in posa, risciacquare con uno shampoo post colorazione.<br />
DEUTSCH SCHNITT 1- Scheitel von einer Ohrspitze zur anderen über den Mittelpunkt des Kopfes ziehen. Auf beiden Seiten einen Scheitel vom Schläfenbein zum Scheitelbein ziehen. 2- In<br />
der Mitte des Nackens einen Scheitel auf der Mittellinie ziehen, Länge bei 180° definieren. Im gesamten Nackenbereich fortfahren. 3- Den Zwischenbereich am Hinterkopf in fünf vertikale<br />
Abschnitte teilen. Im Winkel von 45° nach unten schneiden. Den gesamten Bereich weich gestalten. 4- Den diagonalen Schnittbereich mit der Rasiermessertechnik texturieren. 5- Mit<br />
einem Rasiermesser diagonal schneiden, um mehr Länge an der Vorderseite zu erhalten. Auf der anderen Seite wiederholen. 6- Von einem Schläfenbein zum anderen über den Mittelteil<br />
des Kopfes ein Rechteck erzeugen. Auf jeder Seite einen Scheitel auf der Mitte der Augenbraue ziehen, den gesamten Bereich senkrecht nach unten ausrichten und mit einem Rasiermesser<br />
im Winkel von 180° schneiden. Zum Abschluss der seitlichen Partien eine Verbindung zwischen ihnen und der Mitte herstellen. 7- Auf jeder Seite einen Scheitel vom Scheitelbein zum<br />
Mittelpunkt ziehen. Eine Strähne des Seitenbereichs als Bezugspunkt nehmen und im Winkel von 180° schneiden. Auf beiden Seiten wiederholen. Die Mitte mit einer gleichmäßigen<br />
Bewegung verdrehen und im Winkel von 180° zum Boden schneiden. FARBE 8/9- Ansatz: changierende Mischung Blond Kupfer mit 20 Vol. Einen kreisförmigen Abschnitt von der<br />
Stirnseite bis zum Hinterhauptbein, 2 cm unterhalb des Scheitelknochens, abteilen. Ansatzmischung am unteren Hinterkopf auftragen. 10- Einen weiteren, parallelen Abschnitt von 2 cm<br />
Dicke abteilen. Auf die Spitzen Aufhellung mit 20 Vol. auftragen. 11- Einen weiteren Abschnitt abteilen,und die Ansatzfarbe bis in die Spitzen verteilen. Mit abwechselnd hellen und<br />
dunklen Tönen fortfahren. 12- Einwirken lassen. Ausspülen und goldene oder hellblonde Kupferpatina auftragen. Einwirken lassen, mit einem Farbshampoo waschen.<br />
FRANÇAIS COUPE 1- Créer une section d’une oreille à l’autre en passant par le point d’équilibre, puis de l’os temporal à l’os pariétal. Tracer une séparation d’une oreille à l’autre en passant par l’os<br />
occipital. 2- Tracer une division médiane au niveau de la nuque puis définir la longueur à 180°. 3- Diviser la zone intermédiaire en 5 sections verticales. Projeter l’ensemble de la zone, parallèle<br />
au sol et couper à 45°. Projeter la section médiane sur celle latérale la plus proche, puis couper en suivant la mèche témoin à 45°. Graduer l’ensemble. 4- Texturiser les sections en diagonale au<br />
rasoir, ainsi qu’au niveau de l’os occipital pour un volume plus doux. 5- Perpendiculaire au sol, couper la section au rasoir en diagonale afin de conserver la longueur sur l’avant. Procéder de<br />
l’autre côté. 6- Créer un rectangle d’un os temporal à l’autre en passant par le point d’éclatement. Tracer une séparation médiane à mi sourcil. Perpendiculaire au sol, couper à 180° au rasoir.<br />
Finir par les sections latérales en créant une jonction avec les côtés. 7- Tracer une séparation de l’os pariétal jusqu’au point d’éclatement. Commencer à couper par les triangles proches de la<br />
frange. A l’aide d’une mèche, couper à 180°. Poursuivre sur les deux zones. Vriller l’ensemble de la zone au centre avec une tension régulière puis couper à 180° par rapport au sol. COULEUR<br />
8/9- Appliquer sur les racines le mélange blond irisé cuivré à 20 vol. Créer une section en cercle, à 2 cm après la pointe frontale jusqu’à l’os occipital. Allonger sur la partie basse le mélange des<br />
racines. 10- Tracer une section parallèle de 2 cm d’épaisseur. Travailler les pointes en painting avec le mélange décolorant à 20 vol. 11- Créer une section parallèle, puis allonger sur les pointes,<br />
le mélange des racines. Poursuivre en alternant les tonalités. 12- Poser. Rincer et appliquer la patine blond clair doré cuivré. Laisser poser, rincer avec un shampooing post coloration.<br />
ESPAÑOL CORTE 1- Trazar una sección de oreja a oreja, luego desde el hueso temporal hasta el hueso parietal de cada lado. 2- Trazar una separación central en la nuca y definir<br />
la longitud a 180°. Continuar por toda la zona. 3- Dividir la zona intermedia en 5 partes verticales. Comenzar en la mediana, proyectar toda el área paralela al suelo y cortar<br />
con una ángulo de 45° respecto al suelo. Proyectar la mediana a la sección lateral más cercana. Cortar a 45°. 4- Texturizar el área con secciones diagonales a peine y navaja.<br />
5- Proyectar toda el área perpendicular al suelo y luego cortar en diagonal con una navaja. Repetir en el otro lado. 6- Crear un rectángulo de un hueso temporal a otro pasando<br />
por el punto central. Trazar una raya central a mitad de la ceja en cada lado, proyectar toda el área perpendicular al suelo y cortar a 180° con una navaja. Terminar con las<br />
secciones laterales creando una unión entre el centro y el lado. 7- Trazar una separación del hueso parietal hasta el punto central en cada lado. Comenzar con los triángulos<br />
cerca del flequillo, proyectar cada una de las zonas perpendiculares al suelo. Tomar un mechón guía en el flequillo y cortar a 180° en ambas partes. Sobre el triángulo superior,<br />
proyectar el conjunto perpendicularmente al suelo. Girar toda la parte en el centro con una tensión uniforme. Cortar 180° respecto al suelo. COLOR 8/9- Aplicar en la raíz la<br />
mezcla de rubio cobrizo iridiscente a 20 vol. Crear una sección circular a 2 cm del punto frontal al hueso occipital, pasando por debajo de los huesos parietales. Extender la<br />
mezcla de las raíces a la parte inferior. 10- Dibujar una sección paralela a la primera de 2 cm de grosor. Trabajar las puntas con una mezcla decolorante a 20 vol. 11- Crear una<br />
sección paralela a la anterior, luego llevar hacia las puntas la mezcla colorante de las raíces. Continuar alternando tonos claros y oscuros. 12- Dejar actuar. Enjuagar y aplicar la<br />
pátina cobre dorado o rubio. Dejar actuar y lavar.un champú post-colorante.<br />
step by step 2
ghd<br />
Hair: Adam Reed<br />
Photo: Claire Rothstein<br />
Make-up: Claudine Blythman<br />
Styling: Ozzy Shah
2 3<br />
1<br />
4<br />
5<br />
6<br />
7<br />
8 9<br />
ENGLISH 1- Prep the hair with ghd root lift spray and starting at the nape, place a size 3 ghd ceramic vented radial brush under the section and smooth flat all the hair<br />
using ghd helios directing the air flow down the hair. 2- In the same section, place ghd helios over the hair and curve the hair around the brush and direct the airflow over<br />
it. 3- Start to twist and unloop the hair as you travel down, always directing the airflow around the brush. 4- Continue until you reach the ends of the hair. 5- Continue<br />
until all the hair, apart from the front hair line, has been curled this way. 6- Detail the crown by rolling the hair over the brush. 7- Detail the hair line by rolling the hair in<br />
the centre. 8- Toward the sides start to roll up and away from the face. 9- Pinch and pull to conch the crown.<br />
ITALIANO 1- Preparare i capelli con ghd root lift spray e, partendo dalla nuca, posizionare una spazzola radiale ventilata ghd in ceramica taglia 3 sotto la sezione;<br />
lisciare tutti i capelli usando ghd Helios direzionando il flusso d’aria lungo i capelli. 2- Nella stessa sezione, posizionare ghd Helios sui capelli e arrotolarli attorno alla<br />
spazzola, dirigendovi il flusso d’aria. 3- Iniziare ad attorcigliare e sciogliere i capelli mentre si procede verso il basso direzionando sempre il flusso d’aria intorno alla<br />
spazzola. 4- Continuare fino a raggiungere le estremità dei capelli. 5- Lavorare fino a quando tutti i capelli, a parte quelli della parte anteriore, siano stati arricciati in<br />
questo modo. 6- Rifinire la corona arrotolando i capelli sulla spazzola. 7- Acconciare l’attaccatura dei capelli arrotolandoli verso il centro. 8- Cominciare ad arrotolare<br />
allontanandosi dal viso verso il lato della testa. 9- Pizzicare e definire per ultimare lo styling della corona.<br />
DEUTSCH 1- Die Haare mit dem ghd Root Lift Spray ausgehend vom Nacken vorbereiten. Hierzu eine ghd Keramik Rundbürste mit Belüftungsstärke 3 unter der Sektion<br />
positionieren; alle Haare mithilfe von ghd helios glätten und hierbei den Luftfluss entlang der Haare leiten. 2- In der gleichen Sektion ghd helios auf dem Haar positionieren und<br />
diese um die Bürste wickeln und dabei den Luftfluss dorthin richten. 3- Beginnen, das Haar aufzuwickeln und loszulassen, während man nach unten arbeitend fortfährt und<br />
hierbei stets den Luftfluss um die Bürste richten. 4- So fortfahren, bis die Haarspitzen erreicht werden. 5- Auf diese Weise weiterarbeiten, bis alle Haare, die Vorderhaarlinie<br />
ausgenommen, auf diese Weise gewellt wurden. 6- Die Krone durch das Wickeln des Haars auf die Bürste detaillieren. 7- Den Ansatz durch das Wickeln des Haars Richtung<br />
Mitte stylen. 8- Mit dem Aufwickeln beginnen und sich dabei vom Gesicht Richtung Kopfseite entfernen. 9- Zum Stylen der Krone das Haar zupfen und ziehen.<br />
FRANÇAIS 1- Préparer la chevelure avec le spray ghd Root Lift. Utiliser une brosse ronde ventilée ghd en céramique, taille 3, en partant de la nuque. Lisser tous les cheveux<br />
à l’aide de ghd Helios en dirigeant le flux d’air tout le long de la chevelure. 2- Toujours sur la section de la nuque, placer ghd Helios sur les cheveux et les enrouler autour de<br />
la brosse. 3- Enrouler et dérouler les cheveux sur eux-mêmes, toujours en dirigeant le flux d’air autour de la brosse, vers le bas. 4- Continuer de la même manière jusqu’aux<br />
pointes. 5- Poursuivre ainsi sur l’ensemble de la chevelure, sauf sur la partie avant. 6- Travailler à présent la couronne en enroulant totalement les cheveux sur la brosse.<br />
7- Travailler les racines vers l’arrière. 8- Continuer progressivement vers les côtés. 9- Froisser aux doigts pour bien positionner les différentes mèches sur le haut de tête.<br />
ESPAÑOL 1- Preparar el cabello con el spray ghd root lift y, empezando por la nuca, colocar un cepillo radial para secado en cerámica ghd del tamaño 3 debajo de la<br />
sección y alisar todo el cabello usando ghd helios dirigiendo el flujo de aire hacia abajo. 2- En la misma sección, colocar ghd helios sobre el cabello y curvar el cabello<br />
alrededor del cepillo y orientar el flujo de aire hacia el mismo. 3- Empezar a enrollar y desenrollar el cabello a medida que se baja, dirigiendo el flujo de aire siempre<br />
alrededor del cepillo. 4- Continuar hasta llegar a las puntas del cabello. 5- Seguir hasta que todo el cabello, excepto la línea frontal del mismo, se haya rizado de esta<br />
manera. 6- Trabajar la corona enrollando el cabello sobre el cepillo. 7- Por último, la línea del cabello enrollando el cabello en el centro. 8- En los lados comenzar a ondular<br />
alejándose del rostro. 9- Coger y tirar para ajustar la corona.<br />
step by step 3
Lorenzo Marchelle<br />
Hair: Lorenzo Marchelle by Attilio Artistic Team<br />
for Alfaparf Milano<br />
Photo: Vanessa Polignano<br />
Make-up: Davide Maisano
1 2 3 4<br />
COLOUR FORMULA<br />
• Complete colour lift using BB Bleach<br />
Easy Lift 7 tone at 20 Volume. Blend with<br />
Harmonizers .01 at 10 Volumi<br />
• Root toning: 59 g. Evolution of the<br />
Color 9 Grey Black + 1 g Evolution of the<br />
Color 410 at 10 Volume<br />
• Lengths and ends toning: 55 g Color<br />
Wear 10.21 + 5 g Color Wear 9 Metallic Silver with<br />
Attivatore 5 Volume. Slides toner with Color<br />
Wear 9 Ultra Violet, Revolution Pastel Blue,<br />
Revolution Pastel Green and Revolution Clear<br />
5 6 7 8<br />
9 10 11 12 13<br />
ENGLISH 1- Create a rounded separation from the end of the eyebrows, passing through the crown line, using the top of the head as a reference point. Create a central<br />
parting from the top of the head towards the nose-line. 2/3/4- With the lower section left free, proceed to cut with comb over scissors, to create uniformity. Start working<br />
on the sub-section closest to the eyes, working one said and then the other. Cut slightly diagonally following the roundness of the head. Cut in, finger-thickness, strand by<br />
strand. 5- In the front section, select a sub-section and bring it towards the nape of the neck. 6/7- Select a triangular section. Cut straight across using the club-cutting<br />
technique, working a point from the eyeline down towards the tip of the nose. 8/9/10- Proceed on the other side, following the same line, making sure that a tip is created<br />
in the direction of the nose. Complete the entire section, up to the top of the head, using the same points of reference. 11/12- In the back area, join the lengths with the<br />
fringe, rotating around the head. This will create an inverted bob, starting from the fringe instead of the back area. 13- Deconstruct as you wish, leaving the top area longer<br />
to allow you to customize the styling.<br />
ITALIANO 1- Creare una separazione tondeggiante da fine sopracciglio destro a fine sopracciglio sinistro, passando per la linea di corona, in riferimento al vertice. Creare<br />
una scriminatura centrale dal vertice a riferimento naso. 2/3/4- In tutta la sezione sottostante, lasciata libera, procedere a tagliare a pettine e forbice, per creare aderenza.<br />
Indifferentemente da destra o da sinistra, partire dalla sub-sezione più vicina agli occhi. Tagliare leggermente in diagonale seguendo la rotondità della testa. Tagliare<br />
in ciocca su ciocca con lo spessore delle proprie dita. Completare anche dall’altro lato, partendo dalla sub-sezione più frontale, creando delle diagonali che seguono la<br />
rotondità della testa. 5- Nella sezione frontale, selezionare una sub-sezione e portarla verso la nuca. 6/7- Selezionare una sezione triangolare. Prendere come riferimento<br />
punta, naso e occhio, tagliare in Club-Cutting. 8/9/10- Procedere sull’altro lato, con la stessa inclinazione, facendo sì che si crei una punta in direzione del naso. Completare<br />
tutta la sezione, fino al vertice, in riferimento alla ciocca guida sottostante. 11/12- Nella zona posteriore congiungere la lunghezza alla frangia, ruotando intorno alla<br />
testa. Si creerà così un bob invertito, partendo dalla frangia anziché dalla zona posteriore, come di consueto. 13- Destrutturare a piacimento lasciando più lunga la zona<br />
del vertice che permetterà di personalizzare lo styling.<br />
DEUTSCH 1- Vom Ende der rechten Augenbraue bis zum Ende der linken Augenbraue einen runden Scheitel ziehen, der in Bezug auf den Scheitelpunkt durch die<br />
Scheitellinie verläuft. Einen mittleren Scheitel vom Scheitelpunkt bis zur Bezugslinie der Nase ziehen. 2/3/4- Im gesamten unteren freigelassenen Abschnitt mit Kamm<br />
und Schere fortfahren, um einen Übergang zu schaffen. Von rechts oder links mit dem den Augen nächstgelegenen Unterabschnitt beginnen. Der Rundung des Kopfes<br />
folgend leicht schräg schneiden. Mit der Dicke der Finger Strähne für Strähne schneiden. Auf der anderen Seite ebenfalls vervollständigen. Mit dem frontalsten<br />
Unterabschnitt beginnen, wobei Diagonalen geschaffen werden, die der Rundheit des Kopfes folgen. 5- Aus dem Frontbereich eine Untersektion abteilen und diese in<br />
Richtung Nacken bringen. 6/7- Einen dreieckigen Abschnitt abteilen. Nase und Ohren als Bezugspunkt für die Spitze nehmen und in Club-Cutting schneiden. 8/9/10- Auf<br />
der anderen Seite mit der gleichen Schräge fortfahren und eine Spitze in Richtung Nase kreieren. Den gesamten Abschnitt bis zum oberen Ende durcharbeiten, wobei die<br />
jeweils darunterliegende Strähne den Bezugspunkt bildet. 11/12- Die Länge des hinteren Bereiches um den gesamten Kopf herum mit dem Pony verbinden. Dadurch<br />
entsteht ein umgedrehter Bob, der vom Pony und nicht wie üblich vom Hinterkopf beginnt. 13- Nach Belieben die Struktur auflösen, wobei der Scheitelbereich länger<br />
bleiben sollte, damit das Styling angepasst werden kann.<br />
FRANÇAIS 1- Créer une division en arrondie allant d’un sourcil à l’autre en passant par le vertex. Puis créer une seconde séparation partant du vertex vers l’arrête du nez.<br />
2/3/4- La partie supérieure, laissée libre, sera coupée au peigne et aux ciseaux. Commencer indifféremment par la partie droite ou gauche. Commencer par la partie la plus<br />
proche de l’œil. Couper légèrement en arrondie, en suivant la forme du crâne. Travailler mèche à mèche de façon régulière. Procéder de la même manière de l’autre côté du<br />
visage. 5- Sur la section frontale, délimiter une sous-division en la ramenant vers la nuque. 6/7- Tracer une section triangulaire en prenant comme référence la ligne<br />
“nez-oeil”, puis procéder à la coupe selon la technique du club-cutting. 8/9/10- Procéder à présent de l’autre côté en utilisant la même inclinaison de façon à diriger le<br />
mouvement vers le nez. Poursuivre jusqu’au vertex, en suivant la mèche guide. 11/12- Sur la partie arrière, utiliser la longueur de la frange, en tournant tout autour du<br />
crâne. Créer ainsi un bob inversé, en partant de la frange et non plus de la partie postérieure, comme à l’accoutumée. 13- Déstructurer la coupe selon le goût de chacun en<br />
laissant plus de longueurs au niveau du vertex pour personnaliser le styling.<br />
ESPAÑOL 1- Crear una separación redondeada desde el final de la ceja derecha hasta el final de la ceja izquierda, pasando por la línea de la coronilla en referencia al vértice.<br />
Crear una partición central desde el vértice hasta la referencia de la nariz. 2/3/4- En toda la sección inferior, dejándola libre, proceder a cortar con peine y tijeras, para<br />
crear adherencia. Independientemente de derecha o izquierda, empezar con la subsección más cercana a los ojos. Cortar ligeramente en diagonal siguiendo la redondez de<br />
la cabeza. Cortar mechón por mechón usando el grosor de los dedos como medida. Completar también en el otro lado, partiendo de la subsección más frontal, creando<br />
diagonales que siguen la redondez de la cabeza. 5- En la sección frontal, seleccionar una subsección y llevarla a la nuca. 6/7- Seleccionar una sección triangular. Tomar<br />
como referencia punta, nariz y ojo, cortar en Club-Cutting. 8/9/10- Proceder con el otro lado, con el mismo ángulo, asegurándose que se cree una punta en dirección de la<br />
nariz. Completar toda la sección, hasta el vértice, tomando como referencia el mechón guía inferior. 11/12- En la zona posterior unir el largo al flequillo, girando alrededor<br />
de la cabeza. Esto creará un bob invertido, comenzando por el flequillo en lugar de la zona posterior, como es habitual. 13- Desestructurar libremente, dejando la parte del<br />
vértice más larga lo que permitirá personalizar el estilismo.<br />
step by step 4
Biguine<br />
Hair: Biguine Paris<br />
Photo: Anaïs Biguine<br />
Make-up: Biguine Makeup<br />
Products: Wella Professionals<br />
Coordination: Brian Feinman
1<br />
2 3 4<br />
5<br />
6 7<br />
COLOR FORMULAS<br />
• Wella Professionnals Blondorplex 6%<br />
• Patine 20gr 9,31 Koleston & 20gr 1,9<br />
& 20gr Post Color<br />
• Wella Plex N°2<br />
8 9 10 11<br />
ENGLISH 1- Decide on the desired length then proceed with the cut. 2- Start the cut by working through the ends. 3- Continue by sectioning off and working up through<br />
successive sections. 4- Align the sides with the baseline. 5- After drying the hair, thin out and scale the ends to create texture to the lengths. 6- Prepare the Balayage.<br />
Separate the sections. Proceed by wrapping the sections in foil, with the Luxelights technique on the V section using an oblique brush. 7- Proceed through the subsequent<br />
sections using a wider brush for a more intense effect. 8- Create shading through the root area. 9- At the end of the exposure time, rinse and apply the repair mask. Twist<br />
the strands to make the product penetrate better. 10- Dry the hair by styling with an air cushion brush to give lift to the roots. 11- Work the roots with your fingertips to<br />
get more texture, then distribute suitable styling products through the hair to give finish, movement and colour.<br />
ITALIANO 1- Stabilire la lunghezza desiderata per procedere al taglio. 2- Iniziare il taglio tracciando la base del carré. 3- Proseguire tracciando la base delle sezioni<br />
successive. 4- Allineare i lati sulla base tracciata in precedenza. 5- Dopo aver asciugato i capelli, sfoltire le punte con una scalatura e insistendo sulla parte superiore per<br />
creare un volume armonioso. 6- Preparare il balayage. Separare le sezioni. Procedere avvolgendo le ciocche nell’alluminio, con la tecnica Luxelights sulla sezione a V con<br />
un pennello obliquo. 7- Procedere sulle sezioni successive con un pennello più largo per un effetto più intenso. 8- Creare delle sfumature lungo l’attaccatura delle radici.<br />
9- Terminato il tempo di posa risciacquare e applicare la maschera riparatrice. Attorcigliare le ciocche per far penetrare meglio il prodotto. 10- Asciugare i capelli<br />
mettendo in piega con una spazzola con cuscinetto d’aria per gonfiare meglio le radici. 11- Lavorare le radici con le dita per ottenere maggiore volume, poi distribuire sulla<br />
capigliatura i prodotti di styling più adatti per conferire texture, valorizzare il taglio, il movimento e il colore.<br />
DEUTSCH 1- Die gewünschte Schnittlänge bestimmen. 2- Den Schnitt mit einer geraden Grundlinie beginnen. 3- Weitere Abschnitte auf Grundlage der Grundlinie<br />
schneiden. 4- Die Seiten an die zuvor geschnittene Grundlinie angleichen. 5- Nach dem Trocknen der Haare die Spitzen mit einer Stufung ausdünnen, wobei besonders<br />
am Oberkopf ein harmonisches Volumen entstehen soll. 6- Balayage vorbereiten. Abschnitte abteilen. Fortfahren, indem die Strähnen in Aluminiumfolie gewickelt<br />
werden, wobei die Luxelights-Technik auf der V-Sektion mit einem schrägen Pinsel angewendet wird. 7- Bei den folgenden Abschnitten mit einem breiteren Pinsel<br />
fortfahren, um eine intensivere Wirkung zu erzielen. 8- Entlang den Haaransätzen Schattierungen erzeugen. 9- Nach Ablauf der Einwirkzeit ausspülen und eine<br />
regenerierende Haarmaske auftragen. Die Strähnen verdrehen, um das Produkt besser einarbeiten zu können. 10- Die Haare mit einer luftgepolsterten Bürste trocknen,<br />
damit die Ansätze mehr Volumen erhalten. 11- Für mehr Volumen die Ansätze mit den Fingern bearbeiten. Anschließend die am besten geeigneten Stylingprodukte auf<br />
dem Haar verteilen, um Textur, Schnitt, Bewegung und Farbe zur Geltung zu bringen.<br />
FRANÇAIS 1- Evaluer la longueur souhaitée pour procéder à la coupe. 2- Tracer la base carrée. 3- Continuer à tracer la base carrée par séparations successives. 4- Aligner<br />
les côtés sur la base tracée. 5- Après avoir séché les cheveux, alléger toutes les pointes en effilage en insistant sur le dessus pour un volume plus harmonieux. 6- Préparation<br />
du balayage. Séparations sur mesure. Technique enveloppement feuilles en aluminium selon la technique Luxelights en V avec un pinceau biseauté. 7- Continuer avec<br />
un pinceau plus large pour un effet plus intense. 8- Faire des voiles sur la bordure au départ des racines. 9- Le temps de pose terminé. Rincer puis appliquer le soin reconstituant.<br />
Tourner les mèches en torsades pour une meilleure pénétration du produit. 10- Séchage à l’aide d’une brosse pneumatique en décollant les racines. 11- Redécoller les<br />
racines à l’aide des doigts pour plus de volume, puis texturiser à l’aide des produits coiffants adaptés afin de mettre en valeur la coupe, le mouvement et la couleur.<br />
ESPAÑOL 1- Definir la longitud deseada para proceder con el corte. 2- Iniciar el corte delimitando la base del carré. 3- Continuar trazando la base de las secciones<br />
sucesivas. 4- Alinear los lados sobre la base trazada anteriormente. 5- Después de haber secado el cabello, aligerar las puntas con un escalado e insistir en la parte superior<br />
para crear un volumen armónico. 6- Preparar el balayage. Separar las secciones. Proceder envolviendo los mechones en aluminio, con la técnica Luxelights y con una<br />
sección a V con un pincel oblicuo. 7- Continuar en las siguientes secciones con un pincel más ancho para un efecto más intenso. 8- Crear un degradado en la parte de la<br />
raíz. 9- Finalizado el tiempo de exposición, aclarar y aplicar la mascarilla reparadora. Girar sobre si mismos los mechones para que el producto penetre mejor. 10- Secar<br />
el cabello peinándolo con un cepillo para dar volumen a las raíces. 11- Trabajar las raíces con los dedos para conseguir más volumen, luego aplicar sobre el cabello los<br />
productos más adecuados para conferir textura, y potenciar el corte, el movimiento y el color.<br />
step by step 5
Schwarzkopf Professional<br />
Creative Director: Simon Ellis<br />
Hair: Richard Ashforth, Tyler Johnston, Lesley Jennison<br />
Photo: Simon Emmett, Kapturing<br />
Make-up: Helge Branscheidt<br />
Styling: Adelaida Cue Bär
1<br />
2 3 4 5 6<br />
7<br />
8<br />
9<br />
10<br />
11<br />
ENGLISH CUT 1- Divide hair in five sections. 2- Section 1) Lower head: Create a horizontal baseline, which is cut blunt under the comb. 3- Section 2) Separate the middle<br />
headband horizontally. Create a slight overhang in pointcut technique. 4- Section 3) and 4) left and right lower front head section: Create a pointed line that runs<br />
diagonally backwards and stands for itself without being connected. 5- Blow-dry hair with a styling brush, follow with a straightening iron. 6- Section 5) Finalize the upper<br />
head length in slice cut. Focus on a slight increase in length towards the face conture. 7- The fringe-section: Create a triangular section from the highest point of the head<br />
to the temple. Work strong textures into the fringe-line by point cutting in horizontal sections. COLOUR 8- On the upper head split a narrow trapezoid. Begin with the<br />
narrow side of the trapezoid just behind the highest point of the head and end with the broad side 3cm before the front conture. Pre-lighten the trapezoid with<br />
Schwarzkopf Professional Igora Royal Vario Blond Plus in back to back slices in length and tip. Do not lighten the roots. 9- Color the remaning hair globally with a dark<br />
ebony tone of the Schwarzkopf Professional Igora Vibrance line. 10- Treat hair with Schwarzkopf Professional Fibre Clinix Tribond series, blow-dry and separate the upper<br />
pre-lightened section. The Color Blender is intended to blend, dap, to soften or apply color in a versatile way. 11- Freehand-blending, Petal technique (the application of<br />
several nuances): The blond veil is dotted with color: medium, silver-gray mauve, medium rosewood pink and bright calcified petrol beige.<br />
ITALIANO TAGLIO 1- Dividere i capelli in cinque sezioni. 2- Sezione 1) Testa inferiore: creare una linea di base orizzontale e tagliare a filo pettine. 3- Sezione 2) Separare<br />
l’arco centrale orizzontalmente. Creare una leggera sporgenza usando la tecnica pointcut. 4- Sezione 3) e 4) Sezione anteriore inferiore sinistra e destra: creare una linea<br />
appuntita che corra diagonalmente all’indietro e che stia separata, senza punti di contatto. 5- Asciugare i capelli con una spazzola per lo styling, quindi con la piastra.<br />
6- Sezione 5) Finalizzare la lunghezza superiore della testa in slice cut. Concentrarsi su un leggero aumento della lunghezza verso il viso. 7- Frangia: creare una sezione<br />
triangolare dal punto più alto verso le tempie. Lavorare texturizzando in punta di forbice in senso orizzontale. COLORE 8- Sulla parte superiore della testa realizzare uno<br />
stretto trapezio. Iniziare con il lato stretto del trapezio dietro il punto più alto della testa e terminare con il lato largo 3 cm prima della parte anteriore. Pre-schiarire il<br />
trapezio con Schwarzkopf Professional Igora Royal Vario Blond Plus in slice su tutta la lunghezza. Non schiarire le radici. 9- Colorare i capelli rimanenti globalmente con<br />
una tonalità scura ebano della linea Schwarzkopf Professional Igora Vibrance. 10- Trattare i capelli con Schwarzkopf Professional Fiber serie Clinix Tribond, asciugare<br />
e separare la sezione pre-illuminata. Il Color Blender ha lo scopo di sfumare, tamponare, ammorbidire o applicare il colore in modo versatile. 11- Miscelazione a mano libera,<br />
tecnica Petal (l’applicazione di diverse sfumature): il velo biondo è punteggiato di colore: medio, grigio argento malva, rosa palissandro medio e beige petrolio brillante.<br />
DEUTSCH SCHNITT 1- Das Haar in 5 Sektionen einteilen. 2- Sektion 1) Unterkopf: Erstellen Sie eine horizontale Basislinie, stumpf unter dem Kamm geschnitten. 3- Sektion<br />
2) Mittleres Hinterkopfband horizontal unterteilen. Im Pointcut einen leichten Überhang kreieren. 4- Sektion 3 und 4: Linke und rechte untere Vorderkopfpartie in einer<br />
Unverbundenheit eine leicht diagonal nach hinten verlaufende Linie im Pointcut arbeiten. 5- Das Haar im Wrapdry mit der Stylingbrush im natürlichen Fall föhnen und<br />
dann glätten. 6- Sektion 5: Den Oberkopf im Slicecut mit leichter Längenzunahme zur Gesichtskontur finalisieren. 7- Die Ponysektion: Dreiecksabteilung vom höchsten<br />
Punkt des Kopfes zur Tampel kreieren, dann horizontal im Pointcut starke Texturen in die Ponylinie einarbeiten. FARBE 8- Am Oberkopf ein schmales Trapez kurz hinter<br />
dem höchsten Punkt des Kopfes abteilen und mit der breiten Seite 3cm vor der Stirnkontur enden lassen. Folie auf Folie (back to back) Slicetechnik mit Schwarzkopf<br />
Professional Igora Vario Blond Plus Blondierung in Länge und Spitze aufhellen. Ansätze nicht blondieren. 9- Die restlichen Haare global mit einem dunklen Ebenholzton<br />
der Schwarzkopf Professional Igora Vibrance Range colorieren. 10- Haare pflegen und föhnen, obere, aufgehellte Sektion nochmals abteilen. Der Color Blender: Der Color<br />
Blender vereinfacht das Verschmelzen, Tupfen, Aussoften von Farben. 11- In der Petallingtechnik (das Applizieren von mehreren Nuancen auf einer Abteilung) den<br />
blonden Schleier mit Farbe austupfen: Farben: mittleres, silbergraues Mauve, ein mittleres, Rosenholzpink und ein helles, gekalktes Petrolbeige. Abwechselnd, freihändig<br />
mit dem neuen Color Blender, blütenblattförmig auftupfen und verblenden.<br />
FRANÇAIS COUPE 1- Diviser les cheveux en cinq sections. 2- Section 1 : sur la partie inférieure du crâne, dessiner à l’aide du peigne une ligne de base horizontale puis<br />
couper. 3- Section 2 : Libérer la partie centrale en la ramenant sur la première section. Couper légèrement plus long que la section précédente en utilisant la technique du<br />
pointcut. 4- Sections 3 et 4 : Créer à partir de ces deux sections, situées à droite et à gauche, une ligne en diagonale, sans connection, avec les sections précédentes.<br />
5- Sécher les cheveux à l’aide d’un fer à lisser. 6- Section 5 : Finaliser à présent les longueurs du haut de tête par pallier. Laisser légèrement plus de longueur sur la partie<br />
avant du visage. 7- Créer une section triangulaire à partir des points les plus hauts du visage, au niveau des tempes. Travailler la frange, par section horizontale, afin de lui<br />
apporter plus de texture. COULEUR 8- Sur le dessus de tête, créer une section en forme de trapèze étroit. Commencer sur la partie la plus étroite, située au niveau du front,<br />
puis finir par les côtés les plus larges de 3 cm. Eclaircir cette section avec Schwarzkopf Professional Igora Royal Vario Blond Plus, sur les longueurs et pointes. Ne pas<br />
éclaircir les racines. 9- Colorez le reste de la chevelure avec une tonalité plus foncée ; un ton Brun de la ligne Schwarzkopf Professional Igora Vibrance. 10- Traiter les<br />
cheveux avec Fibre Clinix Tribond de Schwarzkopf Professional. Procéder au séchage puis isoler la partie éclaircie précédemment. Utiliser le Color Blender, conçu pour<br />
mélanger et appliquer la couleur de façon ciblée. 11- Appliquer le mélange à main levée selon la technique du pétale (mélange de différentes nuances). Le voile blond est<br />
recouvert de différentes tonalités de gris argent mauve, rose des bois, beige, etc.<br />
ESPAÑOL CORTE 1- Dividir el cabello en cinco secciones. 2- Sección 1) Parte inferior del cráneo: Crear una línea con base horizontal, que se corta recta debajo del peine.<br />
3- Sección 2) Separar el arco central horizontalmente. Crear una ligera punta con la técnica de pointcut. 4- Sección 3) y 4) sección frontal inferior izquierda y derecha:<br />
Crear una línea y dirigirla diagonalmente hacia atrás, debe quedar suelta, sin conexión. 5- Secar el cabello con un cepillo y luego con una plancha alisadora. 6- Sección 5)<br />
Finalizar la longitud de la parte superior del cráneo con un corte a capas. Realizar un un ligero aumento de longitud hacia el contorno del rostro. 7- Sección del flequillo:<br />
Crear una sección triangular desde el punto más alto de la cabeza hacia las sienes. Texturizar intensamente la zona del flequillo usando el point cutting en secciones<br />
horizontales. COLOR 8- En la parte superior de la cabeza se forma un estrecho trapecio. Empezar con el lado estrecho del trapecio justo detrás del punto más alto de la<br />
cabeza y terminar con el lado ancho a 3 cm de la raíz frontal. Pre-aclarar el trapecio con Schwarzkopf Professional Igora Royal Vario Blond Plus en la parte posterior, tanto<br />
en longitudes como en puntas. No aplicarlo en las raíces. 9- Teñir la totalidad del cabello remanente con una tonalidad ébano de la línea Schwarzkopf Professional Igora<br />
Vibrance. 10- Tratar el cabello con la serie Schwarzkopf Professional Fiber Clinix Tribond, secar y separar la parte superior pre-iluminada. El Color Blender está diseñado<br />
para mezclar, dar un ligero toque, esfumar o aplicar color de una manera versátil. 11- Mezclar a mano libre, técnica Petal (aplicación de varios matices): El velo rubio está<br />
salpicado de color: medio, malva gris-plateado, rosa palisandro medio y beige petróleo calcificado brillante.<br />
step by step 6
Kin Cosmetics<br />
Hair Design: Xevi Jubany for Kin Cosmetics<br />
Color Design: Leonie Ollacarizqueta<br />
e Xavi Rosés for Kin Cosmetics<br />
Photo: Marcos Domingo<br />
Make-up: Concha Rodríguez<br />
Styling: Ángel Cabezuelo
1 2<br />
4<br />
5 6<br />
3<br />
7 8 9<br />
10<br />
11<br />
12<br />
ENGLISH COLOUR 1- Begin with the lower occipital area. Section off with foil applying Kinblond mixed with Color Plus Oxydant 10 V at 1 + 2, leaving 1 cm of the root. Work<br />
upwards and develop for 50 minutes, checking hair condition. 2- Remove foil an excess product. 3- Apply Kinessences Blondes Bleaching Cream mixed with Kinessences<br />
Developer 12 V at 1 + 2 to the roots and develop for 30 minutes, checking hair condition. 4- Wash with Kinmaster Equilibrant Shampoo and towel dry. Tone the hair to eliminate<br />
the yellow highlights using Kinessences Blonde Beautifier tone 04 Lilac Blonde mixed with Kinessences Developer 6 V at 1 + 5. Leave 5 minutes. 5- Wash with Kinmaster<br />
Equilibrant Shampoo and dry. Divide the hair into 3 horizontal zones. 6- In the middle zone, apply Kinessences Blonde Beautifier tone 01 Pink Blonde mixed with Kinessences<br />
Developer 6 V at 1 + 6 to the roots, leaving the ends uncoloured. 7- In the upper area draw out interwoven sections. Apply a global covering of Kinessences Blonde Beautifier<br />
Ringtone 01 Pink Blonde mixed with Kinessences Developer 6 V at 1 + 6. 8- On the subsequent section, apply Kinessences Blonde Beautifier tone 01 Pink Blonde mixed with<br />
Kinessences Developer 6 V at 1 + 6 to the roots. Using a sponge, put Kinactif Color Conditioner on the ends and develop for 35 minutes. 9- Make 7 sections. CUT 10- Cut the lower<br />
partition into reverse diagonal sections, at 90° and a cut angle of 90°. 11- In the intermediate zone, work through vertical sections at 90º, an interior finger of 45º. 12- Cut the upper<br />
zone in front diagonal sections at 90º with a finger angle of 90º creating a slight elongation towards the face.<br />
ITALIANO COLORE 1- Iniziare con l’area occipitale inferiore. Dividere le zone con strisce di alluminio applicando Kinblond miscelato con Color Plus Oxydant 10 V a 1 + 2,<br />
lasciando 1 cm di radice. Lavorare verso l’alto e lasciar agire per 50 minuti, controllando lo stato dei capelli. 2- Rimuovere dalle strisce l’eccesso di prodotto 3- Applicare<br />
Kinessences Blondes Bleaching Cream miscelato con Kinessences Developer 12 V a 1 + 2 sulle radici e lasciar agire per 30 minuti, controllando lo stato dei capelli. 4- Lavare<br />
con Kinmaster Equilibrant Shampoo e tamponare. Tonalizzare i capelli per eliminare i riflessi gialli utilizzando Kinessences Blonde Beautifier tone 04 Lilac Blonde miscelato<br />
con Kinessences Developer 6 V a 1 + 5. Lasciare agire per 5 minuti. 5- Lavare con Kinmaster Equilibrant Shampoo e asciugare. Dividere i capelli in 3 zone orizzontali. 6- Nella<br />
zona centrale, applicare Kinessences Blonde Beautifier tono 01 Pink Blonde miscelato con Kinessences Developer 6 V a 1 + 6 sulle radici, lasciando le estremità incolore.<br />
7- Nella parte superiore creare delle sezioni intrecciate. Applicare una copertura totale di Kinessences Blonde Beautifier Ringtone 01 Pink Blonde miscelato con Kinessences<br />
Developer 6 V a 1 + 6. 8- Nella sezione successiva, applicare Kinessences Blonde Beautifier tono 01 Pink Blonde miscelato con Kinessences Developer 6 V a 1 + 6 sulle radici.<br />
Usando una spugna, applicare Kinactif Color Conditioner sulle punte e lasciar agire per 35 minuti. 9- Creare 7 sezioni. TAGLIO 10- Tagliare la partizione inferiore in sezioni<br />
diagonali inverse a 90 ° e con un angolo di taglio di 90 °. 11- Nella zona intermedia, lavorare con sezioni verticali a 90º, con un angolo interno di 45º. 12- Tagliare la zona<br />
superiore in sezioni diagonali anteriori a 90º con un angolo di 90° creando un leggero allungamento verso il viso.<br />
DEUTSCH FARBE 1- Am unteren Hinterkopfbereich beginnen. Einzelne Abschnitte mit Alufolie abteilen und Kinblond gemischt mit Color Plus Oxydant 10 V bei 1 + 2 auftragen,<br />
wobei 1 cm vom Ansatz freibleiben sollte. Nach oben durcharbeiten und 50 Minuten einwirken lassen. Regelmäßig den Zustand des Haares überprüfen. 2- Über-schüssige Farbe<br />
von den Streifen entfernen 3- Kinessences Blondes Blonde Blondierungscreme gemischt mit Kinessences Entwickler 12 V bei 1 + 2 auf die Ansätze auftragen und 30 Minuten<br />
einwirken lassen und regelmäßig den Zustand des Haares überprüfen. 4- Mit Kinmaster Equilibrant Shampoo waschen und danach trocken tupfen. Die Haare zur Beseitigung<br />
gelber Strähnchen mit dem Kinessences Blonde Beautifier Ton 04 Lila Blond gemischt mit Kinessences Entwickler 6 V bei 1 + 5 tönen. Für fünf Minuten einwirken lassen. 5- Mit<br />
Kinmaster Equilibrant Shampoo waschen und danach die Haare trocknen. Die Haare in drei horizontale Bereiche unterteilen. 6- Im mittleren Bereich Kinessences Blonde<br />
Beautifier Ton 01 Pink Blonde gemischt mit Kinessences Entwickler 6 V bei 1 + 6 auf die Ansätze auftragen, wobei die Spitzen ausgelassen werden. 7- Im oberen Bereich gedrehte<br />
Strähnen abteilen. Komplett mit Kinessences Blonde Beautifier Ringtone 01 Pink Blonde gemischt mit Kinessences Developer 6 V bei 1 + 6 einstreichen. 8- Im nächsten Bereich<br />
Kinessences Blonde Beautifier Ton 01 Pink Blonde gemischt mit Kinessences Entwickler 6 V bei 1 + 6 auf die Ansätze auftragen. Auf die Spitzen mit einem Schwamm Kinactif<br />
Farbconditioner auftragen und 35 Minuten einwirken lassen. 9- Sieben Abschnitte abteilen. SCHNITTE 10- Die untere Sektion in gegenläufige diagonale Abschnitte mit einem<br />
Winkel von 90° und einem Schnittwinkel von 90° schneiden. 11- In der mittleren Zone mit senkrechten Abschnitten mit einem Winkel von 90º und einem innen liegenden<br />
Winkel von 45º arbeiten. 12- Den oberen Bereich in diagonalen frontalen Abschnitten mit einem Winkel von 90° schneiden. Die Abschnitte mit einem Winkel von 90° auf das<br />
Gesicht ausrichten, um eine leichte Verlängerung dahin zu erreichen.<br />
FRANÇAIS COULEUR 1- Démarrer par la section située sur la zone occipitale inférieure. Diviser cette section à l’aide de feuilles d’aluminium et appliquer à 1 cm des racines la tonalité<br />
Kinblond, mélangée à Color Plus 10 Vol, en 1+2. Travailler vers le haut et laisser agir 50 min en contrôlant régulièrement l’évolution. 2- Eliminer l’excès de produit. 3- Appliquer à<br />
présent sur les racines Kinessences Blondes Bleaching Cream , mélangée à Kinessences Developer 12 V en 1 + 2. Laisser poser 30 min en contrôlant régulièrement l’évolution. 4- Laver<br />
les cheveux avec Kinmaster Equilibrant Shampoo, puis essorer. Réaliser à présent une patine afin d’éliminer les reflets jaunes à l’aide de la tonalité Kinessences Blonde Beautifier 04 Lilac<br />
Blonde, mélangée à Kinessences Developer 6 V en 1 + 5. Laisser poser 5 min. 5- Laver de nouveau les cheveux avec Kinmaster Equilibrant Shampoo, puis sécher. Diviser à présent les<br />
cheveux en trois sections horizontales. 6- Sur la partie centrale, appliquer Kinessences Blonde Beautifier 01 Pink Blonde mélangée avec Kinessences Developer 6 V en 1 + 6. Ne pas<br />
appliquer la couleur sur les pointes. 7- Sur la partie supérieure, créer des sections vrillées et appliquer Kinessences Blonde Beautifier Ringtone 01 Pink Blonde mélangée avec<br />
Kinessences Developer 6 V en 1 + 6. 8- Sur la section suivante, appliquer uniquement sur les racines Kinessences Blonde Beautifier 01 Pink Blonde mélangée avec Kinessences<br />
Developer 6 V a 1 + 6. Utiliser une éponge pour appliquer Kinactif Color Conditioner sur les pointes et laisser agir 35 min. 9- Délimiter 7 sections. COUPE 10- Couper la partie<br />
inférieure en sections diagonales inversées à 90°, avec un angle de coupe à 90°. 11- Dans la partie intermédiaire, travailler la section en vertical à 90°, avec un angle interne à 45°.<br />
12- Couper à présent la partie supérieure en sections diagonales internes à 90° avec un angle de coupe à 90° en créant légèrement plus de longueur vers le visage.<br />
ESPAÑOL COLOR 1- Crear velos muy finos con papel de plata aplicando Kinblond con Color Plus Oxydant 10 V a 1+2, dejando 1 cm de raíz. Trabajar desde el occipital inferior de<br />
forma ascendente y dejar 50’. 2- Retirar el papel de plata y el exceso de producto siguiendo el orden del montaje. 3- Aplicar en raíz Kinessences Blondes Bleaching Cream mezclada<br />
con Kinessences Developer 12 V a 1+2. Dejar 30’. 4- Lavar con Kinmaster Equilibrant Shampoo y secar con una toalla. Matizar con Kinessences Blonde Beautifier 04 Lilac Blonde<br />
mezclado con Kinessences Developer 6 V a 1+ 5. Dejar 5’. 5- Lavar con y secar completamente el cabello. Dividirlo en 3 zonas horizontales. 6- En la intermedia, aplicar en raíz<br />
Kinessences Blonde Beautifier tono 01 Pink Blonde mezclado con Kinessences Developer 6 V a 1+6. 7- En la zona superior trazar velos intercalados. Aplicar un velo global con<br />
Kinessences Blonde Beautifier tono 01 Pink Blonde con Kinessences Developer 6 V a 1+6. 8- En el siguiente velo, aplicar en raíz la misma mezcla. Con una esponja, depositar<br />
Kinactif Color Conditioner en puntas difuminando el color de raíz. Dejar 35’. CORTE 9- Realizar 7 particiones. 10- Cortar la partición inferior en secciones diagonales posteriores,<br />
con una elevación de 90° y un ángulo de corte de 90°, sobre su propia base. 11- En la zona intermedia, secciones verticales, con elevación de 90º, ángulo de dedos de 45º interior, sobre<br />
su base, tomando como medida la partición anterior. 12- Con el largo máximo de la partición interior como referencia, corta la zona superior mediante secciones diagonales<br />
anteriores, con una elevación de 90º, transportar cada una a la anterior y crear un ligero alargamiento a medida que llegamos al rostro.<br />
step by step 7
DISCOVER<br />
ESTETICAEXPORT.COM<br />
A new digital way to enhance<br />
international business is<br />
now available!<br />
An editorial and digital<br />
service supporting hair & beauty<br />
product manufacturers in enterprises<br />
into new international markets.<br />
JOIN US TODAY!<br />
www.esteticaexport.com
Máxima iluminación y cuidado de tu cabello<br />
www.salerm.com