UltraSmart IUC-4100E, IUC-5100E - Innotek
UltraSmart IUC-4100E, IUC-5100E - Innotek
UltraSmart IUC-4100E, IUC-5100E - Innotek

You also want an ePaper? Increase the reach of your titles
YUMPU automatically turns print PDFs into web optimized ePapers that Google loves.
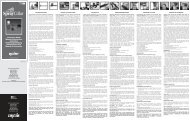
Understanding the Remote<br />
The handheld remote signals the<br />
electronic collar to produce a harmless<br />
yet effective stimulation or tone.<br />
Remote Buttons:<br />
STIMULATION (red central button) – sends stimulation<br />
signal to the collar at the intensity shown in the display<br />
window. Button features four raised bumps, one at each<br />
corner, to easily locate by touch.<br />
Level UP (+) & Level DOWN (-) – adjusts the<br />
stimulation intensity through a range of levels.<br />
From Low-1 to High-9.<br />
TONE (center green button) – Produces a<br />
training tone from the collar. No stimulation is delivered.<br />
See page 4, “Tone Option”. Button is also used to turn<br />
collar ON/OFF.<br />
Dog 1/Dog 2 Collar (right side button) – Switches<br />
remote controls from Collar 1 to Collar 2, great when<br />
training two dogs. IUT-300E users can purchase a second<br />
accessory collar to expand their system to train two dogs.<br />
Boost (left side red button) – Produces stimulation 2<br />
levels higher than the currently selected level. For example,<br />
if the stimulation level is set at Level 2, a touch of the B<br />
control will stimulate at Level 4. Some trainers like instant<br />
access to a higher setting for circumstances where the dog<br />
may not respond to lower levels, such as around high<br />
distractions.<br />
Antenna<br />
The antenna helps transmit the signal to the collar. Take<br />
care not to cover or shield the antenna with your body or<br />
hand or you may see a reduction in transmission range.<br />
Digital Display<br />
The display shows stimulation levels 1<br />
through 9.The lower part of the display shows<br />
which collar is active. Press button once or<br />
twice until Collar 1 icon shows as active.<br />
Pressing the red stimulation button sends a correction<br />
command to the collar indicated on the display. The active<br />
collar icon will display at the bottom of the window. The<br />
display will stay ON, only going OFF 30 minutes after the<br />
last button press.<br />
Power Up<br />
Remove the battery<br />
access door by<br />
unscrewing it with the<br />
edge of a small coin. Insert<br />
the 12v alkaline battery,<br />
ensuring proper +/-<br />
Remove battery door with<br />
screwdriver or coin 12<br />
polarity. Replace the door and tighten by screwing down<br />
with the coin.<br />
The remote is waterproof, though submersion is not<br />
recommended. It operates on a replaceable 12v alkaline<br />
battery (23A or A23). These are commonly available where<br />
you bought your system or where batteries are sold.<br />
ON/OFF<br />
To turn the training mode of the<br />
collar on or off, hold the collar<br />
within 2.5cm of the remote<br />
antenna, taking care not to touch<br />
the metal contacts that touch<br />
your dog’s skin. Press for<br />
Collar button once or twice until<br />
collar 1 shows as active. Press<br />
the TONE button. The collar<br />
will emit a start-up tone, and the right-hand light will glow<br />
solid green.<br />
This ON/OFF command only works when remote and collar<br />
are in close proximity; it will not work at a distance. Never<br />
turn the unit ON/OFF while your dog is wearing the collar.<br />
When not in use, be sure training function is OFF (right<br />
hand collar light is off), or you may drain battery.<br />
About Stimulation<br />
We recommend that you always start training your dog<br />
with the lowest stimulation, and increase to a higher level<br />
if necessary. You will know when you’ve reached the right<br />
level when your dog responds by twitching his head, neck<br />
or shoulders or by perking up his ears. If the dog vocalizes,<br />
you may need to go to a lower level.<br />
You control the length of the stimulation by the time you<br />
press the button. For a short stimulation, press and release<br />
the button. For a longer stimulation, hold the button down.<br />
A maximum of 10 seconds may be applied before the<br />
safety feature to prevent over-correction engages. After 10<br />
seconds, stimulation will be locked out for another 10<br />
seconds.<br />
Pressing the Boost button sends a signal to the collar to<br />
issue a correction two levels higher than the currently<br />
selected level. For example, if the stimulation level is set at<br />
Level 2, a touch of the Boost control will correct at Level 4<br />
. Some trainers like instant access to a higher setting for<br />
circumstances with high distractions. The system will not<br />
correct higher than Level 9.<br />
Tone<br />
The tone button sounds a tone in the collar. No stimulation<br />
is delivered when this button is pressed. The tone<br />
continues for as long as the button is held down. There