Bedienungsanleitung/Garantie Küchenmaschine KM 3354 - Clatronic
Bedienungsanleitung/Garantie Küchenmaschine KM 3354 - Clatronic
Bedienungsanleitung/Garantie Küchenmaschine KM 3354 - Clatronic
You also want an ePaper? Increase the reach of your titles
YUMPU automatically turns print PDFs into web optimized ePapers that Google loves.
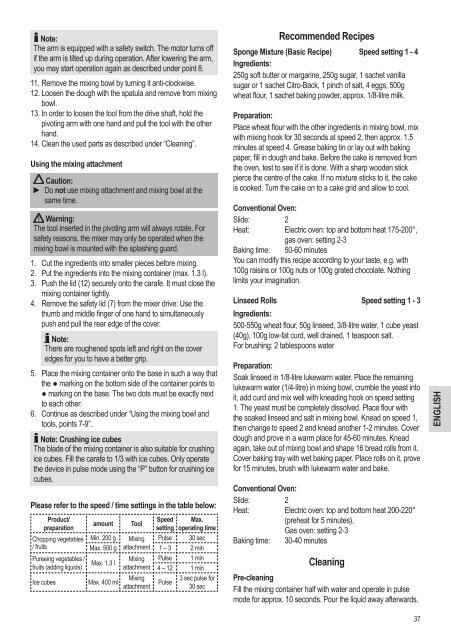
Note:<br />
The arm is equipped with a safety switch. The motor turns off<br />
if the arm is tilted up during operation. After lowering the arm,<br />
you may start operation again as described under point 8.<br />
11. Remove the mixing bowl by turning it anti-clockwise.<br />
12. Loosen the dough with the spatula and remove from mixing<br />
bowl.<br />
13. In order to loosen the tool from the drive shaft, hold the<br />
pivoting arm with one hand and pull the tool with the other<br />
hand.<br />
14. Clean the used parts as described under “Cleaning”.<br />
Using the mixing attachment<br />
Caution:<br />
► Do not use mixing attachment and mixing bowl at the<br />
same time.<br />
Warning:<br />
The tool inserted in the pivoting arm will always rotate. For<br />
safety reasons, the mixer may only be operated when the<br />
mixing bowl is mounted with the splashing guard.<br />
1. Cut the ingredients into smaller pieces before mixing.<br />
2. Put the ingredients into the mixing container (max. 1.3 l).<br />
3. Push the lid (12) securely onto the carafe. It must close the<br />
mixing container tightly.<br />
4. Remove the safety lid (7) from the mixer drive: Use the<br />
thumb and middle finger of one hand to simultaneously<br />
push and pull the rear edge of the cover.<br />
Note:<br />
There are roughened spots left and right on the cover<br />
edges for you to have a better grip.<br />
5. Place the mixing container onto the base in such a way that<br />
the ● marking on the bottom side of the container points to<br />
● marking on the base. The two dots must be exactly next<br />
to each other.<br />
6. Continue as described under “Using the mixing bowl and<br />
tools, points 7-9”.<br />
Note: Crushing ice cubes<br />
The blade of the mixing container is also suitable for crushing<br />
ice cubes. Fill the carafe to 1/3 with ice cubes. Only operate<br />
the device in pulse mode using the “P” button for crushing ice<br />
cubes.<br />
Please refer to the speed / time settings in the table below:<br />
Product/<br />
preparation<br />
Chopping vegetables<br />
/ fruits<br />
Pureeing vegetables /<br />
fruits (adding liquids)<br />
amount Tool<br />
Speed Max.<br />
setting operating time<br />
Min. 200 g Mixing Pulse 30 sec<br />
Max. 500 g attachment 1 – 3 2 min<br />
Max. 1.3 l<br />
Ice cubes Max. 400 ml<br />
Mixing<br />
attachment<br />
Mixing<br />
attachment<br />
Pulse 1 min<br />
4 – 12 1 min<br />
Pulse<br />
3 sec pulse for<br />
30 sec<br />
Recommended Recipes<br />
Sponge Mixture (Basic Recipe) Speed setting 1 - 4<br />
Ingredients:<br />
250g soft butter or margarine, 250g sugar, 1 sachet vanilla<br />
sugar or 1 sachet Citro-Back, 1 pinch of salt, 4 eggs, 500g<br />
wheat flour, 1 sachet baking powder, approx. 1/8-litre milk.<br />
Preparation:<br />
Place wheat flour with the other ingredients in mixing bowl, mix<br />
with mixing hook for 30 seconds at speed 2, then approx. 1.5<br />
minutes at speed 4. Grease baking tin or lay out with baking<br />
paper, fill in dough and bake. Before the cake is removed from<br />
the oven, test to see if it is done. With a sharp wooden stick<br />
pierce the centre of the cake. If no mixture sticks to it, the cake<br />
is cooked. Turn the cake on to a cake grid and allow to cool.<br />
Conventional Oven:<br />
Slide: 2<br />
Heat: Electric oven: top and bottom heat 175-200°,<br />
gas oven: setting 2-3<br />
Baking time: 50-60 minutes<br />
You can modify this recipe according to your taste, e.g. with<br />
100g raisins or 100g nuts or 100g grated chocolate. Nothing<br />
limits your imagination.<br />
Linseed Rolls Speed setting 1 - 3<br />
Ingredients:<br />
500-550g wheat flour, 50g linseed, 3/8-litre water, 1 cube yeast<br />
(40g), 100g low-fat curd, well drained, 1 teaspoon salt.<br />
For brushing: 2 tablespoons water<br />
Preparation:<br />
Soak linseed in 1/8-litre lukewarm water. Place the remaining<br />
lukewarm water (1/4-litre) in mixing bowl, crumble the yeast into<br />
it, add curd and mix well with kneading hook on speed setting<br />
1. The yeast must be completely dissolved. Place flour with<br />
the soaked linseed and salt in mixing bowl. Knead on speed 1,<br />
then change to speed 2 and knead another 1-2 minutes. Cover<br />
dough and prove in a warm place for 45-60 minutes. Knead<br />
again, take out of mixing bowl and shape 16 bread rolls from it.<br />
Cover baking tray with wet baking paper. Place rolls on it, prove<br />
for 15 minutes, brush with lukewarm water and bake.<br />
Conventional Oven:<br />
Slide: 2<br />
Heat: Electric oven: top and bottom heat 200-220°<br />
(preheat for 5 minutes),<br />
Gas oven: setting 2-3<br />
Baking time: 30-40 minutes<br />
Cleaning<br />
Pre-cleaning<br />
Fill the mixing container half with water and operate in pulse<br />
mode for approx. 10 seconds. Pour the liquid away afterwards.<br />
37


