F - Atlantic-comfort.com
F - Atlantic-comfort.com
F - Atlantic-comfort.com

You also want an ePaper? Increase the reach of your titles
YUMPU automatically turns print PDFs into web optimized ePapers that Google loves.
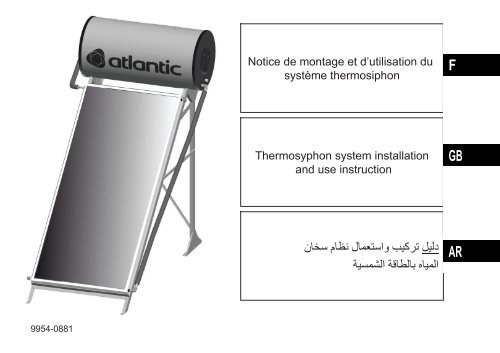
F<br />
Notice de montage et d’utilisation du<br />
système thermosiphon<br />
F<br />
GB<br />
Thermosyphon system installation<br />
and use instruction<br />
GB<br />
AR<br />
<br />
<br />
AR<br />
9954-0881
F<br />
RECOMMANDATIONS IMPORTANTES<br />
Avant de débuter l’assemblage du système solaire, veiller à bien prendre en <strong>com</strong>pte les re<strong>com</strong>mandations suivantes :<br />
- Le système solaire doit être installé de façon à ce que les capteurs soient orientés au Sud (dans l’hémisphére nord) ou au Nord (dans l’hémisphère sud),<br />
- Le lieu d’installation ne doit pas être ombragé pendant la journée et doit être aussi proche que possible des points de consommation,<br />
- Pendant l’installation et la mise en service, les capteurs doivent être protégés du soleil afin de ne pas endommager le circuit fermé du système,<br />
- Lors de la mise en service, <strong>com</strong>mencer par remplir le réservoir d’eau sanitaire avant de remplir le circuit d’un mélange d’antigel et d’eau (seuil mini 15%).<br />
- Le liquide antigel anticorrosion fourni doit être dilué dans de l’eau avant de le verser dans le circuit fermé. Sa concentration doit être adaptée au lieu d’installation.<br />
- Etant donné que les températures régnant à l’intérieur du système peuvent dépasser 60°C, une vanne mitigeuse d’eau sanitaire doit être mise en place côté eau<br />
sanitaire afin d’éviter les risques de brûlures !<br />
CARACTERISTIQUES TECHNIQUES:<br />
Le thermosiphon se <strong>com</strong>pose des éléments suivants : réservoir solaire, capteur(s), support et kit de raccords (une liste détaillée figure plus loin dans le document).<br />
La pression de service maximale côté eau sanitaire est de 6 bars. En cas de dépassement de ce seuil, il est re<strong>com</strong>mandé d’utiliser un détendeur. La pression<br />
maximale du circuit solaire fermé est de 1,5 bars. Le réservoir solaire est émaillé sur l’intérieur et est doté de 2 anodes sacrificielles en magnésium empêchant la<br />
corrosion. En ce qui concerne le circuit solaire, la protection antigel et anticorrosion est assurée par le recours à du propylène de glycol 1,2.<br />
EMBALLAGE ET TRANSPORT:<br />
Le système est emballé de manière à limiter autant que possible les risques de détériorations.<br />
Les produits doivent être entreposés à l’abri des intempéries. Si les produits sont brièvement entreposés en extérieur, l’emballage doit être retiré.<br />
DIRECTIVES D’INSTALLATION:<br />
Avant de procéder à l’installation du système, vérifiez que la surface d’installation (surface du toit) est suffisamment résistante pour supporter le poids du<br />
thermosiphon lorsqu’il est plein. Vous devez obtenir une confirmation écrite de la part de l’architecte/du planificateur.<br />
Pour que l’entretien soit facilité, le système doit être installé à au moins 1 mètre des murs ou à l’extrémité du toit.<br />
Pour éviter les infiltrations au niveau du toit, la tuyauterie doit être rendue étanche grâce à une traversée de la toiture adaptée. Pour ce faire, l’architecte doit<br />
également fournir des directives précises.<br />
Toutes les conduites de raccordement doivent être dotées d’une excellente isolation résistante aux UV. Vous veillerez à choisir un type et une épaisseur de<br />
matériau isolant adaptés aux conditions en présence.<br />
SUPPORT :<br />
La construction du toit doit être en mesure de résister aux charges de vent et de neige correspondante (1m³ de poudreuse = 60kg, 1m³ de neige mouillée = 300kg).<br />
Les conditions en présence en matière de charges de neige et de vent doivent être prises en considération lors de la fixation du système. Pour plus d’informations,<br />
veuillez vous adresser aux négociants locaux.<br />
DISPOSITIFS DE SECURITE:<br />
En ce qui concerne le circuit solaire, une soupape de sécurité présentant une pression d’ouverture de 1,5 bars est utilisée. Cette soupape est montée sur le<br />
réservoir dans un manchon de ½ pouce. La soupape de sécurité de l’eau sanitaire est également montée au-dessus du réservoir sur un manchon de ½ pouce.<br />
La soupape de sécurité solaire 1,5 bars peut également être acheminée jusqu’à un réservoir avec le tuyau de trop plein afin de récupérer le glycol.<br />
ATTENTION : le capteur doit être couvert avant et pendant le remplissage.<br />
2
IMPORTANT DIRECTIONS<br />
Before starting the assembly of the solar heater, take into account the following directions :<br />
- The solar heater should be placed in a way that its collector see the south (in the northern hemisphere) or see the north (in the southern hemisphere),<br />
- The place, that you will place the solar heater, must not be shaded and should be as near as possible to consumption,<br />
- During works, the collectors should be covered from the sun to prevent any damage on the closed loop of the system,<br />
- During the set-up, first fill the tank with the domestic cold water before filling the solar circuit with the antifreeze/water mixture (at least 15% antifreeze),<br />
- The anti-freezing and anti-corrosive liquid delivered should be added to the closed loop after it has been diluted with water. Concentration must fit to the place,<br />
- As temperature of over 60°C occur in the system a suitable domestic hot water mixing valve must be used on the domestic hot water side to avoid scalding.<br />
SPECIFICATIONS:<br />
The thermosyphon system <strong>com</strong>prises the following <strong>com</strong>ponents: solar tank, collector(s), frame and installation kit (a detailed listing may be found below)<br />
The maximum operating pressure on the domestic hot water side is 6 bars. A pressure reducer is re<strong>com</strong>mended in the event that the domestic hot water pressure<br />
is higher. The maximum pressure in the closed solar circuit is 1,5 bars. The solar tank is enamelled on the inside and equipped with two sacrificial magnesium<br />
anodes to inhibit corrosion. 1,2 propylene glycol is used to provide frost and corrosion protection in the solar circuit.<br />
PACKAGING AND TRANSPORT:<br />
The system is packed in such a way as to prevent damages as far as possible. The products must be stored away from effects of the weather.<br />
The packaging must be removed if the products are temporarily stored outdoors.<br />
INSTALLATION GUIDELINES:<br />
Before installing the system, ensure that the mounting surface (roof surface) will withstand the weight of the thermosyphon system when filled. Written confirmation<br />
must be obtained from the architect/designer. The system must be installed at least 1m from walls or at the end of the roof to assist with maintenance of the system.<br />
The piping must be sealed with a suitable roof insertion to prevent moisture getting in the roof. Precise guideline must also be provided by the architect for this.<br />
All connection pipes must be very well insulated and UV resistant. The correct insulating material and insulation thickness must be selected according to local<br />
conditions.<br />
FRAMES:<br />
The roof construction must be capable of withstanding the appropriate wind and snow loads. (1m³ powder snow = 60kg, 1m³ wet snow = 300kg).<br />
The local conditions for snow and wind loads must be taken into consideration when mounting the system. Please consult local dealers for further information.<br />
SAFETY EQUIPMENT:<br />
A pressure relief valve with an opening pressure of 1,5 bars is used in the solar circuit. This valve is mounted on the tank in a ½ inch sleeve. The pressure relief<br />
valve for domestic hot water is also installed in ½ inch sleeve above the tank.The solar pressure relief valve can also be fed through the overflow hose into a<br />
container to trap the glycol.<br />
WARNING: the collector should be covered before and during filling.<br />
GB<br />
3
: <br />
: <br />
.( ) ( ) <br />
. <br />
. <br />
.(%15 ) <br />
. . <br />
! 60 <br />
: <br />
.( ) () : Thermosiphon <br />
15 . . 6 <br />
.12 . (2) .<br />
: <br />
. <br />
. . <br />
. ( ) <br />
: <br />
<br />
. <br />
. <br />
. . <br />
. . <br />
AR<br />
: <br />
.( 300 = 1 60 = 1) <br />
. . <br />
. . 15<br />
: <br />
<br />
<br />
. <br />
. 15 <br />
. :<br />
4
4<br />
1<br />
5<br />
4<br />
1<br />
VUE D’ENSEMBLE<br />
1. Ballon de stockage<br />
2. Capteur(s)<br />
3. Support de fixation<br />
4. Tube de liaison chaud<br />
5. Tube de liaison froid<br />
F<br />
3<br />
5<br />
2<br />
45°<br />
Pente de toit <strong>com</strong>prise entre 15° et 45° Roof Pitch between 15° and 45° 45 15 <br />
2<br />
3<br />
2<br />
6<br />
OVERVIEW<br />
1. Storage tank<br />
2. Collector(s)<br />
3. Mounting Bracket<br />
4. Connecting pipe – hot<br />
5. Connecting pipe – cold<br />
GB<br />
4<br />
1<br />
5<br />
3<br />
4<br />
1<br />
5<br />
<br />
.1<br />
() .2<br />
.3<br />
.4<br />
.5<br />
AR<br />
15° - 45°<br />
2<br />
2<br />
2<br />
3<br />
15<br />
5
F<br />
MONTAGE DU SUPPORT SUR TERRASSE<br />
Percer 6 trous de fixation pour vis de taille M10 minimum.<br />
Choisir des vis de fixation adaptées au matériau du sol.<br />
GB<br />
MOUNTING THE BASE ON A TERRACE<br />
Drill 6 holes for M10 screws, minimum size.<br />
Choose screws appropriate for the ground material.<br />
1780mm<br />
AR<br />
<br />
. 10 6 <br />
<br />
.<br />
200L<br />
300L<br />
340mm<br />
X mm<br />
X 940 1160<br />
6
Fixer les 2 pieds de support au sol et serrer fermement.<br />
Attention au sens, les perçages doivent être visibles par<br />
l’arrière.<br />
F<br />
Attach the two base legs on the ground and tighten.<br />
Pay attention to the direction, the holes should be visible<br />
from the rear.<br />
GB<br />
<br />
.<br />
. <br />
AR<br />
7
F<br />
Fixer la partie haute des supports de capteur sur les<br />
pieds de support.<br />
Visser la partie basse du support au sol fermement.<br />
GB<br />
Attach the upper collector base on the support legs.<br />
Firmly screw the lower part to the ground.<br />
AR<br />
<br />
. <br />
. <br />
8
Assembler les renforts latéraux et serrer les boulons et<br />
les écrous <strong>com</strong>plètement.<br />
F<br />
Assemble the side reinforcements and tighten the bolts<br />
and nuts <strong>com</strong>pletely.<br />
GB<br />
<br />
.<br />
AR<br />
9
F<br />
Assembler la croix de renfort à l’arrière du support sans<br />
serrer les boulons et les écrous <strong>com</strong>plètement. Au centre<br />
de la croix, utiliser le boulon le plus long avec 2 rondelles.<br />
GB<br />
Assemble the cross bracket on the back of the base<br />
without tightening the bolts and nuts <strong>com</strong>pletely. In the<br />
center of the cross, use the longer bolt with 2 washers.<br />
AR<br />
<br />
. <br />
. <br />
Attention à la position de la croix de renfort !<br />
Pay attention to the cross bracket’s position!<br />
! <br />
200L<br />
300L<br />
10
Assembler les rails en aluminium de support capteur sans<br />
serrer les boulons et les écrous <strong>com</strong>plétement. La partie<br />
bombée de la vis est au dessus du rail.<br />
F<br />
200L<br />
Assemble the collector base aluminum rails without<br />
tightening the bolts and nuts <strong>com</strong>pletely. The curved part<br />
of the screw is above the rail.<br />
GB<br />
<br />
. <br />
. <br />
AR<br />
300L<br />
11
F<br />
Glisser le ou les capteurs dans les rails aluminium de la<br />
structure. En version 2 capteurs, relier les tubes des<br />
capteurs entre eux avec les raccords fournis.<br />
GB<br />
Slide the collector(s) into structures aluminum rails. In the<br />
2 collector version, connect the collector pipes between<br />
them with the fittings provided.<br />
AR<br />
.<br />
.<br />
12
Poser le ballon sur le support en insérant les vis dans les<br />
trous du support puis serrer fermement les 4 écrous.<br />
F<br />
Place the tank on the base by inserting the screws<br />
through the holes in the bracket and then tighten the 4<br />
nuts.<br />
GB<br />
<br />
. <br />
AR<br />
13
F<br />
Serrer fermement tous les boulons et les écrous du<br />
montage <strong>com</strong>plet.<br />
GB<br />
Tighten all bolts and nuts for the entire assembly.<br />
AR<br />
. <br />
24<br />
14
15° - 45°<br />
Ø 8,5mm<br />
1020 mm<br />
1230<br />
1265<br />
1300<br />
1335<br />
1370<br />
1405<br />
1440<br />
MONTAGE DU SUPPORT SUR TOITURE<br />
Retirer les éléments de couverture et choisir 2 chevrons<br />
écartés entre 102 et 144 cm pour positionner les tirefonds.<br />
Percer les chevrons au diamètre Ø 8,5mm.<br />
F<br />
MOUNTING THE BASE ON A ROOFTOP<br />
Remove coverings and choose two rafters between 102<br />
and 144 cm apart to position the lag bolts.<br />
Drill the rafters with 8.5 mm diameter.<br />
GB<br />
2448mm<br />
: <br />
<br />
. 144 102 <br />
. 85 <br />
AR<br />
15
F<br />
Percer les chevrons avec un forêt de diamètre 8,5mm et<br />
les éléments de couverture au diamètre 14mm (perçage<br />
dans la partie haute de l’ondulation). Visser les tirefonds<br />
entre 80 et 100mm et réaliser une étanchéité entre la<br />
couverture et les tirefonds.<br />
GB<br />
Drill the rafters with a 8.5 mm diameter bit and the covers<br />
with 14 mm diameter (drilling in the upper part of the<br />
wave). Screw the lag bolts between 80 to 100mm and a<br />
seal between the cover and lag bolts.<br />
AR<br />
85 <br />
.( ) 14 <br />
100 80 <br />
. <br />
16
Régler la hauteur des rails avec les écrous de façon à ce<br />
que les rails soient au minimum 10mm plus haut que la<br />
couverture.<br />
F<br />
Adjust the rail height with the nuts so that the rails are at<br />
least 10mm higher than the cover.<br />
GB<br />
.<br />
10<br />
AR<br />
10mm<br />
17
F<br />
Couper la partie haute des tirefonds et assembler les rails<br />
de support verticaux. Serrer fermement.<br />
GB<br />
Cut the upper part of the lag bolts and assemble the<br />
vertical support rails. Tighten.<br />
AR<br />
. <br />
. <br />
18
Assembler les renforts de support ballon sans serrer les<br />
boulons et les écrous <strong>com</strong>plètement. Régler l’angle de<br />
décalage du support de façon à ce que le support soit le<br />
plus horizontal possible. L’angle correspond à l’angle de<br />
la toiture.<br />
F<br />
Assemble the tank base reinforcements without tightening<br />
the bolts and nuts <strong>com</strong>pletely. Set the base offset angle<br />
so that the surface is as horizontal as possible. The angle<br />
is the roof angle.<br />
GB<br />
15°<br />
30°<br />
45°<br />
<br />
.<br />
. .<br />
AR<br />
19
F<br />
Assembler les rails en aluminium de support capteur sans<br />
serrer les boulons et les écrous <strong>com</strong>plètement.<br />
200L<br />
GB<br />
Assemble the collector base aluminum rails without<br />
tightening the bolts and nuts <strong>com</strong>pletely.<br />
AR<br />
<br />
. <br />
300L<br />
20
Glisser le ou les capteurs dans les rails aluminium de la<br />
structure. En version 2 capteurs, relier les tubes des<br />
capteurs entre eux avec les raccords fournis.<br />
F<br />
Slide the collector(s) into structures aluminum rails. In the<br />
2 collector version, connect the collector pipes between<br />
them with the fittings provided.<br />
GB<br />
. <br />
<br />
. <br />
AR<br />
21
F<br />
Poser le ballon sur le support en insérant les vis dans les<br />
trous du support. Orienter le ballon de façon à ce que le<br />
piquage d’entrée eau froide soit verticalement aligné avec<br />
le capot électrique.<br />
Serrer ensuite fermement les 4 écrous.<br />
GB<br />
Place the tank on the base by inserting the screws<br />
through the holes in the bracket. Orient the tank so that<br />
the cold water inlet nozzle is vertically aligned with the<br />
electrical cover.<br />
Tighten the 4 nuts firmly.<br />
AR<br />
<br />
.<br />
. <br />
. <br />
22
Serrer fermement tous les boulons et les écrous du<br />
montage <strong>com</strong>plet.<br />
F<br />
Tighten all bolts and nuts for the entire assembly.<br />
GB<br />
. <br />
AR<br />
24<br />
23
F<br />
RACCORDEMENTS HYDRAULIQUES<br />
Raccorder le bouchon sur le tube haut du capteur et<br />
raccorder le tube flexible « froid » entre le ballon et le<br />
tube bas du capteur. Réaliser l’étanchéité du piquage<br />
ballon avec le ruban Téflon fourni.<br />
GB<br />
WATER CONNECTIONS<br />
Connect the plug on the top collector pipe and connect<br />
the flexible “cold” tube between the tank and the bottom<br />
collector pipe. Seal the tank nozzle with the Teflon tape<br />
provided.<br />
AR<br />
: <br />
<br />
"" <br />
. <br />
. <br />
24
Raccorder le bouchon sur le tube bas du capteur et<br />
raccorder le tube flexible « chaud » entre le ballon et le<br />
tube haut du capteur.<br />
F<br />
Connect the plug on the bottom collector pipe and<br />
connect the flexible “hot” tube between the tank and the<br />
top collector pipe.<br />
GB<br />
200L<br />
300L<br />
<br />
"" <br />
. <br />
AR<br />
25
F<br />
OPTION KIT DE CHAUFFE ELECTRIQUE<br />
Mettre le kit électrique en place en suivant les instructions<br />
de la notice de montage spécifique (démontage, montage,<br />
branchement électrique). Attention, la position du trou<br />
d’écoulement du capot doit être orienté vers le bas.<br />
GB<br />
OPTIONAL ELECTRICAL HEATER KIT<br />
Install the electrical kit following the specific installation<br />
instructions (disassembly, assembly, electrical<br />
connection). Please note that the position of the drain hole<br />
cover should be facing down.<br />
AR<br />
<br />
<br />
.( ) <br />
. <br />
26
Option<br />
Option<br />
Bleu<br />
Blue<br />
<br />
<br />
Raccord diélectrique<br />
Dielectrical union<br />
<br />
Soupape décharge<br />
PT valve<br />
<br />
Raccorder le circuit d’eau sanitaire. Raccorder la valvula<br />
sur l’entrée eau froide (collerette bleue) et la soupape de<br />
décharge (en option) sur la sortie eau chaude (collerette<br />
rouge). Installer le mitigeur thermostatique (en option).<br />
Vérifier que tous les raccordements sont corrects et<br />
étanches puis remplir le réservoir d’eau sanitaire.<br />
F<br />
Valvula<br />
Pressure relief valve<br />
Rouge<br />
Red<br />
<br />
Connect the hot water circuit. Connect the valve on the<br />
cold water inlet (blue collar) and the relief valve (optional)<br />
on the hot water outlet (red collar). Install the thermostatic<br />
mixing valve (optional). Check that all connections are<br />
correct and tight and then fill the tank with hot water.<br />
GB<br />
Pressure relief valve<br />
Mitigeur<br />
Mixing valve<br />
<br />
Récupération<br />
Mixing valve<br />
<br />
<br />
() ( ) <br />
.( ) <br />
() <br />
. <br />
AR<br />
Eau froide<br />
Cold water<br />
<br />
Eau chaude<br />
Hot water<br />
<br />
27
200L<br />
F<br />
Le remplissage du circuit capteur doit être effectué lorsque le capteur est froid (tôt le matin<br />
ou tard le soir, idéalement couvrir les capteurs). Diluer un nombre suffisant de bidons de<br />
glycol dans de l’eau (1 litre de glycol avec 5 litres d’eau) puis remplir le système avec ce<br />
mélange. Compléter avec de l’eau jusqu’au débordement. S ’assurer que tout l’air présent<br />
dans le système s’échappe en secouant les tubes flexibles.<br />
Selon le lieu d’installation, il peut être nécessaire d’augmenter la quantité de glycol !<br />
300L<br />
1L<br />
5L<br />
GB<br />
The collector circuit must be filled when the collector is cold (early morning or late at night,<br />
ideally cover the collectors). Dilute a sufficient number of cans of glycol in the water (1 liter of<br />
glycol with 5 liters of water) and then fill the system with this mixture. Fill with water to<br />
overflowing. Make sure all the air escapes the system by shaking the flexible tubes.<br />
Depending on the installation site, it may be necessary to increase the amount of glycol!<br />
AR<br />
) <br />
( 5 ) .(<br />
. . <br />
. <br />
! <br />
28
Raccorder la soupape de sécurité et le bouchon dès que<br />
le circuit solaire est rempli à ras bord. Réaliser les deux<br />
étanchéités avec le ruban Téflon haute température<br />
fourni.<br />
F<br />
Connect the safety valve and cap when the solar circuit is<br />
filled to the brim. Make both seals with the high<br />
temperature Teflon tape provided.<br />
GB<br />
<br />
. <br />
. <br />
AR<br />
29
F<br />
DIAGNOSTICS DES DYSFONCTIONNEMENTS:<br />
Si vous constatez que le système perd en efficacité, veuillez vérifiez que :<br />
- l’orientation du système est correcte,<br />
- rien ne couvre le capteur ou lui fait de l’ombre,<br />
- le verre du capteur n’est pas recouvert de substances opaques (crasse, poussière),<br />
- le circuit fermé est exempt de fuites,<br />
- le circuit solaire est suffisamment rempli,<br />
- les conduites de raccordement du système sont suffisamment isolées.<br />
SURCHAUFFE ET GEL:<br />
Le système est protégé des risques de surchauffe par les soupapes de sécurité.<br />
Si le système n’est pas utilisé de manière prolongée pendant l’été (par exemple pendant les vacances) il est préférable de couvrir le capteur.<br />
Le système est protégé du gel par une quantité suffisante de glycol. Le niveau de remplissage du glycol doit être contrôlé chaque année par un technicien agréé.<br />
La concentration d’antigel doit être adaptée aux conditions en présence. Le glycol fourni est du propylène glycol 1,2.<br />
ENTRETIEN:<br />
Le système doit faire l’objet d’un entretien annuel. Les mesures nécessaires sont les suivantes :<br />
- Contrôle et remplacement des anodes en magnésium.<br />
- Contrôle des soupapes de sécurité<br />
- Contrôle du niveau de remplissage du fluide solaire (glycol) dans le circuit solaire. Au besoin faite l’appoint.<br />
- Contrôle de l’étanchéité de la tuyauterie<br />
- Remplacement des joints, si cela s’avère nécessaire.<br />
30<br />
CONDITIONS DE GARANTIE:<br />
L’appareil doit être installé, utilisé et entretenu selon les règles de l’art, conformément aux normes en vigueur dans le pays d’installation et aux indications de cette<br />
notice. La garantie <strong>com</strong>merciale couvre l’échange gratuit des cuves et <strong>com</strong>posants reconnus défectueux par notre service après vente, hors pièces d’usure (anode<br />
magnésium, joint..), et sans indemnité, ni prolongation de garantie. Elle ne couvre pas les frais de main d’oeuvre et de port liés à l’échange de pièces, lesquels vous<br />
seront facturés conformément à nos tarifs. Elle prend effet à <strong>com</strong>pter de la date de pose, facture d’achat ou d’installation faisant foi ; en l’absence de justificatif, la<br />
date de prise en <strong>com</strong>pte sera celle de fabrication indiquée sur la plaque signalétique du chauffe-eau majorée de 6 mois. Les frais et dégâts dus à une installation<br />
défectueuse (gel, non raccordement à l’égout des eaux usées…) ou à des difficultés d’accès, ne peuvent en aucun cas nous être imputés. Tout sinistre devra être<br />
déclaré au dépositaire avant échange sous garantie, et l’appareil restera à la disposition des experts d’assurance et du constructeur. Les dispositions des présentes<br />
conditions de garantie ne sont pas exclusives du bénéfice au profit de l’acheteur, de la garantie légale pour défauts et vices cachés qui s’appliquent en tout état de<br />
cause dans les conditions légales de chaque pays. La garantie ne s’appliquera qu’aux produits expertisés et reconnus défectueux par l’entreprise redevable de la<br />
garantie. Il est impératif de conserver les produits à disposition de cette dernière.<br />
Sont exclus de la garantie : Les pièces d’usure : anodes de magnésium….Les appareils non expertisables (difficilement accessibles pour réparation, entretien ou<br />
expertise).Les appareils exposés à des conditions d’environnement anormales : gel, eau présentant des caractéristiques d’agressivité anormales en dehors des<br />
critères de potabilité, alimentation électrique présentant des surtensions importantes .Les appareils installés sans respect des normes et réglementations en vigueur<br />
dans le pays d’installation : absence ou mauvais montage des organes de sécurité contre la surpression, corrosion anormale due à un raccordement hydraulique<br />
incorrect (contact fer/cuivre), mise à la terre incorrecte, section du câble électrique insuffisante, non respect des schémas de branchement indiqués dans cette<br />
notice. Les appareils non entretenus conformément aux prescriptions de la présente notice. Les réparations ou remplacements de pièces ou <strong>com</strong>posants de<br />
l’appareil non réalisés ou autorisés par l’entreprise redevable de la garantie. Les produits présentés dans cette notice sont susceptibles d’être modifiés à tout<br />
moment pour répondre à l’évolution des techniques et normes en vigueur.
TROUBLESHOOTING:<br />
If you find that the system loses efficiency, please make sure:<br />
-system orientation is correct,<br />
-nothing covers the collector or shades it,<br />
- the collector glass is not covered with opaque substances (dirt, dust)<br />
- the closed circuit is free of leaks,<br />
- the solar circuit is sufficiently filled,<br />
-the pipes connecting the system are sufficiently insulated.<br />
OVERHEATING AND FREEZING:<br />
The system is protected from overheating by safety valves.<br />
If the system is not used for long periods during the summer (e.g. during vacations) it is best to cover the collector.<br />
The system is protected from freezing by an adequate amount of glycol. The glycol fill-level must be checked annually by a certified technician.<br />
The antifreeze concentration must be suitable for actual conditions. The glycol provided is propylene glycol 1.2.<br />
MAINTENANCE:<br />
The system should be serviced annually. The necessary steps are:<br />
- Checking and replacing magnesium anodes.<br />
- Checking safety valves<br />
- Checking the solar fluid (glycol) fill level in the solar circuit. Top up if necessary.<br />
- Checking pipework sealing<br />
-Replace seals, if necessary.<br />
GB<br />
WARRANTY:<br />
The device must be installed, operated, and maintained according to best practice in accordance with applicable standards in the country where it is installed, and<br />
the instructions in this leaflet. The Commercial Warranty covers free replacement of tanks and <strong>com</strong>ponents found to be defective by our customer service,<br />
excluding wear parts (magnesium anode, gaskets..), and without <strong>com</strong>pensation, or extending the warranty. It does not cover the cost of labor and transportation<br />
related to exchanging parts, which will be charged in accordance with our rates. It takes effect from the date of installation, as evidenced by the purchase or<br />
installation invoice; in the absence of proof, the date used shall be the date of manufacture indicated on the water-heater’s information plate plus 6 months. Costs<br />
and damage due to improper installation (freezing, failure to connect the wastewater to the sewer ...) or access difficulties, shall not, under any circumstances, be<br />
our responsibility. Any damage must be reported to the depositary before exchange under warranty, and the unit shall remain available to insurance adjusters and<br />
the manufacturer. The provisions of this warranty conditions shall not be deemed the buyer’s sole recourse: the legal guarantee for faults and hidden defects under<br />
the legal terms of each country shall apply in any case. The guarantee shall only apply to products examined and found to be defective by the <strong>com</strong>pany<br />
responsible for the warranty. It is imperative to keep the product available to said <strong>com</strong>pany.<br />
Shall be excluded from the warranty: Wear parts: magnesium anode.... Devices that cannot be examined (difficult to access for repair, maintenance, or expertise).<br />
Devices exposed to abnormal environmental conditions: freezing, water with characteristics of abnormal aggression outside the criteria for drinking water, power<br />
supply with abnormal surges. Devices installed without regards to standards and regulations in the country of installation: absence or incorrect installation of safety<br />
devices against overpressure, corrosion due to abnormal hydraulic connection (iron/copper contact), incorrect grounding, inadequate electrical cable section, non<strong>com</strong>pliance<br />
with wiring diagrams indicated in this leaflet. Devices not maintained in accordance with the requirements of this notice. Device repairs or part or<br />
<strong>com</strong>ponent replacements not made or authorized by the <strong>com</strong>pany responsible for the warranty. The products described herein are subject to change at any time in<br />
response to changing technologies and standards.<br />
31
AR<br />
: <br />
: <br />
-<br />
-<br />
( ) -<br />
-<br />
-<br />
. -<br />
: <br />
. <br />
. ( ) <br />
. . <br />
.12 . <br />
:<br />
: . <br />
. -<br />
. -<br />
. . () -<br />
. -<br />
. -<br />
: <br />
. <br />
. (... ) <br />
. . <br />
. <br />
. (... ) <br />
. <br />
. . . <br />
( ) ( ) <br />
( ) <br />
) <br />
( <br />
. <br />
. <br />
Imp. Signatures Graphiques F-68360 Soultz<br />
32