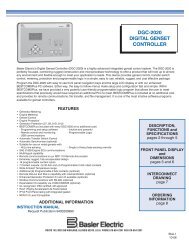
20000 / 18000 Home Generator - NoOutage.com, LLC
20000 / 18000 Home Generator - NoOutage.com, LLC
20000 / 18000 Home Generator - NoOutage.com, LLC

You also want an ePaper? Increase the reach of your titles
YUMPU automatically turns print PDFs into web optimized ePapers that Google loves.
Initial Start-up (No Load)<br />
Before operating the home generator or placing it into<br />
service, inspect the entire installation carefully.<br />
Then begin testing the system without any electrical loads<br />
connected, as follows:<br />
1. Set generator’s main circuit breaker to its ON (closed)<br />
position.<br />
2. Install 15 Amp fuse in control panel.<br />
3. Set generator’s system switch to AUTO.<br />
4. Push MANUAL OVER-RIDE button on control panel.<br />
NOTE: When the home generator is started for the very<br />
first time, it will require that air in the gaseous fuel lines be<br />
purged. This may take a few minutes.<br />
5. DO NOT crank engine for more than 10 seconds, then<br />
pause for 10 seconds to reduce heat in the starter.<br />
6. Repeat process until engine starts.<br />
7. Listen for unusual noises, vibration or other indications<br />
of abnormal operation. Check for oil leaks while engine<br />
runs.<br />
8. Let engine warm up for about five minutes to allow<br />
internal temperatures to stabilize.<br />
9. Connect an accurate AC voltmeter and a frequency<br />
meter to check generator output at load side of circuit<br />
breaker. Voltage should be 239‐262 Volts, frequency<br />
should be 62.0 - 62.5 Hz.<br />
NOTE: If either parameter is outside these ranges, perform<br />
the Engine Adjustments described below.<br />
10. Check generator output between one of the generator<br />
connection lugs and the neutral lug, then between the<br />
other generator connection lug and the neutral lug.<br />
In both cases, voltage reading should be between<br />
119‐131 Volts.<br />
11. Push and hold MANUAL OVER-RIDE button on control<br />
panel again until engine stops.<br />
IMPORTANT: DO NOT proceed until you are certain that<br />
generator AC voltage and frequency are correct and within<br />
the stated limits. To obtain the proper generator frequency,<br />
see Engine Adjustments.<br />
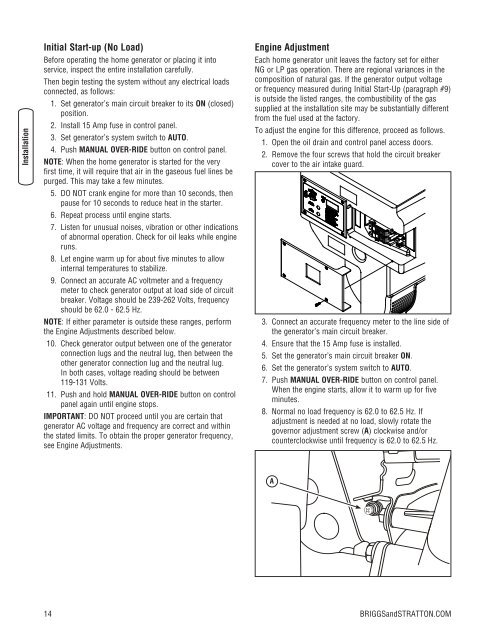
Engine Adjustment<br />
Each home generator unit leaves the factory set for either<br />
NG or LP gas operation. There are regional variances in the<br />
<strong>com</strong>position of natural gas. If the generator output voltage<br />
or frequency measured during Initial Start-Up (paragraph #9)<br />
is outside the listed ranges, the <strong>com</strong>bustibility of the gas<br />
supplied at the installation site may be substantially different<br />
from the fuel used at the factory.<br />
To adjust the engine for this difference, proceed as follows.<br />
1. Open the oil drain and control panel access doors.<br />
2. Remove the four screws that hold the circuit breaker<br />
cover to the air intake guard.<br />
3. Connect an accurate frequency meter to the line side of<br />
the generator’s main circuit breaker.<br />
4. Ensure that the 15 Amp fuse is installed.<br />
5. Set the generator’s main circuit breaker ON.<br />
6. Set the generator’s system switch to AUTO.<br />
7. Push MANUAL OVER-RIDE button on control panel.<br />
When the engine starts, allow it to warm up for five<br />
minutes.<br />
8. Normal no load frequency is 62.0 to 62.5 Hz. If<br />
adjustment is needed at no load, slowly rotate the<br />
governor adjustment screw (A) clockwise and/or<br />
counterclockwise until frequency is 62.0 to 62.5 Hz.<br />
A<br />
14<br />
BRIGGSandSTRATTON.COM