

Samsung i70 (EC-I70ZZBBA/E1 ) - Manuel de l'utilisateur 7.56 MB, pdf, Anglais
Samsung i70 (EC-I70ZZBBA/E1 ) - Manuel de l'utilisateur 7.56 MB, pdf, Anglais
Samsung i70 (EC-I70ZZBBA/E1 ) - Manuel de l'utilisateur 7.56 MB, pdf, Anglais

You also want an ePaper? Increase the reach of your titles
YUMPU automatically turns print PDFs into web optimized ePapers that Google loves.
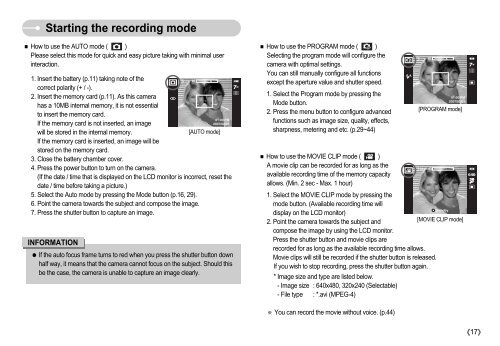
Starting the recording mo<strong>de</strong><br />
How to use the AUTO mo<strong>de</strong> ( )<br />
Please select this mo<strong>de</strong> for quick and easy picture taking with minimal user<br />
interaction.<br />
1. Insert the battery (p.11) taking note of the<br />
correct polarity (+ / -).<br />
2. Insert the memory card (p.11). As this camera<br />
has a 10<strong>MB</strong> internal memory, it is not essential<br />
to insert the memory card.<br />
If the memory card is not inserted, an image<br />
will be stored in the internal memory.<br />
[AUTO mo<strong>de</strong>]<br />
If the memory card is inserted, an image will be<br />
stored on the memory card.<br />
3. Close the battery chamber cover.<br />
4. Press the power button to turn on the camera.<br />
(If the date / time that is displayed on the LCD monitor is incorrect, reset the<br />
date / time before taking a picture.)<br />
5. Select the Auto mo<strong>de</strong> by pressing the Mo<strong>de</strong> button (p.16, 29).<br />
6. Point the camera towards the subject and compose the image.<br />
7. Press the shutter button to capture an image.<br />
INFORMATION<br />
If the auto focus frame turns to red when you press the shutter button down<br />
half way, it means that the camera cannot focus on the subject. Should this<br />
be the case, the camera is unable to capture an image clearly.<br />
How to use the PROGRAM mo<strong>de</strong> ( )<br />
Selecting the program mo<strong>de</strong> will configure the<br />
camera with optimal settings.<br />
You can still manually configure all functions<br />
except the aperture value and shutter speed.<br />
1. Select the Program mo<strong>de</strong> by pressing the<br />
Mo<strong>de</strong> button.<br />
2. Press the menu button to configure advanced<br />
functions such as image size, quality, effects,<br />
sharpness, metering and etc. (p.29~44)<br />
[PROGRAM mo<strong>de</strong>]<br />
How to use the MOVIE CLIP mo<strong>de</strong> ( )<br />
A movie clip can be recor<strong>de</strong>d for as long as the<br />
available recording time of the memory capacity<br />
allows. (Min. 2 sec - Max. 1 hour)<br />
1. Select the MOVIE CLIP mo<strong>de</strong> by pressing the<br />
mo<strong>de</strong> button. (Available recording time will<br />
display on the LCD monitor)<br />
2. Point the camera towards the subject and<br />
[MOVIE CLIP mo<strong>de</strong>]<br />
compose the image by using the LCD monitor.<br />
Press the shutter button and movie clips are<br />
recor<strong>de</strong>d for as long as the available recording time allows.<br />
Movie clips will still be recor<strong>de</strong>d if the shutter button is released.<br />
If you wish to stop recording, press the shutter button again.<br />
* Image size and type are listed below.<br />
- Image size : 640x480, 320x240 (Selectable)<br />
- File type : *.avi (MPEG-4)<br />
You can record the movie without voice. (p.44)<br />
17


