User's Manual for ZR22G, ZR402G - Yokogawa
User's Manual for ZR22G, ZR402G - Yokogawa
User's Manual for ZR22G, ZR402G - Yokogawa

You also want an ePaper? Increase the reach of your titles
YUMPU automatically turns print PDFs into web optimized ePapers that Google loves.
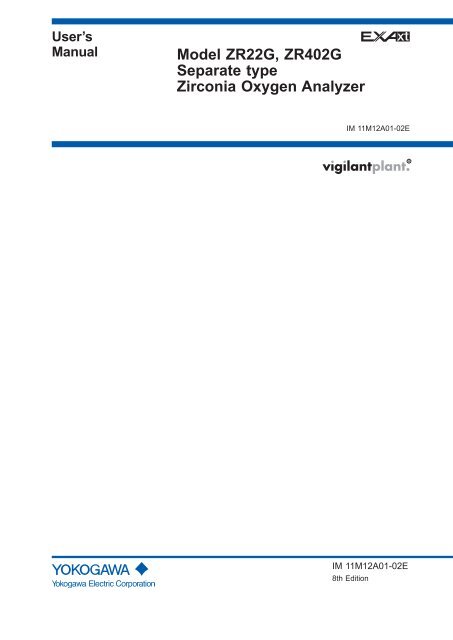
User’s<br />
<strong>Manual</strong><br />
Model <strong>ZR22G</strong>, <strong>ZR402G</strong><br />
Separate type<br />
Zirconia Oxygen Analyzer<br />
IM 11M12A01-02E<br />
R<br />
IM 11M12A01-02E<br />
8th Edition
Blank Page
Introduction<br />
The EXAxt ZR Separate type Zirconia Oxygen Analyzer has been developed <strong>for</strong> combustion<br />
control in various industrial processes. This analyzer basically consists of a detector and a<br />
converter. You can select between several versions, based upon your application.<br />
Optional accessories are also available to improve measurement accuracy and automate<br />
calibration. An optimal control system can be realized by adding appropriate options.<br />
This instruction manual refers to almost all of the equipment related to the EXAxt ZR.<br />
You may skip any section(s) on the equipment which is not included in your system.<br />
Regarding the HART communication protocol, refer to IM 11M12A01-51E.<br />
IM 11M12A01-51E has been published as " Model EXAxt ZR Series HART Protocol" .<br />
The all-in-one version (with sensor and analyzer integrated in one body) is described in<br />
IM 11M12A01-04E<br />
<br />
i<br />
Models and descriptions in this manual<br />
Model<br />
<strong>ZR22G</strong><br />
<strong>ZR22G</strong><br />
<strong>ZR402G</strong><br />
ZO21R<br />
ZO21P<br />
ZA8F<br />
ZR40H<br />
-<br />
-<br />
-<br />
-<br />
-<br />
Product Name<br />
General use detector<br />
High temperature detector (0.15m)<br />
Converter<br />
Probe protector<br />
High temperature probe adapter<br />
Flow setting unit<br />
(<strong>for</strong> manual calibration use)<br />
Automatic Calibration unit<br />
Auxiliary ejector <strong>for</strong> high temperature use<br />
(Part No. E7046EC, E7046EN)<br />
Calibration gas unit case<br />
(Part No. E7044KF)<br />
Check valve<br />
(Part No. K9292DN, K9292DS)<br />
Dust filter <strong>for</strong> the detector<br />
(Part No. K9471UA)<br />
Dust guard protector<br />
(Part No. K9471UC)<br />
Standard gas unit<br />
ZO21S<br />
CMPL : Customer Maintenance Parts List<br />
Specification<br />
◦<br />
◦<br />
◦<br />
◦<br />
◦<br />
◦<br />
◦<br />
◦<br />
◦<br />
◦<br />
◦<br />
◦<br />
◦<br />
Description in this manual<br />
Installation<br />
◦<br />
◦<br />
◦<br />
◦<br />
◦<br />
◦<br />
◦<br />
◦<br />
◦<br />
◦<br />
◦<br />
◦<br />
Operation<br />
◦<br />
◦<br />
◦<br />
◦<br />
◦<br />
◦<br />
Maintenance<br />
◦<br />
◦<br />
◦<br />
◦<br />
CMPL<br />
◦<br />
◦<br />
◦<br />
◦<br />
◦<br />
◦<br />
T-Int1E.ai<br />
Media No. IM 11M12A01-02E (CD) 8th Edition : Jan. 2012 (YK)<br />
All Rights Reserved Copyright © 2000, <strong>Yokogawa</strong> Electric Corporation<br />
IM 11M12A01-02E<br />
8th Edition : Jan.13,2012-00
ii<br />
This manual consists of twelve chapters. Please refer to the reference chapters <strong>for</strong> installation,<br />
operation and maintenance.<br />
Table of Contents<br />
Relates to<br />
Chapter Outline Installation Operation Maintenance<br />
1. Overview<br />
◦ ◦<br />
2. Specifications<br />
◦ ◦ ◦<br />
3. Installation<br />
◦<br />
<br />
4. Piping<br />
Equipment models and system configuration<br />
examples<br />
Standard specification, model code (or part<br />
number), dimension drawing <strong>for</strong> each equipment<br />
Installation method <strong>for</strong> each equipment<br />
Examples of piping in three standard system<br />
configurations<br />
5. Wiring<br />
Wiring procedures such as “Power supply wiring”,<br />
“output signal wiring” or others<br />
6. Components Major parts and function are described in this<br />
manual<br />
<br />
7. Startup<br />
Basic procedure to start operation of EXAxt ZR.<br />
Chapter 7 enables you to operate the equipment<br />
immediately.<br />
8. Detailed Data Setting Details of key operations and displays<br />
9. Calibration Describes the calibration procedure required in<br />
the course of operation.<br />
10. Other Functions Other functions described<br />
11. Inspection and How to conduct maintenance of EXAxt ZR and<br />
Maintenance procedures <strong>for</strong> replacement of deteriorated parts<br />
12. Troubleshooting This chapter describes measures to be taken<br />
when an abnormal condition occurs.<br />
CMPL (parts list) User replaceable parts list<br />
◦<br />
: Read and completely understand be<strong>for</strong>e operating the equipment.<br />
◦: Read be<strong>for</strong>e operating the equipment, and refer to it whenever necessary.<br />
: Recommended to read it at least once.<br />
◦<br />
◦<br />
◦<br />
◦<br />
<br />
<br />
◦<br />
<br />
◦ <br />
◦ <br />
◦<br />
◦<br />
◦<br />
◦<br />
<br />
<br />
◦<br />
◦<br />
T-Int2E.ai<br />
IM 11M12A01-02E<br />
8th Edition : Jan.13,2012-00
iii<br />
• For the safe use of this equipment<br />
WARNING<br />
EXAxt ZR is very heavy. Handle it with care. Be sure not to accidentally drop it.<br />
Handle safely to avoid injury.<br />
Connect the power supply cord only after confirming that the supply voltage matches the rating<br />
of this equipment. In addition, confirm that the power is switched off when connecting power<br />
supply.<br />
Some sample gas is dangerous to people. When removing this equipment from the process line<br />
<strong>for</strong> maintenance or other reasons, protect yourself from potential poisoning by using a protective<br />
mask or ventilating the area well.<br />
CAUTION<br />
The cell (sensor) at the tip of the detector is made of ceramic (zirconia element). Do not drop<br />
the detector or subject it to pressure stress.<br />
• Do NOT allow the sensor (probe tip) to make contact with anything when installing the<br />
detector.<br />
• Avoid any water dropping directly on the probe (sensor) of the detector when installing it.<br />
• Check the calibration gas piping be<strong>for</strong>e introducing the calibration gas to ensure that there<br />
is no leakage of the gas. If there is any leakage of the gas, the moisture drawn from the<br />
sample gas may damage the sensor.<br />
• The detector (especially at the tip) becomes very hot. Be sure to handle it with gloves.<br />
(1) About This <strong>Manual</strong><br />
• This manual should be passed on to the end user.<br />
• The contents of this manual are subject to change without prior notice.<br />
• The contents of this manual shall not be reproduced or copied, in part or in whole, without<br />
permission.<br />
• This manual explains the functions contained in this product, but does not warrant that those will<br />
suit the particular purpose of the user.<br />
• Every ef<strong>for</strong>t has been made to ensure accuracy in the preparation of this manual.<br />
However, should any errors or omissions come to the attention of the user, please contact the<br />
nearest <strong>Yokogawa</strong> Electric representative or sales office.<br />
• This manual does not cover the special specifications. This manual may not be changed on any<br />
change of specification, construction and parts when the change does not affect the functions<br />
or per<strong>for</strong>mance of the product.<br />
• If the product is used in a manner not specified in this manual, the safety of this product may be<br />
impaired.<br />
IM 11M12A01-02E<br />
8th Edition : Jan.13,2012-00
iv<br />
(2) Safety and Modification Precautions<br />
• Follow the safety precautions in this manual when using the product to ensure protection and<br />
safety of personnel, product and system containing the product.<br />
(3) The following safety symbols are used on the product as well as in this manual.<br />
WARNING<br />
Indicates a potentially hazardous situation which, if not avoided, could result in death or serious<br />
injury.<br />
CAUTION<br />
Indicates a potentially hazardous situation which, if not avoided, may result in minor or moderate<br />
injury. It may also be used to alert against unsafe practices.<br />
NOTE<br />
Draws attention to in<strong>for</strong>mation essential <strong>for</strong> understanding the operation and features..<br />
• Special descriptions in this manual<br />
This manual indicates operation keys, displays and drawings on the product as follows:<br />
• Operation keys, Enclosed in [ ], displays on the panel “ “.<br />
(Ex. [MODE] key)<br />
(Ex. selection display “ BASE “)<br />
(Ex. data display “ 102” lit, “ 102” flashing)<br />
• Drawing <strong>for</strong> flashing<br />
Indicated in light print. (Flashing) (lit)<br />
IM 11M12A01-02E<br />
8th Edition : Jan.13,2012-00
• NOTICE<br />
• Specification check<br />
When the instrument arrives, unpack the package with care and check that the instrument<br />
has not been damaged during transportation. In addition, please check that the specification<br />
matches the order, and required accessories are not missing. Specifications can be<br />
checked by the model codes on the nameplate. Refer to Chapter 2 Specifications <strong>for</strong> the list<br />
of model codes.<br />
• Details on operation parameters<br />
When the EXAxt ZR Separate type Oxygen Analyzer arrives at the user site, it will operate<br />
based on the operation parameters (initial data) set be<strong>for</strong>e shipping from the factory.<br />
Ensure that the initial data is suitable <strong>for</strong> the operation conditions be<strong>for</strong>e conducting<br />
analysis. Where necessary, set the instrument parameters <strong>for</strong> appropriate operation.<br />
For details of setting data, refer to chapters 7 to 10.<br />
When user changes the operation parameter, it is recommended to note down the changed<br />
setting data.<br />
• How to dispose the batteries:<br />
This is an explanation about the new EU Battery Directive (DIRECTIVE 2006/66/EC). This<br />
directive is only valid in the EU.<br />
Batteries are included in this product. Batteries incorporated into this product cannot be<br />
removed by yourself. Dispose them together with this product.<br />
When you dispose this product in the EU, contact your local <strong>Yokogawa</strong> Europe B.V.office.<br />
Do not dispose them as domestic household waste.<br />
Battery type: silver oxide battery<br />
v<br />
Notice:<br />
The symbol (see above) means they shall be sorted out and collected as ordained in<br />
ANNEX II in DIRECTIVE 2006/66/EC.<br />
IM 11M12A01-02E<br />
8th Edition : Jan.13,2012-00
vi<br />
• After - Sales Warranty<br />
• Do not modify the product.<br />
• During the warranty period, <strong>for</strong> repair under warranty carry or send the product to<br />
the local sales representative or service office. <strong>Yokogawa</strong> will replace or repair any<br />
damaged parts and return the product to you.<br />
• Be<strong>for</strong>e returning a product <strong>for</strong> repair under warranty, provide us with the model name<br />
and serial number and a description of the problem. Any diagrams or data explaining<br />
the problem would also be appreciated.<br />
• If we replace the product with a new one, we won’t provide you with a repair report.<br />
• <strong>Yokogawa</strong> warrants the product <strong>for</strong> the period stated in the pre-purchase quotation.<br />
<strong>Yokogawa</strong> shall conduct defined warranty service based on its standard. When<br />
the customer site is located outside of the service area, a fee <strong>for</strong> dispatching the<br />
maintenance engineer will be charged to the customer.<br />
• In the following cases, customer will be charged repair fee regardless of warranty<br />
period.<br />
• Failure of components which are out of scope of warranty stated in instruction manual.<br />
• Failure caused by usage of software, hardware or auxiliary equipment, which <strong>Yokogawa</strong><br />
Electric did not supply.<br />
• Failure due to improper or insufficient maintenance by user.<br />
• Failure due to modification, misuse or outside-of-specifications operation which <strong>Yokogawa</strong><br />
does not authorize.<br />
• Failure due to power supply (voltage, frequency) being outside specifications or abnormal.<br />
• Failure caused by any usage out of scope of recommended usage.<br />
• Any damage from fire, earthquake, storms and floods, lightning, disturbances, riots, warfare,<br />
radiation and other natural changes.<br />
• <strong>Yokogawa</strong> does not warrant con<strong>for</strong>mance with the specific application at the user<br />
site. <strong>Yokogawa</strong> will not bear direct/indirect responsibility <strong>for</strong> damage due to a specific<br />
application.<br />
• <strong>Yokogawa</strong> Electric will not bear responsibility when the user configures the product<br />
into systems or resells the product.<br />
• Maintenance service and supplying repair parts will be covered <strong>for</strong> five years after<br />
the production ends. For repair <strong>for</strong> this product, please contact the nearest sales<br />
office described in this instruction manual.<br />
IM 11M12A01-02E<br />
8th Edition : Jan.13,2012-00
TocA-1<br />
Model <strong>ZR22G</strong>, <strong>ZR402G</strong><br />
Separate type<br />
Zirconia Oxygen Analyzer<br />
IM 11M12A01-02E 8th Edition<br />
CONTENTS<br />
Introduction...............................................................................................................i<br />
1. Overview.................................................................................................... 1-1<br />
1.1 < EXAxt ZR > System Configuration...............................................................1-1<br />
1.1.1 System 1.............................................................................................1-1<br />
1.1.2 System 2.............................................................................................1-2<br />
1.1.3 System 3.............................................................................................1-3<br />
1.2 < EXAxt ZR > System Components.................................................................1-4<br />
1.2.1 System Components..........................................................................1-4<br />
1.2.2 Detectors and Accessories.................................................................1-4<br />
2. Specifications............................................................................................ 2-1<br />
2.1 General Specifications......................................................................................2-1<br />
2.1.1 Standard Specifications.....................................................................2-1<br />
2.2 General use Separate type Detector and Related Equipment...................... 2-2<br />
2.2.1 <strong>ZR22G</strong> General use Separate type Detector..................................... 2-2<br />
2.2.2 ZO21R Probe Protector......................................................................2-7<br />
2.3 Separate type Detector <strong>for</strong> High Temperature and Related Equipment...... 2-8<br />
2.3.1 <strong>ZR22G</strong> (0.15m) Separate type Detector <strong>for</strong> High Temperature......... 2-8<br />
2.3.2 ZO21P High Temperature Probe Adapter ......................................... 2-9<br />
2.4 <strong>ZR402G</strong> Separate type Converter.................................................................. 2-11<br />
2.4.1 Standard Specification..................................................................... 2-11<br />
2.4.2 Functions..........................................................................................2-12<br />
2.5 ZA8F Flow Setting Unit and ZR40H Automatic Calibration Unit................2-16<br />
2.5.1 ZA8F Flow Setting Unit.....................................................................2-16<br />
2.5.2 ZR40H Automatic Calibration Unit...................................................2-18<br />
2.6 ZO21S Standard Gas Unit...............................................................................2-20<br />
2.7 Other Equipments...........................................................................................2-21<br />
2.7.1 Dust Filter <strong>for</strong> the Detector (K9471UA)............................................2-21<br />
2.7.2 Dust Guard Protector (K9471UC)....................................................2-21<br />
2.7.3 Ejector Assembly <strong>for</strong> High Temperature (E7046EC, E7046EN)......2-22<br />
2.7.4 Stop Valve (L9852CB, G7016XH)....................................................2-24<br />
2.7.5 Check Valve (K9292DN, K9292DS).................................................2-24<br />
2.7.6 Air Set...............................................................................................2-25<br />
2.7.7 Zero Gas Cylinder (G7001ZC).........................................................2-26<br />
2.7.8 Cylinder Pressure Reducing Valve (G7013XF, G7014XF)..............2-26<br />
IM 11M12A01-02E<br />
8th Edition : Jan.13,2012-00
TocA-2<br />
2.7.9 Case Assembly <strong>for</strong> Calibration Gas Cylinder (E7044KF)................2-27<br />
2.7.10 ZR22A Heater Assembly..................................................................2-27<br />
3. Installation................................................................................................. 3-1<br />
3.1 Installation of General-purpose Detector.......................................................3-1<br />
3.1.1 Installation Location............................................................................3-1<br />
3.1.2 Probe Insertion Hole...........................................................................3-1<br />
3.1.3 Installation of the Detector..................................................................3-2<br />
3.1.4 Installation of the Dust Filter (K9471UA), Dust Guard Protector<br />
(K9471UC), Probe Protector ZO21R................................................. 3-2<br />
3.2 Installation of High Temperature Detector<br />
(<strong>ZR22G</strong>-015).......................................................................................................3-5<br />
3.2.1 Installation Location............................................................................3-5<br />
3.2.2 Usage of the High Temperature Probe Adapter (ZO21P-H).............. 3-5<br />
3.2.3 Probe Insertion Hole...........................................................................3-6<br />
3.2.4 Mounting of the High Temperature Detector...................................... 3-6<br />
3.3 Installation of the <strong>ZR402G</strong> Converter..............................................................3-8<br />
3.3.1 Installation Location............................................................................3-8<br />
3.3.2 Mounting of the Converter..................................................................3-8<br />
3.4 Installation of ZA8F Flow Setting Unit...........................................................3-10<br />
3.4.1 Installation Location..........................................................................3-10<br />
3.4.2 Mounting of ZA8F Flow Setting Unit.................................................3-10<br />
3.5 Installation of ZR40H Automatic Calibration Unit........................................ 3-11<br />
3.5.1 Installation Location.......................................................................... 3-11<br />
3.5.2 Mounting of ZR40H Automatic Calibration Unit............................... 3-11<br />
3.6 Installation of the Case Assembly(E7044KF)...............................................3-13<br />
3.6.1 Installation Location..........................................................................3-13<br />
3.6.2 Mounting...........................................................................................3-13<br />
3.7 Insulation Resistance Test.............................................................................3-14<br />
4. Piping......................................................................................................... 4-1<br />
4.1 Piping <strong>for</strong> System 1...........................................................................................4-1<br />
4.1.1 Parts Required <strong>for</strong> Piping in System 1............................................... 4-2<br />
4.1.2 Connection to the Calibration Gas Inlet.............................................. 4-3<br />
4.1.3 Connection to the Reference Gas Inlet.............................................. 4-3<br />
4.1.4 Piping to the High Temperature Probe Adapter.................................. 4-3<br />
4.2 Piping <strong>for</strong> System 2...........................................................................................4-5<br />
4.2.1 Piping Parts <strong>for</strong> System 2...................................................................4-6<br />
4.2.2 Piping <strong>for</strong> the Calibration Gas............................................................. 4-6<br />
4.2.3 Piping <strong>for</strong> the Reference Gas.............................................................4-7<br />
4.2.4 Piping to the High Temperature Probe Adapter.................................. 4-7<br />
4.3 Piping <strong>for</strong> System 3...........................................................................................4-8<br />
4.3.1 Blow Back Piping................................................................................4-9<br />
IM 11M12A01-02E<br />
8th Edition : Jan.13,2012-00
TocA-3<br />
4.4 Piping <strong>for</strong> the Detector with Pressure Compensation................................4-10<br />
4.4.1 Piping Parts <strong>for</strong> a System using Detector with<br />
Pressure Compensation...................................................................4-12<br />
4.4.2 Piping <strong>for</strong> the Calibration Gas...........................................................4-12<br />
4.4.3 Piping <strong>for</strong> the Reference Gas...........................................................4-12<br />
5. Wiring......................................................................................................... 5-1<br />
5.1 General...............................................................................................................5-1<br />
5.1.1 Terminals <strong>for</strong> the External Wiring in the Converter............................. 5-2<br />
5.1.2 Wiring..................................................................................................5-3<br />
5.1.3 Mounting of Cable Gland....................................................................5-4<br />
5.2 Wiring <strong>for</strong> Detector Output...............................................................................5-5<br />
5.2.1 Cable Specifications...........................................................................5-5<br />
5.2.2 Connection to the Detector.................................................................5-6<br />
5.2.3 Connection to the Converter..............................................................5-6<br />
5.3 Wiring <strong>for</strong> Power to Detector Heater...............................................................5-7<br />
5.3.1 Cable Specifications...........................................................................5-7<br />
5.3.2 Connection to Detector.......................................................................5-7<br />
5.3.3 Connection to Converter....................................................................5-8<br />
5.4 Wiring <strong>for</strong> Analog Output..................................................................................5-9<br />
5.4.1 Cable Specifications...........................................................................5-9<br />
5.4.2 Wiring Procedure................................................................................5-9<br />
5.5 Power and Grounding Wiring...........................................................................5-9<br />
5.5.1 Power Wiring......................................................................................5-9<br />
5.5.2 Grounding Wiring.............................................................................5-10<br />
5.6 Contact Output Wiring....................................................................................5-10<br />
5.6.1 Cable Specifications.........................................................................5-10<br />
5.6.2 Wiring Procedure..............................................................................5-10<br />
5.7 Wiring <strong>for</strong> ZR40H Automatic Calibration Unit.............................................. 5-11<br />
5.7.1 Cable Specifications......................................................................... 5-11<br />
5.7.2 Wiring Procedure.............................................................................. 5-11<br />
5.8 Contact Input Wiring.......................................................................................5-12<br />
5.8.1 Cable Specifications.........................................................................5-12<br />
5.8.2 Wiring Procedure..............................................................................5-12<br />
6. Components.............................................................................................. 6-1<br />
6.1 <strong>ZR22G</strong> Detector.................................................................................................6-1<br />
6.1.1 General-purpose Detector (except <strong>for</strong> <strong>ZR22G</strong>-015).......................... 6-1<br />
6.1.2 High Temperature Detector (<strong>ZR22G</strong>-015)......................................... 6-2<br />
6.2 <strong>ZR402G</strong> Converter.............................................................................................6-3<br />
6.3 ZA8F Flow Setting Unit, ZR40H Automatic Calibration Unit......................... 6-4<br />
7. Startup........................................................................................................ 7-1<br />
7.1 Checking Piping and Wiring Connections.....................................................7-1<br />
7.2 Checking Valve Setup.......................................................................................7-1<br />
IM 11M12A01-02E<br />
8th Edition : Jan.13,2012-00
TocA-4<br />
7.3 Supplying Power to the Converter..................................................................7-1<br />
7.4 Touchpanel Switch Operations........................................................................7-3<br />
7.4.1 Basic Panel and Switch......................................................................7-3<br />
7.4.2 Display Configuration (<strong>for</strong> Oxygen Analyzer)..................................... 7-4<br />
7.4.3 Display Functions...............................................................................7-5<br />
7.4.4 Entering Numeric and Text Data........................................................ 7-5<br />
7.5 Confirmation of Converter Type Setting......................................................... 7-7<br />
7.6 Confirmation of Detector Type Setting...........................................................7-8<br />
7.7 Selection of Sample Gas...................................................................................7-8<br />
7.8 Output Range Setting........................................................................................7-8<br />
7.8.1 Minimum Current (4 mA) and Maximum Current (20 mA)<br />
Settings...............................................................................................7-8<br />
7.9 Setting Display Item..........................................................................................7-9<br />
7.10 Checking Current Loop.................................................................................. 7-11<br />
7.11 Checking Contact I/O......................................................................................7-12<br />
7.11.1 Checking Contact Output.................................................................7-12<br />
7.11.2 Checking Calibration Contact Output...............................................7-13<br />
7.11.3 Checking Input Contacts..................................................................7-13<br />
7.12 Calibration........................................................................................................7-14<br />
7.12.1 Calibration Setup..............................................................................7-14<br />
7.12.2 <strong>Manual</strong> Calibration...........................................................................7-15<br />
8. Detailed Data Setting................................................................................ 8-1<br />
8.1 Current Output Setting......................................................................................8-1<br />
8.1.1 Setting Minimum Current (4 mA) and Maximum Current (20 mA)..... 8-1<br />
8.1.2 Input Ranges......................................................................................8-1<br />
8.1.3 Setting Output Smoothing Coefficient................................................ 8-2<br />
8.1.4 Selection of Output Mode...................................................................8-2<br />
8.1.5 Default Values....................................................................................8-2<br />
8.2 Output Hold Setting...........................................................................................8-3<br />
8.2.1 Definition of Equipment Status...........................................................8-3<br />
8.2.2 Preference Order of Output Hold Value............................................. 8-4<br />
8.2.3 Output Hold Setting............................................................................8-4<br />
8.2.4 Default Values....................................................................................8-5<br />
8.3 Oxygen Concentration Alarms Setting...........................................................8-6<br />
8.3.1 Setting the Alarm Values....................................................................8-6<br />
8.3.2 Alarm Output Actions..........................................................................8-6<br />
8.3.3 Alarm Setting Procedure....................................................................8-7<br />
8.3.4 Default Values....................................................................................8-8<br />
8.4 Output Contact Setup.......................................................................................8-9<br />
8.4.1 Output Contact...................................................................................8-9<br />
8.4.2 Setting Procedure...............................................................................8-9<br />
8.4.3 Default Values..................................................................................8-12<br />
IM 11M12A01-02E<br />
8th Edition : Jan.13,2012-00
TocA-5<br />
8.5 Input Contact Settings....................................................................................8-13<br />
8.5.1 Input Contact Functions...................................................................8-13<br />
8.5.2 Setting Procedure.............................................................................8-14<br />
8.5.3 Default Values..................................................................................8-14<br />
8.6 Other Settings..................................................................................................8-15<br />
8.6.1 Setting the Date-and-Time...............................................................8-15<br />
8.6.2 Setting Periods over which Average Values Are Calculated<br />
and Periods over which Maximum and Minimum Values Are<br />
Monitored..........................................................................................8-15<br />
8.6.3 Setting Fuels.....................................................................................8-16<br />
8.6.4 Setting Purging.................................................................................8-21<br />
8.6.5 Setting Passwords............................................................................8-22<br />
9. Calibration................................................................................................. 9-1<br />
9.1 Calibration Briefs...............................................................................................9-1<br />
9.1.1 Principle of Measurement...................................................................9-1<br />
9.1.2 Calibration Gas...................................................................................9-2<br />
9.1.3 Compensation....................................................................................9-3<br />
9.1.4 Characteristic Data from a Sensor Measured During Calibration...... 9-4<br />
9.2 Calibration Procedures.....................................................................................9-5<br />
9.2.1 Calibration Setting..............................................................................9-5<br />
9.2.2 Default Values....................................................................................9-8<br />
9.2.3 Calibration..........................................................................................9-9<br />
10. Other Functions...................................................................................... 10-1<br />
10.1 Display..............................................................................................................10-1<br />
10.1.1 Detailed-data Display.......................................................................10-1<br />
10.1.2 Trend Graph.....................................................................................10-5<br />
10.1.3 Auto-Return Time.............................................................................10-7<br />
10.1.4 Entering Tag Name...........................................................................10-7<br />
10.1.5 Language Selection..........................................................................10-7<br />
10.2 Blow Back.........................................................................................................10-8<br />
10.2.1 Blow back Setup...............................................................................10-8<br />
10.3 Parameter Initialization................................................................................. 10-11<br />
10.4 Reset...............................................................................................................10-15<br />
10.5 Handling of the ZO21S Standard Gas Unit.................................................10-16<br />
10.5.1 Standard Gas Unit Component Identification................................10-16<br />
10.5.2 Installing Gas Cylinders..................................................................10-17<br />
10.5.3 Calibration Gas Flow......................................................................10-17<br />
10.6 Methods of Operating Valves in the ZA8F Flow Setting Unit...................10-20<br />
10.6.1 Preparation Be<strong>for</strong>e Calibration.......................................................10-20<br />
10.6.2 Operating the Span Gas Flow Setting Valve..................................10-20<br />
10.6.3 Operating the Zero Gas Flow Setting Valve...................................10-21<br />
10.6.4 Operation After Calibration.............................................................10-21<br />
IM 11M12A01-02E<br />
8th Edition : Jan.13,2012-00
TocA-6<br />
11. Inspection and Maintenance................................................................. 11-1<br />
11.1 Inspection and Maintenance of the Detector............................................... 11-1<br />
11.1.1 Cleaning the Calibration Gas Tube.................................................. 11-1<br />
11.1.2 Replacing the Sensor Assembly...................................................... 11-2<br />
11.1.3 Replacement of the Heater Unit....................................................... 11-4<br />
11.1.4 Replacement of Dust Filter............................................................... 11-6<br />
11.1.5 Replacement of O-ring..................................................................... 11-6<br />
11.1.6 Cleaning the High Temperature Probe Adapter............................... 11-7<br />
11.1.7 Stopping and Re-starting Operation................................................. 11-7<br />
11.2 Inspection and Maintenance of the Converter............................................. 11-8<br />
11.2.1 Replacing Fuses............................................................................... 11-8<br />
11.2.2 Cleaning........................................................................................... 11-9<br />
11.2.3 Adjust LCD screen contrast.............................................................. 11-9<br />
11.3 Replacing Flowmeter in ZR40H Automatic Calibration Unit.................... 11-10<br />
12. Troubleshooting...................................................................................... 12-1<br />
12.1 Displays and Remedies When Errors Occur................................................12-1<br />
12.1.1 Error Types.......................................................................................12-1<br />
12.1.2 Remedies When an Error Occurs....................................................12-2<br />
12.2 Displays and Remedies When Alarms are Generated................................12-5<br />
12.2.1 Alarm Types......................................................................................12-5<br />
12.2.2 Remedies When Alarms are Generated..........................................12-6<br />
12.3 Countermeasures When Measured Value Shows Error........................... 12-11<br />
12.3.1 Measured Value Higher Than True Value...................................... 12-11<br />
12.3.2 Measured Value Lower Than True Value.......................................12-12<br />
12.3.3 Measurements Sometimes Show Abnormal Values......................12-12<br />
Customer Maintenance Parts List .....................................CMPL 11M12A01-02E<br />
Customer Maintenance Parts List .....................................CMPL 11M12C01-01E<br />
Customer Maintenance Parts List .....................................CMPL 11M12A01-11E<br />
Customer Maintenance Parts List .....................................CMPL 11M03B01-10E<br />
Customer Maintenance Parts List .....................................CMPL 11M03B01-05E<br />
Customer Maintenance Parts List .....................................CMPL 11M03D01-01E<br />
Revision In<strong>for</strong>mation................................................................................................i<br />
IM 11M12A01-02E<br />
8th Edition : Jan.13,2012-00
EXA <strong>ZR402G</strong><br />
1-1<br />
1. Overview<br />
The EXAxt ZR Separate type Zircon Oxygen Analyzer is used to monitor and control the oxygen<br />
concentration in combustion gases, in boilers and industrial furnaces, <strong>for</strong> wide application<br />
in industries which consume considerable energy — such as steel, electric power, oil and<br />
petrochemical, ceramics, paper and pulp, food, or textiles, as well as incinerators and medium/<br />
small boilers. It can help conserve energy in these industries.<br />
The EXAxt ZR also contributes to preservation of the earth’s environment in preventing global<br />
warming and air pollution by controlling complete combustion to reduce CO 2 , SOx and NOx.<br />
The <strong>ZR22G</strong> Separate type Detector uses a high-reliability Zirconia sensor, and its heater<br />
assembly can be replaced on site. The detector is mounted, <strong>for</strong> example, on the wall of a flue and<br />
can measure the gases directly.<br />
For use in combustion gases at temperatures up to 1400 °C, choose the general use 0.15 m<br />
long detector, which is combined with the ZO21P, the high temperature probe protector. The<br />
converter is equipped with an LCD touch screen which has various setting displays, a calibration<br />
display, oxygen concentration trend display, with easier operation and improvement of display<br />
functions. The converter is equipped with various standard functions such as measurement and<br />
calculation as well as maintenance functions including self-test. Analyzer calibration can also<br />
be fully automated — and the ZR40H, an automatic calibration unit, is available. Choose the<br />
detector version which best suits your needs so that an optimal combustion control system can<br />
be obtained.<br />
Some examples of typical system configurations are illustrated below:<br />
1.1 < EXAxt ZR > System Configuration<br />
The system configuration should be determined by the conditions; e.g. whether calibration is<br />
to be automated, and whether flammable gas is present and requires safety precautions. The<br />
system configuration can be classified into three basic patterns as follows:<br />
1.1.1 System 1<br />
This is the simplest system consisting of a detector and a converter. This system can be<br />
implemented <strong>for</strong> monitoring oxygen concentration in the combustion gases of a package boiler.<br />
No piping is required <strong>for</strong> the reference gas (air) which is fed in at the installation site. The handy<br />
the ZO21S standard gas unit is used <strong>for</strong> calibration.<br />
Zero gas from this unit and span gas (air) is sent to the detector through a tube which is<br />
connected during calibration.<br />
<strong>ZR22G</strong> Separate type<br />
Zirconia Oxygen Analyzer, Detector<br />
<strong>ZR402G</strong> Converter<br />
Stop valve<br />
Signal<br />
(6-core shield cable)<br />
Heater(2-core)<br />
~<br />
100 to<br />
240 V AC<br />
Contact input<br />
Analog output, contact output<br />
(Digital output HART)<br />
Calibration gas<br />
~<br />
ZO21S Standard gas unit<br />
F1-1E.ai<br />
Figure1.1<br />
IM 11M12A01-02E<br />
8th Edition : Jan.13,2012-00
EXA <strong>ZR402G</strong><br />
1-2<br />
NOTE<br />
• As this system uses ambient air <strong>for</strong> the reference gas, measuring accuracy will be affected<br />
by the installation location.<br />
• A needle (stop) valve should be connected to the calibration gas inlet of the detector.<br />
The valve should be fully closed unless calibration is in progress.<br />
1.1.2 System 2<br />
This system is <strong>for</strong> monitoring and controlling oxygen concentration in the combustion gases of a<br />
large-size boiler or heating furnace. Clean (dry) air (21 vol% O 2 ) is used as the reference gas and<br />
the span gas <strong>for</strong> calibration. Zero gas is fed in from a cylinder during calibration. The gas flow is<br />
controlled by the ZA8F flow setting unit (<strong>for</strong> manual valve operation).<br />
<strong>ZR22G</strong> Separate type<br />
Zirconia Oxygen Analyzer, Detector<br />
<strong>ZR402G</strong> Converter<br />
Check valve<br />
or Stop Valve<br />
Reference<br />
gas<br />
Signal<br />
(6-core shield cable)<br />
Heater(2-core)<br />
Flowmeter<br />
Needle<br />
valve<br />
~<br />
100 to<br />
240 V AC<br />
Air Set<br />
Contact input<br />
Analog output, contact output<br />
(Digital output HART)<br />
Calibration gas<br />
Instrument air<br />
Span gas<br />
(Same as Zero gas calibration unit)<br />
ZA8F Flow Setting Unit<br />
Pressure<br />
reducing<br />
valve<br />
Zero gas<br />
cylinder<br />
Figure1.2<br />
Calibration gas<br />
unit case<br />
F1-2E.ai<br />
IM 11M12A01-02E<br />
8th Edition : Jan.13,2012-00
EXA <strong>ZR402G</strong><br />
1.1.3 System 3<br />
1-3<br />
This example, System 3, represents typical applications in large boilers and heating furnaces,<br />
where there is a need to monitor and control oxygen concentration. The reference gas and<br />
calibration-time span gas are (clean, dry) instrument air. Zero gas is supplied from a gas cylinder.<br />
System 3 uses the ZR40H automatic calibration unit, with auto-switching of the calibration gas.<br />
A “combustible gas detected” contact input turns off power to the heater. There’s also contact<br />
output from the converter that can be used to operate a purge gas valve to supply air to the<br />
sensor.<br />
<strong>ZR22G</strong> Separate type<br />
Zirconia Oxygen Analyzer, Detector<br />
*2<br />
<strong>ZR402G</strong> Converter<br />
Check valve<br />
Signal *1<br />
(6-core shield cable)<br />
Heater (2-core)<br />
Reference gas<br />
Calibration gas<br />
Flowmeter Needle<br />
valve<br />
~ 100 to 240 V AC<br />
Contact input<br />
Analog output, contact output<br />
Digital output (HART)<br />
Air Set<br />
lnstrument air<br />
Pressure Zero gas cylinder<br />
ZR40H<br />
reducing<br />
Automatic Calibration Unit valve<br />
*3<br />
Calibration gas<br />
unit case<br />
*1 Shield cable ; Use shielded signal cables, and connect the shield to the FG terminal of the converter.<br />
*2 Select the desired probe from the Probe Configuration table on page 1-4.<br />
*3 When a zirconia oxygen analyzer is used, 100% N 2 gas cannot be used as the zero gas. Use approximately 1% of O 2 gas<br />
(N 2 -based).<br />
F1-3E.ai<br />
Figure1.3<br />
IM 11M12A01-02E<br />
8th Edition : Jan.13,2012-00
1.2 < EXAxt ZR > System Components<br />
1.2.1 System Components<br />
1-4<br />
System Components<br />
Model <strong>ZR22G</strong> Separate type Zirconia Oxygen Analyzers ,Detector<br />
Model <strong>ZR402G</strong> Separate type Zirconia Oxygen Analyzer, Converter<br />
Model ZO21P Adapter <strong>for</strong> High Temperature Probe of separate type Zirconia Oxygen Analyzer<br />
E7046EC, E7046EN Ejector Assembly <strong>for</strong> High temperature of separate type Oxygen Analyzer<br />
Model ZO21R Probe Protector <strong>for</strong> Zirconia Oxygen Analyzers<br />
K9471UA Dust Filter <strong>for</strong> Oxygen Analyzer<br />
K9471UC Dust Guard Protector<br />
Model ZO21S Standard Gas Unit<br />
Model ZA8F Flow Setting Unit <strong>for</strong> manual calibration<br />
Model ZR40H Automatic Calibration Unit <strong>for</strong> Separate type Oxygen Analyzer<br />
L9852CB, G7016XH Stop Valve <strong>for</strong> Calibration gas line<br />
K9292DN,K9292DS Check Valve <strong>for</strong> Calibration gas line<br />
G7003XF/K9473XK, G7004XF/K9473XG Air Set<br />
G7001ZC Zero gas Cylinder<br />
G7013XF, G7014XF Pressure Reducing Valve <strong>for</strong> Gas Cylinder<br />
E7044KF Case Assembly <strong>for</strong> Calibration gas Cylinder<br />
Model ZR22A Heater Assembly (Spare Parts <strong>for</strong> Model <strong>ZR22G</strong>)<br />
: Items required <strong>for</strong> the above system example<br />
: To be selected depending on each application. For details, refer to corresponding chapter.<br />
( ) : Select either<br />
Separate type<br />
System config.<br />
Ex.1 Ex.2 Ex.3<br />
( )<br />
( )<br />
T1-1E.ai<br />
1.2.2 Detectors and Accessories<br />
Mounting<br />
Horizontal<br />
to<br />
vertical<br />
Vertical<br />
Horizontal<br />
to<br />
vertical<br />
Sample gas temperature 0 to 700°C<br />
Insertion<br />
length<br />
0.15<br />
to<br />
2 m<br />
2.5 m<br />
or more<br />
3 m<br />
or less<br />
Gas Flow<br />
Sample inlet<br />
General use Probe<br />
Probe Protector<br />
(ZO21R)<br />
Detector<br />
(<strong>ZR22G</strong>)<br />
Detector<br />
(<strong>ZR22G</strong>)<br />
Application<br />
Boiler<br />
Heating<br />
furnace<br />
For pulverized<br />
coal boiler<br />
with gas flow<br />
velocity<br />
10 m/sec or<br />
more<br />
Sample<br />
outlet<br />
Sample gas temperature 700 to 1400˚C<br />
High temperature detector<br />
Absorption<br />
structure<br />
Probe adapter<br />
<strong>for</strong> high<br />
temperature use<br />
ZO21P-H<br />
High temperature<br />
detector<br />
Sample inlet<br />
Temperature:<br />
Probe material: SUS310S 800˚C<br />
Probe material: SiC 1400˚C<br />
Mounting: Vertical downwards<br />
Insertion length: 1.0 m, 1.5 m<br />
When duct pressure is atmospheric<br />
or negative, attach air ejector.<br />
High temperature auxiliary ejector<br />
assembly (E7046EC, E7046EN)<br />
Application<br />
Heating<br />
furnace<br />
Horizontal<br />
to<br />
vertical<br />
Vertical<br />
0.15<br />
to<br />
2 m<br />
2.5 m<br />
or more<br />
Dust filter <strong>for</strong><br />
Oxygen Analyzer<br />
(K9471UA)<br />
or<br />
Dust guard<br />
protector<br />
(K9471UC)<br />
+<br />
Detector(<strong>ZR22G</strong>)<br />
Black liquid<br />
recovery boiler<br />
Cement<br />
Kiln<br />
Inlet<br />
Needle<br />
valve<br />
Pressure gauge<br />
Blow<br />
Ejector<br />
F06.ai<br />
IM 11M12A01-02E<br />
8th Edition : Jan.13,2012-00
2-1<br />
2. Specifications<br />
This chapter describes the specifications <strong>for</strong> the following:<br />
<strong>ZR22G</strong> General use separate type detector (See Section 2.2.1)<br />
ZO21R Probe protector (See Section 2.2.2)<br />
<strong>ZR22G</strong> (0.15 m) High temperature separate type detector (See Section 2.3.1)<br />
ZO21P Adapter <strong>for</strong> High temperature probe (See Section 2.3.2)<br />
<strong>ZR402G</strong> Separate type converter (See Section 2.4)<br />
ZA8F Flow setting unit (See Section 2.5.1)<br />
ZR40H Automatic calibration unit (See Section 2.5.2)<br />
ZO21S Standard gas unit (See Section 2.6)<br />
2.1 General Specifications<br />
2.1.1 Standard Specifications<br />
Measured Object:<br />
Measurement System: Zirconia system<br />
Oxygen concentration: 0.01 to 100 vol% O 2<br />
Oxygen concentration in combustion exhaust gas and mixed gas<br />
(excluding inflammable gases, may not be applicable corrosive gas such<br />
as ammonia is present-check with YOKOGAWA)<br />
The sampling gases containing a corrosive gas such as ammonia or<br />
chlorine may be applicable to our oxygen gas analyzer. In this case,<br />
contact with YOKOGAWA and its agency.<br />
Output Signal: 4 to 20 mA DC (maximum load resistance 550 Ω)<br />
Measurement Range: Any setting in the range of 0 to 5 through 0 to 100 vol% O 2<br />
(in 1 vol% O 2 ), or partial range<br />
Digital Communication (HART): 250 to 550 Ω, depending on number of field devices connected<br />
to the loop (multi-drop mode).<br />
Display Range: 0 to 100 vol% O 2<br />
Warm-up Time:<br />
Repeatability:<br />
Linearity:<br />
Note: HART is a registered trademark of the HART Communication Foundation.<br />
Approx. 20 min.<br />
(Excluding the case where the reference gas is by natural convection)<br />
±0.5% Maximum value of set range. (range from 0 to 5 vol% O 2 or more<br />
and less than 0 to 25 vol% O 2 range)<br />
±1% Maximum value of set range.<br />
(range from 0 to 25 vol% O 2 or more and up to 0 to 100 vol% O 2 range)<br />
(Excluding standard gas tolerance)<br />
(Excluding the case where the reference gas is by natural convection)<br />
(Use oxygen of known concentration (within the measuring range) as the<br />
zero and span calibration gases.)<br />
±1% Maximum value of set range ;<br />
0 to 5 vol% O 2 or more and less than 0 to 25 vol% O 2 range<br />
(Sample gas pressure: within ±4.9 kPa)<br />
±3% Maximum value of set range ;<br />
0 to 25 vol% O 2 or more and less than 0 to 50 vol% O 2 range<br />
IM 11M12A01-02E<br />
8th Edition : Jan.13,2012-00
2-2<br />
(Sample gas pressure: within ±0.49 kPa)<br />
±5% Maximum value of set range ;<br />
0 to 50 vol% O 2 or more and up to 0 to 100 vol% O 2 range<br />
(Sample gas pressure: within ±0.49 kPa)<br />
Drift:<br />
Response Time :<br />
(Excluding the first two weeks in use)<br />
(Excluding the case where the reference gas is by natural convection.)<br />
Both zero and span ±2% Maximum value of set range/month<br />
Response of 90% within 5 seconds. (Measured after gas is introduced<br />
from calibration gas inlet and analog output start changing.)<br />
2.2 General use Separate type Detector and<br />
Related Equipment<br />
General use separate type detector <strong>ZR22G</strong> can be used in combination with the probe protector<br />
ZO21R (see Section 2.2.2).<br />
2.2.1 <strong>ZR22G</strong> General use Separate type Detector<br />
Sample Gas Temperature:0 to 700 °C (Probe only)<br />
It is necessary to mount the cell using Inconel cell-bolts when the<br />
temperature is greater than 600 °C.<br />
700 to 1400 °C (with High Temperature Probe Adapter)<br />
For high temperature sample gas, apply 0.15 m long probe and High<br />
Temperature Probe Adapter ZO21P.<br />
Sample Gas Pressure: -5 to +250 kPa (When the pressure in the furnace exceeds 3 kPa,<br />
it is recommended that you compensate the pressure. When the<br />
pressure in the furnace exceeds 5 kPa, you must per<strong>for</strong>m pressure<br />
compensation.) For 0.15 m probe, 0.5 to 5 kPa. No pressure fluctuation<br />
in the furnace should be allowed.<br />
Probe Length:<br />
Probe Material:<br />
Note:<br />
When the detector is used in conjunction with a check valve and a ZA8F Flow Setting Unit,<br />
the maximum pressure of sample gas is 150 kPa. When with a check valve and a ZR40H<br />
Automatic Calibration Unit, it is 200 kPa. If the pressure of your sample gas exceeds these<br />
limits, consult with <strong>Yokogawa</strong>.<br />
0.15, 0.4, 0.7, 1.0, 1.5, 2.0, 2.5, 3.0, 3.6, 4.2, 4.8, 5.4 m<br />
SUS 316 (JIS)<br />
Ambient Temperature: -20 to +150 °C<br />
Reference Gas System: Natural Convection, Instrument Air, Pressure Compensation<br />
(other than <strong>for</strong> probe length 0.15 m)<br />
Instrument Air System (excluding Natural Convection) :<br />
Pressure; 200 kPa + the pressure inside the furnace (It is recommended<br />
to use air which has been dehumidified by cooling to dew point -20 °C or<br />
less, and dust or oil mist removed.)<br />
Consumption; Approx. 1 Nl/min<br />
Material in Contact with Gas: SUS 316 (JIS), Zirconia, SUS 304 (JIS) (flange), Hastelloy B,<br />
(Inconel 600, 601)<br />
IM 11M12A01-02E<br />
8th Edition : Jan.13,2012-00
Construction:<br />
Terminal Box Case:<br />
Heater and thermocouple replaceable construction.<br />
Non explosion-proof JIS C0920 / equivalent to IP44D.<br />
2-3<br />
Equivalent to NEMA 4X/IP66 (Achieved when the cable entry is<br />
completely sealed with a cable gland in the recirculation pressure<br />
compensated version.)<br />
Material; Aluminum alloy<br />
Terminal Box Paint Color: Case; Mint green (Munsell 5.6BG3.3/2.9)<br />
Cover; Mint green (Munsell 5.6BG3.3/2.9)<br />
Finish: Polyurethane corrosion-resistant coating<br />
Gas Connection:<br />
Wiring Connection:<br />
Installation:<br />
Rc1/4 or 1/4FNPT<br />
G1/2, Pg13.5, M20 by 1.5 mm, 1/2 NPT<br />
Flange mounting<br />
Probe Mounting Angle: Horizontal to vertically downward.<br />
Weight:<br />
When the probe insertion length is 2 m or less, installing at angles from<br />
horizontal to vertically downward is available.<br />
When the probe insertion length is exceeds 2.5 m, mount vertically<br />
downward (within ±5°), and use a probe protector.<br />
Insertion length of 0.4 m: approx. 6 kg (JIS 5K 65) / approx. 11 kg (ANSI 150 4)<br />
Insertion length of 1.0 m: approx. 8 kg (JIS 5K 65) / approx. 13 kg (ANSI 150 4)<br />
Insertion length of 1.5 m: approx. 10 kg (JIS 5K 65) / approx. 15 kg (ANSI 150 4)<br />
Insertion length of 2.0 m: approx. 12 kg (JIS 5K 65) / approx. 17 kg (ANSI 150 4)<br />
Insertion length of 3.0 m: approx. 15 kg (JIS 5K 65) / approx. 20 kg (ANSI 150 4)<br />
Insertion length of 3.6 m: approx. 17 kg (JIS 5K 65) / approx. 22 kg (ANSI 150 4)<br />
Insertion length of 4.2 m: approx. 19 kg (JIS 5K 65) / approx. 24 kg (ANSI 150 4)<br />
Insertion length of 4.8 m: approx. 21 kg (JIS 5K 65) / approx. 26 kg (ANSI 150 4)<br />
Insertion length of 5.4 m: approx. 23 kg (JIS 5K 65) / approx. 28 kg (ANSI 150 4)<br />
IM 11M12A01-02E<br />
8th Edition : Jan.13,2012-00
2-4<br />
Model and Codes<br />
Model Suffix code Option code Description<br />
<strong>ZR22G</strong> - - - - - - - - - - - - - - - - - - - - - - - - - - - - - - - - - - - - - - - - - - - - Separate type Zirconia Oxygen Analyzer, Detector<br />
Length -015<br />
-040<br />
-070<br />
-100<br />
-150<br />
-200<br />
-250<br />
-300<br />
-360<br />
-420<br />
-480<br />
-540<br />
Wetted material -S<br />
-C<br />
Flange<br />
(*3)<br />
-A<br />
-B<br />
-C<br />
-E<br />
-F<br />
-G<br />
-K<br />
-L<br />
-M<br />
-P<br />
-Q<br />
-R<br />
-S<br />
-W<br />
Reference gas -C<br />
-E<br />
-P<br />
Gas Thread -R<br />
-T<br />
Connection box thread -P<br />
-G<br />
-M<br />
-T<br />
-Q<br />
Instruction manual -J<br />
-E<br />
-C<br />
- - - - - - - - - -<br />
- - - - - - - - - -<br />
- - - - - - - - - -<br />
- - - - - - - - - -<br />
- - - - - - - - - -<br />
- - - - - - - - - -<br />
- - - - - - - - - -<br />
- - - - - - - - - -<br />
- - - - - - - - - -<br />
- - - - - - - - - -<br />
- - - - - - - - - -<br />
- - - - - - - - - -<br />
- - - - - - - - - -<br />
- - - - - - - - - -<br />
- - - - - - - - - -<br />
- - - - - - - - - -<br />
- - - - - - - - - -<br />
- - - - - - - - - -<br />
- - - - - - - - - -<br />
- - - - - - - - - -<br />
- - - - - - - - - -<br />
- - - - - - - - - -<br />
- - - - - - - - - -<br />
- - - - - - - - - -<br />
- - - - - - - - - -<br />
- - - - - - - - - -<br />
- - - - - - - - - -<br />
- - - - - - - - - -<br />
- - - - - - - - - -<br />
- - - - - - - - - -<br />
- - - - - - - - - -<br />
- - - - - - - - - -<br />
- - - - - - - - - -<br />
- - - - - - - - - -<br />
- - - - - - - - - -<br />
- - - - - - - - - -<br />
- - - - - - - - - -<br />
- - - - - - - - - -<br />
- - - - - - - - - -<br />
- - - - - - - - - -<br />
- - - - - - - - - -<br />
0.15 m (<strong>for</strong> high temperature use) (*1)<br />
0.4 m<br />
0.7 m<br />
1.0 m<br />
1.5 m<br />
2.0 m<br />
2.5 m (*2)<br />
3.0 m (*2)<br />
3.6 m (*2)<br />
4.2 m (*2)<br />
4.8 m (*2)<br />
5.4 m (*2)<br />
SUS316<br />
Stainless steel with Inconel calibration gas tube (*10)<br />
ANSI Class 150 2 RF SUS304<br />
ANSI Class 150 3 RF SUS304<br />
ANSI Class 150 4 RF SUS304<br />
DIN PN10 DN50 A SUS304<br />
DIN PN10 DN80 A SUS304<br />
DIN PN10 DN100 A SUS304<br />
JIS 5K 65 FF SUS304<br />
JIS 10K 65 FF SUS304<br />
JIS 10K 80 FF SUS304<br />
JIS 10K 100 FF SUS304<br />
JIS 5K 32 FF SUS304 (<strong>for</strong> high temperature use) (*4)<br />
JPI Class 150 4 RF SUS304<br />
JPI Class 150 3 RF SUS304<br />
Westinghouse<br />
Natural convection<br />
External connection (Instrument air) (*11)<br />
Pressure compensated (*11)<br />
Rc 1/4<br />
1/4 NPT(Female)<br />
G1/2<br />
Pg13.5<br />
M20 x1.5 mm<br />
1/2NPT<br />
Quick connect (*9)<br />
Japanese<br />
English<br />
Chinese<br />
— -A - - - - - - - - - - Always -A<br />
Options<br />
Valves<br />
Filter<br />
Tag plates<br />
/C Inconel bolt (*5)<br />
/CV<br />
/SV<br />
/F1<br />
/F2<br />
/SCT<br />
/PT<br />
Check valve (*6)<br />
Stop valve (*6)<br />
Dust Filter (*7)<br />
Dust Guard Protector (*7)<br />
Stainless steel tag plate (*8)<br />
Printed tag plate (*8)<br />
Style : S2<br />
*1 Used with the ZO21P High Temperature Probe Adapter. Select flange (-Q).<br />
*2 When installing horizontally the probe whose insertion length is 2.5 meters or more, use the Probe Protector. Be sure to<br />
specifyZO21R-L-200-□. Specify the flange suffix code either -C or -K.<br />
*3 The thickness of the flange depends on its dimensions.<br />
*4 Not used in conjunction with -P (pressure compensation) <strong>for</strong> reference gas. The flange thickness does not con<strong>for</strong>m to JIS<br />
specification<br />
*5 Inconel probe bolts and U shape pipe are used. Use this option <strong>for</strong> high temperature use (ranging from 600 to 700 °C).<br />
*6 Specify either /CV or /SV option code.<br />
*7 Not used with the high temperature humidity analyzer.<br />
*8 Specify either /SCT or /PT option code.<br />
*9 Not waterproof, avoid rain. Operating maximum temperature is 80°C. Available only in the U.S.<br />
*10 Recommended if sample gas contains corrosive gas like chlorine.<br />
*11 Piping <strong>for</strong> reference gas must be installed to supply reference gas constantly at a specified flow rate.<br />
IM 11M12A01-02E<br />
8th Edition : Jan.13,2012-00
2-5<br />
EXTERNAL DIMENSIONS<br />
1. Model <strong>ZR22G</strong> Separate type Zirconia Oxygen Analyzer, Detectors<br />
L<br />
283 to 292<br />
Unit : mm<br />
t<br />
25<br />
85<br />
Ø50.8<br />
Ø124<br />
L=0.15, 0.4, 0.7, 1.0,<br />
1.5, 2.0, 2.5, 3.0<br />
3.6, 4.2, 4.8, 5.4 (m)<br />
155 to 163 69<br />
Rc1/4 or 1/4NPT<br />
Reference gas inlet<br />
2-G1/2,2-1/2NPT etc.<br />
Cable connection port<br />
C<br />
ØA<br />
48<br />
ØB<br />
Flange<br />
Rc1/4 or 1/4NPT<br />
Calibration gas inlet<br />
Flange<br />
Flange<br />
ANSI Class 150 2 RF SUS304<br />
ANSI Class 150 3 RF SUS304<br />
ANSI Class 150 4 RF SUS304<br />
DIN PN10 DN50 A SUS304<br />
DIN PN10 DN80 A SUS304<br />
DIN PN10 DN100 A SUS304<br />
JIS 5K 65 FF SUS304<br />
JIS 10K 65 FF SUS304<br />
JIS 10K 80 FF SUS304<br />
JIS 10K 100 FF SUS304<br />
JIS 5K 32 FF SUS304<br />
JPI Class 150 4 RF SUS304<br />
JPI Class 150 3 RF SUS304<br />
Westinghouse<br />
A B C<br />
152.4<br />
190.5<br />
228.6<br />
165<br />
200<br />
220<br />
155<br />
175<br />
185<br />
210<br />
115<br />
229<br />
190<br />
155<br />
120.6<br />
152.4<br />
190.5<br />
125<br />
160<br />
180<br />
130<br />
140<br />
150<br />
175<br />
90<br />
190.5<br />
152.4<br />
127<br />
4 - Ø19<br />
4 - Ø19<br />
8 - Ø19<br />
4 - Ø18<br />
8 - Ø18<br />
8 - Ø18<br />
4 - Ø15<br />
4 - Ø19<br />
8 - Ø19<br />
8 - Ø19<br />
4 - Ø15<br />
8 - Ø19<br />
4 - Ø19<br />
4 - Ø11.5<br />
t<br />
19<br />
24<br />
24<br />
18<br />
20<br />
20<br />
14<br />
18<br />
18<br />
18<br />
5<br />
24<br />
24<br />
14<br />
ØA<br />
ØB<br />
Flange<br />
C<br />
F2-1E.ai<br />
IM 11M12A01-02E<br />
8th Edition : Jan.13,2012-00
2-6<br />
2. Model <strong>ZR22G</strong>...-P (with pressure compensation) Separate type Zirconia Oxygen Analyzer, Detectors<br />
L<br />
t<br />
303<br />
L=0.15, 0.4, 0.7, 1.0,<br />
1.5, 2.0, 2.5, 3.0<br />
3.6, 4.2, 4.8, 5.4 (m)<br />
156 87<br />
C<br />
ØA<br />
25<br />
48<br />
85<br />
Ø50.8<br />
ø124<br />
Rc1/4 or 1/4NPT<br />
Reference gas inlet<br />
2-G1/2, 2-1/2NPT etc.<br />
Cable connection port<br />
ØB<br />
Reference gas outlet<br />
Flange<br />
Flange<br />
ANSI Class 150 2 RF SUS304<br />
ANSI Class 150 3 RF SUS304<br />
ANSI Class 150 4 RF SUS304<br />
DIN PN10 DN50 A SUS304<br />
DIN PN10 DN80 A SUS304<br />
DIN PN10 DN100 A SUS304<br />
JIS 5K 65 FF SUS304<br />
JIS 10K 65 FF SUS304<br />
JIS 10K 80 FF SUS304<br />
JIS 10K 100 FF SUS304<br />
JPI Class 150 4 RF SUS304<br />
JPI Class 150 3 RF SUS304<br />
Westinghouse<br />
A B C<br />
152.4<br />
190.5<br />
228.6<br />
165<br />
200<br />
220<br />
155<br />
175<br />
185<br />
210<br />
229<br />
190<br />
155<br />
PIPING<br />
:B<br />
PIPING : A<br />
120.6<br />
152.4<br />
190.5<br />
125<br />
160<br />
180<br />
130<br />
140<br />
150<br />
175<br />
190.5<br />
152.4<br />
127<br />
4 - Ø19<br />
4 - Ø19<br />
8 - Ø19<br />
4 - Ø18<br />
8 - Ø18<br />
8 - Ø18<br />
4 - Ø15<br />
4 - Ø19<br />
8 - Ø19<br />
8 - Ø19<br />
8 - Ø19<br />
4 - Ø19<br />
4 - Ø11.5<br />
Rc1/4 or 1/4NPT<br />
Calibration gas inlet<br />
Stop Valve<br />
t<br />
19<br />
24<br />
24<br />
18<br />
20<br />
20<br />
14<br />
18<br />
18<br />
18<br />
24<br />
24<br />
14<br />
PIPING<br />
A<br />
B<br />
B<br />
A<br />
B<br />
B<br />
A<br />
A<br />
B<br />
B<br />
B<br />
B<br />
A<br />
ØA<br />
ØB<br />
Flange<br />
Flange<br />
C<br />
F2-2E.ai<br />
IM 11M12A01-02E<br />
8th Edition : Jan.13,2012-00
2.2.2 ZO21R Probe Protector<br />
2-7<br />
Used when sample gas flow velocity is approx. 10 m/sec or more and dust particles wears the<br />
detector in cases such as pulverized coal boiler of fluidized bed furnace (or burner) to protect<br />
the detector from wearing by dust particles. When probe insertion length is 2.5 m or more and<br />
horizontal installation, specify the ZO21R-L-200-□*B to rein<strong>for</strong>ce the probe.<br />
Insertion Length: 1.05 m, 1.55 m, 2.05 m.<br />
Flange:<br />
Material:<br />
Weight:<br />
Installation:<br />
JIS 5K 65A FF equivalent. ANSI Class 150 4 FF (without serration)<br />
equivalent or DIN PN10 DN50A equivalent. However, flange thickness is<br />
different.<br />
SUS316 (JIS), SUS304 (JIS) (Flange)<br />
1.05 m; Approx. 6/10/8.5 kg (JIS/ANSI/DIN),<br />
1.55 m; Approx. 9/13/11.5 kg (JIS/ANSI/DIN),<br />
2.05 m; Approx. 12/16/14.5 kg (JIS/ANSI/DIN)<br />
Bolts, nuts, and washers are provided <strong>for</strong> detector, probe adapter and<br />
process-side flange.<br />
Model and Codes<br />
Model<br />
Suffix code<br />
Option<br />
code<br />
Description<br />
ZO21R -L - - - - - - Probe Protector(0 to 700 °C)<br />
Insertion<br />
length<br />
-100<br />
-150<br />
-200<br />
Flange ( *1) -J<br />
-A<br />
-E<br />
- - - - - -<br />
- - - - - -<br />
- - - - - -<br />
- - - - - -<br />
- - - - - -<br />
- - - - - -<br />
1.05 m (3.5 ft)<br />
1.55 m (5.1 ft)<br />
2.05 m (6.8 ft)<br />
Style code *B - - - - - - Style B<br />
*1 Thickness of flange depends on dimensions of flange.<br />
JIS 5K 65 FF SUS304<br />
ANSI Class 150 4 FF SUS304<br />
DIN PN10 DN50A<br />
Gas flow<br />
Washer (12)<br />
Mounting nut (M12)<br />
SUS316<br />
Ø60.5<br />
Flange <br />
(with bolts, nuts and washer)<br />
gasket (t1.5)<br />
ØA<br />
ØB<br />
l (Insert length)<br />
l=1050,1550,2050<br />
D<br />
ØB<br />
C<br />
Dimensions of<br />
holes on opposing surface<br />
F2-3E.ai<br />
Flange A B C t D<br />
JIS 5K 65 FF SUS304 155 130 4 - Ø15 5 40<br />
ANSI Class 150 4 FF SUS304 228.6 190.5 8 - Ø19 12 50<br />
DIN PN10 DN50A SUS304 165 125 4 - Ø18 12 50<br />
IM 11M12A01-02E<br />
8th Edition : Jan.13,2012-00
2-8<br />
2.3 Separate type Detector <strong>for</strong> High<br />
Temperature and Related Equipment<br />
2.3.1 <strong>ZR22G</strong> (0.15m) Separate type Detector <strong>for</strong> High<br />
Temperature<br />
Standard Specifications<br />
Construction:<br />
Probe length:<br />
Terminal box:<br />
Water-resistant, non-explosionproof<br />
0.15 m<br />
Aluminum alloy<br />
Probe material: Probe material in contact with gas: SUS 316 (JIS) (Probe), SUS 304<br />
(JIS) (Flange), Zirconia (Sensor), Hastelloy B, (Inconel 600, 601)<br />
Weight:<br />
Installation:<br />
Flange standard:<br />
Mounting angle:<br />
Approx. 3 kg<br />
Flange mounting (The use of high temperature detector probe adapter<br />
ZO21P is necessary.)<br />
JIS 5 K 32 FF equivalent (thickness varies)<br />
Any angle between horizontal and vertical (high temperature probe is<br />
fitted with an adapter)<br />
Reference gas and calibration gas piping connection: Rc 1/4 or 1/4 NPT female<br />
Cable inlet:<br />
Ambient temperature: -20 to 150 °C<br />
G 1/2, Pg 13.5, M20 x 15, 1/2 NPT<br />
Sample gas temperature: 0 to 700 °C (temperature at the measuring point of the sampling gas.<br />
0 to 750 °C or 0 to 1400 °C when the probe adapter <strong>for</strong> high temperature<br />
is used.<br />
Temperature of the probe adapter shall not exceed 300 °C to protect the<br />
gasket and avoid the bolts seizing together.<br />
Sample gas pressure: -0.5 to +5 kPa: when used at the range of more than 0 to 25 vol% O 2 ,<br />
-0.5 to +0.5 kPa. (An ejector assembly is required <strong>for</strong> negative pressure<br />
application.)<br />
Model and Code: Refer to “Model and Codes” in page 2-5.<br />
External Dimensions: Refer to the Figure in page 2-6.<br />
IM 11M12A01-02E<br />
8th Edition : Jan.13,2012-00
2.3.2 ZO21P High Temperature Probe Adapter<br />
2-9<br />
Measuring O2 in the high temperature gases (exceeds 700 °C) requires a general use probe<br />
<strong>ZR22G</strong> of 0.15 m length and a high temperature probe adapter.<br />
Sample gas temperature: 0 to 1400 °C (when using SiC probe)<br />
0 to 800 °C (when using SUS 310S probe)<br />
Sample gas pressure: -0.5 to + 5 kPa. When using in the range of 0 to 25 vol% O 2 or more,<br />
the sample gas pressure should be in the range of -0.5 to +0.5 kPa.<br />
(Where the sample gas pressure <strong>for</strong> the high temperature probe is<br />
negative, an auxiliary ejector is necessary.)<br />
Insertion length:<br />
0.5 m, 0.6 m, 0.7 m, 0.8 m, 0.9 m, 1 m, 1.5 m<br />
Material in Contact with Gas: SUS 316 (JIS), SiC or SUS 310S, SUS 304 (JIS) (flange)<br />
Probe Material:<br />
Installation:<br />
SiC, SUS 310S (JIS)<br />
Flange mounting (FF type or RF type)<br />
Probe Mounting Angle: Vertically downward within ± 5° Where the probe material is SUS 310S,<br />
horizontal mounting is available.<br />
Construction:<br />
Weight(example):<br />
Non explosion-proof. Rainproof construction<br />
Insertion length of 1.0 m: approx. 5.3 kg (JIS) / approx. 11.3 kg (ANSI)<br />
Insertion length of 1.5 m: approx. 5.8 kg (JIS) / approx. 11.8 kg (ANSI)<br />
Model and Codes<br />
Model Suffix code Option code Description<br />
ZO21P -H - - - - - - - High Temperature Probe Adapter<br />
Material -A<br />
-B<br />
Insertion<br />
length<br />
-050<br />
-060<br />
-070<br />
-080<br />
-090<br />
-100<br />
-150<br />
Flange -J<br />
-N<br />
-M<br />
-L<br />
-A<br />
-R<br />
-Q<br />
-T<br />
-S<br />
-E<br />
- - - - - - -<br />
- - - - - - -<br />
- - - - - -<br />
- - - - - -<br />
- - - - - -<br />
- - - - - -<br />
- - - - - -<br />
- - - - - -<br />
- - - - - -<br />
- - - - - - -<br />
- - - - - - -<br />
- - - - - - -<br />
- - - - - - -<br />
- - - - - - -<br />
- - - - - - -<br />
- - - - - - -<br />
- - - - - - -<br />
- - - - - - -<br />
- - - - - - -<br />
SiC<br />
SUS 310S<br />
0.5 m<br />
0.6 m<br />
0.7 m<br />
0.8 m<br />
0.9 m<br />
1.0 m<br />
1.5 m<br />
Style code *B - - - - - - - Style B<br />
JIS 5K 50 FF SUS304<br />
JIS 10K 65 FF SUS304<br />
JIS 10K 80 FF SUS304<br />
JIS 10K 100 FF SUS304<br />
ANSI Class 150 4 RF SUS304<br />
ANSI Class 150 2 1/2 RF SUS304<br />
ANSI Class 150 3 RF SUS304<br />
JPI Class 150 3 RF SUS304<br />
JPI Class 150 4 RF SUS304<br />
DIN PN10 DN50 A SUS304<br />
Option /SCT Stainless steel tag plate<br />
Note:The Insertion length 0.15 m of the <strong>ZR22G</strong> should be specified.<br />
IM 11M12A01-02E<br />
8th Edition : Jan.13,2012-00
2-10<br />
Approx. 351<br />
Unit: mm<br />
Sample gas outlet<br />
Rc1/2(Note2)<br />
180<br />
Flange (Thickness 5)<br />
JIS 5K 32 FF equivalent<br />
Gasket (Thickness 1.5)<br />
Approx. 215<br />
170<br />
(Insertion length) (Note1)<br />
Approx. 100<br />
Ø60.5<br />
ØA<br />
Ø60.5<br />
t<br />
Approx. 48<br />
Ø115<br />
Ø52 over<br />
110<br />
Flange <br />
High temperature<br />
Probe SiC pipe<br />
Detector(<strong>ZR22G</strong>)<br />
Reference gas inlet Rc1/4 or 1/4NPT<br />
25<br />
48<br />
Flange provided<br />
by customer<br />
69<br />
L<br />
85<br />
Ø124±3<br />
Ø30<br />
ØA<br />
ØB<br />
C<br />
Pipe hole (2- G1/2, 2-1/2NPT, etc)<br />
Calibration gas inlet Rc1/4 or 1/4NPT<br />
(Note 1) L= 0.5、0.6、0.7、0.8、0.9、<br />
1.0、1.5(m)<br />
(Note 2) Sample gas outlet<br />
(if the sample gas pressure is negative,<br />
connect the auxiliary ejector.)<br />
F2-4E.ai<br />
Flange A B C t<br />
JIS 5K 50 FF SUS304 155 130 4 - Ø15 14<br />
JIS 10K 65 FF SUS304 175 140 4 - Ø19 18<br />
JIS 10K 80 FF SUS304 185 150 8 - Ø19 18<br />
JIS 10K 100 FF SUS304 210 175 8 - Ø19 18<br />
ANSI Class 150 4 RF SUS304 228.6 190.5 8 - Ø19 24<br />
ANSI Class 150 3 RF SUS304 190.5 152.4 4 - Ø19 24<br />
ANSI Class 150 2 RF SUS304 152.4 120.6 4 - Ø19 19<br />
JPI Class 150 4 RF SUS304 229 190.5 8 - Ø19 24<br />
JPI Class 150 3 RF SUS304 190 152.4 4 - Ø19 24<br />
DIN PN10 DN50A SUS304 165 125 4 - Ø18 18<br />
IM 11M12A01-02E<br />
8th Edition : Jan.13,2012-00
2.4 <strong>ZR402G</strong> Separate type Converter<br />
2.4.1 Standard Specification<br />
2-11<br />
The <strong>ZR402G</strong> Separate type Converter can be controlled by LCD touchscreen on the converter.<br />
Display:<br />
LCD display of size 320 by 240 dot with touchscreen.<br />
Output Signal: 4 to 20 mA DC, two points (maximum load resistance 550 Ω)<br />
Contact Output Signal: Four points (one is fail-safe, normally open)<br />
Contact Input:<br />
Two points<br />
Auto-calibration Output: Two points (<strong>for</strong> dedicated automatic calibration unit)<br />
Ambient Temperature: -20 to +55 °C<br />
Storage Temperature: -30 to +70 °C<br />
Ambient Humidity:<br />
Installation Altitude:<br />
0 to 95%RH (Non-condensing)<br />
2000 m or less<br />
Category based on IEC 1010: II (Note)<br />
Pollution degree based on IEC 1010: 2 (Note)<br />
Note:<br />
Installation category, called over-voltage category, specifies impulse withstand voltage.<br />
Category II is <strong>for</strong> electrical equipment.<br />
Pollution degree indicates the degree of existence of solid, liquid, gas or other inclusions<br />
which may reduce dielectric strength. Degree 2 is the normal indoor environment.<br />
Power Supply Voltage: Ratings; 100 to 240 V AC, Acceptable range; 85 to 264 V AC<br />
Power Supply Frequency: Ratings; 50/60 Hz, Acceptable range; 45 to 66 Hz<br />
Power Consumption:<br />
Safety and EMC con<strong>for</strong>ming standards<br />
Safety:<br />
Max. 300 W, approx. 100 W <strong>for</strong> ordinary use.<br />
Con<strong>for</strong>m to EN61010-1, CSA C22.2 No.1010-1 certified,<br />
UL3111-1 certified<br />
EMC: Con<strong>for</strong>m to EN 61326-1, EN 61326-2-3, E 61000-3-2<br />
: Certification No.; KCC-REM-YHQ-EEN103-1-R1<br />
CAUTION<br />
This instrument is a Class A product, and it is designed <strong>for</strong> use in the industrial environment.<br />
Please use this instrument in the industrial environment only.<br />
Maximum Distance between Detector and Converter: Conductor two-way resistance must be<br />
10 Ω or less (when a 1.25 mm 2 cable or equivalent is used, 300 m or<br />
less.)<br />
Construction:<br />
Wiring Connection:<br />
Installation:<br />
Case:<br />
Paint Color:<br />
Finish:<br />
Weight:<br />
Outdoor installation, equivalent to NEMA 4X/IP66 (with conduit holes<br />
completely sealed with a cable gland)<br />
G1/2, Pg13.5, M20 by 1.5 mm, 1/2 NPT (with plug), eight holes<br />
Panel, wall or 2-inch pipe mounting<br />
Aluminum alloy<br />
Door: Sliver gray (Munsell 3.2PB7.4/1.2)<br />
Case: Sliver gray (Munsell 3.2PB7.4/1.2)<br />
Polyurethane corrosion-resistance coating<br />
Approx. 6 kg<br />
IM 11M12A01-02E<br />
8th Edition : Jan.13,2012-00
2.4.2 Functions<br />
Display Functions:<br />
2-12<br />
Value Display; Displays values of the measured oxygen concentration, etc<br />
Graph Display; Displays trends of measured oxygen concentration<br />
Data Display;<br />
Displays various useful data <strong>for</strong> maintenance, such as cell temperature,<br />
reference junction temperature, maximum/minimum oxygen<br />
concentration, or the like<br />
Status Message; Indicates an alarm or error occurrence with flashing of the<br />
corresponding icon. Indicates status such as warming-up, calibrating,or<br />
the like by icons.<br />
Alarm, Error Display; Displays alarms such as “Abnormal oxygen concentration” or<br />
errors such as “Abnormal cell e.m.f.” when any such status occurs.<br />
Calibration Functions:<br />
Automatic calibration; Requires the Automatic Calibration Unit ZR40H. It calibrates<br />
automatically at specified intervals.<br />
Semi-auto Calibration; Requires the Automatic Calibration Unit. Input calibration direction<br />
on the touchscreen or contact, then it calibrates automatically afterwards.<br />
<strong>Manual</strong> Calibration; Calibration with opening/closing the valve of calibration gas in<br />
operation interactively with an LCD touchscreen.<br />
Blow back Function:<br />
Output through the contact in the set period and time. Auto/Semi_Auto selectable.<br />
Maintenance Functions:<br />
Can operate updated data settings in daily operation and checking. Display data settings,<br />
calibration data settings, blow back data settings, current output loop check, input/output<br />
contact check.<br />
Setup Functions:<br />
Initial settings suit <strong>for</strong> the plant conditions when installing the converter.<br />
Equipment settings, current output data settings, alarm data settings, contact data<br />
settings, other settings.<br />
Self-diagnosis:<br />
This function diagnoses conditions of the converter or the detector and indicates when<br />
any abnormal condition occurs.<br />
Password Functions:<br />
Enter your password to operate the analyzer excepting data display.<br />
Individual passwords can be set <strong>for</strong> maintenance and setup.<br />
Display and setting content:<br />
Measuring related items: Oxygen concentration (vol% O 2 ), output current value (mA), air ratio,<br />
moisture quantity (in hot gases) (vol% H 2 O)<br />
Display Items:<br />
Cell temperature (°C), thermocouple reference junction temperature<br />
(°C), maximum/minimum/average oxygen concentration (vol% O 2 ), cell<br />
e.m.f. (mV), cell internal resistance (Ω), cell condition (in four grades),<br />
heater on-time rate (%), calibration record (ten times), time (year/month/<br />
day, hour/minute)<br />
Calibration Setting Items: Span gas concentration (vol% O 2 ), zero gas concentration (vol% O 2 ),<br />
calibration mode (auto, semi-auto, manual), calibration type and<br />
method (zero-span calibration, zero calibration only, span calibration<br />
only), stabilization time (min.sec), calibration time (min.sec), calibration<br />
(day/hour), starting time (year/month/day, hour/minute)<br />
IM 11M12A01-02E<br />
8th Edition : Jan.13,2012-00
Equipment Related Items: Measuring gas selection<br />
2-13<br />
Output Related Items: Analog output/output mode selection, output conditions when warmingup/maintenance/calibrating<br />
(during blow back)/abnormal, 4 mA/20 mA<br />
point oxygen concentration (vol% O 2 ), time constant.<br />
Alarm Related Items: Oxygen concentration high alarm/high-high alarm limit values (vol% O 2 ),<br />
oxygen concentration low alarm/low-low alarm limit values (vol% O 2 ),<br />
oxygen concentration alarm hysteresis (vol% O 2 ), oxygen concentration<br />
alarm detection, alarm delay (seconds)<br />
Contact Related Items: Selection of contact input 1 and 2, selection of contact output 1 to 4<br />
(abnormal, high-high alarm, high alarm, low alarm, low-low alarm,<br />
maintenance, calibrating, range switching, warming-up, calibration gas<br />
pressure decrease, temperature high alarm, blow back, flameout gas<br />
detection, calibration coefficient alarm, stubilization timeout)<br />
Converter Output:<br />
Range:<br />
Output damping:<br />
Contact Output:<br />
Contact Input:<br />
Contact capacity:<br />
Self-diagnosis:<br />
Calibration:<br />
Method;<br />
Two points mA analog output (4 to 20 mA DC (maximum load resistance<br />
of 550 Ω)) and one mA digital output point (HART) (minimum load<br />
resistance of 250 Ω).<br />
Any setting between 0 to 5 through 0 to 100 vol% O 2 in 1 vol% O 2 , or<br />
partial range is available (Maximum range value/minimum range<br />
value 1.3 or more).For the log output, the minimum range value is fixed<br />
at 0.1 vol% O 2 .<br />
4 to 20 mA DC linear or log can be selected. Input/output isolation<br />
provided.<br />
0 to 255 seconds.Hold / non-hold selection, preset value setting<br />
possible with hold.<br />
Four points, contact capacity 30 V DC 3 A, 25 0V AC 3 A (resistive load)<br />
Three of the output points can be selected to either normally energized<br />
or normally de-energized status.<br />
Delayed functions (0 to 255 seconds) and hysteresis function (0 to 9.9<br />
vol% O 2 can be added to high/low alarms.<br />
The following functions are programmable <strong>for</strong> contact outputs.<br />
(1) Abnormal, (2) High-high alarm, (3) High alarm, (4) Low-low alarm,<br />
(5) Low alarm, (6) Maintenance, (7) Calibration, (8) Range switching<br />
answer-back, (9) Warm-up, (10) Calibration gas pressure decrease<br />
(answer-back of contact input), (11) Temperature high alarm,<br />
(12) Blow back start, (13) Flameout gas detection (answer-back of<br />
contact input), (14) Calibration coefficient alarm, (15) Startup power<br />
stabilization timeout alarm<br />
Contact output 4 is set to normally operated, and fixed error status.<br />
Two points (voltage-free)<br />
The following functions are programmable <strong>for</strong> contact inputs:<br />
(1) Calibration gas pressure decrease alarm, (2) Range switching<br />
(Switched range is fixed), (3) External calibration start, (4) Process alarm<br />
(if this signal is received, the heater power turns off), (5) Blow back start<br />
Off-state leakage current: 3 mA or less<br />
Abnormal cell, abnormal cell temperature (low/high), abnormal<br />
calibration, defective A/D converter, defective digital circuit<br />
zero/span calibration<br />
Calibration mode; automatic, semi-automatic and manual (All are operated interactively<br />
with an LCD touchscreen). Either zero or span can be skipped.<br />
IM 11M12A01-02E<br />
8th Edition : Jan.13,2012-00
2-14<br />
Zero calibration gas concentration setting range: 0.3 to 100 vol% O 2 (in increments of<br />
0.01 vol% O 2 in smallest units).<br />
Span calibration gas concentration setting range: 4.5 to 100 vol% O 2 (in increments of<br />
0.01 vol% O 2 in smallest units).<br />
Use nitrogen-balanced mixed gas containing 0 to 10 vol% O 2 scale of<br />
oxygen, and 80 to 100 vol% O 2 scale of oxygen <strong>for</strong> standard zero gas<br />
and standard span gas respectively.<br />
Calibration interval; date/time setting: maximum 255 days<br />
Model and Codes<br />
Model<br />
Suffix code<br />
Option<br />
code<br />
Description<br />
<strong>ZR402G</strong> - - - - - - - - - - - - - - - - - - - - - - Separate type Zirconia Oxygen Analyzer, Converter<br />
Converter<br />
thread<br />
-P<br />
-G<br />
-M<br />
-T<br />
Display -J<br />
-E<br />
-G<br />
-F<br />
-C<br />
Instruction manual -J<br />
-E<br />
-C<br />
- - - - - -<br />
- - - - - -<br />
- - - - - -<br />
- - - - - -<br />
- - - - - -<br />
- - - - - -<br />
- - - - - -<br />
- - - - - -<br />
- - - - - -<br />
- - - - - -<br />
- - - - - -<br />
- - - - - -<br />
G1/2<br />
Pg13.5<br />
M20x1.5 mm<br />
1/2NPT<br />
Japanese<br />
English<br />
German<br />
French<br />
Chinese<br />
Japanese<br />
English<br />
Chinese<br />
— -A - - - - - - Always -A<br />
Options<br />
Tag plates<br />
NAMUR NE43<br />
compliant<br />
/H Hood (*2)<br />
/SCT<br />
/PT<br />
/C2<br />
/C3<br />
Stainless steel tag plate (*1)<br />
Printed tag plate (*1)<br />
Failure alarm down-scale:<br />
Output status at CPU failure and hardware error is 3.6 mA or<br />
less (*3)<br />
Failure alarm up-scale:<br />
Output status at CPU failure and hardware error is 21.0 mA or<br />
more (*3)<br />
*1 Specify either /SCT or /PT option code.<br />
*2 Sun shield hood is still effective even if scratched.<br />
*3 Output signal limits: 3.8 to 20.5 mA. Specify either /C2 or /C3 option code.<br />
(Note) If AC line voltage is 125 V AC or greater, or in the EEC, the ZO21D cannot be used with the <strong>ZR402G</strong>.<br />
IM 11M12A01-02E<br />
8th Edition : Jan.13,2012-00
2-15<br />
● External Dimensions<br />
1 to 6 (Panel Thickness)<br />
2B mounting pipe<br />
Unit: mm<br />
EXA <strong>ZR402G</strong><br />
4 - Ø6 holes<br />
<strong>for</strong> Wall mounting<br />
20.2<br />
(*1/2NPT)<br />
100<br />
126.5<br />
280<br />
8<br />
228<br />
40 40 40<br />
10<br />
57.3<br />
36<br />
136.3 54.7<br />
111<br />
8-G1/2, *8-1/2NPT etc<br />
(Wiring connection)<br />
*: 1/2NPT with plug<br />
36 23<br />
38 24 14 38<br />
( <strong>for</strong> wall mounting)<br />
4 - Ø6 holes<br />
126.5<br />
4-R8 to R10<br />
or<br />
4-C5 to C8<br />
274 +2<br />
0<br />
190 183 +2<br />
0<br />
Wall mounting<br />
• With sun shield hood (option code /H)<br />
Panel Cut-out<br />
243<br />
±4<br />
205.5<br />
±4<br />
55<br />
±2<br />
123<br />
±3<br />
155.5<br />
±3<br />
<strong>ZR402G</strong><br />
251.5<br />
±3<br />
±4<br />
94.5<br />
39<br />
±2<br />
Material of HOOD : Aluminum<br />
• Accessories<br />
Item<br />
Fuse<br />
Bracket <strong>for</strong> mounting<br />
Screw <strong>for</strong> Bracket<br />
Pat.No.<br />
A1113EF<br />
F9554AL<br />
F9123GF<br />
Qty<br />
1<br />
1<br />
1<br />
F2-5E.ai<br />
Description<br />
3.15A<br />
For pipe mounting, panel mounting or wall mounting<br />
IM 11M12A01-02E<br />
8th Edition : Jan.13,2012-00
2.5 ZA8F Flow Setting Unit and<br />
ZR40H Automatic Calibration Unit<br />
2.5.1 ZA8F Flow Setting Unit<br />
2-16<br />
This flow setting unit is applied to the reference gas and the calibration gas in a system<br />
configuration (System 2). Used when instrument air is provided.<br />
This unit consists of a flowmeter and flow control valves to control the flow rates of calibration gas<br />
and reference gas.<br />
Standard Specifications<br />
FIowmeter Scale:<br />
Construction:<br />
Case Material:<br />
Painting:<br />
Tube Connections:<br />
Calibration gas; 0.1 to 1.0 l/min. Reference gas; 0.1 to 1.0 l/min.<br />
Dust-proof and rainproof construction<br />
SPCC (Cold rolled steel sheet)<br />
Baked epoxy resin, Dark-green (Munsell 2.0 GY 3.1/0.5 or equivalent)<br />
Rc1/4 or 1/4FNPT<br />
Reference Gas pressure: Clean air supply of sample gas pressure plus approx. 50 kPa G<br />
(or sample gas pressure plus approx. 150 kPa G when a check valve<br />
is used). Pressure at inlet of the Flow Setting Unit.(Maximum 300 kPaG)<br />
Air Consumption:<br />
Weight:<br />
Approx. 1.5 l/min<br />
Approx. 2.3 kg<br />
Calibration gas (zero gas, span gas) Consumption: Approx. 0.7 l/min (at calibration time only)<br />
NOTE<br />
Use instrument air <strong>for</strong> span calibration gas, if no instrument air is available, contact YOKOGAWA.<br />
Model and Codes<br />
Model Suffix code Option code Description<br />
ZA8F - - - - - - - - - - - - - - - - - Flow setting unit<br />
Joint<br />
-J<br />
-A<br />
- - - - - - - - -<br />
- - - - - - - - -<br />
Style code *C - - - - - - - - - Style C<br />
Rc 1/4<br />
With 1/4 NPT adapter<br />
IM 11M12A01-02E<br />
8th Edition : Jan.13,2012-00
2-17<br />
● External Dimensions<br />
ø6 Hole<br />
7<br />
180<br />
140<br />
Unit : mm<br />
REFERENCE CHECK<br />
235.8<br />
REFERENCE SPAN<br />
ZERO<br />
2B mounting pipe<br />
222.8<br />
Calibration gas outlet<br />
Reference gas outlet<br />
32<br />
Span gas inlet<br />
Zero gas inlet<br />
Piping connection port A<br />
70<br />
35<br />
REF<br />
OUT<br />
CHECK<br />
OUT<br />
AIR<br />
IN<br />
SPAN<br />
IN<br />
ZERO<br />
IN<br />
20 35 35 35 35 20<br />
Model<br />
ZA8F-J*C<br />
Piping connection port A<br />
5 - Rc1/4<br />
7<br />
Instrument air inlet<br />
ZA8F-A*C<br />
5 - 1/4NPT<br />
PIPNG INSIDE THE FLOW SETTING UNIT<br />
Weight : Approx. 2.3 kg<br />
CHECK<br />
OUT<br />
REF<br />
OUT<br />
Flowmeter<br />
Flowmeter<br />
AIR IN<br />
ZERO<br />
GAS IN<br />
SPAN<br />
GAS IN<br />
Instrument air<br />
Approx. 1.5 l/min.<br />
Air Set<br />
Air pressure ;<br />
without check valve ; sample gas pressure + approx.50 kPaG<br />
with check valve ; sample gas pressure + approx.150 kPaG<br />
F13-14E.ai<br />
IM 11M12A01-02E<br />
8th Edition : Jan.13,2012-00
2.5.2 ZR40H Automatic Calibration Unit<br />
2-18<br />
This automatic calibration unit is applied to supply specified flow of reference gas and calibration<br />
gas during automatic calibration to the detector in a system configuration (System 3).<br />
• Specifications<br />
Used when auto calibration is required <strong>for</strong> the separate type and instrument air is provided.<br />
The solenoid valves are provided as standard.<br />
Construction:<br />
Mounting:<br />
Materials:<br />
Finish:<br />
Piping Connection:<br />
Power Supply:<br />
Dust-proof and rainproof construction:<br />
NEMA4X/IP67-only <strong>for</strong> case coating solenoid valve, not flowmeter<br />
(excluding flowmeter)<br />
2-inch pipe or wall mounting, no vibration<br />
Body; Aluminum alloy, Piping; SUS316 (JIS), SUS304 (JIS), Flowmeter;<br />
MA (Metha acrylate resin). Bracket; SUS304 (JIS)<br />
Polyurethane corrosion-resistance coating, mint green (Munsell<br />
5.6BG3.3/2.9)<br />
Refer to Model and Codes<br />
24 V DC (from <strong>ZR402G</strong>), Power consumption; Approx.1.3W<br />
Reference Gas Pressure: Sample gas pressure plus approx. 150 kPa (690 kPa max.), (Pressure<br />
at inlet of the Automatic Calibration Unit)<br />
Air Consumption:<br />
Weight:<br />
Approx. 1.5 l/min<br />
Approx. 3.5 kg<br />
Ambient Temperature: -20 to +55 °C, no condensation or freezing<br />
Ambient Humidity:<br />
0 to 95% RH<br />
Storage Temperature: -30 to +65 °C<br />
• Model and Codes<br />
Model Suffix code Option code Description<br />
ZR40H - - - - - - - - - - - - - - - - - - - - - Automatic calibration unit <strong>for</strong> <strong>ZR402G</strong><br />
Gas piping<br />
connection<br />
Wiring<br />
connection<br />
-R<br />
-T<br />
-P<br />
-G<br />
-M<br />
-T<br />
- - - - - - - -<br />
- - - - - - - -<br />
- - - - - - - -<br />
- - - - - - - -<br />
- - - - - - - -<br />
- - - - - - - -<br />
Rc 1/4<br />
1/4 NPT<br />
— -A - - - - - - - - Always -A<br />
Pipe connection (G1/2)<br />
Pg 13.5<br />
20 mm (M20 x 1.5)<br />
1/2 NPT<br />
IM 11M12A01-02E<br />
8th Edition : Jan.13,2012-00
2-19<br />
● External Dimensions<br />
2B pipe mounting example<br />
Unit: mm<br />
Wiring inlet ; 2-G1/2,Pg13.5,M20X1.5 or 1/2NPT(Female)<br />
(wiring inlet is at same position on rear)<br />
*1 with four ISO M6 screws can wall-mount<br />
90 116.5<br />
26<br />
54 71.5<br />
*1<br />
41.2 41.2<br />
4 - Ø6.5<br />
140<br />
Connection port<br />
OCK<br />
250<br />
26<br />
42<br />
49.5<br />
12<br />
Flowmeter<br />
Needle valve<br />
223<br />
Terminal box<br />
Setting Valve <strong>for</strong><br />
reference gas<br />
Setting Valve <strong>for</strong><br />
calibration gas<br />
2B mounting pipe<br />
Calibration gas outlet<br />
Rc1/4 or 1/4 NPT(Female)<br />
Zero gas inlet<br />
Rc1/4 or 1/4 NPT(Female)<br />
102 58 MAX<br />
46 16<br />
40 30 47.5 25<br />
Reference gas outlet<br />
Rc1/4 or 1/4 NPT(Female)<br />
Reference gas inlet<br />
Rc1/4 or 1/4 NPT(Female)<br />
• Piping Diagram<br />
F2-6_2E.ai<br />
<strong>ZR402G</strong> Converter<br />
ZR40H Automatic<br />
Calibration Unit<br />
CHECK<br />
OUT<br />
REF<br />
OUT<br />
AC-Z<br />
AC-S<br />
AC-C<br />
Zero<br />
EV1<br />
Span<br />
Flowmeter<br />
*2 *2<br />
Flowmeter<br />
Solenoid valve<br />
EV1,2<br />
EV2<br />
EV1<br />
EV2<br />
F35_00.ai<br />
AIR IN<br />
ZERO GAS IN<br />
Instrument air Approx. 1.5 l/min<br />
*2<br />
Needle valve is supplied as on accessory with flowmeter<br />
F2-6_3E.ai<br />
IM 11M12A01-02E<br />
8th Edition : Jan.13,2012-00
2.6 ZO21S Standard Gas Unit<br />
2-20<br />
This is a handy unit to supply zero gas and span gas to the detector in a system configuration<br />
based on System 1. It is used in combination with the detector only during calibration.<br />
Standard Specifications<br />
Function:<br />
Portable unit <strong>for</strong> calibration gas supply consisting of span gas (air) pump,<br />
zero gas cylinder with sealed inlet, flow rate checker and flow rate needle<br />
valve.<br />
Sealed Zero Gas Cylinders (6 provided): E7050BA<br />
Capacity:<br />
Filled pressure:<br />
Composition:<br />
Power Supply:<br />
Power Consumption:<br />
Case material:<br />
1 l<br />
Approx. 686 kPa G (at 35 °C)<br />
0.95 to 1.0 vol% O2 + N2 balance<br />
100, 110, 115, 200, 220, 240 V AC ±10%, 50/60 Hz<br />
Max. 5 VA<br />
SPCC (cold rolled steel sheet)<br />
Paint Color: Mainframe; Munsell 2.0 GY3.1/0.5 equivalent<br />
Cover; Munsell 2.8 GY6.4/0.9 equivalent<br />
Piping:<br />
Weight:<br />
Non CE Mark.<br />
Model and Codes<br />
Φ6 х Φ4 mm flexible tube connection<br />
Approx. 3 kg<br />
Model Suffix code Option code Description<br />
ZO21S - - - - - - - - - - - - - - - - - - - - - - - - Standard gas unit<br />
Power<br />
supply<br />
-2<br />
-3<br />
-4<br />
-5<br />
-7<br />
-8<br />
- - - - - - - - - - - - -<br />
- - - - - - - - - - - - -<br />
- - - - - - - - - - - - -<br />
- - - - - - - - - - - - -<br />
- - - - - - - - - - - - -<br />
- - - - - - - - - - - - -<br />
200 V AC 50/60 Hz<br />
220 V AC 50/60 Hz<br />
240 V AC 50/60 Hz<br />
100 V AC 50/60 Hz<br />
110 V AC 50/60 Hz<br />
115 V AC 50/60 Hz<br />
Panel<br />
-J<br />
-E<br />
- - - - - - - - - - - - -<br />
- - - - - - - - - - - - -<br />
Japanese version<br />
English version<br />
Style code *A - - - - - - - - - - - - - Style A<br />
• External Dimensions<br />
Unit: mm<br />
228<br />
92<br />
253<br />
Flow checker<br />
Span gas valve<br />
1600<br />
354<br />
Zero gas valve<br />
Gas outlet<br />
Zero gas cylinder (6 cylinder): E7050BA<br />
F2-7E.ai<br />
IM 11M12A01-02E<br />
8th Edition : Jan.13,2012-00
2.7 Other Equipments<br />
2.7.1 Dust Filter <strong>for</strong> the Detector (K9471UA)<br />
2-21<br />
This filter is used to protect the detector sensor from a corrosive dust components or high velocity<br />
dust in recovery boilers and cement kilns.<br />
Sample gas flow rate is needed to be 1 m/sec or more to replace gas inside zirconia sensor.<br />
• Standard specification<br />
Applicable detector:<br />
Mesh:<br />
Material:<br />
Weight:<br />
Standard-type detector <strong>for</strong> general use (the sample gas flow should be<br />
approximately perpendicular to the probe.)<br />
30 microns<br />
Carborundum (Filter), SUS316 (JIS)<br />
Approx. 0.2 kg<br />
Part No.<br />
K9471UA<br />
K9471UX<br />
Description<br />
Filter<br />
Tool<br />
Carborundum filter (SiC)<br />
32<br />
Detector<br />
Ø51<br />
Attach the filter unit to the tip of<br />
the detector by screwing it clockwise.<br />
Screw<br />
10<br />
Increasing of insertion length<br />
F3-2E.ai<br />
2.7.2 Dust Guard Protector (K9471UC)<br />
Recommended to be used when sample gas is likely to flow directly into the cell due to its flow<br />
direction in the stack or the like, flammable dust may go into the cell, or water drops are likely to<br />
fall and remain in the cell during downtime or the like due to the installation position.<br />
Material:<br />
SUS316<br />
Weight:<br />
Approx. 0.3 kg<br />
Increasing of insertion length<br />
100<br />
Ø50.8<br />
4-Ø6<br />
122<br />
F11-1E.ai<br />
IM 11M12A01-02E<br />
8th Edition : Jan.13,2012-00
2-22<br />
2.7.3 Ejector Assembly <strong>for</strong> High Temperature (E7046EC,<br />
E7046EN)<br />
This ejector assembly is used where pressure of sample gas <strong>for</strong> high temperature detector is<br />
negative. This ejector assembly consists of an ejector, a pressure gauge assembly and a needle<br />
valve.<br />
Standard Specifications<br />
Ejector<br />
Ejector Inlet Air Pressure: 29 to 68 kPa G<br />
Air Consumption:<br />
Suction gas flow rate:<br />
Connection:<br />
Tube Connection:<br />
Pressure Gauge Assembly<br />
Approx. 30 to 40 l/min<br />
3 to 7 l/min<br />
Rc1/4, SUS304 (JIS)<br />
Φ 6 / Φ 4 mm or 1/4 inch copper tube (stainless tube)<br />
Type: A 1.6 3/8 x75 x100 kPa (JIS B7505)<br />
Material in Contact with Gas: SUS316 (JIS)<br />
Case Material:<br />
Scale:<br />
Needle Valve<br />
Connection:<br />
Connection:<br />
Material:<br />
(Note) Pipe and connections are not provided.<br />
Part No.<br />
E7046EC<br />
E7046EN<br />
Aluminum alloy (Paint color; black)<br />
0 to 100 kPa G<br />
R1/4 or 1/4NPT, SUS304 (JIS) (with Bushing G3/8 x R1/4 or<br />
1/4NTP)<br />
Rc1/4 or 1/4FNPT<br />
SUS316 (JIS)<br />
Description<br />
Ejector; Ø6 / Ø4 TUBE joint, Pressure gauge; R1/4,<br />
Needle valve; Rc1/4: SUS304 (JIS)<br />
Ejector; 1/4 TUBE joint, Pressure gauge; 1/4NPT,<br />
Needle valve; 1/4FNPT : SUS304 (JIS)<br />
< Pressure setting <strong>for</strong> the ejector assembly <strong>for</strong> high temperature use ><br />
Pressure supply <strong>for</strong> the ejector assembly should be set so that the suction flow of the sample gas<br />
becomes approximately 5 l/min.<br />
To set this, proceed as follows:<br />
(1) In Graph 4, draw a horizontal line from the 5 l/min point. on the vertical axis (Suction flow: Qg)<br />
toward the gas pressure line to be used, to find the point of intersection.<br />
Draw a line vertically down from the point of intersection to the axis to find the drive pressure,<br />
P (at the ejector entrance).<br />
(2) In Graph 1, determine Po (pressure setting) from L (the distance between the ejector and the<br />
pressure gauge).<br />
(3) Open the needle valve to supply air <strong>for</strong> the ejector to the pressure gauge until it indicates the<br />
pressure setting, Po.<br />
NOTE<br />
Qg (the suction flow) may require change according to the conditions of use. Refer to Section<br />
3.2.2 and Section 4.1.4 <strong>for</strong> details.<br />
IM 11M12A01-02E<br />
8th Edition : Jan.13,2012-00
Graph explanation<br />
2-23<br />
1) Graph 1 is to compensate <strong>for</strong> pressure loss in piping between the ejector and the pressure<br />
gauge, and find Po (pressure setting).<br />
2) Graph 2 shows correlation between P (drive pressure) and Qa (air consumption).<br />
3) Graph 3 shows correlation between P (drive pressure) and Pg (suction pressure; when the<br />
sample gas inlet of the ejector is closed).<br />
4) Graph 4 shows correlation between P (drive pressure) and Qg (suction flow) <strong>for</strong> each gas<br />
pressure.<br />
Pressure gauge assembly<br />
Pressure gauge<br />
Needle valve<br />
Ø43<br />
Instrument air inlet <br />
<br />
40<br />
Approx. 67<br />
Full open height<br />
Approx. 88 39<br />
Tee<br />
Ejector<br />
Approx. 70<br />
38<br />
20<br />
<br />
Nozzle (Note1)<br />
R1/2<br />
Detector<br />
Blow Rc1/4<br />
(Note1) The connecter of ejector assembly is a<br />
dedicated connecter with nozzle function.<br />
Rc1/4 or 1/4 FNPT<br />
Ø6/Ø4 or 1/4 inch copper tube (stainless)<br />
with ejector to connect<br />
R1/4 or 1/4 NPT<br />
Needle<br />
valve<br />
Po<br />
Pressure gauge<br />
Po (kPa)<br />
200<br />
Air<br />
source<br />
1)<br />
Qa (l/min)<br />
2)<br />
40<br />
Qa<br />
L<br />
Ejector<br />
Pg<br />
Qg<br />
100<br />
P= 0.5<br />
30<br />
0<br />
Pg (kPa)<br />
-1.0<br />
-0.5<br />
0<br />
5 10 15<br />
L (m)<br />
Pressure setting characteristics<br />
40 60 80<br />
P (kPa)<br />
Suction pressure characteristics<br />
0 40 60 80<br />
P (kPa)<br />
Air consumption characteristics<br />
3)<br />
Qg (l/min)<br />
4)<br />
8 Gas Pressure:<br />
0 kPa<br />
4<br />
0<br />
Gas pressure : -15 Pa<br />
40 60 80<br />
P (kPa)<br />
Suction flow characteristics<br />
Gas<br />
Po (kPa) : Pressure setting<br />
P (kPa) : Drive pressure (at the ejector entrance)<br />
Pg (kPa) : Suction pressure<br />
Qa (l/min) : Air consumption<br />
Qg (l/min) : Suction flow<br />
L (m) : Distance between the ejector and the pressure<br />
gauge<br />
F2-9E.ai<br />
IM 11M12A01-02E<br />
8th Edition : Jan.13,2012-00
2.7.4 Stop Valve (L9852CB, G7016XH)<br />
2-24<br />
This valve mounted on the calibration gas line in the system to allow <strong>for</strong> one-touch calibration.<br />
This is applies to the system configuration shown <strong>for</strong> system 1 in section 1.<br />
Standard Specifications<br />
Connection:<br />
Material:<br />
Weight:<br />
Rc 1/4 or 1/4 FNPT<br />
SUS 316 (JIS)<br />
Approx. 80 g<br />
Part No.<br />
L9852CB<br />
G7016XH<br />
Description<br />
Joint: Rc 1/4, Material: SUS316 (JIS)<br />
Joint: 1/4 NPT, Material: SUS316 (JIS)<br />
Ø43<br />
Unit: mm<br />
Rc1/4 or 1/4NPT<br />
40<br />
55<br />
(Full open length)<br />
F15.ai<br />
2.7.5 Check Valve (K9292DN, K9292DS)<br />
This valve is mounted on the calibration gas line (directly connected to the detector).<br />
This is applied to a system based on the (System 2 and 3) system configuration .<br />
This valve prevents the sample gas from entering the calibration gas line. Although it functions as<br />
a stop valve, operation is easier than a stop valve as it does not require opening/closing at each<br />
calibration.<br />
Screw a check valve, instead of a stop valve into the calibration gas inlet of the detector.<br />
Standard Specifications<br />
Connection:<br />
Material:<br />
Pressure:<br />
Weight:<br />
Rc1/4 or 1/4FNPT<br />
SUS304 (JIS)<br />
70 kPa G or more and 350 kPa G or less<br />
Approx. 40 g<br />
Part No.<br />
K9292DN<br />
K9292DS<br />
Description<br />
Joint: Rc 1/4, Material: SUS304 (JIS)<br />
Joint: 1/4 NPT, Material: SUS304 (JIS)<br />
K9292DN : Rc 1/4(A),R 1/4(B)<br />
K9292DS : 1/4FNPT(A),1/4NPT(Male)(B)<br />
Unit: mm<br />
A<br />
B<br />
Approx. 19 Approx. 54<br />
F2-11E.ai<br />
IM 11M12A01-02E<br />
8th Edition : Jan.13,2012-00
2.7.6 Air Set<br />
2-25<br />
This set is used to lower the pressure when instrument air is used as the reference and span<br />
gases.<br />
Standard Specifications<br />
• G7003XF, K9473XK<br />
Primary Pressure:<br />
Secondary Pressure:<br />
Connection:<br />
Weight:<br />
Part No.<br />
G7003XF<br />
Max. 1 MPa G<br />
0.02 to 0.2 MPa G<br />
Rc1/4 or 1/4FNPT with joint adapter<br />
Approx.1 kg<br />
Joint: Rc 1/4, Material: Zinc alloy<br />
Description<br />
K9473XK Joint: 1/4 FNPT with adapter, Material: Zinc alloy, Adapter: SUS 316<br />
• G7004XF, K9473XG<br />
Primary Pressure:<br />
Secondary Pressure:<br />
Connection:<br />
Weight:<br />
Max. 1 MPa G<br />
0.02 to 0.5 MPa G<br />
Rc1/4 or 1/4FNPT with joint adapter<br />
Approx. 1 kg<br />
Part No.<br />
Description<br />
G7004XF Joint: Rc 1/4, Material: Zinc alloy<br />
K9473XG Joint: 1/4 FNPT with adapter, Material: Zinc alloy, Adapter: SUS 316<br />
External Dimensions<br />
Panel cut dimensions<br />
Horizontal Vertical<br />
mounting mounting<br />
22 ø15<br />
View A<br />
Unit : mm<br />
+0.5<br />
-0<br />
2-ø2.2<br />
40<br />
2-ø6.5<br />
40<br />
2-ø6 screw depth 8<br />
max. 55<br />
Panel (Horizontal mounting)<br />
Ø74<br />
Max. 210<br />
Secondary<br />
pressure<br />
gauge<br />
Panel (Vertical mounting)<br />
Primary<br />
Secondary<br />
A<br />
88<br />
G7003XF, G7004XF: Rc 1/4<br />
K9473XK, K9473XG: 1/4NPT connector<br />
Approx. 122<br />
airset.ai<br />
IM 11M12A01-02E<br />
8th Edition : Jan.13,2012-00
2.7.7 Zero Gas Cylinder (G7001ZC)<br />
2-26<br />
The gas from this cylinder is used as the calibration zero gas and detector purge gas.<br />
Standard Specifications<br />
Capacity:<br />
3.4 l<br />
Filled pressure: 9.8 to 12 MPa G<br />
Composition: 0.95 to 1.0 vol% O 2 in N 2<br />
Weight:<br />
Approx. 6 kg<br />
(Note) Export of such high pressure filled gas cylinder to most countries is prohibited or restricted.<br />
Unit : mm<br />
325<br />
485<br />
Φ140<br />
F2-13E.ai<br />
2.7.8 Cylinder Pressure Reducing Valve<br />
(G7013XF, G7014XF)<br />
This pressure reducing valve is used with the zero gas cylinders.<br />
Standard Specifications<br />
Primary Pressure:<br />
Secondary Pressure:<br />
Connection:<br />
Material:<br />
Max. 14.8 MPa G<br />
0 to 0.4 MPa G<br />
Inlet; W22 14 threads, right hand screw<br />
Outlet; Rc1/4 or 1/4FNPT<br />
Brass body<br />
Secondary pressure gauge<br />
Primary pressure gauge<br />
Approx.112<br />
Reducing valve handle<br />
Stop valve<br />
W22 (Righthand screw)<br />
TAK<br />
AC<br />
HI H<br />
IN<br />
O<br />
Approx. 59<br />
* Outlet<br />
Primary safety valve<br />
Approx. 163 Approx. 174<br />
Secondary safety valve<br />
Approx. 82<br />
Part No.<br />
G7013XF<br />
G7014XF<br />
* Outlet<br />
Rc1/4<br />
1/4 NPT female screw<br />
IM 11M12A01-02E<br />
8th Edition : Jan.13,2012-00
2-27<br />
2.7.9 Case Assembly <strong>for</strong> Calibration Gas Cylinder<br />
(E7044KF)<br />
This case assembly is used to store the zero gas cylinders.<br />
Standard Specifications<br />
Installation:<br />
Material:<br />
2B pipe mounting<br />
SPCC (Cold rolled steel sheet)<br />
Case Paint: Baked epoxy resin, Jade green (Munsell 7.5 BG 4/1.5)<br />
Weight:<br />
Approx. 10 kg with gas cylinder<br />
(Note) Export of such high pressure filled gas cylinder to most countries prohibited or restricted.<br />
324<br />
Pressure reducing valve<br />
( G7013XF / G7014XF )<br />
Zero gas cylinder<br />
(G7001ZC)<br />
225<br />
180<br />
496<br />
<br />
<br />
2B mounting pipe<br />
( Ø60.5 )<br />
The oblique line is an opening portion.<br />
(Note)The zero gas cylinder and the reducing valve are not included in the E7044KF (case assembly)<br />
F2-15E.ai<br />
2.7.10 ZR22A Heater Assembly<br />
Model and Codes<br />
Style: S2<br />
Model Suffix code Option code Description<br />
ZR22A - - - - - - - - - - - - - - - - - - - - Heater Assembly <strong>for</strong> <strong>ZR22G</strong><br />
Length (*1) -015<br />
-040<br />
-070<br />
-100<br />
-150<br />
-200<br />
-250<br />
-300<br />
Jig <strong>for</strong> change -A<br />
-N<br />
Reference gas (*3) -A<br />
-B<br />
-C<br />
- - - - - - - - - - -<br />
- - - - - - - - - - -<br />
- - - - - - - - - - -<br />
- - - - - - - - - - -<br />
- - - - - - - - - - -<br />
- - - - - - - - - - -<br />
- - - - - - - - - - -<br />
- - - - - - - - - - -<br />
- - - - - - - - - - -<br />
- - - - - - - - - - -<br />
- - - - - - - - - - -<br />
- - - - - - - - - - -<br />
- - - - - - - - - - -<br />
0.15 m<br />
0.4 m<br />
0.7 m<br />
1 m<br />
1.5 m<br />
2 m<br />
2.5 m<br />
3 m<br />
with Jig (*2)<br />
None<br />
Reference gas Natural convention,<br />
External connection (Instrument air)<br />
Pressure compensated (<strong>for</strong> <strong>ZR22G</strong> S2)<br />
Pressure compensated (<strong>for</strong> <strong>ZR22G</strong> S1)<br />
*1 Suffix code of length should be selected as same as <strong>ZR22G</strong> installed.<br />
*2 Jig part no. is K9470BX to order as a parts after purchase.<br />
*3 Select appropriately among “-A”, “-B”, “-C” according to the reference gas supply method and style.<br />
(Note) The heater is made of ceramic, do not drop or subject it to pressure stress.<br />
IM 11M12A01-02E<br />
8th Edition : Jan.13,2012-00
2-28<br />
• External Dimensions<br />
Jig <strong>for</strong> change<br />
(K9470BX)<br />
Φ 21.7<br />
K9470BX<br />
30<br />
Unit : mm<br />
Φ 45<br />
L±12<br />
Model & Codes<br />
L<br />
Weight (kg)<br />
ZR22A-015<br />
ZR22A-040<br />
ZR22A-070<br />
ZR22A-100<br />
ZR22A-150<br />
ZR22A-200<br />
ZR22A-250<br />
ZR22A-300<br />
302<br />
552<br />
852<br />
1152<br />
1652<br />
2152<br />
2652<br />
3152<br />
Approx. 0.5<br />
Approx. 0.8<br />
Approx. 1.2<br />
Approx. 1.6<br />
Approx. 2.2<br />
Approx. 2.8<br />
Approx. 3.4<br />
Approx. 4.0<br />
F2-16E.ai<br />
IM 11M12A01-02E<br />
8th Edition : Jan.13,2012-00
3-1<br />
3. Installation<br />
This chapter describes installation of the following equipment:<br />
Section 3.1<br />
Section 3.2<br />
Section 3.3<br />
Section 3.4<br />
Section 3.5<br />
Section 3.6<br />
General-purpose Detector (except <strong>ZR22G</strong>-015)<br />
High Temperature Detector (<strong>ZR22G</strong>-015)<br />
Converter<br />
ZA8F Flow Setting Unit<br />
ZR40H Automatic Calibration Unit<br />
Case Assembly (E7044KF)<br />
3.1 Installation of General-purpose Detector<br />
3.1.1 Installation Location<br />
The following should be taken into consideration when installing the detector:<br />
(1) Easy and safe access to the detector <strong>for</strong> checking and maintenance work.<br />
(2) An ambient temperature of not more than 150 °C, and the terminal box should not be affected<br />
by radiant heat.<br />
(3) A clean environment without any corrosive gases.<br />
NOTE<br />
• A natural convection type detector (model <strong>ZR22G</strong>----C), which uses ambient air as<br />
reference gas, requires that the ambient oxygen concentration be constant.<br />
(4) No vibration.<br />
(5) The sample gas satisfies the specifications described in Chapter 2.<br />
(6) No sample gas pressure fluctuations.<br />
3.1.2 Probe Insertion Hole<br />
Includes those analyzers equipped with a probe supporter and probe protector.<br />
When preparing the probe insertion hole, the following should be taken into consideration:<br />
CAUTION<br />
• The outside dimension of detector may vary depending on its options. Use a pipe that is<br />
large enough <strong>for</strong> the detector. Refer to Figure 3.1 <strong>for</strong> the dimensions.<br />
• If the detector is mounted horizontally, the calibration gas inlet and reference gas inlet<br />
should face downwards.<br />
• When using the detector with pressure compensation, ensure that the flange gasket does<br />
not block the reference gas outlet on the detector flange. If the flange gasket blocks the<br />
outlet, the detector cannot conduct pressure compensation. Where necessary, make a<br />
notch in the flange gasket. Confirm the external dimensions of the detector in Section 2.2<br />
be<strong>for</strong>e installation.<br />
• The sensor (zirconia cell) at the tip of the detector may deteriorate due to thermal shock if<br />
water drops are allowed to fall on it, as it is always at high temperature.<br />
IM 11M12A01-02E<br />
8th Edition : Jan.13,2012-00
(1) Do not mount the probe with the tip higher than the probe base.<br />
3-2<br />
(2) If the probe length is 2.5 meters or more, the detector should be mounted vertically<br />
(no more than a 5° tilt).<br />
(3) The detector probe should be mounted at right angles to the sample gas flow or the probe<br />
tip should point downstream.<br />
100 mm<br />
(vertical)<br />
Bounds of the probe<br />
insertion hole location<br />
Flange matches<br />
the detector size<br />
*1<br />
Type<br />
Outside diameter of detector<br />
Standard<br />
50.8 mm in diameter (Note)<br />
With dust filter 51 mm in diameter (Note)<br />
With probe protector 60.5 mm in diameter (Note)<br />
*1<br />
(horizontal)<br />
Note<br />
100 mm<br />
Four-hole flange<br />
Eight-hole flange<br />
F3-1E.ai<br />
(Note)<br />
When using the detector with pressure compensation, ensure that the flange gasket does not block the reference gas outlet on<br />
the detector flange. If the flange gasket blocks the outlet, the detector cannot per<strong>for</strong>m pressure compensation.<br />
Where necessary, make a notch in the flange gasket. Confirm the outside dimensions of the detector in Section 2.2 be<strong>for</strong>e<br />
installation.<br />
Figure 3.1 illustrates an example of the probe insertion hole.<br />
3.1.3 Installation of the Detector<br />
CAUTION<br />
• The cell (sensor) at the tip of the detector is made of ceramic (zirconia). Do not drop the<br />
detector, as impact will damage it.<br />
• A gasket should be used between the flanges to prevent gas leakage. The gasket material<br />
should be heatproof and corrosion-proof, suited to the characteristics of the sample gas.<br />
The following should be taken into consideration when mounting the general use detector:<br />
<br />
(1) Make sure that the cell mounting screws (four bolts) at the tip of the detector are not loose.<br />
If a dust filter (see Section 2.7.1) is used, make sure it is properly attached to the detector.<br />
Refer to Section 3.1.4 <strong>for</strong> installation of the dust filter.<br />
(2) Where the detector is mounted horizontally, the calibration gas inlet and the reference gas<br />
inlet should face downward.<br />
3.1.4 Installation of the Dust Filter (K9471UA), Dust Guard<br />
Protector (K9471UC), Probe Protector ZO21R<br />
IM 11M12A01-02E<br />
8th Edition : Jan.13,2012-00
3-3<br />
CAUTION<br />
• The dust filter is used to protect the Zirconia sensor from corrosive dust or a high<br />
concentration of dust such as in utility boilers and cement kilns. If a filter is used in<br />
combustion systems other than these, it may have adverse effects such as response delay.<br />
These combustion conditions should be examined carefully be<strong>for</strong>e using a filter.<br />
• The dust filter requires gas flow of 1 m/sec or faster at the front surface of the filter.<br />
When you specify option code /F1, the detector is shipped with the dust filter mounted.<br />
Follow this procedure replace the filter on the detector . It is recommended that you read Chapter<br />
11 prior to filter mounting, <strong>for</strong> it is necessary to be familiar with the detector’s construction,<br />
especially the sensor assembly.<br />
(1) Mount the dust filter assembly by putting it on the end of the detector and screw the assembly<br />
clockwise. Put a hook pin wrench (K9471UX), Φ52 to 55 in diameter, into the hole on the<br />
assembly to fasten or remove it.<br />
Apply a heat-resistant coating (see Note 1) to the threads on the detector.<br />
When remounting filter assembly after having once removed it from the detector, reapply the<br />
heat-resistant coating.<br />
Note 1:<br />
As the detector is heated to 700 °C, it is recommended to use heat-resistant coating on the threads to prevent seizing up.<br />
Name of the heat-resistant coating material: NEVER SEEZ Nickel Special”.<br />
Carborundum filter (SiC)<br />
32<br />
Detector<br />
Ø51<br />
Attach the filter unit to the tip of<br />
the detector by screwing it clockwise.<br />
Screw<br />
10<br />
Increasing of insertion length<br />
Figure 3.2 Installation of the dust filter<br />
< Procedures <strong>for</strong> installing the dust guard protector (K9471UC)><br />
The <strong>ZR22G</strong> detector is shipped with the dust guard protector when the option code / F2 is<br />
specified in case of ordering the detector. The protector should be used when preventing dusts<br />
and water drops from lowering the detector per<strong>for</strong>mance is desired.<br />
Screw the protector on the top of the detector so as to cover the top. When attaching or detaching<br />
the protector, per<strong>for</strong>m by hooking holes of its side with a hook pin wrench <strong>for</strong> Φ52-55 hole (Pin<br />
diameter 4.5 mm: P/N K9741UX or the like) or by pass a screwdriver through the holes. When<br />
re-attaching the protector after detaching it, apply the “NEVER SEEZ Nickel Special” to it.<br />
Increasing of insertion length<br />
100<br />
F3-2E.ai<br />
Ø50.8<br />
4-Ø6<br />
122<br />
F11-1E.ai<br />
IM 11M12A01-02E<br />
8th Edition : Jan.13,2012-00
3-4<br />
<br />
The detector is used with a probe protector to support the probe (<strong>ZR22G</strong>) when the probe length<br />
is 2.5 m or more and it is mounted horizontally.<br />
(1) Put a gasket (provided by the user) between the flanges, and mount the probe protector in the<br />
probe insertion hole.<br />
(2) Make sure that the sensor assembly mounting screws (four bolts) at the tip of the detector are<br />
not loose.<br />
(3) Mount the detector so that the reference gas and calibration gas inlet faces downward.<br />
Flow direction of the<br />
sample gas<br />
1050,1550,2050<br />
Gasket (t1.5)<br />
Unit: mm<br />
Φ60.5<br />
Notch<br />
Probe top<br />
Reference gas inlet<br />
Calibration gas inlet<br />
Figure 3.3 Probe protector (supporting the mounting strength)<br />
F3-3E.ai<br />
<br />
The detector is used with a probe protector to prevent the sensor from being worn by dust<br />
particles when there is a high concentration of dust and gas flow exceeds 10 m/sec (pulverized<br />
coal boiler or fluidized-bed furnace).<br />
(1) Put a gasket (provided by the user) between the flanges, and mount the probe protector in the<br />
probe insertion hole. The probe protector should be installed so that the notch is downstream<br />
of the sample gas flow.<br />
(2) Make sure that the sensor assembly mounting screws (four bolts) at the probe tip are not<br />
loose.<br />
(3) Where the detector is mounted horizontally, the reference gas and calibration gas inlet should<br />
face downward.<br />
NOTE<br />
When the probe protector is used in the <strong>ZR22G</strong> with pressure compensation (-P), instrument air<br />
leaking from the probe protector may affect the measured value.<br />
1050,1550,2050<br />
Gasket (t1.5)<br />
Unit: mm<br />
Direction of the sample gas flow<br />
Probe top<br />
Mount the protector so that the notch is<br />
the downstream side of the gas flow.<br />
Figure 3.4 Mounting of detector with a probe protector<br />
F3-4E.ai<br />
Reference gas inlet<br />
Calibration gas inlet<br />
IM 11M12A01-02E<br />
8th Edition : Jan.13,2012-00
3-5<br />
3.2 Installation of High Temperature Detector<br />
(<strong>ZR22G</strong>-015)<br />
3.2.1 Installation Location<br />
This detector is used with the High Temperature Probe Adapter (Model ZO21P-H) when the<br />
temperature of sample gas exceeds 700 °C, or when it is required due to maintenance spaces.<br />
The following should be taken into consideration when installing the detector:<br />
(1) Easy and safe access to the detector <strong>for</strong> checking and maintenance work.<br />
(2) Ambient temperature of not more than 150 °C and the terminal box should not be exposed to<br />
radiant heat.<br />
(3) A clean environment without any corrosive gases.<br />
(4) No vibration.<br />
(5) The sample gas should satisfy the specifications described in Chapter 2.<br />
3.2.2 Usage of the High Temperature Probe Adapter<br />
(ZO21P-H)<br />
During analysis, the surface temperature of the probe adapter should be within the range from<br />
more than the dew point of the sample gas and 300 °C or less to prevent ejector clogging, gasket<br />
deterioration or bolt scoring.<br />
Where the dew point of the sample gas is not known, keep within the range of more than 200 °C<br />
to less than 300 °C.<br />
The temperature shall be measured at the probe in the probe adapter and the surface of the blind<br />
flange at the opposite side.<br />
When the surface temperature is not within the above range, the following measures can be<br />
taken to change the temperature.<br />
<br />
(1) When the furnace pressure is negative, lower the pressure setting to reduce induction flow of<br />
the sample gas.<br />
Refer to Section 2.7.3, Ejector Assembly <strong>for</strong> High Temperature, <strong>for</strong> the setting of induction<br />
flow. When you reduce induction flow, ensure that the ejector inducts air when the furnace<br />
pressure fluctuates.<br />
(2) When the furnace pressure is positive, close the needle valve <strong>for</strong> the sample gas outlet to<br />
reduce the exhaust gas flow. Refer to Section 4.1.4, Piping to the High Temperature Probe<br />
Adapter.<br />
(3) When the probe adapter is surrounded by a heat insulator, remove the heat insulator.<br />
Ensure that the temperature of the probe adapter does not fall below the dew point of the gas<br />
in winter.<br />
(4) To prevent temperature rises due to radiant heat, insert heat insulator between the wall of the<br />
furnace and the probe adapter.<br />
(5) To prevent temperature rises from thermal conduction, place the mounting flange as far from<br />
the wall of the furnace as possible.<br />
IM 11M12A01-02E<br />
8th Edition : Jan.13,2012-00
3-6<br />
<br />
(1) When the furnace pressure is negative, raise the pressure setting to increase induction flow<br />
of the sample gas.<br />
Refer to Section 2.7.3, Ejector Assembly <strong>for</strong> High Temperature, <strong>for</strong> the setting of induction<br />
flow.<br />
If there is much dust in the gas, the ejector may become clogged as induction flow increases.<br />
(2) When the furnace pressure is positive, open the needle valve of the sample gas outlet to<br />
increase the gas flow.<br />
Refer to Section 4.1.4, Piping to the High Temperature Probe Adapter.<br />
(3) Warm the probe adapter. Refer to Section 4.2.4, Piping to the High Temperature Probe<br />
Adapter.<br />
(4) When the surface temperature is still less than 200 °C or below the dew point of the sample<br />
gas, even if the above measures have been taken, warm the probe adapter using a heat<br />
source such as steam.<br />
3.2.3 Probe Insertion Hole<br />
A high temperature detector consists of a <strong>ZR22G</strong>-015 Detector and ZO21P High Temperature<br />
Probe Adapter. When <strong>for</strong>ming the probe insertion hole, the following should be taken into<br />
consideration:<br />
(1) If the probe is made of silicon carbide (SiC), the probe hole should be <strong>for</strong>med so that the<br />
probe is mounted vertically (within ± 5° tilt).<br />
(2) In the case where the probe is made of stainless steel and the probe adapter (ZO21P-H-B) is<br />
to be mounted horizontally, the probe hole should be <strong>for</strong>med so that the probe tip is not higher<br />
than the probe base.<br />
Figure 3.5 illustrates examples of the probe insertion hole.<br />
100mm<br />
JIS 5K 50 FF (equivalent) or<br />
ANSI Class 150 4 RF<br />
(equivalent) flange<br />
A space of 52 mm or more<br />
in diameter, and long enough<br />
<strong>for</strong> the length of the probe<br />
A space of 52 mm or<br />
more in diameter, and<br />
long enough <strong>for</strong> the length<br />
of the probe<br />
Never mount the probe<br />
with its tip higher than<br />
the base<br />
100mm<br />
JIS 5K 50 FF (equivalent)<br />
or ANSI Class 150 4 RF<br />
(equivalent) flange<br />
The allowable margin <strong>for</strong> probe<br />
tilt is within ± 5°.<br />
An SiC probe shall be mounted vertically.<br />
Figure 3.5 Examples of the probe insertion hole<br />
Horizontal mounting is used with a SUS probe.<br />
F3-5E.ai<br />
3.2.4 Mounting of the High Temperature Detector<br />
CAUTION<br />
• Ceramic (zirconia) is used in the sensor (cell) portion on the detector probe tip. Care should<br />
be taken not to drop the detector during installation.<br />
• The same applies to a probe made of silicon carbide (SiC).<br />
• A gasket should be used on the flange surface to prevent gas leakage. The gasket material<br />
should be selected depending on the characteristics of the sample gas. It should be heatproof<br />
and corrosion-proof. The parts, which should be supplied by the user, are listed in Table 3.2.<br />
IM 11M12A01-02E<br />
8th Edition : Jan.13,2012-00
3-7<br />
Table 3.2 Accessories <strong>for</strong> mounting high temperature probe adapter<br />
Mounting flange specification Parts name Q’ty Note<br />
JIS 5K 50 FF (equivalent) Gasket 1 Heatproof and corrosion-proof<br />
Bolt (M12 by 50) 4<br />
Nut (M12) 4<br />
Washer (<strong>for</strong> M12) 8<br />
ANSI Class 150 4RF (equivalent) Gasket 1 Heatproof and corrosion-proof<br />
Bolt (M16 by 60) 8<br />
Nut (M16) 8<br />
Washer (<strong>for</strong> M16) 16<br />
A high temperature detector should be mounted as follows:<br />
(1) It is recommended to mount the detector vertically. When it is impossible due to the physical<br />
arrangements and the detector is mounted horizontally, ensure that the probe tip be placed no<br />
higher than the probe base.<br />
(2) When mounting a high temperature probe adapter, be sure to insert a gasket between the<br />
flanges to prevent gas leakage. When the furnace pressure is negative, ensure that there is<br />
no leakage of air into the detector.<br />
(3) When mounting the detector in a position other than vertical, the cable inlet should face<br />
downward.<br />
(4) When installing the detector in a low-temperature location such as in the open air, cover the<br />
probe adapter including the ejector with a heat insulator (e.g. ceramic wool) to keep it warm<br />
and to prevent condensation of drain on the ejector.<br />
Wiring connection<br />
Mount the probe so that<br />
the probe tip is not higher<br />
than the probe base.<br />
Wiring connection<br />
When using an SiC probe, mount the probe vertically<br />
with an allowable tilt of ± 5°.<br />
F3-6E.ai<br />
Figure 3.6 Mounting of the High Temperature Detector<br />
IM 11M12A01-02E<br />
8th Edition : Jan.13,2012-00
3-8<br />
3.3 Installation of the <strong>ZR402G</strong> Converter<br />
3.3.1 Installation Location<br />
The following should be taken into consideration when installing the converter:<br />
(1) Readability of the indicated values of oxygen concentration or messages on the converter<br />
display. Easy and safe access to the converter <strong>for</strong> operating keys on the panel.<br />
(2) Easy and safe access to the converter <strong>for</strong> checking and maintenance work.<br />
(3) An ambient temperature of not more than 55 °C and little change in temperature<br />
(recommended within 15 °C in a day).<br />
(4) The normal ambient humidity (recommended between 40 to 75% RH) and without any<br />
corrosive gases.<br />
(5) No vibration.<br />
(6) Near to the detector.<br />
(7) Not in direct rays of the sun. If the sun shines on the converter, prepare the hood (/ H) or other<br />
appropriate sunshade.<br />
3.3.2 Mounting of the Converter<br />
The converter can be mounted on a pipe (nominal JIS 50A: O.D. 60.5 mm), a wall or a panel. The<br />
converter can be mounted at an angle to the vertical, however, it is recommended to mount it on<br />
a vertical plane.<br />
Mount the converter as follows.<br />
<br />
(1) Prepare a vertical pipe of sufficient strength (nominal JIS 50A: O.D. 60.5 mm) <strong>for</strong> mounting<br />
the converter. (Converter weighs approximately 6 kg.)<br />
(2) Mount the converter on the pipe. Fix it firmly on the pipe in the procedure described in Figure<br />
3.7.<br />
•Mounting procedure<br />
1. Put four bolts in the holes on the fitting.<br />
2. Clamp the pipe with the fitting and a bracket,<br />
with the four bolts passing through the bracket holes.<br />
3. Secure the fitting and the bracket tightly to the pipe with<br />
four washers and nuts.<br />
A pipe to be mounted (nominal JIS 50A)<br />
Bracket<br />
*Fitting<br />
*Washer<br />
*Bolt<br />
Nut<br />
Bolt<br />
* Note: These fittings are attached to the converter when it is delivered.<br />
Figure 3.7 Pipe Mounting<br />
Washer<br />
F3-7E.ai<br />
IM 11M12A01-02E<br />
8th Edition : Jan.13,2012-00
3-9<br />
<br />
(1) Drill mounting holes through the wall as shown in Figure 3.8.<br />
Unit: mm<br />
Four holes 6 mm in diameter<br />
<strong>for</strong> M5 screws<br />
126.5<br />
190<br />
Figure 3.8 Mounting holes<br />
F3-8E.ai<br />
(2) Mount the converter. Secure the converter on the wall using four screws.<br />
Note: For wall mounting, the bracket and bolts are not used.<br />
Figure 3.9 Wall Mounting<br />
F3-9E.ai<br />
<br />
(1) Cut out the panel according to Figure 3.10.<br />
Unit: mm<br />
274 +2 0<br />
Washer<br />
Bolt<br />
183 +2 0<br />
F3-10E.ai<br />
Clamp screw<br />
F3-11E.ai<br />
Figure 3.10 Panel cutout sizes<br />
Figure 3.11 Panel mounting<br />
(2) Remove the fitting from the converter by loosening the four screws.<br />
(3) Insert the converter case into the cutout hole of the panel.<br />
(4) Attach the mounting fitting which is once removed in step (2) again to the converter.<br />
(5) Firmly fix the converter to the panel. Fully tighten the two clamp screws to hold the panel with<br />
the fitting.<br />
Fitting<br />
IM 11M12A01-02E<br />
8th Edition : Jan.13,2012-00
3-10<br />
3.4 Installation of ZA8F Flow Setting Unit<br />
3.4.1 Installation Location<br />
The following should be taken into consideration:<br />
(1) Easy access to the unit <strong>for</strong> checking and maintenance work.<br />
(2) Near to the detector or the converter<br />
(3) No corrosive gas.<br />
(4) An ambient temperature of not more than 55 °C and little changes of temperature.<br />
(5) No vibration.<br />
(6) Little exposure to rays of the sun or rain.<br />
3.4.2 Mounting of ZA8F Flow Setting Unit<br />
The flow setting unit can be mounted either on a pipe (nominal JIS 50A) or on a wall. It should be<br />
positioned vertically so that the flowmeter works correctly.<br />
<br />
(1) Prepare a vertical pipe of sufficient strength (nominal JIS 50A: O.D. 60.5 mm) <strong>for</strong> mounting<br />
the flow setting unit. (The unit weighs approximately 2 to 3.5 kg.)<br />
(2) Mount the flow setting unit on the pipe by tightening the nuts with the U-bolt so that the metal<br />
fitting is firmly attached to the pipe.<br />
F3.12E.ai<br />
Figure 3.12 Pipe Mounting<br />
<br />
(1) Make a hole in the wall as illustrated in Figure 3.13.<br />
(2) Mount the flow setting unit. Remove the pipe mounting parts from the mount fittings of the<br />
flow setting unit and attach the unit securely on the wall with four screws.<br />
Unit : mm<br />
223<br />
140<br />
F3-13E.ai<br />
4 - Φ6.5 hole, or M6 screw<br />
F3-14E.ai<br />
Figure 3.13 Mounting holes<br />
Figure 3.14 Wall mounting<br />
IM 11M12A01-02E<br />
8th Edition : Jan.13,2012-00
3-11<br />
3.5 Installation of ZR40H Automatic Calibration<br />
Unit<br />
3.5.1 Installation Location<br />
The following should be taken into consideration:<br />
(1) Easy access to the unit <strong>for</strong> checking and maintenance work.<br />
(2) Near to the detector or the converter<br />
(3) No corrosive gas.<br />
(4) An ambient temperature of not more than 55 °C and little change of temperature.<br />
(5) No vibration.<br />
(6) Little exposure to rays of the sun or rain.<br />
3.5.2 Mounting of ZR40H Automatic Calibration Unit<br />
The automatic calibration unit can be mounted either on a pipe (nominal JIS 50 A ) or on a wall.<br />
It should be positioned vertically so that the flowmeter works correctly.<br />
<br />
(1) Prepare a vertical pipe of sufficient strength (nominal JIS 50A: O.D. 60.5 mm) <strong>for</strong> mounting of<br />
automatic calibration unit. (The unit weights approximately 3.5 kg.)<br />
(2) Mount the automatic calibration unit on the pipe by tightening the nuts with the U-bolt so that<br />
the metal fitting is firmly attached to the pipe.<br />
Figure 3.15 Pipe Mounting<br />
<br />
(1) Make a hole in the wall as illustrated in Figure 3.16.<br />
Unit : mm<br />
223<br />
140<br />
F3-13E.ai<br />
4 - Φ6.5 hole, or M6 screw<br />
Figure 3.16 Mounting holes<br />
IM 11M12A01-02E<br />
8th Edition : Jan.13,2012-00
3-12<br />
(2) Mount the automatic calibration unit. Remove the U-bolt from the automatic calibration unit<br />
and attach the unit on the wall with four screws. When setting it with M5 bolts, use washers.<br />
4-Φ6.5<br />
Figure 3.17 Wall Mounting<br />
F3-16_1E.ai<br />
IM 11M12A01-02E<br />
8th Edition : Jan.13,2012-00
3-13<br />
3.6 Installation of the Case Assembly(E7044KF)<br />
The case assembly is used to store the G7001ZC zero gas cylinders.<br />
3.6.1 Installation Location<br />
The following should be taken into consideration:<br />
(1) Easy access <strong>for</strong> cylinder replacement<br />
(2) Easy access <strong>for</strong> checking<br />
(3) Near to the detector or converter as well as the flow setting unit.<br />
(4) The temperature of the case should not exceed 40 °C due to rays of the sun or radiated heat.<br />
(5) No vibration<br />
3.6.2 Mounting<br />
Mount case assembly on a pipe (nominal JIS 50A) as follows:<br />
(1) Prepare a vertical pipe of sufficient strength (nominal JIS 50A: O.D. 60.5 mm) <strong>for</strong> mounting<br />
the case assembly. (The sum of the case assembly and the calibration gas cylinder weighs<br />
approximately 4.2 kg.)<br />
(2) Mount the case assembly on the pipe by tightening the nuts with the U-bolt so that the metal<br />
fitting is firmly attached to the pipe.<br />
A pipe to be mounted<br />
(nominal JIS 50A : O.D. 60.5 mm)<br />
Figure 3.18 Pipe Mounting<br />
F3-16E.ai<br />
IM 11M12A01-02E<br />
8th Edition : Jan.13,2012-00
3.7 Insulation Resistance Test<br />
3-14<br />
Even if the testing voltage is not so great that it causes dielectric breakdown, testing may cause<br />
deterioration in insulation and a possible safety hazard. There<strong>for</strong>e, conduct this test only when it<br />
is necessary.<br />
The applied voltage <strong>for</strong> this test shall be 500 V DC or less. The voltage shall be applied <strong>for</strong> as<br />
short a time as practicable to confirm that insulation resistance is 20 MΩ or more.<br />
Remove wiring from the converter and the detector.<br />
1. Remove the jumper plate located between terminal G and the protective grounding terminal.<br />
2. Connect crossover wiring between L and N.<br />
3. Connect an insulation resistance tester (with its power OFF). Connect (+) terminal to the<br />
crossover wiring, and (-) terminal to ground.<br />
4. Turn the insulation resistance tester ON and measure the insulation resistance.<br />
5. After testing, remove the tester and connect a 100 kΩ resistance between the crossover<br />
wiring and ground, to discharge <strong>for</strong> over 1 min. During discharge, do not touch the terminal.<br />
6. Testing between the heater terminal and ground, contact output terminal and ground,<br />
analog output/input terminal and ground can be conducted in the same manner.<br />
7. Although contact input terminals are isolated, insulation resistance test cannot be conducted<br />
because the breakdown voltage of the surge-preventing arrester between the terminal and<br />
ground is low.<br />
8. After conducting all the tests, replace the jumper plate as it was.<br />
Insulation<br />
resistance tester<br />
- +<br />
<strong>ZR402G</strong> Converter<br />
<strong>ZR22G</strong> Detector<br />
crossover wiring<br />
12<br />
FG<br />
1<br />
FG<br />
2<br />
AO1<br />
(+)<br />
13<br />
DI-1<br />
3<br />
AO1<br />
(-)<br />
14<br />
DI-2<br />
4<br />
AO2<br />
(+)<br />
15<br />
DI-C<br />
5<br />
AO2<br />
(-)<br />
16<br />
AI<br />
(+)<br />
17<br />
AI<br />
(-)<br />
6<br />
CJ<br />
(+)<br />
7<br />
CJ<br />
(-)<br />
18<br />
AC-<br />
ZERO<br />
8 9 10 11<br />
(+) (-) (+) (-)<br />
TC TC CELL CELL<br />
19<br />
AC-<br />
SPAN<br />
20<br />
AC-<br />
COM<br />
21<br />
FG<br />
22<br />
FG<br />
CELL<br />
(+)<br />
CELL<br />
(-)<br />
TC TC CJ<br />
(+) (-) (+)<br />
CJ<br />
(-)<br />
Contact<br />
input 1<br />
Contact<br />
input 2<br />
Span gas<br />
Solenoid valve<br />
<strong>for</strong> automatic<br />
calibration<br />
Solenoid valve <strong>for</strong><br />
automatic calibration<br />
Zero gas<br />
Automatic Calibration Unit<br />
23<br />
DO-1<br />
24<br />
DO-1<br />
25<br />
DO-2<br />
26<br />
DO-2<br />
27<br />
DO-3<br />
28<br />
DO-3<br />
29<br />
DO-4<br />
30<br />
DO-4<br />
31<br />
HTR<br />
32<br />
HTR<br />
33<br />
L<br />
34<br />
N<br />
35<br />
G<br />
36<br />
HTR<br />
HTR<br />
Remove wiring to connect external circuits<br />
and Connect crossover wiring<br />
Remove<br />
jumper plate<br />
crossover wiring<br />
Insulation<br />
resistance tester<br />
- +<br />
Insulation<br />
resistance tester<br />
- +<br />
F3-17E.ai<br />
IM 11M12A01-02E<br />
8th Edition : Jan.13,2012-00
EXA <strong>ZR402G</strong><br />
4. Piping<br />
4-1<br />
This chapter describes piping procedures based on three typical system configurations <strong>for</strong> EXAxt<br />
ZR Separate type Zirconia Oxygen Analyzer.<br />
• Ensure that each check valve, stop valve and joint used <strong>for</strong> piping do not allow leakage.<br />
Especially, if there is any leakage of the calibration gas from pipes and joints, it may cause<br />
clogging of the pipes or incorrect calibration.<br />
• Be sure to conduct leakage test after piping.<br />
• Basically, apply instrument air (dehumidified by cooling to the dew point -20 °C or lower, and<br />
removing any dust, oil mist and the like) <strong>for</strong> the reference gas.<br />
• When the instrument uses natural convection <strong>for</strong> reference gas, ambient air near the detector is<br />
used <strong>for</strong> reference gas; there<strong>for</strong>e the accuracy of analysis will be affected by ambient humidity<br />
changes or the like. If more accurate analysis is necessary, use instrument air (dehumidified to<br />
the dew point -20 °C or lower, and removing any dust, oil mist and the like) <strong>for</strong> reference gas.<br />
Stable analyzing can be conducted when using instrument air.<br />
4.1 Piping <strong>for</strong> System 1<br />
The piping in System 1 is illustrated in Figure 4.1.<br />
<strong>ZR22G</strong> Separate type<br />
Zirconia Oxygen Analyzer, Detector<br />
<strong>ZR402G</strong> Converter<br />
Stop valve<br />
Signal<br />
(6-core shield cable)<br />
Heater (2-core)<br />
~<br />
100 to<br />
240 V AC<br />
Contact input<br />
Analog output, Contact output<br />
Digital output (HART)<br />
Calibration gas<br />
Figure 4.1 Piping in System 1<br />
100/110/115/200/220/240 V AC<br />
~<br />
ZO21S Standard gas unit<br />
F4-1E.ai<br />
CAUTION<br />
• The stop valve should be connected directly to the detector. If any piping is present between<br />
the detector and the stop valve, water may condense in the pipe, which may cause damage to<br />
the sensor by rapid cooling when the calibration gas is introduced.<br />
The stop valve should be closed except while the calibration gas is being introduced.<br />
• If a high temperature detector is used (the sample gas temperature is 700 °C or higher), piping<br />
<strong>for</strong> the reference gas is required. In other cases, piping is required if the air around the detector<br />
is not clean.<br />
• The reference gas should have an oxygen concentration identical to that of fresh air (21%).<br />
• When a high temperature detector is used, the sample gas is vented into the surrounding air.<br />
There<strong>for</strong>e, the oxygen concentration required may not be obtained unless an exhaust pipe is<br />
installed.<br />
IM 11M12A01-02E<br />
8th Edition : Jan.13,2012-00
Piping in System 1 is as follows:<br />
4-2<br />
• Connect a stop valve to the nipple at the calibration gas inlet of the detector. Then mount a<br />
joint <strong>for</strong> a 6 mm (O.D.) x 4 mm (I.D.) soft tube at the stop valve connection hole of the inlet<br />
side (see Section 4.1.2). The tube is to be connected to this joint only during calibration.<br />
• If a high temperature detector is used and no piping can be installed <strong>for</strong> the reference gas,<br />
place piping in the exhaust hole <strong>for</strong> the sample gas on the high temperature probe adapter<br />
so that the sample gas is carried away from the vicinity of the detector (see Section 4.1.4,<br />
Figure 4.6).<br />
• If a high temperature detector is used and the sample gas pressure is negative, connect<br />
an ejector assembly to the sample gas exhaust hole of the high temperature probe adapter<br />
(see Section 4.1.4, Figure 4.3).<br />
• If a high temperature detector is used and the pressure of the sample gas is 0.49 kPa or<br />
higher, it is recommended that a needle valve (throttle) be used in the sample gas exhaust<br />
of the high temperature probe adapter (see Section 4.1.4, Figure 4.4).<br />
CAUTION<br />
• This is <strong>for</strong> lowering the sample gas temperature below 700 °C. If the gas temperature is high<br />
and the pressure is also significantly high, the sample gas temperature may not fall to below<br />
700 °C be<strong>for</strong>e it reaches the detector.<br />
On the other hand, if the sample gas temperature is lowered too much, condensation may<br />
be produced in the High Temperature Probe Adapter. During wintertime, it is recommended<br />
that the High Temperature Probe Adapter be protected with an insulating material to avoid<br />
condensation <strong>for</strong>ming (see Section 4.1.4, Figure 4.5).<br />
For the usage of the High Temperature Probe Adapter, refer to Section 3.2.2.<br />
4.1.1 Parts Required <strong>for</strong> Piping in System 1<br />
Check that the parts listed in Table 4.1 are ready.<br />
Detector Piping location Parts Name Note<br />
General use<br />
detector<br />
High temperature<br />
detector<br />
(0.15 m)<br />
Calibration gas inlet Stop valve Recommended by YOKOGAWA<br />
(L9852CB or G7016XH)<br />
Nipple * Rc1/4 or 1/4 NPT General parts<br />
Joint <strong>for</strong> tube connection<br />
Rc1/4 (1/4NPT) <strong>for</strong> a Ø6 x<br />
Ø4 mm soft tube<br />
General parts<br />
Reference gas inlet (sealed up) (when piping is required, refer to section 4.1.3)<br />
Calibration gas inlet Stop valve Recommended by YOKOGAWA<br />
(L9852CB or G7016XH)<br />
Nipple * Rc1/4 or 1/4 NPT General parts<br />
Joint <strong>for</strong> tube connection<br />
Rc1/4 (1/4 NPT) <strong>for</strong> a Ø6 x Ø4 mm soft tube<br />
Reference gas inlet (sealed up) (when piping is required, refer to section 4.1.3)<br />
Sample gas outlet Ejector assembly * Recommended by YOKOGAWA<br />
(E7046EC or E7046EN)<br />
Note: Parts with marking * are used when required.<br />
General parts can be found on the local market.<br />
T-shaped joint of the same<br />
diameter *<br />
R1/4 or 1/4 NPT General parts<br />
Needle valve * Rc1/4 or 1/4 NPT General parts<br />
Nipple of other diameter * R1/2 to R1/4 or R1/2 to 1/4<br />
NPT<br />
General parts<br />
IM 11M12A01-02E<br />
8th Edition : Jan.13,2012-00
4.1.2 Connection to the Calibration Gas Inlet<br />
4-3<br />
When carrying out calibration, connect the piping (6(O.D) ~4(I.D.) mm tube) from the standard<br />
gas unit to the calibration gas inlet of the detector. First, mount a stop valve (of a quality specified<br />
by YOKOGAWA) on a nipple (found on the local market) as illustrated in Figure 4.2, and mount a<br />
joint (also found on the local market) at the stop valve tip. (The stop valve may be mounted on the<br />
detector prior to shipping the detector.)<br />
Note: Mount the stop valve close to the detector.<br />
Stop valve<br />
Tube connection joint<br />
Nipple<br />
Figure 4.2 Connection to the calibration gas inlet<br />
F4-2E.ai<br />
4.1.3 Connection to the Reference Gas Inlet<br />
• Normally, no piping is required <strong>for</strong> the reference gas inlet when the equipment uses natural<br />
convection <strong>for</strong> the reference gas (models <strong>ZR22G</strong>----C). Leave the plug as it is . If the air<br />
around the detector is polluted and the necessary oxygen concentration (21 vol%O 2 ) cannot be<br />
obtained, prepare piping the same as which described in Section 4.2, System 2.<br />
• When the equipment uses instrument air <strong>for</strong> the reference gas, piping is required as described<br />
in Section 4.2, System 2 (models <strong>ZR22G</strong>----E or P).<br />
4.1.4 Piping to the High Temperature Probe Adapter<br />
• The sample gas should be at a temperature below 700 °C be<strong>for</strong>e reaching the detector<br />
sensor. If the gas is under negative pressure, it should be fed to the detector by suction.<br />
• For usage of the probe adapter when using high temperature detector, refer to Section 3.2.2.<br />
• If the sample gas is under negative pressure, connect the ejector assembly (E7046EC/<br />
E7046EN) as illustrated in Figure 4.3. Mount the pressure gauge as close as possible to the<br />
ejector assembly. However, if the ambient temperature is too high, mount the gauge in a<br />
location with a temperature below 40 °C.<br />
Ejector assembly <strong>for</strong><br />
high temperature use<br />
Detector<br />
Adapter <strong>for</strong><br />
high temperature probe<br />
Figure 4.3 Mounting the ejector assembly<br />
F4-3E.ai<br />
IM 11M12A01-02E<br />
8th Edition : Jan.13,2012-00
4-4<br />
If the temperature of the sample gas exceeds the specified value and its pressure exceeds 0.49 k<br />
Pa, the sample gas temperature may not be below 700 °C at the detector.<br />
In such a case, connect a needle valve (found on the local market) through a nipple (also found<br />
on the local market) to the probe adapter sample gas exhaust (Rc 1/2) so that the sample gas<br />
exhaust volume is restricted.<br />
Reducing nipple<br />
(R1/2-R1/4 or R1/2-1/4NTP)<br />
Needle valve<br />
F4-4E.ai<br />
Figure 4.4 Mounting the needle valve <strong>for</strong> restricting exhaust flow of the sample gas<br />
In cases where condensation is likely to occur in the probe adapter when the sample gas is<br />
cooled, protect the probe adapter with an insulating material as illustrated in Figure 4.5.<br />
Sample gas outlet<br />
Cover flange<br />
Adapter <strong>for</strong> high temperature probe<br />
Detector<br />
Insulating material<br />
Probe<br />
F4-5E.ai<br />
Figure 4.5 Preventing to condensation<br />
If the sample gas is to be vented at a distance from the detector because no reference gas piping<br />
can be provided, an exhaust pipe should be installed as illustrated in Figure 4.6.<br />
In addition, the exhaust pipe shall be kept warm to protect against condensation.<br />
Exhaust pipe<br />
Rc1/2<br />
Figure 4.6 Exhaust pipe<br />
F4-6E.ai<br />
Use thick piping <strong>for</strong> exhaust.<br />
Horizontal part should be kept to the<br />
minimum to maintain piping strength.<br />
IM 11M12A01-02E<br />
8th Edition : Jan.13,2012-00
EXA <strong>ZR402G</strong><br />
4-5<br />
4.2 Piping <strong>for</strong> System 2<br />
Piping in System 2 is illustrated in Figure 4.7.<br />
<strong>ZR22G</strong> Separate type<br />
Zirconia Oxygen Analyzer, Detector<br />
<strong>ZR402G</strong> Converter<br />
Stop valve<br />
or Check valve<br />
Reference<br />
gas<br />
Signal<br />
(6-core shield cable)<br />
Heater (2-core)<br />
Flowmeter<br />
Needle<br />
valve<br />
Air Set<br />
~<br />
100 to<br />
240 V AC<br />
Contact input<br />
Analog output, Contact input<br />
Digital output (HART)<br />
Calibration<br />
gas<br />
Instrument air<br />
Span gas<br />
(Same as Zero gas Calibration)<br />
ZA8F Flow Setting Unit<br />
Pressure<br />
reducing<br />
valve<br />
Zero gas cylinder<br />
Figure 4.7 Piping <strong>for</strong> System 2<br />
Calibration gas<br />
unit case<br />
F4-7E.ai<br />
System 2 illustrated in Figure 4.7 requires piping as follows:<br />
• Connect a stop valve or check valve the nipple at the calibration gas inlet of the detector.<br />
• If a high temperature detector is used and the sample gas pressure is negative, connect an<br />
ejector assembly to the sample gas exhaust hole of the high temperature probe adapter (see<br />
Section 4.1.4, Figure 4.3).<br />
• If a high temperature detector is used and the pressure of the sample gas is 0.49 kPa or higher,<br />
it is recommended that a needle valve (throttle) be used in the sample gas exhaust of the high<br />
temperature probe adapter (see Section 4.1.4, Figure 4.4).<br />
CAUTION<br />
• This is <strong>for</strong> lowering the sample gas temperature below 700 °C. If the gas temperature is high<br />
and the pressure is also significantly high, the sampled gas temperature may not reduced<br />
below 700 °C when reaching the detector.<br />
On the other hand, if the sample gas temperature is lowered too much, condensation may be<br />
produced in the high temperature probe adapter. During wintertime, it is recommended that<br />
the high temperature probe adapter be protected with an insulating material to prevent<br />
condensation (see Section 4.1.4, Figure 4.5).<br />
For the usage of the high temperature probe adapter, refer to Section 3.2.2.<br />
• If the dust sticking to the interior of the high temperature probe adapter is to be eliminated by<br />
blow back while using the high temperature detector, the air feed <strong>for</strong> blow back should also be<br />
taken into consideration.<br />
CAUTION<br />
• The probe is easily clogged if too much dust is contained in the sample gas such as in a utility<br />
boiler or cement kiln. To get rid of the dust with compressed air, the piping from the air source<br />
is connected only during cleaning. Blow back piping can be installed <strong>for</strong> dust cleaning as<br />
illustrated in Section 4.3.1.<br />
IM 11M12A01-02E<br />
8th Edition : Jan.13,2012-00
4-6<br />
4.2.1 Piping Parts <strong>for</strong> System 2<br />
Check that the parts listed in Table 4.2 are ready.<br />
Table 4.2 Piping Parts<br />
Detector Piping location Parts Name Note<br />
General use<br />
detector<br />
High temperature<br />
Detector<br />
(0.15 m)<br />
Calibration gas inlet Stop valve or check valve Recommended by YOKOGAWA (L9852CB or<br />
G7016XH) Provided by YOKOGAWA<br />
(K9292DN or K9292DS)<br />
Nipple * Rc1/4 or 1/4 NPT General parts<br />
Zero gas cylinder<br />
Pressure reducing valve<br />
User´s scope<br />
Recommended by YOKOGAWA (G7013XF or<br />
G7014XF)<br />
Joint <strong>for</strong> tube connection Rc1/4 or 1/4 NPT General parts<br />
Reference gas inlet Air set Recommended by YOKOGAWA (G7003XF/<br />
K9473XK or G7004XF/K9473XG)<br />
Joint <strong>for</strong> tube connection Rc1/4 or 1/4 NPT General parts<br />
Calibration gas inlet Stop valve or check valve Recommended by YOKOGAWA (L9852CB or<br />
G7016XH) Provided by YOKOGAWA<br />
(K9292DN or K9292DS)<br />
Nipple * Rc1/4 or 1/4 NPT General parts<br />
Zero gas cylinder<br />
Pressure reducing valve<br />
Joint <strong>for</strong> tube connection<br />
User´s scope<br />
Recommended by YOKOGAWA (G7013XF or<br />
G7014XF)<br />
Rc1/8 or 1/8 NPT<br />
Reference gas inlet Air set Recommended by YOKOGAWA (G7003XF/<br />
K9473XK or G7004XF/K9473XG)<br />
Joint <strong>for</strong> tube connection Rc1/4 or 1/4 NPT General parts<br />
Sample gas outlet Ejector assembly * Recommended by YOKOGAWA (E7046EC or<br />
E7046EN)<br />
Note: Parts with marking * are used when required.<br />
General parts can be found on the local market.<br />
T-shaped joint of the same<br />
diameter *<br />
R1/4 or 1/4 NPT General parts<br />
Needle valve * Rc1/4 or 1/4 NPT General parts<br />
Nipple of other diameter * R1/2 to R1/4 or R1/2 to 1/4<br />
NPT<br />
4.2.2 Piping <strong>for</strong> the Calibration Gas<br />
General parts<br />
This piping is to be installed between the zero gas cylinder and the ZA8F flow setting unit, and<br />
between the ZA8F flow setting unit and the <strong>ZR22G</strong> detector.<br />
The cylinder should be placed in a case assemble E7044KF or the like to avoid any direct<br />
sunlight or radiant heat so that the gas cylinder temperature does not exceed 40 °C.<br />
Mount a reducing valve (specified by YOKOGAWA) on the cylinder.<br />
Mount a check valve or stop valve (specified by YOKOGAWA) on the nipple (found on the local<br />
market) at the calibration gas inlet of the detector as illustrated in Figure 4.8.<br />
(The check valve or the stop valve may have been mounted on the detector when shipped.)<br />
Connect the flow setting unit and the detector to a stainless steel pipe 6 mm (O.D.) x 4 mm or<br />
larger (I.D.) (or nominal size 1/4 inch).<br />
IM 11M12A01-02E<br />
8th Edition : Jan.13,2012-00
4-7<br />
Stop valve or Check valve<br />
Piping <strong>for</strong> the calibration gas, 6 mm (O.D.)<br />
by 4 mm (I.D.) Stainless steel pipe<br />
Piping <strong>for</strong> the reference gas, 6 mm (O.D.)<br />
by 4 mm (I.D.)Stainless steel pipe<br />
Figure 4.8 Piping <strong>for</strong> the Calibration Gas Inlet<br />
4.2.3 Piping <strong>for</strong> the Reference Gas<br />
Reference gas piping is required between the air source (instrument air) and the flow setting unit,<br />
and between the flow setting unit and the detector.<br />
Insert the air set next to the flow setting unit in the piping between the air source and the flow<br />
setting unit.<br />
Use a 6 mm (O.D.) x 4 mm or larger (I.D.) (or nominal size 1/4 inch) stainless steel pipe between<br />
the flow setting unit and the detector.<br />
4.2.4 Piping to the High Temperature Probe Adapter<br />
Refer to Section 4.1.4 <strong>for</strong> the piping.<br />
F4-8E.ai<br />
IM 11M12A01-02E<br />
8th Edition : Jan.13,2012-00
EXA <strong>ZR402G</strong><br />
4.3 Piping <strong>for</strong> System 3<br />
4-8<br />
Piping in System 3 is illustrated in Figure 4.10. In System 3, calibration is automated;<br />
however, the piping is basically the same as that of System 2. Refer to Section 4.2.<br />
Adjust secondary pressure of both the air set and the zero gas reducing valve so that these<br />
two pressures are approximately the same. The flow rate of zero and span gases (normally<br />
instrument air) are set by a single needle valve.<br />
After installation and wiring, check the calibration contact output (see Sec. 7.11.2), and adjust<br />
zero gas reducing valve and calibration gas needle valve so that zero gas flow is within the<br />
permitted range. Next check span gas calibration contact output and adjust air set so that span<br />
gas flow is within the permitted range.<br />
CHECK<br />
OUT<br />
REF<br />
OUT<br />
Flowmeter<br />
Flowmeter<br />
*2 *2<br />
Solenoid valve<br />
EV1, EV2<br />
EV1<br />
EV2<br />
AIR IN<br />
ZERO GAS IN<br />
Instrument air Approx.<br />
1.5 l/min.<br />
*2: Needle valve is supplied as accessory with flowmeter<br />
F2-6-3E.ai<br />
Figure 4.9 Piping inside in System 3<br />
When blow back function is used by contact input to the <strong>ZR402G</strong> converter, install blow back<br />
piping as illustrated in Section 4.3.1.<br />
NOTE<br />
Blow back function means the function to get rid of dust inside a probe in a high temperature<br />
probe adapter by using compressed air, when a high temperature detector is used.<br />
<strong>ZR22G</strong> Separate type<br />
Zirconia Oxygen Analyzer, Detector<br />
<strong>ZR402G</strong> Converter<br />
Signal<br />
(6-core shield cable)<br />
Check valve ~ 100 to 240 V AC<br />
Heater (2-core cable)<br />
Contact input<br />
Analog output, contact output<br />
Flowmeter Needle<br />
Digital output (HART)<br />
valve<br />
Reference gas<br />
Air Set<br />
Calibration gas<br />
Instrument air<br />
Figure 4.10 Piping <strong>for</strong> System 3<br />
ZR40H<br />
Automatic Calibration Unit<br />
Pressure<br />
reducing<br />
valve<br />
Calibration gas<br />
unit case<br />
Zero gas cylinder<br />
F4-9E.ai<br />
IM 11M12A01-02E<br />
8th Edition : Jan.13,2012-00
4.3.1 Blow Back Piping<br />
4-9<br />
This piping is required when the blow back function is carried out. The piping described below<br />
provides automatic blow back operation when the “ Blow back start “ command is entered to the<br />
converter.<br />
Solenoid valve<br />
Pressure reducing valve<br />
Pipe junction<br />
Blow pipe<br />
Figure 4.11 Blow back Piping<br />
The following parts are required <strong>for</strong> blow back piping.<br />
• Flange (to be prepared as illustrated in Figure 4.12.)<br />
F4-10E.ai<br />
• Blow pipe (to be prepared as illustrated in Figure 4.12.)<br />
• Two-way solenoid valve: “ Open “ when electric current is on. (Found on the local market) .<br />
• Air set (recommended by YOKOGAWA, G7003XF / K9473XK or G7004XF / K9473XG)<br />
<br />
Manufacture the blow pipe as illustrated in Figure 4.12, and mount it on the high temperature<br />
probe adapter.<br />
Rc1/4<br />
4-Φ9<br />
Φ90<br />
Stainless steel flange<br />
Unit : mm<br />
8 ~ 10<br />
Φ73<br />
Welded<br />
Approximately<br />
200<br />
8 (O.D.) by 6 (I.D.) Stainless steel pipe<br />
Figure 4.12 Manufacturing Blow pipe and Flange<br />
F4-11E.ai<br />
IM 11M12A01-02E<br />
8th Edition : Jan.13,2012-00
4.4 Piping <strong>for</strong> the Detector with Pressure<br />
Compensation<br />
4-10<br />
The <strong>ZR22G</strong>----P Detector with Pressure Compensation may be used in System 2 and<br />
System 3. However, it cannot use piping <strong>for</strong> high temperature probe adapter or blow back piping.<br />
Use this detector whenever the furnace pressure exceeds 5 kPa (see Note). Even if the furnace<br />
pressure is high, the detector can measure by adjusting pressure of the detector to the furnace<br />
pressure using instrument air. The inside pressure of the probe will be kept the same as the<br />
furnace pressure by feeding instrument air at higher pressure than that in the furnace.<br />
NOTE<br />
Sample gas pressure should not vary rapidly and widely.<br />
156 87<br />
Rc1/4 or 1/4NPT<br />
Reference gas inlet<br />
2-G1/2, 2-1/2NPT etc.<br />
Cable connection port<br />
*1<br />
*1<br />
*1<br />
25<br />
48<br />
*1<br />
Reference gas outlet<br />
Flange<br />
PIPING<br />
*1<br />
PIPING<br />
Rc1/4 or 1/4NPT<br />
Calibration gas inlet<br />
Stop Valve<br />
*1 Dimensions may vary depending on the detector type. Refer to Section 2.2<br />
Ensure that the flange gasket does not block the reference gas outlet.<br />
Where necessary, make a notch on the flange<br />
Flange<br />
F4-12E.ai<br />
Figure 4.13 Detector with Pressure Compensation<br />
Valve operation<br />
1. For safety, stop the furnace that the detector is to be installed in. If furnace internal pressure<br />
is high, this is especially dangerous.<br />
2. Be<strong>for</strong>e starting instrument air flow, completely shut the stop valve in front of the reference<br />
gas outlet.<br />
3. Check that the reference gas outlet is not blocked by a flange gasket or the like.<br />
4. Set the instrument air pressure higher than furnace internal pressure.<br />
5. Completely open the stop valve in front of the reference gas outlet and, after turning on<br />
instrument air flow, start furnace operation. As furnace internal pressure rises, confirm<br />
that instrument air continues to flow and adjust the valve or increase supply pressure if<br />
necessary.<br />
6. After furnace internal pressure stabilizes, adjust flow.<br />
7. If furnace operation is stopped, stop instrument air flow and completely shut the stop valve<br />
in front of the reference gas outlet. You may leave reference gas flowing if you wish.<br />
IM 11M12A01-02E<br />
8th Edition : Jan.13,2012-00
EXA <strong>ZR402G</strong><br />
4-11<br />
CAUTION<br />
• As far as possible do not stop the instrument air flow, to prevent the sample gas from<br />
entering the detector and damaging the zirconia cell.<br />
• Connect the stop valve, which is at the calibration gas inlet, directly to the detector.<br />
If there is piping between the detector and the valve, condensation may damage the sensor<br />
by rapid cooling when calibration gas is introduced.<br />
Figure 4.14 illustrates an example of System 2 using a detector with pressure compensation.<br />
Supply air pressure (flow) may vary depending on the furnace pressure. It is recommended to<br />
use a flowmeter and an air set that is suitable <strong>for</strong> the furnace pressure.<br />
NOTE<br />
• When using the ZA8F Flow Setting Unit and ZR40H Automatic Calibration Unit, please note<br />
that the supplying airflow (pressure) will vary depending on the furnace pressure.<br />
<strong>ZR22G</strong> Separate type<br />
Zirconia Oxygen Analyzer, Detector<br />
<strong>ZR402G</strong> Converter<br />
Stop valve<br />
or<br />
Check valve<br />
Reference<br />
gas<br />
Signal<br />
(6-core shield cable)<br />
Heater (2 core cable)<br />
Flowmeter<br />
Needle<br />
valve<br />
Air Set<br />
~<br />
100 to<br />
240 V AC<br />
Contact input<br />
Analog output, Contact output<br />
Digital output (HART)<br />
Calibration<br />
gas<br />
Instrument air<br />
Span gas<br />
(Same as Zero gas calibration unit)<br />
ZA8F Flow Setting Unit<br />
Pressure<br />
reducing<br />
valve<br />
Zero gas cylinder<br />
Calibration gas<br />
unit case<br />
F4-13E.ai<br />
Figure 4.14 System 2 using a detector with pressure compensation<br />
IM 11M12A01-02E<br />
8th Edition : Jan.13,2012-00
4.4.1 Piping Parts <strong>for</strong> a System using Detector with<br />
Pressure Compensation<br />
Check that the parts listed in Table 4.3 are ready.<br />
Table 4.3 Piping Parts<br />
Detector Piping location Parts Name Note<br />
Detector with<br />
pressure<br />
compensation<br />
Calibration gas inlet Stop valve or check valve<br />
4-12<br />
Recommended by YOKOGAWA (L9852CB or<br />
G7016XH) Provided by YOKOGAWA (K9292DN<br />
or K9292DS)<br />
Nipple * Rc1/4 or 1/4 NPT General parts<br />
Zero gas cylinder<br />
Pressure reducing valve<br />
User´s scope<br />
Recommended by YOKOGAWA<br />
(G7013XF or G7014XF)<br />
Joint <strong>for</strong> tube connection Rc1/4 or 1/4 NPT General parts<br />
Reference gas inlet Air set Recommended by YOKOGAWA<br />
(G7003XF / K9473XK or G7004XF / K9473XG)<br />
Note: Parts with marking * are used when required.<br />
General parts can be found on the local market.<br />
4.4.2 Piping <strong>for</strong> the Calibration Gas<br />
Joint <strong>for</strong> tube connection Rc1/4 or 1/4 NPT General parts<br />
Calibration gas piping is basically identical to that of System 2. See Section 4.2.2.<br />
4.4.3 Piping <strong>for</strong> the Reference Gas<br />
Reference gas piping is basically identical to that of <strong>for</strong> System 2. See Section 4.2.3.<br />
IM 11M12A01-02E<br />
8th Edition : Jan.13,2012-00
5-1<br />
5. Wiring<br />
In this Chapter, the wiring necessary <strong>for</strong> connection to the EXAxt ZR Separate type Zirconia<br />
Oxygen Analyzer is described.<br />
5.1 General<br />
CAUTION<br />
• NEVER supply current to the converter or any other device constituting a power circuit in<br />
combination with the converter, until all wiring is completed.<br />
• This product complies with CE marking.<br />
Where compliance with CE marking is necessary, the following wiring procedure is necessary.<br />
1.Install an external switch or circuit breaker to the power supply of the converter.<br />
2. Use an external switch or circuit breaker rated 5 A and con<strong>for</strong>ming with IEC 947-1 or<br />
IEC 947-3.<br />
3. It is recommended that the external switch or circuit breaker be mounted in the same room as<br />
the converter.<br />
4. The external switch or circuit breaker should be installed within the reach of the operator, and<br />
marked as the power supply switch of this equipment.<br />
Wiring procedure<br />
Wiring should be per<strong>for</strong>med according to the following procedure:<br />
1. Be sure to connect the shield line to FG terminal of the converter.<br />
2. The outer sheath of the signal line should be stripped to a length of 50 mm or less.<br />
The most outer sheath of the power cable should be stripped to a length of 20 mm or less.<br />
3. Signals may be affected by noise if signal lines, power cable and heater cable are located in<br />
the same conduit. When using conduit, signal lines should be installed in a separate conduit<br />
than power and heater cables.<br />
4. Install metal blind plug(s) in unused cable connection gland(s) of the converter.<br />
5. Metal conduit should be grounded.<br />
6. The following cables are used <strong>for</strong> wiring:<br />
Table 5.1 Cable specifications<br />
Terminal name of converter Name Need <strong>for</strong> shields Cable type Number of cores<br />
CELL+, CELL-<br />
HTR TC+, HTR TC-<br />
CJ+, CJ-<br />
Detector signal О CVVS 6<br />
HEATER Detector heater CVV 2<br />
L, N Power supply CVV 2 or 3 *<br />
AO-1+, AO-1-, AO-2+, AO-2- Analog output О CVVS 2 or 4<br />
DO-1, DO-2, DO-3, DO-4 Contact output CVV 2 to 8<br />
AC-Z, AC-S, AC-C<br />
Automatic<br />
Calibration unit<br />
CVV 3<br />
DI-1, DI-2, DI-C Contact input CVV 3<br />
Note *:<br />
When the case is used <strong>for</strong> protective grounding, use a 2-core cable.<br />
IM 11M12A01-02E<br />
8th Edition : Jan.13,2012-00
5-2<br />
CAUTION<br />
• Select suitable cable O.D. to match the cable gland size.<br />
• Protective grounding should be connected in ways equivalent to JIS D style (Class 3)grounding<br />
(the grounding resistance is 100 Ω or less).<br />
• Special consideration of cable length should be taken <strong>for</strong> the HART communication, For the<br />
detail, refer to Section 1.1.2 of the IM 11M12A01-51E “ Communication Line Requirements “.<br />
5.1.1 Terminals <strong>for</strong> the External Wiring in the Converter<br />
Open the front door and remove the terminal covering plate to gain access to the converter<br />
external wiring terminals (see Figure 5.1).<br />
CAUTION<br />
After wiring necessary cable to the converter terminals, be sure to fix the terminal covering plate<br />
with two screws again.<br />
Front door<br />
Terminals are visible<br />
when the terminal cover is removed.<br />
Cable inlet<br />
F5-2E.ai<br />
Figure 5.1 Terminals <strong>for</strong> external wiring in the converter<br />
IM 11M12A01-02E<br />
8th Edition : Jan.13,2012-00
5.1.2 Wiring<br />
5-3<br />
Connect the following wiring to the converter. It requires a maximum of seven wiring connections<br />
as shown below.<br />
(1) Detector output (connects the converter with the detector.)<br />
(2) Detector heater power (connects the converter with the detector.)<br />
(3) Analog output signal<br />
(4) Power and ground<br />
(5) Contact output<br />
(6) Operation of the solenoid valve of automatic calibration unit<br />
(7) Contact input<br />
<strong>ZR402G</strong> Separate type<br />
Zirconia Oxygen Analyzer, Converter<br />
Analog<br />
output 1 Analog<br />
4-20 mA DC output 2<br />
Digital output 4-20 mA DC<br />
<strong>ZR22G</strong> Separate type<br />
Zirconia Oxygen Analyzer, Detector<br />
12<br />
FG<br />
1<br />
FG<br />
2<br />
AO-1<br />
(+)<br />
13<br />
DI-1<br />
3<br />
AO-1<br />
(-)<br />
14<br />
DI-2<br />
4<br />
AO-2<br />
(+)<br />
15<br />
DI-C<br />
5<br />
AO-2<br />
(-)<br />
16<br />
AI<br />
(+)<br />
17<br />
AI<br />
(-)<br />
6<br />
CJ<br />
(+)<br />
7<br />
CJ<br />
(-)<br />
18<br />
AC-<br />
ZERO<br />
8<br />
TC<br />
(+)<br />
19<br />
AC-<br />
SPAN<br />
20<br />
AC-<br />
COM<br />
9<br />
TC<br />
(-)<br />
10<br />
CELL<br />
(+)<br />
21<br />
FG<br />
11<br />
CELL<br />
(-)<br />
22<br />
FG<br />
CELL<br />
(+)<br />
CELL<br />
(-)<br />
TC<br />
(+)<br />
TC<br />
(-)<br />
CJ<br />
(+)<br />
CJ<br />
(-)<br />
Contact<br />
input 2<br />
Contact input 1<br />
Span gas<br />
Solenoid valve<br />
<strong>for</strong> automatic calibration<br />
*1<br />
23<br />
DO-1<br />
24<br />
DO-1<br />
25<br />
DO-2<br />
26<br />
DO-2<br />
27<br />
DO-3<br />
28<br />
DO-3<br />
Solenoid valve<br />
<strong>for</strong> automatic calibration<br />
Zero gas<br />
Automatic Calibration Unit<br />
ZR40H<br />
29<br />
DO-4<br />
30<br />
DO-4<br />
31<br />
HTR<br />
32<br />
HTR<br />
33<br />
L<br />
34<br />
N<br />
35<br />
G<br />
36<br />
FG HTR HTR<br />
*1<br />
Contact<br />
output 1<br />
Contact<br />
output 2<br />
Contact<br />
output 3<br />
Contact<br />
output 4<br />
100-240V AC<br />
50/60 Hz<br />
The ground wiring of the converter should be connected to either the protective ground terminal in the equipment or<br />
the ground terminal of the converter case.<br />
Ground to earth, ground resistance: 100 Ω or less.<br />
Figure 5.2 Wiring connection to the converter<br />
*1<br />
F5-3E.ai<br />
*1<br />
IM 11M12A01-02E<br />
8th Edition : Jan.13,2012-00
5.1.3 Mounting of Cable Gland<br />
5-4<br />
For each cable connection opening of the converter, mount a conduit that matches the thread<br />
size, or a cable gland.<br />
EXA <strong>ZR402G</strong><br />
8-G1/2, 8-1/2NPT<br />
or the like<br />
(Wiring connection)<br />
Ground terminal (M4)<br />
Adapter <strong>for</strong> 1/2NPT thread<br />
F5-4E.ai<br />
Figure 5.3 Cable gland mounting<br />
IM 11M12A01-02E<br />
8th Edition : Jan.13,2012-00
5.2 Wiring <strong>for</strong> Detector Output<br />
5-5<br />
This wiring enables the converter to receive cell output from the detector, output from a<br />
thermocouple and a reference junction compensation signal. Install wires that allow <strong>for</strong> 10 Ω of<br />
loop resistance or less. Keep detector wiring away from power wiring.<br />
(1) Ambient temperature of the detector: 80 °C or less<br />
<strong>ZR22G</strong><br />
Detector<br />
CELL(+)<br />
CELL(-)<br />
TC(+)<br />
TC(-)<br />
CJ(+)<br />
CJ(-)<br />
Shielded cables<br />
<strong>ZR402G</strong><br />
Converter<br />
CELL(+)<br />
CELL(-)<br />
TC(+)<br />
TC(-)<br />
CJ(+)<br />
CJ(-)<br />
FG<br />
(2) Ambient temperature of the detector: exceeding 80 °C<br />
<strong>ZR22G</strong><br />
Detector<br />
CELL(+)<br />
CELL(-)<br />
TC(+)<br />
TC(-)<br />
CJ(+)<br />
CJ(-)<br />
Heat-resistant wiring<br />
Terminal box<br />
Shielded cables<br />
<strong>ZR402G</strong><br />
Converter<br />
CELL(+)<br />
CELL(-)<br />
TC(+)<br />
TC(-)<br />
CJ(+)<br />
CJ(-)<br />
FG<br />
F5-5E.ai<br />
Figure 5.4 Wiring <strong>for</strong> detector output<br />
CAUTION<br />
If shielded cables cannot be used between the detector and the terminal box, <strong>for</strong> example,<br />
when heat-resistant wiring is used, locate the detector and the terminal box as close together as<br />
possible.<br />
5.2.1 Cable Specifications<br />
Basically, PVC insulated PVC sheathed cable (6-core) is used <strong>for</strong> this wiring. When the ambient<br />
temperature of the detector exceeds 80 °C, install a terminal box, and connect with the detector<br />
using six-piece 600 V silicon rubber insulated glass braided wires.<br />
IM 11M12A01-02E<br />
8th Edition : Jan.13,2012-00
5.2.2 Connection to the Detector<br />
To connect cables to the detector, proceed as follows:<br />
5-6<br />
(1) Mount conduits of the specified thread size or cable glands to the wiring connections of the<br />
detector.<br />
The detector may need to be removed in future <strong>for</strong> maintenance, so be sure to allow<br />
sufficient cable length.<br />
(2) If the ambient temperature at the location of wire installation is 80 to 150 °C, be sure to use a<br />
flexible metallic wire conduit. If a non-shielded “ 600 V silicon rubber insulated glass braided<br />
wire “ is used, keep the wire away from noise sources to avoid noise interference.<br />
(3) Figure 5.5 shows the layout of the detector terminals.<br />
TC +<br />
CELL +<br />
TC -<br />
CELL<br />
(+)<br />
1 CELL<br />
2 3 TC<br />
4 5 CJ<br />
6<br />
7 8 H T R<br />
CELL<br />
(-)<br />
To converter,<br />
or<br />
terminal box<br />
TC TC CJ<br />
(+) (-) (+)<br />
To ground<br />
HTR<br />
CJ<br />
(-)<br />
HTR<br />
To converter,<br />
or<br />
terminal box<br />
Figure 5.5 Detector terminals<br />
F5-6E.ai<br />
The sizes of the terminal screw threads are M3.5 except <strong>for</strong> the M4 on grounding terminal.<br />
Each wire in the cable should be terminated in the corresponding size of crimp terminal (*1)<br />
respectively.<br />
*1: If the ambient temperature at the detector installation site exceeds 60 °C, use a “ bare crimp-on terminal”.<br />
(4) Except when “600 V silicon rubber insulated glass braided wire” is used, connect the cable<br />
shield to the FG terminal of the converter.<br />
5.2.3 Connection to the Converter<br />
To connect the wiring to the converter, proceed as follows:<br />
(1) M4 screws are used <strong>for</strong> the terminals of the converter. Each wire in the cable should be<br />
terminated corresponding to crimp-on terminals.<br />
(2) When a rubber insulated glass braided wire is used <strong>for</strong> wiring to the detector, use a terminal<br />
box. For wiring between the terminal box and the converter, basically use cable, e.g. PVC<br />
insulated PVC sheathed cable, rather than individual wires.<br />
NOTE<br />
The above is to prevent moisture or corrosive gas from entering the converter and to ground the<br />
detector without fail.<br />
IM 11M12A01-02E<br />
8th Edition : Jan.13,2012-00
5.3 Wiring <strong>for</strong> Power to Detector Heater<br />
5-7<br />
This wiring provides electric power from the converter to the heater <strong>for</strong> heating the sensor in the<br />
detector.<br />
(1) Ambient temperature of the detector: 80 °C or less<br />
<strong>ZR22G</strong><br />
Detector<br />
HTR 7<br />
HTR 8<br />
<strong>ZR402G</strong><br />
Converter<br />
HEATER<br />
(2) Ambient temperature of the detector: exceeding 80 °C<br />
<strong>ZR22G</strong><br />
Detector<br />
HTR 7<br />
HTR 8<br />
Terminal box<br />
<strong>ZR402G</strong><br />
Converter<br />
HEATER<br />
Heat-resistant wiring<br />
F5-7E.ai<br />
Figure 5.6 Wiring <strong>for</strong> power to detector heater<br />
5.3.1 Cable Specifications<br />
Basically, PVC insulated PVC sheathed cables (2 cores) are used <strong>for</strong> this wiring. When the<br />
ambient temperature of the detector exceeds 80 °C, install a terminal box, and connect to the<br />
detector using six-piece 600V silicon rubber insulated glass braided wires.<br />
5.3.2 Connection to Detector<br />
When connecting the cable to the detector, proceed as follows:<br />
(1) Mount cable glands or conduits of the specified thread size to the wiring connections of the<br />
detector.<br />
The detector may need to be removed in future <strong>for</strong> maintenance, so be sure to allow<br />
sufficient cable length.<br />
(2) If the ambient temperature at the location of wire installation is 80 to 150 °C, be sure to use<br />
a flexible metallic conduit <strong>for</strong> the wire. If a non-shielded “ 600V silicon rubber insulated glass<br />
braided wire” is used, keep the wire away from noise sources to avoid noise interference.<br />
(3) The size of the terminal screw threads is M3.5. Each cable should be terminated in the<br />
corresponding size crimp-on terminals contact (*1) respectively.<br />
*1 If the ambient temperature at the detector installation site exceeds 60 °C, use a “ bare crimp-on terminal”.<br />
IM 11M12A01-02E<br />
8th Edition : Jan.13,2012-00
5-8<br />
Notice when closing the cover of the detector<br />
NOTE<br />
• Be<strong>for</strong>e opening the detector cover, loosen the lock screw. If the screw is not loosened first,<br />
the screw will damage the cover, and the terminal box will require replacement.<br />
When opening and closing the cover, remove any sand particles or dust to avoid gouging the<br />
thread.<br />
• After screwing the cover in the detector body, secure it with the lock screw.<br />
Lock screw<br />
Detector cover<br />
F5-8E.ai<br />
Figure 5.7<br />
5.3.3 Connection to Converter<br />
To connect the wiring to the converter, proceed as follows:<br />
(1) M4 screws are used <strong>for</strong> the terminals of the converter. Each cable should be terminated in<br />
the corresponding size crimp-on terminals.<br />
(2) When a rubber insulated glass braided wire is used <strong>for</strong> wiring to the detector, use a terminal<br />
box. For wiring between the terminal box and the converter, basically use cable, e.g., PVC<br />
insulated PVC sheathed cable.<br />
CAUTION<br />
The above is to prevent moisture or corrosive gas from entering the converter.<br />
Where the ambient environment of the detector and the converter is well-maintained, it is<br />
permissible to connect the wiring from the detector directly to the converter with protection by<br />
conduits.<br />
WARNING<br />
This wiring is to carry power <strong>for</strong> the heater. Be careful to wire the correct terminals, and be<br />
careful not to ground or short circuit terminals when wiring, as otherwise the instrument may be<br />
damaged.<br />
IM 11M12A01-02E<br />
8th Edition : Jan.13,2012-00
5.4 Wiring <strong>for</strong> Analog Output<br />
5-9<br />
This wiring is <strong>for</strong> transmitting 4 to 20 mA DC output signals to a device, e.g. recorder.<br />
Maintain the load resistance including the wiring resistance at 550 Ω or less.<br />
<strong>ZR402G</strong><br />
Converter<br />
AO-1(+)<br />
AO-1(-)<br />
AO-2(+)<br />
AO-2(-)<br />
FG<br />
Shielded cable<br />
Receiver 1<br />
1<br />
2<br />
Receiver 2<br />
1<br />
2<br />
F5-9E.ai<br />
Figure 5.8 Wiring <strong>for</strong> analog output<br />
5.4.1 Cable Specifications<br />
For this wiring, use a 2-core or a 4-core shielded cable.<br />
5.4.2 Wiring Procedure<br />
(1) M4 screws are used <strong>for</strong> the terminals of the converter. Each wire in the cable should be<br />
terminated corresponding to crimp-on terminals. Ensure that the cable shield is connected<br />
to the FG terminal of the converter.<br />
(2) Be sure to connect “+” and “-” polarities correctly.<br />
5.5 Power and Grounding Wiring<br />
This wiring supplies power to the converter and grounds the converter/detector.<br />
<strong>ZR402G</strong><br />
Converter<br />
<strong>ZR22G</strong><br />
Detector<br />
Grounding to the ground terminal<br />
on the converter case<br />
L N G<br />
Converter case<br />
Jumper plate<br />
Ground<br />
FG terminal<br />
Lock washer<br />
Crimp-on terminal of<br />
the ground wire<br />
100 - 240 V AC<br />
50/60 Hz<br />
F5-10E.ai<br />
Figure 5.9 Power and Grounding wiring<br />
5.5.1 Power Wiring<br />
Connect the power wiring to the L and N terminals of the converter. Proceed as follows:<br />
(1) Use a 2-core or a 3-core cable.<br />
(2) The size of converter terminal screw threads is M4. Each cable should be terminated<br />
corresponding to crimp-on terminals.<br />
IM 11M12A01-02E<br />
8th Edition : Jan.13,2012-00
5.5.2 Grounding Wiring<br />
5-10<br />
The ground wiring of the detector should be connected to the ground terminal of the detector<br />
case. The ground wiring of the converter should be connected to either the ground terminal of the<br />
converter case or the protective ground terminal in the equipment.<br />
The grounding terminals of the detector and the converter are of size M4. Proceed as follows:<br />
(1) Keep ground resistance to 100 Ω or less (equivalent JIS D style (Class 3)).<br />
(2) When the ambient temperature of the wiring installation is 80 to 150 °C <strong>for</strong> the wiring of the<br />
detector, use wiring material with sufficient heat resistance.<br />
(3) When connecting the ground wiring to the ground terminal of the converter case, be sure<br />
that the lock washer is in contact with the case surface (see Figure 5.9.).<br />
(4) Ensure that the jumper plate is connected between the G terminal and the protective ground<br />
terminal of the converter.<br />
5.6 Contact Output Wiring<br />
Contact outputs 1 to 3 can be freely assigned to “low limit alarm”, “high limit alarm”, etc. user<br />
selectable, but the assignment of contact output 4 is fixed (“error output”). And the action (contact<br />
closed on error output) also cannot be changed.<br />
When using these contact outputs, install the wiring as follows:<br />
<strong>ZR402G</strong><br />
Converter<br />
DO-1<br />
DO-1<br />
Terminal box<br />
Annunciator or the like<br />
#1 Output<br />
DO-2<br />
DO-2<br />
#2 Output<br />
DO-3<br />
DO-3<br />
#3 Output<br />
DO-4<br />
DO-4<br />
#4 Output<br />
Figure 5.10 Contact output wiring<br />
F5-11E.ai<br />
5.6.1 Cable Specifications<br />
Number of wire in cable varies depending on the number of contact used.<br />
5.6.2 Wiring Procedure<br />
(1) M4 screws are used <strong>for</strong> the terminals of the converter. Each cable should be terminated<br />
corresponding to crimp-on terminals.<br />
(2) The capacities of the contact output relay are 30 V DC 3 A, 250 V AC 3 A. Connect a load<br />
(e.g. pilot lamp and annunciator) within these limits.<br />
IM 11M12A01-02E<br />
8th Edition : Jan.13,2012-00
5-11<br />
5.7 Wiring <strong>for</strong> ZR40H Automatic Calibration Unit<br />
This wiring is <strong>for</strong> operating the solenoid valve <strong>for</strong> the zero gas and the span gas in the ZR40H<br />
Automatic Calibration Unit, in a system where the calibration gas flow rate is automatically<br />
controlled (e.g. System configuration 3). When installing this wiring, proceed as follows:<br />
Span gas solenoid valve<br />
Wiring inlet<br />
2-G1/2, Pg13.5, M20 or 1/2NPT<br />
Zero gas solenoid valve<br />
COMMON ZERO<br />
SPAN<br />
COMMON SPAN<br />
ZERO<br />
to <strong>ZR402G</strong> terminal "AC-COM"<br />
to <strong>ZR402G</strong> terminal "AC-SPAN"<br />
to <strong>ZR402G</strong> terminal "AC-ZERO"<br />
Terminal screw : M4<br />
Figure 5.11 Automatic Calibration Unit<br />
F5-12E.ai<br />
5.7.1 Cable Specifications<br />
Use a 3-core cable <strong>for</strong> the above wiring.<br />
5.7.2 Wiring Procedure<br />
M4 screws are used <strong>for</strong> the terminals of the converter. Each cable should be terminated<br />
corresponding to crimp-on terminals. M4 screws are used <strong>for</strong> the terminals of the solenoid valve<br />
as well.<br />
<strong>ZR402G</strong><br />
Converter<br />
AC-Z<br />
ZR40H Automatic<br />
Calibration Unit<br />
Zero<br />
AC-S<br />
AC-C<br />
Span<br />
F5-13.ai<br />
Figure 5.12 Wiring <strong>for</strong> Automatic Calibration Unit<br />
IM 11M12A01-02E<br />
8th Edition : Jan.13,2012-00
5.8 Contact Input Wiring<br />
The converter can execute specified function when receiving contact signals.<br />
To use these contact signals, wire as follows:<br />
5-12<br />
<strong>ZR402G</strong><br />
Converter<br />
Terminal box<br />
DI-1<br />
DI-2<br />
Contact input 1<br />
DI-C<br />
Contact input 2<br />
F5-14E.ai<br />
Figure 5.13 Contact Input Wiring<br />
5.8.1 Cable Specifications<br />
Use 2-core or 3-core cable <strong>for</strong> this wiring. Depending on the number of input(s), determine which<br />
cable to use.<br />
5.8.2 Wiring Procedure<br />
(1) M4 screws are used <strong>for</strong> the terminals of the converter. Each cable should be terminated<br />
corresponding to crimp-on terminals.<br />
(2) The ON/OFF level of this contact input is identified by the resistance. Connect a contact<br />
input that satisfies the specifications in Table 5.2.<br />
Table 5.2 Identification of Contact Input ON/OFF<br />
Closed<br />
Open<br />
Resistance 200 Ω or less 100 kΩ or more<br />
IM 11M12A01-02E<br />
8th Edition : Jan.13,2012-00
6-1<br />
6. Components<br />
In this Chapter, the names and functions of components are described <strong>for</strong> the major equipment of<br />
the EXAxt ZR Separate type Zirconia Oxygen Analyzer.<br />
6.1 <strong>ZR22G</strong> Detector<br />
6.1.1 General-purpose Detector (except <strong>for</strong> <strong>ZR22G</strong>-015)<br />
Terminal box,<br />
Non explosion-proof JIS C0920 equivalent to IP44D.<br />
Equivalent to NEMA 4X/IP66 (Achieved when the cable entry<br />
is completely sealed with a cable gland in the recirculation<br />
pressure compensated version.)<br />
Flange<br />
Used to mount the detector.<br />
Select from JIS, ANSI, JPI or DIN<br />
Probe<br />
standard models.<br />
This part is inserted in the furnace.<br />
Select length from 0.4, 0.7, 1.0,<br />
1.5, 2.0, 2.5, 3.0, 3.6, 4.2, 4.8 or 5.4 m.<br />
Dust filter mounting screw<br />
Calibration gas<br />
pipe opening<br />
Bolt<br />
Metal O-ring<br />
Pipe support<br />
U-shaped pipe<br />
Filter<br />
Contact<br />
Screw<br />
Sensor (cell)<br />
Probe<br />
Washer<br />
Figure 6.1 General-purpose Detector<br />
F6-1E.ai<br />
IM 11M12A01-02E<br />
8th Edition : Jan.13,2012-00
6.1.2 High Temperature Detector (<strong>ZR22G</strong>-015)<br />
6-2<br />
Sample gas outlet<br />
When a sample gas pressure is<br />
negative, connect the ejector assembly.<br />
When the sample gas is high<br />
temperature and high pressure, and does<br />
not fall below 700 °C, connect a pressure<br />
control valve (e.g. a needle valve).<br />
(Refer to Section 3.2.2.)<br />
Separate type<br />
High Temperature Detector (<strong>ZR22G</strong>-015)<br />
When the temperature of the sample gas is<br />
between 700 °C and 1400 °C, mount this<br />
detector with a ZO21P-H probe adapter.<br />
Flange<br />
Selectable from JIS, ANSI,<br />
JPI or DIN<br />
High Temperature Probe Adapter (ZO21P-H)<br />
The probe is made of either SUS 310S<br />
or silicon carbide (SiC).<br />
Its length is 0.5, 0.6, 0.7, 0.8, 0.9, 1.0 or 1.5m.<br />
When using an SiC probe, mount it vertically<br />
downward.<br />
Figure 6.2 High Temperature Detector<br />
F6.2E.ai<br />
IM 11M12A01-02E<br />
8th Edition : Jan.13,2012-00
6-3<br />
6.2 <strong>ZR402G</strong> Converter<br />
Complete Operation Display<br />
■ Interactive operations along with operation display.<br />
■ A variety of display modes - enabling you to select<br />
the operation mode freely.<br />
■ Back-lit LCD allows viewing even in the darkness.<br />
■ Error codes and details of errors can be checked in<br />
the field without the need to refer to appropriate<br />
instruction manual.<br />
Typical Converter Displays<br />
● Example of basic display<br />
This display enables you to operate the analyzer<br />
while checking data on the display.<br />
● Example of trend display<br />
— displays data changes<br />
Self-testing suggests countermeasures<br />
<strong>for</strong> problems<br />
If a problem occurs, the liquid-crystal display will<br />
provide an error code and description of the<br />
problem. This enables prompt and appropriate<br />
corrective action to be taken.<br />
Error code<br />
E--1<br />
E--2<br />
E--3<br />
E--4<br />
ALARM1<br />
ALARM2<br />
ALARM3<br />
ALARM6<br />
ALARM7<br />
ALARM8<br />
Reason <strong>for</strong> error<br />
Cell failure<br />
Abnormal heater temperature<br />
Defective A/D converter<br />
Faulty EEPROM<br />
Abnormal oxygen concentration<br />
Abnormal moisture<br />
Abnormal mixing ratio<br />
Abnormal zero calibration ratio<br />
Abnormal span calibration ratio<br />
Stabilization time over<br />
During calibration, you can check the stabilized,<br />
display data while viewing oxygen trend data,thus<br />
providing highly reliable calibration.<br />
● Example of setting data display<br />
— displays data changes<br />
Maintenance<br />
Display setup<br />
Calibration setup<br />
Blow back setup<br />
mA-output loop check<br />
Contact check<br />
Enter<br />
● One-touch interactive display operation<br />
● User-friendly design providing easy operation<br />
without having to use the instruction manual<br />
F7.6E.ai<br />
F6-3E.ai<br />
Figure 6.3 Converter<br />
IM 11M12A01-02E<br />
8th Edition : Jan.13,2012-00
6-4<br />
6.3 ZA8F Flow Setting Unit, ZR40H Automatic<br />
Calibration Unit<br />
Reference gas flow<br />
setting valve<br />
Span gas flow<br />
setting valve<br />
Zero gas flow<br />
setting valve<br />
Flowmeter <strong>for</strong><br />
reference gas<br />
Flowmeter <strong>for</strong><br />
calibration gas<br />
F6-4E.ai<br />
Figure 6.4 ZA8F Flow Setting Unit<br />
Flowmeter <strong>for</strong><br />
Calibration gas<br />
Flowmeter <strong>for</strong><br />
Reference gas<br />
Terminal Box<br />
Reference gas flow<br />
setting valve<br />
Made in Japan<br />
REF.OUT CAL.OUT SPAN IN<br />
ZERO IN<br />
Calibration gas flow<br />
setting valve<br />
F6.5.ai<br />
Figure 6.5 ZR40H Automatic Calibration Unit<br />
IM 11M12A01-02E<br />
8th Edition : Jan.13,2012-00
7-1<br />
7. Startup<br />
The following describes the minimum operating requirements — from supplying power to the<br />
converter to analog output confirmation to manual calibration.<br />
System tuning by the HART communicator, refer to IM11M12A01-51E “ HART Communication<br />
Protocol ”.<br />
7.1 Checking Piping and Wiring Connections<br />
Check that the piping and wiring connections have been properly completed in accordance with<br />
Chapter 4, “Piping,” and Chapter 5, “Wiring.”<br />
7.2 Checking Valve Setup<br />
Set up valves and associated components used in the analyzer system as follows:<br />
(1) If a stop valve is used in the detector’s calibration gas inlet, fully close this valve.<br />
(2) If instrument air is used as the reference gas, adjust the air-set secondary pressure so that<br />
an air pressure equals sample gas pressure plus approx. 50 kPa (or sample gas pressure<br />
plus approx. 150 kPa when a check valve is used, maximum pressure rating is 300 kPa) is<br />
obtained. Turn the reference gas flow setting valve in the flow setting unit to obtain a flow<br />
of 800 to 1000 ml/min. (Turning the valve shaft counterclockwise increases the rate of flow.<br />
Be<strong>for</strong>e turning the valve shaft, if the valve has a lock nut, first loosen the lock nut.) After<br />
completing the valve setup, be sure to tighten the lock nut.<br />
NOTE<br />
The calibration gas flow setting is described later. Fully close the needle valve in the flow setting<br />
unit.<br />
7.3 Supplying Power to the Converter<br />
CAUTION<br />
To avoid temperature changes around the sensor, it is recommended that (rather than turning it<br />
on and off) power be continuously supplied to the Oxygen Analyzer if it is used in an application<br />
where it is used periodically.<br />
It is also recommended to flow a span gas (instrument air) be<strong>for</strong>ehand.<br />
Supply power to the converter. A display as in Figure 7.1, which indicates the detector’s sensor<br />
temperature, then appears. As the heat in the sensor increases, the temperature gradually rises<br />
to 750 °C. This takes about 20 minutes after the power is turned on, depending somewhat on the<br />
ambient temperature and the sample gas temperature.<br />
After the sensor temperature has stabilized at 750 °C, the converter is in measurement mode.<br />
The display panel then displays the oxygen concentration as in Figure 7.2. This is called the<br />
Basic panel display.<br />
IM 11M12A01-02E<br />
8th Edition : Jan.13,2012-00
7-2<br />
Tag:<br />
319°C<br />
4.00mA -Output1<br />
4.00mA -Output2<br />
Warmup<br />
Hold<br />
Tag:<br />
21.0<br />
% O2<br />
17.43mA -Output1<br />
17.43mA -Output2<br />
Figure 7.1 Display During Warm-up<br />
Figure 7.2 Measurement Mode Display<br />
IM 11M12A01-02E<br />
8th Edition : Jan.13,2012-00
7.4 Touchpanel Switch Operations<br />
7.4.1 Basic Panel and Switch<br />
7-3<br />
The converter uses a touchpanel switch which can be operated by just touching the panel<br />
display. Figure 7.3 shows the Basic panel display. The switches that appear in the switch display<br />
area vary depending on the panel display, allowing all switch operations. Table 7.1 shows the<br />
switch functions.<br />
Tag name display area<br />
Tag:<br />
Primary value<br />
Secondary value<br />
Tertiary value<br />
21.0<br />
% O2<br />
17.43mA -Output1<br />
17.43mA -Output2<br />
Switch display area<br />
Alarm and error<br />
display area<br />
Figure 7.3 Basic Panel Display<br />
F7.3E.ai<br />
Tag name display area: Displays the set tag name (Refer to Section 10.1.4, Entering Tag Name).<br />
Primary to tertiary value display items: Displays the selected item. (Refer to Section 7.9, Setting<br />
Display Item.)<br />
Switch display area: Displays switches and functions selected according to the panel display.<br />
Alarm and error display area: Displays an error if an alarm or error occurs. If you touch this area,<br />
the details of the error or alarm are then displayed.<br />
Table 7.1<br />
Switches and Their Functions<br />
Home key:<br />
Returns to the Execution/Setup display.<br />
Enter<br />
Enter key:<br />
Enters the input value and sets up the<br />
selected item.<br />
Reject key:<br />
Moves back to the previous display.<br />
Setup key:<br />
Used to enter the Execution/Setup display.<br />
Cursor key:<br />
Moves the cursor down.<br />
Detailed-data key:<br />
Displays the analog input value.<br />
Graph display key:<br />
Displays a trend graph.<br />
Cursor:<br />
Points the cursor at the currently<br />
selected item.<br />
Alarm:<br />
Displayed if an alarm arises.<br />
Error:<br />
Displayed if an error occurs.<br />
T7-1E.ai<br />
IM 11M12A01-02E<br />
8th Edition : Jan.13,2012-00
7.4.2 Display Configuration (<strong>for</strong> Oxygen Analyzer)<br />
7-4<br />
Figure 7.3.1 shows the configuration. A password the displays positioned below enables display<br />
“Execution/Setup” to be protected. If a password has not been set, press the [Enter] key to<br />
proceed to the next panel display. The [Home] key enables you to return to “Execution/Setup<br />
display” from any panel display.<br />
[Basic panel display]<br />
[Detailed-data display] [Execution/Setup display] [Trend Graph display]<br />
[Password Entry display]<br />
Calibration execution Blow back execution Reset panel display<br />
Returns to the<br />
Execution/Setup<br />
display.<br />
Returns to the<br />
Execution/Setup<br />
display.<br />
Returns to the<br />
Execution/Setup<br />
display.<br />
Maintenance panel<br />
display<br />
Display setup<br />
Display item<br />
Trend graph<br />
Auto return time<br />
Language<br />
Calibration setup<br />
Mode<br />
Points<br />
Zero and Span gas<br />
conc.<br />
Timing<br />
Blow back setup<br />
mA-output loop check<br />
Contact check<br />
Commissioning<br />
(Setup) display<br />
mA-output setup<br />
mA-output1<br />
mA-output2<br />
Set presets<br />
Alarms setup<br />
Hysteresis<br />
Contact delay<br />
Setpoints<br />
Contact Output setup<br />
Contact Input setup<br />
Others<br />
Clock<br />
Averaging<br />
Fuel setup<br />
Passwords<br />
Defaults<br />
Returns to the<br />
Execution/Setup<br />
display.<br />
Returns to the<br />
Execution/Setup<br />
display.<br />
Figure 7.3.1 Display Configuration<br />
F7.3.1E.ai<br />
IM 11M12A01-02E<br />
8th Edition : Jan.13,2012-00
7.4.3 Display Functions<br />
7-5<br />
Individual panel displays in the display configuration provide the following functions:<br />
(1) Basic panel display: Displays the values measured in three selected items (see Section 7.9,<br />
Setting Display Item).<br />
(2) Execution/Setup display: Selects the calibration, maintenance and setup items.<br />
(3) Detailed-data display: This allows you to view such detailed data as the cell electromotive<br />
<strong>for</strong>ce and cell temperature (see Section 10.1.1, Detailed-data Display,<br />
later in this manual).<br />
(4) Trend Graph display: Displays a trend graph (see Section 10.1.2, Trend Graph, later in this<br />
manual).<br />
(5) Calibration execution: Makes zero and span calibrations (see Chapter 9, Calibration, and<br />
the associated sections later in this manual).<br />
(6) Blow back execution: Executes a “Blow back setup” (see Section 10.2, Blow Back, later in<br />
this manual).<br />
(7) Reset panel display: If an error arises, you can restart the equipment from this display (<strong>for</strong><br />
more details, see Section 10.4, Reset, later in this manual).<br />
(8) Maintenance panel display: Sets the data <strong>for</strong> equipment maintenance or makes a loop<br />
check.<br />
(9) Commissioning (Setup) display: Sets up the operation data. (For details, see Chapter 8,<br />
Detailed Data Settings, and the associated sections later in this manual.)<br />
7.4.4 Entering Numeric and Text Data<br />
This section sets out how to enter numeric and text data. If only numeric values are entered,<br />
a numeric-data entry display as in Figure 7.4 then appears. Press the numeral keys to enter<br />
numeric values. If those values include a decimal point as in Figure 7.4, the decimal point need<br />
not be entered because the decimal point position is already fixed, so just enter 00098.<br />
New value: 000.98 % O 2<br />
7<br />
4<br />
8 9<br />
5 6<br />
0 1<br />
2 3<br />
Enter<br />
Figure 7.4 Numeric-data Entry Display<br />
F7.4E.ai<br />
To enter a password (in combination with text data, numeric values and codes), the alphabetic<br />
character entry panel display first appears. If you press any numeral key [0 - 9], the current<br />
display then changes to the numeric-value entry panel display, enabling you to enter numeric<br />
values. If you press the [other] key, the current display then changes to the code-entry display,<br />
enabling you to enter codes. These displays alternate between the three. Figure 7.5 shows the<br />
relationship between these three displays. Three alphabetic characters and three codes are<br />
assigned <strong>for</strong> each individual switch. If the alphabetic character key is pressed and held, three<br />
characters appear in turn. Move the cursor to the desired character and release the key to enter<br />
it. If an incorrect character is entered, move the cursor to re-enter the characters. The following<br />
shows an example of entering “abc%123.”<br />
IM 11M12A01-02E<br />
8th Edition : Jan.13,2012-00
7-6<br />
Operation<br />
Press the [ABC] key once.<br />
Press and hold the [ABC] key.<br />
Display<br />
A_<br />
A A<br />
B<br />
C<br />
Release the [ABC] key when the character B<br />
appears in the cursor position.<br />
Enter the character C in the same manner<br />
as above.<br />
Press the [other] key.<br />
Press and hold the [$%&] key and enter “%.”<br />
Then press the [0-9] key.<br />
Enter the numeric characters 1, 2 and 3 in turn.<br />
Press the [Enter] key to complete the entry.<br />
AB_<br />
ABC_<br />
ABC%_<br />
ABC%123_<br />
Siki7.4E<br />
Enter your password<br />
0-9<br />
A<br />
B C<br />
D<br />
E F<br />
G<br />
H I<br />
other<br />
J<br />
K L<br />
M<br />
N O<br />
P<br />
Q R<br />
Space<br />
- $<br />
S<br />
T U<br />
V<br />
W X<br />
Y<br />
Z @<br />
Enter<br />
Enter your password<br />
Enter your password<br />
A-Z<br />
7<br />
8 9<br />
A-Z<br />
!<br />
0 #<br />
$<br />
% &<br />
'<br />
( )<br />
other<br />
4<br />
5 6<br />
0-9<br />
*<br />
+ ,<br />
–<br />
. /<br />
:<br />
; <<br />
0 1<br />
2 3<br />
Enter<br />
{<br />
[ }<br />
><br />
@<br />
[<br />
\ ]<br />
^<br />
_ `<br />
Enter<br />
F7.5E.ai<br />
Figure 7.5 Text Entry Display<br />
IM 11M12A01-02E<br />
8th Edition : Jan.13,2012-00
7-7<br />
7.5 Confirmation of Converter Type Setting<br />
This converter can be used <strong>for</strong> both the Oxygen Analyzer and the Humidity Analyzer.<br />
Be<strong>for</strong>e setting the operating data, be sure to check that the desired converter model has been<br />
set.<br />
Note that if the converter type setting is changed, the operating data that have been set are then<br />
initialized and the default settings remain. To set the desired operating data, follow these steps:<br />
(1) Press the [Setup] key.<br />
(2) Use the [▼] key to select “Commissioning” and press the [Enter] key.<br />
(3) In the password display, enter the [Enter] key. If the password is to be set again, enter the<br />
new password (<strong>for</strong> details, see Section 8.6.5, Setting Passwords, later in this manual).<br />
(4) The Commissioning display shown in Figure 7.6 appears. Select “Basic setup” and press<br />
the [Enter] key.<br />
(5) The Basic setup display shown in Figure 7.7 then appears. Confirm the currently set<br />
converter type. If the Humidity Analyzer option /HS was selected at the time of purchase, the<br />
converter was set <strong>for</strong> high temperature humidity use be<strong>for</strong>e shipment.<br />
(6) If the converter type is to be changed, press the [Enter] key. The display shown in Figure 7.8<br />
then appears.<br />
(7) Use the [▼] key to select the type of equipment. Then press the [Enter] key to complete the<br />
converter selection.<br />
(8) If the type of converter is changed after setting the operating data, those data are then<br />
initialized and the default settings remain. Reset the operating data to meet the new type of<br />
equipment.<br />
Commissioning<br />
Basic setup<br />
mA-output setup<br />
Alarms setup<br />
Contact setup<br />
Others<br />
Enter<br />
Basic setup<br />
This instrument is <strong>for</strong><br />
Oxygen<br />
Please note:changing this<br />
Basic setting will return ALL<br />
other setting to Default!!<br />
Detector is ZR22<br />
Select measure gas: Wet<br />
Enter<br />
F7.6E.ai<br />
F7.7E.ai<br />
Figure 7.6 Commissioning Display<br />
Figure 7.7 Basic Setup<br />
Basic setup<br />
This instrument is <strong>for</strong><br />
Oxygen<br />
Please note:changing Humidity this<br />
Basic setting will return ALL<br />
other setting to Default!!<br />
Detector is ZR22<br />
Select measure gas: Wet<br />
Enter<br />
F7.8E.ai<br />
Figure 7.8 Equipment Setup<br />
IM 11M12A01-02E<br />
8th Edition : Jan.13,2012-00
7-8<br />
7.6 Confirmation of Detector Type Setting<br />
Check that the detector in Figure 7.7 is the one <strong>for</strong> this equipment.<br />
CAUTION<br />
• If this converter is to be used in conjunction with the ZO21D, the power requirements are<br />
limited to 125 V AC or less, 50 Hz or 60 Hz (it cannot be used with a 125 V or greater, or in<br />
the EEC).<br />
• If detector settings are to be changed, first disconnect the wiring connections between the<br />
detector and the converter. Then change detector settings appropriately.<br />
7.7 Selection of Sample Gas<br />
Combustion gases contain moisture created by burning hydrogen in the fuel. If this moisture is<br />
removed, the oxygen concentration might be higher than be<strong>for</strong>e. You can select whether the<br />
oxygen concentration in a wet gas is to be measured directly, or compensated <strong>for</strong> its dry-gas<br />
value be<strong>for</strong>e use. Select the “Select measure gas: Wet” in Figure 7.8 to select either wet or dry<br />
gas.<br />
7.8 Output Range Setting<br />
This section sets <strong>for</strong>th analog output range settings. For details, consult Section 8.1, Current<br />
Output Setting, later in this manual.<br />
7.8.1 Minimum Current (4 mA) and Maximum Current (20<br />
mA) Settings<br />
To set the minimum and maximum current settings, follow these steps:<br />
(1) Select the “Commissioning” from the Execution/Setup display.<br />
(2) From the Commissioning (Setup) display, select “mA-output setup”; the display shown in<br />
Figure 7.9 then appears.<br />
(3) Select “mA-output1” from the mA-outputs display. The “mA-output1 range” display shown in<br />
Figure 7.10 then appears.<br />
(4) In the display shown in Figure 7.10, select “Min. oxygen conc” and press the [Enter] key to<br />
display the numeric-data entry display. Enter the oxygen concentration at a 4-mA output;<br />
enter [010] <strong>for</strong> a ten-percent oxygen concentration measurement.<br />
(5) Also in Figure 7.10, select “Max. oxygen conc” at a 20-mA output. Enter the appropriate<br />
maximum oxygen concentration (at the 20-mA output) in the same manner as in step 4<br />
above.<br />
(6) Set “mA-output2” in the same manner as in the appropriate steps above.<br />
mA-outputs<br />
Both outputs are 4-20mA<br />
mA-output1<br />
mA-output2<br />
Set presets<br />
Figure 7.9 Setting “mA-outputs”<br />
Enter<br />
F7.9E.ai<br />
mA-output1 range<br />
Parameter: Oxygen<br />
Set range<br />
Min. oxygen conc:<br />
0 %O2<br />
Max. oxygen conc:<br />
25 %O2<br />
Output damping: 0 s<br />
Output mode: Linear<br />
Enter<br />
F7.10E.ai<br />
Figure 7.10 Setting “mA-output1 range”<br />
IM 11M12A01-02E<br />
8th Edition : Jan.13,2012-00
7.9 Setting Display Item<br />
7-9<br />
This section briefly describes the display item settings shown in Figure 7.11, “Basic Panel<br />
Display.”<br />
Tag:<br />
Primary value<br />
Secondary value<br />
Tertiary value<br />
21.0<br />
%O2<br />
17.43mA -Output1<br />
17.43mA -Output2<br />
F7.11E.ai<br />
Figure 7.11 Basic Panel Display<br />
(1) Press the [Setup] key in the Basic panel display to display the Execution/Setup display.<br />
Then select “Maintenance” in the Execution/Setup display.<br />
(2) Select the “Display setup” from the Maintenance panel display (Figure 7.12).<br />
The Display setup display (Figure 7.13) then appears.<br />
(3) In the above Display setup display, select the “Display item”. The Display item display<br />
(Figure 7.14) then appears. From this display, select the “Primary value” and press the<br />
[Enter] key to display the “Display item” selection display (Figure 7.15).<br />
(4) Select the Secondary and Tertiary values in the same manner as in the steps above.<br />
(5) Consult Table 7.2, Display Items, enabling the selection of display items in individual display<br />
areas.<br />
Maintenance<br />
Display setup<br />
Calibration setup<br />
Blow back setup<br />
mA-output loop check<br />
Contact check<br />
Display setup<br />
Display item<br />
Trend graph<br />
Auto return time: 0min<br />
Language: English<br />
Enter<br />
Enter<br />
Figure 7.12 Maintenance Panel Display<br />
F7.12.ai<br />
Figure 7.13 Display Setup<br />
F7.13.ai<br />
IM 11M12A01-02E<br />
8th Edition : Jan.13,2012-00
7-10<br />
Display item<br />
Display item<br />
Primary value:<br />
Oxygen<br />
Secondary value:<br />
mA-output1<br />
Tertiary value:<br />
mA-output2<br />
Tag name:<br />
Enter<br />
Primary value:<br />
Oxygen Oxygen<br />
Item of output1 damping<br />
Secondary Item of output2 value: damping<br />
mA-output1<br />
Tertiary value:<br />
mA-output2<br />
Tag name:<br />
Enter<br />
F7.14.ai<br />
F7.15.ai<br />
Figure 7.14 Display Item Display<br />
Figure 7.15 Display Item Selection<br />
Table 7.2 Display Items<br />
Item<br />
Primary value<br />
Secondary and<br />
tertiary values<br />
Display<br />
Oxygen<br />
concentration ○ ○ Oxygen concentration during measurement<br />
Air ratio ○ Current computed air ratio<br />
Moisture quantity ○ Moisture quantity (%H 2O) in the exhaust gas<br />
Output 1 item ○ ○<br />
Output 2 item ○ ○<br />
Oxygen concentration with the equipment set <strong>for</strong> oxygen<br />
analyzer (See *1 below.)<br />
Oxygen concentration with the equipment set <strong>for</strong> oxygen<br />
analyzer (See *1 below.)<br />
Current output 1 ○ Current value output from analog output 1<br />
Current output 2 ○ Current value output from analog output<br />
*1: If an analog output damping constant is set, the oxygen concentration display then includes these settings.<br />
About the Air ratio:<br />
“Air ratio” is defined as the ratio of (the amount of air theoretically required to completely burn all<br />
the fuel) to (the amount of air actually supplied).<br />
For this equipment, the air ratio will be obtained in a simplified way by measuring the oxygen<br />
concentration in the exhaust gas. The air ratio may be expressed mathematically by:<br />
m = { 1 / ( 21- Oxygen concentration ) } 21<br />
If you use the air ratio data <strong>for</strong> estimating the combustion efficiency, etc., check that no air is<br />
leaking in be<strong>for</strong>ehand and that the measured value has not been affected by any interference<br />
gas (CH 4 , CO, H 2 , etc.).<br />
About moisture quantity:<br />
The moisture quantity in the exhaust gas is calculated based on the parameters of the fuel<br />
setting (refer to Section 8.6.3, Setting Fuels, later in this manual). The moisture content may be<br />
expressed mathematically by:<br />
Moisture quantity = {(water vapor content per fuel unit quantity) + (water content in air)}/ total<br />
amount of exhaust gas<br />
= { Gw + ( 1.61 Z Ao m )} / { X + ( Ao m )}<br />
where,<br />
Gw = water vapor content in exhaust gas, m 3 /kg (m 3 /m 3 )<br />
Z = Ambient absolute humidity, kg/kg<br />
Ao = Ideal air amount, m 3 /kg (m 3 /m 3 )<br />
m = Air ratio<br />
X = Fuel coefficient<br />
For details on each parameter, refer to Section 8.6.3, Setting Fuels.<br />
IM 11M12A01-02E<br />
8th Edition : Jan.13,2012-00
7.10 Checking Current Loop<br />
The set current can be output as an analog output.<br />
7-11<br />
(1) Press the [Setup] key on the Basic panel display to display the Execution/Setup display.<br />
Then select “Maintenance” in the Execution/Setup display.<br />
(2) Select “mA-output loop check” in the Maintenance panel display to display the mA - output<br />
loop check display, enabling you to check “mA-output1” and “mA-output2”.<br />
Select the desired output terminal <strong>for</strong> current-loop checking (see Figure 7.15.1).<br />
(3) At the time of entering the numeric-data entry display, the output current will change to 4 mA<br />
(default value). If the desired current is entered, the corresponding output will be provided.<br />
mA - output loop check<br />
mA - output 1<br />
mA - output 2<br />
Enter<br />
F7.15.1E.ai<br />
Figure 7.15.1 “mA - output loop check” Panel Display<br />
IM 11M12A01-02E<br />
8th Edition : Jan.13,2012-00
7.11 Checking Contact I/O<br />
7-12<br />
Conduct the contact input and output checking as well as operational checking of the solenoid<br />
valves <strong>for</strong> automatic calibration.<br />
7.11.1 Checking Contact Output<br />
To check the contact output, follow these steps:<br />
(1) Press the [Setup] key in the Basic panel display to display the Execution/Setup display.<br />
Select “Maintenance” in that display.<br />
(2) Select “Contact check” then “Output contacts” in the Maintenance panel display to display<br />
the Output contacts display (see Figure 7.15.2).<br />
(3) In this display, select the desired output contact <strong>for</strong> checking. The display, which enables<br />
the closing and opening of contacts, then appears. Use the display to conduct continuity<br />
checking.<br />
Output contacts<br />
Output contact 1 : Open<br />
Output contact 2 : Open<br />
Output contact 3 : Open<br />
Output contact 4 : Open<br />
Enter<br />
F7.15.2E.ai<br />
Figure 7.15.2 Output Contact Check Panel Display<br />
NOTE<br />
• If you conduct an open-close check <strong>for</strong> contact output 4, Error 1 or Error 2 will occur.<br />
This is because the built-in heater power of the detector, which is connected to contact<br />
output 4, is turned off during the above check. So, if the above error occurs, reset the<br />
equipment or turn the power off and then back on to restart (refer to Section 10.4, Reset,<br />
later in this manual).<br />
IM 11M12A01-02E<br />
8th Edition : Jan.13,2012-00
7.11.2 Checking Calibration Contact Output<br />
7-13<br />
The calibration contacts are used <strong>for</strong> solenoid valve drive signals <strong>for</strong> the ZR40H Automatic<br />
Calibration Unit. When using the ZR40H Automatic Calibration Unit, use the calibration contact<br />
output to check that the wiring connections have been properly completed and check equipment<br />
operation.<br />
(1) Referring to Section 7.11.1, display the contact check display.<br />
(2) Select the “Calibration contacts” to display the panel display as Figure 7.15.3 shows.<br />
(3) Open the “Zero gas contact” and the “Span gas contact”. This will help check the automatic<br />
calibration unit and wiring connections.<br />
Calibration contacts<br />
Zero gas contact : Open<br />
Span gas contact : Open<br />
Enter<br />
F7.15.3E.ai<br />
Figure 7.15.3 Calibration Contact Check Display<br />
NOTE<br />
“Open” and “Closed” displayed on the Calibration contacts display indicate actions of drive<br />
contacts and are opposite to the valve open and close actions. If “Open” is displayed on the<br />
Calibration contacts display, no calibration gas flows. If “Closed” is displayed on that display,<br />
calibration gas flows.<br />
7.11.3 Checking Input Contacts<br />
(1) Referring to Section 7.11.1, display the contact check display.<br />
(2) Display the “Input contacts” check display as Figure 7.15.4 shows. The “Open” or “Closed”<br />
input contact in the display shows the current contact input terminal status and the display<br />
changes according to the contact status. Using this enables you to check that the wiring<br />
connections have been properly completed.<br />
Input contacts<br />
Input contact 1 : Open<br />
Input contact 2 : Open<br />
Enter<br />
F7.15.4E.ai<br />
Figure 7.15.4 Input Contact Check Display<br />
IM 11M12A01-02E<br />
8th Edition : Jan.13,2012-00
7.12 Calibration<br />
7-14<br />
To calibrate this instrument, the procedure is to measure zero gas and span gas and set the<br />
instrument to read the known concentrations. The procedure <strong>for</strong> both zero and span calibration,<br />
or <strong>for</strong> either zero or span calibration, can be per<strong>for</strong>med manually from the touch display, or can<br />
be per<strong>for</strong>med semi-automatically using contact signal inputs to start calibration, (allowing preset<br />
calibration and stabilization times), or it can be per<strong>for</strong>med automatically at preset intervals.<br />
There are three types of calibration procedures available:<br />
(1) <strong>Manual</strong> calibration conducting zero and span calibrations, or either of these calibrations in<br />
turn.<br />
(2) Semi-automatic calibration which uses the touchpanel or a contact input signal and<br />
conducts calibration operations based on a preset calibration time and stable time.<br />
(3) Automatic calibration conducted at preset intervals.<br />
<strong>Manual</strong> calibration needs the ZA8F Flow Setting Unit to allow manual supply of the calibration<br />
gases. Semi-automatic and automatic calibrations need the ZR40H Automatic Calibration Unit<br />
to allow automatic supply of the calibration gases. The following sections set <strong>for</strong>th the manual<br />
calibration procedures. For details on semi-automatic and automatic calibrations, consult<br />
Chapter 9, Calibration, later in this manual.<br />
7.12.1 Calibration Setup<br />
7.12.1.1 Mode Setting<br />
For the mode setting, do the following:<br />
Press the [Setup] key in the Basic panel display to display the Execution/Setup display.<br />
Select “Maintenance” in the Execution/Setup display to display the Maintenance panel display.<br />
Then select “Calibration setup” to display the Calibration setup display as Figure 7.16 shows.<br />
Select Mode in this panel, and then select “<strong>Manual</strong>”, “Semi_Auto” or “Auto”.<br />
Calibration setup<br />
Mode: <strong>Manual</strong><br />
Points: Both<br />
Zero gas conc: 1.00%<br />
Span gas conc: 21.00%<br />
Timing<br />
Enter<br />
Figure 7.16 Calibration Setup Display<br />
F7.16E.ai<br />
7.12.1.2 Calibration Setting Procedures<br />
Select “Points” (calibration procedure) in the Calibration setup display to display the “Both, Span,<br />
Zero” selection display. In this display, select “Both.”<br />
7.12.1.3 Calibration Gas Concentration Setting<br />
(1) Zero gas concentration<br />
If “Zero gas conc” is selected in the Calibration setup display, the numeric-data entry display<br />
then appears.<br />
Use this display to enter an oxygen concentration value <strong>for</strong> the zero gas calibration;<br />
if the oxygen concentration is 0.98 vol%O 2 , enter 00098.<br />
IM 11M12A01-02E<br />
8th Edition : Jan.13,2012-00
7-15<br />
(2) Span gas concentration<br />
With “Span gas conc” selected in the Calibration setup display, display the Numeric - data<br />
Entry display and enter an oxygen concentration value <strong>for</strong> the span gas calibration; If<br />
instrument air is used, enter 02100 <strong>for</strong> a 21 vol%O 2 value. When using the ZO21S Standard<br />
Gas Unit (<strong>for</strong> use of the atmospheric air as a span gas), use a portable oxygen analyzer to<br />
measure the actual oxygen concentration, and then enter it.<br />
NOTE<br />
If instrument air is used <strong>for</strong> the span gas, dehumidify the air by cooling to a dew point of - 20 ºC<br />
and remove any oil mist or dust.<br />
7.12.2 <strong>Manual</strong> Calibration<br />
7.12.2.1 Preliminary<br />
Be<strong>for</strong>e per<strong>for</strong>ming manual calibration, be sure that the ZA8F Flow Setting Unit zero gas flow<br />
setting valve is fully closed. Open the zero gas cylinder pressure reducing valve so that the<br />
secondary pressure equals sample gas plus approx. 50 kPa (or sample gas pressure plus<br />
approx. 150 kPa when a check valve is used, maximum pressure rating is 300 kPa).<br />
This applies even if you are using the ZR40H Automatic Calibration Unit.<br />
7.12.2.2 Calibration Procedures<br />
This manual assumes that the instrument air is the same as the reference gas used <strong>for</strong> the span<br />
gas. Follow the steps below to conduct manual calibration:<br />
(1) Press the [Setup] key in the Basic panel display to display the Execution/Setup display.<br />
Then select “Calibration” in the Execution/Setup display.<br />
Calibration<br />
<strong>Manual</strong> calibration<br />
<strong>Manual</strong> calibration<br />
Check the span gas<br />
concentration value<br />
Enter<br />
Next<br />
Cancel calibration<br />
Change value: 21.00%<br />
Enter<br />
Figure 7.17 Calibration Display<br />
F7.17E.ai<br />
Figure 7.18 <strong>Manual</strong> Calibration<br />
F7.18E.ai<br />
(2) Press the [Enter] key to select “Span calibration”. The <strong>Manual</strong> calibration display shown<br />
in Figure 7.18 then appears. Check that the oxygen concentration <strong>for</strong> the span gas in this<br />
display coincides with the oxygen concentration in the calibration gas actually used. If the<br />
check results are assumed to be OK, select “Next” in the <strong>Manual</strong> calibration display.<br />
IM 11M12A01-02E<br />
8th Edition : Jan.13,2012-00
7-16<br />
(3) Follow the display message in Figure 7.19 to turn on span gas flow. Open the span gas flow<br />
valve <strong>for</strong> the Flow Setting Unit by loosening the valve lock nut and slowly turning the valve<br />
shaft counterclockwise to flow the span gas at 600 ± 60 ml/min. Use the calibration gas<br />
flowmeter to check the flow.<br />
<strong>Manual</strong> calibration<br />
Open span gas valve.<br />
Set flow span gas to<br />
600ml/min.<br />
<strong>Manual</strong> calibration<br />
21.00%<br />
0.5min./div<br />
Valve opened<br />
Cancel calibration<br />
Figure 7.19 Span gas Flow Display<br />
Enter<br />
F7.19E.ai<br />
1.00%<br />
21.0 %O2 CAL. TIME<br />
Figure 7.20 Span gas Trend Graph<br />
(<strong>for</strong> <strong>Manual</strong> Calibration)<br />
Enter<br />
F7.20E.ai<br />
(4) If “Valve opened” is selected as in Figure 7.19 , an oxygen concentration trend graph (with<br />
the oxygen concentration being measured) appears (see Figure 7.20). The CAL.TIME in<br />
the bottom area of the panel flashes. Observe the trend graph and wait until the measured<br />
value stabilizes in the vicinity of 21% on the graph. At this point, calibration has not yet been<br />
executed yet, so even if the measured value is above or below 21%, no problem occurs.<br />
(5) After the measured value has stabilized, press the [Enter] key to display the “Span<br />
calibration complete” display shown in Figure 7.21. At this point, the measured value is<br />
corrected to equal the span gas concentration setting. Close the span gas flow valve. The<br />
valve lock nut should be tightened completely so that the span gas does not leak.<br />
<strong>Manual</strong> calibration<br />
Span calibration<br />
Close the span gas valve.<br />
<strong>Manual</strong> calibration<br />
Check the zero gas<br />
concentration value<br />
Next<br />
Zero calibration<br />
End<br />
Enter<br />
Cancel calibration<br />
Change value: 1.00%<br />
Enter<br />
Figure 7.21 Span Calibration Complete<br />
Zero Calibration<br />
Start Display<br />
F7.21E.ai<br />
Figure 7.22 Zero Gas Concentration<br />
Check Display<br />
(in <strong>Manual</strong> Calibration)<br />
F7.22E.ai<br />
(6) Select “Zero calibration” as in Figure 7.21 to display the zero gas concentration check<br />
display (<strong>Manual</strong> calibration) . Check that the zero gas oxygen concentration value and the<br />
calibration gas oxygen concentration value agree. Then select “Next” as in Figure 7.22.<br />
IM 11M12A01-02E<br />
8th Edition : Jan.13,2012-00
7-17<br />
(7) Follow the instructions in the display as in Figure 7.23 to turn on the zero gas flow. To do<br />
this, open the zero gas flow valve <strong>for</strong> the Flow Setting Unit and adjust that valve to obtain a<br />
flow of 600 ± 60 ml/min. The valve should be adjusted by loosening its lock nut and slowly<br />
turning the valve shaft counterclockwise. Use the calibration gas flowmeter to check the<br />
flow.<br />
<strong>Manual</strong> calibration<br />
Open zero gas valve.<br />
Set flow zero gas to<br />
600ml/min.<br />
<strong>Manual</strong> calibration<br />
21.00%<br />
0.5min./div<br />
Valve opened<br />
Cancel calibration<br />
Enter<br />
1.00%<br />
21.0%O2 CAL. TIME<br />
Enter<br />
F7.23E.ai<br />
F7.25E.ai<br />
Figure 7.23 Zero Gas Flow Display<br />
(<strong>for</strong> <strong>Manual</strong> calibration)<br />
Figure 7.24 Zero Gas, Trend Graph<br />
(8) If “Valve opened” is selected as in Figure 7.23 , an oxygen concentration trend graph (with<br />
the oxygen concentration being measured) appears (see Figure 7.24). The CAL.TIME in<br />
the bottom area of the panel flashes. Observe the trend graph and wait until the measured<br />
value stabilizes in the vicinity of the zero gas concentration on the graph. At this point, no<br />
calibration has been executed yet, so even if the measured value is above or below the zero<br />
gas concentration value, no problem occurs.<br />
(9) After the measured value has stabilized, press the [Enter] key to display the “Zero<br />
calibration complete” display shown in Figure 7.25. At this point, the measured value is<br />
corrected to equal the zero gas concentration setting. Close the zero gas flow valve. The<br />
valve lock nut should be tightened completely so that the zero gas does not leak.<br />
<strong>Manual</strong> calibration<br />
Zero calibration<br />
Close the zero gas valve.<br />
Span calibration<br />
End<br />
Enter<br />
F7.26E.ai<br />
Figure 7.25 Zero Calibration Complete Display<br />
(10) Select “End” in the display as shown in Figure 7.25. An oxygen concentration trend graph<br />
(with the oxygen concentration being measured) appears and HOLD TIME then flashes.<br />
This time is referred to as the output-stabilization time. If the HOLD TIME has been set<br />
with the output hold setting, the analog output remains held (refer to Section 8.2, Output<br />
Hold Setting, later in this manual). <strong>Manual</strong> calibration is completed when the preset hold<br />
(output stabilization) time elapses. This hold (output stabilization) time is set to 10 minutes<br />
at the factory be<strong>for</strong>e shipment. If you press the [Enter] or [Reject] key within the hold (output<br />
stabilization) time, manual calibration is then completed.<br />
IM 11M12A01-02E<br />
8th Edition : Jan.13,2012-00
Blank Page
8. Detailed Data Setting<br />
8-1<br />
8.1 Current Output Setting<br />
This section describes setting of the analog output range.<br />
8.1.1 Setting Minimum Current (4 mA) and Maximum<br />
Current (20 mA)<br />
To set the minimum and maximum currents, proceed as follows:<br />
(1) Select [Commissioning] in the Execution/Setup display.<br />
(2) Select the “mA-output setup” in the Commissioning display.<br />
(3) Select “mA-output1” in the mA-outputs display.<br />
(4) Select “Min. oxygen conc” in the mA-output1 range display and press the [Enter] key. The<br />
numeric-data entry display then appears. Enter the oxygen concentration <strong>for</strong> the minimum<br />
current (4 mA); <strong>for</strong> example, enter “010” <strong>for</strong> 10 vol%O 2 .<br />
(5) Select “Max. oxygen conc” in the mA-output1 range display and enter the oxygen<br />
concentration <strong>for</strong> the maximum current (20 mA) in the same manner as in step 4 above.<br />
(6) Set mA-output2 in the same way as the setting procedure <strong>for</strong> mA-output1 given above.<br />
8.1.2 Input Ranges<br />
The range low and high values are restricted as follows:<br />
The range min. O 2 concentration value (corresponding to 4 mA output) can be set to either 0<br />
vol%O 2 or in the range of 6 to 76 vol%O 2 .<br />
The range max. O 2 concentration value (corresponding to 20 mA output) can be set to any value<br />
in the range of 5 to 100 vol%O 2 , however the range max. setting must be at least 1.3 times the<br />
range min. setting.<br />
If you do not observe this restriction, the measurement will be invalid, and any previous valid<br />
value will be used. The gray area in figure represents the valid setting range.<br />
Setting example 1<br />
If the range minimum (corresponding to 4 mA output) is set to 10 vol%O 2 then range maximum<br />
(corresponding to 20 mA output) must be at least 13 vol%O 2 .<br />
IM 11M12A01-02E<br />
8th Edition : Jan.13,2012-00
Setting example 2<br />
8-2<br />
If the range minimum (corresponding to 4 mA output) is set to 75 vol%O 2 then range maximum<br />
(corresponding to 20 mA output) must be at least 75x1.3=98 vol%O 2 (rounding decimal part up).<br />
Maximum oxygen concentration, vol%O2 (<strong>for</strong> a maximum current of 20 mA)<br />
95<br />
85<br />
75<br />
65<br />
55<br />
45<br />
35<br />
25<br />
15<br />
Ranges over which oxygen<br />
concentrations can be set<br />
Outside ranges<br />
5<br />
5 15 25 35 45 55 65 75<br />
Minimum oxygen concentration, vol%O2 (<strong>for</strong> a minimum current of 4 mA)<br />
Minimum-Maximum setting range of oxygen concentration<br />
F8.0E.ai<br />
8.1.3 Setting Output Smoothing Coefficient<br />
When the oxygen concentration in the sample gas fluctuates rapidly, if the measured value is<br />
used <strong>for</strong> control this can lead to problems with undesirable frequent ON/OFF switching. You can<br />
set a smoothing time constant of between 0 and 255 seconds to reduce the effect. Select the<br />
appropriate output damping constant from the numeric-data entry display. To set 30 seconds,<br />
enter 030.<br />
8.1.4 Selection of Output Mode<br />
You can select whether the relationship between the sample oxygen concentration and the<br />
analog output signal be linear or logarithmic. Press the [Enter] key in the output mode display. A<br />
linear/ logarithmic selection display then appears. Select the desired mode.<br />
NOTE<br />
If you select an output mode of “logarithmic” then regardless of range setting the minimum output<br />
value becomes 0.1 vol%O 2 fixed.<br />
8.1.5 Default Values<br />
When the analyzer is delivered or reset to defaults, the output current default settings by as<br />
shown in Table 8.1.1.<br />
Table 8.1.1 Output Current Default Values<br />
Item<br />
Min. oxygen concentration<br />
Max. oxygen concentration<br />
Output damping constant<br />
Output mode<br />
Default setting<br />
0 vol%O2<br />
25 vol%O2<br />
0 (seconds)<br />
Linear<br />
IM 11M12A01-02E<br />
8th Edition : Jan.13,2012-00
8.2 Output Hold Setting<br />
8-3<br />
The “output hold” functions hold an analog output signal at a preset value during the equipment’s<br />
warm-up time or caribration or if an error arises. Outputs 1 and 2 can not be set individually. Table<br />
8.1.2 shows the analog outputs that can be retained and the individual states.<br />
Table 8.1.2<br />
Equipment status<br />
Output<br />
hold values available<br />
During warm-up<br />
4 mA ○<br />
20 mA ○<br />
Under<br />
maintenance<br />
Under calibration<br />
During blow back<br />
On Error<br />
occurrence(*1)<br />
Without hold feature ○ ○ ○<br />
Retains output from just be<strong>for</strong>e<br />
occurrence<br />
○ ○ ○<br />
Set value (2.4 to 21.6 mA) ○ ○ ○ ○<br />
○: The output hold functions are available.<br />
*1: The output hold functions on error occurrence are unavailable when option code “/C2” or “/C3”(NAMER NE 43 compliant) is<br />
specified.<br />
8.2.1 Definition of Equipment Status<br />
(1) During warm-up<br />
“During warm-up” is the time required after applying power until sensor temperature stabilizes at<br />
750 ºC and the instrument is in the measurement mode.<br />
(2) Under Maintenance<br />
“Under maintenance” is the time that starts when you move to the Execution/Setup display by<br />
touching the [Setup] key on the Basic panel display and ends when you return to the Basic panel<br />
display. It includes when you operates keys on lower level menu displays of the Execution/Setup<br />
display.<br />
(3) Under Calibration (see Chapter 9, Calibration, later in this manual)<br />
For manual Calibration, “Under calibration” is the time that starts when you move to the <strong>Manual</strong><br />
calibration display (Figure 7.19) from the Calibration display, lasts while you are operating keys<br />
<strong>for</strong> per<strong>for</strong>ming calibration manually, and ends when you press the End key and after a preset hold<br />
time has elapsed.<br />
For semi-automatic calibration, “Under calibration” is the time required from entering calibration<br />
instructions to per<strong>for</strong>m a, either by using the touchpanel or by a contact input, calibration until the<br />
hold (output stabilization) time elapses.<br />
For automatic calibration, “Under calibration” is the time required, after per<strong>for</strong>ming an appropriate<br />
calibration until the hold (output stabilization) time elapses.<br />
(4) During Blow back (see Section 10.2, Blow Back, later in this manual)<br />
During semi-automatic blow back:<br />
“During semi-automatic blow back” is the time required after pressing the [Blow back start] key,<br />
by using the touchpanel or entering a blow back start instruction by using a contact input, until the<br />
blow back time and hold (output stabilization) time elapse.<br />
During automatic blow back:<br />
“During automatic blow back” is the time required after reaching the blow back start time until the<br />
blow back time and hold (output stabilization) time elapse.<br />
(5) On Error occurrence<br />
This is the time at which any of Errors 1 to 4 occurs.<br />
IM 11M12A01-02E<br />
8th Edition : Jan.13,2012-00
8.2.2 Preference Order of Output Hold Value<br />
The output hold value takes the following preference order:<br />
8-4<br />
Preference order (high)<br />
On error occurrence<br />
Under calibration or during blow back<br />
Under maintenance<br />
During warm-up<br />
8.2.2.siki<br />
For example, if the output current is set to 4 mA during maintenance, and no output-hold output<br />
<strong>for</strong> during calibration is preset, the output is held at 4 mA during the maintenance display.<br />
However, the output hold is released at the time of starting the calibration, and the output will be<br />
again held at 4 mA after completing the calibration and when the hold (output stabilization) time<br />
elapses.<br />
8.2.3 Output Hold Setting<br />
To set the output hold, follow these steps:<br />
(1) Press the [Setup] key in the Basic panel display to display the Execution/Setup display.<br />
Then select “Commissioning” in the Execution/Setup display. Next, select the “mA-output<br />
setup” and then the “mA-outputs presets” display as shown in Figure 8.2.<br />
mA-outputs presets<br />
Warm up: 4mA<br />
Preset value: 4 . 0 mA<br />
Maintenance: Hold<br />
Preset value: 4 . 0 mA<br />
Cal.blow back: Hold<br />
Preset value: 4 . 0 mA<br />
Error: Preset<br />
Preset value: 3 . 4 mA<br />
Enter<br />
mA-outputs presets<br />
Warm up: 4mA<br />
Preset value: 4 . 0 mA<br />
Maintenance: Non-Hold<br />
Preset value: Hold 4.0mA<br />
Cal.blow back: Preset Hold<br />
Preset value: 4 . 0 mA<br />
Error: Preset<br />
Preset value: 3 . 4 mA<br />
Enter<br />
Figure 8.1 mA-outputs presets Display<br />
F8.1E.ai<br />
Figure 8.2 Selecting Maintenance<br />
F8.2E.aiS<br />
(2) From this display (Fig. 8.2), select the desired display. Figure 8.3 shows an example<br />
of selecting “Maintenance”. Select the desired output status.<br />
(3) If a preset value is selected, set the corresponding output current. If you select a preset<br />
value just below Maintenance on the screen, the numeric-data entry display will appear.<br />
Enter the current value you want. To set 10 mA, type in 010 and press the [Enter] key to<br />
complete the setting. The setting range is from 2.4 to 21.6 mA.<br />
NOTE<br />
“Error” of mA-outputs presets is not displayed when option code “/C2” or “/C3” (NAMUR NE 43<br />
compliant) is specified.<br />
IM 11M12A01-02E<br />
8th Edition : Jan.13,2012-00
8.2.4 Default Values<br />
8-5<br />
When the analyzer is delivered, or if data are initialized, output hold is the default as shown in<br />
Table 8.2.<br />
Table 8.2 Output Hold Default Values<br />
Status Output hold setting Preset value<br />
During warm-up 4 mA 4 mA<br />
Under maintenance Holds output at value just be<strong>for</strong>e maintenance started. 4 mA<br />
Under calibration or blow back<br />
Holds output at value just be<strong>for</strong>e starting calibration or<br />
blow back.<br />
4 mA<br />
On Error occurrence Holds output at a preset value. 3.4 mA<br />
IM 11M12A01-02E<br />
8th Edition : Jan.13,2012-00
8-6<br />
8.3 Oxygen Concentration Alarms Setting<br />
The analyzer enables the setting of four alarms — high-high, high, low, and low-low alarms —<br />
depending upon the oxygen concentration. The following section sets out the alarm operations<br />
and setting procedures.<br />
8.3.1 Setting the Alarm Values<br />
(1) High-high and high alarm values<br />
If high-high and high alarm values are set to ON, then alarms occur if measured valves exceed<br />
the alarm set values. The oxygen alarm set values can be set in the range of 0 to 100 vol%O 2 .<br />
(2) Low and low-low alarm values<br />
If low-low and low alarm values are set, then alarms occur if measured values fall below the<br />
alarm set values. The oxygen alarm set values can be set in the range of 0 to 100 vol%O 2 .<br />
8.3.2 Alarm Output Actions<br />
If the measured values of the oxygen concentration fluctuate between normal (steady state)<br />
values and the alarm setting, alarm outputs may be frequently issued and canceled.<br />
To avoid this, set the alarm delay and hysteresis <strong>for</strong> alarm canceling under the alarm output<br />
conditions, as Figure 8.3 shows.<br />
When a delay time is set, an alarm will not be issued so quickly even if the measured value differs<br />
from the steady state and enters the alarm setpoint range.<br />
If the measured value remains within the alarm setpoint range <strong>for</strong> a certain period of time (<strong>for</strong> the<br />
preset delay time), an alarm will be issued. On the other hand, there will be a similar delay each<br />
time the measured value returns to the steady state from the alarm setpoint range (canceling the<br />
alarm status).<br />
If hysteresis is set, alarms will be canceled when the measured value is less than or greater than<br />
the preset hysteresis values.<br />
If both the delay time and hysteresis are set, an alarm will be issued if the measured value is in<br />
the alarm setpoint range and the delay time has elapsed.<br />
For the alarm to be reset (canceled), the measured value must be beyond the preset hysteresis<br />
value and the preset delay time must have elapsed.<br />
Refer to Figure 8.3 <strong>for</strong> any further alarm output actions. The delayed time and hysteresis settings<br />
are common to all alarm points.<br />
Alarm range<br />
A B C D<br />
7.5%<br />
High limit alarm setpoint<br />
5.5%<br />
Hysteresis<br />
2.0%<br />
Oxygen concentration<br />
Alarm output ON<br />
OFF<br />
Delay time:<br />
5 seconds<br />
Delay time:<br />
5 seconds<br />
Delay time:<br />
5 seconds<br />
F8.3E.ai<br />
Figure 8.3 Alarm Output Action<br />
IM 11M12A01-02E<br />
8th Edition : Jan.13,2012-00
8-7<br />
In the example in Figure 8.3, the high limit alarm point is set to 7.5 vol%O 2 , the delay time is set to<br />
five seconds, and hysteresis is set to 2 vol%O 2 .<br />
Alarm output actions in each section in this figure are as follows:<br />
A. Although the oxygen concentration value exceeds the high limit alarm setpoint, it falls below<br />
the high limit alarm setpoint be<strong>for</strong>e the preset delay time of five seconds elapses. So, no<br />
alarm is issued.<br />
B. The oxygen concentration value exceeds the high limit alarm setpoint and the delay time<br />
elapses during that measurement. So, an alarm is issued.<br />
C. Although the oxygen concentration value falls below the hysteresis set value, the value rises<br />
again and exceeds the hysteresis set value be<strong>for</strong>e the preset delay time elapses. So, the<br />
alarm is not canceled.<br />
D. The oxygen concentration value falls below the hysteresis set value and the preset delay<br />
time elapses, so the alarm is canceled.<br />
8.3.3 Alarm Setting Procedure<br />
To set the alarm setpoints, follow these steps:<br />
(1) Press the [Setup] key in the Basic panel display to display the Execution/Setup display.<br />
(2) Select “Commissioning” in the Execution/Setup display. The Commissioning (Setup) display<br />
then appears.<br />
(3) Select the “Alarms setup” in the Commissioning (Setup) display. The Alarms setup display<br />
shown in Figure 8.4 then appears.<br />
• To set the hysteresis, proceed to the following steps.<br />
(4) Select “Hysteresis” in the Alarms setup display. The numeric-data entry display then<br />
appears. Enter the desired hysteresis value as a percent of oxygen concentration. To set 2.5<br />
vol%O 2 , enter “0025.” The hysteresis setting can be in the range of 0 to 9.9 vol%O 2 .<br />
• To set the delay time, proceed as per the following steps.<br />
(5) Select the “Contact delay” in the Alarms setup display. The numeric-data entry display then<br />
appears. Enter the desired delay time, in seconds. To set three seconds, enter “003.” The<br />
delay time setting can be in the range of 0 to 255 seconds.<br />
• To set the alarm point, proceed to the following steps.<br />
(6) Select the “Setpoints” in the Alarms setup display. The Oxygen alarms display then appears,<br />
as shown in Figure 8.5.<br />
(7) When you select “High alarm” in the Oxygen alarms display, the “OFF” or “ON” selection<br />
display then appears. If you select “ON,” the High alarm will then be enabled (enable/<br />
disable).<br />
(8) To set the High alarm values select “Set value” just below the High alarm. The numeric-data<br />
entry display then appears. Enter the alarm set value (percent of oxygen concentration). If<br />
you want to set the alarm value to 10 vol%O 2 , enter “010.”<br />
(9) Set the other alarm settings in the same manner as in the steps above.<br />
NOTE<br />
No alarm is issued when alarm is set to “OFF” (disabled). To use the alarm functions, be sure to<br />
set the alarms “ON”.<br />
IM 11M12A01-02E<br />
8th Edition : Jan.13,2012-00
8-8<br />
Alarms setup<br />
Parameter: Oxygen<br />
Hysteresis: 0.1%O2<br />
Contact delay: 3 s<br />
Setpoints<br />
Enter<br />
Oxygen alarms<br />
High High alarm: OFF<br />
Set value: 1 0 0 . 0 % O2<br />
High alarm: ON<br />
Set value: 1 0 0 . 0 % O2<br />
Low alarm: OFF<br />
Set value: 0 . 0 % O2<br />
Low Low alarm: OFF<br />
Set value: 0 . 0 % O2 Enter<br />
Figure 8.4 Alarms Setup Display<br />
F8.4E.ai<br />
Figure 8.5 Oxygen Alarms Display<br />
F8.5E.ai<br />
8.3.4 Default Values<br />
When the analyzer is delivered, or if data are initialized, the default alarm set values are as<br />
shown in Table 8.3.<br />
Table 8.3 Alarm Setting Default Values<br />
Item Setting range Default setting<br />
Hysteresis 0 to 9.9 vol%O2 0.1 vol%O2<br />
Delay time 0 to 255 seconds 3 seconds<br />
High-high limit alarm<br />
OFF<br />
High-high limit alarm setpoint 0 to 100 vol%O2 100 vol%O2<br />
High limit alarm<br />
OFF<br />
High limit alarm setpoints 0 to 100 vol%O2 100 vol%O2<br />
Low limit alarm<br />
OFF<br />
Low limit alarm setpoint 0 to 100 vol%O2 0 vol%O2<br />
Low-low limit alarm<br />
OFF<br />
Low-low limit alarm setpoint 0 to 100 vol%O2 0 vol%O2<br />
IM 11M12A01-02E<br />
8th Edition : Jan.13,2012-00
8-9<br />
8.4 Output Contact Setup<br />
8.4.1 Output Contact<br />
Mechanical relays provide contact outputs. Be sure to observe relay contact ratings. (For details,<br />
see Section 2.1, General Specifications) The operation modes of each contact output are as<br />
follows. For output contacts 1 to 3 you can select open or closed contact when the contact is<br />
“operated”. Default is closed. For output contact 4, contact is closed.<br />
When power fails, contact outputs 1 to 3 are open, and 4 is closed.<br />
Table 8.4<br />
State when contact “ operated ”<br />
When no power is applied<br />
to this equipment<br />
Output contact 1 Open (deenergized) or closed (energized) selectable. Open<br />
Output contact 2 Open (deenergized) or closed (energized) selectable. Open<br />
Output contact 3 Open (deenergized) or closed (energized) selectable. Open<br />
Output contact 4 Closed (deenergized) only Closed<br />
8.4.2 Setting Procedure<br />
To set the output contact, follow these steps.<br />
(1) Press the [Setup] key in the Basic panel display to display the Execution/Setup display.<br />
(2) Select “Commissioning” in the Execution/Setup display. The Commissioning (Setup) display<br />
then appears.<br />
(3) Select the “Contact setup” in the Commissioning (Setup) display. The Contact setup display<br />
shown in Figure 8.6 then appears.<br />
(4) Select the desired output contact. This section shows an example where “Output contact1”<br />
is selected (see Figure 8.7).<br />
(5) Each set item and the selected items are briefly described in Table 8.5. The following<br />
describes an example of setting where Output contact 1 is closed during calibration.<br />
(6) Select “Others” in the Output contact 1 display. The “Contact1 Others” display shown in<br />
Figure 8.8 then appears. Select “Calibration” in the Contact1 Others display.<br />
(7) The ON or OFF selection display then appears. Select “ON” herein.<br />
(8) Press the [Reject] key to go back to the previous display.<br />
(9) Move the pointer to “During power-off the contact is open and in condition it is Open” and<br />
press the [Enter] key. The “OFF” or “ON” selection display then appears. If you select “OFF,”<br />
this means “Open” in normal conditions and “Closed” when the contact output is on.<br />
CAUTION<br />
• The contact output 4 is fixed as “ close in power ON”, which cannot be changed by setting.<br />
IM 11M12A01-02E<br />
8th Edition : Jan.13,2012-00
8-10<br />
Contact setup<br />
Output contact 1<br />
Output contact 2<br />
Output contact 3<br />
lnput contacts<br />
Output contact 1<br />
Alarms<br />
Others<br />
During power-off the<br />
contact is open and<br />
in condition it is Open<br />
Enter<br />
Enter<br />
Figure 8.6 Contact Setup Display<br />
F8.7E.ai<br />
Figure 8.7 Output Contact 1 Display<br />
F8.8E.ai<br />
Contact1 Others<br />
Warm up: ON<br />
Range change: OFF<br />
Calibration: OFF<br />
Maintenance: ON<br />
Blow back: OFF<br />
Temp.input high: OFF<br />
Cal.gas press.low: OFF<br />
Process up set: OFF<br />
Enter<br />
Figure 8.8 “Contact1 Others” Display<br />
F8.9E.ai<br />
IM 11M12A01-02E<br />
8th Edition : Jan.13,2012-00
8-11<br />
Table 8.5 Output Contact Settings<br />
Alarm<br />
and<br />
Error<br />
settings<br />
Other<br />
settings<br />
Item to be selected<br />
High-high limit alarm<br />
High limit alarm<br />
Low limit alarm<br />
Low-low limit alarm<br />
Calibration coefficient alarm<br />
Startup power stabilization<br />
timeout alarm<br />
Error<br />
Warm-up<br />
Output range change<br />
Calibration<br />
Maintenance<br />
Blow back<br />
High limit temperature alarm<br />
Calibration gas press. low<br />
Process upset<br />
Brief description<br />
If “High-High alarm ON” is selected, contact output occurs when the<br />
high-high limit is issued. To do this, it is required, in Alarms setup, that<br />
the high-high alarm be set on be<strong>for</strong>ehand (see Section 8.3).<br />
If “High alarm ON” is selected, contact output occurs when the high<br />
limit alarm is provided. To do this, it is required, in Alarms setup, that<br />
the high limit alarm be set on be<strong>for</strong>ehand (see Section 8.3).<br />
If “Low alarm ON” is selected, contact output occurs when the low<br />
limit alarm is provided. To do this, it is required, in Alarms setup, that<br />
the low limit alarm be set on be<strong>for</strong>ehand (see Section 8.3).<br />
If “Low-Low alarm ON” is selected, contact output occurs when the<br />
low-low limit alarm is issued. To do this, it is required, in Alarms setup,<br />
that the low-low alarm be set on be<strong>for</strong>ehand (see Section 8.3).<br />
If Calibration coefficient alarm is ON (enabled), then when a zero<br />
calibration coefficient alarm (Alarm 6) or span calibration coefficient<br />
alarm (Alarm 7) occurs then calibration coefficient alarm contact<br />
output occurs (see Sec. 12.2.1)<br />
If set ON then contact output occurs when startup power stabilization<br />
timeout alarm (Alarm 8) occurs (see Sec.12.2.1)<br />
If “Error ON” is selected, contact output occurs when an error is<br />
issued. (See Chapter 12, Troubleshooting).<br />
If “Warm-up ON” is selected, contact output occurs during warm-up.<br />
For the definition of Warm-up (see Section 8.2.1).<br />
If “Range change ON” is selected, contact output occurs (“answerback<br />
signal to a range change signal”) while a range change signal is<br />
applied to a contact input. To do this, it is required, in Input contacts<br />
setup, that the range change be selected be<strong>for</strong>ehand. For more on<br />
this (see Section 8.5).<br />
If “Calibration ON” is selected, contact output occurs during<br />
calibration. For the definition of Under calibration (see Section 8.2.1).<br />
If “Maintenance ON” is selected, contact output occurs during<br />
maintenance. For the definition of Under maintenance (see Section<br />
8.2.1).<br />
If “Blow back ON” is selected, contact output occurs during blow<br />
back. For the definition of During blow back (see Section 8.2.1).<br />
Not supported by the oxygen analyzer.<br />
If “Cal. gas press. low ON” is selected, contact output occurs<br />
(“answer-back signal to a calibration gas low pressure signal”)when<br />
a calibration gas low pressure signal is applied to the contact input.<br />
To do this, it is required, in Input contacts setup, that “Cal. gas press.<br />
low” be selected be<strong>for</strong>ehand. For more on this (see Section 8.5).<br />
If “Process upset” is selected, contact output occurs (“answer-back<br />
signal to a process upset signal) when the process upset signal is<br />
applied to the contact input. To do this, it is required, in Input contacts<br />
setup, that “Process upset” be selected be<strong>for</strong>ehand (see Section 8.5).<br />
Note: To provide an alarm with an output contact, be sure to make an alarm setting.<br />
When using contact output as an answer-back signal <strong>for</strong> an input contact, be sure to make an input contact setting.<br />
IM 11M12A01-02E<br />
8th Edition : Jan.13,2012-00
8-12<br />
8.4.3 Default Values<br />
When the analyzer is delivered, or if data are initialized, alarm and other setting defaults are as<br />
shown in Table 8.6.<br />
Table 8.6 Output Contact Default Settings<br />
Alarm<br />
settings<br />
Other<br />
settings<br />
Item to be selected<br />
High-high limit alarm<br />
Output<br />
contact 1<br />
Output<br />
contact 2<br />
Output<br />
contact 3<br />
Output<br />
contact 4<br />
<br />
High limit alarm ON <br />
Low limit alarm ON <br />
Low-low limit alarm<br />
Calibration coefficient alarm<br />
Startup power stabilization<br />
timeout alarm<br />
Error<br />
<br />
<br />
<br />
Warm-up ON <br />
Output range change<br />
ON<br />
<br />
Calibration ON <br />
Maintenance ON <br />
Blow back<br />
High limit temperature alarm<br />
<br />
<br />
Calibration gas press. low (default) (default) (default) <br />
Process upset<br />
Operating contact status Open Closed Closed<br />
Note: Blank boxes in the above table indicate that the default is “disabled“.<br />
<br />
Closed<br />
(fixed)<br />
IM 11M12A01-02E<br />
8th Edition : Jan.13,2012-00
8-13<br />
8.5 Input Contact Settings<br />
8.5.1 Input Contact Functions<br />
The converter input contacts execute set functions by accepting a remote dry-contact (“voltagefree<br />
contact”) signal. Table 8.7 shows the functions executed by a remote contact signal.<br />
Table 8.7 Input Contact Functions<br />
tem<br />
Calibration gas pressure low<br />
Function<br />
Contact input disables Semi-automatic or Automatic Calibration.<br />
Measuring range change While Contact signal is ON, range of mA-Output 1 is switched to 0-25<br />
vol%O2 and “Range” is displayed on the screen. See Figure 8.9.<br />
Calibration start<br />
Process upset<br />
(Combustible gas detection)<br />
Blow back start<br />
Contact input starts Semi-Automatic Calibration. Calibration Mode<br />
setting must be [Semi_Auto] or [Auto]. Contact signal must be<br />
applied <strong>for</strong> at least 1 sec. Even if input signal continues to be applied,<br />
calibration is not repeated unless contact input is released then<br />
reapplied.<br />
If the Contact signal is ON, heater power will be switched off. (A<br />
one- to 11-second time interval single-output signal is available as<br />
a contact signal.) If this operation starts, the sensor temperature<br />
decreases and an error occurs. To restore it to normal, turn the power<br />
off and then back on, or reset the analyzer.<br />
Contact input starts Blow back. Contact signal must be applied <strong>for</strong> at<br />
least 1 sec. Even if input signal continues to be applied, Blow back is<br />
not repeated unless contact input is released then reapplied. (Refer<br />
to Section 10.2, Blow Back.)<br />
Tag:<br />
21.0%O2<br />
7.35mA -Output1<br />
7.35mA -Output2<br />
Range<br />
F8.9E.ai<br />
Figure 8.9 Changing Measuring Range with Input Contact<br />
CAUTION<br />
1. Measurement range switching function by an external contact input is available <strong>for</strong> analog<br />
output1 only.<br />
2. When making a semi-automatic calibration, be sure to set the semi-automatic or automatic<br />
mode using the Calibration setup display.<br />
3. When carrying out “Blow back,” be sure to set “Blow back” in the output contact setup.<br />
4. When the combustible gas detection signal is sent to the contact input, the converter will cut<br />
the power supply to the heater of the detector. As a result, the heater temperature becomes<br />
low and Error 1 or Error 2 happens.<br />
IM 11M12A01-02E<br />
8th Edition : Jan.13,2012-00
8.5.2 Setting Procedure<br />
8-14<br />
This setting example shows how to set “When contact input 1 Opens, Start Semi_Auto<br />
Calibration”.<br />
1) From the Basic panel display touch [Setup] key, and the [Execution/Setup] display appears.<br />
2) Select “Commissioning” and the Commissioning display appears.<br />
3) Select “Contact Setup” then “Input contacts”.<br />
4) Select “Input 1” . Function Selection window (Fig 8.11) appears.<br />
5) Select “Calibration start”.<br />
6) For Input contact 1 select (operate if) “Closed”. (You can select “Open” or “Closed”).<br />
7) Change Closed to Open.<br />
Input contacts<br />
Input1: No function<br />
Input1 contact is active at:<br />
Closed<br />
Input2: No function<br />
Input2 contact is active at:<br />
Closed<br />
Enter<br />
Input contacts<br />
Input1: No function<br />
Input1 contact Cal. gas is press. active low at:<br />
Range change<br />
Calibration Closed start<br />
Input2: Process No function up set<br />
Blow back start<br />
Input2 contact is active at:<br />
Closed<br />
Enter<br />
Figure 8.10 Input Contacts Display<br />
F8.10E.ai<br />
Figure 8.11 Input Contacts Display<br />
F8.11.ai<br />
8.5.3 Default Values<br />
All contact inputs are set to “No function”(disabled) prior factory shipment or after data<br />
initialization..<br />
IM 11M12A01-02E<br />
8th Edition : Jan.13,2012-00
8-15<br />
8.6 Other Settings<br />
8.6.1 Setting the Date-and-Time<br />
The following describe how to set the date-and-time. Automatic calibration or blow back works<br />
following this setting.<br />
Proceed as follows:<br />
1) From the Basic panel display if you touch the [Setup] key, the Execution/Setup display<br />
appears.<br />
2) Select “Commissioning” and the Commissioning display appears.<br />
3) Select “Others” and the display of Fig 8.12 appears.<br />
4) Select “Clock” and the display of Fig 8.13 appears.<br />
5) Select “Set date” and the numerical entry display appears. To enter June 21. 2004 , enter<br />
210604. Touch the [Enter] key and you revert to the display of Fig 8.13.<br />
6) Select “Set time”. Enter the time in 24-hour <strong>for</strong>mat. To set 2:30 pm, enter 1430 on the<br />
numerical display and touch enter. Touch the [Enter] key. The clock starts from 00 seconds..<br />
Others<br />
Clock<br />
Averaging<br />
Fuel setup<br />
Purging<br />
Unit setup<br />
Passwords<br />
Defaults<br />
Enter<br />
F8.12E.ai<br />
Clock<br />
Set date: 1 3 / 0 7 / 0 0<br />
Set time: 1 4 : 3 9<br />
1 3 J ul. 2 0 0 0<br />
1 4 : 3 9 : 5 5<br />
Enter<br />
F8.13E.ai<br />
Figure 8.12 Other Settings<br />
Figure 8.13 Clock Display<br />
8.6.2 Setting Periods over which Average Values Are<br />
Calculated and Periods over which Maximum and<br />
Minimum Values Are Monitored<br />
The equipment enables the display of oxygen concentration average values and maximum and<br />
minimum values under measurement (see Section 10.1.1, later in this manual).<br />
The following section describes how to set the periods over which oxygen concentration average<br />
values are calculated and maximum and minimum values are monitored.<br />
8.6.2.1 Procedure<br />
1) From the Basic panel display touch [Setup] key, and the Execution/Setup display appears.<br />
2) Select “Commissioning” and the Commissioning display appears.<br />
3) Select “Others” then Averaging. The display of Fig. 8.14 appears.<br />
4) Select “Set period over which average is calculated” and numerical entry display appears.<br />
To set 3 hours, enter 003. Entry range is 1 to 255 hours.<br />
5) Select “Set period over which maximum and minimum is stored” and numerical entry display<br />
appears. To set 48 hours, enter 048. Entry range is 1 to 255 hours.<br />
IM 11M12A01-02E<br />
8th Edition : Jan.13,2012-00
8-16<br />
Averaging<br />
Set period over which<br />
average is calculated:<br />
1 h<br />
Set period over which<br />
maximum and minimum is<br />
stored: 2 4 h<br />
Enter<br />
F8.14E.ai<br />
Figure 8.14 Setting Average-Value Calculation Periods and<br />
Maximum- and Minimum-Value Monitoring Periods<br />
8.6.2.2 Default Values<br />
“Set period over which average is calculated” is set to 1hr, and “Set period over which maximum<br />
and minimum is stored” is set to 24 hrs prior factory shipment or after data initialization.. .<br />
8.6.3 Setting Fuels<br />
8.6.3.1 Input Parameters<br />
The analyzer calculates the moisture content contained in exhaust gases. The following sets<br />
<strong>for</strong>th the fuel parameters necessary <strong>for</strong> calculation and their entries. The moisture quantity may<br />
be mathematically expressed by:<br />
(water vapor caused by combustion and water vapor contained in the exhaust gas)<br />
+ (water vapor contained in air <strong>for</strong> combustion)<br />
Moisture quantity =<br />
x 100..... Equation 1<br />
actual exhaust gas (including water vapor) per fuel<br />
= (Gw + Gw1)/G x 100<br />
Gw + (1.61 x Z x m x Ao)<br />
=<br />
x 100 ............ Equation 2<br />
Go + Gw + [(m - 1) Ao + (1.61 x Z x m x Ao)]<br />
where,<br />
Gw + (1.61 x Z x m x Ao )<br />
X + Ao x m<br />
x 100<br />
Ao : Theoretical amount of air per unit quantity of fuel, m 3 /kg (or m 3 /m 3 ) ... 2 in Table 8.8<br />
G: Actual amount of exhaust gas (including water vapor) per unit quantity of fuel, m 3 /kg (or m 3 /m 3 )<br />
Gw : Water vapor contained in exhaust gas per unit quantity of fuel (by hydrogen<br />
and moisture content in fuel), m 3 /kg (or m 3 /m 3 ) ............ 1 in Table 8.8<br />
Gw1: Water vapor contained in exhaust gas per unit quantity of fuel (moisture content<br />
in air), m 3 /kg (or m 3 /m 3 )<br />
Go: Theoretical amount of dry exhaust gas per unit quantity of fuel, m 3 /kg (or m 3 /m 3 )<br />
m: Air ratio<br />
X : Fuel coefficient determined depending on low calorific power of fuel, m 3 /kg (or m 3 /m 3 ) ....... 3 in Table 8.8<br />
Z : Absolute humidity of the atmosphere, kg/kg ....... Figure 8.16<br />
Fill in the boxes with fuel parameters in Equation 2 above to calculate the moisture content.<br />
Use Ao, Gw and X shown in Table 8.8. If there are no appropriate fuel data in Table 8.8, use the<br />
following equations <strong>for</strong> calculation. Find the value of “Z” in Equations 1 and 2 using Japanese<br />
Standard JIS B 8222. If a precise measurement is not required, obtain the value of “Z” using a<br />
graph <strong>for</strong> the absolute humidity indicated by a dry and wet bulb hygrometer.<br />
IM 11M12A01-02E<br />
8th Edition : Jan.13,2012-00
8-17<br />
For liquid fuel<br />
3<br />
Amount of water vapor in exhaust gas (Gw) = (1/100) {1.24 (9h + w)} (m /kg)<br />
Theoretical amount of air (Ao) = 12.38 x (Hl/10000) – 1.36<br />
3<br />
(m /kg)<br />
Low calorific power = Hl<br />
X value = (3.37 / 10000) x Hx – 2.55 (m /kg)<br />
3<br />
where,<br />
Hl: low calorific power of fuel<br />
h: Hydrogen in fuel (weight percentage)<br />
w: Moisture content in fuel (weight percentage)<br />
Hx: Same as numeric value of Hl<br />
For gas fuel<br />
Amount of water vapor in exhaust gas (Gw) = (1/100) {(h2) + 1/2 ∑y (Cx Hy) + wv} (m /m )<br />
Theoretical amount of air (Ao) = 11.2 x (Hl/10000) (m /m )<br />
Low calorific power = Hl<br />
X value = (1.05 / 10000) x Hx (m /m )<br />
3<br />
3<br />
3<br />
3<br />
3<br />
3<br />
where,<br />
Hl: low calorific power of fuel<br />
CxHy: Each hydrocarbon in fuel (weight percentage)<br />
h2: Hydrogen in fuel (weight percentage)<br />
wv: Moisture content in fuel (weight percentage)<br />
Hx: Same as numeric value of Hl<br />
For solid fuel<br />
Amount of water vapor in exhaust gas (Gw) = (1/100) {1.24 (9h + w)} (m /kg)<br />
3<br />
Theoretical amount of air (Ao) = 1.01 x (Hl / 1000) + 0.56<br />
3<br />
(m /kg)<br />
Low calorific power = Hl = Hh – 25 (9h + w) (kJ/kg)<br />
X value = 1.11 - (0.106 / 1000 ) x Hx (m /m )<br />
3<br />
3<br />
where,<br />
w: Total moisture content in use (weight percentage)<br />
h: Hydrogen content (weight percentage)<br />
The average hydrogen content of coal mined in Japan, which is a dry ash-free type, is<br />
5.7 percent. Accordingly, "h" may be expressed mathematically by:<br />
h = 5.7 [{100 – (w + a)} / 100] x (100 – w) / (100 – w1)<br />
where, a: Ash content (%)<br />
w1: Moisture content (%), analyzed on a constant humidity basis<br />
Hh: Higher calorific power of fuel (kJ/kg)<br />
Hl: Low calorific power of fuel (kJ/kg)<br />
Hx: Same numeric value of Hl<br />
Figure 8.15 Calculation Formula<br />
IM 11M12A01-02E<br />
8th Edition : Jan.13,2012-00
8-18<br />
40<br />
39<br />
0.046<br />
38<br />
37<br />
36<br />
35<br />
34<br />
33<br />
32<br />
31<br />
0.044<br />
0.042<br />
0.040<br />
0.038<br />
0.036<br />
0.034<br />
0.032<br />
0.030<br />
30<br />
0.028<br />
Wet-bulb<br />
29<br />
temperature, °C<br />
28<br />
27<br />
26<br />
25<br />
24<br />
20<br />
22<br />
0.026<br />
0.024<br />
0.022<br />
0.020<br />
0.018<br />
0.016<br />
Absolute<br />
humidity, kg/kg<br />
18<br />
0.014<br />
0<br />
-2<br />
2<br />
4<br />
6<br />
8<br />
10<br />
12<br />
14<br />
16<br />
0.012<br />
0.010<br />
0.008<br />
0.006<br />
0.004<br />
0.002<br />
0.000<br />
0 2 4 6 8 10 12 14 16 18 20 22 24 26 28 30 32 34 36 38 40<br />
Dry-bulb temperature, °C<br />
F8.16E.ai<br />
Figure 8.16 Absolute Humidity of Air<br />
IM 11M12A01-02E<br />
8th Edition : Jan.13,2012-00
8-19<br />
Table 8.8 Fuel Data<br />
• For liquid fuel<br />
Type<br />
Kerosene<br />
Light oil<br />
A<br />
B<br />
Fuel<br />
properties<br />
Heavy<br />
oil<br />
class<br />
1<br />
No.1<br />
No.2<br />
Heavy oil<br />
class 2<br />
No.1<br />
weight<br />
kg/l<br />
0.78~<br />
0.83<br />
0.81~<br />
0.84<br />
0.85~<br />
0.88<br />
0.83~<br />
0.89<br />
0.90~<br />
0.93<br />
0.93~<br />
0.95<br />
Ash Higher Lower<br />
C H O N S w content<br />
Nm 3/ kg<br />
order order<br />
CO2 H2O SO2 N2<br />
85.7 14.0<br />
85.6 13.2<br />
85.9 12.0<br />
84.6 11.8<br />
84.5 11.3<br />
86.1 10.9<br />
Chemical component<br />
(weight percentage)<br />
0.7<br />
0.7<br />
0.4<br />
0.5<br />
0.5<br />
0.5<br />
0.4<br />
0.4<br />
0.5<br />
1.2<br />
0.5<br />
2.0<br />
3.0<br />
1.5<br />
0.0 0.0<br />
0.0 0.0<br />
0.3<br />
0.4<br />
0.5<br />
0.5<br />
0.05<br />
0.05<br />
0.05<br />
0.1<br />
Calorific power<br />
kJ/kg<br />
46465<br />
45879<br />
45544<br />
45125<br />
43827<br />
43952<br />
43535<br />
43032<br />
42739<br />
42320<br />
41274<br />
41441<br />
Theoretical<br />
amount of<br />
air <strong>for</strong><br />
combustion<br />
11.4<br />
11.2<br />
10.9<br />
10.8<br />
10.7<br />
10.7<br />
Amount of combustion<br />
gas Nm 3 /kg<br />
1.59 1.56 0.00 9.02 12.17 0.96<br />
1.59<br />
Total<br />
1.47 0.00 8.87 11.93<br />
1.60 1.34 0.00 8.61 11.55<br />
1.58 1.32 0.01 8.53 11.44<br />
1.58 1.27 0.02 8.44 11.31<br />
1.61 1.22 0.01 8.43 11.27<br />
X<br />
value<br />
0.91<br />
0.89<br />
0.86<br />
0.77<br />
0.79<br />
C<br />
Heavy<br />
oil<br />
class<br />
3<br />
No.2<br />
No.3<br />
0.94~<br />
0.96<br />
0.92~<br />
1.00<br />
84.4 10.7<br />
86.1 10.9<br />
0.5<br />
0.5<br />
0.4<br />
0.4<br />
3.5<br />
1.5<br />
0.5<br />
0.6<br />
0.1<br />
0.1<br />
43116<br />
43660<br />
40646<br />
41190<br />
10.5<br />
10.7<br />
1.58 1.20 0.02 8.32 11.12<br />
1.61 1.22 0.01 8.43 11.27<br />
0.72<br />
0.77<br />
No.4<br />
0.94~<br />
0.97<br />
83.0 10.5<br />
0.5<br />
0.4<br />
3.5<br />
2.0<br />
0.1<br />
43032<br />
40604<br />
10.3<br />
1.55<br />
1.18 0.02<br />
8.18<br />
10.93<br />
0.72<br />
Specific<br />
• For gas fuel<br />
Type<br />
Coke oven<br />
gas<br />
Blast furnace<br />
gas<br />
Natural gas<br />
Propane<br />
Butane<br />
(Gases)<br />
Oxygen<br />
Nitrogen<br />
Fuel<br />
properties<br />
Specific<br />
weight<br />
kg/Nm 3<br />
0.544<br />
1.369<br />
0.796<br />
2.030<br />
2.530<br />
1.43<br />
1.25<br />
CO<br />
9.0<br />
Theoretical amount of air<br />
Combustion<br />
Chemical component Calorific power Theoretical<br />
product,<br />
kJ/Nm 3 amount of<br />
(weight percentage)<br />
air <strong>for</strong><br />
Nm 3 / m 3<br />
combustion<br />
Higher Lower<br />
H2 CO2 CH4 CmHn O2 N2 Nm 3 /m<br />
order order<br />
3 CO2 H2O N2 Total<br />
50.5 2.6 25.9 3.9 0.1 8.0 20428 18209<br />
25.0 2.0 20.0 53.0<br />
C3H8<br />
90%, C4H10 10%<br />
C3H8 10%, C4H10 90%<br />
(Molecular Formula)<br />
O2<br />
N2<br />
2.0 88.4 3.2 1.6 4.2<br />
3391 3349<br />
37883 34074<br />
102055 93976<br />
125496 115868<br />
2 1 3<br />
4.455<br />
0.45 1.10 3.60 5.15<br />
X<br />
value<br />
0.46<br />
0.603 0.45 0.02 1.01 1.48 0.08<br />
9.015 0.98 1.88 7.17 10.03 0.86<br />
24.63<br />
30.37<br />
3.10 4.10<br />
3.90 4.90<br />
19.5<br />
24.0<br />
26.7<br />
32.8<br />
2.36<br />
2.91<br />
Hydrogen<br />
Carbon<br />
monoxide<br />
Carbon dioxide<br />
0.09<br />
1.25<br />
1.96<br />
H2<br />
CO<br />
CO2<br />
12767 10758<br />
12642 12642<br />
2.390<br />
2.390<br />
1.0<br />
1.0<br />
1.89<br />
1.89<br />
2.89<br />
2.89<br />
0.27<br />
0.32<br />
Methane<br />
0.72<br />
CH4<br />
39750<br />
35820<br />
9.570<br />
1.0<br />
2.0<br />
7.57<br />
10.6<br />
0.90<br />
Ethane<br />
1.34<br />
C2H6<br />
69638<br />
63744<br />
16.74<br />
2.0<br />
3.0<br />
13.2<br />
18.2<br />
1.60<br />
Ethylene<br />
1.25<br />
C2H4<br />
62991<br />
59060<br />
14.35<br />
2.0<br />
2.0<br />
11.4<br />
15.4<br />
1.48<br />
Propane<br />
1.97<br />
C3H8<br />
99070<br />
91255<br />
23.91<br />
3.0<br />
4.0<br />
18.9<br />
25.9<br />
2.29<br />
Butane<br />
2.59<br />
C4H10<br />
128452118623<br />
31.09<br />
4.0<br />
5.0<br />
24.6<br />
33.6<br />
2.98<br />
2 1 3<br />
T8.8E.ai<br />
IM 11M12A01-02E<br />
8th Edition : Jan.13,2012-00
8.6.3.2 Procedure<br />
To make a fuel setting, follow these steps:<br />
8-20<br />
(1) Press the [Setup] key in the Basic panel display to display the Execution/Setup display.<br />
(2) Select “Commissioning” in the Execution/Setup display. The Commissioning (Setup) display<br />
then appears.<br />
(3) Select “Others” in that display and then the Fuel setup shown in Figure 8.17.<br />
(4) Choose the “Theoretical air quantity required” and the “Contents of moisture in exhaust gas”<br />
in turn. The numeric-data entry display then appears. Enter numeric data using the numeric<br />
keys.<br />
(5) Choose “more” in the Fuel setup display. The Fuel setup shown in Figure 8.18 then appears.<br />
(6) Set the numeric data to the “Value of the X coefficient” and then to the “Absolute humidity of<br />
the atmosphere”.<br />
(7) Choose “finished” to return to the display shown in Figure 8.17.<br />
Fuel setup<br />
See <strong>Manual</strong> <strong>for</strong> details!<br />
Contents of moisture in<br />
exhaust gas: 1. 0 0 m 3 /kg<br />
Theoretical air quantity<br />
required: 1. 0 0 m 3 /kg<br />
more.....<br />
Fuel setup<br />
Value of the X coefficient:<br />
1 . 0 0<br />
Absolute humidity of the<br />
atmosphere:<br />
0. 1 0 0 0 kg/kg<br />
finished.<br />
Enter<br />
Enter<br />
Figure 8.17 Fuel Setup<br />
F8.17E.ai<br />
Figure 8.18 Fuel Setup<br />
F8.18E.ai<br />
8.6.3.3 Default Values<br />
When the analyzer is delivered, or if data are initialized, default, parameter settings are as shown<br />
in Table 8.9.<br />
Table 8.9 Default Settings <strong>for</strong> Fuel Values<br />
Item<br />
Default setting<br />
Amount of water vapor in exhaust gas 0.00 m 3 /kg (m 3 )<br />
Theoretical amount of air 1.00 m 3 /kg (m 3 )<br />
X value 1.00<br />
Absolute humidity of the atmosphere<br />
0.0 kg/kg<br />
IM 11M12A01-02E<br />
8th Edition : Jan.13,2012-00
8.6.4 Setting Purging<br />
8-21<br />
Purging is to remove condensed water in the calibration gas pipe by supplying a span calibration<br />
gas <strong>for</strong> a given length of time be<strong>for</strong>e warm-up of the detector. This prevents cell breakage during<br />
calibration due to condensed water in the pipe.<br />
Open the solenoid valve <strong>for</strong> the automatic calibration span gas during purging and after the purge<br />
time has elapsed, close the valve to start warm-up.<br />
Purging is enabled when the cell temperature is 100 °C or below upon power up and the purge<br />
time is set in the range of 1 to 60 minutes.<br />
Tag:<br />
30°C<br />
4mA -Output1<br />
4mA -Output2<br />
Purge<br />
Hold<br />
F8.19.ai<br />
Figure 8.19 Display during Purging<br />
8.6.4.1 Procedure<br />
Set the purging time as follows:<br />
(1) Press the [Setup] key in the Basic panel display to display the Execution/Setup display.<br />
(2) Select “Commissioning” in the Execution/Setup display. The Commissioning (Setup) display<br />
then appears.<br />
(3) Select “Others” in that display and the Others display then appears, as shown in Figure<br />
8.20.<br />
(4) Select “Purging”. The purging time setting display appears, as shown in Figure 8.21.<br />
(5) Point to the “Purging time” and press the [Enter] key. Then the display <strong>for</strong> selecting purging<br />
time appears.<br />
(6) Enter the desired numeric value from the numeric-data entry display.<br />
The allowable input ranges from 0 to 60 minutes.<br />
Others<br />
Clock<br />
Averaging<br />
Fuel setup<br />
Purging<br />
Unit setup<br />
Passwords<br />
Defaults<br />
Figure 8.20 Other Settings<br />
Enter<br />
F8.20.ai<br />
Purging<br />
Purging time: 0 min<br />
Figure 8.21 Purging Display<br />
Enter<br />
F8.21E.ai<br />
IM 11M12A01-02E<br />
8th Edition : Jan.13,2012-00
8.6.5 Setting Passwords<br />
8-22<br />
Unauthorized access to lower level menu displays from the Execution/Setup display can be<br />
protected by passwords. You can set separate passwords <strong>for</strong> Calibration, Blow back, and<br />
Maintenance and <strong>for</strong> Commissioning<br />
Proceed as follows:<br />
1) From the Basic panel display touch the [Setup] key, and the Execution/Setup display<br />
appears.<br />
2) Select “Commissioning” , and the Commissioning display appears.<br />
3) Select “Others” then “Passwords”. The display shown in Fig. 8.22 appears.<br />
First set the password <strong>for</strong> Calibration, Indication Check, Blow back, and Maintenance:<br />
4) Select “Calibration, Blow back, and Maintenance”.<br />
5) A text entry display appears. Enter password as up to 8 alphanumeric characters.<br />
6) You can enter a password <strong>for</strong> Commissioning by the same procedure.<br />
7) Record the passwords and look after them carefully.<br />
Passwords<br />
Calibration,Blow back<br />
and Maintenance:<br />
Commissioning:<br />
Enter<br />
Figure 8.22 Passwords Display<br />
F8.22E.ai<br />
<br />
The passwords are not set as shipped from factory. If you reset initialize the parameters, and<br />
password settings are deleted.<br />
If you <strong>for</strong>get a password, select “Commissioning” in the Execution/Setup display, and enter<br />
“MOON.” By doing so, you can enter the Commissioning display only. Then display the<br />
Passwords and verify the set passwords.<br />
IM 11M12A01-02E<br />
8th Edition : Jan.13,2012-00
9-1<br />
9. Calibration<br />
9.1 Calibration Briefs<br />
9.1.1 Principle of Measurement<br />
This section sets <strong>for</strong>th the principles of measurement with a zirconia oxygen analyzer be<strong>for</strong>e<br />
detailing calibration.<br />
A solid electrolyte such as zirconia allows the conductivity of oxygen ions at high temperatures.<br />
There<strong>for</strong>e, when a zirconia-plated element with platinum electrodes on both sides is heated up<br />
in contact with gases having different oxygen partial pressures on each side, the element shows<br />
the action of the concentration cell. In other words, the electrode in contact with a gas with a<br />
higher oxygen partial pressure acts as a negative electrode. As the gas comes in contact with the<br />
zirconia element in this negative electrode, oxygen molecules in the gas acquire electrons and<br />
become ions. Moving in the zirconia element, they eventually arrive at the positive electrode on<br />
the opposite side.<br />
There, the electrons are released and the ions return to the oxygen molecules. This reaction is<br />
indicated as follows:<br />
Negative electrode: O 2 + 4e 2 O 2-<br />
Positive electrode: 2 O 2-<br />
O 2 + 4 e<br />
The electromotive <strong>for</strong>ce E (mV) between the two electrodes, generated by the reaction, is<br />
governed by Nernst’s equation as follows:<br />
E = -RT/nF ln Px/Pa ........................................ Equation (1)<br />
where,<br />
R: Gas constant<br />
T: Absolute temperature<br />
n: 4<br />
F: Faraday’s constant<br />
Px: Oxygen concentration in a gas in contact with the positive zirconia<br />
electrode (%)<br />
Pa: Oxygen concentration in a gas in contact with the negative zirconia<br />
electrode (%)<br />
Assuming the zirconia element is heated up to 750 °C, then we obtain equation (2) below.<br />
E = −50.74 log Px<br />
Pa ................................. Equation (2)<br />
With this analyzer, the sensor (zirconia element) is heated up to 750 °C, so Equation (2) is valid.<br />
At that point, the relationship as in Figure 9.1 is effected between the oxygen concentration of the<br />
sample gas in contact with the positive electrode and the electromotive <strong>for</strong>ce of the sensor (cell),<br />
where a comparison gas of air is used on the negative electrode side.<br />
IM 11M12A01-02E<br />
8th Edition : Jan.13,2012-00
9-2<br />
120<br />
100<br />
0.51 vol% O2,81.92mV(Zero origin of calibration)<br />
80<br />
Cell<br />
voltage<br />
(mV)<br />
60<br />
40<br />
20<br />
0<br />
21.0 vol% O2, 0mV<br />
(Span origin of calibration)<br />
-20<br />
-40<br />
0.1 0.5 1 5 10 21.0 50 100<br />
Oxygen concentration (vol % O2)<br />
Figure 9.1 Oxygen concentration in a Sample Gas vs Cell Voltage (21 vol%O 2 Equivalent)<br />
F9.1E.EPS<br />
The measurement principles of a zirconia oxygen analyzer have been described above.<br />
However, the relationship between oxygen concentration and the electromotive <strong>for</strong>ce of a cell is<br />
only theoretical. Usually, in practice, a sensor shows a slight deviation from the theoretical value.<br />
This is the reason why calibration is necessary. To meet this requirement, an analyzer calibration<br />
is conducted so that a calibration curve is obtained, which corrects the deviation from the<br />
theoretical cell electromotive <strong>for</strong>ce.<br />
9.1.2 Calibration Gas<br />
A gas with a known oxygen concentration is used <strong>for</strong> calibration. Normal calibration is per<strong>for</strong>med<br />
using two different gases: a zero gas of low oxygen concentration and a span gas of high oxygen<br />
concentration. In some cases, only one of the gases needs to be used <strong>for</strong> calibration. However,<br />
even if only one of the gases is normally used, calibration using both gases should be done at<br />
least once.<br />
The zero gas normally used has an oxygen concentration of 0.95 to 1.0 vol%O 2 with a balance of<br />
nitrogen gas (N 2 ). The span gas widely used is clean air (at a dew-point temperature below -20<br />
°C and free of oily mist or dust, as in instrument air).<br />
For best accuracy, as the span gas use oxygen whose concentration is near the top of the<br />
measurement range, in a nitrogen mixture.<br />
IM 11M12A01-02E<br />
8th Edition : Jan.13,2012-00
9.1.3 Compensation<br />
9-3<br />
The deviation of a measured value from the theoretical cell electromotive <strong>for</strong>ce is checked by the<br />
method in Figure 9.2 or 9.3.<br />
Figure 9.2 shows a two-point calibration using two gases: zero and span. Cell electromotive<br />
<strong>for</strong>ces <strong>for</strong> a span gas with an oxygen concentration p1 and a zero gas with an oxygen<br />
concentration p2 are measured while determining the calibration curve passing between these<br />
two points. The oxygen concentration of the sample gas is determined from this calibration<br />
curve. In addition, the calibration curve corrected by calibration is compared with the theoretical<br />
calibration curve <strong>for</strong> determining the zero-point correction ratio represented by B/A x 100 (%) on<br />
the basis of A, B and C shown in Figure 9.2 and a span correction ratio of C/A x 100 (%). If the<br />
zero-point correction ratio exceeds the range of 100 ± 30% or the span correction ratio becomes<br />
larger than 0 ± 18%, calibration of the sensor becomes impossible.<br />
81.92<br />
ez<br />
Zero origin<br />
e2<br />
Cell<br />
electromotive<br />
<strong>for</strong>ce, mV<br />
Calibration curve<br />
be<strong>for</strong>e correction<br />
B<br />
A<br />
es<br />
C<br />
0<br />
e1<br />
Corrected calibration<br />
curve (theoretical<br />
calibration curve)<br />
21.0 p1 p2 0.51<br />
Span gas concentration Zero gas concentration<br />
Oxygen concentration (vol%O2)<br />
Span origin<br />
Zero-point correction ratio = (B/A) x 100 (%) Correctable range: 100 ± 30%<br />
Span correction ratio = (C/A) x 100 (%) Correctable range: 0 ± 18%<br />
Figure 9.2 Calculation of a Two-point Calibration Curve and Correction Ratios using Zero and<br />
Span Gases<br />
Figure 9.3 shows a one-point calibration using only a span gas. In this case, only the cell<br />
electromotive <strong>for</strong>ce <strong>for</strong> a span gas with oxygen concentration p1 is measured. The cell<br />
electromotive <strong>for</strong>ce <strong>for</strong> the zero gas is carried over from a previous measurement to obtain the<br />
calibration curve. The principle of calibration using only a span gas also applies to the one-point<br />
calibration method using a zero gas only.<br />
F9.2E.ai<br />
81.92<br />
ez<br />
Zero origin<br />
Cell<br />
electromotive<br />
<strong>for</strong>ce, mV<br />
Calibration curve be<strong>for</strong>e<br />
correction<br />
Previous<br />
zero gas data<br />
B<br />
A<br />
es<br />
C<br />
0<br />
e1<br />
Corrected calibration curve<br />
(theoretical calibration curve)<br />
21.0 p1 0.51<br />
Span gas concentration<br />
Oxygen concentration (vol%O2)<br />
Zero point correction ratio = (B/A) x 100 (%) Correctable range: 100 ± 30%<br />
Span correction ratio = (C/A) x 100 (%) Correctable range: 0 ± 18%<br />
Span origin<br />
F9.3E.ai<br />
Figure 9.3 Calculation of a One-point Calibration Curve and Correction Ratios using a Span Gas<br />
IM 11M12A01-02E<br />
8th Edition : Jan.13,2012-00
9-4<br />
9.1.4 Characteristic Data from a Sensor Measured During<br />
Calibration<br />
During calibration, calibration data and sensor status data (listed below) are acquired.<br />
However, if the calibration is not properly conducted (an error occurs in automatic or semiautomatic<br />
calibration), these data are not collected in the current calibration.<br />
These data can be observed by selecting the [Detailed-data] key from the Basic panel display.<br />
For an explanation and the operating procedures of individual data, consult Section 10.1.1,<br />
Detailed-data Display.<br />
(1) Record of span correction ratio<br />
Recorded the past ten span correction ratios.<br />
(2) Record of zero correction ratio<br />
Recorded the past ten zero correction ratios.<br />
(3) Response time<br />
You can monitor the response time provided that a two-point calibration has been done in semiautomatic<br />
or automatic calibration.<br />
(4) Cell’s internal resistance<br />
The cell’s internal resistance gradually increases as the cell (sensor) deteriorates. You can<br />
monitor the values measured during the latest calibration. However, these values include the<br />
cell’s internal resistance and other wiring connection resistance. So, the cell’s degrading cannot<br />
be estimated from these values only.<br />
When only a span calibration has been made, these values will not be measured, and previously<br />
measured values will remain.<br />
(5) Robustness of a cell<br />
The robustness of a cell is an index <strong>for</strong> predicting the remaining life of a sensor and is expressed<br />
in a number on four levels.<br />
IM 11M12A01-02E<br />
8th Edition : Jan.13,2012-00
9-5<br />
9.2 Calibration Procedures<br />
NOTE<br />
Calibration should be made under normal operating conditions (if the probe is connected to a<br />
furnace, the analyzer will undergo calibration under the operating conditions of the furnace).<br />
To make a precise calibration, conduct both zero and span calibrations.<br />
9.2.1 Calibration Setting<br />
9.2.1.1 Mode<br />
The following sets <strong>for</strong>th the required calibration settings:<br />
There are three calibration modes available:<br />
(1) <strong>Manual</strong> calibration which allows zero and span calibrations or either one manually in turn;<br />
(2) Semi-automatic calibration which lets calibration start with the touchpanel or a contact input,<br />
and undergoes a series of calibration operations following preset calibration interval and<br />
stabilization time.<br />
(3) Automatic calibration which is carried out automatically following preset calibration interval.<br />
Calibrations are limited by the following mode selection:<br />
• When <strong>Manual</strong> calibration is selected:<br />
<strong>Manual</strong> calibration only can be conducted. (This mode does not allow semi-automatic calibration<br />
with a contact input nor automatic calibration even when its start-up time has reached.)<br />
• When Semi-automatic calibration is selected:<br />
This mode enables manual and semi-automatic calibrations to be conducted. (The mode,<br />
however, does not allow automatic calibration even when its start-up time has reached.)<br />
• When Automatic calibration is selected:<br />
This calibration can be conducted in any mode.<br />
To execute this calibration, follow these steps:<br />
(1) Select the [Setup] key from the Basic panel display to display the Execution/Setup display.<br />
Then select “Maintenance” from the Execution/Setup display.<br />
(2) Select “Calibration setup” from the Maintenance display. Then select “Mode” from the<br />
Calibration setup display (see Figure 9.4).<br />
Now you can select “<strong>Manual</strong>”, “Semi_Auto”, or “Auto” calibration.<br />
IM 11M12A01-02E<br />
8th Edition : Jan.13,2012-00
9.2.1.2 Calibration Procedure<br />
9-6<br />
Select both span and zero calibrations or span calibration only or zero calibration only.<br />
Usually select span and zero calibrations.<br />
Select “Points” from the Calibration setup display and then you can select “Both,” “Span” or<br />
“Zero” (see Figure 9.5).<br />
Calibration setup<br />
Mode: <strong>Manual</strong><br />
Points:<br />
Semi_Auto<br />
Auto<br />
Zero gas conc: 1 . 0 0 %<br />
Span gas conc: 2 1 . 0 0 %<br />
Timing<br />
Calibration setup<br />
Mode: <strong>Manual</strong><br />
Points: Both<br />
Zero gas<br />
Span<br />
conc: 1 . 0 0 %<br />
Zero<br />
Span gas conc: 21 . 0 0 %<br />
Timing<br />
Enter<br />
Enter<br />
Figure 9.4 Calibration Setup display<br />
F9.4E.ai<br />
Figure 9.5 Calibration Setup display<br />
F9.5E.ai<br />
9.2.1.3 Zero gas Concentration<br />
Set the oxygen concentration <strong>for</strong> zero-point calibration. Enter the oxygen concentration <strong>for</strong> the<br />
zero gas in the cylinder used in the following procedures:<br />
Select “Zero gas conc” from the Calibration setup display. The numeric-data entry display then<br />
appears. Enter the desired oxygen concentration <strong>for</strong> the zero-point calibration. (The zero gas set<br />
ranges from 0.3 to 100 vol%O 2 .)<br />
Enter 00098 <strong>for</strong> an oxygen concentration of 0.98 vol%O 2 .<br />
9.2.1.4 Span gas Concentration<br />
Set the oxygen concentration <strong>for</strong> span calibration. If instrument air is used as the span gas, enter<br />
21% O 2 .<br />
Select “Span gas conc” from the Calibration setup display. Enter the desired span gas oxygen<br />
concentration from the numeric-data entry display.<br />
(The span gas set ranges from 4.5 to 100 vol%O 2 .)<br />
Enter 02100 <strong>for</strong> an oxygen concentration of 21 vol%O 2 .<br />
Instrument air is here defined as dry air with a dew-point temperature of no higher than -20 °C. If<br />
the dew-point temperature is higher than -20 °C, use a hand-held oxygen analyzer to measure<br />
the actual oxygen concentration.<br />
When using the ZO21S Standard Gas Unit (<strong>for</strong> use of the atmospheric air as a span gas), use a<br />
hand-held oxygen analyzer to measure the actual oxygen concentration, and then enter it.<br />
NOTE<br />
(1) When the instrument air supply is to be used as span gas, cool it to -20 °C below dew point<br />
to remove moisture, oil mist and dust from the air.<br />
(2) If you do not do this to purify the air, then the accuracy of the calibration may be affected.<br />
IM 11M12A01-02E<br />
8th Edition : Jan.13,2012-00
9-7<br />
9.2.1.5 Setting Calibration Time<br />
• When the calibration mode is in manual:<br />
First set the “Hold time” (output stabilization time). This indicates the time required from the<br />
end of calibration to entering a measurement again. This time, after calibration, the sample<br />
gas enters the sensor to set the time until the output returns to normal. The output remains<br />
held after completing the calibration operation until the hold (output stabilization) time elapses.<br />
The calibration time set ranges from 00 minutes, 00 seconds to 60 minutes, 59 seconds. For<br />
more details, consult Section 8.2, Output Hold Setting. When the calibration mode is in semiautomatic,<br />
set the hold (output stabilization) time and calibration time. The calibration time is the<br />
time required from starting the flow of the calibration gas to reading out the measured value. The<br />
set calibration time is effective in conducting both zero and span calibrations. The calibrationtime<br />
set ranges from 00 minutes, 00 seconds to 60 minutes, 59 seconds. Figure 9.6 shows the<br />
relationship between the calibration time and hold (output stabilization) time.<br />
Calibration start<br />
(contact or switch input)<br />
Span calibration<br />
(span gas valve open)<br />
Calibration time<br />
Zero calibration<br />
(zero gas valve open)<br />
Calibration time<br />
Analog output status<br />
Hold (output<br />
stabilization) time<br />
Analog output remains held<br />
(when output remains held)<br />
F9.6E.ai<br />
Figure9.6 Calibration and Hold Time Settings<br />
• When the calibration mode is in automatic:<br />
In addition to the above Hold (output stabilization) time and Calibration time, set the Interval, Start<br />
date, and Start time.<br />
Interval means the calibration intervals ranging from 000 days, 00 hours to 255 days, 23 hours.<br />
Set the first calibration day and the start-calibration time to the “Start date” and “Start time”<br />
respectively. For example, to start the first calibration at 1:30 p.m. on March 25, 2001, enter<br />
25/03/01 to the start date and 13 hours, 30 minutes to the start time, following the steps below:<br />
(1) Select the “Calibration timing” display. A panel display as shown in Figure 9.7 appears.<br />
(2) Select each item <strong>for</strong> the calibration to display the numeric-data entry display. Enter the<br />
desired numeric values <strong>for</strong> the calibration.<br />
Calibration timing<br />
Hold time: 1 0 min 0 0 s<br />
Cal time: 1 0 min 0 0 s<br />
lnterval: 3 0 d 0 0 h<br />
Start date: 0 1 / 0 1 / 0 0<br />
Start time: 0 0 : 0 0<br />
Enter<br />
Figure 9.7 Calibration Timing Display<br />
F9.7E.ai<br />
IM 11M12A01-02E<br />
8th Edition : Jan.13,2012-00
9-8<br />
NOTE<br />
When setting calibration timing requirements, bear the following precautions in mind:<br />
(1) If the calibration interval is shorter than the sum of hold (output stabilization) time plus<br />
calibration time, the second calibration start time will conflict with the first calibration. In such<br />
a case, the second calibration will not be conducted. (When both zero and span calibrations<br />
are to be per<strong>for</strong>med, the calibration time is double that required <strong>for</strong> a single (zero or span)<br />
calibration.)<br />
(2) For the same reason, if the calibration start time conflicts with manual calibration or semiautomatic<br />
calibration, the current calibration will not be conducted.<br />
(3) If the calibration time conflicts with maintenance service or blow back operations, calibration<br />
will start after completing the maintenance service or blow back operations (see Section<br />
8.2.1, earlier in this manual).<br />
(4) If 000 days, 00 hours are set <strong>for</strong> the calibration intervals, only the first calibration will be<br />
conducted; a second or later calibration will not be conducted.<br />
(5) If a past date is set to the calibration start day, no calibration will be conducted.<br />
9.2.2 Default Values<br />
When the analyzer is delivered, or if data are initialized, the calibration settings are by default, as<br />
shown in Table 9.1.<br />
Table 9.1 Default Settings <strong>for</strong> Calibration<br />
Calibration mode<br />
Item<br />
Calibration procedure<br />
<strong>Manual</strong><br />
Default Setting<br />
Span - zero<br />
Zero gas (oxygen) concentration 1.00%<br />
Span gas (oxygen) concentration 21.00%<br />
Hold (output stabilization) time<br />
Calibration time<br />
Calibration interval<br />
10 minutes, 00 seconds<br />
10 minutes, 00 seconds<br />
30 days, 00 hours<br />
Start date 01 / 01 / 00<br />
Start time 0:00<br />
IM 11M12A01-02E<br />
8th Edition : Jan.13,2012-00
9-9<br />
9.2.3 Calibration<br />
NOTE<br />
1) Per<strong>for</strong>m calibration under normal working conditions (e.g. continuous operation with sensor<br />
mounted on furnace).<br />
2) Per<strong>for</strong>m both Span and Zero calibration <strong>for</strong> best resultant accuracy.<br />
3) When instrument air is used <strong>for</strong> the span calibration, remove the moisture from the<br />
instrument air at a dew-point temperature of -20 °C and also remove any oily mist and dust<br />
from that air.<br />
4) If dehumidifying is not enough, or if foul air is used, the measurement accuracy will be<br />
adversely affected.<br />
9.2.3.1 <strong>Manual</strong> Calibration<br />
For manual calibration, consult Section 7.12, Calibration, earlier in this manual.<br />
9.2.3.2 Semi-automatic Calibration<br />
To start calibration, follow these steps:<br />
(1) Press the [Setup] key in the Basic panel display to display the Execution/Setup display.<br />
Then select “Calibration” from the Execution/Setup display. The Calibration display shown in<br />
Figure 9.8 appears.<br />
(2) Select “Semi-auto calibration” to display the Semi-auto calibration display shown in Figure<br />
9.9.<br />
(3) Select “Start calibration”. The display shown in Figure 9.10 appears, and then start<br />
calibration.<br />
Calibration<br />
<strong>Manual</strong> calibration<br />
Semi-auto calibration<br />
Enter<br />
Semi-auto calibration<br />
Check settings<br />
Zero gas conc: 1 . 0 0 %<br />
Span gas conc: 2 1 . 0 0 %<br />
Cal time: 1 0 min 0 0 s<br />
Go to setup to change value.<br />
Start calibration<br />
Cancel calibration<br />
Enter<br />
F9.8E.ai<br />
F9.9E.ai<br />
Figure 9.8 Calibration Display<br />
Figure 9.9 Semi-auto Calibration Display<br />
Semi-auto calibration<br />
2 1 . 0 0%<br />
0.5min./div<br />
1 . 0 0%<br />
2 1 . 0 % O2 CAL. TIME<br />
F9.10E.ai<br />
Figure 9.10 Semi-auto Calibration Display<br />
IM 11M12A01-02E<br />
8th Edition : Jan.13,2012-00
To start calibration using an input contact, follow these steps:<br />
9-10<br />
(1) Make sure that Calibration start has been selected in the Input contacts display (see Section<br />
8.5, earlier in this manual).<br />
(2) Apply an input contact to start calibration.<br />
To stop calibration midway, follow these steps:<br />
(1) Press the [Reject] key. If this key is pressed midway during calibration, the calibration will<br />
stop and the hold (output stabilization) time will be set up.<br />
(2) Press the [Reject] key once again to return to the Basic panel display and the analyzer will<br />
be in normal measurement.<br />
9.2.3.3 Automatic Calibration<br />
No execution operations are required <strong>for</strong> automatic calibration. Automatic calibration starts in<br />
accordance with a preset start day and time. Calibration is then executed at preset intervals.<br />
NOTE<br />
Be<strong>for</strong>e starting Semi-automatic calibration or Automatic calibration, operate the calibration gas<br />
solenoid valves and adjust calibration gas flow to 600 ± 60 ml/min.<br />
IM 11M12A01-02E<br />
8th Edition : Jan.13,2012-00
10. Other Functions<br />
10-1<br />
10.1 Display<br />
10.1.1 Detailed-data Display<br />
Press the [Detailed-data] key on the Basic panel display to view the detailed operation data as<br />
shown in Figure 10.1.<br />
Pressing the [▼] or [▲] key, you can advance the page or go back to your desired page.<br />
• Detailed-data display<br />
There are ten panel displays <strong>for</strong> viewing detailed data. The following briefly describe the<br />
operational data displayed on the Detailed-data display.<br />
Tag:<br />
Span gas ratio: 0 . 0 %<br />
Zero gas ratio 1 0 0 . 0 %<br />
Response time: 0 s<br />
Cell robustness: life> 1year<br />
Cell temperature: 750 °C<br />
C.J.temperature: 47 °C<br />
Hold<br />
Figure 10.1 Detailed-data Display<br />
F10.1E.ai<br />
10.1.1.1 Span gas and Zero gas Correction Ratios<br />
These are used to check <strong>for</strong> degradation of the sensor (cell). If the correction ratio is beyond the<br />
limits as shown in Figure 10.2, the sensor should no longer be used.<br />
These ratios can be found by calculating the data as shown below.<br />
81.92<br />
ez<br />
Zero origin<br />
Cell<br />
electromotive<br />
<strong>for</strong>ce, mV<br />
Calibration curve<br />
be<strong>for</strong>e correction<br />
Previous<br />
zero gas data<br />
B<br />
A<br />
es<br />
C<br />
0<br />
e1<br />
Corrected calibration curve<br />
(theoretical calibration curve)<br />
21.0 p1 0.51<br />
Span gas<br />
concentration<br />
Oxygen concentration (vol%O 2 )<br />
Span origin<br />
Zero gas correction ratio = (B/A) x 100 (%) Correctable range: 100 ± 30%<br />
Span gas correction ratio = (C/A) x 100 (%) Correctable range: 0 ± 18%<br />
Figure 10.2<br />
F10.2E.ai<br />
IM 11M12A01-02E<br />
8th Edition : Jan.13,2012-00
10.1.1.2 Cell Response Time<br />
10-2<br />
The cell’s response time is obtained in the procedure shown in Figure 10.3. If only either a zeropoint<br />
or span calibration has been carried out, the response time will not be measured just as it<br />
will not be measured in manual calibration.<br />
Five minutes maximum<br />
Response time<br />
mA<br />
90%<br />
100%<br />
10% of analog<br />
output span<br />
Start calibration<br />
Time<br />
Calibration<br />
complete<br />
The response time is obtained after the corrected calibration curve has been found. The response time<br />
is calculated, starting at the point corresponding to 10% of the analog output up to the point at 90% of<br />
the analog output span. That is, this response time is a 10 to 90% response.<br />
Figure 10.3 Typical Response Time characteristic<br />
10.1.1.3 Robustness of a Cell<br />
The robustness of a cell is an index <strong>for</strong> predicting the remaining life of a sensor and is expressed<br />
as one of four time periods during which the cell may still be used:<br />
(1) more than a year<br />
(2) more than six months<br />
(3) more than three months<br />
(4) less than one month<br />
The above four time periods are tentative and only used <strong>for</strong> preventive maintenance, not <strong>for</strong><br />
warranty of the per<strong>for</strong>mance.<br />
This cell’s robustness can be found by a total evaluation of data involving the response time, the<br />
cell’s internal resistance, and calibration factor. However, if a zero or span calibration was not<br />
made, the response time cannot be measured. In such a case, the response time is not used as<br />
a factor in evaluating the cell’s robustness.<br />
10.1.1.4 Cell Temperature<br />
This displays the cell (sensor) temperature, which is determined from the thermocouple emf and<br />
cold junction temperature. Normally it is 750 ºC.<br />
10.1.1.5 C. J. Temperature<br />
This indicates the detector terminal box temperature, which compensates <strong>for</strong> the cold junction<br />
temperature <strong>for</strong> a thermocouple measuring the cell temperature. When the ZR22 Detector is<br />
used, the maximum C. J. temperature will be 150 °C. If the terminal box temperature exceeds<br />
this, take measures to shield the terminal box from heat radiation.<br />
The maximum C. J. temperature varies depending on the type of detector.<br />
F10.3E.ai<br />
IM 11M12A01-02E<br />
8th Edition : Jan.13,2012-00
10-3<br />
10.1.1.6 Cell Voltage<br />
The cell (sensor) voltage will be an index to determine the amount of degradation of the<br />
sensor. The cell voltage corresponds to the oxygen concentration currently being measured.<br />
If the indicated voltage approximates the ideal value (corresponding to the measured oxygen<br />
concentration), the sensor will be assumed to be normal.<br />
The ideal value of the cell voltage (E), when the oxygen concentration measurement temperature<br />
is controlled at 750 °C, may be expressed mathematically by:<br />
E = -50.74 log (Px/Pa) [mV]<br />
where, Px: Oxygen concentration in the sample gas<br />
Pa: Oxygen concentration in the reference gas, (21 vol%O 2 )<br />
Table 10.1 shows oxygen concentration versus cell voltage.<br />
Table 10.1 Oxygen Concentration Vs. Cell Voltage, (cell temperature: 750 ºC)<br />
%O 2 0.1 0.2 0.3 0.4 0.5 0.6 0.7 0.8 0.9<br />
mv 117.83 102.56 93.62 87.28 82.36 78.35 74.95 72.01 69.41<br />
%O 2 1 2 3 4 5 6 7 8 9<br />
mv 67.09 51.82 42.88 36.54 31.62 27.61 24.21 21.27 18.67<br />
%O 2 10 21.0 30 40 50 60 70 80 90<br />
mv 16.35 0 -7.86 -14.2 -19.2 -23.1 -26.5 -29.5 -32.1<br />
%O 2 100<br />
mv -34.4<br />
T10.1E.ai<br />
10.1.1.7 Thermocouple Voltage<br />
The cell temperature is measured with a Type K (chromel-alumel) thermocouple. The<br />
thermocouple cold junction is located in the detector terminal box. The cell temperature and the<br />
thermocouple voltage (including the voltage corresponding to the cold junction temperature) are<br />
displayed.<br />
10.1.1.8 Cold Junction Resistance (C.J. Voltage)<br />
The ZR22 Detector measures the cold junction temperature using an RTD (Pt 1000). (The earlier<br />
model of ZO21D uses transistors to measure the cold junction temperature.)<br />
If detector is “ZR22” is selected in the Basic setup display, the RTD resistance values will be<br />
displayed. If the ZO21D is selected, the transistor voltage will be displayed.<br />
10.1.1.9 Cell’s Internal Resistance<br />
A new cell (sensor) indicates its internal resistance of 200 Ω maximum. As the cell degrades, so<br />
will the cell’s internal resistance increase. The degradation of the cell cannot be evaluated just by<br />
changes in cell’s internal resistance, however. Those changes in the cell’s internal resistance are<br />
just a guide to the extent the cell is degrading. The updated values obtained during the calibration<br />
are displayed.<br />
10.1.1.10 Software Revision<br />
The revision (number) of the software installed is displayed.<br />
IM 11M12A01-02E<br />
8th Edition : Jan.13,2012-00
10.1.1.11 Maximum Oxygen Concentration<br />
10-4<br />
The maximum oxygen concentration and the time of its occurrence during the period specified<br />
in the Averaging display are displayed. After the present monitoring interval has elapsed, the<br />
maximum oxygen concentration that has been displayed so far will be cleared and a new<br />
maximum oxygen concentration will be displayed. If the setup period of time is changed, the<br />
current maximum oxygen concentration will be displayed (<strong>for</strong> more details, see Section 8.6.2<br />
earlier in this manual).<br />
10.1.1.12 Minimum Oxygen Concentration<br />
The minimum oxygen concentration and the time of its occurrence during the period specified<br />
in the Averaging display are displayed. If the setup period elapses, the minimum oxygen<br />
concentration that has been displayed so far will be cleared and a new minimum oxygen<br />
concentration will be displayed. If the setup period of time is changed, the current minimum<br />
oxygen concentration will be displayed (<strong>for</strong> more details, see Section 8.6.2 earlier in this manual).<br />
10.1.1.13 Average Oxygen Concentration<br />
The average oxygen concentration during the periods over which average values are calculated<br />
is displayed. If the setup period elapses, the average oxygen concentration that has been<br />
displayed so far will be cleared and a new average oxygen concentration will be displayed. If the<br />
setup period of time is changed, the current average oxygen concentration will be displayed (<strong>for</strong><br />
more details, see Section 8.6.2 earlier in this manual).<br />
10.1.1.14 Heater On-Time Ratio<br />
The probe sensor is heated to and maintained at 750 °C. When the sample gas temperature is<br />
high, the amount of heater ON-time decreases.<br />
10.1.1.15 Time<br />
The current date and time are displayed. These are backed up with built-in batteries, so the clock<br />
continue the run even if the power is switched off.<br />
10.1.1.1.16 History of Calibration Time<br />
The calibration-conducted dates and times, and span gas and zero gas ratios <strong>for</strong> the past ten<br />
calibrations are stored in memory.<br />
10.1.1.17 Power Supply Voltage<br />
For the temperature control <strong>for</strong> the heater of the detector to work best, you should set the power<br />
supply voltage and frequency appropriately, as the control parameters are based on this. Set the<br />
AC supply voltage to “Low” if supply is 140 V AC or less, and to “High” if it is 180 V or more.<br />
10.1.1.18 Power Frequency<br />
Set the AC supply frequency setting appropriately --”Low” <strong>for</strong> 50 Hz, and “High” <strong>for</strong> 60 Hz.<br />
IM 11M12A01-02E<br />
8th Edition : Jan.13,2012-00
10.1.2 Trend Graph<br />
10-5<br />
Press the [Graph display] key in the Basic panel display to switch to the graph display.<br />
This will help grasp the measured-value trend. Touching anywhere on the graph display will<br />
return to the Basic panel display. To set the Trend graph display, follow the steps in Section<br />
10.1.2.1.<br />
10.1.2.1 Setting Display Items<br />
(1) Press the [Setup] key in the Basic panel display to display the Execution/Setup display.<br />
Select “Maintenance” from the Execution/Setup display.<br />
(2) Select “Display setup” from the Maintenance display.<br />
(3) Select “Trend graph” from the Display setup display. The Trend graph display shown in<br />
Figure 10.4 appears.<br />
(4) Select “Parameter: Oxygen” from the Trend graph display. Then select the desired display<br />
item shown in Table 10.2.<br />
Table 10.2 Trend Graph Display Items<br />
Selected item<br />
Oxygen concentration<br />
Output 1<br />
Output 2<br />
Description<br />
Oxygen concentration graph under measurement<br />
If this equipment is <strong>for</strong> the oxygen analyzer, the trend graph will be an<br />
oxygen concentration graph.<br />
If this equipment is <strong>for</strong> the oxygen analyzer, the trend graph will be an<br />
oxygen concentration graph.<br />
Trend graph<br />
Parameter:<br />
Oxygen<br />
Sample interval: 3 0 s<br />
Scale Oxygen<br />
Upper limit: 2 5 . 0 % O2<br />
Lower limit: 0 . 0 % O2<br />
Enter<br />
Figure 10.4 Trend Graph Display<br />
F10.4E.ai<br />
10.1.2.2 Sampling Interval<br />
To plot a graph, set the “Sampling interval” <strong>for</strong> the measurement data.<br />
This graph allows the plotting of 60 data items on one division on the time axis. So, if you set<br />
a ten-second sampling interval, one division corresponds to 600 seconds (Figure 10.5). The<br />
allowable sampling intervals range from 1 to 30 seconds. If you set a one-second sampling<br />
interval, the axis of the abscissas then corresponds to five minutes.<br />
If you set it to 30 seconds, the axis of the abscissas then corresponds to 150 minutes.<br />
IM 11M12A01-02E<br />
8th Edition : Jan.13,2012-00
10-6<br />
Preset upper limit<br />
25.0 vol%O2 10 min./div<br />
Time per division,<br />
calculated by the set<br />
sampling interval<br />
Preset lower limit<br />
0.0 vol%O2<br />
12.3 vol%O2<br />
Currently measured<br />
value<br />
60 data<br />
Sampling period<br />
Figure 10.5 Plotting Graph <strong>for</strong> Sampling Interval<br />
F10.5E.ai<br />
10.1.2.3 Setting Upper and Lower Limit Values on Graph<br />
Set upper- and lower-limit values on the graph in the following procedure:<br />
Press “Upper limit” in the Trend graph display. The numeric-data entry key appears.<br />
Enter the upper-limit value. Also enter the lower-limit value in the same way. The allowable<br />
settings <strong>for</strong> both upper-limit and lower-limit values range from 0 to 100 vol%O 2 .<br />
10.1.2.4 Default Setting<br />
When the analyzer is delivered, or if data are initialized, the set data are by default, as shown in<br />
Table 10.3.<br />
Table 10.3 Default Values <strong>for</strong> Graph Setting<br />
Item Default<br />
Parameter<br />
Sampling interval<br />
Value<br />
Oxygen concentration<br />
30 seconds<br />
Upper limit 25 vol%O 2<br />
Lower limit 0 vol%O 2<br />
NOTE<br />
If a rapid change in the measured value occurs during sampling, no sampled data are plotted on<br />
the graph. Use the graph indication tentatively. Check the output current <strong>for</strong> accurate data.<br />
IM 11M12A01-02E<br />
8th Edition : Jan.13,2012-00
10.1.3 Auto-Return Time<br />
10-7<br />
On the Execution/Setup display or lower level menu displays, if no keys are touched <strong>for</strong> a preset<br />
time, the Auto return time, then the display will automatically revert to the Basic panel display. The<br />
“Auto return time” can be set in the range 0 to 255 minutes. If it is set to 0, then the display does<br />
not automatically revert. By default, the “Auto return time” is set to 0 (zero).<br />
<br />
(1) On the Basic panel display, touch the [Setup] key to display the Execution/Setup display,<br />
then select “Maintenance”. Select “Display setup” then “Auto return time”.<br />
(2) The numerical entry display appears <strong>for</strong> you to enter the desired Auto return time.<br />
To set an Auto return time of one hour, enter 060.<br />
(3) If you set 0, then the Auto return function does not operate.<br />
<br />
The Auto return time is set to 0 prior factory shipment or after data initialization.<br />
10.1.4 Entering Tag Name<br />
You can attach a desired tag name to the equipment. To attach it, follow these steps:<br />
(1) Select the [Setup] key from the Basic panel display to display the Execution/Setup display.<br />
Then select “Maintenance” from the Execution/Setup display.<br />
(2) Select the “Display setup” from the Maintenance display.<br />
(3) Select the “Display item” from the Display setup display. The display shown in Figure 10.6<br />
then appears.<br />
(4) Select the “Tag name” from the Display item. The text-data entry display then appears.<br />
(5) Enter up to 12 alphanumeric characters including codes <strong>for</strong> the desired tag name.<br />
Display item<br />
Primary value:<br />
Oxygen<br />
Secondary value:<br />
mA-ouput1<br />
Tertiary value:<br />
mA-output2<br />
Tag name:<br />
Enter<br />
Display setup<br />
Display item<br />
Trend graph<br />
Auto return time: 0 min<br />
Language: English<br />
Deutsch<br />
Francias<br />
Enter<br />
Figure 10.6 Display Item Display<br />
10.1.5 Language Selection<br />
F10.6E.ai<br />
Figure 10.7 Selecting the Display Language<br />
You can select a display language from among English, Japanese, German and French.<br />
The display language is set to the one specified in the purchase order when the analyzer is<br />
shipped from the factory.<br />
To select the language you want, follow these steps:<br />
<br />
(1) On the Basic panel display, touch the [Setup] key to display the Execution/Setup display.<br />
(2) Select “Maintenance”, then “Display setup”.<br />
(3) Select “Language” and the dropdown selection (Figure 10.7) allows you to select the<br />
desired language.<br />
F10.7E.ai<br />
IM 11M12A01-02E<br />
8th Edition : Jan.13,2012-00
10-8<br />
10.2 Blow Back<br />
10.2.1 Blow back Setup<br />
10.2.1.1 Mode<br />
This section explains the parameter settings <strong>for</strong> per<strong>for</strong>ming blow back.<br />
There are three modes of blow back operation: no function, semi-automatic, and automatic.<br />
Blow back is not per<strong>for</strong>med when the mode is set to “No function”. In “Semi_Auto” mode, blow<br />
back can be started by key operation on the display or by a contact input signal, and then<br />
sequentially per<strong>for</strong>med at a preset blow back time and hold time. In “Auto” mode, blow back<br />
is automatically per<strong>for</strong>med at preset intervals. For “Semi_Auto” or “Auto” modes, blow back is<br />
per<strong>for</strong>med. The following restrictions apply:<br />
When “No function” is selected:<br />
Blow back is not per<strong>for</strong>med<br />
When “Semi_Auto” is selected:<br />
Semi-auto blow back can be per<strong>for</strong>med. (Blow back does not start at Auto blow back start time.)<br />
When “Auto” is selected:<br />
Blow back can be per<strong>for</strong>med in either “Auto” or “Semi_Auto” mode.<br />
<br />
(1) From the Basic panel display, touch [Setup] key; on the Execution/Setup display which<br />
appears, select “Maintenance”.<br />
(2) On the Maintenance display, select “Blow back setup” and the Mode selection pull down<br />
allows you to select between “No function”, “Semi_Auto” and “Auto” (see Fig.10.8).<br />
Blow back setup<br />
Mode:<br />
No function<br />
Semi_Auto<br />
Auto<br />
Enter<br />
Figure 10.8 Blow back setup Display<br />
F10.9E.ai<br />
IM 11M12A01-02E<br />
8th Edition : Jan.13,2012-00
10.2.1.2 Operation of Blow back<br />
10-9<br />
Figure 10.9 shows a timing chart <strong>for</strong> the operation of blow back. To execute blow back with a<br />
contact input, use a contact input with an ON-time period of one to 11 seconds.<br />
Once blow back starts, a contact output repeatedly opens and closes at an interval of<br />
approximately 10 seconds during the preset blow back time. After the blow back time elapses,<br />
the analog output remains held at the preset status until the hold time elapses (refer to Section<br />
8.2, earlier in this manual).<br />
As the hold (output stabilization) time, set the time until the sample gas is returned to the sensor<br />
and output returns to the normal operating conditions, after completing blow back operations.<br />
ON-time period of 1 to 11 seconds <strong>for</strong> the contact input<br />
Blow back start<br />
(with contact input or<br />
touchpanel operation)<br />
Blow back time<br />
Contact output<br />
(blow back switch)<br />
ON<br />
(<strong>for</strong> 10<br />
seconds)<br />
ON<br />
(<strong>for</strong> 10<br />
seconds)<br />
OFF<br />
(<strong>for</strong> 10 seconds)<br />
ON<br />
(<strong>for</strong> 10<br />
seconds)<br />
Hold time<br />
Analog output<br />
Figure 10.9 Operation of Blow back<br />
Analog output remains held<br />
(with HOLD feature specified)<br />
F10.9E.ai<br />
10.2.1.3 Setting Output Hold Time and Blow back Time<br />
If the blow back mode is in “No function”, the output “Hold time” and “Blow back time” are not<br />
displayed. If you select “Hold time”, the numeric-data entry display appears. Enter the desired<br />
“Hold time” (output stabilization time) from 00 minutes, 00 seconds to 60 minutes, 59 seconds.<br />
When you select “Blow back time”, the numeric-data entry display appears. Enter the desired<br />
“Blow back time” from 00 minutes, 00 seconds to 60 minutes, 59 seconds.<br />
10.2.1.4 Setting Interval, Start Date, and Start Time<br />
The “Interval” is the time to execute blow back. Display the numeric-data entry panel display to<br />
set the desired interval from 000 days, 00 hours to 255 days, 59 hours.<br />
For the “Start date” and “Start time”, set the date when the blow back is first executed and the<br />
time when to start the blow back, respectively. If you want to execute the first blow back, <strong>for</strong><br />
example, at 4:00 p.m. on March 25, 2001, enter 25/ 03/ 01 <strong>for</strong> the Start date and 16:00 <strong>for</strong> the<br />
Start time.<br />
Blow back setup<br />
Mode: Auto<br />
Hold time: 1 0 min 0 0 s<br />
Blow back time:<br />
1 0 min 0 0 s<br />
Interval: 3 0 d 0 0 h<br />
Start date: 0 1 / 0 1 / 0 0<br />
Start time: 0 0 : 0 0<br />
Enter<br />
F10.10E.ai<br />
Figure 10.10 Blow back Setup Display<br />
In the Blow back setup display shown in Figure 10.10, if you choose “Mode: No function” or<br />
“Semi_Auto”, the Interval, Start date, and Start time <strong>for</strong> these are not displayed.<br />
IM 11M12A01-02E<br />
8th Edition : Jan.13,2012-00
10-10<br />
NOTE<br />
• If the blow back is executed with an input contact, it must be preset in the Input contact<br />
settings (<strong>for</strong> more details, see Section 8.5, earlier in this manual).<br />
• In Section 8.4, Output Contact Setup, earlier in this manual, set the contact used as the<br />
blow back switch be<strong>for</strong>ehand.<br />
• Do not set any other function <strong>for</strong> the contact used as the blow back switch.<br />
Otherwise, blow back may be activated when the contact is closed by any other function.<br />
• No blow back is executed during calibration or maintenance service. If automatic blow back<br />
reaches the preset start time during calibration or maintenance service, blow back will be<br />
executed after completing the calibration or maintenance service and after the equipment<br />
returns to the measurement mode.<br />
• If automatic blow back reaches the preset start time during semi-automatic blow back, the<br />
current automatic blow back will not be executed.<br />
• If you set the blow back interval at 000 days, 00 hours, only the first blow back is then<br />
executed. No subsequent blow backs will be executed.<br />
• If a past date is set <strong>for</strong> the Start time, no blow back will be executed.<br />
10.2.1.5 Default Setting<br />
When the analyzer is delivered, or if data are initialized, the blow back settings are by default, as<br />
shown in Table 10.4.<br />
Table 10.4 Blow back Default Setting<br />
Mode<br />
Hold time<br />
Item<br />
Blow back time<br />
Interval<br />
Default setting<br />
No function (“invalid”)<br />
10 minutes, 00 seconds<br />
10 minutes, 00 seconds<br />
30 days, 00 hours<br />
Start date 01/ 01/00<br />
Start time 0:00<br />
IM 11M12A01-02E<br />
8th Edition : Jan.13,2012-00
10.3 Parameter Initialization<br />
10-11<br />
Parameter settings can be initialized to the factory default settings. Initialization can be done<br />
<strong>for</strong> all parameters or <strong>for</strong> individual parameters. The parameters that can be initialized and their<br />
defaults are listed in Table 10.5.<br />
<br />
(1) On the Basic panel display, touch the [Setup] key to display the Execution/Setup display.<br />
(2) Select “Commissioning”, next “Others” then “Defaults”. A display like Figure 10.11. appears.<br />
(3) Select the desired item to be initialized then a display like Figure 10.12 appears.<br />
Select “Defaults start” then initialization starts.<br />
Defaults<br />
Display<br />
Calibration<br />
Blow back<br />
mA-outputs<br />
Alarms<br />
Contacts<br />
Others<br />
All data<br />
Enter<br />
Defaults Display<br />
Defaults start<br />
Cancel<br />
Enter<br />
F10.11E.ai<br />
Figure 10.11 Defaults Display<br />
Figure 10.12 Initialization Start Display<br />
CAUTION<br />
• Do not turn off the power during initialization. Otherwise, initialization will not be per<strong>for</strong>med<br />
properly.<br />
IM 11M12A01-02E<br />
8th Edition : Jan.13,2012-00
10-12<br />
Table 10.5 Initialization Items and Default Values - Part 1<br />
Equipment<br />
selection<br />
Displayed data<br />
Item Initialization Parameter Default setting<br />
Type of equipment<br />
Detector<br />
Sample gas<br />
Display item<br />
Trend graph<br />
Automatic return time<br />
1st display item<br />
Not initialized<br />
ZR22<br />
Wet gas<br />
Oxygen concentration<br />
2nd display item Current output 1<br />
3rd display item Current output 2<br />
Tag name<br />
Parameter<br />
Sampling interval<br />
Deleted<br />
Oxygen concentration<br />
30 seconds<br />
Upper limit (graph) 25 vol%O 2<br />
Lower limit (graph) 0 vol%O 2<br />
0 min.<br />
Language Not initialized<br />
Mode<br />
Calibration procedure<br />
<strong>Manual</strong><br />
Span - zero<br />
Zero gas concentration 1.00 vol%O 2<br />
Calibration data<br />
Blow back<br />
Current output<br />
data<br />
Calibration setting<br />
Blow back setting<br />
mA-output 1<br />
mA-output 2<br />
Output hold setting<br />
Span gas concentration 21.00 vol%O 2<br />
Output hold time<br />
Calibration time<br />
Interval<br />
Start date<br />
Start time<br />
Mode<br />
(Output) hold time<br />
Blow back time<br />
Interval<br />
10 min., 00 sec. (Semi_Auto)<br />
10 min., 00 sec. (Semi_Auto)<br />
30 days, 00 hr. (Auto)<br />
01/01/00 (Auto)<br />
0:00 (Auto)<br />
No function (invalid)<br />
10 min., 00 sec.<br />
10 min., 00 sec.<br />
30 days, 00 hr.<br />
Start date 01/01/00<br />
Start time 0:00<br />
Parameter<br />
Min. oxygen concentration 0 vol%O 2<br />
Max. oxygen concentration 25 vol%O 2<br />
Output damping constant<br />
Output mode<br />
Warm-up<br />
Set value of Warm-up<br />
Maintenance<br />
Set value of Maintenance<br />
Calibration, blow back<br />
Set value of Calibration, blow<br />
back<br />
Error<br />
Set value of Error<br />
Oxygen concentration<br />
0 sec.<br />
Linear<br />
4 mA<br />
4 mA<br />
Previous value held<br />
4 mA<br />
Previous value held<br />
4 mA<br />
Preset value held<br />
3.4 mA<br />
IM 11M12A01-02E<br />
8th Edition : Jan.13,2012-00
10-13<br />
Table 10.5 Initialization Items and Default Values - Part 2<br />
Item Initialization Parameter Default setting<br />
Alarm setting<br />
Parameter<br />
Oxygen<br />
concentration<br />
Hysteresis 0.1 vol%O 2<br />
Delayed action of alarm contact<br />
High-high alarm<br />
3 seconds<br />
OFF<br />
Alarm data<br />
Alarm value of High-high alarm 100 vol%O 2<br />
High limit alarm<br />
OFF<br />
Alarm set value<br />
Alarm value of High limit alarm 100 vol%O 2<br />
Low limit alarm<br />
OFF<br />
Contacts<br />
Output contact 1<br />
Output contact 2<br />
Output contact 3<br />
Output contact 4<br />
Input contact 1<br />
Input contact 2<br />
Alarm value of Low limit alarm 0 vol%O 2<br />
Low-low alarm<br />
OFF<br />
Alarm value of Low-low alarm 0 vol%O 2<br />
Alarm<br />
Other settings<br />
Contact output action<br />
Alarm<br />
Other settings<br />
Contact output action<br />
Alarm<br />
Other settings<br />
Contact output<br />
Warm-up<br />
OFF<br />
ON<br />
Output range now being switched OFF<br />
Now calibrating<br />
Now maintenance servicing<br />
Blow back<br />
High limit temp. alarm<br />
Calibration gas press. drop<br />
Gas leak detection<br />
Warm-up<br />
Output range switching<br />
Now calibrating<br />
Now maintenance servicing<br />
Blow back<br />
High limit temp. alarm<br />
Calibration gas press. drop<br />
Gas leak detection<br />
High-high alarm<br />
High limit alarm<br />
Low limit alarm<br />
Low-low alarm<br />
Calibration Coefficient Alarm<br />
Startup power stabilization<br />
timeout<br />
Error<br />
OFF<br />
ON<br />
OFF<br />
OFF<br />
OFF<br />
OFF<br />
Open<br />
OFF<br />
OFF<br />
OFF<br />
ON<br />
OFF<br />
OFF<br />
OFF<br />
OFF<br />
OFF<br />
Closed<br />
OFF<br />
ON<br />
ON<br />
OFF<br />
OFF<br />
OFF<br />
OFF<br />
OFF<br />
Alarm Error ON<br />
Other settings<br />
Contact output<br />
Function<br />
Action<br />
Closed<br />
OFF<br />
Closed (Fixed)<br />
OFF<br />
Closed<br />
IM 11M12A01-02E<br />
8th Edition : Jan.13,2012-00
10-14<br />
Other data<br />
Average value/<br />
Maximum and minimum values<br />
Fuel set value<br />
Password<br />
Average-value calculation<br />
Intervals over which max. and<br />
min.<br />
values are monitored<br />
Amount of water vapor in exhaust<br />
gas<br />
One hour<br />
24 hours<br />
0.00 m 3 /kg (m 3 )<br />
Theoretical amount of air 1.00 m 3 /kg (m 3 )<br />
X value 1.00<br />
Absolute humidity of atmosphere<br />
0.0 kg/kg<br />
Deleted<br />
IM 11M12A01-02E<br />
8th Edition : Jan.13,2012-00
10.4 Reset<br />
10-15<br />
Resetting enables the equipment to restart. If the equipment is reset, the power is turned off<br />
and then back on. In practical use, the power remains on, and the equipment is restarted under<br />
program control. Resetting will be possible in the following conditions:<br />
(1) Error 1 – if the cell voltage is defective<br />
(2) Error 2 – if a temperature alarm occurs<br />
(3) Error 3 – if the A/D converter is defective<br />
(4) Error 4 – if an EEPROM write error occurs<br />
For details on error occurrence, consult Chapter 12, Troubleshooting, later in this manual.<br />
If any of the above problems occurs, the equipment turns off the power to the detector heater.<br />
To cancel the error, reset the equipment following the steps below, or turn the power off and then<br />
back on.<br />
NOTE<br />
Make sure that be<strong>for</strong>e resetting or restarting the power that there is no problem with the detector<br />
or converter.<br />
If a problem arises again after the resetting, turn the power off and troubleshoot the problem by<br />
consulting the Troubleshooting chapter later in this manual.<br />
To reset the equipment, follow these steps:<br />
(1) Press the [Setup] key in the Basic panel display to display the Execution/Setup display.<br />
(2) Choose “Reset”. The Reset display shown in Figure 10.13 appears.<br />
(3) Choose “Start reset” and then press the [Enter] key to reset the equipment and the<br />
equipment will then be in its warm-up state.<br />
Reset<br />
<br />
Start reset<br />
Cancel reset<br />
Enter<br />
F10.13E.ai<br />
Figure 10.13 Reset Display<br />
IM 11M12A01-02E<br />
8th Edition : Jan.13,2012-00
10-16<br />
10.5 Handling of the ZO21S Standard Gas Unit<br />
The following describe how to flow zero and span gases using the ZO21S Standard Gas<br />
Unit. Operate the ZO21S Standard Gas Unit, <strong>for</strong> calibrating a system classified as System 1,<br />
according to the procedures that follow.<br />
10.5.1 Standard Gas Unit Component Identification<br />
Carrying case<br />
Flow checker<br />
Checks the zero and<br />
span gas flow.<br />
Span gas valve<br />
Controls the span gas (air) flow.<br />
Zero gas valve regulator<br />
Tube connection<br />
Cover screws (six pcs.)<br />
Pump<br />
Supplies span gas (air)<br />
Gas cylinder<br />
Contains the zero gas. A gas<br />
of 7 Nl is charged to 700 kPa<br />
Clamp<br />
Clamps the gas cylinder.<br />
Zero gas valve<br />
Attaches to the gas<br />
cylinder <strong>for</strong> use.<br />
Power cord<br />
Applies the power to operate the<br />
pump to supply the span gas.<br />
Figure 10.14 Standard Gas Unit Component Identification<br />
F10.14E.ai<br />
IM 11M12A01-02E<br />
8th Edition : Jan.13,2012-00
10.5.2 Installing Gas Cylinders<br />
10-17<br />
Each ZO21S Standard Gas Unit comes with six zero gas cylinders including a spare. Each<br />
gas cylinder contains 7-liters of gas with a 0.95 to 1.0 vol%O 2 (concentration varies with each<br />
cylinder) and nitrogen, at a pressure of 700 kPaG (at 35 °C).<br />
The operating details and handling precautions are also printed on the product. Please read them<br />
be<strong>for</strong>ehand.<br />
To install the gas cylinder, follow these steps:<br />
(1) Attach the zero gas valves onto the gas cylinder. First, turn the valve regulator of the zero<br />
gas valves counterclockwise to completely retract the needle at the top from the gasket<br />
surface. Maintaining the valve in this position, screw the valve mounting into the mouthpiece<br />
of the gas cylinder. (If screw connection is proper, you can turn the screw manually. Do not<br />
use any tool.) When the gasket comes in contact with the mouthpiece of the gas cylinder<br />
and you can no longer turn it manually, tighten the lock nut with a wrench.<br />
(2) Remove the carrying case from the standard gas unit. The case is attached to the unit with<br />
six screws. So, loosen the screws and lift them off.<br />
(3) Slide the gas cylinder through the hole in the back of the unit and connect the tube (the<br />
piping in the unit) to the valve connections. Insert each tube at least 10 mm to prevent<br />
leakage, and secure it using a tube clamp.<br />
(4) Attach the gas cylinder to the case. Extend the valve regulator of the zero gas valves<br />
through the hole in the front panel of the unit and secure the bottom of the cylinder with the<br />
clamp.<br />
(5) Take note of the oxygen concentration of the sealed gas indicated on the gas cylinder and<br />
replace the carrying case. Enter the oxygen concentration of the sealed gas, following<br />
instructions on the converter display. Also check that no piping is disconnected.<br />
Thus, the work of installing a gas cylinder is completed. However, gases in the cylinders cannot<br />
immediately flow out after these procedures. To discharge the gases, it is necessary <strong>for</strong> the<br />
needle in the zero gas valves to puncture a hole in the gas cylinder (see Section 10.5.3).<br />
10.5.3 Calibration Gas Flow<br />
<br />
(1) To operate the standard gas unit, place it on a nearly horizontal surface in order to allow the<br />
flow check to indicate the precise flow rate. In addition, a power supply <strong>for</strong> driving the span<br />
gas (air) supply pump is required near the unit (the length of the power cord attached to the<br />
unit is 2 m). Select a suitable location <strong>for</strong> the unit near the installation site of the converter.<br />
(2) Connect the tube connector port of the standard gas unit to the calibration gas inlet of the<br />
detector, using a polyethylene resin tube with an outside diameter of 6 mm. Be careful to<br />
prevent gas leakage.<br />
(3) Fully open the stop valve mounted on the calibration gas inlet of the detector.<br />
(4) Enter the oxygen concentration of the sealed gas (noted from the cylinder) into the<br />
converter. Also check that the oxygen concentration of the span gas is correctly set<br />
(21 vol%O 2 <strong>for</strong> clean air). When using the ZO21S Standard Gas Unit (<strong>for</strong> use of the<br />
atmospheric air as a span gas), use a hand-held oxygen analyzer to measure the actual<br />
oxygen concentration, and then enter it.<br />
IM 11M12A01-02E<br />
8th Edition : Jan.13,2012-00
10-18<br />
<br />
The standard gas unit is used only when manual calibration is employed. There<strong>for</strong>e, the timing<br />
<strong>for</strong> flowing span gas (air) is included in the manual calibration flowchart described in Section<br />
10.5.2. For operation of the converter, see Section 7.12, earlier in this manual.<br />
(1) When the message “Open span gas valve” is displayed on the converter display during<br />
calibration, plug the power cord into the power supply socket to start the pump of the<br />
standard gas unit.<br />
<strong>Manual</strong> calibration<br />
Open span gas valve.<br />
Set flow span gas to<br />
600ml/min.<br />
Valve opened<br />
Cancel calibration<br />
Enter<br />
F10.15E.ai<br />
Figure 10.15 <strong>Manual</strong> Calibration Display<br />
(2) Next, adjust the flow rate to 600 ± 60 ml/min using the span gas valve “AIR” (the flow check<br />
ball stops floating on the green line when the valve is slowly opened). To rotate the valve<br />
shaft, loosen the lock nut and turn it using a flat-blade screwdriver. Turning the valve shaft<br />
counterclockwise increases the flow rate.<br />
(3) After adjusting the flow rate, tighten the valve lock nut.<br />
(4) Select “Valve opened” (to start calibration) from the <strong>Manual</strong> calibration display shown in<br />
Figure 10.15. Check the Trend graph display to see that the measured value is stabilized.<br />
Then press the [Enter] key. The <strong>Manual</strong> calibration display shown in Figure 10.16 appears.<br />
Disconnect the power cord to stop the pump.<br />
<strong>Manual</strong> calibration<br />
Span calibration<br />
Close the span gas valve.<br />
Zero calibration<br />
End<br />
Enter<br />
F10.16E.ai<br />
Figure 10.16 <strong>Manual</strong> Calibration Display<br />
<br />
Cause a zero gas to flow according to the <strong>Manual</strong> calibration display shown in Figure 10.17.<br />
<strong>Manual</strong> calibration<br />
Open zero gas valve.<br />
Set flow zero gas to<br />
600ml/min.<br />
Valve opened<br />
Cancel calibration<br />
Enter<br />
Figure 10.17 <strong>Manual</strong> Calibration Display<br />
F10.17E.ai<br />
IM 11M12A01-02E<br />
8th Edition : Jan.13,2012-00
10-19<br />
(1) Use the needle of the zero gas valve “ CHECK GAS “ to puncture a hole in the gas cylinder<br />
installed as described in Section 10.5.2. Fully clockwise turn the valve regulator by hand.<br />
(2) Next, adjust the flow rate to 600 ± 60 ml/min (the flow check ball stops floating on the green<br />
line when the valve is slowly opened). Turn the regulator of the zero gas valves back slowly<br />
counterclockwise. At that time, the flow rate also decreases as the inner pressure of the gas<br />
cylinder decreases. There<strong>for</strong>e, monitor the flow check and, when the ball’s position changes<br />
greatly, readjust the valve.<br />
(3) Select “Valve opened” (to start calibration) from the <strong>Manual</strong> calibration display. Check the<br />
Trend graph display to see that the measured value is stabilized. Then press the [Enter] key.<br />
The <strong>Manual</strong> calibration display shown in Figure 10.18 appears. Then stop the zero gas flow<br />
immediately. Turn the zero gas valve regulator fully clockwise. If this valve regulator is not<br />
properly adjusted, the needle valve will not close completely and a cylinder gas may leak.<br />
<strong>Manual</strong> calibration<br />
Zero calibration<br />
Close the zero gas valve.<br />
Span calibration<br />
End<br />
Enter<br />
F10.18E.ai<br />
Figure 10.18 Zero gas Calibration Complete (in <strong>Manual</strong> Calibration Display)<br />
NOTE<br />
Be sure not to terminate a calibration in progress because of a shortage of gas in the cylinder.<br />
Each gas cylinder is operable <strong>for</strong> nine minutes or more provided the gas is discharged at the<br />
specified rate. There<strong>for</strong>e, if your calibration time is estimated at four minutes, you can operate<br />
the zero-point calibration twice.<br />
<br />
(1) Fully close the stop valve mounted on the calibration gas inlet of the detector.<br />
(2) Remove the tube connecting the detector to the standard gas unit.<br />
WARNING<br />
Store the standard gas unit with the gas cylinder mounted where the ambient temperature does<br />
not exceed 40 °C. Otherwise, the gas cylinder may explode. Store the spare gas cylinders under<br />
the same condition.<br />
IM 11M12A01-02E<br />
8th Edition : Jan.13,2012-00
10-20<br />
10.6 Methods of Operating Valves in the ZA8F<br />
Flow Setting Unit<br />
The ZA8F Flow Setting Unit is used as a calibration device <strong>for</strong> a system con<strong>for</strong>ming to System<br />
2. Calibration in such a system is to be manually operated. So, you have to operate the valve of<br />
the Flow Setting each time calibration is made (starting and stopping the calibration gas flow and<br />
adjusting the flow rate). This applies even if you are using the ZR40H Automatic Calibration Unit.<br />
For operation of the converter, see Section 7.12, earlier in this manual.<br />
10.6.1 Preparation Be<strong>for</strong>e Calibration<br />
To operate the ZA8F Flow Setting Unit, prepare <strong>for</strong> calibration as follows:<br />
(1) Check <strong>for</strong> a complete closing of the zero gas flow setting valve in the unit and open the<br />
regulator valve <strong>for</strong> the zero gas cylinder until the secondary pressure equals sample gas<br />
pressure plus approx. 50 kPa (or sample gas pressure plus approx. 150 kPa when a check<br />
valve is used, maximum pressure rating is 300 kPa).<br />
(2) Check that the oxygen concentration of the zero gas and span gas (instrument air 21<br />
vol%O 2 ) in the cylinder is set in the converter.<br />
10.6.2 Operating the Span Gas Flow Setting Valve<br />
The following description is given assuming that instrument air, the same as the reference gas, is<br />
used as the span gas.<br />
(1) When the display shown in Figure 10.15 appears during calibration, open the span gas<br />
flow setting valve of the flow setting unit and adjust the flow rate to 600 ± 60 ml/min. Turn<br />
the valve slowly counterclockwise after loosening the lock nut if the valve has a lock nut. To<br />
check the flow rate, use the calibration flowmeter. If the sample gas pressure is extremely<br />
high, adjust the sample gas pressure to obtain pressures (listed in Table 10.6) ± 10%.<br />
Table 10.6<br />
Sample gas pressure (kPa) 50 100 150 200 250<br />
Flow rate (ml/min) 500 430 380 350 320<br />
(2) Adjust the flow rate and select “Valve opened” from the <strong>Manual</strong> calibration display.<br />
Check the Trend graph display to see that the measured value is stabilized. Then press the<br />
[Enter] key. The <strong>Manual</strong> calibration display shown in Figure 10.16 appears.<br />
(3) Close the span gas flow setting valve to stop the span gas (air) flow. If the valve has a lock<br />
nut, be sure to tighten the lock nut to prevent any leakage of span gas into the sensor during<br />
measurement.<br />
IM 11M12A01-02E<br />
8th Edition : Jan.13,2012-00
10.6.3 Operating the Zero Gas Flow Setting Valve<br />
10-21<br />
Operate the zero gas flow setting valve during zero-point calibration in the following procedures:<br />
(1) When the display shown in Figure 10.19 appears during calibration, open the zero gas<br />
flow setting valve of the flow setting unit and adjust the flow rate to 600 ± 60 ml/ min. To<br />
rotate the valve shaft, if the valve has a lock nut loosen the lock nut and slowly turn it<br />
counterclockwise. To check the flow rate, monitor the calibration gas flowmeter.<br />
If the sample gas pressure is extremely high, adjust the sample gas pressure to obtain<br />
pressures (listed in Table 10.6) ± 10%.<br />
Table 10.6<br />
Sample gas pressure (kPa) 50 100 150 200 250<br />
Flow rate (ml/min) 500 430 380 350 320<br />
<strong>Manual</strong> calibration<br />
Open zero gas valve.<br />
Set flow zero gas to<br />
600ml/min.<br />
Valve opened<br />
Cancel calibration<br />
Enter<br />
Figure 10.19 <strong>Manual</strong> Calibration Display<br />
F10.19E.ai<br />
(2) Adjust the flow rate and select “Valve opened” from the <strong>Manual</strong> calibration display.<br />
Check the Trend graph display to see that the measured value is stabilized. Then press the<br />
[Enter] key. The <strong>Manual</strong> calibration display shown in Figure 10.20 appears.<br />
<strong>Manual</strong> calibration<br />
Zero calibration<br />
Close the zero gas valve.<br />
Span calibration<br />
End<br />
Enter<br />
F10.20E.ai<br />
Figure 10.20 Zero-point Calibration Complete (in <strong>Manual</strong> Calibration)<br />
(3) Close the zero gas flow setting valve to stop the zero gas flow. If the valve has a lock nut,<br />
be sure to tighten the lock nut to prevent the any leakage of the zero gas into the sensor<br />
because the valve may become loose during measurement.<br />
10.6.4 Operation After Calibration<br />
No special operation of the instrument is needed after calibration. However, it is recommended<br />
that the pressure reducing valve <strong>for</strong> the zero gas cylinders be closed because calibration is not<br />
required so often.<br />
IM 11M12A01-02E<br />
8th Edition : Jan.13,2012-00
Blank Page
11-1<br />
11. Inspection and Maintenance<br />
This chapter describes the inspection and maintenance procedures <strong>for</strong> the EXAxt ZR Zirconia<br />
Oxygen Analyzer to maintain its measuring per<strong>for</strong>mance and normal operating conditions.<br />
CAUTION<br />
When checking the detector, carefully observe the following:<br />
(1) Do not touch the probe if it has been in operation immediately just be<strong>for</strong>e being checked.<br />
(The sensor at the tip of the probe heats up to 750 °C during operation. If you touch it, you<br />
will get burned.)<br />
(2) Do not subject the probe to shock or cool it rapidly.<br />
The sensor is made of ceramic (zirconia). If the detector is dropped or bumped into<br />
something, the sensor may be damaged and no longer work.<br />
(3) Do not reuse a metal O-ring to seal the cell assembly. If you replace the cell or remove it<br />
from the probe <strong>for</strong> checking, be sure to replace the metal O-ring. Otherwise, the furnace gas<br />
may leak, and then the leaking corrosive gas will cause the built-in heater or thermocouple<br />
to go open circuit, or the detector may corrode.<br />
(4) Handle the probe with care so that the dust-filter mounted screws on the tip of the probe do<br />
not hurt your finger(s).<br />
(5) Be<strong>for</strong>e opening or closing the terminal box, first remove dust, sand, or the like from the<br />
terminal box cover.<br />
11.1 Inspection and Maintenance of the Detector<br />
11.1.1 Cleaning the Calibration Gas Tube<br />
The calibration gas, supplied through the calibration gas inlet of the terminal box into the detector,<br />
flows through the tube and comes out at the tip of the probe. The tube might become clogged<br />
with dust from the sample gas. If you become aware of clogging, such as when a higher pressure<br />
is required to achieve a specified flow rate (600 ± 60 ml/min), clean the calibration gas tube.<br />
To clean the tube, follow these steps:<br />
(1) Remove the detector from the installation assembly.<br />
(2) Following Section 11.1.2, later in this manual, remove the four bolts (and associated<br />
washers) that tighten the sensor assembly, and the pipe support as well as the U-shaped<br />
pipe.<br />
(3) Use a rod 2 to 2.5 mm in diameter to clean the calibration gas tube inside the probe. In<br />
doing this, keep air flowing from the calibration gas inlet at about 600 ml/min and insert the<br />
rod into the tube (3-mm inside diameter). However, be careful not to insert the rod deeper<br />
than 40 cm <strong>for</strong> a general-purpose detector, or 15 cm <strong>for</strong> high temperature detector.<br />
(4) Clean the U-shaped pipe. The pipe can be rinsed with water. However, it should be dried out<br />
thoroughly be<strong>for</strong>e reassembly.<br />
(5) Restore all components you removed <strong>for</strong> cleaning. Follow Section 11.1.2 to restore all<br />
components in their original positions. Be sure to replace the O-ring(s) with new ones.<br />
IM 11M12A01-02E<br />
8th Edition : Jan.13,2012-00
11-2<br />
Exploded view of components<br />
Rod<br />
(with outside diameter<br />
of 2 to 2.5 mm)<br />
Calibration gas tube<br />
Figure 11.1 Cleaning the Calibration Gas Tube<br />
F11.1E.ai<br />
11.1.2 Replacing the Sensor Assembly<br />
The per<strong>for</strong>mance of the sensor (cell) deteriorates as its surface becomes soiled during operation.<br />
There<strong>for</strong>e, you have to replace the sensor when its life expectancy expires, <strong>for</strong> example, when<br />
it can no longer satisfy a zero gas ratio of 100 ± 30% or a span gas ratio of 0 ± 18%. In addition,<br />
the sensor assembly is to be replaced if it becomes damaged and can no longer operate during<br />
measurement.<br />
If the sensor becomes no longer operable (<strong>for</strong> example, due to breakage), investigate the cause<br />
and remedy the problem as much as possible to prevent recurrence.<br />
CAUTION<br />
• If the sensor assembly is to be replaced, allow enough time <strong>for</strong> the detector to cool down<br />
from its high temperature. Otherwise, you may get burned.<br />
• If the cell assembly is to be replaced, be sure to replace the metal O-ring and the contact<br />
together.<br />
Additionally, even in a case where the cell is not replaced, if the contact becomes de<strong>for</strong>med<br />
and cannot make complete contact with the cell, replace the contact.<br />
• If there is any corroded or discolored area in the metal O-ring groove in which the contact<br />
is embedded, sand the groove with sandpaper or use a metal brush, and then sand further<br />
with a higher grade of sandpaper (no. 1500 or so), or use an appropriate metal brush<br />
to eliminate any sharp protrusions on the groove. The contact’s resistance should be<br />
minimized.<br />
• Use sensor assemblies manufactured in or after Sept. 2000: the serial number on the side<br />
of the sensor assembly should be 0J000 or later (<strong>for</strong> example: 0K123, 1AA01 etc)<br />
1. Identifying parts to be replaced<br />
In order not to lose or damage disassembled parts, identify the parts to be replaced from among<br />
all the parts in the sensor assembly. Normally, replace the sensor, metal O-ring and contact<br />
together at the same time. If required, also replace the U-shaped pipe, bolts, filter and associated<br />
spring washers.<br />
2. Removal procedures<br />
(1) Remove the four bolts and associated washers from the tip of the detector probe.<br />
(2) Remove the U-shaped pipe support together with the U-shaped pipe. Remove filter also.<br />
(3) Pull the sensor assembly toward you while turning it clockwise. Also, remove the metal<br />
O-ring between the assembly and the probe. Remove filter also.<br />
(When replacing the assembly, be careful not to scratch or dent the tip of the probe with<br />
which the metal O-ring comes in contact (the surface with which the sensor flange also<br />
comes in contact). Otherwise, the sample gas will not be sealed.)<br />
(4) Use tweezers to pull the contact out of the groove in the tip of the probe.<br />
IM 11M12A01-02E<br />
8th Edition : Jan.13,2012-00
11-3<br />
(5) Clean the sensor assembly, especially the metal O-ring contact surface to remove any<br />
contaminants adhering to that part. If you can use any of the parts from among those<br />
removed, also clean them up to remove any contaminants adhering to them.<br />
(Once the metal O-ring has been used, it can not be reused. So, be sure to replace it.)<br />
3. Part assembly procedure<br />
(1) First, install the contact. Being careful not to cause irregularities in the pitch of the coil spirals<br />
(i.e., not to bend the coil out of shape), place it in the ringed groove properly so that it <strong>for</strong>ms<br />
a solid contact.<br />
Groove in which the contact<br />
(E7042BS) is placed<br />
Figure 11.2 Installing the Contact<br />
F11.2E.ai<br />
(2) Next, make sure that the O-ring groove on the flange surface of the sensor is clean.<br />
Install the metal O-ring in that O-ring groove, and then insert the sensor in the probe while<br />
turning it clockwise. After inserting it until the metal O-ring comes in contact with the probe’s<br />
O-ring contact surface, properly align the U-shaped pipe insertion holes with the bolt<br />
openings.<br />
(3) Attach the U-shaped pipe to its support with filter, then fully insert the U-shaped pipe and its<br />
support into the probe.<br />
(4) Coat the threads of the four bolts with anti-seize grease and then screw them in along with<br />
the washers. First, tighten the four bolts uni<strong>for</strong>mly by hand, and then use a torque wrench<br />
to tighten all areas of the metal O-ring uni<strong>for</strong>mly, that is, to make sure the sensor flange is<br />
perfectly horizontal to the O-ring’s working face in the probe.<br />
This is done by tightening first one bolt and then its opposing bolt each 1/8 turn, and then<br />
one of the other bolts followed by its opposing bolt, each also 1/8 turn. This continues<br />
in rotating fashion until they are all fully tightened with the torque wrench preset to<br />
approximately 5.9 N • m. If they are not uni<strong>for</strong>mly tightened, the sensor or heater may be<br />
damaged.<br />
Replacement of the sensor assembly is now complete. Install the detector and restart<br />
operation. Calibrate the instrument be<strong>for</strong>e making a measurement.<br />
IM 11M12A01-02E<br />
8th Edition : Jan.13,2012-00
11-4<br />
Metal O-ring<br />
Sensor<br />
Dust filter<br />
(optional)<br />
Bolts (four)<br />
U-shaped pipe<br />
support<br />
Screw<br />
Contact<br />
Probe<br />
Filter<br />
U-shaped pipe<br />
Washers<br />
(four)<br />
1/8 turn – tighten bolts 1/8 turn<br />
(approximately 45°) each<br />
F11.3E.ai<br />
Figure 11.3 Exploded View of Sensor Assembly<br />
NOTE<br />
Optional Inconel bolts have a high coefficient of expansion. If excess torque is applied while the<br />
bolts are being tightened, abnormal strain or bolt breakage may result.<br />
So, tighten the bolts following the instructions given above.<br />
11.1.3 Replacement of the Heater Unit<br />
This section describes the replacement procedure <strong>for</strong> the heater unit.<br />
The sensor or ceramic heater-furnace core internal structure is subject to fracturing, so do NOT<br />
subject it to strong vibrations or shock. Additionally, the heater unit reaches high temperatures<br />
and is subjected to high voltages. So, maintenance services should be per<strong>for</strong>med after the power<br />
is off and the heater unit temperature has returned to normal room temperature.<br />
For details, refer to IM11M12A01-21E “ Heater Assembly “.<br />
NOTE<br />
If the heater strut assembly can not be removed because a screw has fused to its thread,<br />
one of our service representatives can fix it.<br />
IM 11M12A01-02E<br />
8th Edition : Jan.13,2012-00
11-5<br />
16<br />
A<br />
14<br />
‣<br />
14<br />
10<br />
11<br />
12<br />
‣<br />
14<br />
‣<br />
35<br />
A<br />
24<br />
15<br />
13<br />
7<br />
8<br />
9<br />
24<br />
2<br />
3<br />
4<br />
5<br />
6<br />
24<br />
1<br />
23<br />
TC +<br />
View A-A<br />
17 18<br />
26<br />
CELL +<br />
TC -<br />
34<br />
28<br />
29<br />
19<br />
25<br />
13<br />
<br />
<br />
<br />
<br />
30<br />
33<br />
22<br />
32<br />
<br />
<br />
‣<br />
14<br />
20 21<br />
F11.4.ai<br />
‣<br />
‣ 37<br />
36<br />
‣<br />
35<br />
Figure 11.4 Exploded View of Detector (When pressure compensation specified)<br />
Note: The parts marked by ‣ is not equipped with the types except the pressure compensation type.<br />
IM 11M12A01-02E<br />
8th Edition : Jan.13,2012-00
Replacement of heater strut assembly (<strong>ZR22G</strong> : Style S2 and after)<br />
Refer to Figure 11.4 as an aid in the following discussion.<br />
11-6<br />
Remove the cell assembly (6), following Section 11.1.2, earlier in this manual. Open the terminal<br />
box (16) and remove the three terminal connections – CELL +, TC + and TC -.Be<strong>for</strong>e disconnect<br />
the HTR terminals, remove the terminal block screw (28). Keeping the other terminal remaining<br />
to be connected. Disconnect the two HTR connections. (These terminals have no polarity.)<br />
Remove the two screws (15) that fasten the cover (12) and slide it to the flange side.<br />
Remove the four bolts (10) and terminal box (16) with care so that the already disconnected wire<br />
will not get caught in the terminal box.<br />
In case of the pressure compensation type detector, remove the screw (36) and the plate (37) on<br />
the adapter (35). Remove the adapter (35), drawing out the wires of the heater strut assembly<br />
(23) from it.<br />
Loosen screw (19) until heater strut assembly (23) plate can be removed.<br />
There’s no need to remove O-ring (18) which prevents screw (19) from coming out.<br />
Pull out connector (13).<br />
Loosen and remove the screw (8) with a special wrench (part no. K9470BX or equivalent) and<br />
then remove the heater strut assembly (23) from the detector (24).<br />
To reassemble the heater strut assembly, reverse the above procedure:<br />
Insert the heater strut assembly (23) into the detector (24), while inserting the calibration pipe in<br />
the detector (24) into the heater section in the heater strut assembly (23) as well as in the bracket<br />
hole. Coat the screw (8) with grease (NEVER SEEZ: G7067ZA) and tighten the screw (8) with a<br />
special tool (part no. K9470BX or equivalent) with a tightening torque of 12N • m ± 10%.<br />
Next, to install the O-rings (22) on the calibration gas and reference gas pipes, disassemble the<br />
connector (13) in the following procedure:<br />
First, remove the screw (25) and then remove the plate (17) and two caps (20). If the O-rings (22)<br />
remains in the hole, pull them out from the back. Pass the heater and thermocouple lead wire<br />
through the connector (13). Also, pass the calibration gas and reference gas pipes through the<br />
opening of the connector (13). If the O-ring (22) fails, replace it with a new one.<br />
Push the two caps (20) into the associated opening of the connector (13). Insert the plate (17),<br />
aligning it with the groove of the cap (20), and tighten it with the screw (25). If you attempt to<br />
insert the calibration gas and reference gas pipes into the connector (13) without disassembling<br />
the connector (13), the O-ring may be damaged. Tighten the screw (19) in heater strut assembly<br />
(23) until connector (13) can’t move.<br />
Reassemble in reverse order to the above disassembly procedure.<br />
The two wires with ceramic insulators from the heater strut assembly are heater wires, and the<br />
single-core shielded wire is the cell signal + terminal; <strong>for</strong> the two-core shielded cable, the semitranslucent<br />
rubber-sheathed wire is the thermocouple + terminal, and the other wire is the<br />
− terminal. (If the wires are marked, match the markings with those on the terminal board).<br />
When installing the cell assembly (6), replace the metal O-ring (7) with a new one.<br />
11.1.4 Replacement of Dust Filter<br />
Set the dust filter (1) in place using a special pin spanner (with a pin 4.5 mm in diameter: part no.<br />
K9471UX or equivalent). If a dust filter that has already been replaced once is used again, apply<br />
grease (NEVER SEEZ: G7067ZA) to the threads of the dust filter.<br />
11.1.5 Replacement of O-ring<br />
The detector uses three different types of O-rings (14), (21), and (22). One O-ring alone (14), or<br />
two O-rings (21) and (22) are used. (For a pressure compensating model, two O-rings are used<br />
<strong>for</strong> individual uses. Two O-rings (21) and (22) are used <strong>for</strong> reference gas and calibration gas<br />
sealing and require periodic replacement.<br />
IM 11M12A01-02E<br />
8th Edition : Jan.13,2012-00
11-7<br />
Part No.<br />
(7) K9470BJ Metal O-ring<br />
(14) K9470ZS O-ring with grease<br />
(21)<br />
(22)<br />
K9470ZP<br />
Description<br />
Two pairs of O-rings with grease<br />
11.1.6 Cleaning the High Temperature Probe Adapter<br />
CAUTION<br />
• Do not subject the probe of the High Temperature Probe Adapter (ZO21P-H-A) to shock.<br />
This probe uses silicon carbide (SiC) which may become damaged if it is subjected to a<br />
strong shock or thermal shock.<br />
The high temperature detector is structured so that the gas to be measured is directed toward<br />
the detector with the high temperature probe adapter. There<strong>for</strong>e, if the probe or the sample gas<br />
outlet clogs, a precise measurement is no longer possible because of no gas flow. If you use the<br />
high temperature detector, you have to inspect it periodically and, if any part of it is significantly<br />
clogged with dust, clean it.<br />
Dust found sticking to the probe should be blown off. If any dust still remains after the blowing,<br />
clean it with a metal rod, etc., inserted. In addition, if dust is found on the auxiliary ejector or<br />
needle valve (choke) at the sample gas outlet, remove these parts from the high temperature<br />
probe adapter and then clean them. To remove dust, blow air on them or rinse them with water.<br />
11.1.7 Stopping and Re-starting Operation<br />
<br />
When operation is stopped, take care of the followings so that the sensor of the detector cannot<br />
become unused.<br />
CAUTION<br />
When operating an instrument such as boiler or industrial furnace is stopped with the zirconia<br />
oxygen analyzer operation, moisture can condensate on the sensor portion and dusts may stick<br />
to it.<br />
If operation is restarted in this condition, the sensor which is heated up to 750 °C firmly fixes the<br />
dusts on itself. Consequently, the dusts can make the sensor per<strong>for</strong>mance much lower. If a large<br />
amount of water is condensed, the sensor can be broken and will never be used.<br />
To prevent the above noncon<strong>for</strong>mity, take the following action when stopping operation.<br />
(1) If possible, keep on supplying the power to converter and flowing reference gas to the sensor.<br />
If this is impossible to do the above, remove the detector.<br />
(2) If unavoidably impossible to supply the power and removing the detector, keep on the<br />
following air at 600 ml/min into the calibration gas pipe.<br />
<br />
When restarting operation, be sure to flow air, <strong>for</strong> 5-10 minutes, at 600 ml/min into the calibration<br />
gas pipe be<strong>for</strong>e supplying power to the converter.<br />
IM 11M12A01-02E<br />
8th Edition : Jan.13,2012-00
11-8<br />
11.2 Inspection and Maintenance of the<br />
Converter<br />
The converter does not require routine inspection and maintenance. If the converter does not<br />
work properly, in most cases it probably comes from problems or other causes.<br />
A dirty touchpanel should be wiped off with a soft dry cloth.<br />
11.2.1 Replacing Fuses<br />
The converter incorporates a fuse, as indicated in Figure 11.5. If the fuse blows out, replace it in<br />
the following procedure.<br />
CAUTION<br />
• If a replaced fuse blows out immediately, there may be a problem in the circuit.<br />
Go over the circuit completely to find out why the fuse has blown.<br />
• This fuse is <strong>for</strong> protecting the main power supply circuit and does not provide overcurrent<br />
protection <strong>for</strong> the heater temperature control circuit. For overcurrent protection circuitry, refer<br />
to Section 12.1.2.2, Heater Temperature Failure.<br />
Fuse<br />
Figure 11.5 Location of Fuse in the Converter<br />
F11.5E.ai<br />
IM 11M12A01-02E<br />
8th Edition : Jan.13,2012-00
To replace the fuse, follow these steps:<br />
(1) Turn off the power to the converter <strong>for</strong> safe replacement.<br />
11-9<br />
(2) Remove the fuse from its holder. With the appropriate flat-blade screwdriver that just fits the<br />
holder cap slot (Figure 11.6), turn the fuse holder cap 90° counterclockwise.<br />
By doing so, you can remove the fuse together with the cap.<br />
Cap<br />
Flat-blade<br />
screwdriver<br />
Socket<br />
Fuse<br />
F11.6E.ai<br />
Figure 11.6 Removing the Fuse<br />
(3) Check the rating of the fuse and that it satisfies the following:<br />
Maximum rated voltage: 250 V<br />
Maximum rated current: 3.15 A<br />
Type: Time-lag fuse<br />
Standards: UL-, CSA- or VDE-approved<br />
Part number: A1113EF<br />
Place a new, properly rated fuse in the holder together with the cap, and push and turn the<br />
cap clockwise 90° with the screwdriver to complete installation of the fuse.<br />
11.2.2 Cleaning<br />
Use a soft dry cloth to clean any part of the converter during inspection and maintenance.<br />
11.2.3 Adjust LCD screen contrast<br />
An LCD is built in the <strong>ZR402G</strong> converter. The contrast of this LCD is affected by its ambient<br />
temperature. For this reason, the LCD is shipped, after adjusting the contrast so as to become<br />
the most suitable in a room temperature(20-30 °C). However, when display on the LCD is hard<br />
to see, adjust the LCD contrast by change the resistance of the variable resistor; its position is<br />
shown in Fig. 11.7<br />
Variable register<br />
Figure 11.7<br />
IM 11M12A01-02E<br />
8th Edition : Jan.13,2012-00
11-10<br />
11.3 Replacing Flowmeter in ZR40H Automatic<br />
Calibration Unit<br />
(1) Remove piping and wiring, and remove the ZR40H from the 2B pipe or wall mounting.<br />
(2) Remove four M6 bolts between brackets.<br />
(3) Remove piping extension<br />
(4) Remove bolts holding flowmeter, and replace it. A white back plate (to make the float easy<br />
to see) is attached. The end of the pin holding down the back plate must be on the bracket<br />
side.<br />
(5) Replace piping, and fix M6 bolts between brackets. *1<br />
*1 : When disassembling and reassembling, mark original positions, and tighten an extra 5-10° when reassembling.<br />
After tightening, do a liquid leakage test.<br />
Bolt fixes bracket<br />
Flowmeter with back plate<br />
COM ON S N<br />
Z RO<br />
Connecter<br />
Fig. 11.8 Flowmeter replacement<br />
F11.8E.ai<br />
C<br />
D<br />
Two screws fix flowmeter<br />
Connect piping pairs A-A', B-B', C-C', D-D'<br />
A'<br />
B'<br />
A<br />
C'<br />
D'<br />
B<br />
Fig. 11.9 Fixing Flowmeter<br />
F11.9E.ai<br />
IM 11M12A01-02E<br />
8th Edition : Jan.13,2012-00
12. Troubleshooting<br />
12-1<br />
This chapter describes errors and alarms detected by the self-diagnostic function of the<br />
converter. It also explains inspections and remedies when other problems occur.<br />
12.1 Displays and Remedies When Errors Occur<br />
12.1.1 Error Types<br />
An error occurs when an abnormality is detected in the detector or the converter, e.g., in the cell<br />
(sensor), detector heater, or internal circuits of the the converter..<br />
If an error occurs, the converter per<strong>for</strong>ms the following:<br />
(1) Stops the supply of power to the heater in the detector to insure system safety.<br />
(2) Causes an error indication in the display to start blinking to notify of an error generation<br />
(Figure 12.1).<br />
(3) Sends an output contact if the error is set up <strong>for</strong> Output contact setup <strong>for</strong> that contact<br />
(refer to Section 8.4, Output Contact Setup).<br />
(4) Changes the analog output status to the one set in Output hold setting.<br />
(refer to Section 8.2, Output Hold Setting).<br />
When the display shown in Figure 12.1 appears, pressing the error indication brings up a<br />
description of the error (Figure 12.2). The content of errors that are displayed include those<br />
shown in Table 12.1.<br />
Tag:<br />
Tag:<br />
Error 2 :Heater temp.<br />
Alarm 1 1 : T.C. voltage<br />
21.0%O2<br />
17.42mA -Output1<br />
17.42mA -Output2<br />
Hold<br />
Hold<br />
F12.1E.ai<br />
Figure 12.1 Figure 12.2<br />
F12.2E.ai<br />
Table 12.1 Types of Errors and Reasons <strong>for</strong> Occurrence<br />
Error Code Error Type Occurrence Conditions<br />
Error1 Cell voltage failure The cell (sensor) voltage signal input to the converter falls below -50 mV.<br />
Error2 Heater temperature failure The heater temperature does not rise during failure warm-up, or it falls<br />
below 730 ºC or exceeds 780 ºC after warm-up is completed.<br />
Or this occurs if the TC+, TC- thermocouple terminals are wired to<br />
converter with reverse (wrong) polarity.<br />
Error3 A/D converter failure The A/D converter fails in the internal electrical circuit in the converter.<br />
Error4 Memory failure Data properly are not written into memory in the internal electrical circuit<br />
in the converter.<br />
IM 11M12A01-02E<br />
8th Edition : Jan.13,2012-00
12.1.2 Remedies When an Error Occurs<br />
12.1.2.1 Error1: Cell Voltage Failure<br />
12-2<br />
Error1 occurs when the cell (sensor) voltage input to the converter falls below -50 mV<br />
(corresponding to about 200 vol% O 2 ). The following are considered to be the causes <strong>for</strong> the cell<br />
voltage falling below -50 mV:<br />
(1) Poor contact in terminal connections between the converter and detector<br />
(2) Breakage in wiring cable between the converter and the detector<br />
(3) Damage or deterioration of the sensor assembly<br />
(4) Continuity failure between the sensor assembly electrode and the contact<br />
(5) Wiring failure inside the detector<br />
(6) Abnormality in electrical circuits in the converter<br />
<br />
Turn off power to the converter.<br />
Is there any breakage<br />
or poor contact in the wiring to the<br />
converter terminals<br />
No<br />
Is there any breakage<br />
or poor contact in the wiring to the<br />
detector terminals<br />
Yes<br />
Yes<br />
Replace the damaged<br />
portions.<br />
Replace the damaged<br />
portions.<br />
•Examine the wiring connection to converter terminals<br />
"CELL+" and "CELL-" Also, check the wiring<br />
connection in the repeater terminal box if it is used.<br />
•Examine the wiring connection status to<br />
detector terminals 1 and 2. Also, check that<br />
terminals and cable conductors are not corroded.<br />
No<br />
Is the sensor extremely<br />
dirty, corroded or broken<br />
No<br />
Is there any<br />
disconnection or poor continuity<br />
in the wiring between the<br />
detector and<br />
converter<br />
No<br />
Yes<br />
Yes<br />
Replace the sensor<br />
assembly.<br />
See Section 11.1.2 <strong>for</strong> the<br />
replacement procedure.<br />
Replace the wiring cable.<br />
•Remove the sensor assembly from the detector<br />
and check <strong>for</strong> the presence of corrosion that may<br />
cause a poor contact between the electrode and<br />
the contact; also, check <strong>for</strong> dirt. A sensor assembly<br />
in which no abnormality is found may be used again.<br />
However, be sure to use a new metal O-ring and<br />
contact even in such a case.<br />
•Remove the wiring conductors from detector<br />
terminals 1 and 2 and short out the removed<br />
conductors. Measure the resistance of these<br />
wiring conductors on the converter side.<br />
The resistance value is normal if it indicates<br />
10 Ω or less.<br />
•Turn on the power to the converter and temporarily<br />
place the analyzer in the operating status.<br />
Is an error indicated<br />
on the display<br />
No<br />
End. Carry out calibration.<br />
Yes<br />
Replace the sensor<br />
assembly and temporarily<br />
place the analyzer in the<br />
operating status.<br />
See Section 11.1.2 <strong>for</strong> the replacement<br />
procedure.<br />
The analyzer operates normally.<br />
Yes<br />
No<br />
A failure in the detector or<br />
the converter is suspected.<br />
Contact <strong>Yokogawa</strong>.<br />
F12.1.2E.ai<br />
IM 11M12A01-02E<br />
8th Edition : Jan.13,2012-00
12.1.2.2 Error2: Heater Temperature Failure<br />
12-3<br />
This error occurs if the detector heater temperature does not rise during warm-up, falls below 730<br />
°C after warm-up, or exceeds 780 °C. When Error2 occurs, Alarm 10 (cold junction temperature<br />
alarm) or Alarm 11 (thermocouple voltage alarm) may be generated at the same time. Be sure to<br />
press the error indication to get the error description and confirm whether or not these alarms are<br />
being generated simultaneously.<br />
If Alarm 10 is generated simultaneously, a failure in the cold junction system on the detector<br />
terminal block is suspected. In this case, follow the procedure according to troubleshooting <strong>for</strong><br />
Alarm 10 in Section 12.2.2.5.<br />
If Alarm 11 is generated simultaneously, a failure in the thermocouple system located in the<br />
detector heater is suspected. In this case, follow the procedure according to troubleshooting <strong>for</strong><br />
Alarm 11 in Section 12.2.2.6<br />
If this failure occurs immediately after the power is supplied, the polarity at thermocouple input<br />
connection (TC+, TC-) on the converter may be reversed. Check the connection from the<br />
detector.<br />
Causes considered <strong>for</strong> cases where Error2 occurs independently are shown below.<br />
(1) Faulty heater in the detector (heater wire breakage)<br />
(2) Faulty thermocouple in the detector<br />
(3) Faulty cold junction sensor located at the detector terminal block.<br />
(4) Failure in electrical circuits inside the converter<br />
(5) Heater temperature control overcurrent limiting triggered.<br />
(6) TC+ ,TC- thermocouple terminals wired to detector with reverse (wrong) polarity.<br />
Overcurrent protection is triggered if there are problems in the heater wiring. When the protective<br />
circuit is triggered, the internal fuse blows and the heater is disconnected, resulting in Error 2<br />
(temperature failure).<br />
<br />
(1) Turn off power to the converter.<br />
(2) Remove the cable from terminals 7 and 8 of the detector and measure the resistance value<br />
between these terminals. The heater unit is normal if the resistance is lower than about<br />
90 Ω. If the resistance value is higher, failure of the heater unit is suspected. In this case,<br />
replace the heater unit (refer to Section 11.1.3, Replacement of the Heater Unit). In addition,<br />
check that the wiring resistance between the converter and detector is 10 Ω or less.<br />
(3) Ensure that TC+ terminal (terminal 3 in detector) is connected to converter TC+ terminal,<br />
and TC- terminal (terminal 4) is connected to converter TC- terminal.<br />
(4) Remove the wiring from terminals 3 and 4 of the detector and measure the resistance<br />
value between these terminals. The thermocouple is considered normal if the resistance<br />
value is 5 Ω or less. If the value is higher than 5 Ω, it may indicate that the thermocouple<br />
wire has broken or is about to break. In this case, replace the heater unit (refer to Section<br />
11.1.3, Replacement of the Heater Unit). Also, check that the wiring resistance between the<br />
converter and detector is 10 Ω or less.<br />
(5) Even if items (2) to (4) are normal, the heater overcurrent protection fuse may have blown.<br />
Check <strong>for</strong> wiring problems such as the following:<br />
1) Heater terminals shorted.<br />
2) Heater terminal(s) shorted to ground.<br />
3) Heater terminals shorted to power supply.<br />
If the internal fuse blows, this cannot be replaced by the user. Contact your <strong>Yokogawa</strong> service<br />
representative.<br />
IM 11M12A01-02E<br />
8th Edition : Jan.13,2012-00
12-4<br />
NOTE<br />
• Measure the thermocouple resistance value after the temperature difference between<br />
the detector tip and the ambient atmosphere has decreased to 50 °C or less. If the<br />
thermocouple voltage is large, accurate measurement cannot be achieved.<br />
12.1.2.3 Error3: A/D Converter Failure/Error4: Writing-to-memory Failure<br />
• A/D Converter Failure<br />
It is suspected that a failure has occurred in the A/D converter mounted in the electrical circuits<br />
inside the converter.<br />
• Writing-to-memory Failure<br />
It is suspected that a failure has occurred in an operation writing to the memory (EEPROM)<br />
mounted in the electrical circuits inside the converter.<br />
<br />
Turn off the power to the converter once and then restart the converter. If the converter<br />
operates normally after restarting, an error might have occurred due to a temporary drop in the<br />
voltage (falling below 85 V, the least amount of voltage required to operate the converter) or a<br />
malfunction of the electrical circuits affected by noise. Check whether or not there is a failure in<br />
the power supply system or whether the converter and detector are securely grounded.<br />
If the error occurs again after restarting, a failure in the electrical circuits is suspected.<br />
Consult the service personnel at <strong>Yokogawa</strong>.<br />
IM 11M12A01-02E<br />
8th Edition : Jan.13,2012-00
12-5<br />
12.2 Displays and Remedies When Alarms are<br />
Generated<br />
12.2.1 Alarm Types<br />
When an alarm is generated, the alarm indication blinks in the display to notify of the alarm<br />
(Figure 12.3). Pressing the alarm indication displays a description of the alarm.<br />
Alarms include those shown in Table 12.2.<br />
Tag:<br />
Tag:<br />
Alarm 6 :Zero conc.ratio<br />
21.0%O 2<br />
17.42mA -Output1<br />
17.42mA -Output2<br />
F12.3E.ai<br />
Figure 12.3 Figure 12.4<br />
F12.4E.ai<br />
Table 12.2 Types of Alarms and Reasons <strong>for</strong> Occurrence<br />
Alarm<br />
Code<br />
Alarm Type<br />
Occurrence Conditions<br />
Alarm 1 Oxygen concentration alarm Measured oxygen concentration value exceeds or falls below<br />
the preset alarm limits. (refer to Section 8.3, Setting Oxygen<br />
Concentration Alarms).<br />
Alarm 6<br />
Alarm 7<br />
Zero-point calibration coefficient<br />
alarm<br />
Span-point calibration coefficient<br />
alarm<br />
In automatic or semi-automatic calibration, zero correction<br />
ratio is outside the range of 100 ±30%. (refer to Section 9.1.3,<br />
Compensation).<br />
Span correction ratio is outside the range of 0±18% (refer to<br />
Section 9.1.3, Compensation).<br />
Alarm 8 EMF stabilization time-up alarm In automatic or semi-automatic calibration, cell voltage does not<br />
stabilize after calibration time is up.<br />
Alarm 10 Cold junction temperature alarm Temperature of the cold junction placed in the detector terminal<br />
box falls below -25 ºC or exceeds 155 ºC.<br />
Alarm 11 Thermocouple voltage alarm Generated when thermocouple voltage exceeds 42.1 mV (about<br />
1020 ºC) or falls below -5 mV (about -170 ºC).<br />
Alarm 13 Battery low alarm Internal battery needs replacement.<br />
If an alarm is generated, actions such as turning off the heater power are not carried out. The<br />
alarm is cancelled when the cause of the alarm is removed. However, Alarm 10 and/or Alarm 11<br />
may be generated concurrently with Error2 (heater temperature error). In this case, the operation<br />
when the error occurs has priority.<br />
If the power to the converter is turned off after an alarm is generated and the converter is restarted<br />
be<strong>for</strong>e the cause of the alarm has been removed, the alarm will be generated again. However,<br />
Alarms 6, 7, and 8 (alarms related to calibration) are not generated unless calibration is executed.<br />
IM 11M12A01-02E<br />
8th Edition : Jan.13,2012-00
12.2.2 Remedies When Alarms are Generated<br />
12.2.2.1 Alarm 1: Oxygen Concentration Alarm<br />
12-6<br />
This alarm is generated when a measured value exceeds an alarm set point or falls below it.<br />
For details on the oxygen concentration alarm, see Section 8.3, Setting Oxygen Concentration<br />
Alarms, in the chapter on operation.<br />
12.2.2.2 Alarm 6: Zero-point Calibration Coefficient Alarm<br />
In automatic or semi-automatic calibration, this alarm is generated when the zero correction ratio<br />
is out of the range of 100 ± 30% (refer to Section 9.1.3, Compensation).<br />
The following are possible causes of this alarm.<br />
(1) The zero-gas oxygen concentration does not agree with the value of the zero-gas<br />
concentration set in Calibration setup. Otherwise, the span gas is used as the zero gas.<br />
(2) The flow rate of zero gas is out of the specified flow (600 ± 60 ml/min).<br />
(3) The sensor assembly is damaged and so cell voltage is not normal.<br />
<br />
(1) Check that the following have been set up correctly. If not, correct them. Then, recalibrate.<br />
a. Check the preset zero gas concentration on the Calibration setup display. The displayed<br />
concentration value has agreed with the concentration of the zero gas actually used.<br />
b. The piping <strong>for</strong> calibration gases has been constructed so that the zero gas does not leak.<br />
(2) If the alarm is not generated during the recalibration, improper calibration conditions are<br />
considered as the cause of the alarm generated in the previous calibration. In this case, no<br />
particular restoration is necessary.<br />
(3) If the alarm is generated again during the recalibration, deterioration of or damage to the<br />
sensor assembly is considered as the cause of the alarm. It is necessary to replace the cell<br />
with a new one. Be<strong>for</strong>e replacement, carry out the following.<br />
Check the cell voltages when the zero gas and span gas are introduced.<br />
a. From the Basic panel display, move to the Detailed-data display of the channel where the<br />
alarm is being generated.<br />
b. When the [▼] key is pressed once, the cell voltage should be indicated on the top line<br />
(Figure 12.5).<br />
c. Check whether or not the displayed cell voltage is very different from the theoretical value<br />
at the oxygen concentration of the relevant gas. See Table 12.3 <strong>for</strong> the theoretical cell<br />
voltages. Although the tolerance to the theoretical value cannot be generally specified, a<br />
reasonable one may be approximately ±10 mV.<br />
Table 12.3 Oxygen Concentration and Cell Voltage<br />
Oxygen concentration<br />
(vol%O2)<br />
Cell voltage<br />
(mV)<br />
1% 67.1<br />
21% 0<br />
IM 11M12A01-02E<br />
8th Edition : Jan.13,2012-00
12-7<br />
(4) Check whether the deterioration of or damage to the sensor assembly that caused the<br />
alarm has occurred suddenly during the current calibration in the following procedure:<br />
a. Call up the Detailed-data Display.<br />
b. Use the [Page Scroll] key to check Calibration Data (Figure 12.6). The span and zero<br />
correction ratios of the last ten calibration can be checked here. By checking these data,<br />
whether the sensor deterioration has occurred suddenly or gradually can be determined.<br />
Tag:<br />
Cell voltage: 0 . 6 mV<br />
Thermo voltage: 4 2 . 1 mV<br />
C.J.resistance: 1 1 8 1 . 4 Ω<br />
Cell resistance: - 4 Ω<br />
Soft.rev.: 0 . 2 4<br />
Tag:<br />
Calibration data:<br />
1: 2 0 0 0 / 07 / 07 1 4 : 57<br />
Span gas ratio: - 2 . 9 %<br />
Zero gas ratio: 7 0 . 3 %<br />
2: 2 0 0 0 / 07 / 07 1 4 : 5 4<br />
Span gas ratio: - 2 . 9 %<br />
Zero gas ratio: 8 9 . 7 %<br />
Hold<br />
Figure 12.5 Detailed Data Display<br />
F12.5E.ai<br />
Hold<br />
Figure 12.6 Calibration History<br />
(5) If the sensor assembly has deteriorated suddenly, the check valve that prevents moisture in<br />
the furnace from entering into the calibration pipes may have malfunctioned. If the furnace<br />
gas flows into calibration lines, the gas is cooled and thus condensation develops and<br />
accumulates in the pipe. During calibration the condensate is carried with the calibration gas<br />
and blow onto the sensor assembly, whereby the cell is cooled quickly. This results in the<br />
failed sensor assembly.<br />
(6) If the sensor assembly has deteriorated gradually, check the condition of the sensor<br />
assembly following the procedure below.<br />
a. Use the [Page Scroll] key to check Cell Resistance. It should be 200V or less if the cell<br />
(sensor) is new. On the other hand, if the cell (sensor) is approaching the end of its service<br />
life, it will be 3 to 10 kV.<br />
b. Use the [Page Scroll] key to check Cell Robustness. It should say “Life > 1 year” if the cell<br />
(sensor) is in good condition.<br />
Tag:<br />
Span gas ratio: - 2 . 9 %<br />
Zero gas ratio: 7 0 . 3 %<br />
Response time:<br />
0 s<br />
Cell robustness: life< 1 month<br />
Cell temperature: 1 0 6 7 °C<br />
C.J.temperature: 4 7 °C<br />
Hold<br />
F12.7E.ai<br />
Figure 12.7<br />
12.2.2.3 Alarm 7: Span-point Calibration Coefficient Alarm<br />
In automatic or semi-automatic calibration, this alarm is generated when the span correction ratio<br />
is out of the range of 0 ± 18% (refer to Section 9.1.3, Compensation).<br />
The following are suspected as the cause:<br />
(1) The oxygen concentration of the span gas does not agree with the value of the span gas set<br />
in Calibration setup.<br />
(2) The flow of the span gas is out of the specified flow value (600 ± 60 ml/min).<br />
(3) The sensor assembly is damaged and the cell voltage is abnormal.<br />
IM 11M12A01-02E<br />
8th Edition : Jan.13,2012-00
12-8<br />
(1) Confirm the following and carry out calibration again: If the items are not within their proper<br />
states, correct them.<br />
a. If the display “Span gas conc” is selected in Calibration setup, the set point should agree<br />
with the concentration of span gas actually used.<br />
b. The calibration gas tubing should be constructed so that the span gas does not leak.<br />
(2) If no alarm is generated as a result of carrying out re-calibration, it is suspected that<br />
improper calibration conditions were the cause of the alarm in the preceding calibration.<br />
In this case, no specific restoration is necessary.<br />
(3) If an alarm is generated again as a result of carrying out re-calibration, deterioration of or<br />
damage to the cell (sensor) is suspected as the cause of the alarm. Replacement of the<br />
cell with a new one is necessary. However, be<strong>for</strong>e replacement, carry out the procedure<br />
described in step (3) and later of in<br />
Section 12.2.2.2, Alarm 6: Zero-point Calibration Coefficient Alarm.<br />
12.2.2.4 Alarm 8: EMF Stabilization Time-up Alarm<br />
This alarm is generated if the sensor (cell) voltage has not stabilized even after the calibration<br />
time is up <strong>for</strong> the reason that the calibration gas (zero gas or span gas) has not filled the sensor<br />
assembly of the detector.<br />
<br />
(1) The flow of the calibration gas is less than normal (a specified flow of 600 ± 60 ml/min).<br />
(2) The length or thickness of the calibration gas tubing has been changed (lengthened or<br />
thickened).<br />
(3) The measuring gas flows toward the tip of the probe.<br />
(4) The sensor (cell) response has deteriorated.<br />
<br />
(1) Carry out calibration by passing the calibration gas at the specified flow (600 ± 60 ml/min)<br />
after checking that there is no leakage in the tubing.<br />
(2) If calibration is carried out normally, per<strong>for</strong>m a steady operation without changing the<br />
conditions. If the error occurs again, check whether or not the reason is applicable to the<br />
following and then replace the sensor assembly.<br />
• A lot of dust and the like may be sticking to the tip of the detector probe. If dust is found,clean<br />
the probe (see Section 11.1.1).<br />
In addition, if an error occurs in calibration even after the sensor assembly is replaced, the<br />
influence of sample gas flow may be suspected. Do not let the sample gas flow toward the<br />
tip of the detector probe, <strong>for</strong> example, by changing the mounting position of the detector.<br />
12.2.2.5 Alarm 10: Cold Junction Temperature Alarm<br />
This alarm is generated when the temperature of the cold junction located at the terminal block of<br />
the detector falls below -25 °C or exceeds 155 °C. Check the following:<br />
Display “C.J.temperature” in the Detailed-data display. If “C.J.temperature” is indicated as 200 °C<br />
or -50 °C, the following can be considered.<br />
(1) Breakage of the cold junction signal wires between the converter and the detector, or the<br />
cable is not securely connected to the connecting terminals.<br />
(2) The positive and negative poles of the cold junction signal wiring are shorted out in the<br />
wiring extension or at the connection terminals.<br />
IM 11M12A01-02E<br />
8th Edition : Jan.13,2012-00
12-9<br />
(3) A failure of the cold junction temperature sensor located at the detector terminal block<br />
occurred.<br />
(4) A failure of the electrical circuits inside the converter occurred.<br />
If “C.J.temperature” exceeds 150 °C or falls below -20 °C, the following can be considered.<br />
• The temperature of the detector terminal block is out of the operating temperature range<br />
(-20 °C to 150 °C).<br />
• A failure of the cold junction temperature sensor located at the detector terminal block<br />
occurred.<br />
• A failure of the electrical circuits inside the converter occurred.<br />
<br />
Be<strong>for</strong>e proceeding to the following troubleshooting procedure, examine whether or not the<br />
temperature of the detector terminal block is out of the operating temperature range.<br />
The operating temperature range varies with the type of detector. If the detector terminal block<br />
is out of its operating temperature range, take the measure to lower the temperature, such as<br />
situating it so that it is not subjected to radiant heat.<br />
The case where the Model ZR22 Detector is used:<br />
(1) Stop the power to the converter.<br />
(2) Remove the wiring from terminals 5 and 6 of the detector and measure the resistance<br />
between these terminals. If the resistance value is out of the range of 1 to 1.6 kΩ, the cold<br />
junction temperature sensor is considered to be faulty. Replace that temperature sensor<br />
with a new one.<br />
(3) If the resistance value is within the above range, the cold junction temperature sensor<br />
seems to be normal. Check whether or not the cable is broken or shorted out, and whether<br />
the cable is securely connected to the terminals. Also, check that the resistance of the wiring<br />
between the converter and detector is 10 Ω or less.<br />
(4) If there is no failure in the wiring, the electrical circuits inside the converter may possibly fail.<br />
Contact the service personnel at <strong>Yokogawa</strong>.<br />
The case where the Model ZO21D Detector is used:<br />
(1) Without stopping the power to the converter, remove the wiring from terminals 5 and 6 of<br />
the detector and measure the voltage between these terminals. If the voltage between the<br />
terminals is out of the range of 0.4 to 0.7 V, the cold junction temperature sensor seems to<br />
be faulty. Replace the cold junction temperature sensor.<br />
(2) If the voltage between the terminals is within the above range, the cold junction temperature<br />
sensor seems to be normal. Check whether or not the cable is broken or shorted out, and<br />
whether the cable is securely connected to the terminals. Also, check that the resistance of<br />
the wiring between the converter and detector is 10 Ω or less.<br />
(3) If there is no failure in the wiring, the electrical circuits inside the converter may possibly fail.<br />
Contact the service personnel at <strong>Yokogawa</strong>.<br />
CAUTION<br />
• The operating temperature range of the Model ZO21D Detector is -10 °C to 80 °C (except<br />
<strong>for</strong> the high temperature detector ZO21D-H). Since a cold junction temperature alarm <strong>for</strong><br />
this analyzer is not generated until the temperature exceeds 155 °C, if the Model ZO21D<br />
Detector is used, be careful in controlling the ambient temperature of the terminal block.<br />
IM 11M12A01-02E<br />
8th Edition : Jan.13,2012-00
12.2.2.6 Alarm 11: Thermocouple Voltage Alarm<br />
12-10<br />
This alarm is generated when the emf (voltage) of the thermocouple falls below -5 mV (about<br />
-170 °C) or exceeds 42.1 mV (about 1020 °C). Whenever Alarm 11 is generated, Error2 (heater<br />
temperature failure) occurs.<br />
(1) Breakage of the heater thermocouple signal wire between the converter and the detector<br />
occurred, or the cable is not securely connected to the connecting terminals.<br />
(2) The positive and negative poles of the heater thermocouple signal wiring are shorted out in<br />
the wiring extension or at the connection terminals.<br />
(3) A failure of the thermocouple at the detector heater assembly occurred.<br />
(4) A failure of the electrical circuits inside the converter occurred.<br />
<br />
(1) Stop the power to the converter.<br />
(2) Remove the wiring from terminals 3 and 4 of the detector and measure the resistance<br />
between these terminals. If the resistance value is 5 Ω or less, the thermocouple seems to<br />
be normal. If it is higher than 5 Ω, it may indicate the possibility that the thermocouple has<br />
broken or is about to break. In this case, replace the heater unit (refer to Section 11.1.3,<br />
Replacement of the Heater Unit).<br />
CAUTION<br />
• Measure the thermocouple resistance value after the difference between the detector tip<br />
temperature and ambient temperature falls to 50 °C or less. If the thermocouple voltage is<br />
large, accurate measurement cannot be achieved.<br />
(3) If the thermocouple is normal, check whether or not the wiring cable is broken or shorted<br />
out, and also whether the wiring cable is securely connected to the terminals.<br />
Also check that the wiring resistance between the converter and the detector is 10 Ω or less.<br />
(4) If there is no failure in the wiring, the electrical circuits inside the converter may possibly fail.<br />
Contact the service personnel at <strong>Yokogawa</strong>.<br />
12.2.2.7 Alarm 13: Battery Low Alarm<br />
An internal battery is used as backup <strong>for</strong> the clock. After this alarm occurs, removing power from<br />
the instrument may cause the clock to stop but should not affect stored parameters. The internal<br />
clock is used <strong>for</strong> blow back scheduling; if you use this then after a battery alarm occurs (until the<br />
battery is replaced) be sure to check / correct the date and time every time you turn on the power.<br />
<br />
When the battery low alarm occurs, remember that the battery cannot be replaced by the user.<br />
Contact your <strong>Yokogawa</strong> service representative.<br />
NOTE<br />
Battery life varies with environmental conditions.<br />
* If power is applied to the instrument continuously, then the battery should not run down, and<br />
life is typically about ten years. However the battery will be used during the time interval<br />
between shipment from the factory and installation.<br />
* If power is not applied to the instrument, at normal room temperatures of 20 to 25 °C then<br />
battery life is typically 5 years, and outside this range but within the range -30 to +70 °C then<br />
battery life is typically 1 year.<br />
IM 11M12A01-02E<br />
8th Edition : Jan.13,2012-00
12-11<br />
12.3 Countermeasures When Measured Value<br />
Shows Error<br />
The causes that the measured value shows an abnormal value is not always due to instrument<br />
failures. There are rather many cases where the causes are those that measuring gas itself<br />
is in abnormal state or external causes exist, which disturb the instrument operation. In this<br />
section, causes of and measures against the cases where measured values show the following<br />
phenomena will be described.<br />
(1) The measured value is higher than the true value.<br />
(2) The measured value is lower than the true value.<br />
(3) The measured value sometimes shows abnormal values.<br />
12.3.1 Measured Value Higher Than True Value<br />
<br />
(1) The measuring gas pressure becomes higher.<br />
The measured oxygen concentration value X (vol% O 2 ) is expressed as shown below,<br />
when the measuring gas pressure is higher than that in calibration by ∆p (kPa).<br />
X=Y [ 1+ (∆p/101.30) ]<br />
where Y: Measured oxygen concentration value at the same pressure as in calibration<br />
(vol% O 2 ).<br />
Where an increment of the measured value by pressure change cannot be neglected,<br />
measures must be taken.<br />
Investigate the following points to per<strong>for</strong>m improvement available in each process.<br />
• Is improvement in facility’s aspect available so that pressure change does not occur<br />
• Is per<strong>for</strong>ming calibration available under the average measuring gas pressure<br />
(internal pressure of a furnace)<br />
(2) Moisture content in a reference gas changes (increases) greatly.<br />
If air at the detector installation site is used <strong>for</strong> the reference gas, large change of moisture<br />
in the air may cause an error in measured oxygen concentration value (vol% O 2 ).<br />
When this error is not ignored, use a gas in which moisture content is constant such as<br />
instrument air in almost dry condition as a reference gas.<br />
In addition, change of moisture content in exhaust gas after combustion is also considered<br />
as a cause of error. However, normally this error is negligible.<br />
(3) Calibration gas (span gas) is mixing into the detector due to leakage.<br />
If the span gas is mixing into the detector due to leakage as a result of failure of the valve<br />
provided in the calibration gas tubing system, the measured value shows a value a little<br />
higher than normal.<br />
Check valves (needle valves, check valves, solenoid valves <strong>for</strong> automatic calibration,<br />
etc.) in the calibration gas tubing system <strong>for</strong> leakage. For manual valves, check them after<br />
confirming that they are in fully closed states. In addition, check the tubing joints <strong>for</strong> leakage.<br />
(4) The reference gas is mixing into the measuring gas and vice versa.<br />
Since the difference between oxygen partial pressures on the sensor anode and cathode<br />
sides becomes smaller, the measured value shows a higher value.<br />
An error which does not appear as the Error1 may occur in the sensor. Sample gas and/or<br />
the reference gas may be leaking. Visually inspect the sensor. If any crack is found, replace<br />
the sensor assembly with a new one.<br />
NOTE<br />
Data such as cell robustness displayed in the Detailed-data display should also be used <strong>for</strong><br />
deciding sensor quality as references.<br />
IM 11M12A01-02E<br />
8th Edition : Jan.13,2012-00
12.3.2 Measured Value Lower Than True Value<br />
<br />
12-12<br />
(1) The measuring gas pressure becomes lower.<br />
Where an increment of the measured value due to pressure change cannot be neglected,<br />
take measures referring to subsection 12.3.1 (1).<br />
(2) Moisture content in a reference gas changes (decreases) greatly.<br />
If air at the detector installation site is used <strong>for</strong> the reference gas, large change of moisture<br />
content in the air may cause an error in measured oxygen concentration value (vol% O 2 ).<br />
When this error is not ignored, use a gas in which moisture content is constant such as<br />
instrument air in almost dry condition as a reference gas.<br />
In addition, change of moisture content in exhaust gas after combustion is also considered<br />
as a cause of error. However, normally this error is negligible.<br />
(3) Calibration gas (zero gas) is mixed into the detector due to leakage.<br />
If the zero gas is mixed into the detector due to leakage as a result of failure of the valve<br />
provided in the calibration gas tubing system, the measured value shows a value a little<br />
lower than normal.<br />
Check valves (needle valves, check valves, solenoid valves <strong>for</strong> automatic calibration,<br />
etc.) in the calibration gas tubing system <strong>for</strong> leakage. For manual valves, check them after<br />
confirming that they are in a fully closed situation.<br />
(4) Combustible components exist in the sample gas. If combustible components exist in the<br />
sample gas, they burn in the sensor and thus oxygen concentration decreases.<br />
Check that there are no combustible components.<br />
(5) Temperature of the detector cell reaches 750 °C or more.<br />
12.3.3 Measurements Sometimes Show Abnormal Values<br />
<br />
(1) Noise may be mixing in with the converter from the detector output wiring.<br />
Check whether the converter and detector are securely grounded.<br />
Check whether or not the signal wiring is laid along other power cords.<br />
(2) The converter may be affected by noise from the power supply.<br />
Check whether or not the converter power is supplied from the same outlet, switch, or<br />
breaker as other power machines and equipment.<br />
(3) Poor wiring contact<br />
If there is poor contact in the wiring, the sensor voltage or thermocouple emf (voltage) may<br />
vary due to vibration or other factors.<br />
Check whether or not there are loose points in the wiring connections or loose crimping<br />
(caulking) at the crimp-on terminal lugs.<br />
(4) Combustible components in the sample gas may be getting into the sensor.<br />
If the combustible components show signs of dust, the abnormality may be improved by<br />
mounting a dust-removing filter K9471UA.<br />
(5) There may be a crack in the sensor or leakage at the sensor-mounting portion.<br />
If the indication of concentration varies in synchronization with the pressure change in the<br />
furnace, check whether or not there is a crack in the sensor or whether the sensor flange is<br />
sticking tightly to the probe-attaching face with the metal O-ring squeezed.<br />
(6) There may be leakage in the calibration gas tubing<br />
In the case of a negative furnace inner pressure, if the indication of concentration varies with<br />
the pressure change in the furnace, check whether or not there is leakage in the calibration<br />
gas tubing.<br />
IM 11M12A01-02E<br />
8th Edition : Jan.13,2012-00
Customer<br />
Maintenance<br />
Parts List<br />
Model <strong>ZR22G</strong><br />
Zirconia Oxygen Analyzer, Detector<br />
(Separate type)<br />
A<br />
1<br />
A<br />
13<br />
13<br />
View A-A<br />
2<br />
7<br />
6 5 4 3<br />
10 9 8<br />
11 12 F02E.ai<br />
Item Part No. Qty Description<br />
1<br />
2<br />
3<br />
4<br />
5<br />
K9471UA<br />
-------------<br />
E7042BR<br />
K9470BM<br />
K9473AN<br />
E7042DW<br />
1<br />
1<br />
1<br />
1<br />
1<br />
4<br />
Dust Filter (Option)<br />
Sensor Assembly<br />
Plate<br />
Pipe<br />
Pipe <strong>for</strong> Option code "/C"<br />
Washer (SUS316 stainless steel)<br />
6<br />
7<br />
8<br />
9<br />
10<br />
11<br />
12<br />
13<br />
G7109YC<br />
K9470BK<br />
ZR01A01-01<br />
ZR01A01-02<br />
ZR01A01-05<br />
ZR01A01-10<br />
E7042BS<br />
K9470BJ<br />
E7042AY<br />
K9470ZF<br />
K9470ZG<br />
K9470ZK<br />
K9470ZL<br />
ZR22A-□□□-□-□<br />
4<br />
4<br />
1<br />
1<br />
1<br />
1<br />
1<br />
1<br />
1<br />
1<br />
1<br />
Bolt (M5x12, SUS316 stainless steel)<br />
Bolt (M5x12, inconel) <strong>for</strong> Option code "/C"<br />
Cell Assembly<br />
1 piece<br />
2 pieces<br />
5 pieces<br />
10 pieces<br />
Contact<br />
Metal O-ring<br />
Filter Assembly<br />
Bolts and Washeres<br />
G7109YC x 4 + E7042DW x 4<br />
K9470BK x 4 + E7042DW x 4 <strong>for</strong> Option code "/C"<br />
Calibration Tube Assembly<br />
Cal. Gas Tube Assembly<br />
Cal. Gas Tube Assembly <strong>for</strong> Option code "/C"<br />
Heater Assembly<br />
All Rights Reserved, Copyright © 2000, <strong>Yokogawa</strong> Electric Corporation.<br />
Subject to change without notice.<br />
CMPL 11M12A01-02E<br />
1st Edition : Aug. 2000 (YK)<br />
7th Edition : Feb. 2011 (YK)
Customer<br />
Maintenance<br />
Parts List<br />
Model <strong>ZR402G</strong><br />
Zirconia Oxygen Analyzer/High Temperature<br />
Humidity Analyzer,Converter<br />
1<br />
Hood <strong>for</strong> <strong>ZR402G</strong><br />
<strong>ZR402G</strong><br />
2<br />
Item Part No. Qty Description<br />
1 A1113EF 1 Fuse (3.15A)<br />
2 K9471UF 1 Hood<br />
All Rights Reserved, Copyright © 2000, <strong>Yokogawa</strong> Electric Corporation.<br />
Subject to change without notice.<br />
CMPL 11M12C01-01E<br />
1st Edition : Jan. 2000 (YK)<br />
3rd Edition : Feb. 2011 (YK)
Customer<br />
Maintenance<br />
Parts List<br />
Model ZR40H<br />
Separate type Zirconia Oxygen /<br />
High Temperature Humidity Analyzer,<br />
Automatic Calibration Unit<br />
6<br />
LOCK ZERO LOCK<br />
COMMON SPAN ZERO<br />
10<br />
9<br />
MODEL ZR40H<br />
SUFFIX<br />
STYLE S1<br />
AUTO CALIBRATION UNIT<br />
SUPPLY 690kPa MAX.<br />
AMB.TEMP-20 TO 558C<br />
USED WITH<strong>ZR402G</strong><br />
NO.<br />
Made in Japan<br />
REF.OUT<br />
CAL.OUT<br />
SPAN IN<br />
ZERO IN<br />
Item Part No. Qty Description<br />
6 K9473XC 1 Flowmeter<br />
All Rights Reserved, Copyright © 2000, <strong>Yokogawa</strong> Electric Corporation.<br />
Subject to change without notice.<br />
CMPL 11M12A01-11E<br />
1st Edition : Dec. 2000 (YK)<br />
3th Edition : Feb. 2011 (YK)
Customer<br />
Maintenance<br />
Parts List<br />
Model ZO21P-H<br />
Zirconia Oxygen Analyzer<br />
High Temperature Probe Adapter<br />
4 5,6<br />
3<br />
7 8,9,10<br />
11 <strong>ZR22G</strong><br />
2<br />
1<br />
Item Part No. Qty Description<br />
1 E7046AL<br />
E7046BB<br />
E7046AP<br />
E7046AQ<br />
2 E7046AD<br />
E7046CB<br />
——<br />
——<br />
——<br />
——<br />
1<br />
1<br />
1<br />
1<br />
1<br />
1<br />
1<br />
1<br />
1<br />
1<br />
Probe (SiC, L=1.0m)<br />
Probe (SiC, L=1.5m)<br />
Probe (SUS, L=1.0m)<br />
Probe (SUS, L=1.5m)<br />
Probe Adaptor (<strong>for</strong> JIS 5K-50-FF)<br />
Probe adapter (<strong>for</strong> ANSI CLASS150-4-RF)<br />
Probe adapter (<strong>for</strong> DIN PN10-DN50-A)<br />
Probe adapter (<strong>for</strong> JIS 10K-100-FF)<br />
Probe adapter (<strong>for</strong> JIS 10K-80-FF)<br />
Probe adapter (<strong>for</strong> JIS 10K-65-FF)<br />
——<br />
——<br />
——<br />
——<br />
3 E7046FQ 1 Gasket<br />
1<br />
1<br />
1<br />
1<br />
Probe adapter (<strong>for</strong> ANSI CLASS150-3-RF)<br />
Probe adapter (<strong>for</strong> ANSI CLASS150-2 1/2-RF)<br />
Probe adapter (<strong>for</strong> JPI CLASS150-4-RF)<br />
Probe adapter (<strong>for</strong> JPI CLASS150-3-RF)<br />
4<br />
5<br />
6<br />
7<br />
8<br />
E7046FN<br />
Y9825NU<br />
Y9800WU<br />
G7073XL<br />
Y9630RU<br />
1<br />
4<br />
8<br />
1<br />
4<br />
Plate<br />
Bolt<br />
Washer<br />
Gasket<br />
Bolt<br />
9<br />
10<br />
11<br />
Y9121BU<br />
Y9120WU<br />
Y9801BU<br />
4<br />
4<br />
4<br />
Nut<br />
Washer<br />
Nut<br />
All Rights Reserved, Copyright © 2000, <strong>Yokogawa</strong> Electric Corporation.<br />
Subject to change without notice.<br />
CMPL 11M03B01-10E<br />
1st Edition : Dec. 2000 (YK)<br />
7th Edition : Feb. 2011 (YK)
Customer<br />
Maintenance<br />
Parts List<br />
E7046EC/E7046EN<br />
Zirconia Oxygen Analyzer<br />
Auxiliary Ejector Assembly (<strong>for</strong> Model ZO21P-H)<br />
1<br />
2 3 4<br />
5 6 7<br />
Item Part No. Qty Description<br />
1 E7046EC 1 Auxiliary Ejector, Connection Rc1/4<br />
E7046EN 1 Auxiliary Ejector, Connection 1/4NPT<br />
2 L9852CB 1 Needle Valve, Connection Rc1/4<br />
G7016XH 1 Needle Valve, Connection 1/4NPT<br />
3 E7046EK 1 Pressure Gauge, Connection Rc1/4<br />
E7046EV 1 Pressure Gauge, Connection 1/4NPT<br />
4 E7046ED 1 Ejector Assembly, Connection Rc1/4<br />
E7046EP 1 Ejector Assembly, Connection 1/4NPT<br />
5 E7046EF 1 Connector, Connection Rc1/4<br />
E7046ER 1 Connector, Connection 1/4NPT<br />
6 G7031XA 1 Ejector, Connection Rc1/4<br />
7 E7046EJ 1 Ejector, Connection R1/4<br />
All Rights Reserved, Copyright © 2000, <strong>Yokogawa</strong> Electric Corporation.<br />
Subject to change without notice.<br />
CMPL 11M03B01-05E<br />
1st Edition : Dec. 2000 (YK)<br />
7th Edition : Feb. 2011 (YK)
Customer<br />
Maintenance<br />
Parts List<br />
Model ZO21S<br />
Zirconia Oxygen Analyzer/ High Temperature<br />
Humidity Analyzer, Standard Gas Unit<br />
1 2<br />
3<br />
Item Part No. Qty Description<br />
1 ——— 1 Pump (see Table 1)<br />
2 E7050BA 1 Zero Gas Cylinder (x6 pcs)<br />
3 E7050BJ 1 Needle Valve<br />
Power<br />
AC 100 V<br />
110<br />
115<br />
AC 200 V<br />
220<br />
240<br />
Table 1<br />
Pump<br />
E7050AU<br />
E7050AV<br />
All Rights Reserved, Copyright © 2000, <strong>Yokogawa</strong> Electric Corporation.<br />
Subject to change without notice.<br />
CMPL 11M3D1-01E<br />
1st Edition : Jan. 2000 (YK)<br />
4th Edition : Mar. 2011 (YK)
Revision In<strong>for</strong>mation<br />
i<br />
Title<br />
: Model <strong>ZR22G</strong>, <strong>ZR402G</strong> Separate type Zirconia Oxygen Analyzer<br />
<strong>Manual</strong> No.<br />
: IM 11M12A01-02E<br />
Oct. 2000/1st Edition<br />
Newly published<br />
Mar. 2001/2nd Edition<br />
Revised section<br />
1.1.3 “System 3” explanation changed<br />
2.2 In “General use Separate type Detector”, some MS codes changed<br />
2.4 Corrected errors in <strong>ZR402G</strong> External Dimensions figure, changed MS Code table<br />
2.5.1 Changed reference gas pressure where check valves is used, style changed of ZA8F<br />
2.5.2 Added detail about ZR40H Automatic Calibration Unit<br />
2.7.3 Added items to figure of Auxiliary Ejector <strong>for</strong> High Temperature<br />
3.2.2 Corrected Figure 3.6 Panel Cutout, Figure 3.13 Mounting Holes<br />
3.5 Added to 3.5 Installation of ZR40H Automatic Calibration Unit<br />
6.1 Added Filter to 6.1 <strong>ZR22G</strong> Detector<br />
6.3 Added Names and Functions to 6.3 ZR40H Automatic Calibration Unit<br />
7.2 Changed reference gas pressure where check valve is used<br />
7.12.2.1 Changed reference gas pressure where check valve is used<br />
10.1.1.6 Corrected Table 10.1<br />
10.6.1 Changed reference gas pressure where check valve is used<br />
11.1 Added Filter to 11.1 Inspection and Maintenance of the Detector Added Filter to<br />
CMPL11M12A01-02E, and added ZR40H Automatic Calibration Unit to CMPL11M12A01-11E<br />
Sept. 2001/3rd Edition<br />
Revised section<br />
1.2 Model ZR22A Heater Assembly added<br />
2.5.1 ZA8F Flow Setting Unit error corrected<br />
2.7.9 Model ZR22A Heater Assembly added<br />
8.5.1 Table 8.7 Input Contact Functions changed<br />
10.1.5 “French” added to Language Selection<br />
11.1.3 Reference document added to Replacement of the Heater Unit<br />
Heater Assembly added to CMPL 11M12A01-02E<br />
CMPL11M03B01-05E revised to 6th Edtion, some part No. changed.<br />
CMPL11M03B01-10E revised to 5th Edtion, some part deleted.<br />
July 2003/4th Edition<br />
Style of model <strong>ZR22G</strong> and ZR22A changed to S2<br />
Notation of flange specification unified<br />
Dust guard protector, Airset added<br />
CMPL 11M12A01-02E Cell some parts no. changed, revised to 5th edition.<br />
CMPL 11M03B01-05E some parts no. changed, revised to 6th edition.<br />
Dec. 2003/5th Edition<br />
Changes of related by ROM and Main Board Assembly changed.<br />
Apr. 2005/6th Edition<br />
Revised section<br />
Introduction Added description in DANGER, Added description regarding modification<br />
1.2.1 “ System Components” Changed part numbers of air set in table<br />
2.2.1 Changed terminal box paint colors<br />
2.4.1 Changed safety and EMC con<strong>for</strong>ming standards and paint colors<br />
2.5.2 Changed Finish color<br />
2.6 Added description Non CE Mark<br />
2.7.6 “ Air Set” Changed part numbers and drawing of air set<br />
4.2.1 “ Piping Parts <strong>for</strong> System 2” Change part numbers of air set in Table 4.2<br />
IM 11M12A01-02E
ii<br />
4.3.1 “ Blow Back Piping” Changed part numbers of air set<br />
4.4.1 “ Piping Parts <strong>for</strong> a System using Detector with Pressure Conpensation” Changed part<br />
numbers of air set in Table 4.3<br />
5.3.3 Added WARNING<br />
11.2.1 Added instruction in Note<br />
12.1.1 Added description in Error-2 of Table 12.1, Type of Errors and Reasons <strong>for</strong> Occurrence<br />
12.1.2.1 Changed reference in<strong>for</strong>mation<br />
12.1.2.2 Added descriptions<br />
12.2.1 Added Alarm 13 in Table 12.2, Types of Alarms and Reasons <strong>for</strong> Occurrence<br />
12.2.2.7 Added Section 12.2.2.7, “Alarm 13: Battery Low Alarm”<br />
Sep. 2006/7th Edition<br />
Revised section<br />
2.7.6 “Air Set,” Part No. K9473XH or K9473XJ, Standard Specification:<br />
Changed descriptions partly; “Air Set,”Part No. G7004XF or K9473XG,<br />
Standard Specification:Changed descriptions partly;<br />
2.7.8 “Cylinder Regulator Valve (Part No. G7013XF or G7014XF), Standard Specification”:<br />
Changed descriptions partly and drawing.<br />
8.2.3 “Output Hold Setting”: Changed value in Figures 8.2 and 8.3.<br />
8.2.4 “Default Values”: Changed value and description in Table 8.3.<br />
8.6.1 “Setting the Date-and-Time”: Added Item in Figure 8.15.<br />
8.6.4 “Setting Purging”: Added Item.<br />
8.6.5 “Setting Passwords”: Changed section number.<br />
10.3 “Operational Data Initialization”: Changed value in Table 10.5.<br />
Revised section<br />
2.3.2 “ZO21P-H Adapter <strong>for</strong> High Temperature Probe”: Changed the thickness of the gasket in the<br />
drawing.<br />
2.4.1 “Standard Specification,” Safety and EMC con<strong>for</strong>ming standards: The following CAUTION<br />
description should be added.<br />
“Standard Specification,” Construction: “ NEMA 4 “ should read “NEMA 4X/IP66.”<br />
2.4.2 “• Model and Codes,”: Added Note and Suffix Codes.<br />
8.2, “Output Hold Setting,” Table 8.1.2 : Added Note.<br />
8.2.3, “Output Hold Setting” To set the output hold, follow these setps: The following Note<br />
description should be added.<br />
Revised and Corrected over all<br />
Jan. 2012/8th Edition<br />
Revised and Corrected over all<br />
• If you want more in<strong>for</strong>mation about <strong>Yokogawa</strong> products, you can visit<br />
<strong>Yokogawa</strong>’s home page at the following web site.<br />
Home page: http://www.yokogawa.com/an/<br />
• Written by Environmental & Analytical Products PMK Group<br />
IA Div., Product Business Center<br />
<strong>Yokogawa</strong> Electric Corporation<br />
• Published by <strong>Yokogawa</strong> Electric Corporation<br />
2-9-32 Nakacho, Musashino-shi, Tokyo 180-8750, JAPAN<br />
• Printed by KOHOKU PUBLISHING & PRINTING INC.<br />
IM 11M12A01-02E
User’s<br />
<strong>Manual</strong><br />
Model <strong>ZR22G</strong>, <strong>ZR402G</strong><br />
Separate type<br />
Zirconia Oxygen Analyzer<br />
Supplement<br />
Thank you <strong>for</strong> selecting our Model <strong>ZR22G</strong>, <strong>ZR402G</strong> Separate type Zirconia Oxygen Analyzer.<br />
<strong>User's</strong> <strong>Manual</strong>, IM 11M12A01-02E, 8th Edition, supplied with the product, some revisions/additions have been<br />
made. Please replace the corresponding pages in your copy with the attached, revised pages.<br />
Revisions:<br />
- page 2-2, Section 2.1.1, "Standard Specifications": Added the C-tick, Safety and EMC con<strong>for</strong>ming<br />
standards.<br />
- page 2-9, Section 2.3.2, "ZO21P High Temperature Probe Adapter" Model and Codes: Added of the<br />
option code.<br />
- Page 2-10, Section 2.3.2, "ZO21P High Temperature Probe Adapter" Table: Changed the some<br />
numerical value.<br />
- Page 2-11, Section 2.4.1, "Standard Specification": Deleted the C-tick, Safety and EMC con<strong>for</strong>ming<br />
standards.<br />
- Page 5-1, Section5.1, "General" Table 5.1: Deleted cable type.<br />
- Page 5-2, Section5.1, "General" : Added "WARNING".<br />
- Page 5-5, Section5.2, "Wiring <strong>for</strong> Detector Output" Ambient temperature of the detector : Changed<br />
temperature.<br />
Section5.2.1, "Cable Specifications": Chenged description.<br />
- Page 5-6, Section5.2.2, "Connection to the Detector" (2):Changed range of the ambient temperature<br />
at the location of the wire installation.<br />
Section 5.2.3, "Connection to the Converter"(2):Changed description.<br />
- Page 5-7, Section5.3, "Wiring <strong>for</strong> Power to Detector Heater" Ambient temperature of the detector:<br />
Changed temperature.<br />
Section 5.3.1,<br />
Section5.3.2,<br />
"Cable Specifications": Chenged description.<br />
"Connection to Detector" (2):Changed range of the ambient temperature<br />
at the location of the wire installation.<br />
- Page 5-8, Section5.3.3, "Connection to Converter" (2): Changed description.<br />
- Page 5-10, Section5.5.2, "Grounding Wiring" (2):Changed range of the ambient temperature<br />
at the location of the wire installation.<br />
- CMPL "CMPL 11M03B01-10E": Revised to 8th edition.<br />
- CMPL "CMPL 11M03B01-05E": Revised to 8th edition.<br />
- CMPL "CMPL 11M12A01-02E": Revised to 8th edition.<br />
- CMPL "CMPL 11M12a01-11E": Revised to 4th edition.<br />
All Rights Reserved, Copyright © 2000, 6th Edition: Sep. 2013 (YK)<br />
Subject to change without notice.<br />
IM 11M12A01-02E<br />
8th Edition
2-2<br />
(Sample gas pressure: within ±0.49 kPa)<br />
±5% Maximum value of set range ;<br />
0 to 50 vol% O 2 or more and up to 0 to 100 vol% O 2 range<br />
(Sample gas pressure: within ±0.49 kPa)<br />
Drift:<br />
(Excluding the first two weeks in use)<br />
(Excluding the case where the reference gas is by natural convection.)<br />
Both zero and span ±2% Maximum value of set range/month<br />
Response Time : Response of 90% within 5 seconds. (Measured after gas is introduced<br />
from calibration gas inlet and analog output start changing.)<br />
Installation Altitude: 2000 m or less<br />
Category based on IEC 1010: II (Note)<br />
Pollution degree based on IEC 1010: 2 (Note)<br />
Note:<br />
Installation category, called over-voltage category, specifies impulse withstand voltage.<br />
Category II is <strong>for</strong> electrical equipment.<br />
Pollution degree indicates the degree of existence of solid, liquid, gas or other inclusions<br />
which may reduce dielectric strength. Degree 2 is the normal indoor environment.<br />
Safety and EMC con<strong>for</strong>ming standards <strong>ZR402G</strong><br />
Safety: EN 61010-1, CAN/CSA-C22.2 No. 61010-1, UL Std. No. 61010-1<br />
EMC:<br />
EN 61326-1 Class A, EN 61326-2-3, EN61000-3-2<br />
EMC Regulatory Arrangement in Australia and New Zealand<br />
Korea Electromagnetic Con<strong>for</strong>mity Standard<br />
CAUTION<br />
This instrument is a Class A product, and it is designed <strong>for</strong> use in the industrial environment.<br />
Please use this instrument in the industrial environment only.<br />
2.2 General use Separate type Detector and<br />
Related Equipment<br />
General use separate type detector <strong>ZR22G</strong> can be used in combination with the probe protector<br />
ZO21R (see Section 2.2.2).<br />
2.2.1 <strong>ZR22G</strong> General use Separate type Detector<br />
Sample Gas Temperature:0 to 700 °C (Probe only)<br />
It is necessary to mount the cell using Inconel cell-bolts when the<br />
temperature is greater than 600 °C.<br />
700 to 1400 °C (with High Temperature Probe Adapter)<br />
For high temperature sample gas, apply 0.15 m long probe and High<br />
Temperature Probe Adapter ZO21P.<br />
Sample Gas Pressure: -5 to +250 kPa (When the pressure in the furnace exceeds 3 kPa,<br />
it is recommended that you compensate the pressure. When the<br />
pressure in the furnace exceeds 5 kPa, you must per<strong>for</strong>m pressure<br />
compensation.) For 0.15 m probe, 0.5 to 5 kPa. No pressure fluctuation<br />
in the furnace should be allowed.<br />
Note:<br />
When the detector is used in conjunction with a check valve and a ZA8F Flow Setting Unit,<br />
the maximum pressure of sample gas is 150 kPa. When with a check valve and a ZR40H<br />
Automatic Calibration Unit, it is 200 kPa. If the pressure of your sample gas exceeds these<br />
limits, consult with <strong>Yokogawa</strong>.<br />
IM 11M12A01-02E<br />
8th Edition : Jan.13,2012-00
2.3.2 ZO21P High Temperature Probe Adapter<br />
2-9<br />
Measuring O2 in the high temperature gases (exceeds 700 °C) requires a general use probe<br />
<strong>ZR22G</strong> of 0.15 m length and a high temperature probe adapter.<br />
Sample gas temperature: 0 to 1400 °C (when using SiC probe)<br />
0 to 800 °C (when using SUS 310S probe)<br />
Sample gas pressure: -0.5 to + 5 kPa. When using in the range of 0 to 25 vol% O 2 or more,<br />
the sample gas pressure should be in the range of -0.5 to +0.5 kPa.<br />
(Where the sample gas pressure <strong>for</strong> the high temperature probe is<br />
negative, an auxiliary ejector is necessary.)<br />
Insertion length: 0.5 m, 0.6 m, 0.7 m, 0.8 m, 0.9 m, 1 m, 1.5 m<br />
Material in Contact with Gas: SUS 316 (JIS), SiC or SUS 310S, SUS 304 (JIS) (flange)<br />
Probe Material: SiC, SUS 310S (JIS)<br />
Installation:<br />
Flange mounting (FF type or RF type)<br />
Probe Mounting Angle: Vertically downward within ± 5° Where the probe material is SUS 310S,<br />
horizontal mounting is available.<br />
Construction: Non explosion-proof. Rainproof construction<br />
Weight(example): Insertion length of 1.0 m: approx. 5.3 kg (JIS) / approx. 11.3 kg (ANSI)<br />
Insertion length of 1.5 m: approx. 5.8 kg (JIS) / approx. 11.8 kg (ANSI)<br />
Model and Codes<br />
Model Suffix code Option code Description<br />
ZO21P -H - - - - - - - High Temperature Probe Adapter<br />
Material -A<br />
-B<br />
Insertion<br />
length<br />
-050<br />
-060<br />
-070<br />
-080<br />
-090<br />
-100<br />
-150<br />
Flange -J<br />
-N<br />
-M<br />
-L<br />
-A<br />
-R<br />
-Q<br />
-T<br />
-S<br />
-E<br />
- - - - - - -<br />
- - - - - - -<br />
- - - - - -<br />
- - - - - -<br />
- - - - - -<br />
- - - - - -<br />
- - - - - -<br />
- - - - - -<br />
- - - - - -<br />
- - - - - - -<br />
- - - - - - -<br />
- - - - - - -<br />
- - - - - - -<br />
- - - - - - -<br />
- - - - - - -<br />
- - - - - - -<br />
- - - - - - -<br />
- - - - - - -<br />
- - - - - - -<br />
SiC<br />
SUS 310S<br />
0.5 m<br />
0.6 m<br />
0.7 m<br />
0.8 m<br />
0.9 m<br />
1.0 m<br />
1.5 m<br />
JIS 5K 50 FF SUS304<br />
JIS 10K 65 FF SUS304<br />
JIS 10K 80 FF SUS304<br />
JIS 10K 100 FF SUS304<br />
ANSI Class 150 4 RF SUS304<br />
ANSI Class 150 2 1/2 RF SUS304<br />
ANSI Class 150 3 RF SUS304<br />
JPI Class 150 3 RF SUS304<br />
JPI Class 150 4 RF SUS304<br />
DIN PN10 DN50 A SUS304<br />
Style code *B - - - - - - - Style B<br />
Option<br />
Ejector<br />
Tag plate<br />
/EJ1<br />
/EJ2<br />
/SCT<br />
Ejector Assy with E7046EC<br />
Ejector Assy with E7046EN<br />
Stainless steel tag plate<br />
Note:The Insertion length 0.15 m of the <strong>ZR22G</strong> should be specified.<br />
IM 11M12A01-02E<br />
8th Edition : Jan.13,2012-00
2-10<br />
Approx. 351<br />
Unit: mm<br />
Sample gas outlet<br />
Rc1/2(Note2)<br />
180<br />
Flange (Thickness 5)<br />
JIS 5K 32 FF equivalent<br />
Gasket (Thickness 1.5)<br />
Ø60.5<br />
Ø52 over<br />
110<br />
High temperature<br />
Probe SiC pipe<br />
Detector(<strong>ZR22G</strong>)<br />
Reference gas inlet Rc1/4 or 1/4NPT<br />
25<br />
48<br />
Approx. 215<br />
(Insertion length) (Note1)<br />
170<br />
Approx. 100<br />
Ø60.5<br />
ØA<br />
t<br />
Approx. 48<br />
Ø115<br />
Flange <br />
Flange provided<br />
by customer<br />
69<br />
85<br />
Ø124±3<br />
L<br />
Ø30<br />
ØA<br />
ØB<br />
C<br />
Pipe hole (2- G1/2, 2-1/2NPT, etc)<br />
Calibration gas inlet Rc1/4 or 1/4NPT<br />
(Note 1) L= 0.50.60.70.80.9<br />
1.01.5(m)<br />
(Note 2) Sample gas outlet<br />
(if the sample gas pressure is negative,<br />
connect the auxiliary ejector.)<br />
Flange A B C t<br />
JIS 5K 50 FF SUS304 130 105 4 - Ø15 14<br />
JIS 10K 65 FF SUS304 175 140 4 - Ø19 18<br />
JIS 10K 80 FF SUS304 185 150 8 - Ø19 18<br />
JIS 10K 100 FF SUS304 210 175 8 - Ø19 18<br />
ANSI Class 150 4 RF SUS304 228.6 190.5 8 - Ø19 24<br />
ANSI Class 150 3 RF SUS304 190.5 152.4 4 - Ø19 24<br />
ANSI Class 150 2 RF SUS304 177.8 120.6 4 - Ø19 19<br />
JPI Class 150 4 RF SUS304 229 190.5 8 - Ø19 24<br />
JPI Class 150 3 RF SUS304 190 152.4 4 - Ø19 24<br />
DIN PN10 DN50A SUS304 165 125 4 - Ø18 18<br />
IM 11M12A01-02E<br />
8th Edition : Jan.13,2012-00
2.4 <strong>ZR402G</strong> Separate type Converter<br />
2.4.1 Standard Specification<br />
2-11<br />
The <strong>ZR402G</strong> Separate type Converter can be controlled by LCD touchscreen on the converter.<br />
Display:<br />
LCD display of size 320 by 240 dot with touchscreen.<br />
Output Signal: 4 to 20 mA DC, two points (maximum load resistance 550 Ω)<br />
Contact Output Signal: Four points (one is fail-safe, normally open)<br />
Contact Input: Two points<br />
Auto-calibration Output: Two points (<strong>for</strong> dedicated automatic calibration unit)<br />
Ambient Temperature: -20 to +55 °C<br />
Storage Temperature: -30 to +70 °C<br />
Ambient Humidity: 0 to 95%RH (Non-condensing)<br />
Power Supply Voltage: Ratings; 100 to 240 V AC, Acceptable range; 85 to 264 V AC<br />
Power Supply Frequency: Ratings; 50/60 Hz, Acceptable range; 45 to 66 Hz<br />
Power Consumption: Max. 300 W, approx. 100 W <strong>for</strong> ordinary use.<br />
Maximum Distance between Detector and Converter: Conductor two-way resistance must be<br />
10 Ω or less (when a 1.25 mm 2 cable or equivalent is used, 300 m or<br />
less.)<br />
Construction: Outdoor installation, equivalent to NEMA 4X/IP66 (with conduit holes<br />
completely sealed with a cable gland)<br />
Wiring Connection: G1/2, Pg13.5, M20 by 1.5 mm, 1/2 NPT (with plug), eight holes<br />
Installation:<br />
Panel, wall or 2-inch pipe mounting<br />
Case:<br />
Aluminum alloy<br />
Paint Color:<br />
Door: Sliver gray (Munsell 3.2PB7.4/1.2)<br />
Case: Sliver gray (Munsell 3.2PB7.4/1.2)<br />
Finish:<br />
Polyurethane corrosion-resistance coating<br />
Weight:<br />
Approx. 6 kg<br />
IM 11M12A01-02E<br />
8th Edition : Jan.13,2012-00
5-1<br />
5. Wiring<br />
In this Chapter, the wiring necessary <strong>for</strong> connection to the EXAxt ZR Separate type Zirconia<br />
Oxygen Analyzer is described.<br />
5.1 General<br />
CAUTION<br />
• NEVER supply current to the converter or any other device constituting a power circuit in<br />
combination with the converter, until all wiring is completed.<br />
• This product complies with CE marking.<br />
Where compliance with CE marking is necessary, the following wiring procedure is necessary.<br />
1.Install an external switch or circuit breaker to the power supply of the converter.<br />
2. Use an external switch or circuit breaker rated 5 A and con<strong>for</strong>ming with IEC 947-1 or<br />
IEC 947-3.<br />
3. It is recommended that the external switch or circuit breaker be mounted in the same room as<br />
the converter.<br />
4. The external switch or circuit breaker should be installed within the reach of the operator, and<br />
marked as the power supply switch of this equipment.<br />
Wiring procedure<br />
Wiring should be per<strong>for</strong>med according to the following procedure:<br />
1. Be sure to connect the shield line to FG terminal of the converter.<br />
2. The outer sheath of the signal line should be stripped to a length of 50 mm or less.<br />
The most outer sheath of the power cable should be stripped to a length of 20 mm or less.<br />
3. Signals may be affected by noise if signal lines, power cable and heater cable are located in<br />
the same conduit. When using conduit, signal lines should be installed in a separate conduit<br />
than power and heater cables.<br />
4. Install metal blind plug(s) in unused cable connection gland(s) of the converter.<br />
5. Metal conduit should be grounded.<br />
6. The following cables are used <strong>for</strong> wiring:<br />
Table 5.1 Cable specifications<br />
Terminal name of converter Name Need <strong>for</strong> shields Number of cores<br />
CELL+, CELL-<br />
HTR TC+, HTR TC- Detector signal О 6<br />
CJ+, CJ-<br />
HEATER Detector heater 2<br />
L, N Power supply 2 or 3 *<br />
AO-1+, AO-1-, AO-2+, AO-2- Analog output О 2 or 4<br />
DO-1, DO-2, DO-3, DO-4 Contact output 2 to 8<br />
AC-Z, AC-S, AC-C<br />
Automatic<br />
3<br />
Calibration unit<br />
DI-1, DI-2, DI-C Contact input 3<br />
Note *:<br />
When the case is used <strong>for</strong> protective grounding, use a 2-core cable.<br />
IM 11M12A01-02E<br />
8th Edition : Jan.13,2012-00
5-2<br />
WARNING<br />
Cables that withstand temperatures of at least 80 °C should be used <strong>for</strong> wiring.<br />
CAUTION<br />
• Select suitable cable O.D. to match the cable gland size.<br />
• Protective grounding should be connected in ways equivalent to JIS D style (Class 3)grounding<br />
(the grounding resistance is 100 Ω or less).<br />
• Special consideration of cable length should be taken <strong>for</strong> the HART communication, For the<br />
detail, refer to Section 1.1.2 of the IM 11M12A01-51E “ Communication Line Requirements “.<br />
5.1.1 Terminals <strong>for</strong> the External Wiring in the Converter<br />
Open the front door and remove the terminal covering plate to gain access to the converter<br />
external wiring terminals (see Figure 5.1).<br />
CAUTION<br />
After wiring necessary cable to the converter terminals, be sure to fix the terminal covering plate<br />
with two screws again.<br />
Front door<br />
Terminals are visible<br />
when the terminal cover is removed.<br />
Cable inlet<br />
F5-2E.ai<br />
Figure 5.1 Terminals <strong>for</strong> external wiring in the converter<br />
IM 11M12A01-02E<br />
8th Edition : Jan.13,2012-00
5.2 Wiring <strong>for</strong> Detector Output<br />
5-5<br />
This wiring enables the converter to receive cell output from the detector, output from a<br />
thermocouple and a reference junction compensation signal. Install wires that allow <strong>for</strong> 10 Ω of<br />
loop resistance or less. Keep detector wiring away from power wiring.<br />
(1) Ambient temperature of the detector: 75 °C or less<br />
<strong>ZR22G</strong><br />
Detector<br />
CELL(+)<br />
CELL(-)<br />
TC(+)<br />
TC(-)<br />
CJ(+)<br />
CJ(-)<br />
Shielded cables<br />
<strong>ZR402G</strong><br />
Converter<br />
CELL(+)<br />
CELL(-)<br />
TC(+)<br />
TC(-)<br />
CJ(+)<br />
CJ(-)<br />
FG<br />
(2) Ambient temperature of the detector: exceeding 75 °C<br />
<strong>ZR22G</strong><br />
Detector<br />
CELL(+)<br />
CELL(-)<br />
TC(+)<br />
TC(-)<br />
CJ(+)<br />
CJ(-)<br />
Heat-resistant wiring<br />
Terminal box<br />
Shielded cables<br />
<strong>ZR402G</strong><br />
Converter<br />
CELL(+)<br />
CELL(-)<br />
TC(+)<br />
TC(-)<br />
CJ(+)<br />
CJ(-)<br />
FG<br />
F5-5E.ai<br />
Figure 5.4 Wiring <strong>for</strong> detector output<br />
CAUTION<br />
If shielded cables cannot be used between the detector and the terminal box, <strong>for</strong> example,<br />
when heat-resistant wiring is used, locate the detector and the terminal box as close together as<br />
possible.<br />
5.2.1 Cable Specifications<br />
Basically, a cable (6-core) that withstand temparetures of at least 80°C is used <strong>for</strong> this wiring.<br />
When the ambient temperature of the detector exceeds 75 °C, install a terminal box, and connect<br />
with the detector using six-piece 600 V silicon rubber insulated glass braided wires.<br />
IM 11M12A01-02E<br />
8th Edition : Jan.13,2012-00
5.2.2 Connection to the Detector<br />
5-6<br />
To connect cables to the detector, proceed as follows:<br />
(1) Mount conduits of the specified thread size or cable glands to the wiring connections of the<br />
detector.<br />
The detector may need to be removed in future <strong>for</strong> maintenance, so be sure to allow<br />
sufficient cable length.<br />
(2) If the ambient temperature at the location of wire installation is 75 to 150 °C, be sure to use a<br />
flexible metallic wire conduit. If a non-shielded “ 600 V silicon rubber insulated glass braided<br />
wire “ is used, keep the wire away from noise sources to avoid noise interference.<br />
(3) Figure 5.5 shows the layout of the detector terminals.<br />
TC +<br />
CELL +<br />
TC -<br />
CELL<br />
(+)<br />
1 CELL<br />
2 3 TC<br />
4 5 CJ<br />
6<br />
7 8 H T R<br />
CELL<br />
(-)<br />
To converter,<br />
or<br />
terminal box<br />
TC TC CJ<br />
(+) (-) (+)<br />
To ground<br />
HTR<br />
CJ<br />
(-)<br />
HTR<br />
To converter,<br />
or<br />
terminal box<br />
Figure 5.5 Detector terminals<br />
F5-6E.ai<br />
The sizes of the terminal screw threads are M3.5 except <strong>for</strong> the M4 on grounding terminal.<br />
Each wire in the cable should be terminated in the corresponding size of crimp terminal (*1)<br />
respectively.<br />
*1: If the ambient temperature at the detector installation site exceeds 60 °C, use a “ bare crimp-on terminal”.<br />
(4) Except when “600 V silicon rubber insulated glass braided wire” is used, connect the cable<br />
shield to the FG terminal of the converter.<br />
5.2.3 Connection to the Converter<br />
To connect the wiring to the converter, proceed as follows:<br />
(1) M4 screws are used <strong>for</strong> the terminals of the converter. Each wire in the cable should be<br />
terminated corresponding to crimp-on terminals.<br />
(2) When a rubber insulated glass braided wire is used <strong>for</strong> wiring to the detector, use a terminal<br />
box. For wiring between the terminal box and the converter, basically use a cable that<br />
withstand temperatures of at least 80 °C, rather than individual wires.<br />
NOTE<br />
The above is to prevent moisture or corrosive gas from entering the converter and to ground the<br />
detector without fail.<br />
IM 11M12A01-02E<br />
8th Edition : Jan.13,2012-00
5.3 Wiring <strong>for</strong> Power to Detector Heater<br />
5-7<br />
This wiring provides electric power from the converter to the heater <strong>for</strong> heating the sensor in the<br />
detector.<br />
(1) Ambient temperature of the detector: 75 °C or less<br />
<strong>ZR22G</strong><br />
Detector<br />
HTR 7<br />
HTR 8<br />
<strong>ZR402G</strong><br />
Converter<br />
HEATER<br />
(2) Ambient temperature of the detector: exceeding 75 °C<br />
<strong>ZR22G</strong><br />
Detector<br />
HTR 7<br />
HTR 8<br />
Terminal box<br />
<strong>ZR402G</strong><br />
Converter<br />
HEATER<br />
Heat-resistant wiring<br />
F5-7E.ai<br />
Figure 5.6 Wiring <strong>for</strong> power to detector heater<br />
5.3.1 Cable Specifications<br />
Basically, cables (2 cores) that withstand temperatures of at least 80 °C are used <strong>for</strong> this wiring.<br />
When the ambient temperature of the detector exceeds 75 °C, install a terminal box, and connect<br />
to the detector using six-piece 600V silicon rubber insulated glass braided wires.<br />
5.3.2 Connection to Detector<br />
When connecting the cable to the detector, proceed as follows:<br />
(1) Mount cable glands or conduits of the specified thread size to the wiring connections of the<br />
detector.<br />
The detector may need to be removed in future <strong>for</strong> maintenance, so be sure to allow<br />
sufficient cable length.<br />
(2) If the ambient temperature at the location of wire installation is 75 to 150 °C, be sure to use<br />
a flexible metallic conduit <strong>for</strong> the wire. If a non-shielded “ 600V silicon rubber insulated glass<br />
braided wire” is used, keep the wire away from noise sources to avoid noise interference.<br />
(3) The size of the terminal screw threads is M3.5. Each cable should be terminated in the<br />
corresponding size crimp-on terminals contact (*1) respectively.<br />
*1 If the ambient temperature at the detector installation site exceeds 60 °C, use a “ bare crimp-on terminal”.<br />
IM 11M12A01-02E<br />
8th Edition : Jan.13,2012-00
5-8<br />
Notice when closing the cover of the detector<br />
NOTE<br />
• Be<strong>for</strong>e opening the detector cover, loosen the lock screw. If the screw is not loosened first,<br />
the screw will damage the cover, and the terminal box will require replacement.<br />
When opening and closing the cover, remove any sand particles or dust to avoid gouging the<br />
thread.<br />
• After screwing the cover in the detector body, secure it with the lock screw.<br />
Lock screw<br />
Detector cover<br />
F5-8E.ai<br />
Figure 5.7<br />
5.3.3 Connection to Converter<br />
To connect the wiring to the converter, proceed as follows:<br />
(1) M4 screws are used <strong>for</strong> the terminals of the converter. Each cable should be terminated in<br />
the corresponding size crimp-on terminals.<br />
(2) When a rubber insulated glass braided wire is used <strong>for</strong> wiring to the detector, use a terminal<br />
box. For wiring between the terminal box and the converter, basically use a cable that<br />
withstand temperatures of at least 80 °C.<br />
CAUTION<br />
The above is to prevent moisture or corrosive gas from entering the converter.<br />
Where the ambient environment of the detector and the converter is well-maintained, it is<br />
permissible to connect the wiring from the detector directly to the converter with protection by<br />
conduits.<br />
WARNING<br />
This wiring is to carry power <strong>for</strong> the heater. Be careful to wire the correct terminals, and be<br />
careful not to ground or short circuit terminals when wiring, as otherwise the instrument may be<br />
damaged.<br />
IM 11M12A01-02E<br />
8th Edition : Jan.13,2012-00
5.5.2 Grounding Wiring<br />
5-10<br />
The ground wiring of the detector should be connected to the ground terminal of the detector<br />
case. The ground wiring of the converter should be connected to either the ground terminal of the<br />
converter case or the protective ground terminal in the equipment.<br />
The grounding terminals of the detector and the converter are of size M4. Proceed as follows:<br />
(1) Keep ground resistance to 100 Ω or less (equivalent JIS D style (Class 3)).<br />
(2) When the ambient temperature of the wiring installation is 75 to 150 °C <strong>for</strong> the wiring of the<br />
detector, use wiring material with sufficient heat resistance.<br />
(3) When connecting the ground wiring to the ground terminal of the converter case, be sure<br />
that the lock washer is in contact with the case surface (see Figure 5.9.).<br />
(4) Ensure that the jumper plate is connected between the G terminal and the protective ground<br />
terminal of the converter.<br />
5.6 Contact Output Wiring<br />
Contact outputs 1 to 3 can be freely assigned to “low limit alarm”, “high limit alarm”, etc. user<br />
selectable, but the assignment of contact output 4 is fixed (“error output”). And the action (contact<br />
closed on error output) also cannot be changed.<br />
When using these contact outputs, install the wiring as follows:<br />
<strong>ZR402G</strong><br />
Converter<br />
DO-1<br />
DO-1<br />
Terminal box<br />
Annunciator or the like<br />
#1 Output<br />
DO-2<br />
DO-2<br />
#2 Output<br />
DO-3<br />
DO-3<br />
#3 Output<br />
DO-4<br />
DO-4<br />
#4 Output<br />
Figure 5.10 Contact output wiring<br />
F5-11E.ai<br />
5.6.1 Cable Specifications<br />
Number of wire in cable varies depending on the number of contact used.<br />
5.6.2 Wiring Procedure<br />
(1) M4 screws are used <strong>for</strong> the terminals of the converter. Each cable should be terminated<br />
corresponding to crimp-on terminals.<br />
(2) The capacities of the contact output relay are 30 V DC 3 A, 250 V AC 3 A. Connect a load<br />
(e.g. pilot lamp and annunciator) within these limits.<br />
IM 11M12A01-02E<br />
8th Edition : Jan.13,2012-00
Customer<br />
Maintenance<br />
Parts List<br />
Model ZO21P-H<br />
Zirconia Oxygen Analyzer<br />
High Temperature Probe Adaptor<br />
4 5,6<br />
3<br />
7 8,9,10<br />
11 <strong>ZR22G</strong><br />
2<br />
1<br />
Item Part No. Qty Description Item Part No. Qty Description<br />
1 K9292TP<br />
E7046CF<br />
K9292TQ<br />
E7046CG<br />
E7046CH<br />
1<br />
1<br />
1<br />
1<br />
1<br />
Probe (SiC, L=0.5m)<br />
Probe (SiC, L=0.6m)<br />
Probe (SiC, L=0.7m)<br />
Probe (SiC, L=0.8m)<br />
Probe (SiC, L=0.9m)<br />
2 E7046FA<br />
E7046FE<br />
E7046FK<br />
E7046FD<br />
E7046FC<br />
1<br />
1<br />
1<br />
1<br />
1<br />
Probe Adaptor (<strong>for</strong> JIS 5K-50-FF)<br />
Probe Adaptor (<strong>for</strong> ANSI CLASS150-4-RF)<br />
Probe Adaptor (<strong>for</strong> DIN PN10-DN50-A)<br />
Probe Adaptor (<strong>for</strong> JIS 10K-100-FF)<br />
Probe Adaptor (<strong>for</strong> JIS 10K-80-FF)<br />
E7046AL<br />
E7046BB<br />
K9292TV<br />
E7046CR<br />
K9292TW<br />
1<br />
1<br />
1<br />
1<br />
1<br />
Probe (SiC, L=1.0m)<br />
Probe (SiC, L=1.5m)<br />
Probe (SUS, L=0.5m)<br />
Probe (SUS, L=0.6m)<br />
Probe (SUS, L=0.7m)<br />
E7046FB<br />
E7046FG<br />
E7046FF<br />
E7046FJ<br />
E7046FH<br />
1<br />
1<br />
1<br />
1<br />
1<br />
Probe Adaptor (<strong>for</strong> JIS 10K-65-FF)<br />
Probe Adaptor (<strong>for</strong> ANSI CLASS150-3-RF)<br />
Probe Adaptor (<strong>for</strong> ANSI CLASS150-2 1/2-RF)<br />
Probe Adaptor (<strong>for</strong> JPI CLASS150-4-RF)<br />
Probe Adaptor (<strong>for</strong> JPI CLASS150-3-RF)<br />
E7046CS<br />
E7046CT<br />
E7046AP<br />
E7046AQ<br />
1<br />
1<br />
1<br />
1<br />
Probe (SUS, L=0.8m<br />
Probe (SUS, L=0.9m<br />
Probe (SUS, L=1.0m<br />
Probe (SUS, L=1.5m<br />
3<br />
4<br />
5<br />
6<br />
7<br />
E7046FQ<br />
E7046FN<br />
Y9825NU<br />
Y9800WU<br />
G7073XL<br />
1<br />
1<br />
4<br />
8<br />
1<br />
Gasket<br />
Plate<br />
Bolt<br />
Washer<br />
Gasket<br />
8<br />
9<br />
10<br />
11<br />
Y9630RU<br />
Y9121BU<br />
Y9120WU<br />
Y9801BU<br />
4<br />
4<br />
4<br />
4<br />
Bolt<br />
Nut<br />
Washer<br />
Nut<br />
All Rights Reserved, Copyright © 2000, <strong>Yokogawa</strong> Electric Corporation.<br />
Subject to change without notice.<br />
CMPL 11M03B01-10E<br />
1st Edition : Dec. 2000 (YK)<br />
8th Edition : Sep. 2012 (YK)
Customer<br />
Maintenance<br />
Parts List<br />
E7046EC/E7046EN<br />
Zirconia Oxygen Analyzer<br />
Auxiliary Ejector Assembly (<strong>for</strong> Model ZO21P-H)<br />
1<br />
2 3 4<br />
5 6 7<br />
Item Part No. Qty Description<br />
1 E7046EC 1 Auxiliary Ejector Assembly, Connection Rc1/4<br />
E7046EN 1 Auxiliary Ejector Assembly, Connection 1/4 NPT<br />
2 L9852CB 1 Needle Valve, Connection Rc1/4<br />
G7016XH 1 Needle Valve, Connection 1/4NPT<br />
3 E7046EK 1 Pressure Gauge, Connection Rc1/4<br />
E7046EV 1 Pressure Gauge, Connection 1/4NPT<br />
4 E7046ED 1 Ejector, Connection Rc1/4<br />
E7046EP 1 Ejector, Connection 1/4NPT<br />
5 E7046EF 1 Nozzle Assembly, Tube Connection Ø6хØ4 tube<br />
E7046ER 1 Nozzle Assembly, Tube Connection 1/4 inch tube<br />
6 G7031XA 1 Tee, Connection Rc1/4<br />
7 E7046EJ 1 Reducing nipple, Connection R1/4<br />
All Rights Reserved, Copyright © 2000, <strong>Yokogawa</strong> Electric Corporation.<br />
Subject to change without notice.<br />
CMPL 11M03B01-05E<br />
1st Edition : Dec. 2000 (YK)<br />
8th Edition : Mar. 2013 (YK)
Customer<br />
Maintenance<br />
Parts List<br />
Model <strong>ZR22G</strong><br />
Zirconia Oxygen Analyzer, Detector<br />
(Separate type)<br />
A<br />
1<br />
A<br />
13<br />
13<br />
View A-A<br />
2<br />
7<br />
6 5 4 3<br />
10 9 8<br />
11 12 F02E.ai<br />
Item Part No. Qty Description<br />
1<br />
2<br />
3<br />
4<br />
5<br />
K9471UA<br />
-------------<br />
E7042BR<br />
K9470BM<br />
K9473AN<br />
E7042DW<br />
1<br />
1<br />
1<br />
1<br />
1<br />
4<br />
Dust Filter (Option)<br />
Sensor Assembly<br />
Plate<br />
Pipe<br />
Pipe <strong>for</strong> Option code "/C"<br />
Washer (SUS316 stainless steel)<br />
6<br />
7<br />
8<br />
9<br />
10<br />
11<br />
12<br />
13<br />
G7109YC<br />
K9470BK<br />
ZR01A01-01<br />
ZR01A01-02<br />
ZR01A01-05<br />
ZR01A01-10<br />
E7042BS<br />
K9470BJ<br />
E7042AY<br />
K9470ZF<br />
K9470ZG<br />
K9470ZK<br />
K9470ZL<br />
ZR22A-□□□-□-□<br />
4<br />
4<br />
1<br />
1<br />
1<br />
1<br />
1<br />
1<br />
1<br />
1<br />
1<br />
Bolt (M5x12, SUS316 stainless steel)<br />
Bolt (M5x12, inconel) <strong>for</strong> Option code "/C"<br />
Cell Assembly<br />
1 piece<br />
2 pieces<br />
5 pieces<br />
10 pieces<br />
Contact<br />
Metal O-ring<br />
Filter<br />
Bolts and Washers<br />
G7109YC x 4 + E7042DW x 4<br />
K9470BK x 4 + E7042DW x 4 <strong>for</strong> Option code "/C"<br />
Calibration Tube Assembly<br />
Cal. Gas Tube Assembly<br />
Cal. Gas Tube Assembly <strong>for</strong> Option code "/C"<br />
Heater Assembly<br />
All Rights Reserved, Copyright © 2000, <strong>Yokogawa</strong> Electric Corporation.<br />
Subject to change without notice.<br />
CMPL 11M12A01-02E<br />
1st Edition : Aug. 2000 (YK)<br />
8th Edition : Mar. 2013 (YK)
Customer<br />
Maintenance<br />
Parts List<br />
Model ZR40H<br />
Separate type Zirconia Oxygen Analyzer/<br />
High Temperature Humidity Analyzer,<br />
Automatic Calibration Unit<br />
1<br />
LOCK ZERO LOCK<br />
COMMON SPAN ZERO<br />
MODEL ZR40H<br />
SUFFIX<br />
STYLE S1<br />
AUTO CALIBRATION UNIT<br />
SUPPLY 690kPa MAX.<br />
AMB.TEMP-20 TO 558C<br />
USED WITH<strong>ZR402G</strong><br />
NO.<br />
Made in Japan<br />
REF.OUT<br />
CAL.OUT<br />
SPAN IN<br />
ZERO IN<br />
Item Part No. Qty Description<br />
1 K9473XC 1 Flowmeter<br />
All Rights Reserved, Copyright © 2000, <strong>Yokogawa</strong> Electric Corporation.<br />
Subject to change without notice.<br />
CMPL 11M12A01-11E<br />
1st Edition : Dec. 2000 (YK)<br />
4th Edition : Mar. 2013 (YK)