

MAINTENANCE MANUAL - Meritor
MAINTENANCE MANUAL - Meritor
MAINTENANCE MANUAL - Meritor

Create successful ePaper yourself
Turn your PDF publications into a flip-book with our unique Google optimized e-Paper software.
<strong>MAINTENANCE</strong> <strong>MANUAL</strong><br />
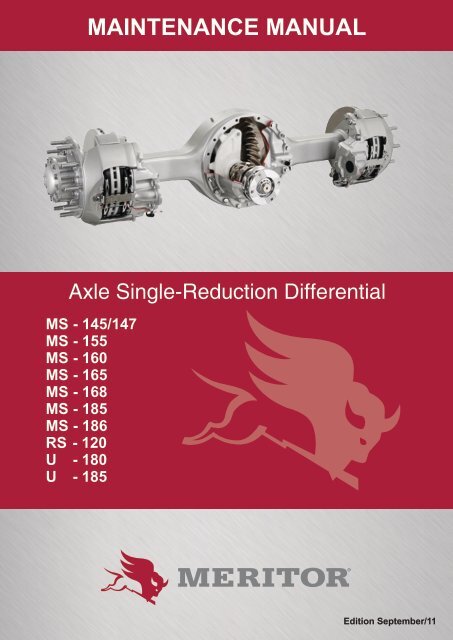
Axle Single-Reduction Differential<br />
MS - 145/147<br />
MS - 155<br />
MS - 160<br />
MS - 165<br />
MS - 168<br />
MS - 185<br />
MS - 186<br />
RS - 120<br />
U - 180<br />
U - 185<br />
Edition September/11
Index<br />
1 - Alterations to the Shaft......................................................................................... 03<br />
2 - Introduction........................................................................................................... 04<br />
3 - Exploded View...................................................................................................... 05<br />
4 - Identification......................................................................................................... 07<br />
5 - Disassembly......................................................................................................... 08<br />
6 - Preparation for the Assembly............................................................................... 14<br />
7 - Liquid Lock........................................................................................................... 18<br />
8 - Chemical Joint...................................................................................................... 20<br />
9 - Assembly.............................................................................................................. 21<br />
10 - Adjustments.......................................................................................................... 39<br />
11 - Main Satellite Box Blocking System..................................................................... 44<br />
12 - Lubrication............................................................................................................ 58<br />
13 - Torque Table........................................................................................................ 59<br />
<strong>MAINTENANCE</strong> <strong>MANUAL</strong>
Alterations to the Shaft<br />
In order to maintain the maintenance manual<br />
updated, for each alteration made to the shaft, a<br />
Technical Instruction will be issued with the data<br />
and implications arising from this alteration.<br />
In the footer of each page of this manual there<br />
is an area designated to noting down the number<br />
of each Technical Instruction which involves<br />
possible alterations occurring on that page<br />
as shown in the example below.<br />
Safety<br />
It is of paramount importance to use safety<br />
equipment when maintaining the shaft.<br />
• When using a hammer or executing any operating<br />
involving impact, wear safety goggles.<br />
• When handling parts which are hot or have<br />
sharp edges, wear suitable gloves.<br />
<strong>MAINTENANCE</strong> <strong>MANUAL</strong><br />
3
Introduction<br />
The <strong>Meritor</strong> differentials of simple speed are drive<br />
units which the following features:<br />
• Hypoid Crown and Pinion teeth cut by the<br />
GENEROID process which leads to greater<br />
capacity of torque and durability than conventional<br />
gears due to a larger number of teeth in<br />
gear (1 totally and 2 partially in gear)<br />
• Hypoid Pinion assembled on conic roller bearings,<br />
which absorb the axial and radial forces<br />
and a cylindrical roller bearing at the top<br />
of the head, which absorbs the radial loads.<br />
• Box-Unit of Satellites and Crown, mounted<br />
on conic roller bearings.<br />
• Satellites and Planetary gears with straight<br />
conic teeth obtained by precision forging.<br />
• Notch of the Pinion with fine teeth of an evolving<br />
profile, rolled cold for greater resistance<br />
and durability with a small screw angle to<br />
couple under pressure, with the Fork of the<br />
Universal Joint, the-reby avoiding the loosening<br />
of the pinion nut when the vehicle is subject<br />
to a high vibration level.<br />
• Lubrication channels positioned at stra-tegic<br />
points, to ensure efficient lubrication of the<br />
gears and bearings at lower speeds.<br />
4 <strong>MAINTENANCE</strong> <strong>MANUAL</strong>
Exploded View<br />
<strong>MAINTENANCE</strong> <strong>MANUAL</strong><br />
5
Exploded View Nomenclature<br />
ITEM DESCRIPTION ITEM DESCRIPTION<br />
01 Differential Box<br />
02 Bearing Cover<br />
03 Screw - Fastening Bearing<br />
04 Washer<br />
05 Satellite Box - Flange Half<br />
06 Satellite Box - Single Half<br />
07 Satellite<br />
08 Satellite Thrust Washer<br />
09 Differential Crosspiece<br />
10 Planetary Item<br />
11 Satellite Thrust Washer<br />
12 Screw Fastening<br />
13 Roller Bearing Cone (Satellite Box<br />
- Flange Half)<br />
14 Roller Bearing Cone (Satellite Box<br />
- Single Half)<br />
15 Roller Bearing Cover (Satellite<br />
Box - Flange Half)<br />
16 Roller Bearing Cover (Satellite<br />
Box - Single Half)<br />
17 Adjusting Ring<br />
18 Locking Pin<br />
19 Pinion<br />
24 Elastic Ring<br />
25 Pinion Box Adjusting Wedge<br />
26 Pinion Box<br />
27 Roller Bearing Cover (Inside<br />
Pinion)<br />
28 Roller Bearing (Outside Pinion)<br />
29 Roller Bearing Cone (Outside<br />
Pinion)<br />
30 Pinion Roll Adjusting Wedge<br />
31 Roller Bearing Cone (Inside Pinion)<br />
32 Universal Joint Fork<br />
33 Dust Deflector<br />
34 Pinion Sealer<br />
35 Pinion Nut<br />
36 Screw (Fastening Pinion Box)<br />
37 Washer (Fastening Pinion Box)<br />
38 Washer (Fastening Pinion Box)<br />
39 Washer (Fastening Crow)<br />
6 <strong>MAINTENANCE</strong> <strong>MANUAL</strong>
Identification<br />
The unit has ID plates on which the basic product<br />
specifications are written.<br />
MODEL<br />
CUST Nº<br />
PART Nº<br />
RATIO<br />
SERIE Nº<br />
DATE<br />
(Model)<br />
(Customer Number)<br />
(Product Number)<br />
(Differential Reductions)<br />
(Serial Number)<br />
(Manufacturing Date)<br />
Before starting service operations, identify the<br />
unit to be repaired, looking at the ID plates fastened<br />
to the differential box frame. This information<br />
will allow correct identification of the spare<br />
parts required, allowing the execution of a quicker<br />
and more accurate service operation.<br />
DIFFERENTIAL ID PLATE<br />
FRAME ID PLATE<br />
AXLE UNIT ID PLATE<br />
ID PLATE<br />
<strong>MAINTENANCE</strong> <strong>MANUAL</strong><br />
7
Disassembly<br />
Disassembly of Differential<br />
Before starting service operations, identify the<br />
unit to be repaired, looking at the ID plates fastened<br />
to the frame and Differential Box.<br />
• Remove the draining belly, located on the<br />
lower surface of the frame and drain all the<br />
existing oil (figure 01).<br />
Figure 03<br />
• Remove the half shafts.<br />
• Disconnect the cardan shaft.<br />
PLUG<br />
Figure 01<br />
• Loosen the nuts, the lock washers and conic<br />
washers of the tap bolts fastening the half<br />
shafts.<br />
IMPORTANT:<br />
In order to remove the conic washers, support<br />
a brass bar (with O 38 mm) in the depression<br />
existing at the center of the flange<br />
of the half shaft and hit it with a bronze<br />
hammer (figure 02) or use and auxiliary nut,<br />
hitting with a hammer on the hexagonal nut<br />
(figure 03).<br />
Removal of the Differential<br />
A - Loosen the differential setscrews and remove<br />
them.<br />
B - Loosen the differential from the frame using<br />
a suitable support and a jack. (figure 04).<br />
IMPORTANT:<br />
If it is necessary to use eyebolts, the flange of<br />
the differential box has threaded holes for this<br />
purpose. The same setscrews of the differential<br />
can be used in this operation.<br />
If necessary, apply firm blows with a rubber<br />
or plastic hammer to release the differential<br />
from the adhesive effect of the chemical joint.<br />
Never insert a wedge or chisel between the differential<br />
box and the frame so as not to cause<br />
irreparable damage to their surfaces.<br />
CAUTION:<br />
1 - Do not hit directly on the half shaft.<br />
2 - Do not insert wedges or chisels be-tween<br />
the half shaft and the wheel to avoid<br />
irreparable damage to these parts.<br />
Figure 02<br />
Figure 04<br />
8 <strong>MAINTENANCE</strong> <strong>MANUAL</strong>
Disassembly<br />
C - Install the unit in an appropriate support (figure<br />
05)<br />
Removal of the Bearing Covers<br />
A - Remove and discard the pins, cotter pins<br />
or lock of the adjusting rings of the satellite<br />
box (figure 07).<br />
Figure 05<br />
D - Measure the value of the gearing gap of<br />
the teeth of the crown/pinion pair. See the<br />
section GEARING GAP ADJUSTMENT<br />
(figure 06).<br />
CAUTION:<br />
Before executing the measurement,<br />
remove all the oil existing on<br />
the teeth of the crown and pinion<br />
with one of the solvents indicated<br />
in the CLEANING section and follow<br />
the instructions in the DRYING section<br />
Figure 07<br />
B - Loosen the retaining washers and screws<br />
of the bearing covers and mark the original<br />
positions of the covers.<br />
C - Manually remove the bearing covers (figure<br />
08).<br />
Figure 06 Figure 08<br />
<strong>MAINTENANCE</strong> <strong>MANUAL</strong><br />
9
Disassembly<br />
D - Manually remove the adjusting rings (figure<br />
09).<br />
Disassembly of the Satellite Box<br />
A - Check, before the disassembly, if the halves<br />
of the satellite boxes (single and with a<br />
flange), have a marked assembly position.<br />
If not, mark them so that the original position<br />
is maintained in the reassembly (figure<br />
11).<br />
B - Loosen the setscrews of the two halves of<br />
the box.<br />
Figure 09<br />
E - Remove the satellite box with safety and<br />
place it on a bench (figure 10).<br />
Figure 11<br />
C - Separate the two halves of the box and remove<br />
the internal components, in the sequence<br />
indicated (figures 12, 13, 14 and 15).<br />
Figure 10<br />
Figure 12<br />
Figure 13<br />
10 <strong>MAINTENANCE</strong> <strong>MANUAL</strong>
Disassembly<br />
E - Only if necessary, remove the crown using<br />
an appropriate extractor or a press. Sup-<br />
-port the crown between metal or wooden<br />
blocks and press the half box through the<br />
crown (figure 17).<br />
Figure 14<br />
Figure 17<br />
Figure 15<br />
F - If it is necessary to replace the crown and it<br />
is attached by rivets, use the following procedure<br />
(L-147):<br />
D - If necessary, loosen and remove the retaining<br />
washers, nuts and bolts of the crown<br />
(figure 16).<br />
Figure 22<br />
Figure 16<br />
<strong>MAINTENANCE</strong> <strong>MANUAL</strong><br />
11
Disassembly<br />
G- Remove the hypoid crown, using an appropriate<br />
extractor or a press (figure 22).<br />
B - Remove the universal joint fork using an extractor<br />
(figure 26).<br />
IMPORTANT:<br />
Do not remove the fork with hammer blows,<br />
as this may warp it, besides making deep<br />
marks on the roller bearings, preventing<br />
their possible reuse.<br />
Figure 23<br />
Figure 26<br />
C - Remove and discard the pinion sealer (figure<br />
27).<br />
Figure 24<br />
Disassembly of the Pinion Box and the<br />
Pinion Rod<br />
A - Immobilize the universal joint fork with an<br />
appropriate tool and loosen the pinion nut<br />
(figure 25).<br />
IMPORTANT:.<br />
In order to remove the sealer easily and safely,<br />
insert a screwdriver between the sealer<br />
flange and the pinion box and make a lever<br />
movement at several points so that it comes<br />
out gradually, without damaging the pinion<br />
box.<br />
Figure 27<br />
Figure 25<br />
D - Loosen the setscrews of the pinion box and<br />
remove them together with the washers.<br />
12 <strong>MAINTENANCE</strong> <strong>MANUAL</strong>
Inspeção<br />
E - Remove the pinion box (figure 28).<br />
F - Remove and fasten the adjusting wedges of<br />
the pinion box, so that their original position<br />
is main-tained in the reassembly, if reusing<br />
these components.<br />
G - Remove the pinion using an appropri-ate<br />
extractor or a press. Support the flange of<br />
the pinion box on wooden or metal blocks<br />
and press the pinion through the box (figure<br />
30).<br />
Figure 28<br />
Note:<br />
Hit the pinion box a few times with a rubber<br />
or leather hammer to loosen it. The pinion<br />
box has threaded holes for using eyebolts.<br />
The same setscrews of the pinion box can<br />
be used in this operation (figure 29).<br />
CAUTION:<br />
Upon using the press, wear safety<br />
goggles.<br />
IMPORTANT:<br />
Do not remove the pinion with hammer blows,<br />
as the effect of the blows may damage<br />
the roller bearings, preventing possible reuse<br />
of them.<br />
H - Manually remove the front roller bearing<br />
cone.<br />
Figure 29<br />
CAUTION:<br />
Do not insert wedges of chisels between<br />
the pinion box and the differential<br />
box to avoid irreparable<br />
damage to these parts, as well as<br />
to the adjusting wedges. If the adjusting<br />
wedges are in good condition,<br />
measure them and keep them<br />
for the reassembly.<br />
Even if the wedges are damaged, measure<br />
the thickness of the packet<br />
and record the dimension, as it will<br />
be used as a reference in reassembling<br />
the pinion box.<br />
Figure 30<br />
I - Remove, if necessary, the front and back roller<br />
bearing covers, using an appropriate extractor<br />
or a press (figure 31).<br />
Figure 31<br />
<strong>MAINTENANCE</strong> <strong>MANUAL</strong><br />
13
Preparation for assembly<br />
J - Remove from the pinion rod manually the<br />
adjusting wedges of the roller bearings. (figure<br />
32).<br />
Cleaning<br />
The unit can undergo external washing, in order<br />
to facilitate its removal and disassembly. In<br />
this case, all the openings should be covered<br />
to avoid the possibility of water or humidity entering<br />
the unit.<br />
Figure 32<br />
K - Remove, if necessary the back roller bearing<br />
cone using an appropriate extractor or<br />
a press (figure 33).<br />
L - Remove and discard, if necessary, the elastic<br />
ring, using appropriate pliers.<br />
IMPORTANT :<br />
We do not recommend washing the unit with<br />
water after it has been disassembled. When<br />
this cleaning system is used, the water is retained<br />
in the parts. This can cause oxidation<br />
(rust) in critical parts and allow the circulation<br />
of these rust particles in the oil. This<br />
practice can lead to premature wear of the<br />
roller bearings, gears and other parts. Thuds,<br />
the unit should be totally disas-sembled<br />
as it cannot be cleaned suitably in another<br />
manner.<br />
NEVER USE GASOLINE<br />
Wash all the components which have ma-chined<br />
or rectified surfaces (gears, roller bearings,<br />
wedges, crosspiece) using appropriate solvents<br />
with a petroleum base, such as: diesel oil<br />
of kerosene.<br />
Wash the cast parts (satellite box, bearing covers<br />
and inside of the differential box) using the<br />
afore mentioned solvents. CAUTIONly remove<br />
all the joint particles. See the LIQUIDJOINT<br />
section.<br />
Clean the breathing plugs CAUTIONly (an air<br />
jet can be used). If it is blocked or damaged,<br />
replace it.<br />
Figure 33<br />
M - Remove, if necessary, the pilot roller bearing,<br />
using an appropriate press (figure 34)..<br />
CAUTION:<br />
Blocked plugs cause an increase in<br />
internal pressure in the unit, being<br />
able to lead to oil leaking by the<br />
sealers.<br />
Figure 34<br />
14 <strong>MAINTENANCE</strong> <strong>MANUAL</strong>
Preparation for assembly<br />
Drying<br />
T he parts should be completely dry, imme- diately<br />
after the cleaning, which must be performed<br />
using soft, clean cotton cloths.<br />
Note :<br />
Compressed air can also be used for drying<br />
the parts, except for the roller bearings.<br />
B - Wear (with visible lowering ) on the race of<br />
the cover or cone and/or deep indentations<br />
(figure 35).<br />
C - Cracks or breakages in the seats of the cover<br />
and/or cone, or in the surface of the<br />
conic rolls.<br />
CAUTION:<br />
The recess chambers must be very<br />
clean and dry to avoid later contamination.<br />
Inspection<br />
It is of paramount importance to inspect all the<br />
unit components fully and CAUTIONly, before<br />
they are reassembled. This inspection will reveal<br />
the parts with excessive wear or cracks,<br />
which should be replaced.<br />
Figure 35<br />
D - Signs of friction in the conic roll cage (figure<br />
36).<br />
Inspection of the Roller Bearings<br />
Inspect the roller bearings of cylindrical rollers<br />
and/or conic rollers (covers and cones) including<br />
those which were not removed from the<br />
seats upon which they were mounted, and replace<br />
them if they have any of the following defects:<br />
A - Excessive wear on the wide surface of the<br />
conic rolls, with almost total elimination of the<br />
central lowering, and/or a worn radius, with a<br />
sharp edge, on the wide surface of the rolls:<br />
(figure 34).<br />
Figure 36<br />
E - Corrosion ( caused by chemical action ) or<br />
cavity in the functioning surfaces (figure<br />
37).<br />
Figure 37<br />
6 - Splintering or scaling in the surface of the<br />
cover and/or cone (figure 38).<br />
Figure 34<br />
Figure 38<br />
<strong>MAINTENANCE</strong> <strong>MANUAL</strong><br />
15
Preparation for assembly<br />
Inspection of the Crown and Pinion Pair<br />
Inspect these gears, noting if there is any wear<br />
or damage, as cracks, depressions, splits or<br />
splinters. Also check the seats of the roller bearing<br />
cones and the notch of the pinion.<br />
Note :<br />
The CROWN and PINION are machined gears<br />
coupled in pairs, to ensure the ideal<br />
contact position between their teeth. So, if it<br />
is necessary to Exchange a damaged crown<br />
or pinion, both the gears of the pair should<br />
be replaced.<br />
Note :<br />
O ar comprimido pode ser empregado também<br />
na secagem das peças, exceto para os<br />
rolamentos.<br />
A - Internal surfaces on both the halves of the<br />
satel-lite box;<br />
B - Support surface of the thrust washers of satellites<br />
and planetary gears;<br />
C - Crosspiece legs;<br />
D - Planetary gear teeth and notches;<br />
E - Satellite teeth and holes.<br />
IMPORTANT:<br />
If it is necessary to replace a damaged satellite<br />
or planetary gear, Exchange all the<br />
gears, including the thrust washers. The<br />
combination of new and old parts can lead<br />
to premature failure of the unit.<br />
Inspection of the Unit Satellite Box<br />
Inspect the components of the differential<br />
system and replace the parts which have depressions,<br />
cracks, excessive ovalization in<br />
holes and semi-holes or excessive wear tin<br />
the work surfaces. Also check the work areas<br />
specified below (figure 39).<br />
Inspection of the Half Shaft<br />
Check if there are cracks and excessive wear<br />
in the notches or teeth and also if there is ovalization<br />
in the flange holes.<br />
Inspection of the Differential Box<br />
Observe if there are fractures in any surface<br />
or burrs in the machined regions.<br />
SATELLITE BOX<br />
INSIDE<br />
SATELLITES<br />
AND WASHERS<br />
Inspection of the Universal Joint Fork<br />
Replace the universal joint fork, if it has excessive<br />
wear in the working area of the sealer<br />
lips.<br />
Inspection of the Frame<br />
Check if there are signs of cracks, loose tap<br />
bolts, burrs or notches in the machined surfaces.<br />
PLANETARY GEAR<br />
WASHER<br />
CROSSPIECE<br />
INSPECT<br />
NOTCH<br />
Figure 39<br />
16 <strong>MAINTENANCE</strong> <strong>MANUAL</strong>
Preparation for assembly<br />
Stocking<br />
The parts, after washing, drying and inspec-<br />
-tion, should be immediately reassembled or<br />
covered with a fine layer of the oil specified in<br />
the LUBRICATION section, in order to avoid<br />
oxidation.<br />
The parts which had top be stocked should be<br />
covered with a good layer of oil or any other<br />
substance preventing corrosion and kept in a<br />
closed box or the equivalent, protecting them<br />
from dust, humidity and rust (except for the<br />
components already protected with paint or<br />
zincing, etc).<br />
Maintenance - Recovery<br />
Replace all the parts which are worn or damaged,<br />
always using original components of<br />
MERITOR, to ensure a maintenance service<br />
with satisfactory results, as using parts which<br />
are not original will reduce the useful life of<br />
the unit.<br />
For better guidance, we indicate some basic<br />
check criteria, for purposes of repairs and/or<br />
replacement of the components:<br />
Recovery Through Welding<br />
For the sake of safety and prevention of the<br />
life of the maintenance to be executed, ME-<br />
RITOR recommends that repairs are not performed<br />
through welding, which can affect the<br />
structural integrity of the components, as well<br />
as cause distortions in those already submitted<br />
to the processes of thermal treatment.<br />
Repairing with welding can only be approved<br />
where rigorous controls are imposed with<br />
equipment which, usually, is only to be found<br />
in the manufacturing sites.<br />
IMPORTANT :<br />
Upon deciding if a part should be repaired<br />
or destroyed, bear in mind that we, the<br />
manufacturers, never hesitate to destroy a<br />
part which is in any way doubtful.<br />
A - Replace the nuts and bolts with rounded edges<br />
of the head and/or a damaged thread.<br />
B - Replace the lock washers, plain wash-ers,<br />
elastic rings, elastic pins and cotter pins.<br />
C - Whenever the unit is reconditioned, also replace<br />
the pinion sealer.<br />
D - Remove all the joint particles. See the CHE-<br />
MICAL JOINT section.<br />
E - Remove notches, stains, burrs or other imperfections<br />
of the machined surfaces.<br />
F - The threads must be clean and unda-maged<br />
to obtain an exact adjustment and the<br />
correct tightening torque.<br />
G - Whenever possible, use a press to reassemble<br />
the parts.<br />
H - Tighten all the fastening or locking com-ponents<br />
with the values specified in the TOR-<br />
QUE TABLE section.<br />
I - Remove the notches or burrs from the differential<br />
box or frame.<br />
<strong>MAINTENANCE</strong> <strong>MANUAL</strong><br />
17
Liquid lock<br />
MERITOR adopted a liquid lock as its main<br />
locking element and, therefore, this section<br />
describes the care required for the suitable<br />
use of this liquid adhesive.<br />
The liquid locks are cured in the absence<br />
of air and as they are liquid quickly and uniformly<br />
fill all the space existing between the<br />
threads, allowing a safer and more efficient<br />
locking to be obtained than the existing conventional<br />
systems.<br />
FEATURES OF THE LIQUID LOCKS<br />
PRODUCT<br />
TYPE<br />
COLOR<br />
CURE TIME<br />
TORQUE<br />
LOCTITE<br />
271<br />
241/1243<br />
221<br />
RED<br />
BLUE<br />
VIOLET<br />
2 HOURS<br />
6 HOURS<br />
6 HOURS<br />
THREE<br />
BOND<br />
1334<br />
1305<br />
RED<br />
GREEN<br />
6 HOURS<br />
6 HOURS<br />
MEDIUM<br />
HIGH<br />
Disassembly<br />
Execute the disassembly of the units locked<br />
originally with a liquid lock, using the normal<br />
procedures of mechanical disassembly.<br />
CAUTION:<br />
Do not use impact wrenches or hammer<br />
blows, to avoid damaging the head of these<br />
components.<br />
If the removal of a nut, for example, becomes<br />
difficult due to the wear of its head<br />
or because it requires a rather high force<br />
to loosen it, reduce the resistance of<br />
the liquid lock heating the head of this<br />
component at 150 ºC, approximately, at<br />
the same time as trying to loosen it. This<br />
procedure must be done slowly, to avoid<br />
thermal tension in the components of this<br />
unit.<br />
Cleaning<br />
CAUTIONly clean the threaded hole and the<br />
fastening thread (screw, nut or tap bolt), totally<br />
eliminating the dirt, oil, grease or humidity. The<br />
removal should be executed with a cleaning<br />
agent, as trichloroethylene or another chlorine<br />
solvent.<br />
Reassembly<br />
Before starting this operation, check the application<br />
places specified in the REASSEMBLY<br />
section. If there are, in this unit, for example,<br />
screws which were not removed during the disassembly<br />
of the unit, but had previous application<br />
of a liquid lock, it is necessary to check<br />
the tightening condition of each one of them. In<br />
this case apply the tightening torque (minimum)<br />
recommended by MERITOR. If the screw does<br />
not turn, its condition is satisfactory. If it turns,<br />
remove it and execute the procedures described<br />
in this section.<br />
18 <strong>MAINTENANCE</strong> <strong>MANUAL</strong>
Liquid lock<br />
Procedure For Application<br />
A - Apply the liquid lock so as to fill all the gap<br />
between the threads. In the case of internal<br />
threads (with a blind hole), apply 4 to 6<br />
drops in the fillets of the threaded hole (fig-<br />
-ure 41).<br />
Note :<br />
When the hole is not passing, apply a liquid<br />
lock in the thread of the hole, as when the<br />
lock is applied to the thread of the screw<br />
and it is inserted, the air existing in the hole<br />
makes a contrary pressure, expelling the liquid<br />
of the lock.<br />
Figure 41<br />
B - Tighten the fastening components with the<br />
values specified in the TIGHTENING TOR-<br />
QUES section.<br />
<strong>MAINTENANCE</strong> <strong>MANUAL</strong><br />
19
Chemical joint<br />
Description<br />
The CHEMICAL JOINT is a material with pasty<br />
consistency, which is cured at ambient temperature,<br />
forming a resistant joint.<br />
The joints used by MERITOR are:<br />
174 and 574 (LOCTITE) and NEUTRAL SI-LI-<br />
CONE (DOW CORNING 780, LOCTITE 5699,<br />
TREE BOND 1216, RHODIA 567 or 666).<br />
Cleaning<br />
CAUTIONly clean both the junction surfaces,<br />
eliminating the residue of the previous joint,<br />
dirt, oil, grease or humidity. This residue should<br />
be removed using a spatula or sandpaper,<br />
followed by cleaning with a solvent free of oil as<br />
xylol, or toluene or methylethylketone.<br />
Avoid causing grooves in these surfaces, as<br />
they can lead to later leakage.<br />
Procedure For Application<br />
A - Apply a continuous fillet of approximately 3<br />
mm in diameter when the joint is NEUTRAL<br />
SILICONE or apply with a brush when it is<br />
FAG-3 , all over one of the coupling surfaces<br />
and all the fastening holes, to en-sure a<br />
total Seal which avoids leakage;<br />
FILLET APPROX.<br />
3 mm IN DIAMETER<br />
Drying<br />
Before application, ensure that the junction surfaces<br />
are perfectly dry.<br />
Figure 42<br />
CAUTION:<br />
Excessive application causes the<br />
joint mass to migrate inside the<br />
unit, and also leads to difficulties<br />
in future disassembly. Failures in<br />
applying the joint Cord may cause<br />
future leakage.<br />
B - After the application, join the two surfaces<br />
immediately, so that the joint cord spreads<br />
in a uniform manner;<br />
C - Then, tighten the fastening components<br />
with the values specified in the TIGHTE-<br />
NING TORQUES section.<br />
20 <strong>MAINTENANCE</strong> <strong>MANUAL</strong>
Assembly<br />
Assembly of Pinion Box<br />
A - Install the roller bearing covers ( back and<br />
front ) in the pinion box in a press, with the<br />
box supported on wooden or metal blocks<br />
or use a suitable tool (figures 42 and 43).<br />
Note:<br />
The same procedure is used to Install both<br />
the covers.<br />
B - Assemble the back roller bearing cone,<br />
using a suitable tool or a press. Ensure that<br />
the cone is perfectly aligned in the pinion<br />
(figure 44).<br />
COUPLING<br />
ROLLER<br />
BEARING<br />
COVER<br />
Figure 42<br />
Figure 44<br />
C - Assemble the pilot roller bearing, using a<br />
suitable tool or a press (figure 45). .<br />
Figure 42<br />
CAUTION:<br />
- Check that the cover seats are clean and<br />
free of burrs.<br />
- Check during the assembly that no wrenching<br />
of the pinion box material is occurring.<br />
- Ensure that the covers are perfectly supported<br />
in their seats.<br />
Figure 45<br />
CAUTION:<br />
Ensure that the roller bearing is perfectly<br />
supported in the pinion. In the assembly use<br />
an appropriate coupling which only rests in<br />
the internal race of the roller bearing.<br />
<strong>MAINTENANCE</strong> <strong>MANUAL</strong><br />
21
Assembly<br />
D - Install the new elastic Ting using appropriate<br />
pliers (figure 46).<br />
Roller Bearings of the Pinion<br />
The control of the pre-load avoids that the roller<br />
bearings operate with excessive pres-sure (it<br />
reduces their useful life) or with a gap (it generates<br />
a noise and reduces the useful life of the<br />
differential).<br />
The pre-load is obtained by installing 1 (one)<br />
selective wedge between the cones of the roller<br />
bearings of the pinion (see figure 48);<br />
Figure 46<br />
E - Lubricate the roller bearing covers and cones<br />
with the oil recommended in the LU-<br />
BRICATION section.<br />
F - Install, in the pinion rod, the roller bearing<br />
spacers.<br />
ADJUSTING WED-<br />
GES OF THE ROL-<br />
LER BEARING<br />
Note :<br />
The spacers control the adjustment of the<br />
preload of the pinion roller bearings.<br />
G - Position the pinion in the box.<br />
H - Press the front roller bearing and check the<br />
pre-load (figure 47).<br />
Figure 48<br />
Identification of the Adjusting Wedge<br />
of the Pinion Roller Bearings<br />
A series wedges is available for this adjustment<br />
which are differentiated by the thickness, as indicated<br />
in tables “A”, “B”, “C” and “D”.<br />
The differential uses a wedge which will ensure<br />
a pressure between the roller bearings, which<br />
is equivalent to the following resisting torques:<br />
MODEL<br />
120<br />
USED ROLLER<br />
NEW ROLLER BEARINGS BEARINGS<br />
N.m lbf.pol N.m lbf.pol<br />
2,2 - 3,3 20 - 30 1,3 - 2,0 12 - 18<br />
145/147<br />
0,5 - 5,0<br />
5 - 45 1,1 - 3,4 10 - 30<br />
155<br />
1,7 - 4,0<br />
15- 35 1,1 - 2,3 10- 20<br />
Figure 47<br />
160<br />
0,5 - 5,0<br />
5 - 45 1,1 - 3,4 10 - 30<br />
185<br />
0,5 - 5,0<br />
5 - 45 1,1 - 3,4 10 - 30<br />
Note :<br />
DO NOT INSTALL the pinion sealer before<br />
adjusting the pre-load of the pinion roller<br />
bearings.<br />
CAUTION:<br />
These values should be obtained without<br />
the sealer being assembled in the pinion<br />
box.<br />
22 <strong>MAINTENANCE</strong> <strong>MANUAL</strong>
Assembly<br />
MODEL RS 120<br />
MODEL 145/147<br />
PART N° THICKNESS PART N°<br />
THICKNESS<br />
PART N° THICKNESS PART N°<br />
THICKNESS<br />
028079<br />
12,12<br />
028089<br />
12,37<br />
028820<br />
17,77<br />
028826<br />
17,92<br />
028080<br />
12,14<br />
028090<br />
12,40<br />
028821<br />
17,79<br />
028827<br />
17,95<br />
028081<br />
12,17<br />
028091<br />
12,42<br />
028822<br />
17,82<br />
028828<br />
17,97<br />
028082<br />
12,19<br />
028092<br />
12,45<br />
028823<br />
17,84<br />
028829<br />
18,00<br />
028083<br />
12,22<br />
028093<br />
12,47<br />
028824<br />
17,87<br />
028830<br />
18,02<br />
028084<br />
12,24<br />
028094<br />
12,50<br />
028825<br />
17,89<br />
028831<br />
18,05<br />
028085<br />
028086<br />
12,27<br />
12,30<br />
028095<br />
028096<br />
12,52<br />
12,55<br />
Table B<br />
028087<br />
12,32<br />
028097<br />
12,57<br />
028088<br />
12,34<br />
028098<br />
12,60<br />
Table A<br />
MODEL 155<br />
MODEL 160 / 185<br />
PART N° THICKNESS PART N°<br />
THICKNESS<br />
PART N° THICKNESS PART N°<br />
THICKNESS<br />
029050<br />
18,72<br />
029057<br />
18,90<br />
029684<br />
13,03<br />
029693<br />
13,18<br />
029051<br />
18,74<br />
029058<br />
18,92<br />
029685<br />
13,05<br />
029694<br />
13,20<br />
029052<br />
18,77<br />
029059<br />
18,95<br />
029686<br />
13,06<br />
029695<br />
13,23<br />
029053<br />
18,79<br />
029060<br />
18,98<br />
029687<br />
13,08<br />
029696<br />
13,25<br />
029054<br />
18,82<br />
029061<br />
19,00<br />
029688<br />
13,10<br />
029697<br />
13,28<br />
029055<br />
18,85<br />
029062<br />
19,03<br />
029689<br />
13,11<br />
029698<br />
13,31<br />
029056<br />
18,87<br />
029690<br />
13,13<br />
029699<br />
13,33<br />
Table C<br />
029691<br />
029692<br />
13,15<br />
13,16<br />
029700<br />
029701<br />
13,35<br />
13,38<br />
Table D<br />
MODEL<br />
120<br />
RECOMMENDED RANGE<br />
MM<br />
INCHES<br />
17,48 - 17,53 0,688 - 0,690<br />
IMPORTANT:<br />
The parts are identified through the recording<br />
of the thickness on one of the surfaces.<br />
145/147<br />
155<br />
160<br />
17,87 - 17,97<br />
18,79 - 18,92<br />
13,18 - 13,28<br />
0,704 - 0,708<br />
0,740 - 0,745<br />
0,519 - 0,523<br />
We recommend that the start assembly is performed<br />
with the wedges situated in the range<br />
recommended in table “E”, which will allow the<br />
adjustment desired to be obtained immediately<br />
(in most cases):<br />
185<br />
13,18 - 13,28<br />
0,519 - 0,523<br />
Table E<br />
<strong>MAINTENANCE</strong> <strong>MANUAL</strong><br />
23
Assembly<br />
Pinion Roller Bearing Pre-Load Adjustment<br />
The pre-load value of the pinion measured as<br />
per fig. 49 is the one indicated in the table below:<br />
MODELO<br />
120<br />
145/147<br />
155<br />
160<br />
185<br />
Method Using Press<br />
Note :<br />
If a press is not available, use the assembly<br />
method with the yoke (universal joint fork).<br />
A - Lubricate all the pinion roller bearings with<br />
the oil specified in the LUBRICATION section.<br />
B - Press the cone of the front roller bearing<br />
and rotate the pinion box several times to<br />
ensure a suitable seating between covers<br />
and cones. Maintain the pinion box under<br />
the press with an applied load.<br />
MODEL<br />
120<br />
145/147<br />
155/160/185<br />
USED ROLLER<br />
NEW ROLLER BEARINGS BEARINGS<br />
KG LB KG<br />
LB<br />
3,4 - 5,1<br />
0,7 - 6,7<br />
2,1 - 4,8<br />
0,5 - 5,1<br />
0,5 - 5,1<br />
7,7 - 11,8 2,0 - 3,1 4,6 - 6,9<br />
1,7 - 15,0 1,5 - 4,6 3,3 - 10,0<br />
4,5 - 10,6 1,3 - 2,8 3,0 - 6,0<br />
1,3 - 11,4 1,1 - 3,5 2,5 - 7,6<br />
1,3 - 11,4 1,1 - 3,5 2,5 - 7,6<br />
LOAD (TON)<br />
6 (MAX)<br />
C - Wind a cord around the pilot diameter<br />
of the pinion box with a dynamometer<br />
(balance of good quality), tied at its<br />
end (figure 49).<br />
11<br />
14<br />
D - Pull the dynamometer horizontally and observe<br />
the value (pounds or kilos) recorded<br />
on its scale.<br />
Note :<br />
Note the value recorded with the box rotating<br />
and not the start value. The start value<br />
gives a false reading.<br />
Method Without Using Press<br />
If a press is not available during the service<br />
operation, use the following procedure:<br />
A - Lubricate all the hypoid pinion roller bearings<br />
with the oil specified in the LUBRICA-<br />
TION section;<br />
B - Install the fork/flange of the universal joint<br />
(without the pinion sealer);<br />
C - Immobilize the pinion (through the fork/flange<br />
of the universal joint) using a suitable device;<br />
D - Tighten the pinion nut with the minimum<br />
value specified in the TIGHTENING TOR-<br />
QUES section;<br />
E - Turn the pinion box several times to en-sure<br />
a suitable seating between covers and<br />
cones;<br />
F - Wind a cord around the pilot diameter of the<br />
pinion box with a dynamometer (balance of<br />
good quality), tied at its end. (figure 49);<br />
G - Pull the dynamometer horizontally and observe<br />
the value (pounds or kilos) recorded<br />
on its scale;<br />
Note :<br />
Note the value recorded with the box rotating<br />
and not the start value. The start value<br />
gives a false reading.<br />
H - If after tightening with the maximum limit of<br />
torque, the desired pre-load is not obtained,<br />
replace the wedges by thinner ones and re-<br />
-peat the checking procedure;<br />
I - Remove the fork/flange of the universal joint<br />
and continue to reassemble the differential.<br />
Figure 49<br />
24 <strong>MAINTENANCE</strong> <strong>MANUAL</strong>
Assembly<br />
Pinion Assembly Depth Adjustment<br />
- Without the aid of a Special Tool<br />
The depth adjustment of the pinion aims to position<br />
the pinion related to the crown to obtain<br />
an ideal contact between the teeth of these gears<br />
(figures 50 and 51);<br />
WEDGES<br />
eXAMPLE<br />
ms 124<br />
Figure 50 Figure 51<br />
INCREASE THE<br />
REDUCES THE<br />
DEPTH<br />
DEPTH<br />
dn: 173,0<br />
Figure 52<br />
- With the aid of Special Tool 140 / 145<br />
CAUTION:<br />
In the operations described below, check<br />
the cleanness, mainly:<br />
1 - Of the contact surfaces between the<br />
components of the special tool;<br />
2 - Of the contact surfaces of the components<br />
of the special tool with the two<br />
boxes of the differential and the pinion,<br />
which is fundamental.<br />
A series of wedges is available to adjust the<br />
depth of the pinion, which are differentiated by<br />
the thickness. (figure 52)<br />
MODEL<br />
120<br />
145/147<br />
145 (NOVO)<br />
155<br />
PART N°<br />
029101<br />
029345<br />
029099<br />
029311<br />
028807<br />
028808<br />
028809<br />
028810<br />
029522<br />
029523<br />
029524<br />
029525<br />
028453<br />
028454<br />
028455<br />
THICKNESS (mm)<br />
0,20<br />
0,10<br />
0,05<br />
0,05<br />
0,08<br />
0,12<br />
0,20<br />
0,50<br />
0,06<br />
0,12<br />
0,25<br />
0,50<br />
0,08<br />
0,12<br />
0,25<br />
Adjust the depth of the pinion with the aid of the<br />
following components of the tools (figure 53):<br />
1. Centralized shaft<br />
2. Pinion simulator<br />
3. Adapter<br />
4. Circlet<br />
5. Knurled nut<br />
6. Clock support<br />
7. Wedge<br />
8. Centralizing disk<br />
9. Centralizing disk<br />
160/185<br />
029390<br />
029391<br />
029386<br />
029387<br />
0,05<br />
0,12<br />
0,20<br />
0,50<br />
185<br />
220328814<br />
22038815a<br />
2203B8816<br />
2203C8817<br />
0,05<br />
0,12<br />
0,20<br />
0,50<br />
Figure 53<br />
<strong>MAINTENANCE</strong> <strong>MANUAL</strong><br />
25
Assembly<br />
Install in the pinion simulator the pinion back<br />
roller bearing adapter (figure 54).<br />
1. Adapter<br />
2. Pinion simulator<br />
Install on the other surface of the pinion box the<br />
front roller bearing (figure 57).<br />
Figure 54<br />
Install in the adapter back roller bearing of the<br />
pinion (figure 55).<br />
1. Adapter<br />
Figure 57<br />
Place the circlet of the pinion front roller bearing<br />
and the knurled nut, tightening the latter<br />
manually (figure 58).<br />
1. Circlet<br />
2. Knurled nut<br />
1<br />
Figure 55<br />
Install the pinion box with the surface which will<br />
fit in the differential box turned downwards on<br />
the pinion back roller bearing (figure 56).<br />
Figure 58<br />
Figure 56<br />
26 <strong>MAINTENANCE</strong> <strong>MANUAL</strong>
Assembly<br />
Check that the contact surfaces of the pinion<br />
box and the differential box are clean and free of<br />
scratches or protuberances.<br />
Install the pinion box without the height adjustment<br />
wedges in the differential box (figure 59).<br />
Turn the differential box 180º degrees.<br />
Check that the housing bearings of the satellite<br />
roller bearings and centralizing disks of the<br />
tools are perfectly clean, lubricating them afterwards<br />
with a slight oil film.<br />
Install the wedge on top of the pinion simulator<br />
(figure 61).<br />
1. Wedge<br />
2. Pinion simulator<br />
3. Bearings<br />
Figure 59<br />
Place four bolts and apply a start tightening in a<br />
crosswise sequence.<br />
Then, with a torquemeter and in the same sequence,<br />
apply the final tightening, as per the<br />
torque specified in the table page 46) (figure<br />
60).<br />
Figure 61<br />
Install the centralizing disks with their respective<br />
shaft in the housing bearings of the satellite<br />
box roller bearings (figure 62).<br />
1. Centralizing disk<br />
2. Centralizing disk<br />
3. Centralizing shaft<br />
Figure 60<br />
Figure 62<br />
<strong>MAINTENANCE</strong> <strong>MANUAL</strong><br />
27
Assembly<br />
Install in the support a centesimal comparator.<br />
Place the support and the feeler gauge of the<br />
comparator on the wedge at the point of the pinion<br />
simulator - standard surface adjusting the<br />
instrument dial to reading “0” (zero) (figure 63).<br />
This value is called the nominal gauge of the<br />
differential in question.<br />
The nominal gauge is the distance existing between<br />
the touching surface of the pinion back<br />
roller bearing and the crown center. (figure 64).<br />
1. Wedge<br />
2. Clock support<br />
3. Comparator<br />
4. Pinion simulator<br />
(CN) Nominal<br />
GAUGE<br />
Figure 64<br />
Figure 63<br />
MODEL<br />
120<br />
(CN) NOMINAL GAUGE<br />
193,68<br />
Then, with the support of the comparator firmly<br />
supported on the wedge, on the point of the pinion<br />
simulator, place the feeler gauge on the<br />
centralizing shaft.<br />
Next, move the feeler gauge transversally to<br />
the centralizing shaft, until the instrument pointer<br />
indicates a maximum value. This value which<br />
indicates that the feeler gauge is exactly on<br />
the diameter of the centralizing shaft.<br />
Note the maximum value (Vm) indicated by the<br />
pointer of the comparator (figure 64).<br />
145/147<br />
155<br />
160<br />
185<br />
195,28<br />
219,08<br />
235,00<br />
254,00<br />
Check and Note the number recorded at the<br />
top of the pinion. This value indicates, in accordance<br />
with the signal which precedes it, how<br />
many hundredths of millimeters must be added<br />
to or subtracted from the maximum value (Vm)<br />
obtained in the reading of the comparator clock<br />
(figure 65).<br />
Figure 64<br />
Figure 65<br />
28 <strong>MAINTENANCE</strong> <strong>MANUAL</strong>
Assembly<br />
We list below some cases as an example to<br />
determine the quantity of wedges to be installed,<br />
between the pinion box and the differential<br />
box:<br />
1. Recording (0) zero at the top of the pinion.<br />
A - Measurement obtained in the clock reading;<br />
B - Recording at the top of the pinion;<br />
0.58 mm<br />
0.00 mm+<br />
Total 0.58 mm<br />
Install the same quantity of wedges ob-tained<br />
in the reading of the clock (A) 0.58 mm (figure<br />
66).<br />
3. Recording (-06) at the top of the pinion<br />
A - Measurement obtained in the clock reading;<br />
B - Recording at the top of the pinion (-06);<br />
0.58 mm<br />
0.06 mm-<br />
Total 0.52 mm<br />
In this case, install the quantity of wedges (0.52<br />
mm) resulting from subtracting A - B (figure 68).<br />
Figure 66<br />
2. Recording (+06) at the top of the pinion<br />
A - Measurement obtained in the clock reading;<br />
B - Recording at the top of the pinion (+06);<br />
0.58 mm<br />
0.06 mm+<br />
Total 0.64 mm<br />
In this case, install the quantity of wedges (0.64<br />
mm), resulting from adding A + B (figure 67).<br />
Figure 68<br />
Method without Special Tool<br />
If there is no exchange of crown and pinion pair,<br />
maintain the wedge pack of the pinion box.<br />
If there is an exchange of pair, check the reading<br />
in the old pinion and the new pi-nion (figure<br />
68). Calculate the difference and add or<br />
remove wedges of the original pack.<br />
Figure 67<br />
Figure 68<br />
<strong>MAINTENANCE</strong> <strong>MANUAL</strong><br />
29
Assembly<br />
EXAMPLE OF CALCULATION No. 1<br />
Old Pinion +06<br />
New Pinion -03<br />
Difference 09<br />
Action: Remove 0.09 mm from the origi-nal<br />
wedge pack.<br />
EXAMPLE OF CALCULATION No. 2<br />
><br />
Old Pinion = -06<br />
><br />
New Pinion = +03<br />
Difference 09<br />
Action: Add 0.09 mm to the original wedge<br />
pack.<br />
Note: If the original wedge pack is lost, start<br />
from the nominal pack of:<br />
C - Pinion variance (VP)<br />
All the pinions have an individual variance related<br />
to their DN, which is recorded at the top<br />
of their head. This variance is expressed in<br />
thousandths of an inch and preceded by a +<br />
or - sign.<br />
If there is no exchange of crown and pinion pair,<br />
maintain the wedge pack of the pinion box.<br />
If there is an exchange of pair, check the recording<br />
in the old pinion and the new pinion (figure<br />
68). Calculate the difference and add wedges<br />
to or subtract them from the original pack.<br />
EXAMPLE OF CALCULATION No. 1<br />
Old Pinion +6<br />
New Pinion -3<br />
Difference 9<br />
Action: Remove 0.009” from the original<br />
wedge pack.<br />
MODEL<br />
120<br />
145/147<br />
155<br />
THICK. (mm)<br />
0,96<br />
0,96<br />
THICKNESS<br />
(inches)<br />
.020 + .010=.038”<br />
.020 + .010=.038”<br />
0,906 (2).010 +(2).005=.038”<br />
EXAMPLE OF CALCULATION No. 2<br />
><br />
Pinhão Velho = -6<br />
><br />
Pinhão Novo = +3<br />
Diferença 9<br />
5 Adjustments of Differential<br />
L-147<br />
The process for adjusting this unit is basically<br />
the same as for models 140 and 145, except<br />
that the wedges must be executed in inches, as<br />
these gears are NOT metric.<br />
Action: Add 0.009” to the original wedge<br />
pack l.<br />
Note: If the original wedge pack is lost, start<br />
from the nominal pack of: 0.90 mm (0.035”).<br />
A - Identification of the Pinion Box Adjustment<br />
Wedges<br />
MODEL<br />
120<br />
CODE<br />
THICKNESS<br />
MM INCHES<br />
029101 0,20 0,008<br />
029101 0,10 0,004<br />
029101 0,5 0,002<br />
029101 0,3 0,001<br />
B - Nominal dimension of pinion assembly:<br />
DN = 7,625”<br />
30 <strong>MAINTENANCE</strong> <strong>MANUAL</strong>
Assembly<br />
Assembly of the Pinion Sealer<br />
1 - Install the pinion sealer as indicated below:<br />
a - If the sealer does not have the external diameter<br />
rubberized, apply a sealing paste (industrial<br />
adhesive 847 3M) on the external<br />
surfaces of the pinion sealer.<br />
CAUTION:<br />
Ensure that the lips of the sealer<br />
are free of dirt or particles which<br />
may cause possible leakages.<br />
Installation of the Pinion Box in the<br />
Differential Box<br />
A - Install the pinion box wedges already selected,<br />
in the differential box with 2 guide pins<br />
(figure 71).<br />
Note :<br />
Place the thickest wedges at the ends of the<br />
pack and the finer ones in the middle.<br />
b - Press the pinion sealer with a coupling or<br />
install it with the device.<br />
Ensure that the sealer flange is level with the<br />
top of the pinion box. It is important that the<br />
coupling diameter is larger than that of the sealer<br />
(figures 69 and 70).<br />
Figure 71<br />
B - Install the pinion box. If necessary use a<br />
rubber or leather hammer (figure 72 ).<br />
Cassete Type<br />
for Shafts 145 - 155<br />
Tri-labial<br />
Industrial Adhesive<br />
Figure 69<br />
Figure 72<br />
Figure 70<br />
<strong>MAINTENANCE</strong> <strong>MANUAL</strong><br />
31
Assembly<br />
C - Apply sealing paste FAG-3 to the thread of<br />
the pinion box setscrews.<br />
D - Install and tighten the washers and setscrews<br />
of the pinion box, with the value specified.<br />
See the TORQUES TABLE. (figure<br />
73 ).<br />
IMPORTANT:<br />
Do not use a hammer to install the fork of<br />
the universal joint, as it can be damaged.<br />
6. With a torquemeter on the pinion nut, check<br />
the resisting torque value (pre-load) to<br />
turn the pinion. Increase if necessary the<br />
torque applied to the pinion nut (until the<br />
maximum limit allowed), to handle the values<br />
specified. (figure 75).<br />
MODEL<br />
USED ROLLER<br />
NEW ROLLER BEARINGS<br />
BEARINGS<br />
N.m lbf.pol N.m lbf.pol<br />
120<br />
2,2 - 3,3<br />
20 - 30<br />
1,3 - 2,0<br />
12 - 18<br />
145/147<br />
0,5 - 5,0<br />
5 - 45<br />
1,1 - 3,4<br />
10 - 30<br />
Figure 73<br />
155<br />
1,7 - 4,0<br />
15- 35 1,1 - 2,3 10- 20<br />
160<br />
0,5 - 5,0<br />
5 - 45 1,1 - 3,4 10 - 30<br />
185<br />
0,5 - 5,0<br />
5 - 45 1,1 - 3,4 10 - 30<br />
5. Immobilize the fork of the universal joint<br />
with a suitable tool and tighten the pinion<br />
nut with the value specified. See TORQUES<br />
TABLE. (figure 74 ).<br />
Figure 75<br />
Figure 74<br />
32 <strong>MAINTENANCE</strong> <strong>MANUAL</strong>
Assembly<br />
Assembly of the Satellite Box<br />
A - Apply the lubricating oil specified in the LU-<br />
BRICATION section in all the components<br />
of the satellite box, before installing them;<br />
B - Heat the crown in warm water, at the temperature<br />
of approximately 70°-80°C, during<br />
10 minutes, to allow it to be placed manually.<br />
D - Install the fastening components of the crown<br />
and tighten the screws with the tor-que<br />
specified in the TORQUES TABLE.<br />
Note:<br />
Apply to the screws HIGH TORQUE locking<br />
paste (LOCTITE 271 or THREE BOND 1305).<br />
See section LIQUID LOCK.<br />
CAUTION:<br />
Wear appropriate gloves to handle<br />
the heated part.<br />
E - Assemble the new cones of the roller bearings<br />
in the two halves of the bipartite satellite<br />
box, using a suitable tool and a press<br />
(figure 77).<br />
IMPORTANT:<br />
The installation of the crown with pre-heating<br />
ensures the correct seating of it in all<br />
the common contact area with the satellite<br />
box, as when the crown is as-sembled on<br />
the press or turned on the satellite box, there<br />
may occur a wrenching of metallic particles<br />
which are lodged between these 2<br />
parts, causing misalignment of the crown<br />
and making final adjustments of the differential<br />
difficult. See the ADJUSTMENTS<br />
section.<br />
C - Install the crown in the flange half of the satellite<br />
box. If the crown is not seated satisfactorily,<br />
repeat step 2 (figure 76).<br />
Figure 77<br />
CAUTION:<br />
- Check that the cone seats are clean and<br />
without burrs;<br />
- Check, during the assembly operation<br />
that no material wrenching is occurring in<br />
the box;<br />
- Ensure that the cones are perfectly supported<br />
on their respective seats.<br />
F - Position the planetary gear with its thrust<br />
washer in the flange half box.<br />
G - Assemble the crosspiece, the satellites with<br />
the respective washers (figure 78).<br />
Figure 76<br />
<strong>MAINTENANCE</strong> <strong>MANUAL</strong><br />
33
Assembly<br />
J - Initially install four setscrews of the satellite<br />
box at equally spaced points and tighten<br />
them with the torque specified. See the<br />
TORQUES TABLE.<br />
K - Assemble the remaining screws and tighten<br />
them with the torque indicated in item 10.<br />
See the TORQUES TABLE.<br />
Figure 78<br />
Note:<br />
Apply to the screws HIGH TORQUE locking<br />
paste (LOCTITE 271 or THREE BOND 1305).<br />
H - Then position the planetary gear opposite<br />
its thrust washer in the box – flange half (fig-<br />
-ure 79).<br />
Figure 79<br />
I - Install the satellite box – single half, ob-serving<br />
the original alignment (figure 80).<br />
MARCAS<br />
Figure 80<br />
34 <strong>MAINTENANCE</strong> <strong>MANUAL</strong>
Assembly<br />
Check of the Resistance to Rotation of<br />
the Satellite / Planetary Gear Unit<br />
C- Install the tool coupling it to the planetary<br />
gear notch (figure 83).<br />
Torque specified:<br />
68 N.m (50 lb.ft) maximum.<br />
Note :<br />
A suitable tool for checking can be made<br />
from a cut solar half shaft, with a nut welded<br />
to its end (figure 81).<br />
Figure 83<br />
D - Place a torquemeter at the end of this device<br />
and check the resistance to the rotation of<br />
the satellite/planetary gear unit. The value<br />
should be less than that specified (figure 84).<br />
Figure 81<br />
A - Place a protector in the vise (filing block) of<br />
bronze, aluminum or plastic to protect the<br />
crown.<br />
B - Fasten the satellite box in the vise (figure<br />
82).<br />
Figure 84<br />
E - If the value exceeds that specified, disassemble<br />
the satellites and planetary gears of<br />
the satellite box.<br />
F - Check the parts to discover the reason for<br />
the excessive resistance. Repair the cause<br />
or change the parts.<br />
G - After fixing the problems, assemble the parts<br />
and repeat the procedure from A to D.<br />
Figure 82<br />
<strong>MAINTENANCE</strong> <strong>MANUAL</strong><br />
35
Assembly<br />
Assembly of the Satellite Box Unit in<br />
the Differential Box<br />
A - Support the covers on the cones and assemble<br />
the unit in the differential box (figure 85).<br />
CAUTION:<br />
If it is not possible to turn the rings manually<br />
(without applying force) it is because<br />
they are out of position. Remove the covers<br />
and reposition the adjusting rings to avoid<br />
irreparable damage to the differential box<br />
and bearing covers.<br />
• Assembly of the Satellite Box/Adjustment<br />
of the Gears. (figure 88)<br />
Figure 85<br />
B - Place the adjusting rings in the bearings turning<br />
them manually until touching the roller<br />
bearings (figure 86).<br />
ring side<br />
of coro<br />
ring opposite<br />
side<br />
Figure 88<br />
A quick and accurate way to assemble the satellite<br />
box and adjust the gap of the gearing<br />
(between teeth) and the pre-load of the roller<br />
bearings, is as follows:<br />
Figure 86<br />
C - Position the bearing covers tightening them<br />
slightly (figure 87).<br />
A - Assemble the satellite box, tightening the<br />
ring on the crown side until eliminating the<br />
gap. Then, loosen it by three or four castles<br />
(value of approximation for gap between<br />
teeth).<br />
B - Tighten the ring opposite until eliminating<br />
the gap of the roller bearings. Next, tighten it<br />
by two to three castles (new roller bearings)<br />
or one to two castles (used roller bearings).<br />
Then, check the gap of the gearing (see table<br />
page 39). If necessary, adjust it loosening<br />
and tightening the ad-justments rings as<br />
in the figure .<br />
C - The pre-load indicated (1.7- 3.5 N.m (15-35<br />
lbf inch)) will be obtained with this procedure.<br />
(figure 89)<br />
Figure 87<br />
36 <strong>MAINTENANCE</strong> <strong>MANUAL</strong>
Assembly<br />
increases<br />
gap<br />
reduces<br />
gap<br />
Figure 89<br />
IMPORTANT:<br />
In order to move the rings in the final adjustments,<br />
always use a “T” type bar or ordinary<br />
bars which engage in to opposite castles, as<br />
illustrated in the figure. Never hit the castles<br />
with hammers or chisels, as this may cause<br />
irreparable damage to the adjusting rings.<br />
(figure 90)<br />
D - Apply the liquid lock (Loctite 271 or Three<br />
Bond 1305) to the thread of the bearing<br />
setscrews.<br />
E - Install and tighten the bearing setscrews<br />
with the respective washers, with the value<br />
specified. See the TORQUES TABLE.<br />
F - Adjust the pre-load of the satellite box roller<br />
bearings.<br />
specified: 1.7- 3.5 N.m<br />
G - Adjust the gearing gap. See the ADJUST-<br />
MENTS section.<br />
H - Check the contact of the teeth of the crown/<br />
pinion pair. See the ADJUSTMENTS section.<br />
I - Install the cotter pin and/or lock of the ad-<br />
-justing rings with the torque specified. See<br />
the TORQUES TABLE. (figure 91).<br />
Figure 91<br />
Figure 90<br />
<strong>MAINTENANCE</strong> <strong>MANUAL</strong><br />
37
Assembly<br />
Installation of the Unit Differential Box<br />
in the Frame<br />
A - Apply neutral silicone in the opening of the<br />
frame. See the CHEMICAL JOINT section<br />
(figure 92).<br />
B - Position the differential in the frame. Use a<br />
hydraulic Jack or a block and tackle.<br />
Figure 92<br />
CAUTION:<br />
Do not try to place the differential in the frame<br />
using a hammer, as the flange may be<br />
deformed and cause a leakage.<br />
C - Apply high torque liquid lock to the thread<br />
of the differential box setscrews. See the<br />
LÍQUID LOCK section.<br />
D - Install the differential box setscrews with<br />
their respective washers and alternately tighten<br />
the first four spaced at 180º and then<br />
the others with the specified torque:<br />
MODEL<br />
BOLT<br />
NUT<br />
N.m lbf pé N.m lbf pé<br />
120<br />
145/147<br />
155<br />
160<br />
95-150<br />
270-330<br />
270-330<br />
270-330<br />
70-110<br />
200-245<br />
200-245<br />
200-245<br />
185<br />
270-330<br />
38 <strong>MAINTENANCE</strong> <strong>MANUAL</strong>
Adjustments<br />
Gearing Gap<br />
A - Check the gearing gap of the crown/pinion<br />
pair, using the following procedure:<br />
B - Support the pointer of a comparator clock in<br />
the tooth of the crown (figure 93).<br />
E - If necessary increase or reduce the gearing<br />
gap, by loosening the adjusting ring on the<br />
right side and in the same proportion tightening<br />
the left side or vice versa, as required<br />
(figure 94).<br />
Figure 93<br />
C - Immobilize the pinion, manually move the<br />
crown in both directions of rotation and take<br />
the reading. The gap value should be as per<br />
the table below.<br />
D - If necessary increase or reduce the gearing<br />
gap, by loosening the adjusting ring on the<br />
right side and in the same proportion tightening<br />
the left side or vice versa, as required<br />
(figure 94).<br />
Figure 94<br />
Note:<br />
It is important to maintain the propor-tion<br />
between tightening and loosening, i.e.: the<br />
same amount that is loosened in one ring<br />
must be tightened in the other so that the<br />
pre-load of the satellite box roller bearings<br />
is maintained<br />
MODEL<br />
120<br />
145/147<br />
155<br />
160<br />
185<br />
GAP<br />
milímeters<br />
21 - 45<br />
21 - 45<br />
0,26 - 0,50<br />
0,25 - 0,51<br />
0,25 - 0,41<br />
IMPORTANT:<br />
If reusing the crown/pinion pair, it is advisable<br />
to maintain the original gearing gap.<br />
<strong>MAINTENANCE</strong> <strong>MANUAL</strong><br />
39
Adjustments<br />
Contact of the Crown and Pinion Teeth<br />
Check of the Differential Contact Models 120 -<br />
145 - 147 - 155 - 160 - 185<br />
Checking Process<br />
A - Apply yellow iron oxide (diluted in fine oil) to<br />
some of the crown teeth (figure 95).<br />
C - Check if the contact obtained by the manual<br />
process complies with the standard (figure<br />
97). If not, use the correction methods indicated<br />
in the item “Incorrect Contacts”.<br />
Note:<br />
- Upon obtaining the correct contact on the<br />
convex side (forward gear), the contact on<br />
the concave side (reverse gear) will automatically<br />
be satisfactory (figure 97).<br />
- With the application of load in the vehicle,<br />
this contact will practically encompass all<br />
the length of the tooth, approaching its<br />
toe (figure 98).<br />
Figure 95<br />
B - Brake the crown, with the aid of a lever or<br />
lath simulating a load and turn the pinion<br />
manually, until obtaining the impression of<br />
contact on the convex side (forward gear)<br />
of the crown teeth (figure 96).<br />
Figure 97<br />
Figure 96<br />
Figure 98<br />
40 <strong>MAINTENANCE</strong> <strong>MANUAL</strong>
Adjustments<br />
Satisfactory Contact<br />
To make it easier, we indicate the terminol-ogy<br />
used in this section (figure 99).<br />
The contact standard for the manual process<br />
indicates that the gears are in the correct position,<br />
resulting in a contact area between the toe<br />
and heel/top and root of the tooth. Figure 97.<br />
Incorrect Contact<br />
Variances Concerning the Height of the<br />
Tooth<br />
If the pinion is not at the correct depth, the contact<br />
can have variance related to the height of<br />
the tooth. In this case, correct its position varying<br />
the thickness of the wedge pack under<br />
the pinion box. (figures 101 and 102)<br />
Figure 99<br />
If the convex side is satisfactory, consider the<br />
contact of the concave side of the tooth (reverse<br />
gear) automatically accepted.<br />
The standard with application of load shows<br />
the contact resulting when the gears approved<br />
by the manual process undergo a load action<br />
(work operation). The contact area extends<br />
to all the length of the tooth and the top of the<br />
standard approaches the top of the crown tooth<br />
(figure 100).<br />
Figure 101<br />
IT REDUCES THE THICK-<br />
NESS OF THE WEDGE<br />
PACK<br />
Figure 102<br />
IT INCREASES THE THI-<br />
CKNESS OF THE WEDGE<br />
PACK<br />
Figure 100<br />
<strong>MAINTENANCE</strong> <strong>MANUAL</strong><br />
41
Adjustments<br />
CONTACT<br />
OBTAINED<br />
Level<br />
Contact<br />
Bottom<br />
Contact<br />
MEANING<br />
It indicates that the pinion is very far<br />
from the crown, resulting in a contact<br />
very near the top of the tooth (figure<br />
101).<br />
It indicates that the pinion is very<br />
near the crown, resulting in a contact<br />
very near the tooth root (figure 102).<br />
HOW TO CORRECT<br />
Approach the pinion reducing the thickness<br />
of the adjusting wedge Pack of<br />
the pinion box (see the Pinion Assembly<br />
Distance Adjustment section). This will<br />
make the contact move to the tooth root<br />
(figure 101).<br />
Separate the pinion increasing the<br />
adjusting wedge pack thickness of the<br />
pinion (see the Pinion Assembly Distance<br />
Adjustment section). This will make<br />
the contact move to the top of the tooth.<br />
(figure 102).<br />
Variances Concerning the Tooth Length<br />
Then, check if the contact has variance related<br />
to the tooth length. If so, alter the crown depth,<br />
varying the gearing gap.<br />
CONTACT<br />
OBTAINED<br />
Toe<br />
End<br />
Contact<br />
Heel<br />
End<br />
Contact<br />
MEANING<br />
It indicates that the crown is very<br />
near the pinion, resulting in a contact<br />
very near the toe of the tooth (figure<br />
103).<br />
It indicates that the crown is very far<br />
from the pinion, resulting in a contact<br />
very near the heel of the tooth (figure<br />
104).<br />
HOW TO CORRECT<br />
Separate the crown increasing the gearing<br />
gap (if necessary, until the maximum<br />
allowed) so that the contact area<br />
moves in the direction of the tooth heel,<br />
approaching in the manner indicated in<br />
figure 97 (see the Gearing Gap Adjustment<br />
section).<br />
Approach the crown reducing the gearing<br />
gap (if necessary, until the minimum<br />
allowed) so that the contact area moves<br />
in the direction of the tooth toe, approaching<br />
in the manner indicated in figure<br />
97 (see the Gearing Gap Adjustment<br />
section).<br />
Contacto Extremo de<br />
la Punta<br />
Figure 103 Contacto Extremo<br />
Figure 104<br />
Talón<br />
42 <strong>MAINTENANCE</strong> <strong>MANUAL</strong>
Adjustments<br />
Check of the Differential Contact<br />
Model RS120<br />
The hypoid pinion and crown teeth of the differential<br />
RS120 are cut by the conventional process.<br />
Check the contact of the teeth of these gears<br />
using the same correction procedure specified<br />
for the models 120, 145/147, 155, 160 and 185,<br />
but considering the contact standards illustrated<br />
in figures 103, 104, 105, 106, 107, 108.<br />
STANDARD FOR APPLYING<br />
load<br />
Figure 107<br />
STANDARD FOR<br />
<strong>MANUAL</strong> PROCESS<br />
Figure 105<br />
BOTTOM CONTACT<br />
Figure 108<br />
IMPORTANT:<br />
Upon noting that the contacts are correct,<br />
lock the adjusting rings with a pin or cotter<br />
pin.<br />
CAUTION:<br />
In the assembly, a cotter pin may be used<br />
where originally the pin was assembled, but<br />
NEVER assemble a pin in the hole where a<br />
cotter pin was used.<br />
LEVEL CONTACT<br />
Figure 106<br />
<strong>MAINTENANCE</strong> <strong>MANUAL</strong><br />
43
Main Satellite Box Blocking System<br />
Warning and Danger Messages<br />
Read and observe all the Warning and Precaution<br />
alert messages. They contain information<br />
which can help to prevent serious personal injury,<br />
damage to components, or both.<br />
WARNING:<br />
In order to prevent serious injury to the eyes,<br />
always wear safety goggles when executing<br />
services or maintenance in the vehicle.<br />
Description<br />
Some traction shafts of Arvin<strong>Meritor</strong> are equipped<br />
with a Blocking System of the Main Satellite<br />
Box (DCDL). This locking of the satellite<br />
box is operated by an air drive mechanism and<br />
assembled in the differential unit. When activated,<br />
the drive mechanism moves a locking ring<br />
sliding it on a notch in the half shaft. When coupled,<br />
the locking ring links the half shaft to a<br />
second notch which exists on one of the sides<br />
of the satellite box. Both the traction wheels<br />
are now simultaneously coupled, not allow-ing<br />
the differential action of the main satellite box.<br />
Figure 109<br />
Note :<br />
The Arvin<strong>Meritor</strong> differential unit models<br />
equipped with a locking system of the main<br />
satellite box are made in metric dimensions.<br />
When these differential units are maintained,<br />
it is very important to use metric size<br />
tools suited to the fastening components.<br />
Removal of the Differential Unit of the Shaft<br />
Frame.<br />
Before the differential unit can be removed or installed,<br />
the locking system of the main satellite box<br />
must be activated and maintained in the activated<br />
or locked position. In the “locked” position, there<br />
will be a sufficiently large gap between the locking<br />
ring and the shaft frame to allow the removal or<br />
installation of the differential unit.<br />
Note:<br />
If the half shaft is removed to tow the vehicle<br />
and the differential is in the unlocked or<br />
uncoupled position, install the half shaft of<br />
the left side in the shaft frame before continuing.<br />
Execute the following steps to reinstall<br />
the half shafts in the shaft frame:<br />
1. Remove the protection, if used during the towing<br />
of the vehicle, of the wheel hubs.<br />
2. If the traction shaft is equipped with a locking<br />
system of the main satellite box, activate the<br />
system to the unlocked or uncoupled position.<br />
Install the half shaft with two notches<br />
and new joints in their place as follows:<br />
A. Place the half shaft and joint in the hub and<br />
frame until the half shaft touches the gearing<br />
ring.<br />
B. Lower, raise and turn the half shaft by the<br />
flange until the notch of the half shaft and the<br />
gearing ring are engaged.<br />
C. Push the half shaft inside the frame of the<br />
shaft until the half shaft touches the planetary<br />
gear of the main satellite box.<br />
D. Lower and turn the half shaft by the flange<br />
until the notch of the half shaft and of the<br />
planetary gear of the differential are engaged.<br />
E. Place the half shaft completely inside the<br />
frame until the flange and joint are adjusted<br />
against the wheel hub.<br />
44 <strong>MAINTENANCE</strong> <strong>MANUAL</strong>
Main Satellite Box Blocking System<br />
Gearing or Locking of the DCDL<br />
WARNING:<br />
During the disassembly of the DCDL or the<br />
removal of the differential unit, when the<br />
DCDL is in the locked or engaged position<br />
and one of the vehicle wheels is raised from<br />
the ground, do not turn the motor on or couple<br />
the transmission. The vehicle may move<br />
and cause serious personal injury. The<br />
components may also be damaged.<br />
Park the vehicle on a level surface. Block the<br />
wheels to prevent the vehicle from moving.<br />
Support the vehicle on safety supports. Do<br />
not work under a vehicle supported only by<br />
a jack. The jack can slip or break. Serious<br />
personal injury and damage to the components<br />
may occur.<br />
CDDL FASTENED BY SCREWS<br />
housing hole for the<br />
manual gearing screw<br />
manual<br />
gearing<br />
screw<br />
PLUG and<br />
joint<br />
housing hole for the<br />
plug and joint in the<br />
lower joint<br />
air line<br />
cylinder<br />
cover<br />
electric<br />
cable<br />
position of operation<br />
hole<br />
Figure 111<br />
Manual Method<br />
Use the following manual method to couple the<br />
mechanism of the DCDL in the locked position:<br />
If an air line is not available or the differential unit<br />
is stocked for later use, use this manual gearing<br />
method for the DCDL. Figure 110 and Figure 111.<br />
housing<br />
hole<br />
air<br />
hose<br />
threaded CDDL<br />
Cylinder<br />
manual gearing screw<br />
Figure 110<br />
1. Park the vehicle on a level surface. Block the<br />
wheels to prevent the vehicle from moving.<br />
2. Remove the drainage plug from the frame<br />
and drain all the lubricant.<br />
3. Use a jack to raise the wheel of the left side<br />
of the traction shaft.<br />
4. Place a safety support under the spring seat<br />
of the left side to maintain the vehicle in the<br />
raised position.<br />
5. Disconnect the cardan shaft of the differential<br />
unit input fork.<br />
6. Disconnect the air line of the vehicle of the<br />
differential locking drive system between<br />
shafts and of the main satellite box.<br />
7. Remove the connection and the joint from<br />
the central hole of the cylinder fastened by<br />
a thread or of the flanged cylinder fastened<br />
by screws of the DCDL.<br />
8. Remove the manual gearing screw from the<br />
housing hole in the cover of the cylinder fastened<br />
by screws or in the box of the mechanism<br />
with a cylinder fastened by a thread.<br />
Figure 110 and Figure 111.<br />
Note:<br />
For the drive mechanism unit of the DCDL<br />
fastened by screws, the housing hole of<br />
the plug and joint is on the opposite side<br />
of the housing hole of the manual gearing<br />
screw. Figure 111.<br />
9. Install the plug and the joint of the lower housing<br />
threaded hole in the cylinder cover or<br />
in the box of the mechanism fastened by a<br />
thread.<br />
<strong>MAINTENANCE</strong> <strong>MANUAL</strong><br />
45
Main Satellite Box Blocking System<br />
10.Install the manual gearing screw in the threaded<br />
hole in the center of the cylinder or in<br />
the threaded hole of the cylinder cover, as<br />
built.<br />
CAUTION<br />
There will be a small resistance<br />
of the spring which you will feel<br />
when threading the manual gearing<br />
screw. If you feel a high resistance<br />
before reaching the locked<br />
or engaged position, stop tightening<br />
the screw, or the cover, fork<br />
and screw thread may be damaged.<br />
11. Turn the manual adjustment screw to the<br />
right until the head is approximately 6 mm<br />
(0.25”) from the cylinder cover. Do not turn<br />
the screw beyond its normal stop.<br />
A high resistance in the screw indicates that<br />
the notch of the gearing ring and of the satellite<br />
box are not aligned or engaged. To align the<br />
notches, use the following procedure:<br />
A. Turn the left Wheel to align the notch of the<br />
gearing ring with the satellite box while you<br />
turn the manual gearing screw.<br />
B. When you feel a normal slight resistance of<br />
the spring again in the gearing screw, the<br />
notched items will be engaged. Continue<br />
to turn the ma-nual gearing screw until the<br />
head is approximately 6 mm (0.25”) from<br />
the cylinder cover. The screw will now be<br />
in the position for maintenance and the locking<br />
system of the differential will be engaged.<br />
12. Remove the differential from the shaft frame.<br />
13. Release the locking of the differential by<br />
removing the manual gearing screw and<br />
seal the cover of the cylinder fastened by a<br />
screw or the threaded cylinder.<br />
Method with the Auxiliary Air Source<br />
1. Park the vehicle on a level surface. Block the<br />
wheels to prevent the vehicle from moving.<br />
2. Use a jack to raise the wheel on the left side<br />
of the shaft. Place a safety support under the<br />
left side of the frame to maintain the vehicle<br />
in this raised position.<br />
bosseS<br />
Figure 112<br />
3. Remove the drainage plug from the lower<br />
part of the frame and drain the lubricant.<br />
4. Disconnect the cardan shaft of the input fork.<br />
5. Disconnect the air line of the vehicle which<br />
activates the blocking system of the differential<br />
between shafts and of the main satellite<br />
box.<br />
6. Install a connector for a suitable air line in<br />
the main satellite drive mechanism unit.<br />
7. Install the air line in the connector.<br />
CAUTION<br />
When using an auxiliary air source<br />
to engage the DCDL, the source<br />
should be maintained connected<br />
until the removal of the differential<br />
of the shaft frame. Do not disconnect<br />
the auxiliary air line or<br />
reduce the pressure for the DCDL<br />
before removing the differential<br />
unit from the shaft frame. The components<br />
may be damaged.<br />
8. The air line should supply the mechanism<br />
with a regulated pressure of 120 psi (827<br />
kPa).<br />
9. Check if the DCDL is engaged.<br />
10. Remove the differential unit from the shaft<br />
frame.<br />
11. Close the air source to the DCDL.<br />
12. Disconnect the air line of the main satellite<br />
box drive mechanism unit connector.<br />
Main Satellite Box and its Blocking System<br />
Drive mechanism unit with a cylinder fastened<br />
by a Thread.<br />
The current project of the locking fork does not<br />
use elastic pins. Bosses on the internal surface<br />
of the fork maintain the gearing ring in place.<br />
Figure 112.<br />
46 <strong>MAINTENANCE</strong> <strong>MANUAL</strong>
Main Satellite Box Blocking System<br />
1. Check that the drive system is released and<br />
that the manual gearing screw was removed<br />
from the drive mechanism cylinder.<br />
2. Hit the gearing ring with a rubber hammer to<br />
loosen it and remove it from the gearing fork.<br />
Figure 113<br />
5. Place the piston and cylinder unit in a vise<br />
protected by bronze filing blocks. Remove<br />
the piston and “O” ring from inside the cylinder.<br />
Use a small bar placed through the hole<br />
of the top of the cylinder and push the piston<br />
outwards. It may be necessary to use a small<br />
rubber hammer CAUTIONly to hit and remove<br />
the piston outwards. Figure 116.<br />
suitable<br />
diameter<br />
bar<br />
gearing ring fork<br />
gearing ring<br />
Figure 113<br />
3. Remove the locking mechanism sensor switch,<br />
if used, and its locking nut from the differential<br />
box. Figure 114.<br />
Figure 116<br />
6. CAUTIONly remove the “O” ring from the piston.<br />
Use the point of a small tool to facilitate<br />
this removal. Be very CAUTION not to damage<br />
the piston. Figure 117.<br />
Figure 114<br />
4. Remove the locking system drive piston and<br />
cylinder unit turning it to the left. Figure 115.<br />
Figure 117<br />
7. Check the “O” ring to identify any type of damage<br />
as cuts, splits.<br />
• If the “O” ring is damaged, replace it by a<br />
new ring when you reassemble the components.<br />
8. Clean and inspect all he drive mechanism<br />
unit parts.<br />
Figure 115<br />
<strong>MAINTENANCE</strong> <strong>MANUAL</strong><br />
47
Main Satellite Box Blocking System<br />
9. Pull the locking fork drive shaft and remove it<br />
from the differential box. Figure 118.<br />
gearing fork<br />
drive<br />
shaft<br />
10. Remove the spring from the differential box<br />
locking fork drive shaft spring. Figure 119.<br />
MOLA DO EIXO DE<br />
ACIONAMENTO<br />
box of the dcdl<br />
cast in the differential<br />
box<br />
Figure 118<br />
Figure 120<br />
This unit is disassembled in the same manner<br />
as in the differentials without the satellite box<br />
locking mechanisms.<br />
Drive Mechanism Unit Fastened by Screws<br />
1. To remove the gearing ring from the block-<br />
-ing mechanism, withdraw the two retaining<br />
elastic pins of the ring until they are level<br />
with the internal surface of the locking ring<br />
fork. Figure 121.<br />
2. If necessary, remove the blocking drive mechanism.<br />
drive<br />
shaft<br />
spring<br />
Figure 119<br />
11. If elastic pins are used, use a hammer and<br />
a bronze punch to remove the pins from the<br />
covers of the bearing and the adjusting ring.<br />
If cotter pins or screws are used, remove<br />
them.<br />
12. Remove the adjusting rings and setscrews<br />
and washers from the bearing covers. Mark<br />
one of the bearing covers and the differential<br />
box so that these parts are assembled in the<br />
same position when reassembling the differential.<br />
13. Raise and remove the satellite box unit from<br />
the differential box. Figure 120.<br />
ELASTIC PINS - Withdraw<br />
until they are facing<br />
the internal surface<br />
of the gearing ring fork<br />
Figure 121<br />
A. Remove the mechanism sensor switch and<br />
its locking nut.<br />
B. Remove the four screws and washers which<br />
fasten the cylinder cover. Remove the cover.<br />
In the Series 160 differentials, remove<br />
the copper joint. Figure 122.<br />
C. Remove the drive mechanism piston and<br />
cylinder.<br />
D. Remove the locking ring fork shaft. It may<br />
be necessary to use heat to separate the<br />
fork shaft.<br />
48 <strong>MAINTENANCE</strong> <strong>MANUAL</strong>
Main Satellite Box Blocking System<br />
Note:<br />
Some models use a Silastic seal instead of<br />
a plain washer in step E. There is also an<br />
elastic pin installed in the drive shaft and<br />
it is used as a stop for the spring. It is not<br />
necessary to remove this elastic pin during<br />
a normal disassembly.<br />
E. Remove the spring from the drive shaft and<br />
the plain washer.<br />
F. Remove the drive fork and continue with<br />
step 11 in the previous procedure.<br />
DCDL Mechanism Unit with Fastening by<br />
Thread.<br />
Install the blocking drive mechanism unit of the<br />
satellite box after it has been installed and the<br />
gears and roller bearings have been adjusted.<br />
The drive mechanism of the satellite box blocking<br />
fastened by thread is shown in figure 123.<br />
THREADED VERSION UNBLOCKED<br />
drive shaft and<br />
springs<br />
electrical connection<br />
for sensor<br />
fastening position<br />
of manual gearing<br />
screw<br />
piston<br />
cylinder<br />
screws and<br />
washers four<br />
edges<br />
cover, joint of copper<br />
under cober<br />
series 160 only<br />
gearing<br />
ring<br />
fork<br />
“o” ring<br />
Figure 122<br />
Figure 123<br />
Installation of Satellite Box Blocking Drive<br />
Mechanism Unit<br />
WARNING:<br />
Upon applying the silicone chemical joint, a<br />
small quantity of acid vapor will be released. In<br />
order to prevent serious per-sonal injury, ensure<br />
that the work area is well ventilated. Read<br />
the manufacturer’s instructions before using<br />
the silicone chemical joint, and then follow the<br />
instructions CAUTIONly. If your eyes are attained<br />
by the material of the silicone chemical<br />
joint, follow the manufacturer’s emergency procedures.<br />
Make an appointment with an ophthalmologist<br />
as quickly as possible.<br />
Be CAUTION when using Loctite adhesive to<br />
avoid serious personal injury. Read the manu-<br />
-facturer’s instructions before using this product.<br />
Follow the instructions CAUTIONly to<br />
prevent irritation of the eyes and skin.<br />
1. Install the locking ring in the drive shaft in<br />
the differential unit. The “L” from section<br />
of the fork and the hole for the drive shaft<br />
should be turned towards the cylinder housing<br />
side in the differential box. Figure 124<br />
“L” form fork<br />
external<br />
surface<br />
Figure 124<br />
<strong>MAINTENANCE</strong> <strong>MANUAL</strong><br />
49
Main Satellite Box Blocking System<br />
2. Compress the spring of the locking drive<br />
shaft and install it between the rear part of<br />
the locking fork and the inside wall. Figure<br />
125.<br />
conic end<br />
drive shaft spring<br />
drive cylinder<br />
Figure 127<br />
Install the spring<br />
behind the fork<br />
Figure 125<br />
3. Align the spring and the hole of the locking<br />
ring fork with the hole of the drive shaft in<br />
the differential box.<br />
4. Install the drive shaft through the hole in the<br />
differential box, the locking ring fork and the<br />
spring. Figure 126.<br />
7. Apply a continuous fillet of 1.5 mm (0.06”) in<br />
diameter of seal for flanges of Loctite with<br />
number Arvin<strong>Meritor</strong> 2297-D-7076, around<br />
the threads of the DCDL cylinder.<br />
8. Turn the piston and drive cylinder unit to the<br />
right until reaching the bottom of the housing<br />
in the differential box. Figure 128.<br />
gearing ring<br />
fork<br />
drive<br />
shaft<br />
Figure 126<br />
Figure 128<br />
5. If necessary, lubricate a new “O” ring with<br />
lubricating oil of the shaft. Install the “O” ring<br />
in the piston channel.<br />
6. Install the piston unit with the “O” ring inside<br />
the drive cylinder with the beveled side<br />
turned towards the bottom of the cylinder.<br />
Push the piston until it is at the bottom of the<br />
cylinder. Figure 127.<br />
9. Position the locking ring on the fork. The<br />
larger notch of the locking ring should be<br />
turned towards the main satellite box. Use<br />
a rubber hammer to hit the locking ring until<br />
it goes through the bosses of the drive fork.<br />
Figure 129.<br />
50 <strong>MAINTENANCE</strong> <strong>MANUAL</strong>
Main Satellite Box Blocking System<br />
10. Engage the notch of the locking ring with<br />
the notch of the satellite box. Insert the manual<br />
gearing screw by the top of the drive<br />
cylinder of the mechanism to move the gearing<br />
ring in the direction of the satellite box.<br />
Turn the gearing ring as required to align<br />
the notches. Figure 130.<br />
12. With the locking ring in the engaged position,<br />
install the sensor switch in its threaded<br />
hole in the front part of the differential box.<br />
Figure 131.<br />
large<br />
notches<br />
in the<br />
satellite<br />
box of the<br />
main differential<br />
Figure 131<br />
bosses in the gearing<br />
ring fork<br />
Figure 129<br />
11. Turn the manual gearing screw to the right<br />
until its head is approximately 6 mm (0.25”)<br />
from the cylinder top. Do not turn the screw<br />
beyond its normal stop. The screw will have<br />
raised the piston to the correct work position<br />
and the locking system of the main satellite<br />
box will be completely engaged.<br />
Note:<br />
The differential unit should be in its locked<br />
position t install the half shaft in the shaft<br />
frame.<br />
drive cylinder of<br />
the threaded<br />
dcdl<br />
13. Connect a multimeter to the sensor switch.<br />
Select the resistance measurement function<br />
in the appliance. With the DCDL engaged,<br />
the circuit should be closed, showing less<br />
than 1 ohm of resistance. If the resistance<br />
is above 1 ohm, check the sensor.<br />
A. Check that the fork is aligned with the sensor<br />
switch when it is in the engaged position.<br />
B. Check that the connection wires are loose.<br />
The connector should be firmly placed in its<br />
hous-ing.<br />
C. Check that the sensor switch is totally pressed<br />
against the differential box.<br />
• If the resistance is greater than 1 ohm<br />
after these checks, replace the sensor<br />
switch.<br />
DCDL Mechanism Unit with Fastening by<br />
Screws.<br />
Install the drive mechanism after the differential<br />
unit has been assembled and the adjustments<br />
of the gears and roller bearings are ready.<br />
The drive mechanism of the type fastened by<br />
screws is shown in Figure 132.<br />
manual gearing screw<br />
Figure 130<br />
<strong>MAINTENANCE</strong> <strong>MANUAL</strong><br />
51
Main Satellite Box Blocking System<br />
DCDL FASTENED BY SCREWS<br />
4. Apply the thread lock Loctite 222 to the<br />
threads of the drive shaft of the locking ring<br />
fork.<br />
5. Install the locking fork in its assembly position<br />
in the differential box. Figure 134.<br />
1 - Plain washers or chemical<br />
joint as required<br />
2 - Cylinder<br />
3 - Electrical connection for<br />
the sensor<br />
4 - Air line<br />
5 - “O” Ring<br />
6 - Piston<br />
7 - Disengaged<br />
8 - Engaged<br />
9 - Copper joint<br />
10 - Pin<br />
11 - Gearing ring fork<br />
12 - Gearing ring<br />
13 - Drive shaft and spring<br />
Figure 132<br />
Figure 134<br />
6. Maintain the gearing ring fork in its position.<br />
Install the return spring of the drive shaft<br />
through the opening for the shaft in the differential<br />
box, through the fork hole and inside<br />
the housing for the spring. Figure 135.<br />
1. In the differential models with locking ring<br />
fork with elastic pins, install the two elastic<br />
pins at the ends of the fork. Insert the pins<br />
until they are touching the internal side of<br />
the fork. Figure 133. Do not install the pins<br />
in their end position at this moment.<br />
Apply Thread<br />
Chemical Lock 222<br />
gearing ring fork<br />
elastic pin<br />
drive<br />
shaft<br />
internal surfaces<br />
of the<br />
fork<br />
Figure 135<br />
Figure 133<br />
2. If the blocking pin of the spring was removed<br />
from the drive shaft head, reinstall the<br />
pin now.<br />
3. In the models without the spring blocking<br />
pin, assemble the locking fork in its position.<br />
7. Slide the drive shaft on the spring. Install<br />
the drive shaft in the locking ring fork. Tighten<br />
with 27-34 N.m (20-25 lb-ft).<br />
8. Install the copper joint or apply the Silastic<br />
seal, with number Arvin<strong>Meritor</strong> 1199-Q-<br />
2981, on the touching surface of the cylinder.<br />
Figure 136.<br />
52 <strong>MAINTENANCE</strong> <strong>MANUAL</strong>
Main Satellite Box Blocking System<br />
VERSION FASTENED BY SCREWS<br />
9. Lubricate the “O” ring with shaft lubricating<br />
oil. Install the “O” ring in its channel in the<br />
piston. CAUTIONly install the air piston inside<br />
the air cylinder. Figure 136. Do not damage<br />
the “O” ring.<br />
10. Install the air cylinder inside the housing in<br />
the differential box. Check that the pilot in<br />
the piston entered the housing of the drive<br />
shaft. Figure 137.<br />
Apply Chemical<br />
Joint<br />
cylinder<br />
cover<br />
screw 4-6<br />
lb-ft (6,6-<br />
8,6 N/M)<br />
drive<br />
shaft<br />
air<br />
cylinder<br />
piston and<br />
“o” ring<br />
Install plain washer or apply<br />
chemical joint Figure 136<br />
VERSÃO FIXADA POR PARAFUSO<br />
11. Install the copper joint, if used, in the housing<br />
inside the air cylinder cover. Place the<br />
cover in its position on the cylinder so that<br />
the air inlet is turned upwards when the differential<br />
unit is installed in the shaft frame.<br />
Install the cover with the four setscrews and<br />
retaining washers. Tighten the screws with<br />
5.5-8.5 N.m (4-6 lb-ft). Figure 138.<br />
12. Apply a fillet of Silastic seal, number Arvin-<br />
<strong>Meritor</strong> 1199-Q-2981, in the joint between<br />
the cylinder and frame of the differential.<br />
13. Slide the gearing ring inside the locking ring<br />
fork and engage the notch of the locking<br />
ring with the notch of the satellite box. Use a<br />
manual actuation screw to move the locking<br />
ring on the satellite box.<br />
14. Maintain the gearing ring in its locked or engaged<br />
position and hit the two elastic pins at<br />
the ends of the fork until they are level with<br />
the external surfaces of the fork. Figure 139.<br />
15 While the locking ring is in its locked position,<br />
place the sensor switch in the threaded<br />
hole and with the locking nut loose.<br />
GEARING RING<br />
GEARING<br />
FORK<br />
VERSION<br />
<strong>MANUAL</strong><br />
GEARING<br />
SCREW<br />
Figure 138<br />
cilindro e<br />
pistão<br />
piloto<br />
Figure 139<br />
eixo de<br />
acionamento<br />
Figure 137<br />
16. Connect a multimeter to the sensor switch.<br />
Select the resistance function in the appliance.<br />
Turn the switch in the direction of the clock<br />
pointers until you read on the appliance a<br />
resistance infinite or less than 1 ohm. Give<br />
the switch an additional turn and tighten the<br />
locking nut with 35-45 N.m (25-35 lb-ft).<br />
<strong>MAINTENANCE</strong> <strong>MANUAL</strong><br />
53
Main Satellite Box Blocking System<br />
Covers Stopping Up the Satellite Box Blocking<br />
System<br />
For differentials without the main satellite box<br />
blocking system, assemble a protection cover<br />
and plug to stop up the hole for the sensor as<br />
below.<br />
Assembly of the protection cover unit for<br />
DCDL fastened by screws.<br />
1. Install the washer and the plug in the threaded<br />
hole for the sensor switch. Tighten the<br />
plug with 60-74 N.m (45-55 lb-ft). Figure 140.<br />
2. Apply the silicone chemical joint to the assembly<br />
surface of the protection cover in the<br />
differential box.<br />
3. Install the four washers and screws. Tighten<br />
the screws with 10-12 N.m (7.4-8.9 lb-ft). Figure<br />
140.<br />
COVER IN THE VERSION FASTENED BY THREAD<br />
(Apply adhesive Loctite 518 to the cover threads))<br />
SENSOR<br />
SWITCH<br />
PLUG<br />
WASHER<br />
WASHER<br />
SCREW<br />
COVER IN THE<br />
VERSION FASTE-<br />
NED BY SCREWS<br />
(Apply Chemical<br />
Joint)<br />
Figure 140<br />
Assembly of the protection cover unit for<br />
DCDL fastened by thread.<br />
1. Apply the adhesive Loctite 518 to the protection<br />
cover threads.<br />
Assembly of the Previous Differential Unit<br />
in the Shaft Frame<br />
WARNING:<br />
Solvents for cleaning can be flammable,<br />
poisonous and cause burns. Examples of<br />
solvents for cleaning are: carbon tetrachloride,<br />
emulsion types and solvents with a petroleum<br />
base. Read the manufacturer’s instructions<br />
before using the cleaning solvent,<br />
and then CAUTIONly follow the instructions.<br />
Also obey the following procedures.<br />
• Wear safe protection for the eyes;<br />
• Wear clothes which protect your skin;<br />
• Work in a well-ventilated area;<br />
• Do not use gasoline or solvents which contain<br />
gasoline. Gasoline can explode;<br />
• You will be able to use a hot solution tank<br />
or alkaline solution. Read the manufacturer’s<br />
instructions before using tanks with a hot solution<br />
and alkaline solutions. Then, CAUTIO-<br />
Nly follow the instructions.<br />
Note:<br />
When you install the differential unit in the<br />
shaft frame, the locking ring should be in<br />
the coupled or engaged position. This can<br />
be obtained by applying air pressure to the<br />
cylinder or by using the manual gearing<br />
screw. See the procedure in this section.<br />
The differential should be in the engaged or<br />
coupled position to allow it to be installed<br />
in the shaft frame After installing the differential<br />
unit in the shaft frame, activate the<br />
mechanism to the unlocked or disengaged<br />
position to allow the installation of the half<br />
shaft of the left side.<br />
Manual Method<br />
1. Use cleaning solvent and cloths to clean the<br />
internal part and the assembly surface of the<br />
flange of the differential unit in the shaft frame.<br />
2. Check the shaft frame to identify if it is damaged.<br />
If necessary, repair or replace the shaft<br />
frame.<br />
3. Check if there are tap bolts loose on the assembly<br />
surface of the differential unit. Remove<br />
and replace the tap bolts when required.<br />
Apply adhesive to the threaded holes of the<br />
tap bolts. Install and tighten the tap bolts with<br />
204-312 N.m (150-230 lb-ft).<br />
4. The locking system of the satellite box should<br />
be in the coupled or engaged position before<br />
installing the differential unit in the shaft frame.<br />
See the procedure in this section.<br />
5. Install the differential unit in the shaft frame.<br />
6. Install and tighten the setscrews of the differential<br />
unit in the shaft frame with the torque<br />
specified.<br />
7. Install the half shafts of the left side and the<br />
right side.<br />
54 <strong>MAINTENANCE</strong> <strong>MANUAL</strong>
Main Satellite Box Blocking System<br />
Note:<br />
When the manual engaging screw is removed<br />
from the service position of the actuator<br />
center of the DCDL, the main satellite<br />
box locking system will be disengaged or<br />
uncoupled.<br />
8. Remove the long engaging screw of the<br />
DCDL of the cylinder with fastening by<br />
thread or of the cylinder with fastening by<br />
screws<br />
9. Clean the plug, joint, cylinder cover and the<br />
threaded hole of the cylinder cover center<br />
of the DCDL fastened by screws, or in the<br />
cylinder cen-ter of the DCDL fastened DRI-<br />
VE MECHANISM OF DCDL FASTENED<br />
BY THREAD HOUSING HOLE CYLINDER<br />
Figure 142 <strong>MANUAL</strong>by thread.<br />
10. Check that the sealing joint is under the<br />
screw head.<br />
11. Install the manual gearing screw in its housing<br />
in the versions of the DCDL fastened<br />
by thread or fastened by screws. Figure 141<br />
and Figure 142.<br />
A. In the DCDL fastened by screws, remove<br />
the short plug and the joint of the housing<br />
hole. Install the short plug and joint in the<br />
service hole in the center of the DCDL. Figure<br />
141.<br />
B. In the DCDL fastened by thread, install the<br />
short screw or plug in the housing hole located<br />
in the top of the drive mechanism box.<br />
Figure 142. 12. Tighten the plug with 44-55<br />
lb-ft (60-75 N.m). Tighten the manual gearing<br />
screw 30- 38 N.m (22-28 lb-ft) for cylinders<br />
of the DCDL fas-tened by screws and<br />
10-15 N.m (7-11 lb-ft) for mechanisms of<br />
the reverse type DCDL fastened by thread.<br />
<strong>MANUAL</strong><br />
GEARING<br />
SCREW<br />
DCDL UNIT FASTENED BY SCREWS<br />
plug aND JOINT<br />
AIR<br />
LINE<br />
sensor<br />
DRIVE MECHANISM OF DCDL FASTENED<br />
BY THREAD<br />
housing hole<br />
cylinder<br />
air hose<br />
manual gearing<br />
screw<br />
Figure 142<br />
13. Connect the air line of the vehicle to the main<br />
satellite box blocking drive mechanism.<br />
14. Install the electrical connection in the sensor<br />
switch located in the differential box under<br />
the actuator unit.<br />
15. Remove the safety support under the shaft.<br />
Lower the vehicle to the ground.<br />
16. Fill the shaft with lubricating oil.<br />
17. Proceed to check the locking system of the<br />
main satellite box as described in this section.<br />
Method with Auxiliary Air Supply<br />
1. Use a cleaning solvent and cloths to clean<br />
the internal part of the frame and the assembly<br />
flange of the differential unit.<br />
2. Check the differential frame to identify damage.<br />
If necessary, repair or replace the<br />
shaft frame.<br />
3. Check if there are loose tap bolts in the assembly<br />
flange of the differential unit. Remove<br />
and replace the tap bolts when re-quired.<br />
Apply adhesive to the threaded holes.<br />
Install and tighten the tap bolt with 204-312<br />
N.m (150-230 lb-ft).<br />
4. Connect an air line to the blocking mechanism<br />
of the main satellite box.<br />
5. The air line should supply the mechanism<br />
with a regulated pressure of 827 Kpa (120<br />
Psi).<br />
6. Check if the DCDL is engaged or<br />
HOLE FOR HOUSING<br />
OF THE PLUG AND<br />
JOINT IN THE LOWER<br />
PART<br />
POSITION OF THE HOLE<br />
FOR <strong>MANUAL</strong> GEARING<br />
SCREW<br />
Figure 141<br />
<strong>MAINTENANCE</strong> <strong>MANUAL</strong><br />
55
Main Satellite Box Blocking System<br />
7. Install the differential unit in the shaft frame.<br />
8. Install and tighten the setscrews of the differential<br />
unit with the torque specified.<br />
9. Install the half shaft of the left side and the<br />
right side.<br />
10. Remove the coupling of the air line from the<br />
main satellite box locking mechanism unit.<br />
11. Clean the plug, joint, cylinder cover and the<br />
threaded hole of the cylinder cover center<br />
of the DCDL fastened by screws, or in the<br />
cylinder center of the DCDL fastened by<br />
thread.<br />
12. Tighten the plug with 60-75 N.m (44-55 lb-<br />
-ft). Tighten the manual engagement screw<br />
with 30-38 N.m (22-28 lb-ft) of the cylinders<br />
of the DCDL fastened by screws and 10-15<br />
N.m (7-11 lb-ft) for the DCDL type fastened<br />
by thread.<br />
13. Connect the air line of the vehicle to the drive<br />
mechanism of the main satellite box blocking.<br />
14. Install the electrical connection to the sensor<br />
switch located in the differential box below<br />
the actuator unit.<br />
15. Remove the safety support under the shaft.<br />
Lower the vehicle to the ground.<br />
16. Fill the shaft with lubricating oil.<br />
17. Proceed to check the main satellite box<br />
blocking system as described in this<br />
section.<br />
Checking the Main Satellite Box Blocking<br />
System.<br />
1. Place the transmission of the vehicle in the<br />
disengaged position. Turn on the engine so<br />
that the pneumatic system of the vehicle attains<br />
the normal pressure level of functioning.<br />
WARNING:<br />
During the disassembly of the DCDL, when<br />
it is in the locked or engaged position and<br />
one of the wheels is off the ground, do not<br />
turn on the engine or couple the transmission.<br />
The vehicle may move and cause serious<br />
personal injury and damage to the<br />
components.<br />
2. Place the drive switch of the differential blocking<br />
installed in the vehicle cabin in the unlocked<br />
or disengaged position.<br />
3. Drive the vehicle at 8-16 km/h (5-10 mph)<br />
and check the light indicating the differential<br />
block-ing. The light should be off when the<br />
switch is in the unlocked or disengaged position.<br />
4. Continue to drive the vehicle and place the<br />
switch of the differential blocking system in<br />
the locked or engaged position. Take your<br />
foot off the accelerator to remove the torque<br />
of the cardan shaft and allow the blocking position<br />
to be changed. The light should be on<br />
when the switch is in the locked position.<br />
• If the indication light continues to be ON with<br />
the switch in the unlocked position, the blocking<br />
system is still in the locked position.<br />
Check if the manual gearing screw has been<br />
removed from the cylinder cover of the drive<br />
mechanism of the differential blocking. See<br />
the o procedure in this section.<br />
Label of Driver Care with the<br />
DCDL Check if the driver care label is installed<br />
in the vehicle cabin. Figure 143. The label<br />
should be placed in a place easy to be seen by<br />
the driver. The recommended place is on the<br />
instrument panel, next to the indication lamp<br />
and differential locking switch.<br />
!<br />
CAREFUL<br />
This vehicle is equipped with a Shaft Blocking System,<br />
controlled by the driver. (DCDL)<br />
• Only use the DCDL in poor road conditions<br />
• Do not activate when descending<br />
• Do not activate the blocking in speeds above 40 Km/H<br />
W hen the blocking is activated, the vehicle may be uncomfortable<br />
to drive, which requires care in the procedure of operating<br />
the vehicle. When the blocking is deactivated, the driving<br />
conditions return to normal.<br />
For further information about using the blocking, see<br />
the vehicle operator’s manual<br />
56 <strong>MAINTENANCE</strong> <strong>MANUAL</strong>
Main Satellite Box Blocking System<br />
The use of incorrect lubricants or those with<br />
unsuitable additives is, usually, the greatest<br />
cause of failures occurring in differentials.<br />
The lubricating oil specified for the differential<br />
must have features of extreme pressure (EP),<br />
service classification API-GL- 5 of the “American<br />
Petroleum Institute” and meet the requirements<br />
of the American military specification<br />
MILL-2105-C.<br />
This type of oil, better known as hypoid oil, has<br />
a lubricating film capable of supporting high<br />
work load pressure, which makes it appropriate<br />
for hypoid gears, where the lubrication condi-<br />
-tions are rather severe.<br />
Viscosity<br />
Generally speaking, the high viscosity degree<br />
of monoviscous oil is suited to high ambient<br />
temperatures. Besides extending the useful life<br />
of the gears, opting for a multiviscous oil will<br />
satisfy the temperature conditions found. The<br />
table below represents the viscosity selection<br />
of oils:<br />
MILITARY<br />
SPECIFIC.<br />
OIL DESCRIPTION<br />
MIN.<br />
AMBIENT TEMP.<br />
MAX.<br />
MIL - L2105 - C/D API GL-5 85W/140 -X-<br />
-12 C°<br />
MIL - L2105 - C/D API GL-5 80W/140<br />
-15 C°<br />
MIL - L2105 - C/D API GL-5 80W/140<br />
MIL - L2105 - C/D API GL-5 75W/140<br />
MIL - L2105 - C/D API GL-5 75W/140<br />
-28 C°<br />
-40 C°<br />
-40 C°<br />
MIL - L2105 - B API GL-5 90<br />
MIL - L2105 - B API GL-5 140<br />
0 C°<br />
+4 C°<br />
-X-<br />
-X-<br />
-X-<br />
-X-<br />
-X-<br />
-X-<br />
<strong>MAINTENANCE</strong> <strong>MANUAL</strong><br />
57
Lubrication<br />
Inspection and Recommendations<br />
Every 2000km check that the oil level is correct.<br />
Execute the drainage operation while the oil is<br />
still warm. This allows the lubricant to flow freely<br />
and more quickly, reducing the time required<br />
to drain the oil completely from the differential.<br />
Complete the level or resupply until the lubricant<br />
runs slightly over the lower edge of the oil<br />
level filling hole.<br />
The shaft should not be washed internally with<br />
any type of solvent (kerosene, gasoline, diesel<br />
oil, etc.).<br />
After each oil change, and before placing the<br />
vehicle in normal operation, drive limiting the<br />
speed to 40 km/h, for 5 to 10 minutes, or 2 to 3<br />
km to ensure that all the channels and pockets<br />
were duly filled with the lubricating oil.<br />
f the differential is a replacement unit, not foreseen<br />
for immediate reuse, all the bearings and<br />
gears should be covered with a good layer of<br />
anticorrosive oil.<br />
In this case, the differential should be maintained<br />
in a closed box until its reuse, to avoid<br />
contact between dust and other impuri-ties and<br />
the unit.<br />
Change the oil every 160,000 km or once a<br />
year, whichever occurs first.<br />
Vehicles which operate on the highway or off<br />
the road in severe applications, using the maximum<br />
load capacity allowed, should change the<br />
oil at intervals of 40000 - 50000 km, or every six<br />
months, whichever occurs first.<br />
Magnetic Plug<br />
MERITOR recommends using magnetic plugs<br />
in the oil drainage hole of the shaft.<br />
IMPORTANTE:<br />
The magnetic plug quickly loses its efficiency<br />
when it accumulates many metallic<br />
particles, and, therefore, should be cleaned<br />
before losing its efficiency. The removed<br />
plug can be cleaned and reused. It is advisable<br />
to practice this procedure once or<br />
many times within the period of changing<br />
the oil.<br />
Change Periods<br />
New or Reconditioned Units. In the initial period<br />
(running in), change the oil of the differential between<br />
2000 and 5000 km. This initial change is<br />
recommended to ensure the removal of metallic<br />
particles, usually released in a greater quantity<br />
during this phase.<br />
After the Running In Period Vehicles which<br />
operate basically on highways, with work loads<br />
below their maximum capacity of load allowed.<br />
58 <strong>MAINTENANCE</strong> <strong>MANUAL</strong>
Torque Table<br />
ITEM DESCRIPTION<br />
1<br />
2<br />
3<br />
4<br />
5<br />
6<br />
7<br />
8<br />
Pinion nut<br />
Screw (fastening pinion box)<br />
Screw (fastening satellite box)<br />
Filling hole and oil level<br />
Screw (fastening bearing)<br />
Nuts (fastening crow)<br />
Draining plug<br />
Breathing plug<br />
TORQUE SPECIFIED N.m (lbf.PÉ)<br />
RS 120 145/147 155 160 185<br />
1006-1250 (740-920)<br />
95-150 (70-110)<br />
129-156 (95-115)<br />
47 mín. (35 mín)<br />
245-299 (180-220)<br />
150-177 (110-130)<br />
47 mín (35 mín.)<br />
2,3 - 2,8 (20-25)<br />
1250-1535 (920-1130)<br />
95-150 (70-110)<br />
130-155 (95-115)<br />
47 mín. (35 mín.)<br />
430-540 (320-400)<br />
220-290 (160-210)<br />
47 mín. (35 mín.)<br />
2,3-2,8 (20-25)<br />
1250-1535 (920-1130)<br />
91-150 (67-91)<br />
235-290 (175-214)<br />
47 mín. (35 mín.)<br />
575-705 (425-520)<br />
300-365 (220-270)<br />
47 mín. (35 mín.)<br />
27 mín. (20 mín.)<br />
1350-1670 (1000-1230)<br />
95-150 (70-110)<br />
300-420 (220-310)<br />
47 mín. (35 mín.)<br />
650-810 (480-600)<br />
265-355 (195-262)<br />
47 mín. (35 mín.)<br />
27 mín. (20 mín.)<br />
1350-1670 (1000-1230)<br />
95-150 (70-110)<br />
300-420 (220-310)<br />
47 mín. (35 mín.)<br />
650-810 (480-600)<br />
365-355 (195-262)<br />
47 mín. (35 mín.)<br />
27 mín. (20 mín.)<br />
<strong>MAINTENANCE</strong> <strong>MANUAL</strong><br />
59
Always use Technical Manuals of...<br />
<strong>MAINTENANCE</strong> <strong>MANUAL</strong>
Always use original parts<br />
For more details, see the Spare Parts Catalog<br />
Customer service<br />
55 11 3684.6741<br />
55 11 3684.6867<br />
Purchase the CD-ROM failure analysis of components of the axis<br />
traction<br />
Customer Service<br />
Av. João Batista, 825 - Osasco - SP - 06097-105<br />
Tel. (11) 3684-664 - (11) 3684-6867<br />
AfterMarket (Replace parts)<br />
R. Ester Rombenso, 403 - Osasco - SP - 06097-120<br />
Tel. (11) 0800-555530<br />
www.arvinmeritor.com


