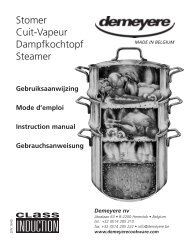
Mode d'emploi casserole à pression/autocuiseur - Demeyere
Mode d'emploi casserole à pression/autocuiseur - Demeyere
Mode d'emploi casserole à pression/autocuiseur - Demeyere

Sie wollen auch ein ePaper? Erhöhen Sie die Reichweite Ihrer Titel.
YUMPU macht aus Druck-PDFs automatisch weboptimierte ePaper, die Google liebt.
48<br />
Place the lid on the pan as shown.<br />
The positioning triangle on the lid must be aligned with the triangle on the pan handle.<br />
Turn the lid in a clockwise direction until the<br />
handle of the lid is over the handle of the pan.<br />
Check: The pressure cooker is correctly closed if the handle on the lid is positioned<br />
directly over the handle on the pan.<br />
9. Cooking under pressure<br />
Only hold the hot pressure cooker by its grips or handles. Always<br />
handle the pressure cooker with extreme care, especially if it is filled<br />
with hot liquid. If your pan has metallic handles, the use of oven<br />
gloves may be necessary.<br />
To avoid damage to the appliance, never allow the pressure<br />
cooker to boil dry.<br />
Never leave an empty pressure cooker on a hot hob.<br />
This cooker is not suitable for the preparation of apple compote,<br />
cranberries, porridge (oat flakes), barley or other cereals (except those<br />
listed section 18), peas, pasta, macaroni or rhubarb. These foods<br />
tend to foam and froth and could block the valve.<br />
In the case of problems during cooking: remove the pressure cooker<br />
from the heat source and allow it to cool.<br />
Place the properly closed cooker on a heat source commensurate with the size of the pressure<br />
cooker base. See underside of cooker base for correct size (see section 14). Next turn<br />
the heat source up to full power.<br />
As food begins to boil, any air present in the pressure cooker firstly escapes through the<br />
valve. The valve cap will then move up. Now, the pressure indicator stem rises with increasing<br />
pressure inside the pressure cooker. Please observe: after a short while the first red<br />
(pressure indication) line will become visible indicating that cooking level 1 has been reached.<br />
The cooking time begins (see the cooking time table in section 18)<br />
once the desired cooking level has been reached.