G&D CATVision - Guntermann und Drunck GmbH
G&D CATVision - Guntermann und Drunck GmbH
G&D CATVision - Guntermann und Drunck GmbH

Erfolgreiche ePaper selbst erstellen
Machen Sie aus Ihren PDF Publikationen ein blätterbares Flipbook mit unserer einzigartigen Google optimierten e-Paper Software.
<strong>Guntermann</strong> & <strong>Drunck</strong> <strong>GmbH</strong><br />
www.gdsys.de<br />
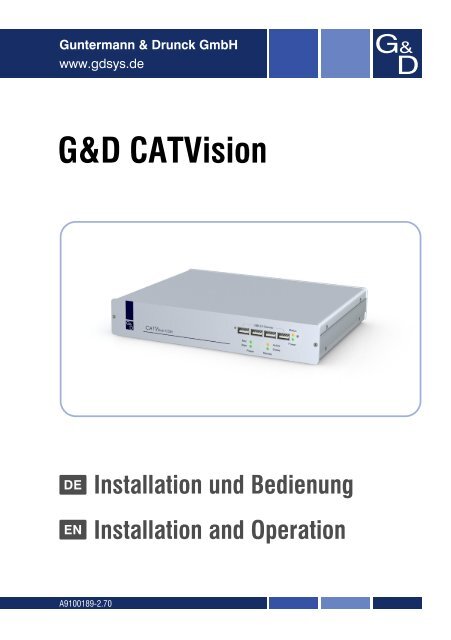
G&D <strong>CATVision</strong><br />
DE Installation <strong>und</strong> Bedienung<br />
EN Installation and Operation<br />
A9100189-2.70
<strong>Guntermann</strong> & <strong>Drunck</strong> <strong>GmbH</strong> Installations- <strong>und</strong><br />
Bedienungsanleitung <strong>CATVision</strong> (MC)<br />
HINWEISE<br />
Achtung<br />
UM DAS RISIKO EINES STROMSCHLAGES ZU VERM EIDEN, SOLLTEN SIE<br />
DAS GERÄT NICHT ÖFFNEN ODER ABDECKUNGEN ENTFERNEN.<br />
IM SERVICEFALL WENDEN SIE SICH BITTE AN UNSERE TECHNIKER.<br />
LESEN SIE DIE BEDIENUNGSANLEITUNG SORGFÄLTIG, BEVOR SIE DAS GERÄT IN BETRIEB<br />
NEHMEN.<br />
BEFOLGEN SIE ALLE WARNUNGEN ODER BEDIENUNGSHINWEISE, DIE SICH AM GERÄT ODER<br />
IN DER BEDIENUNGSANLEITUNG BEFINDEN.<br />
BEWAHREN SIE DIE BEDIENUNGSANLEITUNG SORGFÄLTIG AUF.<br />
SPANNUNGSVERSORGUNG : BETREIBEN SIE DIESES GERÄT NUR MIT DEM MITGELIEFERTEN<br />
ODER IN DER BEDIENUNGSANLEITUNG AUFGEFÜHRTEM AC-ADAPTER.<br />
BETREIBEN SIE DIESES GERÄT NUR AN EINER GEERDETEN SPANNUNGSQUELLE.<br />
SPANNUNGSFREIHEIT: STELLEN SIE VOR INSTALLATIONSARBEITEN SICHER, DAß DAS GERÄT<br />
SPANNUNGSFREI IST. ZIEHEN SIE DEN NETZSTECKER ODER DIE SPANNUNGSVERSORGUNG<br />
AM GERÄT AB.<br />
KABEL: VERWENDEN SIE AUSSCHLIEßLICH VON G&D GELIEFERTE KABEL.<br />
BESCHÄDIGUNGEN, DIE AUS DEM EINSATZ VON FREMDKABELN RESULTIEREN, FALLEN<br />
NICHT UNTER DIE GEWÄHRLEISTUNGSBESTIMMUNGEN. VERMEIDEN SIE BEI DER<br />
VERLEGUNG DER KABEL STOLPERFALLEN.<br />
LÜFTUNGSÖFFNUNGEN: LÜFTUNGSÖFFNUNGEN VERHINDERN EINE ÜBERHITZUNG DES<br />
GERÄTES. VERDECKEN SIE DIESE NICHT.<br />
GARANTIEAUSSCHLUß: G&D ÜBERNIMMT KEINE GARANTIE FÜR GERÄTE, DIE<br />
- NICHT BESTIMMUNGSGEMÄß EINGESETZT WURDEN.<br />
- NICHT AUTORISIERT REPARIERT ODER MODIFIZIERT WURDEN.<br />
- SCHWERE ÄUßERE BESCHÄDIGUNGEN AUFWEISEN, WELCHE NICHT BEI<br />
LIEFERUNGSERHALT ANGEZEIGT WURDEN.<br />
- DURCH FREMDZUBEHÖR BESCHÄDIGT WURDEN.<br />
G&D HAFTET NI CHT FÜR FOLGESCHÄDEN JEGLICHER ART, DIE MÖGLICHER WEISE DURCH<br />
DEN EINSATZ DER PRODUKTE ENTSTEHEN KÖNNEN.<br />
EINSATZBEREICH: DIE GERÄTE SIND AUSG ELEGT FÜR EI NE VERWENDUNG IM<br />
INNENBEREICH. VERMEIDEN SIE EXTREME KÄLTE, HITZE ODER FEUCHTIGKEIT.<br />
KONFORMITÄT: DAS GERÄT GENÜGT DEN FORDERUNGEN ÜBER DIE<br />
NIEDERSPANNUNGSRICHTLINIE 73/23 EWG BZW. 93/68/EWG IN ANLEHNUNG AN EN60950<br />
(2003) UND ENTSPRICHT DEN WESENTLICHEN SCHUTZANFORDERUNGEN DER<br />
RECHTSVORSCHRIFTEN ÜBER DIE ELEK TROMAGNETISCHE VERTRÄGLICHKEIT<br />
(89/336/EWG) UND DEN NORMEN EN55024 (1998) +A1, A2, EN61000-6-2 (2001),<br />
EN61000-3-2 (2000) + A2, EN61000-3-3 (1995) + A1 UND EN55022 KLASSE B (1998+ A1,<br />
A2).<br />
Seite 2
<strong>Guntermann</strong> & <strong>Drunck</strong> <strong>GmbH</strong> Installations- <strong>und</strong><br />
Bedienungsanleitung <strong>CATVision</strong> (MC)<br />
Inhaltsverzeichnis <strong>CATVision</strong><br />
1 Beschreibung ....................................................................................................... 6<br />
2 Lieferumfang ........................................................................................................ 7<br />
3 Installationsanleitung .......................................................................................... 8<br />
3.1 Installation der Sendeeinheit........................................................................ 8<br />
3.1.1 Videoanschluss am <strong>CATVision</strong>-MC-CPU .......................................... 9<br />
3.1.2 Optionale Anschlussmöglichkeiten .................................................... 9<br />
3.2 Installation der Empfangseinheit................................................................ 10<br />
3.2.1 Videoanschluss am <strong>CATVision</strong>-MC-Con ......................................... 11<br />
3.2.2 Optionale Anschlussmöglichkeiten .................................................. 11<br />
4 Stromversorgung............................................................................................... 13<br />
4.1 Allgemein ................................................................................................... 13<br />
4.2 Hinweis zum USB-Betrieb.......................................................................... 13<br />
5 Inbetriebnahme .................................................................................................. 14<br />
5.1 Einschalten des <strong>CATVision</strong>-Systems......................................................... 14<br />
5.2 Systemzustandsinformationen ................................................................... 14<br />
5.2.1 Keyboard/Mouse lokal nicht vorhanden ........................................... 15<br />
5.2.2 Remote Unit nicht vorhanden........................................................... 15<br />
5.2.3 Fehlen der CAT-x-Verbindung ........................................................ 16<br />
5.3 LED Anzeigen ............................................................................................ 17<br />
5.4 IVT – Individuelles Video Tuning................................................................ 19<br />
5.4.1 Berechtigung .................................................................................... 19<br />
5.4.2 Aufruf des IVT-Modus ...................................................................... 20<br />
5.4.2.1 Aufruf über das Function Menü.............................................. 21<br />
5.4.2.2 Aufruf über Keyboard-Kombination........................................ 21<br />
5.4.3 Hinweise zur Einstellung des IVT..................................................... 21<br />
5.4.4 Einstellung des Video Tuning........................................................... 22<br />
5.4.4.1 Videokanalwechsel................................................................. 23<br />
5.4.4.2 Automatische Einstellung....................................................... 23<br />
5.4.4.3 Manuelle Einstellung .............................................................. 24<br />
5.4.4.3.1 Festlegung der Videoverstärkung ..................................... 25<br />
5.4.4.3.2 Einstellung der Rauschunterdrückung .............................. 25<br />
5.4.4.3.3 Beseitigung der Fahnenbildung......................................... 26<br />
5.4.4.3.4 Einstellung der Laufzeitkompensation............................... 26<br />
5.4.5 Kopieren der IVT-Einstellungen ....................................................... 27<br />
5.4.6 Getestete Auflösungen..................................................................... 27<br />
5.4.7 Kabelempfehlung ............................................................................. 28<br />
6 Konfiguration ..................................................................................................... 29<br />
6.1 Console Setup............................................................................................ 30<br />
6.1.1 Einstellung des ScreenSaver ........................................................... 30<br />
6.1.2 Einstellung des AutoLogout ............................................................. 31<br />
6.1.3 Vergabe des Console Name ............................................................ 31<br />
6.1.4 Aktivierung der Kanalanzeige „Display“ ........................................... 32<br />
6.1.5 Einstellung der Display Position + Colour ........................................ 32<br />
6.1.6 Einstellung der Menu-Position / - Size ............................................. 33<br />
6.1.7 Einstellung der erweiterten Mouseunterstützung ............................. 33<br />
6.1.8 OSD SyncMod ................................................................................. 34<br />
6.1.9 Keyboard Layout .............................................................................. 34<br />
Seite 3
<strong>Guntermann</strong> & <strong>Drunck</strong> <strong>GmbH</strong> Installations- <strong>und</strong><br />
Bedienungsanleitung <strong>CATVision</strong> (MC)<br />
6.2 Config......................................................................................................... 35<br />
6.2.1 IVT.................................................................................................... 36<br />
6.2.2 System Config.................................................................................. 37<br />
6.2.2.1 Definition des ersten Hotkeys................................................. 38<br />
6.2.2.2 Festlegung des Doppel-HotKey ............................................. 38<br />
6.2.2.3 Set System Defaults (Supervisor-Funktion) ........................... 39<br />
6.2.2.4 Remote Video (Dunkelschaltung) .......................................... 39<br />
6.2.2.5 Local Video (Dunkelschaltung) .............................................. 40<br />
6.2.2.6 Permanent Access ................................................................. 40<br />
6.2.2.7 Festlegung der Time-Out-Zeit ................................................ 41<br />
6.2.2.8 Aktivieren des Protected Mode .............................................. 41<br />
6.2.2.9 Keyb. LED flash...................................................................... 42<br />
6.2.2.10 Festlegung des Scancode-Satzes local ................................. 42<br />
6.2.2.11 Festlegung des Scancode-Satzes remote ............................. 42<br />
6.2.2.12 USB Multimedia Keyboard ..................................................... 42<br />
6.2.2.13 USB SUN-Keyboard mode..................................................... 43<br />
6.2.2.14 USB SUN-Keyboard layout .................................................... 43<br />
6.2.2.15 Temperature Warning ............................................................ 43<br />
6.2.2.16 Keyboard Type Local ............................................................. 44<br />
6.2.2.17 Keyboard Type Remote ......................................................... 45<br />
6.2.2.18 Signal type input..................................................................... 45<br />
6.2.2.19 Remote sync .......................................................................... 45<br />
6.2.3 User Account.................................................................................... 46<br />
6.2.3.1 Account enable / disable ........................................................ 47<br />
6.2.3.2 Vergabe des User-Namens.................................................... 47<br />
6.2.3.3 Set Account Defaults.............................................................. 49<br />
6.2.3.4 IVT Access ............................................................................. 49<br />
6.2.3.5 System Config Access ........................................................... 49<br />
6.2.3.6 User Account Access ............................................................. 50<br />
6.2.3.7 Change Password.................................................................. 50<br />
6.3 Mouse Utility............................................................................................... 51<br />
7 Systembedienung .............................................................................................. 53<br />
7.1 Zugriffsmöglichkeiten ................................................................................. 53<br />
7.1.1 Zugriff über OpenAccess ................................................................. 53<br />
7.1.2 Zugriff über definierte User .............................................................. 55<br />
7.1.3 Zugriff als Supervisor ....................................................................... 55<br />
7.2 Automatische Umschaltung ....................................................................... 56<br />
7.3 Manuelle Haltefunktion (Permanent Access)............................................. 57<br />
7.4 Protected Mode.......................................................................................... 58<br />
7.5 Dunkelschaltung des Monitors................................................................... 59<br />
7.5.1 Dunkelschaltung des Monitors bei automatischer Umschaltung...... 59<br />
7.5.2 Dunkelschaltung des Monitors bei Permanent Access.................... 59<br />
7.6 Manueller Logout ....................................................................................... 60<br />
8 Optionale Ausstattung ...................................................................................... 61<br />
8.1 Delay .......................................................................................................... 61<br />
8.2 Audio .......................................................................................................... 62<br />
8.3 RS232 ........................................................................................................ 63<br />
8.4 Übertragung von USB 1.1 (transparent) .................................................... 63<br />
9 System-Update................................................................................................... 64<br />
10 System Info......................................................................................................... 64<br />
Seite 4
<strong>Guntermann</strong> & <strong>Drunck</strong> <strong>GmbH</strong> Installations- <strong>und</strong><br />
Bedienungsanleitung <strong>CATVision</strong> (MC)<br />
11 CV-Power-Erweiterung ...................................................................................... 65<br />
11.1 Lieferumfang .............................................................................................. 65<br />
11.2 Installationsanleitung.................................................................................. 66<br />
11.2.1 Einbau im PC ................................................................................... 66<br />
11.2.2 Verbinden mit <strong>CATVision</strong>-CPU ........................................................ 68<br />
11.2.3 Verbinden des Tasters mit dem <strong>CATVision</strong>-CON ............................ 68<br />
12 Technische Daten .............................................................................................. 70<br />
12.1 <strong>CATVision</strong> .................................................................................................. 70<br />
12.2 <strong>CATVision</strong>-MC ........................................................................................... 72<br />
13 Anhang................................................................................................................ 74<br />
13.1 HotKey-Belegungstabelle........................................................................... 74<br />
13.2 IVT-Settings ............................................................................................... 74<br />
13.3 Passwort .................................................................................................... 75<br />
Seite 5
<strong>Guntermann</strong> & <strong>Drunck</strong> <strong>GmbH</strong> Installations- <strong>und</strong><br />
Bedienungsanleitung <strong>CATVision</strong> (MC)<br />
1 Beschreibung<br />
Das <strong>CATVision</strong>-System besteht aus einem Sender <strong>und</strong> einem Empfänger <strong>und</strong><br />
ermöglicht es, einen Rechner aus einer Entfernung bis zu 300 Metern (max.<br />
Wert, auflösungs- <strong>und</strong> kabelabhängig) fern zu bedienen. Zusätzlich kann auch<br />
eine lokale Bedienstation am Sender angeschlossen werden. Die Bedienung<br />
kann wahlweise lokal oder remote durchgeführt werden.<br />
Setzten Sie ein <strong>CATVision</strong>-MC-System ein, kann der Rechner mit bis zu 4<br />
Videoausgängen ausgestattet sein.<br />
Folgende Varianten stehen zur Verfügung (Unterscheidung nach den<br />
existierenden Videokanälen).<br />
Produkt Videokanäle<br />
<strong>CATVision</strong> 1 Videokanal<br />
<strong>CATVision</strong>-MC2 2 Videokanäle<br />
<strong>CATVision</strong>-MC3 3 Videokanäle<br />
<strong>CATVision</strong>-MC4 4 Videokanäle<br />
Da sich alle Produkte lediglich in der Anzahl der zu übertragenden Videokanäle<br />
unterscheiden, wird in diesem Handbuch generell von den <strong>CATVision</strong>-<br />
Systemen gesprochen.<br />
Ausnahmen bilden die:<br />
Kapitel 2 (Lieferumfang),<br />
Kapitel 3 (Installationsanleitung) <strong>und</strong><br />
Kapitel 5.4.4.1 (Videokanalwechsel).<br />
Die Übertragung der Signale Monitor, Keyboard <strong>und</strong> Mouse erfolgt über ein<br />
CAT-x-Kabel (x= 5, 6, 7). Durch die Möglichkeit der individuellen Videoanpassung<br />
werden unterschiedliche Kabelqualitäten <strong>und</strong> –längen ausgeglichen<br />
<strong>und</strong> dem Anwender steht immer ein optimales Bild zur Verfügung.<br />
Die Anpassung des Videosignals erfolgt automatisch. Jedoch ist eine<br />
individuelle Anpassung des Videosignals am entfernten Arbeitsplatz mit dem<br />
IVT möglich (vgl. Kapitel 5.4).<br />
Optional kann das System, zusätzlich zu den Monitor-, Keyboard- <strong>und</strong><br />
Mouseinformationen, auch Audio <strong>und</strong> RS232 über das CAT-x-Kabel<br />
übertragen. Über ein zusätzliches CAT-x-Kabel können USB 1.1-Signale<br />
transparent übertragen werden.<br />
Seite 6
<strong>Guntermann</strong> & <strong>Drunck</strong> <strong>GmbH</strong> Installations- <strong>und</strong><br />
Bedienungsanleitung <strong>CATVision</strong> (MC)<br />
2 Lieferumfang<br />
Sendeeinheit <strong>CATVision</strong>-CPU bzw.<br />
<strong>CATVision</strong>-MC-CPU<br />
Empfangseinheit <strong>CATVision</strong>-CON bzw.<br />
<strong>CATVision</strong>-MC-CON<br />
Anschlusskabel Video/Keyboard/Mouse PS/2 CPU-2<br />
- Zum Anschluss am <strong>CATVision</strong>-CPU (bzw. <strong>CATVision</strong>-MC-CPU):<br />
1 x MDR-20 f. Monitor, Keyboard <strong>und</strong> Mouseanschluss<br />
- Zum Anschluss des PC:<br />
1 x PS/2 für Mouseanschluss (inkl. 9pol-Adapter für serielle Mouse)<br />
1 x PS/2 (incl. AT-Adapter) für Keyboard-Anschluss<br />
1 x HD-15 Stecker für VGA-Anschluss<br />
<strong>und</strong> USB Keyboard/ Mouse USB-AM/BM-2<br />
Kaltgerätekabel PowerCable-2<br />
Übertragungskabel (separat bestellen) K-C7-x<br />
Optional:<br />
- 1 x RS232-M/F-2 -> SUB-D 9 (Stecker/Buchse) zum<br />
Anschluss eines seriellen Endgerätes<br />
- 2 x Audio-M/M-2 -> für den rechnerseitigen<br />
Audioanschluss<br />
- K-C7-x -> für transparente Übertragung von USB<br />
1.1<br />
Zusätzlicher Lieferumfang für <strong>CATVision</strong>-MC:<br />
- VGA-M/M-2 -> HD15 (Stecker/Stecker) Videoanschlusskabel;<br />
Anzahl abhängig von den zusätzlichen<br />
Videokanälen<br />
Seite 7
<strong>Guntermann</strong> & <strong>Drunck</strong> <strong>GmbH</strong> Installations- <strong>und</strong><br />
Bedienungsanleitung <strong>CATVision</strong> (MC)<br />
3 Installationsanleitung<br />
Die Installation der <strong>CATVision</strong> <strong>und</strong> <strong>CATVision</strong>-MC unterscheidet sich lediglich<br />
in der Anzahl der anzuschließenden Videoquellen. Daher wird in den folgenden<br />
Abschnitten nur die Installation des <strong>CATVision</strong> beschrieben. Der Anschluss<br />
zusätzlicher Videoquellen wird gesondert erläutert.<br />
3.1 Installation der Sendeeinheit<br />
Anschluß der Mouse<br />
für die lokale Konsole<br />
Mouse PS/2<br />
Anschluß der Tastatur<br />
für die lokale Konsole<br />
Red. Power<br />
RS 232<br />
Keyb PS/2. 12V DC/0,6A Transmission<br />
Anschluß des<br />
<strong>CATVision</strong>-CON<br />
über CATx-Kabel<br />
Line In Line Out<br />
Monitor<br />
Alternativ: Anschluß von Keyboard/Mouse<br />
zum Rechner über USB-AM/BM-2<br />
USB K/M<br />
CPU<br />
Trans<br />
VGA Keyb. Mouse CPU<br />
Anschluß des Monitors<br />
für die lokale Konsole<br />
USB 1.1<br />
Monitor-, Keyboard- <strong>und</strong> Mouse vom Rechner abziehen.<br />
CPU<br />
100-240V/60-50Hz<br />
140-82mA<br />
Anschluß des lokalen Rechners<br />
über CPU-x Kabel<br />
Monitor:<br />
Stecken Sie den 15 pol. Sub HD Stecker des Kabels CPU-x (x=2, 4, 6<br />
od. 9 Meter) in die VGA-Schnittstelle des Rechners.<br />
Keyboard/Mouse (PS/2):<br />
Stellen Sie nun mittels der beiden PS/2-Stecker des Kabels CPU-x<br />
die Verbindung zur Keyboard- <strong>und</strong> Mouseschnittstelle des Rechners<br />
her. Die beiden Stecker sind mit entsprechenden Symbolen versehen.<br />
Alternativ<br />
Keyboard/Mouse (USB):<br />
Stellen Sie nun mittels der beiden USB-Stecker des Kabels USB-<br />
AM/BM-2 die Verbindung zur Keyboard- <strong>und</strong> Mouseschnittstelle des<br />
Rechners her.<br />
Seite 8
<strong>Guntermann</strong> & <strong>Drunck</strong> <strong>GmbH</strong> Installations- <strong>und</strong><br />
Bedienungsanleitung <strong>CATVision</strong> (MC)<br />
Verbinden Sie danach das andere Ende der Kabel CPU-x (MDR 20 =<br />
Mini Delta Ribbon 20pol) mit der Schnittstelle VGA Keyb. Mouse CPU des<br />
<strong>CATVision</strong>.<br />
Anschluss des Verlängerungskabel<br />
Das Verlängerungskabel K-C7-x in die Schnittstelle TRANSMISSION<br />
(Buchse) der Sendeeinheit einstecken.<br />
Anschluss der lokalen Konsole<br />
Den Stecker des lokalen Keyboards <strong>und</strong> der lokalen Mouse in die<br />
Schnittstelle Keyb. beziehungsweise MOUSE PS/2 an der<br />
Sendeeinheit <strong>CATVision</strong>-CPU stecken.<br />
Den lokalen Monitor an die Buchse MONITOR anschließen.<br />
3.1.1 Videoanschluss am <strong>CATVision</strong>-MC-CPU<br />
Verbinden Sie die Anschlusskabel VGA-M/M-2 mit den weiteren<br />
Videokanälen des Rechners.<br />
Verbinden Sie die anderen Enden des Kabels VGA-M/M-2 mit den<br />
Schnittstellen VGA CPU 2 - 4<br />
3.1.2 Optionale Anschlussmöglichkeiten<br />
Mouse PS/2<br />
Verbindung zum<br />
seriellen Port<br />
des lokalen Rechners<br />
über RS232-M/F-2<br />
Red. Power<br />
RS 232<br />
Keyb PS/2. 12V DC/0,6A Transmission<br />
Audioanschluß<br />
über<br />
Audio-M/M-2<br />
Line In Line Out<br />
Monitor<br />
Anschluß des Übertragungskabel<br />
K-C7-x für USB 1.1<br />
USB K/M<br />
CPU<br />
Trans<br />
VGA Keyb. Mouse CPU<br />
Verbindung zum USB-Port<br />
des Rechners<br />
USB 1.1<br />
Anschluss von RS232<br />
Das Anschlusskabel RS232-M/F-x (x=2, 4, 6 od. 9 Meter) mit einer<br />
COM-Schnittstelle des Rechners <strong>und</strong> der Schnittstelle RS232<br />
(optional) des <strong>CATVision</strong>-CPU verbinden (Belegung 1:1).<br />
Seite 9<br />
CPU<br />
100-240V/60-50Hz<br />
140-82mA
<strong>Guntermann</strong> & <strong>Drunck</strong> <strong>GmbH</strong> Installations- <strong>und</strong><br />
Bedienungsanleitung <strong>CATVision</strong> (MC)<br />
Anschluss von Audio<br />
Das Anschlusskabel Audio-M/M-2 mit einer Line-Out-Schnittstelle des<br />
Rechners (oder einem anderen Audiogerät) <strong>und</strong> der Schnittstelle Line IN<br />
(optional) des <strong>CATVision</strong>-CPU verbinden.<br />
Anschluss von USB1.1<br />
Stecken Sie den Stecker USB - Typ B des mitgelieferten USB-Kabels in<br />
die Schnittstelle USB 1.1 CPU der CPU-Einheit. Stecken Sie den TYP A<br />
Stecker des USB-Kabels in den entsprechenden Rechnerport ein.<br />
Anschluss des Verlängerungskabels<br />
Das Verlängerungskabel K-C7-x innerhalb des Bereiches USB 1.1 in<br />
die Schnittstelle TRANS (Buchse) der Sendeeinheit stecken.<br />
Hinweis zur Kompatibilität des transparenten USB-Anschlusses:<br />
Der USB-Anschluss entspricht den USB 1.1 Spezifikationen, welche<br />
das Design von USB full-speed Geräten regeln. Dennoch garantieren<br />
wir nicht, dass alle USB full-speed Geräte kompatibel zum <strong>CATVision</strong><br />
sind.<br />
3.2 Installation der Empfangseinheit<br />
Anschluß der Tastatur<br />
für die remote Konsole<br />
RS 232 Line In Micro In Speaker<br />
Keyb. PS/2 Mouse<br />
Service<br />
Anschluß der Mouse<br />
für die lokale Konsole<br />
Anschluss von Keyboard/Mouse<br />
für remote Konsole<br />
Keyb. USB Mouse<br />
USB Trans<br />
12V DC/0,9A<br />
Monitor Transmission Red. Power<br />
Anschluß des<br />
<strong>CATVision</strong>-CPU<br />
über CATx-Kabel<br />
Anschluß des Monitors<br />
für die remote Konsole<br />
Seite 10<br />
100-240V/60-50Hz<br />
0,24-0,1A
<strong>Guntermann</strong> & <strong>Drunck</strong> <strong>GmbH</strong> Installations- <strong>und</strong><br />
Bedienungsanleitung <strong>CATVision</strong> (MC)<br />
Die Empfangseinheit aufstellen.<br />
Das Verlängerungskabel K-C7-x in die Schnittstelle TRANSMISSION<br />
der Empfangseinheit <strong>CATVision</strong>-CON einstecken.<br />
Den Monitor an die Buchse MONITOR anschließen.<br />
Das PS/2-Keyboard an der Schnittstelle Keyb. am <strong>CATVision</strong>-CON<br />
anschließen.<br />
Die PS/2-Mouse an die Buchse MOUSE PS/2 anstecken.<br />
Optional haben Sie Möglichkeit, Keyboard <strong>und</strong> Mouse (auch SUN-<br />
USB-Tastaturen) über USB anzuschließen. Verbinden Sie dazu<br />
Keyboard <strong>und</strong>/oder Mouse mit den USB-Schnittstellen Keyb. USB<br />
Mouse an der Rückseite des <strong>CATVision</strong>-CON.<br />
Verwenden Sie für den Keyboard- <strong>und</strong> Mouseanschluss nicht die<br />
USB-Schnittstellen auf der Frontseite des Gerätes, da diese USB-<br />
Schnittstellen eine transparente Verlängerung der USB-Signale zum<br />
Rechner ermöglichen.<br />
3.2.1 Videoanschluss am <strong>CATVision</strong>-MC-Con<br />
Die Verlängerungskabel K-C7-x in die Schnittstelle TRANSMISSION 1 – 4<br />
der Empfangseinheit <strong>CATVision</strong>-MC -CON einstecken. Achten Sie<br />
auf die richtige Zuordnung der Videokanäle!<br />
Die Monitore an die Buchsen MONITOR 1 - 4 anschließen.<br />
3.2.2 Optionale Anschlussmöglichkeiten<br />
Anschluß eines<br />
seriellen Endgerätes<br />
RS 232 Line In Micro In Speaker<br />
Keyb. PS/2 Mouse<br />
Anschluß von Mikrofon,<br />
Lautsprecher <strong>und</strong> eines<br />
weiteren Audiogerätes<br />
Service<br />
Keyb. USB Mouse<br />
USB Trans<br />
12V DC/0,9A<br />
Monitor Transmission Red. Power<br />
Seite 11<br />
Anschluß des Übertragungskabel<br />
K-C7-x für USB 1.1<br />
100-240V/60-50Hz<br />
0,24-0,1A
<strong>Guntermann</strong> & <strong>Drunck</strong> <strong>GmbH</strong> Installations- <strong>und</strong><br />
Bedienungsanleitung <strong>CATVision</strong> (MC)<br />
Anschluss von RS232<br />
Verbinden Sie das serielle Endgerät mit der Schnittstelle RS232<br />
(optional) am <strong>CATVision</strong>-CON.<br />
Anschluss von Audio<br />
Das Mikrofon mit der Schnittstelle Micro In, die Lautsprecher mit<br />
Speaker <strong>und</strong> ein weiteres Audio-Endgerät (z. B. CD-Player) mit Line<br />
In verbinden.<br />
Anschluss von USB1.1<br />
Zum Anschluss Ihrer USB-Geräte stecken Sie die USB-Geräte auf der<br />
Frontseite des <strong>CATVision</strong>-CON in eine der hier vier verfügbaren USB-<br />
A-Buchsen.<br />
Hinweis: Es handelt sich hier um die transparente Verlängerung<br />
von USB-Signalen an den angeschlossenen Rechner.<br />
Anschluss des Verlängerungskabels<br />
Stecken Sie das Verlängerungskabel K-C7-x in die Schnittstelle USB-<br />
TRANS (Buchse) der Empfangseinheit.<br />
Seite 12
<strong>Guntermann</strong> & <strong>Drunck</strong> <strong>GmbH</strong> Installations- <strong>und</strong><br />
Bedienungsanleitung <strong>CATVision</strong> (MC)<br />
4 Stromversorgung<br />
4.1 Allgemein<br />
Schließen Sie das mitgelieferte Kaltgerätekabel an der Kaltgerätebuchse Main<br />
POWER der Geräte (<strong>CATVision</strong>-CPU <strong>und</strong> <strong>CATVision</strong>-CON) an.<br />
Optional kann über die Buchse Red. Power ein red<strong>und</strong>antes Netzteil<br />
angeschlossen werden. Verwenden Sie dazu das optional erhältliche<br />
Steckernetzteil Power-Set 12/Typ 2.<br />
Anschluss der<br />
Hauptstromversorgung<br />
Mouse PS/2<br />
Red. Power<br />
RS 232<br />
Keyb PS/2. 12V DC/0,6A Transmission<br />
Anschluss der optionalen<br />
red<strong>und</strong>anten Stromversorgung<br />
Line In Line Out<br />
Monitor<br />
RS 232 Line In Micro In Speaker<br />
Keyb. PS/2 Mouse<br />
Service<br />
Rückblende <strong>CATVision</strong>-CON<br />
USB K/M<br />
CPU<br />
Trans<br />
VGA Keyb. Mouse CPU<br />
Keyb. USB Mouse<br />
USB 1.1<br />
CPU<br />
Rückblende <strong>CATVision</strong>-CPU<br />
USB Trans<br />
12V DC/0,9A<br />
Monitor Transmission Red. Power<br />
Anschluss der optionalen<br />
red<strong>und</strong>anten Stromversorgung<br />
4.2 Hinweis zum USB-Betrieb<br />
100-240V/60-50Hz<br />
140-82mA<br />
Anschluss der<br />
Hauptstromversorgung<br />
Beim Anschluss von USB-Geräten werden durch das <strong>CATVision</strong>-System high-<br />
Power-Geräte (bis 500 mA) unterstützt.<br />
Seite 13<br />
100-240V/60-50Hz<br />
0,24-0,1A
<strong>Guntermann</strong> & <strong>Drunck</strong> <strong>GmbH</strong> Installations- <strong>und</strong><br />
Bedienungsanleitung <strong>CATVision</strong> (MC)<br />
5 Inbetriebnahme<br />
5.1 Einschalten des <strong>CATVision</strong>-Systems<br />
Nachdem Sie das <strong>CATVision</strong>-System erstmalig eingeschaltet haben,<br />
erscheint auf beiden (lokal <strong>und</strong> remote) Monitoren ein Hinweisfenster:<br />
SYSTEM STARTUP CVM<br />
to call up AdonIS, press<br />
Ctrl + Num<br />
pc unit fo<strong>und</strong><br />
remote unit fo<strong>und</strong><br />
local mouse fo<strong>und</strong><br />
local keyboard fo<strong>und</strong><br />
Press pause to read info…<br />
Nach diesem Startfenster erscheint das Bild des Rechners auf Ihrem Monitor.<br />
WICHTIG<br />
Wenn Sie das <strong>CATVision</strong> System starten, passt das System automatisch alle<br />
Parameter (z. B. Kabellänge, Laufzeitunterschiede, Dämpfung) an Ihr Umfeld<br />
an. Als Ergebnis sollte ein Bild auf Ihrem Monitor erhalten, welches keiner<br />
weiteren Anpassung bedarf. Sollten Sie jedoch eine individuelle Anpassung<br />
durchführen wollen, steht Ihnen hierzu das IVT zur Verfügung (vgl. Kap. 5.4).<br />
5.2 Systemzustandsinformationen<br />
Zusätzlich zu dem in Kapitel 5.1 beschriebenen Vorgang, können bei der<br />
Inbetriebnahme von des <strong>CATVision</strong>s folgende Situationen auftreten:<br />
Kein Keyboard/Mouse-Anschluss am <strong>CATVision</strong>-CPU gef<strong>und</strong>en<br />
Keine existierende Verbindung zwischen <strong>CATVision</strong>-CPU <strong>und</strong><br />
<strong>CATVision</strong>-CON<br />
Weder Keyboard/Mouse noch Verbindung zum <strong>CATVision</strong>-CPU<br />
existiert.<br />
Diese Betriebszustände werden in den folgenden Kapiteln erläutert.<br />
Seite 14
<strong>Guntermann</strong> & <strong>Drunck</strong> <strong>GmbH</strong> Installations- <strong>und</strong><br />
Bedienungsanleitung <strong>CATVision</strong> (MC)<br />
5.2.1 Keyboard/Mouse lokal nicht vorhanden<br />
Sollte das lokale Keyboard <strong>und</strong> die Mouse nicht mit dem <strong>CATVision</strong>-CPU<br />
verb<strong>und</strong>en sein, erscheint auf beiden Monitoren (lokal <strong>und</strong> remote) folgender<br />
Warnhinweis:<br />
SYSTEM STARTUP CVM<br />
to call up AdonIS, press<br />
Ctrl + Num<br />
pc unit fo<strong>und</strong><br />
remote unit fo<strong>und</strong><br />
no local mouse fo<strong>und</strong><br />
no local keyboard fo<strong>und</strong><br />
Please wait…<br />
In diesem Fall wechselt der Monitor am <strong>CATVision</strong>-CON automatisch in das<br />
nächste Info-Fenster (IVT-Hinweisfenster). Um dieses Fenster zu schließen,<br />
oder den IVT-Modus zu starten, müssen Sie zumindest eine Tastatur am<br />
System anschließen.<br />
5.2.2 Remote Unit nicht vorhanden<br />
Sollte bei der Inbetriebnahme des <strong>CATVision</strong>-System keine Verbindung zum<br />
entfernten System (<strong>CATVision</strong>-CON) existieren, erscheint an der lokalen<br />
Konsole folgender Warnhinweis:<br />
SYSTEM STARTUP CVM<br />
to call up AdonIS, press<br />
Ctrl + Num<br />
pc unit fo<strong>und</strong><br />
local mouse fo<strong>und</strong><br />
local keyboard fo<strong>und</strong><br />
no remote unit fo<strong>und</strong><br />
check connection to local<br />
keyboard and remote unit<br />
Please wait…<br />
Seite 15
<strong>Guntermann</strong> & <strong>Drunck</strong> <strong>GmbH</strong> Installations- <strong>und</strong><br />
Bedienungsanleitung <strong>CATVision</strong> (MC)<br />
In diesem Fall bleibt das <strong>CATVision</strong>-System in diesem Zustand stehen. Um<br />
mit der Inbetriebnahme weiter fortfahren zu können, stellen Sie bitte erst die<br />
notwendigen CAT-x-Verbindungen her. Wenn diese Verbindungen hergestellt<br />
sind, wechselt das <strong>CATVision</strong>-System automatisch an beiden Konsolen (lokal<br />
<strong>und</strong> remote) in das IVT-Infofenster<br />
Info CVM<br />
To optimize video quality<br />
please start IVT.<br />
Press Enter to start IVT<br />
or ESC to exit this window<br />
or Ctrl + ESC to exit this<br />
window and don´t show again<br />
5.2.3 Fehlen der CAT-x-Verbindung <strong>und</strong> lokal Keyboard/Mouse<br />
nicht gef<strong>und</strong>en<br />
Sollte bei der Inbetriebnahme des <strong>CATVision</strong>-System weder eine Verbindung<br />
zum entfernten System (<strong>CATVision</strong>-Con) existieren, noch lokal<br />
Keyboard/Mouse nicht dem <strong>CATVision</strong>-CPU verb<strong>und</strong>en sein, so erscheint an<br />
der lokalen Konsole folgender Warnhinweis:<br />
SYSTEM STARTUP CVM<br />
to call up AdonIS, press<br />
Ctrl + Num<br />
pc unit fo<strong>und</strong><br />
no local mouse fo<strong>und</strong><br />
no local keyboard fo<strong>und</strong><br />
no remote unit fo<strong>und</strong><br />
check connection to local<br />
keyboard and remote unit<br />
Please wait…<br />
Verfahren Sie auch in diesem Fall wie in Kap. 5.2.1 & 5.2.2 beschrieben.<br />
Seite 16
<strong>Guntermann</strong> & <strong>Drunck</strong> <strong>GmbH</strong> Installations- <strong>und</strong><br />
Bedienungsanleitung <strong>CATVision</strong> (MC)<br />
5.3 LED Anzeigen<br />
Nach dem Anschluss des Steckernetzteils schalten Sie die <strong>CATVision</strong>s über<br />
die Kippschalter auf den Rückseiten der Geräte ein. Die LEDs auf der<br />
Frontseite der beiden Geräte haben folgende Bedeutung:<br />
POWER Red<strong>und</strong>ant Leuchtet, wenn externes<br />
Netzteil angeschlossen ist,<br />
<strong>und</strong> 12V liefert.<br />
Main Leuchtet, wenn die<br />
Stromversorgung hergestellt<br />
ist<br />
<strong>CATVision</strong> CPU <strong>CATVision</strong> CON<br />
Seite 17<br />
Leuchtet, wenn externes<br />
Netzteil angeschlossen ist, <strong>und</strong><br />
12V liefert.<br />
Leuchtet, wenn die<br />
Stromversorgung hergestellt ist.<br />
Remote Active --- Leuchtet, solange die remote<br />
Konsole aktiv ist, oder aktiv<br />
werden kann(1). Erlischt, wenn<br />
lokal bedient wird<br />
Status --- Ist aus, wenn die remote<br />
Konsole nicht mit Spannung<br />
versorgt wird.<br />
Blinkt, wenn Spannung<br />
vorhanden ist, aber der<br />
Controller der Remotekonsole<br />
nicht arbeitet.<br />
Leuchtet dauerhaft, wenn<br />
Spannung vorhanden ist,<br />
<strong>und</strong> der Controller arbeitet.<br />
Local Active Leuchtet, solange die lokale<br />
Konsole aktiv ist, oder aktiv<br />
werden kann (1). Blinkt, wenn<br />
kein Keyboard vorhanden,<br />
Erlischt, wenn remote bedient<br />
wird<br />
---<br />
Status Ist aus, wenn die lokale<br />
Konsole nicht mit<br />
Spannung versorgt wird.<br />
---<br />
Blinkt, wenn Spannung<br />
vorhanden ist, aber der<br />
Controller der lokalen<br />
Konsole nicht arbeitet.<br />
(Bitte setzten Sie sich<br />
mit unserem Service in<br />
Verbindung!)<br />
Leuchtet dauerhaft, wenn<br />
Spannung vorhanden ist,<br />
<strong>und</strong> der Controller<br />
arbeitet.
<strong>Guntermann</strong> & <strong>Drunck</strong> <strong>GmbH</strong> Installations- <strong>und</strong><br />
Bedienungsanleitung <strong>CATVision</strong> (MC)<br />
<strong>CATVision</strong> CPU <strong>CATVision</strong> CON<br />
CPU Active Leuchtet, wenn eine der<br />
beiden Konsolen aktiv ist. (1)<br />
---<br />
Status Leuchtet, wenn die<br />
Keyboard/Mouse-Emulation<br />
des <strong>CATVision</strong>-Systems<br />
arbeitet<br />
---<br />
USB- Status --- Leuchtet, wenn eine CAT-x-<br />
Abschnitt<br />
Verbindung zwischen CV-CPU<br />
<strong>und</strong> CV-CON besteht. Bei einer<br />
fehlerhaften Verbindung ist<br />
diese LED aus.<br />
Power --- Leuchtet, wenn das USB-<br />
Modul mit Spannung aus dem<br />
<strong>CATVision</strong>-CON versorgt wird.<br />
Zu (1): Eine Konsole wird aktiv, wenn mittels Mouse oder Keyboard Eingaben<br />
getätigt werden. Sie bleibt entweder für die voreingestellte Time-Out-Zeit<br />
nach der letzten Eingabe aktiv, oder solange, wie der Permanent<br />
Access oder der Protected Mode aktiviert ist, zuzüglich dem<br />
eingestellten Time-Out.<br />
Frontblende <strong>CATVision</strong>-CPU<br />
Frontblende <strong>CATVision</strong>-CON<br />
ision -CPU<br />
ision -CON<br />
Seite 18<br />
Power<br />
Red.<br />
Main<br />
Red.<br />
Main<br />
Power<br />
Local CPU<br />
Active<br />
Status<br />
USB 1.1 Devices Status<br />
Active<br />
Status<br />
Remote<br />
Power
<strong>Guntermann</strong> & <strong>Drunck</strong> <strong>GmbH</strong> Installations- <strong>und</strong><br />
Bedienungsanleitung <strong>CATVision</strong> (MC)<br />
5.4 IVT – Individuelles Video Tuning<br />
WICHTIG<br />
Wenn Sie das <strong>CATVision</strong> System starten, passt das System automatisch alle<br />
Parameter (z. B. Kabellänge, Laufzeitunterschiede, Dämpfung) an Ihr Umfeld<br />
an <strong>und</strong> ein Videoprofil wird angelegt. Als Ergebnis sollte ein Bild auf Ihrem<br />
Monitor erhalten, welches keiner weiteren Anpassung bedarf.<br />
Dieses Videoprofil kann im Nachhinein verändert werden. Hierfür bietet das<br />
<strong>CATVision</strong> System die Möglichkeit der manuellen Videoanpassung, falls Sie<br />
mit den automatisch eingestellten Werten nicht zufrieden sind.<br />
Durch diese Funktionalität kann der Anwender unterschiedliche Kabelqualitäten<br />
<strong>und</strong> –längen ausgleichen. Die individuelle Ausführung dieser<br />
Funktion erlaubt es, das subjektive Empfinden eines jeden Einzelnen als<br />
Maßstab für ein „gutes Bild“ zu setzen.<br />
Die Anpassung wird über das remote Keyboard oder als Supervisor der<br />
lokalen Konsole ausgeführt.<br />
Das System deckt den Bereich von 0 – 190 ab; die Anpassung kann in 1er -<br />
Schritten erfolgen.<br />
Das <strong>CATVision</strong> System bietet die Möglichkeit, die eingesetzte Kabelart<br />
individuell auszuwählen. Wählen Sie den, der überwiegend eingesetzten<br />
Kabelart entsprechenden Modus für die Videoanpassung.<br />
Optional können Laufzeitunterschiede der CAT-x-Kabel (Skew) mit der Delay-<br />
Funktion elektronisch kompensiert werden.<br />
5.4.1 Berechtigung<br />
Zur Ausführung des IVT sind folgende Personen berechtigt:<br />
Im aktivierten OpenAccess: alle Personen, die mit dem System<br />
arbeiten. (Auslieferungszustand!)<br />
Ausnahme: Sollte durch den Supervisor dem „OpenAccess“ die<br />
Berechtigung zur Ausführung des IVT entzogen worden sein, so haben<br />
Sie im Modus des „OpenAccess“ keine Zugriffsmöglichkeiten auf das<br />
IVT!<br />
Im deaktivierten OpenAccess: nur Personen, die vom Supervisor<br />
dazu berechtigt worden sind. Dazu muss für jeden User ein Account<br />
angelegt werden (siehe User Accounts, Kapitel 6.2.3) <strong>und</strong> diese<br />
User müssen mit dem Recht des IVT-Zugriffes ausgestattet sein.<br />
Seite 19
<strong>Guntermann</strong> & <strong>Drunck</strong> <strong>GmbH</strong> Installations- <strong>und</strong><br />
Bedienungsanleitung <strong>CATVision</strong> (MC)<br />
5.4.2 Aufruf des IVT-Modus<br />
Der IVT-Modus kann über drei Wege aufgerufen werden (Default-Werte):<br />
Über das Function-Menü CTRL & NUM<br />
Über den Keyboard-Hotkey CTRL & Rollen<br />
Es öffnet sich folgendes Fenster:<br />
IVT<br />
Active channel: 1<br />
CVM<br />
Boost 4<br />
Noise filter 0<br />
Fine tuning 36<br />
delay R delay G delay B<br />
0 ns 0 ns 0 ns<br />
ESC: quit IVT menu<br />
F1: save and quit<br />
F3: copy to all channels<br />
1/2/3/4: select channel<br />
F5: auto adjust active channel<br />
F6: auto adjust all channels<br />
Das IVT -Menü lässt sich jeweils von der remote <strong>und</strong> der lokalen Konsole<br />
aufrufen. Einstellungen innerhalb des IVT -Menüs sind jedoch nur über die<br />
remote Konsole möglich. Über die lokale Konsole können nur durch den<br />
Supervisor IVT-Einstellungen durchgeführt werden.<br />
Beabsichtigt ein User von der lokale Konsole aus eine IVT-Einstellung<br />
vorzunehmen, öffnet sich folgendes Hinweisfenster:<br />
Info CVM<br />
IVT is only available<br />
on remote console.<br />
Press ESC to return.<br />
Durch Drücken der Taste ESC kehren Sie in das zuvor aktive Menü zurück.<br />
Seite 20
<strong>Guntermann</strong> & <strong>Drunck</strong> <strong>GmbH</strong> Installations- <strong>und</strong><br />
Bedienungsanleitung <strong>CATVision</strong> (MC)<br />
5.4.2.1 Aufruf über das Function Menü<br />
Zum Aufruf des IVT-Modus öffnen Sie das Function Menü über die<br />
Keyboardkombination CTRL + NUM (Default).<br />
Function CVM<br />
F2: IVT<br />
F3: Console Setup<br />
F6: Config<br />
F8: Logout<br />
Mouse Utility<br />
System Info<br />
Esc Enter<br />
Fahren Sie mit dem Cursor auf den Eintrag IVT oder betätigen Sie die Taste F2<br />
<strong>und</strong> Drücken im Anschluss ENTER. Daraufhin öffnet sich das IVT-Fenster.<br />
5.4.2.2 Aufruf über Keyboard-Kombination<br />
Zum direkten Aufruf des IVT halten Sie die CTRL-Taste gedrückt. Betätigen<br />
Sie zusätzlich die ROLLEN-Taste. Werden die beiden Tasten losgelassen<br />
öffnet sich das IVT-Fenster. (Ein Rechner muss angeschlossen sein!)<br />
5.4.3 Hinweise zur Einstellung des IVT<br />
Die nachfolgenden Schritte verstehen sich als Richtwerte.<br />
Da die Qualität eines Videobildes sowohl vom Monitor, als auch der Grafikkarte<br />
<strong>und</strong> dem Übertragungskabel abhängt, ist es möglich, das Sie trotz einer<br />
Kabellänge von z.B. 120 Metern das subjektiv „beste Bild“ mit der Einstellung<br />
für 140 Meter erzielen. Die Bezeichnung Meter ist hierbei ein Synonym für die<br />
einzustellende Videoverstärkung!<br />
Probieren Sie die für Ihre Anwendung beste Einstellung aus.<br />
Da die PFEIL-Tasten in 1-Meter-Schritten arbeiten, müssen Sie diese evtl.<br />
häufiger drücken, um im Feintuning zum optimalen Bild zu gelangen.<br />
Sollte Ihr Monitor schwarz bleiben, prüfen Sie bitte ob die eingestellte<br />
Auflösung der Grafikkarte durch den Monitor unterstützt wird. Ist dies der Fall,<br />
aktivieren Sie das IVT (Kapitel 5.4).<br />
Möglicherweise ist der durch Ihren Monitor unterstützte Bereich über- oder<br />
unterschritten. Stellen Sie die niedrigste Verstärkung mit der Taste Pos1 ein<br />
<strong>und</strong> bewegen Sie sich dann mit der Tastaturkombination CTRL + PFEIL<br />
Rechts -Taste in Zehnerschritten nach oben.<br />
Das Bild wird dann wieder erscheinen <strong>und</strong> Sie können die optimale Einstellung<br />
vornehmen.<br />
Seite 21
<strong>Guntermann</strong> & <strong>Drunck</strong> <strong>GmbH</strong> Installations- <strong>und</strong><br />
Bedienungsanleitung <strong>CATVision</strong> (MC)<br />
5.4.4 Einstellung des Video Tuning<br />
Nachdem Sie das IVT aufgerufen haben, stehen Ihnen im geöffneten IVT-<br />
Submenüs folgende Einstellmöglichkeiten zur Verfügung:<br />
Festlegung der Videoverstärkung (Boost)<br />
Einstellung der Rauschunterdrückung (Noise filter)<br />
Beseitigung der Fahnenbildung (Fine Tuning)<br />
Delayeinstellung (optional) auf den Farben R, G <strong>und</strong> B des CAT-x-<br />
Kabels<br />
Das IVT-Submenü sieht wie folgt aus:<br />
IVT<br />
Active channel: 1<br />
CVM<br />
Boost 4<br />
Noise filter 0<br />
Fine tuning 36<br />
delay R delay G delay B<br />
0 ns 0 ns 0 ns<br />
ESC: quit IVT menu<br />
F1: save and quit<br />
F3: copy to all channels<br />
1/2/3/4: select channel<br />
F5: auto adjust active channel<br />
F6: auto adjust all channels<br />
ESC: beendet das IVT-Submenü ohne Änderung<br />
F1: speichert alle Änderungen <strong>und</strong> beendet das IVT-Submenü<br />
F3: kopiert alle Einstellungen auf alle existierenden Kanäle<br />
1/2/3/4 Wechsel zwischen den Videokanälen (nur bei <strong>CATVision</strong>-MC-<br />
Systemen)<br />
F5: führt die automatische Videooptimierung für den aktiven Kanal<br />
durch<br />
F6: führt die automatische Videooptimierung für alle Kanäle durch<br />
Zwischen den einzelnen Einträgen können Sie mit den PFEIL AUF bzw. PFEIL<br />
AB–Tasten wechseln.<br />
Das IVT-Menü kann mit der Tastaturkombination SHIFT+ PFEIL-Taste<br />
verschoben werden.<br />
Seite 22
<strong>Guntermann</strong> & <strong>Drunck</strong> <strong>GmbH</strong> Installations- <strong>und</strong><br />
Bedienungsanleitung <strong>CATVision</strong> (MC)<br />
5.4.4.1 Videokanalwechsel<br />
Diese Funktion ist nur bei den <strong>CATVision</strong>-MC-Systemen verfügbar.<br />
IVT<br />
Active channel: 1<br />
CVM<br />
Der Eintrag „active channel“ bezieht sich auf den jeweils belegten Videokanal.<br />
Die Kanäle können mit den Tasten 1 bis 4 (für die Videokanäle) gewechselt<br />
werden.<br />
Ihre Auswahl bestätigen Sie mit ENTER.<br />
5.4.4.2 Automatische Einstellung<br />
Sie können alle Video-Einstellungen automatisch durchführen lassen. Hierzu<br />
müssen Sie auf einen Target aufgeschaltet sein.<br />
Drücken Sie zum Auslösen dieser Funktion die F5-Taste. Während dieser<br />
automatischen Einstellung schaltet sich der Bildschirm für ca. 3 Sek<strong>und</strong>en<br />
dunkel <strong>und</strong> für den aktiven Kanal wird die automatische Videoanpassung<br />
durchgeführt.<br />
Mit der F6-Taste führen Sie die automatische Anpassung für alle Kanäle (nur<br />
bei <strong>CATVision</strong>-MC-Systemen) durch. In diesem Fall erscheint auf Ihrem<br />
Bildschirm folgende Meldung:<br />
Info CVM<br />
Please wait<br />
Automatic Video Tuning<br />
status<br />
Channel 1: ok<br />
Channel 2: not connected<br />
Channel 3: in progress<br />
Channel 4: wait<br />
Seite 23
<strong>Guntermann</strong> & <strong>Drunck</strong> <strong>GmbH</strong> Installations- <strong>und</strong><br />
Bedienungsanleitung <strong>CATVision</strong> (MC)<br />
Während des automatischen Messvorgangs teilt Ihnen dieses Fenster den<br />
jeweiligen Messstatus mit.<br />
Hinweis: Die Kanäle 2 bis 4 gelten nur beim Einsatz eines <strong>CATVision</strong>-MC-<br />
Systems!<br />
Die Einträge hinter den Kanalangaben haben folgende Bedeutung:<br />
ok: Messvorgang erfolgreich abgeschlossen<br />
not connected: an diesem Kanal liegt kein Videosignal vor<br />
in progress: der Messvorgang für diesen Kanal läuft aktuell<br />
wait: es ist noch kein Messvorgang erfolgt, dieser steht noch an<br />
Nach dieser automatischen Einstellung ist wieder ein Bild sichtbar.<br />
Diese hier ermittelten automatischen Werte werden im System hinterlegt. Diese<br />
Werte sind solange gültig, bis Sie diese Werte manuell (vgl. Kapitel 5.4.4.3)<br />
abändern. Sollten Sie diese Werte manuell angepasst haben, so werden fortan<br />
nur noch die manuellen Werte vom System verwendet.<br />
Hinweis:<br />
Verändern Sie nach einer manuellen Einstellung die Länge des eingesetzten<br />
Kabels, so misst das System automatisch neue Werte. Stellt das System hier<br />
bei den automatisch gemessenen Werten im Vergleich zu den manuell<br />
eingestellten Werten eine Differenz von größer als „10“ fest (als Referenz dient<br />
hier das Feld „Boost“ im IVT-Menü), verwendet das System zukünftig die<br />
neuen automatisch gemessenen Werte <strong>und</strong> verwirft die manuellen Werte.<br />
Nach der automatischen Videoeinstellung speichern Sie die Einstellung mit der<br />
F1-Taste. In diesem Fall wird das IVT-Submenü geschlossen <strong>und</strong> Sie kehren<br />
zurück zum FUNCTION-Menü.<br />
5.4.4.3 Manuelle Einstellung<br />
Für den Fall, dass die automatische Videoeinstellung ein nicht zufrieden<br />
stellendes Ergebnis geliefert hat, können Sie dieses manuell beeinflussen. Die<br />
manuelle Einstellung des Videobildes wird in den nachfolgenden Kapiteln<br />
beschrieben.<br />
Seite 24
<strong>Guntermann</strong> & <strong>Drunck</strong> <strong>GmbH</strong> Installations- <strong>und</strong><br />
Bedienungsanleitung <strong>CATVision</strong> (MC)<br />
5.4.4.3.1 Festlegung der Videoverstärkung<br />
Boost: 4<br />
Zur Veränderung der Videoverstärkung stehen Ihnen folgende Tasten zur<br />
Verfügung:<br />
Taste <br />
subtrahiert den Wert 1 zur Videoverstärkung<br />
Taste <br />
addiert den Wert 1 zur Videoverstärkung<br />
Tasten STRG + subtrahiert den Wert 5 zur Videoverstärkung<br />
Tasten STRG + addiert den Wert 5 zur Videoverstärkung<br />
Pos 1 Minimale Videoverstärkung<br />
Ende Maximale Videoverstärkung (Achtung: Übersteuerung<br />
möglich kein Monitorbild mehr sichtbar)<br />
Beabsichtigen Sie noch weitere Änderungen innerhalb des IVT-Subemenü<br />
durchzuführen, steppen Sie mit den PFEIL AUF- bzw. PFEIL AB–Tasten oder<br />
der Mouse zum nächsten Eintrag.<br />
Nach Festlegung der Videoverstärkung bestätigen <strong>und</strong> speichern Sie die<br />
Auswahl mit F1 oder verwerfen die Auswahl mit ESC. In beiden Fällen wird das<br />
IVT-Submenü geschlossen <strong>und</strong> Sie kehren zurück zum FUNCTION -Menü.<br />
5.4.4.3.2 Einstellung der Rauschunterdrückung<br />
Noise filter: 0<br />
Sollte die Bildqualität auf Ihrem Monitor von Störsignalen (Rauschen)<br />
beeinflusst werden, so kann dieser Effekt durch die Einstellung der<br />
Rauschunterdrückung beseitigt werden.<br />
Zur Einstellung der Rauschunterdrückung stehen Ihnen folgende Tasten zur<br />
Verfügung:<br />
Taste <br />
subtrahiert den Wert 1 zur Rauschunterdrückung<br />
Taste <br />
addiert den Wert 1 zur Rauschunterdrückung<br />
Tasten STRG + subtrahiert den Wert 5 zur Rauschunterdrückung<br />
Tasten STRG + addiert den Wert 5 zur Rauschunterdrückung<br />
Pos 1 Rauschunterdrückung hat den Wert 0<br />
Ende Maximale Rauschunterdrückung (Wert: 255)<br />
Seite 25
<strong>Guntermann</strong> & <strong>Drunck</strong> <strong>GmbH</strong> Installations- <strong>und</strong><br />
Bedienungsanleitung <strong>CATVision</strong> (MC)<br />
Beabsichtigen Sie noch weitere Änderungen innerhalb des IVT-Submenü<br />
durchzuführen, steppen Sie mit den PFEIL AUF bzw. PFEIL AB–Tasten oder<br />
der Mouse zum nächsten Eintrag.<br />
Nach der Einstellung der Rauschunterdrückung bestätigen <strong>und</strong> speichern Sie<br />
die Auswahl mit F1 oder verwerfen die Auswahl mit ESC. In beiden Fällen wird<br />
das IVT-Submenü geschlossen <strong>und</strong> Sie kehren zurück zum FUNCTION-Menü.<br />
5.4.4.3.3 Beseitigung der Fahnenbildung<br />
Fine tuning: 36<br />
Zur Beseitigung eventuell auftretender Fahnen stehen Ihnen folgende Tasten<br />
zur Verfügung:<br />
Taste <br />
subtrahiert den Wert 1 zum Fine Tuning<br />
Taste <br />
addiert den Wert 1 zum Fine Tuning<br />
Tasten STRG + subtrahiert den Wert 5 zum Fine Tuning<br />
Tasten STRG + addiert den Wert 5 zum Fine Tuning<br />
Pos 1 Minimales Fine Tuning (Wert: 0)<br />
Ende Maximales Fine Tuning (Wert: 575)<br />
Beabsichtigen Sie noch weitere Änderungen innerhalb des IVT-Submenüs<br />
durchzuführen, steppen Sie mit den PFEIL AUF bzw. PFEIL AB–Tasten oder<br />
der Mouse zum nächsten Eintrag.<br />
Nach der Beseitigung der Fahnen bestätigen <strong>und</strong> speichern Sie die Auswahl<br />
mit der F1–Taste oder verwerfen die Auswahl mit der ESC–Taste. In beiden<br />
Fällen wird das IVT-Fenster geschlossen <strong>und</strong> Sie kehren zurück zum<br />
FUNCTION-Menü.<br />
5.4.4.3.4 Einstellung der Laufzeitkompensation<br />
delay R delay G delay B<br />
0 ns 0 ns 0 ns<br />
Die Delaykompensation kann beim <strong>CATVision</strong>-System für alle drei<br />
Farbsignale bis zu 46 ns durchgeführt werden.<br />
Bei 0 ns ist keine Delaykompensation (Verzögerung) vorhanden.<br />
Seite 26
<strong>Guntermann</strong> & <strong>Drunck</strong> <strong>GmbH</strong> Installations- <strong>und</strong><br />
Bedienungsanleitung <strong>CATVision</strong> (MC)<br />
Zur Durchführung des Delaykompensierung stehen Ihnen folgende Tasten zur<br />
Verfügung:<br />
Taste <br />
Taste <br />
Tasten CTRL + <br />
Tasten CTRL + <br />
Verringert die Delaykompensation um 2 ns<br />
Erhöht die Delaykompensation um 2 ns<br />
Verringert die Delaykompensation um 10 ns<br />
Erhöht die Delaykompensation um 10 ns<br />
Beispiel:<br />
Sollte das Farbsignal ROT zu früh erscheinen (roter Schatten links neben<br />
einem Buchstaben), so steppen Sie auf den Eintrag delay R <strong>und</strong> verzögern das<br />
Signal, bis alle Farben wieder übereinander liegen <strong>und</strong> ein einwandfreies Bild<br />
sichtbar wird. Sollte ein weiteres Farbsignal zu spät am Monitor erscheinen<br />
wiederholen Sie diesen Vorgang wie zuvor beschrieben.<br />
Nach Festlegung der Delaykompensation bestätigen <strong>und</strong> speichern Sie die<br />
Auswahl mit F1 oder verwerfen die Auswahl mit ESC. In beiden Fällen wird das<br />
IVT-Fenster geschlossen.<br />
Hinweis:<br />
Da sich die Laufzeitverzögerung aus dem Verhältnis der Farbsignale<br />
untereinander ergibt, macht es keinen Sinn alle drei Farben zu verzögern.<br />
Dies würde das Verhältnis nur insgesamt verschieben. Korrigieren Sie jeweils<br />
nur 2 Werte, um die Laufzeitdifferenz auszugleichen.<br />
Beabsichtigen Sie noch weitere Änderungen innerhalb des IVT-Fensters<br />
durchzuführen, steppen Sie mit den Pfeil Auf/Pfeil Ab-Tasten zum nächsten<br />
Eintrag.<br />
5.4.5 Kopieren der IVT-Einstellungen<br />
Die für einen Videokanal getroffenen Einstellungen lassen sich über die Taste<br />
F3 auf alle weiteren vorhanden Videokanäle kopieren.<br />
Das kann sinnvoll sein, wenn für diese weiteren Videokanäle die gleichen<br />
Rahmenbedingungen vorliegen.<br />
5.4.6 Getestete Auflösungen<br />
Die maximale Auflösung des <strong>CATVision</strong> (bei aktiviertem IVT - Individuelles<br />
Video Tuning) beträgt 1920 x 1440 Bildpunkte, welche mit einer<br />
Wiederholfrequenz von 75 Hz dargestellt werden kann. Diese Auflösung kann<br />
bei einer Kabellänge bis 300 Metern übertragen werden, falls der Rechner ein<br />
Videosignal (RGBHV) verwendet, welches für das Synchronisationssignal<br />
separate Leitungen vorsieht.<br />
Seite 27
<strong>Guntermann</strong> & <strong>Drunck</strong> <strong>GmbH</strong> Installations- <strong>und</strong><br />
Bedienungsanleitung <strong>CATVision</strong> (MC)<br />
Wird das Synchronisationssignal hingegen von einem (oder mehreren) Farbsignalen<br />
überlagert (RGsB oder RsGsBs), so wirkt sich dies direkt auf die<br />
maximalen Übertragungslängen des Signals aus:<br />
Entfernung Auflösung Bildwiederholrate<br />
100 Meter 1600 x 1200 80 Hz<br />
150 Meter 1280 x 1024 85 Hz<br />
180 Meter 1024 x 768 85 Hz<br />
200 Meter 800 x 600 85 Hz<br />
Diese Übersicht stellt keine Maximalwerte dar.<br />
5.4.7 Kabelempfehlung<br />
G&D empfiehlt zum Einsatz mit dem <strong>CATVision</strong> System folgende Kabel:<br />
Patchkabel:<br />
DAETWYLER<br />
UNINET 7702 flex 4P AWG26 S-STP (bis 100 Meter)<br />
Installationskabel:<br />
Kerpen MegaLine G12-150 S/F AWG22 (bis 300 Meter)<br />
Seite 28
<strong>Guntermann</strong> & <strong>Drunck</strong> <strong>GmbH</strong> Installations- <strong>und</strong><br />
Bedienungsanleitung <strong>CATVision</strong> (MC)<br />
6 Konfiguration<br />
Das <strong>CATVision</strong>-System kann an Ihre Bedürfnisse angepasst werden. Die<br />
Konfiguration wird über AdonIS ausgeführt.<br />
Mit CTRL + NUM (Default-Einstellung) öffnen Sie das AdonIS:<br />
Function CVM<br />
F2: IVT<br />
F3: Console Setup<br />
F6: Config<br />
F8: Logout<br />
Mouse Utility<br />
System Info<br />
Esc Enter<br />
In dem Function Menü stehen Ihnen folgende Konfigurationsoptionen zur<br />
Verfügung:<br />
F2: IVT (vgl. Kapitel 5.4)<br />
F3: Einstellungen für die jeweilige Bedienkonsole (lokal oder<br />
remote), konsolenbezogen (vgl. Kapitel 6.1)<br />
F6: Hauptkonfigurationsmenü; hier kann zusätzlich das IVT<br />
aufgerufen werden, User Accounts werden angelegt, System-<br />
Einstellungen vorgenommen (vgl. Kapitel 6.2)<br />
Mouse Utility: Reinitialisierung der angeschlossenen Mouse, falls die<br />
Initialisierung verloren gegangen ist (vgl. Kapitel 6.3)<br />
Seite 29
<strong>Guntermann</strong> & <strong>Drunck</strong> <strong>GmbH</strong> Installations- <strong>und</strong><br />
Bedienungsanleitung <strong>CATVision</strong> (MC)<br />
6.1 Console Setup<br />
Durch drücken der Taste F 3 im Function Menü gelangen Sie für die jeweils<br />
aktivierende Konsole (lokal oder remote) in das Console Setup.<br />
CONSOLE SETUP CVM<br />
Screen Saver: OFF<br />
Auto Logout: OFF<br />
Console Name: CVM<br />
Display: Temp<br />
Display Position: …<br />
Menu Position: …<br />
AdonIS by Mouse: NO<br />
OSD Sync Mode: OFF<br />
Keyboard Layout: German<br />
Esc Enter F1:Save<br />
6.1.1 Einstellung des ScreenSaver<br />
Der hier einzustellende ScreenSaver wird vom <strong>CATVision</strong> erzeugt <strong>und</strong> steht in<br />
keiner Verbindung zum ScreenSaver des Rechners.<br />
Da in der Regel nur eine indirekte Verbindung (über das <strong>CATVision</strong>) zwischen<br />
dem Rechner <strong>und</strong> dem Monitor besteht, sollten Sie die ScreenSaver der<br />
Rechner aus Gründen Ihrer Arbeitserleichterung abschalten.<br />
Der ScreenSaver des <strong>CATVision</strong> übernimmt diese Aufgabe; er setzt den<br />
Monitor in den Power-Down Modus.<br />
Steuern Sie den Cursor auf die Zeile ScreenSaver. Der vorhandene Eintrag<br />
kann überschrieben, oder nach Drücken der ENTER -Taste editiert werden.<br />
Zulässig ist eine Zeit von 1 - 60 Minuten. Die Eingabe „0“ stellt den<br />
ScreenSaver auf „OFF“.<br />
ENTER schließt die Eingabe ab.<br />
Um die Einstellungen zu speichern, verlassen Sie dies Menü mit F 1.<br />
Seite 30
<strong>Guntermann</strong> & <strong>Drunck</strong> <strong>GmbH</strong> Installations- <strong>und</strong><br />
Bedienungsanleitung <strong>CATVision</strong> (MC)<br />
6.1.2 Einstellung des AutoLogout<br />
Über diese Einstellung können Sie ein automatisches LOGOUT des Systems<br />
aktivieren. Der automatische LOGOUT führt, gleich dem manuellen (Taste F8),<br />
zurück zur LOGIN Maske.<br />
Das System wird damit gegen nicht autorisierten Zugriff geschützt <strong>und</strong> erst<br />
nach einer Passwort-Eingabe im LOGIN Fenster kann wieder auf den Rechner<br />
zugegriffen werden (nur gültig, wenn der OPEN ACCESS deaktiviert ist).<br />
Die Zeit, zur Auslösung des automatischen LOGOUT, wird eingestellt, indem<br />
der Cursor auf die Zeile AutoLogout gesteuert wird. Der vorhandene Eintrag<br />
kann überschrieben, oder nach Drücken der ENTER -Taste editiert werden.<br />
Zulässig ist eine Zeit von 1 - 60 Minuten. Die Eingabe „0“ schaltet den Logout<br />
auf „OFF“.<br />
ENTER schließt die Eingabe ab.<br />
Um die Einstellungen zu speichern, verlassen Sie dies Menü mit F 1.<br />
6.1.3 Vergabe des Console Name<br />
Für den Fall der kombinierten Verwendung mehrerer G&D-Geräte lässt sich<br />
jede G&D Einheit mit einer eindeutigen Bezeichnung, dem Console Name,<br />
versehen.<br />
Steuern Sie den Cursor auf die Zeile Console Name. Der vorhandene Eintrag<br />
kann überschrieben, oder nach Drücken der ENTER –Taste, editiert werden.<br />
Zulässig ist die Eingabe von 10 alphanumerischen Zeichen. ENTER schließt<br />
die Eingabe ab.<br />
Um die Einstellungen zu speichern, verlassen Sie dies Menü mit F 1.<br />
Seite 31
<strong>Guntermann</strong> & <strong>Drunck</strong> <strong>GmbH</strong> Installations- <strong>und</strong><br />
Bedienungsanleitung <strong>CATVision</strong> (MC)<br />
6.1.4 Aktivierung der Kanalanzeige „Display“<br />
Hier besteht die Möglichkeit, die Anzeige der Systemzustandsmeldungen<br />
entweder<br />
Dauernd => Perm oder<br />
Temporär => Temp (verschwindet ca. 5 Sek. nach Umschaltung)<br />
einzustellen.<br />
Nach dem Fahren des Cursors auf das Feld DISPLAY können Sie über die<br />
SPACE Taste (toggle) oder die Tasten Y + N die gewünschte Option anwählen.<br />
Um die Einstellungen zu speichern, verlassen Sie dies Menü mit F 1.<br />
Haben Sie die temporäre Einstellung gewählt können Sie die Anzeige des<br />
Displays jederzeit durch die Tastenkombination CTRL + CAPS LOCK (Default-<br />
Einstellung) aufrufen.<br />
6.1.5 Einstellung der Display Position + Colour<br />
Stellen Sie hier die Lage + Größe der Displays auf dem Monitor ein. Fahren<br />
Sie den Cursor auf den entsprechenden Eintrag im Menü CONSOLE SETUP.<br />
Nach Drücken der Taste ENTER gelangen Sie in den Editiermodus <strong>und</strong> können<br />
nun über die Pfeiltasten oder mittels der Mouse die Anzeige an die<br />
gewünschte Stelle verschieben.<br />
+<br />
[Display Position####]<br />
Space: change colour<br />
Die Änderung der Farbe des eingeblendeten Textes ist optional ebenfalls<br />
möglich. Betätigen Sie die Space-Taste um zwischen den verschiedenen<br />
Farben zu wechseln.<br />
ENTER schließt die Einstellung ab <strong>und</strong> führt zurück zum CONSOLE SETUP<br />
(temporär gespeichert).<br />
Um die Einstellungen zu speichern, verlassen Sie das CONSOLE SETUP mit F<br />
1 (permanent gespeichert).<br />
Seite 32
<strong>Guntermann</strong> & <strong>Drunck</strong> <strong>GmbH</strong> Installations- <strong>und</strong><br />
Bedienungsanleitung <strong>CATVision</strong> (MC)<br />
6.1.6 Einstellung der Menu-Position / - Size<br />
Verändern Sie hier die Lage <strong>und</strong> Größe aller AdonIS-Fenster. Fahren Sie den<br />
Cursor auf den entsprechenden Eintrag im Menü CONSOLE SETUP.<br />
Nach Drücken der Taste ENTER gelangen Sie in den Editiermodus <strong>und</strong> können<br />
nun über die Pfeiltasten oder mittels der Mouse die Anzeige an die<br />
gewünschte Stelle verschieben.<br />
MENU-POSITION CVM<br />
Esc Enter F1:Save<br />
Um bei allen Auflösungen eine optimale Lesbarkeit des AdonIS<br />
sicherzustellen, lässt sich die Größe der Anzeige ab einer Monitorauflösung<br />
von größer als 640 x 480 über die Tasten Bild/auf + Bild/ab verändern.<br />
ENTER schließt die Eingabe ab <strong>und</strong> führt zurück zum CONSOLE SETUP<br />
(temporär gespeichert).<br />
Um die Einstellungen zu speichern, verlassen Sie das CONSOLE SETUP mit<br />
F1 (permanent gespeichert).<br />
6.1.7 Einstellung der erweiterten Mouseunterstützung<br />
Hier besteht die Möglichkeit, die Unterstützung der Sondertasten der Intelli-<br />
Explorer Mouse für die Arbeit mit dem <strong>CATVision</strong> zu aktivieren. Setzen Sie<br />
den Eintrag hier auf „Yes“, kann das AdonIS, zusätzlich zum Aufruf über das<br />
Keyboard, auch durch Betätigen der Taste 4 oder 5 der Explorer-Mouse (linke<br />
Seitentasten) aufgerufen werden.<br />
Nach dem Fahren des Cursors auf das Feld „AdonIS by Mouse“ können Sie<br />
über die SPACE Taste (toggle) oder die Tasten Y + N die gewünschte Option<br />
anwählen.<br />
Um die Einstellungen zu speichern, verlassen Sie dies Menü mit F 1.<br />
Seite 33
<strong>Guntermann</strong> & <strong>Drunck</strong> <strong>GmbH</strong> Installations- <strong>und</strong><br />
Bedienungsanleitung <strong>CATVision</strong> (MC)<br />
6.1.8 OSD SyncMod<br />
Grafikkarten können unterschiedliche Sync-Signale (Sync on Green, RGBHV..)<br />
generieren. Je nach dem welches Sync-Signal anliegt, hat dies Auswirkungen<br />
auf die Darstellung des AdonIS.<br />
Das AdonIS ist auf ein RGB HV-Sync-Signal ausgelegt. Sollte nun von der<br />
Grafikkarte des angeschlossenen Rechners ein anderes Sync-Signal als RGB<br />
HV geliefert werden, hat dies eine Farbverfälschung des AdonIS zur Folge. So<br />
könnte z. B. das AdonIS zu dunkel auf Ihrem Monitor erscheinen.<br />
Um nun die Farbverfälschungen auszugleichen, können im Menüpunkt OSD-<br />
Sync die Farbpegel angehoben werden.<br />
Zur Auswahl stehen folgende Einträge (Auswahl durch drücken der Space-<br />
Taste):<br />
RGB HV: kein Farbanpassung<br />
RGsB: der Pegel für das grüne Farbsignal wird angehoben<br />
RsGsBs: alle Farbpegel werden angehoben<br />
Um die Einstellungen zu speichern, verlassen Sie dies Menü mit F 1.<br />
6.1.9 Keyboard Layout<br />
Passen Sie hier den vom <strong>CATVision</strong> verwendeten Keyboard-Satz an das<br />
tatsächliche Layout des angeschlossenen Keyboards an. Sie sollten z. B. eine<br />
Umstellung vornehmen, wenn Sie eine Y/Z-Vertauschung feststellen<br />
(amerikanisch/deutsches Layout).<br />
Folgende Alternativen stehen zur Verfügung:<br />
German<br />
English US<br />
English UK<br />
French<br />
Spanish<br />
Lat America<br />
Portuguese<br />
Nach dem Fahren des Cursors auf das Feld KEYBOARD LAYOUT können Sie<br />
über die SPACE Taste (toggle) die gewünschte Option anwählen.<br />
Seite 34
<strong>Guntermann</strong> & <strong>Drunck</strong> <strong>GmbH</strong> Installations- <strong>und</strong><br />
Bedienungsanleitung <strong>CATVision</strong> (MC)<br />
6.2 Config<br />
Im Menü Config haben Sie die Möglichkeit Videoanpassungen über das IVT<br />
durchzuführen, Userkonten anzulegen <strong>und</strong> systemübergreifende Einstellungen<br />
vorzunehmen. Durch drücken der Taste F6 im Function Menü gelangen Sie in<br />
das Config Menü.<br />
Der Zugriff auf dieses Menü ist nur einem bestimmten Personenkreis gestattet.<br />
Außer dem Supervisor können auch User auf dieses Menü zugreifen, die in<br />
Ihrem User Account mit einer entsprechenden Berechtigung durch den<br />
Supervisor ausgestattet worden sind.<br />
In jedem Fall hat der SUPERVISOR immer eine Zugriffsberechtigung auf<br />
das Config Menü!<br />
Da das <strong>CATVision</strong>-System entweder im Systemzustand des Open Access<br />
(der Zugriff auf das System ist ohne Login-Name <strong>und</strong> Passwort möglich) oder<br />
durch angelegte User Accounts betrieben werden kann, ergeben sich dadurch<br />
unterschiedliche Konstellationen beim Aufruf des Config-Menüs:<br />
Open Access:<br />
Zugriff ist ohne Passworteingabe möglich, wenn dem OpenAccess<br />
Konfigurationsrechte zugewiesen worden sind. Die für den OpenAccess<br />
zugänglichen Einträge des Menü Config sind weiß dargestellt. Einträge, auf die<br />
nicht zugegriffen werden kann, sind hellblau dargestellt.<br />
Hat der OpenAccess dagegen keine Konfigurationsberechtigung, öffnet sich<br />
das Login-Fenster für eine weitergehende Authentifizierung. So können Sie<br />
sich zum Beispiel als Supervisor oder User mit Konfigurationsrecht durch<br />
Eingabe des Loginnamens <strong>und</strong> des Passwortes einloggen.<br />
ACCESS CONFIG CVM<br />
Please enter your login:<br />
Name: max. 14 Zeichen<br />
Password: max. 12 Zeichen<br />
Esc Enter<br />
Nach Eingabe des Loginnamens <strong>und</strong> des Passwortes öffnet sich das Config<br />
Menü.<br />
Seite 35
<strong>Guntermann</strong> & <strong>Drunck</strong> <strong>GmbH</strong> Installations- <strong>und</strong><br />
Bedienungsanleitung <strong>CATVision</strong> (MC)<br />
Angelegte User Accounts + Supervisor (OpenAccess ist deaktiv):<br />
Der Zugriff ist ohne Passwortabfrage möglich, da sich die Benutzer bereits<br />
angemeldet haben d.h. die Zwischenabfrage (über das Access Config Fenster)<br />
der Konfigurationsberechtigung entfällt.<br />
Jedem User können aber unterschiedliche Konfigurationsrechte zugewiesen<br />
sein (z. B. nur IVT <strong>und</strong> System Config). Die Konfigurationseinträge, die für<br />
jeden einzelnen User zur Verfügung stehen, sind weiß markiert. Hellblaue<br />
Markierung signalisieren, dass kein Zugriff möglich ist.<br />
Stehen einem Benutzer keine Konfigurationsrechte zur Verfügung, so erhält<br />
dieser einen entsprechenden Hinweis.<br />
Der Supervisor hat in jedem Fall uneingeschränkten Zugriff auf alle Einträge<br />
des Config-Menüs.<br />
Nachdem das Config-Menü erfolgreich aufgerufen wurde, erscheint auf dem<br />
Monitor folgendes Fenster:<br />
Config CVM<br />
IVT<br />
System Config<br />
User Account<br />
Esc Enter<br />
Wählen Sie mit den Pfeil Auf/Pfeil Ab-Tasten den gewünschten Eintrag aus<br />
<strong>und</strong> betätigen Sie anschließend die Enter-Taste.<br />
6.2.1 IVT<br />
Vgl. Kap 5.4<br />
Seite 36
<strong>Guntermann</strong> & <strong>Drunck</strong> <strong>GmbH</strong> Installations- <strong>und</strong><br />
Bedienungsanleitung <strong>CATVision</strong> (MC)<br />
6.2.2 System Config<br />
Steppen Sie im Config Menü auf den Eintrag System Config <strong>und</strong> drücken Sie<br />
die Taste Enter. Folgendes Fenster öffnet sich:<br />
SYSTEM CONFIG CVM<br />
Hotkey: Ctrl<br />
Double Hotkey: Off<br />
Set System Defaults: …<br />
Remote Video: On<br />
Local Video: On<br />
Permanent Access: Both<br />
Timeout: 1 s<br />
Protected Mode: Off<br />
Keyb. LED flash: On<br />
Scan Code Set Local: 2<br />
Scancode Set Remote: 2<br />
USB Multimedia-Keyboard: No<br />
USB SUN-Keyboard Mode: No<br />
USB SUN-Keyboard Layout: US<br />
Temperature Warning: OSD<br />
Keyboard Type Local: …<br />
Keyboard Type Remote: …<br />
Signal type input: Standard<br />
Remote Sync: as input<br />
Esc Enter F1: Save<br />
Sollte durch Ihre Software ein Konflikt zu den in der AdonIS Bedienung<br />
verwendeten HotKey bestehen, können Sie diese hier umstellen.<br />
Ein weiterer Gr<strong>und</strong> für die Umstellung der HotKeys kann in der Kombination<br />
mehrerer G&D Umschaltertypen liegen, denn im Auslieferungszustand sind alle<br />
G&D-Geräte mit der HotKey-Kombination CTRL + NUM (als Beispiel zum<br />
Aufruf des AdonIS) eingestellt.<br />
Seite 37
<strong>Guntermann</strong> & <strong>Drunck</strong> <strong>GmbH</strong> Installations- <strong>und</strong><br />
Bedienungsanleitung <strong>CATVision</strong> (MC)<br />
6.2.2.1 Definition des ersten Hotkeys<br />
Fahren Sie den Cursor auf den Eintrag HotKey.<br />
Durch Betätigen der SPACE -Taste können Sie dann zwischen folgenden<br />
Alternativen wählen:<br />
Ctrl, Alt, AltGr, Win, Shift<br />
Bitte beachten Sie, dass der hier eingestellte HotKey ferner auch als<br />
erste Taste zum Aufruf des AdonIS dient ( z.B. WIN + NUM ).<br />
Um die Einstellung zu speichern, verlassen Sie dies Menü mit F 1.<br />
6.2.2.2 Festlegung des Doppel-HotKey<br />
Hier legen Sie fest, ob Sie zum Aufruf des AdonIS oder des IVT einen Doppel-<br />
HotKey verwenden wollen.<br />
Steppen Sie mit den Pfeiltasten oder bewegen Sie die Mouse auf den Eintrag<br />
Double-Hotkey. Mit der Space-Taste können Sie zwischen den Einträgen<br />
Yes<br />
No (Default)<br />
auswählen.<br />
Nachdem Sie den Eintrag auf Yes abgeändert haben, verändert sich<br />
automatisch der Eintrag in der Zeile HotKey (vgl. Kapitel 6.2.2.1). Sie können<br />
nun in dieser Zeile Ihren gewünschten Doppel-HotKey auswählen. Folgende<br />
Positionen stehen Ihnen zur Verfügung:<br />
Ctrl (Strg) + Shift<br />
Alt +Shift<br />
Alt Gr + Ctrl (Strg)<br />
Windows + Ctrl (Strg)<br />
Shift + Windows<br />
Bitte beachten Sie, dass der hier eingestellte HotKey ferner auch als<br />
erste Taste zum Aufruf des AdonIS dient (z.B. WIN (+CTRL) + NUM).<br />
Um die Einstellung zu speichern, verlassen Sie dies Menü mit F 1. Nach dieser<br />
Einstellung müssen Sie zum Aufruf des AdonIS oder der IVT-Menüs insgesamt<br />
drei Tasten drücken.<br />
Seite 38
<strong>Guntermann</strong> & <strong>Drunck</strong> <strong>GmbH</strong> Installations- <strong>und</strong><br />
Bedienungsanleitung <strong>CATVision</strong> (MC)<br />
6.2.2.3 Set System Defaults (Supervisor-Funktion)<br />
Die Ausführung dieser Funktion versetzt das Gerät zurück in den Lieferzustand.<br />
Auch die eingestellten Passwörter <strong>und</strong> IVT-Einstellungen werden<br />
zurückgesetzt.<br />
Die jeweiligen Default-Einstellungen entnehmen Sie bitte der Darstellung der<br />
einzelnen Menü-Fenster in diesem Handbuch.<br />
Steppen Sie mittels der Pfeiltasten auf den entsprechenden Menüpunkt.<br />
Durch Eingabe von ENTER wird die Funktion ausgeführt <strong>und</strong> folgendes<br />
Infofenster öffnet sich.<br />
Info CVM<br />
This function will delete<br />
all settings.<br />
Press Enter to continue<br />
or<br />
Esc to cancel<br />
Bestätigten Sie hier nochmals mit der Taste ENTER. Das Fenster wechselt<br />
zum Menü FUNCTION.<br />
6.2.2.4 Remote Video (Dunkelschaltung)<br />
Mit dieser Einstellung legen Sie fest, ob der Monitor der remote Konsole bei<br />
einer Keyboard bzw. Mouseaktion der lokalen Konsole:<br />
entweder permanent eingeschaltet bleibt, oder<br />
dunkel geschaltet wird.<br />
Folgende Wählmöglichkeiten stehen zur Verfügung:<br />
ON: der Monitor bleibt permanent eingeschaltet<br />
Switch off der Monitor wird bei einer Keyboard bzw. Mouseaktion<br />
der lokalen Konsole dunkel geschaltet wird<br />
Um die Einstellung zu speichern, verlassen Sie dies Menü mit F 1.<br />
Seite 39
<strong>Guntermann</strong> & <strong>Drunck</strong> <strong>GmbH</strong> Installations- <strong>und</strong><br />
Bedienungsanleitung <strong>CATVision</strong> (MC)<br />
Sie können diesen Menüpunkt jederzeit durch drücken der ESC - Taste<br />
verlassen.<br />
6.2.2.5 Local Video (Dunkelschaltung)<br />
Funktion entsprechend wie in Kapitel 6.2.2.4, aber bezogen auf das Bild der<br />
lokalen Konsole (Monitor am <strong>CATVision</strong>-CPU).<br />
6.2.2.6 Permanent Access<br />
Möchten Sie, dass z. B. Ihre Konfigurationsarbeiten nicht von Dritten<br />
unterbrochen werden sollen, so besteht sowohl für die remote Konsole<br />
(<strong>CATVision</strong>-CON) als auch die lokale Konsole am <strong>CATVision</strong>-CPU die<br />
Möglichkeit, einen permanenten Zugriff (Haltefunktion; vgl. Kapitel 7.3) zu<br />
aktivieren (Permanent Access).<br />
Wird an einer Konsole der permanente Zugriff über die Tastenkombination<br />
CTRL + Druck (Default-Einstellung) aktiviert, hat der Rechnerzugriff für diese<br />
Konsole einen exklusiven Rechnerzugriff.<br />
Wurde in den Einträgen „Local Video“ <strong>und</strong> „Remote Video“ (vgl. Kapitel<br />
6.2.2.4 <strong>und</strong> 6.2.2.5) die Einstellung auf Switch Off vorgenommen, so schaltet<br />
der Monitor der blockierten Konsole zusätzlich dunkel.<br />
Die blockierte Konsole erhält solange keinen Zugriff, bis die Funktion durch die<br />
gleiche Tastenkombination wieder aufgehoben wird.<br />
Die Funktion Permanent Access lässt folgende Einstellungen zu:<br />
BOTH Beide Konsole können den permanenten Zugriff<br />
aktivieren<br />
NONE Keine Konsole kann aktivieren<br />
LOCAL Nur die lokale Konsole (am <strong>CATVision</strong>-CPU) kann den<br />
permanenten Zugriff aktivieren<br />
REMOTE Nur die remote Konsole (am <strong>CATVision</strong>-CON) kann<br />
aktivieren<br />
Die Änderung der Einstellung wird durchgeführt, indem der Cursor mittels<br />
Mouse oder Keyboard auf den Eintrag Permanent Access bewegt wird.<br />
Mit der SPACE -Taste werden die Wahlmöglichkeiten geschaltet (Toggle-<br />
Funktion).<br />
Um die Einstellung zu speichern, verlassen Sie dies Menü mit F 1.<br />
Seite 40
<strong>Guntermann</strong> & <strong>Drunck</strong> <strong>GmbH</strong> Installations- <strong>und</strong><br />
Bedienungsanleitung <strong>CATVision</strong> (MC)<br />
6.2.2.7 Festlegung der Time-Out-Zeit<br />
Mit der Festlegung der Time-Out-Zeit wird definiert, wie lange die inaktive<br />
Konsole gesperrt bleibt, nachdem an der aktiven Konsole die letzte<br />
Keyboard/Mouse-Aktivität getätigt wurde. Nach Ablauf dieser Time-Out-Zeit<br />
sind beiden Konsolen für Eingaben wieder freigeschaltet.<br />
Steppen Sie dazu mit der Cursor-Taste auf den Eintrag Time-Out.<br />
Durch Eingabe einer beliebigen Zeit können Sie die Time-Out-Zeit in einem<br />
Intervall von 1 – 90 Sek<strong>und</strong>en individuell bestimmen.<br />
Um die Einstellung zu speichern, verlassen Sie dies Menü mit F 1.<br />
6.2.2.8 Aktivieren des Protected Mode<br />
Beim Protected Mode sind im Ausgangszustand beide Monitor (lokal <strong>und</strong><br />
remote) dunkelgeschaltet, <strong>und</strong> an keiner der beiden Konsolen sind Keyboard-<br />
<strong>und</strong> Mouseaktionen möglich (vgl. Kapitel 7.4). Erst durch Eingabe eines<br />
HotKeys (CTRL + Druck), kann sich eine Konsole exklusiv das Recht zur<br />
Bedienung reservieren. Dabei bleibt der Monitor der inaktiven Konsole<br />
weiterhin dunkelgeschaltet <strong>und</strong> auch Keyboard- <strong>und</strong> Mouseaktionen sind<br />
gesperrt.<br />
Mit dieser Einstellung legen Sie fest, ob der Protected Mode aktiv geschaltet<br />
werden soll.<br />
Steppen Sie dazu mit der Cursor-Taste auf den Eintrag Protected Mode.<br />
Durch Betätigen der SPACE-Taste können Sie dann zwischen folgenden<br />
Alternativen wählen: Yes oder NO.<br />
Um die Einstellung zu speichern, verlassen Sie dies Menü mit F 1.<br />
Nach Beendigung aller Konfigurationsarbeiten ist der Protected Mode aktiv.<br />
Nach aktiviertem Protected Mode erscheint auf dem Monitor folgendes Display<br />
auf dem Monitor.<br />
CVM<br />
PROTECTED MODE ENABLED<br />
Seite 41
<strong>Guntermann</strong> & <strong>Drunck</strong> <strong>GmbH</strong> Installations- <strong>und</strong><br />
Bedienungsanleitung <strong>CATVision</strong> (MC)<br />
6.2.2.9 Keyb. LED flash<br />
Mit dieser Einstellung legen Sie fest, ob die Keyboard-LED „Rollen“ nach<br />
ausgelöster Haltefunktion (vgl. Kapitel 7.3) oder ausgelöstem Protected Mode<br />
(vgl. Kapitel 7.4) blinken sollen oder nicht.<br />
Steppen Sie dazu mit der Cursor-Taste auf den Eintrag Keyb. LED flash.<br />
Durch Betätigen der SPACE-Taste können Sie dann zwischen folgenden<br />
Alternativen wählen: Yes oder NO.<br />
Um die Einstellung zu speichern, verlassen Sie dies Menü mit F 1.<br />
6.2.2.10 Festlegung des Scancode-Satzes local<br />
Der Scancode bezeichnet die „Sprache“, in welcher das Keyboard mit dem<br />
Rechner kommuniziert. Das <strong>CATVision</strong> arbeitet im Scancode 2 (Default).<br />
Stellen Sie diese Einstellung nur nach Rücksprache mit unserem Service<br />
um.<br />
Fahren Sie den Cursor auf den entsprechenden Eintrag.<br />
Durch Betätigen der SPACE-Taste können Sie dann zwischen folgenden<br />
Alternativen wählen: 3 oder 2<br />
Um die Einstellung zu speichern, verlassen Sie dies Menü mit F 1.<br />
6.2.2.11 Festlegung des Scancode-Satzes remote<br />
Funktion entsprechend wie in Kapitel 6.2.2.10, aber bezogen auf das<br />
Keyboard an der remote Konsole.<br />
6.2.2.12 USB Multimedia Keyboard<br />
Mittels Anwahl dieses Menüpunktes kann die Multimedia-USB-Unterstützung<br />
im <strong>CATVision</strong> aktiviert werden. Im Auslieferungszustand ist diese deaktiviert<br />
(Wert steht auf „no“)!<br />
Um die Einstellung zu speichern, verlassen Sie dies Menü mit F 1.<br />
Seite 42
<strong>Guntermann</strong> & <strong>Drunck</strong> <strong>GmbH</strong> Installations- <strong>und</strong><br />
Bedienungsanleitung <strong>CATVision</strong> (MC)<br />
6.2.2.13 USB SUN-Keyboard mode<br />
Wird ein SUN-Rechner mit USB-Keyboard (<strong>und</strong> -Maus) an <strong>CATVision</strong>-CPU angeschlossen,<br />
so wird dies dem System durch Änderung des Wertes dieser<br />
Einstellung auf „yes“ mitgeteilt.<br />
Im Auslieferungszustand ist die Unterstützung für USB SUN-Keyboards deaktiviert<br />
(Wert steht auf „no“)!<br />
6.2.2.14 USB SUN-Keyboard layout<br />
Nach Aktivierung des USB SUN-Keyboard mode (s.o.) wird über diese<br />
Einstellung das Tastaturlayout des SUN-Keyboards ausgewählt.<br />
Stellt sich während der Bedienung des Rechners heraus, dass Umlaute <strong>und</strong><br />
andere landesspezifische Zeichen der Tastatur unzutreffend ausgegeben<br />
werden, so ist diese Einstellung zu prüfen <strong>und</strong> gegebenenfalls zu ändern.<br />
Folgende Optionen stehen zur Auswahl:<br />
DE: deutsches Tastaturlayout<br />
US: amerikanisches Tastaturlayout<br />
Wird die Einstellung des Tastaturlayouts während des laufenden Betriebs des<br />
SUN-Rechners geändert, ist ein Neustart des SUN-Rechners erforderlich, um<br />
die geänderte Einstellung anzuwenden.<br />
Im Auslieferungszustand ist das Ändern dieser Einstellung nicht möglich, da die<br />
Unterstützung für USB SUN-Keyboards deaktiviert ist.<br />
6.2.2.15 Temperature Warning<br />
Das Arbeitsplatz- (<strong>CATVision</strong>-CON) <strong>und</strong> das Rechnermodul (<strong>CATVision</strong>-CPU)<br />
sind mit Temperatursensoren ausgestattet. Die Temperatur innerhalb der Geräte<br />
wird ständig überwacht.<br />
Um eine Überhitzung der Module zu vermeiden, werden die folgenden Aktionen<br />
bei Erreichen der angegebenen Werte durchgeführt:<br />
60 °C: Die Module weisen durch eine Anzeige im OSD oder auf dem<br />
Bildschirm (s. u.) auf die erhöhte Temperatur hin.<br />
80 °C: Das Bildsignal am Arbeitsplatzmodul wird deaktiviert!<br />
Seite 43
<strong>Guntermann</strong> & <strong>Drunck</strong> <strong>GmbH</strong> Installations- <strong>und</strong><br />
Bedienungsanleitung <strong>CATVision</strong> (MC)<br />
Wichtig: Wird das Bildsignal aufgr<strong>und</strong> der hohen Temperatur innerhalb des<br />
Arbeitsplatzmoduls deaktiviert, ist die entfernte Kontrolle <strong>und</strong> Bedienung des<br />
angeschlossenen Rechners nicht möglich! Sorgen Sie bei Anzeige einer<br />
Warnmeldung unverzüglich für die Kühlung des erwärmten Moduls!<br />
Die Warnung erscheint auf beiden Modulen, sobald die Temperatur eines der<br />
Module einen kritischen Wert erreicht. In der Warnung wird angegeben, ob das<br />
Arbeitsplatz- (remote unit) oder das Rechnermodul (local unit) betroffen ist.<br />
Wichtig: Erreicht die Temperatur eines Moduls den kritischen Bereich, während<br />
bereits eine Warnung für das andere Modul aktiv ist, erfolgt hierüber keine<br />
separate Warnung!<br />
Die Temperatur-Warnung können Sie wahlweise im OSD oder als Display-<br />
Einblendung anzeigen lassen:<br />
OSD: Die Anzeige der Warnung erscheint in der Standardeinstellung des<br />
KVM-Extenders ggf. bei Aufruf des OSDs. Durch Betätigung einer beliebigen<br />
Taste bestätigen Sie die Meldung <strong>und</strong> können das OSD wie gewohnt<br />
bedienen.<br />
Hinweis: Sinkt die Temperatur auf den Normalbereich <strong>und</strong> steigt<br />
anschließend – nach mindestens einer Minute – wieder in den kritischen<br />
Bereich, wird die Meldung erneut angezeigt.<br />
Display-Einblendung: Alternativ können Sie die Warnung als Einblendung<br />
im aktuell dargestellten Bild anzeigen lassen. Entsprechend der von Ihnen<br />
konfigurierten »Display Position« erscheint der Hinweis als dauerhafte<br />
Einblendung auf dem Bildschirm.<br />
So bestimmen Sie, ob die Warnung im OSD oder als Display-Einblendung<br />
dargestellt wird:<br />
1. Wählen Sie im OSD „System Config > Temperature Warning“.<br />
2. Betätigen Sie die Space-Taste, um zwischen den Optionen<br />
OSD <strong>und</strong> Display zu wählen.<br />
3. Um die Einstellung zu speichern, verlassen Sie dies Menü mit F 1.<br />
6.2.2.16 Keyboard Type Local<br />
Nach Anwahl dieses Menüpunktes können Sie im Untermenü die<br />
Unterstützung der Tastaturen „PixelPower Clarity (blue)“ bzw. „SKIDATA1“ im<br />
<strong>CATVision</strong> für die lokale Konsole aktivieren.<br />
Seite 44
<strong>Guntermann</strong> & <strong>Drunck</strong> <strong>GmbH</strong> Installations- <strong>und</strong><br />
Bedienungsanleitung <strong>CATVision</strong> (MC)<br />
Im Auslieferungszustand ist diese deaktiviert. Um die Unterstützung für diese<br />
Tastatur zu aktivieren betätigen Sie bitte im Untermenü die Space-Taste um die<br />
Einstellung zu aktivieren.<br />
Um die Einstellung zu speichern, verlassen Sie dies Menü mit F 1.<br />
6.2.2.17 Keyboard Type Remote<br />
Nach Anwahl dieses Menüpunktes können Sie im Untermenü die<br />
Unterstützung der Tastaturen „PixelPower Clarity (blue)“ bzw. „SKIDATA1“ im<br />
<strong>CATVision</strong> für die remote Konsole aktivieren.<br />
Im Auslieferungszustand ist diese deaktiviert. Um die Unterstützung für diese<br />
Tastatur zu aktivieren betätigen Sie bitte im Untermenü die Space-Taste um die<br />
Einstellung zu aktivieren.<br />
6.2.2.18 Signal type input<br />
Um die korrekte Farbdarstellung des übertragenen Videosignals sicherzustellen,<br />
kann hier eine Auswahl getroffen werden, welcher<br />
Synchronisationstyp für das eingehende Videosignal vorliegt.<br />
Zur Auswahl stehen:<br />
Standard: umfasst RGB HV, RGsB, RsGsBs<br />
RGsB/HV: Sync auf Grün <strong>und</strong> zusätzlich getrennt HV<br />
6.2.2.19 Remote sync<br />
Der Eintrag „Remote sync“ kann gr<strong>und</strong>sätzlich zwischen zwei möglichen<br />
Einträgen wechseln. Diese sind:<br />
Separated H/V<br />
as input<br />
Wenn <strong>CATVision</strong> getrennte HV-Signale erkennt, wird Remote sync auf<br />
„Separated H/V“ gestellt <strong>und</strong> ist nicht veränderbar.<br />
Wenn keine HV-Signale erkannt werden, besteht die Möglichkeit diese über die<br />
Einstellung „Separated H/V“ trotzdem auszugeben.<br />
Bei Auswahl „as input“ wird das Signal so ausgegeben wie es vom Rechner in<br />
das <strong>CATVision</strong>-System gelangt.<br />
Seite 45
<strong>Guntermann</strong> & <strong>Drunck</strong> <strong>GmbH</strong> Installations- <strong>und</strong><br />
Bedienungsanleitung <strong>CATVision</strong> (MC)<br />
6.2.3 User Account<br />
Steppen Sie im Config Menü auf den Eintrag User Account <strong>und</strong> drücken Sie<br />
die Taste ENTER. Folgendes Fenster öffnet sich:<br />
User Account CVM<br />
1 USER 01<br />
2 USER 02<br />
3 USER 03<br />
4 USER 04<br />
... bis User 08<br />
OpenAccess<br />
SUPERVISOR<br />
Esc Enter<br />
Hier wählen Sie den USER ACCOUNT aus, den Sie im folgenden verändern<br />
möchten.<br />
Steuern Sie den Cursor über Keyboard oder Mouse auf den entsprechenden<br />
Account.<br />
Bestätigen Sie Ihre Auswahl mit ENTER (oder linke Mousetaste) oder<br />
verlassen Sie dieses Menü ohne Auswahl über ESC (oder rechte Mousetaste).<br />
Haben Sie einen Account angewählt (z. B. User 1), gelangen Sie in ein<br />
Untermenü, das Fenster USER ACCOUNT.<br />
Hier können sie die Einstellungen für den im SELECT ACCOUNT<br />
ausgewählten User ändern.<br />
Aufgr<strong>und</strong> der Besonderheiten des Supervisor sowie des Open Access<br />
Accounts, erscheinen diese gesondert im Menü.<br />
Supervisor: Diese Account können keine Rechte entzogen werden<br />
User: Benutzer, der wahlweise mit Konfigurationsrechten<br />
ausgestattet werden kann<br />
Open Access: Ist die offene Zugangsvariante zum <strong>CATVision</strong>-System <strong>und</strong><br />
kein "echter" User.<br />
Seite 46
<strong>Guntermann</strong> & <strong>Drunck</strong> <strong>GmbH</strong> Installations- <strong>und</strong><br />
Bedienungsanleitung <strong>CATVision</strong> (MC)<br />
Derzeit können 8 User, der Supervisor sowie der Open Access-Zugang<br />
verwaltet werden.<br />
User Account CVM<br />
Account No. 1<br />
Account enabled: Yes<br />
User Name: USER 01<br />
Set Account Defaults<br />
IVT access Yes<br />
System Config access No<br />
User Account access No<br />
Change Password…<br />
Esc Enter F1:Save<br />
Hinweis:<br />
Wollen Sie mehr als ein Feld ändern, speichern Sie erst nach Durchführung<br />
aller Änderungen im USER-ACCOUNT mit F1 ab.<br />
6.2.3.1 Account enable / disable<br />
Account enabled: Yes / No<br />
In der ersten Zeile des USER-ACCOUNT haben Sie die Möglichkeit, den<br />
gesamten Account zu sperren, bzw. freizugeben (Administrator-Account kann<br />
nicht gesperrt werden). Eine Sperrung kann z. B. bei einer längeren<br />
Abwesenheit des Account-Inhabers sinnvoll sein.<br />
Nachdem Sie den Cursor, wie zuvor beschrieben, auf das entsprechende Feld<br />
gesteuert haben, können Sie die Einstellung durch Eingabe von Y oder N<br />
verändern.<br />
Zur alternierenden Umschaltung können Sie auch die SPACE -Taste nutzen.<br />
F 1 speichert die neue Einstellung <strong>und</strong> führt zurück zum SELECT ACCOUNT.<br />
Default: Account enabled = Yes<br />
6.2.3.2 Vergabe des User-Namens<br />
User name USER 01<br />
Geben Sie mit max. 14 Zeichen den Namen des diesem Account zugeordneten<br />
Users ein. Vorhergehende Einträge können überschrieben werden.<br />
Steuern Sie den Cursor auf dieses Feld. Drücken Sie die ENTER -Taste, um in<br />
den Editiermodus für dieses Feld zu gelangen.<br />
Schließen Sie die Eingabe mit ENTER ab.<br />
Seite 47
<strong>Guntermann</strong> & <strong>Drunck</strong> <strong>GmbH</strong> Installations- <strong>und</strong><br />
Bedienungsanleitung <strong>CATVision</strong> (MC)<br />
Wird der User Name geändert, erscheint automatisch ein Fenster, welches Sie<br />
auf die erfolgte Umstellung hinweist. Nachdem Sie eine beliebige Taste betätigt<br />
haben, erscheint das Eingabemenü für das User-Passwort:<br />
CHANGE PASSWORD CVM<br />
Please enter your new<br />
password twice:<br />
[max. 12 Zeichen]<br />
Esc Enter<br />
Die Eingabe kann alphanumerisch erfolgen <strong>und</strong> umfasst max. 12 Zeichen.<br />
ENTER schließt die erste Eingabe ab <strong>und</strong> springt automatisch in das zweite<br />
Feld, wo das Passwort nochmals einzugeben ist. ENTER bestätigt das neue<br />
Passwort <strong>und</strong> führt zurück zum User Account.<br />
F 1 speichert die neue Einstellung <strong>und</strong> führt zurück zum SELECT ACCOUNT.<br />
Abbruch der Passwortänderung<br />
ESC im Fenster CHANGE PASSWORD bricht die Aktion ab <strong>und</strong> führt ebenfalls<br />
zum User Account.<br />
Hinweis:<br />
Haben Sie zuvor bereits einen Usernamen angelegt, brechen jedoch diese<br />
Passwortvergabe ab, so bleibt dieser User weiter existent, kann sich aber nicht<br />
einloggen, da kein Passwort existiert!<br />
Ist bereits ein Passwort angelegt welches ersetzt werden soll, bleibt dieses<br />
weiterhin aktiv.<br />
Durch Anlegen eines Users wird der evtl. noch aktive OpenAccess<br />
deaktiviert!<br />
Seite 48
<strong>Guntermann</strong> & <strong>Drunck</strong> <strong>GmbH</strong> Installations- <strong>und</strong><br />
Bedienungsanleitung <strong>CATVision</strong> (MC)<br />
6.2.3.3 Set Account Defaults<br />
Set Account Defaults<br />
Diese Funktion setzt alle Änderungen des USER ACCOUNT zurück auf den<br />
Lieferzustand, der in diesem Kapitel jeweils am Ende eines Abschnitts als<br />
„default“ angegeben ist.<br />
Ausnahme: User Name + User Password<br />
Bewegen Sie den Cursor auf den Eintrag <strong>und</strong> betätigen Sie dann die ENTER -<br />
Taste. Die Funktion wird im Hintergr<strong>und</strong> ausgeführt.<br />
F 1 speichert die neue Einstellung <strong>und</strong> führt zurück zum SELECT ACCOUNT.<br />
6.2.3.4 IVT Access<br />
IVT Access: Yes/No<br />
Hier können Sie dem Inhaber dieses Accounts den Zugang zum IVT gewähren<br />
oder entziehen.<br />
Steuern Sie das Feld an <strong>und</strong> gewähren Sie den Zugang zum IVT durch<br />
Eingabe von Y oder verwehren Sie diesen durch N.<br />
Die SPACE -Taste kann zusätzlich zur alternierenden Umschaltung genutzt werden.<br />
F 1 speichert die neue Einstellung <strong>und</strong> führt zurück zum SELECT ACCOUNT.<br />
Default: IVT-Access = Yes<br />
6.2.3.5 System Config Access<br />
System Config Access... No/Yes<br />
Hier können Sie dem Inhaber dieses Accounts den Zugang zum Menü System<br />
Config gewähren oder entziehen.<br />
Steuern Sie das Feld an <strong>und</strong> gewähren Sie den Zugang zum System Config<br />
durch Eingabe von Y oder verwehren Sie diesen durch N.<br />
Die SPACE -Taste kann zusätzlich zur alternierenden Umschaltung genutzt<br />
werden.<br />
F 1 speichert die neue Einstellung <strong>und</strong> führt zurück zum SELECT ACCOUNT.<br />
Default: System Config Access = No<br />
Seite 49
<strong>Guntermann</strong> & <strong>Drunck</strong> <strong>GmbH</strong> Installations- <strong>und</strong><br />
Bedienungsanleitung <strong>CATVision</strong> (MC)<br />
6.2.3.6 User Account Access<br />
User Account Access ... No/Yes<br />
Hier können Sie dem Inhaber dieses Accounts den Zugang zum Menü User<br />
Account gewähren oder entziehen.<br />
Steuern Sie das Feld an <strong>und</strong> gewähren Sie den Zugang zum User Account<br />
durch Eingabe von Y oder verwehren Sie diesen durch N.<br />
Die SPACE -Taste kann zusätzlich zur alternierenden Umschaltung genutzt<br />
werden.<br />
F 1 speichert die neue Einstellung <strong>und</strong> führt zurück zum SELECT ACCOUNT.<br />
Default: User Account Access = No<br />
6.2.3.7 Change Password<br />
Change password...<br />
Hier können Sie das User Password festlegen. Achten Sie darauf, dass weder<br />
das Passwort noch der USER-Name zweimal vergeben wird. Die Eingabe ist<br />
alphanumerisch möglich.<br />
Fahren Sie den Cursor auf den entsprechenden Eintrag im Menü USER<br />
ACCOUNT.<br />
Nach Drücken der Taste ENTER gelangen Sie in ein Untermenü, wo Sie zur<br />
Eingabe des Passwortes aufgefordert werden.<br />
CHANGE PASSWORD CVM<br />
Please enter your new<br />
password twice:<br />
[Min. 4, max. 12 Zeichen]<br />
Esc Enter<br />
Die Eingabe kann alphanumerisch erfolgen <strong>und</strong> umfasst min. 4 Zeichen, max.<br />
12 Zeichen.<br />
Seite 50
<strong>Guntermann</strong> & <strong>Drunck</strong> <strong>GmbH</strong> Installations- <strong>und</strong><br />
Bedienungsanleitung <strong>CATVision</strong> (MC)<br />
ENTER schließt die erste Eingabe ab <strong>und</strong> springt automatisch in das zweite<br />
Feld, wo das Passwort nochmals einzugeben ist. ENTER bestätigt das neue<br />
Passwort <strong>und</strong> führt zurück zum USER ACCOUNT.<br />
F 1 speichert die neue Einstellung <strong>und</strong> führt zurück zum SELECT ACCOUNT.<br />
Default: Kein Passwort.<br />
Abbruch der Passwortänderung<br />
ESC im Fenster CHANGE PASSWORD bricht die Aktion ab <strong>und</strong> führt ebenfalls<br />
zum USER ACCOUNT.<br />
Hinweis:<br />
Ist bereits früher ein Passwort angelegt worden, welches erneuert werden soll,<br />
<strong>und</strong> die Passwortänderung wird abgebrochen, so bleibt das alte Passwort<br />
weiterhin aktiv.<br />
Bitte merken Sie sich die Passwörter gut, da bei Verlust kein<br />
Systemzugriff mehr möglich ist.<br />
6.3 Mouse Utility<br />
Sollte die Mouse des angeschlossenen Rechners während des Betriebes<br />
nicht mehr funktionieren (Mouse-Pfeil bewegt sich nicht), besteht die<br />
Möglichkeit, eine Re-Initialisierung durchzuführen.<br />
Überprüfen Sie jedoch zuerst alle Anschlusskabel auf korrekten Sitz.<br />
Rufen Sie das FUNCTION Menü (CTRL + NUM) auf. Steppen Sie mittels der<br />
Pfeiltasten in den Menübereich unter F8 auf den Menüpunkt Mouse Utility.<br />
Durch Eingabe von ENTER öffnet sich ein Untermenü, welches Ihnen folgende<br />
Möglichkeiten bietet:<br />
MOUSE UTILITY CVM<br />
Enable Mouse ► for Unix ◄<br />
Reset Mouse<br />
Enable Intelli<br />
Enable Int Explorer<br />
Esc Enter<br />
Achtung! Führen Sie nur den für den einzelnen Rechner passenden<br />
Enable/Reset durch!<br />
Seite 51
<strong>Guntermann</strong> & <strong>Drunck</strong> <strong>GmbH</strong> Installations- <strong>und</strong><br />
Bedienungsanleitung <strong>CATVision</strong> (MC)<br />
Enable Mouse (for Unix)<br />
Wählen Sie diese Funktion bei Nicht-Windows-Systemen (z. B. Linux), wenn<br />
der Rechner mit einem Standard-Mouse Treiber arbeitet.<br />
Reset Mouse<br />
Wählen Sie diese Funktion bei Windows-Betriebssystemen; unabhängig vom<br />
eingestellten Mouse-Treiber.<br />
Dies trifft zu für:<br />
WIN 98, WIN NT, WIN ME, WIN 2000, WIN XP.<br />
Steuern Sie den Cursor mittels der Pfeiltasten auf den entsprechenden Eintrag.<br />
Betätigen Sie die Taste ENTER.<br />
Die Initialisierung der Mouse wird durchgeführt <strong>und</strong> das Menü geschlossen. Die<br />
Mouse arbeitet wieder mit voller Funktionalität.<br />
Enable Intelli (MS-Intelli-Mouse)<br />
Wählen Sie diese Funktion bei Nicht-Windows-Systemen (z. B. Linux), sollte<br />
der angeschlossene Rechner den MS-Intelli-Mousetreiber geladen haben.<br />
Enable Int Explorer (MS-Intelli-Mouse)<br />
Wählen Sie diese Funktion bei Nicht-Windows-Systemen (z. B. Linux), sollte<br />
der angeschlossene Rechner den MS-Intelli-Explorer Mousetreiber geladen<br />
haben.<br />
Seite 52
<strong>Guntermann</strong> & <strong>Drunck</strong> <strong>GmbH</strong> Installations- <strong>und</strong><br />
Bedienungsanleitung <strong>CATVision</strong> (MC)<br />
7 Systembedienung<br />
7.1 Zugriffsmöglichkeiten<br />
Folgende Zugriffsmöglichkeiten bestehen auf das System:<br />
Open Access: freier Zugang zum System<br />
über definierte User: Anmeldung mit Passwort <strong>und</strong> Name erforderlich<br />
als Supervisor<br />
Im den nachfolgenden Kapiteln werden die einzelnen Zugriffsmöglichkeiten<br />
näher erläutert.<br />
7.1.1 Zugriff über OpenAccess<br />
Beim Zugriff über OpenAccess kann jeder auf das <strong>CATVision</strong>-System <strong>und</strong> die<br />
angeschlossene CPU zugreifen.<br />
Der OpenAccess definiert sich im Lieferzustand folgendermaßen:<br />
Zugriff auf die angeschlossene CPU ohne vorherige Anmeldung mit<br />
Loginname <strong>und</strong> Passwort<br />
Zugriff auf das IVT zur individuellen Anpassung des Videobildes<br />
Zugriff auf das Menü Console Setup<br />
Berechtigung zum manuellen Logout über F8<br />
Berechtigung zur Reinitialisierung der Mouse<br />
Im Auslieferungszustand ist dem OpenAccess der Zugriff auf das Menü Config<br />
verwehrt (Ausnahme ist das IVT; hier gelangt der OpenAccess bei der<br />
Passwortabfrage durch Drücken der Taste Enter in das Untermenü IVT).<br />
Das Recht zum Zugriff auf das Menü Config kann dem OpenAccess durch den<br />
Supervisor zugewiesen werden. Dazu muss der Supervisor im Menü User<br />
Account dem OpenAccess die gewünschten Konfigurationsrechte zuweisen<br />
(vgl. Kapitel 6.2.3.4 bis 6.2.3.6).<br />
Solange der OpenAccess aktiv ist, besteht immer die Möglichkeit des Zugriffes<br />
ohne vorherige Anmeldung, auch wenn bereits User angelegt worden sind.<br />
Um das System gegen unbefugten Zugriff zu schützen, muss durch den<br />
Supervisor oder einem User mit Konfigurationsrecht der OpenAccess<br />
deaktiviert werden. Im UserAccount wird der OpenAccess verwaltet. Um den<br />
OpenAccess zu deaktivieren, öffnen Sie das Menü UserAccount, welches ein<br />
Untermenü des Config-Menüs ist (vgl. Kapitel 6.2.3).<br />
Seite 53
<strong>Guntermann</strong> & <strong>Drunck</strong> <strong>GmbH</strong> Installations- <strong>und</strong><br />
Bedienungsanleitung <strong>CATVision</strong> (MC)<br />
Dort befindet sich am unteren Ende des Fensters der Eintrag OpenAccess.<br />
User Account CVM<br />
1 USER 01<br />
2 USER 02<br />
3 USER 03<br />
4 USER 04<br />
... bis User 08<br />
OpenAccess<br />
SUPERVISOR<br />
Esc Enter<br />
Bewegen Sie den Cursor auf diesen Eintrag <strong>und</strong> drücken Sie die Taste Enter.<br />
Folgendes Fenster öffnet sich:<br />
User Account CVM<br />
OpenAccess<br />
Account enabled: NO<br />
User Name: OpenAccess<br />
Set Account Defaults<br />
IVT Access Yes<br />
System Config Access No<br />
User Account Access No<br />
Change Password…<br />
Esc Enter F1:Save<br />
Bewegen Sie den Cursor auf den Eintrag Account enabled <strong>und</strong> wechseln mit<br />
der Space-Taste den dortigen Eintrag auf NO. Speichern Sie Ihre Einstellung<br />
mit F1.<br />
Somit ist der OpenAccess deaktiviert <strong>und</strong> der Zugriff auf das <strong>CATVision</strong>-<br />
System nur noch über den Login möglich.<br />
Um den OpenAccess zu aktivieren, wiederholen Sie die zuvor beschriebene<br />
Verfahrensweise, ändern jedoch den Eintrag im Feld Account enabled von NO<br />
auf YES!<br />
Seite 54
<strong>Guntermann</strong> & <strong>Drunck</strong> <strong>GmbH</strong> Installations- <strong>und</strong><br />
Bedienungsanleitung <strong>CATVision</strong> (MC)<br />
7.1.2 Zugriff über definierte User<br />
Beabsichtigen Sie, das System gegen unbefugten Zugriff zu schützen, ist es<br />
sinnvoll User anzulegen <strong>und</strong> diese User mit bestimmten Rechten auszustatten.<br />
Sobald durch den Supervisor im Menü UserAccount Benutzer angelegt<br />
worden sind, ist der Zugriff auf des System nur noch über einen Login-Namen<br />
<strong>und</strong> ein Passwort möglich. Diesem Benutzer können bestimmte Rechte<br />
zugewiesen sein. Das Verfahren zum Anlegen von Benutzern wird in Kapitel<br />
6.2.3 beschrieben.<br />
7.1.3 Zugriff als Supervisor<br />
Wollen Sie Änderungen der Voreinstellungen vornehmen, geben Sie im<br />
LOGIN-Fenster Feld „Name“ Ihre SUPERVISOR-Kennung <strong>und</strong> im Feld<br />
„Password“ Ihr SUPERVISOR-Passwort ein. Beides finden Sie in der Anlage 1<br />
zur Bedienungsanleitung.<br />
Über den SUPERVISOR-Login haben Sie, unabhängig von den aktuellen<br />
Einstellungen, jederzeit Zugriff auf alle Konfigurationsebenen.<br />
Für Einstellungen im Menü Config ist die Anmeldung als SUPERVISOR<br />
erforderlich.<br />
Selbstverständlich kann auch an User-Logins ein Konfigurationsrecht geknüpft<br />
werden (vgl. Kapitel 6.2.3.4 bis 6.2.3.6)<br />
Bitte entfernen Sie das SUPERVISOR-Passwort zu Ihrer eigenen<br />
Sicherheit unbedingt aus der Bedienungsanleitung.<br />
Seite 55
<strong>Guntermann</strong> & <strong>Drunck</strong> <strong>GmbH</strong> Installations- <strong>und</strong><br />
Bedienungsanleitung <strong>CATVision</strong> (MC)<br />
7.2 Automatische Umschaltung<br />
Das <strong>CATVision</strong>-System erlaubt die wahlweise Bedienung des Rechners von<br />
beiden Konsolen aus (lokal <strong>und</strong> remote).<br />
Im Gr<strong>und</strong>zustand ist die Bedienung für beide Konsolen freigechaltet.<br />
Sobald an einer der Stationen eine Eingabe über Keyboard oder Mouse<br />
durchgeführt wird, sind Keyboard/Mouse der anderen Station automatisch<br />
gesperrt.<br />
Wird für einen Time-out von ca. 1 Sek. keinerlei Bedienung vorgenommen,<br />
schaltet das System wieder frei.<br />
Der Time-out zwischen den einzelnen Umschaltvorgängen kann<br />
entsprechend Ihren Bedürfnissen angepasst werden (vgl. Kapitel 6.2.2.7).<br />
Beide angeschlossene Monitore zeigen simultan das Bild des Rechners.<br />
Ist die Dunkelschaltung aktiviert (vgl. Kapitel 7.5), so wird nur an der aktiven<br />
Konsole das Videobild angezeigt.<br />
Seite 56
<strong>Guntermann</strong> & <strong>Drunck</strong> <strong>GmbH</strong> Installations- <strong>und</strong><br />
Bedienungsanleitung <strong>CATVision</strong> (MC)<br />
7.3 Manuelle Haltefunktion (Permanent Access)<br />
Durch das <strong>CATVision</strong>-System ist es möglich, dass entweder die lokale oder<br />
die entfernte (remote) Konsole exklusiv den Rechner bedienen kann. Dies<br />
verhindert, dass das System die andere Konsole nach dem voreingestellten<br />
Time-Out von ca. 1 Sek. freischaltet.<br />
Durch halten der CTRL-Taste <strong>und</strong> zusätzlicher Bedienung der DRUCK-Taste<br />
wird der Permanent Access aktiviert (Default-Einstellung).<br />
Signalisiert wird der Permanent Access:<br />
an der auslösenden Konsole, durch die langsam blinkende Keyboard-<br />
Led „Scroll Lock“.<br />
an der Konsole, welche durch die Haltefunktion gesperrt wurde, durch<br />
schnell blinkende Keyboard-Led „Scroll Lock“, die ACTIVE LED<br />
LOCAL (z. B. bei <strong>CATVision</strong>-CPU) erlischt <strong>und</strong> die ACTIVE LED<br />
CPU leuchtet<br />
das Display wird folgendermaßen dargestellt<br />
CVM<br />
PERMANENT ACCESS<br />
Der Permanent Access wird durch erneutes Drücken der Tastenkombination<br />
CTRL <strong>und</strong> DRUCK deaktiviert <strong>und</strong> die LED SCROLL-LOCK der Keyboard<br />
erlischt. Danach ist die automatische Umschaltung (vgl. Kapitel 7.2) wieder<br />
aktiv.<br />
Hinweis: Sollten Sie den Doppel-HotKey aktiviert haben (vgl. Kapitel 6.2.2.2),<br />
müssen Sie zur Auslösung des Permanent Access, den von Ihnen definierten<br />
Doppel-HotKey zur Auslösung des Permanent Access drücken.<br />
Im Default-Zustand ist der Permanent Access für beide Konsolen<br />
freigegeben. Beabsichtigen Sie, den Permanent Access zu sperren oder<br />
nur für eine Konsole freizugeben, so verfahren Sie bitte wie in Kapitel<br />
6.2.2.6 beschrieben.<br />
Diese Funktion kann ebenfalls mit der Dunkelschaltungs-Funktion kombiniert<br />
werden (vgl. Kapitel 7.5). In diesem Fall wird das Videobild der gesperrten<br />
Konsole dunkel geschaltet.<br />
Seite 57
<strong>Guntermann</strong> & <strong>Drunck</strong> <strong>GmbH</strong> Installations- <strong>und</strong><br />
Bedienungsanleitung <strong>CATVision</strong> (MC)<br />
7.4 Protected Mode<br />
Beim Protected Mode sind im Ausgangszustand beide Monitor (lokal <strong>und</strong><br />
remote) dunkelgeschaltet, <strong>und</strong> an keiner der beiden Konsolen sind Keyboard-<br />
<strong>und</strong> Mouseaktionen möglich (vgl. Kapitel 7.4). Erst durch Eingabe eines<br />
HotKeys (CTRL + Druck), kann sich eine Konsole exklusiv das Recht zur<br />
Bedienung reservieren. Dabei bleibt der Monitor der inaktiven Konsole<br />
weiterhin dunkelgeschaltet <strong>und</strong> auch Keyboard- <strong>und</strong> Mouseaktionen sind<br />
gesperrt.<br />
Der Unterschied zum Permanent Access besteht darin, das beim Permanent<br />
Access die Bedienung gr<strong>und</strong>sätzlich freigegeben ist <strong>und</strong> durch Aktivierung der<br />
Funktion sich eine Konsole das exklusive Recht zur Bedienung solange sichern<br />
kann, bis diese Funktion wieder deaktiviert wird.<br />
Durch Betätigen der Keyboard-Kombination CTRL <strong>und</strong> DRUCK erhält die<br />
auslösende Konsole vollen Keyboard- <strong>und</strong> Mousezugriff. Dagegen bleibt die<br />
inaktive Konsole weiter für Keyboard- <strong>und</strong> Mouseeingaben gesperrt.<br />
Signalisiert wird der Protected Mode:<br />
an der Konsole, welche das exklusive Recht der Bedienung hat, durch<br />
langsam blinkende Keyboard-Led „Scroll Lock“.<br />
an der Konsole, welche weiterhin gesperrt ist, durch schnell blinkende<br />
Keyboard-Led „Scroll Lock“, die ACTIVE LED LOCAL (z. B. bei<br />
<strong>CATVision</strong>-CPU) erlischt <strong>und</strong> die ACTIVE LED CPU leuchtet<br />
auf beiden Monitoren erscheint folgende Anzeige<br />
CVM<br />
PROTECTION ACTIVATED<br />
Die Protected Mode wird durch erneutes Drücken der Tastenkombination<br />
CTRL <strong>und</strong> DRUCK deaktiviert <strong>und</strong> die LED SCROLL-LOCK des Keyboards<br />
erlischt. Die Monitore werden sofort dunkel geschaltet. Danach ist die<br />
automatische Umschaltung (vgl. Kapitel 7.2) wieder aktiv.<br />
Im Default-Zustand ist die Protected Mode nicht freigegeben.<br />
Beabsichtigen Sie, den Protected Mode zu aktivieren, so verfahren Sie<br />
bitte so wie in Kapitel 6.2.2.8 beschrieben.<br />
Seite 58
<strong>Guntermann</strong> & <strong>Drunck</strong> <strong>GmbH</strong> Installations- <strong>und</strong><br />
Bedienungsanleitung <strong>CATVision</strong> (MC)<br />
7.5 Dunkelschaltung des Monitors<br />
Beim <strong>CATVision</strong>-System besteht die Möglichkeit, während des lokalen oder<br />
entfernten Zugriffs auf den Rechner, den Monitor der nicht zugreifenden<br />
Konsole dunkel zu schalten. Sie können somit z. B. als Supervisor Ihre<br />
Konfigurationseinstellungen gegen unbefugte Beobachter schützen.<br />
Folgende Möglichkeiten der Dunkelschaltung können sich ergeben:<br />
Dunkelschaltung bei automatischer Umschaltung<br />
Dunkelschaltung kombiniert mit Permanent Access<br />
Diese genannten Möglichkeiten werden nun in den nachfolgenden Kapiteln<br />
näher erläutert.<br />
7.5.1 Dunkelschaltung des Monitors bei automatischer<br />
Umschaltung<br />
In der Standardeinstellung (Automatischen Umschaltung) wird die<br />
Dunkelschaltung durch eine Maus- oder Tastatureingabe ausgelöst. Nach dem<br />
voreingestellten time-out von ca. 1 Sek. wird der Bildschirm der inaktiven<br />
Konsole wieder freigeschaltet.<br />
Bedingung dafür ist jedoch, dass die Dunkelschaltung freigegeben wurde.<br />
Im Default-Zustand ist die „Dunkelschaltung“ nicht freigegeben.<br />
Beabsichtigen Sie, die „Dunkelschaltung“ zu aktivieren, so verfahren Sie<br />
bitte so wie in den Kapiteln 6.2.2.4 <strong>und</strong> 6.2.2.5 beschrieben.<br />
7.5.2 Dunkelschaltung des Monitors bei Permanent Access<br />
Die Dunkelschaltung des nicht aktiven Monitors ist bei einer Keyboard <strong>und</strong><br />
Mouseaktion <strong>und</strong> im Modus der „Haltefunktion“ möglich. Bedingung ist, dass<br />
die Dunkelschaltung aktiviert wurde (vgl. Kap. 6.2.2.4 <strong>und</strong> 6.2.2.5).<br />
Ausgelöst wird die Dunkelschaltung durch eine Keyboard/Mouse-Aktion oder<br />
durch die Aktivierung der Haltefunktion (CTRL + DRUCK-Taste).<br />
Die manuelle Haltefunktion wird durch erneutes Drücken der Tastenkombination<br />
CTRL <strong>und</strong> DRUCK wieder deaktiviert <strong>und</strong> der Monitor der<br />
inaktiven Arbeitstation nach dem fest definierten Time-Out (vgl. Kap. 6.2.2.7)<br />
wieder freigeschaltet.<br />
Im Default-Zustand ist die „Dunkelschaltung“ nicht freigegeben.<br />
Beabsichtigen Sie, die „Dunkelschaltung“ zu aktivieren, so verfahren Sie<br />
bitte so wie in Kap. 6.2.2.4 <strong>und</strong> 6.2.2.5 beschrieben.<br />
Seite 59
<strong>Guntermann</strong> & <strong>Drunck</strong> <strong>GmbH</strong> Installations- <strong>und</strong><br />
Bedienungsanleitung <strong>CATVision</strong> (MC)<br />
7.6 Manueller Logout<br />
Durch Drücken der Taste F8 im Function Menü führen Sie ein Logout durch.<br />
Diese Funktion hebt Ihre Anmeldung am <strong>CATVision</strong> auf.<br />
Nach der Ausführung wechselt der <strong>CATVision</strong> zum LOGIN Fenster:<br />
Sollten Sie sich noch im Modus OPEN ACCESS befinden, können Sie<br />
sich über die Enter-Taste sofort wieder am System anmelden.<br />
Sollten Sie User Accounts angelegt haben <strong>und</strong> OPEN ACCESS wurde<br />
deaktiviert, können Sie erst wieder nach Eingabe Ihres User-<br />
Passwortes oder des Supervisor-Passwortes Zugriff auf das System<br />
erhalten.<br />
Hinweis: Sie sollten immer dann ein Logout ausführen, wenn sie Ihren<br />
Rechner gegen nicht autorisierten Zugriff schützen möchten, z. B.<br />
wenn Sie Ihren Arbeitsplatz verlassen.<br />
Seite 60
<strong>Guntermann</strong> & <strong>Drunck</strong> <strong>GmbH</strong> Installations- <strong>und</strong><br />
Bedienungsanleitung <strong>CATVision</strong> (MC)<br />
8 Optionale Ausstattung<br />
Alle in diesem Kapitel erwähnten Ausstattungskomponenten sind als<br />
Zukaufoption erhältlich. Sollten Sie nachträglich einen der im folgenden<br />
genannten Komponenten benötigen, so setzen Sie sich bitte mit unserem<br />
Vertrieb (02739-8901-100 oder sales@gdsys.de) in Verbindung.<br />
8.1 Delay<br />
Das Delay kompensiert Laufzeitunterschiede bei CAT-x-Kabeln. Diese<br />
Laufzeitunterschiede kommen durch die Verdrillung der Aderpaare zustande.<br />
Als Resultat dieser Verdrillung erhält man unterschiedliche Längen jeder<br />
einzelnen Ader.<br />
Durch diese unterschiedlichen Längen kommen die Farbsignale R, G <strong>und</strong> B zu<br />
unterschiedlichen Zeiten am Monitor an. Der Effekt dieser Laufzeitunterschiede<br />
ist, dass Sie kein harmonisches Bild erkennen, sondern Farbverschiebungen<br />
am Monitor festzustellen sind, welche mit Konvergenzfehlern am Monitor zu<br />
vergleichen sind.<br />
Um diese Laufzeitunterschiede zu kompensieren, wird das Delay eingesetzt. In<br />
Kapitel 5.4.4.3.4 wird das Verfahren beschrieben.<br />
Seite 61
<strong>Guntermann</strong> & <strong>Drunck</strong> <strong>GmbH</strong> Installations- <strong>und</strong><br />
Bedienungsanleitung <strong>CATVision</strong> (MC)<br />
8.2 Audio<br />
Das <strong>CATVision</strong> bietet eine bidirektionale Stereo-Audio-Übertragung in<br />
nahezu CD-Qualität an.<br />
Dazu befinden sich am <strong>CATVision</strong>-CPU die Audioschnittstellen<br />
Mouse PS/2<br />
Keyb PS/2.<br />
Red. Power<br />
5V DC/5A<br />
RS 232<br />
Transmission<br />
Line In<br />
Line Out<br />
Line In Line Out<br />
Monitor<br />
USB K/M<br />
CPU In<br />
Trans<br />
CPU VGA Keyb. Mouse In<br />
USB 1.1<br />
CPU In<br />
Seite 62<br />
Main Power<br />
AC 100-240 V, 47-63 Hz<br />
Am <strong>CATVision</strong>-CON befinden sich folgende Audioschnittstellen:<br />
Line In<br />
Micro In<br />
Speaker<br />
RS 232 Line In Micro In Speaker<br />
Keyb. PS/2 Mouse<br />
Service<br />
Keyb. USB Mouse<br />
USB Trans<br />
Monitor Transmission Red. Power<br />
5V DC/5A<br />
Main Power<br />
AC 100-240 V, 47-63 Hz<br />
Der Ausgang gibt dabei jeweils die Audiosignale aus, die am Eingang des<br />
anderen Endes der Übertragungsstrecke eingespeist werden.<br />
Die Übertragung der Audiosignale erfolgt digital über die CAT x-Kabel <strong>und</strong> ist<br />
somit von der Kabellänge unabhängig.<br />
Die Digitalisierung erfolgt mit einer Auflösung von 18 Bit <strong>und</strong> einer Abtastrate<br />
von 48kHz.<br />
Die Anschlüsse sind als 3,5 mm Klinkenbuchsen ausgeführt.<br />
Die Eingänge Micro In <strong>und</strong> Line In der jeweiligen Geräte können wahlweise,<br />
also nicht gleichzeitig, genutzt werden.<br />
Der Eingang Micro In ist mit einer Vorverstärkung von 20 dB ausgestattet.<br />
Als Beispiel die Verbindungen im wahrscheinlich häufigsten Einsatzfall:<br />
PC CAT<br />
CAT<br />
Peripherie<br />
Vision-CPU Vision-CON<br />
1. Line-Out => Line-In Line-Out Line-Out Micro-In
<strong>Guntermann</strong> & <strong>Drunck</strong> <strong>GmbH</strong> Installations- <strong>und</strong><br />
Bedienungsanleitung <strong>CATVision</strong> (MC)<br />
8.3 RS232<br />
Mit der Schnittstelle RS232 lassen sich externe serielle Geräte am <strong>CATVision</strong><br />
anschließen. Folgende Parameter müssen diese Geräte erfüllen:<br />
Übertragungsrate: 200 Meter max. 38400 bit/s<br />
100 Meter max. 57600 bit/s<br />
übertragbare Signale: TxD, RxD, RTS, CTS, DTR, DSR<br />
8.4 Übertragung von USB 1.1 (transparent)<br />
Mit dem <strong>CATVision</strong>-System überwinden Sie aufgr<strong>und</strong> der eingesetzten<br />
Technologie die übliche 5-Meter Grenze für die Entfernung zwischen CPU <strong>und</strong><br />
USB-Peripheriegerät. Die Übertragungsrate beträgt bis zu 12 MBit/s.<br />
USB-Geräte können mit dem <strong>CATVision</strong>-System bis zu 200 Meter vom<br />
Rechner entfernt angeschlossen werden.<br />
Hinweis zur Kompatibilität des transparenten USB-Anschlusses:<br />
Der USB-Anschluss entspricht den USB 1.1 Spezifikationen, welche das<br />
Design von USB full-speed Geräten regeln. Dennoch garantieren wir nicht,<br />
dass alle USB full-speed Geräte kompatibel zum <strong>CATVision</strong> sind.<br />
Seite 63
<strong>Guntermann</strong> & <strong>Drunck</strong> <strong>GmbH</strong> Installations- <strong>und</strong><br />
Bedienungsanleitung <strong>CATVision</strong> (MC)<br />
9 System-Update<br />
Mit dem <strong>CATVision</strong> haben Sie die Möglichkeit einen Firmware-Update über die<br />
Servicebuchse (2,5mm Klinke) durchzuführen. Diese Buchse finden Sie beim<br />
<strong>CATVision</strong>-CPU auf der Vorderseite des Gerätes.<br />
Servicebuchse für Firmwareupdate<br />
Beim <strong>CATVision</strong>-CON befindet sich diese Buchse auf der Rückseite des<br />
Gerätes.<br />
Diese Servicebuchse ist im alltäglichen Gebrauch für Sie ohne weitere<br />
Bedeutung.<br />
Sollte einer dieser Fälle bei Ihnen vorliegen (Sonderhardware oder<br />
Einspielung von Systemupdates), so kontaktieren Sie bitte unseren Service<br />
unter der Telefonnummer 02739-8901-100 oder service@gdsys.de.<br />
10 System Info<br />
Im Fenster System Info, welches nur über den entsprechenden Eintrag im<br />
Menü FUNCTION aufgerufen werden kann, können Sie keinerlei Einstellungen<br />
vornehmen.<br />
Sie finden hier Informationen über den <strong>CATVision</strong>, die für den Werksservice<br />
von Bedeutung sind.<br />
ESC schließt das Fenster.<br />
Seite 64
<strong>Guntermann</strong> & <strong>Drunck</strong> <strong>GmbH</strong> Installations- <strong>und</strong><br />
Bedienungsanleitung <strong>CATVision</strong> (MC)<br />
11 CV-Power-Erweiterung<br />
Das <strong>CATVision</strong>-System offeriert durch die optionale CV-Power-<br />
Funktionalität (GPIO=General Purpose Input Output) die Möglichkeit, zur<br />
Schaltung elektronischer Signale über größere Distanzen.<br />
Eine konkrete Anwendung dafür ist die Fernbedienung von<br />
RESET <strong>und</strong><br />
Schalten der ATX-Stromversorgung<br />
in einem PC. Dafür werden mit einer einfachen Slot-Blenden-Einsteckkarte in<br />
dem zu bedienenden PC die vorhandenen Taster mit den Steuersignalen des<br />
<strong>CATVision</strong> kombiniert.<br />
11.1 Lieferumfang<br />
Zum Anschluss am <strong>CATVision</strong>-CPU<br />
1 x CV-Power Slotkarte (ATX-Modul) zum Einbau<br />
im PC<br />
2 x 2pol. Verbindungskabel-0,4 zur Verbindung zwischen Motherboard<br />
<strong>und</strong> CV-Power (2-adrig Buchse/Buchse)<br />
2 x 2pol. Verbindungskabel-0,4 zur Verlängerung des Buchse-Buchse-<br />
Kabels (2-adrig Stecker/Buchse)<br />
1 x Power-Cord-2 Anschlusskabel für den Anschluss der<br />
Slotkarte CV-Power mit dem<br />
<strong>CATVision</strong>-CPU<br />
(3pol-Stecker auf RJ9-Stecker)<br />
Zum Anschluss am <strong>CATVision</strong>-CON<br />
1 x 3-pol. Kabelbuchse zum Anschluss an das<br />
Tasterverbindungskabel<br />
Seite 65
<strong>Guntermann</strong> & <strong>Drunck</strong> <strong>GmbH</strong> Installations- <strong>und</strong><br />
Bedienungsanleitung <strong>CATVision</strong> (MC)<br />
11.2 Installationsanleitung<br />
11.2.1 Einbau im PC<br />
Die Verbindung des CV-Power (ATX-Modul) mit dem Motherboard des<br />
Rechners ermöglicht die Durchführung von<br />
RESET <strong>und</strong><br />
Schalten der ATX-Stromversorgung<br />
Zum Schalten der ATX-Stromversorgung gehen Sie bitte folgendermaßen vor:<br />
Öffnen Sie die seitliche Verkleidung des PC<br />
Montieren Sie das ATX-Modul CV-Power in einen freien<br />
Erweiterungssteckplatz. Sie benötigen dabei keinen PCI-, ISA- oder<br />
AGP-Steckplatz, sondern lediglich die Montageposition an der Rückseite<br />
des Rechners.<br />
Ziehen Sie das vom ATX-Einschalter an der PC-Vorderseite kommende<br />
zweiadrige Kabel an der Hauptplatine (Motherboard) ab <strong>und</strong> stecken<br />
dieses auf den Stecker Pwr-Sw ATX-Modul CV-Power.<br />
Die 2-polige Steckerpositionen von oben<br />
nach unten betrachtet:<br />
Pwr-Sw – Power Verbindung zum ATX-Einschalter<br />
Pwr-MB – Power Verbindung zum Motherboard<br />
(Platzhalter)<br />
Res-MB – Reset Verbindung zum Motherboard<br />
Res-Sw – Reset Verbindung zum Reset-Schalter<br />
Stecken Sie nun in den Stecker Pwr-MB das 2 polige<br />
Verbindungskabel. Verbinden Sie das andere Ende mit der<br />
Steckposition auf dem Motherboard, wo zuvor das Kabel des ATX-<br />
Einschalters eingesteckt war. Sollte die Länge des 2-poligen<br />
Verbindungskabels nicht ausreichen, so verwenden Sie in diesem Fall<br />
bitte das im Lieferumfang enthaltene Verlängerungskabel.<br />
Seite 66
<strong>Guntermann</strong> & <strong>Drunck</strong> <strong>GmbH</strong> Installations- <strong>und</strong><br />
Bedienungsanleitung <strong>CATVision</strong> (MC)<br />
Zur Herstellung der Reset-Verbindung verfährt man analog zu dem oben<br />
beschriebenen Verfahren. Hier verbinden Sie die Stecker Res-Sw mit dem<br />
Resetschalter <strong>und</strong> verbinden anschließend den Stecker Res-MB des Moduls<br />
mit dem Motherboard.<br />
Hat man am PC-Gehäuse keinen Reset-Taster, möchte diesen aber dennoch<br />
aus der Ferne auslösen, so ist dieses ohne weiteres möglich. In diesem Fall<br />
wird lediglich Res-MB mit einem 2adrigen Kabel mit dem passenden Anschluß<br />
für den Reset-Taster auf der Hauptplatine verb<strong>und</strong>en.<br />
Hinweis:<br />
Zur exakten Feststellung der Kontakte auf dem Motherboard schauen Sie bitte<br />
in die Beschreibung des Motherboard.<br />
Typische Anwendung: Prinzipschaltung zur Ansteuerung von ATX-Power<br />
<strong>und</strong> –Reset:<br />
V+ 5V (Pin 2)<br />
O2 RESET# (Pin 3)<br />
O2 ATXPWR# (Pin 1)<br />
2pol-Verbindung zum<br />
ATX-Einschalter am<br />
PC-Gehäuse<br />
(Pwr-SW)<br />
2pol-Verbindung zu<br />
PWR-SW Anschluß<br />
auf PC-Hauptplatine<br />
(Pwr-MB)<br />
2pol-Verbindung zum<br />
Resettaster am PC-<br />
Gehäuse<br />
(Res-Sw)<br />
2pol-Verbindung zu<br />
Reset-Anschluß auf<br />
PC-Hauptplatine<br />
(Res-MB)<br />
Die Fernauslösung von Reset oder Ein-/Ausschalten des Rechners funktioniert<br />
nur bei eingeschalteten <strong>und</strong> verb<strong>und</strong>enen (über CAT-x Kabel) <strong>CATVision</strong>-CPU<br />
<strong>und</strong> <strong>CATVision</strong>-CON. Bei ordnungsgemäßer Verdrahtung funktionieren die<br />
Taster am PC ganz wie gewohnt auch weiterhin.<br />
Seite 67
<strong>Guntermann</strong> & <strong>Drunck</strong> <strong>GmbH</strong> Installations- <strong>und</strong><br />
Bedienungsanleitung <strong>CATVision</strong> (MC)<br />
11.2.2 Verbinden mit <strong>CATVision</strong>-CPU<br />
Um eine Verbindung vom ATX-Modul CV-Power mit dem <strong>CATVision</strong>-CPU<br />
herzustellen, verwenden Sie bitte das im Lieferumfang enthaltene Kabel<br />
PowerCord-2.<br />
Stecken Sie die 3-polige Kabelbuchse des Kabels in den 3-poligen<br />
Flanschstecker des <strong>CATVision</strong>-CPU. Dieser ist auf der Rückseite des<br />
Gerätes angebracht.<br />
(3-poliger Flanschstecker)<br />
Stecken Sie anschließend den RJ9-Stecker in die RJ-9 Buchse des<br />
ATX-Modul CV-Power.<br />
11.2.3 Verbinden des Tasters mit dem <strong>CATVision</strong>-CON<br />
Bevor Sie Ihren Taster mit dem <strong>CATVision</strong>-CON verbinden, muss Ihr Taster<br />
mit der im Lieferumfang enthaltenen 3-poligen Kabelbuchse verb<strong>und</strong>en<br />
werden.<br />
Anhand der nachfolgenden Abbildungen ersehen Sie, welche Leitungen mit<br />
welchem PIN verb<strong>und</strong>en werden müssen.<br />
Seite 68
<strong>Guntermann</strong> & <strong>Drunck</strong> <strong>GmbH</strong> Installations- <strong>und</strong><br />
Bedienungsanleitung <strong>CATVision</strong> (MC)<br />
Prinzipschaltung mit Tastern für Reset <strong>und</strong> ATX-Power-On/Off:<br />
I1 SW1_ATXPWR# (Pin 1)<br />
I2 SW2_RESET# (Pin 3)<br />
- 0V (Pin 2)<br />
Nachdem Sie Ihren Taster mit der 3-poligen Kabelbuchse verb<strong>und</strong>en haben,<br />
stecken Sie diese in den 3-poligen Flanschstecker des <strong>CATVision</strong>-CON.<br />
Dieser ist auf der Rückseite des Gerätes angebracht.<br />
(3-poliger Flanschstecker)<br />
Seite 69
<strong>Guntermann</strong> & <strong>Drunck</strong> <strong>GmbH</strong> Installations- <strong>und</strong><br />
Bedienungsanleitung <strong>CATVision</strong> (MC)<br />
12 Technische Daten<br />
12.1 <strong>CATVision</strong><br />
Video:<br />
Auflösung: max. 1920 x 1440 Bildpunkte<br />
(abhängig von Kabel <strong>und</strong> Videosignal)<br />
Übertragungslänge: 10 bis max. 300 Meter<br />
(abhängig von Kabel, Auflösung <strong>und</strong> Videosignal)<br />
übertragbare Signale: RGBHV, RGsB oder RsGsBs<br />
Keyboard / Mouse:<br />
(RECHNER- + USERSEITIG)<br />
Schnittstelle/Übertragung: USB, PS/2 / Intelli-Maus, SUN-USB<br />
über Adaption: Sun, MAC<br />
Mischbetrieb möglich<br />
RS232 (optional):<br />
Übertragungsrate: bis 100 Meter max. 57600 bit/s<br />
bis 200 Meter max. 38400 bit/s<br />
übertragbare Signale: TxD, RxD, RTS, CTS, DTR, DSR<br />
Audio (optional):<br />
Auflösung: 18 bit digital<br />
Abtastrate: 48 kHz<br />
Bandbreite: 22 kHz<br />
Mikrofon-Vorverstärkung: 20dB<br />
USB 1.1 (optional)<br />
Reichweite: 200 Meter<br />
Unterstützung: High Power Geräte (bis 500 mA)<br />
Übertragungsrate: bis 12 Mbits/s<br />
Übertragungskabel: CAT x - Kabel oder höher (x = 5, 6, 7)<br />
Seite 70
<strong>Guntermann</strong> & <strong>Drunck</strong> <strong>GmbH</strong> Installations- <strong>und</strong><br />
Bedienungsanleitung <strong>CATVision</strong> (MC)<br />
Gehäusemaße: <strong>CATVision</strong>-CPU<br />
( B x H x T in mm ) 210 x 44 x 210 ( 19“ / 1HE )<br />
<strong>CATVision</strong>-CON<br />
210 x 44 x 210 ( 19“ / 1 HE )<br />
Gewichte:<br />
<strong>CATVision</strong>-CPU <strong>CATVision</strong>-CON<br />
ohne USB 1,20 kg ohne USB 1,10 kg<br />
mit USB 1,28 kg mit USB 1,18 kg<br />
Spannungsversorgung:<br />
Hauptstromversorgung: 100 – 240 V primär<br />
50 – 60 Hz<br />
Red. Stromversorgung: DC 12V<br />
5 A<br />
Stromaufnahme (max. Werte):<br />
Bei 100 V (Main) Bei 240 V (Main) Bei 12 V (red.)<br />
<strong>CATVision</strong>-CPU 140 mA 82 mA 600 mA<br />
<strong>CATVision</strong>-CON 240 mA 100 mA 900 mA<br />
Leistungsaufnahme (max. Werte):<br />
Bei 100 V (Main) Bei 240 V (Main) Bei 12 V (red.)<br />
<strong>CATVision</strong>-CPU 9,08 W 9,78 W 7,2 W<br />
<strong>CATVision</strong>-CON 11,38 W 11,46 W 9,96 W<br />
Wärmeabgabe (max. Werte):<br />
Bei 100 V (Main) Bei 240 V (Main) Bei 12 V (red.)<br />
<strong>CATVision</strong>-CPU 9,08 W 9,78 W 7,2 W<br />
<strong>CATVision</strong>-CON 11,38 W 11,46 W 9,96 W<br />
Temperaturbereiche:<br />
Betrieb: 5 bis 40° C<br />
rel. Luftfeuchte < 80%, nicht kondensierend<br />
Lagerung: -10 bis 55°C, < 85 % Luftfeuchtigkeit<br />
Seite 71
<strong>Guntermann</strong> & <strong>Drunck</strong> <strong>GmbH</strong> Installations- <strong>und</strong><br />
Bedienungsanleitung <strong>CATVision</strong> (MC)<br />
12.2 <strong>CATVision</strong>-MC<br />
Video<br />
Auflösung: max. 1920 x 1440 Bildpunkte<br />
(abhängig von Kabel <strong>und</strong> Videosignal)<br />
Übertragungslänge: 10 bis max. 300 Meter<br />
(abhängig von Kabel, Auflösung <strong>und</strong><br />
Videosignal)<br />
übertragbare Signale: RGBHV, RGsB oder RsGsBs<br />
Keyboard / Mouse<br />
(RECHNER- + USERSEITIG)<br />
Schnittstelle/Übertragung: USB, PS/2 / Intelli-Maus, SUN-USB,<br />
über Adaption: Sun, MAC<br />
Mischbetrieb möglich<br />
RS232 (optional)<br />
Übertragungsrate: bis 100 Meter max. 57600 bit/s<br />
bis 200 Meter max. 38400 bit/s<br />
übertragbare Signale: TxD, RxD, RTS, CTS, DTR, DSR<br />
Audio (optional)<br />
Auflösung: 18 bit digital<br />
Abtastrate: 48 kHz<br />
Bandbreite: 22 kHz<br />
Mikrofon-Vorverstärkung: 20dB<br />
USB 1.1 (optional)<br />
Reichweite: 200 Meter<br />
Unterstützung: High Power Geräte (bis 500 mA)<br />
Übertragungsrate: bis 12 Mbits/s<br />
Übertragungskabel: CAT x - Kabel oder höher (x = 5, 6, 7)<br />
Seite 72
<strong>Guntermann</strong> & <strong>Drunck</strong> <strong>GmbH</strong> Installations- <strong>und</strong><br />
Bedienungsanleitung <strong>CATVision</strong> (MC)<br />
Gehäusemaße <strong>CATVision</strong>-MC 2 (3,4)-CPU; <strong>CATVision</strong>-MC 3 (4)-CON<br />
Twin <strong>CATVision</strong>-MC 2-CPU<br />
( B x H x T in mm ) 435 x 44 x 210 (19“ / 1 HE)<br />
<strong>CATVision</strong>-MC2-CON<br />
210 x 44 x 210 (19“ / 1 HE)<br />
Gewichte:<br />
<strong>CATVision</strong>-MC2-CPU <strong>CATVision</strong>-MC2-CON<br />
ohne USB 1,90 kg ohne USB 1,35 kg<br />
mit USB 1,98 kg mit USB 1,43 kg<br />
<strong>CATVision</strong>-MC3-CPU <strong>CATVision</strong>-MC3-CON<br />
ohne USB 2,10 kg ohne USB 2,00 kg<br />
mit USB 2,18 kg mit USB 2,08 kg<br />
<strong>CATVision</strong>-MC4-CPU <strong>CATVision</strong>-MC4-CON<br />
ohne USB 2,15 kg ohne USB 2,00 kg<br />
mit USB 2,23 kg mit USB 2,08 kg<br />
Spannungsversorgung:<br />
Hauptstromversorgung: 100 – 240 V primär<br />
50 – 60 Hz<br />
Red. Stromversorgung: DC 12V<br />
5 A<br />
Stromaufnahme (max. Werte):<br />
Bei 100 V (Main) Bei 240 V (Main) Bei 12 V (red.)<br />
<strong>CATVision</strong>-MC-CPU 410 mA 200 mA 2 A<br />
<strong>CATVision</strong>-MC-CON 310 mA 160 mA 1,5 A<br />
Leistungsaufnahme (max. Werte):<br />
Bei 100 V (Main) Bei 240 V (Main) Bei 12 V (red.)<br />
<strong>CATVision</strong>-MC-CPU 26,0 W 26,51 W 21,24 W<br />
<strong>CATVision</strong>-MC-CON 19,51 W 21,96 W 16,56 W<br />
Wärmeabgabe (max. Werte):<br />
Bei 100 V (Main) Bei 240 V (Main) Bei 12 V (red.)<br />
<strong>CATVision</strong>-MC-CPU 26,0 W 26,51 W 21,24 W<br />
<strong>CATVision</strong>-MC-CON 19,51 W 21,96 W 16,56 W<br />
Temperaturbereiche:<br />
Betrieb: 5 bis 40° C<br />
rel. Luftfeuchte < 80%, nicht kondensierend<br />
Lagerung: -10 bis 55°C, < 85 % Luftfeuchtigkeit<br />
Seite 73
<strong>Guntermann</strong> & <strong>Drunck</strong> <strong>GmbH</strong> Installations- <strong>und</strong><br />
Bedienungsanleitung <strong>CATVision</strong> (MC)<br />
13 Anhang<br />
13.1 HotKey-Belegungstabelle<br />
Funktion Default-HotKey Persönlicher<br />
HotKey<br />
Aufruf des Function-<br />
Menüs<br />
CTRL+ NUM Seite 29<br />
Permanent Access CTRL + DRUCK Seite 40<br />
Freischaltung der<br />
Bedienung im<br />
Protected Mode<br />
CTRL + DRUCK Seite 58<br />
Aufruf des IVT-Modus CTRL+ ROLLEN Seite 19<br />
Verschieben des IVT-<br />
Menüs<br />
SHIFT+ PFEIL-<br />
Tasten<br />
13.2 IVT-Settings<br />
Seite im<br />
Handbuch<br />
Seite 22<br />
Parameter Konfigurationstaste<br />
Aufruf des IVT-Modus CTRL + ROLLEN<br />
Geringste Verstärkung POS 1<br />
Höchste Verstärkung ENDE<br />
+ 5 Verstärkung CTRL + Pfeil <br />
- 5 Verstärkung CTRL + Pfeil <br />
+ 1 Verstärkung Pfeil <br />
- 1 Verstärkung Pfeil <br />
Verwerfen der neuen Einstellungen ESC<br />
Seite 74
<strong>Guntermann</strong> & <strong>Drunck</strong> <strong>GmbH</strong> Installations- <strong>und</strong><br />
Bedienungsanleitung <strong>CATVision</strong> (MC)<br />
13.3 Passwort<br />
Für den OpenAccess muss kein Name <strong>und</strong> Passwort eingegeben werden.<br />
Wollen Sie Konfigurationen am System vornehmen, müssen Sie sich als<br />
SUPVERVISOR anmelden!<br />
SUPERVISOR<br />
LOGIN CVM<br />
Name:<br />
Password:<br />
Please enter your login:<br />
ESC Enter<br />
Bitte beachten Sie die Groß/Kleinschreibung.<br />
Ersetzen Sie das voreingestellte Passwort bitte durch ein<br />
individuelles <strong>und</strong> sicheres Passwort.<br />
Seite 75<br />
4658
<strong>Guntermann</strong> & <strong>Drunck</strong> <strong>GmbH</strong> Operating Instructions<br />
<strong>CATVision</strong> (MC)<br />
INFORMATION<br />
Warning<br />
IN ORDER TO AV OID THE RISK OF AN ELECTRIC SHOCK THE DEVICE IS<br />
NOT TO BE OPENED OR THE COVERS NOT TO BE REMOVED.<br />
IN CASE OF AN ERROR PLEASE CONTACT OUR TECHNICIANS.<br />
BEFORE YOU T AKE THIS DE VICE INTO OP ERATION PLEASE R EAD THE OPERATING<br />
INSTRUCTIONS CAREFULLY.<br />
FOLLOW ALL THE WARNINGS OR OPERATING HINT S WHICH ARE ON THE DEVICE OR I N THE<br />
OPERATING INSTRUCTIONS.<br />
KEEP THE OPERATING INSTRUCTIONS IN A SAFE PLACE FOR LATER USE.<br />
POWER SUPPLY : USE THIS DEVI CE ONLY WITH THE DELIVERED OR IN THE OPER ATING<br />
INSTRUCTIONS DESCRIBED AC-ADAPTOR. CONNECT THIS DEVICE ONLY TO A N EARTHED<br />
VOLTAGE SOURCE.<br />
VOLTAGE-FREENESS: MAKE SURE THAT THIS DEVICE IS V OLTAGE-FREE BEFORE<br />
INSTALLATION. PULL OFF THE POWER PLUG OR THE POWER SUPPLY.<br />
CABLES: ONLY USE ORIGINAL G&D CABLES. DAMAGES WHICH SOURCE FROM THE USE OF<br />
FOREIGN CABLES ARE NOT INC LUDED IN T HE WARRANTY REGULATIONS. AVOID TRUMPLE<br />
TRAPS WHEN LAYING THE CABLES.<br />
VENTING SLOTS: VENTING SLOTS PREVENT AN O VEHREATING OF THIS DEVICE . DO NOT<br />
COVER THEM.<br />
EXCLUSION OF GUARANTEE: G&D DOES NO T TAKE OVER ANY GUARANTEE FOR DEVICES<br />
WHICH<br />
- WERE NOT USED ACCORDINGLY.<br />
- WERE REPAIRED OR MODIFIED BY NON AUTHORIZED PERSONS.<br />
- SHOW BIG OUTER DAMAGES NOT VISIBLE WHEN DELIVERED.<br />
- WERE DAMAGED BY FOREIGN ACCESSORIES.<br />
- G&D IS NOT RESPONSIBLE FOR CONSE QUENTIAL DAMAGE OF ANY KIND WHICH<br />
POSSIBLY COULD OCCUR WHEN USING THE PRODUCTS.<br />
RANGE: THIS DEVICE IS CONSTRUCTED FOR THE USE IN THE IN TERIOR. AVOID EXTREME<br />
COLDNESS, HEAT OR MOISTURE.<br />
CONFORMITY: THIS DEVICE FULF ILL THE N EEDS OF THE LO W VOLTAGE DIRECTIVE 73/23<br />
EWG RESPECTIVLY 93/68 EWG IN DEPENDENCE ON EN60950 (2000) AND CORRESPONDS TO<br />
THE MAIN PR OTECTIVE DEMANDS OF THE PROVISION FOR ELECTROMA GNETIC<br />
COMPATIBILITY (89/336/EWG) AND THE STANDARDS EN55024 (1998) +A1, A2, EN61000-<br />
6-2 (2001), EN61000-3-2 (2000) + A2, EN61000-3-3 (1995) + A1 AND EN55022 CLASS B<br />
(1998+ A1, A2).<br />
page 2
<strong>Guntermann</strong> & <strong>Drunck</strong> <strong>GmbH</strong> Operating Instructions<br />
<strong>CATVision</strong> (MC)<br />
Table of Content <strong>CATVision</strong><br />
1 Description .............................................................................................................6<br />
2 Scope of Delivery...................................................................................................7<br />
3 Installation ..............................................................................................................8<br />
3.1 Installing of the transmitting unit.....................................................................8<br />
3.1.1 Videoconnection at <strong>CATVision</strong>-MC-CPU .............................................9<br />
3.1.2 Optional Connections...........................................................................9<br />
3.2 Installation of the receiving unit....................................................................10<br />
3.2.1 Videoconnection at <strong>CATVision</strong>-MC-CON...........................................11<br />
3.2.2 Optional Connections.........................................................................11<br />
4 Power Supply .......................................................................................................13<br />
4.1 In general .....................................................................................................13<br />
4.2 Note for USB-operation................................................................................13<br />
5 Operation ..............................................................................................................14<br />
5.1 Switching on the <strong>CATVision</strong>-System............................................................14<br />
5.2 System Informationen Windows...................................................................14<br />
5.2.1 Keyboard/Mouse local not attached...................................................15<br />
5.2.2 Remote Unit not attached...................................................................15<br />
5.2.3 Missing of the CAT-x-connection and local Keyboard/Mouse............16<br />
5.3 Getting into Operation / LEDs ......................................................................17<br />
5.4 IVT – Individual Video Tuning ......................................................................19<br />
5.4.1 Authorization ......................................................................................19<br />
5.4.2 Calling up the IVT Mode.....................................................................20<br />
5.4.2.1 Call up via Function Menu........................................................21<br />
5.4.2.2 Call up via Keyboard Combination ...........................................21<br />
5.4.3 Advices for Setting the IVT.................................................................21<br />
5.4.4 Video Tuning Settings ........................................................................22<br />
5.4.4.1 Changing video channels .........................................................23<br />
5.4.4.2 Automatic Settings ...................................................................23<br />
5.4.4.3 Manual Settings........................................................................24<br />
5.4.4.3.1 Establishing the Video Boost...............................................24<br />
5.4.4.3.2 Setting Noise Suppression ..................................................25<br />
5.4.4.3.3 Fine Tuning..........................................................................26<br />
5.4.4.3.4 Setting the Run Time Delay Compensation ........................26<br />
5.4.5 Copy the IVT Settings ........................................................................27<br />
5.4.6 Tested Resolutions.............................................................................27<br />
5.4.7 Recommended Cables.......................................................................27<br />
6 Configuration........................................................................................................28<br />
6.1 Console Setup..............................................................................................29<br />
6.1.1 ScreenSaver Settings.........................................................................29<br />
6.1.2 AutoLogout Setting.............................................................................30<br />
6.1.3 Defining the Console Name ...............................................................30<br />
6.1.4 Activating the Channel “Display” ........................................................31<br />
6.1.5 Setting the Display Position + Colour.................................................31<br />
6.1.6 Setting the Menu Position & Size.......................................................32<br />
6.1.7 Settings of the extended Mouse Support ...........................................32<br />
6.1.8 OSD SyncMod....................................................................................33<br />
6.1.9 Keyboard Layout ................................................................................33<br />
page 3
<strong>Guntermann</strong> & <strong>Drunck</strong> <strong>GmbH</strong> Operating Instructions<br />
<strong>CATVision</strong> (MC)<br />
6.2 Config...........................................................................................................34<br />
6.2.1 IVT......................................................................................................35<br />
6.2.2 System Config....................................................................................36<br />
6.2.2.1 Defining the first Hotkey ...........................................................37<br />
6.2.2.2 Defining the Double-HotKey.....................................................37<br />
6.2.2.3 Set System Defaults (Supervisor Function) .............................38<br />
6.2.2.4 Remote Video (Dark-Switching)...............................................38<br />
6.2.2.5 Local Video (Dark-Switching) ...................................................39<br />
6.2.2.6 Permanent Access ...................................................................39<br />
6.2.2.7 Defining the Time Out ..............................................................40<br />
6.2.2.8 Enabling the Protected Mode ...................................................40<br />
6.2.2.9 Keyb. LED flash........................................................................41<br />
6.2.2.10 Defining the local Scan Code ...................................................41<br />
6.2.2.11 Defining the remote Scan Code ...............................................41<br />
6.2.2.12 USB Multimedia Keyboard .......................................................41<br />
6.2.2.13 USB SUN Keyboard mode .......................................................41<br />
6.2.2.14 USB SUN Keyboard layout ......................................................42<br />
6.2.2.15 Temperature Warning ..............................................................42<br />
6.2.2.16 Keyboard Type Local ...............................................................43<br />
6.2.2.17 Keyboard Type Remote ...........................................................43<br />
6.2.2.18 Signal type input.......................................................................44<br />
6.2.2.19 Remote sync ............................................................................44<br />
6.2.3 User Account......................................................................................44<br />
6.2.3.1 Account Enable / Disable .........................................................45<br />
6.2.3.2 Defining the User Name ...........................................................46<br />
6.2.3.3 Set Account Defaults................................................................47<br />
6.2.3.4 IVT Access ...............................................................................47<br />
6.2.3.5 System Config Access .............................................................47<br />
6.2.3.6 User Account Access ...............................................................48<br />
6.2.3.7 Change Password ....................................................................48<br />
6.3 Mouse Utility.................................................................................................49<br />
7 System Operation ................................................................................................51<br />
7.1 Possibilities of Access..................................................................................51<br />
7.1.1 OpenAccess.......................................................................................51<br />
7.1.2 Access via Defined User ....................................................................52<br />
7.1.3 Access as Supervisor.........................................................................53<br />
7.2 Automatic Switching.....................................................................................53<br />
7.3 Manual Hold Function (Permanent Access).................................................54<br />
7.4 Protected Mode............................................................................................55<br />
7.5 Dark Switching of the Monitor ......................................................................56<br />
7.5.1 Dark switching whilst automatic switching .........................................56<br />
7.5.2 Dark switching whilst permanent access ...........................................56<br />
7.6 Manual Logout .............................................................................................57<br />
8 Optional Equipment.............................................................................................58<br />
8.1 Delay ............................................................................................................58<br />
8.2 Audio ............................................................................................................59<br />
8.3 RS232 ..........................................................................................................60<br />
8.4 USB 1.1 transmission...................................................................................60<br />
9 System-Update.....................................................................................................61<br />
10 System Info...........................................................................................................61<br />
page 4
<strong>Guntermann</strong> & <strong>Drunck</strong> <strong>GmbH</strong> Operating Instructions<br />
<strong>CATVision</strong> (MC)<br />
11 CV-Power-Expansion...........................................................................................62<br />
11.1 Scope of Delivery .........................................................................................62<br />
11.2 Installation ....................................................................................................63<br />
11.2.1 Installation in the PC ..........................................................................63<br />
11.2.2 Conncetion with <strong>CATVision</strong>-CPU.......................................................65<br />
11.2.3 Connection of the key switch with <strong>CATVision</strong>-CON...........................65<br />
12 Specifications.......................................................................................................67<br />
12.1 <strong>CATVision</strong> ....................................................................................................67<br />
12.2 <strong>CATVision</strong>-MC .............................................................................................69<br />
13 Appendix...............................................................................................................71<br />
13.1 HotKey Seizure ............................................................................................71<br />
13.2 IVT Settings..................................................................................................71<br />
13.3 Password .....................................................................................................72<br />
page 5
<strong>Guntermann</strong> & <strong>Drunck</strong> <strong>GmbH</strong> Operating Instructions<br />
<strong>CATVision</strong> (MC)<br />
1 Description<br />
The <strong>CATVision</strong> system consists of a transmitter and a receiver. It allows<br />
operating a console from a distance up to 300 m (max value, dependent on the<br />
resolution and the used cable). Also a local console can be connected to the<br />
transmitter. You can choose between local and remote operation.<br />
If you use a <strong>CATVision</strong>-MC-System, your PC can be equipped with up to 4<br />
Video-Outlets.<br />
Following products are available (differentiation by existing videochannel/s)<br />
Product Videochannel/s<br />
<strong>CATVision</strong> 1 videochannel<br />
<strong>CATVision</strong>-MC2 2 videochannels<br />
<strong>CATVision</strong>-MC3 3 videochannels<br />
<strong>CATVision</strong>-MC4 4 videochannels<br />
In general in this manual is spoken of a <strong>CATVision</strong>-System, since all products<br />
differ in the number of transmittable videochannels.<br />
Exceptions in this manual are:<br />
Chapter 2 (Scope of delivery),<br />
Chapter 3 (Installation) <strong>und</strong><br />
Chapter 5.4.4.1 (Change of Videochannel).<br />
The transmission of the monitor, keyboard and mouse signals is done via<br />
CAT-x cable (x = 5, 6, 7). By the possibility of individual video adjustment<br />
different cable qualities and lengths are balanced so that the user is always<br />
getting the optimum picture.<br />
The adjustment of the video signal happens automatically. A manual<br />
adjustment is possible from the remote console via IVT (see chapter 5.4).<br />
Via CAT-x cable the system can also transmit audio and RS232 signals besides<br />
the monitor, keyboard and mouse data. By using an additional CAT-x cable,<br />
USB-signals can be transmitted transparent.<br />
page 6
<strong>Guntermann</strong> & <strong>Drunck</strong> <strong>GmbH</strong> Operating Instructions<br />
<strong>CATVision</strong> (MC)<br />
2 Scope of Delivery<br />
Transmitting unit <strong>CATVision</strong>-CPU or<br />
<strong>CATVision</strong>-MC-CPU<br />
Receiving unit <strong>CATVision</strong>-CON or<br />
<strong>CATVision</strong>-MC-CON<br />
Connecting cable Video/Keyboard/Mouse PS/2 CPU-2<br />
- for connecting the <strong>CATVision</strong>-CPU:<br />
1 x MDR-20 for monitor, keyboard and mouse port<br />
- for connecting the computer:<br />
1 x PS/2 for mouse port (incl. 9pole adaptor for serial mouse)<br />
1 x PS/2 (incl. AT adaptor) for keyboard port<br />
1 x HD-15 connector for VGA port<br />
and USB Keyboard/ Mouse USB-AM/BM-2<br />
Power cable PowerCable-2<br />
Transmission cable (order separately) K-C7-x<br />
Optional:<br />
- 1 x RS232-M/F-2 -> for connecting a serial terminal device<br />
- 2 x Audio-M/M-2 -> for the audio port<br />
- K-C7-x -> for transparent USB 1.1 transmission<br />
Additional Scope of Delivery for <strong>CATVision</strong>-MC:<br />
- VGA-M/M-2 -> HD15 (jack/jack) Video connection cable;<br />
Number depends on existing videochannels<br />
page 7
<strong>Guntermann</strong> & <strong>Drunck</strong> <strong>GmbH</strong> Operating Instructions<br />
<strong>CATVision</strong> (MC)<br />
3 Installation<br />
The installation of <strong>CATVision</strong> and <strong>CATVision</strong>-MC differs in the number of<br />
connectable video sources. As an installation example the manual focus is<br />
therefore on the <strong>CATVision</strong>. The connection of additional video sources will be<br />
explained separately.<br />
3.1 Installing of the transmitting unit<br />
Mouse port<br />
for local console<br />
Mouse PS/2<br />
Port of the keyboard<br />
for the local console<br />
Red. Power<br />
RS 232<br />
Keyb PS/2. 12V DC/0,6A Transmission<br />
Monitor<br />
Connection for<br />
the CAT-x cable<br />
to the <strong>CATVision</strong>-CON<br />
Line In Line Out<br />
Alternative: connection for keyboard/mouse<br />
via USB-AM/BM-2 to the PC<br />
USB K/M<br />
CPU<br />
Trans<br />
VGA Keyb. Mouse CPU<br />
Port for the monitor<br />
of the local console<br />
USB 1.1<br />
CPU<br />
100-240V/60-50Hz<br />
140-82mA<br />
Connection for the CPU-x cable<br />
to the local PC; VGA, PS/2,<br />
keyboard and PS/2 mouse<br />
Disconnect monitor, keyboard and mouse from the computer.<br />
Monitor:<br />
Connect the 15 pole Sub HD connector of the CPU-x cable (x = 2, 4,<br />
6 or 9 m) to the VGA interface of the computer.<br />
Keyboard/Mouse (PS/2):<br />
Establish a connection to the keyboard and mouse interface of the<br />
computer by means of the two PS/2 connectors of the CPU-x cable.<br />
Both connectors have corresponding symbols.<br />
Alternativ<br />
Keyboard/Mouse (USB)<br />
Establish a connection to the keyboard and mouse interface of the<br />
computer by means of the two USB connectors of the USB-<br />
AM/BM-2-cable<br />
page 8
<strong>Guntermann</strong> & <strong>Drunck</strong> <strong>GmbH</strong> Operating Instructions<br />
<strong>CATVision</strong> (MC)<br />
Then connect the other end of the CPU-x cable (MDR 20 = Mini<br />
Delta Ribbon 20pole) with the interface VGA Keyb. Mouse CPU of<br />
<strong>CATVision</strong>.<br />
Connection of the transmission cable<br />
Connect the K-C7-x extension cable to the TRANSMISSION (jack)<br />
interface of the transmitting unit.<br />
Connection of the local console<br />
Connect the connector of the local keyboard and the local mouse to<br />
the keyboard interface or rather MOUSE PS/2 at the transmitting unit<br />
<strong>CATVision</strong>-CPU.<br />
Connect the local monitor to the MONITOR jack.<br />
3.1.1 Videoconnection at <strong>CATVision</strong>-MC-CPU<br />
Connect the 15 pole Sub HD connector of the VGA-M/M-2-cabel to<br />
the additional VGA interface of the computer.<br />
Then connect the other end of the VGA-M/M-2-cabel with the<br />
interfaces VGA CPU 2 – 4.<br />
3.1.2 Optional Connections<br />
Port for the<br />
Connection for the CAT-x cable<br />
K-C7-x for USB 1.1<br />
RS232-M/F-2 to the serial Audio connection<br />
port of the local PC via Audio-M/M-2<br />
Connection to the USB-Port<br />
of the local PC<br />
Mouse PS/2<br />
Red. Power<br />
RS 232<br />
Keyb PS/2. 12V DC/0,6A Transmission<br />
Line In Line Out<br />
Monitor<br />
USB K/M<br />
CPU<br />
Trans<br />
VGA Keyb. Mouse CPU<br />
USB 1.1<br />
Connection of RS232<br />
Connect the RS232-M/F-x connecting cable (x=2, 4, 6 or 9 m) with a<br />
COM interface of the computer and the RS232 interface (optional) of<br />
the <strong>CATVision</strong>-CPU (seizure 1:1).<br />
page 9<br />
CPU<br />
100-240V/60-50Hz<br />
140-82mA
<strong>Guntermann</strong> & <strong>Drunck</strong> <strong>GmbH</strong> Operating Instructions<br />
<strong>CATVision</strong> (MC)<br />
Connection of Audio<br />
Connect the Audio-M/M-2 connecting cable with the line-out interface<br />
of the computer (or another audio device) and the Line IN interface<br />
(optional) of the <strong>CATVision</strong>-CPU.<br />
Connection of USB1.1<br />
Connect the jack USB - Typ B of the delivered USB-cabel to the<br />
interface CPU of the CPU unit. Connect the TYP A jack of the USBcabel<br />
with the appropriate USB-Port of the local PC.<br />
Connection of the transmission cable<br />
Connect the K-C7-x extension cable within the USB 1.1 section to the<br />
TRANS (jack) interface of the transmitting unit.<br />
Special note to the compatiblity of the transparent USB 1.1<br />
connection:<br />
The USB-conncection complies with the specification of the USB 1.1<br />
standard, which defines the design of USB full-speed devices.<br />
However, we do not gurantee, that all USB full-speed devices are<br />
compatibel to the <strong>CATVision</strong>.<br />
3.2 Installation of the receiving unit<br />
Port of the keyboard<br />
for the remote console<br />
RS 232 Line In Micro In Speaker<br />
Keyb. PS/2 Mouse<br />
Service<br />
Mouse port<br />
for remote console<br />
Connection for keyboard/mouse<br />
of the remote console<br />
Keyb. USB Mouse<br />
USB Trans<br />
12V DC/0,9A<br />
Monitor Transmission Red. Power<br />
Connection for the<br />
CAT-x cable to the<br />
<strong>CATVision</strong>-CPU<br />
Port for the monitor<br />
of the remote console<br />
page 10<br />
100-240V/60-50Hz<br />
0,24-0,1A
<strong>Guntermann</strong> & <strong>Drunck</strong> <strong>GmbH</strong> Operating Instructions<br />
<strong>CATVision</strong> (MC)<br />
Set up the receiving unit.<br />
Connect the K-C7-x extension cable to the TRANSMISSION interface<br />
of the receiving unit <strong>CATVision</strong>-CON.<br />
Connect the monitor to the MONITOR jack.<br />
Connect the keyboard to the Keyb. interface at <strong>CATVision</strong>-CON.<br />
Connect the mouse to the MOUSE PS/2 jack.<br />
As an option you have the possibility to connect keyboard and mouse<br />
(also SUN-USB-keyboards) via USB. For this connect keyboard and/or<br />
mouse with the USB-interfaces Keyb. USB Mouse at the backside of<br />
<strong>CATVision</strong>-CON.<br />
Don´t use the USB-interfaces at the frontside of <strong>CATVision</strong>-CON for<br />
keyboard- mouse connection. The usage of these USB-interfaces is<br />
restricted to a usage as a transparent USB-transmission to the local<br />
PC.<br />
3.2.1 Videoconnection at <strong>CATVision</strong>-MC-CON<br />
Connect the K-C7-x extension cable to the TRANSMISSION interface<br />
TRANSMISSION 1 – 4 of the receiving unit <strong>CATVision</strong>-MC-CON.<br />
Consider the correct assignment of the videochannels!<br />
Connect the monitors to the monitor jacks MONITOR 1 - 4.<br />
3.2.2 Optional Connections<br />
Connection for another<br />
serial device<br />
RS 232 Line In Micro In Speaker<br />
Keyb. PS/2 Mouse<br />
Connection for microphone,<br />
speakers and another<br />
audio device<br />
Service<br />
Keyb. USB Mouse<br />
USB Trans<br />
12V DC/0,9A<br />
Monitor Transmission Red. Power<br />
page 11<br />
Connection for the CAT-x cable<br />
K-C7-x for USB 1.1<br />
100-240V/60-50Hz<br />
0,24-0,1A
<strong>Guntermann</strong> & <strong>Drunck</strong> <strong>GmbH</strong> Operating Instructions<br />
<strong>CATVision</strong> (MC)<br />
Connection of RS232<br />
Connect the serial device with the RS232 interface (optional) at<br />
<strong>CATVision</strong>-CON.<br />
Connection of Audio<br />
Connect the microphone to Micro In, the speakers and another audio<br />
device (e.g. CD player) to Line In.<br />
Connection of USB1.1<br />
Connect your USB devices with one of the four available USB-A-ports<br />
on the frontside of the <strong>CATVision</strong>-CON.<br />
Note: The usage of these USB-interfaces is restricted to a usage<br />
as a transparent USB-transmission to the local PC.<br />
Connection of the transmission cable<br />
Connect the K-C7-x extension cable with the the USB TRANS (jack)<br />
interface of the receiving unit.<br />
page 12
<strong>Guntermann</strong> & <strong>Drunck</strong> <strong>GmbH</strong> Operating Instructions<br />
<strong>CATVision</strong> (MC)<br />
4 Power Supply<br />
4.1 In general<br />
Connect the delivered power cables to the Main POWER jack of the devices<br />
(<strong>CATVision</strong>-CPU and <strong>CATVision</strong>-CON).<br />
As an option you can connect a red<strong>und</strong>ant power via Optional Red. Power<br />
jack. For this use the power set Power-Set 12/Typ 2 (available as option).<br />
Mouse PS/2<br />
Red. Power<br />
RS 232<br />
Keyb PS/2. 12V DC/0,6A Transmission<br />
Connection for the optional<br />
red<strong>und</strong>ant power supply<br />
Rear view of <strong>CATVision</strong>-CPU<br />
Line In Line Out<br />
Monitor<br />
RS 232 Line In Micro In Speaker<br />
Keyb. PS/2 Mouse<br />
Service<br />
Rear view of <strong>CATVision</strong>-CON<br />
USB K/M<br />
CPU<br />
Trans<br />
VGA Keyb. Mouse CPU<br />
Keyb. USB Mouse<br />
Connection for the<br />
main power supply<br />
USB 1.1<br />
USB Trans<br />
CPU<br />
12V DC/0,9A<br />
Monitor Transmission Red. Power<br />
Connection for the optional<br />
red<strong>und</strong>ant power supply<br />
4.2 Note for USB-operation<br />
100-240V/60-50Hz<br />
140-82mA<br />
Connection for the<br />
main power supply<br />
Only high-Power USB devices (up to 500 mA) are supported by the<br />
<strong>CATVision</strong>-System.<br />
page 13<br />
100-240V/60-50Hz<br />
0,24-0,1A
<strong>Guntermann</strong> & <strong>Drunck</strong> <strong>GmbH</strong> Operating Instructions<br />
<strong>CATVision</strong> (MC)<br />
5 Operation<br />
5.1 Switching on the <strong>CATVision</strong>-System<br />
After having switched on the <strong>CATVision</strong> system the following information<br />
appears on your monitor (local and remote):<br />
SYSTEM STARTUP CVM<br />
to call up AdonIS, press<br />
Ctrl + Num<br />
pc unit fo<strong>und</strong><br />
remote unit fo<strong>und</strong><br />
local mouse fo<strong>und</strong><br />
local keyboard fo<strong>und</strong><br />
Press pause to read info…<br />
After this window the image of the PC appears on your screen.<br />
IMPORTANT<br />
When starting the <strong>CATVision</strong> system, the system executes automatically an<br />
automatic adjustment of the video parameters (e. g. cable length, run time<br />
delays to your environment. As a result, the displayed image on your screen<br />
should not need any further adjustments. If, however, the displayed image<br />
doesn´t meet your expectations, a manually adjustment can be executed via<br />
IVT (see chapter 5.4).<br />
5.2 System Informationen Windows<br />
Additional to the described operation in Chapter 5.1 following conditions of the<br />
<strong>CATVision</strong> can exist:<br />
No local connection of Keyboard/Mouse at the <strong>CATVision</strong>-CPU was<br />
fo<strong>und</strong><br />
No existing connection between <strong>CATVision</strong>-CPU and <strong>CATVision</strong>-<br />
CON<br />
Wether Keyboard/Mouse has been fo<strong>und</strong> local nor a communication to<br />
the <strong>CATVision</strong>-CPU exist.<br />
These conditions will be described in the following chapters.<br />
page 14
<strong>Guntermann</strong> & <strong>Drunck</strong> <strong>GmbH</strong> Operating Instructions<br />
<strong>CATVision</strong> (MC)<br />
5.2.1 Keyboard/Mouse local not attached<br />
If local Keyboard/Mouse is not attached to the <strong>CATVision</strong>-CPU following<br />
information appears on your monitor (local and remote).<br />
SYSTEM STARTUP CVM<br />
to call up AdonIS, press<br />
Ctrl + Num<br />
pc unit fo<strong>und</strong><br />
remote unit fo<strong>und</strong><br />
no local mouse fo<strong>und</strong><br />
no local keyboard fo<strong>und</strong><br />
Please wait…<br />
In this case the monitor at the <strong>CATVision</strong>-CON changes automatically to the<br />
next Information-Window (IVT-Information). To close this window or to start<br />
IVT you have to connect at least a keyboard to the system.<br />
5.2.2 Remote Unit not attached<br />
When the <strong>CATVision</strong>-System detects no connection to the remote unit<br />
<strong>CATVision</strong>-Con (after swichting on the system), following information appears<br />
on your local monitor.<br />
SYSTEM STARTUP CVM<br />
to call up AdonIS, press<br />
Ctrl + Num<br />
pc unit fo<strong>und</strong><br />
local mouse fo<strong>und</strong><br />
local keyboard fo<strong>und</strong><br />
no remote unit fo<strong>und</strong><br />
check connection to local<br />
keyboard and remote unit<br />
Please wait…<br />
page 15
<strong>Guntermann</strong> & <strong>Drunck</strong> <strong>GmbH</strong> Operating Instructions<br />
<strong>CATVision</strong> (MC)<br />
In this case the <strong>CATVision</strong>-System remains in this condition. To proceed with<br />
initial operation, establish first the needed CAT-x-connection. When this<br />
connection has been established, the <strong>CATVision</strong>-System automatically<br />
changes to IVT-Information window (local and remote).<br />
Info CVM<br />
To optimize video quality<br />
please start IVT.<br />
Press Enter to start IVT<br />
or ESC to exit this window<br />
or Ctrl + ESC to exit this<br />
window and don´t show again<br />
5.2.3 Missing of the CAT-x-connection and local<br />
Keyboard/Mouse<br />
If whilst the initial operation no connection to the remot unit (<strong>CATVision</strong>-Con)<br />
exist and locally no Keyboard/Mouse connection to the <strong>CATVision</strong>-CPU can be<br />
detected, following information appears on your local monitor.<br />
SYSTEM STARTUP CVM<br />
to call up AdonIS, press<br />
Ctrl + Num<br />
pc unit fo<strong>und</strong><br />
no local mouse fo<strong>und</strong><br />
no local keyboard fo<strong>und</strong><br />
no remote unit fo<strong>und</strong><br />
check connection to local<br />
keyboard and remote unit<br />
Please wait…<br />
Proceed in this case as described in Chapter 5.2.1 & 5.2.2.<br />
page 16
<strong>Guntermann</strong> & <strong>Drunck</strong> <strong>GmbH</strong> Operating Instructions<br />
<strong>CATVision</strong> (MC)<br />
5.3 Getting into Operation / LEDs<br />
After having connected the power set switch on the <strong>CATVision</strong>s via toggle<br />
switch on the rear. The LEDs on the front side mean the following:<br />
<strong>CATVision</strong> CPU <strong>CATVision</strong> CON<br />
POWER Red<strong>und</strong>ant is lit when an external power<br />
set is connected and delivers<br />
12V.<br />
Main is lit when the main power<br />
supply has been established.<br />
page 17<br />
is lit when an external power set<br />
is connected and delivers 12V.<br />
is lit when the main power<br />
supply has been established.<br />
Remote Active --- is lit as long as the remote<br />
console is active or can be<br />
active(1). Off when locally<br />
operated<br />
Status --- Is off when the remote<br />
console is not supplied with<br />
voltage.<br />
Flashes when there is<br />
voltage but the controller of<br />
the remote console is not<br />
working.<br />
Is lit steadily when there is<br />
voltage and the controller<br />
works.<br />
Local Active is lit as long as the local<br />
console is active or can be<br />
active(1). Off when operated<br />
locally. Disappear whilst<br />
remote operation<br />
---<br />
Status Off when the local<br />
console is not supplied<br />
with voltage.<br />
---<br />
Flashes when there is<br />
voltage but the controller<br />
of the local console is not<br />
working. (Please contact<br />
our Service personal)<br />
Is lit steadily when there<br />
is voltage and the<br />
controller is working.<br />
CPU Active is lit when one of both<br />
consoles is active. (1)<br />
---<br />
Status is lit when the emulation of<br />
keyboard and mouse is active<br />
---
<strong>Guntermann</strong> & <strong>Drunck</strong> <strong>GmbH</strong> Operating Instructions<br />
<strong>CATVision</strong> (MC)<br />
USBsection<br />
Status --- Is lit, when a CAT-x- connection<br />
betwenn CV-CPU and CV-CON<br />
exist. Is off, when a connection<br />
failure exist.<br />
Power --- Is lit, when the USB-modul is<br />
supplied with voltage by the<br />
<strong>CATVision</strong>-CON<br />
To (1): A console is active when there are mouse or keyboard activities. Either it<br />
stays active for the time out after the last entry or as long as the<br />
Permanent Access or Protected Mode is active plus the set time out.<br />
Front view of <strong>CATVision</strong>-CPU<br />
Front view of <strong>CATVision</strong>-CON<br />
ision -CPU<br />
ision -CON<br />
page 18<br />
Power<br />
Red.<br />
Main<br />
Red.<br />
Main<br />
Power<br />
Local CPU<br />
Active<br />
Status<br />
USB 1.1 Devices Status<br />
Active<br />
Status<br />
Remote<br />
Power
<strong>Guntermann</strong> & <strong>Drunck</strong> <strong>GmbH</strong> Operating Instructions<br />
<strong>CATVision</strong> (MC)<br />
5.4 IVT – Individual Video Tuning<br />
IMPORTANT<br />
When starting the <strong>CATVision</strong> system, the system executes automatically an<br />
automatic adjustment of the video parameters (e. g. cable length, run time<br />
delays to your environment and a video profil will be saved. As a result, the<br />
displayed image on your screen should not need any further adjustments.<br />
This saved videoprofil can be edited if the displayed image doesn´t meet your<br />
exepectations. Therefore, the <strong>CATVision</strong> system offers the possibility of video<br />
adjustment.<br />
By this function the user can balance different cable qualities and lengths. The<br />
individual characteristic of this function allows setting the measures to the<br />
personal feeling for a “good picture”.<br />
The adjustment is done via remote keyboard or as Supervisor from the<br />
local console.<br />
The system covers a range of 0 – 190; adjustment can be done in increments<br />
of 1.<br />
The <strong>CATVision</strong> system offers the possibility of selecting the kind of cable<br />
used. Choose the corresponding mode for the kind of cable used most often.<br />
As an option the run time delays of the CAT-x cables (Skew) can be balanced<br />
with the delay electronically.<br />
5.4.1 Authorization<br />
For using the IVT the following persons are authorized:<br />
In the activated OpenAccess: all persons who work with the system.<br />
(State of delivery)<br />
Exception: Should the authorization for using the IVT be withdrawn<br />
by the administrator you have no access in the “OpenAccess” mode to<br />
the IVT!<br />
In the disabled OpenAccess: only persons who are authorized. For<br />
this an account for each user has to be opened (see User Accounts,<br />
chapter 6.2.3) and the user must have the right of IVT access.<br />
page 19
<strong>Guntermann</strong> & <strong>Drunck</strong> <strong>GmbH</strong> Operating Instructions<br />
<strong>CATVision</strong> (MC)<br />
5.4.2 Calling up the IVT Mode<br />
The IVT mode can be called up in two ways (Default):<br />
via function menu CTRL & NUM<br />
via hotkey CTRL & Scroll.<br />
The following window opens:<br />
IVT<br />
Active channel: 1<br />
CVM<br />
Boost 4<br />
Noise filter 0<br />
Fine tuning 36<br />
delay R delay G delay B<br />
0 ns 0 ns 0 ns<br />
ESC: quit IVT menu<br />
F1: save and quit<br />
F3: copy to all channels<br />
1/2/3/4: select channel<br />
F5: auto adjust active channel<br />
F6: auto adjust all channels<br />
The IVT menu can be called up from the remote or the local console. Settings<br />
within the IVT menu, however, are only possible via remote console. IVT<br />
settings from the local console can only be proceeded by the administrator.<br />
If a user from the local console wants to change the settings the following<br />
window opens:<br />
Info CVM<br />
IVT is only available<br />
on remote console.<br />
Press ESC to return.<br />
By pressing ESC you will get back to the last active menu.<br />
page 20
<strong>Guntermann</strong> & <strong>Drunck</strong> <strong>GmbH</strong> Operating Instructions<br />
<strong>CATVision</strong> (MC)<br />
5.4.2.1 Call up via Function Menu<br />
For calling up the IVT mode open the function menu with CTRL + NUM<br />
(Default).<br />
Function CVM<br />
F2: IVT<br />
F3: Console Setup<br />
F6: Config<br />
F8: Logout<br />
Mouse Utility<br />
System Info<br />
Esc Enter<br />
Move the cursor to the entry IVT or confirm with F2 and press ENTER. Then<br />
the IVT window will open.<br />
5.4.2.2 Call up via Keyboard Combination<br />
For directly calling up IVT keep CTRL pressed and additionally press Scroll.<br />
When both keys are released the IVT window opens (A PC must be connected<br />
to the system).<br />
5.4.3 Advices for Setting the IVT<br />
The previously mentioned steps are to be <strong>und</strong>erstood as a default<br />
proceeding.<br />
Because the quality of the picture is dependent on the monitor as well as on the<br />
graphics card and the transmitting cable it is possible that despite a cable<br />
length of e.g.120 meter the “best picture” is reached with a setting of 140 meter.<br />
Meter stands as a synonym for the adjustable video boost.<br />
Try for the best setting.<br />
Because the cursors work in 1m steps you may have to press them more often<br />
in order to get the best picture within the fine tuning.<br />
If your monitor stays dark, check whether the set resolution of the graphics card<br />
is supported by the monitor. If so, activate the IVT (chapter 5.3.2).<br />
Possibly the supported range is exceeded or <strong>und</strong>ercut. Set the lowest value<br />
with the key Pos1 and move upwards with the HotKey-combination CTRL+<br />
Cursor Right.<br />
The picture will then appear again and you can change for the best setting.<br />
page 21
<strong>Guntermann</strong> & <strong>Drunck</strong> <strong>GmbH</strong> Operating Instructions<br />
<strong>CATVision</strong> (MC)<br />
5.4.4 Video Tuning Settings<br />
After you access IVT, the following settings are available to you in the open IVT<br />
submenu:<br />
Establishing the video boost.<br />
Setting the noise filter.<br />
Fine tuning.<br />
Delay setting (optional) on the colors R, G, and B of the CAT-x cable.<br />
The IVT submenu appears as follows:<br />
IVT<br />
Active channel: 1<br />
CVM<br />
Boost 4<br />
Noise filter 0<br />
Fine tuning 36<br />
delay R delay G delay B<br />
0 ns 0 ns 0 ns<br />
ESC: quit IVT menu<br />
F1: save and quit<br />
F3: copy to all channels<br />
1/2/3/4: select channel<br />
F5: auto adjust active channel<br />
F6: auto adjust all channels<br />
ESC: Exits the IVT submenu without saving changes<br />
F1: Saves all changes and closes the IVT submenu<br />
F3: copies all settings to all channels<br />
1/2/3/4 Selecting the video channel (only with <strong>CATVision</strong>-MC-<br />
Systemen)<br />
F5: Carries out automatic video optimization for the active channel<br />
F6: Carries out automatic video optimization for all channels<br />
You can switch between the individual entries using the UP ARROW and/or<br />
DOWN ARROW keys.<br />
The position of IVT-menu can be placed individual on your monitor with the<br />
HotKey-combination SHIFT+ Cursor.<br />
page 22
<strong>Guntermann</strong> & <strong>Drunck</strong> <strong>GmbH</strong> Operating Instructions<br />
<strong>CATVision</strong> (MC)<br />
5.4.4.1 Changing video channels<br />
This function is only with <strong>CATVision</strong>-MC-Systemen available.<br />
IVT<br />
Active channel: 1<br />
CVM<br />
The entry “active channel” refers to the corresponding used video channel.<br />
The channels can be selected via pressing the keys 1 to 4.<br />
Confirm with ENTER.<br />
5.4.4.2 Automatic Settings<br />
You can establish all video settings automatically. To do so, you must be<br />
connected to a target.<br />
To activate this function, press the F5 key. While the settings for the active<br />
channel are being established automatically, the monitor turns black for approx.<br />
3 seconds.<br />
With the F6 key the settings will be established for all channels (only with<br />
<strong>CATVision</strong>-MC systems). In this case, following message appears on your<br />
monitor:<br />
Info CVM<br />
Please wait<br />
Automatic Video Tuning<br />
status<br />
Channel 1: ok<br />
Channel 2: not connected<br />
Channel 3: in progress<br />
Channel 4: wait<br />
Whilst the automatic measuring this windows informs you about the process of<br />
the respective measurement.<br />
page 23
<strong>Guntermann</strong> & <strong>Drunck</strong> <strong>GmbH</strong> Operating Instructions<br />
<strong>CATVision</strong> (MC)<br />
Note: Channel 2 to 4 are only available by the usage of an <strong>CATVision</strong>-MCsystem!<br />
The entrys behind the channel have the following meaning:<br />
ok: automatic measuring succesfully completed<br />
not connected: no video signal available at this channel<br />
in progress: the automatic measuring for this channel is in progress<br />
wait: no automatic measuring has been carried out yet<br />
After the automatic settings have been established, the display reappears.<br />
The values determind whilst the automatic measuring will be stored. These<br />
values can be replaced by manual settings (vgl. Kap. 5.4.4.3). By processing<br />
the manual settings, only this manual settled values will be used.<br />
Note:<br />
If you change the length of the used cabel after you have processed the manual<br />
settings, the system starts an automatic measurement. If hereby a margin of<br />
greater than „10“ is asserted between the automatic and manual settings (as<br />
reference see the entry „Boost“ within the IVT-menu), the system will use the<br />
automatic settings and discards the manual settings.<br />
After the automatic video setting process, save the settings by pressing the F2<br />
key. In this case, the IVT submenu is closed and you return to the<br />
CONFIGURATION menu.<br />
5.4.4.3 Manual Settings<br />
In case, that the automatic setting doesn´t meet your expectations, you can<br />
adjust the video display manually. This manually adjusting of the video display<br />
is described in the following chapters.<br />
5.4.4.3.1 Establishing the Video Boost<br />
Boost: 4<br />
The following keys are available to you to modify the video boost:<br />
Key <br />
Subtracts 1 from the video boost value<br />
Key <br />
Adds 1 to the video boost value<br />
Keys CTRL + Subtracts 5 from the video boost value<br />
Keys CTRL + Adds 5 to the video boost value<br />
Home Minimum video boost<br />
End Maximum video boost (Caution: Overdrive possible <br />
no picture visible on monitor)<br />
page 24
<strong>Guntermann</strong> & <strong>Drunck</strong> <strong>GmbH</strong> Operating Instructions<br />
<strong>CATVision</strong> (MC)<br />
If you want to make other changes within the IVT submenu, use the UP<br />
ARROW and/or DOWN ARROW keys to move to another entry.<br />
After establishing the video boost, confirm and save your selection by pressing<br />
F2 or discard your changes by pressing ESC. In both cases, the IVT submenu<br />
is closed and you return to the FUNCTION menu.<br />
5.4.4.3.2 Setting Noise Suppression<br />
Noise filter: 0<br />
If the video quality of your monitor is influenced by noise, this effect can be<br />
removed using the noise filter setting.<br />
The following keys are available to you to modify the noise filter setting:<br />
Key Subtracts 1 from the noise suppression value<br />
Key Adds 1 to the noise suppression value<br />
Keys CTRL + Subtracts 5 from the noise suppression value<br />
Keys CTRL + Adds 5 to the noise suppression value<br />
Home Noise suppression has the value 0<br />
End Maximum noise suppression (value: 255)<br />
If you want to make other changes within the IVT submenu, use the UP<br />
ARROW and/or DOWN ARROW keys to move to another entry.<br />
After establishing the noise filter setting, confirm and save your selection by<br />
pressing F2 or discard your changes by pressing ESC. In both cases, the IVT<br />
submenu is closed and you return to the FUNCTION menu.<br />
page 25
<strong>Guntermann</strong> & <strong>Drunck</strong> <strong>GmbH</strong> Operating Instructions<br />
<strong>CATVision</strong> (MC)<br />
5.4.4.3.3 Fine Tuning<br />
Fine tuning: 36<br />
The following keys are available to you for fine tuning:<br />
Key <br />
Subtracts 1 from the fine tuning value<br />
Key <br />
Adds 1 to the fine tuning value<br />
Keys CTRL + Subtracts 5 from the fine tuning value<br />
Keys CTRL + Adds 5 to the fine tuning value<br />
Home Minimum fine tuning (value: 0)<br />
End Maximum fine tuning (value: 575)<br />
If you want to make other changes within the IVT submenu, use the UP<br />
ARROW and/or DOWN ARROW keys to move to another entry.<br />
After establishing the fine tuning setting, confirm and save your selection by<br />
pressing F2 or discard your changes by pressing ESC. In both cases, the IVT<br />
submenu is closed and you return to the FUNCTION menu.<br />
5.4.4.3.4 Setting the Run Time Delay Compensation<br />
delay R delay G delay B<br />
0 ns 0 ns<br />
0 ns<br />
At the <strong>CATVision</strong> system the run time delay compensation can be set up to 46<br />
ns.<br />
At 0 ns there is no delay compensation.<br />
For compensating the delay the following keys can be used:<br />
<br />
<br />
CTRL + <br />
CTRL + <br />
minimizes the delay compensation for 2 ns.<br />
increases the delay compensation for 2 ns.<br />
minimizes the delay compensation for 10 ns.<br />
increases the delay compensation for 10 ns.<br />
Example:<br />
If the colour signal red appears too early (red shadow appear left of the letter)<br />
move to the entry delay R and delay this signal until all colours are on top of<br />
page 26
<strong>Guntermann</strong> & <strong>Drunck</strong> <strong>GmbH</strong> Operating Instructions<br />
<strong>CATVision</strong> (MC)<br />
each other and the picture is faultless. If another colour signal appears to early<br />
on the monitor repeat this procedure as described before.<br />
After having defined the delay compensation confirm and safe your entry with<br />
F1 or reject your choice with ESC. In both cases the IVT window will be closed.<br />
Note:<br />
It isn´t useful to compensate all three colors, since the delay is a result of all<br />
three colors. Compensating all three colors would only shift all colors together<br />
to a new inncorrect value. Therefore adjust only two colours to compensate the<br />
run time delay.<br />
If you want to make further changes within the IVT window move to the next<br />
entry with cursor up/cursor down.<br />
5.4.5 Copy the IVT Settings<br />
The settings for a video channel can be copied to other video channels with F3.<br />
It may be useful if the conditions for all video channels are the same.<br />
5.4.6 Tested Resolutions<br />
In-house the following resolutions reached good pictures (the values are<br />
dependent on the used cable and the IVT settings):<br />
Cable length (m) Resolution Refresh Rate<br />
200 1920 x 1440 max. 75 Hz<br />
300 1280 x 1024 max. 85 Hz<br />
This overview includes no maximum values.<br />
5.4.7 Recommended Cables<br />
G&D recommends for the use of the <strong>CATVision</strong> system the following cables:<br />
Patch cable:<br />
DAETWYLER<br />
UNINET 7702 flex 4P AWG26 S-STP (up to 100 meter)<br />
Installation cable:<br />
Kerpen MegaLine G12-150 S/F AWG22 (up to 300 meter)<br />
page 27
<strong>Guntermann</strong> & <strong>Drunck</strong> <strong>GmbH</strong> Operating Instructions<br />
<strong>CATVision</strong> (MC)<br />
6 Configuration<br />
The <strong>CATVision</strong> system can be adapted to your needs. The configuration is<br />
done via AdonIS.<br />
With CTRL + NUM (Default) you open AdonIS:<br />
Function CVM<br />
F2: IVT<br />
F3: Console Setup<br />
F6: Config<br />
F8: Logout<br />
Mouse Utility<br />
System Info<br />
Esc Enter<br />
In the Function menu the following options can be used:<br />
F2: IVT (see chapter 5.3)<br />
F3: settings at the console (see chapter 6.1)<br />
F6: main configuration menu; here additionally IVT can be called up,<br />
User Accounts can be opened and changes in system settings<br />
can be made (see chapter 6.2)<br />
Mouse Utility: Reinitialisation of the connected mouse if the<br />
initialisation is lost (see chapter 6.3)<br />
page 28
<strong>Guntermann</strong> & <strong>Drunck</strong> <strong>GmbH</strong> Operating Instructions<br />
<strong>CATVision</strong> (MC)<br />
6.1 Console Setup<br />
By pressing F3 in the Function Menu you will get to the Console Setup for the<br />
activating console.<br />
CONSOLE SETUP CVM<br />
Screen Saver: OFF<br />
Auto Logout: OFF<br />
Console Name: CVM<br />
Display: Temp<br />
Display Position: …<br />
Menu Position: …<br />
AdonIS by Mouse: NO<br />
OSD sync: OFF<br />
Keyboard Layout: German<br />
Esc Enter F1:Save<br />
6.1.1 ScreenSaver Settings<br />
The ScreenSaver to be set is started by <strong>CATVision</strong> and has nothing to do with<br />
the ScreenSaver of the computer.<br />
As in general there is only one indirect connection (via <strong>CATVision</strong>) between the<br />
computer and the monitor you should switch off the ScreenSaver of the<br />
computers for making work easier.<br />
The ScreenSaver of <strong>CATVision</strong> takes over this task; it puts the monitor to the<br />
Power-Down Mode.<br />
Move the cursor to the line ScreenSaver. The current entry can be written over<br />
or edited by pressing ENTER.<br />
Valid is a time of 1 - 60 minutes. The entry “0” puts the ScreenSaver to “OFF”.<br />
ENTER completes the entry.<br />
For saving and closing this menu press F1.<br />
page 29
<strong>Guntermann</strong> & <strong>Drunck</strong> <strong>GmbH</strong> Operating Instructions<br />
<strong>CATVision</strong> (MC)<br />
6.1.2 AutoLogout Setting<br />
With this setting you can activate the automatic LOGOUT of the system. The<br />
automatic LOGOUT, like the manual (F8), leads you back to the LOGIN mask.<br />
With this the system is protected against unauthorized access. You can only<br />
get access after entering your password in the LOGIN window.<br />
The time until the LOGOUT is carried out is set by moving the cursor to the line<br />
AutoLogout. The current entry can be written over or edited by pressing<br />
ENTER.<br />
Valid is a time of 1 - 60 minutes. The entry “0” sets the Logout to “OFF”.<br />
ENTER closes the entry.<br />
For saving and closing this menu press F1 .<br />
6.1.3 Defining the Console Name<br />
In case of using many switches every G&D device can be given a unique name,<br />
the Console Name.<br />
Move the cursor to the line Console Name. The current entry can be written<br />
over or edited by pressing ENTER.<br />
Valid is an entry of 10 alphanumerical characters. ENTER closes this entry.<br />
For saving and closing this menu press F1.<br />
page 30
<strong>Guntermann</strong> & <strong>Drunck</strong> <strong>GmbH</strong> Operating Instructions<br />
<strong>CATVision</strong> (MC)<br />
6.1.4 Activating the Channel “Display”<br />
With this you have the possibility to set the display of the selected computer or<br />
system informations either to<br />
permanent => Perm or<br />
temporary => Temp (disappears approx 5 seconds after switching).<br />
After having moved the cursor to the array DISPLAY you can select your<br />
wanted option with SPACE (toggle) or Y + N.<br />
For saving and closing this menu press F1.<br />
If you have selected the temporary setting, the channel display can be called up<br />
anytime by pressing CTRL + CAPSLOCK (Default).<br />
6.1.5 Setting the Display Position + Colour<br />
Here you set the position and size of the display on the monitor. Move the<br />
cursor to the corresponding entry in the menu CONSOLE SETUP.<br />
After having pressed ENTER you get to the edit mode and can move the<br />
display with the cursor control keys or mouse to the wanted position.<br />
+<br />
[Display Position####]<br />
Space: change colour<br />
The modification of the colour of the displayed text is also possible. Press the<br />
space bar to toggle between the different available colours.<br />
ENTER closes the setting and leads you back to the CONSOLE SETUP<br />
(temporary saved).<br />
For saving the setting and closing the CONSOLE SETUP press F1<br />
(permanently saved).<br />
page 31
<strong>Guntermann</strong> & <strong>Drunck</strong> <strong>GmbH</strong> Operating Instructions<br />
<strong>CATVision</strong> (MC)<br />
6.1.6 Setting the Menu Position & Size<br />
With this you change the position and size of all AdonIS windows. Move the<br />
cursor to the corresponding entry in the menu CONSOLE SETUP.<br />
After having pressed ENTER you get to the edit mode and can move the<br />
display to the wanted position with the cursor control keys or mouse.<br />
MENU-POSITION CVM<br />
Esc Enter F1:Save<br />
For making sure that AdonIS can be read easily at all resolutions the size of<br />
the display can be changed with the keys picture up/picture down at a<br />
resolution higher than 640 x 480.<br />
ENTER closes the entry and leads you back to the CONSOLE SETUP<br />
(temporary saved).<br />
For saving this setting and leaving the CONSOLE SETUP press F1<br />
(permanently saved).<br />
6.1.7 Settings of the extended Mouse Support<br />
With this the special keys of the Intelli Explorer Mouse for working with<br />
<strong>CATVision</strong> are activated. By setting the entry to “Yes” AdonIS can also be<br />
called up by pressing button 4 or 5 of the Explorer Mouse (left side buttons).<br />
After having moved the cursor to the array „AdonIS by Mouse“ you can select<br />
the wanted option with SPACE (toggle) or the keys Y + N.<br />
For saving the settings and closing the menu press F1.<br />
page 32
<strong>Guntermann</strong> & <strong>Drunck</strong> <strong>GmbH</strong> Operating Instructions<br />
<strong>CATVision</strong> (MC)<br />
6.1.8 OSD SyncMod<br />
Graphics cards are able to generate different sync signals (sync on Green,<br />
RGBHV etc.). Depending on the sync signal it has effect on the picture of<br />
AdonIS.<br />
AdonIS is designed for a RGB/HV-Sync signal. If the graphics card of the<br />
connected computer sends a different sync signal than RGB/HV the<br />
consequence would be a colour corruption of AdonIS. As a result of this,<br />
AdonIS could appear to dark on your monitor.<br />
In order to balance this colour corruption the colour levels can be changed in<br />
the menu OSD-Sync.<br />
The following entries can be fo<strong>und</strong> (be pressing the Space-Bar):<br />
RGB HV: no colour adjustment<br />
RGsB: the level for the green signal is changed<br />
RsGsBs: all colours are changed.<br />
For saving the settings and closing this menu press F1.<br />
6.1.9 Keyboard Layout<br />
With this you select the layout of the connected keyboard. If you realize a<br />
change of Y and Z (American/German layout) you should change the setting.<br />
The following layouts can be selected:<br />
German<br />
English US<br />
English UK<br />
French<br />
Spanish<br />
Lat America<br />
Portugiese<br />
After having moved the cursor to the array KEYBOARD LAYOUT you can<br />
select the wanted option with SPACE (toggle).<br />
page 33
<strong>Guntermann</strong> & <strong>Drunck</strong> <strong>GmbH</strong> Operating Instructions<br />
<strong>CATVision</strong> (MC)<br />
6.2 Config<br />
In the menu Config you can open user accounts and make system<br />
comprehensive settings. By pressing F6 in the function menu you will get to<br />
the Config Menu.<br />
The access to this menu is only for certain persons. Besides the supervisor also<br />
user can have access to their User Account menu having the corresponding<br />
authorization by the supervisor.<br />
Anyway, the SUPERVISOR has always access authority on that Config<br />
Menu!<br />
Because the <strong>CATVision</strong> system is used either in the Open Access Mode<br />
(access to the system without Login-Name and Password) or by opened User<br />
Accounts different constellations occur when calling up the Config Menu:<br />
Open Access:<br />
Access is possible without password entry, when the OpenAccess has<br />
configuration rights! The entries for the OpenAccess are presented in white.<br />
Entries with no access are presented in light blue.<br />
If the OpenAccess has no configuration rights a Login-Window opens for<br />
further authorization. You can now logon as an administrator or user with<br />
configuration rights by entering Login-Name and Password.<br />
ACCESS CONFIG CVM<br />
Please enter your login:<br />
Name: max 14 characters<br />
Password: max 12 characters<br />
Esc Enter<br />
After having pressed the button Enter the Config Menu opens.<br />
page 34
<strong>Guntermann</strong> & <strong>Drunck</strong> <strong>GmbH</strong> Operating Instructions<br />
<strong>CATVision</strong> (MC)<br />
Opened User Accounts & Supervisor (OpenAccess is disabled):<br />
Access without password query is possible because the users are already<br />
logged in (the password query via Access Config window doesn´t apply).<br />
Every user, however, can have different configuration rights (e.g. only IVT and<br />
System Config). The configuration entries available for the single user are<br />
marked in white. Light blue markings indicate that an access is not possible.<br />
When a user has no configuration rights an tries to access the config menu, a<br />
menu appears on his window containing information about the missing<br />
configuration rights.<br />
Anyway, the supervisor has always unlimited access to the Config-Menu!<br />
After having called up the Config-Menu successfully the following window<br />
appears on the monitor:<br />
Config CVM<br />
IVT<br />
System Config<br />
User Account<br />
Esc Enter<br />
Select the wanted entry with cursor up/cursor down and then confirm with<br />
Enter.<br />
6.2.1 IVT<br />
See chapter 5.4<br />
page 35
<strong>Guntermann</strong> & <strong>Drunck</strong> <strong>GmbH</strong> Operating Instructions<br />
<strong>CATVision</strong> (MC)<br />
6.2.2 System Config<br />
Move in the menu Config Menü to the entry System Config and press Enter.<br />
The following window will open:<br />
SYSTEM CONFIG CVM<br />
Hotkey: Ctrl<br />
Double Hotkey: Off<br />
Set System Defaults: …<br />
Remote Video: On<br />
Local Video: On<br />
Permanent Access: Both<br />
Timeout: 1 s<br />
Protected Mode: Off<br />
Keyb. LED flash: On<br />
Scan Code Set Local: 2<br />
Scancode Set Remote: 2<br />
USB Multimedia-Keyboard: No<br />
USB SUN-Keyboard Mode: No<br />
USB SUN-Keyboard Layout: US<br />
Temperature Warning: OSD<br />
Keyboard Type Local: …<br />
Keyboard Type Remote: …<br />
Signal type input: Standard<br />
Remote Sync: as input<br />
Esc Enter F1: Save<br />
If there is a conflict between the hotkeys used in AdonIS and your software you<br />
can change it here.<br />
Another reason for changing the hotkeys may lay in the combination of several<br />
G&D switch types. In the delivery status of all G&D products, the default<br />
HotKey-Combination is set to CTRL + NUM (as an example for calling up the<br />
AdonIS).<br />
page 36
<strong>Guntermann</strong> & <strong>Drunck</strong> <strong>GmbH</strong> Operating Instructions<br />
<strong>CATVision</strong> (MC)<br />
6.2.2.1 Defining the first Hotkey<br />
Move with the cursor to the entry HotKey.<br />
By pressing SPACE you can select between the following alternatives:<br />
Ctrl, Alt, AltGr, Win, Shift<br />
Please remember that the defined HotKey also is used as first key for<br />
calling up AdonIS (e.g. WIN + NUM).<br />
For saving the settings and closing the menu press F1.<br />
6.2.2.2 Defining the Double-HotKey<br />
Here you define whether to use a double-hotkey for calling up AdonIS or the<br />
IVT<br />
Move with the cursor control keys or the mouse to the entry double-hotkey.<br />
With Space you can select between<br />
Yes<br />
No (Default).<br />
After having changed the entry to Yes the entry in the line HotKey changes<br />
automatically (see chapter 6.2.2.1). Now you can select the wanted doublehotkey.<br />
The following positions are available:<br />
Ctrl (Strg) + Shift<br />
Alt +Shift<br />
Alt Gr + Ctrl (Strg)<br />
Windows + Ctrl (Strg)<br />
Shift + Windows<br />
Please remember that the selected HotKey is also used as first key for<br />
calling up AdonIS (e.g. WIN (+CTRL) + NUM).<br />
For saving the settings and closing the menu press F1. After this setting you<br />
need to press three keys to call up AdonIS or IVT.<br />
page 37
<strong>Guntermann</strong> & <strong>Drunck</strong> <strong>GmbH</strong> Operating Instructions<br />
<strong>CATVision</strong> (MC)<br />
6.2.2.3 Set System Defaults (Supervisor Function)<br />
This function sets back this device to the default condition.<br />
Also the passwords and IVT settings are set back.<br />
The corresponding default settings can be fo<strong>und</strong> in the descriptions of the<br />
different menu windows in this documentation.<br />
Move with the cursor control keys to the corresponding menu.<br />
By pressing ENTER the function will be executed and the following window will<br />
open.<br />
Info CVM<br />
This function will delete<br />
all settings.<br />
Press Enter to continue<br />
or<br />
Esc to cancel<br />
Confirm again with ENTER. The window will change to the menu FUNCTION.<br />
6.2.2.4 Remote Video (Dark-Switching)<br />
With this setting you define whether the monitor of the remote console at<br />
keyboard or mouse action of the local console either<br />
stays permanently visible or<br />
is switched dark.<br />
The following selections are possible:<br />
ON: Monitor stays permanently visible<br />
Switch off: Monitor is switched dark at keyboard or mouse action of<br />
the local console.<br />
For saving the settings and closing the menu press F1.<br />
You can always close this menu by pressing ESC.<br />
page 38
<strong>Guntermann</strong> & <strong>Drunck</strong> <strong>GmbH</strong> Operating Instructions<br />
<strong>CATVision</strong> (MC)<br />
6.2.2.5 Local Video (Dark-Switching)<br />
Function according to chapter 6.2.2.4 but related to the picture at the local<br />
console (monitor at <strong>CATVision</strong>-CPU).<br />
6.2.2.6 Permanent Access<br />
Whilst your e. g. configuration you don´t want to be interrupted. Therefor the<br />
remote console (<strong>CATVision</strong>-CON) as well as for the local console (<strong>CATVision</strong>-<br />
CPU) has the possibility of activating a permanent access (hold function, see<br />
chapter 7.3).<br />
If the permanent access is activated at one console by CTRL + Print the<br />
computer access for this console is exclusive. If in the entries “Local Video”<br />
and “Remote Video” (see chapters 6.2.2.4 – 6.2.2.5) the setting is Switch Off<br />
the monitors of the blocked consele are additionally switched dark.<br />
The blocked station has access until the function is disabled by the same key<br />
combination.<br />
The function Permanent Access allows the following settings:<br />
BOTH Both consoles can activate the permanent access<br />
NONE No console can activate the permanent access<br />
LOCAL Only the local console (<strong>CATVision</strong>-CPU) can activate<br />
the permanent access<br />
REMOTE Only the remote console (<strong>CATVision</strong>-CON) can<br />
activate the permanent access<br />
The change in setting is done by moving the cursor with the mouse or keyboard<br />
to the entry Permanent Access.<br />
With SPACE the selection is activated (toggle function)<br />
For saving the settings and closing the menu press F1.<br />
page 39
<strong>Guntermann</strong> & <strong>Drunck</strong> <strong>GmbH</strong> Operating Instructions<br />
<strong>CATVision</strong> (MC)<br />
6.2.2.7 Defining the Time Out<br />
With this setting you define the delay time you define how long the blocked<br />
console stays inactive unless at the active console no Keyboard/Mouse action<br />
can be mentioned. The other console can have access to the system again,<br />
after the in this chapter defined time-out after the last keyboard/mouse action<br />
has exceeded.<br />
Move the cursor to the entry Timeout.<br />
By entering a value in the range of 1 to 90 seconds you can define the delay<br />
time.<br />
For saving the settings and closing the menu press F1 .<br />
6.2.2.8 Enabling the Protected Mode<br />
In default condition of the Protected Mode all connected console are locked for<br />
keyboard and mouse action and all monitors are switched dark (see chapter<br />
7.4). Only by pressing the hotkeys (CTRL + Print), a console can exclusivly<br />
reserve the right for operation. Whilst this exclusiv operation of the active<br />
console, the monitor of the inactive console remains dark and no keyboard and<br />
mouse operation are possible.<br />
With this setting you define whether the Protected Mode (see chapter 7.4) is<br />
enabled or not.<br />
Move the cursor to the entry Protected Mode.<br />
By pressing SPACE you can chose between Yes or NO.<br />
For saving the settings and closing the menu press F1. After you have finished<br />
all settings the Protected Mode is activ.<br />
After enabling the Protected Mode the following window appears on the<br />
monitor.<br />
CVM<br />
PROTECTED MODE ENABLED<br />
page 40
<strong>Guntermann</strong> & <strong>Drunck</strong> <strong>GmbH</strong> Operating Instructions<br />
<strong>CATVision</strong> (MC)<br />
6.2.2.9 Keyb. LED flash<br />
With this setting you define whether the keyboard LEDs will flash after activated<br />
hold function (see chapter 7.3) or Protected Mode (see chapter 7.4) or not.<br />
Move the cursor to the entry Keyb. LED flash.<br />
By pressing SPACE you can chose between Yes or NO.<br />
For saving the settings and closing the menu press F1.<br />
6.2.2.10 Defining the local Scan Code<br />
The scan code is the language with which keyboard and computer<br />
communicate. <strong>CATVision</strong> works with Scancode 2 (Default).<br />
Only change this setting in accordance with our service department.<br />
Move the cursor to the corresponding entry.<br />
By pressing SPACE you can select between 3 or 2.<br />
For saving the settings and closing the menu press F1.<br />
6.2.2.11 Defining the remote Scan Code<br />
Function according to chapter 6.2.2.10 but related to the keyboard at the<br />
remote console.<br />
6.2.2.12 USB Multimedia Keyboard<br />
By selection of the entry USB Multimedia Keyboard the USB multimedia<br />
support for keyboards will be activated. In Default this setting is not activated<br />
(NO).<br />
For saving the settings and closing the menu press F1.<br />
6.2.2.13 USB SUN Keyboard mode<br />
If you connect a SUN computer with USB keyboard (and mouse) at <strong>CATVision</strong>-<br />
CPU, adjust this setting to yes.<br />
At default the support for USB SUN Keyboards is deactivated.<br />
page 41
<strong>Guntermann</strong> & <strong>Drunck</strong> <strong>GmbH</strong> Operating Instructions<br />
<strong>CATVision</strong> (MC)<br />
6.2.2.14 USB SUN Keyboard layout<br />
After activation of the USB SUN Keyboard mode (see above) you can use this<br />
menu item to select the keyboard layout of the SUN keyboard.<br />
If you experience that german umlauts and other language-specific characters<br />
are without correct output at screen, check this adjustment and modify if<br />
necessary.<br />
The following options are available:<br />
DE: German keyboard layout<br />
US: American keyboard layout<br />
If the adjustment of the keyboard layout is modified during the operation of the<br />
SUN computer, a restart of the SUN computer is necessary, in order to apply<br />
the modified adjustment.<br />
At default modifying of this adjustment is not possible, because the support for<br />
USB SUN keyboards is deactivated.<br />
6.2.2.15 Temperature Warning<br />
Both the user module (<strong>CATVision</strong>-CON) and the computer module (<strong>CATVision</strong>-<br />
CPU) provide temperature sensors. The temperature within the devices is<br />
permanently monitored.<br />
To prevent the modules from overheating, the following actions are performed<br />
when the stated values are achieved:<br />
60 °C: The modules show the increased temperature values in the OSD or as<br />
display popup (see below).<br />
80 °C: The image signal is disabled at the user module!<br />
Important: If the computer module disables the image signal due to the increase<br />
of temperature, the connected computers cannot be controlled or operated<br />
remotely! Cool down the heated module immediately after the warning has been<br />
displayed on your screen!<br />
The warning is displayed at both modules after the temperature of one of the<br />
modules reaches a critical value. The warning states whether the overheating<br />
affects the user module (remote unit) or the computer module (local unit).<br />
Important: There is no warning if the temperature of the second module<br />
reaches a critical value while the first module also provides increased<br />
temperature values!<br />
page 42
<strong>Guntermann</strong> & <strong>Drunck</strong> <strong>GmbH</strong> Operating Instructions<br />
<strong>CATVision</strong> (MC)<br />
Decide whether you want the temperature warning to be displayed in the OSD or<br />
as display popup :<br />
OSD: In the defaults of the KVM extender, the warning is displayed in a<br />
separate OSD window. Press any key to close the window.<br />
Note: If the temperature is back at its normal value but reaches a critical<br />
value within one minute, the warning pops up again.<br />
Display popup: The warning can also pop up within the currently displayed<br />
image. Depending on the configured »Display Position«, the warning pops<br />
up on the display.<br />
Note: The warning is displayed on the monitor until the operating<br />
temperature reaches the normal value.<br />
How to define if you want the warning to be displayed in the OSD or as<br />
display popup:<br />
1. Select “System Config > Temperature Warning” in the OSD.<br />
2. Press the Space key to select between OSD and Display.<br />
3. The settings are saved when leaving the menu by pressing F 1.<br />
6.2.2.16 Keyboard Type Local<br />
By selection of the entry Keyboard Type Local, the support for the keyboard<br />
„PixelPower Clarity (blue)“ or the keyboard “SKIDATA1” can be activated for the<br />
local console in the displayed submenu.<br />
In the delivery status this setting is not activated. In order to activate the support<br />
for this keyboard, open the submenu and press the space bar.<br />
For saving the settings and closing the menu press F1.<br />
6.2.2.17 Keyboard Type Remote<br />
By selection of the entry Keyboard Type Remote, the support for the keyboard<br />
„PixelPower Clarity (blue)“ or the keyboard “SKIDATA1” can be activated for the<br />
remote console in the displayed submenu.<br />
In the delivery status this setting is not activated. In order to activate the support<br />
for this keyboard, open the submenu and press the space bar.<br />
For saving the settings and closing the menu press F1.<br />
page 43
<strong>Guntermann</strong> & <strong>Drunck</strong> <strong>GmbH</strong> Operating Instructions<br />
<strong>CATVision</strong> (MC)<br />
6.2.2.18 Signal type input<br />
To ensure the correct display of the transmitted video signal you find selection<br />
in this menu, which type synchronisation signal is available as input video<br />
signal.<br />
The options are:<br />
Standard: comprises RGB HV, RGsB, RsGsBs<br />
RGsB/HV: Sync on green and additionally seperated HV<br />
6.2.2.19 Remote sync<br />
Basically, two options are available at the entry „Remote sync“. These are:<br />
Separated H/V<br />
as input<br />
When <strong>CATVision</strong> detects seperated HV signals, the value behind the entry<br />
„Remote sync“ changes to „Separated H/V“. This entry is not editable.<br />
When no seperated HV signals can be detected, you still have the possibilty to<br />
deliver seperated HV signals by choosing the value „Separated H/V“.<br />
With the value „as input“ the signal will be transmitted without any changes from<br />
the PC to the <strong>CATVision</strong> system.<br />
6.2.3 User Account<br />
Move in the Config Menu to the entry User Account and press Enter. The<br />
following window will open:<br />
User Account CVM<br />
1 USER 01<br />
2 USER 02<br />
3 USER 03<br />
4 USER 04<br />
... bis User 08<br />
OpenAccess<br />
SUPERVISOR<br />
Esc Enter<br />
Here you select the USER ACCOUNT which you want to change.<br />
Move the cursor with the keyboard or mouse to the corresponding account.<br />
page 44
<strong>Guntermann</strong> & <strong>Drunck</strong> <strong>GmbH</strong> Operating Instructions<br />
<strong>CATVision</strong> (MC)<br />
Confirm your selection with ENTER (or left mouse button) or close the menu<br />
without selection with ESC (or right mouse button).<br />
If you have selected an account (e.g. user 1) you get to a submenu with the<br />
window USER ACCOUNT.<br />
Here you can change the settings for the user selected in SELECT ACCOUNT.<br />
Due to the special condition of the Supervisor and the OpenAccess, these two<br />
accounts appear seperatly in the menu Select Account.<br />
Supervisor: No rights can be detracted<br />
User: User, who optionally can be be provided with configuration<br />
rights<br />
Open Access: by enabling this account, you can access the <strong>CATVision</strong>-<br />
System without Login-Name and Passwort.<br />
Up to 8 users, SUPERVISOR + OpenAccess can be managed.<br />
User Account CVM<br />
Account No. 1<br />
Account enabled: Yes<br />
User Name: USER 01<br />
Set Account Defaults<br />
IVT access Yes<br />
System Config access No<br />
User Account access No<br />
Change Password…<br />
Esc Enter F1:Save<br />
Notice:<br />
If you want to change more than one array save with F1 only after all changes<br />
are made in the USER-ACCOUNT.<br />
6.2.3.1 Account Enable / Disable<br />
Account enabled: Yes / No<br />
In the first line of the USER-ACCOUNT you have the possibility to lock or<br />
release the whole account. The Administrator-Account cannot be disabled. A<br />
lock can be useful e.g. at longer absence of the account owner.<br />
After having moved the cursor to the corresponding array like described before<br />
you can change the setting with Y or N.<br />
For alternative switching you also can use SPACE.<br />
F1 saves the new settings and leads you back to SELECT ACCOUNT.<br />
Default: Account enabled = Yes<br />
page 45
<strong>Guntermann</strong> & <strong>Drunck</strong> <strong>GmbH</strong> Operating Instructions<br />
<strong>CATVision</strong> (MC)<br />
6.2.3.2 Defining the User Name<br />
User name USER 01<br />
Enter maximum 14 characters for the name of the user of this account. Current<br />
entries can be written over.<br />
Move the cursor to this array. Press ENTER for getting into the edit mode fort<br />
his array.<br />
Close the entry with ENTER.<br />
If the User Name is changed a window opens automatically which indicates the<br />
change. After having pressed any key the input menu for the user password<br />
appears:<br />
CHANGE PASSWORD CVM<br />
Please enter your new<br />
password twice:<br />
[max. 12 characters]<br />
Esc Enter<br />
The entry has max 12 alphanumerical characters. ENTER closes the first entry<br />
and automatically jumps to the second array where the password has to be<br />
entered again. With ENTER you confirm the new password and this will lead<br />
you back to the User Account.<br />
With F1 you save the new settings and go back to SELECT ACCOUNT.<br />
Interrupting the password change<br />
ESC in the window CHANGE PASSWORD will interrupt the action and lead<br />
you back to User Account.<br />
Note:<br />
When you have defined a User Name earlier and abort this procedure without<br />
entering a new password, this user is still existing. This user won´t have any<br />
chance to login, since no password is existing!<br />
If you abort the reentering of an existing password, the old password remains<br />
activ.<br />
By creating a User Account, the OpenAccess will be disabled.<br />
page 46
<strong>Guntermann</strong> & <strong>Drunck</strong> <strong>GmbH</strong> Operating Instructions<br />
<strong>CATVision</strong> (MC)<br />
6.2.3.3 Set Account Defaults<br />
Set Account Defaults<br />
This function sets back all changes of the USER ACCOUNT to the default<br />
values which can be fo<strong>und</strong> at the end of a chapter at “default”.<br />
Exception: User Name + User Password<br />
Move the cursor to the entry and confirm with ENTER. The function will then be<br />
active in the backgro<strong>und</strong>.<br />
With F1 you save the new settings and go back to SELECT ACCOUNT.<br />
6.2.3.4 IVT Access<br />
IVT Access: Yes/No<br />
Here you can give the owner of this account access to IVT or not.<br />
Move to the array and give access to IVT by entering Y or deny access by<br />
entering N.<br />
SPACE can additionally be used for alternative switching.<br />
With F1 you save the new settings and go back to SELECT ACCOUNT.<br />
Default: IVT-Access = Yes<br />
6.2.3.5 System Config Access<br />
System Config Access... No/Yes<br />
Here you can give the owner of this account access to the menu System<br />
Config or not.<br />
Move to the array and give access to System Config by entering Y or deny<br />
access by entering N.<br />
SPACE can additionally be used for alternative switching.<br />
With F1 you save the new settings and go back to SELECT ACCOUNT.<br />
Default: System Config Access = No<br />
page 47
<strong>Guntermann</strong> & <strong>Drunck</strong> <strong>GmbH</strong> Operating Instructions<br />
<strong>CATVision</strong> (MC)<br />
6.2.3.6 User Account Access<br />
User Account Access ... No/Yes<br />
Here you can give the owner of this account access to the menu User Account<br />
or not.<br />
Move to the array and give access to the User Account by entering Y or deny<br />
access by entering N.<br />
SPACE can additionally be used for alternative switching.<br />
With F1 you save the new settings and go back to SELECT ACCOUNT.<br />
Default: User Account Access = No<br />
6.2.3.7 Change Password<br />
Change password...<br />
Here you can define the User Password. Take care that the user password<br />
and the user name exist only once. The entry is possible for alphanumerical<br />
characters.<br />
Move the cursor to the corresponding entry in the menu USER ACCOUNT.<br />
After having pressed ENTER you get into the submenu where you are asked to<br />
enter the password.<br />
CHANGE PASSWORD CVM<br />
Please enter your new<br />
password twice:<br />
[Min. 4, max. 12 characters]<br />
Esc Enter<br />
The input can be done with min 4 and max 12 alphanumerical characters.<br />
page 48
<strong>Guntermann</strong> & <strong>Drunck</strong> <strong>GmbH</strong> Operating Instructions<br />
<strong>CATVision</strong> (MC)<br />
ENTER will close the first entry and automatically will lead you to the second<br />
array where you have to enter the password once again. With ENTER you<br />
confirm the new password and go back to the USER ACCOUNT.<br />
With F1 you save the new settings and go back to SELECT ACCOUNT.<br />
Default: no password.<br />
Interrupting the password change<br />
ESC in the window CHANGE PASSWORD will interrupt the action and lead<br />
you back to USER ACCOUNT.<br />
Note:<br />
If you abort the reentering of an existing password, the old password remains<br />
activ.<br />
Please keep the password in a safe place as at a loss a system access is<br />
not possible anymore.<br />
6.3 Mouse Utility<br />
If the mouse of the computer does not work anymore during operation (mouse<br />
cursor does not move) you have the possibility of re-initialization.<br />
First check whether the connecting cables are fitted correctly.<br />
First call up the FUNCTION menu (CTRL + NUM). Move by means of the<br />
cursor control keys to the menu Mouse Utility.<br />
By pressing ENTER a submenu will open which offers the following<br />
possibilities:<br />
MOUSE UTILITY CVM<br />
Enable Mouse ► for Unix ◄<br />
Reset Mouse<br />
Enable Intelli<br />
Enable Int Explorer<br />
Esc Enter<br />
Warning! Only do the Enable/Reset suitable for the single computer!<br />
page 49
<strong>Guntermann</strong> & <strong>Drunck</strong> <strong>GmbH</strong> Operating Instructions<br />
<strong>CATVision</strong> (MC)<br />
Enable Mouse (Standard Mouse)<br />
Select this function for non-Windows systems (e.g Linux) if the computer works<br />
with a standard mouse driver.<br />
Reset Mouse<br />
Select this function for Windows OS; independent from the set mouse driver.<br />
This is for:<br />
WIN 98, WIN NT, WIN ME, WIN 2000, WIN XP.<br />
Move the cursor via cursor control keys to the corresponding entry.<br />
Press ENTER.<br />
The initialisation of the mouse is done and the menu is closed. The mouse<br />
works with all its functions.<br />
Enable Intelli (MS-IntelliMouse)<br />
Select this function for non-Windows systems (e.g. Linux) if the connected<br />
computer uses the MS IntelliMouse driver.<br />
Enable Int Explorer (MS IntelliMouse)<br />
Select this function for non-Windows systems (e.g. Linux) if the connected<br />
computer uses the MS IntelliMouse Explorer driver.<br />
page 50
<strong>Guntermann</strong> & <strong>Drunck</strong> <strong>GmbH</strong> Operating Instructions<br />
<strong>CATVision</strong> (MC)<br />
7 System Operation<br />
7.1 Possibilities of Access<br />
The following possibilities of access on this system exist:<br />
Open Access: free access to the system<br />
User defined: Log-in with password and name<br />
as supervisor<br />
In the following chapters these possibilities of access are described in detail.<br />
7.1.1 OpenAccess<br />
At OpenAccess everybody has access to the <strong>CATVision</strong> system and the<br />
connected CPU.<br />
OpenAccess in default condition is defined as follows:<br />
Access to the connected CPU without necessary log-in with name and<br />
password<br />
Access to the IVT for individual adjustment of the picture<br />
Access to the menu Console Setup<br />
Manual log-out via F8<br />
Reinitialisation of the mouse<br />
In default the OpenAccess to the menu Config is denied (except IVT, the<br />
OpenAccess can access IVT just by pressing Enter at the password query).<br />
The authorization can be assigned by the supervisor. For this the supervisor<br />
has to assign the corresponding configuration rights in the menu User Account<br />
to the OpenAccess (see chapters 6.2.3.4 – 6.2.3.6).<br />
As long as the OpenAccess is active there is always the possibility of access<br />
without log-in even if the user already exists.<br />
In order to protect the system against unauthorized access OpenAccess has to<br />
be disabled by the supervisor or by a user. OpenAccess is managed in the<br />
UserAccount. For disabling OpenAccess open the menu UserAccount, a<br />
submenu of the Config Menu (see chapter 6.2.3).<br />
page 51
<strong>Guntermann</strong> & <strong>Drunck</strong> <strong>GmbH</strong> Operating Instructions<br />
<strong>CATVision</strong> (MC)<br />
At the bottom of the window the entry OpenAccess can be fo<strong>und</strong>.<br />
User Account CVM<br />
1 USER 01<br />
2 USER 02<br />
3 USER 03<br />
4 USER 04<br />
... bis User 08<br />
OpenAccess<br />
SUPERVISOR<br />
Esc Enter<br />
Move to the entry and press Enter. The following window opens:<br />
USER ACCOUNT CVM<br />
OpenAccess<br />
Account enabled: NO<br />
User Name: OpenAccess<br />
Set Account Defaults<br />
IVT Access Yes<br />
System Config Access No<br />
User Account Access No<br />
Change Password…<br />
Esc Enter F1:Save<br />
Move to the entry Account enabled and change it with Space to NO. Save your<br />
settings with F1.<br />
With this OpenAccess is disabled and access to the <strong>CATVision</strong> system is only<br />
possible with the log-in.<br />
For activating OpenAccess again repeat the last procedure and change the<br />
entry from NO to YES!<br />
7.1.2 Access via Defined User<br />
If you wish to protect the <strong>CATVision</strong>-system against <strong>und</strong>esired access, it is<br />
useful to define Users in the menu UserAccount and assign this users with<br />
certain rights.<br />
As soon as the supervisor has defined users, the access to the system is<br />
possible by entring a Login-Name and Password. To this user certain rights can<br />
be assigned. The procedure of defining a user is described in chapter 6.2.3.<br />
page 52
<strong>Guntermann</strong> & <strong>Drunck</strong> <strong>GmbH</strong> Operating Instructions<br />
<strong>CATVision</strong> (MC)<br />
7.1.3 Access as Supervisor<br />
If you want to change the presets enter your SUPERVISOR identification in<br />
the arrays “name” and “password”. Both can be fo<strong>und</strong> in the appendix 1 of the<br />
operating instructions.<br />
Via SUPERVISOR-Login you have unrestricted access to all configuration<br />
levels independent from the current settings.<br />
For the settings in Menu Config a log-in as SUPERVISOR is necessary:<br />
Of course can a configuration right be linked to the User Login (see chapters<br />
6.2.3.4 – 6.2.3.6)<br />
Please remove the SUPERVISOR password from the operating<br />
instructions for your own safety.<br />
7.2 Automatic Switching<br />
The <strong>CATVision</strong> system allows the selectable operation of the computers from<br />
both consoles (local and remote).<br />
In default operation at both consoles is possible.<br />
As soon as at one of the consoles there is keyboard or mouse action<br />
keyboard and mouse of the other station are disabled.<br />
After a time out of approx 1 second where there is no action the system is<br />
enabled again.<br />
The time out between the switching can be adjusted to your needs (see<br />
chapter 6.2.2.7).<br />
Both connected monitors show simultaneously the picture of the computer.<br />
If the dark switching is enabled (see chapter 7.5) only the monitor of the active<br />
console is switched on.<br />
page 53
<strong>Guntermann</strong> & <strong>Drunck</strong> <strong>GmbH</strong> Operating Instructions<br />
<strong>CATVision</strong> (MC)<br />
7.3 Manual Hold Function (Permanent Access)<br />
The <strong>CATVision</strong> system makes it possible that either the local or the remote<br />
console has access to the computer. This prevents that the system enables the<br />
other console after a preset time out of approx 1 second.<br />
By pressing CTRL and PRINT the hold function is enabled.<br />
The enabled permantent access is indicated<br />
by the slowly flashing keyboard LED “Scroll Lock” at the console<br />
where the hold function was enabled.<br />
by the fast flashing keyboard LED “Scroll Lock”, the disabled<br />
ACTIVE LED LOCAL (e.g. at <strong>CATVision</strong>-CPU) and the enabled<br />
ACTIVE LED CPU at the console which was locked by the hold<br />
function.<br />
The display looks like the following:<br />
CVM<br />
PERMANENT ACCESS<br />
The permantent access will be enabled by pressing CTRL and PRINT again<br />
and the LED SCROLL-LOCK of the keyboard will be switched off. After this the<br />
automatic switch (as described in chapter 7.2) will be enabled again.<br />
Notice: If you have activated the double-hotkey (see chapter 6.2.2.2) you have<br />
to press the defined double-hotkey for activating the permantent access.<br />
In default the permantent access for both consoles is released. If you<br />
intend to lock the permantent access or only release it for one console<br />
proceed as described in chapter 6.2.2.6.<br />
This function can be combined with the dark-switching-function (see chapter<br />
7.5). In this case the monitor of the inactive console will be dark-switched.<br />
page 54
<strong>Guntermann</strong> & <strong>Drunck</strong> <strong>GmbH</strong> Operating Instructions<br />
<strong>CATVision</strong> (MC)<br />
7.4 Protected Mode<br />
In default condition of the Protected Mode all connected console are locked for<br />
keyboard and mouse action and all monitors are switched dark (see chapter<br />
7.4). Only by pressing the hotkeys (CTRL + Print), a console can exclusivly<br />
reserve the right for operation. Whilst this exclusiv operation of the active<br />
console, the monitor of the inactive console remains dark and no keyboard and<br />
mouse operation are possible.<br />
Whilst permanent access, operation is possible for the local and remote<br />
console. Just by activating the hold function one console obtain the exclusive<br />
right to work with the system.<br />
By pressing CTRL and PRINT the releasing console will have full keyboard and<br />
mouse access. The disabled keyboard, however, still has no keyboard and<br />
mouse access.<br />
The Protected Mode is indicated<br />
at the console which has the exclusive right of control by the slowly<br />
flashing keyboard LED “Scroll Lock”.<br />
at the console which still is locked by the fast keyboard LED “Scroll<br />
Lock”, the ACTIVE LED LOCAL (e.g. at <strong>CATVision</strong>-CPU) is<br />
switched off and the ACTIVE LED CPU is lit.<br />
The display looks like the following:<br />
CVM<br />
PROTECTION ACTIVATED<br />
The Protected Mode will be activated by pressing CTRL and PRINT again and<br />
the LED SCROLL-LOCK of the keyboard will be switched off and all monitors<br />
will be switched dark. After this the automatic switching (as described in chapter<br />
7.2) will be active again.<br />
In default the Protected Mode is not enabled. If you intend to activate the<br />
Protected Mode proceed as described in chapter 6.2.2.8.<br />
page 55
<strong>Guntermann</strong> & <strong>Drunck</strong> <strong>GmbH</strong> Operating Instructions<br />
<strong>CATVision</strong> (MC)<br />
7.5 Dark Switching of the Monitor<br />
The <strong>CATVision</strong>-system offers the possibility that the monitor of the local or<br />
remote console can be switched of when a keyboard/mouse action is done at<br />
one of the attached consoles.<br />
The dark-switching can be carried out:<br />
whilst automatic switching<br />
whilst permanent access<br />
All of this issues will be explaind in the following chapters.<br />
7.5.1 Dark switching whilst automatic switching<br />
In default (automatic switching), the hold function will be released by a<br />
keyboard/mouse operation. After the set time-out of approx. 1 second, the<br />
monitor of the of the disabled console will be released after the set time out<br />
(see chapter 6.2.2.7).<br />
In default the “dark switching” is disabled. If you intend to activate the<br />
“dark switching” proceed as described in the chapters 6.2.2.4 and 6.2.2.5.<br />
7.5.2 Dark switching whilst permanent access<br />
The dark switching of the disabled monitor is possible at keyboard and mouse<br />
action and in the mode “Hold Function” if the dark switching was enabled (see<br />
chapters 6.2.2.4 and 6.2.2.5).<br />
The dark switching is activated by keyboard or mouse action or by activating<br />
the hold function (CTRL + PRINT).<br />
The manual hold function will be disabled again by pressing CTRL and PRINT<br />
and the monitor of the disabled console will be released after the set time out<br />
(see chapter 6.2.2.7).<br />
In default the “dark switching” is disabled. If you intend to activate the<br />
“dark switching” proceed as described in the chapters 6.2.2.4 and 6.2.2.5.<br />
page 56
<strong>Guntermann</strong> & <strong>Drunck</strong> <strong>GmbH</strong> Operating Instructions<br />
<strong>CATVision</strong> (MC)<br />
7.6 Manual Logout<br />
By pressing F8 in the Function Menu you log-out.<br />
This function deletes log-in to the <strong>CATVision</strong>.<br />
After execution <strong>CATVision</strong> opens the LOGIN window:<br />
If you are still in the mode OPEN ACCESS you can directly log-in<br />
again with Enter.<br />
If you have opened User Accounts and OPEN ACCESS was disabled<br />
you can only have access to the system after entering your user<br />
password or the supervisor password.<br />
Notice: You should use this function always then when you want to protect<br />
your computer against unauthorized access, e.g. when you leave<br />
your working place.<br />
page 57
<strong>Guntermann</strong> & <strong>Drunck</strong> <strong>GmbH</strong> Operating Instructions<br />
<strong>CATVision</strong> (MC)<br />
8 Optional Equipment<br />
All components mentioned in this chapter are available as options. If you need<br />
one of these components please contact our sales department (phone: +49<br />
2739 89010 or mail: sales@gdsys.de).<br />
8.1 Delay<br />
Delay balances the run time delays in CAT-x cables. These run time delays are<br />
caused by the twisting of the core pairs.<br />
Because of these different lengths the colour signals R, G and B reach the<br />
monitor in different times. The effect of these run time delays is that you see no<br />
harmonic picture but colour shifts which can be compared with convergence<br />
errors at the monitor.<br />
For balancing the run time delays Delay is used and described in chapter<br />
5.4.4.4.<br />
page 58
<strong>Guntermann</strong> & <strong>Drunck</strong> <strong>GmbH</strong> Operating Instructions<br />
<strong>CATVision</strong> (MC)<br />
8.2 Audio<br />
<strong>CATVision</strong> offers a bidirectional Stereo-Audio transmission nearly in CD<br />
quality.<br />
For this <strong>CATVision</strong>-CPU has<br />
Mouse PS/2<br />
Keyb PS/2.<br />
Red. Power<br />
5V DC/5A<br />
RS 232<br />
Transmission<br />
- Line In<br />
- Line Out.<br />
Line In Line Out<br />
Monitor<br />
USB K/M<br />
CPU In<br />
Trans<br />
CPU VGA Keyb. Mouse In<br />
USB 1.1<br />
page 59<br />
CPU In<br />
<strong>CATVision</strong>-CON has the following connections:<br />
- Line In<br />
- Micro In<br />
- Speaker<br />
RS 232 Line In Micro In Speaker<br />
Keyb. PS/2 Mouse<br />
Service<br />
Keyb. USB Mouse<br />
USB Trans<br />
Monitor Transmission Red. Power<br />
5V DC/5A<br />
Main Power<br />
AC 100-240 V, 47-63 Hz<br />
Main Power<br />
AC 100-240 V, 47-63 Hz<br />
The output is for sending the corresponding audio signals which come in at the<br />
other end of the transmitting distance.<br />
The transmission of the audio signals is digital via CAT-x cable and so<br />
independent from the length of the cable.<br />
Digitalisation is done with a resolution of 18 Bit and a scan rate of 48 kHz.<br />
The connecting is designed as 3.5 mm jack.<br />
The inputs Micro In and Line In of the corresponding devices can not be used<br />
at the same time.<br />
The input Micro In has a preamplification of 20 dB.<br />
Here the connections used most often:<br />
PC CAT<br />
CAT<br />
Periphery<br />
Vision-CPU Vision-CON<br />
1. Line-Out => Line-In Line-Out Line-Out Micro-In
<strong>Guntermann</strong> & <strong>Drunck</strong> <strong>GmbH</strong> Operating Instructions<br />
<strong>CATVision</strong> (MC)<br />
8.3 RS232<br />
With the port RS232 external devices can be connected to <strong>CATVision</strong>. These<br />
devices must have the following characteristics:<br />
Transmission rate: up to 200 meter:max 38400 bits/sec<br />
up to 100 meter:max 57600 bits/sec<br />
Transmittable signals: TxD, RxD, RTS, CTS, DTR, DSR<br />
8.4 USB 1.1 transmission<br />
Due to the used technologie you overcome the transmitting limitation of the USB<br />
standard between the PC and the USB – device.(normally up to 5 meter).<br />
With the <strong>CATVision</strong>-System USB-devices can be connected up to 200 meter to the<br />
local PC.<br />
Special note to the compatiblity of the transparent USB 1.1 connection:<br />
The USB-conncection complies with the specification of the USB 1.1 standard,<br />
which defines the design of USB full-speed devices. However, the manufacturer<br />
does not gurantee, that all USB full-speed devices are compatibel to the<br />
<strong>CATVision</strong>.<br />
page 60
<strong>Guntermann</strong> & <strong>Drunck</strong> <strong>GmbH</strong> Operating Instructions<br />
<strong>CATVision</strong> (MC)<br />
9 System-Update<br />
Over a Service-Interface you can update <strong>CATVision</strong> with an actual firmware.<br />
This interface is located at the front-side of the <strong>CATVision</strong>-CPU.<br />
Service-Interface for Firmwareupdate<br />
The Service-interface at <strong>CATVision</strong>-CON is located at the rear-side.<br />
For the daily use the Service-interface is for you without broader meaning.<br />
Since the system can be updated with special hardware or new firmware<br />
releases, a permanent use of the <strong>CATVision</strong>-System will be ensured by<br />
the Service-interface. In one of these issues, please contact out servicedepartement<br />
by dialing +49-2739-8901-100.<br />
10 System Info<br />
In the window System Info which only can be called up via FUNCTION menu<br />
no settings can be made.<br />
Here you will find information about <strong>CATVision</strong> which is important for the<br />
service department.<br />
With ESC you close the window.<br />
page 61
<strong>Guntermann</strong> & <strong>Drunck</strong> <strong>GmbH</strong> Operating Instructions<br />
<strong>CATVision</strong> (MC)<br />
11 CV-Power-Expansion<br />
By the CV-Power functionality (GPIO=General Purpose Input Output) the<br />
<strong>CATVision</strong> system offers the possibility of transmitting electronic signals over<br />
long distances.<br />
A correct application for this is the remote control of<br />
RESET and<br />
switching of the ATX power supply<br />
in a PC. With a simple slot-aperture insertion card the current key switches are<br />
combined with the control signals of <strong>CATVision</strong>.<br />
11.1 Scope of Delivery<br />
For the connection at the <strong>CATVision</strong>-CPU<br />
1 x CV power Slot card (ATX module) for the<br />
installation in a PC<br />
2 x 2pole connection cable-0,4 for the connection between<br />
motherboard and CV power<br />
(2-core jack/jack)<br />
2 x 2pole connection cable-0,4 for the extension of the jack-jack cable<br />
(2-core connector/jack)<br />
1 x Power Cord-2 Connection cable for connecting the<br />
CV power card with the <strong>CATVision</strong><br />
CPU (3pole connector on RJ9 plug)<br />
For the connection at the <strong>CATVision</strong>-CON<br />
1 x 3-pole cable jack for the connection at the<br />
key switch connection cable<br />
page 62
<strong>Guntermann</strong> & <strong>Drunck</strong> <strong>GmbH</strong> Operating Instructions<br />
<strong>CATVision</strong> (MC)<br />
11.2 Installation<br />
11.2.1 Installation in the PC<br />
The connection of the CV-Power (ATX module) with the motherboard of the<br />
computer allows<br />
RESET and<br />
switching of the ATX power supply.<br />
For switching the ATX power supply please proceed as follows:<br />
Open the side covers of the PC case<br />
Insert the ATX module CV-Power in a free extension slot.<br />
This doe not require a PCI, ISA or AGP slot but just the installation<br />
position at the back of the computer.<br />
Pull off the 2-core cable at the motherboard coming from the ATX switch<br />
at the PC front side(Motherboard) and connect it to the connector Pwr-<br />
Sw ATX-Modul CV-Power.<br />
The 2-pole connector position seen from<br />
bottom to top:<br />
Pwr-Sw – Power connection to the ATX switch<br />
Pwr-MB – Power connection to the motherboard<br />
(Place holder)<br />
Res-MB – Reset connection to the motherboard<br />
Res-Sw – Reset connection to the Reset switch<br />
Now connect the 2-pole connection cable with Pwr-MB. Connect the<br />
other end with the connecting position with the motherboard where the<br />
cable of the ATX switch was connected before. If the length of the 2-pole<br />
connection cable is not sufficient use the delivered extension cable.<br />
page 63
<strong>Guntermann</strong> & <strong>Drunck</strong> <strong>GmbH</strong> Operating Instructions<br />
<strong>CATVision</strong> (MC)<br />
For establishing a Reset connection, proceed in the same way as described<br />
above. Here you connect the connector Res-Sw with the Reset switch and then<br />
the connector Res-MB of the module with the motherboard.<br />
Even if there is no Reset button at the PC case a Reset is still possible. In this<br />
case Res-MB is connected with a 2-core cable with suitable connections for the<br />
Reset key switch on the motherboard.<br />
Information:<br />
For finding the correct contacts on the motherboard please see the manual of<br />
the motherboard.<br />
Typical application: principle circuit for controlling ATX power and Reset:<br />
V+ 5V (Pin 2)<br />
O2 RESET# (Pin 3)<br />
O2 ATXPWR# (Pin 1)<br />
2-pole-connection to<br />
the ATX switch at the<br />
PC case (Pwr-SW)<br />
2-pole connection to<br />
the PWR-SW<br />
connection on the<br />
PC motherboard<br />
(Pwr-MB)<br />
2-pole connection to<br />
ATX switch at the PC<br />
case (Res-Sw)<br />
2-pole connection to<br />
the Reset connection<br />
on the PC motherboar<br />
(Res-MB)<br />
The remote activation of Reset or On/Off of the computer only works at<br />
switched on and (over CAT-x cable) connected <strong>CATVision</strong>-CPU and<br />
<strong>CATVision</strong>-CON. At a correct wiring the key switches at the PC still work as<br />
usual.<br />
page 64
<strong>Guntermann</strong> & <strong>Drunck</strong> <strong>GmbH</strong> Operating Instructions<br />
<strong>CATVision</strong> (MC)<br />
11.2.2 Conncetion with <strong>CATVision</strong>-CPU<br />
For establishing a connection between ATX module CV-Power and<br />
<strong>CATVision</strong>-CPU please use the delivered cable PowerCord-2.<br />
Plug the 3-pole jack of the cable in the 3-pole flange connector of<br />
<strong>CATVision</strong>-CPU on the back of the device.<br />
(3-pole flange connector)<br />
Then plug the RJ9 connector in the RJ-9 jack of the ATX module CV-<br />
Power.<br />
11.2.3 Connection of the key switch with <strong>CATVision</strong>-CON<br />
Before connecting the key switch with <strong>CATVision</strong>-CON the key switch has to<br />
be connected with the delivered 3-pole cable jack.<br />
From the following illustration you can see which wire has to be connected with<br />
which PIN.<br />
page 65
<strong>Guntermann</strong> & <strong>Drunck</strong> <strong>GmbH</strong> Operating Instructions<br />
<strong>CATVision</strong> (MC)<br />
Principle circuit with key switches for Reset and ATX Power On/Off:<br />
I1 SW1_ATXPWR# (Pin 1)<br />
I2 SW2_RESET# (Pin 3)<br />
- 0V (Pin 2)<br />
After having connected the key switches with the 3-pole cable jack, plug these<br />
in the 3-pole flange connector of <strong>CATVision</strong>-CON on the back of the device.<br />
(3-pole flange connector)<br />
page 66
<strong>Guntermann</strong> & <strong>Drunck</strong> <strong>GmbH</strong> Operating Instructions<br />
<strong>CATVision</strong> (MC)<br />
12 Specifications<br />
12.1 <strong>CATVision</strong><br />
Video<br />
Resolution: max 1920 x 1440 pixels (depending on cable and<br />
video signal)<br />
Transmitting distance: 10 to 300 m (max value, depending on resolution,<br />
cable and video signal)<br />
Transmittable signals: RGBHV, RGsB or RsGsBs<br />
Keyboard / Mouse<br />
(ON COMPUTER + USER SIDE)<br />
Port/Transmission: USB, PS/2 / serial Mouse / Intelli-Mouse,<br />
via adaptor: Sun, MAC<br />
Mixed operation possible<br />
RS232 (optional)<br />
Transmission rate: up to 100 meter:max 57600 bits/sec<br />
up to 200 meter:max 38400 bits/sec<br />
Transmittable signals: TxD, RxD, RTS, CTS, DTR, DSR<br />
Audio (optional)<br />
Resolution: 18 Bit digital<br />
Scan rate: 48 kHz<br />
Band width: 22 kHz<br />
Microphone preamplification: 20dB<br />
USB 1.1 (optional)<br />
Transmitting distance: 200 meter<br />
Support: High power devices (up to 500 mA)<br />
Transmission rate: up to 12 Mbits/s<br />
Transmitting cable: CAT-x cable or higher (x = 5, 6, 7)<br />
Size: <strong>CATVision</strong>-CPU<br />
(W x H x D in mm) 210 x 44 x 210 (19“ / 1 unit)<br />
<strong>CATVision</strong>-CON<br />
210 x 44 x 210 (19“ / 1 unit)<br />
page 67
<strong>Guntermann</strong> & <strong>Drunck</strong> <strong>GmbH</strong> Operating Instructions<br />
<strong>CATVision</strong> (MC)<br />
Weight:<br />
<strong>CATVision</strong>-CPU <strong>CATVision</strong>-CON<br />
without USB 1,20 kg without USB 1,10 kg<br />
with USB 1,28 kg with USB 1,18 kg<br />
Power supply:<br />
Main: 100 – 240 V primary<br />
50 – 60 Hz<br />
Red<strong>und</strong>ant: DC 12V<br />
5 A<br />
Current consumption (max. values):<br />
at 100 V (Main) at 240 V (Main) at 12 V (red.)<br />
<strong>CATVision</strong>-CPU 140 mA 82 mA 600 mA<br />
<strong>CATVision</strong>-CON 240 mA 100 mA 900 mA<br />
Power consumption (max. values):<br />
at 100 V (Main) at 240 V (Main) at 12 V (red.)<br />
<strong>CATVision</strong>-CPU 9,08 W 9,78 W 7,2 W<br />
<strong>CATVision</strong>-CON 11,38 W 11,46 W 9,96 W<br />
Heat dissipation (max. values):<br />
at 100 V (Main) at 240 V (Main) at 12 V (red.)<br />
<strong>CATVision</strong>-CPU 9,08 W 9,78 W 7,2 W<br />
<strong>CATVision</strong>-CON 11,38 W 11,46 W 9,96 W<br />
Temperature range:<br />
Operation: 5 to 40° C<br />
rel. air moisture < 80%, non precipitate<br />
Storage: - 10 to 55°C, < 85 % Air moisture<br />
page 68
<strong>Guntermann</strong> & <strong>Drunck</strong> <strong>GmbH</strong> Operating Instructions<br />
<strong>CATVision</strong> (MC)<br />
12.2 <strong>CATVision</strong>-MC<br />
Video<br />
Resolution: max 1920 x 1440 pixels (depending on cable and<br />
video signal)<br />
Transmitting distance: 10 to 300 m (max value, depending on resolution,<br />
cable and video signal)<br />
Transmittable signals: RGBHV, RGsB or RsGsBs<br />
Keyboard / Mouse<br />
(ON COMPUTER + USER SIDE)<br />
Port/Transmission: USB, PS/2 / serial Mouse / Intelli-Mouse,<br />
via adaptor: Sun, MAC<br />
Mixed operation possible<br />
RS232 (optional)<br />
Transmission rate: up to 100 meter:max 57600 bits/sec<br />
up to 200 meter:max 38400 bits/sec<br />
Transmittable signals: TxD, RxD, RTS, CTS, DTR, DSR<br />
Audio (optional)<br />
Resolution: 18 Bit digital<br />
Scan rate: 48 kHz<br />
Band width: 22 kHz<br />
Microphone preamplification: 20dB<br />
USB 1.1 (optional)<br />
Transmitting distance: 200 meter<br />
Support: High power devices (up to 500 mA)<br />
Transmission rate: up to 12 Mbits/s<br />
Transmitting cable: CAT-x cable or higher (x = 5, 6, 7)<br />
Size: <strong>CATVision</strong>-MC 2 (3,4)-CPU; <strong>CATVision</strong>-MC 3 (4)-CON<br />
Twin <strong>CATVision</strong>-MC 2-CPU<br />
(W x H x D in mm) 435 x 44 x 210 (19“ / 1 unit)<br />
<strong>CATVision</strong>-MC2-CON<br />
210 x 44 x 210 (19“ / 1 unit)<br />
page 69
<strong>Guntermann</strong> & <strong>Drunck</strong> <strong>GmbH</strong> Operating Instructions<br />
<strong>CATVision</strong> (MC)<br />
Weight:<br />
<strong>CATVision</strong>-MC2-CPU <strong>CATVision</strong>-MC2-CON<br />
without USB 1,90 kg without USB 1,35 kg<br />
with USB 1,98 kg with USB 1,43 kg<br />
<strong>CATVision</strong>-MC3-CPU <strong>CATVision</strong>-MC3-CON<br />
without USB 2,10 kg without USB 2,00 kg<br />
with USB 2,18 kg with USB 2,08 kg<br />
<strong>CATVision</strong>-MC4-CPU <strong>CATVision</strong>-MC4-CON<br />
without USB 2,15 kg without USB 2,00 kg<br />
with USB 2,23 kg with USB 2,08 kg<br />
Power supply:<br />
Main: 100 – 240 V primary<br />
50 – 60 Hz<br />
Red<strong>und</strong>ant: DC 12V<br />
5 A<br />
Current consumption (max. values):<br />
at 100 V (Main) at 240 V (Main) at 12 V (red.)<br />
<strong>CATVision</strong>-MC-CPU 410 mA 200 mA 2 A<br />
<strong>CATVision</strong>-MC-CON 310 mA 160 mA 1,5 A<br />
Power consumption (max. values):<br />
at 100 V (Main) at 240 V (Main) at 12 V (red.)<br />
<strong>CATVision</strong>-MC-CPU 26,0 W 26,51 W 21,24 W<br />
<strong>CATVision</strong>-MC-CON 19,51 W 21,96 W 16,56 W<br />
Heat dissipation (max. values):<br />
at 100 V (Main) at 240 V (Main) at 12 V (red.)<br />
<strong>CATVision</strong>-MC-CPU 26,0 W 26,51 W 21,24 W<br />
<strong>CATVision</strong>-MC-CON 19,51 W 21,96 W 16,56 W<br />
Temperature range:<br />
Operation: 5 to 45° C<br />
rel. air moisture < 80%, non precipitate<br />
Storage: - 10 to 55°C, < 85 % Air moisture<br />
page 70
<strong>Guntermann</strong> & <strong>Drunck</strong> <strong>GmbH</strong> Operating Instructions<br />
<strong>CATVision</strong> (MC)<br />
13 Appendix<br />
13.1 HotKey Seizure<br />
Function Default HotKey Personal HotKey Chapter<br />
Calling up Function-<br />
Menu<br />
CTRL+ NUM 6<br />
Manual Hold function CTRL + PRINT 7.3<br />
Activating keyboardmouse<br />
operation in<br />
protected mode<br />
Calling up the IVT<br />
Mode<br />
Shifting the IVT-Menu<br />
CTRL + PRINT 74<br />
CTRL+ SCROLL 5.4<br />
SHIFT+ Cursor-<br />
Keys<br />
13.2 IVT Settings<br />
Parameter Konfiguration Key Chapter<br />
CALLING UP THE<br />
IVT MODE<br />
CTRL +<br />
SCROLL<br />
Min Amplification END 5.4.4.3.1<br />
Max Amplification POS 1 5.4.4.3.1<br />
+ 5 Amplification CTRL + 5.4.4.3.1<br />
- 5 Amplification CTRL + 5.4.4.3.1<br />
+ 1 Amplification 5.4.4.3.1<br />
- 1 Amplification 5.4.4.3.1<br />
Reject new settings ESC 5.4.4.3.1<br />
page 71<br />
5.3<br />
5.4.4
<strong>Guntermann</strong> & <strong>Drunck</strong> <strong>GmbH</strong> Operating Instructions<br />
<strong>CATVision</strong> (MC)<br />
13.3 Password<br />
For OpenAccess name and password are not necessary.<br />
If you want to configurate the system you have to log-in as SUPVERVISOR!<br />
LOGIN CVM<br />
Name:<br />
Password:<br />
SUPERVISOR<br />
Please enter your login:<br />
ESC Enter<br />
page 72<br />
4658<br />
Please watch the spelling.<br />
Replace the preset password by a individual and safe<br />
password.
NOTES
NOTES
NOTES
NOTES
NOTES
Das Handbuch wird fortlaufend aktualisiert <strong>und</strong> im Internet veröffentlicht.<br />
The manual is constantly updated and available on our website.<br />
http://gdsys.de/A9100189<br />
<strong>Guntermann</strong> & <strong>Drunck</strong> <strong>GmbH</strong><br />
Dortm<strong>und</strong>er Str. 4a<br />
57234 Wilnsdorf<br />
Germany<br />
http://www.GDsys.de<br />
sales@GDsys.de