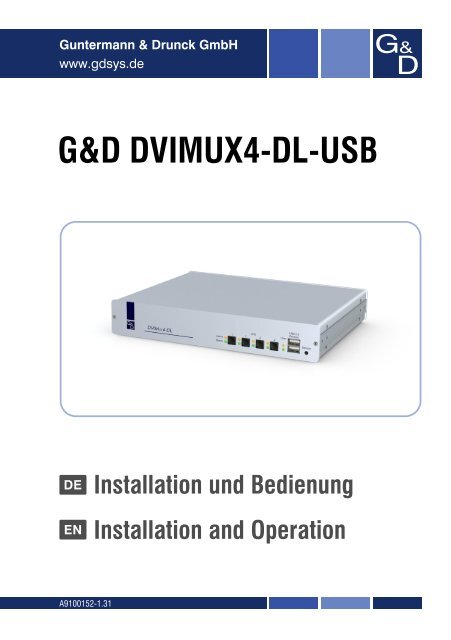
G&D DVIMUX4-DL-USB - Guntermann und Drunck GmbH
G&D DVIMUX4-DL-USB - Guntermann und Drunck GmbH
G&D DVIMUX4-DL-USB - Guntermann und Drunck GmbH

Sie wollen auch ein ePaper? Erhöhen Sie die Reichweite Ihrer Titel.
YUMPU macht aus Druck-PDFs automatisch weboptimierte ePaper, die Google liebt.
<strong>Guntermann</strong> & <strong>Drunck</strong> <strong>GmbH</strong><br />
www.gdsys.de<br />
G&D <strong>DVIMUX4</strong>-<strong>DL</strong>-<strong>USB</strong><br />
DE Installation <strong>und</strong> Bedienung<br />
EN Installation and Operation<br />
A9100152-1.31
Zu dieser Dokumentation<br />
Diese Dokumentation wurde mit größter Sorgfalt erstellt <strong>und</strong> nach dem Stand der<br />
Technik auf Korrektheit überprüft.<br />
Für die Qualität, Leistungsfähigkeit sowie Marktgängigkeit des G&D-Produkts zu<br />
einem bestimmten Zweck, der von dem durch die Produktbeschreibung<br />
abgedeckten Leistungsumfang abweicht, übernimmt G&D weder ausdrücklich<br />
noch stillschweigend die Gewähr oder Verantwortung.<br />
Für Schäden, die sich direkt oder indirekt aus dem Gebrauch der Dokumentation<br />
ergeben, sowie für beiläufige Schäden oder Folgeschäden ist G&D nur im Falle des<br />
Vorsatzes oder der groben Fahrlässigkeit verantwortlich.<br />
Gewährleistungsausschluss<br />
G&D übernimmt keine Gewährleistung für Geräte, die<br />
nicht bestimmungsgemäß eingesetzt wurden.<br />
nicht autorisiert repariert oder modifiziert wurden.<br />
schwere äußere Beschädigungen aufweisen, welche nicht bei Lieferungserhalt<br />
angezeigt wurden.<br />
durch Fremdzubehör beschädigt wurden.<br />
G&D haftet nicht für Folgeschäden jeglicher Art, die möglicherweise durch den<br />
Einsatz der Produkte entstehen können.<br />
Warenzeichennachweis<br />
Alle Produkt- <strong>und</strong> Markennamen, die in diesem Handbuch oder in den übrigen<br />
Dokumentationen zu Ihrem G&D-Produkt genannt werden, sind Warenzeichen<br />
oder eingetragene Warenzeichen der entsprechenden Rechtsinhaber.<br />
Impressum<br />
© <strong>Guntermann</strong> & <strong>Drunck</strong> <strong>GmbH</strong> 2011. Alle Rechte vorbehalten.<br />
Version 1.31 – 17.03.2011 <br />
Firmware: 1.5.4<br />
<strong>Guntermann</strong> & <strong>Drunck</strong> <strong>GmbH</strong><br />
Dortm<strong>und</strong>er Str. 4a<br />
57234 Wilnsdorf<br />
Germany<br />
Telefon +49 (0) 2739 8901-100<br />
Telefax +49 (0) 2739 8901-120<br />
http://www.GDsys.de<br />
sales@GDsys.de<br />
i · G&D <strong>DVIMUX4</strong>-<strong>DL</strong>-<strong>USB</strong>
Inhaltsverzeichnis<br />
Inhaltsverzeichnis<br />
Sicherheitshinweise .......................................................................................... 1<br />
Der KVM-Switch »<strong>DVIMUX4</strong>-<strong>DL</strong>-<strong>USB</strong>« ........................................................ 2<br />
Lieferumfang .................................................................................................... 2<br />
Installation ....................................................................................................... 3<br />
Übersicht der Schnittstellen ................................................................................ 3<br />
Aufstellen des Geräts ......................................................................................... 3<br />
Anschluss der Geräte des Arbeitsplatzes ............................................................. 4<br />
Anschluss der Rechner ....................................................................................... 5<br />
Anschluss der Stromversorgung ......................................................................... 6<br />
Weiterführende Informationen ......................................................................... 7<br />
Unterstützung digitaler <strong>und</strong> analoger Videosignale ............................................. 7<br />
Anschluss von <strong>USB</strong> 2.0-Massenspeichergeräten .................................................. 7<br />
Inbetriebnahme ................................................................................................. 8<br />
Statusanzeigen .................................................................................................. 8<br />
Umschaltung zwischen den Rechnern ............................................................... 9<br />
Umschaltung durch Verwendung der Taster ....................................................... 9<br />
Umschaltung mit Tastenkombinationen ............................................................. 9<br />
Umschaltung mit Step-Keys ............................................................................... 9<br />
Umschaltung über ein serielles Gerät ................................................................ 10<br />
Konfiguration ................................................................................................. 12<br />
Übersicht der Funktionen <strong>und</strong> Standardeinstellungen ....................................... 12<br />
Bedienung des Setup-Modus ............................................................................ 13<br />
Bedienung des Setup-Menüs ............................................................................ 14<br />
Konfigurationseinstellungen ............................................................................. 16<br />
Verwendung von einfachen oder Doppel-Hotkeys ....................................... 16<br />
Änderung des einfachen Hotkeys ................................................................ 17<br />
Änderung des Doppel-Hotkeys ................................................................... 18<br />
Änderung der Select-Keys .......................................................................... 19<br />
Hotkey-Verzögerung ein- oder ausschalten .................................................. 20<br />
Standardeinstellungen wiederherstellen ....................................................... 21<br />
Automatische Aufschaltung des ersten Kanals ............................................ 22<br />
Umschaltung über Taster an der Frontseite (de)aktivieren ........................... 23<br />
Umschaltung über Tastenkombinationen (de)aktivieren .............................. 24<br />
Umschaltung über Step-Keys (de)aktivieren ................................................ 25<br />
Änderung der Bitrate der Service-Buchse .................................................... 26<br />
Änderung des Standard-Modus der Service-Buchse ..................................... 27<br />
Auswahl des Typs der <strong>USB</strong>-Tastatur ........................................................... 28<br />
Bestellnummern .............................................................................................. 30<br />
Technische Daten ........................................................................................... 31<br />
G&D <strong>DVIMUX4</strong>-<strong>DL</strong>-<strong>USB</strong> · ii
Sicherheitshinweise<br />
Sicherheitshinweise<br />
Bitte lesen Sie die folgenden Sicherheitshinweise aufmerksam durch, bevor Sie das<br />
G&D-Produkt in Betrieb nehmen. Die Hinweise helfen Schäden am Produkt zu vermeiden<br />
<strong>und</strong> möglichen Verletzungen vorzubeugen.<br />
Halten Sie diese Sicherheitshinweise für alle Personen griffbereit, die dieses Produkt<br />
benutzen werden.<br />
Befolgen Sie alle Warnungen oder Bedienungshinweise, die sich am Gerät oder in<br />
dieser Bedienungsanleitung befinden.<br />
, Vorsicht vor Stromschlägen<br />
Um das Risiko eines Stromschlags zu vermeiden, sollten Sie das Gerät nicht<br />
öffnen oder Abdeckungen entfernen. Im Servicefall wenden Sie sich bitte an<br />
unsere Techniker.<br />
, Ziehen Sie den Netzstecker des Geräts vor Installationsarbeiten<br />
Stellen Sie vor Installationsarbeiten sicher, dass das Gerät spannungsfrei ist.<br />
Ziehen Sie den Netzstecker oder die Spannungsversorgung am Gerät ab.<br />
, Ständigen Zugang zu den Netzsteckern der Geräte sicherstellen<br />
Achten Sie bei der Installation der Geräte darauf, dass die Netzstecker der<br />
Geräte jederzeit zugänglich bleiben.<br />
! Stolperfallen vermeiden<br />
Vermeiden Sie bei der Verlegung der Kabel Stolperfallen.<br />
, Geerdete Spannungsquelle verwenden<br />
Betreiben Sie dieses Gerät nur an einer geerdeten Spannungsquelle.<br />
, Verwenden Sie ausschließlich das G&D-Netzteil<br />
Betreiben Sie dieses Gerät nur mit dem mitgelieferten oder in der Bedienungsanleitung<br />
aufgeführten Netzteil.<br />
! Betreiben Sie das Gerät ausschließlich im vorgesehenen Einsatzbereich<br />
Die Geräte sind für eine Verwendung im Innenbereich ausgelegt. Vermeiden Sie<br />
extreme Kälte, Hitze oder Feuchtigkeit.<br />
1 · G&D <strong>DVIMUX4</strong>-<strong>DL</strong>-<strong>USB</strong>
Der KVM-Switch »<strong>DVIMUX4</strong>-<strong>DL</strong>-<strong>USB</strong>«<br />
Der KVM-Switch »<strong>DVIMUX4</strong>-<strong>DL</strong>-<strong>USB</strong>«<br />
Der KVM-Switch <strong>DVIMUX4</strong>-<strong>DL</strong>-<strong>USB</strong> ermöglicht die Bedienung von bis zu vier<br />
Rechnern über einen Arbeitsplatz.<br />
Der Arbeitsplatz wird mit einer <strong>USB</strong>-Tastatur <strong>und</strong> <strong>USB</strong>-Maus sowie einem<br />
digitalen <strong>und</strong>/oder analogen Monitor ausgestattet.Die an den KVM-Switch angeschlossenen<br />
Rechner werden zentral am eingerichteten Arbeitsplatz bedient.<br />
Die Umschaltung zwischen den Rechnern erfolgt wahlweise über die Taster an der<br />
Frontseite, über konfigurierbare Tastenkombinationen oder über ein serielles Gerät,<br />
das an die Service-Schnittstelle angeschlossen wird.<br />
An der Frontseite des Geräts stehen zwei <strong>USB</strong> 2.0-Schnittstellen zum Betrieb<br />
beliebiger <strong>USB</strong>-Geräte zur Verfügung. Die angeschlossenen <strong>USB</strong>-Geräte werden<br />
dem jeweils aktiven Rechner zur Verfügung gestellt.<br />
HINWEIS: Der KVM-Switch arbeitet mit voller Tastatur- <strong>und</strong> Mausemulation auf<br />
jedem Kanal <strong>und</strong> gewährleistet jederzeit das fehlerfreie Booten der angeschlossenen<br />
Rechner.<br />
Lieferumfang<br />
1 × KVM-Switch <strong>DVIMUX4</strong>-<strong>DL</strong> (Gr<strong>und</strong>- oder Multi-Channel-Variante)<br />
1 × Adapter DVI-Divider pro unterstütztem Videokanal<br />
1 × Datenkabel (Update-Cable-2)<br />
1 × Stromversorgungskabel<br />
1 × Handbuch »Installation <strong>und</strong> Bedienung«<br />
WICHTIG: Zum Anschluss der Rechner an den KVM-Switch sind KVM-Kabelsets<br />
erforderlich. Eine Auflistung der erhältlichen KVM-Kabelsets finden Sie auf Seite 30.<br />
G&D <strong>DVIMUX4</strong>-<strong>DL</strong>-<strong>USB</strong> · 2
Installation<br />
Installation<br />
Übersicht der Schnittstellen<br />
Frontseite des KVM-Switches<br />
An der Frontseite des KVM-Switches sind zwei <strong>USB</strong> 2.0-Schnittstellen zum<br />
Anschluss beliebiger <strong>USB</strong> 2.0-Geräte vorhanden.<br />
HINWEIS: Wird ein Drucker oder eine Festplatte an eine dieser Schnittstellen<br />
angeschlossen, stehen dem jeweils aktiven Rechner diese Geräte zur Verfügung.<br />
Zusätzlich ist hier die Service-Buchse zu finden. Diese Buchse wird zur Bedienung<br />
des Setup-Menüs (siehe Bedienung des Setup-Menüs ab Seite 14) <strong>und</strong> zum Ausführen<br />
von Firmware-Updates verwendet.<br />
Abbildung 1: Frontansicht des KVM-Switches<br />
Neben den Schnittstellen sind vier Taster zur Auswahl des aktiven Kanals <strong>und</strong><br />
einige LEDs (siehe Statusanzeigen auf Seite 8) an der Frontseite platziert.<br />
Rückseite des KVM-Switches<br />
Auf der Rückseite des KVM-Switches sind die Schnittstellen zum Anschluss der<br />
Geräte des Arbeitsplatzes <strong>und</strong> der Rechner angeordnet. Eine detaillierte Beschreibung<br />
der Schnittstellen finden Sie auf der folgenden Seite.<br />
Aufstellen des Geräts<br />
1. Stellen Sie sicher, dass die an den KVM-Switch anzuschließenden Rechner ausgeschaltet<br />
sind. Falls an die Rechner Tastaturen <strong>und</strong>/oder Mäuse angeschlossen<br />
sind, ziehen Sie die Kabel der Eingabegeräte aus den <strong>USB</strong>-Schnittstellen.<br />
2. Platzieren Sie den KVM-Switch zwischen den Rechnern sowie dem Arbeitsplatz.<br />
Beachten Sie hierbei die maximale Kabellänge von fünf Metern zwischen dem<br />
KVM-Switch <strong>und</strong> den anzuschließenden Rechnern.<br />
3. Entscheiden Sie vor der Installation des KVM-Switches, welcher Taster an der<br />
Frontseite des Geräts, welchem Rechner zugewiesen werden soll.<br />
3 · G&D <strong>DVIMUX4</strong>-<strong>DL</strong>-<strong>USB</strong><br />
<strong>USB</strong> 2.0<br />
Devices<br />
CPU 1 CPU 2 CPU 3 CPU 4 User Service<br />
Active<br />
Status
Anschluss der Geräte des Arbeitsplatzes<br />
Keyb.: Stecken Sie das Anschlusskabel der <strong>USB</strong>-Tastatur in diese Schnittstelle.<br />
Mouse: Stecken Sie das Anschlusskabel der <strong>USB</strong>-Maus in diese Schnittstelle.<br />
Installation<br />
HINWEIS: Beim Anschluss der Kabel des Arbeitsplatzes <strong>und</strong> der Rechner ist vorzugsweise<br />
blockweise <strong>und</strong> von unten nach oben vorzugehen. So vermeiden Sie, dass<br />
bereits gesteckte Kabel die Sicht auf die Bezeichnung der Schnittstellen versperren.<br />
Monitor 1<br />
CON<br />
Keyb./Mouse Line In<br />
Speaker<br />
DVI-I CPU 1.1<br />
CPU 1<br />
Line In Line Out <strong>USB</strong> 2.0<br />
DVI-I CPU 2.1<br />
CPU 2<br />
DVI-I CPU 3.1<br />
Line In Line Out <strong>USB</strong> 2.0 Line In Line Out <strong>USB</strong> 2.0 Line In Line Out <strong>USB</strong> 2.0<br />
Abbildung 2: Schnittstellen zum Anschluss der Geräte des Arbeitsplatzes<br />
HINWEIS: Alternativ können Sie die <strong>USB</strong>-Tastatur <strong>und</strong>/oder die -Maus an die<br />
Schnittstellen <strong>USB</strong> 2.0 Devices an der Frontseite des Geräts anschließen.<br />
In diesem Fall ist die Umschaltung des Kanals per Tastatur nicht möglich.<br />
Line In: Falls gewünscht, schließen Sie ein Mikrofon oder ein Headset an diese<br />
Schnittstelle an.<br />
Speaker: Schließen Sie die Lautsprecher zur Ausgabe der Audiosignale des aktiven<br />
Rechners an diese Schnittstelle an.<br />
Monitor 1: Stecken Sie das DVI-Kabel des Monitors in diese Schnittstelle.<br />
HINWEIS: Die separaten Videosignale von Rechnern einer Multi-Monitor-<br />
Umgebung können bei Einsatz einer Multichannel-Variante des KVM-Switches<br />
an zwei (MC2), drei (MC3) oder vier (MC4) Monitore übertragen werden.<br />
Pro anschließbarem Monitor sind bis zu vier Videoeingänge (DVI-I CPU 1.x bis 4.x)<br />
vorgesehen.<br />
Schließen Sie bei Einsatz einer solchen Gerätevariante den bzw. die weiteren<br />
Monitore an die hierfür vorgesehene(n) Schnittstelle(n) Monitor x an.<br />
<strong>USB</strong> 2.0 Devices: Möchten Sie den angeschlossenen Rechnern <strong>USB</strong>-Geräte (beispielsweise<br />
einen Drucker oder ein Massenspeichergerät) zur Verfügung stellen, schließen<br />
Sie diese Geräte an diese Schnittstellen an der Frontseite (siehe Abbildung 1 auf<br />
Seite 3) an.<br />
CPU 3<br />
DVI-I CPU 4.1<br />
CPU 4<br />
Power<br />
G&D <strong>DVIMUX4</strong>-<strong>DL</strong>-<strong>USB</strong> · 4
Installation<br />
Anschluss der Rechner<br />
WICHTIG: Zum Anschluss der Rechner an den KVM-Switch sind KVM-Kabelsets<br />
erforderlich. Eine Auflistung der erhältlichen KVM-Kabelsets finden Sie auf Seite 30.<br />
Ordnen Sie die bestellten KVM-Kabelsets den verschiedenen Rechnern zu <strong>und</strong><br />
legen Sie sie anschließend für die Installation bereit.<br />
HINWEIS: Zum Anschluss der (maximal vier) Rechner an den KVM-Switch sind<br />
die unten aufgeführten Schnittstellen für jeden Rechner verfügbar.<br />
Die Bezeichnung (beispielsweise CPU 1) eines bestimmten Abschnitts der Rückblende<br />
ordnet die entsprechenden Schnittstellen einem bestimmten Rechner<br />
sowie dem gleichnamigen Schalter an der Frontseite zu.<br />
Monitor 1<br />
CON<br />
Keyb./Mouse Line In<br />
Speaker<br />
DVI-I CPU 1.1<br />
CPU 1<br />
Line In Line Out <strong>USB</strong> 2.0<br />
Abbildung 3: Schnittstellen zum Anschluss der Rechner<br />
Line In: Falls Sie die Audio-Signale des Rechners über die am KVM-Switch angeschlossenen<br />
Lautsprecher ausgeben möchten, verbinden Sie die Line Out-Schnittstelle<br />
des Rechners mit dieser Schnittstelle.<br />
Verwenden Sie hierfür eines der Audio-Anschlusskabel (Audio-M/M).<br />
Line Out: Möchten Sie ein Mikrofon oder ein Headset am Arbeitsplatz verwenden,<br />
verbinden Sie diese Schnittstelle mit dem Mikrofoneingang des Rechners.<br />
Verwenden Sie hierfür eines der Audio-Anschlusskabel (Audio-M/M).<br />
<strong>USB</strong> 2.0: Verbinden Sie eine <strong>USB</strong>-Schnittstelle des Rechners mit dieser Schnittstelle.<br />
Verwenden Sie hierfür eines der <strong>USB</strong>-Anschlusskabel (<strong>USB</strong>-AM/BM).<br />
DVI-I CPU: Verbinden Sie den Videoausgang des Rechners mit dieser Schnittstelle.<br />
Ist der Rechner mit einem DVI-D-Videoausgang ausgestattet, nehmen Sie ein<br />
digitales Videokabel (DVI-D-<strong>DL</strong>-M/M) zur Hand. Im Falle eines analogen VGA-<br />
Ausgangs ist ein analoges Videokabel (VGA-M/DVI-A-M) zu verwenden.<br />
HINWEIS: Verbinden Sie bei Einsatz einer Multichannel-Variante des KVM-<br />
Switches ggf. den zweiten, dritten <strong>und</strong> vierten Videoausgang des Rechners mit<br />
der/den Schnittstelle(n) DVI-I CPU 1.x bis 4.x.<br />
5 · G&D <strong>DVIMUX4</strong>-<strong>DL</strong>-<strong>USB</strong><br />
DVI-I CPU 2.1<br />
CPU 2<br />
Line In Line Out <strong>USB</strong> 2.0<br />
DVI-I CPU 3.1<br />
CPU 3<br />
Line In Line Out <strong>USB</strong> 2.0<br />
DVI-I CPU 4.1<br />
CPU 4<br />
Line In Line Out <strong>USB</strong> 2.0<br />
Power
Anschluss der Stromversorgung<br />
Monitor 1<br />
CON<br />
Keyb./Mouse Line In Speaker<br />
DVI-I CPU 1.1<br />
CPU 1<br />
Line In Line Out <strong>USB</strong> 2.0<br />
DVI-I CPU 2.1<br />
DVI-I CPU 3.1<br />
Line In Line Out <strong>USB</strong> 2.0 Line In Line Out <strong>USB</strong> 2.0 Line In Line Out <strong>USB</strong> 2.0<br />
Abbildung 4: Schnittstelle zum Anschluss der Stromversorgung<br />
CPU 2<br />
Installation<br />
Power: Verbinden Sie das Stromversorgungskabel (PowerCable-2 Standard) mit einer<br />
Netzsteckdose <strong>und</strong> der Power-Buchse des KVM-Switches.<br />
CPU 3<br />
DVI-I CPU 4.1<br />
CPU 4<br />
Power<br />
G&D <strong>DVIMUX4</strong>-<strong>DL</strong>-<strong>USB</strong> · 6
Weiterführende Informationen<br />
Weiterführende Informationen<br />
Unterstützung digitaler <strong>und</strong> analoger Videosignale<br />
An die KVM-Switches der <strong>DVIMUX4</strong>-<strong>DL</strong>-Serie können Rechner angeschlossen werden,<br />
die digitale oder analoge Videosignale liefern. Der vom Rechner an den KVM-<br />
Switch übertragene Signaltyp (digital oder analog) wird unverändert an den angeschlossenen<br />
Monitor ausgegeben wird.<br />
Einheitlicher Signaltyp innerhalb eines Videokanals<br />
Stellen Sie am Arbeitsplatz einen Monitor auf, der den einheitlichen Signaltyp eines<br />
Videokanals (ausschließlich digital oder analog) der Rechner wiedergeben kann.<br />
BEISPIEL: Das Videosignal aller Rechner wird digital (DVI-Signale) an den KVM-<br />
Switch geleitet. Um die Signale auf dem Monitor des Arbeitsplatzes darzustellen,<br />
ist der Einsatz eines digitalen Monitors erforderlich.<br />
Unterschiedliche Signaltypen innerhalb eines Videokanals<br />
Werden auf dem einem Videokanal sowohl digitale (beispielsweise über CPU 1) als<br />
auch analoge Videosignale (beispielsweise über CPU 2) übertragen, schließen Sie<br />
den Adapter DVI-Divider an die Schnittstelle Monitor x des KVM-Switches an.<br />
Der Adapter stellt sowohl einen DVI- als auch einen VGA-Ausgang bereit. Verbinden<br />
Sie beide Ausgänge des Adapters mit dem Monitor des Arbeitsplatzes.<br />
HINWEIS: Wählen Sie einen Monitor, der sowohl digitale als auch analoge Videodaten<br />
verarbeiten kann. Derartige Monitore verfügen über eine DVI- <strong>und</strong> eine<br />
VGA-Schnittstelle.<br />
Moderne Monitore dieser Art schalten üblicherweise – je nach Eingangssignal – den<br />
Signaltyp selbstständig um. Ist dies nicht der Fall, so hat die Umschaltung von<br />
digitaler auf analoge Signalverarbeitung (<strong>und</strong> umgekehrt) manuell durch den<br />
Anwender am Monitor zu erfolgen.<br />
Anschluss von <strong>USB</strong> 2.0-Massenspeichergeräten<br />
An den <strong>USB</strong> 2.0-Schnittstellen der Frontseite des KVM-Switches können beliebige<br />
<strong>USB</strong>-Geräte angeschlossen werden.<br />
Erfolgt die Umschaltung des aktiven Kanals durch den Anwender, steht das <strong>USB</strong>-<br />
Gerät dem bisher aktiven Rechner sofort nicht mehr zur Verfügung. Falls der<br />
Rechner zu diesem Zeitpunkt Daten auf das Massenspeichergerät schreibt, wird dieser<br />
Vorgang abgebrochen.<br />
WICHTIG: Um einen Datenverlust zu vermeiden, verwenden Sie die Funktion zum<br />
sicheren Entfernen der Hardware des auf dem Rechner eingesetzten Betriebssystems<br />
vor der Umschaltung des Kanals.<br />
7 · G&D <strong>DVIMUX4</strong>-<strong>DL</strong>-<strong>USB</strong>
Inbetriebnahme<br />
Schalten Sie den Power-Schalter auf der Rückseite des KVM-Switches ein.<br />
Inbetriebnahme<br />
Sobald das Gerät mit elektrischer Spannung versorgt wird, leuchtet die grüne User-<br />
LED. Der KVM-Switch ist nach dem Startvorgang des Gerätes sofort betriebsbereit.<br />
Statusanzeigen<br />
Die LEDs an der Frontseite des Geräts geben Ihnen die Möglichkeit, den Betriebsstatus<br />
jederzeit zu kontrollieren.<br />
Bereich LED Status Bedeutung<br />
CPU 1 ... 4 Active an Der KVM-Switch ist derzeit auf diesem Kanal aktiv.<br />
Alle Eingaben werden an diesen Rechner geleitet.<br />
Angeschlossene <strong>USB</strong>-Geräte werden dem aktiven Rechner<br />
zur Verfügung gestellt.<br />
aus Der Kanal ist derzeit nicht aktiv.<br />
Status an Der Rechner ist betriebsbereit.<br />
aus Es ist kein Rechner angeschlossen oder der Rechner ist<br />
ausgeschaltet.<br />
User Active an Die Tastatur wurde korrekt <strong>und</strong> vollständig initialisiert.<br />
blinkt Die LED blinkt nach dem Einschalten des Geräts bis die<br />
langsam Tastatur initialisiert wurde.<br />
blinkt Setup-Modus des KVM-Switches aktiv.<br />
Status an Der KVM-Switch wird mit der erforderlichen elektrischen<br />
Spannung versorgt.<br />
aus Der KVM-Switch ist ausgeschaltet oder die erforderliche<br />
elektrische Spannung ist nicht verfügbar.<br />
Prüfen Sie gegebenenfalls den korrekten Anschluss des<br />
Stromversorgungskabels.<br />
G&D <strong>DVIMUX4</strong>-<strong>DL</strong>-<strong>USB</strong> · 8
Umschaltung zwischen den Rechnern<br />
Umschaltung zwischen den Rechnern<br />
Die Umschaltung zwischen den verschiedenen Rechnern kann wahlweise über die<br />
vier Taster an der Frontseite des Geräts oder über Tastenkombinationen erfolgen.<br />
Die Tastatur- <strong>und</strong> Mauseingaben werden an den aktiven Rechner geleitet <strong>und</strong> dessen<br />
Videosignal auf dem Monitor des Arbeitsplatzes dargestellt.<br />
Umschaltung durch Verwendung der Taster<br />
So schalten Sie mit den Tastern am Gerät auf einen bestimmten Kanal um:<br />
Betätigen Sie den Taster des gewünschten Kanals am Gerät, um diesen<br />
zu aktivieren.<br />
Umschaltung mit Tastenkombinationen<br />
So schalten Sie mit Tastenkombinationen auf einen bestimmten Kanal um:<br />
Betätigen Sie auf der Tastatur des Arbeitsplatzes die Tastenkombination<br />
Hotkey+Select-Key.<br />
Im Auslieferungszustand ist die Umschaltung des Kanals über den<br />
Hotkey Strg <strong>und</strong> die Select-Keys 1 bis 4 möglich.<br />
WICHTIG: Die Umschaltung des Kanals erfolgt, wenn die betätigte Tastenkombination<br />
losgelassen wird.<br />
HINWEIS: Falls eine der Tastenkombinationen mit einer Tastenkombination eines<br />
eingesetzten Anwendungsprogramms kollidiert, kann die Tastenkombination des<br />
KVM-Switches angepasst werden (s. Seite 17 f.).<br />
Umschaltung mit Step-Keys<br />
WICHTIG: Die Verwendung von Step-Keys ist im Auslieferungszustand des KVM-<br />
Switches deaktiviert. Hinweise zur Aktivierung der Funktion lesen Sie auf Seite 25.<br />
Alternativ zur gezielten Umschaltung auf einen der am KVM-Switch angeschlossenen<br />
Kanäle mit den Select-Keys (s. vorangegangener Abschnitt) können Sie die<br />
Kanäle in auf- oder absteigender Folge mit den Step-Keys umschalten.<br />
WICHTIG: Die jeweils aktiven Step-Keys sind von der Auswahl der Select-Keys<br />
abhängig. Die folgende Tabelle listet die Step-Keys in Abhängigkeit von den aktiven<br />
Select-Keys auf.<br />
9 · G&D <strong>DVIMUX4</strong>-<strong>DL</strong>-<strong>USB</strong>
Umschaltung zwischen den Rechnern<br />
Select-Keys Step-Key »zurück« Step-Key »vor«<br />
1 ... 4 9 0<br />
NUM 1 ... NUM 4 NUM 9 NUM 0<br />
A ... D I K<br />
F1 ... F4 F9 F10<br />
So schalten Sie mit Step-Keys auf einen bestimmten Kanal um:<br />
1. Betätigen Sie auf der Tastatur des Arbeitsplatzes die Tastenkombination<br />
Hotkey+Step-Key »zurück« oder Hotkey+Step-Key »vor«.<br />
Umschaltung über ein serielles Gerät<br />
Die Kanalumschaltung ist über ein serielles Gerät möglich, das an die Service-<br />
Schnittstelle des KVM-Switches angeschlossen ist. Das serielle Gerät kann beispielsweise<br />
ein spezielles Tastenfeld oder ein Rechner sein, auf welchem ein Terminalemulationsprogramm<br />
betrieben wird.<br />
WICHTIG: Voraussetzungen für die erfolgreiche Schaltung des Kanals durch ein<br />
serielles Endgerät sind u. a. die Anwendung der unten aufgeführten Anschlusseinstellungen<br />
sowie die Verwendung der Umschaltbefehle des KVM-Switches.<br />
Anschlusseinstellungen<br />
Zum Aufbau einer seriellen Verbindung zum KVM-Switch sind die nachfolgend<br />
aufgeführten Anschlusseinstellungen durch das serielle Endgerät anzuwenden.<br />
Bits pro Sek<strong>und</strong>e: 115.200 | alternativ : 9.600 (s. Seite 26)<br />
Datenbits: 8<br />
Parität: keine<br />
Stoppbits: 1<br />
Flussteuerung: keine<br />
Aktivierung des »Switch«-Modus<br />
WICHTIG: Über die Service-Buchse des KVM-Switches kann sowohl das Setup-<br />
Menü bedient werden, als auch die Umschaltung der Kanäle über ein serielles<br />
Gerät erfolgen.<br />
Die Umschaltung der Kanäle über das serielle Gerät ist nur möglich, wenn der Switch-<br />
Modus aktiv ist!<br />
Ändern Sie ggf. den Standard-Modus (s. Seite 27) der Service-Buchse auf diesen Modus,<br />
falls Sie unmittelbar nach dem Start des KVM-Switches die Kanalumschaltung über<br />
das serielle Gerät nutzen möchten.<br />
Alternativ ist im laufenden Betrieb durch Eingabe des Befehls »!« der Wechsel zum<br />
Switch-Modus möglich.<br />
G&D <strong>DVIMUX4</strong>-<strong>DL</strong>-<strong>USB</strong> · 10
Umschaltung zwischen den Rechnern<br />
Umschaltbefehle<br />
Zur Umschaltung des Kanals stehen die folgenden Befehle zur Verfügung:<br />
Befehl Kanal<br />
1! 1<br />
2! 2<br />
3! 3<br />
4! 4<br />
! einen Kanal vor<br />
TIPP: Den aktuell aufgeschalteten Kanal können Sie mit dem Befehl »?!« abfragen.<br />
HINWEIS: Der Befehl wird unmittelbar nach dem Senden des Befehls durch das serielle<br />
Gerät ausgeführt.<br />
Eine Meldung (s. unten) informiert das serielle Gerät über die korrekte Ausführung<br />
oder den Gr<strong>und</strong>, weshalb die Umschaltung nicht erfolgt ist.<br />
Meldungen<br />
Der KVM-Switch bestätigt die korrekte Ausführung des Befehls durch eine Meldung.<br />
Konnte die Umschaltung nicht erfolgen, wird dies durch eine entsprechende Meldung<br />
mitgeteilt.<br />
Meldung Bedeutung<br />
In[x] All Schaltung auf Kanal [x] erfolgreich<br />
E01 ungültige Kanalnummer (out of range)<br />
E06 Kanalumschaltung fehlgeschlagen<br />
E10 ungültiger Befehl<br />
E13 ungültiger Wert (out of range)<br />
RS232 mode enabled Switch-Modus (RS232) aktiviert<br />
11 · G&D <strong>DVIMUX4</strong>-<strong>DL</strong>-<strong>USB</strong>
Konfiguration<br />
Konfiguration<br />
Die Konfiguration des KVM-Switches kann wahlweise im Setup-Modus oder im<br />
Setup-Menü durch den Anwender geändert werden:<br />
Der Setup-Modus wird über die Tastatur des Arbeitsplatzes aktiviert. Durch spezielle<br />
Setup-Keys kann anschließend die Änderung der Konfiguration erreicht werden.<br />
Das Setup-Menü wird mit einem Terminalemulationsprogramm bedient <strong>und</strong> bietet<br />
eine einfache Textoberfläche zur Konfiguration des Gerätes.<br />
HINWEIS: Die Auswahl des Typs der <strong>USB</strong>-Tastur (s. Seite 28) ist ausschließlich<br />
im Setup-Menü möglich. Hier haben Sie zudem die Möglichkeit die Konfiguration<br />
des KVM-Switches einzusehen.<br />
Übersicht der Funktionen <strong>und</strong> Standardeinstellungen<br />
Die folgenden Tabelle listet die konfigurierbaren Funktionen <strong>und</strong> die Standardeinstellungen<br />
des KVM-Switches auf.<br />
Ausführlichen Erläuterungen der Funktionen finden Sie auf den angegebenen Seiten:<br />
Funktion Standard Seite<br />
Verwendung von einfachen oder Doppel-Hotkeys einfache Hotkeys 16<br />
Änderung des einfachen Hotkeys Strg 17<br />
Änderung des Doppel-Hotkeys Strg+Shift 18<br />
Änderung der Select-Keys 1 bis 4 19<br />
Hotkey-Verzögerung ein- oder ausschalten 7 Sek<strong>und</strong>en 20<br />
Standardeinstellungen wiederherstellen 21<br />
Automatische Aufschaltung des ersten Kanals ausgeschaltet 22<br />
Umschaltung über Taster an der Frontseite (de)aktivieren eingeschaltet 23<br />
Umschaltung über Tastenkombinationen (de)aktivieren eingeschaltet 24<br />
Umschaltung über Step-Keys (de)aktivieren ausgeschaltet 25<br />
Änderung der Bitrate der Service-Buchse 115.200 26<br />
Änderung des Standard-Modus der Service-Buchse Switch 27<br />
Auswahl des Typs der <strong>USB</strong>-Tastatur PC Multimedia 28<br />
Auf den folgenden Seiten wird die gr<strong>und</strong>legende Bedienung des Setup-Modus sowie<br />
des Setup-Menüs erläutert.<br />
Die konfigurierbaren Funktionen des KVM-Switches werden ab Seite 16 detailliert<br />
beschrieben.<br />
G&D <strong>DVIMUX4</strong>-<strong>DL</strong>-<strong>USB</strong> · 12
Konfiguration<br />
Bedienung des Setup-Modus<br />
Der Setup-Modus kann jederzeit mit der Tastatur des Arbeitsplatzes aktiviert werden.<br />
Nach der Aktivierung kann die Konfiguration des KVM-Switches mit verschiedenen<br />
Setup-Keys verändert werden.<br />
HINWEIS: Nach dem Aufruf des Setup-Modus kann nur eine Setup-Funktion ausgeführt<br />
werden. Möchten Sie mehrere Funktionen ausführen, ist das mehrfache<br />
Starten des Setup-Modus – nach dem Ausführen einer jeden Funktion – erforderlich.<br />
So aktivieren Sie den Setup-Modus:<br />
Betätigen Sie zur Aktivierung des Setup-Modus die Tastenkombination<br />
Hotkey+Backspace (Standard: Strg+Backspace) gleichzeitig.<br />
HINWEIS: Die Tastatur signalisiert die erfolgreiche Aktivierung des Setup-Modus<br />
durch das gleichzeitige Blinken der Kontrollleuchten NUM, <strong>und</strong> Rollen. Zusätzlich<br />
blinkt am KVM-Switch die gelbe User-LED.<br />
WICHTIG: In der Standardeinstellung ist die Tastenkombination zur Aktivierung<br />
des Setup-Modus sieben Sek<strong>und</strong>en lang zu betätigen.<br />
Nach dem erstmaligen Aufruf des Setup-Modus kann die Hotkey-Verzögerung<br />
durch Betätigung des Setup-Keys 8 (s. Seite 20) ausgeschaltet werden.<br />
So führen Sie eine Setup-Funktion aus:<br />
Betätigen Sie nach der Aktivierung des Setup-Modus einen der auf den folgenden<br />
Seiten beschriebenen Setup-Keys.<br />
So beenden Sie den Setup-Modus ohne Ausführung einer Funktion:<br />
Betätigen Sie ESC-Taste der Tastatur um den Setup-Modus zu beenden.<br />
13 · G&D <strong>DVIMUX4</strong>-<strong>DL</strong>-<strong>USB</strong>
Bedienung des Setup-Menüs<br />
Konfiguration<br />
Das Setup-Menü bietet eine komfortable Möglichkeit die Konfiguration des KVM-<br />
Switches einzusehen <strong>und</strong> zu editieren.<br />
Die Textoberfläche des Setup-Menüs ermöglicht die einfache Bedienung sowie die<br />
Änderung mehrerer Einstellungen innerhalb einer Sitzung.<br />
Das Setup-Menü wird über ein beliebiges Terminalemulationsprogramm (beispielsweise<br />
HyperTerminal oder PuTTY) bedient. Der Rechner auf dem das Terminalemulationsprogramm<br />
installiert ist, wird über das mitgelieferte Service-Kabel mit der<br />
Service-Buchse des Geräts verb<strong>und</strong>en.<br />
So richten Sie eine Verbindung im Terminalemulationsprogramm ein:<br />
1. Starten Sie ein beliebiges Terminalemulationsprogramm (z. B. HyperTerminal<br />
oder PuTTY).<br />
2. Erstellen Sie eine neue Verbindung im Terminalemulationsprogramm <strong>und</strong> erfassen<br />
Sie die folgenden Verbindungseinstellungen:<br />
Bits pro Sek<strong>und</strong>e: 115.200 | alternativ : 9.600 (s. Seite 26)<br />
Datenbits: 8<br />
Parität: Keine<br />
Stoppbits: 1<br />
Flusssteuerung: Keine<br />
3. Verwenden Sie das mitgelieferte Datenkabel (Update-Cable-2), um den Rechner<br />
mit der Service-Buchse an der Frontseite des KVM-Switches zu verbinden.<br />
So rufen Sie das Setup-Menü auf:<br />
1. Stecken Sie den Klinkenstecker des seriellen Datenkabels in die Service-Buchse an<br />
der Frontseite des Geräts.<br />
2. Starten Sie im Terminalemulationsprogramm die Verbindung mit dem<br />
KVM-Switch.<br />
Sobald die Verbindung erfolgreich aufgebaut ist, wird im Terminalemulationsprogramm<br />
das Setup-Menü (s. Abbildung auf Seite 15) dargestellt.<br />
HINWEIS: Wird der KVM-Switch gestartet, während die Verbindung aufgebaut<br />
wird, sehen Sie kurzzeitig das G&D Firmware Update Utility, bevor das Setup-Menü<br />
dargestellt wird.<br />
Dieses spezielle Utility wird ausschließlich vom Support-Team angewendet.<br />
G&D <strong>DVIMUX4</strong>-<strong>DL</strong>-<strong>USB</strong> · 14
Konfiguration<br />
Das Setup-Menü listet alle Einstellungen des KVM-Switches in Tabellenform auf:<br />
Settings for <strong>DVIMUX4</strong>-<strong>DL</strong><br />
Show System Info ...<br />
Hotkey: Ctrl<br />
Double Hotkey: NO<br />
Select Key: 1..4<br />
Hotkey Delay: YES<br />
Set System Defaults ...<br />
Select Ch.1 after Power up: No<br />
Select Channel via Front Button: Yes<br />
Select Channel via Hotkey: Yes<br />
Select Channel via Step Key: No<br />
Service RS232 Bitrate: 115200<br />
Service RS232 Startup Mode: Setup Menu<br />
PS/2 Scancode Set: 2<br />
PS/2 Keyboard Type: Standard<br />
<strong>USB</strong> Keymode: ...<br />
'Space': Toggle 'S': Save<br />
In der rechten Spalte können Sie sofort die aktive Einstellung einer Funktion ablesen.<br />
Eine Ausnahme hiervon bilden Menüeintrage, die verschiedene Einstellungen in<br />
einem Untermenü ermöglichen. Dies wird durch drei Punkte (...) in der rechten<br />
Spalte dargestellt.<br />
HINWEIS: Die Einstellungen Scan Code Set <strong>und</strong> PS/2 Keyboard Type sind ausschließlich<br />
für die PS/2-Varianten des KVM-Switches von Bedeutung <strong>und</strong> werden daher<br />
nicht erläutert.<br />
So bedienen Sie das Setup-Menü:<br />
1. Wählen Sie mit den Tasten Pfeil oder Pfeil zunächst den gewünschten Menüpunkt<br />
aus.<br />
Die aktive Zeile wird durch eckige Pfeile an den Rändern der Zeilen angezeigt.<br />
2. Abhängig von der Art des Menüpunkts, können Sie folgende Aktion(en)<br />
durchführen:<br />
Menüpunkte deren Einstellung in der rechten Spalte angezeigt wird, können<br />
durch (mehrfache) Betätigung der Leertaste geändert werden.<br />
Haben Sie einen Menüpunkt ausgewählt, der über einen Unterdialog verfügt,<br />
betätigen Sie die Eingabetaste, um diesen zu öffnen.<br />
HINWEIS: Detaillierte Anweisungen zur Änderung einer bestimmten Funktion<br />
lesen Sie auf den folgenden Seiten.<br />
15 · G&D <strong>DVIMUX4</strong>-<strong>DL</strong>-<strong>USB</strong>
Konfigurationseinstellungen<br />
Verwendung von einfachen oder Doppel-Hotkeys<br />
Konfiguration<br />
Werden auf einem Rechner viele Anwendungsprogramme mit Tastenkombinationen<br />
bedient oder verschiedene G&D-Geräte in einer Kaskade verwendet, ist die<br />
Zahl der „freien” Tastenkombinationen möglicherweise eingeschränkt.<br />
In einem solchen Fall ist der Einsatz von Doppel-Hotkeys sinnvoll.<br />
So aktivieren Sie die Verwendung von einfachen oder Doppel-Hotkeys:<br />
Setup-Modus<br />
Setup-Menü<br />
1. Betätigen Sie zur Aktivierung des Setup-Modus die Tastenkombination<br />
Hotkey+Backspace (Standard: Strg+Backspace) gleichzeitig.<br />
Bei aktivierter Hotkey-Verzögerung halten Sie die Tastenkombination<br />
sieben Sek<strong>und</strong>en lang gedrückt.<br />
2. Betätigen Sie einen der unten angegebenen Setup-Keys, um die<br />
Verwendung von einfachen oder Doppel-Hotkeys zu aktivieren:<br />
S Verwendung von einfachen Hotkeys<br />
A Verwendung von Doppel-Hotkeys<br />
1. Starten Sie mit dem Terminalemulationsprogramm den Verbindungsaufbau<br />
zum KVM-Switch.<br />
Wird das Setup-Menü nicht angezeigt, ist der Switch-Modus der Service-<br />
Schnittstelle aktiv. Geben Sie »#!« ein, um zum Setup-Menü zu wechseln.<br />
2. Wählen Sie mit den Tasten Pfeil bzw. Pfeil die Zeile Double Hotkey aus.<br />
3. Betätigen Sie (mehrfach) die Leertaste der Tastatur, um die Verwendung<br />
von einfachen oder Doppel-Hotkeys zu aktivieren:<br />
No Verwendung von einfachen Hotkeys<br />
Yes Verwendung von Doppel-Hotkeys<br />
4. Nach Auswahl der gewünschten Einstellung betätigen Sie die Taste S,<br />
um diese zu speichern.<br />
Nach der Umschaltung wird der aktive Hotkey in einen Doppel-Hotkey (oder<br />
umgekehrt) konvertiert:<br />
einfacher Hotkey Doppel-Hotkey<br />
Strg Strg+Shift<br />
Alt Alt+Shift<br />
Alt Gr Alt Gr+Strg<br />
Win Win+Strg<br />
Shift Shift+Win<br />
G&D <strong>DVIMUX4</strong>-<strong>DL</strong>-<strong>USB</strong> · 16
Konfiguration<br />
Änderung des einfachen Hotkeys<br />
Der Hotkey wird gleichzeitig mit der Taste Backspace betätigt, um den Setup-Modus<br />
des KVM-Switches zu starten. Bei gleichzeitiger Betätigung des Hotkeys <strong>und</strong> eines<br />
Select-Keys wird die Umschaltung auf einen anderen Kanal erreicht.<br />
Falls ein Anwendungsprogramm oder ein anderes G&D-Gerät innerhalb der Kaskade<br />
den gleichen Hotkey verwendet, kann dieser geändert werden.<br />
HINWEIS: Im Auslieferungszustand ist der einfache Hotkey Strg voreingestellt.<br />
So ändern Sie den aktuellen Hotkey:<br />
Setup-Modus<br />
Setup-Menü<br />
1. Betätigen Sie zur Aktivierung des Setup-Modus die Tastenkombination<br />
Hotkey+Backspace (Standard: Strg+Backspace) gleichzeitig.<br />
Bei aktivierter Hotkey-Verzögerung halten Sie die Tastenkombination<br />
sieben Sek<strong>und</strong>en lang gedrückt.<br />
2. Betätigen Sie einen der unten angegebenen Setup-Keys, um einen<br />
bestimmten Hotkey zu aktivieren:<br />
Strg Aktivierung des Hotkeys Strg<br />
Alt Aktivierung des Hotkeys Alt<br />
Alt Gr Aktivierung des Hotkeys Alt Gr<br />
Win Aktivierung des Hotkeys Win<br />
Shift Aktivierung des Hotkeys Shift<br />
1. Starten Sie mit dem Terminalemulationsprogramm den Verbindungsaufbau<br />
zum KVM-Switch.<br />
Wird das Setup-Menü nicht angezeigt, ist der Switch-Modus der Service-<br />
Schnittstelle aktiv. Geben Sie »#!« ein, um zum Setup-Menü zu wechseln.<br />
2. Wählen Sie mit den Tasten Pfeil bzw. Pfeil die Zeile Hotkey aus.<br />
3. Betätigen Sie (mehrfach) die Leertaste der Tastatur, um einen bestimmten<br />
Hotkey zu aktivieren:<br />
Ctrl Aktivierung des Hotkeys Strg<br />
Alt Aktivierung des Hotkeys Alt<br />
Alt Gr Aktivierung des Hotkeys Alt Gr<br />
Win Aktivierung des Hotkeys Win<br />
Shift Aktivierung des Hotkeys Shift<br />
4. Nach Auswahl der gewünschten Einstellung betätigen Sie die Taste S,<br />
um diese zu speichern.<br />
17 · G&D <strong>DVIMUX4</strong>-<strong>DL</strong>-<strong>USB</strong>
Änderung des Doppel-Hotkeys<br />
Konfiguration<br />
Haben Sie die Verwendung von Doppel-Hotkeys (s. Seite 16) aktiviert, wird durch<br />
die Betätigung des Doppel-Hotkeys <strong>und</strong> der Taste Backspace der Setup-Modus des<br />
KVM-Switches gestartet. Bei gleichzeitiger Betätigung des Doppel-Hotkeys <strong>und</strong><br />
eines Select-Keys wird die Umschaltung auf einen anderen Kanal erreicht.<br />
Falls ein Anwendungsprogramm oder ein anderes G&D-Gerät innerhalb der Kaskade<br />
den gleichen Doppel-Hotkey verwendet, kann dieser geändert werden.<br />
So ändern Sie den aktuellen Doppel-Hotkey:<br />
Setup-Modus<br />
Setup-Menü<br />
1. Voraussetzung: Aktivierung der Doppel-Hotkeys (s. Seite 16).<br />
2. Betätigen Sie zur Aktivierung des Setup-Modus die Tastenkombination<br />
Doppel-Hotkey+Backspace (Standard: Strg+Shift+Backspace) gleichzeitig.<br />
Bei aktivierter Hotkey-Verzögerung halten Sie die Tastenkombination<br />
sieben Sek<strong>und</strong>en lang gedrückt.<br />
3. Betätigen Sie einen der unten angegebenen Setup-Keys, um den<br />
gewünschten Doppel-Hotkey zu aktivieren:<br />
Strg Aktivierung des Doppel-Hotkeys Strg + Shift<br />
Alt Aktivierung des Doppel-Hotkeys Alt + Shift<br />
Alt Gr Aktivierung des Doppel-Hotkeys Alt Gr + Strg<br />
Win Aktivierung des Doppel-Hotkeys Win + Strg<br />
Shift Aktivierung des Doppel-Hotkeys Shift + Win<br />
1. Voraussetzung: Aktivierung der Doppel-Hotkeys (s. Seite 16).<br />
2. Starten Sie mit dem Terminalemulationsprogramm den Verbindungsaufbau<br />
zum KVM-Switch.<br />
Wird das Setup-Menü nicht angezeigt, ist der Switch-Modus der Service-<br />
Schnittstelle aktiv. Geben Sie »#!« ein, um zum Setup-Menü zu wechseln.<br />
3. Wählen Sie mit den Tasten Pfeil bzw. Pfeil die Zeile Hotkey aus.<br />
4. Betätigen Sie (mehrfach) die Leertaste der Tastatur, um den gewünschten<br />
Doppel-Hotkey zu aktivieren:<br />
Ctrl+Shift Aktivierung des Doppel-Hotkeys Strg + Shift<br />
Alt+Shift Aktivierung des Doppel-Hotkeys Alt + Shift<br />
Alt Gr+Ctrl Aktivierung des Doppel-Hotkeys Alt Gr + Strg<br />
Win+Ctrl Aktivierung des Doppel-Hotkeys Win + Strg<br />
Shift+Win Aktivierung des Doppel-Hotkeys Shift + Win<br />
5. Nach Auswahl der gewünschten Einstellung betätigen Sie die Taste S,<br />
um diese zu speichern.<br />
G&D <strong>DVIMUX4</strong>-<strong>DL</strong>-<strong>USB</strong> · 18
Konfiguration<br />
Änderung der Select-Keys<br />
In der Standardeinstellung sind die Select-Keys 1 bis 4 zur Umschaltung zwischen<br />
den am KVM-Switch angeschlossenen Rechnern aktiv.<br />
Die Umschaltung zu Rechner 2 erfolgt in der Standardeinstellung beispielsweise mit<br />
der Tastenkombination Hotkey+2 (Standard: Strg+2).<br />
So wählen Sie ein anderes Set von Select-Keys:<br />
Setup-Modus<br />
Setup-Menü<br />
1. Betätigen Sie zur Aktivierung des Setup-Modus die Tastenkombination<br />
Hotkey+Backspace (Standard: Strg+Backspace) gleichzeitig.<br />
Bei aktivierter Hotkey-Verzögerung halten Sie die Tastenkombination<br />
sieben Sek<strong>und</strong>en lang gedrückt.<br />
2. Betätigen Sie einen der unten angegebenen Setup-Keys, um das gewünschte<br />
Set von Select-Keys zur Umschaltung von Rechner 1 bis Rechner 4 zu aktivieren:<br />
1 Aktivierung der Select-Keys 1, 2, 3, 4<br />
NUM 1 Aktivierung der Select-Keys NUM 1, [...], NUM 3, NUM 4<br />
Y Aktivierung der Select-Keys A, B, C, D<br />
F1 Aktivierung der Select-Keys F1, F2, F3, F4<br />
1. Starten Sie mit dem Terminalemulationsprogramm den Verbindungsaufbau<br />
zum KVM-Switch.<br />
Wird das Setup-Menü nicht angezeigt, ist der Switch-Modus der Service-<br />
Schnittstelle aktiv. Geben Sie »#!« ein, um zum Setup-Menü zu wechseln.<br />
2. Wählen Sie mit den Tasten Pfeil bzw. Pfeil die Zeile Select Key aus.<br />
3. Betätigen Sie (mehrfach) die Leertaste der Tastatur, um das entsprechende<br />
Set von Select-Keys zur Umschaltung von Rechner 1 bis 4 zu aktivieren:<br />
1 ... 4 Aktivierung der Select-Keys 1, 2, 3, 4<br />
NUM 1 ... 4 Aktivierung der Select-Keys NUM 1, [...], NUM 3, NUM 4<br />
A ... D Aktivierung der Select-Keys A, B, C, D<br />
F1 ... F4 Aktivierung der Select-Keys F1, F2, F3, F4<br />
4. Nach Auswahl der gewünschten Einstellung betätigen Sie die Taste S,<br />
um diese zu speichern.<br />
19 · G&D <strong>DVIMUX4</strong>-<strong>DL</strong>-<strong>USB</strong>
Hotkey-Verzögerung ein- oder ausschalten<br />
Konfiguration<br />
In der Standardeinstellung des Switches ist die Tastenkombination Hotkey+Backspace<br />
(Standard: Strg+Backspace) sieben Sek<strong>und</strong>en lang zu betätigen um den Setup-Modus<br />
zu starten.<br />
Möchten Sie den Setup-Modus unmittelbar nach Betätigung der Tastenkombination<br />
starten, kann die Hotkey-Verzögerung deaktiviert werden.<br />
So schalten Sie die Hotkey-Verzögerung an oder aus:<br />
Setup-Modus<br />
Setup-Menü<br />
1. Betätigen Sie zur Aktivierung des Setup-Modus die Tastenkombination<br />
Hotkey+Backspace (Standard: Strg+Backspace) gleichzeitig.<br />
Bei aktivierter Hotkey-Verzögerung halten Sie die Tastenkombination<br />
sieben Sek<strong>und</strong>en lang gedrückt.<br />
2. Betätigen Sie einen der unten angegebenen Setup-Keys, um die Hotkey-<br />
Verzögerung an- oder auszuschalten:<br />
7 Aktivierung der Hotkey-Verzögerung<br />
8 Deaktivierung der Hotkey-Verzögerung<br />
1. Starten Sie mit dem Terminalemulationsprogramm den Verbindungsaufbau<br />
zum KVM-Switch.<br />
Wird das Setup-Menü nicht angezeigt, ist der Switch-Modus der Service-<br />
Schnittstelle aktiv. Geben Sie »#!« ein, um zum Setup-Menü zu wechseln.<br />
2. Wählen Sie mit den Tasten Pfeil bzw. Pfeil die Zeile Hotkey Delay aus.<br />
3. Betätigen Sie (mehrfach) die Leertaste der Tastatur, um die Hotkey-Verzögerung<br />
an- oder auszuschalten:<br />
Yes Aktivierung der Hotkey-Verzögerung<br />
No Deaktivierung der Hotkey-Verzögerung<br />
4. Nach Auswahl der gewünschten Einstellung betätigen Sie die Taste S,<br />
um diese zu speichern.<br />
G&D <strong>DVIMUX4</strong>-<strong>DL</strong>-<strong>USB</strong> · 20
Konfiguration<br />
Standardeinstellungen wiederherstellen<br />
Mit dieser Funktion werden die Standardeinstellungen des KVM-Switches wiederhergestellt.<br />
WICHTIG: Nach dem Ausführen der Funktion sind die auf Seite 12 aufgeführten<br />
Standardeinstellungen des KVM-Switches wieder aktiv!<br />
So stellen Sie die Standardeinstellungen wieder her:<br />
Setup-Modus<br />
Setup-Menü<br />
1. Betätigen Sie zur Aktivierung des Setup-Modus die Tastenkombination<br />
Hotkey+Backspace (Standard: Strg+Backspace) gleichzeitig.<br />
Bei aktivierter Hotkey-Verzögerung halten Sie die Tastenkombination<br />
sieben Sek<strong>und</strong>en lang gedrückt.<br />
2. Betätigen Sie den unten angegebenen Setup-Key, um die Standardeinstellungen<br />
wiederherzustellen:<br />
D Standardeinstellung wiederherstellen<br />
1. Starten Sie mit dem Terminalemulationsprogramm den Verbindungsaufbau<br />
zum KVM-Switch.<br />
Wird das Setup-Menü nicht angezeigt, ist der Switch-Modus der Service-<br />
Schnittstelle aktiv. Geben Sie »#!« ein, um zum Setup-Menü zu wechseln.<br />
2. Wählen Sie mit den Tasten Pfeil bzw. Pfeil die Zeile Set System Defaults aus.<br />
3. Betätigen Sie die Eingabetaste, um die Standardeinstellungen<br />
wiederherzustellen.<br />
4. Bestätigen Sie die erscheinende Sicherheitsabfrage mit der Eingabetaste.<br />
Ein Abbruch der Funktion ist alternativ mit der Taste Q möglich.<br />
21 · G&D <strong>DVIMUX4</strong>-<strong>DL</strong>-<strong>USB</strong>
Automatische Aufschaltung des ersten Kanals<br />
Konfiguration<br />
Nach dem Einschalten des Gerätes wird üblicherweise der zuletzt aktive Kanal<br />
aufgeschaltet. Alternativ können Sie die automatische Aufschaltung des am ersten<br />
Kanal angeschlossenen Rechners nach dem Einschalten des Gerätes einstellen.<br />
So (de)aktivieren Sie die automatische Aufschaltung des ersten Kanals<br />
nach dem Start:<br />
HINWEIS: Die Aktivierung der automatischen Aufschaltung des ersten Kanals<br />
nach dem Einschalten des Gerätes kann ausschließlich über das Setup-Menü ein-<br />
bzw. ausgeschaltet werden.<br />
Setup-Menü<br />
1. Starten Sie mit dem Terminalemulationsprogramm den Verbindungsaufbau<br />
zum KVM-Switch.<br />
Wird das Setup-Menü nicht angezeigt, ist der Switch-Modus der Service-<br />
Schnittstelle aktiv. Geben Sie »#!« ein, um zum Setup-Menü zu wechseln.<br />
2. Wählen Sie mit den Tasten Pfeil bzw. Pfeil die Zeile<br />
Select Ch.1 after Power up aus.<br />
3. Betätigen Sie (mehrfach) die Leertaste der Tastatur, um zwischen folgenden<br />
Optionen zu wählen:<br />
No Aktivierung des zuletzt aktiven Kanals nach dem Einschalten<br />
Yes Aktivierung von Kanal 1 nach dem Einschalten<br />
4. Nach Auswahl der gewünschten Einstellung betätigen Sie die Taste S,<br />
um diese zu speichern.<br />
G&D <strong>DVIMUX4</strong>-<strong>DL</strong>-<strong>USB</strong> · 22
Konfiguration<br />
Umschaltung über Taster an der Frontseite (de)aktivieren<br />
Die Umschaltung zwischen den verschiedenen Rechnern über die Taster der Frontseite<br />
des Geräts ist in der Standardeinstellung aktiviert.<br />
Falls gewünscht können Sie die Taster über das Setup-Menü deaktivieren.<br />
So aktivieren bzw. deaktivieren Sie die Umschaltung über die Taster:<br />
HINWEIS: Die Umschaltung über die Taster kann ausschließlich über das Setup-<br />
Menü ein- bzw. ausgeschaltet werden.<br />
Setup-Menü<br />
1. Starten Sie mit dem Terminalemulationsprogramm den Verbindungsaufbau<br />
zum KVM-Switch <strong>und</strong> stecken Sie anschließend das serielle<br />
Datenkabel in die Service-Buchse.<br />
2. Wählen Sie mit den Tasten Pfeil bzw. Pfeil die Zeile <br />
Select Channel via Front Button aus.<br />
3. Betätigen Sie (mehrfach) die Leertaste der Tastatur, um zwischen folgenden<br />
Optionen zu wählen:<br />
Yes Umschaltung über Taster an der Frontseite deaktiviert<br />
No Umschaltung über Taster an der Frontseite aktiviert<br />
4. Nach Auswahl der gewünschten Einstellung betätigen Sie die Taste S,<br />
um diese zu speichern.<br />
23 · G&D <strong>DVIMUX4</strong>-<strong>DL</strong>-<strong>USB</strong>
Umschaltung über Tastenkombinationen (de)aktivieren<br />
Konfiguration<br />
Die Umschaltung zwischen den verschiedenen Rechnern über Tastenkombinationen<br />
ist in der Standardeinstellung aktiviert.<br />
Falls gewünscht können Sie diese Art der Umschaltung über das Setup-Menü deaktivieren.<br />
So aktivieren bzw. deaktivieren Sie die Umschaltung über Tastenkombinationen:<br />
HINWEIS: Die Umschaltung über Tastenkombinationen kann ausschließlich über<br />
das Setup-Menü ein- bzw. ausgeschaltet werden.<br />
Setup-Menü<br />
1. Starten Sie mit dem Terminalemulationsprogramm den Verbindungsaufbau<br />
zum KVM-Switch <strong>und</strong> stecken Sie anschließend das serielle<br />
Datenkabel in die Service-Buchse.<br />
2. Wählen Sie mit den Tasten Pfeil bzw. Pfeil die Zeile <br />
Select Channel via Hotkey aus.<br />
3. Betätigen Sie (mehrfach) die Leertaste der Tastatur, um zwischen folgenden<br />
Optionen zu wählen:<br />
Yes Umschaltung über Tastenkombination deaktiviert<br />
No Umschaltung über Tastenkombination aktiviert<br />
4. Nach Auswahl der gewünschten Einstellung betätigen Sie die Taste S,<br />
um diese zu speichern.<br />
G&D <strong>DVIMUX4</strong>-<strong>DL</strong>-<strong>USB</strong> · 24
Konfiguration<br />
Umschaltung über Step-Keys (de)aktivieren<br />
Alternativ zur gezielten Umschaltung auf einen der am KVM-Switch angeschlossenen<br />
Kanäle mit über Tastenkombinationen können Sie die Kanäle in auf- oder<br />
absteigender Folge mit den Step-Keys umschalten.<br />
WICHTIG: Die Verwendung von Step-Keys ist im Auslieferungszustand des KVM-<br />
Switches deaktiviert.<br />
Nach Aktivierung der Step-Keys können Sie mit folgenden Tastenkombinationen<br />
die Kanäle in auf- oder absteigender Reihenfolge umschalten:<br />
absteigend: Step-Key »zurück« (Standard: Hotkey+9)<br />
aufsteigend: Step-Key »vor« (Standard: Hotkey+0)<br />
WICHTIG: Die jeweils aktiven Step-Keys sind von der Auswahl der Select-Keys<br />
abhängig. Die folgende Tabelle listet die Step-Keys in Abhängigkeit von den aktiven<br />
Select-Keys auf.<br />
Select-Keys Step-Key »zurück« Step-Key »vor«<br />
1 ... 4 9 0<br />
NUM 1 ... NUM 4 NUM 9 NUM 0<br />
A ... C I K<br />
F1 ... F4 F9 F10<br />
So aktivieren bzw. deaktivieren Sie die Verwendung von Step-Keys:<br />
HINWEIS: Die Verwendung von Step-Keys kann ausschließlich über das Setup-<br />
Menü ein- bzw. ausgeschaltet werden.<br />
Setup-Menü<br />
1. Starten Sie mit dem Terminalemulationsprogramm den Verbindungsaufbau<br />
zum KVM-Switch <strong>und</strong> stecken Sie anschließend das serielle<br />
Datenkabel in die Service-Buchse.<br />
2. Wählen Sie mit den Tasten Pfeil bzw. Pfeil die Zeile<br />
Select Channel via Step Key aus.<br />
3. Betätigen Sie (mehrfach) die Leertaste der Tastatur, um zwischen folgenden<br />
Optionen zu wählen:<br />
Off Verwendung von Step-Keys deaktiviert<br />
[Step-Keys] Verwendung der angezeigten Step-Keys aktiviert<br />
4. Nach Auswahl der gewünschten Einstellung betätigen Sie die Taste S,<br />
um diese zu speichern.<br />
25 · G&D <strong>DVIMUX4</strong>-<strong>DL</strong>-<strong>USB</strong>
Änderung der Bitrate der Service-Buchse<br />
Konfiguration<br />
Über die Service-Buchse des KVM-Switches kann sowohl das Setup-Menü bedient<br />
werden, als auch die Umschaltung der Kanäle über ein serielles Gerät erfolgen.<br />
Pro Zeiteinheit wird über die Service-Buchse eine bestimmte Datenmenge übertragen.<br />
Diese sogenannte Bitrate wird in der Einheit bit/s angegeben.<br />
WICHTIG: Die erfolgreiche Kommunikation eines Terminalemulationsprogrammes<br />
oder eines seriellen Gerätes mit dem KVM-Switch erfordert die Verwendung einer<br />
einheitlichen Bitrate des Senders sowie des Empfängers der Daten.<br />
Falls die Bitrate im Terminalemulationsprogramm oder im seriellen Gerät nicht der<br />
Standard-Bitrate des KVM-Switches (115.200 bit/s) angepasst werden kann, ist die<br />
Änderung der Bitrate der Service-Buchse möglich.<br />
So wählen Sie die Bitrate der Service-Buchse des KVM-Switches:<br />
Setup-Menü<br />
1. Starten Sie mit dem Terminalemulationsprogramm den Verbindungsaufbau<br />
zum KVM-Switch.<br />
Wird das Setup-Menü nicht angezeigt, ist der Switch-Modus der Service-<br />
Schnittstelle aktiv. Geben Sie »#!« ein, um zum Setup-Menü zu wechseln.<br />
2. Wählen Sie mit den Tasten Pfeil bzw. Pfeil die Zeile<br />
Service RS232 Bitrate aus.<br />
3. Betätigen Sie (mehrfach) die Leertaste der Tastatur, um zwischen folgenden<br />
Bitraten zu wählen:<br />
115200 serielle Datenübertragung mit 115.200 bit/s<br />
9600 serielle Datenübertragung mit 9.600 bit/s<br />
4. Nach Auswahl der gewünschten Einstellung betätigen Sie die Taste S,<br />
um diese zu speichern.<br />
G&D <strong>DVIMUX4</strong>-<strong>DL</strong>-<strong>USB</strong> · 26
Konfiguration<br />
Änderung des Standard-Modus der Service-Buchse<br />
Über die Service-Buchse des KVM-Switches kann sowohl das Setup-Menü bedient<br />
werden, als auch die Umschaltung der Kanäle über ein serielles Gerät erfolgen.<br />
WICHTIG: Der KVM-Extender unterscheidet – je nach Einsatzzweck – zwischen<br />
den nachfolgend aufgeführten Modi der Service-Buchse.<br />
In der Standardeinstellung des KVM-Switches ist der Modus Setup-Menü aktiv. In<br />
diesem Modus wird nach dem Aufbau einer Sitzung mit dem KVM-Switch sofort<br />
das Setup-Menü im Terminalemulationsprogramm angezeigt.<br />
Verwenden Sie die Service-Buchse hauptsächlich zur Umschaltung des aktiven Kanals<br />
mit einem seriellen Gerät, ist die Aktivierung des Switch-Modus empfehlenswert.<br />
TIPP: Im laufenden Betrieb ist die Umschaltung des beim Start aktivierten Modus<br />
jederzeit möglich:<br />
Durch Eingabe des Befehls »#!« wechselt der KVM-Switch <br />
zum Modus Setup-Menü.<br />
Durch Eingabe des Befehls »!« wechselt der KVM-Switch zum Switch-Modus.<br />
So wählen Sie den beim Start des KVM-Extenders zu aktivierenden Modus:<br />
Setup-Menü<br />
1. Starten Sie mit dem Terminalemulationsprogramm den Verbindungsaufbau<br />
zum KVM-Switch.<br />
Wird das Setup-Menü nicht angezeigt, ist der Switch-Modus der Service-<br />
Schnittstelle aktiv. Geben Sie »#!« ein, um zum Setup-Menü zu wechseln.<br />
2. Wählen Sie mit den Tasten Pfeil bzw. Pfeil die Zeile<br />
Service RS232 Startup Mode aus.<br />
3. Betätigen Sie (mehrfach) die Leertaste der Tastatur, um zwischen folgenden<br />
Optionen zu wählen:<br />
Setup Menu Start des KVM-Extenders erfolgt im Modus Setup-Menü<br />
Switch Start des KVM-Extenders erfolgt im Modus Switch<br />
4. Nach Auswahl der gewünschten Einstellung betätigen Sie die Taste S,<br />
um diese zu speichern.<br />
27 · G&D <strong>DVIMUX4</strong>-<strong>DL</strong>-<strong>USB</strong>
Auswahl des Typs der <strong>USB</strong>-Tastatur<br />
Konfiguration<br />
Die Tasten der Standardtastatur wurden bei einigen <strong>USB</strong>-Tastaturen verschiedener<br />
Hersteller ergänzt. So sind einige <strong>USB</strong>-Tastaturen mit Multimedia-Sondertasten<br />
ausgestattet, die die komfortable Bedienung spezieller Multimedia-Funktionen des<br />
Rechners ermöglichen.<br />
Sun Desktops <strong>und</strong> Server verfügen – im Vergleich zu Standardtastaturen – über<br />
separate Tasten (Solaris Shortcut Keys), um spezielle Systemfunktionen zu bedienen.<br />
Diese Tasten können nach Aktivierung des Tastaturmodus für Sun Desktops <strong>und</strong><br />
Server am Arbeitsplatz verwendet werden. Ist am Arbeitsplatz nur eine Standardtastatur<br />
verfügbar, stehen Ihnen verschiedene Tastenkombinationen zur Emulation<br />
der Solaris Shortcut Keys zur Verfügung (s. Seite 29).<br />
Wählen Sie den Typ der <strong>USB</strong>-Tastatur im Setup-Menü aus, um alle Tasten solcher<br />
Tastaturen nutzen zu können.<br />
HINWEIS: Die Auswahl des Typs der <strong>USB</strong>-Tastatur kann ausschließlich über das<br />
Setup-Menü geändert werden.<br />
So wählen Sie den Typ der <strong>USB</strong>-Tastatur aus:<br />
Setup-Menü<br />
1. Starten Sie mit dem Terminalemulationsprogramm den Verbindungsaufbau<br />
zum KVM-Switch.<br />
Wird das Setup-Menü nicht angezeigt, ist der Switch-Modus der Service-<br />
Schnittstelle aktiv. Geben Sie »#!« ein, um zum Setup-Menü zu wechseln.<br />
2. Wählen Sie mit den Tasten Pfeil bzw. Pfeil die Zeile <strong>USB</strong>-Keymode aus <strong>und</strong><br />
betätigen Sie die Eingabetaste.<br />
3. Wählen Sie im Untermenü Set <strong>USB</strong> Keymode mit den Tasten Pfeil bzw.<br />
Pfeil die Zeile des Kanals aus, dessen Einstellung Sie ändern möchten.<br />
4. Betätigen Sie (mehrfach) die Leertaste der Tastatur, um eine der folgenden<br />
Tastaturen auszuwählen:<br />
PC Multimedia Multimedia-Tastatur<br />
PC Standard Standard-Tastatur<br />
SUN German Sun-Tastatur (deutsches Layout)<br />
SUN US Sun-Tastatur (amerikanisches Layout)<br />
Apple Apple-Tastatur<br />
5. Wiederholen Sie ggf. die Schritte 3. <strong>und</strong> 4. zur Änderung dieser Einstellung<br />
eines anderen Kanals.<br />
6. Nach Auswahl der gewünschten Einstellung betätigen Sie die Taste S,<br />
um diese zu speichern.<br />
WICHTIG: Erfolgt die Umschaltung auf die Einstellung SUN German bzw. SUN US,<br />
ist abschließend ein Reboot des Sun-Rechners erforderlich.<br />
G&D <strong>DVIMUX4</strong>-<strong>DL</strong>-<strong>USB</strong> · 28
Konfiguration<br />
Falls eine Sun-Tastatur am Arbeitsplatz angeschlossen ist, können die Solaris Shortcut<br />
Keys dieser Tastatur nach Aktivierung der Unterstützung verwendet werden.Bei<br />
Einsatz einer Standardtastatur können die Funktionen – durch Verwendung derunten<br />
aufgelisteten Tastenkombinationen – bedient werden:<br />
Tastenkombination »Solaris Shortcut Keys« des Sun Keyboards<br />
Strg+Alt+F2 Wiederholen<br />
Strg+Alt+F3 Eigenschaften<br />
Strg+Alt+F4 Zurücknehmen<br />
Strg+Alt+F5 Vordergr<strong>und</strong><br />
Strg+Alt+F6 Kopieren<br />
Strg+Alt+F7 Öffnen<br />
Strg+Alt+F8 Einfügen<br />
Strg+Alt+F9 Suchen<br />
Strg+Alt+F10 Ausschneiden<br />
Strg+Alt+F11 Hilfe<br />
Strg+Alt+F12 Still<br />
Strg+Alt+NUM+ Lauter<br />
Strg+Alt+NUM- Leiser<br />
Strg+Alt+NUM* Compose<br />
Strg+Alt+Pause Shutdown<br />
Pause+A Stop<br />
29 · G&D <strong>DVIMUX4</strong>-<strong>DL</strong>-<strong>USB</strong>
Bestellnummern<br />
<strong>DVIMUX4</strong>-<strong>DL</strong>-PS/2 <strong>DVIMUX4</strong>-<strong>DL</strong>-<strong>USB</strong><br />
KVM-SWITCHES<br />
A210 0098 <strong>DVIMUX4</strong>-<strong>DL</strong>-PS/2<br />
A210 0100 <strong>DVIMUX4</strong>-<strong>DL</strong>-PS/2-RM<br />
A210 0102 <strong>DVIMUX4</strong>-<strong>DL</strong>-MC2-PS/2<br />
A210 0103 <strong>DVIMUX4</strong>-<strong>DL</strong>-MC2-PS/2-RM<br />
A210 0106 <strong>DVIMUX4</strong>-<strong>DL</strong>-MC3-PS/2<br />
A210 0107 <strong>DVIMUX4</strong>-<strong>DL</strong>-MC3-PS/2-RM<br />
A210 0110 <strong>DVIMUX4</strong>-<strong>DL</strong>-MC4-PS/2<br />
A210 0111 <strong>DVIMUX4</strong>-<strong>DL</strong>-MC4-PS/2-RM<br />
KABEL-SETS<br />
A610 0117 CPU-DVID-<strong>DL</strong>-PL-2<br />
A610 0121 CPU-DVID-<strong>DL</strong>-PL-5<br />
A610 0133 CPU-DVIA-PL-2<br />
A610 0137 CPU-DVIA-PL-5<br />
KVM-SWITCHES<br />
A210 0099 <strong>DVIMUX4</strong>-<strong>DL</strong>-<strong>USB</strong><br />
A210 0101 <strong>DVIMUX4</strong>-<strong>DL</strong>-<strong>USB</strong>-RM<br />
A210 0104 <strong>DVIMUX4</strong>-<strong>DL</strong>-MC2-<strong>USB</strong><br />
Bestellnummern<br />
A210 0105 <strong>DVIMUX4</strong>-<strong>DL</strong>-MC2-<strong>USB</strong>-RM<br />
A210 0108 <strong>DVIMUX4</strong>-<strong>DL</strong>-MC3-<strong>USB</strong><br />
A210 0109 <strong>DVIMUX4</strong>-<strong>DL</strong>-MC3-<strong>USB</strong>-RM<br />
A210 0112 <strong>DVIMUX4</strong>-<strong>DL</strong>-MC4-<strong>USB</strong><br />
A210 0113 <strong>DVIMUX4</strong>-<strong>DL</strong>-MC4-<strong>USB</strong>-RM<br />
KABEL-SETS<br />
A610 0125 CPU-DVID-<strong>DL</strong>-U-2<br />
A610 0129 CPU-DVID-<strong>DL</strong>-U-5<br />
A610 0088 CPU-DVIA-U-2<br />
A610 0089 CPU-DVIA-U-5<br />
G&D <strong>DVIMUX4</strong>-<strong>DL</strong>-<strong>USB</strong> · 30
Technische Daten<br />
Technische Daten<br />
Allgemeine Eigenschaften der Serie<br />
<strong>DVIMUX4</strong>-<strong>DL</strong>-<strong>USB</strong>-SERIE<br />
Anzahl Videoquellen pro Rechner/Arbeitsplatz: siehe Eigenschaften der Varianten<br />
Arbeitsplatz Anschlüsse pro Gerät: 1<br />
Schnittstellen für<br />
Arbeitsplatz<br />
31 · G&D <strong>DVIMUX4</strong>-<strong>DL</strong>-<strong>USB</strong><br />
Anschluss: direkt am Gerät<br />
Video: siehe Eigenschaften der Varianten<br />
<strong>USB</strong>-Tastatur/-Maus: 2 × <strong>USB</strong>-A-Buchse<br />
<strong>USB</strong> 2.0-Geräte: 2 × <strong>USB</strong>-A-Buchse<br />
Audio: 1 × 3,5-mm-Klinkenbuchse (Line In)<br />
1 × 3,5-mm-Klinkenbuchse (Speaker)<br />
Rechner Anschlüsse pro Gerät: 4<br />
Schnittstellen<br />
für Rechner<br />
Anschluss: mit optionalen Kabelsets am Gerät<br />
Video: siehe Eigenschaften der Varianten<br />
<strong>USB</strong>: 4 × <strong>USB</strong>-B-Buchse<br />
Audio: 4 × 3,5-mm-Klinkenbuchse (Line In)<br />
4 × 3,5-mm-Klinkenbuchse (Line Out)<br />
Video Signaltyp: DVI-I (analoges <strong>und</strong> digitales Video)<br />
Videoauflösung (digital): max. 2560 × 1600 @ 60 Hz<br />
Videoauflösung (analog): max. 1920 x 1440 @ 75 Hz<br />
Farbmodus digital: 24 Bit<br />
DDC: Enhanced Display Data Channel<br />
Mischbetrieb: wird unterstützt (digital/analog)<br />
Audio Art: analog<br />
Bandbreite: 22 kHz<br />
Update Verfahren: lokale Servicebuchse<br />
Schnittstelle: 2,5-mm-Klinkenbuchse<br />
Stromversorgung Typ: Internes Netzteil<br />
Anschluss: Kaltgerätestecker (IEC-320 C14)<br />
Gehäuse Material: Aluminium eloxiert<br />
Konformität CE, RoHs
Individuelle Eigenschaften der Varianten<br />
<strong>DVIMUX4</strong>-<strong>DL</strong>-<strong>USB</strong><br />
Technische Daten<br />
Anzahl Videoquellen pro Rechner/Arbeitsplatz: 1<br />
Schnittstellen für<br />
Arbeitsplatz<br />
Video: 1 × DVI-I-Buchse<br />
Schnittstellen<br />
für Rechner<br />
Video: 4 × DVI-I-Buchse<br />
Stromversorgung Stromaufnahme (max.): 130mA@240VAC; 285mA@100VAC<br />
Leistungsaufnahme (max.): 17,4W@240VAC; 17,1W@100VAC<br />
Gehäuse Maße (B × H × T): 270 × 44 × 210 mm<br />
Gewicht: ca. 1,5 kg<br />
Einsatzumgebung Temperatur: +5 bis +45 °C<br />
Luftfeuchte: < 80%, nicht kondensierend<br />
<strong>DVIMUX4</strong>-<strong>DL</strong>-MC2-<strong>USB</strong><br />
Anzahl Videoquellen pro Rechner/Arbeitsplatz: 2<br />
Schnittstellen<br />
für Arbeitsplatz<br />
Video: 2 × DVI-I-Buchse<br />
Schnittstellen<br />
für Rechner<br />
Video: 4 × je 2 DVI-I-Buchsen<br />
Stromversorgung Stromaufnahme (max.): 160mA@240VAC; 370mA@100VAC<br />
Leistungsaufnahme (max.): 22,6W@240VAC; 22,3W@100VAC<br />
Gehäuse Maße (B × H × T): 270 × 66 × 210 mm<br />
Gewicht: ca. 1,7 kg<br />
Einsatzumgebung Temperatur: +5 bis +45 °C<br />
Luftfeuchte: < 80%, nicht kondensierend<br />
<strong>DVIMUX4</strong>-<strong>DL</strong>-MC3-<strong>USB</strong><br />
Anzahl Videoquellen pro Rechner/Arbeitsplatz: 3<br />
Schnittstellen<br />
für Arbeitsplatz<br />
Video: 3 × DVI-I-Buchse<br />
Schnittstellen<br />
für Rechner<br />
Video: 4 × je 3 DVI-I-Buchsen<br />
Stromversorgung Stromaufnahme (max.): 200mA@240VAC; 511mA@100VAC<br />
Leistungsaufnahme (max.): 28,5W@240VAC; 28,5W@100VAC<br />
Gehäuse Maße (B × H × T): 270 × 88 × 210 mm<br />
Gewicht: ca. 2,1 kg<br />
Einsatzumgebung Temperatur: +5 bis +40 °C<br />
Luftfeuchte: < 80%, nicht kondensierend<br />
G&D <strong>DVIMUX4</strong>-<strong>DL</strong>-<strong>USB</strong> · 32
Technische Daten<br />
<strong>DVIMUX4</strong>-<strong>DL</strong>-MC4-<strong>USB</strong><br />
Anzahl Videoquellen pro Rechner/Arbeitsplatz: 4<br />
Schnittstellen<br />
für Arbeitsplatz<br />
Video: 4 × DVI-I-Buchse<br />
Schnittstellen<br />
für Rechner<br />
Video: 4 × je 4 DVI-I-Buchsen<br />
Stromversorgung Stromaufnahme (max.): 233mA@240VAC; 611mA@100VAC<br />
Leistungsaufnahme (max.): 33,8W@240VAC; 34,3W@100VAC<br />
Gehäuse Maße (B × H × T): 270 × 132 × 210 mm<br />
Gewicht: ca. 2,5 kg<br />
Einsatzumgebung Temperatur: +5 bis +35 °C<br />
Luftfeuchte: < 80%, nicht kondensierend<br />
33 · G&D <strong>DVIMUX4</strong>-<strong>DL</strong>-<strong>USB</strong>
NOTIZEN
About this manual<br />
This manual has been carefully compiled and examined to the state-of-the-art.<br />
G&D neither explicitly nor implicitly takes guarantee or responsibility for the quality,<br />
efficiency and marketability of the product when used for a certain purpose that<br />
differs from the scope of service covered by this manual.<br />
For damages which directly or indirectly result from the use of this manual as well<br />
as for incidental damages or consequential damages, G&D is liable only in cases of<br />
intent or gross negligence.<br />
Caveat Emptor<br />
G&D will not provide warranty for devices that:<br />
Are not used as intended.<br />
Are repaired or modified by unauthorized personnel.<br />
Show severe external damages that was not reported on the receipt of goods.<br />
Have been damaged by non G&D accessories.<br />
G&D will not be liable for any consequential damages that could occur from using<br />
the products.<br />
Proof of trademark<br />
All product and company names mentioned in this manual, and other documents<br />
you have received alongside your G&D product, are trademarks or registered trademarks<br />
of the holder of rights.<br />
© <strong>Guntermann</strong> & <strong>Drunck</strong> <strong>GmbH</strong> 2011. All rights reserved.<br />
Version 1.31 – 17/03/2011<br />
Firmware: 1.5.4<br />
<strong>Guntermann</strong> & <strong>Drunck</strong> <strong>GmbH</strong><br />
Dortm<strong>und</strong>er Str. 4a<br />
57234 Wilnsdorf<br />
Germany<br />
Phone +49 2739 8901-100<br />
Fax +49 2739 8901-120<br />
http://www.GDsys.de<br />
sales@GDsys.de<br />
i · G&D <strong>DVIMUX4</strong>-<strong>DL</strong>-<strong>USB</strong>
Contents<br />
Contents<br />
Safety instructions ............................................................................................ 1<br />
The »<strong>DVIMUX4</strong>-<strong>DL</strong>-<strong>USB</strong>« KVM switch ......................................................... 2<br />
Package contents .............................................................................................. 2<br />
Installation ....................................................................................................... 3<br />
Overview of the interfaces .................................................................................. 3<br />
Setting up the device .......................................................................................... 3<br />
Connecting the console devices .......................................................................... 4<br />
Connecting the computers .................................................................................. 5<br />
Connecting the power supply ............................................................................. 6<br />
Further information .......................................................................................... 7<br />
Support of digital and analog video signals ......................................................... 7<br />
Connecting <strong>USB</strong> 2.0 mass storage devices .......................................................... 7<br />
Initiation .......................................................................................................... 8<br />
Status displays .................................................................................................. 8<br />
Switching between the computers ..................................................................... 9<br />
Switching via buttons ......................................................................................... 9<br />
Switching via key combinations ......................................................................... 9<br />
Switching via step keys ...................................................................................... 9<br />
Switching via serial device ............................................................................... 10<br />
Configuration ................................................................................................. 12<br />
Overview of the functions and default settings .................................................. 12<br />
Operating the setup mode ................................................................................ 13<br />
Operating the setup menu ................................................................................ 14<br />
Configuration settings ...................................................................................... 16<br />
Using single or double hotkeys ................................................................... 16<br />
Changing the single hotkey ......................................................................... 17<br />
Changing the double hotkey ....................................................................... 18<br />
Changing the select keys ............................................................................. 19<br />
Disabling/Enabling the hotkey delay .......................................................... 20<br />
Resetting the default settings ...................................................................... 21<br />
Auto-accessing the first channel .................................................................. 22<br />
(De)activating the switching via front buttons ............................................. 22<br />
(De)activating the switching via hotkeys ..................................................... 23<br />
(De)activating the switching via step keys ................................................... 24<br />
Changing the bit rate of the Service port ...................................................... 25<br />
Changing the standard mode of the Service port .......................................... 26<br />
Selecting the <strong>USB</strong> keyboard type ................................................................ 27<br />
Order Numbers ............................................................................................... 29<br />
Technical Data ............................................................................................... 30<br />
G&D <strong>DVIMUX4</strong>-<strong>DL</strong>-<strong>USB</strong> · ii
Safety instructions<br />
Safety instructions<br />
Please read the following safety instructions carefully before you start operating the<br />
G&D product. The instructions well help in avoiding damages to the product and in<br />
preventing possible injuries.<br />
Keep this manual handy for all persons who will be using this product.<br />
Follow all warnings or operating instructions which are on the device or stated in<br />
this user manual.<br />
, Beware of electric shocks<br />
To avoid the risk of electric shock, do not open the device or remove the covers.<br />
If service is required, please contact our technicians.<br />
, Disconnect the main power plug or the power supply before installation<br />
Before installation, ensure that the device has been disconnected from the power<br />
source. Disconnect the main power plug or the power supply of the device.<br />
, Ensure constant access to the power plugs<br />
During the installation of the devices, ensure that the power plugs remain accessible.<br />
! Avoid the risk of tripping over cables<br />
Ensure that there is no risk of tripping over cables.<br />
, Only use a gro<strong>und</strong>ed voltage source<br />
Operate this device by using a gro<strong>und</strong>ed voltage source.<br />
, Use only the provided G&D power pack<br />
Operate this device with the provided G&D power pack or with the power pack<br />
listed in the manual.<br />
! Operate the device only in designated areas.<br />
The devices are designed for indoor use. Avoid exposure to extreme cold, heat<br />
or humidity.<br />
1 · G&D <strong>DVIMUX4</strong>-<strong>DL</strong>-<strong>USB</strong>
The »<strong>DVIMUX4</strong>-<strong>DL</strong>-<strong>USB</strong>« KVM switch<br />
The »<strong>DVIMUX4</strong>-<strong>DL</strong>-<strong>USB</strong>« KVM switch<br />
The <strong>DVIMUX4</strong>-<strong>DL</strong>-<strong>USB</strong> KVM switch enables you to operate up to four computers<br />
via one console.<br />
The console has to be supplied with a <strong>USB</strong> keyboard, a <strong>USB</strong> mouse and a digital<br />
and/or analog monitor. The computers connected to the KVM switch are operated<br />
at the installed console.<br />
The switching between computers takes place either via the pushbuttons on the<br />
front panel, configurable key combinations, or a serial device which is connected to<br />
the Service port.<br />
The front panel of the device provides two <strong>USB</strong> 2.0 interfaces to operate any <strong>USB</strong><br />
devices. The connected <strong>USB</strong> devices are available to whichever active computer.<br />
NOTE: The KVM switch emulates keyboard and mouse on each channel and<br />
hence guarantees error-free booting at all times.<br />
Package contents<br />
1 × <strong>DVIMUX4</strong>-<strong>DL</strong>-<strong>USB</strong> KVM switch (basic or multi-channel variant)<br />
1 × DVI-Divider adapter per supported video channel<br />
1 × data cable (Update-Cable-2)<br />
1 × power cable<br />
1 × »Installation and Operation« manual<br />
IMPORTANT: KVM cable sets are required to connect the computers to the KVM<br />
switch. A list of the available KVM cable sets can be fo<strong>und</strong> on page 29.<br />
G&D <strong>DVIMUX4</strong>-<strong>DL</strong>-<strong>USB</strong> · 2
Installation<br />
Installation<br />
Overview of the interfaces<br />
Front panel of the KVM switch<br />
The front panel of the KVM switch provides two <strong>USB</strong> 2.0 interfaces to connect any<br />
<strong>USB</strong> 2.0 devices.<br />
NOTE: <strong>USB</strong> devices such as a printer or a mass storage device connected to one of<br />
these interfaces are available to the active computer.<br />
The front panel also provides a service port. This port is used for operating the setup<br />
menu (see Operating the setup menu on page 14 ff.) and for carrying out firmware<br />
updates.<br />
Figure 1: Front view of the KVM switch<br />
The active channel can be selected by using one of the four buttons on the front<br />
panel. The front panel also provides several LEDs (see Status displays on page 8).<br />
The back panel of the KVM switch<br />
The back panel of the KVM switch provides interfaces to connect the console devices<br />
and the computers. The following page contains a detailed description of these interfaces.<br />
Setting up the device<br />
1. Ensure that the computers, which are to be connected to the KVM switch, are<br />
turned off. If the computers are provided with both keyboards and mouses,<br />
unplug the cables of the input devices from the <strong>USB</strong> interfaces.<br />
2. Place the KVM switch between the computers and the console. Please mind the<br />
maximum cable length of five metres between the KVM switch and the computers<br />
which are to be connected.<br />
3. Before installing the KVM switch, decide which button on the front panel of the<br />
device should be assigned to which computer.<br />
3 · G&D <strong>DVIMUX4</strong>-<strong>DL</strong>-<strong>USB</strong><br />
<strong>USB</strong> 2.0<br />
Devices<br />
CPU 1 CPU 2 CPU 3 CPU 4 User Service<br />
Active<br />
Status
Connecting the console devices<br />
Keyb.: Insert the connection cable of the <strong>USB</strong> keyboard to this interface.<br />
Mouse: Insert the connection cable of the <strong>USB</strong> mouse to this interface.<br />
Line In: If desired, connect a microphone or headset to this interface.<br />
Installation<br />
NOTE: Connect the cables of the console and the computers preferably block by<br />
block and from the bottom up. By doing so, you will avoid already connected<br />
cables blocking your view of the interfaces.<br />
Monitor 1<br />
CON<br />
Keyb./Mouse Line In<br />
Speaker<br />
DVI-I CPU 1.1<br />
CPU 1<br />
Line In Line Out <strong>USB</strong> 2.0<br />
DVI-I CPU 2.1<br />
Figure 2: Interfaces to connect the console devices<br />
DVI-I CPU 3.1<br />
Line In Line Out <strong>USB</strong> 2.0 Line In Line Out <strong>USB</strong> 2.0 Line In Line Out <strong>USB</strong> 2.0<br />
NOTE: You can also connect the <strong>USB</strong> keyboard and/or mouse to the <strong>USB</strong> 2.0<br />
Devices interfaces at the front panel of the device.<br />
In this case, the keyboard cannot be used to switch between the channels.<br />
Speaker: Connect the speaker for the output of the audio signals of the active computer<br />
to this interface.<br />
Monitor 1: Connect the DVI cable of the monitor to this interface.<br />
CPU 2<br />
NOTE: When deploying a multi-channel variant of the KVM switch, the separate<br />
video signals of computers in a multi-monitor installation can be transmitted to<br />
two (MC2), three (MC3), or four (MC4) monitors.<br />
The device provides up to four video inputs (DVI-I CPU 1.x to 4.x) for each monitor<br />
you want to connect.<br />
If required, connect the other monitors to the Monitor x interfaces of the MC variant.<br />
<strong>USB</strong> 2.0 Devices: If you want <strong>USB</strong> devices to be available to the connected computers<br />
(e.g. a printer or a mass storage device), connect these devices to the interfaces on<br />
the front panel (see figure 1 on page 3).<br />
CPU 3<br />
DVI-I CPU 4.1<br />
CPU 4<br />
Power<br />
G&D <strong>DVIMUX4</strong>-<strong>DL</strong>-<strong>USB</strong> · 4
Installation<br />
Connecting the computers<br />
IMPORTANT: KVM cable sets are required to connect the computers to the KVM<br />
switch. A list of the available KVM cable sets can be fo<strong>und</strong> on page 29.<br />
Assign the KVM cable sets to the different computers and place them ready for<br />
installation.<br />
NOTE: To connect the (maximum four) computers to the KVM switch, the interfaces<br />
as shown below are available for each computer.<br />
The label (e.g. CPU 1) assigns the interface to a specific computer and to the correspondent<br />
button on the front panel.<br />
Monitor 1<br />
CON<br />
Keyb./Mouse Line In<br />
Speaker<br />
DVI-I CPU 1.1<br />
CPU 1<br />
Line In Line Out <strong>USB</strong> 2.0<br />
Figure 3: Interfaces to connect the computers<br />
Line In: If the audio signals of the computers are to be output over the speakers which are<br />
connected to the KVM switch, use one of the audio connection cables (Audio-M/M) to<br />
connect the computer’s Line Out interface to this interface.<br />
Line Out: If you want to use a microphone or a headset at the console, use one of the<br />
audio connection cables (Audio-M/M) to connect this interface to the computer’s<br />
microphone input.<br />
<strong>USB</strong> 2.0: Use one of the <strong>USB</strong> connection cables (<strong>USB</strong>-AM/BM) to connect one of the<br />
computer‘s <strong>USB</strong> interfaces to this interface.<br />
DVI-I CPU x.1: Connect the computer‘s video output to this interface.<br />
If the computer provides a DVI-D video output, use a digital video cable <br />
(DVI-D-<strong>DL</strong>-M/M). In case of an analog VGA output, use an analog video<br />
cable (VGA-M/DVI-A-M).<br />
NOTE: When deploying a multi-channel variant of the KVM switch, connect the<br />
computer’s second, third, and fourth video output to the DVI-I CPU 1.x to 4.x ínterfaces.<br />
5 · G&D <strong>DVIMUX4</strong>-<strong>DL</strong>-<strong>USB</strong><br />
DVI-I CPU 2.1<br />
CPU 2<br />
Line In Line Out <strong>USB</strong> 2.0<br />
DVI-I CPU 3.1<br />
CPU 3<br />
Line In Line Out <strong>USB</strong> 2.0<br />
DVI-I CPU 4.1<br />
CPU 4<br />
Line In Line Out <strong>USB</strong> 2.0<br />
Power
Connecting the power supply<br />
Monitor 1<br />
CON<br />
Keyb./Mouse Line In Speaker<br />
DVI-I CPU 1.1<br />
CPU 1<br />
Line In Line Out <strong>USB</strong> 2.0<br />
DVI-I CPU 2.1<br />
CPU 2<br />
Figure 4: Interface to connect the power supply<br />
DVI-I CPU 3.1<br />
Line In Line Out <strong>USB</strong> 2.0 Line In Line Out <strong>USB</strong> 2.0 Line In Line Out <strong>USB</strong> 2.0<br />
Installation<br />
Power: Connect the power cable (PowerCable-2 Standard) to a power outlet and the<br />
power socket of the KVM switch.<br />
CPU 3<br />
DVI-I CPU 4.1<br />
CPU 4<br />
Power<br />
G&D <strong>DVIMUX4</strong>-<strong>DL</strong>-<strong>USB</strong> · 6
Further information<br />
Further information<br />
Support of digital and analog video signals<br />
Computers that provide digital or analog video signals can be connected to the KVM<br />
switches of the <strong>DVIMUX4</strong>-<strong>DL</strong> series. The signal type (digital or analog) that is transmitted<br />
from computer to KVM switch is displayed unaltered on the connected monitor.<br />
Uniform signal type within one video channel<br />
Install a console monitor that can display the uniform signal type of the computer’s<br />
video channels (only digital or analog).<br />
EXAMPLE: The video signal of all computers is digitally (DVI signals) transmitted<br />
to the KVM switch. A digital monitor is required to display the signals on the console<br />
monitor.<br />
Different signal types within one video channel<br />
If digital (e.g. via CPU 1) as well as analog (e.g. via CPU 2) video signals of different<br />
computers are transmitted on the same video channel, a DVI-Divider adapter must be<br />
connected to the Monitor x interface of the KVM switch.<br />
The adapter provides both DVI and VGA output. Connect both outputs of the<br />
adapter to the console monitor.<br />
NOTE: Choose a monitor which can process digital as well as analog video data.<br />
Such monitors provide a DVI and a VGA interface.<br />
Depending on the input signal, modern monitors usually switch the signal type independently.<br />
Otherwise, the switching from digital to analog signal processing (and vice<br />
versa) must take place manually by the user.<br />
Connecting <strong>USB</strong> 2.0 mass storage devices<br />
Any <strong>USB</strong> devices can be connected to the <strong>USB</strong> 2.0 interfaces on the front panel of<br />
the KVM switch.<br />
If the user switches the active channel, the <strong>USB</strong> device instantly is no longer available<br />
at the computer that has been active so far. If the computer is writing data on the<br />
mass storage device at this point in time, this process is going to be cancelled.<br />
IMPORTANT: To avoid data loss, use the Safely Remove Hardware function of the<br />
applied operating system before switching the channel.<br />
7 · G&D <strong>DVIMUX4</strong>-<strong>DL</strong>-<strong>USB</strong>
Initiation<br />
Turn on the Power switch on the back panel of the KVM switch.<br />
Initiation<br />
As soon as the device is supplied with power, the green User LED lights up. The<br />
KVM switch is now ready for operation.<br />
Status displays<br />
The LEDs on the front panel of the device enable you to control the operational status<br />
at all time.<br />
Section LED Status Meaning<br />
CPU 1 ... 4 Active on The KVM switch is currently active on this channel.<br />
All inputs are forwarded to this computer.<br />
off<br />
All connected <strong>USB</strong> devices are provided to the active<br />
computer.<br />
The channel is currently inactive.<br />
Status on The computer is ready for operation.<br />
off No computer is connected or the computer is turned off.<br />
User Active on The keyboard was fully and properly initialised.<br />
slowly<br />
blinking<br />
The LED is blinking after the device has been turned on<br />
and until the keyboard has been initialised<br />
blinking The setup mode of the KVM switch is active.<br />
Status on The KVM switch is supplied with the necessary voltage.<br />
off The KVM switch is turned off or is not supplied with the<br />
necessary voltage.<br />
If necessary, check if the power cable has been properly<br />
connected.<br />
G&D <strong>DVIMUX4</strong>-<strong>DL</strong>-<strong>USB</strong> · 8
Switching between the computers<br />
Switching between the computers<br />
The user can either use the four buttons on the front panel of the device or key combinations<br />
to switch between different computers.<br />
Keyboard and mouse inputs are forwarded to the active computer. The video signal<br />
of the active computer is displayed at the console monitor.<br />
Switching via buttons<br />
How to use the buttons at the device to switch to a certain channel:<br />
Press the button to enable the desired channel.<br />
Switching via key combinations<br />
How to use key combinations to switch to a certain channel:<br />
Press Hotkey+Select key on the console keyboard.<br />
The default settings allow you to switch between channels by pressing Ctrl and the<br />
select keys 1 to 4.<br />
IMPORTANT: Switching between the channels takes place if the pressed key combination<br />
is released.<br />
NOTE: If one of these key combinations interferes with a key combination of an<br />
installed application program, the key combination of the KVM switch can be<br />
adjusted (see page 17).<br />
Switching via step keys<br />
IMPORTANT: Step keys are deactivated in the default settings. Information on how<br />
to enable this function are provided on page 24.<br />
Alternative to using select keys to switch between channels connected to the KVM<br />
switch is to use the step keys to switch the channels in ascending or descending order.<br />
IMPORTANT: The active step keys depend on the selected select keys. The following<br />
table lists the step keys depending on the active select keys.<br />
9 · G&D <strong>DVIMUX4</strong>-<strong>DL</strong>-<strong>USB</strong>
How to use step keys to switch to a certain channel:<br />
1. Press Hotkey+»Back« step key or Hotkey+»Forward« step key on the<br />
console keyboard.<br />
Switching via serial device<br />
Switching between the computers<br />
Select keys »Back« step key »Forward« step key<br />
1 ... 4 9 0<br />
NUM 1 ... 4 NUM 9 NUM 0<br />
A ... D I K<br />
F1 ... F4 F9 F10<br />
The channels can be switched via a serial device connected to the Service port of the<br />
KVM switch. The serial device can either be a special keypad or a computer which<br />
is terminal emulator operated.<br />
IMPORTANT: Use the following connection settings and the switching commands of<br />
the KVM switch to successfully switch the channel with a serial end device.<br />
Connection settings<br />
Use the following connection settings for the serial end device to establish a serial<br />
connection to the KVM switch.<br />
Bits per second: 115.200 | or : 9.600 (see page 26)<br />
Data bits: 8<br />
Parity: none<br />
Stop bits: 1<br />
Flow control: none<br />
Enabling the »Switch« mode<br />
IMPORTANT: The Service port of the KVM switch can be used to operate the setup<br />
menu as well as to switch between the channels with a serial device.<br />
Switching of channels via the serial device is possible only if the Switch mode is active!<br />
If necessary, change the standard mode (see page 27) of the Service port to this mode if<br />
you want to switch channels via the serial device immediately after starting the KVM<br />
switch.<br />
An alternative to switching to the Switch mode is to enter the »!« command during<br />
operation.<br />
G&D <strong>DVIMUX4</strong>-<strong>DL</strong>-<strong>USB</strong> · 10
Switching between the computers<br />
Switching commands<br />
The following commands are provided for switching the channel:<br />
Command Channel<br />
1! 1<br />
2! 2<br />
3! 3<br />
4! 4<br />
! switch to next channel<br />
ADVICE: Use the »?!« command to show the currently accessing channel.<br />
NOTE: The serial device carries out the command directly after it has been sent.<br />
A message (see below) informs the serial device concerning the success or failure<br />
of the switching of channels.<br />
Messages<br />
The KVM switch confirms the successful execution of a command and otherwise<br />
sends a meassage.<br />
Message Meaning<br />
In[x] All switching to channel [x] successful<br />
E01 invalid channel number (out of range)<br />
E06 channel switching has failed<br />
E10 invalid command<br />
E13 invalid value (out of range)<br />
RS232 mode enabled switch mode (RS232) enabled<br />
11 · G&D <strong>DVIMUX4</strong>-<strong>DL</strong>-<strong>USB</strong>
Configuration<br />
Configuration<br />
The configuration of the KVM switch can optionally be changed in the setup mode<br />
or in the setup menu:<br />
Enable the setup mode using the console keyboard. You can change the configuration<br />
via special setup keys.<br />
The setup menu is operated with a terminal emulator and provides a user interface<br />
to configure the device.<br />
NOTE: The <strong>USB</strong> keyboard type (see page 27) can only be selected in the setup menu<br />
where you can also find the configuration settings of the KVM switch.<br />
Overview of the functions and default settings<br />
The following table lists functions that can be configured as well as their default settings<br />
of the KVM switch.<br />
Detailed description of the functions is given in the following pages:<br />
Function Default Page<br />
Using single or double hotkeys single hotkeys 16<br />
Changing the single hotkey Ctrl 17<br />
Changing the double hotkey Ctrl+Shift 18<br />
Changing the select keys 1 to 4 19<br />
Disabling/Enabling the hotkey delay 7 seconds 20<br />
Resetting the default settings 21<br />
Auto-accessing the first channel disabled 22<br />
(De)activating the switching via front buttons enabled 22<br />
(De)activating the switching via hotkeys enabled 23<br />
(De)activating the switching via step keys disabled 24<br />
Changing the bit rate of the Service port 115.200 25<br />
Changing the standard mode of the Service port switch 26<br />
Selecting the <strong>USB</strong> keyboard type PC Multimedia 27<br />
Basic operation of the setup mode as well as the setup menu is explained in the following<br />
pages.<br />
All functions that can be configured for the KVM switch are described in detail from<br />
page 16 ff.<br />
G&D <strong>DVIMUX4</strong>-<strong>DL</strong>-<strong>USB</strong> · 12
Configuration<br />
Operating the setup mode<br />
The setup mode can be enabled using the console keyboard. After enabling, the configuration<br />
of the KVM switch can be changed by using various step keys.<br />
NOTE: Only one setup function can be performed after the calling of the setup mode.<br />
If you want to perform more functions, please restart the setup mode.<br />
How to enable the setup mode:<br />
Press the Hotkey+Backspace (default: Ctrl+Backspace) key combination to enable<br />
the setup mode.<br />
NOTE: The successful activation of the setup mode is displayed by the blinking<br />
NUM, and Scroll control LEDs on the keyboard. Additionally, the yellow User<br />
LED will blink at the KVM switch.<br />
IMPORTANT: The key combination to enable the setup mode needs to be pressed<br />
for seven seconds.<br />
After the first call of the setup mode, the hotkey delay can be disabled by pressing<br />
the setup key 8 (see page 20).<br />
How to perform a setup function:<br />
After enabling the setup mode, press one of the setup keys described on the following<br />
pages.<br />
How to end the setup mode without performing a function:<br />
Press ESC to end the setup mode.<br />
13 · G&D <strong>DVIMUX4</strong>-<strong>DL</strong>-<strong>USB</strong>
Operating the setup menu<br />
Configuration<br />
The setup menu provides a convenient alternative to view and edit the configuration<br />
of the KVM switch.<br />
The switch can be operated through the setup menu which both easy operation and<br />
adjustment of several settings within a session.<br />
The setup menu can be operated via any terminal emulator (e.g. HyperTerminal or<br />
PuTTY). Use the supplied service cable to connect the computer on which the terminal<br />
emulator is installed with the Service port of the device.<br />
How to establish a connection within the terminal emulator:<br />
1. Start any terminal emulator (HyperTerminal or PuTTY, for example).<br />
2. Establish a new connection in the terminal emulator and enter the following settings:<br />
Bits per second: 115.200 | or : 9.600 (see page 25)<br />
Data bits: 8<br />
Parity: none<br />
Stop bits: 1<br />
Flow control: none<br />
3. Use the provided data cable (Update-Cable-2) to connect the computer to the Service<br />
port at the front panel of the KVM switch.<br />
How to call up the setup menu:<br />
1. Connect the jack plug of the serial data cable to the Service port at the front panel<br />
of the device.<br />
2. Use the terminal emulator to establish the connection to the KVM switch.<br />
As soon as the connection is successfully established, the setup menu will be displayed<br />
in the terminal emulator (see figure on page 15).<br />
NOTE: If the KVM switch is started while the connection is being established, the<br />
G&D Firmware Update Utility will be displayed briefly before the setup menu opens.<br />
This special utility is solely used by the support team.<br />
G&D <strong>DVIMUX4</strong>-<strong>DL</strong>-<strong>USB</strong> · 14
Configuration<br />
The setup menu lists all settings in tabular form:<br />
Settings for <strong>DVIMUX4</strong>-<strong>DL</strong><br />
Show System Info ...<br />
Hotkey: Ctrl<br />
Double Hotkey: NO<br />
Select Key: 1..4<br />
Hotkey Delay: YES<br />
Set System Defaults ...<br />
Select Ch.1 after Power up: No<br />
Select Channel via Front Button: Yes<br />
Select Channel via Hotkey: Yes<br />
Select Channel via Step Key: 9 | 0<br />
Service RS232 Bitrate: 115200<br />
Service RS232 Startup Mode: Setup Menu<br />
PS/2 Scancode Set: 2<br />
PS/2 Keyboard Type: Standard<br />
<strong>USB</strong> Keymode: ...<br />
'Space': Toggle 'S': Save<br />
The right column displays the active setting of the respective function.<br />
Menu items with submenus containing more settings are indicated with three dots<br />
(...) in the right column.<br />
NOTE: The PS/2 Scancode Set and PS/2 Keyboard Type are only relevant PS/2 variants<br />
of the KVM switch and are therefore not described in this manual.<br />
How to operate the setup menu:<br />
1. Use the Arrow or Arrow keys to select the desired menu item.<br />
The active row is marked with angular arrows .<br />
2. Depending on the type of menu item, the following action(s) can be carried out:<br />
Menu items whose settings are displayed in the right column can be changed<br />
by pressing the Space key (repeatedly).<br />
A menu item that has a sub-dialogue available can be opened by pressing Enter.<br />
NOTE: The following pages provide detailed information on how to change a certain<br />
function.<br />
15 · G&D <strong>DVIMUX4</strong>-<strong>DL</strong>-<strong>USB</strong>
Configuration settings<br />
Using single or double hotkeys<br />
Configuration<br />
If many application programs with key combinations are operated on one computer<br />
or if different G&D devices are used in one cascade, the number of available key<br />
combinations might be restricted.<br />
In such a case, it is appropriate to apply double hotkeys.<br />
How to enable single or double hotkeys:<br />
Setup Mode<br />
Setup Menu<br />
1. Press Hotkey+Backspace (default: Ctrl+Backspace) to enabled the setup mode.<br />
If the hotkey delay is active, press the key combination for seven seconds.<br />
2. Press one of the setup keys listed below to enable single or double hotkeys:<br />
S enables single hotkeys<br />
A disables double hotkeys<br />
1. Use the terminal emulator to establish a connection to the KVM switch.<br />
If the setup menu is not displayed, the Switch mode of the service port is<br />
enabled. Enter »#!« to change to the setup menu.<br />
2. Use the Arrow or Arrow keys to select the Double Hotkey entry.<br />
3. Press the Space key (repeatedly) to enable the usage of single or double hotkeys:<br />
No enables single hotkeys<br />
Yes disables double hotkeys<br />
4. Press the S key to save your settings.<br />
Depending on your settings, the active hotkey is converted into a double hotkey (or<br />
vice versa):<br />
Single Hotkey Double Hotkey<br />
Ctrl Ctrl+Shift<br />
Alt Alt+Shift<br />
Alt Gr Alt Gr+Ctrl<br />
Win Win+Ctrl<br />
Shift Shift+Win<br />
G&D <strong>DVIMUX4</strong>-<strong>DL</strong>-<strong>USB</strong> · 16
Configuration<br />
Changing the single hotkey<br />
Press the hotkey and the Backspace key simultaneously to start the setup mode of the<br />
KVM switch. Pressing the hotkey and the select key simultaneously enables the<br />
switching of channels.<br />
If an application program or another G&D device uses the same hotkey within the<br />
cascade, the hotkey can be changed.<br />
NOTE: The single hotkey Ctrl is preset at default.<br />
How to change the current hotkey:<br />
Setup Mode<br />
Setup Menu<br />
1. Press the Hotkey+Backspace (default: Ctrl+Backspace) key combination to<br />
enable the setup mode.<br />
If the hotkey delay is active, press the key combination for seven seconds.<br />
2. Press one of the setup keys listed below to enable a certain hotkey:<br />
Ctrl enables Ctrl hotkey<br />
Alt enables Alt hotkey<br />
Alt Gr enables Alt Gr hotkey<br />
Win enables Win hotkey<br />
Shift enables Shift hotkey<br />
1. Use the terminal emulator to establish a connection to the KVM switch.<br />
If the setup menu is not displayed, the Switch mode of the service port is<br />
enabled. Enter »#!« to change to the setup menu.<br />
2. Use the Arrow or Arrow keys to select the Hotkey entry.<br />
3. Press the Space key (repeatedly) to enable a certain hotkey:<br />
Ctrl enables Ctrl hotkey<br />
Alt enables Alt hotkey<br />
Alt Gr enables Alt Gr hotkey<br />
Win enables Win hotkey<br />
Shift enables Shift hotkey<br />
4. Press the S key to save your settings.<br />
17 · G&D <strong>DVIMUX4</strong>-<strong>DL</strong>-<strong>USB</strong>
Changing the double hotkey<br />
Configuration<br />
If the use of double hotkeys is enabled (see page 16), press the double hotkey and the<br />
Backspace key simultaneously to start the setup mode of the KVM switch. Switching<br />
of channels takes place by pressing the double hotkey and a select key at the same<br />
time.<br />
If an application program or another G&D device uses the same hotkey within the<br />
cascade, the hotkey can be changed.<br />
How to change the current double hotkey:<br />
Setup Mode<br />
Setup Menu<br />
1. Requirement: enabled double hotkeys (see page 16).<br />
2. Press Double hotkey+Backspace (default: Ctrl+Shift+Backspace) to enable the<br />
setup mode.<br />
If the hotkey delay is active, press the key combination for seven seconds.<br />
3. Press one of the setup keys listed below to activate the desired double hotkey:<br />
Ctrl enables Ctrl+Shift double hotkey<br />
Alt enables Alt+Shift double hotkey<br />
Alt Gr enables Alt Gr+Ctrl double hotkey<br />
Win enables Win+Ctrl double hotkey<br />
Shift enables Shift+Win double hotkey<br />
1. Requirement: active double hotkeys (see page 16).<br />
2. Use the terminal emulator to establish a connection to the KVM switch.<br />
If the setup menu is not displayed, the Switch mode of the service port is<br />
enabled. Enter »#!« to change to the setup menu.<br />
3. Use the Arrow or Arrow keys to select the Hotkey entry.<br />
4. Press the Space key (repeatedly) to enable the desired double hotkey:<br />
Ctrl+Shift enables Ctrl+Shift double hotkey<br />
Alt+Shift enables Alt+Shift double hotkey<br />
Alt Gr+Ctrl enables Alt Gr+Ctrl double hotkey<br />
Win+Ctrl enables Win+Ctrl double hotkey<br />
Shift+Win enables Shift+Win double hotkey<br />
5. Press the S key to save your settings.<br />
G&D <strong>DVIMUX4</strong>-<strong>DL</strong>-<strong>USB</strong> · 18
Configuration<br />
Changing the select keys<br />
In the default settings, use the enabled select keys 1 to 4 to switch between the computers<br />
that are connected to the KVM switch.<br />
For instance, you can switch to computer 2 by pressing Hotkey+2 (default: Ctrl+2).<br />
How to choose a different select key set:<br />
Setup Mode<br />
Setup Menu<br />
1. Press Hotkey+Backspace (default: Ctrl+Backspace) to enable the setup mode.<br />
If the hotkey delay is active, press the key combination for seven seconds.<br />
2. Press one of the setup keys listed below to activate the particular set of select<br />
keys to switch the computers 1 to 4:<br />
1 enables select keys 1, 2, 3, 4<br />
NUM 1 enables select keys NUM 1, [...], NUM 3, NUM 4<br />
Z enables select keys A, B, C, D<br />
F1 enables select keys F1, F2, F3, F4<br />
1. Use the terminal emulator to establish a connection to the KVM switch.<br />
If the setup menu is not displayed, the Switch mode of the service port is<br />
enabled. Enter »#!« to change to the setup menu.<br />
2. Use the Arrow or Arrow keys to select the Select Keys entry.<br />
3. Press the Space key (repeatedly) to enable the particular set of select keys to<br />
switch the computers 1 to 4:<br />
1 ... 4 enables select keys 1, 2, 3, 4<br />
NUM 1 ... 4 enables select keys NUM 1, [...], NUM 3, NUM 4<br />
A ... D enables select keys A, B, C, D<br />
F1 ... F4 enables select keys F1, F2, F3, F4<br />
4. Press the S key to save your settings.<br />
19 · G&D <strong>DVIMUX4</strong>-<strong>DL</strong>-<strong>USB</strong>
Disabling/Enabling the hotkey delay<br />
Configuration<br />
Press the Hotkey+Backspace (default: Ctrl+Backspace) key combination for seven seconds<br />
in order to start the setup mode in the default settings.<br />
You can disable the hotkey delay if you want to start the setup mode immediately<br />
after pressing the key combination.<br />
How to disable/enable the hotkey delay:<br />
Setup Mode<br />
Setup Menu<br />
1. Press Hotkey+Backspace (default: Ctrl+Backspace) to enable the setup mode.<br />
If the hotkey delay is active, press the key combination for seven seconds.<br />
2. Press one of the setup keys listed below to disable/enable the hotkey delay:<br />
7 enables hotkey delay<br />
8 disables hotkey delay<br />
1. Use the terminal emulator to establish a connection to the KVM switch.<br />
If the setup menu is not displayed, the Switch mode of the service port is<br />
enabled. Enter »#!« to change to the setup menu.<br />
2. Use the Arrow or Arrow keys to select the Hotkey Delay entry.<br />
3. Press the Space key (repeatedly) to disable/enable the hotkey delay:<br />
Yes enables hotkey delay<br />
No disables hotkey delay<br />
4. Press the S key to save your settings.<br />
G&D <strong>DVIMUX4</strong>-<strong>DL</strong>-<strong>USB</strong> · 20
Configuration<br />
Resetting the default settings<br />
This function resets the default settings of the KVM switch.<br />
IMPORTANT: Performing this function reactivates the default settings of the KVM<br />
switch as shown on page 12!<br />
How to reset the default settings:<br />
Setup Mode<br />
Setup Menu<br />
1. Press Hotkey+Backspace (default: Ctrl+Backspace) to enable the setup mode.<br />
If the hotkey delay is active, press the key combination for seven seconds.<br />
2. Press the setup key listed below to reset the default settings:<br />
D resets default settings<br />
1. Use the terminal emulator to establish a connection to the KVM switch.<br />
If the setup menu is not displayed, the Switch mode of the service port is<br />
enabled. Enter »#!« to change to the setup menu.<br />
2. Use the Arrow or Arrow keys to select the Set System Defaults entry.<br />
3. Press Enter to reset the default settings.<br />
4. Confirm the opening security query with Enter.<br />
Cancel the function by pressing the Q key.<br />
21 · G&D <strong>DVIMUX4</strong>-<strong>DL</strong>-<strong>USB</strong>
Auto-accessing the first channel<br />
Configuration<br />
Usually, after turning on the device, the recently active channel is accessed. The setting<br />
can be changed so that the computer connected to the first channel is automatically<br />
accessed when the device is turned on.<br />
How to disable/enable the automatic access of the first channel after booting:<br />
NOTE: The option to automatically access the first channel after booting the device<br />
can only be disabled/enabled in the setup menu.<br />
Setup Menu<br />
1. Use the terminal emulator to establish a connection to the KVM switch.<br />
If the setup menu is not displayed, the Switch mode of the service port is<br />
enabled. Enter »#!« to change to the setup menu.<br />
2. Use the Arrow or Arrow keys to select the Select Ch.1 after Power up row.<br />
3. Press the Space key (repeatedly) to select between the following options:<br />
No accesses the last active channel after booting<br />
Yes accesses channel 1 after booting<br />
4. Press the S key to save your settings.<br />
(De)activating the switching via front buttons<br />
In the defaults, you can use the buttons on the front panel to switch between the<br />
computers.<br />
If desired, you can deactivate the front buttons in the setup menu.<br />
How to enable/disable the switching via front buttons:<br />
HINWEIS: Use the setup menu to (de)activate the switching via front buttons.<br />
Setup Menu<br />
1. Use the terminal emulator to establish a connection to the KVM switch<br />
and connect the serial data cable to the Service socket.<br />
2. Use the Arrow or Arrow keys to select the <br />
Select Channel via Front Button entry.<br />
3. Press the Space key (repeatedly) to choose one of the following options:<br />
Yes disables the switching via front button<br />
No enables the switching via front button<br />
4. Press the S key to save your settings.<br />
G&D <strong>DVIMUX4</strong>-<strong>DL</strong>-<strong>USB</strong> · 22
Configuration<br />
(De)activating the switching via hotkeys<br />
In the defaults, you can use hotkeys to switch between the computers.<br />
If desired, you can deactivate this kind of switching in the setup menu.<br />
How to enable/disable the switching via hotkeys:<br />
NOTE: Use the setup menu to (de)activate the switching via hotkeys.<br />
Setup Menu<br />
1. Use the terminal emulator to establish a connection to the KVM switch<br />
and connect the serial data cable to the Service socket.<br />
2. Use the Arrow or Arrow keys to select the <br />
Select Channel via Hotkey entry.<br />
3. Press the Space key (repeatedly) to choose one of the following options:<br />
Yes disables the switching via hotkeys<br />
No enables the switching via hotkeys<br />
4. Press the S key to save your settings.<br />
23 · G&D <strong>DVIMUX4</strong>-<strong>DL</strong>-<strong>USB</strong>
(De)activating the switching via step keys<br />
Configuration<br />
Instead of using hotkeys to switch to one of the channels connected to the KVM<br />
switch, you can also use step keys to switch the channels in ascending or descending<br />
order.<br />
NOTE: The use of step keys is disabled in the default settings.<br />
After enabling the step keys, you can use the following key combinations to switch<br />
channels in ascending or descending order:<br />
descending: »back« step key (default: Hotkey+9)<br />
ascending: »forward« step key (default: Hotkey+0)<br />
IMPORTANT: The active step keys are dependent on the selected select keys (see<br />
page 19). The following table lists the step keys depending on the active select keys.<br />
Select keys »Back« step key »Forward« step key<br />
1 ... 4 9 0<br />
NUM 1 ... 4 NUM 9 NUM 0<br />
A ... C I K<br />
F1 ... F4 F9 F10<br />
How to disable/enable the use of step keys:<br />
NOTE: Use the setup menu to enable or disable the usage of step keys.<br />
Setup Menu<br />
1. Use the terminal emulator to establish a connection to the KVM switch.<br />
Now plug the serial data cable into the service socket.<br />
2. Use the Arrow or Arrow keys to select the Select Channel via Step Key entry.<br />
3. Press the Space key (repeatedly) to choose between the following options:<br />
Off step keys disabled<br />
[Step-Keys] step keys enabled<br />
4. Press the S key to save your settings.<br />
G&D <strong>DVIMUX4</strong>-<strong>DL</strong>-<strong>USB</strong> · 24
Configuration<br />
Changing the bit rate of the Service port<br />
The Service port of the KVM switch can be used both for operating the setup menu<br />
and for switching the channels with a serial device.<br />
The Service port transfers a certain amount of data per time unit. The bitrate is given<br />
in bit/s.<br />
IMPORTANT: Transmitter and receiver of the data must use the same bitrate to<br />
ensure successful communication between the terminal emulator or a serial device<br />
and the KVM switch.<br />
If the bitrate cannot be adjusted to the standard bitrate of the KVM switch (115.200<br />
bit/s) in the terminal emulator or the serial device, the bitrate of the Service port can<br />
be modified.<br />
How to select the bit rate of the Service port of the KVM switch:<br />
Setup Menu<br />
1. Use the terminal emulator to establish a connection to the KVM switch.<br />
If the setup menu is not displayed, the Switch mode of the service port is<br />
enabled. Enter »#!« to change to the setup menu.<br />
2. Use the Arrow or Arrow keys to select the Service RS232 Bitrate row.<br />
3. Press the Space key (repeatedly) to select between the following bitrates:<br />
115200 serial data transmission with 115.200 bit/s<br />
9600 serial data transmission with 9.600 bit/s<br />
4. Press the S key to save your settings.<br />
25 · G&D <strong>DVIMUX4</strong>-<strong>DL</strong>-<strong>USB</strong>
Changing the standard mode of the Service port<br />
Configuration<br />
The Service port of the KVM switch can be used both for operating the setup menu<br />
and for switching the channels with a serial device.<br />
IMPORTANT: Depending on the purpose of use, the KVM extender distinguishes<br />
between the modes listed below.<br />
The Setup Menu mode is enabled in the default settings of the KVM switch. In this<br />
mode, the Setup Menu is immediately displayed in the terminal emulator after a session<br />
is established with the KVM switch.<br />
If you primarily use the Service port for switching the active channel via a serial device,<br />
it is recommendable to enable the Switch mode.<br />
ADVICE: The activated mode when starting the KVM extender can be changed<br />
anytime during operation:<br />
By entering the »#!« command, the KVM switch changes to the Setup menu mode.<br />
By entering the »!« command, the KVM switch changes to the Switch mode<br />
How to choose the mode to be enabled when booting the KVM extender:<br />
Setup Menu<br />
1. Use the terminal emulator to establish a connection to the KVM switch.<br />
If the setup menu is not displayed, the Switch mode of the service port is<br />
enabled. Enter »#!« to change to the setup menu.<br />
2. Use the Arrow or Arrow keys to select the Service RS232 Startup Mode row.<br />
3. Press the Space key (repeatedly) to select between the following options:<br />
Setup Menu enabled Setup Menu mode when starting KVM extender<br />
Switch enabled Switch mode when starting KVM extender<br />
4. Press the S key to save your settings.<br />
G&D <strong>DVIMUX4</strong>-<strong>DL</strong>-<strong>USB</strong> · 26
Configuration<br />
Selecting the <strong>USB</strong> keyboard type<br />
Various manufacturers added special keys to the standard keyboards. Some keyboards<br />
are provided with multimedia keys which enable the user to easily operate<br />
special multimedia functions of the computer.<br />
Compared to standard keyboards, Sun desktops and servers are provided with separate<br />
keys (Solaris Shortcut Keys) to operate special system functions. These keys can be<br />
used at the console after enabling the keyboard mode for Sun desktops and servers.<br />
If the console only has a standard keyboard available, several key combinations are<br />
provided to emulate Solaris Shortcut Keys (see page 28).<br />
Select the <strong>USB</strong> keyboard type in the setup menu in order to use all keys of such keyboards.<br />
NOTE: The <strong>USB</strong> keyboard type can only be changed in the setup menu.<br />
How to select the <strong>USB</strong> keyboard type:<br />
Setup Menu<br />
1. Use the terminal emulator to establish a connection to the KVM switch.<br />
If the setup menu is not displayed, the Switch mode of the service port is<br />
enabled. Enter »#!« to change to the setup menu.<br />
2. Use the Arrow or Arrow keys to select the row <strong>USB</strong> Keymode of the channel<br />
and press Enter.<br />
3. Use the Arrow or Arrow keys to select the channel whose setting you want<br />
to change in the Set <strong>USB</strong> Keymode submenu.<br />
4. Press the Space key (repeatedly) to select one of the following keyboards:<br />
PC Multimedia Multimedia keyboard<br />
PC Standard Standard keyboard<br />
SUN German Sun keyboard (German layout)<br />
SUN US Sun keyboard (American layout)<br />
Apple Apple keyboard<br />
5. Repeat steps 3 and 4 to change this setting for another channel.<br />
6. Press the S key to save your settings.<br />
IMPORTANT: Changing to the SUN German or SUN US keymode requires a reboot of<br />
the Sun computer.<br />
27 · G&D <strong>DVIMUX4</strong>-<strong>DL</strong>-<strong>USB</strong>
Configuration<br />
If the console is provided with a Sun keyboard, use the Solaris Shortcut Keys of this<br />
keyboard after enabling.<br />
When using a standard keyboard, these functions can be performed by using the key<br />
combinations listed below:<br />
Key combination »Solaris Shortcut Key« of the Sun keyboard<br />
Ctrl+Alt+F2 Again<br />
Ctrl+Alt+F3 Props<br />
Ctrl+Alt+F4 Undo<br />
Ctrl+Alt+F5 Front<br />
Ctrl+Alt+F6 Copy<br />
Ctrl+Alt+F7 Open<br />
Ctrl+Alt+F8 Paste<br />
Ctrl+Alt+F9 Find<br />
Ctrl+Alt+F10 Cut<br />
Ctrl+Alt+F11 Help<br />
Ctrl+Alt+F12 Mute<br />
Ctrl+Alt+NUM+ Loud<br />
Ctrl+Alt+NUM- Quiet<br />
Ctrl+Alt+NUM* Compose<br />
Ctrl+Alt+Pause Shutdown<br />
Pause+A Stop<br />
G&D <strong>DVIMUX4</strong>-<strong>DL</strong>-<strong>USB</strong> · 28
Order Numbers<br />
Order Numbers<br />
<strong>DVIMUX4</strong>-<strong>DL</strong>-PS/2 <strong>DVIMUX4</strong>-<strong>DL</strong>-<strong>USB</strong><br />
KVM SWITCHES<br />
A210 0098 <strong>DVIMUX4</strong>-<strong>DL</strong>-PS/2<br />
A210 0100 <strong>DVIMUX4</strong>-<strong>DL</strong>-PS/2-RM<br />
A210 0102 <strong>DVIMUX4</strong>-<strong>DL</strong>-MC2-PS/2<br />
A210 0103 <strong>DVIMUX4</strong>-<strong>DL</strong>-MC2-PS/2-RM<br />
A210 0106 <strong>DVIMUX4</strong>-<strong>DL</strong>-MC3-PS/2<br />
A210 0107 <strong>DVIMUX4</strong>-<strong>DL</strong>-MC3-PS/2-RM<br />
A210 0110 <strong>DVIMUX4</strong>-<strong>DL</strong>-MC4-PS/2<br />
A210 0111 <strong>DVIMUX4</strong>-<strong>DL</strong>-MC4-PS/2-RM<br />
CABLE SETS<br />
A610 0117 CPU-DVID-<strong>DL</strong>-PL-2<br />
A610 0121 CPU-DVID-<strong>DL</strong>-PL-5<br />
A610 0133 CPU-DVIA-PL-2<br />
A610 0137 CPU-DVIA-PL-5<br />
29 · G&D <strong>DVIMUX4</strong>-<strong>DL</strong>-<strong>USB</strong><br />
KVM SWITCHES<br />
A210 0099 <strong>DVIMUX4</strong>-<strong>DL</strong>-<strong>USB</strong><br />
A210 0101 <strong>DVIMUX4</strong>-<strong>DL</strong>-<strong>USB</strong>-RM<br />
A210 0104 <strong>DVIMUX4</strong>-<strong>DL</strong>-MC2-<strong>USB</strong><br />
A210 0105 <strong>DVIMUX4</strong>-<strong>DL</strong>-MC2-<strong>USB</strong>-RM<br />
A210 0108 <strong>DVIMUX4</strong>-<strong>DL</strong>-MC3-<strong>USB</strong><br />
A210 0109 <strong>DVIMUX4</strong>-<strong>DL</strong>-MC3-<strong>USB</strong>-RM<br />
A210 0112 <strong>DVIMUX4</strong>-<strong>DL</strong>-MC4-<strong>USB</strong><br />
A210 0113 <strong>DVIMUX4</strong>-<strong>DL</strong>-MC4-<strong>USB</strong>-RM<br />
CABLE SETS<br />
A610 0125 CPU-DVID-<strong>DL</strong>-U-2<br />
A610 0129 CPU-DVID-<strong>DL</strong>-U-5<br />
A610 0088 CPU-DVIA-U-2<br />
A610 0089 CPU-DVIA-U-5
Technical Data<br />
General features of the series<br />
<strong>DVIMUX4</strong>-<strong>DL</strong>-<strong>USB</strong> SERIES<br />
No. of video sources per computer/console: see variant features<br />
Console Connections per device: 1<br />
Interfaces for<br />
console<br />
Connection: directly at the device<br />
Video: see variant features<br />
<strong>USB</strong> keyboard/mouse: 2 × <strong>USB</strong>-A socket<br />
<strong>USB</strong> 2.0 devices: 2 × <strong>USB</strong>-A socket<br />
Audio: 1 × 3,5-mm jack plug (Line In)<br />
1 × 3,5-mm jack plug (Speaker)<br />
Computer Connections per device: 4<br />
Interfaces<br />
for computer<br />
Technical Data<br />
Connection: with optional cable sets at the device<br />
Video: see variant features<br />
<strong>USB</strong>: 4 × <strong>USB</strong>-B socket<br />
Audio: 4 × 3,5-mm jack plug (Line In)<br />
4 × 3,5-mm jack plug (Line Out)<br />
Video Signal type: DVI-I (analog and digital video)<br />
Video resolution (digital): max. 2560 × 1600 @ 60 Hz<br />
Video resolution (analog): max. 1920 x 1440 @ 75 Hz<br />
Digital colour mode: 24 Bit<br />
DDC: Enhanced Display Data Channel<br />
Mixed mode: is supported (digital/analog)<br />
Audio Mode: analog<br />
Bandwidth: 22 kHz<br />
Update Type: local service socket<br />
Interface: 2,5-mm jack plug<br />
Power supply Type: internal power pack<br />
Connection: IEC plug (IEC-320 C14)<br />
Casing Material: anodised aluminium<br />
Conformity CE, RoHs<br />
G&D <strong>DVIMUX4</strong>-<strong>DL</strong>-<strong>USB</strong> · 30
Technical Data<br />
Individual variant features<br />
<strong>DVIMUX4</strong>-<strong>DL</strong>-<strong>USB</strong><br />
No. of video sources per computer/console: 1<br />
Interfaces for<br />
console<br />
Video: 1 × DVI-I socket<br />
Interfaces<br />
for computer<br />
Video: 4 × DVI-I socket<br />
Power supply Current consumption (max.): 130mA@240VAC; 285mA@100VAC<br />
Power consumption (max.): 17,4W@240VAC; 17,1W@100VAC<br />
Casing Dimensions (W × H × D): 270 × 44 × 210 mm<br />
Weight: approx. 1,5 kg<br />
Operational environ- Temperature: +5 to +45 °C<br />
ment<br />
Air humidity: < 80%, non-condensing<br />
<strong>DVIMUX4</strong>-<strong>DL</strong>-MC2-<strong>USB</strong><br />
No. of video sources per computer/console: 2<br />
Interfaces<br />
for console<br />
Video: 2 × DVI-I socket<br />
Interfaces<br />
for computer<br />
Video: 4 × 2 DVI-I sockets<br />
Power supply Current consumption (max.): 160mA@240VAC; 370mA@100VAC<br />
Power consumption (max.): 22,6W@240VAC; 22,3W@100VAC<br />
Casing Dimensions (W × H × D): 270 × 66 × 210 mm<br />
Weight: approx. 1,7 kg<br />
Operational environ- Temperature: +5 to +45 °C<br />
ment<br />
Air humidity: < 80%, non-condensing<br />
<strong>DVIMUX4</strong>-<strong>DL</strong>-MC3-<strong>USB</strong><br />
No. of video sources per computer/console: 3<br />
Interfaces<br />
for console<br />
Video: 3 × DVI-I socket<br />
Interfaces<br />
for computer<br />
Video: 4 × 3 DVI-I sockets<br />
Power supply Current consumption (max.): 200mA@240VAC; 511mA@100VAC<br />
Power consumption (max.): 28,5W@240VAC; 28,5W@100VAC<br />
Casing Dimensions (W × H × D): 270 × 88 × 210 mm<br />
Weight: approx. 2,1 kg<br />
Operational environ- Temperature: +5 to +40 °C<br />
ment<br />
Air humidity: < 80%, non-condensing<br />
31 · G&D <strong>DVIMUX4</strong>-<strong>DL</strong>-<strong>USB</strong>
<strong>DVIMUX4</strong>-<strong>DL</strong>-MC4-<strong>USB</strong><br />
Technical Data<br />
No. of video sources per computer/console: 4<br />
Interfaces<br />
for console<br />
Video: 4 × DVI-I socket<br />
Interfaces<br />
for computer<br />
Video: 4 × 4 DVI-I sockets<br />
Power supply Current consumption (max.): 233mA@240VAC; 611mA@100VAC<br />
Power consumption (max.): 33,8W@240VAC; 34,3W@100VAC<br />
Casing Dimensions (W × H × D): 270 × 132 × 210 mm<br />
Weight: approx. 2,5 kg<br />
Operational environ- Temperature: +5 bis +35 °C<br />
ment<br />
Air humidity: < 80%, non-condensing<br />
G&D <strong>DVIMUX4</strong>-<strong>DL</strong>-<strong>USB</strong> · 32
NOTES
NOTES
NOTES
NOTES
Das Handbuch wird fortlaufend aktualisiert <strong>und</strong> im Internet veröffentlicht.<br />
The manual is constantly updated and available on our website.<br />
http://gdsys.de/A9100152<br />
<strong>Guntermann</strong> & <strong>Drunck</strong> <strong>GmbH</strong><br />
Dortm<strong>und</strong>er Str. 4a<br />
57234 Wilnsdorf<br />
Germany<br />
http://www.GDsys.de<br />
sales@GDsys.de