Bedienung Java-Client (1.00) - Guntermann und Drunck GmbH
Bedienung Java-Client (1.00) - Guntermann und Drunck GmbH
Bedienung Java-Client (1.00) - Guntermann und Drunck GmbH

Sie wollen auch ein ePaper? Erhöhen Sie die Reichweite Ihrer Titel.
YUMPU macht aus Druck-PDFs automatisch weboptimierte ePaper, die Google liebt.
<strong>Guntermann</strong> & <strong>Drunck</strong> <strong>GmbH</strong><br />
www.gdsys.de<br />
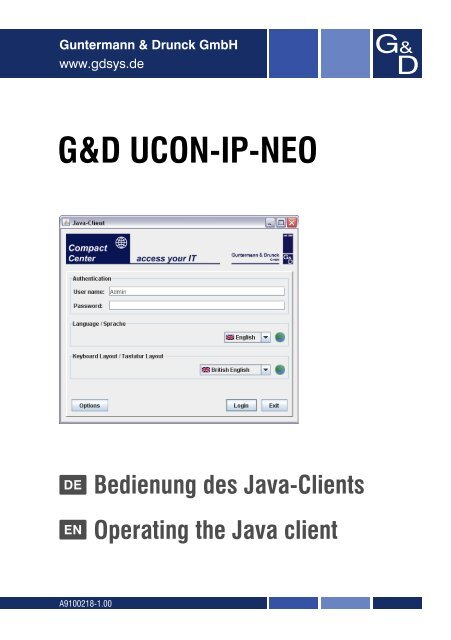
G&D UCON-IP-NEO<br />
DE <strong>Bedienung</strong> des <strong>Java</strong>-<strong>Client</strong>s<br />
EN Operating the <strong>Java</strong> client<br />
A9100218-<strong>1.00</strong>
Zu dieser Dokumentation<br />
Diese Dokumentation wurde mit größter Sorgfalt erstellt <strong>und</strong> nach dem Stand der<br />
Technik auf Korrektheit überprüft.<br />
Für die Qualität, Leistungsfähigkeit sowie Marktgängigkeit des G&D-Produkts zu<br />
einem bestimmten Zweck, der von dem durch die Produktbeschreibung<br />
abgedeckten Leistungsumfang abweicht, übernimmt G&D weder ausdrücklich<br />
noch stillschweigend die Gewähr oder Verantwortung.<br />
Für Schäden, die sich direkt oder indirekt aus dem Gebrauch der Dokumentation<br />
ergeben, sowie für beiläufige Schäden oder Folgeschäden ist G&D nur im Falle des<br />
Vorsatzes oder der groben Fahrlässigkeit verantwortlich.<br />
Gewährleistungsausschluss<br />
G&D übernimmt keine Gewährleistung für Geräte, die<br />
nicht bestimmungsgemäß eingesetzt wurden.<br />
nicht autorisiert repariert oder modifiziert wurden.<br />
schwere äußere Beschädigungen aufweisen, welche nicht bei Lieferungserhalt<br />
angezeigt wurden.<br />
durch Fremdzubehör beschädigt wurden.<br />
G&D haftet nicht für Folgeschäden jeglicher Art, die möglicherweise durch den<br />
Einsatz der Produkte entstehen können.<br />
Warenzeichennachweis<br />
Alle Produkt- <strong>und</strong> Markennamen, die in diesem Handbuch oder in den übrigen<br />
Dokumentationen zu Ihrem G&D-Produkt genannt werden, sind Warenzeichen<br />
oder eingetragene Warenzeichen der entsprechenden Rechtsinhaber.<br />
Impressum<br />
© <strong>Guntermann</strong> & <strong>Drunck</strong> <strong>GmbH</strong> 2010. Alle Rechte vorbehalten.<br />
Version <strong>1.00</strong> – 14.12.2010<br />
Software: 2.3.001 (00692)<br />
<strong>Guntermann</strong> & <strong>Drunck</strong> <strong>GmbH</strong><br />
Dortm<strong>und</strong>er Str. 4a<br />
57234 Wilnsdorf<br />
Germany<br />
Telefon +49 (0) 2739 8901-100<br />
Telefax +49 (0) 2739 8901-120<br />
http://www.GDsys.de<br />
sales@GDsys.de<br />
i · G&D UCON-IP-NEO
Inhaltsverzeichnis<br />
Inhaltsverzeichnis<br />
Der <strong>Java</strong> <strong>Client</strong> ................................................................................................ 1<br />
Systemvoraussetzungen ..................................................................................... 1<br />
Unterstützte Webbrowser ............................................................................. 1<br />
Unterstützte Betriebssysteme ........................................................................ 1<br />
Erste Schritte .................................................................................................... 2<br />
Start des <strong>Java</strong> <strong>Client</strong>s ......................................................................................... 2<br />
Eine Verbindung zum KVM-Matrixsystem herstellen ......................................... 3<br />
Eine Sitzung mit dem KVM-Matrixsystem starten ........................................ 3<br />
Das <strong>Client</strong>-Fenster ............................................................................................. 4<br />
Informationen der Titelzeile ......................................................................... 4<br />
Informationen der Statuszeile ....................................................................... 5<br />
Auslösen der Maus aus dem <strong>Client</strong>-Fenster ................................................... 6<br />
Verschieben des Fensterausschnittes (Scrollen) .............................................. 6<br />
Umschalten zwischen den Zielrechnern .............................................................. 7<br />
Umschaltung über das Steuerboard ............................................................... 7<br />
Umschaltung über das On-Screen-Display (OSD) ......................................... 7<br />
Wechsel zwischen Zielrechner <strong>und</strong> lokalem Computer ....................................... 7<br />
Timeout bei Inaktivität ...................................................................................... 8<br />
Einsatz von Hotkeys während einer Sitzung ....................................................... 8<br />
Beenden der aktiven Sitzung .............................................................................. 8<br />
Beenden der Software ........................................................................................ 8<br />
Verbindungsaufbau ........................................................................................... 9<br />
Messung der Bandbreite ..................................................................................... 9<br />
Chat-Funktion ................................................................................................. 10<br />
Das Steuerboard ............................................................................................. 11<br />
Die Benutzeroberfläche .................................................................................... 11<br />
Status-Anzeige der Link-Verbindung .......................................................... 11<br />
Menüleiste ................................................................................................. 12<br />
Filterfunktion ............................................................................................. 12<br />
Aufschaltung auf den zuletzt aktiven Zielrechner (Last Target) .................... 13<br />
Verschieben des Fensterausschnittes (Scrollen) ............................................ 13<br />
Informationen der Statuszeile ..................................................................... 13<br />
Karteikarten des Steuerboards .................................................................... 13<br />
Darstellungsoptionen der Einträge der Karteikarten .................................... 14<br />
Anzeige des On-Screen-Displays über das Steuerboard ................................ 15<br />
Durchführbare Aktionen im Steuerboard .......................................................... 15<br />
Steuerboard schließen ................................................................................ 15<br />
Sitzung schließen ....................................................................................... 15<br />
Software beenden ....................................................................................... 15<br />
Umschaltung auf Vollbild-Modus des <strong>Client</strong>-Fensters ................................. 16<br />
Position der Statuszeile festlegen ................................................................ 16<br />
G&D UCON-IP-NEO · ii
Inhaltsverzeichnis<br />
Videoeinstellungen .......................................................................................... 17<br />
Anzeige der Detailinformationen ...................................................................... 17<br />
Änderung eines Videoprofils ............................................................................. 17<br />
Einstellungsoptionen ........................................................................................ 18<br />
Bestimmen von Bildbreite, -lage <strong>und</strong> -größe ................................................. 18<br />
Bestimmen der Farbwerte ........................................................................... 20<br />
Einstellung der Phasenlage ......................................................................... 21<br />
Tastaturmakros ............................................................................................... 22<br />
Ausführen eines Tastaturmakros ....................................................................... 22<br />
Filterung der Makros anhand einer Gruppe ....................................................... 22<br />
Videofunktionen ............................................................................................. 23<br />
Automatische Größenanpassung des <strong>Client</strong>-Fensters (AutoFit) .................... 23<br />
Erneute Übertragung des vollständigen Bildschirminhaltes .......................... 23<br />
Erneute Übertragung <strong>und</strong> Phasen-Erkennung des Bildes .............................. 23<br />
Automatische Erkennung der Phasenlage .................................................... 24<br />
Automatische Bestimmung der Farbwerte ................................................... 24<br />
Automatische Erkennung der Bildlage ........................................................ 24<br />
Mausbremse .................................................................................................... 25<br />
Mausbremse aktivieren ..................................................................................... 25<br />
Beschleunigungswert der Mausbremse konfigurieren .......................................... 25<br />
Erweiterte Funktionen .................................................................................... 26<br />
Sitzungseinstellungen ....................................................................................... 26<br />
Sprache ...................................................................................................... 26<br />
Hotkey-Auswahl ........................................................................................ 26<br />
<strong>Bedienung</strong> .................................................................................................. 26<br />
Verschlüsselung .......................................................................................... 27<br />
Bandbreitenmessung ........................................................................................ 28<br />
<strong>Client</strong>-/Serverinformationen anzeigen .............................................................. 28<br />
Systemweite Hotkeys im <strong>Client</strong>-Fenster ............................................................ 28<br />
iii · G&D UCON-IP-NEO
Der <strong>Java</strong> <strong>Client</strong><br />
Der <strong>Java</strong> <strong>Client</strong><br />
Der <strong>Java</strong> <strong>Client</strong> stellt Ihnen innerhalb des IP-Netzwerks einen virtuellen Arbeitsplatz<br />
zur Verfügung. An diesem virtuellen Arbeitsplatz können Sie das KVM-Matrixsystem<br />
bedienen <strong>und</strong> konfigurieren.<br />
Die Software ist Bestandteil der Firmware des Gerätes <strong>und</strong> sofort nach der Installation<br />
des KVM-Matrixsystems betriebsbereit.<br />
Systemvoraussetzungen<br />
Der <strong>Java</strong> <strong>Client</strong> wird in der Laufzeitumgebung <strong>Java</strong> Runtime Environment (JRE) innerhalb<br />
Ihres Webbrowsers ausgeführt.<br />
Voraussetzung für den Start des <strong>Client</strong>s ist die Installation der Laufzeitumgebung in<br />
der Version 1.5.0 oder höher.<br />
Die Laufzeitumgebung steht auf der Website http://java.sun.com/javase/downloads/ für<br />
die Betriebssysteme Windows, Solaris, Linux <strong>und</strong> Apple OS zum Download bereit.<br />
WICHTIG: Die Open-Source-Implementation OpenJDK der <strong>Java</strong>-Plattform wird<br />
nicht unterstützt.<br />
Unterstützte Webbrowser<br />
Folgende Webbrowser wurden erfolgreich mit dem <strong>Java</strong> <strong>Client</strong> getestet:<br />
Internet Explorer 7<br />
Internet Explorer 8<br />
Mozilla Firefox 3.6<br />
Unterstützte Betriebssysteme<br />
Folgende Betriebssysteme wurden erfolgreich mit dem <strong>Java</strong> <strong>Client</strong> getestet:<br />
Microsoft Windows XP<br />
Microsoft Windows Vista<br />
Microsoft Windows 7<br />
GNU/Linux Ubuntu 10.04<br />
GNU/Linux Ubuntu 10.10<br />
G&D UCON-IP-NEO · 1
Erste Schritte<br />
Erste Schritte<br />
Die gr<strong>und</strong>legende <strong>Bedienung</strong> des <strong>Java</strong> <strong>Client</strong>s lernen Sie in diesem Kapitel kennen.<br />
HINWEIS: Detaillierte Erläuterungen der Funktionen <strong>und</strong> Einstellungen erfolgen<br />
in den folgenden Kapiteln dieses Handbuchs.<br />
Start des <strong>Java</strong> <strong>Client</strong>s<br />
Der <strong>Java</strong> <strong>Client</strong> kann über einen unterstützten Webbrowser eines Computers mit<br />
installierter Laufzeitumgebung <strong>Java</strong> Runtime Environment gestartet werden.<br />
HINWEIS: Informationen zu den Systemvoraussetzungen des <strong>Client</strong>s finden Sie<br />
auf Seite 1.<br />
So starten Sie den <strong>Java</strong> <strong>Client</strong>:<br />
1. Geben Sie in der Adresszeile die URL https://[IP-Adresse des Gerätes] zum Aufruf<br />
der Webapplikation ein.<br />
HINWEIS: Wird die Webapplikation über eine „normale“ http-Verbindung<br />
gestartet, erhalten Sie den Hinweis, dass der Verbindungsaufbau ausschließlich<br />
über eine sichere https-Verbindung möglich ist.<br />
Nach 10 Sek<strong>und</strong>en erfolgt automatisch die Weiterleitung auf die sichere https-<br />
Verbindung.<br />
2. Falls das im KVM-System gespeicherte Zertifikat nicht verifiziert werden kann,<br />
werden Sie zur Authentisierung des Zertifikates aufgefordert. Das standardmäßig<br />
hinterlegte Zertifikat erkennen Sie an folgenden Merkmalen:<br />
MD5-Fingerabruck:<br />
A4:53:5C:42:E4:7C:B8:C7:74:1E:40:3F:D7:FE:95:99<br />
SHA1-Fingerabdruck<br />
E1:59:BF:BC:E3:53:B1:56:0E:23:CE:0E:ED:49:56:CF:98:78:DC:87<br />
3. Klicken Sie oberhalb der Eingabefelder der Login-Maske auf <strong>Client</strong> starten.<br />
2 · G&D UCON-IP-NEO
Erste Schritte<br />
Eine Verbindung zum KVM-Matrixsystem herstellen<br />
Nach dem Start der Software können Sie eine Sitzung mit dem KVM-Matrixsystem<br />
starten. Hiernach wird innerhalb des <strong>Java</strong> <strong>Client</strong>s der virtuelle Arbeitsplatz dargestellt.<br />
Eine Sitzung mit dem KVM-Matrixsystem starten<br />
So starten Sie eine Sitzung mit dem KVM-Matrixsystem:<br />
1. Geben Sie im Abschnitt Authentifizierung den Benutzernamen <strong>und</strong> das Kennwort Ihres<br />
Benutzerkontos ein.<br />
WICHTIG: Falls Ihnen die Zugangsdaten nicht vorliegen, erfragen Sie diese<br />
beim Administrator des Matrixsystems.<br />
2. Wählen Sie im Abschnitt Language/Sprache die von Ihnen gewünschte Sprache<br />
(Deutsch oder English) der Software.<br />
3. Wählen Sie im Abschnitt Keyboard Layout/Tastatur Layout die Sprachvariante der<br />
Tastatur (Deutsch, American English, British English, French oder Belgian) Ihres Arbeitsplatzes<br />
aus.<br />
4. Optional: Klicken Sie auf Optionen, falls Sie die (s. Seite 26 ff.) Sitzungseinstellungen<br />
konfigurieren möchten.<br />
5. Starten Sie den Verbindungsaufbau (s. Seite 9) durch Klick auf Anmelden.<br />
G&D UCON-IP-NEO · 3
Erste Schritte<br />
Das <strong>Client</strong>-Fenster<br />
Nachdem der <strong>Java</strong> <strong>Client</strong> eine Verbindung zum KVM-Matrixsystem aufgebaut hat,<br />
erscheint auf Ihrem Bildschirm das <strong>Client</strong>-Fenster:<br />
In diesem Fenster wird das On-Screen-Display des KVM-Matrixsystems bzw. die<br />
Bildschirmausgabe des aufgeschalteten Zielrechners dargestellt.<br />
HINWEIS: Da die Darstellung des On-Screen-Displays nicht vom KVM-Matrixsystem,<br />
sondern durch den <strong>Java</strong> <strong>Client</strong> erstellt wird, ist die Änderung der Positionierung<br />
<strong>und</strong> die Synchronisationseinstellung nicht möglich!<br />
Informationen der Titelzeile<br />
In der Titelzeile des <strong>Client</strong>-Fensters werden neben dem Namen der Software<br />
folgende Informationen angezeigt:<br />
<strong>Bedienung</strong>sstatus: Ist die <strong>Bedienung</strong> des Zielrechners innerhalb des <strong>Client</strong>-<br />
Fensters aktiv, wird in der eckigen Klammer <strong>Bedienung</strong> aktiv<br />
angezeigt.<br />
Andernfalls wird in der eckigen Klammer <strong>Bedienung</strong> inaktiv<br />
angezeigt.<br />
IP-Adresse des<br />
Gerätes:<br />
Name des<br />
Zielrechners:<br />
4 · G&D UCON-IP-NEO<br />
Die IP-Adresse des KVM-Matrixsystems auf welchem die Sitzung<br />
gestartet wurde, wird zur Ihrer Information angezeigt.<br />
Im Abschnitt Zielrechner wird der Name des aufgeschalteten<br />
Zielrechners angezeigt.
Informationen der Statuszeile<br />
Erste Schritte<br />
In der Statuszeile werden folgende Informationen (von links nach rechts) angezeigt:<br />
Belegungssymbol: Das Symbol zeigt an, ob ein oder mehrere Benutzer auf den<br />
Zielrechner zugreifen.<br />
Name des<br />
Zielrechners:<br />
Name des aufgeschalteten Zielrechners des Matrixsystems<br />
Bezeichnung des<br />
Videoprofils:<br />
Bezeichnung des Videoprofils, welches dem aufgeschalteten<br />
Zielrechner zugeordnet wurde<br />
Datentransferrate: Datentransferrate (in Kilobyte pro Sek<strong>und</strong>e) zwischen dem<br />
Matrixsystem <strong>und</strong> dem <strong>Java</strong> <strong>Client</strong>.<br />
Bildfrequenz: Anzahl der Bildaktualisierungen pro Sek<strong>und</strong>e die im <strong>Client</strong>-<br />
Fenster dargestellt werden<br />
»Num Lock«-LED Die LED wird hellgrün dargestellt, wenn die Num-Lock-<br />
Funktion auf dem Zielrechner aktiv ist.<br />
Ist die Funktion nicht aktiv, wird die LED dunkelgrün dargestellt.<br />
»Caps Lock«-LED Die LED wird hellgrün dargestellt, wenn die Feststelltaste auf<br />
dem Zielrechner betätigt wurde.<br />
Ist die Feststelltaste nicht aktiv, wird die LED dunkelgrün<br />
dargestellt.<br />
»Scroll Lock«-LED Die LED wird hellgrün dargestellt, wenn die Scroll-Lock-<br />
Funktion auf dem Zielrechner aktiv ist.<br />
Ist die Funktion nicht aktiv, wird die LED dunkelgrün dargestellt.<br />
HINWEIS: Die Statuszeile kann wahlweise oben oder unten innerhalb des <strong>Client</strong>-<br />
Fensters angezeigt werden (s. Seite 16).<br />
G&D UCON-IP-NEO · 5
Erste Schritte<br />
Auslösen der Maus aus dem <strong>Client</strong>-Fenster<br />
Ist die <strong>Bedienung</strong> des On-Screen-Displays des Matrixsystems bzw. des Zielrechners<br />
innerhalb des <strong>Client</strong>-Fensters aktiv, wird in der eckigen Klammer <strong>Bedienung</strong> aktiv<br />
angezeigt.<br />
HINWEIS: In diesem Status werden die Tastatureingaben <strong>und</strong> Mausaktionen am<br />
lokalen Computer direkt an den Zielrechner weitergeleitet.<br />
Die <strong>Bedienung</strong> des lokalen Computers mit den Eingabegeräten ist erst nach Auslösen<br />
der Maus aus dem <strong>Client</strong>-Fenster möglich.<br />
So lösen Sie die Maus aus dem <strong>Client</strong>-Fenster aus:<br />
Drücken <strong>und</strong> halten Sie die Tasten Strg+Shift während Sie zusätzlich die<br />
linke Maustaste betätigen.<br />
Verschieben des Fensterausschnittes (Scrollen)<br />
Ist die Bildschirmauflösung des Zielrechners größer als jene Ihres Computers, so<br />
kann nur ein Ausschnitt des Bildschirminhaltes des Zielrechners auf Ihrem Monitor<br />
angezeigt werden.<br />
Über die Bildlaufleisten des <strong>Client</strong>-Fensters oder mit den Schaltflächen im Scrollen-<br />
Bereich des Steuerboards können Sie den darzustellenden Ausschnitt auswählen.<br />
So wählen Sie den darzustellenden Ausschnitt mit der Maus:<br />
Klicken Sie auf die Bildlaufleisten des <strong>Client</strong>-Fensters zur Auswahl des darzustellenden<br />
Ausschnitts.<br />
Klicken Sie auf die Schaltflächen (s. u.) im Scrollen-Bereich des Steuerboards.<br />
So wählen Sie den darzustellenden Ausschnitt mit der Tastatur:<br />
1. Stellen Sie sicher, dass das <strong>Client</strong>-Fenster aktiv <strong>und</strong> die »Num Lock«-Funktion<br />
ausgeschaltet ist.<br />
2. Halten Sie Strg+Shift gedrückt, während Sie eine der<br />
rechts abgebildeten Navigationstasten (Num-Taste) des<br />
numerischen Tastenblocks betätigen:<br />
Die Tasten 8 (hoch), 6 (rechts), 2 (runter) <strong>und</strong> 4 (links)<br />
bewegen den Bildausschnit in kleinen Schritten.<br />
Die Tasten 9 (rechts oben), 3 (rechts unten), 1 (links<br />
unten) <strong>und</strong> 7 (links oben) positionieren den Bildausschnitt<br />
an die entsprechenden Positionen.<br />
Die Tasten 5 zentriert den Bildausschnitt in der Mitte.<br />
6 · G&D UCON-IP-NEO
Umschalten zwischen den Zielrechnern<br />
Erste Schritte<br />
Zwischen den am KVM-Matrixsystem angeschlossenen Zielrechnern können Sie<br />
wahlweise über das On-Screen-Display oder über das Steuerboard umschalten.<br />
Nähere Erläuterungen zu den jeweiligen Verfahren erhalten Sie in den folgenden<br />
Abschnitten.<br />
Umschaltung über das Steuerboard<br />
So schalten Sie einen Zielrechner über das Steuerboard auf:<br />
1. Öffnen Sie ggf. das Steuerboard mit der Tastenkombination Strg+Shift (Standard).<br />
2. Klicken Sie ggf. auf den Reiter Zielrechner.<br />
3. Verwenden Sie ggf. die Filterfunktion (s. Seite 12), um die Auflistung der Zielrechner<br />
einzugrenzen.<br />
4. Wählen Sie mit der Maus oder den Pfeiltasten der Tastatureinen Zielrechner aus.<br />
5. Führen Sie einen Doppelklick aus oder betätigen Sie die Eingabetaste.<br />
TIPP: Klicken Sie im Steuerboard auf die Schaltfläche Last Target (s. Seite 13), um<br />
sich auf den zuletzt aktiven Zielrechner aufzuschalten.<br />
Umschaltung über das On-Screen-Display (OSD)<br />
So schalten Sie einen Zielrechner über das On-Screen-Display auf:<br />
1. Öffnen Sie ggf. das Steuerboard mit der Tastenkombination Strg+Shift (Standard).<br />
2. Klicken Sie auf die Schaltfläche AdonIS.<br />
3. Wählen Sie den aufzuschaltenden Zielrechner mit den Pfeiltasten aus.<br />
4. Betätigen Sie die Eingabetaste.<br />
Wechsel zwischen Zielrechner <strong>und</strong> lokalem<br />
Computer<br />
Möchten Sie während einer Sitzung auf einem Zielrechner, Tastatur <strong>und</strong>/oder<br />
Mausaktionen auf Ihrem lokalen Computer durchführen, ist dies ohne Beendigung<br />
der Sitzung oder Aufruf des Steuerboards möglich.<br />
Detaillierte Informationen zu diesem Thema finden Sie im Abschnitt Auslösen der<br />
Maus aus dem <strong>Client</strong>-Fenster auf Seite 6.<br />
G&D UCON-IP-NEO · 7
Erste Schritte<br />
Timeout bei Inaktivität<br />
Haben Sie während einer aktiven Sitzung innerhalb von 10 Minuten (Standardeinstellung)<br />
keine Tastatur- bzw. Mausaktion durchgeführt, wird die Beendigung der<br />
aktiven Sitzung eingeleitet.<br />
Ein Informationsfenster informiert Sie nach Ablauf des Timeouts über die bevorstehende<br />
Beendigung der Sitzung <strong>und</strong> bietet Ihnen folgende Wahlmöglichkeiten:<br />
Sitzung beenden: Klicken Sie auf diese Schaltfläche, um die aktive Sitzung sofort zu<br />
beenden.<br />
Fortsetzen: Klicken Sie auf diese Schaltfläche, um die aktuelle Sitzung fortzusetzen.<br />
TIPP: Über die Webapplikation Config Panel können Sie die Einstellung des Timeouts<br />
ändern. Die entsprechende Einstellung finden Sie auf dem Reiter KVM-Server der<br />
Konfigurationseinstellungen des Matrixswitches.<br />
Einsatz von Hotkeys während einer Sitzung<br />
Innerhalb eines aktivierten <strong>Client</strong>-Fensters stehen Ihnen die folgenden Hotkeys<br />
während einer Sitzung zur Verfügung.<br />
Strg+Shift+Maustaste Auslösen der Maus aus dem aktiven <strong>Client</strong>-Fenster<br />
Strg+Shift+Num-Taste In Kombination mit dem Ziffernblock der Tastatur,<br />
können Sie innerhalb des <strong>Client</strong>-Fensters navigieren.<br />
Beenden der aktiven Sitzung<br />
Zum Beenden der aktiven Sitzung haben Sie zwei Möglichkeiten: Sie können die<br />
Sitzung über das Menü des Steuerboards oder durch das Schließen des <strong>Client</strong>-Fensters<br />
beenden<br />
So beenden Sie die aktive Sitzung:<br />
Ist das Steuerboard geöffnet, klicken Sie in diesem auf das Menü Aktion > Sitzung<br />
schließen.<br />
Andernfalls schließen Sie das <strong>Client</strong>-Fenster durch einen Klick auf das Schließen-<br />
Symbol des Fensters.<br />
Beenden der Software<br />
So beenden Sie die Ausführung der Software auf Ihrem Computer:<br />
1. Öffnen Sie ggf. das Steuerboard mit der Tastenkombination Strg+Shift (Standard).<br />
2. Klicken Sie im Menü auf Aktion > Beenden.<br />
8 · G&D UCON-IP-NEO
Verbindungsaufbau<br />
Verbindungsaufbau<br />
Während des Verbindungsaufbaus einer Sitzung erscheint auf Ihrem Bildschirm ein<br />
Fenster, welches Sie über den aktuellen Status des Verbindungsaufbaus informiert:<br />
In diesem Fenster werden (von oben nach unten) folgende Informationen angezeigt:<br />
Fortschrittsbalken: Hier können Sie den aktuellen Fortschritt des Anmeldevorgangs<br />
erkennen. Die aktuell durchgeführte Aktion wird über dem Balken angezeigt.<br />
Kanal-Verschlüsselung: Die verschiedenen Kanäle <strong>und</strong> die angewendeten Verschlüsselungen<br />
(s. Seite 27) werden angezeigt.<br />
Messung der Bandbreite<br />
Während des Verbindungsaufbaus wird eine Bandbreitenmessung durchgeführt.<br />
Der ermittelte Wert der Messung wird anschließend im Rahmen der Aufbereitung<br />
<strong>und</strong> Übertragung der Videoinformationen angewendet.<br />
TIPP: Klicken Sie während der Bandbreitenmessung auf Erweitert, um eine grafische<br />
Darstellung der aktuellen gemessenen Bandbreite in Form einer Kurve anzuzeigen.<br />
HINWEIS: Die zur Verfügung stehende Bandbreite innerhalb eines IP-Netzwerkes<br />
kann sich – je nach Auslastung des Netzwerkes – ändern. Dies kann zu einem<br />
Performanceverlust führen.<br />
Führen Sie ggf. eine erneute Bandbreitenmessung (s. Seite 28) während der Sitzung<br />
durch, falls Sie einen Performanceverlust feststellen.<br />
G&D UCON-IP-NEO · 9
Verbindungsaufbau<br />
Chat-Funktion<br />
Der <strong>Java</strong> <strong>Client</strong> kann auf mehreren Computern innerhalb des IP-Netzwerkes<br />
installiert werden.<br />
HINWEIS: Zur gleichen Zeit kann immer nur ein Benutzer auf einen IP-Arbeitsplatz<br />
des Systems zugreifen.<br />
Die Chat-Funktion des <strong>Client</strong>s ermöglicht dem Benutzer, der sich am System<br />
anmeldet, mit einem bereits angemeldeten Benutzer in Kontakt zu treten.<br />
Beide Benutzer können innerhalb des Chats die weitere Vorgehensweise abstimmen.<br />
So stimmen Sie die weitere Vorgehensweise bei bereits belegter Konsole innerhalb<br />
eines Chats ab:<br />
1. Starten Sie den Verbindungsaufbau (s. Seite 3).<br />
HINWEIS: Auf Ihrem Bildschirm erscheint ein Hinweis-Fenster, das über die<br />
Belegung der des IP-Arbeitsplatzes informiert <strong>und</strong> eine Verbindungsaufnahme<br />
mit dem anderen Benutzer anbietet.<br />
2. Klicken Sie im Fenster auf Ja, um das Chat-Fenster zu öffnen.<br />
WICHTIG: Wird innerhalb des Zeitfensters von 10 Sek<strong>und</strong>en keine Schaltfläche<br />
angeklickt, wird der Verbindungsaufbau automatisch abgebrochen.<br />
HINWEIS: Wird der Verbindungsaufbau durch Klick auf Nein abgebrochen,<br />
wird wieder das Anmeldung-Fenster angezeigt.<br />
3. Das Chat-Fenster wird auf Ihrem <strong>und</strong> dem Bildschirm des anderen Benutzers<br />
angezeigt.<br />
HINWEIS: Gibt der andere Benutzer nicht innerhalb von 45 Sek<strong>und</strong>en eine<br />
Nachricht in das Textfenster ein oder klickt auf Ablehnen oder Sitzung beenden<br />
wird seine Sitzung automatisch beendet <strong>und</strong> Ihre Sitzung hergestellt.<br />
4. Geben Sie Ihre Nachricht in das Eingabefeld ein <strong>und</strong> klicken Sie auf Senden oder<br />
betätigen Sie die Eingabetaste, um Ihre Nachricht an den anderen Benutzer zu<br />
versenden.<br />
5. Die Anwort des anderen Benutzers wird im Textfeld im oberen Bereich des Fensters<br />
angezeigt. Hierauf können Sie erneut, wie in Schritt 4. erläutert, antworten.<br />
Die Chat-Kommunikation wird beendet, wenn der andere Benutzer Ihren Verbindungswunsch<br />
ablehnt bzw. zustimmt oder Sie den Anmeldevorgang durch Klick<br />
auf Sitzung beenden abbrechen.<br />
10 · G&D UCON-IP-NEO
Das Steuerboard<br />
Das Steuerboard<br />
Das Steuerboard ist die Bedienzentrale des <strong>Java</strong> <strong>Client</strong>s. Alle wichtigen Programmfunktionen<br />
sind über das Steuerboard erreichbar:<br />
Umschaltung zwischen den verfügbaren Zielrechnern<br />
Aufruf des On-Screen-Displays des Matrixsystems<br />
Ausführung von Tastatur-Makros<br />
Scrollen des sichtbaren Bildschirminhalts im <strong>Client</strong>-Fenster der Software<br />
Auswahl des darzustellenden Bildschirm-Ausschnittes des Zielrechners<br />
Die Benutzeroberfläche<br />
Auf der Benutzeroberfläche stehen Ihnen die nachfolgend aufgeführten Status-<br />
Anzeigen <strong>und</strong> Werkzeuge zur Verfügung.<br />
Status-Anzeige der Link-Verbindung<br />
Im Feld Link Status wird der aktuelle Status der seriellen Verbindung<br />
zwischen dem <strong>Java</strong> <strong>Client</strong> <strong>und</strong> dem KVM-Matrixsystem angezeigt.<br />
HINWEIS: Über die Link-Verbindung werden die im On-Screen-Display darzustellenden<br />
Informationen <strong>und</strong> die Schaltzustände der Zielrechner an die Software<br />
übermittelt.<br />
G&D UCON-IP-NEO · 11
Das Steuerboard<br />
Menüleiste<br />
Die Menüleiste zeigt die aktuell verfügbaren Befehle an (Aktion, Zielrechner oder<br />
Makros, Video, System, Ansicht, Hilfe).<br />
Filterfunktion<br />
Mit der Filterfunktion oberhalb der Auflistung der Zielrechner können Sie die<br />
Anzeige der Zielrechner eingrenzen.<br />
So grenzen Sie die Auflistung der Zielrechner mit der Filterfunktion ein:<br />
1. Geben Sie im Textfeld eine beliebige Zeichenkette ein.<br />
2. Auf dem Karteireiter Zielrechner werden daraufhin ausschließlich solche Rechner<br />
angezeigt, die die eingegebene Zeichenkette in der Spalte Zielrechner, Physikalische<br />
Adresse oder Kommentar enthalten.<br />
Die Groß-/Kleinschreibung der Namen wird bei der Filterung ignoriert.<br />
3. Um die Filterung aufzuheben, klicken Sie auf Löschen.<br />
12 · G&D UCON-IP-NEO<br />
Link-Verbindung korrekt hergestellt.<br />
Link-Verbindung gestört.<br />
HINWEIS: Abhängig von der aktivierten Karteikarte des Steuerboards wird entweder<br />
der Menüeintrag Zielrechner oder Makro angezeigt.
Das Steuerboard<br />
Aufschaltung auf den zuletzt aktiven Zielrechner (Last Target)<br />
Mit der Last Target-Funktion schalten Sie vom derzeit aktiven Zielrechner auf<br />
den zuletzt aufgeschalteten Zielrechner um.<br />
HINWEIS: Wurde seit dem Start des <strong>Java</strong> <strong>Client</strong>s noch kein Zielrechner aufgeschaltet<br />
oder ausschließlich auf dem aktuell aufgeschalteten Zielrechner gearbeitet,<br />
steht diese Funktion nicht zur Verfügung.<br />
So schalten Sie die Verbindung auf den zuletzt aufgeschalteten Zielrechner um:<br />
1. Klicken Sie auf das Last Target-Symbol neben dem Filterfeld.<br />
Verschieben des Fensterausschnittes (Scrollen)<br />
Ist die Bildschirmauflösung des Zielrechners größer als jene Ihres Computers, so<br />
kann nur ein Ausschnitt des Bildschirminhaltes des Zielrechners auf Ihrem Monitor<br />
angezeigt werden.<br />
Über die Schaltflächen im Scrollen-Bereich des Steuerboards können Sie den darzustellenden<br />
Ausschnitt auswählen. Weiterführende Informationen finden Sie im<br />
Abschnitt Verschieben des Fensterausschnittes (Scrollen) auf Seite 6.<br />
Informationen der Statuszeile<br />
In der Statuszeile werden folgende Informationen (von links nach rechts) angezeigt:<br />
Bezeichnung des<br />
Videoprofils:<br />
Bezeichnung des Videoprofils, welches dem aufgeschalteten<br />
Zielrechner zugeordnet wurde<br />
Datentransferrate: Datentransferrate (in Kilobyte pro Sek<strong>und</strong>e) zwischen dem<br />
Matrixsystem <strong>und</strong> dem <strong>Java</strong> <strong>Client</strong><br />
Bildfrequenz: Anzahl der Bildaktualisierungen pro Sek<strong>und</strong>e die im <strong>Client</strong>-<br />
Fenster dargestellt werden<br />
Karteikarten des Steuerboards<br />
Den größten Teil des Steuerboards nehmen die Karteikarten in der Mitte des Fensters<br />
ein. Hier können Sie wahlweise die Karteikarten Zielrechner oder Makros anzeigen:<br />
Die Karteikarte Zielrechner enthält eine Auflistung der angeschlossenen Zielrechner.<br />
Zu jedem Zielrechner werden folgende Informationen angezeigt:<br />
G&D UCON-IP-NEO · 13
Das Steuerboard<br />
Zielrechner: Bezeichnung des Zielrechners im Matrixsystem<br />
Phys. Adr.: physikalische Adresse des Zielrechners<br />
Status: Schaltzustand (An oder Aus) des Zielrechners<br />
Zugriff: Zugriffsberechtigung auf den Zielrechner<br />
Kommentar: vom Anwender erfasster Zielrechner-Kommentar<br />
Die Symbole vor den Bezeichnungen der Zielrechner haben folgende Bedeutung:<br />
Sie sind auf diesen Zielrechner aufgeschaltet.<br />
Ein anderer Benutzer ist auf diesen Zielrechner aufgeschaltet.<br />
Mehrere Benutzer sind auf diesen Zielrechner aufgeschaltet.<br />
Der Zielrechner ist eingeschaltet ist (grüner Punkt).<br />
Der Zielrechner ist ausgeschaltet (roter Punkt).<br />
Die Karteikarte Makros ermöglicht das Ausführen von Tastaturmakros (s. Seite 22).<br />
TIPP: Die anzuzeigenden Tastaturmakros können Sie durch die Auswahl einer<br />
Gruppe (s. Seite 22) filtern.<br />
Darstellungsoptionen der Einträge der Karteikarten<br />
Die Auflistung der Zielrechner bzw. Makros der Karteikarten können in folgenden<br />
Anzeigemodi betrachtet werden:<br />
Liste: Anzeige kleiner Symbole <strong>und</strong> Angabe des Namens (nebeneinander)<br />
Details: Anzeige kleiner Symbole, Angabe des Namens sowie weiterer Informationen<br />
in Tabellenform<br />
So ändern Sie den Anzeigemodi zur Darstellung der Zielrechner bzw. Makros:<br />
1. Öffnen Sie ggf. das Steuerboard der Software.<br />
2. Öffnen Sie das Ansicht-Menü.<br />
3. Wählen Sie den Eintrag Liste oder Details des Menüs.<br />
14 · G&D UCON-IP-NEO
Anzeige des On-Screen-Displays über das Steuerboard<br />
Das On-Screen-Display (OSD) des KVM-Matrixsystems kann<br />
jederzeit im <strong>Client</strong>-Fenster angezeigt werden. Über das OSD ist die<br />
<strong>Bedienung</strong> <strong>und</strong> Konfiguration des Systems möglich.<br />
Das Steuerboard<br />
HINWEIS: Da die Darstellung des On-Screen-Displays nicht vom KVM-Matrixsystem,<br />
sondern vom <strong>Java</strong> <strong>Client</strong> erstellt wird, ist die Änderung der Positionierung<br />
<strong>und</strong> die Synchronisationseinstellung nicht möglich!<br />
So zeigen Sie das On-Screen-Displays des Matrixsystems im <strong>Client</strong>-Fenster an:<br />
1. Klicken Sie auf die Schaltfläche AdonIS.<br />
TIPP: Während Ihrer Arbeit auf einem Zielrechner innerhalb des <strong>Client</strong>-Fensters<br />
können Sie das OSD durch Verwendung der Tastenkombination Strg+Num<br />
(Standard) des Matrixsystems aufrufen.<br />
Durchführbare Aktionen im Steuerboard<br />
Steuerboard schließen<br />
Schließen Sie das Steuerboard, um die Arbeit im <strong>Client</strong>-Fenster der Software fortzusetzen.<br />
So schließen Sie das Steuerboard:<br />
1. Klicken Sie im Menü auf Aktion > Steuerboard schließen.<br />
Sitzung schließen<br />
Beenden Sie die Sitzung mit dem KVM-Matrixsystem nach Abschluss Ihrer Arbeiten<br />
oder um beispielsweise einem anderen Benutzer die Verwendung des IP-Arbeitsplatzplatzes<br />
zu ermöglichen.<br />
So schließen Sie die Sitzung:<br />
1. Öffnen Sie ggf. das Steuerboard mit der Tastenkombination Strg+Shift (Standard).<br />
2. Klicken Sie im Menü auf Aktion > Sitzung schließen.<br />
Software beenden<br />
So beenden Sie die Ausführung der Software auf Ihrem Computer:<br />
1. Öffnen Sie ggf. das Steuerboard mit der Tastenkombination Strg+Shift (Standard).<br />
2. Klicken Sie im Menü auf Aktion > Beenden.<br />
G&D UCON-IP-NEO · 15
Das Steuerboard<br />
Umschaltung auf Vollbild-Modus des <strong>Client</strong>-Fensters<br />
Ist auf dem Zielrechner <strong>und</strong> auf Ihrem lokalen Computer die gleiche Bildschirmauflösung<br />
eingestellt, empfiehlt sich die Darstellung des <strong>Client</strong>-Fensters im Vollbild-<br />
Modus.<br />
In diesem Modus wird das <strong>Client</strong>-Fenster auf die vollständige Desktopgröße erweitert,<br />
damit der komplette Bildschirm für das Bild des Zielrechners zur Verfügung<br />
steht.<br />
HINWEIS: Taskleisten <strong>und</strong> andere Bedienelemente auf Ihrem Desktop werden<br />
durch den Vollbild-Modus des <strong>Client</strong>-Fensters überdeckt.<br />
Im Vollbild-Modus ist das Scrollen innerhalb des <strong>Client</strong>-Fensters nicht erforderlich.<br />
So schalten Sie das <strong>Client</strong>-Fenster in den Vollbild-Modus:<br />
1. Öffnen Sie ggf. das Steuerboard mit der Tastenkombination Strg+Shift (Standard).<br />
2. Klicken Sie im Menü auf Video > Vollbild oder betätigen Sie die F11-Taste.<br />
Position der Statuszeile festlegen<br />
Die Statuszeile des <strong>Client</strong>-Fensters kann wahlweise am oberen (Standard) oder am<br />
unteren Fensterrand angezeigt werden.<br />
So bestimmen Sie die Position der Statuszeile des <strong>Client</strong>-Fenster:<br />
1. Öffnen Sie ggf. das Steuerboard der Software.<br />
2. Klicken Sie im Menü auf Ansicht > Statuszeile > Oberer Fensterrand oder alternativ<br />
Ansicht > Statuszeile > Unterer Fensterrand.<br />
16 · G&D UCON-IP-NEO
Videoeinstellungen<br />
Videoeinstellungen<br />
Beim ersten Aufschalten auf einen Zielrechner wird ein Videoprofil für diesen<br />
Rechner erstellt <strong>und</strong> gespeichert.<br />
Jedes Videoprofil hat eine individuelle Bezeichnung. Der Gr<strong>und</strong>aufbau der von der<br />
Software erstellten <strong>und</strong> vom Benutzer editierbaren Bezeichnungen hat folgende Syntax:<br />
[Bildpunkte_horizontal]×[Bildpunkte_vertikal]@[Wiederholfrequenz_vertikal]<br />
HINWEIS: Videoprofilen, die im Rahmen der ersten Aufschaltung auf einen Zielrechner<br />
– ohne Ermittlung der Farbwerte – erstellt wurden, wird die Zeichenfolge<br />
Auto- vorangestellt.<br />
Wurde ein Videoprofil im Rahmen des Erstinbetriebnahmemodus der Software IP-<br />
Console <strong>Client</strong> bzw. mit der Funktion Videoprofil erstellen erstellt, wird diesem die<br />
Zeichenfolge EIM- vorangestellt.<br />
Anzeige der Detailinformationen<br />
So rufen Sie die Einstellungen des aktuellen Videoprofils auf:<br />
1. Öffnen Sie ggf. das Steuerboard mit der Tastenkombination Strg+Shift (Standard).<br />
2. Klicken Sie in der Menüleiste auf Video > Videoeinstellungen > Aktuelles Profil bearbeiten.<br />
Änderung eines Videoprofils<br />
Alle Daten des Videoprofils (Bildlage, die Phasenverschiebung <strong>und</strong> die Farbwerte)<br />
können durch den Benutzer editiert <strong>und</strong> angepasst werden.<br />
So ändern Sie die Einstellungen des aktuellen Videoprofils:<br />
1. Öffnen Sie ggf. das Steuerboard mit der Tastenkombination Strg+Shift (Standard).<br />
2. Klicken Sie in der Menüleiste auf Video > Videoeinstellungen > Aktuelles Profil bearbeiten.<br />
3. Ändern Sie die gewünschte(n) Einstellung(en) des Videoprofils (s. Seite 18 f.).<br />
4. Klicken Sie auf Speichern, um die Einstellungen zu speichern oder verwerfen Sie<br />
Ihre Eingaben durch Klick auf Abbrechen.<br />
G&D UCON-IP-NEO · 17
Videoeinstellungen<br />
Einstellungsoptionen<br />
Die Videoeinstellungen des Profils können vom Benutzer editiert werden. Auf den<br />
folgenden Seiten werden die möglichen Einstellungen der verschiedenen Karteikarten<br />
des Fensters erläutert.<br />
Der untere Bereich des Fensters ist auf allen Karteikarten identisch:<br />
Links unten wird die die Datentransferrate (in Kilobyte pro Sek<strong>und</strong>e) zwischen dem<br />
KVM-Matrixsystem <strong>und</strong> dem <strong>Java</strong> <strong>Client</strong> sowie die Anzahl der Bildaktualisierungen<br />
pro Sek<strong>und</strong>e im <strong>Client</strong>-Fenster (Bildfrequenz) angezeigt.<br />
Zusätzlich finden Sie hier folgende Bedienelemente:<br />
direkt anzeigen: Änderungen an den Einstellungen werden sofort auf die Bildanzeige<br />
im <strong>Client</strong>-Fenster angewendet<br />
Testen: Änderungen an den Einstellungen auf die Bildanzeige im <strong>Client</strong>-<br />
Fenster anwenden<br />
Neu zeichnen: Synchronisierung des übertragenen Bildes des Zielrechners<br />
Abbrechen: Änderungen an den Einstellungen verwerfen <strong>und</strong> Dialog schließen<br />
Schließen: Temporäre Speicherung der Einstellungen bis zum erneuten<br />
Aufschalten des Zielrechners<br />
Speichern: Speicherung der Einstellungen<br />
Rückgängig: Änderungen seit dem letzten Speichern verwerfen<br />
Bestimmen von Bildbreite, -lage <strong>und</strong> -größe<br />
Auf der Karteikarte Bild haben Sie die Möglichkeit, die Bildbreite, -lage <strong>und</strong> -größe<br />
festzulegen.<br />
TIPP: Möchten Sie die auf dieser Karteikarte editierbaren Einstellungen automatisch<br />
ermitteln lassen, klicken Sie auf Bildlageerkennung.<br />
Folgende Voraussetzungen sind zur verlässlichen Ausführung der Funktion<br />
erforderlich:<br />
Die Bildschirmauflösung des Zielrechners ist kleiner als jene des <strong>Client</strong>-Fensters.<br />
Die Einstellung der Ränder des aktuell aufgeschalteten Zielrechners liegen innerhalb<br />
einer errechneten Größe (abhängig von der jeweiligen Bildauflösung).<br />
18 · G&D UCON-IP-NEO
Folgende Einstellungen können von Ihnen individuell optimiert werden:<br />
Videoeinstellungen<br />
Bildbreite: Breite des Bildes (inkl. der Schwarzschulter) in Pixel<br />
Die Bildbreite ist immer größer als die Breite des tatsächlich sichtbaren<br />
Bildbereiches!<br />
Vertikale Pixel (vertikal) ab welchem das Bild beginnt<br />
Bildlage:<br />
Vertikale Höhe des sichtbaren Bildbereiches<br />
Bildgröße:<br />
Bei der Einstellung der Bildhöhe können Sie sich an den üblichen Bildschirmauflösungen<br />
orientieren (z. B. 1024 × 768).<br />
Stellen Sie die Bildhöhe so ein, dass oben kein schwarzer Rand verbleibt<br />
<strong>und</strong> das Bild vollständig sichtbar ist.<br />
Horizontale Pixel (horizontal) ab welchem das Bild beginnt<br />
Bildlage:<br />
Horizontale Breite des sichtbaren Bildbereiches<br />
Bildgröße:<br />
Bei der Einstellung der Bildbreite können Sie sich an den üblichen Bildschirmauflösungen<br />
orientieren (z. B. 1024 × 768).<br />
Stellen Sie die Bildlage so ein, dass links kein schwarzer Rand verbleibt<br />
<strong>und</strong> das Bild vollständig sichtbar ist.<br />
So ändern Sie die vorbelegten Werte:<br />
1. Ändern Sie die gewünschten Werte in den verschiedenen Eingabefeldern.<br />
Hierbei ist es empfehlenswert, die numerischen Werte nicht direkt über die<br />
Tastatur einzugeben, sondern die Pfeiltasten zu verwenden.<br />
TIPP: Haben Sie die Funktion direkt anzeigen (s. Seite 18) aktiviert, können Sie<br />
die Einstellungen komfortabel ändern <strong>und</strong> gleichzeitig die Auswirkung im<br />
<strong>Client</strong>-Fenster betrachten.<br />
HINWEIS: Klicken Sie auf Rückgängig, um die ursprünglichen Werte dieses Reiters<br />
wieder zu aktivieren.<br />
G&D UCON-IP-NEO · 19
Videoeinstellungen<br />
Bestimmen der Farbwerte<br />
Auf der Karteikarte Farben können Sie die Farbwerte <strong>und</strong> die Helligkeit des Bildes<br />
individuell einstellen.<br />
TIPP: Möchten Sie die auf dieser Karteikarte editierbaren Einstellungen automatisch<br />
ermitteln lassen, klicken Sie auf Auto-Farbeinstellung.<br />
Folgende Einstellungen können von Ihnen individuell optimiert werden:<br />
Rot: Einstellung des Farbwertes der Farbe rot<br />
Grün: Einstellung des Farbwertes der Farbe grün<br />
Blau: Einstellung des Farbwertes der Farbe blau<br />
Farbregler Aktivieren Sie diese Option, wenn Sie den Kontrast anpassen<br />
synchronisieren: möchten. Bei der Änderung eines Farbwertes werden die<br />
Werte der beiden anderen Farben ebenfalls angepasst.<br />
Ist die Funktion deaktiviert (Standard) können Sie die Gewichtung<br />
der einzelnen Farben verändern, beispielsweise um einen<br />
Farbstich im Bild zu korrigieren.<br />
Helligkeit: Einstellung der Gr<strong>und</strong>helligkeit des Bildes<br />
So ändern Sie die vorbelegten Werte:<br />
1. Verwenden Sie die Schieberegler, um die Farbwerte <strong>und</strong> die Helligkeit einzustellen.<br />
Alternativ können Sie die gewünschten Werte direkt in den entsprechenden<br />
Eingabefeldern erfassen.<br />
TIPP: Haben Sie die Funktion direkt anzeigen (s. Seite 18) aktiviert, können Sie<br />
die Einstellungen komfortabel ändern <strong>und</strong> gleichzeitig die Auswirkung im<br />
<strong>Client</strong>-Fenster betrachten.<br />
HINWEIS: Klicken Sie auf Rückgängig, um die ursprünglichen Werte dieses Reiters<br />
wieder zu aktivieren.<br />
20 · G&D UCON-IP-NEO
Einstellung der Phasenlage<br />
Videoeinstellungen<br />
Die Einstellung der Phasenlage ist eine wesentliche Einstellung für die korrekte Verarbeitung<br />
des Videosignals.<br />
TIPP: Die Funktion Autophase übernimmt die Phaseneinstellung für den Benutzer.<br />
Zur korrekten Ausführung der Funktion ist die Ausgabe eines statischen Bildes<br />
(beispielsweise des Desktops) durch den Zielrechner erforderlich.<br />
Ist auf dem Zielrechner ein Bildschirmschoner aktiv, kann die Funktion nicht<br />
durchgeführt werden!<br />
So ändern Sie die vorbelegte Phaseneinstellung:<br />
1. Wählen Sie im Abschnitt Einstellung die Option manuell.<br />
2. Stellen Sie den gewünschten Wert ein.<br />
TIPP: Zeigen Sie auf dem Zielrechner möglichst ein Bild mit senkrechter<br />
Schraffur oder vielen senkrechten Linien an <strong>und</strong> optimieren Sie den Phasen-<br />
Wert so, dass die Linien gleichmäßig <strong>und</strong> scharf dargestellt werden.<br />
Hierbei ist es empfehlenswert, die numerischen Werte nicht direkt über die<br />
Tastatur einzugeben, sondern die Pfeiltasten zu verwenden.<br />
TIPP: Haben Sie die Funktion direkt anzeigen (s. Seite 18) aktiviert, können Sie die<br />
Einstellungen komfortabel ändern <strong>und</strong> gleichzeitig die Auswirkung im <strong>Client</strong>-<br />
Fenster betrachten.<br />
3. Optional: Aktivieren Sie falls gewünscht die Option Rauschunterdrückung.<br />
HINWEIS: Klicken Sie auf Rückgängig, um die ursprünglichen Werte dieses Reiters<br />
wieder zu aktivieren.<br />
G&D UCON-IP-NEO · 21
Tastaturmakros<br />
Tastaturmakros<br />
Viele Benutzer verwenden Tastaturbefehle zur schnellen <strong>und</strong> effizienten <strong>Bedienung</strong><br />
des Betriebssystems oder der Anwendungssoftware.<br />
Bei der <strong>Bedienung</strong> der Zielrechner über den IP-Arbeitsplatz des KVM-Matrixsystems<br />
befinden sich drei Geräte in der Kommunikationsstrecke: der Zielrechner, der<br />
Matrixswitch <strong>und</strong> der lokale Computer auf dem der <strong>Java</strong> <strong>Client</strong> betrieben wird.<br />
WICHTIG: Betätigen Sie eine Tastenkombination (beispielsweise Strg+Alt+Entf),<br />
wird diese vom lokalen Computer interpretiert <strong>und</strong> somit nicht zum Zielrechner<br />
übertragen.<br />
Verwenden Sie die in diesem Kapitel beschriebenen Tastaturmakros des Steuerboards,<br />
um die Weiterleitung der Tastenkombinationen an den Zielrechner sicherzustellen.<br />
Ausführen eines Tastaturmakros<br />
Die Tastaturmakros können wahlweise über das Steuerboard oder mit den – in den<br />
Einstellungen der Tastaturmakros – gewählten Tastenkombinationen ausgeführt<br />
werden.<br />
So führen Sie ein Tastaturmakro über das Steuerboard aus:<br />
1. Öffnen Sie ggf. das Steuerboard mit der Tastenkombination Strg+Shift (Standard).<br />
2. Klicken Sie ggf. auf den Reiter Makros.<br />
3. Doppelklicken Sie auf das auszuführende Makro.<br />
Filterung der Makros anhand einer Gruppe<br />
Um auch bei einer Vielzahl von Makros schnell das gewünschte Makro zu finden,<br />
können die einzelnen Makros in Gruppen organisiert werden.<br />
HINWEIS: In der Standardkonfiguration sind die Gruppen Linux, Novell, G&D Hotkeys,<br />
SUN, VMWare, Windows <strong>und</strong> special keys angelegt.<br />
So grenzen Sie die auf dem Reiter Makros anzuzeigenden Tastaturmakros ein:<br />
1. Öffnen Sie ggf. das Steuerboard mit der Tastenkombination Strg+Shift (Standard).<br />
2. Klicken Sie ggf. auf den Reiter Makros.<br />
3. Wählen Sie im Feld Makro-Gruppe die Gruppe aus, deren Makros aufgelistet werden<br />
sollen.<br />
22 · G&D UCON-IP-NEO
Videofunktionen<br />
Videofunktionen<br />
Automatische Größenanpassung des <strong>Client</strong>-Fensters (AutoFit)<br />
Die automatische Größenanpassung passt die Größe des <strong>Client</strong>-Fensters bei jedem<br />
Aufschaltvorgang an die aktuelle Auflösung des Zielrechners an.<br />
TIPP: Für einen optimalen Bedienkomfort ist es empfehlenswert, die Auflösung<br />
Ihres lokalen Computers höher einzustellen als die des Zielrechners.<br />
Ist die Bildschirmauflösung des Zielrechners größer als jene Ihres Computers, so<br />
können Sie den anzuzeigenden Bildschirmausschnitt im <strong>Client</strong>-Fenster verschieben<br />
(s. Seite 6).<br />
So (de)aktivieren Sie die AutoFit-Funktion:<br />
1. Öffnen Sie ggf. das Steuerboard mit der Tastenkombination Strg+Shift (Standard).<br />
2. Klicken Sie in der Menüzeile auf Video > AutoFit.<br />
HINWEIS: Ist die Funktion aktiviert, erscheint neben dem Menüpunkt eine<br />
Markierung.<br />
Erneute Übertragung des vollständigen Bildschirminhaltes<br />
Mit der Funktion Bild neu zeichnen erreichen Sie eine vollständige Übertragung des<br />
gesamten Bildschirminhaltes. Eventuell auftretende Bildartefakte werden durch die<br />
erneute Übertragung beseitigt.<br />
TIPP: Diese Funktion können Sie alternativ mit der F5-Taste aktivieren, wenn das<br />
Steuerboard aktiv ist.<br />
So erreichen Sie die vollständige Übertragung <strong>und</strong> Darstellung des Bildes:<br />
1. Öffnen Sie ggf. das Steuerboard mit der Tastenkombination Strg+Shift (Standard).<br />
2. Klicken Sie in der Menüzeile auf Video > Videoeinstellungen > Bild neu zeichnen.<br />
Erneute Übertragung <strong>und</strong> Phasen-Erkennung des Bildes<br />
Mit der Funktion Bild neu synchronisieren erreichen Sie eine vollständige Übertragung<br />
des gesamten Bildschirminhaltes sowie die automatische Phasen-Erkennung.<br />
So erreichen Sie die vollständige Synchronisierung des Bildes:<br />
1. Öffnen Sie ggf. das Steuerboard mit der Tastenkombination Strg+Shift (Standard).<br />
2. Klicken Sie in der Menüzeile auf Video > Videoeinstellungen > Bild neu synchronisieren.<br />
G&D UCON-IP-NEO · 23
Videofunktionen<br />
Automatische Erkennung der Phasenlage<br />
Mit der Funktion Autophase führen Sie eine automatische Erkennung der Phasenlage<br />
durch.<br />
So führen Sie die automatische Phasen-Erkennung durch:<br />
1. Öffnen Sie ggf. das Steuerboard mit der Tastenkombination Strg+Shift (Standard).<br />
2. Klicken Sie in der Menüzeile auf Video > Videoeinstellungen > Autophase.<br />
Automatische Bestimmung der Farbwerte<br />
Mit der Funktion Auto-Farbeinstellung wird die automatische Bestimmung der Farbwerte<br />
des Zielrechners ausgeführt.<br />
So führen Sie die automatische Bestimmung der Farbwerte durch:<br />
1. Öffnen Sie ggf. das Steuerboard mit der Tastenkombination Strg+Shift (Standard).<br />
2. Klicken Sie in der Menüzeile auf Video > Videoeinstellungen > Auto-Farbeinstellung.<br />
Automatische Erkennung der Bildlage<br />
Mit der Funktion Bildlageerkennung wird die automatische Erkennung der Bildlage<br />
des Zielrechners ausgeführt.<br />
So führen Sie die Erkennung der Bildlage durch:<br />
1. Öffnen Sie ggf. das Steuerboard mit der Tastenkombination Strg+Shift (Standard).<br />
2. Klicken Sie in der Menüzeile auf Video > Videoeinstellungen > Bildlageerkennung.<br />
24 · G&D UCON-IP-NEO
Mausbremse<br />
Mausbremse<br />
Viele Betriebssysteme bieten den Benutzern eine so genannte Mausbeschleunigung an.<br />
HINWEIS: Die Mausbeschleunigung der Betriebssysteme wertet neben der Strecke,<br />
die die Maus verschoben wird, auch die Dauer der Bewegung aus.<br />
Bei „langen“ Bewegungen wird die Bewegung des Mauszeigers auf dem Bildschirm<br />
beschleunigt.<br />
Wenn sowohl auf Ihrem lokalen Computer als auch auf dem Zielrechner eine Mausbeschleunigung<br />
durchgeführt wird, hat dies zur Folge, dass sich der Mauszeiger auf<br />
dem Zielrechner sehr schnell bewegt <strong>und</strong> hierdurch die <strong>Bedienung</strong> erschwert.<br />
Mausbremse aktivieren<br />
Die Anwendung der Mausbremse kann während der Sitzung über das Steuerboard eingestellt<br />
werden.<br />
So (de)aktivieren Sie die Anwendung der Mausbremse innerhalb einer Sitzung:<br />
1. Öffnen Sie ggf. das Steuerboard mit der Tastenkombination Strg+Shift (Standard).<br />
2. Klicken Sie im Menü auf System > Mausbremse konfigurieren.<br />
3. Aktivieren oder deaktivieren Sie die Optionen Mausbremse aktivieren bzw. Mausbremse<br />
global aktivieren im Abschnitt Aktivierung.<br />
4. Klicken Sie auf OK, um die Einstellungen anzuwenden oder verwerfen Sie Ihre<br />
Eingaben durch Klick auf Abbrechen.<br />
Beschleunigungswert der Mausbremse konfigurieren<br />
So legen Sie den Beschleunigungswert der Mausbremse fest:<br />
1. Schalten Sie sich auf den Zielrechner auf, dessen Beschleunigungswert der Mausbremse<br />
Sie ändern möchten.<br />
2. Öffnen Sie ggf. das Steuerboard mit der Tastenkombination Strg+Shift (Standard).<br />
3. Klicken Sie im Menü auf System > Mausbremse konfigurieren.<br />
4. Stellen Sie den gewünschten Beschleunigungswert über den Regler ein:<br />
HINWEIS: Bewegt sich die Maus auf dem Zielrechner zu schnell, verändern Sie<br />
den Regler nach links (Langsam). Im umgekehrten Fall bewegen Sie den Regler<br />
nach rechts (Schnell).<br />
5. Klicken Sie auf Speichern, um die Einstellungen zu speichern oder verwerfen Sie<br />
Ihre Eingaben durch Klick auf Abbrechen.<br />
G&D UCON-IP-NEO · 25
Erweiterte Funktionen<br />
Erweiterte Funktionen<br />
Sitzungseinstellungen<br />
Vor der Herstellung einer Sitzung mit dem KVM-Matrixsystem können Sie die<br />
nachfolgend beschriebenen Einstellungen der Sitzung festlegen.<br />
Sprache<br />
Die Benutzeroberfläche des <strong>Java</strong> <strong>Client</strong>s unterstützt mehrere Sprachen (Deutsch <strong>und</strong><br />
English). Wählen Sie die von Ihnen gewünschte Sprache aus.<br />
Hotkey-Auswahl<br />
Wählen Sie eine Tastenkombination (Standard: Strg+Shift) zum Aufruf des Steuerboards.<br />
<strong>Bedienung</strong><br />
Bei IP-basierten KVM-Produkten werden die analogen Tastatur-, Video- <strong>und</strong> Maus-<br />
Signale digitalisiert <strong>und</strong> anschließend über das IP-Netzwerk übertragen.<br />
Abhängig von der Auflösung <strong>und</strong> Farbtiefe des Videosignals vom Zielrechner kann<br />
die zur Verfügung stehende Bandbreite durch ein höheres Datenaufkommen stark<br />
beansprucht werden.<br />
HINWEIS: Dies kann zu Performanceeinbußen bei schmalbandigen Verbindungen<br />
führen. Eine mögliche Auswirkung ist beispielsweise, dass für das Maus-Signal nur<br />
noch minimale Bandbreite zur Verfügung steht <strong>und</strong> eine flüssige <strong>Bedienung</strong> der<br />
Maus somit erschwert wird.<br />
Um diesen Effekt zu mindern, können Sie im Bereich <strong>Bedienung</strong> einstellen, wie die<br />
zur Verfügung stehende Bandbreite bevorzugt verwendet werden soll.<br />
Drei Einstellmöglichkeiten stehen Ihnen zur Verfügung:<br />
anzeigen <strong>und</strong><br />
bedienen:<br />
26 · G&D UCON-IP-NEO<br />
Der Bildschirmaufbau <strong>und</strong> der Mauszeiger werden gleichrangig<br />
behandelt.<br />
Diese Einstellung wird bei Einsatz einer LAN-Verbindung empfohlen<br />
(Standardeinstellung).<br />
anzeigen: Der Bildschirmaufbau wird bevorzugt behandelt.<br />
Diese Einstellung wird empfohlen, wenn bei einer schmalbandigen Verbindung<br />
die Aufgabe hauptsächlich im „Beobachten“ besteht.<br />
bedienen: Der Mauszeiger wird bevorzugt behandelt.<br />
Diese Einstellung wird empfohlen, wenn bei einer schmalbandigen Verbindung<br />
die Aufgabe hauptsächlich in der Administration <strong>und</strong> Konfiguration<br />
der Zielrechner besteht <strong>und</strong> ein schneller Bildschirmaufbau von<br />
nachrangiger Bedeutung ist.
Verschlüsselung<br />
Erweiterte Funktionen<br />
WICHTIG: Werden sensible Daten auf dem Zielrechner angezeigt <strong>und</strong> editiert, ist<br />
die Aktivierung der Verschlüsselung des Input- <strong>und</strong> des Video-Kanals bei Datenübertragung<br />
über das Internet empfehlenswert.<br />
Wird der Datenverkehr über eine gesicherte VPN-Verbindung geleitet, ist die Verschlüsselung<br />
üblicherweise nicht erforderlich.<br />
Die Datenübertraugung zwischen dem Matrixsystem <strong>und</strong> der Software kann durch<br />
den Einsatz von Verschlüsselungsoptionen gesichert werden.<br />
Während die Übertragung der Authentifizierungsdaten immer gesichert ist, können<br />
Sie die Daten der Tastatur-/Maus-Aktionen <strong>und</strong> des übertragenen Videosignals<br />
optional verschlüsseln.<br />
HINWEIS: Bedenken Sie, dass jede zusätzliche Verschlüsselung Zeit erfordert <strong>und</strong><br />
somit die Performance beeinflusst.<br />
Folgende Verschlüsselungsoptionen stehen zur Verfügung:<br />
CTRL-Kanal: Über diesen Kanal wird der Datenaustausch im Rahmen des<br />
Anmeldevorgangs an das Matrixsystem übertragen.<br />
Die Datenübertragung dieses Kanals wird immer verschlüsselt.<br />
Input-Kanal: Über diesen Kanal werden die Tastatur-/Maus-Signale zum<br />
Matrixsystem übertragen.<br />
Wird auf die Verschlüsselung dieses Kanals verzichtet, ist das<br />
Abhören (sniffen) der IP-Pakete möglich.<br />
Die Verschlüsselung ist optional <strong>und</strong> kann geringfügige Performanceverluste<br />
durch erhöhtes Datenaufkommen hervorrufen.<br />
Video-Kanal: Über diesen Kanal wird das Videosignal des Zielrechners an den<br />
<strong>Java</strong> <strong>Client</strong> übertragen.<br />
Wird auf die Verschlüsselung dieses Kanals verzichtet, kann das<br />
übertragene Bild des Zielrechners durch abgehörte IP-Pakete<br />
wiederhergestellt werden.<br />
Die Verschlüsselung ist optional <strong>und</strong> kann geringfügige Performanceverluste<br />
durch erhöhtes Datenaufkommen hervorrufen.<br />
G&D UCON-IP-NEO · 27
Erweiterte Funktionen<br />
Bandbreitenmessung<br />
Die zur Verfügung stehende Bandbreite innerhalb eines IP-Netzwerkes kann sich – je<br />
nach Auslastung des Netzwerkes – ändern. Dies kann zu einem Performanceverlust<br />
führen.<br />
Falls Sie einen Performanceverlust feststellen, ist die Durchführung einer erneuten<br />
Bandbreitenmessung empfehlenswert.<br />
So führen Sie eine erneute Bandbreitenmessung durch:<br />
1. Öffnen Sie ggf. das Steuerboard mit der Tastenkombination Strg+Shift (Standard).<br />
2. Klicken Sie in der Menüzeile auf System > Bandbreitenmessung.<br />
<strong>Client</strong>-/Serverinformationen anzeigen<br />
Informationen über den <strong>Java</strong> <strong>Client</strong> <strong>und</strong> das Matrixsystem (Server) können Sie über<br />
das Hilfe-Menü auslesen.<br />
So zeigen Sie die <strong>Client</strong>-/Serverinformationen an:<br />
1. Öffnen Sie ggf. das Steuerboard mit der Tastenkombination Strg+Shift (Standard).<br />
2. Klicken Sie im Menü auf Hilfe > Info.<br />
3. Klicken Sie auf <strong>Client</strong> oder Server, um die entsprechenden Informationen anzuzeigen.<br />
4. Klicken auf Schließen.<br />
Systemweite Hotkeys im <strong>Client</strong>-Fenster<br />
Innerhalb eines aktivierten <strong>Client</strong>-Fensters stehen Ihnen die folgenden Hotkeys<br />
während einer Sitzung zur Verfügung.<br />
Strg+Shift+Maustaste Auslösen der Maus aus dem aktiven <strong>Client</strong>-Fenster<br />
Strg+Shift+Num-Taste In Kombination mit einer Taste des Ziffernblocks der<br />
Tastatur können Sie innerhalb des <strong>Client</strong>-Fensters<br />
scrollen.<br />
28 · G&D UCON-IP-NEO<br />
Weiterführende Informationen finden Sie im<br />
Abschnitt Verschieben des Fensterausschnittes (Scrollen) auf<br />
Seite 13.
NOTIZEN
About this guide<br />
This guide is authored with special diligence and verified by the state of the art for<br />
correctness.<br />
G&D neither explicitly nor implicitly takes guarantee or responsibility for the quality,<br />
efficiency and marketability of the product when used for a certain purpose that<br />
differs from the scope of service covered by this guide.<br />
For losses, which directly or indirectly result from the use of the documentation as<br />
well as for incidental damages or subsequent damages, G&D is liable only in the<br />
cases of intent or gross negligence.<br />
Warranty exclusion<br />
In the following cases, G&D will not accept warranty claims:<br />
The devices were not used as intended.<br />
The devices were repaired or modified by unauthorized personnel.<br />
The devices offer extensive external damage that was not reported at time of<br />
delivery.<br />
The devices were damaged by third-party accessories.<br />
G&D will assume no liability for any consequential damages that may arise from<br />
the use of the products.<br />
Trademark credits<br />
All product and company names mentioned in this guide and other documents you<br />
have received with your G&D product may be trademarks or trade names of their<br />
respective owners.<br />
Impressum<br />
© <strong>Guntermann</strong> & <strong>Drunck</strong> <strong>GmbH</strong> 2010. All rights reserved.<br />
Version <strong>1.00</strong> – 14/12/2010<br />
Software: 2.3.001 (00692)<br />
<strong>Guntermann</strong> & <strong>Drunck</strong> <strong>GmbH</strong><br />
Dortm<strong>und</strong>er Str. 4a<br />
57234 Wilnsdorf<br />
Germany<br />
Phone +49 2739 8901-100<br />
Fax +49 2739 8901-120<br />
http://www.GDsys.de<br />
sales@GDsys.de<br />
i · G&D UCON-IP-NEO
Contents<br />
Contents<br />
The <strong>Java</strong> client ................................................................................................. 1<br />
System requirements .......................................................................................... 1<br />
Supported web browsers .................................................................................... 1<br />
Supported operating systems .............................................................................. 1<br />
Getting started .................................................................................................. 2<br />
Starting the <strong>Java</strong> client ....................................................................................... 2<br />
Establishing a connection to the KVM matrix system ......................................... 3<br />
Starting a session with the KVM matrix system ............................................. 3<br />
The client window ............................................................................................. 4<br />
Information in the header ............................................................................. 4<br />
Information in the status bar ......................................................................... 5<br />
Releasing the mouse from the client window ................................................. 6<br />
Scrolling an image section ............................................................................ 6<br />
Switching between targets .................................................................................. 7<br />
Accessing a target with the control panel ...................................................... 7<br />
Accessing a target via OSD .......................................................................... 7<br />
Switching between target and local computer ..................................................... 7<br />
Timeout during inactivity .................................................................................. 8<br />
Using hotkeys during a session ........................................................................... 8<br />
Closing the current session ................................................................................. 8<br />
Closing the <strong>Java</strong> client ....................................................................................... 8<br />
Establishing a connection ................................................................................. 9<br />
Detecting the average bandwidth ....................................................................... 9<br />
Chat function .................................................................................................. 10<br />
Control panel ................................................................................................. 11<br />
The user interface ............................................................................................ 11<br />
Status display of the connection .................................................................. 11<br />
Menu bar ................................................................................................... 12<br />
Filter function ............................................................................................ 12<br />
Accessing the last target (Last Target) ........................................................... 13<br />
Scrolling the image section ......................................................................... 13<br />
Information in the status bar ....................................................................... 13<br />
Control panel tabs ...................................................................................... 13<br />
Options to display the tab entries ................................................................ 14<br />
Displaying the on-screen display via the control panel ................................. 15<br />
Feasible action in the control panel .................................................................. 15<br />
Closing the control panel ............................................................................ 15<br />
Exiting the session ..................................................................................... 15<br />
Exiting the <strong>Java</strong> client ................................................................................ 15<br />
Switching to full screen mode of the client window ..................................... 16<br />
Defining the position of the status bar ......................................................... 16<br />
G&D UCON-IP-NEO · ii
Contents<br />
Video profiles .................................................................................................. 17<br />
Displaying detailed information .................................................................. 17<br />
Changing a video profile ............................................................................. 17<br />
Setting options ................................................................................................. 18<br />
Defining the image width, position and size ................................................ 18<br />
Defining color values .................................................................................. 20<br />
Adjusting the phase position ....................................................................... 21<br />
Keyboard macros ............................................................................................ 22<br />
Executing a keyboard macro ............................................................................. 22<br />
Filtering macros with the help of groups ........................................................... 22<br />
Video functions ............................................................................................... 23<br />
Automatically adjusting the size of the client window (AutoFit) ................... 23<br />
Refreshing the full screen content ................................................................ 23<br />
Resynchronizing the image ......................................................................... 23<br />
Automatically recognizing the phasing ........................................................ 24<br />
Automatically defining the color values ....................................................... 24<br />
Automatically recognizing the image position ............................................. 24<br />
Mouse delay .................................................................................................... 25<br />
Activating the mouse delay ............................................................................... 25<br />
Configuring the acceleration value for the mouse delay ........................................... 25<br />
Advanced functions ......................................................................................... 26<br />
Session settings ................................................................................................ 26<br />
Language ................................................................................................... 26<br />
Hotkey selection ......................................................................................... 26<br />
Operation ................................................................................................... 26<br />
Encryption ................................................................................................. 27<br />
Bandwidth recognition ..................................................................................... 27<br />
Displaying client/server information ................................................................ 28<br />
Systemwide hotkeys in the client window ......................................................... 28<br />
iii · G&D UCON-IP-NEO
The <strong>Java</strong> client<br />
The <strong>Java</strong> client<br />
The <strong>Java</strong> client provides a virtual console within the IP network. This virtual console<br />
enables the user to operate and configure the KVM matrix system.<br />
The client is part of the device’s software and immediately ready for use after the<br />
KVM matrix system has been installed.<br />
System requirements<br />
The web application is carried out in <strong>Java</strong> Runtime Environment (JRE).<br />
The start of the web application requires the installation of version 1.5.0 or later.<br />
A free download for Windows, Solaris, Linux and Apple OS is available at<br />
http://java.sun.com/javase/downloads/.<br />
IMPORTANT: The OpenJDK open source implementation of the <strong>Java</strong> platform is not<br />
supported.<br />
Supported web browsers<br />
The following web browsers support the web application:<br />
Internet Explorer 7<br />
Internet Explorer 8<br />
Mozilla Firefox 3.6<br />
Supported operating systems<br />
The following operating systems have been successfully tested with the <strong>Java</strong> client:<br />
Microsoft Windows XP<br />
Microsoft Windows Vista<br />
Microsoft Windows 7<br />
GNU/Linux Ubuntu 10.04<br />
GNU/Linux Ubuntu 10.10<br />
G&D UCON-IP-NEO · 1
Getting started<br />
Getting started<br />
This chapter describes the basic operation of the <strong>Java</strong> client.<br />
NOTE: The following chapters describe all functions and settings in detail.<br />
Starting the <strong>Java</strong> client<br />
The <strong>Java</strong> client can be applied on a computer with installed <strong>Java</strong> Runtime Environment.<br />
NOTE: Information regarding the system requirements of the web application can<br />
be fo<strong>und</strong> page 1.<br />
How to start the <strong>Java</strong> client:<br />
1. Enter the URL https://[device IP address] to the address bar in oreder to call the web<br />
application.<br />
NOTE: If the web application is started via a “simple” http connection, a message<br />
informs the user that the connection can only be established via a secure<br />
https connection.<br />
After 10 seconds, the user is automatically forwarded to a secure https connection.<br />
2. In case the certificate that is stored in the KVM system cannot be verified, you<br />
are asked to confirm the certificate. The provided certificate contains the following<br />
features:<br />
MD5 fingerprint:<br />
A4:53:5C:42:E4:7C:B8:C7:74:1E:40:3F:D7:FE:95:99<br />
SHA1 fingerprint:<br />
E1:59:BF:BC:E3:53:B1:56:0E:23:CE:0E:ED:49:56:CF:98:78:DC:87<br />
3. Click the Start client button above the login box.<br />
2 · G&D UCON-IP-NEO
Getting started<br />
Establishing a connection to the KVM matrix system<br />
After the client has been started, you can start a session with the KVM matrix system.<br />
The virtual console is now displayed in the <strong>Java</strong> client.<br />
Starting a session with the KVM matrix system<br />
How to start a session with the KVM matrix system:<br />
1. Use the Authentication paragraph to enter your Username and your Password.<br />
IMPORTANT: Ask the administrator of the KVM matrix system if you are not<br />
familiar with the access data to the system.<br />
2. Use the Language/Sprache paragraph to select your language (Deutsch or English)<br />
(Deutsch oder English).<br />
3. Use the Keyboard Layout/Tastatur Layout paragraph to select the keyboard layout<br />
(Deutsch, American English, British English, French or Belgian) of your console.<br />
4. Optional: Click on Options, if you want to configure the session settings (see<br />
page 26 ff.).<br />
5. Start the connection (see page 9) by clicking Login.<br />
G&D UCON-IP-NEO · 3
Getting started<br />
The client window<br />
After the <strong>Java</strong> client has established a connection to the KVM matrix system, the client<br />
window is displayed on your monitor:<br />
This window displays the on-screen display of the KVM matrix system or the monitor<br />
image of the accessing target.<br />
NOTE: Since the image of the on-screen display is not created by the KVM matrix<br />
system but by the <strong>Java</strong> client, its position or the synchronisation settings cannot be<br />
changed!<br />
Information in the header<br />
The header of the client window displays the software name and the following information:<br />
Operating status: If the target can be operated in the client window, the square<br />
brackets display active operation.<br />
4 · G&D UCON-IP-NEO<br />
Otherwise the square brackets display inactive operation.<br />
Device IP address: The IP address of the KVM matrix system on which the session<br />
has been started is displayed for your information.<br />
Target name The Target part displays the name of the accessing target.
Information in the status bar<br />
The status bar shows the following information (from left to right):<br />
Getting started<br />
Status symbol: The symbol indicates if one or several users are accessing the<br />
target.<br />
Target name: Name of the accessing KVM matrix system target.<br />
Video profile name: Name of the video profile which is assigned to the accessing<br />
target.<br />
Image frequency: Number of image updates per second that are displayed in<br />
the client window.<br />
Data transfer rate: Data transfer rate (in kilobyte per second) between KVM<br />
matrix system and <strong>Java</strong> client.<br />
»Num Lock« LED The LED is displayed in light green if the Num-Lock function<br />
is activated on the target.<br />
If this function is disabled, the LED is displayed in dark<br />
green.<br />
»Caps Lock« LED The LED is displayed in light green if the CapsLock key is<br />
activated on the target.<br />
If the CapsLock key is not activated, the LED is displayed in<br />
dark green.<br />
»Scroll Lock« LED The LED is displayed in light green if the Scroll-Lock function<br />
is activated on the target.<br />
If this function is disabled, the LED is displayed in dark<br />
green.<br />
NOTE: The status bar can either be displayed above or below the client window<br />
(see page 16).<br />
G&D UCON-IP-NEO · 5
Getting started<br />
Releasing the mouse from the client window<br />
If the on-screen display of either the KVM matrix system or the target can be operated<br />
in the client window, the square brackets display active operation.<br />
NOTE: In this status, all keyboard entries and mouse activities at the local computer<br />
are directly transmitted to the target.<br />
The local computer can only be operated via input devices after the mouse has been<br />
released from the client window.<br />
How to release the mouse from the client window:<br />
Press and hold the keys Ctrl+Shift while additionally pressing the left mouse key.<br />
Scrolling an image section<br />
If the screen resolution of the target is higher than the resolution on your computer,<br />
only a section of the target’s screen content can be displayed on your monitor.<br />
Use the scrollbars of the client window or the buttons in the Scroll area of the control<br />
panel to select the section to be displayed.<br />
How to select the section to be displayed by mouse:<br />
Click the scrollbars of the client window to select the section to be displayed.<br />
Click the buttons (see below) in the Scroll area of the control panel.<br />
How to select the section to be displayed by keyboard:<br />
1. Make sure the client window is activated and the »Num Lock« function is disabled.<br />
2. Press Ctrl+Shift in combination with one of the navigation<br />
keys (Num key) of the numerical keyblock:<br />
The keys 8 (up), 6 (right), 2 (down) and 4 (left) move the<br />
image section in small steps.<br />
The keys 9 (top right), 3 (bottom right), 1 (bottom down)<br />
and 7 (top left) put the image section to the respective<br />
positions.<br />
The 5 key centres the image section in the middle.<br />
6 · G&D UCON-IP-NEO
Switching between targets<br />
Getting started<br />
You can switch between the targets that are connected to the KVM matrix system<br />
by using the on-screen display or the control panel.<br />
The following paragraphs provide a detailed description of each mode.<br />
Accessing a target with the control panel<br />
How to access a target with the control panel:<br />
1. Open the control panel with the key combination Ctrl+Shift (default).<br />
2. Click the Target tab.<br />
3. If necessary, use the filter function (see page 12), to limit the list of the targets.<br />
4. Use mouse or the arrow keys to select a target.<br />
5. Double-click the target or press Enter.<br />
ADVICE: Click the Last Target button (see page 13) to access the last active target.<br />
Accessing a target via OSD<br />
How to access a target using the on-screen display:<br />
1. Open the control panel with the key combination Ctrl+Shift (default).<br />
2. Click the AdonIS.<br />
3. Use the arrow keys to select the target to be accessed.<br />
4. Press Enter.<br />
Switching between target and local computer<br />
If keyboard and/or mouse activities are to be executed on your local computer during<br />
a session on a target, you do not have to close your session or call the control<br />
panel.<br />
The paragraph Releasing the mouse from the client window on page 6 provides detailed<br />
information regarding this topic.<br />
G&D UCON-IP-NEO · 7
Getting started<br />
Timeout during inactivity<br />
If no keyboard or mouse activities are carried out during a time span of 10 minutes<br />
(default), the active session is about to be cancelled.<br />
An window informs you that the active session is about to be cancelled and offers<br />
the following possibilities:<br />
Exit session: Click this button to close the current session immediately.<br />
Continue: Click this button to continue with the current session.<br />
ADVICE: Use the Config Panel web application to change the timeout settings. This<br />
particular setting can be fo<strong>und</strong> on the KVM Server tab in the configuration settings<br />
of the matrix switch.<br />
Using hotkeys during a session<br />
During your session, the following hotkeys are provided to be used in the active client<br />
window.<br />
Ctrl+Shift+Mouse key releases the mouse from the active client window<br />
Ctrl+Shift+Num key Use this key combination in combination with the keyboard’s<br />
numeric pad to navigate in the client window.<br />
Closing the current session<br />
There are two possibilities to close the current session: You can use the control<br />
panel to close the session or simply close the client window.<br />
How to close the current session:<br />
If the control panel is open, click the menu Action > Exit session.<br />
You can also close the client window by clicking the window’s Close symbol.<br />
Closing the <strong>Java</strong> client<br />
How to close the <strong>Java</strong> client at your computer:<br />
1. Open the control panel with the key combination Ctrl+Shift (default).<br />
2. Use the menu bar to click on Action > Exit application.<br />
8 · G&D UCON-IP-NEO
Establishing a connection<br />
Establishing a connection<br />
When establishing a connection, a window opens on your screen. This window<br />
informs you about the current status of the connection establishment:<br />
This window displays the following information (from top to bottom):<br />
Progress bar: Here, you can see the current progress of the login procedure. The currently<br />
executed activity is displayed above the bar.<br />
Channel encryption: The different channels and the applied encryptions (see page 27)<br />
are displayed.<br />
Detecting the average bandwidth<br />
The bandwidth is detected while the connection is being established.<br />
Now, the detected value is being applied to edit and transmit the video information.<br />
ADVICE: Click on Advanced while the bandwidth is being detected to display the currently<br />
detected bandwidth in the form of a curve.<br />
NOTE: The provided bandwidth within an IP network can vary depending on the<br />
network load. This might lead to performance losses.<br />
If necessary, re-execute the bandwidth recognition during the session (see<br />
page 27) if you notice performance losses.<br />
G&D UCON-IP-NEO · 9
Establishing a connection<br />
Chat function<br />
The <strong>Java</strong> client can be installed on several computers in the IP network.<br />
NOTE: Only one user can access the IP console at the same time.<br />
The client’s chat function enables the user who logs in to the system to contact an<br />
already logged-in user.<br />
Both users can use the chat to agree on the further procedure.<br />
How to use the chat to agree on the further procedure if the console is already<br />
occupied:<br />
1. Establish a connection (see page 3).<br />
NOTE: Your screen now displays a window which informs you that the IP console<br />
is currently occupied and offers to contact the other user.<br />
2. Click Yes to open the chat window.<br />
IMPORTANT: If no button is clicked within 10 seconds, the connection establishment<br />
is cancelled.<br />
NOTE: If the connection cannot be established because the progcess was cancelled<br />
by clicking No, the login mask is displayed again.<br />
3. The chat window is displayed on your screen and on the screen of the other user.<br />
NOTE: If the other user does not answer within 45 seconds or clicks on Deny or Exit<br />
session, his session is automatically being cancelled and your session is being<br />
established.<br />
4. Enter your message in the input field and click Send or press Enter to send your<br />
message to the other user.<br />
5. The other user’s message is displayed in the text field in the upper section of the<br />
window. You can answer this message as described in step 4.<br />
The chat is closed if the other user denies or accepts your request or if you cancel the<br />
login procedure by clicking Exit session.<br />
10 · G&D UCON-IP-NEO
Control panel<br />
Control panel<br />
The control panel is the operating centre of the <strong>Java</strong> client. All important functions can<br />
be accessed via the control panel:<br />
switching between the available targets<br />
calling the on-screen display of the KVM matrix system<br />
executing keyboard macros<br />
scrolling the visible screen contents in the software’s client window<br />
selecting the image sections to be displayed<br />
The user interface<br />
The user interface provides you with the status displays and tools listed in the following<br />
paragraph.<br />
Status display of the connection<br />
The Link Status field displays the current status of the serial connection<br />
between the <strong>Java</strong> client and the KVM matrix system.<br />
NOTE: The connection transmits the information and switching states to be displayed<br />
on the on-screen display to the client.<br />
G&D UCON-IP-NEO · 11
Control panel<br />
Menu bar<br />
The menu bar displays the commands that are currently available (Action, Target or<br />
Macros, Video, System, View, Help).<br />
Filter function<br />
The filter function above the list of the target enables you to limit the displayed targets.<br />
How to limit the list of displayed targets by using the filter function:<br />
1. Enter any string to the text field.<br />
2. The Target tab only displays the computers that contain the entered string in the<br />
Target, Physical address or Comment column.<br />
3. Click Delete to discard the filtering.<br />
12 · G&D UCON-IP-NEO<br />
The connection has been properly established.<br />
The connection is interrupted.<br />
NOTE: Depending on the activated tab of the control panel, either the Target or<br />
Macro menu item is displayed.
Accessing the last target (Last Target)<br />
Control panel<br />
The Last Target function enables you to access the last active target from the currently<br />
active target.<br />
NOTE: If you accessed no target since the start of the <strong>Java</strong> client or you only worked<br />
on the currently accessing target, this function is not provided.<br />
How to access the last active target:<br />
1. Click the Last Target symbol next to the filter field.<br />
Scrolling the image section<br />
If the screen resolution of the target is higher than the resolution on your computer,<br />
only a section of the target’s screen content can be displayed on your monitor.<br />
You can use the buttons in the Scroll area of the control panel to select the section to<br />
be displayed. Further information regarding this topic are provided in the paragraph<br />
Scrolling an image section on page 6.<br />
Information in the status bar<br />
The status bar provides the following information (from left to right):<br />
Video profile name: Name of the video profile which is assigned to the accessing<br />
target<br />
Image frequency: Number of image updates per second that are displayed in<br />
the client window<br />
Data transfer rate: Data transfer rate (in kilobyte per second) between KVM<br />
matrix system and the <strong>Java</strong> client.<br />
Control panel tabs<br />
The tabs in the middle of the window take the biggest part of the control panel. Here,<br />
you can display the Targets or Macros tabs:<br />
The Target tab contains a list of the connected targets.<br />
For each target, the following information is displayed:<br />
Target: target name in the KVM matrix system<br />
Phys. Addr.: the target’s physical address<br />
Status: the target’s switching status (on or off)<br />
Access: access right for the target<br />
Comment: user comment regarding the target<br />
G&D UCON-IP-NEO · 13
Control panel<br />
The symbols that are put in front of the target names have the following meaning:<br />
You are accessing this target.<br />
Another user is accessing this target.<br />
Several users are accessing the target.<br />
The target is switched on (green spot).<br />
The target is switched off (red spot).<br />
The Macros tab enables you to execute keyboard macros (see page 22).<br />
ADVICE: The keyboard macros to be displayed can be filtered by selecting a<br />
group (see page 22).<br />
Options to display the tab entries<br />
The lists of Targets and Macros can be displayed in the following display modes:<br />
List: displays small symbols and the name (next to each other)<br />
Details: displays small symbols, the name as well as other information in the form<br />
of a table<br />
How to change the display modes to display the Targets or Macros:<br />
1. Open the control panel of the <strong>Java</strong> client.<br />
2. Open the View menu.<br />
3. Select the List or Details menu item.<br />
14 · G&D UCON-IP-NEO
Displaying the on-screen display via the control panel<br />
The on-screen display (OSD) of the KVM matrix system can be displayed<br />
in the client window. The OSD enables you to operate and<br />
configure the system.<br />
Control panel<br />
NOTE: Since the display of the on-screen display is not created by the KVM matrix<br />
system but by the <strong>Java</strong> client, the position and the synchronisation settings cannot<br />
be changed!<br />
How to display the on-screen display of the KVM matrix system in the client window:<br />
1. Click the AdonIS button.<br />
ADVICE: While working in the client window of a target, the OSD of the KVM<br />
matrix system can be called by pressing Ctrl+Num (default).<br />
Feasible action in the control panel<br />
Closing the control panel<br />
Close the control panel to continue your work in the software’s client window.<br />
How to close the control panel:<br />
1. Use the menu bar to click on Action > Close control panel.<br />
Exiting the session<br />
Exit the session at the KVM matrix system after you have finished your work or to<br />
enable another user to use the IP console.<br />
How to exit the session:<br />
1. Open the control panel with the key combination Ctrl+Shift (default).<br />
2. Use the menu bar to click on Action > Exit session.<br />
Exiting the <strong>Java</strong> client<br />
How to exit the application at your computer:<br />
1. Open the control panel with the key combination Ctrl+Shift (default).<br />
2. Use the menu bar to click on Action > Exit session.<br />
G&D UCON-IP-NEO · 15
Control panel<br />
Switching to full screen mode of the client window<br />
If the target provides the same display resolution as your local computer, we recommend<br />
to display the client window in full screen mode.<br />
In this mode, the client window is enlarged to full screen size so that the full screen<br />
is available for the image of the target.<br />
NOTE: Task bars and other operating elements on your desktop are covered by the<br />
full screen of the client window.<br />
It is not necessary to scroll in the client window when the full screen mode is activated.<br />
How to switch the client window to full screen mode:<br />
1. Open the control panel with the key combination Ctrl+Shift (default).<br />
2. Use the menu bar to click on Video > Full screen or press F11.<br />
Defining the position of the status bar<br />
The client window’s status bar can either be displayed at the window’s top (default)<br />
or bottom.<br />
How to define the position of the client window’s status bar:<br />
1. Open the control panel of the software.<br />
2. Use the menu bar to click on View > Status bar > Upper edge or View > Status bar ><br />
Lower edge.<br />
16 · G&D UCON-IP-NEO
Video profiles<br />
Video profiles<br />
When a target is accessed for the first time, a video profile is created and stored for<br />
this computer.<br />
Each video profile has an individual name. The basic structure of the names created by<br />
the software and edited by the user has the following syntax:<br />
[pixels_horizontal]×[pixels_vertical]@[repetition rate_vertical]<br />
NOTE: The Auto- string is put in front of video profiles that were created after the target<br />
was accessed for the first time and whose color values were not detected.<br />
The EIM- string is put in front of video profiles that were created during the initial<br />
start-up procedure of the <strong>Java</strong> client software or with the Create video profile function.<br />
Displaying detailed information<br />
How to call the settings of the current video profile:<br />
1. Open the control panel with the key combination Ctrl+Shift (default).<br />
2. Use the menu bar to click on Video > Video settings > Edit active profile.<br />
Changing a video profile<br />
All data of a video profile can be edited and adjusted (image position, phase shift and<br />
color values).<br />
How to change the settings of the current video profile:<br />
1. Open the control panel using the key combination Ctrl+Shift (default).<br />
2. Use the menu bar to click on Video > Video settings > Edit active profile.<br />
3. Change the setting(s) of the video profile (see page 18 f.).<br />
4. Click Save to save your settings or discard your changes by clicking Cancel.<br />
G&D UCON-IP-NEO · 17
Video profiles<br />
Setting options<br />
The user is enabled to edit the profile’s video settings. The following pages describe<br />
the settings that are provided on the different tabs of the window.<br />
The lower window section is identical on all tabs:<br />
The left corner displays the number of image updates per second in the client window<br />
(image frequency) as well as the data transfer rate (in kilobyte per second)<br />
between KVM matrix system and <strong>Java</strong> client.<br />
The following operating elements can also be fo<strong>und</strong> in this section:<br />
display directly: changes in the settings are immediately applied to the image<br />
screen in the client window<br />
Test: applies changes in the settings for the display screen in the client<br />
window<br />
Refresh: synchronizes the transmitted image of the target<br />
Cancel: cancels changes in the settings and close window<br />
Close: temporarily saves settings until the target is accessed again<br />
Save: save settings<br />
Undo: <strong>und</strong>o all changes since last saving<br />
Defining the image width, position and size<br />
The Image tab enables you to define the image width, the position and the size.<br />
ADVICE: If you want this tab’s settings to be automatically determined, click on<br />
Image position recognition.<br />
The following requirements are necessary to execute this function reliably:<br />
The screen resolution of the target is lower than the resolution of the client window.<br />
The setting of the frames of the currently accessing target computer lie within a<br />
gegnerated size (depending on the image resolution).<br />
18 · G&D UCON-IP-NEO
The following settings can be individually optimised:<br />
Video profiles<br />
Image width: image width (incl. back porch) in pixel<br />
The image width is always bigger than the width of the actually visible<br />
image section!<br />
Vertical pixel (vertical) from which the image starts from<br />
image position:<br />
Vertical height of the visible image section<br />
image size:<br />
When adjusting the image height you can orient yourself to the usual<br />
image resolutions (e. g. 1024 × 768).<br />
Adjust the image height in way that no black frame remains and the image<br />
is fully visible.<br />
Horizontal pixel (horizontal) from which the image starts from<br />
image position:<br />
Horizontal width of the visible image section<br />
image size:<br />
When adjusting the image width you can orient yourself to the usual<br />
image resolutions (e. g. 1024 × 768).<br />
Adjust the image position in way that no black frame remains at the left<br />
side and the image is fully visible.<br />
How to change the preset values:<br />
1. Change your values in the different input fields.<br />
It is recommended not to enter the numeric values directly at the keyboard but to<br />
use the arrow keys.<br />
ADVICE: If the display directly function (see page 18) is activated, you can change<br />
the settings and, at the same time, view the result in the client window.<br />
NOTE: Click Undo to activate the default values of this tab.<br />
G&D UCON-IP-NEO · 19
Video profiles<br />
Defining color values<br />
The Colors tab enables you to individually adjust the color values and the brightness<br />
of the image.<br />
ADVICE: If you want this tab’s settings to be automatically determined, click on<br />
Image position recognition.<br />
The following settings can be optimised:<br />
Red: sets the color values for the color red<br />
Green: sets the color values for the color green<br />
Blue: sets the color values for the color blue<br />
Synchronize<br />
color settings:<br />
Activate this option if you want to adjust the contrast. When the<br />
color value is changed, the other two colors are adjusted as well.<br />
If this function is deactivated (default), you can change the<br />
weight of the single colors, for example to correct a color fault<br />
in the image.<br />
Brightness: adjusts the basic brightness of the image<br />
How to change the preset values:<br />
1. Use the slider to adjust the color values and the brightness.<br />
It is also possible to enter the values directly to the particular input fields.<br />
ADVICE: If the display directly function (see page 18) is activated, you can change<br />
the settings and, at the same time, view the result in the client window.<br />
NOTE: Click Undo to activate the default values of this tab.<br />
20 · G&D UCON-IP-NEO
Adjusting the phase position<br />
Video profiles<br />
The setting of the phase position is an important setting to properly process the<br />
video signal.<br />
ADVICE: The Auto phase function automatically executes the phase setting.<br />
To properly perform this function, a static image (for example of the desktop) has<br />
to be output by the target.<br />
This function cannot be performed if the screensaver is activated on the target!<br />
How to change the preset phase setting:<br />
1. Select the manually option in the Settings paragraph.<br />
2. Adjust the value according to your needs.<br />
ADVICE: If possible, display a vertically hatched image or an image with many<br />
vertical lines at the target. Now, optimise the phase value to that effect that the<br />
lines are evenly and sharply displayed.<br />
It is recommended not to enter the numeric values directly at the keyboard but to<br />
use the arrow keys.<br />
ADVICE: If the display directly function (see page 18) is activated, you can change<br />
the settings and, at the same time, view the result in the client window.<br />
3. Optional: If desired, activate the Noise suppression option.<br />
NOTE: Click Undo to activate the default values of this tab.<br />
G&D UCON-IP-NEO · 21
Keyboard macros<br />
Keyboard macros<br />
Many users use shortcuts for a fast and efficient operation of the operating system or<br />
the application software.<br />
When operating the target via the IP console of the KVM matrix system, three<br />
devices are arranged in the communication line: the target, the matrix switch and<br />
the local computer on which the <strong>Java</strong> client is executed.<br />
IMPORTANT: If a key combination, for example Ctrl+Alt+Delete, is pressed, the<br />
local computer interprets this key combination which is therefore not transmitted<br />
to the target.<br />
Use the keyboard macros of the control panel as described in this chapter to ensure<br />
that the key combinations are forwarded to the target.<br />
Executing a keyboard macro<br />
The keyboard macros can either be executed via the control panel or via the selected<br />
key combinations that have been selected in the settings of the keyboard macro.<br />
How to execute a keyboard macro using the control panel:<br />
1. Open the control panel withthe key combination Ctrl+Shift (default).<br />
2. Click the Macros tab.<br />
3. Double-click the macro to be executed.<br />
Filtering macros with the help of groups<br />
In order to quickly find a specific macro among the multitude of macros, the macros<br />
can be grouped.<br />
NOTE: The standard configuration provides the groups Linux, Novell, G&D Hotkeys,<br />
SUN, VMWare, Windows and special keys.<br />
How to limit the keyboard macros to be displayed on the Macros tab:<br />
1. Open the control panel with the key combination Ctrl+Shift (default).<br />
2. Click the Macros tab.<br />
3. Use the Macro group field to select the group whose macros are to be listed.<br />
22 · G&D UCON-IP-NEO
Video functions<br />
Video functions<br />
Automatically adjusting the size of the client window (AutoFit)<br />
During each access, the automatic size adjustment adjusts the size of the client window<br />
to the target’s current resolution.<br />
ADVICE: We recommend to set the resolution of your local computer higher than<br />
the target’s resolution.<br />
If the screen resolution of the target is higher than the resolution of your computer,<br />
you can scroll the image section to be displayed within the client window (see<br />
page 6).<br />
How to (de)activate the AutoFit function via the Video menu:<br />
1. Open the control panel with the key combination Ctrl+Shift (default).<br />
2. Use the menu bar to click on Video > AutoFit.<br />
NOTE: A marker next to the menu item indicates if this function is activated.<br />
Refreshing the full screen content<br />
The Refresh image function enables you to transmit the full screen content. Any image<br />
artefacts that might appear are removed by the retransmission.<br />
ADVICE: This function can also activated by pressing F5 if the control panel is active.<br />
1. Open the control panel with the key combination Ctrl+Shift (default).<br />
2. Use the menu bar to click on Video > Video settings > Refresh image.<br />
Resynchronizing the image<br />
The Resynchronize image function enables you to fully transmit the full screen content<br />
as well as to automatically recognize the phase.<br />
How to fully synchronize the image:<br />
1. Open the control panel withthe key combination Ctrl+Shift (default).<br />
2. Use the menu bar to click on Video > Video settings > Resynchronize image.<br />
G&D UCON-IP-NEO · 23
Video functions<br />
Automatically recognizing the phasing<br />
The Auto phase function automatically recognizes the phasing.<br />
How to execute the automatic phase recognition:<br />
1. Open the control panel with the key combination Ctrl+Shift (default).<br />
2. Use the menu bar to click on Video > Video settings > Auto phase.<br />
Automatically defining the color values<br />
The Auto color adjustment function enables the automatic definition of the target’s<br />
color values.<br />
How to automatically define the color values:<br />
1. Open the control panel with the key combination Ctrl+Shift (default).<br />
2. Use the menu bar to click on Video > Video settings > Auto color adjustment.<br />
Automatically recognizing the image position<br />
The Recognize image position enables the automatic recognition of the target’s image<br />
position.<br />
How to recognize the image position:<br />
1. Open the control panel with the key combination Ctrl+Shift (default).<br />
2. Use the menu bar to click on Video > Video settings > Recognize image position.<br />
24 · G&D UCON-IP-NEO
Mouse delay<br />
Many operating systems provide the users with a so-called mouse acceleration.<br />
Mouse delay<br />
NOTE: The mouse acceleration of the operating systems does not only evaluate the<br />
distance the mouse is being moved but also the duration of this movement.<br />
During “long” movements the cursor movement on the screen is accelerated.<br />
If the mouse is accelerated on your local computer as well as on the target, the cursor<br />
moves very fast and complicates the operation.<br />
Activating the mouse delay<br />
The control panel can be used to adjust the mouse delay during a session.<br />
How to (de)activate the application of the mouse delay within a session:<br />
1. Open the control panel with the key combination Ctrl+Shift (default).<br />
2. Klicken Sie im Menü auf System > Define mouse delay.<br />
3. (De)activate the Enable mouse delay or Global mouse delay enabled options in the Mouse<br />
delay settings window.<br />
4. Click Save to apply your settings or discard your changes by clicking Cancel.<br />
Configuring the acceleration value for the mouse delay<br />
How to define the acceleration value for the mouse delay:<br />
1. Access the target for which the acceleration value of the mouse delay is to be<br />
changed.<br />
2. Open the control panel with the key combination Ctrl+Shift (default).<br />
3. Use the menu bar to click on System > Configure mouse delay.<br />
4. Use the slider to adjust the acceleration value:<br />
NOTE: If the mouse moves too fast on the target, move the slider to the left<br />
(Slow). For the opposite, move the slider to the right (Fast).<br />
5. Click Save to save your settings or discard your changes by clicking Cancel.<br />
G&D UCON-IP-NEO · 25
Advanced functions<br />
Advanced functions<br />
Session settings<br />
Before establishing a session with the KVM matrix system, the user is enabled to<br />
define the following settings for their session.<br />
Language<br />
The user interface supports several languages (German and English).<br />
Select your desired language.<br />
Hotkey selection<br />
Select a key combination (default: Ctrl+Shift) to call the control panel.<br />
Operation<br />
At IP-based KVM products, analog keyboard, video and mouse signals are digitalised<br />
before they are transmitted over the IP network.<br />
Depending on the resolution and color depth of the target’s video signal, the provided<br />
bandwidth can be highly strained due to high data traffic.<br />
NOTE: The performance might be influenced for narrow-band connections. As a<br />
result, only a minimal bandwidth is provided for the mouse signal which complicates<br />
the fluid operation of the mouse.<br />
To reduce this effect you can use the Operation section to define how the provided<br />
bandwidth is to be used preferably.<br />
The following three possibilities are provided for adjustment:<br />
view and oper- The screen layout and the cursor are treated equally.<br />
ate:<br />
This setting is recommended if a LAN connection is applied (default).<br />
view: The screen layout is treated preferentially.<br />
This setting is recommended if the task mainly consists of “viewing” when a<br />
narrow-band connection is applied.<br />
operate: The cursor is treated preferentially.<br />
This setting is recommended if the task mainly consists of administering and<br />
configuring the target and a fast screen layout is secondary when using a narrow-band<br />
connection.<br />
26 · G&D UCON-IP-NEO
Encryption<br />
Advanced functions<br />
IMPORTANT: In case sensitive data is being displayed and edited on the target,<br />
activate the encryption of the Input and the Video channel for transmitting data via<br />
the internet.<br />
If the data traffic is transmitted via a secure VPN connection, the encryption is not<br />
required.<br />
The transmitted data between the KVM matrix system and the <strong>Java</strong> client can be<br />
secured by applying encryption options.<br />
The transmission of authentication data is always secured. Additionally, you can<br />
encrypt the data of keyboard and mouse activities and of the transmitted video signal.<br />
NOTE: Please mind that every additional encryption requires time and influences<br />
the performance.<br />
The following options for encryption are provided:<br />
CTRL channel: This channel transmits the exchanged data for the login procedure<br />
at the KVM matrix system.<br />
The data transmitted on this channel is always encrypted.<br />
Input channel: This channel transmits the keyboard/mouse signals to the KVM<br />
matrix system.<br />
If this channel is not encrypted, IP packets can be sniffed.<br />
Encryption is optional and can lead to small performance losses due to higher<br />
data traffic.<br />
Video channel: This channel transmits the target’s video signal to the<br />
<strong>Java</strong> client.<br />
If this channel is not encrypted, the transmitted image can be<br />
restored by sniffed IP packets.<br />
Encryption is optional and can lead to small performance losses due to higher<br />
data traffic.<br />
Bandwidth recognition<br />
The provided bandwidth within an IP network can vary depending on the network<br />
load. This might lead to a performance loss.<br />
If you detect losses in the performance, it is recommended to re-execute the bandwidth<br />
recognition.<br />
How to execute the bandwidth recognition:<br />
1. Open the control panel with the key combination Ctrl+Shift (default).<br />
2. Use the menu bar to click on System > Bandwidth recognition.<br />
G&D UCON-IP-NEO · 27
Advanced functions<br />
Displaying client/server information<br />
The help menu can be used to read out information on the <strong>Java</strong> client and the KVM<br />
matrix system.<br />
How to display client/server information:<br />
1. Open the control panel with the key combination Ctrl+Shift (default).<br />
2. Click Help > Info.<br />
3. Click <strong>Client</strong> or Server to display the respective information.<br />
4. Click Close.<br />
Systemwide hotkeys in the client window<br />
The following hotkeys are provided within an active client window:<br />
Ctrl+Shift+Mouse key releases the mouse from the active client window<br />
Ctrl+Shift+Num key In combination with a key of the keyboard’s keypad<br />
you are enabled to scroll within the client window.<br />
28 · G&D UCON-IP-NEO<br />
The paragraph Scrolling the image section on page 13<br />
provides further information regarding this topic.
NOTES
NOTES
NOTES
Das Handbuch wird fortlaufend aktualisiert <strong>und</strong> im Internet veröffentlicht.<br />
The manual is constantly updated and available on our website.<br />
http://gdsys.de/A9100218<br />
<strong>Guntermann</strong> & <strong>Drunck</strong> <strong>GmbH</strong><br />
Dortm<strong>und</strong>er Str. 4a<br />
57234 Wilnsdorf<br />
Germany<br />
http://www.GDsys.de<br />
sales@GDsys.de