G&D DVIMUX2-DL-USB | Installation und Bedienung - Guntermann ...
G&D DVIMUX2-DL-USB | Installation und Bedienung - Guntermann ...
G&D DVIMUX2-DL-USB | Installation und Bedienung - Guntermann ...

Erfolgreiche ePaper selbst erstellen
Machen Sie aus Ihren PDF Publikationen ein blätterbares Flipbook mit unserer einzigartigen Google optimierten e-Paper Software.
<strong>Installation</strong><br />
<strong>Installation</strong><br />
Overview of the interfaces<br />
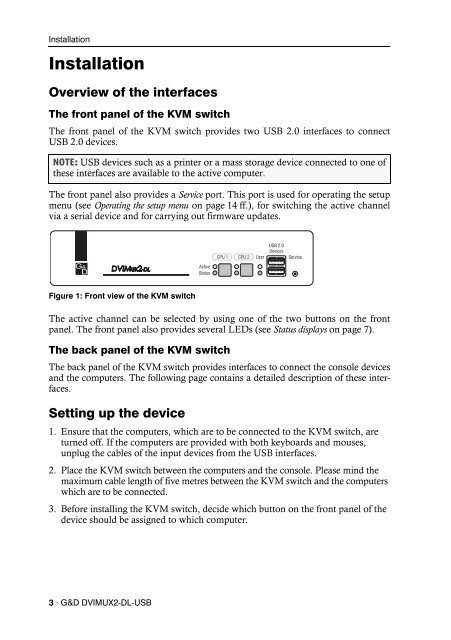
The front panel of the KVM switch<br />
The front panel of the KVM switch provides two <strong>USB</strong> 2.0 interfaces to connect<br />
<strong>USB</strong> 2.0 devices.<br />
NOTE: <strong>USB</strong> devices such as a printer or a mass storage device connected to one of<br />
these interfaces are available to the active computer.<br />
The front panel also provides a Service port. This port is used for operating the setup<br />
menu (see Operating the setup menu on page 14 ff.), for switching the active channel<br />
via a serial device and for carrying out firmware updates.<br />
Figure 1: Front view of the KVM switch<br />
The active channel can be selected by using one of the two buttons on the front<br />
panel. The front panel also provides several LEDs (see Status displays on page 7).<br />
The back panel of the KVM switch<br />
The back panel of the KVM switch provides interfaces to connect the console devices<br />
and the computers. The following page contains a detailed description of these interfaces.<br />
Setting up the device<br />
1. Ensure that the computers, which are to be connected to the KVM switch, are<br />
turned off. If the computers are provided with both keyboards and mouses,<br />
unplug the cables of the input devices from the <strong>USB</strong> interfaces.<br />
2. Place the KVM switch between the computers and the console. Please mind the<br />
maximum cable length of five metres between the KVM switch and the computers<br />
which are to be connected.<br />
3. Before installing the KVM switch, decide which button on the front panel of the<br />
device should be assigned to which computer.<br />
3 · G&D <strong>DVIMUX2</strong>-<strong>DL</strong>-<strong>USB</strong><br />
<strong>USB</strong> 2.0<br />
Devices<br />
CPU 1 CPU 2 User<br />
Service<br />
Active<br />
Status