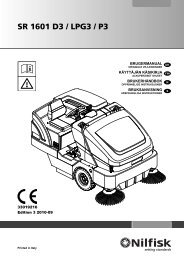
SR 1601 D3 / LPG3 / P3 - Nilfisk PARTS - Nilfisk-Advance
SR 1601 D3 / LPG3 / P3 - Nilfisk PARTS - Nilfisk-Advance
SR 1601 D3 / LPG3 / P3 - Nilfisk PARTS - Nilfisk-Advance
Erfolgreiche ePaper selbst erstellen
Machen Sie aus Ihren PDF Publikationen ein blätterbares Flipbook mit unserer einzigartigen Google optimierten e-Paper Software.
ENGLISHUSER MANUALMain broom height adjustmentNOTEBrooms of various hardness are available.This procedure is applicable to all types of brooms.1.2.3.4.5.6.7.8.Drive the machine on a level fl oor.Engage the parking brake.Turn the ignition key (64) and start the machine.Lower the main broom with the lever (53) and let it run for 1 minute.This allows the broom to polish a “strip” on the fl oor. After 1 minute, lift the main broom, disengage the parking brake and movethe machine so that the polished strip is visible.Inspect the polished strip on the fl oor. If the strip is less than 2 in (50 mm) or more than 3 in (75 mm) wide, the main broommust be adjusted.To adjust, open the engine compartment hood (1) by using the unlocking push-button (25), loosen the knob (A, Fig. 3) andoperate on the main broom adjuster (B) by considering the following:• When turning clockwise, the main broom pressure and polish strip is decreased.• When turning counter-clockwise, the main broom pressure and polish strip is increased.After adjusting, lock the adjuster with the knob (A).Repeat steps 2-7 until the polished strip is 2 - 3 in (50-75 mm) wide.NOTEIf the broom pattern cannot be properly adjusted, because the broom pressure differs from one end to another, see theadjustment procedure in the Service Manual.BAFigure 3P10032224 33019216(2)2009-05 A <strong>SR</strong> <strong>1601</strong> <strong>D3</strong> / <strong>LPG3</strong> / <strong>P3</strong>


