Model 393aav upflow gas furnace - gogeise - Geisel
Model 393aav upflow gas furnace - gogeise - Geisel
Model 393aav upflow gas furnace - gogeise - Geisel

You also want an ePaper? Increase the reach of your titles
YUMPU automatically turns print PDFs into web optimized ePapers that Google loves.
USER’S INFORMATION MANUAL<br />
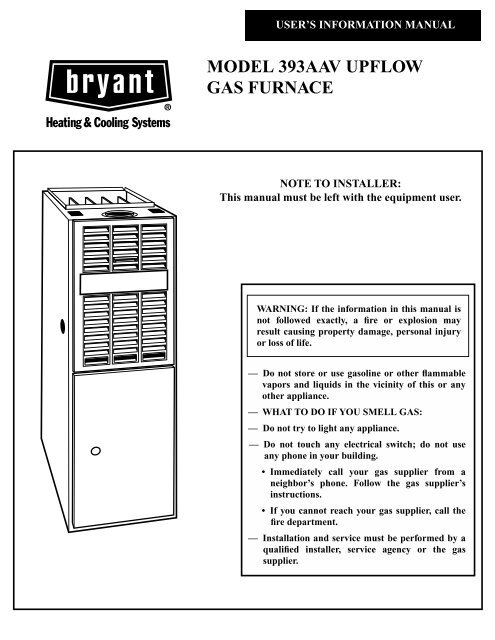
MODEL 393AAV UPFLOW<br />
GAS FURNACE<br />
NOTE TO INSTALLER:<br />
This manual must be left with the equipment user.<br />
WARNING: If the information in this manual is<br />
not followed exactly, a fire or explosion may<br />
result causing property damage, personal injury<br />
or loss of life.<br />
— Do not store or use <strong>gas</strong>oline or other flammable<br />
vapors and liquids in the vicinity of this or any<br />
other appliance.<br />
— WHAT TO DO IF YOU SMELL GAS:<br />
— Do not try to light any appliance.<br />
— Do not touch any electrical switch; do not use<br />
any phone in your building.<br />
• Immediately call your <strong>gas</strong> supplier from a<br />
neighbor’s phone. Follow the <strong>gas</strong> supplier’s<br />
instructions.<br />
• If you cannot reach your <strong>gas</strong> supplier, call the<br />
fire department.<br />
— Installation and service must be performed by a<br />
qualified installer, service agency or the <strong>gas</strong><br />
supplier.
WELCOME TO TODAY’S<br />
GENERATION OF COMFORT<br />
Congratulations! Your new, higher efficiency <strong>gas</strong> <strong>furnace</strong> is a<br />
sound investment which will reward you and your family<br />
with years of warm memories winter after winter.<br />
Not only is your new <strong>furnace</strong> energy efficient, it is also extremely<br />
reliable. Spend just a few minutes with this booklet<br />
to learn about the operation of your new <strong>furnace</strong>—and the<br />
small amount of maintenance it takes to keep it operating at<br />
peak efficiency. Years went into the development of your new<br />
<strong>furnace</strong>. Take a little time now to assure its most efficient<br />
operation for years to come.<br />
UPFLOW FURNACE<br />
COMPONENTS<br />
1<br />
2<br />
3<br />
4<br />
5<br />
6<br />
7<br />
8<br />
9<br />
10<br />
11<br />
12<br />
13<br />
14<br />
15<br />
16<br />
17<br />
Inducer<br />
Rating Plate (<strong>Model</strong> and Serial No.)<br />
Gas Valve Control Knob or Electric Switch<br />
(On/Off)<br />
Gas Valve<br />
Gas Burner<br />
Flame Sensor<br />
Air Filter Retainer<br />
Air Filter<br />
Blower and Blower Motor<br />
Blocked Vent Safeguard Tube and Switch<br />
Gas Manifold<br />
Replaceable Fuse Link<br />
Hot Surface Ignitor<br />
Blower Door Safety Switch<br />
Masonry Chimney Adapter (When Used)<br />
(Blocked Vent Shutoff Switch Inside)<br />
Vent Pipe<br />
Furnace Control<br />
2<br />
MODEL 393AAV<br />
Upflow Furnace<br />
1<br />
2<br />
3<br />
4<br />
5<br />
6<br />
7<br />
8<br />
9<br />
;;<br />
;; ;;<br />
;;<br />
;;<br />
16<br />
15<br />
17<br />
14<br />
10<br />
11<br />
12<br />
13<br />
1<br />
2
IMPORTANT FACTS<br />
Your <strong>furnace</strong> must have adequate surrounding<br />
airflow for efficient combustion<br />
and safe ventilation. Do not<br />
enclose it in an airtight room or “seal’’<br />
it behind solid doors. To minimize the<br />
possibility of serious personal injury,<br />
fire, damage to your <strong>furnace</strong>, or improper<br />
operation; carefully follow<br />
these safety rules:<br />
• Keep the area around your <strong>furnace</strong><br />
free of combustible materials, <strong>gas</strong>oline,<br />
and other flammable liquids and<br />
vapors.<br />
3<br />
• Do not cover the <strong>furnace</strong>, store trash<br />
or debris near it, or in any way block<br />
the flow of fresh air to the unit.<br />
• Combustion air must be clean and<br />
uncontaminated with chlorine or fluorine.<br />
These compounds are present in<br />
many products around the home, such<br />
as: water softener salts, laundry<br />
bleaches, detergents, adhesives, paints,<br />
varnishes, paint strippers, waxes, and<br />
plastics.<br />
Make sure the combustion air for your<br />
<strong>furnace</strong> does not contain any of these<br />
compounds. The combustion air during<br />
remodeling must be fresh and uncontaminated.<br />
If these compounds are<br />
burned in your <strong>furnace</strong>, the heat exchangers<br />
and metal vent system may<br />
deteriorate.<br />
• A <strong>furnace</strong> installed in the attic or<br />
other insulated space must be kept free<br />
and clear of the insulating material. Examine<br />
the <strong>furnace</strong> area when installing<br />
the <strong>furnace</strong> or adding more insulation.<br />
Some materials may be combustible.<br />
NOTE: Do not use this <strong>furnace</strong> if any<br />
part has been under water. Immediately<br />
call a qualified service technician to inspect<br />
the <strong>furnace</strong> and to replace any<br />
part of the control system and any <strong>gas</strong><br />
control which has been under water.<br />
NOTE: The qualified installer or agency<br />
must use only factory-authorized replacement<br />
parts, kits, and accessories<br />
when modifying or repairing this product.<br />
This <strong>furnace</strong> contains safety devices<br />
which must be manually reset or replaced.<br />
If the <strong>furnace</strong> is left unattended<br />
for an extended period of time, have it<br />
checked periodically for proper operation.<br />
This precaution will prevent problems<br />
associated with no heat, such as<br />
frozen water pipes, etc. See “Before You<br />
Request a Service Call’’ section in this<br />
manual.<br />
SAFETY<br />
CONSIDERATIONS<br />
Installing and servicing heating equipment<br />
can be hazardous due to <strong>gas</strong> and<br />
electrical components. Only trained<br />
and qualified personnel should install,<br />
repair, or service heating equipment.<br />
Untrained personnel can perform basic<br />
maintenance functions such as cleaning<br />
and replacing air filters. All other<br />
operations must be performed by<br />
trained service personnel. Observe<br />
safety precautions in this manual, on<br />
tags, and on labels attached to the <strong>furnace</strong><br />
and other safety precautions that<br />
may apply.<br />
Recognize safety information: This is<br />
the safety-alert symbol ! . When you<br />
see this symbol on the <strong>furnace</strong> and in<br />
instructions or manuals, be alert to the<br />
potential for personal injury.<br />
Understand the signal words—DAN-<br />
GER, WARNING, and CAUTION.<br />
These words are used with the safetyalert<br />
symbol. DANGER identifies the<br />
most serious hazards which will result<br />
in severe personal injury or death.<br />
WARNING signifies hazards which<br />
could result in personal injury or<br />
death. CAUTION is used to identify<br />
unsafe practices which would result in<br />
minor personal injury or product and<br />
property damage.<br />
STARTING YOUR<br />
FURNACE<br />
Instead of a continuously burning pilot<br />
flame, your <strong>furnace</strong> uses an automatic<br />
3<br />
hot surface ignition system to light the<br />
burners each time the thermostat signals<br />
the <strong>furnace</strong> to start. Follow these<br />
important safeguards:<br />
• Never attempt to manually light the<br />
burners with a match or other source of<br />
flame.<br />
• Read and follow the operating instructions<br />
on the <strong>furnace</strong>, especially the<br />
item that reads as follows:<br />
Wait 5 minutes to clear out any <strong>gas</strong>.<br />
Then smell for <strong>gas</strong>, including near the<br />
floor. If you smell <strong>gas</strong>, STOP! Follow<br />
“B’’ in the safety information<br />
above on this label. If you don’t smell<br />
<strong>gas</strong>, go to the next step.<br />
• If a suspected malfunction occurs<br />
with your <strong>gas</strong> control system, such as<br />
the burners do not light when they<br />
should, refer to the shutdown procedures<br />
on the <strong>furnace</strong>, or in the next section,<br />
to turn off your system, then call<br />
your dealer as soon as possible.<br />
!<br />
WARNING<br />
Should overheating occur, or<br />
the <strong>gas</strong> valve fail to shut off the<br />
<strong>gas</strong> supply, turn off the manual<br />
<strong>gas</strong> valve (See Fig. 6) to the <strong>furnace</strong><br />
BEFORE turning off the<br />
electrical supply. A failure to<br />
follow this warning could result<br />
in a fire or explosion, and<br />
personal injury or death.<br />
• CHECK AIR FILTER: Before attempting<br />
to start your <strong>furnace</strong>, be sure<br />
the <strong>furnace</strong> filter is clean and in place.<br />
(See the maintenance section of this<br />
manual.) Then proceed as follows:<br />
4
STEPS FOR STARTING<br />
YOUR FURNACE<br />
1. Set your room thermostat to the<br />
lowest temperature setting.<br />
(See Fig. 5.)<br />
2. Close the external manual <strong>gas</strong><br />
valve. (See Fig. 6.)<br />
3. Turn OFF the electrical supply to<br />
your <strong>furnace</strong>. (See Fig. 7.)<br />
CLOSE<br />
®<br />
5<br />
6<br />
7<br />
8<br />
4. Remove control access door. (See<br />
Fig. 8.)<br />
5. The <strong>gas</strong> valve will have EITHER a<br />
control knob or control switch to<br />
turn off and on. Turn the control<br />
knob or switch on the <strong>gas</strong> valve to<br />
the OFF position and wait 5 minutes.<br />
(See Fig. 9 or 10.)<br />
6. After waiting 5 minutes, turn the<br />
control knob or switch on the<br />
<strong>gas</strong> valve to the ON position.<br />
(See Fig. 11 or 12.)<br />
7. Replace control access door.<br />
(See Fig. 13.)<br />
8. Turn ON the electrical supply to<br />
the <strong>furnace</strong>. (See Fig. 14.)<br />
9. Open the external manual <strong>gas</strong><br />
valve. (See Fig. 15.)<br />
10. Set the room thermostat to a temperature<br />
slightly above the room<br />
temperature. This will automatically<br />
signal the <strong>furnace</strong> to start. The<br />
inducer motor will start, and the hot<br />
surface ignitor will energize. When<br />
hot, the ignitor will have an orange<br />
glow.<br />
OFF<br />
ON<br />
4<br />
O FF<br />
O FF<br />
ON<br />
M<br />
P<br />
C<br />
1<br />
3<br />
2<br />
9<br />
10<br />
11<br />
12<br />
11. After 32 to 70 sec, the <strong>gas</strong> valve<br />
permits <strong>gas</strong> to flow to the main<br />
burners where it is ignited. Hot<br />
flames begin to warm the <strong>furnace</strong>’s<br />
heat exchanger. After a time delay<br />
of approximately 45 sec, the <strong>furnace</strong><br />
blower is switched on.<br />
13<br />
14<br />
15<br />
NOTE: If the main burners fail to<br />
ignite, the <strong>furnace</strong> control system will<br />
go through 3 more ignition cycles.<br />
Then, if burners fail to ignite, the system<br />
will lockout. If lockout occurs, or<br />
the blower doesn’t come on—shut<br />
down your <strong>furnace</strong> and call your dealer<br />
for service.<br />
O FF<br />
ON<br />
M<br />
P<br />
C<br />
OPEN<br />
1<br />
3<br />
2
12. Set your thermostat to the temperature<br />
that satisfies your comfort<br />
requirements. SUGGESTION: Setting<br />
the thermostat back a few degrees—and<br />
compensating for the<br />
difference with warmer clothing—<br />
can make a big difference in your<br />
fuel consumption on extremely<br />
cold days. The few degrees at the<br />
top of your thermostat “comfort<br />
level’’ are the most costly degrees<br />
to obtain.<br />
When the room temperature drops<br />
below the temperature selected on<br />
the thermostat, the <strong>furnace</strong> will be<br />
switched on automatically. When the<br />
room temperature reaches the degree<br />
selected on the thermostat, the <strong>furnace</strong><br />
will be switched off automatically.<br />
Some thermostats have a “fan’’ mode<br />
with 2 selections: AUTO or ON. When<br />
set on AUTO, the <strong>furnace</strong> blower cycles<br />
on and off, controlled by the thermostat.<br />
In the ON position, the <strong>furnace</strong><br />
blower runs continuously except for a<br />
62-sec delay at the “call for heat.’’ This<br />
keeps the temperature level in your<br />
home more evenly balanced. It also<br />
continuously filters the indoor air.<br />
SHUTTING DOWN<br />
YOUR FURNACE<br />
Should you ever suspect a malfunction<br />
in your <strong>furnace</strong>, you will need to turn<br />
the <strong>furnace</strong> off. The following procedures<br />
must be followed:<br />
1. Set your room thermostat to<br />
the lowest temperature setting.<br />
(See Fig. 16.)<br />
2. Close the external manual <strong>gas</strong><br />
valve. (See Fig. 6.)<br />
3. Turn OFF the electrical supply to<br />
your <strong>furnace</strong>. (See Fig. 17.)<br />
®<br />
16<br />
4. Remove the control access door on<br />
your <strong>furnace</strong>. (See Fig. 8.) Removing<br />
the blower access door is not<br />
required.<br />
5. Turn the control knob or switch on<br />
the <strong>gas</strong> valve to the OFF position.<br />
(See Fig. 18 or 19.)<br />
OFF<br />
5<br />
17<br />
18<br />
19<br />
6. Replace the control access door.<br />
(See Fig. 13.)<br />
7. If the <strong>furnace</strong> is being shut down<br />
because of a malfunction, call your<br />
dealer as soon as possible.<br />
PERFORMING ROUTINE<br />
MAINTENANCE<br />
With the proper maintenance and care,<br />
your <strong>furnace</strong> will operate economically<br />
and dependably. Basic maintenance,<br />
O FF<br />
O FF<br />
ON<br />
M<br />
P<br />
C<br />
1<br />
3<br />
2<br />
which can easily be accomplished by<br />
someone who follows the directions, is<br />
found on this and the following pages.<br />
However, before beginning<br />
maintenance, follow these safety<br />
precautions:<br />
!<br />
WARNING<br />
Turn off electrical power supply<br />
to your <strong>furnace</strong> before removing<br />
the access doors to<br />
perform service or maintenance.<br />
A failure to follow this<br />
warning could result in personal<br />
injury or death.<br />
!<br />
CAUTION<br />
Although special care has<br />
been taken to minimize sharp<br />
edges, be extremely careful<br />
when handling parts or reaching<br />
into the <strong>furnace</strong>.<br />
FILTERING OUT<br />
TROUBLE<br />
A dirty filter will cause excessive stress<br />
on the <strong>furnace</strong> and can cause it to overheat<br />
and automatically shut down. The<br />
<strong>furnace</strong> filter should be checked every<br />
3 or 4 weeks and cleaned if necessary.<br />
If installed with factory specified disposable<br />
media filter, check or replace<br />
filter before each heating and cooling<br />
season. Replace disposable media filter<br />
at least once a year.<br />
If your <strong>furnace</strong> filter needs replacing,<br />
be sure to use the same size and type of<br />
filter that was originally supplied. Use<br />
the Furnace Filter Table on the next<br />
page and compare your <strong>furnace</strong> size<br />
with the proper filter size.<br />
!<br />
CAUTION<br />
Never operate your <strong>furnace</strong><br />
without a filter in place. Doing<br />
so may damage the <strong>furnace</strong><br />
blower motor. An accumulation<br />
of dust and lint on internal<br />
parts of your <strong>furnace</strong> can<br />
cause a loss of efficiency.
The air filter is normally located in the<br />
blower compartment (See Fig. 2) or in<br />
the factory-supplier filter cabinet attached<br />
to the side or bottom of the<br />
blower cabinet. If air filter has been installed<br />
in another location, contact your<br />
dealer for instructions. To inspect,<br />
clean, and/or replace the air filter(s),<br />
follow these steps:<br />
1. Turn off electrical supply to <strong>furnace</strong>.<br />
(See Fig. 17)<br />
2. Remove door/access panel<br />
• AIR FILTER(S) LOCATED IN<br />
BLOWER COMPARTMENT<br />
Remove control and blower access<br />
doors. (See Fig. 8)<br />
• AIR FILTER LOCATED IN FIL-<br />
TER CABINET<br />
Remove filter cabinet door (See<br />
Fig. 24 and 25)<br />
NOTE: It will be necessary to remove 1<br />
thumbscrew.<br />
20<br />
21<br />
3. Remove air filter from <strong>furnace</strong>.<br />
• AIR FILTER LOCATED IN<br />
BLOWER COMPARTMENT:<br />
a. Slide filter retainer sideways until<br />
it is free of latch. (See Fig. 20)<br />
b. Gently remove air filter and carefully<br />
turn the dirty side up (if dirty)<br />
to avoid spilling dirt from the filter.<br />
(see Fig. 21)<br />
• AIR FILTER LOCATED IN FIL-<br />
TER CABINET:<br />
a. Slide air filter out of <strong>furnace</strong>.<br />
Keep dirty side up (if dirty) to avoid<br />
spilling dirt. (See Fig. 26 and 27)<br />
22<br />
4. Inspect the filter. If torn, replace it.<br />
NOTE: If washable filter that was<br />
shipped with the <strong>furnace</strong> has been replaced<br />
by:<br />
a) Factory specified disposable media<br />
filter – Do not clean. If dirty, replace<br />
only with media filter having<br />
the same part number and size. Install<br />
with airflow direction arrow<br />
pointing towards blower.<br />
b) Electronic air cleaner (EAC) – Refer<br />
to EAC owner’s Manual for<br />
maintenance information.<br />
5. Wash filter (if dirty) in sink, bathtub,<br />
or outside with a garden hose.<br />
Always use cold tap water. A mild<br />
liquid detergent may be used if necessary.<br />
Spray water through filter in<br />
the opposite direction of airflow.<br />
Allow filter to dry.<br />
6. Reinstall clean air filter<br />
7. Reinstall filter retainer (for blower<br />
compartment locations only)<br />
8. Replace control and blower doors<br />
(See Fig. 13 and 22) or filter cabinet<br />
door (Fig. 28 and 29)<br />
9. Turn on electrical supply to <strong>furnace</strong><br />
(see Fig. 18).<br />
NOTE: If side return ducts are used,<br />
2 filters may be required in some<br />
models. The procedure listed above<br />
may be used to remove side filters.<br />
UPFLOW FURNACE AIR<br />
FILTER TABLE<br />
FURNACE<br />
CASING<br />
WIDTH (IN.)<br />
AIR FILTER LOCATED IN BLOWER<br />
COMPARTMENT<br />
FILTER SIZE (IN.)<br />
Side<br />
Return<br />
6<br />
Bottom<br />
Return<br />
FILTER<br />
TYPE<br />
14-3/16 (1)16x25x1* (1)14x25x1 Cleanable<br />
17-1/2 (1)16x25x1* (1)16x25x1* Cleanable<br />
21 (1)16x25x1* (1)20x25x1* Cleanable<br />
24-1/2 (1 or 2)16x25x1 (1)24x25x1* Cleanable<br />
AIR FILTER LOCATED IN FILTER CABINET<br />
FILTER<br />
CABINET<br />
HEIGHT (IN) FILTER SIZE (IN.)<br />
* Factory provided with the <strong>furnace</strong>. Filters may be<br />
field modified by cutting filter material and support<br />
rods (3) in filters. Alternate sizes and additional filters<br />
may be ordered from your dealer.<br />
COMBUSTION AREA<br />
AND VENT SYSTEM<br />
FILTER<br />
TYPE<br />
16 (1)16x25x1* Cleanable<br />
or (1)16x25x4-5/16 Disposable<br />
20 (1)20x25x1* Cleanable<br />
or (1)20x25x4-5/16 Disposable<br />
24 (1)24x25x1* Cleanable<br />
or (1)24x25x4-5/16 Disposable<br />
!<br />
CAUTION<br />
Use care when cutting support<br />
rods in filters to protect<br />
against flying pieces and<br />
sharp rod ends. Wear safety<br />
glasses, gloves, and appropriate<br />
protective clothing. Failure<br />
to follow this caution could result<br />
in personal injury.<br />
Inspect the combustion area and vent<br />
system before each heating season. An<br />
accumulation of dirt, soot, or rust can<br />
mean a loss of efficiency and improper<br />
performance. Buildups on the main<br />
burners can cause faulty firing. This<br />
“delayed ignition’’ is characterized by<br />
an alarmingly loud sound. If your<br />
<strong>furnace</strong> makes a loud noise when the<br />
main burners are ignited, shut down the<br />
<strong>furnace</strong>—call your servicing dealer.<br />
Use your flashlight and follow these<br />
steps for inspecting the combustion<br />
area and vent system of your <strong>furnace</strong>:<br />
1. Turn off the <strong>gas</strong> and electrical supplies<br />
to the <strong>furnace</strong> and remove the<br />
access doors. (See Fig. 6, 7, and 8.)<br />
2. Carefully inspect the <strong>gas</strong> burner<br />
(see Fig. 23) for dirt, rust, or scale.<br />
Then inspect the inducer, vent connection<br />
area, and the vent pipe for<br />
rust.<br />
NOTE: If dirt, rust, soot, or scale accumulations<br />
are found, call your servicing<br />
dealer. DO NOT OPERATE THE<br />
FURNACE.<br />
3. Inspect the vent pipe for a sag,<br />
holes, or a disconnection. A horizontal<br />
vent pipe must slope upward<br />
away from the <strong>furnace</strong>. If rusty<br />
joints or seams, or signs of water<br />
leakages are found call your dealer<br />
for service.
!<br />
WARNING<br />
If holes caused by deterioration<br />
are found—or holes in the<br />
vent pipe—or if the vent pipe is<br />
obstructed or is not connected—toxic<br />
fumes can escape<br />
into your home. DO NOT OP-<br />
ERATE YOUR FURNACE. Call<br />
your dealer for service. A failure<br />
to follow this warning<br />
could result in personal injury<br />
or death.<br />
23<br />
4. Replace the access doors and restore<br />
<strong>gas</strong> and electrical supplies to<br />
the <strong>furnace</strong>. Be sure bottom door<br />
flange is inside of the <strong>furnace</strong> casing.<br />
(See Fig. 22, 13, 14, and 15.)<br />
5. Start the <strong>furnace</strong> and observe its<br />
operation. If possible, watch the<br />
burner flames. Are they burning<br />
bright blue? If not (or if you suspect<br />
some other malfunction), call your<br />
servicing dealer.<br />
24<br />
7<br />
25<br />
26<br />
27<br />
28<br />
29<br />
BEFORE YOU REQUEST<br />
A “SERVICE CALL”<br />
BEFORE YOU CALL FOR<br />
SERVICE, CHECK FOR<br />
SEVERAL EASILY SOLVED<br />
PROBLEMS:<br />
• Check for sufficient airflow surrounding<br />
the <strong>furnace</strong>. Check the air filter<br />
for dirt. Check for blocked returnair<br />
or supply-air grilles. Be sure they<br />
are open and unobstructed. If this isn’t<br />
the cause, call your servicing dealer.<br />
If your <strong>furnace</strong> isn’t operating at all,<br />
check the following list for easily<br />
solved problems:<br />
• Is your thermostat set above room<br />
temperature? Is the HEAT mode<br />
selected?<br />
• Is the electrical power supply switch<br />
ON? Is the blower access door firmly in
place? Are any fuses blown? (There is<br />
a 3-amp automotive type fuse on the<br />
<strong>furnace</strong> control board.) Has a circuit<br />
breaker tripped?<br />
• Is the manual shutoff valve in the <strong>gas</strong><br />
supply pipe leading to the <strong>furnace</strong><br />
open? Does the lever point in the same<br />
direction that the pipe runs (open)? Or<br />
is it at right angles (closed)?<br />
NOTE: Before proceeding with the<br />
next checks, turn OFF the electrical<br />
power supply to the <strong>furnace</strong>. Remove<br />
the access doors.<br />
• Is the control knob or switch on the<br />
<strong>gas</strong> valve turned to the ON position? If<br />
this or the preceding check shows an<br />
interruption in the <strong>gas</strong> supply, make<br />
sure the <strong>gas</strong> has not been shut off for<br />
safety reasons. If nothing else seems to<br />
be wrong, follow the startup procedures<br />
found on pages 3, 4, and 5 of this<br />
user’s manual.<br />
• If for some reason the vent is<br />
blocked, the draft safeguard switch or<br />
blocked vent shutoff switch (when<br />
used) will shut off the <strong>furnace</strong>. Reset<br />
the switch by pushing the button<br />
located on the switch. (See page 2<br />
for switch location.)<br />
If the switch trips a second time,<br />
turn off the <strong>furnace</strong> and call for<br />
service.<br />
• If your <strong>furnace</strong> still fails to operate,<br />
call your servicing dealer for troubleshooting<br />
and repairs. Tell your dealer<br />
the model and serial numbers for your<br />
<strong>furnace</strong>. (You should have them<br />
recorded on page 8 of this booklet.)<br />
By knowing exactly which <strong>furnace</strong> you<br />
have, the dealer may be able to offer<br />
suggestions over the phone, or save<br />
valuable time through knowledgeable<br />
preparation for the service call.<br />
REGULAR DEALER<br />
MAINTENANCE<br />
In addition to the type of routine maintenance<br />
you might be willing to do,<br />
your <strong>furnace</strong> should be inspected<br />
regularly by a properly trained service<br />
technician. An annual inspection (or<br />
biennial inspection, at least) should<br />
include the following:<br />
1. Inspection of all combustion product<br />
passages—including the burners,<br />
heat exchanger, inducer, and<br />
vent pipe.<br />
2. Inspection of all combustion air<br />
and ventilation air passages and<br />
openings.<br />
3. Close check of all <strong>gas</strong> pipes<br />
leading to (and inside of) your<br />
<strong>furnace</strong> for leaks.<br />
4. Inspection, cleaning, and lubrication<br />
(when required) of the blower<br />
motor and wheel.<br />
8<br />
NOTE: Refer to the unit Service Procedures<br />
for blower motor oiling infor-mation.<br />
When required, the motor should<br />
be oiled by a qualified service technician.<br />
(Wrong oil type or excessive oil is<br />
detrimental to the motor.)<br />
5. Routine inspection and cleaning/<br />
replacement of the air filter.<br />
6. Inspection of all supply- and<br />
return-air ducts for obstructions,<br />
air leaks, and insulation. Any<br />
problems found should be resolved<br />
at this time.<br />
7. Inspection of <strong>furnace</strong> installation<br />
for proper support and any obvious<br />
deterioration of the <strong>furnace</strong>. The<br />
support must be sound and without<br />
sags, gaps, cracks, etc., around the<br />
<strong>furnace</strong> base so as to provide an<br />
air seal between the support and<br />
<strong>furnace</strong>.<br />
8. A check for loose connections<br />
attaching individual components.<br />
Inspection of all electrical wiring<br />
and their connections.<br />
9. Operational check of the <strong>furnace</strong><br />
itself to determine working condition.<br />
Repair or adjustment should<br />
be made at this time.<br />
Ask your servicing dealer for further details<br />
about an economical service contract<br />
that covers seasonal inspections.
INSTALLATION DATA<br />
Date Installed<br />
Dealer Name<br />
Address<br />
City<br />
State Zip<br />
Telephone<br />
FURNACE<br />
Product No.<br />
<strong>Model</strong> No.<br />
Serial No.<br />
ACCESSORIES:<br />
Product No.<br />
<strong>Model</strong> No.<br />
Serial No.<br />
Product No.<br />
<strong>Model</strong> No.<br />
Serial No.<br />
Cancels: OM04-32 OM04-34<br />
© 2000 Bryant Heating & Cooling Systems, 7310 W. Morris St. Indpls., IN 46231 PRINTED IN U.S.A. Catalog No. 5339-306 10-00<br />
12<br />
SPLIT-SYSTEM<br />
OUTDOOR UNIT:<br />
Product No.<br />
<strong>Model</strong> No.<br />
Serial No.<br />
INDOOR COIL:<br />
Product No.<br />
<strong>Model</strong> No.<br />
Serial No.<br />
Product No.<br />
<strong>Model</strong> No.<br />
Serial No.<br />
Product No.<br />
<strong>Model</strong> No.<br />
Serial No.