Power Vented Gas Models FPSH/FPCR/FPST with ... - Geisel
Power Vented Gas Models FPSH/FPCR/FPST with ... - Geisel
Power Vented Gas Models FPSH/FPCR/FPST with ... - Geisel

You also want an ePaper? Increase the reach of your titles
YUMPU automatically turns print PDFs into web optimized ePapers that Google loves.
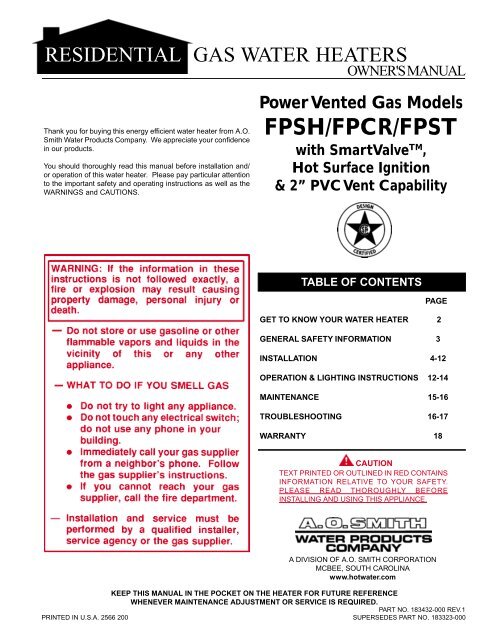
RESIDENTIAL GAS WATER HEATERS<br />
Thank you for buying this energy efficient water heater from A.O.<br />
Smith Water Products Company. We appreciate your confidence<br />
in our products.<br />
You should thoroughly read this manual before installation and/<br />
or operation of this water heater. Please pay particular attention<br />
to the important safety and operating instructions as well as the<br />
WARNINGS and CAUTIONS.<br />
OWNER'S MANUAL<br />
<strong>Power</strong> <strong>Vented</strong> <strong>Gas</strong> <strong>Models</strong><br />
<strong>FPSH</strong>/<strong>FPCR</strong>/<strong>FPST</strong><br />
<strong>with</strong> SmartValve TM ,<br />
Hot Surface Ignition<br />
& 2” PVC Vent Capability<br />
TABLE OF CONTENTS<br />
PAGE<br />
GET TO KNOW YOUR WATER HEATER 2<br />
GENERAL SAFETY INFORMATION 3<br />
INSTALLATION 4-12<br />
OPERATION & LIGHTING INSTRUCTIONS 12-14<br />
MAINTENANCE 15-16<br />
TROUBLESHOOTING 16-17<br />
WARRANTY 18<br />
CAUTION<br />
TEXT PRINTED OR OUTLINED IN RED CONTAINS<br />
INFORMATION RELATIVE TO YOUR SAFETY.<br />
PLEASE READ THOROUGHLY BEFORE<br />
INSTALLING AND USING THIS APPLIANCE.<br />
A DIVISION OF A.O. SMITH CORPORATION<br />
MCBEE, SOUTH CAROLINA<br />
www.hotwater.com<br />
KEEP THIS MANUAL IN THE POCKET ON THE HEATER FOR FUTURE REFERENCE<br />
WHENEVER MAINTENANCE ADJUSTMENT OR SERVICE IS REQUIRED.<br />
PART NO. 183432-000 REV.1<br />
PRINTED IN U.S.A. 2566 200 1<br />
SUPERSEDES PART NO. 183323-000
REPLACEMENT PARTS AND DELIMING PRODUCTS<br />
Replacement parts and recommended delimer may be ordered<br />
through authorized servicers or distributors. Refer to the Yellow<br />
Pages for your A. O. Smith plumber or contact the A. O. Smith<br />
Water Products Company, 5621 W. 115th Street, Alsip, IL 60803,<br />
1-800-433-2545. When ordering parts, provide complete model<br />
and serial numbers (see rating plate), quantity and name of part<br />
desired (as listed in Figure 1). Standard hardware items may be<br />
purchased locally.<br />
GET TO KNOW YOUR WATER HEATER<br />
*CAUTION: 115VAC IN CONTROL HARNESS<br />
AND INSIDE OUTER DOOR<br />
GAS MODELS<br />
<strong>FPSH</strong>/<strong>FPCR</strong>/<strong>FPST</strong><br />
WITH HOT SURFACE IGNITION AND<br />
SMARTVALVE TM - 2” PVC VENT CAPABILITY<br />
FIGURE 1<br />
2<br />
(A) VENT PIPE-EXHAUST<br />
(B) ANODE<br />
(C) HOT WATER OUTLET<br />
(D) OUTLET (115 VAC)<br />
(E) FLUE BAFFLE<br />
(F) GAS SUPPLY<br />
(G) MAIN MANUAL GAS<br />
SHUT OFF VALVE<br />
(H) GROUND JOINT UNION<br />
(J) DIRT LEG<br />
(K) OUTER DOOR<br />
(L) UNION<br />
(M) INLET WATER SHUT<br />
OFF VALVE<br />
(N) COLD WATER INLET<br />
(O) INLET DIP TUBE<br />
WATER<br />
TEMPERATURE<br />
ADJUSTING DIAL<br />
SMARTVALVE TM CONTROL SYSTEM<br />
(P) TEMPERATURE AND<br />
PRESSURE RELIEF VALVE<br />
(Q) EMBLEM AND RATING PLATE<br />
(R) INSULATION<br />
(S) VENT TERMINAL<br />
(T) DRAIN VALVE<br />
(U) HSI BURNER ASSEMBLY<br />
(V) FLUE<br />
(W) DRAIN PAN<br />
(X) GAS VALVE<br />
(Y) CONTROL HARNESS<br />
(Z) CONDENSATE TUBE<br />
(AA) INNER DOOR
GENERAL SAFETY INFORMATION<br />
EXTERNAL DAMAGE<br />
Do not operate the water heater until it has been fully checked<br />
out by a qualified technician, if the water heater:<br />
Has been exposed to fire or damage.<br />
Displays evidence of sooting.<br />
Produces steam or unusually hot water.<br />
If the water heater has been flooded it must be replaced.<br />
CHEMICAL VAPOR CORROSION<br />
WARNING<br />
CORROSION OF THE FLUEWAYS AND VENT SYSTEM MAY<br />
OCCUR IF AIR FOR COMBUSTION CONTAINS CERTAIN<br />
CHEMICAL VAPORS. SUCH CORROSION MAY RESULT IN<br />
FAILURE AND RISK OF ASPHYXIATION.<br />
Spray can propellants, cleaning solvents, refrigerator and air<br />
conditioning refrigerants, swimming pool chemicals, calcium and<br />
sodium chloride (water softener salt), waxes, and process<br />
chemicals are typical compounds which are potentially corrosive.<br />
Do not store products of this sort near the heater. Also, air which<br />
is brought in contact <strong>with</strong> the heater should not contain any of<br />
these chemicals. If necessary, uncontaminated air should be<br />
obtained from remote or outside sources. The limited warranty is<br />
voided when failure of water heater is due to a corrosive<br />
atmosphere. (Reference is made to the limited warranty for<br />
complete terms and conditions).<br />
IMPROPER COMBUSTION<br />
WARNING<br />
ATTIC AND/OR EXHAUST FANS OPERATING ON THE<br />
PREMISES WITH A WATER HEATER CAN RESULT IN CARBON<br />
MONOXIDE POISONING AND DEATH.<br />
OPERATION OF THESE FANS CAN PRODUCE A NEGATIVE<br />
DRAFT IN THE AREA OF THE WATER HEATER PREVENTING<br />
THE PRODUCTS OF COMBUSTION FROM EXHAUSTING<br />
THROUGH THE VENT PIPE.<br />
The venting of the water heater should be inspected by a qualified<br />
service technician at the time of installation and periodically<br />
thereafter to ensure a down-draft condition does not exist.<br />
DO NOT OBSTRUCT THE FLOW OF COMBUSTION AND<br />
VENTILATING AIR. ADEQUATE AIR FOR COMBUSTION AND<br />
VENTILATION MUST BE PROVIDED FOR SAFE OPERATION.<br />
LIQUID PETROLEUM MODELS<br />
WARNING<br />
Water heaters for propane or liquefied petroleum gas (LPG) are<br />
different from natural gas models. A natural gas heater will not<br />
function safely on LP gas and no attempt should be made to<br />
convert a heater from natural gas to LP gas.<br />
LP gas must be used <strong>with</strong> great caution. It is highly explosive<br />
and heavier than air. It collects first in the low areas making its<br />
odor difficult to detect at nose level. If LP gas is present or even<br />
3<br />
suspected, do not attempt to find the cause yourself. Go to a<br />
neighbor's house, leaving your doors open to ventilate the house,<br />
then call your gas supplier or service agent. Keep area clear<br />
until a service call has been made.<br />
At times you may not be able to smell an LP gas leak. One cause<br />
is odor fade, which is a loss of the chemical odorant that gives LP<br />
gas its distinctive smell. Another cause can be your physical<br />
condition, such as having a cold or a diminishing sense of smell<br />
<strong>with</strong> age. For these reasons, the use of a propane gas detector<br />
is recommended.<br />
IF YOU EXPERIENCE AN OUT-OF-GAS SITUATION, DO NOT<br />
TRY TO RELIGHT APLIANCE YOURSELF. Ask your LP delivery<br />
person to relight pilots for you. Only trained LP professionals<br />
should conduct the required safety checks in accordance <strong>with</strong><br />
industry standards.<br />
EXTENDED NON-USE PERIODS<br />
WARNING<br />
HYDROGEN GAS CAN BE PRODUCED IN A HOT WATER<br />
SYSTEM SERVED BY THIS HEATER THAT HAS NOT BEEN<br />
USED FOR A LONG PERIOD OF TIME (GENERALLY TWO<br />
WEEKS OR MORE). HYDROGEN GAS IS EXTREMELY<br />
FLAMMABLE. To reduce the risk of injury under these conditions,<br />
it is recommended that the hot water faucet be opened for several<br />
minutes at the kitchen sink before using any electrical appliance<br />
connected to the hot water system. If hydrogen is present, there<br />
will probably be an unusual sound such as air escaping through<br />
the pipe as the water begins to flow. THERE SHOULD BE NO<br />
SMOKING OR OPEN FLAME NEAR THE FAUCET AT THE TIME<br />
IT IS OPEN.<br />
INSULATION BLANKETS<br />
Insulation blankets available to the general public for external<br />
use on gas water heaters are not approved for use on your A.O.<br />
Smith water heater. The purpose of an insulation blanket is to<br />
reduce the standby heat loss encountered <strong>with</strong> storage tank<br />
heaters. Your A.O. Smith water heater meets and exceeds the<br />
National Appliance Energy Conservation Act standards <strong>with</strong><br />
respect to insulation and standby loss requirements, making an<br />
insulation blanket unnecessary.<br />
WARNING<br />
Should you choose to apply an insulation blanket to this heater,<br />
you should follow these instructions (See Figure 1 for identification<br />
of components mentioned below). Failure to follow these<br />
instructions can restrict the air flow required for proper combustion,<br />
potentially resulting in fire, asphyxiation, serious personal injury<br />
or death.<br />
• Do not cover the outer door, thermostat or temperature &<br />
pressure relief valve.<br />
Do not allow insulation to come <strong>with</strong>in 2" of the floor to prevent<br />
blockage of combustion air flow to the burner.<br />
Do not cover the instruction manual. Keep it on the side of the<br />
water heater or nearby for future reference.<br />
Do obtain new warning and instruction labels from A.O. Smith<br />
for placement on the blanket directly over the existing labels.<br />
Do inspect the insulation blanket frequently to make certain it<br />
does not sag, thereby obstructing combustion air flow.
INSTALLATION<br />
REQUIRED ABILITY<br />
INSTALLATION OR SERVICE OF THIS WATER HEATER<br />
REQUIRES ABILITY EQUIVALENT TO THAT OF A LICENSED<br />
TRADESMAN IN THE FIELD INVOLVED. PLUMBING, AIR<br />
SUPPLY, VENTING AND GAS SUPPLY ARE REQUIRED.<br />
GENERAL<br />
The installation must conform to these instructions and the local<br />
code authority having jurisdiction. In the absence of local codes,<br />
the installation must comply <strong>with</strong> the latest editions of the National<br />
Fuel <strong>Gas</strong> Code ANSI Z223.1/NFPA 54 and the National Electrical<br />
Code, NFPA 70. The former is available from the Canadian<br />
Standards Association, 8501 East Pleasant Valley Road,<br />
Cleveland, OH 44131, and both documents are available from<br />
the National Fire Protection Association, 1 Batterymarch Park,<br />
Quincy, MA 02269.<br />
HIGH ALTITUDE INSTALLATION<br />
WARNING<br />
INSTALLATIONS ABOVE 6500 FEET REQUIRE REPLACEMENT<br />
OF THE BURNER ORIFICE IN ACCORDANCE WITH THE<br />
NATIONAL FUEL GAS CODE (ANSI Z223.1/NFPA 54). FAILURE<br />
TO REPLACE THE ORIFICE WILL RESULT IN IMPROPER AND<br />
INEFFICIENT OPERATION OF THE APPLIANCE, PRODUCING<br />
CARBON MONOXIDE GAS IN EXCESS OF SAFE LIMITS,<br />
WHICH COULD RESULT IN SERIOUS PERSONAL INJURY OR<br />
DEATH.<br />
LOCATION OF HEATER<br />
The heater is design certified by the American <strong>Gas</strong> Association<br />
for installation on combustible flooring in a closet having minimum<br />
clearances from combustible material of: 0" clearance from sides<br />
and rear, 4" from the front and 12" from the top. (Standard<br />
clearance.) If clearances stated on the heater differ from standard<br />
clearances, install water heater according to clearances stated<br />
on heater.<br />
Adequate clearance for servicing this appliance should be<br />
considered before installation, such as changing the anodes, etc<br />
A minimum clearance of 4" must be allowed for access to<br />
replaceable parts such as the thermostats, drain valve and relief<br />
valve.<br />
When installing the heater, consideration must be given to proper<br />
location. Location selected should be as close to the wall as<br />
practicable and as centralized <strong>with</strong> the water piping system as<br />
possible.<br />
AIR REQUIREMENTS<br />
Dilution air temperature must be 100°F or less. In calculating the<br />
free area of a vent opening, the blocking effect of screens, louvers<br />
and grills should be considered. Screens shall not be of a mesh<br />
smaller than 1/4 inch square. If the free area is not known, the<br />
latest edition of National Fuel <strong>Gas</strong> Code ANSI Z223.1<br />
recommends using figures of 20-25 percent free area for wood<br />
louvers or 60-75 percent for metal grills or louvers.<br />
4<br />
UNCONFINED SPACE<br />
In buildings of conventional frame, brick or stone construction,<br />
unconfined spaces may provide adequate air for combustion,<br />
ventilation, and dilution air for power venter.<br />
If the unconfined space is <strong>with</strong>in a building of tight construction<br />
(as defined in the most recent revision of the National Fuel <strong>Gas</strong><br />
Code Handbook), air for combustion, ventilation, and venter<br />
dilution must be obtained from outdoors. The installation<br />
instructions for confined spaces must be followed.<br />
Installation:<br />
Do not install water heater<br />
where flammable products<br />
will be stored or used unless<br />
the main burner and hot<br />
surface igniter are at least<br />
18” above the floor. This will<br />
reduce, but not eliminate, the<br />
risk of vapors being ignited<br />
by the main burner or hot<br />
surface igniter.<br />
CONFINED SPACE<br />
When drawing combustion and dilution air from inside a<br />
conventionally constructed building to a confined space, such a<br />
space shall be provided <strong>with</strong> two permanent openings; ONE<br />
WITHIN 12 INCHES OF THE ENCLOSURE TOP AND ONE IN<br />
OR WITHIN 12 INCHES OF THE ENCLOSURE BOTTOM. Each<br />
opening shall have a free area of one square inch per 1000 Btuh<br />
of the total input of all appliances in the enclosure, but not less<br />
than 100 square inches.<br />
If the confined space is <strong>with</strong>in a building of tight construction, air<br />
for combustion, ventilationand power venter dilution must be<br />
obtained from outdoors. When directly communicating <strong>with</strong> the<br />
outdoors or communicating through vertical ducts, two permanent<br />
openings, located in the above manner, shall be provided. Each<br />
opening shall have a free area of not less than one square inch<br />
per 4000 Btuh of the total input of all appliances in the enclosure.<br />
If horizontal ducts are used, each opening shall have a free area<br />
of not less than one square inch per 2000 Btuh of the total input<br />
of all appliances in the enclosure.<br />
CAUTION<br />
In cold climates provide protection against freeze-up.
THE HEATER SHOULD BE LOCATED IN AN AREA WHERE<br />
LEAKAGE OF THE TANK OR CONNECTIONS WILL NOT<br />
RESULT IN DAMAGE TO THE AREA ADJACENT TO THE<br />
HEATER OR TO LOWER FLOORS OF THE STRUCTURE. When<br />
such locations cannot be avoided, a suitable drain pan should be<br />
installed under the heater, see fig. 1. The pan should have a<br />
minimum length and width of at least 2 inches greater than the<br />
diameter of the heater and should be piped to an adequate drain.<br />
Drain pans suitable for these heaters are available from your<br />
dealer or A.O. Smith Water Products Company, Product Service<br />
Division, 5621 W. 115th Street, Alsip, IL 60803, 1-800-433-2545.<br />
WARNING<br />
DO NOT INSTALL THIS WATER HEATER DIRECTLY ON A<br />
CARPETED FLOOR. A FIRE HAZARD MAY RESULT. Instead<br />
the water heater must be placed on a metal or wood panel<br />
extending beyond the full width and depth by at least 3 inches<br />
(76.2mm) in any direction. If the heater is installed in a carpeted<br />
alcove or closet, the entire floor shall be covered by the panel.<br />
Also, see DRAINING.<br />
WATER CONNECTIONS<br />
Refer to figure 1 for typical installation. A suitable pipe thread<br />
sealant must be used to prevent leakage.<br />
WATER (POTABLE) HEATING AND SPACE<br />
HEATING<br />
1. All piping components connected to this unit for space heating<br />
applications shall be suitable for use <strong>with</strong> potable water.<br />
2. Toxic chemicals, such as those used for boiler treatment, shall<br />
NEVER be introduced into this system.<br />
3. This unit may NEVER be connected to any existing heating<br />
system or component(s) previously used <strong>with</strong> a non-potable<br />
water heating appliance.<br />
4. When the system requires water for space heating at<br />
temperatures higher than required for domestic water<br />
purposes, a tempering valve must be installed. Please refer<br />
to Figure 2 for suggested piping arrangement.<br />
FIGURE 2<br />
CLOSED WATER SYSTEM<br />
A closed system will exist if a back-flow preventer (check valve),<br />
pressure reducing valve, or other similar device is installed in the<br />
cold water line between the water heater and the street main (or<br />
well). Excessive pressure may develop due to the thermal<br />
expansion of heated water causing premature tank failure or<br />
5<br />
intermittent relief valve operation. This type of failure is not<br />
covered by the limited warranty. An expansion tank may be<br />
necessary in the cold water supply to alleviate this situation, see<br />
fig. 1. Contact the local plumbing authority.<br />
If the temperature and pressure relief valve on the appliance<br />
discharges periodically, this may be due to thermal expansion in<br />
a closed water supply system. Contact the water supplier or local<br />
plumbing inspector on how to correct the situation. Do not plug<br />
the temperature and pressure relief valve.<br />
GAS CONNECTIONS<br />
The minimum gas supply pressure is 5.0" W.C for natural gas<br />
(11.0" W.C. for propane).<br />
THE HEATER IS NOT INTENDED FOR OPERATION AT HIGHER<br />
THAN 14.0'' WATER COLUMN SUPPLY PRESSURE.<br />
EXPOSURE TO HIGHER GAS SUPPLY PRESSURE MAY<br />
CAUSE DAMAGE TO THE CONTROL WHICH COULD RESULT<br />
IN FIRE OR EXPLOSION. If overpressure has occurred such as<br />
through improper testing of gas lines or emergency malfunction<br />
of the supply system, the control must be checked for safe<br />
operation. Make sure that the outside vents on the supply<br />
regulators and the safety vent valves are protected against<br />
blockage. These are parts of the gas supply system not the heater.<br />
Vent blockage may occur during ice storms.<br />
IT IS IMPORTANT TO GUARD AGAINST CONTROL FOULING<br />
FROM CONTAMINANTS IN THE GAS WAYS. SUCH FOULING<br />
MAY CAUSE IMPROPER OPERATION, FIRE OR EXPLOSION.<br />
All piping must comply <strong>with</strong> local codes and ordinances or <strong>with</strong><br />
the National Fuel <strong>Gas</strong> Code (ANSI Z223.1/ NFPA-54) whichever<br />
applies. Copper and brass tubing and fittings (except tin lined<br />
copper tubing) shall not be used.<br />
REFER TO FIG. 1 FOR CONNECTION DETAILS. BEFORE<br />
ATTACHING THE GAS LINE BE SURE THAT ALL GAS PIPE IS<br />
CLEAN ON THE INSIDE.<br />
TO TRAP ANY DIRT OR FOREIGN MATERIAL IN THE GAS<br />
SUPPLY LINE, A DIRT LEG (SOMETIMES CALLED DRIP LEG)<br />
MUST BE INCORPORATED IN THE PIPING, FIG. 1. The dirt leg<br />
must be readily accessible. Install in accordance <strong>with</strong><br />
recommendations of serving gas supplier. Refer to the latest<br />
edition of National Fuel <strong>Gas</strong> Code, ANSI Z223.1.<br />
To prevent damage, care must be taken not to apply too much<br />
torque when attaching gas supply pipe to gas valve inlet. The<br />
thermostat inlet has a pad for use <strong>with</strong> back up wrench.<br />
Apply joint compounds (pipe dope) sparingly and only to the male<br />
threads of pipe joints. Do not apply compound to the first two<br />
threads. Use compounds resistant to the action of liquefied<br />
petroleum gases. Do not use teflon tape on gas valve fittings.<br />
DISCONNECT THE APPLIANCE AND ITS INDIVIDUAL SHUT<br />
OFF VALVE FROM THE GAS SUPPLY PIPING SYSTEM DURING<br />
ANY SUPPLY PRESSURE TESTING EXCEEDING 1/2 PSI (3.5<br />
kPa). GAS SUPPLY LINE MUST BE CAPPED WHEN<br />
DISCONNECTED FROM THE HEATER. FOR TEST<br />
PRESSURES AT 1/2 PSI (3.5 kPa) OR LESS, THE APPLIANCE<br />
NEED NOT BE DISCONNECTED, BUT MUST BE ISOLATED<br />
FROM THE SUPPLY PRESSURE TEST BY CLOSING THE MAIN<br />
MANUAL GAS VALVE.
BEFORE PLACING THE HEATER IN OPERATION, CHECK FOR<br />
GAS LEAKAGE. USE SOAP AND WATER SOLUTION OR<br />
OTHER MATERIAL ACCEPTABLE FOR THIS PURPOSE. DO<br />
NOT USE MATCHES CANDLES, FLAME OR OTHER SOURCES<br />
OF IGNITION TO LOCATE GAS LEAKS.<br />
RELIEF VALVE (P)-FIG. 1<br />
A NEW TEMPERATURE AND PRESSURE RELIEF VALVE<br />
COMPLYING WITH THE STANDARD FOR RELIEF VALVES AND<br />
AUTOMATIC GAS SHUT OFF DEVICES FOR HOT WATER<br />
SUPPLY SYSTEMS, ANSI Z21.22 (LATEST EDITION) MUST BE<br />
INSTALLED IN THE HEATER IN THE MARKED OPENING<br />
PROVIDED. THE VALVE MUST BE OF A SIZE (INPUT RATING)<br />
THAT WILL BE ADEQUATE FOR YOUR SIZE HEATER.<br />
Check the metal tag on the relief valve and compare it to the<br />
heater’s rating plate. The pressure rating of relief valve must not<br />
exceed the working pressure shown on the rating plate of the<br />
heater. In addition the hourly Btu rated temperature steam<br />
discharge capacity of the relief valve shall not be less than the<br />
input rating of the heater. NO VALVE IS TO BE PLACED<br />
BETWEEN THE RELIEF VALVE AND TANK. DO NOT PLUG<br />
THE RELIEF VALVE.<br />
The drain line connected to this valve must not contain a reducing<br />
coupling or other restriction and must terminate near a suitable<br />
drain to prevent water damage during valve operation. The<br />
discharge line shall be installed in a manner to allow complete<br />
drainage of both the valve and line. DO NOT THREAD, PLUG<br />
OR CAP THE END OF THE DRAIN LINE.<br />
VENTING<br />
WARNING<br />
NEVER OPERATE THE HEATER UNLESS IT IS VENTED TO<br />
THE OUTDOORS AND HAS ADEQUATE AIR SUPPLY TO AVOID<br />
RISKS OF IMPROPER OPERATION, FIRE, EXPLOSION OR<br />
ASPHYXIATION.<br />
VENT PIPE TERMINATION<br />
NOTE: Before installing power venter determine place of vent<br />
pipe termination. See figure3 on page 7.<br />
IMPORTANT<br />
The vent system must terminate so that proper clearances are<br />
maintained as cited in local codes or the latest edition of the<br />
National Fuel <strong>Gas</strong> Code, ANSI Z223.1, 7.3.4e and 7.8a,b, as<br />
follows:<br />
1. The exit terminals of a mechanical vent system shall be not<br />
less than 7 feet above grade when located adjacent to public<br />
walkways. (Figure. 3)<br />
2. A venting system shall terminate at least 3 feet above any<br />
forced air inlet located <strong>with</strong>in 10 feet. (Figure 3)<br />
6<br />
3. The venting system shall terminate at least 4 feet below, 4 feet<br />
horizontally from or, 1 foot above any door, window or gravity<br />
air inlet into any building.<br />
The manufacturer also recommends that the vent termination<br />
should not be installed closer than 3 feet from an inside corner<br />
of an L shaped structure and not be less than 1 foot above<br />
grade.<br />
The vent shall terminate a minimum of 12'' above expected<br />
snowfall level to prevent blockage of vent termination.<br />
4. In cold climates, it is recommended that vent termination not<br />
be mounted directly above or <strong>with</strong>in 3 feet horizontally from an<br />
oil tank vent or gas meter to avoid potential freeze-up from<br />
condensation.<br />
Plan the vent system layout so that proper clearances are<br />
maintained from plumbing and wiring.<br />
Vent pipes serving power vented appliances are classified by<br />
building codes as “vent connectors”. Required clearances from<br />
combustible materials must be provided in accordance <strong>with</strong><br />
information in this manual under LOCATION OF HEATER and<br />
VENT TERMINAL INSTALLATIONS, and <strong>with</strong> the National Fuel<br />
<strong>Gas</strong> Code and local codes.<br />
IMPORTANT<br />
Plan the layout of the vent system backwards from the vent<br />
termination to the appliance. Take into consideration that an elbow<br />
may be necessary to make the first vent pipe connection to the<br />
blower outlet.<br />
CAUTION<br />
Use only the vent terminal supplied <strong>with</strong> this unit. Termination of<br />
a sidewall vent system <strong>with</strong> a device other than the supplied vent<br />
terminal could affect system performance and result in a safety<br />
hazard.<br />
VENT TERMINAL INSTALLATION<br />
1. After the point of termination has been determined, use the<br />
cover plate as a template to mark the hole for the vent pipe to<br />
insert through the wall. BEWARE OF CONCEALED WIRING<br />
AND PIPING INSIDE OF WALL.<br />
2. If the Vent Terminal is being installed on the outside of a finished<br />
wall, it may be easier to mark both the inside and outside wall.<br />
Align the holes by drilling a hole through the center of the<br />
template from the inside through to the outside. The template<br />
can now be positioned on the outside wall using the drilled<br />
hole as a centering point for the template.<br />
3. A) MASONRY SIDE WALLS<br />
Chisel an opening approximately one half inch larger than the<br />
marked circle.<br />
B) WOODEN SIDE WALLS<br />
Drill a pilot hole approximately one quarter inch outside of the<br />
marked circle. This pilot hole is used as a starting point for a<br />
saws-all or sabre saw blade. Cut around the marked circle<br />
staying approximately one quarter inch outside of the line.<br />
(This will allow the vent pipe to easily slide through the opening.<br />
The resulting gap will be covered up by the vent terminal<br />
cover plates.) Repeat this step on inside wall if necessary.
WARNING<br />
VENT HOOD(S) MAY<br />
BE EXTREMELY HOT<br />
DURING OPERATION<br />
SEQUENCE OF INSTALLATION<br />
This unit can vent through two (2) or three (3) inch PVC pipe and<br />
fittings. The vent terminal supplied <strong>with</strong> the unit must be used for<br />
both two or three inch pipe.<br />
The vent pipe installation can be started from either the blower<br />
discharge or the termination wall. Keep in mind the total vent system<br />
(pipe and elbows) when installing the vent system. (SEE VENT<br />
CHART ON PAGES 9-10.)<br />
FIGURE 4<br />
FIGURE 3<br />
The vent terminal should be kept as close as possible to the outside<br />
wall, but you need to allow at least 1.5 inches of pipe past the wall,<br />
for the wall flange and vent terminal to mount on the pipe.<br />
Before the vent terminal is installed, caulk (not supplied) around the<br />
pipe on the exterior wall and install the wall flange (can be held to the<br />
outside wall by placing some of the caulking on the back of the flange).<br />
Consider all of the 90 degree and 45 degree elbows, plus the number<br />
of feet of pipe that would be needed for the installation of total vent<br />
system.<br />
Review the charts on Page9, to make sure that the vent system is<br />
<strong>with</strong>in the allowed vent configuration.<br />
7<br />
1. The <strong>FPSH</strong>/<strong>FPCR</strong>/<strong>FPST</strong> <strong>Power</strong> Vent <strong>Models</strong> come <strong>with</strong> the<br />
blower assembly installed.<br />
2. After the unit is set in place, make sure the blower assembly<br />
is still mounted securely. Also make sure there is no<br />
damage to the blower.<br />
3. Make sure there is no packing material in the discharge of<br />
the blower or the intake of the dilution air restrictor. See<br />
Fig. 5 for description of blower parts.<br />
4. Make sure that the plastic tubing is still attached from the<br />
air pressure switch to the port on the blower housing.<br />
5. Make sure the ON/OFF switch is in the OFF position and<br />
then connect the outer harness from the blower control box<br />
to the connector on the right side of the gas valve.<br />
The two clips should be installed on the side of the water<br />
heater and the wire placed through the opening in the side<br />
of the clip. The clips should be placed so as to hold the<br />
harness as close as possible to the side of the unit and<br />
away from any hot surfaces.<br />
FIGURE 5
THIS UNIT IS MANUFACTURED WITH AN EXTERNAL<br />
CONTROL HARNESS FOR EASIER REPLACEMENT IF THE<br />
HARNESS OR CONNECTORS GET DAMAGED.<br />
6. Do not plug in power cord until vent system is completely<br />
installed. The <strong>Power</strong> Vent operates on 110-120 Vac, therefore<br />
a grounded outlet must be <strong>with</strong>in reach of the six (6) foot flexible<br />
power cord supplied <strong>with</strong> the unit (see fig. 1). The power cord<br />
supplied may be used only where local codes permit. If local<br />
codes do not permit the use of a flexible power supply cord:<br />
a.)Make sure the unit is unplugged from wall outlet. Remove<br />
screw and open access panel on side of control box.<br />
b.) Cut the flexible power cord, leaving enough to be able<br />
to make connections, then remove the strain relief fitting<br />
from box.<br />
c.) Install suitable conduit fitting in top of enclosure and<br />
then follow (D) and (E) below.<br />
d.) Splice field wiring into existing wiring using code authorized<br />
method (wire nuts, etc.).<br />
e.) Be certain that neutral and line connections are not reversed<br />
when making these connections.<br />
f.) Close panel on the side of control box, make sure that access<br />
panel issecured shut.<br />
CAUTION<br />
LABEL ALL WIRES PRIOR TO DISCONNECTION WHEN<br />
SERVICING CONTROLS. WIRING ERRORS CAN CAUSE<br />
IMPROPER AND DANGEROUS OPERATION. VERIFY PROPER<br />
OPERATION AFTER SERVICING.<br />
FIGURE 6<br />
8<br />
INSTALLATION OF VENT SYSTEM<br />
(Refer to Figures 3, 4, 5,7 and 8 as guides).<br />
1. Plan the route of the vent system from the discharge of the<br />
blower to the planned location of the vent terminal. Layout the<br />
total vent system to use minimum of vent pipe and elbows.<br />
2. Refer to charts on page 9, for instructions for total vent length,<br />
for both two (2) and three (3) inch vent pipe. See information<br />
below on what types of material can be used for pipe and<br />
fittings. Note: Use only vent terminal supplied <strong>with</strong> unit!<br />
3. See the instructions on pages 11 and 12 for the proper method<br />
of cutting and cementing the PVC pipe and fittings.<br />
4. A 2” elbow or coupling should be mounted to the discharge or<br />
the blower and secured <strong>with</strong> silicone sealant.<br />
NOTE: This unit can be vented using only PVC (Class<br />
160,ASTM D-2241; Schedule 40,ASTM D-1785; or Cellular<br />
Core Schedule 40 DWV,ASTM F-891), Schedule 40<br />
CPVC(ASTM F-441), or ABS(ASTM D-2661) pipe. The fittings,<br />
other than the TERMINATION, should be equivalent to PVC-<br />
DWV fittings meeting ASTM D-2665 (Use CPVC fittings, ASTM<br />
F-438 for CPVC pipe and ABS fittings, ASTM D-2661/3311 for<br />
ABS pipe. If CPVC or ABS pipe and fittings are used, then the<br />
proper cement must be used for all joints, including joining the<br />
pipe to the Termination Tee (PVC Material).<br />
PVC Materials should use ASTM D-2564 Grade Cement;<br />
CPVC Materials should use ASTM F-493 Grade Cement and;<br />
ABS Materials should use ASTM D-2235 Grade Cement.<br />
NOTE: For Water Heaters in locations <strong>with</strong> high ambient<br />
temperatures (above 100°F) and/or insufficient dilution air, it<br />
is recommended that CPVC or ABS pipe and fittings (MUST<br />
USE SUPPLIED VENT TERMINAL) be used.<br />
FIGURE 7<br />
5. The temperature of the flue gases leaving the blower is about<br />
140°F to 175°F after mixing <strong>with</strong> the dilution air in the inlet<br />
adapter of the blower. Even <strong>with</strong> a high concentration of room<br />
air taken into the vent system for dilution air, there will be some<br />
installations where condensate will be formed in the horizontal<br />
or vertical run of pipe. Any of this condensate that runs back<br />
into the blower housing must be drained out of the blower
TABLE FOR VENT PIPE LENGTH FOR <strong>FPSH</strong>/<strong>FPCR</strong> UNITS<br />
TWO INCH DIAMETER PIPE<br />
**Number of 90° Elbows **Number of 45° Elbows Minimum Pipe Maximum Pipe<br />
One (1) None 2 Ft. 46 Ft.<br />
One (1) One (1) 1 Ft. 42 Ft.<br />
Two (2) None 1 Ft. 38 Ft.<br />
Two (2) One (1) 1 Ft. 34 Ft.<br />
Three (3) None 1 Ft. 30 Ft.<br />
Three (3) One (1) 1 Ft. 26 Ft.<br />
Four (4) None 1 Ft. 22 Ft.<br />
Four (4) One (1) 1 Ft. 18 Ft.<br />
THREE INCH DIAMETER PIPE<br />
** Number of 90° Elbows **Number of 45° Elbows Minimum Pipe Maximum Pipe<br />
One (1) None 2 Ft. 75 Ft.<br />
One (1) One (1) 2 Ft. 72.5 Ft.<br />
Two (2) None 1 Ft. 70 Ft.<br />
Two (2) One (1) 1 Ft. 67.5 Ft.<br />
Three (3) None 1 Ft. 65 Ft.<br />
Three (3) One (1) 1 Ft. 62.5 Ft.<br />
Four (4) None 1 Ft. 60 Ft.<br />
Four (4) One (1) 1 Ft. 57.5 Ft.<br />
***Five (5) None 1 Ft. 55 Ft.<br />
***Five (5) One (1) 1 Ft. 52.5 Ft.<br />
***Six (6) None 1 Ft. 50 Ft.<br />
** One (1) 90° elbow is equal to two (2) 45° elbows.<br />
*** It is not recommended that more than (4) 90° elbows be used, or a combination of three (3) 90° and two (2) 45° elbows, but as long as the<br />
total length is less than in the chart above, the vent system is acceptable.<br />
Note: For the two inch vent, one (1) 90° elbow is approximately the same as eight (8) feet of pipe. For the three inch vent, one (1) 90° elbow is<br />
approximately the same as five (5) feet of pipe.<br />
TABLE FOR VENT PIPE LENGTH FOR <strong>FPST</strong> UNITS<br />
TWO INCH DIAMETER PIPE<br />
**Number of 90° Elbows **Number of 45° Elbows Minimum Pipe Maximum Pipe<br />
One (1) None 2 Ft. 27 Ft.<br />
One (1) One (1) 1 Ft. 23 Ft.<br />
Two (2) None 1 Ft. 19 Ft.<br />
Two (2) One (1) 1 Ft. 15 Ft.<br />
Three (3) None 1 Ft. 11 Ft.<br />
Three (3) One (1) 1 Ft. 7 Ft.<br />
Four (4) None 1 Ft. 3 Ft.<br />
THREE INCH DIAMETER PIPE<br />
** Number of 90° Elbows **Number of 45° Elbows Minimum Pipe Maximum Pipe<br />
One (1) None 2 Ft. 65 Ft.<br />
One (1) One (1) 2 Ft. 62.5 Ft.<br />
Two (2) None 1 Ft. 60 Ft.<br />
Two (2) One (1) 1 Ft. 57.5 Ft.<br />
Three (3) None 1 Ft. 55 Ft.<br />
Three (3) One (1) 1 Ft. 52.5 Ft.<br />
Four (4) None 1 Ft. 50 Ft.<br />
Four (4) One (1) 1 Ft. 47.5 Ft.<br />
***Five (5) None 1 Ft. 45 Ft.<br />
***Five (5) One (1) 1 Ft. 42.5 Ft.<br />
***Six (6) None 1 Ft. 40 Ft.<br />
** One (1) 90° elbow is equal to two (2) 45° elbows.<br />
*** It is not recommended that more than (4) 90° elbows be used, or a combination of three (3) 90° and two (2) 45° elbows, but as long as the<br />
total length is less than in the chart above, the vent system is acceptable.<br />
Note: For the two inch vent, one (1) 90° elbow is approximately the same as eight (8) feet of pipe. For the three inch vent, one (1) 90° elbow is<br />
approximately the same as five (5) feet of pipe.<br />
9
through the drain in the bottom of the housing. A plastic tube<br />
is furnished for the condensate to be drained away from the<br />
water heater.<br />
A method to keep the condensate from draining back to the<br />
blower, in a horizontal run, is to install the pipe <strong>with</strong> a slight<br />
downward slope. The pipe can slope 1/4 inch per five (5) feet<br />
of pipe, but no more than 1.5 inches in the total vent length.<br />
The vent system should be supported every five(5) feet of<br />
vertical run and every three (3) feet of horizontal run of vent<br />
pipe length. All pipe and fittings should be joined by the proper<br />
procedures discussed on pages 11 and 12, under the heading:<br />
VENT PIPE PREPARATION.<br />
VERTICAL VENT THROUGH ROOF<br />
This unit is approved for venting through the roof <strong>with</strong> only the<br />
vent terminal that is included <strong>with</strong> the unit. All proper flashing or<br />
“BOOT” should be used to seal the pipe where it exits the roof.<br />
The total vent system should not exceed that which is specified in<br />
the chart on page 9.<br />
All of the pipe should be secured as per the instructions in the<br />
“INSTALLATION OF VENT SYSTEM” on pages 8 and 9.<br />
VERTICAL VENT TERMINATION RESTRICTIONS<br />
1. Minimum of twelve (12) inches above the roof or twelve (12)<br />
inches above the anticipated snow level. Provide proper<br />
support for all pipe protruding through the roof.<br />
2. Four (4) feet from or one (1) foot above any gable, dormer, or<br />
other roof structure <strong>with</strong> access to interior of building (i.e.-vent,<br />
window etc.).<br />
3. Three (3) feet above any forced air inlet located <strong>with</strong>in ten (10)<br />
feet.<br />
FIGURE 8<br />
10<br />
VENT PIPE PREPARATION<br />
1. INITIAL PREPARATION<br />
A. Make sure the solvent cement you are planning to use is<br />
designed for the specific application you are attempting.<br />
B. Know the physical and chemical characteristics and<br />
limitations of the PVC and CPVC piping materials that<br />
you are about to use.<br />
C. Know the reputation of your manufacturer and their<br />
products.<br />
D. Know your own qualifications or those of your contractor.<br />
The solvent welding technique of joining PVC and CPVC<br />
pipe is a specialized skill just as any other pipe fitting<br />
technique.<br />
E. Closely supervise the installation and inspect the finished<br />
job before start-up.<br />
F. Contact the manufacturer, supplier, or competent<br />
consulting agency if you have any questions about the<br />
application or installation of PVC and CPVC pipe.<br />
G. Take the time and effort to do a professional job.<br />
Shortcuts will only cause you problems and delays in<br />
start-up. By far, the majority of failures in PVC and CPVC<br />
systems are the result of shortcuts and/or improper<br />
joining techniques.<br />
2. SELECTION OF MATERIALS<br />
Cutting Device - Saw or Pipe Cutter<br />
Deburring Tool, Knife, File, or Beveling Machine (2" and<br />
above)<br />
Brush - Pure Bristle<br />
Rag - Cotton (Not Synthetic)<br />
Primer and Cleaner<br />
Solvent Cement - PVC for PVC Components and CPVC for<br />
CPVC Components<br />
Containers - Metal or Glass to hold Primer and Cement .<br />
Select the type of PVC or CPVC materials to be used on<br />
the basisof their application <strong>with</strong> respect to chemical<br />
resistance, pressure rating, temperature characteristics, etc.<br />
Insertion Tool - Helpful for larger diameter pipe and fittings<br />
(6" and above).<br />
PRIMER<br />
It is recommended that Tetrahydrofuran (THF) be used to prepare<br />
the surfaces of pipe and fittings for solvent welding. Do not use water,<br />
rags, gasoline or any other substitutes for cleaning PVC or CPVC<br />
surfaces. A chemical cleaner such as MEK may be used.<br />
CEMENT<br />
The cement should be a bodied cement of approximately 500 to<br />
1600 centipoise viscosity containing 10-20% (by weight) virgin<br />
PVC material solvated <strong>with</strong> tetrahydrofuran (THF). Small quantities<br />
of dimethyl formamide (DMF) may be included to act as a retarding<br />
agent to extend curing time. Select the proper cement; Schedule<br />
40 cement should be used for Schedule 40 pipe. Never use allpurpose<br />
cements, commercial glues and adhesives or ABS<br />
cement to join PVC or CPVC pipe and fittings.<br />
SAFETY PRECAUTION: PRIMERS AND CEMENTS ARE<br />
EXTREMELY FLAMMABLE, AND MUST NOT BE STORED OR<br />
USED NEAR HEAT OR OPEN FLAME. ALSO, USE ONLY IN A<br />
WELL-VENTILATED AREA.
APPLICATORS<br />
Select a suitable pure bristle type paint brush. Use a proper width<br />
brush or roller to apply the primer and cement (see chart below).<br />
Speedy application of cement is important due to its fast drying<br />
characteristics. IMPORTANT NOTE: A dauber type applicator<br />
should only be used on pipe sizes 2" and below. For larger<br />
diameter pipe, a brush or roller must be used.<br />
RECOMMENDED BRUSH* SIZE FOR PRIMER<br />
AND CEMENT APPLICATIONS<br />
Nominal Pipe SizeBrush Width<br />
(IPS) (INS.)<br />
2 1-1/2<br />
3 1-1/2 - 2-1/2<br />
*USE ONLY NATURAL BRISTLE<br />
3. MAKING THE JOINT<br />
A. Cutting<br />
Pipe must be squarely cut to allow for the proper interfacing of<br />
the pipe end and the fitting socket bottom. This can be<br />
accomplished <strong>with</strong> a miter box saw or wheel type cutter. Wheel<br />
type cutters are not generally recommended for larger<br />
diameters since they tend to flare the corner of the pipe end. If<br />
this type of cutter is used, the flare on the end must be<br />
completely removed.<br />
NOTE: <strong>Power</strong> saws should be specifically designed to cut plastic<br />
pipe.<br />
STEP A<br />
B. Deburring<br />
Use a knife, plastic pipe deburring tool, or file to remove burrs<br />
from the end of small diameter pipe. Be sure to remove all<br />
burrs from around the inside as well as the outside of the pipe.<br />
A slight chamfer (bevel) of about 10°-15° should be added to<br />
the end to permit easier insertion of the pipe into the end of<br />
the fitting. Failure to chamfer the edge of the pipe may remove<br />
cement from the fitting socket, causing the joint to leak.<br />
STEP B<br />
C. Test dry fit of the joint<br />
Tapered fitting sockets are designed so that an interfaced fit<br />
should occur when the pipe is inserted about 1/3 to 2/3 of the<br />
way into the socket. Occasionally, when pipe fitting dimensions<br />
11<br />
are at the tolerance extremes, it will be possible to fully insert<br />
dry pipe to the bottom of the fitting socket. When this happens,<br />
a sufficient quantity of cement must be applied to the joint to<br />
fill the gap between the pipe and fitting. The gap must be filled<br />
to obtain a strong, leak-free joint.<br />
D. Inspection, cleaning, priming<br />
Visually inspect the inside of the pipe and fitting sockets and<br />
remove all dirt, grease or moisture <strong>with</strong> a clean dry rag. If<br />
wiping fails to clean the surfaces, a chemical cleaner must be<br />
used. Check for possible damage such as splits or cracks<br />
and replace if necessary.<br />
Depth-of-entry<br />
Marking the depth of entry is a way to check if the pipe has<br />
reached the bottom of the fitting socket in Step F. Measure<br />
the fitting depth and mark this distance on the pipe O.D. You<br />
may want to add several inches to the distance and make a<br />
second mark as the primer and cement will most likely destroy<br />
your first one.<br />
Apply primer to the surface of the pipe and fitting socket <strong>with</strong> a<br />
natural bristle brush (see chart on this page). This process<br />
softens and prepares the PVC or CPVC for the solvent<br />
cementing step. Move quickly and <strong>with</strong>out hesitation to the<br />
cementing procedure while the surfaces are still wet <strong>with</strong> primer.<br />
STEP E<br />
E. Application of solvent cement<br />
Apply the solvent cement evenly and quickly around the<br />
outside of the pipe at a width a little greater than the depth<br />
of the fitting socket.<br />
Apply a light coat of cement evenly around the inside of the<br />
fitting socket. Avoid puddling.<br />
Apply a second coat of cement to the pipe end.<br />
NOTE: Cans of cement and primer should be closed at all times<br />
when not in use to prevent evaporation of chemicals and hardening<br />
of cement. They are also very flammable and should be kept<br />
away from heat or flame.<br />
STEP F
F. Joint assembly<br />
Working quickly, insert the pipe into the fitting socket bottom<br />
and give the pipe or fitting a 1/4" turn to evenly distribute the<br />
cement. Do not continue to rotate the pipe after it has hit the<br />
bottom of the fitting socket. A good joint will have sufficient<br />
cement to make a bead all the way around the outside of the<br />
fitting hub. The fitting will have a tendency to slide back while<br />
the cement is still wet so hold the joint together for about 15<br />
seconds.<br />
STEP G<br />
G. Cleanup and joint movement<br />
Remove all excess cement from around the pipe and fitting<br />
<strong>with</strong> a dry cotton rag. This must be done while the cement is<br />
still soft.<br />
The joint should not be disturbed immediately after the<br />
cementing procedure, and sufficient time should be allowed<br />
for proper curing of the joint. Exact drying time is difficult to<br />
predict because it depends on variables such as temperature,<br />
humidity and cement integrity. For more specific information,<br />
you should contact your solvent cement manufacturer.<br />
T & P VALVE and PIPE INSULATION (On Selected <strong>Models</strong>)<br />
Remove insulation for T & P<br />
Valve and pipe connections<br />
from carton.<br />
Fit pipe insulation over the incoming<br />
cold water line and the<br />
hot water line. Make sure that<br />
the insulation is against the<br />
top cover of the heater.<br />
Fit T & P valve insulation over<br />
valve. Make sure that the<br />
insulation does not interfere<br />
<strong>with</strong> the lever of the T & P<br />
valve.<br />
Secure all insulation using tape.<br />
OPERATION<br />
WARNING<br />
NEVER OPERATE THE HEATER WITHOUT FIRST BEING<br />
CERTAIN IT IS FILLED WITH WATER AND A TEMPERATURE<br />
AND PRESSURE RELIEF VALVE IS INSTALLED IN THE RELIEF<br />
VALVE OPENING OF THE HEATER. DO NOT ATTEMPT TO<br />
OPERATE HEATER WITH COLD WATER INLET VALVE<br />
CLOSED.<br />
12<br />
TO OPERATE THE WATER HEATER<br />
FILLING<br />
1. Close the heater drain valve by turning handle clockwise .<br />
Fig. 1 (T)<br />
2. Open a nearby hot water faucet to permit the air in the system<br />
to escape.<br />
3. Fully open the cold water inlet pipe valve (allowing the heater<br />
and piping to be filled. Fig. 1(M)<br />
4. Close the hot water faucet as water starts to flow from the<br />
faucet.<br />
5. The heater is ready to be operated.<br />
TEMPERATURE REGULATION<br />
WARNING<br />
THIS WATER HEATER IS EQUIPPED WITH AN ADJUSTABLE<br />
THERMOSTAT TO CONTROL WATER TEMPERATURE. HOT<br />
WATER TEMPERATURES REQUIRED FOR AUTOMATIC<br />
DISHWASHER AND LAUNDRY USE CAN CAUSE PAINFUL<br />
SCALDING WITH POSSIBLE SERIOUS AND PERMANENT<br />
INJURY. THE TEMPERATURE AT WHICH INJURY OCCURS<br />
VARIES WITH THE PERSON'S AGE AND THE TIME OF<br />
EXPOSURE. THE SLOWER RESPONSE TIME OF CHILDREN,<br />
AGED OR DISABLED PERSONS INCREASES THE HAZARDS<br />
TO THEM. NEVER ALLOW SMALL CHILDREN TO USE A HOT<br />
WATER TAP OR TO DRAW THEIR OWN BATH WATER. NEVER<br />
LEAVE A CHILD OR DISABLED PERSON UNATTENDED IN A<br />
BATHTUB OR SHOWER.<br />
THE WATER HEATER SHOULD BE LOCATED IN AN AREA<br />
WHERE THE GENERAL PUBLIC DOES NOT HAVE ACCESS.<br />
IF A SUITABLE AREA IS NOT AVAILABLE, A COVER SHOULD<br />
BE INSTALLED OVER THE THERMOSTAT TO PREVENT<br />
TAMPERING. Suitable covers are available through A.O. Smith<br />
Water Products Company, 5621 W. 115th Street, Alsip, IL 60803.<br />
It is recommended that lower water temperatures be used to avoid<br />
the risk of scalding. It is further recommended, in all cases, that<br />
the water temperature dial be set for the lowest temperature which<br />
satisfies your hot water needs. This will also provide the most<br />
energy efficient operation of the water heater. The water<br />
temperature adjusting dial was factory set at the lowest<br />
temperature; Turning the dial counterclockwise decreases<br />
temperature, and clockwise increases temperature.<br />
SETTING THE WATER HEATER TEMPERATURE AT 120°F<br />
(APPROX. "HOT" MARK ON TEMPERATURE SETTING DIAL<br />
OF GAS VALVE) WILL REDUCE THE RISK OF SCALDS. Some<br />
states require settings at specific lower temperatures.<br />
Figure 9 shows the approximate water temperatures produced at<br />
various thermostat dial settings. Short repeated heating cycles<br />
caused by small hot water uses can cause temperatures at the<br />
point of use to exceed the thermostat setting by up to 30°F. If you<br />
experience this type of use you should consider using lower<br />
temperature settings to reduce scald hazards.
FOR YOUR SAFETY READ BEFORE OPERATING<br />
WARNING: If you do not follow these instructions exactly, a fire or<br />
explosion may result causing property damage, personal injury or loss<br />
of life.<br />
BEFORE OPERATING: ENTIRE SYSTEM MUST BE FILLED WITH WATER AND AIR PURGED FROM ALL LINES.<br />
A. This appliance does not have a pilot. It is equipped<br />
<strong>with</strong> an ignition device which automatically lights the<br />
burner. Do NOT try to light the pilot by hand.<br />
B. BEFORE OPERATING smell all around the<br />
appliance area for gas. Be sure to smell next to the<br />
floor because some gas is heavier than air and will<br />
settle on the floor.<br />
WHAT TO DO IF YOU SMELL GAS:<br />
Do not try to light any appliance.<br />
Do not touch any electric switch;<br />
do not use any phone in your building.<br />
Immediately call your gas supplier from a neighbor’s<br />
phone. Follow the gas supplier’s instructions.<br />
1. STOP! Read the safety information above<br />
on this label.<br />
2. Turn the “ON/OFF” switch on the blower control box<br />
to the “OFF” position.<br />
3. Set the thermostat to the lowest setting. Turn<br />
thermostat dial fully counterclockwise until it<br />
stops.<br />
OPERATING INSTRUCTIONS<br />
TO TURN OFF GAS TO APPLIANCE<br />
A. Set thermostat to the lowest setting.<br />
B. Turn off all electric power to the appliance if service is to be performed.<br />
13<br />
If you cannot reach your gas supplier, call the fire<br />
department.<br />
C. Use only your hand to turn the gas control lever.<br />
Never use tools. If the lever will not push in or turn<br />
by hand, don’t try to repair it, call a qualified service<br />
technician. Force or attempted repair may result in<br />
a fire or explosion.<br />
D. Do not use this appliance if any part has been under<br />
water. Immediately call a qualified service technician<br />
to inspect the appliance and to replace any part of<br />
the control system and any gas control which has<br />
been under water.<br />
4. This appliance is equipped <strong>with</strong> a device which<br />
automatically lights the burner.<br />
DO NOT TRY TO LIGHT THE BURNER BY<br />
HAND.<br />
5. Wait five (5) minutes to clear out any gas. If you<br />
then smell gas, STOP! Follow “B” in the<br />
safety information above on this label.<br />
If you don’t smell gas, go to the next step.<br />
6. Set thermostat to desired setting.<br />
7. Turn on all electrical power to the appliance.<br />
8. If the appliance will not operate, follow the<br />
instructions “TO TURN OFF GAS TO APPLIANCE”<br />
and call your technician or gas supplier.<br />
9. WATER TEMPERATURE ADJUSTMENT<br />
Turn temperature knob by hand to the desired<br />
temperature.<br />
Hot is approximately 120°F.<br />
CAUTION: Hotter water increases the<br />
risk of scald injury. Consult the<br />
instruction manual before changing<br />
temperature.<br />
WARNING: TURN OFF ALL ELECTRIC<br />
POWER BEFORE SERVICING
Time to Produce 2nd & 3rd<br />
Temperature Setting Degree Burns on Adult Skin<br />
VERY HOT= approx. 160*F About 1/2 second<br />
C = approx. 150*F About 1-1/2 seconds<br />
B = approx. 140*F Less than 5 seconds<br />
A = approx. 130*F About 30 seconds<br />
HOT = approx. 120*F More than 5 minutes<br />
LOW = approx. 80*F - - - - - - - - - - - - - - - -<br />
FIGURE 9<br />
Valves for reducing the point-of-use temperature by mixing cold<br />
and hot water are available. See figure 2. Also available are<br />
inexpensive devices that attach to faucets to limit hot water<br />
temperatures. Contact a licensed plumber or the local plumbing<br />
authority.<br />
SHOULD OVERHEATING OCCUR OR THE GAS SUPPLY FAIL<br />
TO SHUTOFF, TURN OFF THE MANUAL GAS CONTROL VALVE<br />
TO THE APPLIANCE. SEE FIGURE 1(G).<br />
WATER HEATING IGNITION SEQUENCE<br />
(Make sure gas and electric power are connected properly)<br />
1) The ignition control module is powered and monitors the<br />
system, waiting for a call for heat from the thermostat.<br />
2) The thermostat calls for heat by reading a resistance value<br />
<strong>with</strong>in a given range directly proprtional to water temperature.<br />
3) The control Module:<br />
a) Checks the pressure switch for an open circuit.<br />
b) Energizes the blower.<br />
c) Checks the pressure switch for a closed circuit to prove<br />
draft.<br />
d) Sends line voltage to the hot surface igniter <strong>with</strong> a 7-second<br />
warm up period.<br />
e) Opens the gas valve and checks the sensing rod for flame.<br />
4) The burner heats the water to the desired thermostat setting.<br />
a) The resistance in the thermostat rises to the value selected<br />
by the temperature control knob.<br />
b) The control module closes the gas valve and 5 seconds<br />
later, removes power from the blower.<br />
5) Cycle is completed.<br />
14<br />
FIGURE 10<br />
CONTROL SEQUENCE - HOT SURFACE DIRECT IGNITION<br />
Pre-purge 5 sec.<br />
HSI Warm-up 7 sec. 1st try, then 12 sec.<br />
Ignition Activation Period 3 sec.<br />
Flame Recognition Period 1sec.<br />
Ignition Trial 4sec.<br />
Interpurge 30sec.<br />
Post-purge 5sec.<br />
Retries 3<br />
Reset from Lockout 1 hr.<br />
Flame Sensing (Nominal)<br />
HSI Off/Run Mode 0.4µ
MAINTENANCE<br />
WARNING<br />
DISCONNECT FROM ELECTRICAL SUPPLY BEFORE<br />
SERVICING UNIT.<br />
FOR YOUR SAFETY, WATER HEATER SERVICE SHOULD BE<br />
PERFORMED ONLY BY A QUALIFIED SERVICE TECHNICIAN.<br />
READ THE GENERAL SAFETY INFORMATION SECTION FIRST.<br />
USERS OF THIS APPLIANCE SHOULD BE AWARE THAT GAS<br />
COMPONENTS WEAR OUT OVER A PERIOD OF TIME. THE<br />
GAS CARRYING COMPONENTS OF THIS APPLIANCE<br />
SHOULD BE INSPECTED FOR PROPER OPERATION<br />
PERIODICALLY BY A QUALIFIED SERVICE TECHNICIAN.<br />
MAIN BURNER -FIG. 1<br />
Check main burner every 12 months for proper flame<br />
characteristics. This is done by removing door(s) on heater, fig.<br />
1. The main burner should provide complete combustion of gas;<br />
ignite rapidly; give reasonably quiet operation; cause no excessive<br />
flame lifting from burner ports. Make sure that the flow of<br />
combustion and ventilation air is not blocked.<br />
If proper flame characteristics are not evident, check for<br />
accumulation of lint or other foreign material that restricts or blocks<br />
the air openings in the heater or burner. Also check AIR<br />
REQUIREMENTS.<br />
WARNING<br />
SOOT BUILD-UP INDICATES A PROBLEM THAT REQUIRES<br />
CORRECTION BEFORE FURTHER USE. Consult <strong>with</strong> a qualified<br />
service technician.<br />
Should the main burner or burner air openings require cleaning,<br />
turn the blower switch to “OFF” position and allow the burner to<br />
cool. Remove the burner and clean <strong>with</strong> a soft brush. Clean<br />
main burner orifice <strong>with</strong> a suitable soft material.<br />
HIGH TEMPERATURE LIMIT SWITCH<br />
(Single-UseType Energy Cut Off)<br />
The thermostat has a built-in limit switch which will actuate in<br />
case of excessive water temperatures. The heater cannot be<br />
relit until the ECO (labeled as single-use type) is replaced It is<br />
important that a serviceman be called to determine the reason<br />
for limit operation and thus avoid repeated thermostat<br />
replacement. Lower the temperature adjustment dial setting on<br />
new control.<br />
VENTING SYSTEM (S)-FIG. 10<br />
HAVE VENTING SYSTEM CHECKED EVERY SIX MONTHS<br />
FOR OBSTRUCTIONS AND/OR DETERIORATION IN VENT<br />
PIPING.<br />
POWER VENTER MAINTENANCE<br />
should be checked periodically for any accumulation of dust and<br />
lint. Any build up of dirt in the screen can result in insufficient<br />
dilution air and excessive vent temperatures that could cause<br />
heat damage to the PVC pipe.<br />
The venter must be inspected four times a year. Points of<br />
inspection are:<br />
1. MOTOR - Motor must rotate freely.<br />
2. WHEEL - Wheel must be clean of soot, ash, lint or any other<br />
coating which inhibits either rotation or air flow. Remove all<br />
foreign material from vent system before operating.<br />
3. The pressure switch part inside the power venter must be open<br />
and free from deposits of ssot, carbon, etc.<br />
For safety and satisfactory operation it is recommended that the<br />
heater be checked once a year by a competent service person.<br />
T & P VALVE<br />
At least once a year, the temperature and pressure relief valve<br />
must be checked to ensure that it is in operating condition. Lift<br />
the lever at the top of the valve several times until the valve seats<br />
properly and operates freely.<br />
DANGER<br />
THE WATER PASSING OUT OF THE VALVE DURING THIS<br />
CHECKING OPERATION MAY BE EXTREMELY HOT. AVOID<br />
CONTACT AND DISCHARGE SAFELY TO PREVENT WATER<br />
DAMAGE.<br />
DRAINING (T)-FIG. 1<br />
If the heater is to be shut off and exposed to freezing temperatures,<br />
it must be drained. Water, if left in the tank and allowed to freeze,<br />
will damage the heater.<br />
Turn off the gas and cold water inlet valve to the heater.<br />
Open a nearby hot water faucet and the heater drain valve.<br />
BE CAREFUL TO GRASP THE DRAIN VALVE HANDLE SO<br />
THAT THE HAND IS NOT EXPOSED TO HOT WATER. IF<br />
DESIRED, A HOSE MAY BE CONNECTED TO THE DRAIN<br />
VALVE TO CARRY THE WATER AWAY.<br />
DANGER:<br />
The water MAY BE HOT.<br />
The drain valve must be left open during the shutdown period.<br />
To restart heater, refer to the FILLING instructions under<br />
OPERATION.<br />
Periodically open the drain valve and allow the water to run until<br />
it flows clean. This will help prevent sediment build-up in the<br />
tank.<br />
It is normal for lime and scale deposits to form <strong>with</strong>in the tank.<br />
Such deposits will not be removed by periodic draining. It is<br />
necessary to chemically delime the affected parts in water areas<br />
where such deposits are encountered. See page 2 for<br />
recommended deliming information.<br />
CONDENSATION<br />
CAUTION<br />
The air flow restrictor screen on the inlet side of the blower unit Water vapor can condense on the cooler surfaces of the tank<br />
15
forming droplets, these drip into the fire or run out on the floor.<br />
This is common at the time of startup after installation, during<br />
periods of time when incoming water is very cold, or the heater<br />
may be undersized for the requirements.<br />
Droplets from the bottom of the flue may be due to corrosive<br />
combustion products or improper vent. Check <strong>with</strong> your dealer<br />
for more information.<br />
16<br />
CATHODIC PROTECTION - ANODE (FIG. 1)<br />
The anode rod <strong>with</strong>in the tank is designed to be slowly consumed<br />
cathodically, minimizing corrosion in the glass lined tank. A<br />
hydrogen sulfide (rotten egg) odor may result if water contains<br />
high sulfate and/or minerals. Chlorinating the water supply should<br />
minimize the problem. (See EXTENDED NON-USE PERIODS).<br />
NOTE: Anode must remain installed (except for inspection) to<br />
avoid shortening tank life. See LIMITED WARRANTY. Replace<br />
as necessary.<br />
WARNING: DO NOT BY-PASS ANY CONTROLS TO MAKE HEATER OPERATE.<br />
OPERATE ONLY AS WIRED FROM FACTORY.<br />
TROUBLE SHOOTING<br />
Please check guidelines below. For your safety, water heater service should be performed only by a qualified service technician.<br />
Read the GENERAL SAFETY INFORMATION section first.<br />
PROBLEM LED STATUS CAUSE SOLUTION<br />
Check for power to heater.<br />
Off No power to system control. Check wiring harness for proper connections.<br />
Check for line voltage at harness connectors.<br />
Slow Blink<br />
Bright-Dim Normal operation Not applicable.<br />
1 Flash Setpoint error, internal failure detected. Replace gas control valve.<br />
Replace pressure switch.<br />
Replace pressure switch.<br />
2 Flashes Pressure switch failed to open. Replace blower assembly.<br />
Replace pressure switch.<br />
3 Flashes Pressure switch failed to close. Replace blower assembly.<br />
ECO activated. Replace ECO.<br />
4 Flashes Blower Assembly is energized. Replace gas control valve.<br />
Internal hardware failure. Replace gas control valve.<br />
Insure that burner stays lit.<br />
GAS Flame signal sensed out of sequence. Insure that igniter wires are not loose at gas valve.<br />
VALVE Replace gas control valve.<br />
Insure that burner stays lit.<br />
Blower Assembly is energized. Insure that igniter wires are not loose at gas valve.<br />
Replace gas control valve.<br />
<strong>Gas</strong> supply is off or too low to operate.<br />
Damaged or broken HSI element.<br />
Appliance not properly earth ground.<br />
Flame sense rod contaminated or not positioned<br />
correctly.<br />
6 Flashes System lockout. HSI element not positioned correctly.<br />
HSI element or flame sense rod wiring not<br />
connected properly.<br />
Less than 100Vac between flame rod and burner<br />
pan <strong>with</strong> 120Vac input to control.<br />
Cycle external power or remove request for heat<br />
for 2 seconds before reapplying.<br />
Water temperature is below 36°F. Wait until gas control generates a self-reset.<br />
Rapidly Loose connection between valve Make sure connections<br />
blinking and spud assembly. are properly seated.<br />
Internal component failure. Replace gas control valve.
TROUBLE SHOOTING (Continued)<br />
PROBLEM CAUSE SOLUTION<br />
1) Blower will not run.<br />
A) “ON/OFF” control switch turned off. Turn switch to the “ON” position.<br />
B) Blower unplugged. Plug blower back into 115 Vac. outlet.<br />
C) No power at outlet. Repair service to outlet.<br />
D) Thermostat defective. Replace thermostat.<br />
E) Control harness defective. Replace control harness.<br />
F) High limit control circuit open. Replace ECO.<br />
NOT ENOUGH G) Blower motor defective. Replace Blower Assembly.<br />
HOT WATER Thermosat problems.<br />
A) Themostat set too low. Turn temperature control higher.<br />
B) Thermostat or ECO defective. Replace thermostat or ECO as required.<br />
Others<br />
A) Heater undersized. Reduce hot water use.<br />
B) Low gas pressure. Contact dealer.<br />
C) Incoming water is unusually cold. Allow more time for heater to re-heat.<br />
D) Leaking hot water pipes or fixtures. Have plumber check and repair leaks.<br />
A) Defective air flow restrictor. Take unit out of service immediately, call an<br />
A.O. Smith service representative.<br />
B) Not enough dilution air to mix <strong>with</strong> Proper dilution air must be provided for<br />
flue gases in inlet tee. combustion and dilution of flue temp.<br />
VENT PIPE TOO HOT Refer to “INSTALLATION” section.<br />
(ABOVE 170°F) C) Dilution air too hot for mixing <strong>with</strong> Supply air is too hot. Check for heat sources<br />
flue gases. around intake terminal and blockage of<br />
dilution air leg.<br />
D) Wrong burner orifice. Install correct orifice.<br />
A) Dirt in burner ports Turn off heater and gas, clean burner head.<br />
B) Combustion air path restricted. Check intake venting arrangements for<br />
YELLOW FLAME obstructions.<br />
C) Not enough dilution air for proper Check Intake venting arrangement for obstructions.<br />
combustion.<br />
A) Water on the floor under heater. See “CONDENSATION” section.<br />
CONDENSATION B) Water dripping from pan. Provide drip “TEE” to catch condensation,<br />
see figure 1.<br />
Improperly sealed, hot or cold supply<br />
connections, relief valve, drain valve Tighten threaded connections.<br />
WATER LEAKS or thermostat threads.<br />
Leakage from other appliances or water Inspect other appliances near water heater.<br />
lines.<br />
Condensation of flue products. Refer to “CONDENSATION” section.<br />
Thermal expansion in closed water Install thermal expansion tank (DO NOT plug<br />
LEAKING T&P system. T&P valve).<br />
Improperly seated valve. Check relief valve for proper operation<br />
(DO NOT plug T&P valve).<br />
HOT WATER ODORS High sulfate or minerial content in Drain and flush heater thoroughly then refill.<br />
(Refer to CATHODIC water supply.<br />
PROTECTION Bacteria in water supply. Chlorinate water supply.<br />
WATER TOO HOT Thermostat set too high. Refer to HIGH TEMPERATURE REGULATION.<br />
WATER HEATER SOUNDS Condensation dripping on burner. Refer to CONDENSATION above.<br />
SIZZLING-RUMBLING Sediment at bottom of heater tank. Clean sediment from tank. Refer to DRAINING<br />
instruction in Maintenance section of manual.<br />
SOOTING Improper combustion. Refer to AIR REQUIREMENTS on page 4.<br />
17
LIMITED RESIDENTIAL GAS WARRANTY<br />
THIS WARRANTY IS APPLICABLE TO THE ORIGINAL OWNER<br />
ONLY. If the glass lined tank in this water heater shall prove upon<br />
examination by A. O. Smith Corporation (the warrantor) to have<br />
leaked during the warranty period in normal residential use, due<br />
to natural corrosion from potable water therein, the warrantor will<br />
furnish the ORIGINAL OWNER a replacement A. O. Smith water<br />
heater of equivalent size and current model, or a replacement<br />
part for any component part which fails in normal use, in<br />
accordance <strong>with</strong> the warranty terms and conditions specified<br />
below. THE A. O. SMITH REPLACEMENT MODEL OR PART<br />
WILL BE WARRANTED FOR ONLY THE UNEXPIRED PORTION<br />
OF THE ORIGINAL WARRANTY. The warranty period will be<br />
determined by the original installation date of the water heater.<br />
PROOF-OF-PURCHASE AND PROOF-OF-INSTALLATION ARE<br />
NECESSARY TO VALIDATE THIS WARRANTY. This warranty<br />
is not transferable and applies to models listed in Table 1.<br />
TABLE 1<br />
WARRANTY PERIOD<br />
MODEL TANK 1 PARTS 2<br />
<strong>FPSH</strong> 6 YEARS 2 YEARS<br />
<strong>FPCR</strong> 6 YEARS 2 YEARS<br />
<strong>FPST</strong> 6 YEARS 2 YEARS<br />
When the water heater has been used for other than single family<br />
residential application: 1. The tank warranty shall be reduced to<br />
1 year. 2. The parts warranty shall be reduced to 1 year for all<br />
models. Returned parts which meet any of the following conditions<br />
are not covered by this warranty: 1) improper installation or<br />
removal; 2) damaged by other than normal wear; 3) replaced for<br />
cosmetic purposes; or 4) returned <strong>with</strong> defaced date codes.<br />
CONDITIONS AND EXCEPTIONS<br />
This warranty shall apply only when the water heater is installed<br />
and operated in accordance <strong>with</strong>: 1) all local fire codes and<br />
plumbing codes, ordinances and regulations; 2) the printed<br />
instructions provided <strong>with</strong> it; 3) good industry practices; and 4)<br />
proper safety practices such as but not limited to a properly sized<br />
drain pan if installed in an area where leakage from connections<br />
of the tank would result in damage to the area adjacent to the<br />
heater. In addition, a new temperature and pressure relief valve,<br />
certified by the American <strong>Gas</strong> Association must have been<br />
properly installed and piped to the nearest drain.<br />
This warranty shall apply only when the heater is:<br />
owned by the original purchaser;<br />
used at temperatures not exceeding the maximum calibrated<br />
setting of its thermostat;<br />
not subjected to excessive water pressure fluctuations and not<br />
subject to an operating pressure greater than 150 P.S.I.;<br />
filled <strong>with</strong> potable water, free to circulate at all times and <strong>with</strong><br />
the tank free of damaging water sediment or scale deposits;<br />
used in a non-corrosive and non-contaminated atmosphere;<br />
used <strong>with</strong> factory approved anode(s) installed;<br />
in its original installation location;<br />
in the United States, its territories or possessions, and Canada;<br />
sized in accordance <strong>with</strong> proper sizing techniques for residential<br />
water heaters;<br />
bearing a rating plate which has not been altered, defaced or<br />
removed except as required by the warrantor;<br />
not used in a closed system <strong>with</strong>out a properly sized and installed<br />
thermal expansion tank;<br />
fired at the factory rated input using the fuel stated in the face of<br />
the rating plate;<br />
operated <strong>with</strong> the inner and outer combustion chamber doors<br />
in place;<br />
maintained in accordance <strong>with</strong> the instructions printed in the<br />
manual included <strong>with</strong> the heater.<br />
Any accident to the water heater or any part thereof (including<br />
freezing, fire, floods, or lightning), any misuse, abuse or alteration<br />
of it, any operation of it in a modified form, or any attempt to<br />
repair tank leaks or parts, will void this warranty.<br />
SERVICE AND LABOR RESPONSIBILITY<br />
UNDER THIS LIMITED WARRANTY, THE WARRANTOR WILL<br />
PROVIDE ONLY A REPLACEMENT WATER HEATER OR PART<br />
THEREOF. THE OWNER IS RESPONSIBLE FOR ALL OTHER<br />
COSTS. Such costs may include but are not limited to:<br />
18<br />
a. Labor charges for service, removal, or reinstallation of the<br />
water heater or part thereof.<br />
b. Shipping and delivery charges for forwarding the new water<br />
heater or replacement part from the nearest distributor and<br />
returning the claimed defective heater or part to such distributor<br />
except in the state of California where such charges are the<br />
manufacturer’s responsibility.<br />
c. All cost necessary or incidental for handling and administrative<br />
charges, and for any materials and/or permits required for<br />
installation of the replacement heater or part.<br />
LIMITATION ON IMPLIED WARRANTIES<br />
Implied warranties, including any warranty of merchantability<br />
imposed on the sale of this heater under state law are limited to<br />
one year duration for the heater or any of its parts. Some states<br />
do not allow limitations on how long an implied warranty lasts, so<br />
the above limitations may not apply to you.<br />
CLAIM PROCEDURE<br />
Any claim under this warranty should be initiated <strong>with</strong> the dealer<br />
who sold the heater, or <strong>with</strong> any other dealer handling the<br />
warrantor’s products. If this is not practical, the owner should<br />
contact: A. O. Smith Water Products Company, 5621 West 115th<br />
Street, Alsip, Illinois, 60803 (800) 323-2636. Canadian customers<br />
should contact A. O. Smith Enterprises, Ltd., P.O. Box 310-768<br />
Erie Street, Stratford, Ontario N5A 6T3, (519) 271-5800.<br />
The warrantor will only honor replacement <strong>with</strong> identical or similar<br />
water heater or parts thereof which are manufactured or distributed<br />
by the warrantor.<br />
Dealer replacements are made subject to in-warranty validation<br />
by warrantor.<br />
PROOF-OF-PURCHASE AND PROOF-OF-INSTALLATION<br />
DATES ARE REQUIRED TO SUPPORT WARRANTY FOR<br />
CLAIM FROM ORIGINAL OWNER. THIS FORM DOES NOT<br />
CONSTITUTE PROOF-OF-PURCHASE OR PROOF-OF-<br />
INSTALLATION.<br />
DISCLAIMERS<br />
NO EXPRESSED WARRANTY HAS BEEN OR WILL BE MADE<br />
IN BEHALF OF THE WARRANTOR WITH RESPECT TO THE<br />
HEATER OR THE INSTALLATION, OPERATION, REPAIR OR<br />
REPLACEMENT OF THE HEATER OR PARTS. THE<br />
WARRANTOR SHALL NOT BE RESPONSIBLE FOR WATER<br />
DAMAGE, LOSS OF USE OF THE UNIT, INCONVENIENCE,<br />
LOSS OR DAMAGE TO PERSONAL PROPERTY, OR OTHER<br />
CONSEQUENTIAL DAMAGE. THE WARRANTOR SHALL NOT<br />
BE LIABLE BY VIRTUE OF THIS WARRANTY OR OTHERWISE<br />
FOR DAMAGE TO ANY PERSONS OR PROPERTY, WHETHER<br />
DIRECT OR INDIRECT, AND WHETHER ARISING IN<br />
CONTRACT OR IN TORT.<br />
Some states do not allow the limitation or exclusion of incidental<br />
or consequential damages, so the above limitation or exclusion<br />
may not apply to you.<br />
This warranty gives you specific legal rights, and you may also<br />
have other rights which vary from state to state.<br />
Fill out and keep <strong>with</strong> water heater.<br />
IMPORTANT INFORMATION<br />
Model Number____________________________________________<br />
Serial Number_____________________________________________<br />
Installation Information:<br />
Date Installed _____________________________________________<br />
Company’s Name _________________________________________<br />
Street or P.O. Box _________________________________________<br />
City, State, and Zip Code ___________________________________<br />
Phone Number _______________Plumber’s Name_______________