Power Vented Gas Models FPSH/FPCR/FPST with ... - Geisel
Power Vented Gas Models FPSH/FPCR/FPST with ... - Geisel
Power Vented Gas Models FPSH/FPCR/FPST with ... - Geisel

You also want an ePaper? Increase the reach of your titles
YUMPU automatically turns print PDFs into web optimized ePapers that Google loves.
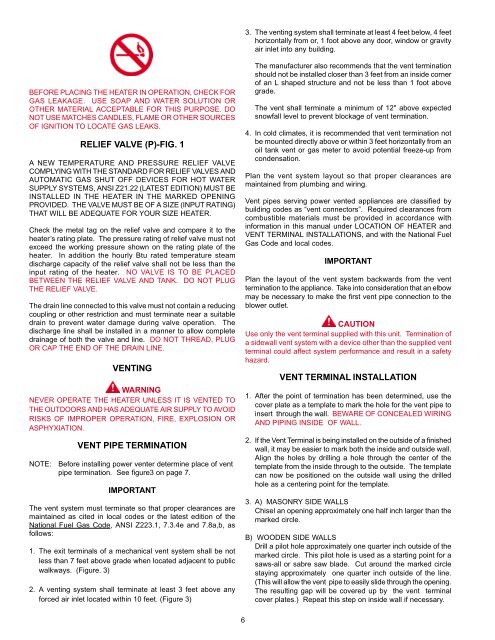
BEFORE PLACING THE HEATER IN OPERATION, CHECK FOR<br />
GAS LEAKAGE. USE SOAP AND WATER SOLUTION OR<br />
OTHER MATERIAL ACCEPTABLE FOR THIS PURPOSE. DO<br />
NOT USE MATCHES CANDLES, FLAME OR OTHER SOURCES<br />
OF IGNITION TO LOCATE GAS LEAKS.<br />
RELIEF VALVE (P)-FIG. 1<br />
A NEW TEMPERATURE AND PRESSURE RELIEF VALVE<br />
COMPLYING WITH THE STANDARD FOR RELIEF VALVES AND<br />
AUTOMATIC GAS SHUT OFF DEVICES FOR HOT WATER<br />
SUPPLY SYSTEMS, ANSI Z21.22 (LATEST EDITION) MUST BE<br />
INSTALLED IN THE HEATER IN THE MARKED OPENING<br />
PROVIDED. THE VALVE MUST BE OF A SIZE (INPUT RATING)<br />
THAT WILL BE ADEQUATE FOR YOUR SIZE HEATER.<br />
Check the metal tag on the relief valve and compare it to the<br />
heater’s rating plate. The pressure rating of relief valve must not<br />
exceed the working pressure shown on the rating plate of the<br />
heater. In addition the hourly Btu rated temperature steam<br />
discharge capacity of the relief valve shall not be less than the<br />
input rating of the heater. NO VALVE IS TO BE PLACED<br />
BETWEEN THE RELIEF VALVE AND TANK. DO NOT PLUG<br />
THE RELIEF VALVE.<br />
The drain line connected to this valve must not contain a reducing<br />
coupling or other restriction and must terminate near a suitable<br />
drain to prevent water damage during valve operation. The<br />
discharge line shall be installed in a manner to allow complete<br />
drainage of both the valve and line. DO NOT THREAD, PLUG<br />
OR CAP THE END OF THE DRAIN LINE.<br />
VENTING<br />
WARNING<br />
NEVER OPERATE THE HEATER UNLESS IT IS VENTED TO<br />
THE OUTDOORS AND HAS ADEQUATE AIR SUPPLY TO AVOID<br />
RISKS OF IMPROPER OPERATION, FIRE, EXPLOSION OR<br />
ASPHYXIATION.<br />
VENT PIPE TERMINATION<br />
NOTE: Before installing power venter determine place of vent<br />
pipe termination. See figure3 on page 7.<br />
IMPORTANT<br />
The vent system must terminate so that proper clearances are<br />
maintained as cited in local codes or the latest edition of the<br />
National Fuel <strong>Gas</strong> Code, ANSI Z223.1, 7.3.4e and 7.8a,b, as<br />
follows:<br />
1. The exit terminals of a mechanical vent system shall be not<br />
less than 7 feet above grade when located adjacent to public<br />
walkways. (Figure. 3)<br />
2. A venting system shall terminate at least 3 feet above any<br />
forced air inlet located <strong>with</strong>in 10 feet. (Figure 3)<br />
6<br />
3. The venting system shall terminate at least 4 feet below, 4 feet<br />
horizontally from or, 1 foot above any door, window or gravity<br />
air inlet into any building.<br />
The manufacturer also recommends that the vent termination<br />
should not be installed closer than 3 feet from an inside corner<br />
of an L shaped structure and not be less than 1 foot above<br />
grade.<br />
The vent shall terminate a minimum of 12'' above expected<br />
snowfall level to prevent blockage of vent termination.<br />
4. In cold climates, it is recommended that vent termination not<br />
be mounted directly above or <strong>with</strong>in 3 feet horizontally from an<br />
oil tank vent or gas meter to avoid potential freeze-up from<br />
condensation.<br />
Plan the vent system layout so that proper clearances are<br />
maintained from plumbing and wiring.<br />
Vent pipes serving power vented appliances are classified by<br />
building codes as “vent connectors”. Required clearances from<br />
combustible materials must be provided in accordance <strong>with</strong><br />
information in this manual under LOCATION OF HEATER and<br />
VENT TERMINAL INSTALLATIONS, and <strong>with</strong> the National Fuel<br />
<strong>Gas</strong> Code and local codes.<br />
IMPORTANT<br />
Plan the layout of the vent system backwards from the vent<br />
termination to the appliance. Take into consideration that an elbow<br />
may be necessary to make the first vent pipe connection to the<br />
blower outlet.<br />
CAUTION<br />
Use only the vent terminal supplied <strong>with</strong> this unit. Termination of<br />
a sidewall vent system <strong>with</strong> a device other than the supplied vent<br />
terminal could affect system performance and result in a safety<br />
hazard.<br />
VENT TERMINAL INSTALLATION<br />
1. After the point of termination has been determined, use the<br />
cover plate as a template to mark the hole for the vent pipe to<br />
insert through the wall. BEWARE OF CONCEALED WIRING<br />
AND PIPING INSIDE OF WALL.<br />
2. If the Vent Terminal is being installed on the outside of a finished<br />
wall, it may be easier to mark both the inside and outside wall.<br />
Align the holes by drilling a hole through the center of the<br />
template from the inside through to the outside. The template<br />
can now be positioned on the outside wall using the drilled<br />
hole as a centering point for the template.<br />
3. A) MASONRY SIDE WALLS<br />
Chisel an opening approximately one half inch larger than the<br />
marked circle.<br />
B) WOODEN SIDE WALLS<br />
Drill a pilot hole approximately one quarter inch outside of the<br />
marked circle. This pilot hole is used as a starting point for a<br />
saws-all or sabre saw blade. Cut around the marked circle<br />
staying approximately one quarter inch outside of the line.<br />
(This will allow the vent pipe to easily slide through the opening.<br />
The resulting gap will be covered up by the vent terminal<br />
cover plates.) Repeat this step on inside wall if necessary.