GENERAL Model FE and BE - Geisel
GENERAL Model FE and BE - Geisel
GENERAL Model FE and BE - Geisel
- TAGS
- model
- geisel
- www.gogeisel.com

You also want an ePaper? Increase the reach of your titles
YUMPU automatically turns print PDFs into web optimized ePapers that Google loves.
Index by Page<br />
Belt Tension ............................................... 16<br />
Blower/Filter Cabinet (Optional) ...................22<br />
Blower Motor ............................................ 16<br />
Blower Rotation ........................................ 17<br />
Blower Speed Adjustment ......................... 17<br />
Bottom Access ........................................... 23<br />
Burners ................................................ 18, 23<br />
Burner Air Adjustment .............................. 18<br />
Burner Rack Removal ............................... 23<br />
Carryover, Flash ........................................ 25<br />
Check Installation <strong>and</strong> Start-Up ................ 19<br />
Clearances .................................................... 5<br />
Combustion Air Proving Switch ............... 18<br />
Combustion Air ....................................... 5, 6<br />
Confined Space Installation......................... 6<br />
Dimensional Drawings ................................ 3<br />
Disconnect Switch (Optional) ................... 11<br />
Duct Flange (Blower <strong>Model</strong> Option) ........ 20<br />
FOR YOUR SA<strong>FE</strong>TY<br />
If you smell gas:<br />
1. Open windows.<br />
2. Don't touch electrical switches.<br />
3. Extinguish any open flame.<br />
4. Immediately call your gas supplier.<br />
Table of Contents<br />
Installation <strong>and</strong> Operation ......................... Par. 1-23 ......... Pages 1-18<br />
Check Installation <strong>and</strong> Start-Up ................. Par. 24 .............. Page 19<br />
Optional Equipment .................................. Par. 25-31 ....... Pages 20-22<br />
Service/Maintenance/Troubleshooting ..... Par. 32-42 ....... Pages 23-28<br />
WARNING: Gas-fired appliances are not<br />
designed for use in hazardous atmospheres<br />
containing flammable vapors or combustible<br />
dust, in atmospheres containing chlorinated<br />
or halogenated hydrocarbons, or in applications<br />
with airborne silicone substances. See<br />
Hazard Levels, Page 2.<br />
WARNING: Improper installation, adjustment,<br />
alteration, service, or maintenance can<br />
cause property damage, injury or death. Read<br />
the installation, operation, <strong>and</strong> maintenance<br />
instructions thoroughly before installing or<br />
servicing this equipment.<br />
Electrical Supply <strong>and</strong> Connections............ 11<br />
Fan Blade ................................................... 25<br />
Fan Control .......................................... 17, 26<br />
Fan Motor .................................................. 16<br />
Gas Piping <strong>and</strong> Pressures .......................... 10<br />
Guard Options (Blower <strong>Model</strong>) ................ 22<br />
Hanger Kits (Optional) ................................ 7<br />
Hazard Intensity Levels ............................... 2<br />
Heat Exchanger ......................................... 25<br />
Ignition System .................................... 18, 24<br />
Installation Codes ........................................ 2<br />
Limit Control ....................................... 17, 26<br />
Locating the Heater ..................................... 5<br />
Louvers, Vertical (Optional) ...................... 20<br />
Maintenance .............................................. 23<br />
Maintenance Schedule ............................... 23<br />
Multiple Heater Control Option ................ 22<br />
INSTALLATION FORM RGM 436 (Version A)<br />
Obsoletes 436-5<br />
APPLIES TO: Installation/Operation/Service<br />
Nozzles, Downturn Air (Optional) ............ 20<br />
Optional Equipment .................................. 20<br />
Operating Sequence ................................... 19<br />
Orifices, Burner <strong>and</strong> Pilot .......................... 25<br />
Pilot ..................................................... 18, 24<br />
Polytube Adapter (Blower <strong>Model</strong> Option) ..... 21<br />
Service ....................................................... 23<br />
Spark Gap .................................................. 24<br />
Suspending the Unit .................................... 6<br />
Thermostats ............................................... 11<br />
Troubleshooting ......................................... 27<br />
Uncrating <strong>and</strong> Preparation ........................... 5<br />
Valve, Gas ............................................ 18, 26<br />
Venter Motor <strong>and</strong> Relay ............................ 26<br />
Venting ................................................... 7, 26<br />
Warranty ...................................................... 2<br />
Wiring Diagrams ................................ 12-15<br />
FOR YOUR SA<strong>FE</strong>TY<br />
The use <strong>and</strong> storage of gasoline or other<br />
flammable vapors <strong>and</strong> liquids in open<br />
containers in the vicinity of this appliance is<br />
hazardous.<br />
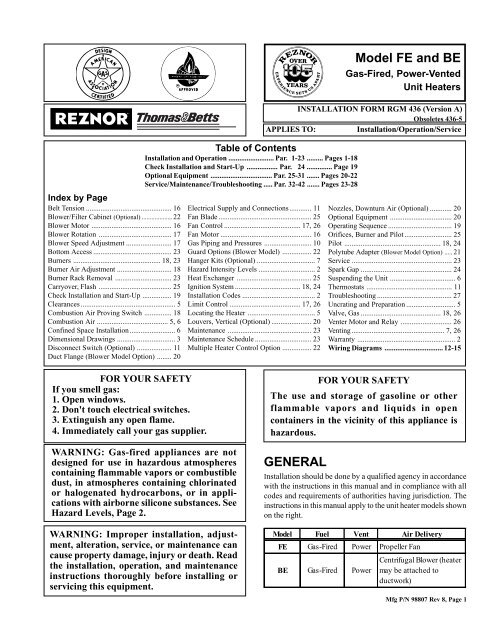
<strong>GENERAL</strong><br />
<strong>Model</strong> <strong>FE</strong> <strong>and</strong> <strong>BE</strong><br />
Gas-Fired, Power-Vented<br />
Unit Heaters<br />
Installation should be done by a qualified agency in accordance<br />
with the instructions in this manual <strong>and</strong> in compliance with all<br />
codes <strong>and</strong> requirements of authorities having jurisdiction. The<br />
instructions in this manual apply to the unit heater models shown<br />
on the right.<br />
<strong>Model</strong> Fuel Vent Air Delivery<br />
<strong>FE</strong> Gas-Fired Power Propeller Fan<br />
Centrifugal Blower (heater<br />
<strong>BE</strong> Gas-Fired Power may be attached to<br />
ductwork)<br />
Mfg P/N 98807 Rev 8, Page 1
HAZARD INTENSITY LEVELS<br />
1. DANGER: Failure to comply will result in severe personal injury or death <strong>and</strong>/or property damage.<br />
2. WARNING: Failure to comply could result in severe personal injury or death <strong>and</strong>/or property damage.<br />
3. CAUTION: Failure to comply could result in minor personal injury <strong>and</strong>/or property damage.<br />
1. Installation Codes<br />
The gas-fired unit heaters covered in this manual are design-certified<br />
by the American Gas Association <strong>and</strong> approved by the Canadian Gas<br />
Association for use with either natural or propane gas. The type of gas<br />
for which your heater is equipped <strong>and</strong> the correct firing rate are shown<br />
on the rating plate attached to your unit. Electrical characteristics are<br />
shown on the motor nameplate <strong>and</strong> on the unit rating plate.<br />
These units must be installed in accordance with local building codes.<br />
In the absence of local codes, in the United States, the unit must be<br />
installed in accordance with the National Fuel Gas Code (latest edition).<br />
A Canadian installation must be in accordance with the CAN/<br />
CGA B149.1 <strong>and</strong> B149.2 Installation Code for Gas Burning Appliances<br />
<strong>and</strong> Equipment. These codes are available from CSA Information<br />
Services, 1-800-463-6727. Local authorities having jurisdiction<br />
should be consulted before installation to verify local codes <strong>and</strong> installation<br />
procedure requirements.<br />
Clearances from the heater <strong>and</strong> vent to combustible construction or<br />
material in storage must conform with the National Fuel Gas Code<br />
ANSI Z223.1a (latest edition) pertaining to gas-burning devices, <strong>and</strong><br />
such material must not attain a temperature over 160 o F by continued<br />
operation of the heater.<br />
Special Installations (Aircraft Hangars/<br />
Garages)<br />
Installations in aircraft hangars should be in accordance with ANSI/<br />
NFPA No. 409 (latest edition), St<strong>and</strong>ard for Aircraft Hangars; in public<br />
garages in accordance with ANSI/NFPA No. 88A (latest edition),<br />
St<strong>and</strong>ard for Parking Structures; <strong>and</strong> for repair garages in accordance<br />
with ANSI/NFPA No. 88B (latest edition), St<strong>and</strong>ard for Repair Garages.<br />
ANSI/NFPA-88 (latest edition) specifies overhead heaters must<br />
be installed at least eight feet above the floor. In Canada, installations<br />
in aircraft hangars should be in accordance with the requirements of<br />
the enforcing authorities, <strong>and</strong> in public garages in accordance with CAN/<br />
CGA B149 codes.<br />
ANSI/NFPA 409 (latest edition) specifies a clearance of ten feet to the<br />
bottom of the heater from the highest surface of the top of the wing or<br />
engine enclosure of whatever aircraft would be the highest to be housed<br />
in the hangar, <strong>and</strong> a minimum clearance of eight feet from the floor in<br />
other sections of aircraft hangars, such as the offices, <strong>and</strong> shops which<br />
communicate with areas used for servicing or storage. The heaters must<br />
be located so as to be protected from damage by aircraft or other objects<br />
such as cranes <strong>and</strong> movable scaffolding. In addition, the heaters<br />
must be located so as to be accessible for servicing, adjustment, etc.<br />
Form 436, Page 2<br />
2. Warranty<br />
Refer to limited warranty information on the warranty card in the<br />
"Owner's Envelope".<br />
WARRANTY: Warranty is void if......<br />
a. Unit Heaters are used in atmospheres containing flammable<br />
vapors or atmospheres containing chlorinated or halogenated<br />
hydrocarbons or airborne silicone substances.<br />
b. Wiring is not in accordance with the diagram furnished with<br />
the heater.<br />
c. Unit is installed without proper clearances to combustible materials<br />
or located in a confined space without proper ventilation<br />
<strong>and</strong> air for combustion. (See Paragraphs 6 <strong>and</strong> 7.)<br />
d. Fan-type unit heater is connected to a duct system.
3. Dimensions<br />
Fan-Type, Power-Vented Unit Heater<br />
Dimensions (inches)<br />
Size A B C D E F G H J K L M N<br />
Nat Pro<br />
25 29-25/32 13-9/16 27-1/16 31-7/16 5-27/32 14-7/16 14-1/32 4 10-9/32 16 1/2 1/2 9-13/16 3<br />
50 29-25/32 13-9/16 27-1/16 31-7/16 5-27/32 14-7/16 14-1/32 4 10-9/32 16 1/2 1/2 9-13/16 3<br />
75 29-25/32 15-9/16 27-1/16 31-7/16 5-27/32 14-7/16 14-1/32 4 10-17/32 16 1/2 1/2 10-7/16 3<br />
100 29-25/32 17-9/16 30-7/16 31-7/16 5-27/32 14-7/16 14-1/32 4 12-29/32 16 1/2 1/2 10-7/16 3<br />
125 29-25/32 23-5/16 30-7/16 31-7/16 5-27/32 14-7/16 14-1/32 5 14-7/16 16 1/2 1/2 11-9/16 2-5/8<br />
165 39-15/16 20-5/16 35-7/16 35-15/16 4-7/8 19-15/32 15-23/32 5 14-9/32 24 1/2 1/2 11-11/16 4-19/32<br />
200 39-15/16 23-5/16 36-3/16 35-15/16 4-7/8 19-15/32 15-23/32 5 14-13/32 24 1/2 1/2 11-11/16 4-19/32<br />
250 39-15/16 28-13/16 36-3/16 35-15/16 4-7/8 19-15/32 15-23/32 5 12-11/32 24 1/2 1/2 11-11/16 4-19/32<br />
300 39-15/16 28-13/16 36-11/16 35-15/16 4-7/8 19-15/32 15-23/32 6 12-11/32 24 3/4 1/2 11-11/16 3-19/32<br />
400 39-15/16 37-1/16 37-5/16 35-15/16 4-7/8 19-15/32 15-23/32 6 13 24 3/4 1/2 11-11/16 3-19/32<br />
Dimensions (mm)<br />
Size A B C D E F G H J K L M N<br />
Nat Pro<br />
25 756 344 687 799 148 367 356 102 261 406 13 13 249 76<br />
50 756 344 687 799 148 367 356 102 261 406 13 13 249 76<br />
75 756 395 687 799 148 367 356 102 267 406 13 13 265 76<br />
100 756 446 773 799 148 367 356 102 328 406 13 13 265 76<br />
125 756 592 773 799 148 367 356 127 367 406 13 13 294 67<br />
165 1014 516 900 913 124 498 399 127 363 610 13 13 297 117<br />
200 756 592 919 913 124 498 399 127 366 610 13 13 297 117<br />
250 756 732 919 913 124 498 399 127 314 610 13 13 297 117<br />
300 756 732 932 913 124 498 399 152 314 610 19 13 297 91<br />
400 756 941 948 913 124 498 399 152 330 610 19 13 297 91<br />
Suspension Notes: Use Dimension "G" for two-point suspension <strong>and</strong> "E" <strong>and</strong> "F" for fourpoint<br />
suspension. (Two-point suspension is st<strong>and</strong>ard; four-point is optional.<br />
Four-point suspension is available either factory or field installed.)<br />
Mfg P/N 98807 Rev 8, Page 3
3. Dimensions (cont'd)<br />
Blower-Type, Power-Vented Unit Heater<br />
Dimensions (inches)<br />
Size A B C D E F„ G H J K L<br />
ˆ Hanger ƒ ‚ Nat Pro<br />
25 29-25/32 13-9/16 43-3/8 31-7/16 5-27/32 14-7/16 61-3/8 4 10-9/32 16 1/2 1/2<br />
50 29-25/32 13-9/16 50 31-7/16 5-27/32 14-7/16 61-3/8 4 10-9/32 16 1/2 1/2<br />
75 29-25/32 15-9/16 50 31-7/16 5-27/32 14-7/16 61-3/8 4 10-17/32 16 1/2 1/2<br />
100 29-25/32 17-9/16 50 31-7/16 5-27/32 14-7/16 61-3/8 4 12-29/32 16 1/2 1/2<br />
125 29-25/32 23-5/16 47-1/2 31-7/16 5-27/32 14-7/16 65-29/32 5 14-7/16 16 1/2 1/2<br />
165 39-15/16 20-5/16 61 35-15/16 4-7/8 19-15/32 76-1/8 5 14-9/32 24 1/2 1/2<br />
200 39-15/16 23-5/16 66-1/2 35-15/16 4-7/8 19-15/32 76-1/8 5 14-13/32 24 1/2 1/2<br />
250 39-15/16 28-13/16 66-1/2 35-15/16 4-7/8 19-15/32 76-1/8 5 12-11/32 24 1/2 1/2<br />
300 39-15/16 28-13/16 66-1/2 35-15/16 4-7/8 19-15/32 76-1/8 6 12-11/32 24 3/4 1/2<br />
400 39-15/16 37-1/16 66-1/2 35-15/16 4-7/8 19-15/32 76-1/8 6 13 24 3/4 1/2<br />
Size M N P R S T U W … X Y Z<br />
‚ ‚ Hanger<br />
25 3-23/32 20-15/16 17-3/4 5-1/4 10-3/4 8-7/16 14-3/4 6-3/16 31-7/32 9-13/16 3<br />
50 3-23/32 20-15/16 17-3/4 5-1/4 10-3/4 8-7/16 14-3/4 6-3/16 31-7/32 9-13/16 3<br />
75 2-23/32 20-15/16 17-3/4 5-1/4 12-3/4 8-7/16 14-3/4 6-3/16 31-7/32 10-7/16 3<br />
100 1-23/32 20-15/16 17-3/4 5-1/4 14-3/4 8-7/16 14-3/4 6-3/16 31-7/32 10-7/16 3<br />
125 1-11/32 20-15/16 17-3/4 5-1/4 20-1/2 8-7/16 20-1/2 6-3/16 35-3/4 11-9/16 2-5/8<br />
165 2-27/32 25-15/16 25-1/4 7-1/4 17-1/2 11-7/16 20-1/2 7-15/16 36-11/16 11-11/16 4-19/32<br />
200 1-11/32 25-15/16 25-1/4 7-1/4 20-1/2 11-7/16 20-1/2 7-15/16 36-11/16 11-11/16 4-19/32<br />
250 5-29/32 40-9/16 25-1/4 7-1/4 26 11-7/16 26 7-15/16 36-11/16 11-11/16 4-19/32<br />
300 5-29/32 40-9/16 25-1/4 7-1/4 26 11-7/16 26 7-15/16 36-11/16 11-11/16 3-19/32<br />
400 6-25/32 50-9/16 25-1/4 7-1/4 34-1/4 11-7/16 34-1/4 7-15/16 36-11/16 11-11/16 3-19/32<br />
Dimensions (mm)<br />
Size A B C D E F„ G H J K L<br />
ˆ Hanger ƒ ‚ Nat Pro<br />
25 756 344 1102 799 148 367 1559 102 261 406 13 13<br />
50 756 344 1270 799 148 367 1559 102 261 406 13 13<br />
75 756 395 1270 799 148 367 1559 102 267 406 13 13<br />
100 756 446 1270 799 148 367 1559 102 328 406 13 13<br />
125 756 592 1207 799 148 367 1674 127 367 406 13 13<br />
165 1014 516 1549 913 124 495 1934 127 363 610 13 13<br />
200 1014 592 1689 913 124 495 1934 127 366 610 13 13<br />
250 1014 732 1689 913 124 495 1934 127 314 610 13 13<br />
300 1014 732 1689 913 124 495 1934 152 314 610 19 13<br />
400 1014 914 1689 913 124 495 1934 152 330 610 19 13<br />
Form 436, Page 4
Size M N P R S T U W … X Y Z<br />
‚ ‚ Hanger<br />
25 94 532 481 133 273 214 375 157 793 249 76<br />
50 94 532 481 133 273 214 375 157 793 249 76<br />
75 69 532 481 133 324 214 375 157 793 265 76<br />
100 44 532 481 133 375 214 375 157 793 265 76<br />
125 34 532 481 133 521 214 521 157 908 294 67<br />
165 72 659 641 184 445 291 521 202 932 297 117<br />
200 34 659 641 184 521 291 521 202 932 297 117<br />
250 150 1030 641 184 660 291 660 202 932 297 117<br />
300 150 1030 641 184 660 291 660 202 932 297 91<br />
400 172 1284 641 184 870 291 870 202 932 297 91<br />
NOTES<br />
When equipped with optional blower cabinet.<br />
‚When equipped with optional duct flange.<br />
ƒDimension includes a 3/4" flange on the rear of the blower<br />
cabinet.<br />
„Use with 4-point suspension without blower cabinet. If<br />
installing hanger kit Option CK19, suspension points<br />
change; see Paragraph 8.<br />
4. Uncrating <strong>and</strong> Preparation<br />
This unit was test operated <strong>and</strong> inspected at the factory prior to crating<br />
<strong>and</strong> was in operating condition. If the heater has incurred any<br />
damage in shipment, file a claim with the transporting agency.<br />
Check the rating plate for the gas specifications <strong>and</strong> electrical characteristics<br />
of the heater to be sure that they are compatible with the<br />
gas <strong>and</strong> electric supplies at the installation site. Read this booklet<br />
<strong>and</strong> become familiar with the installation requirements of your particular<br />
heater. If you do not have knowledge of local requirements,<br />
check with the local gas company or any other local agencies who<br />
might have requirements concerning this installation. Before beginning,<br />
make preparations for necessary supplies, tools, <strong>and</strong> manpower.<br />
Check to see if there are any field-installed options that need to be<br />
assembled to the heater prior to installation. Each of the option packages<br />
includes a list of components <strong>and</strong> step-by-step instructions. For<br />
a brief description of optional hanger kits, refer to Paragraph 8. For a<br />
brief explanation of other frequently specified field-installed options,<br />
see Paragraphs 25-31. After becoming familiar with the instructions,<br />
assemble <strong>and</strong> install the options that are required for your heater.<br />
If the heater was ordered with a vent cap shipped with the heater<br />
(Option BT2), packaging depends on the size of the heater. Sizes 25<br />
<strong>and</strong> 50 have the vent cap mounted on a shipping tube that is attached<br />
to the venter housing. Remove the vent cap; remove <strong>and</strong> discard the<br />
shipping tube. Sizes 100, 165, 200, 250, 300 <strong>and</strong> 400 have the vent<br />
cap attached directly to the venter housing. Size 125 is shipped with<br />
the vent cap mounted on the crate near the gas valve. Remove the<br />
vent cap for field installation at the vent terminal.<br />
Unless the crate bottom has been removed for option installation,<br />
leave it attached until after the heater has been suspended. If the<br />
crate bottom has been removed, the bottom of the heater must be<br />
supported with plywood or appropriately placed boards. Without<br />
adequate support, the bottom access panel could be damaged.<br />
To protect the unit during shipping, the blower model has special<br />
supports that must be removed before installation. Follow these instructions<br />
to remove:<br />
oBlower Support Legs -- Remove the two blower support legs <strong>and</strong><br />
screws.<br />
oMotor Shipping Block - Remove the wooden block located under<br />
the motor bracket. Find the two rubber pads shipped in the instruction<br />
envelope. Place these pads on the ends of the motor<br />
bracket bolts.<br />
…Use with 4-point suspension with blower cabinet.<br />
†Contactor is st<strong>and</strong>ard on <strong>Model</strong>s 300 <strong>and</strong> 400; optional on other<br />
sizes.<br />
‡Contactor location with optional three phase motors on Sizes 50,<br />
75, 100 <strong>and</strong> 125.<br />
ˆDeduct 6-5/8" on Sizes 50, 75, <strong>and</strong> 100 when equipped with<br />
direct drive motor.<br />
oMotor Shipping Plate -- Blower models that are equipped with motors<br />
of 3/4 HP or less have a metal shipping plate attached between the<br />
motor <strong>and</strong> the blower housing. Remove <strong>and</strong> discard the shipping plate.<br />
Note: On units factory equipped with an optional belt guard, the belt<br />
guard must be removed in order to reach the shipping plate.<br />
5. Unit Heater Location<br />
CAUTION: Avoid installing a unit heater in extremely<br />
drafty areas. Extreme drafts can shorten the life of the<br />
heat exchanger <strong>and</strong>/or cause safety problems.<br />
For best results, the heater should be placed with certain rules in mind. In<br />
general, a unit should be located from 8 to 12 feet above the floor. Units<br />
should always be arranged to blow toward or along exposed wall surfaces,<br />
if possible. Where two or more units are installed in the same room,<br />
a general scheme of air circulation should be maintained for best results.<br />
Suspended heaters are most effective when located as close to the working<br />
zone as possible, <strong>and</strong> this fact should be kept in mind when determining<br />
the mounting heights to be used. However, care should be exercised<br />
to avoid directing the discharged air directly on the room occupants.<br />
Partitions, columns, counters, or other obstructions should be taken into<br />
consideration when locating the unit heater so that a minimum quantity<br />
of airflow will be deflected by such obstacles.<br />
When units are located in the center of the space to be heated, the air<br />
should be discharged toward the exposed walls. In large areas, units should<br />
be located to discharge air along exposed walls with extra units provided<br />
to discharge air in toward the center of the area.<br />
At those points where infiltration of cold air is excessive, such as at entrance<br />
doors <strong>and</strong> shipping doors, it is desirable to locate the unit so that it<br />
will discharge directly toward the source of cold air from a distance of 15<br />
to 20 feet.<br />
Units should not be installed closer than 18 inches from any wall.<br />
CAUTION: Do not locate the heater where it may be<br />
exposed to water spray, rain or dripping water.<br />
6. Clearances & Combustion Air<br />
Units must be installed so that the following clearances are provided for<br />
combustion air space, service <strong>and</strong> inspection, <strong>and</strong> for proper spacing from<br />
combustible construction.<br />
Mfg P/N 98807 Rev 8, Page 5
6. Clearances <strong>and</strong> Combustion<br />
Air (cont'd)<br />
<strong>Model</strong> Required Clearances (inches <strong>and</strong> mm)<br />
Size Top Flue Sides Bottom Rear<br />
Collector<br />
25-400 6"(152) 6"(152) 18"(457) 12"(305) * 24" (610)**<br />
* When supplied with optional downturn nozzle, bottom clearance is<br />
42"(1067mm). For service purposes, on st<strong>and</strong>ard units, bottom clearance<br />
exceeding minimum (12" or 305mm) is not required but may<br />
be desirable.<br />
** For servicing purposes only, rear must remain full open.<br />
All fuel-burning equipment must be supplied with the air that enters<br />
into the combustion process <strong>and</strong> is then vented to the outdoors. Sufficient<br />
air must enter the equipment location to replace that exhausted<br />
through the heater vent system. In the past, the infiltration of outside<br />
air assumed in heat loss calculations (one air change per hour) was<br />
assumed to be sufficient. However, current construction methods utilizing<br />
more insulation, vapor barriers, tighter fitting <strong>and</strong> gasketed doors<br />
<strong>and</strong> windows or weather-stripping, <strong>and</strong> mechanical exhaust fans may<br />
now require the introduction of outside air through wall openings or<br />
ducts.<br />
The requirements for combustion <strong>and</strong> ventilation air depend upon<br />
whether the unit is located in a confined or unconfined space. An "unconfined<br />
space" is defined as a space whose volume is not less than 50<br />
cubic feet per 1000 BTUH of the installed appliance. Under all conditions,<br />
enough air must be provided to ensure there will not be a negative<br />
pressure condition within the equipment room or space. For specific<br />
requirements for confined space installation, see Paragraph 7.<br />
WARNING: These power-vented unit heaters are<br />
designed to take combustion air from the space<br />
in which the unit is installed <strong>and</strong> are not designed<br />
for connection to outside combustion air intake<br />
ducts. Connecting outside air ducts voids the<br />
warranty <strong>and</strong> could cause hazardous operation.<br />
See Hazard Levels, Page 2.<br />
7. Combustion Air Requirements<br />
for a Heater Located in a<br />
Confined Space<br />
Do not install a unit in a confined space without providing wall openings<br />
leading to <strong>and</strong> from the space. Provide openings near the floor<br />
<strong>and</strong> ceiling for ventilation <strong>and</strong> air for combustion as shown in Figure<br />
1, depending on the combustion air source as noted in Items 1, 2, <strong>and</strong><br />
3 below the illustration.<br />
Figure 1 -<br />
Confined Space: A<br />
space whose volume is<br />
less than 50 cubic feet<br />
per 1000 BTUH of the<br />
installed appliance<br />
input rating<br />
Add total BTUH of all appliances in the confined space <strong>and</strong> divide by<br />
figures below for square inch free area size of each (top <strong>and</strong> bottom)<br />
opening.<br />
Form 436, Page 6<br />
1. Air from inside the building -- openings 1 square inch free area per<br />
1000 BTUH. Never less than 100 square inches free area for each opening.<br />
See (1) in Figure 1.<br />
2. Air from outside through duct -- openings 1 square inch free area<br />
per 2000 BTUH. See (2) in Figure 1.<br />
3. Air direct from outside -- openings 1 square inch free area per 4000<br />
BTUH. See (3) in Figure 1.<br />
NOTE: For further details on supplying combustion air to a confined<br />
space, see the National Fuel Gas Code ANSI Z223.1a (latest edition ).<br />
8. Suspending the Heater<br />
Before suspending the heater, check the supporting structure to be used<br />
to verify that it has sufficient load-carrying capacity to support the weight<br />
of the unit.<br />
Net Weight (lbs <strong>and</strong> kg)<br />
<strong>Model</strong> Size<br />
Type 25 50 75 100 125 165 200 250 300 400<br />
Fan lbs 76 83 92 101 132 154 175 209 226 281<br />
kg 34 38 42 46 60 70 79 95 103 127<br />
Blower lbs 97 104 118 130 180 206 240 278 301 395<br />
kg 44 47 54 59 82 93 109 126 137 179<br />
NOTE: If the installation includes an optional stepdown transformer<br />
kit (Option CF or CG), the stepdown transformer bracket is part of the<br />
heater suspension <strong>and</strong> must be installed prior to hanging the heater.<br />
Follow the instructions on the installation sheet included with the option<br />
kit.<br />
A fan-type unit heater is equipped with st<strong>and</strong>ard two-point suspension.<br />
A 3/8-16 threaded hanger bracket assembly is located on each<br />
side of the heater. If a fan-type unit has been ordered with optional,<br />
factory-installed, four-point suspension (Option BJ6), it will have two<br />
threaded hanger brackets on each side.<br />
A blower-type heater is equipped with st<strong>and</strong>ard four-point suspension.<br />
Two 3/8-16 threaded hanger bracket assemblies are located on<br />
each side of the unit. Each hanger bracket assembly is designed for<br />
threaded rod attachment.<br />
For both "st<strong>and</strong>ard" <strong>and</strong> "optional" suspension point dimensions, see<br />
Dimension Tables in Paragraph 3. (Note: If installing Option CK19<br />
hanger kit, suspension points change; see Figure 4B.)<br />
WARNING: Suspend the heater only from the<br />
threaded hanger brackets. Do not suspend from<br />
the heater side panel.<br />
When the heater is lifted for suspension, the bottom must be protected.<br />
If the wooden crate bottom has been removed, the bottom of the heater<br />
will have to be supported with plywood or other appropriately placed<br />
material. If the bottom is not supported, the bottom access panel could<br />
be damaged. Also, when lifting a blower unit, support the blower <strong>and</strong><br />
motor to prevent the unit from tipping.<br />
All blower models have legs that support the blower assembly during<br />
shipping. After<br />
the unit is suspended,<br />
these<br />
legs should be<br />
removed.<br />
Be sure that the<br />
threaded hanger<br />
rods are locked<br />
to the heater as<br />
shown in Figure<br />
2.<br />
Figure 2 -<br />
Suspension
WARNING: Unit must be level for proper<br />
operation. Do not place or add additional weight<br />
to the suspended heater. See Hazard Levels, page<br />
2.<br />
If an optional downturn air nozzle is used, the unit must be suspended<br />
from four points to ensure level suspension. Two hanger<br />
brackets are included in the downturn option package <strong>and</strong> must<br />
be field-installed on fan-type units with st<strong>and</strong>ard two-point suspension.<br />
For additional information, refer to Paragraph 26 <strong>and</strong><br />
the instructions that are furnished with the option package.<br />
When blower-type units are equipped with an optional blower/<br />
filter cabinet, there are two suspension points on the blower cabinet<br />
hanger bar. Suspend a unit equipped with a blower/filter cabinet<br />
from four points, using the two heater hanger bracket assemblies<br />
closest to the front of the heater <strong>and</strong> the two suspension<br />
points on the blower/filter cabinet.<br />
If one of the optional, field-installed hanger kits has been ordered<br />
for your heater, it will have been shipped separately. Each option<br />
package includes a list of components <strong>and</strong> complete, step-by-step<br />
assembly instructions.<br />
Optional, Field-Installed Hanger Kits:<br />
1) Four-Point Suspension (fan models only) - Option CK7<br />
This option kit is designed to convert a fan-type heater from st<strong>and</strong>ard<br />
two-point suspension to four-point suspension. The kit contains<br />
two additional hanger brackets.<br />
2) Two-Point Swivel Connectors (fan models only) - Option<br />
CK8 (See Figure 3.)<br />
The purpose of this option kit is to adapt the st<strong>and</strong>ard hanger<br />
bracket so that the heater can be suspended from 1", threaded,<br />
stationary pipe. The swivel connector screws "into" the threaded<br />
hanger bracket on the heater <strong>and</strong> "onto" the 1" threaded pipe used<br />
for hanging the heater. The kit includes two swivel hanger connector<br />
assemblies <strong>and</strong> two lock washers.<br />
Figure 3 - Two-<br />
Point Suspension<br />
with Swivel<br />
Connections<br />
(fan models<br />
only)<br />
3) Four-Point with Swivel Connectors (fan-models only) -<br />
Option CK9 (See Figure 4A)<br />
This option package is designed to convert a fan-type heater from<br />
st<strong>and</strong>ard two-point suspension to four-point suspension with<br />
swivel connectors. By installing this kit the st<strong>and</strong>ard fan-type heater<br />
can be hung from four 1", threaded, stationary pipes. The kit includes<br />
two hanger bracket assemblies, four swivel hanger connector<br />
assemblies <strong>and</strong> four lock washers.<br />
Figure 4A - Four-Point Suspension with Swivel<br />
Connections (Applies to both fan<br />
<strong>and</strong> blower models)<br />
4) Four-Point Swivel Connectors - Option CK10 (See Figure 4A)<br />
This option package is used on a heater that is already equipped with fourpoint<br />
suspension to adapt it for suspension from four 1", threaded, stationary<br />
pipes. The kit includes four swivel hanger connector assemblies <strong>and</strong><br />
four lock washers.<br />
5) Special Four-Point Suspension with Nearly Equal Loading (applies<br />
to blower models only) - Option CK19<br />
This suspension option is designed for special applications when a suspension<br />
system is needed that has nearly equal loading at all four suspension<br />
points. Use this option in installations with spring isolation designed for<br />
seismic protection or when threaded rod hangers are longer than twelve<br />
inches.<br />
Suspension points change with the addition of hanger kit Option CK19; see<br />
Figure 4B.<br />
Figure 4B - Suspension Dimensions (inches <strong>and</strong> mm) for<br />
<strong>Model</strong> <strong>BE</strong> Heater with Hanger Kit Option CK19<br />
Size A B<br />
25-50 11-7/8 (302) 9-1/8 (232)<br />
75 13-7/8 (352) 11-1/8 (283)<br />
100 15-7/8 (403) 13-1/8 (333)<br />
125 21-5/8 (549) 18-7/8 (479)<br />
165 18-5/8 (473) 15-7/8 (403)<br />
200 21-5/8 (549) 18-7/8 (479)<br />
250 27-1/8 (689) 24-3/8 (618)<br />
300 27-1/8 (689) 24-3/8 (618)<br />
400 35-3/8 (897) 32-5/8 (829)<br />
9. Venting<br />
These power-vented unit heaters are designed to operate safely <strong>and</strong> efficiently<br />
with either a horizontal or vertical vent. (Horizontal vent run is recommended<br />
for maximum fuel savings.)<br />
WARNING: Units installed in multiples require<br />
individual vent pipe runs <strong>and</strong> vent caps. Manifolding<br />
of vent runs is not permitted due to possible<br />
recirculation of combustion products into the<br />
building <strong>and</strong> possible back pressure effects on the<br />
combustion air proving switch.<br />
Specific Venting Requirements (read all before<br />
installing)<br />
1. Venter (Flue) Outlet<br />
Venter Outlet Size:<br />
<strong>Model</strong> Size Outlet Diameter<br />
25-100 4" (102 mm)<br />
125-250 5" (127 mm)<br />
300-400 6" (152 mm)<br />
Mfg P/N 98807 Rev 8, Page 7
9. Venting (cont'd)<br />
Venter Outlet Attachment Requirements:<br />
• If the pipe used in the vent run is larger than the diameter of the<br />
venter outlet (See Vent Length Table 2), make the transition at<br />
the venter outlet.<br />
• A minimum of 12" of straight pipe is required at the venter<br />
outlet (or transition fitting) before installing an elbow in the<br />
vent system. An elbow should never be attached directly to the<br />
venter. An elbow attached to the straight pipe can be in any<br />
position at or above horizontal. See Figure 5.<br />
Figure 5 - Alternate Vent<br />
Directions (vent in any<br />
position above horizontal;<br />
minimum of 12" of straight<br />
pipe<br />
required<br />
before<br />
an<br />
elbow)<br />
2. Vent Pipe<br />
If installed with a horizontal vent run, use either vent pipe approved<br />
for a Category III heater or appropriately sealed 26-gauge galvanized<br />
steel or equivalent single-wall pipe.<br />
If at least half of the equivalent length of the vent system is vertical,<br />
vent pipe approved for a Category I heater may be used. Singlewall<br />
pipe or double-wall (Type B) vent pipe are suitable for use<br />
with a Category I heater.<br />
Use only one of the flue pipe diameters listed in the Vent Length<br />
Tables for the furnace size being installed.<br />
2A. Vent Pipe Diameter Reduction<br />
If at least half of the equivalent length of the vent system is vertical,<br />
the vent pipe diameter may be reduced one inch from the st<strong>and</strong>ard<br />
diameter listed in Vent Length Table 1. Only single-wall pipe<br />
is suitable for use when reducing the pipe diameter. A taper-type<br />
reducer must be used. The maximum allowable vent length remains<br />
the same. If required, double wall pipe may be used at the terminal<br />
end as shown in Figure 6. (Use the equivalent length for elbows as<br />
shown in Vent Length Table 1 for the st<strong>and</strong>ard vent pipe diameter.<br />
All elbows used in the vent system must be considered.)<br />
3. Vent Length Tables<br />
Table 1: Maximum Permissible Vent Lengths<br />
Vent Pipe Maximum Equivalent Straight<br />
<strong>Model</strong> Diameter Vent Length* Length** - ft (m)<br />
-" (mm) - ft (m) 90o Elbows 45o Elbows<br />
25 4"(102) 30 ft (9.1 m) 3.5' (1 m) 1.8' (.5 m)<br />
50 4"(102) 40 ft (12.2 m) 5' (1.5 m) 2.5' (.8 m)<br />
75 4"(102) 50 ft (15.2 m) 7' (2.1 m) 3.5' (1.1 m)<br />
100 4"(102) 50 ft (15.2 m) 7' (2.1 m) 3.5' (1.1 m)<br />
125 5"(127) 50 ft (15.2 m) 5' (1.5 m) .5' (.8 m)<br />
165 5"(127) 50 ft (15.2 m) 9' (2.7 m) 4.5' (1.4 m)<br />
200 5"(127) 50 ft (15.2 m) 8' (2.4 m) 4.0' (1.2 m)<br />
250 5"(127) 50 ft (15.2 m) 10' (3.0 m) 5' (1.5 m)<br />
300 6"(152) 50 ft (15.2 m) 11' (3.4 m) 5.5' (1.7 m)<br />
400 6"(152) 50 ft (15.2 m) 15' (4.6 m) 7.5' (2.3 m)<br />
Form 436, Page 8<br />
Table 2: Optional Maximum Permissible Vent Lengths<br />
(Requires an increase in vent pipe diameter.)<br />
Vent Pipe Maximum Equivalent Straight<br />
<strong>Model</strong> Diameter Vent Length* Length** - ft (m)<br />
- " (mm) - ft (m) 90 o Elbows 45 o Elbows<br />
100 5" (127) 60 ft (18.3 m) 8' (2.4 m) 4.0' (1.2 m)<br />
165 6" (152) 60 ft (18.3 m) 10' (3.0 m) 5.0' (1.5 m)<br />
200 6" (152) 60 ft (18.3 m) 12' (3.7 m) 6.0' (1.8 m)<br />
250 6" (152) 70 ft (21.3 m) 8' (2.4 m) 4.0' (1.2 m)<br />
300 7" (178) 70 ft (21.3 m) 13' (4.0) 6.5' (2.0 m)<br />
400 7" (178) 90 ft (27.4 m) 14' (4.3) 7.0' (2.1)<br />
*Note 1: If the system contains all vertical pipe or a combination of horizontal<br />
<strong>and</strong> vertical vent pipe, the Maximum Permissible Vent Length shown in Tables 1<br />
<strong>and</strong> 2 may be increased one foot for each foot vertical rise up to a maximum<br />
increase of 10 feet for model sizes 25 thru 100 <strong>and</strong> up to 20 feet for model sizes<br />
125 thru 400.<br />
**Reduce the maximum vent length by the amount indicated for each elbow.<br />
4. Vent System Joints<br />
Vent system joints depend on the installation <strong>and</strong> the type of pipe being<br />
used.<br />
• If using single wall, 26-gauge or heavier galvanized pipe, secure slipfit<br />
connections using sheet metal screws or rivets. Seal pipe joints either<br />
with tape suitable for 550 o F (such as Option FA1, P/N 98266) or<br />
high-temperature silicone sealant.<br />
• If using Category III vent pipe, follow pipe manufacturer's instructions<br />
for joining pipe sections. When attaching Category III pipe to the venter<br />
outlet or the vent cap, make secure, sealed joints following a procedure<br />
that best suits the style of Category III pipe being used.<br />
• If using double-wall (Type B) vent pipe (allowed only if 1/2 of the<br />
equivalent vent length is vertical), follow pipe manufacturer's instructions<br />
for joining pipe sections. For joining double-wall pipe to the venter<br />
outlet collar, single-wall pipe, <strong>and</strong>/or the vent cap, follow the instructions<br />
below.<br />
Instructions for attaching double-wall (Type B) vent pipe to the venter outlet,<br />
a single-wall pipe run, or to the vent cap (use these instructions for either<br />
full length double-wall or terminal only):<br />
Hardware <strong>and</strong> Sealant Required: 3/4" long sheetmetal screws; <strong>and</strong> a tube of RTV<br />
1) Look for the "flow" arrow on the vent pipe; attach according to the arrow.<br />
Slide the pipe so that the venter outlet, the single-wall pipe, or the vent cap is<br />
inside the double-wall pipe.<br />
2) Drill a hole through the pipe into the outlet collar, the single-wall pipe, or the<br />
vent cap. (Hole should be slightly smaller than the sheet metal screw being used.)<br />
Using a 3/4" long sheet metal screw, attach the pipe. Do not overtighten. Repeat,<br />
drilling <strong>and</strong> inserting two additional screws evenly spaced (120 o apart) around<br />
the pipe.<br />
3) Use RTV to seal any gaps. If there is an annular opening, run a large bead of<br />
RTV in the opening. The bead of RTV must be large enough to seal the opening,<br />
but it is not necessary to fill the full volume of the annular area.<br />
5. Vent System Support<br />
Support lateral runs every six feet, using a non-combustible material such<br />
as strap steel or chain. Do not rely on the heater for support of either horizontal<br />
or vertical vent pipe<br />
6. Condensation<br />
Single wall vent pipe exposed to cold air or run through unheated areas<br />
must be insulated. Where extreme conditions are anticipated, install a means<br />
of condensate disposal.<br />
7. Vent Terminal (Pipe <strong>and</strong> Vent Cap)<br />
The vent system must be terminated with a suitable vent cap that is the<br />
same size as the vent run.<br />
Heaters installed in Canada must be equipped with the vent cap supplied<br />
as optional equipment by the heater manufacturer (Option CC1 or<br />
Option BT2). Heaters installed in the United States must be equipped<br />
with the heater manufacturer's vent cap, a Type L Breidert Air-x-hauster ®<br />
vent cap, or equivalent. Use of a vent cap supplied by the pipe manufac-
turer is not permitted; the vent cap must be the type approved for use<br />
with this heater. A different style vent cap could cause nuisance problems<br />
or unsafe conditions.<br />
See the illustrations in Figures 6 <strong>and</strong> 7 for requirements of both vertical<br />
<strong>and</strong> horizontal vent termination. The vent terminal section may be<br />
Figure 6 - Vertical Vent Terminals<br />
Figure 7 - Horizontal Vent Terminals<br />
Horizontal Vent Terminal Clearances:<br />
The location of the termination of the horizontal<br />
vent system must be in accordance with<br />
National Fuel Gas Code Z223.1. Required<br />
minimum clearances are listed on the right.<br />
Products of combustion can cause discoloration<br />
of some building finishes <strong>and</strong> deterioration<br />
of masonry materials. Applying a clear<br />
silicone sealant that is normally used to protect<br />
concrete driveways can protect masonry<br />
materials. If discoloration is an esthetic problem,<br />
relocate the vent or install a vertical vent.<br />
either single-wall or double-wall (Type B) vent pipe. If double-wall<br />
pipe is used in the vent terminal with a single-wall vent run, follow the<br />
instructions in No. 4, Vent System Joints, to attach the vent cap <strong>and</strong> to<br />
connect the double-wall pipe to the single-wall vent pipe run.<br />
Structure Minimum Clearances for Vent Termination<br />
Location (all directions unless specified)<br />
Forced air inlet within 10 ft (3.1m) 3 ft (0.9m) above<br />
Combustion air inlet of another appliance 6 ft (1.8m)<br />
Door, window, or gravity air inlet 4 ft (1.2m) horizontally<br />
(any building opening) 4 ft (1.2m) below<br />
3 ft (0.9m) above<br />
Electric meter, gas meter * <strong>and</strong> relief equipment 4 ft (1.2m) horizontally<br />
Gas regulator * 3 ft (0.9m)<br />
Adjoining building or parapet 6 ft (1.8m)<br />
Grade (ground level) 7 ft (2.1m) above<br />
*Do not terminate the vent directly above a gas meter or service regulator.<br />
Mfg P/N 98807 Rev 8, Page 9
10. Gas Piping <strong>and</strong> Pressures<br />
WARNING<br />
This appliance is equipped for a maximum gas<br />
supply pressure of 1/2 pound, 8 ounces, or 14<br />
inches water column. Supply pressure higher<br />
than 1/2 pound requires installation of an<br />
additional service regulator external to the unit.<br />
PRESSURE TESTING SUPPLY PIPING<br />
Test Pressures Above 1/2 PSI: Disconnect the heater <strong>and</strong> manual<br />
valve from the gas supply line which is to be tested. Cap or<br />
plug the supply line.<br />
Test Pressures Below 1/2 PSI: Before testing, close the manual<br />
valve on the heater.<br />
All piping must be in accordance with requirements outlined in the<br />
National Fuel Gas Code ANSI/Z223.1a (latest edition), published by<br />
the American Gas Association or CAN/CGA-B149.1 <strong>and</strong> B149.2, published<br />
by the Canadian Gas Association (See Paragraph 1). Gas supply<br />
piping installation should conform with good practice <strong>and</strong> with local<br />
codes.<br />
Unit heaters for natural gas are orificed for operation with gas having a<br />
heating value of 1000 (+ or - 50) BTUH per cubic ft. If the gas at the<br />
installation does not meet this specification, consult the factory for<br />
proper orificing.<br />
Pipe joint compounds (pipe dope) shall be resistant to the action of<br />
liquefied petroleum gas or any other chemical constituents of the<br />
gas being supplied.<br />
Install a ground joint union <strong>and</strong> manual shut-off valve upstream of the<br />
unit control system, as shown in Figure 8. The 1/8" plugged tapping in<br />
the shut-off valve provides connection for supply line pressure test<br />
gauge. The National Fuel Gas Code requires the installation of a trap<br />
with a minimum 3" drip leg. Local codes may require a minimum drip<br />
leg longer than 3" (typically 6").<br />
Gas connection sizes are included in the Dimensional Tables in Paragraph<br />
3. After all connections are made, disconnect the pilot supply at<br />
the control valve <strong>and</strong> bleed the system of air. Reconnect the pilot line<br />
<strong>and</strong> leak-test all connections by brushing on a soap solution.<br />
Sizing a Gas Supply Line<br />
Form 436, Page 10<br />
Figure 8 - Supply<br />
Piping Connection<br />
WARNING: All components of a gas supply<br />
system must be leak tested prior to placing<br />
equipment in service. NEVER TEST FOR<br />
LEAKS WITH AN OPEN FLAME. Failure to<br />
comply could result in personal injury, property<br />
damage or death.<br />
Manifold or Orifice Pressure Settings<br />
Measuring manifold gas pressure cannot be done until the heater is in<br />
operation. It is included in the steps of the "Check-Test-Start" procedure<br />
in Paragraph 24. The following warnings <strong>and</strong> instructions apply.<br />
WARNING: Manifold gas pressure must never<br />
exceed 3.5" w.c. for natural gas <strong>and</strong> 10" w.c. for<br />
propane gas.<br />
For Natural Gas: Manifold gas pressure is regulated by the combination<br />
valve to 3.5" w.c. Inlet pressure to the valve must be a minimum of<br />
5" w.c. or as noted on the rating plate <strong>and</strong> a maximum of 14" w.c.<br />
For Propane Gas: Manifold gas pressure is regulated by the combination<br />
valve to 10" w.c. Inlet pressure to the valve must be a minimum of<br />
11" w.c. <strong>and</strong> a maximum of 14" w.c.<br />
C apac ity of P iping<br />
Cubic Feet per Hour based on 0.3" w.c. Pressure Drop<br />
Sp ecific G ravity for N atural G as -- 0.6 (N atural G as -- 1000 BT U /Cubic Ft)<br />
Specific Gravity for Propane Gas -- 1.6 (Propane Gas -- 2550 BTU/Cubic Ft)<br />
Length Diameter of Pipe<br />
of 1/2" 3/4" 1" 1-1/4" 1-1/2" 2"<br />
Pip e Natu ral Pro p an e Natu ral Pro p an e Natu ral Pro p an e Natu ral Pro p an e Natu ral Pro p an e Natu ral Pro p an e<br />
20' 92 56 190 116 350 214 730 445 1100 671 2100 1281<br />
30' 73 45 152 93 285 174 590 360 890 543 1650 1007<br />
40' 63 38 130 79 245 149 500 305 760 464 1450 885<br />
50' 56 34 115 70 215 131 440 268 670 409 1270 775<br />
60' 50 31 105 64 195 119 400 244 610 372 1105 674<br />
70' 46 28 96 59 180 110 370 226 560 342 1050 641<br />
80' 43 26 90 55 170 104 350 214 530 323 990 604<br />
90' 40 24 84 51 160 98 320 195 490 299 930 567<br />
100' 38 23 79 48 150 92 305 186 460 281 870 531<br />
125' 34 21 72 44 130 79 275 168 410 250 780 476<br />
150' 31 19 64 39 120 73 250 153 380 232 710 433<br />
175' 28 17 59 36 110 67 225 137 350 214 650 397<br />
200' 26 16 55 34 100 61 210 128 320 195 610 372<br />
N ote: W hen siz ing sup p ly lines, consider p ossibilities of future exp ansion <strong>and</strong> increased requirem ents.<br />
Refer to National Fuel Gas Code for additional information on line sizing.
Before attempting to measure or adjust manifold gas pressure,<br />
the inlet (supply) pressure must be within the specified range for<br />
the gas being used both when the heater is in operation <strong>and</strong> on<br />
st<strong>and</strong>by. Incorrect inlet pressure could cause excessive manifold<br />
gas pressure immediately or at some future time.<br />
Instructions to Check Manifold Pressure:<br />
1) With the manual valve (on the combination valve) positioned<br />
to prevent flow to the main burners, connect a manometer to<br />
the 1/8" pipe outlet pressure tap in the valve. NOTE: A manometer<br />
(fluid-filled gauge) is recommended rather than a<br />
11. Electrical Supply <strong>and</strong> Connections<br />
All electrical wiring <strong>and</strong> connections, including electrical grounding<br />
MUST be made in accordance with the National Electric<br />
Code ANSI/NFPA No. 70 (latest edition) or, in Canada, the Canadian<br />
Electrical Code, Part I-C.S.A. St<strong>and</strong>ard C22.1. In addition,<br />
the installer should be aware of any local ordinances or gas<br />
company requirements that might apply.<br />
Check the rating plate on the heater for the supply voltage <strong>and</strong><br />
current requirements. A separate line voltage supply with fused<br />
disconnect switch should be run directly from the main electrical<br />
panel to the heater. All external wiring must be within approved<br />
conduit <strong>and</strong> have a minimum temperature rise of 60 o C.<br />
Conduit from the disconnect switch must be run so as not to<br />
interfere with the service panels of the heater.<br />
The electrical supply connects at the top back of the heater in the<br />
left corner (left when facing the back of the heater). A threaded<br />
hole is provided for a st<strong>and</strong>ard 1/2" electrical fitting.<br />
The wiring access panel is easily removed for field connections.<br />
Consult the wiring diagram supplied with your heater. Replace<br />
the panel after the wiring connections are made.<br />
If the heater has field-installed options that require electrical connections,<br />
consult the instruction sheet <strong>and</strong> wiring diagram supplied<br />
in the option package.<br />
A fan-type heater may be equipped with a built-in fused disconnect<br />
switch (Option AI-1). If the heater is equipped with a builtin<br />
disconnect switch, a two-position toggle (on/off) switch is<br />
located near the electrical supply access panel (See Figures 9A<br />
<strong>and</strong> 9B). This switch may be used to disconnect the power when<br />
servicing the heater other than in the supply junction box.<br />
Specific wiring diagrams that include st<strong>and</strong>ard <strong>and</strong> factory-installed<br />
options are included with the heater. Check the wiring<br />
diagram to identify optional equipment.<br />
Field Wiring<br />
from Disconnect<br />
in Conduit<br />
Threaded<br />
Hole for<br />
St<strong>and</strong>ard 1/2"<br />
Fitting<br />
Note: Fan-type<br />
heaters with optional<br />
built-in disconnect<br />
switch, have an on/off<br />
switch located near<br />
the electrical supply<br />
access panel.<br />
Figure 9A - Electrical<br />
Connections<br />
Remove<br />
Access<br />
Panel to<br />
make<br />
connections<br />
spring type gauge due to the difficulty of maintaining calibration of a<br />
spring type gauge.<br />
2) Open the valve <strong>and</strong> operate the heater. Measure the gas pressure to the<br />
manifold. Normally adjustments should not be necessary to the factory<br />
preset regulator.<br />
If adjustment is necessary, set pressure to correct settings by turning the regulator<br />
screw IN (clockwise) to increase pressure. Turn regulator screw OUT<br />
(counterclockwise) to decrease pressure.<br />
Consult the valve manufacturer's literature provided with the heater for more<br />
detailed information.<br />
WARNINGS: On a heater with<br />
a unit disconnect switch (Option<br />
AI-1), if the power is turned off<br />
at the switch, the supply lead in<br />
the electrical supply junction<br />
box (Figure 9A) remains<br />
energized. If service is to be<br />
done in the supply junction box,<br />
turn off the power at the remote<br />
disconnect switch.<br />
If you turn off the power supply,<br />
turn off the gas.<br />
The operating sequence of the heater can be<br />
found on the heater wiring diagram <strong>and</strong> is published<br />
in Paragraph 24, Check Installation <strong>and</strong><br />
Start-Up. Typical wiring diagrams are on the<br />
next four pages, showing st<strong>and</strong>ard singlestage<br />
heating with spark pilot with <strong>and</strong> without<br />
lockout.<br />
CAUTION: If any of the original wire as<br />
supplied with the appliance must be replaced, it must be replaced with<br />
wiring material having a temperature rating of at least 105 o C, except for<br />
limit control <strong>and</strong> sensor lead wires which must be 150 o C. See Hazard<br />
Levels, page 2.<br />
12. Thermostat <strong>and</strong> Thermostat<br />
Connections<br />
A thermostat is not st<strong>and</strong>ard equipment but is an installation requirement.<br />
Use either an optional thermostat available with the heater or a field-supplied<br />
thermostat. Install according to the thermostat manufacturer's instructions.<br />
Make sure that the heat anticipator setting on the thermostat is in accordance<br />
with the amperage value noted on the<br />
wiring diagram of your heater.<br />
Terminal Strip Connections - The<br />
st<strong>and</strong>ard heater is equipped with a twoscrew<br />
terminal connector strip (See Figure<br />
10) for easy connection to the low<br />
voltage controls (24V). When factoryinstalled<br />
options require two-stage<br />
thermostat control, the heater is<br />
equipped with a SP-ST relay <strong>and</strong> a<br />
four-screw terminal connector strip<br />
(See Figure 11).<br />
If your heater requires field installation<br />
of the four-screw terminal<br />
strip <strong>and</strong> the relay, follow the instructions<br />
packaged with the relay<br />
or thermostat option.<br />
If equipped<br />
with unitmounted<br />
disconnect<br />
switch, on/<br />
off toggle<br />
switch is<br />
near access<br />
panel to<br />
electrical<br />
supply<br />
junction<br />
box.<br />
Circuit<br />
breaker<br />
button for<br />
Option AI-1<br />
unitmounted<br />
disconnect<br />
switch<br />
Figure 10 -<br />
Two Screw<br />
Terminal<br />
Connector<br />
Strip for<br />
24-volt<br />
Wiring<br />
Figure 11 -<br />
Four Screw<br />
Terminal<br />
Connector<br />
Strip for 24-<br />
Volt Wiring<br />
Figure 9B<br />
(Paragraph 12 continued on page 16.)<br />
Mfg P/N 98807 Rev 8, Page 11
TYPICAL WIRING DIAGRAMS -- Pages 12 - 15<br />
Field Control Wiring Length <strong>and</strong> Gauge<br />
Total Wire Distance from MinimumRecommended<br />
Length Unit to Control Wire Gauge<br />
150' (45.7 m) 75' (22.9 m) #18 gauge<br />
250' (76.2 m) 125' (38.1 m) #16 gauge<br />
350' (106.7 m) 175' (53.3 m) #14 gauge<br />
Fan-Type, Power-Vented <strong>Model</strong><br />
with Intermittent Spark Pilot,<br />
Single-Stage Heating,<br />
Natural or Propane<br />
W.R 1C30-339 THERMOSTAT W-S23-6 SUBBASE<br />
SET ANTICIPATOR AT 0.8 AMPS<br />
OPERATING SEQUENCE<br />
1. SET THERMOSTAT AT LOWEST SETTING.<br />
2. TURN ON MAIN AND PLOT MANUAL GAS VALVES.<br />
3. TURN ON POWER TO UNIT.<br />
4. SET THERMOSTAT AT DESIRED SETTING.<br />
5. THERMOSTAT CALLS FOR HEAT ENERGIZING THE VENTER MOTOR.<br />
6. VENTER PRESSURE SWITCH CLOSES FIRING UNIT AT FULL RATE AFTER PILOT<br />
PROVING SEQUENCE.<br />
7. FAN CONTROL SENSES HEAT EXCHANGER TEMPERATURE, ENERGIZING THE<br />
FAN MOTOR.<br />
8. IF THE FLAME IS EXTINGUISHED DURING MAIN BURNER OPERATION THE SA<strong>FE</strong>TY SWITCH<br />
CLOSES THE MAIN VALVE AND RECYCLES THE SPARK GAP. ON UNITS EQUIPPED<br />
WITH THE G77ONGC-4 LOCKOUT CONTROL, IF PILOT IS NOT ESTABLISHED WITHIN 120<br />
SECONDS (APPROX.) UNIT LOCKS OUT AND THE UNIT MUST <strong>BE</strong> RESET BY<br />
INTERRUPTING POWER TO CONTROL CIRCUIT (SEE LIGHTING INSTRUCTIONS).<br />
NOTES<br />
1. THE FOLLOWING CONTROLS ARE FIELD INSTALLED OPTIONS:<br />
THERMOSTAT<br />
2. THE FOLLOWING CONTROLS ARE FACTORY INSTALLED OPTIONS:<br />
S/W SWITCH<br />
3. DOTTED WIRING INSTALLED BY OTHERS.<br />
4. CAUTION: IF ANY OF THE ORIGINAL WIRING AS SUPPLIED WITH THE APPLIANCE MUST <strong>BE</strong><br />
REPLACED, IT MUST <strong>BE</strong> REPLACED WITH WIRING MATERIAL HAVING A TEMPERATURE<br />
RATING OF AT LEAST 105 DEGREES C., EXCEPT FOR SENSOR LEAD AND<br />
LIMIT WIRING WHICH MUST <strong>BE</strong> 150 DEGREES C.<br />
5. USE #18 GA WIRE FOR ALL WIRING EXCEPT FAN MOTOR CIRCUIT.<br />
6. LINE AND FAN MOTOR BRANCH WIRE SIZES SHOULD <strong>BE</strong> OF A SIZE TO PREVENT VOLTAGE<br />
DROPS <strong>BE</strong>YOND 5% OF SUPPLY LINE VOLTAGE.<br />
7. ON 230V. UNITS THE CONTROL TRANSFORMER HAS A DUAL VOLTAGE PRIMARY.<br />
FOR 230V. UNITS USE BLACK AND YELLOW LEADS (CAP RED).<br />
FOR 208V. UNITS USE BLACK AND RED LEADS (CAP YELLOW).<br />
ON 115V. UNITS THE CONTROL TRANSFORMER IS A SINGLE VOLTAGE PRIMARY.<br />
FOR 115V. UNITS USE BLACK AND YELLOW LEADS.<br />
8. SEE INSTALLATION INSTRUCTIONS FOR GREATER DETAIL.<br />
FACTORY WIRING<br />
WIRING CODE<br />
FIELD WIRING<br />
BLACK - BK<br />
BROWN - BR<br />
OPTIONAL FACTORY WIRING<br />
RED - R<br />
ORANGE - O<br />
WIRE NUT<br />
YELLOW - Y<br />
GREEN - G<br />
CRIMP TERMINAL<br />
BLUE - BL<br />
PURPLE - PR<br />
WHITE - W<br />
115/1/60, 208/1/60 OR 230/1/60<br />
L1<br />
L2<br />
(HOT)<br />
(COM)<br />
VENTER RELAY<br />
VENTER MOTOR<br />
CONTACTS<br />
BK BK<br />
BK<br />
BK<br />
GRD<br />
2 4<br />
6<br />
7<br />
OPTIONAL<br />
FAN MOTOR<br />
S/W SWITCH<br />
BK BK<br />
BK<br />
BK<br />
BK<br />
BK<br />
FIELD WIRING<br />
TERMINAL STRIP<br />
FACTORY WIRING<br />
BK BK<br />
FAN CONTROL<br />
BK BK<br />
BK<br />
LINE VOLT<br />
Y<br />
CONTROL<br />
TRANSFORMER<br />
R<br />
R<br />
BR<br />
24V<br />
8<br />
GROUND TERMINAL<br />
VENTER RELAY COIL<br />
(TERMINAL STRIP)<br />
BL BR BR<br />
3 1<br />
BR<br />
BR<br />
GRND.<br />
W<br />
STRIP<br />
R<br />
R<br />
R<br />
G67BG-5<br />
RECYCLE<br />
C<br />
OR<br />
G770NGC-4<br />
LOCKOUT<br />
BK<br />
3<br />
M<br />
TR OR<br />
IGNITION FLAME SENSING<br />
PV-MV<br />
CONTROLLER PRO<strong>BE</strong><br />
BL<br />
W<br />
4<br />
PRESSURE<br />
LIMIT<br />
BK<br />
W<br />
SWITCH<br />
CONTROL<br />
Y Y Y Y Y<br />
IGNITOR<br />
TH OR<br />
BK<br />
2<br />
MV<br />
GRND<br />
BL<br />
5 5<br />
1<br />
P<br />
BL<br />
CHASSIS GRND.<br />
TH-TR<br />
OR PV<br />
<strong>FE</strong> 25-400 OPT. AH2/AH3 WD #97302 REV #8<br />
Form 436, Page 12<br />
5<br />
R<br />
MAIN<br />
PILOT<br />
W.R. OR RO<strong>BE</strong>RTSHAW<br />
REDUNDANT GAS VALVE<br />
BR<br />
W<br />
G<br />
BR<br />
W<br />
W<br />
BR<br />
PILOT MAIN<br />
ALTERNATE HONEYWELL<br />
REDUNDANT GAS VALVE<br />
CAUTION: If any of the original wire as supplied with<br />
the appliance must be replaced, it must be replaced with<br />
wiring material having a temperature rating of at least<br />
105 o C, except for limit control <strong>and</strong> sensor lead wires<br />
which must be 150 o C. See Hazard Levels, page 2.
Blower-Type, Power-Vented <strong>Model</strong> Sizes 25-100 with<br />
Intermittent Spark Pilot,<br />
Single-Stage Heating,<br />
Natural or Propane,<br />
Direct Drive<br />
<strong>Model</strong> Size Speed Use these Two Motor Wires<br />
25 *Medium *Blue <strong>and</strong> White<br />
Low Red <strong>and</strong> White<br />
50 *High *Black <strong>and</strong> White<br />
Medium Blue <strong>and</strong> White<br />
High Black <strong>and</strong> White<br />
75 *Medium *Blue <strong>and</strong> White<br />
Low Red <strong>and</strong> White<br />
*High *Black <strong>and</strong> White<br />
100 Medium Blue <strong>and</strong> White<br />
Low Red <strong>and</strong> White<br />
*Factory-wired speed<br />
Mfg P/N 98807 Rev 8, Page 13
Blower-Type, Power-Vented <strong>Model</strong> Sizes 50-250 with Intermittent Spark Pilot, Single-Stage Heating,<br />
Natural or Propane, Belt Drive (NOTE: Belt drive is st<strong>and</strong>ard on Sizes 125-250; optional on Sizes 50-<br />
100.)<br />
Form 436, Page 14
Blower-Type, Power-Vented <strong>Model</strong> Sizes 165-400 with Intermittent Spark Pilot, Single-stage<br />
Heating, Natural or Propane, Belt Drive, Motor Contactor (NOTE: Motor contactor is<br />
st<strong>and</strong>ard on Sizes 300 <strong>and</strong> 400; optional on other sizes.<br />
Mfg P/N 98807 Rev 8, Page 15
12. Thermostat Connections (cont'd)<br />
There are some unique wiring requirements with the installation of the optional controls (relay <strong>and</strong> two-stage). Figure 12 illustrates the wiring of the<br />
relay <strong>and</strong> the connections required for optional thermostat control.<br />
575/3/60<br />
Figure 12 - Wiring Diagrams for Optional Controls<br />
Multiple Heater Control - These unit heaters are not designed for multiple unit connection to one thermostat. If you require that more than one unit<br />
be controlled by a single thermostat, it will be necessary to use relays in the circuit. Options CL31 <strong>and</strong> CL32 provide the necessary parts <strong>and</strong><br />
instructions for multiple heater control. For more information on these options, see Paragraph 30.<br />
13. Fan Motor<br />
Fan motors are equipped with thermal overload protection of the automatic<br />
reset type. Should the motor refuse to run, it may be because of<br />
improper current characteristics. Make certain that the correct voltage<br />
is available at the motor.<br />
NOTE: If the unit is equipped with an optional totally enclosed motor,<br />
the horsepower may be larger than the st<strong>and</strong>ard motor. Refer to the<br />
motor nameplate to verify horsepower.<br />
14. Blower Motor<br />
Blower <strong>Model</strong> Sizes 25-100 are st<strong>and</strong>ardly equipped with a direct drive<br />
motor; an optional belt drive motor is available on Sizes 50-100. Blower<br />
<strong>Model</strong> Sizes 125-400 have an adjustable belt drive motor.<br />
As part of the Check/Test/Start (Paragraph 24), check the belt for proper<br />
tension. Proper belt tension is important to the long life of the belt <strong>and</strong><br />
motor. A loose belt will cause wear <strong>and</strong> slippage. Too much tension<br />
will cause excessive motor <strong>and</strong> blower bearing wear. Adjust the belt<br />
tension by turning the adjusting screw on the motor base until the belt<br />
can be depressed 1/2-3/4". (See Figure 13.) After correct tension is<br />
achieved, re-tighten the locknut on the adjusting screw.<br />
Most blower motors are equipped with thermal overload protection of<br />
the automatic reset type. If a motor is not equipped with thermal overload<br />
protection, the unit will be equipped with a starter. The adjustable<br />
setting on the starter will be factory set to match the amp draw of the<br />
Form 436, Page 16<br />
Figure 13 -<br />
Adjusting Belt<br />
Tension<br />
motor <strong>and</strong> sealed. No change should be made to starter set unless the<br />
original motor is replaced.<br />
Starters are supplied from the factory for manual reset operation. If an<br />
overload condition is experienced, the condition must be corrected,<br />
<strong>and</strong> the starter must be manually reset.<br />
After the installation is complete including all ductwork, the amp draw<br />
of the motor should be checked with an amp meter to verify that the<br />
motor amp rating on the motor nameplate is not being exceeded. Amps<br />
may be adjusted downward by reducing blower speed for by increasing<br />
the duct system static pressure. The temperature rise must be within<br />
the range specified on the unit rating plate.
15. Blower Speed Adjustment<br />
The blower speed may be adjusted to achieve the desired outlet temperature,<br />
as long as the adjustment is within the temperature rise <strong>and</strong><br />
the static pressure limits shown on the heater rating plate. Direct drive<br />
motors are factory set as indicated in the chart below. Belt drive motors<br />
are factory set at the mid-point between maximum <strong>and</strong> minimum<br />
blower speeds.<br />
If the duct resistance is low, the blower may deliver too high an air<br />
volume; or if the heater is operated without ductwork, it may deliver<br />
sufficient excess air to overload the motor, causing the overload protector<br />
to cycle the motor. Reducing the blower speed will correct these<br />
conditions. If ductwork is added to an installation, it may be necessary<br />
to increase the blower speed. Decreasing blower speed will increase<br />
outlet temperature; increasing blower speed will decrease outlet temperature.<br />
Blower <strong>Model</strong> Sizes 25-100 with Direct<br />
Drive<br />
Direct drive blower motors have multi-speed taps for speed adjustment.<br />
If your installation requires an adjustment of the blower speed,<br />
the motor may be re-wired to an alternate tap by following these instructions.<br />
1. Turn off the gas <strong>and</strong> the electric power.<br />
2. Remove the left (left when facing the back of the unit) outer side<br />
panel of the heater to reveal the wiring connections.<br />
3. Consult the wiring diagram on the heater <strong>and</strong> follow the below chart<br />
to choose the wire for the desired adjustment. The asterisk(*) indicates<br />
the factory-wired speed.<br />
<strong>Model</strong> Size Speed Use these Two Motor Wires<br />
25 *Medium *Blue <strong>and</strong> White<br />
Low Red <strong>and</strong> White<br />
50 *High *Black <strong>and</strong> White<br />
Medium Blue <strong>and</strong> White<br />
High Black <strong>and</strong> White<br />
75 *Medium *Blue <strong>and</strong> White<br />
Low Red <strong>and</strong> White<br />
*High *Black <strong>and</strong> White<br />
100 Medium Blue <strong>and</strong> White<br />
Low Red <strong>and</strong> White<br />
4. Cut the crimped cap from the end of the wire that you intend to use<br />
<strong>and</strong> strip the insulation.<br />
5. Disconnect the factory-wired connection <strong>and</strong> re-wire, using the<br />
newly stripped wire.<br />
6. Put a wire nut on the end of the blower motor wire that was disconnected.<br />
7. Replace the heater side panel <strong>and</strong> turn on the gas <strong>and</strong> the electric.<br />
Blower <strong>Model</strong> Sizes 50-400 with Belt Drive<br />
The belt drive on these units is equipped with an adjustable pulley<br />
which permits adjustment of the blower speed. Follow these instructions<br />
to adjust the blower speed.<br />
1. Turn off the gas <strong>and</strong> the electric power.<br />
2. Loosen belt tension <strong>and</strong> remove the belt.<br />
3. Loosen the set screw on the side of the pulley away from the motor.<br />
4. To increase the blower speed, decreasing outlet temperature, turn<br />
the adjustable half of the pulley inward. To decrease the blower<br />
speed, increasing the outlet temperature, turn the adjustable half<br />
of the pulley outward. One turn of the pulley will change the speed<br />
8-10%.<br />
5. Tighten the set screw on the flat portion of the pulley shaft.<br />
6. Replace the belt <strong>and</strong> adjust the belt tension. Adjust tension by turning<br />
the adjusting screw on the motor base until the belt can be depressed<br />
1/2-3/4". (See Figure 13.) Re-tighten the lock nut on the<br />
adjusting screw.<br />
7. Turn on the gas <strong>and</strong> electric. Light the heater following the instructions<br />
on the lighting instruction plate.<br />
8. Check the motor amps with an amp meter. The maximum motor<br />
amp rating on the motor nameplate must not be exceeded.<br />
CAUTION: An external duct system static<br />
pressure not within the limits shown on the rating<br />
plate or improper adjustment of the motor pulley<br />
or belt may overload the motor.<br />
16. Blower Rotation<br />
Each blower housing is marked for proper rotation. Rotation may be<br />
changed on single-phase motors by re-wiring in the motor terminal<br />
box. Three-phase motors may be reversed by interchanging two wires<br />
on the 3-phase supply connections.<br />
17. Fan Control<br />
1. A fan control provides the following:<br />
(a) Delay of fan or blower operation to prevent the discharge of<br />
cold air.<br />
(b) Fan or blower operation as long as the unit is hot.<br />
2. The fan control provides additional safety by keeping the fan or<br />
blower in operation in the event that the gas valve fails to close<br />
when the thermostat is satisfied.<br />
3. To be sure that the fan or blower can continue to operate, the power<br />
supply to the heater MUST NOT be interrupted except when servicing<br />
the unit.<br />
4. If the customer wants the heater off at night, the gas valve circuit<br />
SHOULD <strong>BE</strong> OPENED by a single pole switch wired in series<br />
with the thermostat. Some thermostats are provided with this feature.<br />
Multiple units controlled from a single thermostat are shut off in the<br />
same manner. For proper operation, be sure the fan control wiring<br />
is observed.<br />
WARNING: If you turn off the power supply,<br />
turn off the gas. See Hazard Levels, page 2.<br />
NOTE: Low ambient temperatures (less than 40 o F) may cause false<br />
cycling of the fan/blower. To prevent this, a time delay relay can be<br />
added to the unit (available with single-stage gas valve only) to activate<br />
the fan/blower electrically independent of the heat exchanger or<br />
the room temperature. The low ambient fan control relay can be factory<br />
installed; Option BF8 will appear on the heater wiring diagram.<br />
Or, the relay can be field installed; order Option CQ3 (P/N 112779).<br />
This relay is in addition to the fan control The fan control is a safety<br />
device <strong>and</strong> should never be removed from the heater circuit.<br />
18. Limit Control<br />
All models are equipped with an automatic, non-adjustable reset limit<br />
control that acts to interrupt the electric supply to the redundant main<br />
operating valve in case of motor failure or lack of airflow due to re-<br />
strictions at the inlet or outlet.<br />
Mfg P/N 98807 Rev 8, Page 17
19. Combustion Air Proving<br />
Switch<br />
The combustion air proving switch is a pressure sensitive switch that<br />
monitors air pressure to ensure that proper combustion air flow is available.<br />
The switch is a single pole - normally open - device which closes<br />
when a decreasing pressure is sensed in the outlet duct of the flue gas<br />
collection box.<br />
On start-up when the heater is cold, the sensing pressure is at the most<br />
negative level, <strong>and</strong> as the heater <strong>and</strong> flue system warm up, the sensing<br />
pressure becomes less negative. After the system has reached equilibrium<br />
(about 20 minutes), the sensing pressure levels off.<br />
If a restriction or excessive flue length or turns cause the sensing pressure<br />
to become less than the switch setpoint, the pressure switch will<br />
function to shut off the main burners. The main burners will remain off<br />
until the system has cooled <strong>and</strong>/or the flue system resistance is reduced.<br />
The Table on the right lists the approximate water column negative pressure<br />
readings <strong>and</strong> switch setpoints for sea level operating conditions.<br />
<strong>Model</strong> Start-Up Equilibrium Set Point Set Point<br />
Size Cold "OFF" "ON"<br />
25-400 -1.0" w.c. -0.60" w.c. -0.47" w.c. -0.64"w.c.<br />
DANGER: Safe operation of this unit requires<br />
proper venting flow. NEVER bypass combustion<br />
air proving switch or attempt to operate the unit<br />
without the venter running <strong>and</strong> the proper flow<br />
in the vent system. Hazardous conditions could<br />
result. See Hazard Levels, page 2.<br />
20. Gas Valve<br />
Main operating valve is powered by the 24-volt control circuit through<br />
thermostat <strong>and</strong> safety controls. The main control valve is of the diaphragm<br />
type with magnetic pilot servo bleed operators, providing regulated<br />
gas flow preset at the factory. The valve body also incorporates a<br />
magnetic valve providing pilot gas control for the electronic ignitor system<br />
<strong>and</strong> redundant or dual valve safety shutoff function.<br />
WARNING: The operating valve is the prime<br />
safety shutoff. All gas supply lines must be free of<br />
dirt or scale before connecting the unit to ensure<br />
positive closure. See Hazard Levels, page 2.<br />
21. Pilot <strong>and</strong> Ignition System<br />
These unit heaters are equipped with a spark ignited intermittent safety<br />
pilot system that shuts off the pilot gas flow between heat cycles. In<br />
addition, propane units are equipped with a spark pilot system that incorporates<br />
a lockout device that stops the gas flow to the pilot if the<br />
pilot fails to light in 120 seconds. The spark pilot with 100% lockout<br />
requires manual reset by interruption of the thermostat circuit. Propane<br />
units require the lockout; natural gas units may be equipped with either<br />
st<strong>and</strong>ard spark pilot or spark pilot with lockout (Option AH3). Refer to<br />
the wiring diagram with your heater for pilot system identification <strong>and</strong><br />
proper wiring.<br />
The ignition controller in the spark pilot system provides the high voltage<br />
spark to ignite the pilot gas <strong>and</strong> also acts as the flame safety device.<br />
After ignition of the pilot gas, the control electronically senses the pilot<br />
flame. (A separate solid metal probe in the pilot burner assembly is<br />
employed for the flame sensing function. A low voltage electrical signal<br />
Form 436, Page 18<br />
is imposed on that metal probe which is electrically isolated from<br />
ground. When the pilot flame impinges on the flame sensing probe,<br />
the flame acts as a conduction path to ground. The pilot flame rectifies<br />
<strong>and</strong> completes the DC circuit. The ignition controller acknowledges<br />
the flame <strong>and</strong> energizes the main gas valve.)<br />
22. Burners<br />
These unit heaters have individually formed steel burners with accurately<br />
die-formed ports to give controlled flame stability without lifting<br />
or flashback with either natural or propane gas. The burners are<br />
lightweight <strong>and</strong> factory mounted in an assembly which permits them<br />
to be removed as a unit for inspection or service.<br />
23. Burner Air Adjustment<br />
All sizes of these unit heaters that are equipped with st<strong>and</strong>ard aluminized<br />
burners are designed to operate without burner air shutters when<br />
fueled with either natural or propane gas. However, Sizes 165 through<br />
400 equipped with optional stainless steel burners (Option AD2) require<br />
air shutters (Option AE1) when used with propane gas (Option<br />
AA2).<br />
Optional air shutters, either factory or field installed, are available for<br />
any size model for use where unusual conditions cause excess primary<br />
aeration.<br />
Before making any adjustments to the air shutters, allow the heater to<br />
operate for about fifteen minutes. The air shutter adjustment screws<br />
can be reached by opening the bottom panel. (Remove the two screws<br />
located at the rear of the bottom panel <strong>and</strong> allow the panel to hinge<br />
down from the front.) The adjustment screws for the air shutters are<br />
visible at the rear of the burner rack . See Figure 14.<br />
When making the adjustment, close the air shutters no more than is<br />
necessary to eliminate the problem condition.<br />
Observe the flame for yellow-tipping. A limited amount of yellowtipping<br />
is permissible for liquefied petroleum gases. Other fuels should<br />
not display any yellow-tipping.<br />
Two adjustment screws are used (See Figure 14). Rotating the screws<br />
clockwise closes the shutters, reducing the primary air supply. Counterclockwise<br />
rotation opens the shutters, increasing the primary air<br />
supply. The two adjustment screws should be rotated alternately to<br />
open or close the shutters. Attempting to gain adjustment by not alternating<br />
between the two screws may cause the shutters to bind.<br />
After proper adjustment has been completed, eliminating the problem<br />
condition, close the bottom panel <strong>and</strong> replace the retaining screws.<br />
Figure 14 - Air Shutter Adjustment Screws -- Alternate<br />
Turning Screws When Adjusting Shutter<br />
DANGER: Failure to install <strong>and</strong>/or adjust air<br />
shutters according to directions could cause<br />
property damage, personal injury, <strong>and</strong> or death.
24. Check Installation <strong>and</strong> Start-Up<br />
Check the installation prior to start-up: 5. Thermostat calls for heat, energizing the venter motor.<br />
o Check suspension. Unit must be secure <strong>and</strong> level.<br />
o Blower <strong>Model</strong> - Check to be sure that all shipping supports<br />
have been removed. Rubber feet must be on the motor bracket<br />
bolts. See Paragraph 4.<br />
o Check clearances from combustibles. Requirements are shown<br />
in Paragraph 6.<br />
o Check vent system to be sure that it is installed according to<br />
the instructions in Paragraph 9.<br />
o Check piping for leaks <strong>and</strong> proper gas line pressure. Bleed<br />
gas lines of trapped air. See paragraph 10.<br />
o Check electrical wiring. Be sure all wire gauges are as recommended.<br />
A service disconnect switch should be used.<br />
Verify that fusing or circuit breakers are adequate for the load<br />
use.<br />
o Check that any field-installed options have been included in<br />
the installation.<br />
o Blower <strong>Model</strong> - Check belt tension. See Paragraph 14.<br />
Start-Up -- Typical Operating Sequence:<br />
1. Set thermostat at lowest setting.<br />
2. Turn on main <strong>and</strong> pilot manual gas valves.<br />
3. Turn on the power to the unit.<br />
4. Set the thermostat to desired setting.<br />
6. Venter pressure switch closes, firing the unit, after pilot proving<br />
sequence.<br />
7. Fan control senses heat exchanger temperature, energizing<br />
the fan or blower motor.<br />
8. If the flame is extinguished during the main burner operation,<br />
the safety switch closes the main valve <strong>and</strong> recycles the<br />
spark gap.<br />
On units equipped with lockout device, if the pilot is not established<br />
within 120 seconds, the unit locks out <strong>and</strong> must be<br />
reset by interrupting power to the control circuit. (See lighting<br />
instructions on the heater.)<br />
Check installation after start-up:<br />
o With the unit in operation, measure manifold gas pressure.<br />
Manifold pressure for natural gas should be 3.5" w.c. <strong>and</strong><br />
10" w.c. for propane gas. See Paragraph 10.<br />
o Turn the unit off <strong>and</strong> on, pausing two minutes between each<br />
cycle. Observe for smooth ignition.<br />
o Blower <strong>Model</strong> - Check motor amps with an amp meter. The<br />
maximum amp rating on the motor nameplate must not be<br />
exceeded.<br />
o Place 'Owner's Envelope" containing Limited Warranty Card,<br />
this booklet, <strong>and</strong> any optional information in an accessible<br />
location near the heater. Follow the instructions on the envelope.<br />
DANGER: The gas burner in this gas-fired equipment is designed <strong>and</strong> equipped to provide safe<br />
<strong>and</strong> economically controlled complete combustion. However, if the installation does not permit<br />
the burner to receive the proper supply of combustion air, complete combustion may not occur.<br />
The result is incomplete combustion which produces carbon monoxide, a poisonous gas that can<br />
cause death. Safe operation of indirect-fired gas burning equipment requires a properly operating<br />
vent system which vents all flue products to the outside atmosphere. FAILURE TO PROVIDE<br />
PROPER VENTING WILL RESULT IN A HEALTH HAZARD WHICH COULD CAUSE<br />
SERIOUS PERSONAL INJURY OR DEATH.<br />
Always comply with the combustion air requirements in the installation codes <strong>and</strong> in Paragraphs<br />
6 <strong>and</strong> 7. Combustion air at the burner should be regulated only by manufacturer-provided<br />
equipment. NEVER RESTRICT OR OTHERWISE ALTER THE SUPPLY OF COMBUSTION<br />
AIR TO ANY HEATER. Indoor units installed in a confined space must be supplied with air for<br />
combustion as required by Code <strong>and</strong> in Paragraph 7 of this heater installation manual. MAINTAIN<br />
THE VENT SYSTEM IN STRUCTURALLY SOUND AND PROPERLY OPERATING<br />
CONDITION.<br />
Mfg P/N 98807 Rev 8, Page 19
OPTIONAL EQUIPMENT<br />
This section contains a brief description of the more frequently specified field-installed options. All option packages include complete assembly<br />
<strong>and</strong> installation instructions.<br />
25. Optional Vertical Louvers -<br />
Option CD1<br />
The purpose of the addition of optional vertical louvers is to increase<br />
the air pattern spread. The vertical louver assembly is designed<br />
to be field assembled <strong>and</strong> installed. Refer to the instructions<br />
packaged with Option CD1 for a list of components <strong>and</strong> step-bystep<br />
installation instructions (Do not add optional vertical louvers to<br />
a fan-type heater with downturn nozzle Option CD3. See Paragraph<br />
26.)<br />
CAUTION: To avoid getting burned, adjust<br />
louvers prior to heater operation. If louvers<br />
need re-adjusting after start-up, wear<br />
protective gloves.<br />
Figure 15 -<br />
Optional<br />
Vertical<br />
Louvers<br />
27. Optional Duct Flange - Option CD9 (Blower <strong>Model</strong>s only)<br />
Blower-type unit heaters may be connected to ductwork. The duct flange option is designed to adapt<br />
the heater outlet (supply side) for connection to ductwork.<br />
Ductwork connection sizes are shown in the chart below.<br />
Follow the installation instructions included with the option package.<br />
<strong>Model</strong> <strong>BE</strong> Duct Connection Sizes (inches <strong>and</strong> mm) with Optional Duct Flange<br />
Size 25-50 75 100 125 165 200 250-300 400<br />
Height 15-7/8 15-7/8 15-7/8 15-7/8 23-7/8 23-7/8 23-7/8 23-7/8<br />
403 403 403 403 606 606 606 606<br />
Width 10-3/4 12-3/4 14-3/4 20-1/2 17-1/2 20-1/2 26 34-1/4<br />
273 324 375 521 445 521 660 870<br />
Form 436, Page 20<br />
26. Optional Downturn Air Nozzles<br />
- Options CD2, CD3, CD4, & CD5<br />
Sizes "A" Range of<br />
Air Deflection<br />
25-125 9" (229mm) 25 o -65 o<br />
165-400 13" (330mm) 25 o -65 o<br />
Figure 16 - Optional<br />
Downturn Nozzles<br />
Sizes "A" Range of<br />
Air Deflection<br />
25-125 16-1/2" (419mm) 50 o -90 o<br />
165-400 23-1/2" (597mm) 50 o -90 o<br />
Unit heaters may be specified with optional downturn air nozzles to direct<br />
the discharge tempered air. The nozzles are shipped separately for field<br />
assembly <strong>and</strong> installation. The horizontal louvers are removed from the<br />
heater <strong>and</strong> re-installed into the outlet of the downturn nozzle.<br />
The addition of a downturn nozzle requires four-point heater suspension.<br />
Two hanger brackets are included with downturn nozzle options <strong>and</strong> must<br />
be added to fan-type heaters with st<strong>and</strong>ard two-point suspension. Suspension<br />
point dimensions are found in Dimension Charts in Paragraph 3. On<br />
fan-type heaters, do not install Option CD5 or use vertical louvers with<br />
Option CD3.
28. Optional Polytube Adapter - Options CD6, CD8, <strong>and</strong> CD11<br />
(Blower <strong>Model</strong>s only)<br />
The polytube adapter option is designed to adapt this blowertype<br />
heater for use with polytube ductwork. The use of<br />
polytubes for air distribution is common in greenhouse applications<br />
<strong>and</strong> some industrial applications. A polytube distribution<br />
system delivers warm air to a specific area, reducing the<br />
need for complete area heating. The polytube adapter is available<br />
in three installation designs making it adaptable to many<br />
applications <strong>and</strong> building structures.<br />
WARNINGS: This adapter is to be used<br />
only on units equipped with a blower. At<br />
no time should the free area in the polytube<br />
be less than the listed minimum. Failure to<br />
comply with these warnings could result<br />
in severe personal injury, death <strong>and</strong>/or<br />
property damage.<br />
The polytube adapter option package does not include polytubing.<br />
Polytubing can be obtained from a supply distributor such as FOF<br />
Products, Inc., P. O. Box E, 1505 Racine Street, Delevan, WI<br />
53115; ACME Engineering Co., P.O. Box 978, Muskogee, OK<br />
74402; or any local greenhouse supply distributor. Some local<br />
code authorities require the polytube material to be a listed material.<br />
Consult code authority having jurisdiction <strong>and</strong> the polytube<br />
supplier to determine the appropriate polytube material <strong>and</strong> recommended<br />
methods of suspension.<br />
Figure 17 - Polytube Adapter<br />
Illustration shows Option<br />
CD8, Polytube Adapter<br />
for Floor-Mounted<br />
Heater. Options CD6 <strong>and</strong><br />
CD11 are for Suspended<br />
Heaters.<br />
The following chart shows specification information covering the use of polytubes with these blower-type unit heaters.<br />
CFM at Polytube Minimum Free Suggested Hole Sizes <strong>and</strong> Locations<br />
Size .25"<br />
ESP<br />
Diameter<br />
(inches)<br />
Area (square<br />
Inches)<br />
Holes<br />
50 Ft<br />
Length of Polytube<br />
75 Ft 100 Ft 125 Ft 150 Ft<br />
Number 37pairs 75 pairs 75 pairs<br />
75 925 18 110 Diameter 1-1/2" 1" 1"<br />
Spacing 16" 12" 16"<br />
Number 50 pairs 50 pairs 100 pairs 94 pairs<br />
100 1235 18 145 Diameter 1-1/2" 1-1/2" 1" 1"<br />
Spacing 12" 18" 12" 16"<br />
Number 40 pairs 60 pairs 60 pairs 125 pairs<br />
125 1540 18 185 Diameter 1-7/8" 1-1/2" 1-1/2" 1"<br />
Spacing 15" 15" 20" 12"<br />
Number 40 pairs 60 pairs 60 pairs 125 pairs<br />
130 1600 24 190 Diameter 1-7/8" 1-1/2" 1-1/2" 1"<br />
Spacing 15" 15" 20" 12"<br />
Number 50 pairs 50 pairs 75 pairs 75 pairs 75 pairs<br />
165 2035 24 240 Diameter 1-7/8" 1-7/8" 1-1/2" 1-1/2" 1-1/2"<br />
Spacing 12" 18" 16" 20" 24"<br />
Number 42 pairs 42 pairs 60 pairs 60 pairs 100 pairs<br />
200 2465 24 300 Diameter 2-1/4" 2-1/4" 1-7/8" 1-7/8" 1-1/2"<br />
Spacing 14" 21" 20" 25" 18"<br />
Number 40 pairs 60 pairs 60 pairs 60 pairs 60 pairs<br />
250 3085 24 360 Diameter 2-1/2" 2" 2" 2" 2"<br />
Spacing 15" 15" 20" 25" 30"<br />
Number 75 pairs 75 pairs 75 pairs 75 pairs 75 pairs<br />
300 3700 24 425 Diameter 2" 2" 2" 2" 2"<br />
Spacing 9" 12" 16" 20" 24"<br />
Number 60 pairs 60 pairs 60 pairs 100 pairs 100 pairs<br />
400 4935 24 550 Diameter 2-1/2" 2-1/2" 2-1/2" 1-7/8" 1-7/8"<br />
Spacing 10" 15" 20" 15" 18"<br />
Conversion Table (Diameter to Area)<br />
Diameter of the Hole Area of the Hole<br />
(inches) (sq in)<br />
2-1/2 4.91<br />
2-1/4 3.98<br />
2 3.14<br />
1-7/8 2.76<br />
1-1/2 1.76<br />
1 0.785<br />
Mfg P/N 98807 Rev 8, Page 21
29. Optional Guards -<br />
Options CD10 & CD12<br />
(Blower <strong>Model</strong>s only)<br />
These guard options are designed to provide complete protection<br />
from the rotating drive <strong>and</strong>/or blower components.<br />
Option CD12 is designed for use with Sizes 25-100 with<br />
st<strong>and</strong>ard direct drive motor. This kit includes only the blower<br />
inlet guard.<br />
Option CD10 is designed for use on Sizes 50-400 with a<br />
belt driven motor <strong>and</strong> includes both the belt guard <strong>and</strong> the<br />
blower inlet guard.<br />
Figure 18 - Optional Guards<br />
Optional<br />
Belt<br />
Guard<br />
Installed<br />
Form 436, Page 22<br />
Optional<br />
Blower Inlet<br />
Guard<br />
Installed<br />
31. Optional Blower/Filter Cabinet -<br />
Options CW1, CW2, or CW3<br />
(Blower <strong>Model</strong>s Only)<br />
The blower/filter cabinet option is available for all sizes. The blower/filter cabinet<br />
is shipped separately for field assembly <strong>and</strong> installation. The cabinet is adaptable<br />
for use with either 1" or 2" filters <strong>and</strong> may be connected to a return air duct<br />
(includes 3/4" duct flange). Option CW1 does not include filters; CW2 includes<br />
1" permanent aluminum filters; <strong>and</strong> CW3 includes 2" permanent aluminum<br />
filters.<br />
Figure 20 - Optional Field-Installed Blower/Filter Cabinet<br />
30. Optional Multiple Heater Control -<br />
Options CL31 & CL32<br />
The multiple heater control options are designed to permit the control of up to six<br />
heaters (one master <strong>and</strong> five slave units) with a single thermostat or a time clock<br />
<strong>and</strong> single/multiple thermostats.<br />
For maximum safety, the multiple control is one in the low voltage circuit. These<br />
multiple heater control options may not be used with two-stage gas valves.<br />
Figure 19 - Multiple Heater Control Wiring with Options CL31<br />
<strong>and</strong>/or CL32<br />
Blower Cabinet with<br />
Filters (Option CW2<br />
or CW3) -- side panel<br />
removed to illustrate<br />
interior of cabinet<br />
Blower Cabinet<br />
without Filters<br />
(Option CW1)<br />
<strong>Model</strong> Filter Replacement P/N<br />
Size Qty Size 1" Filter 2" Filter<br />
25-125 1 20 x 20 101608 101621<br />
165-200 1 16 x 25 101609 101622<br />
1 20 x 25 101610 101623<br />
250-300 2 16 x 20 101607 101620<br />
2 20 x 20 101608 101621<br />
400 2 16 x 25 101609 101622<br />
2 20 x 25 101610 101623
SERVICE AND MAINTENANCE<br />
WARNING: If you turn off the power supply,<br />
turn off the gas. See Hazard Levels, page 2.<br />
This unit will operate with a minimum of maintenance. To ensure long<br />
life <strong>and</strong> satisfactory performance, a heater that is operated under normal<br />
conditions should be inspected <strong>and</strong> cleaned at the start of each<br />
heating season. If the heater is operating in an area where an unusual<br />
amount of dust or soot or other impurities are present in the air, more<br />
frequent maintenance is recommended.<br />
The following procedures should be carried out at least annually (See<br />
Paragraphs 32-41 for specific instructions.):<br />
1. Clean all dirt <strong>and</strong> grease from the primary <strong>and</strong> secondary combustion<br />
air openings.<br />
2. Fan <strong>Model</strong>s - Clean the fan blade, fan guard, <strong>and</strong> motor.<br />
3. Blower <strong>Model</strong>s - Clean the blower, the belt guard, the inlet guard,<br />
<strong>and</strong> motor of all dirt <strong>and</strong> grease. Check the blower belt for tension<br />
<strong>and</strong> wear. Replace a worn belt that may fail before the next scheduled<br />
maintenance check.<br />
4. Clean the heat exchanger both internally <strong>and</strong> externally.<br />
5. Check the pilot burner <strong>and</strong> main burners for scale, dust, or lint accumulation.<br />
Clean as needed.<br />
6. Check the vent system for soundness. Replace any parts that do not<br />
appear sound.<br />
7. Check the wiring for any damaged wire. Replace damaged wiring.<br />
(See Paragraph 11 for replacement wiring requirements.)<br />
NOTE: Use only factory-authorized replacement parts.<br />
32. Burner Rack Removal<br />
These unit heaters have a convenient bottom access panel. The pilot is<br />
attainable with the bottom panel open. With the access panel removed,<br />
the burner rack assembly will hinge down for removal. Use the following<br />
step-by-step instructions for removal of the bottom access panel<br />
<strong>and</strong> the complete burner rack assembly.<br />
Instructions for Burner Rack Removal (See<br />
Figures 21-24.)<br />
1. Shut the gas supply off ahead of the combination valve.<br />
2. Turn off electric supply.<br />
3. Remove the two sheet metal screws located at the rear of the bottom<br />
panel.<br />
4. Allow bottom<br />
panel to hinge<br />
down from the<br />
front.<br />
5. Push in one of<br />
the two springloaded<br />
hinge pins<br />
located at the<br />
front of the bottom<br />
panel (inside),<br />
<strong>and</strong> completely<br />
remove<br />
the bottom<br />
panel.<br />
6. The bottom of<br />
the pilot is now<br />
Pilot<br />
Location<br />
Push<br />
hinge<br />
pin to<br />
remove<br />
bottom<br />
panel<br />
Figure 21- Bottom Access Panel Open<br />
visible. Do the<br />
following:<br />
(a) Disconnect the<br />
pilot tubing from the<br />
pilot burner.<br />
(b) Disconnect the<br />
flame sensing wire<br />
<strong>and</strong> high tension<br />
(spark) lead from<br />
the ignition controller.<br />
7A. Heaters manufactured beginning 8/91 (Serial No. Date Code<br />
AQH) - The burner rack is indexed as illustrated in Figure 23. While<br />
supporting the burner rack, remove the screws (two or three) that<br />
hold the burner rack support. (For screw location, refer to Figure<br />
23.) Remove the burner rack support allowing the burner rack assembly<br />
to swing down (See Figure 24).<br />
Burner Rack Support<br />
with Indexing<br />
Screws<br />
Pilot<br />
Tubing<br />
Flame<br />
Sensor Lead<br />
Figure 22 - Spark Pilot Location<br />
Burner Rack<br />
Support on units<br />
manufactured<br />
prior to 8/91 was<br />
not indexed<br />
Figure 23 - Burner Rack Support <strong>and</strong> Retaining Screws<br />
7B. Heaters manufactured prior to 8/91 (Serial No. Date Code AQH)<br />
Loosen the sheet metal screws (two or three) located at the front of<br />
the burner rack assembly. See Figures 23. These screws retain the<br />
burner rack support. While supporting the burner rack assembly,<br />
slide the burner rack support <strong>and</strong> remove it from the screws, allowing<br />
the burner rack assembly to swing down (See Figure 24).<br />
8. To Remove the Burner Rack -- With the burner rack assembly<br />
"hanging" down, lift up on the rear <strong>and</strong> slide the assembly up <strong>and</strong><br />
out of the manifold support brackets.<br />
Figure 24 -<br />
Burner Rack<br />
Hinged Down<br />
Mfg P/N 98807 Rev 8, Page 23
32. Burner Rack Removal (cont'd)<br />
Figure 25<br />
Figure 26 -<br />
Burner Rack<br />
Completely<br />
Removed<br />
9. To remove the individual burners:<br />
a. Remove the flash carryover<br />
(one screw per<br />
burner).<br />
Figure 27 - Individual Burners<br />
b. With the burner rack<br />
upside down, remove<br />
the sheet metal screws<br />
(located at the rear)<br />
that retain the burner<br />
holddown.<br />
c. Lift the rear of the<br />
burner upward slightly<br />
<strong>and</strong> pull back, removing<br />
the individual<br />
burners.<br />
d. To replace individual burners, reverse the above procedure.<br />
10. To replace the burner rack assembly <strong>and</strong> the bottom panel, reverse<br />
the above procedure (Steps 1-8).<br />
Individual burners may be cleaned using air pressure. Use an air nozzle<br />
to blow out scale <strong>and</strong> dust accumulation from the burner ports. Alternately,<br />
blow through burner ports <strong>and</strong> venturi.<br />
Form 436, Page 24<br />
Burner Orifices<br />
Burner Assembly Support Brackets<br />
CAUTION: Eye protection is recommended.<br />
Use a fine wire to dislodge any stubborn particles. Do not use anything<br />
that might change the port size.<br />
When any service is completed, be careful to reassemble correctly to<br />
ensure that no unsafe conditions are created. When re-lighting, always<br />
follow the lighting instructions on the heater.<br />
33. Pilot <strong>and</strong> Ignition System<br />
The pilot can be serviced by opening the bottom access panel of the<br />
heater. Follow the first four steps of instructions for Burner Rack Re-<br />
moval, Paragraph 32. The pilot can be removed to check the wiring,<br />
the spark gap, or to remove the orifice for cleaning. When the pilot is<br />
re-installed, be sure to include the pilot hole cover plate.<br />
Figure 28 - Pilot Removal<br />
Spark gap must be maintained to .100". (See Figure 29.)<br />
Figure 29 -<br />
Pilot Burner<br />
Spark Gap<br />
In the event the pilot<br />
flame is short <strong>and</strong>/or<br />
yellow, check the pilot<br />
orifice for blockage<br />
caused by lint or<br />
dust accumulation.<br />
Remove the pilot orifice<br />
<strong>and</strong> clean with air<br />
pressure. Check <strong>and</strong><br />
clean the aeration slot<br />
in the pilot burner.<br />
Figure 30 -<br />
Pilot<br />
Assembly<br />
Pilot Hole<br />
Cover<br />
Plate<br />
CAUTION: Due to high voltage on pilot spark<br />
wire <strong>and</strong> pilot electrode, do not touch when<br />
energized. See Hazard Levels, page 2.<br />
The ignition controller of the intermittent electronic ignition pilot system<br />
is visibly located on the back of the heater. (See Figure 31.) Do not<br />
attempt to disassemble the ignition controller. There are no field replaceable<br />
components in the control enclosure. However, each heating<br />
season the lead wires should be checked for insulation deterioration<br />
<strong>and</strong> good connections.<br />
Proper operation of the electronic spark ignition system requires a<br />
minimum flame signal of .2 microamps as measured by a<br />
microampmeter.<br />
For further information <strong>and</strong> check out procedure on the intermittent<br />
electronic ignition pilot system, refer to the manufacturer's control operating<br />
instructions supplied with the heater.
Figure 31<br />
- Ignition<br />
Controller<br />
Location<br />
Ignition<br />
Controller<br />
for Spark<br />
Pilot<br />
34. Burner Orifices<br />
Heaters are shipped with orifices of proper size <strong>and</strong> type for gas <strong>and</strong><br />
altitude specified on the order. When ordering replacement orifices,<br />
give BTUH content, specific gravity of gas, <strong>and</strong> altitude, as well as<br />
model <strong>and</strong> serial number of the heater.<br />
Main Burner Orifices (sea level)<br />
<strong>Model</strong> Natural Gas Propane Gas<br />
Size Drill<br />
Size<br />
Orifice<br />
P/N<br />
WARNING: Do not use this table for gas conversion.<br />
Additional parts are required; contact your Reznor<br />
Distributor.<br />
35. Flash Carryover<br />
Qty Drill Size Orifice<br />
P/N<br />
Qty<br />
25 51 39650 2 60 95936 2<br />
50 47 84853 3 1.2MM 63003 3<br />
75 45 38678 4 1.3MM 64676 4<br />
100 44 11833 5 55 11830 5<br />
125 44 11833 6 55 11830 6<br />
165 35 11831 5 1.65MM 96344 5<br />
200 35 11831 6 1.65MM 96344 6<br />
250 35 11831 8 1.65MM 96344 8<br />
300 35 11831 9 1.65MM 96344 9<br />
400 35 11831 12 1.65MM 96344 12<br />
Pilot<br />
Natural - P/N 103034<br />
Orifice<br />
Propane - P/N 98695<br />
See Figure 32. The burner carryover system receives its gas supply<br />
from the main burner ports. Check the carryover assembly <strong>and</strong> also the<br />
main burner ports for cleanliness. Clean with air pressure.<br />
Flash<br />
Carryover<br />
Figure 32 -<br />
Burner<br />
Rack Flash<br />
Carryover<br />
CAUTION: Eye protection is recommended.<br />
36. Heat Exchanger<br />
The outside of the heat exchanger can be cleaned from the front of the<br />
heater with an air hose <strong>and</strong>/or a brush. Remove all accumulated dust<br />
<strong>and</strong> grease deposits.<br />
The inner surfaces of the heat exchanger can be reached for cleaning<br />
with the burner rack removed. (See Paragraph 32.) Cleaning can be<br />
done with a long furnace brush or a heavy wire to which steel wool has<br />
been attached. Brush up <strong>and</strong> down inside each heat exchanger tube<br />
until all foreign material is removed. A flashlight is helpful in examining<br />
the upper section of the tube.<br />
37. Fan or Blower<br />
Remove dirt <strong>and</strong> grease from the motor.<br />
On fan model units, remove dirt <strong>and</strong> grease from the fan guard <strong>and</strong><br />
blades. Use care when cleaning the fan blades to prevent causing misalignment<br />
or imbalance. Check that the hub of the fan blades is secure<br />
to the shaft.<br />
On blower models, remove the grease <strong>and</strong> dirt from the blower housing<br />
<strong>and</strong> check the belt for wear <strong>and</strong> proper tension (See Paragraph 14.)<br />
Lubricate if the motor has oil cups or grease fittings. The motor supplied<br />
as st<strong>and</strong>ard has lifetime lubrication <strong>and</strong> sleeve bearings.<br />
On blower models, check current draw to motor rating plate.<br />
Fan <strong>Model</strong>s: Follow these instructions for replacement of the fan guard,<br />
fan motor or fan blades.<br />
1. If the heater is installed, turn off the gas <strong>and</strong> disconnect the electric<br />
power.<br />
2. Remove the left outer side panel (left when facing the rear of the<br />
unit). Disconnect the fan motor wires.<br />
3. Depending on the date that the heater was manufactured, it will have<br />
either a lower-half fan guard only, two-piece full fan guard, or a onepiece<br />
full fan guard. If the unit has a two piece fan guard, remove the<br />
tension mounted upper half fan guard <strong>and</strong> the four screws that hold the<br />
lower half. If the unit has a one-piece fan guard, remove all of the<br />
screws that retain the fan guard. Remove the assembled parts (the fan<br />
guard, the motor <strong>and</strong> the fan blade).<br />
4. Disassemble <strong>and</strong> replace whatever parts are needed <strong>and</strong> reassemble<br />
using whatever part(s) are being replaced <strong>and</strong> the original parts. If the<br />
fan guard is being replaced, it is important that the same hardware be<br />
used for attaching the motor to the fan guard as was used with the<br />
original guard. These screws are especially made to cut through the<br />
coating on the fan guard to provide adequate grounding for the motor.<br />
Figure 33 -<br />
Proper Position<br />
of the Fan<br />
Blade on the<br />
Motor Shaft<br />
Be sure the fan<br />
blade is in proper<br />
position on the<br />
shaft. Position the<br />
fan as shown in<br />
Figure 33 according<br />
to the chart on<br />
the right.<br />
Fan<br />
Motor<br />
A<br />
Fan Hub<br />
<strong>Model</strong> Set Screw “A” Hub to<br />
Size Torque In-Lbs Motor<br />
25 80 + or - 10 1-1/4" (32mm)<br />
50 80 + or - 10 3/8"(10mm)<br />
75 80 + or - 10 1/8" (3mm)<br />
100-125 120 + or - 10 2-1/2" (64mm)<br />
165-400 150 + or - 10 2-1/2" (64mm)<br />
Mfg P/N 98807 Rev 8, Page 25
37. Fan (cont'd)<br />
Position the assembly on the heater. Attach the fan guard at the center<br />
mounts. (IMPORTANT: If replacing the fan guard, use the screws<br />
that held the original fan guard. These specially designed screws will<br />
cut through the coating on the fan guard to provide a ground for the fan<br />
motor.)<br />
Rotate the fan blade to check for adequate clearance. If adjustment is<br />
required, loosen the mounting screws, re-position the fan guard, <strong>and</strong><br />
tighten the screws. Rotate the fan blade <strong>and</strong> re-check for adequate clearance.<br />
Repeat this procedure until the assembly is positioned properly.<br />
5. If necessary, drill the required upper <strong>and</strong> lower fan guard mounting<br />
holes. Attach the fan guard at all upper <strong>and</strong> lower mounting points<br />
using either the screws removed or field-installed sheet metal screws.<br />
6. Reconnect the fan motor wires <strong>and</strong> replace the outer side panel.<br />
7. Restore power to the heater <strong>and</strong> turn on the gas. Light, following the<br />
instructions on the lighting instruction plate. Check for proper operation.<br />
40. Fan <strong>and</strong> Limit Controls<br />
Form 436, Page 26<br />
38. Venter Motor<br />
Remove dirt <strong>and</strong> grease from the motor housing. Power venter motor<br />
is permanently lubricated.<br />
The vent relay controls the venter motor. If the relay contacts fail to<br />
close the venter motor will not run. If the relay contacts fail to open,<br />
the venter motor will not shut off, preventing the combustion air pressure<br />
switch from opening.<br />
39. Operating Gas Valve<br />
The gas valve requires no field maintenance except careful removal of<br />
external dirt accumulation <strong>and</strong> checking of wiring connections. Instructions<br />
for testing pressure settings are in Paragraph 10.<br />
CAUTION: The operating valve is the prime<br />
safety shutoff. All gas supply lines must be free<br />
of dirt or scale before connecting to the unit<br />
to ensure positive closure. See Hazard Levels,<br />
page 2.<br />
If it is determined that the fan or limit control needs replacing, use only factory-authorized replacement parts that are designed for your heater.<br />
Instructions for replacing fan or limit control:<br />
1. Turn off the electric power <strong>and</strong> shut off the gas supply.<br />
2. Remove the outer left side panel (left when facing the back of the unit). Remove the access panel. (See Figure 34.)<br />
3. Remove defective controls <strong>and</strong> install new controls in the same mounting holes. Use only factory-authorized replacement parts.<br />
4. Replace access panel <strong>and</strong> side panel.<br />
5. Turn on the electric power <strong>and</strong> the gas supply.<br />
6. Relight following the lighting instructions on the heater.<br />
Figure 34 -<br />
Access to<br />
Controls<br />
Remove<br />
Control<br />
Access<br />
Panel<br />
41. Vent System<br />
Check the vent system at least once a year. Inspection should include all<br />
joints, seams, <strong>and</strong> the vent cap. Replace any defective parts.<br />
Limit<br />
Control<br />
Fan<br />
Control
42. Troubleshooting<br />
TRO UB LE PRO B AB LE C AUS E REMEDY<br />
Venter motor will<br />
not start<br />
1. No power to unit. 1. Turn on power, check supply fuses, or circuit breaker. If unit is equipped with<br />
unit-mounted disconnect switch, check circuit breaker (See Paragraph 11).<br />
2. No 24 volt power to venter relay. 2. Turn up thermostat; check control transformer output.<br />
3. Venter relay defective. 3. Replace relay.<br />
4. Defective motor or capacitor. 4. Replace motor or capacitor.<br />
Pilot will not light 1. Manual valve not open. 1. Open manual valve.<br />
(spark ignition 2. Air in gas line. 2. Bleed gas line.<br />
system) 3. Dirt in pilot orifice. 3. Remove <strong>and</strong> clean with compressed air or solvent (do not ream).<br />
4. Gas pressure too high or too low. 4. Adjust supply pressure. (See Paragraph 10).<br />
5. Kinked pilot tubing. 5. Replace tubing.<br />
6. Pilot valve does not open. 6. If 24 volt available at valve, replace valve.<br />
7. No spark: 7.<br />
a) Loose wire connections a) Be certain all wires connections are solid.<br />
b) Transformer failure. b) Be certain 24 volts is available.<br />
c) Incorrect spark gap. c) Maintain spark gap at .100".<br />
d) Spark cable shorted to ground. d) Replace worn or grounded spark cable.<br />
e) Spark electrode shorted to ground. e) Replace pilot if ceramic spark electrode is cracked or grounded.<br />
f) Drafts affecting pilot. f) Make sure all panels are in place <strong>and</strong> tightly secured to prevent drafts at pilot.<br />
g) Ignition control not grounded. g) Make certain ignition control is grounded to furnace chassis<br />
h) Faulty ignition controller. h) If 24 volt is available to ignition controller <strong>and</strong> all other causes have been<br />
eliminated, replace ignition control.<br />
8. Optional lockout device interrupting control<br />
circuit by above causes.<br />
8. Reset lockout by interrupting control at thermostat.<br />
9. Faulty combustion air proving switch. 9. Replace combustion air proving switch.<br />
Pilot lights, main 1. Manual valve not open. 1. Open manual valve.<br />
valve will not open 2. Main valve not operating. 2.<br />
(Spark Ignition<br />
system)<br />
a) Defective valve. a) If 24 volt is measured at valve connections <strong>and</strong> valve remains closed, replace<br />
valve.<br />
b) Loose wire connections. b) Check <strong>and</strong> tighten all wiring connections.<br />
3. Ignition control does not power main valve. 3.<br />
a) Loose wire connections. a) Check <strong>and</strong> tighten all wiring connections.<br />
b) Flame sensor grounded. (Pilot lights - spark b) Be certain flame sensor lead is not grounded or insulation or ceramic is not<br />
continues)<br />
cracked. Replace as required.<br />
c) Gas pressure incorrect. c) Set supply pressure at 5" w.c. to 14" w.c. for natural gas <strong>and</strong> 11" w.c. to 14"<br />
w.c. for propane gas.<br />
d) Cracked ceramic at sensor. d) Replace sensor.<br />
e) Faulty ignition controller. e) See Paragraph 33. If all checks indicate no other cause, replace ignition<br />
controller. DO NOT ATTEMPT TO REPAIR IGNITION CONTROLLER.<br />
THIS DEVICE HAS NO FIELD REPLACEABLE PARTS.<br />
No heat (Heater 1. Incorrect manifold pressure or orifices. 1. Check manifold pressure (See Paragraph 10).<br />
Operating) 2. Cycling on limit control. 2. Check air throughput (See Paragraph 15).<br />
3. Improper thermostat location or adjustment. 3. See thermostat manufacturer's instructions.<br />
Cold air delivered 1. Fan control improperly wired 1. Connect as per wiring diagram.<br />
O n Start-up 2. Defective fan control. 2. Replace fan control.<br />
During O peration 3. Incorrect manifold pressure. 3. Check manifold line pressure (See Paragraph 10).<br />
Motor will not run 1. Circuit open. 1. Check wiring <strong>and</strong> connections. .<br />
2. Fan control inoperative. 2. Replace fan control.<br />
3. Defective motor or capacitor. 3. Replace motor or capacitor.<br />
Motor turns on 1. Fan control improperly wired. 1. Connect as per wiring diagram.<br />
<strong>and</strong> off while 2. Defective fan control. 2. Replace fan control.<br />
burner is operating 3. Poor contact between fan control <strong>and</strong> heat 3. Check for bent mounting or loose mounting screws.<br />
(See motor cuts out exchanger tube. Surface contact is required.<br />
on overload 4. Motor overload device cycling on <strong>and</strong> off. 4. Check motor load against motor rating plate. Replace motor if needed.<br />
below) 5. Low ambient temperature (less than 40<br />
Mfg P/N 98807 Rev 8, Page 27<br />
oF) causing false cycling.<br />
5. Install fan delay relay kit (See Paragraph 17.)<br />
Fan motor cuts 1. Low or high voltage supply . 1. Correct electric supply.<br />
out on overload 2. Defective motor. 2. Replace motor.<br />
3. Poor air flow. 3. Clean motor, fan <strong>and</strong> fan guard.<br />
4. Defective bearing or lubrication. 4. Lubricate bearings or replace motor.<br />
Blower motor 1. Improper motor pulley <strong>and</strong>/or adjustment. 1. See instructions in Paragraph 14.<br />
cuts out on 2. Improper static pressure in the duct system. 2. Adjust duct system dampers.<br />
overload 3. Low voltage. 3. Check power supply.
FOR SERVICE OR REPAIR, FOLLOW THESE STEPS IN ORDER:<br />
FIRST: Contact the installer.<br />
Form 436, Page 28<br />
Name _______________________________________________________________________________________<br />
Address ________________________________________________________________________________________<br />
________________________________________________________________________________________<br />
________________________________________________________________________________________<br />
Phone ________________________________________________________________________________________<br />
SECOND: Contact the nearest distributor (See telephone Yellow Pages.)<br />
THIRD: Contact: REZNOR ® /Thomas & Betts Corporation<br />
150 McKinley Avenue<br />
Mercer, PA 16137<br />
Phone: (724) 662-4400<br />
<strong>Model</strong> No. ______________________________________________________________________________________________<br />
Unit Serial No. __________________________________________________________________________________________<br />
Date of Installation _______________________________________________________________________________________<br />
©1999 Thomas & Betts Corporation, All rights reserved. Printed in the U.S.A.<br />
Trademark Note: Reznor ® is registered in the United States <strong>and</strong> other countries. All other trademarks<br />
are the property of their respective organizations.<br />
MANUFACTURER OF GAS, OIL, ELECTRIC HEATING AND VENTILATING SYSTEMS<br />
999 10M YL Form 436 (Version A.8)