Profibus® DP - Rice Lake Weighing Systems
Profibus® DP - Rice Lake Weighing Systems
Profibus® DP - Rice Lake Weighing Systems
You also want an ePaper? Increase the reach of your titles
YUMPU automatically turns print PDFs into web optimized ePapers that Google loves.
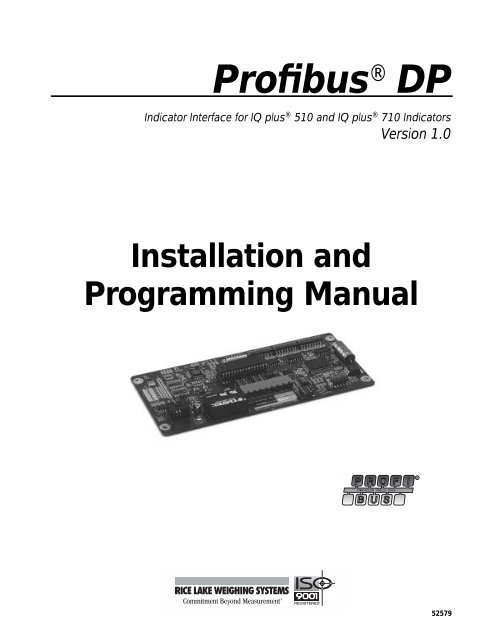
®<br />
Profibus <strong>DP</strong><br />
Indicator Interface<br />
Indicator Interface for IQ plus®<br />
510 and IQ plus<br />
Installation and<br />
®<br />
710 Indicators<br />
Version 1.0<br />
Programming Manual<br />
R<br />
52579
© 2003 <strong>Rice</strong> <strong>Lake</strong> <strong>Weighing</strong> <strong>Systems</strong>. All rights reserved. Printed in the United States of America.<br />
Specifications subject to change without notice.<br />
Version 1.0, December 2003<br />
Contents<br />
About This Manual ................................................................................................................................... 1<br />
1.0 Introduction.................................................................................................................................. 1<br />
2.0 Installation ................................................................................................................................... 2<br />
2.1 Installing the Profibus Indicator Interface . . . . . . . . . . . . . . . . . . . . . . . . . . . . . . . . . . . . . . . . . . . . . . 2<br />
2.1.1 Replace Backplate . . . . . . . . . . . . . . . . . . . . . . . . . . . . . . . . . . . . . . . . . . . . . . . . . . . . . . . . . . . . . . . . 2<br />
2.1.2 Install Profibus Indicator Interface Board . . . . . . . . . . . . . . . . . . . . . . . . . . . . . . . . . . . . . . . . . . . . . . . . 2<br />
2.1.3 Connect Cables to Profibus Indicator Interface . . . . . . . . . . . . . . . . . . . . . . . . . . . . . . . . . . . . . . . . . . . 2<br />
2.1.4 Reassemble Enclosure. . . . . . . . . . . . . . . . . . . . . . . . . . . . . . . . . . . . . . . . . . . . . . . . . . . . . . . . . . . . . 3<br />
2.2 Physical Connections for Installed Boards . . . . . . . . . . . . . . . . . . . . . . . . . . . . . . . . . . . . . . . . . . . . . 5<br />
2.2.1 Power Connections . . . . . . . . . . . . . . . . . . . . . . . . . . . . . . . . . . . . . . . . . . . . . . . . . . . . . . . . . . . . . . . 6<br />
2.2.2 Serial Communications Jumpers. . . . . . . . . . . . . . . . . . . . . . . . . . . . . . . . . . . . . . . . . . . . . . . . . . . . . . 6<br />
2.2.3 Serial Connections . . . . . . . . . . . . . . . . . . . . . . . . . . . . . . . . . . . . . . . . . . . . . . . . . . . . . . . . . . . . . . . . 6<br />
2.2.4 Profibus Network Connections . . . . . . . . . . . . . . . . . . . . . . . . . . . . . . . . . . . . . . . . . . . . . . . . . . . . . . . 6<br />
2.2.5 Bus Termination Jumpers . . . . . . . . . . . . . . . . . . . . . . . . . . . . . . . . . . . . . . . . . . . . . . . . . . . . . . . . . . . 6<br />
2.3 DIP Switch Configuration . . . . . . . . . . . . . . . . . . . . . . . . . . . . . . . . . . . . . . . . . . . . . . . . . . . . . . . . . . 6<br />
2.4 Onboard LED Indicators . . . . . . . . . . . . . . . . . . . . . . . . . . . . . . . . . . . . . . . . . . . . . . . . . . . . . . . . . . 8<br />
2.5 Indicator Setup . . . . . . . . . . . . . . . . . . . . . . . . . . . . . . . . . . . . . . . . . . . . . . . . . . . . . . . . . . . . . . . . . 9<br />
3.0 Profibus Commands................................................................................................................... 10<br />
3.1 Integer (20-bit) Commands . . . . . . . . . . . . . . . . . . . . . . . . . . . . . . . . . . . . . . . . . . . . . . . . . . . . . . . 10<br />
3.1.1 Integer Command Formats . . . . . . . . . . . . . . . . . . . . . . . . . . . . . . . . . . . . . . . . . . . . . . . . . . . . . . . . . 10<br />
3.1.2 Integer Commands . . . . . . . . . . . . . . . . . . . . . . . . . . . . . . . . . . . . . . . . . . . . . . . . . . . . . . . . . . . . . . . 11<br />
3.2 Floating Point (32-bit) Commands . . . . . . . . . . . . . . . . . . . . . . . . . . . . . . . . . . . . . . . . . . . . . . . . . . 12<br />
3.2.1 Floating Point Command Formats. . . . . . . . . . . . . . . . . . . . . . . . . . . . . . . . . . . . . . . . . . . . . . . . . . . . 12<br />
3.2.2 Floating Point Commands. . . . . . . . . . . . . . . . . . . . . . . . . . . . . . . . . . . . . . . . . . . . . . . . . . . . . . . . . . 13<br />
3.3 Status Data . . . . . . . . . . . . . . . . . . . . . . . . . . . . . . . . . . . . . . . . . . . . . . . . . . . . . . . . . . . . . . . . . . . 13<br />
3.4 Command Examples . . . . . . . . . . . . . . . . . . . . . . . . . . . . . . . . . . . . . . . . . . . . . . . . . . . . . . . . . . . . 14<br />
3.4.1 Retrieve Net Weight Data (20-bit) . . . . . . . . . . . . . . . . . . . . . . . . . . . . . . . . . . . . . . . . . . . . . . . . . . . . 14<br />
3.4.2 Retrieve Net Weight Data (32-bit) . . . . . . . . . . . . . . . . . . . . . . . . . . . . . . . . . . . . . . . . . . . . . . . . . . . . 14<br />
3.4.3 Send Setpoint Value (32-bit) . . . . . . . . . . . . . . . . . . . . . . . . . . . . . . . . . . . . . . . . . . . . . . . . . . . . . . . . 15<br />
3.4.4 Read Setpoint Value (32-bit) . . . . . . . . . . . . . . . . . . . . . . . . . . . . . . . . . . . . . . . . . . . . . . . . . . . . . . . . 15<br />
4.0 Appendix .................................................................................................................................... 16<br />
4.1 Troubleshooting. . . . . . . . . . . . . . . . . . . . . . . . . . . . . . . . . . . . . . . . . . . . . . . . . . . . . . . . . . . . . . . . 16<br />
4.2 Profibus Indicator Interface GSD File . . . . . . . . . . . . . . . . . . . . . . . . . . . . . . . . . . . . . . . . . . . . . . . . 17<br />
4.3 Profibus Indicator Interface Specifications . . . . . . . . . . . . . . . . . . . . . . . . . . . . . . . . . . . . . . . . . . . . 18<br />
Profibus Indicator Interface Limited Warranty...................................................................................... 19<br />
Technical training seminars are available through <strong>Rice</strong> <strong>Lake</strong> <strong>Weighing</strong> <strong>Systems</strong>.<br />
Course descriptions and dates can be viewed at www.rlws.com or obtained by<br />
calling 715-234-9171 and asking for the training department.
ii<br />
Profibus <strong>DP</strong> Indicator Interface Installation and Programming Manual
About This Manual<br />
This manual provides information needed to install<br />
and use the <strong>Rice</strong> <strong>Lake</strong> <strong>Weighing</strong> <strong>Systems</strong> <strong>Profibus®</strong><br />
Indicator Interface. The Profibus Indicator Interface<br />
allows IQ plus 510/710 indicators to communicate<br />
with a Profibus master device using the Profibus-<strong>DP</strong><br />
communications standard. 1<br />
The Profibus Indicator Interface is housed inside the<br />
NEMA 4X stainless steel indicator enclosure to<br />
permit use in washdown environments.<br />
1. Profibus<br />
®<br />
is a registered trademark of Profibus International.<br />
1.0 Introduction<br />
This manual applies to the following software<br />
versions:<br />
• Profibus Indicator Interface, Version 1.0<br />
• IQ plus 510, Version 2.0<br />
• IQ plus 710, Version 2.0<br />
Some procedures described in this<br />
manual require work inside the indicator<br />
enclosure. These procedures are to be<br />
performed by qualified service personnel<br />
only.<br />
Authorized distributors and their employees<br />
can view or download this manual from the<br />
<strong>Rice</strong> <strong>Lake</strong> <strong>Weighing</strong> <strong>Systems</strong> distributor site<br />
at www.rlws.com.<br />
The Profibus Indicator Interface provides full control of indicator functions to the PLC programmer and allows<br />
indicator weight and status data to be returned to the Profibus <strong>DP</strong> network. A diskette containing the GSD file<br />
used to configure the master device is supplied with the Profibus Indicator Interface (see Section 4.2 on page 17).<br />
The following figure shows an example of the Profibus Indicator Interface used to connect an IQ plus 710<br />
indicator to the master device on a Profibus <strong>DP</strong> network.<br />
Profibus Master Device<br />
IQ plus 710<br />
with Profibus<br />
Indicator Interface<br />
Warning<br />
Scale Platform<br />
The Profibus Indicator Interface supports two sets of commands: 20-bit integer commands and 32-bit floating<br />
point commands (see Section 3.0 on page 10). Both sets are designed for use in demand mode: the master device<br />
sends a command to the Profibus Indicator Interface to request information from or pass data to the indicator; the<br />
indicator responds with weight data, status information, or an acknowledgement that the command was executed.<br />
For applications that do not require the capablilities provided by these commands, the Profibus Indicator<br />
Interface can be used with the indicator in stream mode. In stream mode, the Display Status command provides<br />
fast, continuous acquisition of indicator weight and status data.<br />
Introduction<br />
1
2.0 Installation<br />
This section describes the procedures used to install the<br />
Profibus Indicator Interface board into IQ plus 510/710<br />
indicators, connect communications cables, and set the<br />
configuration DIP switches for the Profibus Indicator<br />
Interface.<br />
Section 2.1 describes the procedure for replacing the<br />
standard IQ plus 510/710 backplate and installing the<br />
Profibus board inside the indicator enclosure.<br />
Section 2.2 on page 5 describes cabling for units with<br />
the Profibus board already installed.<br />
2.1 Installing the Profibus Indicator<br />
Interface<br />
To install the Profibus Indicator Interface board into<br />
the IQ plus 510/710 indicators, do the following:<br />
2.1.1 Replace Backplate<br />
1. Ensure power to the indicator is disconnected,<br />
then place the indicator face-down on an<br />
antistatic work mat. Remove the screws that<br />
hold the backplate to the enclosure body.<br />
Loosen cord grips then lift the backplate away<br />
from the enclosure and set it aside.<br />
2<br />
Caution<br />
• Use a wrist strap to ground yourself and protect<br />
components from electrostatic discharge (ESD)<br />
when working inside the indicator enclosure.<br />
• IQ plus 510/710 indicators use double pole/neutral<br />
fusing which could create an electric shock hazard.<br />
Procedures requiring work inside the indicator<br />
must be performed by qualified service personnel<br />
only.<br />
• The supply cord serves as the power disconnect for<br />
the IQ plus 510/710. The power outlet supplying the<br />
indicator must be installed near the unit and be<br />
easily accessible<br />
2. Disconnect and remove any load cell, serial<br />
communications, and digital I/O cabling<br />
through the indicator backplate.<br />
3. Disconnect power cord ground wire from<br />
enclosure ground stud, then disconnect<br />
ground wire from backplate. Cut cable tie that<br />
secures the line filter input wires to the inside<br />
of the indicator enclosure and remove power<br />
cord.<br />
4. Remove cord grips from original backplate<br />
and reinstall in Profibus Indicator Interface<br />
backplate.<br />
5. Route power cord, load cell, digital I/O, and<br />
communications cables through cord grips in<br />
Profibus Indicator Interface backplate.<br />
6. Reconnect power cord wires to the line filter.<br />
Profibus <strong>DP</strong> Indicator Interface Installation and Programming Manual<br />
Use a cable tie to secure the line filter wires to<br />
the cable tie mount. Reconnect backplate and<br />
power cord ground wires to enclosure ground<br />
stud.<br />
7. Reconnect load cell, digital I/O, and<br />
communications cables to the appropriate<br />
connectors on the indicator CPU board.<br />
2.1.2 Install Profibus Indicator Interface Board<br />
8. Use the four 6-32NC kep nuts supplied to<br />
mount the three brackets as shown in<br />
Figure 2-3 on page 4.<br />
9. Remove connector J4 from the header on the<br />
indicator CPU board. Connect serial<br />
communications wires to the connector as<br />
shown in Table 2-1 and in Figure 2-3, then<br />
reinstall J4 on the indicator board.<br />
10. Plug 10-pin ribbon cable into connector J15<br />
on the indicator CPU board as shown in<br />
Figure 2-3. Ensure connector is oriented as<br />
shown in the drawing, with red wire of ribbon<br />
cable toward center of board.<br />
11. Use the four 6-32NC x 1/4 machine screws<br />
supplied to mount the Profibus Indicator<br />
Interface board on the brackets as shown in<br />
Figure 2-3.<br />
2.1.3 Connect Cables to Profibus Indicator Interface<br />
12. Connect serial communications wires from<br />
the indicator J4 (or J12) serial connector to<br />
the J5 connector on the Profibus Indicator<br />
Interface board (see Table 2-1 below and<br />
Figure 2-6 on page 6).<br />
Indicator Profibus Indicator Interface<br />
Pin Signal Signal J5 Pin<br />
J4-1 RS232/TxD RS232/RxD 8<br />
J4-2 RS232/GND RS232/GND 2<br />
J4-3 RS232/RxD RS232/TxD 3<br />
Table 2-1. Indicator-to-Profibus Serial Port Pin<br />
Assignments
C15<br />
J2<br />
R68<br />
C14<br />
R69<br />
1<br />
U11<br />
GND<br />
R70<br />
R1<br />
R2<br />
R3<br />
R4<br />
R5<br />
R6<br />
R7<br />
R71<br />
R72<br />
R19<br />
R73<br />
R74<br />
R20<br />
R21<br />
R8 U1<br />
R9<br />
R10<br />
R11<br />
R12<br />
R13<br />
R14<br />
R15<br />
R16<br />
R17<br />
R18<br />
J4<br />
Profibus<br />
Communications<br />
U2<br />
U3<br />
U12<br />
U13<br />
R22<br />
R23<br />
C16<br />
R75<br />
1<br />
R76<br />
R78<br />
C17<br />
ANALOG<br />
GND<br />
C1<br />
R77<br />
R92<br />
R91<br />
R24<br />
R25<br />
C2<br />
R26<br />
R27<br />
C3<br />
C19<br />
R93<br />
JMP3<br />
U14<br />
13. Set serial communications jumpers for<br />
RS-232 operation (see Section 2.2.2 on<br />
page 6).<br />
14. Plug power supply ribbon cable connector<br />
from J15 on the indicator CPU board into<br />
connector J6 on the Profibus Indicator<br />
Interface board. Ensure cable is oriented as<br />
shown in Figure 2-3, with red wire of ribbon<br />
cable attached at pin 1 on the Profibus board.<br />
15. Plug LED annunciator cable pairs into<br />
connector J1 on the Profibus board as shown<br />
in Table 2-2.<br />
Table 2-2. LED Connections to J1<br />
16. Feed Profibus network cable through cord<br />
grip. Allow enough cable for routing along<br />
inside of enclosure to J4 connector on the<br />
Profibus Indicator Interface board. Connect<br />
Profibus network cables into connector J4 on<br />
the Profibus board as described in<br />
Section 2.2.4 on page 6.<br />
17. Use three cable ties to secure the LED and<br />
Profibus network cables to the cable tie<br />
mounts attached in step 9.<br />
C4<br />
R79<br />
C18<br />
U4<br />
U5<br />
R28<br />
JMP4<br />
CLK1<br />
U15<br />
C5<br />
R29<br />
C20<br />
R31 C6<br />
R30<br />
R32<br />
DC/DC Converter<br />
R33<br />
R34<br />
PTxD<br />
R35<br />
GND<br />
CABLE<br />
TERMINATION<br />
Install JMP3 &JMP4<br />
ISOPWR1<br />
LED J1 Pins*<br />
ERROR<br />
R36<br />
R80<br />
1<br />
PRxD<br />
R37<br />
1<br />
+5V<br />
J5<br />
R38<br />
R39<br />
C21<br />
U6<br />
J1<br />
Figure 2-1. Profibus Indicator Interface Board<br />
R40<br />
R41<br />
4100 4200<br />
GND<br />
EPROM<br />
U16 U17<br />
20mA Chips<br />
TxD 1, 2<br />
RxD 3, 4<br />
ERROR 5, 6<br />
Power 7, 8<br />
* Connect black wire of each pair to the even-numbered pin.<br />
U7<br />
LED connector<br />
RS-232 / TxD<br />
CTS<br />
C22<br />
RTS<br />
+20mA OUT<br />
1<br />
R42<br />
R43<br />
R44<br />
R45<br />
R46<br />
R47<br />
R48<br />
RS-232<br />
RxD<br />
20mA/RS485<br />
–20mA OUT<br />
+20mA IN<br />
SW3<br />
Serial Communications<br />
RICE LAKE WEIGHING SYSTEMS<br />
U8<br />
R81<br />
R49<br />
U18 U19<br />
C23<br />
C26 C25 C24<br />
C28<br />
C8<br />
RS-485<br />
R50<br />
R51<br />
R52<br />
R53<br />
R54<br />
R55<br />
R56<br />
R57<br />
C27<br />
U20<br />
R82A1<br />
R83 R82 C29<br />
U9<br />
RxD<br />
TxD<br />
R84<br />
18. Set DIP switches as described in Section 2.3<br />
on page 6.<br />
19. If the interface is the last device on the<br />
network bus, install termination jumpers<br />
JMP3 and JMP4 (see Figure 2-1).<br />
2.1.4 Reassemble Enclosure<br />
20. Position the backplate over the enclosure and<br />
reinstall the backplate screws. Use the torque<br />
pattern shown in Figure 2-2 to prevent<br />
distorting the backplate gasket. Torque screws<br />
to 15 in-lb (1.7 N-m).<br />
15<br />
ON<br />
1 2 3 4 5 6 7 8<br />
1<br />
3<br />
RS-232 / RxD<br />
–20mA IN<br />
9<br />
U21<br />
ON<br />
1 2 3 4 5 6 7 8<br />
SW2<br />
J6<br />
Figure 2-2. IQ plus 510/710 / Profibus Backplate<br />
R85<br />
RS-232<br />
OUTPUT<br />
20mA<br />
7<br />
3.3V<br />
R86<br />
C9<br />
C30<br />
C31<br />
ON<br />
R58<br />
R66<br />
C35<br />
R67<br />
R66A1<br />
C10 R67A1<br />
U22<br />
TEST<br />
+5V<br />
Setup switch access screw<br />
1 2 3 4 5 6 7 8<br />
R59<br />
R60<br />
R87<br />
C32<br />
SW1<br />
Torque backplate screws<br />
to 10 in-lb (1.13 N-m)<br />
R61<br />
R62<br />
RESET1<br />
1<br />
GND<br />
R63<br />
R64<br />
R65<br />
U10<br />
R87A1<br />
RT1<br />
C12<br />
R87B1<br />
J3<br />
C11<br />
Installation<br />
1<br />
R88<br />
C33<br />
C34<br />
Fillister head screws<br />
5 6<br />
11 16<br />
14<br />
8<br />
13<br />
10<br />
C13<br />
VR1<br />
GND<br />
4<br />
2<br />
12<br />
3
4<br />
LED connections to J1<br />
on Profibus board<br />
Mounting bracket<br />
with 6-32NC kep nuts (2)<br />
Green (RxD, pin 3)<br />
Black (Gnd, pin 2)<br />
Red (TxD, pin 1)<br />
J15<br />
Standoffs<br />
Figure 2-3. Profibus Indicator Interface Board Installation and Wiring<br />
Profibus <strong>DP</strong> Indicator Interface Installation and Programming Manual<br />
J4<br />
Ribbon cable from<br />
J6 to J15<br />
on indicator board<br />
J6 J5<br />
J1<br />
pin 1<br />
Backplate<br />
Cable tie mounts (3)<br />
Red (RxD, pin 8)<br />
Green (TxD, pin 3)<br />
Black (Gnd, pin 2)<br />
Profibus board<br />
6-32NC x 1/4<br />
machine screws (4)<br />
Mounting brackets<br />
with 6-32NC kep nuts (2)
2.2 Physical Connections for Installed Boards<br />
Use the following procedure when connecting cables to a Profibus board already installed in the indicator.<br />
The indicator enclosure must be opened to connect cables and set DIP switches for the Profibus Indicator<br />
Interface. Ensure power to the indicator is disconnected, then place the indicator face-down on an antistatic work<br />
mat. Remove the screws that hold the backplate to the enclosure body, then lift the backplate away from the<br />
enclosure and set it aside.<br />
! Caution<br />
Use a wrist strap to ground yourself and protect components from electrostatic discharge (ESD)<br />
when working inside the indicator enclosure.<br />
The Profibus board (see Figure 2-1) is mounted on brackets above the indicator CPU board. Connections<br />
between the two boards are as follows:<br />
• Power supply ribbon cable from connector J15 on the indicator CPU/power supply board (see Figure 2-4<br />
on page 5) to connector J6 on the Profibus board.<br />
• Serial communications wiring from the indicator E<strong>DP</strong> port on connector J4 to connector J5 on the<br />
Profibus board.<br />
Once wiring and DIP switch configuration (see Section 2.3 on page 6) are complete, position the backplate over<br />
the indicator enclosure and reinstall the backplate screws. Use the torque pattern shown in Figure 2-2 on page 3<br />
to prevent distorting the backplate gasket. Torque screws to 10 in-lb (1.13 N-m).<br />
GND<br />
DI8<br />
DI7<br />
DI6<br />
DI5<br />
DI4<br />
DI3<br />
DI2<br />
DI1<br />
GND<br />
J7<br />
IQ plus 710 only<br />
10<br />
9<br />
8<br />
7<br />
6<br />
5<br />
4<br />
3<br />
2<br />
1<br />
DIGITAL INPUT<br />
J8<br />
GND<br />
1<br />
DO1<br />
DO2<br />
2<br />
3<br />
1<br />
100<br />
25<br />
U22<br />
50 26<br />
U16<br />
EPROM<br />
DO3<br />
DO4<br />
4<br />
5<br />
75<br />
76<br />
51<br />
DO5<br />
DO6<br />
6<br />
7<br />
DIGITAL OUTPUT<br />
U19<br />
DO7<br />
8<br />
DO8<br />
+5V<br />
10<br />
9<br />
JP4<br />
J5<br />
ANALOG OUTPUT<br />
C96<br />
LOCATION OF INSTALLED ANALOG OUTPUT MODULE<br />
1<br />
J10<br />
10 11<br />
U18<br />
9<br />
A/D Converter<br />
12<br />
3<br />
T1<br />
Figure 2-4. IQ plus 510/710 CPU and Power Supply Board<br />
8<br />
+<br />
14<br />
D6<br />
KEYPAD CONNECTOR<br />
7<br />
D5 D4<br />
C95<br />
J6<br />
Ribbon cable power connection to<br />
J6 on Profibus board<br />
15<br />
6<br />
D9<br />
SW1<br />
U17<br />
J1<br />
BLUE WIRE BROWN WIRE<br />
2<br />
J1<br />
3<br />
1<br />
1<br />
4<br />
C104<br />
C100<br />
–EXC<br />
+EXC<br />
TO LINE FILTER<br />
F2 F1<br />
JP3<br />
J15<br />
SHIELD<br />
–SENSE<br />
P2<br />
B1<br />
JP2 JP1<br />
LOAD CELL CONNECTOR<br />
7 6 5 4 3 2 1<br />
+SENSE<br />
–SIG<br />
+SIG<br />
U23<br />
J9<br />
SERIAL COMMUNICATIONS - 2<br />
SERIAL COMMUNICATIONS - 1<br />
1<br />
2<br />
3<br />
4<br />
5<br />
6<br />
7<br />
1<br />
2<br />
3<br />
4<br />
5<br />
6<br />
7<br />
J12<br />
–I<br />
+I<br />
+5V<br />
GND<br />
GND<br />
J4<br />
RS485-A<br />
Installation<br />
RS485-B<br />
E<strong>DP</strong> TxD<br />
GND<br />
E<strong>DP</strong> RxD<br />
Prn TxD<br />
Prn RxD<br />
–20 mA<br />
+20 mA<br />
5
2.2.1 Power Connections<br />
Power to the Profibus Indicator Interface is supplied<br />
by the indicator, using a ribbon cable attached from<br />
connector J15 on the indicator to connector J6 on the<br />
Profibus board. Note that the red wire strand of the<br />
ribbon cable must connect pin 1 at each connector.<br />
2.2.2 Serial Communications Jumpers<br />
Two jumpers, labeled RxD and OUTPUT,<br />
determine<br />
whether the Profibus Indicator Interface uses RS-232<br />
or 20 mA current loop (available as an option for IQ<br />
plus 800/810 indicators only) for serial<br />
communications with the indicator. Leave the jumpers<br />
in the position shown in Figure 2-5 for RS-232<br />
communications. See Figure 2-1 on page 3 for board<br />
location of the jumpers.<br />
RS-232<br />
RxD<br />
20mA<br />
6<br />
RS-232<br />
OUTPUT<br />
20mA<br />
Figure 2-5. RxD and OUTPUT Jumpers, Showing Jumper<br />
Positions for RS-232 Communications<br />
2.2.3 Serial Connections<br />
Serial communications connections to the indicator<br />
are made at connector J5 on the Profibus board (see<br />
Figure 2-1 on page 3 for board location of J5).<br />
Figure 2-6 shows the J5 connector layout for the<br />
Profibus Indicator Interface. Table 2-1 on page 2<br />
shows the serial communications connections<br />
between the Profibus Indicator Interface and the IQ<br />
plus 510/710 indicators.<br />
+5V<br />
GND<br />
RS-232 / TxD<br />
CTS<br />
RTS<br />
+20mA OUT<br />
1<br />
J5 Serial Communications<br />
Figure 2-6. Serial Communications Connections<br />
–20mA OUT<br />
+20mA IN<br />
Profibus <strong>DP</strong> Indicator Interface Installation and Programming Manual<br />
RS-232 / RxD<br />
–20mA IN<br />
2.2.4 Profibus Network Connections<br />
Connections to the Profibus network are made at<br />
connector J4 on the Profibus board (see Figure 2-1 on<br />
page 3 for board location of J4). Table 2-3 shows the<br />
connections from J4 connector on the Profibus board<br />
to the DB-9 Profibus connector.<br />
Profibus<br />
Network DB-9<br />
Pin Signal<br />
2.2.5 Bus Termination Jumpers<br />
If the Profibus Indicator Interface is the last device on<br />
the network bus, install jumpers JMP3 and JMP4 on<br />
the Profibus board (see Figure 2-1 on page 3 for<br />
jumper locations).<br />
2.3 DIP Switch Configuration<br />
Two banks of DIP switches are used to configure the<br />
Profibus Indicator Interface for communication<br />
between the indicator and the network. Figure 2-7<br />
shows the switch assignments for SW1–SW3.<br />
Figure 2-7. DIP Switch Assignments<br />
Profibus<br />
Indicator<br />
Interface J4<br />
Connector Pin<br />
1 Shield ground/Earth ground 10<br />
2 Blank pin<br />
2<br />
3 Profibus B 3<br />
4 RTS 4<br />
5 Power supply common 5<br />
6 +5V 6<br />
7 Blank pin<br />
7<br />
8 Profibus A 8<br />
9 Blank pin<br />
9<br />
NC NC/chassis ground 1<br />
NOTE: If connecting the DB-9 shield ground (pin 1) to J4 pin<br />
10 causes ground loop problems, disconnect.<br />
ON<br />
Table 2-3. Profibus Network Connections<br />
SW2 SW1<br />
1 2 3 4 5 6 7 8<br />
Indicator<br />
Type<br />
Indicator<br />
Data Rate<br />
Stop Bits<br />
Parity<br />
Reserved<br />
ON<br />
1 2 3 4 5 6 7 8<br />
LSB<br />
Profibus Address<br />
MSB
Profibus Address<br />
Switches SW1-1 through SW1-8 are used to set the<br />
address of the Profibus Indicator Interface. Use<br />
Table 2-4 to select the correct switch settings for the<br />
network address. Note that setting a switch OFF acts<br />
as a logical “0” and that SW1-1 represents the least<br />
significant bit (LSB) of the network address.<br />
Switch Decimal Value if Switch=ON<br />
1-1 1<br />
1-2 2<br />
1-3 4<br />
1-4 8<br />
1-5 16<br />
1-6 32<br />
1-7 64<br />
1-8 128<br />
Table 2-4. SW1 Switch Values for Network Addressing<br />
The configured address equals the sum of the values<br />
of the switches set on. For example, to set a network<br />
address of 19, SW1 switches would be set as shown in<br />
Table 2-5:<br />
For hexadecimal addressing, SW1 functions as shown in Table 2-6. Repeating the example from Table 2-4,<br />
decimal 19 is hexadecimal 13: Switch 1-5 (1 in byte 1) and switches 1-2 and 1-1 (2+1 = 3 in byte 0) would be set<br />
on for an address of hex 13.<br />
Indicator Type<br />
Switches SW2-1 and SW2-2 set the type of indicator<br />
attached to the Profibus Indicator Interface. Set<br />
SW2-1 OFF and SW2-2 ON for IQ plus 510/710<br />
indicators.<br />
Indicator Data Rate<br />
Switches SW2-3 and SW2-4 set the data rate used for<br />
communications between the indicator and the<br />
Profibus Indicator Interface.<br />
Stop Bits<br />
Switch SW2-5 sets the number of stop bits used to<br />
communicate with the indicator. Set SW2-5 OFF for<br />
one stop bit, ON for two stop bits.<br />
Switch<br />
Switch ON Value Switch State Value<br />
1-1 1 ON 1<br />
1-2 2 ON 2<br />
1-3 4 OFF 0<br />
1-4 8 OFF 0<br />
1-5 16 ON 16<br />
1-6 32 OFF 0<br />
1-7 64 OFF 0<br />
1-8 128 OFF 0<br />
Sum of ON switch values:<br />
Parity<br />
Switches SW2-6 and SW2-7 set the type of parity<br />
used to communicate with the indicator.<br />
Installation<br />
19<br />
Table 2-5. SW1 Example for Network Address 19<br />
1-8 1-7 1-6 1-5 1-4 1-3 1-2 1-1<br />
Byte 1 Byte 0<br />
8 4 2 1 8 4 2 1<br />
2<br />
7<br />
2<br />
6<br />
2<br />
5<br />
2<br />
4<br />
2<br />
3<br />
2<br />
2<br />
2<br />
1<br />
2<br />
0<br />
Data Rate (bps) SW2-3 SW2-4<br />
9600 OFF OFF<br />
19200 OFF ON<br />
Table 2-7. Network Data Rate Switch Settings<br />
Table 2-6. Switch Values for Hexadecimal Addressing<br />
Parity SW2-6 SW2-7<br />
NONE OFF OFF<br />
EVEN OFF ON<br />
ODD ON OFF<br />
Table 2-8. Parity Switch Settings<br />
7
2.4 Onboard LED Indicators<br />
Two groups of three amber LEDs on the Profibus board itself provide additional diagnostic flexibility:<br />
• LEDs labeled PTxD,<br />
ERROR,<br />
and PRxD are mounted next to the J1 LED connector<br />
• LEDs labeled RxD,<br />
TxD,<br />
and 3.3V are mounted behind the OUTPUT jumper<br />
Table 2-10 summarizes the function of these LEDs:<br />
8<br />
LED Function<br />
PTxD Profibus communications status. Same functions as backplate LEDs.<br />
ERROR<br />
PRxD<br />
RxD Blinks when data received from indicator. Off indicates no transmission from the indicator to the Profibus<br />
Indicator Interface.<br />
TxD Blinks when data sent to the indicator. Off indicates no transmission from the Profibus Indicator Interface to the<br />
indicator.<br />
3.3V Off indicates possible failure of 3.3V or 5V power supply.<br />
Table 2-9. Onboard Diagnostic LEDs<br />
Profibus <strong>DP</strong> Indicator Interface Installation and Programming Manual
2.5 Indicator Setup<br />
The IQ plus 510/710 indicators communicate with the Profibus Indicator Interface board using RS-232<br />
communications with the indicator E<strong>DP</strong> port.<br />
Table 2-11 shows the SERIAL menu configuration parameters recommended for the IQ plus 510/710 indicators<br />
to communicate with the Profibus Indicator Interface. See the indicator Installation Manual for detailed<br />
configuration information.<br />
Indicator Configuration Settings Notes<br />
E<strong>DP</strong> or PRN BAUD 9600 or 19200 Must match DIP switch selection on Profibus Indicator Interface<br />
BITS 8 NONE<br />
TERMIN CR<br />
EOL DLY 0 Required<br />
HANDSHK OFF<br />
ADDRESS 0<br />
BUS ON Required. For indicators running Version 1.x software, set the AB-RIO<br />
parameter ON.<br />
STREAM OFF Required<br />
Table 2-10. IQ plus 510/710 Configuration Settings<br />
Installation 9
3.0 Profibus Commands<br />
The Profibus Indicator Interface uses 20-bit integer and 32-bit floating point commands to send and receive data<br />
from the indicator. This section describes the input and output data formats and commands, status bit<br />
assignments, and provides examples of 20-bit and 32-bit command usage.<br />
3.1 Integer (20-bit) Commands<br />
3.1.1 Integer Command Formats<br />
Tables 3-1 and 3-2 show the data formats used to send and receive 20-bit integer commands. Bit assignments as<br />
follows:<br />
R Reserved<br />
s00-s08 Status data<br />
cccc cccc Command number<br />
v00–v19 20-bit integer value<br />
See Table 3-3 on page 11 for a list of supported commands; see Section 3.3 on page 13 for status bit assignments.<br />
NOTE: Integer commands return no decimal point information to the master. For example, a value of 750.1<br />
displayed on the indicator is returned to the master as 7501.<br />
Bit<br />
Byte 1 Byte 0<br />
15 14 13 12 11 10 9 8 7 6 5 4 3 2 1 0<br />
Word 0 R R R R R R R R c c c c c c c c<br />
Word 1 R R R R R R R R R R R R R R R R<br />
Word 2 R R R R R R R R R R R R v19 v18 v17 v16<br />
Word 3 v15 v14 v13 v12 v11 v10 v09 v08 v07 v06 v05 v04 v03 v02 v01 v00<br />
Bit<br />
Table 3-1. Profibus 20-bit Integer Output Format<br />
Byte 1 Byte 0<br />
15 14 13 12 11 10 9 8 7 6 5 4 3 2 1 0<br />
Word 0 R R R R R R R R R R R R R R R R<br />
Word 1 s15 s14 s13 s12 s11 s10 s09 s08 s07 s06 s05 s04 s03 s02 s01 s00<br />
Word 2 R R R R R R R R R R R R v19 v18 v17 v16<br />
Word 3 v15 v14 v13 v12 v11 v10 v09 v08 v07 v06 v05 v04 v03 v02 v01 v00<br />
Table 3-2. Profibus 20-bit Integer Input Format<br />
10 Profibus <strong>DP</strong> Indicator Interface Installation and Programming Manual
3.1.2 Integer Commands<br />
Table 3-3 lists the integer commands that can be specified for IQ plus 510 and IQ plus 710 indicators. Valid<br />
commands for each indicator are indicated by a check mark (√). The number representing the indicator command<br />
is sent in the lower byte of word 0 (bits 0–7).<br />
Hex Decimal Command 510 710<br />
00 00 Display Status √ √<br />
06 06 Display Gross Weight √ √<br />
07 07 Display Net Weight √ √<br />
09 09 Acquire Tare √ √<br />
0A 10 Primary Units √ √<br />
0B 11 Secondary Units √ √<br />
0E 14 Print Request √ √<br />
11 17 Clear Accumulator √<br />
15 21 Clear Tare √ √<br />
17 23 Return Gross √ √<br />
1C 28 Return Net √ √<br />
21 33 Return Tare √ √<br />
25 37 Return Currrent Display √ √<br />
26 38 Batch Start √<br />
28 40 Batch Pause √<br />
29 41 Batch Reset √<br />
2A 42 Batch Status √<br />
2B 43 Zero √ √<br />
2C 44 Enter Tare √ √<br />
2F 47 Return Accumulator √<br />
3E 62 Push Weight to Accumulator √<br />
42 66 Lock Indicator Front Panel √ √<br />
43 67 Unlock Indicator Front Panel √ √<br />
44 68 Set Digital Output ON √<br />
45 69 Set Digital Output OFF √<br />
Table 3-3. IQ plus 510/710 Integer Commands<br />
Profibus Commands 11
3.2 Floating Point (32-bit) Commands<br />
3.2.1 Floating Point Command Formats<br />
Tables 3-4 and 3-5 show the data formats used to send and receive 32-bit floating point commands. Bit<br />
assignments as follows:<br />
R Reserved<br />
s00-s08 Status data<br />
n00-n07 Channel number or setpoint number<br />
c cccc cccc Command number<br />
v00–v31 32-bit floating point value<br />
See Table 3-6 on page 13 for a list of supported commands; see Section 3.3 on page 13 for status bit assignments.<br />
NOTE: Floating point commands support decimal point information with no special handling.<br />
Bit<br />
Byte 1 Byte 0<br />
15 14 13 12 11 10 9 8 7 6 5 4 3 2 1 0<br />
Word 0 R R R R R R R c c c c c c c c c<br />
Word 1 R R R R R R R R n07 n06 n05 n04 n03 n02 n01 n00<br />
Word 2 v31 v30 v29 v28 v27 v26 v25 v24 v03 v22 v21 v20 v19 v18 v17 v16<br />
Word 3 v15 v14 v13 v12 v11 v10 v09 v08 v07 v06 v05 v04 v03 v02 v01 v00<br />
Bit<br />
Table 3-4. Profibus 32-bit Floating Point Output Format<br />
Byte 1 Byte 0<br />
15 14 13 12 11 10 9 8 7 6 5 4 3 2 1 0<br />
Word 0 R R R R R R R c c c c c c c c c<br />
Word 1 s15 s14 s13 s12 s11 s10 s09 s08 s07 s06 s05 s04 s03 s02 s01 s00<br />
Word 2 v31 v30 v29 v28 v27 v26 v25 v24 v03 v22 v21 v20 v19 v18 v17 v16<br />
Word 3 v15 v14 v13 v12 v11 v10 v09 v08 v07 v06 v05 v04 v03 v02 v01 v00<br />
Table 3-5. Profibus 32-bit Floating Point Input Format<br />
12 Profibus <strong>DP</strong> Indicator Interface Installation and Programming Manual
3.2.2 Floating Point Commands<br />
Table 3-6 lists the integer commands that can be specified for IQ plus 510 and IQ plus 710 indicators. Valid<br />
commands for each indicator are indicated by a check mark (√). The number representing the indicator command<br />
is sent in word 0 (bits 0–8).<br />
Hex Decimal Command 510 710<br />
101 257 Set Tare √ √<br />
102 258 Read Tare √ √<br />
103 259 Read Accumulator √<br />
104 260 Read Gross √ √<br />
105 261 Read Net √ √<br />
106 262 Set Setpoint Value √<br />
107 263 Set Setpoint Hysteresis √<br />
108 264 Set Setpoint Bandwidth √<br />
109 265 Set Setpoint Preact √<br />
10A 266 Read Setpoint Value √<br />
10B 267 Read Setpoint Hysteresis √<br />
10C 268 Read Setpoint Bandwidth √<br />
10D 269 Read Setpoint Preact √<br />
10E 270 Set Batching State √<br />
Table 3-6. IQ plus 510/710 Floating Point Commands<br />
3.3 Status Data<br />
Table 3-7 shows the remote function status data format; Table 3-8 shows the batch status data format. The batch<br />
status format is used in response to command 42 (hex 2A), Batch Status.<br />
Bit<br />
Status Data<br />
Value=0 Value=1<br />
s00 No Error Error<br />
s01 Tare not entered Tare entered<br />
s02 Not zero Center of zero<br />
s03 Weight invalid Weight OK<br />
s04 Standstill In motion<br />
s05 Primary units Secondary units<br />
s06 Tare not acquired Tare acquired<br />
s07 Gross weight Net weight<br />
s08 Channel 0 or 1 Channel 2, 3, or 4<br />
s09<br />
s10<br />
Not used<br />
s11 Positive weight Negative weight<br />
s12<br />
s13<br />
s14<br />
s15<br />
Not used<br />
Table 3-7. Run Status Word Format<br />
Bit<br />
Status Data<br />
Value=0 Value=1<br />
s00 No Error Error<br />
s01 DIGIN 3 = OFF DIGIN 3 = ON<br />
s02 DIGIN 2 = OFF DIGIN 2 = ON<br />
s03 DIGIN 1 = OFF DIGIN 1 = ON<br />
s04 Batch paused Batch not paused<br />
s05 Batch running Batch not running<br />
s06 Batch not stopped Batch stopped<br />
s07<br />
s08<br />
s09<br />
s10<br />
s11<br />
s12<br />
s13<br />
s14<br />
s15<br />
Not used<br />
Table 3-8. Batch Status Word Format<br />
Profibus Commands 13
3.4 Command Examples<br />
This section provides examples of 20-bit integer and 32-bit floating point commands used to send and receive<br />
indicator data.<br />
3.4.1 Retrieve Net Weight Data (20-bit)<br />
Table 3-9 shows a binary representation of the 20-bit output data used to retrieve net weight from the indicator<br />
using command 28. The output format includes only the command number, in byte 0 of word 0 (0001 1100 =<br />
hex 1C, decimal 28).<br />
Bit<br />
Byte 1 Byte 0<br />
15 14 13 12 11 10 9 8 7 6 5 4 3 2 1 0<br />
Word 0 R R R R R R R R 0 0 0 1 1 1 0 0<br />
Word 1 Not used<br />
Word 2 Not used<br />
Word 3 Not used<br />
Table 3-9. 20-bit Integer Output to Send Command 28, Return Net Weight<br />
Table 3-10 shows the input data returned by the previous command:<br />
• The status bits in word 1 (see Section 3.3 on page 13) show that a tare has been performed and the<br />
indicator is in net mode.<br />
• Weight data is returned in word 3 (0000 0111 1101 0101 = hex 07D5 = decimal 2005). Assuming the<br />
indicator is configured to display pounds, with one decimal position, the net weight is interpreted as<br />
200.5 LB.<br />
Bit<br />
Byte 1 Byte 0<br />
15 14 13 12 11 10 9 8 7 6 5 4 3 2 1 0<br />
Word 0 R R R R R R R R R R R R R R R R<br />
Word 1 0 0 0 0 0 0 0 0 1 1 0 0 0 0 1 0<br />
Word 2 R R R R R R R R 0 0 0 0 0 0 0 0<br />
Word 3 0 0 0 0 0 1 1 1 1 1 0 1 0 1 0 1<br />
Table 3-10. 20-bit Integer Input with Returned Net Weight Data<br />
3.4.2 Retrieve Net Weight Data (32-bit)<br />
Table 3-11 shows a binary representation of the 32-bit output data used to retrieve net weight from the indicator<br />
using command 261. The output format includes only the command number, in byte 0 of word 0 (0001 0001<br />
1100 = hex 105, decimal 261).<br />
Bit<br />
Byte 1 Byte 0<br />
15 14 13 12 11 10 9 8 7 6 5 4 3 2 1 0<br />
Word 0 0 0 0 0 0 0 0 1 0 0 0 0 0 1 0 1<br />
Word 1 Not used<br />
Word 2 Not used<br />
Word 3 Not used<br />
Table 3-11. 32-bit Floating Point Output to Send Command 261, Read Net Weight<br />
14 Profibus <strong>DP</strong> Indicator Interface Installation and Programming Manual
Table 3-12 shows the input data returned by the previous command:<br />
• The command number for which the data is returned is included in word 0 (command 261).<br />
• The status bits in word 1 (see Section 3.3 on page 13) show that a tare has been performed and the<br />
indicator is in net mode.<br />
• Weight data returned in words 2 and 3 must be copied into a floating point storage location before being<br />
read.<br />
Bit<br />
3.4.3 Send Setpoint Value (32-bit)<br />
Table 3-13 shows a decimal representation of the<br />
32-bit output data used to set the value of setpoint 1 to<br />
100.5. Note that the setpoint value is not readable as<br />
100.5: The value data must be copied to words 2 and 3<br />
from a floating point storage location.<br />
After sending the command, use the Read Setpoint<br />
Value command (decimal 266) to verify that the<br />
indicator received the correct setpoint value.<br />
Byte 1 Byte 0<br />
15 14 13 12 11 10 9 8 7 6 5 4 3 2 1 0<br />
Word 0 0 0 0 0 0 0 0 1 0 0 0 0 0 1 0 1<br />
Word 1 0 0 0 0 0 0 0 0 1 1 0 0 0 0 1 0<br />
Word 2 0 1 0 0 0 0 1 1 1 1 1 1 1 0 1 0<br />
Word 3 1 1 0 1 1 0 0 1 1 0 0 1 1 0 1 0<br />
Word Value (Decimal) Description<br />
Table 3-12. 32-bit Floating Point Input with Returned Net Weight Data<br />
0 262 Command number<br />
1 1 Setpoint number<br />
2 17097 Setpoint value (MSW)<br />
3 0 Setpoint value (LSW)<br />
Table 3-13. 32-bit Floating Point Output to Send Command<br />
262, Send Setpoint Value<br />
3.4.4 Read Setpoint Value (32-bit)<br />
Table 3-14 shows the output data used to read the<br />
value of setpoint 1.<br />
Word Value (Decimal) Description<br />
0 262 Command number<br />
1 1 Setpoint number<br />
2 0 Not used<br />
3 0 Not used<br />
Table 3-14. 32-bit Floating Point Output to Send Command<br />
266, Read Setpoint Value<br />
Table 3-15 shows the data returned by the previous<br />
command. Again, the value data returned in words 2<br />
and 3 must be copied into a floating point storage<br />
location to be read.<br />
Word Value (Decimal) Description<br />
0 266 Command number<br />
1 0 Not used<br />
2 17097 Setpoint value (MSW)<br />
3 0 Setpoint value (LSW)<br />
Table 3-15. 32-bit Floating Point Input with Returned<br />
Setpoint Value Data<br />
Profibus Commands 15
4.0 Appendix<br />
4.1 Troubleshooting<br />
The following section provides information for diagnosing communications problems between the indicator and<br />
the Profibus master. The status of the LEDs on the Profibus Indicator Interface can be used to diagnose the<br />
general area of difficulty, as shown in Table 4-1.<br />
Symptom Possible Cause<br />
POWER LED not lit No power to Profibus board. Ensure connector J6 on the Profibus<br />
board is properly seated.<br />
RxD LED flashes constantly; TxD LED not lit Indicator is streaming data to the Profibus slave. Check indicator<br />
configuration. See Section 2.5 on page 9 for indicator configuration<br />
information.<br />
TxD LED flashes every two seconds; RxD LED not lit Serial connection between the indicator and the Profibus Indicator<br />
Interface is not correct. See Section 2.5 on page 9 for indicator<br />
configuration information.<br />
Table 4-1. Troubleshooting Symptoms Indicated by LEDs<br />
If there is no communication between the indicator and the master device, do the following:<br />
1. Ensure DIP switches on the Profibus board are set correctly (see Section 2.3 on page 6).<br />
2. Power down,then power up the indicator.<br />
3. Ensure the Profibus master device is set to send a command to the slave. Commands are listed in<br />
Section 3.0 on page 10.<br />
4. Check the OUTPUT and RxD jumpers to ensure they are set for RS-232 communications (see<br />
Section 2.2.2 on page 6).<br />
5. Check the wiring from connector J4 on the indicator board to connector J5 on the Profibus board (see<br />
Section 2.1.3 on page 2).<br />
6. Ensure the indicator configuration is correct.<br />
7. Check that the master is set up correctly to communicate with the slave device.<br />
8. On the Profibus board, ensure that the 3.3V LED is lit. If it is not, check connectors J6 on the Profibus<br />
board and J15 on the indicator board for loose or incorrect connections (see Figure 2-1 on page 3 and<br />
Figure 2-4 on page 5). If the LED is still not lit, the indicator power supply may be bad.<br />
9. Locate EPROM U7 found in the middle of the Profibus board (see Figure 2-1 on page 3). Ensure that the<br />
chip is seated by pressing down on the chip.<br />
10. Check that the connector J4 on the Profibus board is firmly connected.<br />
11. If no problems are found in the checks above, replace the Profibus board.<br />
16 Profibus <strong>DP</strong> Indicator Interface Installation and Programming Manual
4.2 Profibus Indicator Interface GSD File<br />
;=================================================================<br />
; GSD-File for Profibus Indicator Interface<br />
; <strong>Rice</strong> <strong>Lake</strong> <strong>Weighing</strong> <strong>Systems</strong><br />
;<br />
; Version V0.3<br />
;<br />
; Date : 01.02.2000<br />
; File : RLWS088C.GSD<br />
;=================================================================<br />
#Profibus_<strong>DP</strong><br />
; <br />
GSD_Revision = 1 ; Needed to tell that this file works with text readers.<br />
Vendor_Name = "<strong>Rice</strong> <strong>Lake</strong> <strong>Weighing</strong> <strong>Systems</strong> "; Used to tell whose file this is.<br />
Model_Name = "Profibus Indicator Interface "; Tells what is supported by this<br />
file.<br />
Revision = "V1.1 "; Tells what version GSD file this is.<br />
Ident_Number = 0x088B; Seperates one manufacturers different part numbers.<br />
Protocol_Ident = 0 ; Profibus <strong>DP</strong> protocol<br />
Station_Type = 0 ; This is a slave device<br />
FMS_supp = 0 ; No FMS support<br />
Hardware_Release= "Rev B "; Tells that this works with hardware Rev B, not required.<br />
Software_Release= "Rev1.00"; Tells that this file works with Software release 1.00, not<br />
required.<br />
9.6_supp = 1 ; These baud rates with a "1" are supported, "0" is not<br />
19.2_supp = 1<br />
93.75_supp = 1<br />
187.5_supp = 1<br />
500_supp = 1<br />
45.45_supp = 1<br />
1.5M_supp = 1<br />
3M_supp = 1<br />
6M_supp = 1<br />
12M_supp = 1<br />
MaxTsdr_9.6 = 60 ; This is the time delay needed after a message is sent.<br />
MaxTsdr_19.2 = 60<br />
MaxTsdr_93.75 = 60<br />
MaxTsdr_187.5 = 60<br />
MaxTsdr_500 = 100<br />
MaxTsdr_45.45 = 120<br />
MaxTsdr_1.5M = 150<br />
MaxTsdr_3M = 250<br />
MaxTsdr_6M = 450<br />
MaxTsdr_12M = 800<br />
Redundancy = 0 ; Redundancy not supported<br />
Repeater_Ctrl_Sig = 2 ; Repeater control signal TTL RTS (2) not connected (0).<br />
24V_Pins = 0 ; 24 V pins not connected.<br />
Implementation_Type ="SPC3"; Slave-Specification:<br />
Freeze_Mode_supp =0 ; Freeze mode is not supported.<br />
Sync_Mode_Supp = 0 ; Sync-mode is not supported.<br />
Auto_Baud_supp = 1 ; Auto baud rate detection supported.<br />
Set_Slave_Add_Supp = 0 ; Supports function Set_Slave Add<br />
Min_Slave_Intervall = 100 ; Sets the value (multiples of 100us) between two slave poll<br />
cycles of the same slave<br />
Modular_Station = 1 ; Indicates that this is a modular device (device can be set up<br />
multiple ways.)<br />
Max_Module = 1 ; indicates the number of ways -1 that this can be set up.<br />
Max_Input_Len = 128 ; Indicates the max number of bytes of a modular station.<br />
Max_Output_Len = 128 ; Indicates the maximum number of output bytes of a modular<br />
station.<br />
Max_Data_Len = 256 ; Indicates the maximum number of data transferred in bytes to or<br />
from the device.<br />
; Unit_Diag_Bit(0) = ; Usable to indicate status or error messages (bitwise).<br />
Fail_Safe = 0;1 ; Tells if fail safe mode is supported (1) or not (0).<br />
; Max_Diag_Data_Len= 29<br />
Modul_Offset = 0 ; Tells how many to add to "module" number for module numbers.<br />
Slave_Family = 3@TdF@OTHER; USED BY COM PROFIBUS TO SET UP IN SLAVE MODULES MENU<br />
; Below useable for RS485 Adresses?<br />
Appendix 17
; UserPrmData: Length and Preset:<br />
; User_Prm_Data_Len = 0<br />
; User_Prm_Data = 0x40,0x60,0x00<br />
; Max_User_Prm_Data_Len=171<br />
; <br />
; FixPresetModules =1<br />
Module = "4 words I/O consistent" 0xD3,0xE3<br />
1<br />
; Preset = 1<br />
EndModule<br />
4.3 Profibus Indicator Interface Specifications<br />
Power Requirement<br />
5 VDC, 250 mA, provided by indicator power supply<br />
Communications Specifications<br />
Profibus Network Communications:<br />
Twinaxial cable attachment to Profibus network<br />
Serial Communications:<br />
Interface: RS-232C<br />
Data rate: 9600 or 19.2 Kbps<br />
ASCII encoding: 1 start bit, 8 data bits, 1 stop bit<br />
Environmental Specifications<br />
Temperature: –10° to +40° C (14° to 104° F)<br />
18 Profibus <strong>DP</strong> Indicator Interface Installation and Programming Manual
Profibus Indicator Interface Limited Warranty<br />
<strong>Rice</strong> <strong>Lake</strong> <strong>Weighing</strong> <strong>Systems</strong> (RLWS) warrants that all RLWS equipment and systems properly installed by a<br />
Distributor or Original Equipment Manufacturer (OEM) will operate per written specifications as confirmed by<br />
the Distributor/OEM and accepted by RLWS. All systems and components are warranted against defects in<br />
materials and workmanship for one year.<br />
RLWS warrants that the equipment sold hereunder will conform to the current written specifications authorized<br />
by RLWS. RLWS warrants the equipment against faulty workmanship and defective materials. If any equipment<br />
fails to conform to these warranties, RLWS will, at its option, repair or replace such goods returned within the<br />
warranty period subject to the following conditions:<br />
• Upon discovery by Buyer of such nonconformity, RLWS will be given prompt written notice with a<br />
detailed explanation of the alleged deficiencies.<br />
• Individual electronic components returned to RLWS for warranty purposes must be packaged to<br />
prevent electrostatic discharge (ESD) damage in shipment. Packaging requirements are listed in a<br />
publication, “Protecting Your Components From Static Damage in Shipment,” available from RLWS<br />
Equipment Return Department.<br />
• Examination of such equipment by RLWS confirms that the nonconformity actually exists, and was<br />
not caused by accident, misuse, neglect, alteration, improper installation, improper repair or<br />
improper testing; RLWS shall be the sole judge of all alleged non-conformities.<br />
• Such equipment has not been modified, altered, or changed by any person other than RLWS or its<br />
duly authorized repair agents.<br />
• RLWS will have a reasonable time to repair or replace the defective equipment. Buyer is responsible<br />
for shipping charges both ways.<br />
• In no event will RLWS be responsible for travel time or on-location repairs, including assembly or<br />
disassembly of equipment, nor will RLWS be liable for the cost of any repairs made by others.<br />
THESE WARRANTIES EXCLUDE ALL OTHER WARRANTIES, EXPRESSED OR IMPLIED, INCLUDING<br />
WITHOUT LIMITATION WARRANTIES OF MERCHANTABILITY OR FITNESS FOR A PARTICULAR<br />
PURPOSE. NEITHER RLWS NOR DISTRIBUTOR WILL, IN ANY EVENT, BE LIABLE FOR INCIDENTAL<br />
OR CONSEQUENTIAL DAMAGES.<br />
RLWS AND BUYER AGREE THAT RLWS’S SOLE AND EXCLUSIVE LIABILITY HEREUNDER IS<br />
LIMITED TO REPAIR OR REPLACEMENT OF SUCH GOODS. IN ACCEPTING THIS WARRANTY, THE<br />
BUYER WAIVES ANY AND ALL OTHER CLAIMS TO WARRANTY.<br />
SHOULD THE SELLER BE OTHER THAN RLWS, THE BUYER AGREES TO LOOK ONLY TO THE SELLER<br />
FOR WARRANTY CLAIMS.<br />
NO TERMS, CONDITIONS, UNDERSTANDING, OR AGREEMENTS PURPORTING TO MODIFY THE<br />
TERMS OF THIS WARRANTY SHALL HAVE ANY LEGAL EFFECT UNLESS MADE IN WRITING AND<br />
SIGNED BY A CORPORATE OFFICER OF RLWS AND THE BUYER.<br />
© 2000 <strong>Rice</strong> <strong>Lake</strong> <strong>Weighing</strong> <strong>Systems</strong>, Inc. <strong>Rice</strong> <strong>Lake</strong>, WI USA. All Rights Reserved.<br />
RICE LAKE WEIGHING SYSTEMS • 230 WEST COLEMAN STREET • RICE LAKE, WISCONSIN 54868 • USA<br />
Appendix 19


