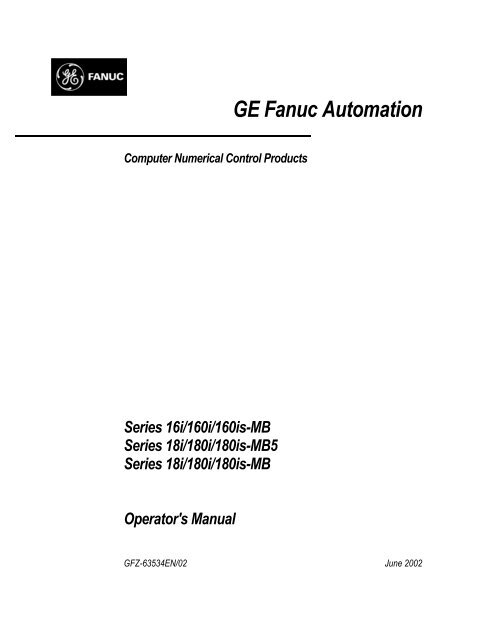
Series 16i/160i/160is-MB, Series 18i/180i - Flint Machine Tools, Inc.
Series 16i/160i/160is-MB, Series 18i/180i - Flint Machine Tools, Inc.
Series 16i/160i/160is-MB, Series 18i/180i - Flint Machine Tools, Inc.

Create successful ePaper yourself
Turn your PDF publications into a flip-book with our unique Google optimized e-Paper software.
Computer Numerical Control Products<br />
<strong>Series</strong> <strong>16i</strong>/<strong>160i</strong>/<strong>160i</strong>s-<strong>MB</strong><br />
<strong>Series</strong> <strong>18i</strong>/<strong>180i</strong>/<strong>180i</strong>s-<strong>MB</strong>5<br />
<strong>Series</strong> <strong>18i</strong>/<strong>180i</strong>/<strong>180i</strong>s-<strong>MB</strong><br />
Operator's Manual<br />
GE Fanuc Automation<br />
GFZ-63534EN/02 June 2002
Warnings, Cautions, and Notes<br />
as Used in this Publication<br />
Warning<br />
GFL-001<br />
Warning notices are used in this publication to emphasize that hazardous voltages, currents,<br />
temperatures, or other conditions that could cause personal injury exist in this equipment or<br />
may be associated with its use.<br />
In situations where inattention could cause either personal injury or damage to equipment, a<br />
Warning notice is used.<br />
Caution<br />
Caution notices are used where equipment might be damaged if care is not taken.<br />
Note<br />
Notes merely call attention to information that is especially significant to understanding and<br />
operating the equipment.<br />
This document is based on information available at the time of its publication. While efforts<br />
have been made to be accurate, the information contained herein does not purport to cover all<br />
details or variations in hardware or software, nor to provide for every possible contingency in<br />
connection with installation, operation, or maintenance. Features may be described herein<br />
which are not present in all hardware and software systems. GE Fanuc Automation assumes<br />
no obligation of notice to holders of this document with respect to changes subsequently made.<br />
GE Fanuc Automation makes no representation or warranty, expressed, implied, or statutory<br />
with respect to, and assumes no responsibility for the accuracy, completeness, sufficiency, or<br />
usefulness of the information contained herein. No warranties of merchantability or fitness for<br />
purpose shall apply.<br />
©Copyright 2002 GE Fanuc Automation North America, <strong>Inc</strong>.<br />
All Rights Reserved.
SAFETY PRECAUTIONS<br />
This section describes the safety precautions related to the use of CNC units. It is essential that these precautions<br />
be observed by users to ensure the safe operation of machines equipped with a CNC unit (all descriptions in this<br />
section assume this configuration). Note that some precautions are related only to specific functions, and thus<br />
may not be applicable to certain CNC units.<br />
Users must also observe the safety precautions related to the machine, as described in the relevant manual supplied<br />
by the machine tool builder. Before attempting to operate the machine or create a program to control the operation<br />
of the machine, the operator must become fully familiar with the contents of this manual and relevant manual<br />
supplied by the machine tool builder.<br />
Contents<br />
1. DEFINITION OF WARNING, CAUTION, AND NOTE . . . . . . . . . . . . . . . . . . . . . . . s–2<br />
2. GENERAL WARNINGS AND CAUTIONS . . . . . . . . . . . . . . . . . . . . . . . . . . . . . . . . s–3<br />
3. WARNINGS AND CAUTIONS RELATED TO PROGRAMMING . . . . . . . . . . . . . s–5<br />
4. WARNINGS AND CAUTIONS RELATED TO HANDLING . . . . . . . . . . . . . . . . . . . s–7<br />
5. WARNINGS RELATED TO DAILY MAINTENANCE . . . . . . . . . . . . . . . . . . . . . . . .<br />
s–9<br />
s–1
1 DEFINITION<br />
SAFETY PRECAUTIONS B–63534EN/02<br />
OF WARNING, CAUTION, AND NOTE<br />
This manual includes safety precautions for protecting the user and preventing damage to the<br />
machine. Precautions are classified into Warning and Caution according to their bearing on safety.<br />
Also, supplementary information is described as a Note. Read the Warning, Caution, and Note<br />
thoroughly before attempting to use the machine.<br />
WARNING<br />
Applied when there is a danger of the user being injured or when there is a danger of both the user<br />
being injured and the equipment being damaged if the approved procedure is not observed.<br />
CAUTION<br />
Applied when there is a danger of the equipment being damaged, if the approved procedure is not<br />
observed.<br />
NOTE<br />
The Note is used to indicate supplementary information other than Warning and Caution.<br />
Read this manual carefully, and store it in a safe place.<br />
s–2
B–63534EN/02<br />
2 GENERAL<br />
SAFETY PRECAUTIONS<br />
WARNINGS AND CAUTIONS<br />
WARNING<br />
1. Never attempt to machine a workpiece without first checking the operation of the machine.<br />
Before starting a production run, ensure that the machine is operating correctly by performing<br />
a trial run using, for example, the single block, feedrate override, or machine lock function or<br />
by operating the machine with neither a tool nor workpiece mounted. Failure to confirm the<br />
correct operation of the machine may result in the machine behaving unexpectedly, possibly<br />
causing damage to the workpiece and/or machine itself, or injury to the user.<br />
2. Before operating the machine, thoroughly check the entered data.<br />
Operating the machine with incorrectly specified data may result in the machine behaving<br />
unexpectedly, possibly causing damage to the workpiece and/or machine itself, or injury to the<br />
user.<br />
3. Ensure that the specified feedrate is appropriate for the intended operation. Generally, for each<br />
machine, there is a maximum allowable feedrate. The appropriate feedrate varies with the<br />
intended operation. Refer to the manual provided with the machine to determine the maximum<br />
allowable feedrate. If a machine is run at other than the correct speed, it may behave<br />
unexpectedly, possibly causing damage to the workpiece and/or machine itself, or injury to the<br />
user.<br />
4. When using a tool compensation function, thoroughly check the direction and amount of<br />
compensation.<br />
Operating the machine with incorrectly specified data may result in the machine behaving<br />
unexpectedly, possibly causing damage to the workpiece and/or machine itself, or injury to the<br />
user.<br />
5. The parameters for the CNC and PMC are factory–set. Usually, there is not need to change them.<br />
When, however, there is not alternative other than to change a parameter, ensure that you fully<br />
understand the function of the parameter before making any change.<br />
Failure to set a parameter correctly may result in the machine behaving unexpectedly, possibly<br />
causing damage to the workpiece and/or machine itself, or injury to the user.<br />
6. Immediately after switching on the power, do not touch any of the keys on the MDI panel until<br />
the position display or alarm screen appears on the CNC unit.<br />
Some of the keys on the MDI panel are dedicated to maintenance or other special operations.<br />
Pressing any of these keys may place the CNC unit in other than its normal state. Starting the<br />
machine in this state may cause it to behave unexpectedly.<br />
7. The operator’s manual and programming manual supplied with a CNC unit provide an overall<br />
description of the machine’s functions, including any optional functions. Note that the optional<br />
functions will vary from one machine model to another. Therefore, some functions described<br />
in the manuals may not actually be available for a particular model. Check the specification of<br />
the machine if in doubt.<br />
s–3
WARNING<br />
SAFETY PRECAUTIONS B–63534EN/02<br />
8. Some functions may have been implemented at the request of the machine–tool builder. When<br />
using such functions, refer to the manual supplied by the machine–tool builder for details of their<br />
use and any related cautions.<br />
CAUTION<br />
1 Do not remove the internal parts, including the ATA card and compact flash card, from within<br />
the CNC.<br />
NOTE<br />
Programs, parameters, and macro variables are stored in nonvolatile memory in the CNC unit.<br />
Usually, they are retained even if the power is turned off. Such data may be deleted inadvertently,<br />
however, or it may prove necessary to delete all data from nonvolatile memory as part of error<br />
recovery.<br />
To guard against the occurrence of the above, and assure quick restoration of deleted data, backup<br />
all vital data, and keep the backup copy in a safe place.<br />
s–4
B–63534EN/02<br />
3 WARNINGS<br />
SAFETY PRECAUTIONS<br />
AND CAUTIONS RELATED TO<br />
PROGRAMMING<br />
This section covers the major safety precautions related to programming. Before attempting to<br />
perform programming, read the supplied operator’s manual and programming manual carefully<br />
such that you are fully familiar with their contents.<br />
WARNING<br />
1. Coordinate system setting<br />
If a coordinate system is established incorrectly, the machine may behave unexpectedly as a<br />
result of the program issuing an otherwise valid move command.<br />
Such an unexpected operation may damage the tool, the machine itself, the workpiece, or cause<br />
injury to the user.<br />
2. Positioning by nonlinear interpolation<br />
When performing positioning by nonlinear interpolation (positioning by nonlinear movement<br />
between the start and end points), the tool path must be carefully confirmed before performing<br />
programming.<br />
Positioning involves rapid traverse. If the tool collides with the workpiece, it may damage the<br />
tool, the machine itself, the workpiece, or cause injury to the user.<br />
3. Function involving a rotation axis<br />
When programming polar coordinate interpolation or normal–direction (perpendicular) control,<br />
pay careful attention to the speed of the rotation axis. <strong>Inc</strong>orrect programming may result in the<br />
rotation axis speed becoming excessively high, such that centrifugal force causes the chuck to<br />
lose its grip on the workpiece if the latter is not mounted securely.<br />
Such mishap is likely to damage the tool, the machine itself, the workpiece, or cause injury to<br />
the user.<br />
4. <strong>Inc</strong>h/metric conversion<br />
Switching between inch and metric inputs does not convert the measurement units of data such<br />
as the workpiece origin offset, parameter, and current position. Before starting the machine,<br />
therefore, determine which measurement units are being used. Attempting to perform an<br />
operation with invalid data specified may damage the tool, the machine itself, the workpiece, or<br />
cause injury to the user.<br />
5. Constant surface speed control<br />
When an axis subject to constant surface speed control approaches the origin of the workpiece<br />
coordinate system, the spindle speed may become excessively high. Therefore, it is necessary<br />
to specify a maximum allowable speed. Specifying the maximum allowable speed incorrectly<br />
may damage the tool, the machine itself, the workpiece, or cause injury to the user.<br />
s–5
WARNING<br />
6. Stroke check<br />
SAFETY PRECAUTIONS B–63534EN/02<br />
After switching on the power, perform a manual reference position return as required. Stroke<br />
check is not possible before manual reference position return is performed. Note that when stroke<br />
check is disabled, an alarm is not issued even if a stroke limit is exceeded, possibly damaging<br />
the tool, the machine itself, the workpiece, or causing injury to the user.<br />
7. Tool post interference check<br />
A tool post interference check is performed based on the tool data specified during automatic<br />
operation. If the tool specification does not match the tool actually being used, the interference<br />
check cannot be made correctly, possibly damaging the tool or the machine itself, or causing<br />
injury to the user.<br />
After switching on the power, or after selecting a tool post manually, always start automatic<br />
operation and specify the tool number of the tool to be used.<br />
8. Absolute/incremental mode<br />
If a program created with absolute values is run in incremental mode, or vice versa, the machine<br />
may behave unexpectedly.<br />
9. Plane selection<br />
If an incorrect plane is specified for circular interpolation, helical interpolation, or a canned cycle,<br />
the machine may behave unexpectedly. Refer to the descriptions of the respective functions for<br />
details.<br />
10. Torque limit skip<br />
Before attempting a torque limit skip, apply the torque limit. If a torque limit skip is specified<br />
without the torque limit actually being applied, a move command will be executed without<br />
performing a skip.<br />
11. Programmable mirror image<br />
Note that programmed operations vary considerably when a programmable mirror image is<br />
enabled.<br />
12. Compensation function<br />
If a command based on the machine coordinate system or a reference position return command<br />
is issued in compensation function mode, compensation is temporarily canceled, resulting in the<br />
unexpected behavior of the machine.<br />
Before issuing any of the above commands, therefore, always cancel compensation function<br />
mode.<br />
s–6
B–63534EN/02<br />
4 WARNINGS<br />
SAFETY PRECAUTIONS<br />
AND CAUTIONS RELATED TO HANDLING<br />
This section presents safety precautions related to the handling of machine tools. Before attempting<br />
to operate your machine, read the supplied operator’s manual and programming manual carefully,<br />
such that you are fully familiar with their contents.<br />
WARNING<br />
1. Manual operation<br />
When operating the machine manually, determine the current position of the tool and workpiece,<br />
and ensure that the movement axis, direction, and feedrate have been specified correctly.<br />
<strong>Inc</strong>orrect operation of the machine may damage the tool, the machine itself, the workpiece, or<br />
cause injury to the operator.<br />
2. Manual reference position return<br />
After switching on the power, perform manual reference position return as required. If the<br />
machine is operated without first performing manual reference position return, it may behave<br />
unexpectedly. Stroke check is not possible before manual reference position return is performed.<br />
An unexpected operation of the machine may damage the tool, the machine itself, the workpiece,<br />
or cause injury to the user.<br />
3. Manual numeric command<br />
When issuing a manual numeric command, determine the current position of the tool and<br />
workpiece, and ensure that the movement axis, direction, and command have been specified<br />
correctly, and that the entered values are valid.<br />
Attempting to operate the machine with an invalid command specified may damage the tool, the<br />
machine itself, the workpiece, or cause injury to the operator.<br />
4. Manual handle feed<br />
In manual handle feed, rotating the handle with a large scale factor, such as 100, applied causes<br />
the tool and table to move rapidly. Careless handling may damage the tool and/or machine, or<br />
cause injury to the user.<br />
5. Disabled override<br />
If override is disabled (according to the specification in a macro variable) during threading, rigid<br />
tapping, or other tapping, the speed cannot be predicted, possibly damaging the tool, the machine<br />
itself, the workpiece, or causing injury to the operator.<br />
6. Origin/preset operation<br />
Basically, never attempt an origin/preset operation when the machine is operating under the<br />
control of a program. Otherwise, the machine may behave unexpectedly, possibly damaging the<br />
tool, the machine itself, the tool, or causing injury to the user.<br />
s–7
WARNING<br />
7. Workpiece coordinate system shift<br />
SAFETY PRECAUTIONS B–63534EN/02<br />
Manual intervention, machine lock, or mirror imaging may shift the workpiece coordinate<br />
system. Before attempting to operate the machine under the control of a program, confirm the<br />
coordinate system carefully.<br />
If the machine is operated under the control of a program without making allowances for any shift<br />
in the workpiece coordinate system, the machine may behave unexpectedly, possibly damaging<br />
the tool, the machine itself, the workpiece, or causing injury to the operator.<br />
8. Software operator’s panel and menu switches<br />
Using the software operator’s panel and menu switches, in combination with the MDI panel, it<br />
is possible to specify operations not supported by the machine operator’s panel, such as mode<br />
change, override value change, and jog feed commands.<br />
Note, however, that if the MDI panel keys are operated inadvertently, the machine may behave<br />
unexpectedly, possibly damaging the tool, the machine itself, the workpiece, or causing injury<br />
to the user.<br />
9. Manual intervention<br />
If manual intervention is performed during programmed operation of the machine, the tool path<br />
may vary when the machine is restarted. Before restarting the machine after manual intervention,<br />
therefore, confirm the settings of the manual absolute switches, parameters, and<br />
absolute/incremental command mode.<br />
10. Feed hold, override, and single block<br />
The feed hold, feedrate override, and single block functions can be disabled using custom macro<br />
system variable #3004. Be careful when operating the machine in this case.<br />
11. Dry run<br />
Usually, a dry run is used to confirm the operation of the machine. During a dry run, the machine<br />
operates at dry run speed, which differs from the corresponding programmed feedrate. Note that<br />
the dry run speed may sometimes be higher than the programmed feed rate.<br />
12. Cutter and tool nose radius compensation in MDI mode<br />
Pay careful attention to a tool path specified by a command in MDI mode, because cutter or tool<br />
nose radius compensation is not applied. When a command is entered from the MDI to interrupt<br />
in automatic operation in cutter or tool nose radius compensation mode, pay particular attention<br />
to the tool path when automatic operation is subsequently resumed. Refer to the descriptions of<br />
the corresponding functions for details.<br />
13. Program editing<br />
If the machine is stopped, after which the machining program is edited (modification, insertion,<br />
or deletion), the machine may behave unexpectedly if machining is resumed under the control<br />
of that program. Basically, do not modify, insert, or delete commands from a machining program<br />
while it is in use.<br />
s–8
B–63534EN/02<br />
5 WARNINGS<br />
SAFETY PRECAUTIONS<br />
RELATED TO DAILY MAINTENANCE<br />
WARNING<br />
1. Memory backup battery replacement<br />
Only those personnel who have received approved safety and maintenance training may perform<br />
this work.<br />
When replacing the batteries, be careful not to touch the high–voltage circuits (marked and<br />
fitted with an insulating cover).<br />
Touching the uncovered high–voltage circuits presents an extremely dangerous electric shock<br />
hazard.<br />
NOTE<br />
The CNC uses batteries to preserve the contents of its memory, because it must retain data such as<br />
programs, offsets, and parameters even while external power is not applied.<br />
If the battery voltage drops, a low battery voltage alarm is displayed on the machine operator’s panel<br />
or screen.<br />
When a low battery voltage alarm is displayed, replace the batteries within a week. Otherwise, the<br />
contents of the CNC’s memory will be lost.<br />
Refer to the maintenance section of the operator’s manual or programming manual for details of the<br />
battery replacement procedure.<br />
s–9
WARNING<br />
2. Absolute pulse coder battery replacement<br />
SAFETY PRECAUTIONS B–63534EN/02<br />
Only those personnel who have received approved safety and maintenance training may perform<br />
this work.<br />
When replacing the batteries, be careful not to touch the high–voltage circuits (marked and<br />
fitted with an insulating cover).<br />
Touching the uncovered high–voltage circuits presents an extremely dangerous electric shock<br />
hazard.<br />
NOTE<br />
The absolute pulse coder uses batteries to preserve its absolute position.<br />
If the battery voltage drops, a low battery voltage alarm is displayed on the machine operator’s panel<br />
or screen.<br />
When a low battery voltage alarm is displayed, replace the batteries within a week. Otherwise, the<br />
absolute position data held by the pulse coder will be lost.<br />
Refer to the FANUC SERVO AMPLIFIER αi series Maintenance Manual or FANUC SERVO<br />
AMPLIFIER α series Maintenance Manual for details of the battery replacement procedure.<br />
s–10
B–63534EN/02<br />
WARNING<br />
3. Fuse replacement<br />
SAFETY PRECAUTIONS<br />
Before replacing a blown fuse, however, it is necessary to locate and remove the cause of the<br />
blown fuse.<br />
For this reason, only those personnel who have received approved safety and maintenance<br />
training may perform this work.<br />
When replacing a fuse with the cabinet open, be careful not to touch the high–voltage circuits<br />
(marked and fitted with an insulating cover).<br />
Touching an uncovered high–voltage circuit presents an extremely dangerous electric shock<br />
hazard.<br />
s–11
B–63534EN/02 Table of Contents<br />
SAFETY PRECAUTIONS . . . . . . . . . . . . . . . . . . . . . . . . . . . . . . . . . . . . . . . . . . . . . . . . . . s–1<br />
I. GENERAL<br />
1. GENERAL . . . . . . . . . . . . . . . . . . . . . . . . . . . . . . . . . . . . . . . . . . . . . . . . . . . . . . . . . . . . 3<br />
1.1 GENERAL FLOW OF OPERATION OF CNC MACHINE TOOL . . . . . . . . . . . . . . . . . . . . . . . . . 7<br />
1.2 NOTES ON READING THIS MANUAL . . . . . . . . . . . . . . . . . . . . . . . . . . . . . . . . . . . . . . . . . . . . . 9<br />
1.3 NOTES ON VARIOUS KINDS OF DATA . . . . . . . . . . . . . . . . . . . . . . . . . . . . . . . . . . . . . . . . . . . . 9<br />
II. PROGRAMMING<br />
1. GENERAL . . . . . . . . . . . . . . . . . . . . . . . . . . . . . . . . . . . . . . . . . . . . . . . . . . . . . . . . . . . . 13<br />
1.1 TOOL MOVEMENT ALONG WORKPIECE PARTS FIGURE–INTERPOLATION . . . . . . . . . . . 14<br />
1.2 FEED–FEED FUNCTION . . . . . . . . . . . . . . . . . . . . . . . . . . . . . . . . . . . . . . . . . . . . . . . . . . . . . . . . . 16<br />
1.3 PART DRAWING AND TOOL MOVEMENT . . . . . . . . . . . . . . . . . . . . . . . . . . . . . . . . . . . . . . . . . 17<br />
1.3.1 Reference Position (<strong>Machine</strong>–Specific Position) . . . . . . . . . . . . . . . . . . . . . . . . . . . . . . . . . . . . . . . . . 17<br />
1.3.2 Coordinate System on Part Drawing and Coordinate System Specified by<br />
CNC – Coordinate System . . . . . . . . . . . . . . . . . . . . . . . . . . . . . . . . . . . . . . . . . . . . . . . . . . . . . . . . . . 18<br />
1.3.3 How to Indicate Command Dimensions for Moving the Tool – Absolute,<br />
<strong>Inc</strong>remental Commands . . . . . . . . . . . . . . . . . . . . . . . . . . . . . . . . . . . . . . . . . . . . . . . . . . . . . . . . . . . . 21<br />
1.4 CUTTING SPEED – SPINDLE SPEED FUNCTION . . . . . . . . . . . . . . . . . . . . . . . . . . . . . . . . . . . . 22<br />
1.5 SELECTION OF TOOL USED FOR VARIOUS MACHINING – TOOL FUNCTION . . . . . . . . . . 23<br />
1.6 COMMAND FOR MACHINE OPERATIONS – MISCELLANEOUS FUNCTION . . . . . . . . . . . . 24<br />
1.7 PROGRAM CONFIGURATION . . . . . . . . . . . . . . . . . . . . . . . . . . . . . . . . . . . . . . . . . . . . . . . . . . . . 25<br />
1.8 TOOL FIGURE AND TOOL MOTION BY PROGRAM . . . . . . . . . . . . . . . . . . . . . . . . . . . . . . . . . 28<br />
1.9 TOOL MOVEMENT RANGE – STROKE . . . . . . . . . . . . . . . . . . . . . . . . . . . . . . . . . . . . . . . . . . . . 29<br />
2. CONTROLLED AXES . . . . . . . . . . . . . . . . . . . . . . . . . . . . . . . . . . . . . . . . . . . . . . . . . . 30<br />
2.1 CONTROLLED AXES . . . . . . . . . . . . . . . . . . . . . . . . . . . . . . . . . . . . . . . . . . . . . . . . . . . . . . . . . . . . 31<br />
2.2 AXIS NAME . . . . . . . . . . . . . . . . . . . . . . . . . . . . . . . . . . . . . . . . . . . . . . . . . . . . . . . . . . . . . . . . . . . . 32<br />
2.3 INCREMENT SYSTEM . . . . . . . . . . . . . . . . . . . . . . . . . . . . . . . . . . . . . . . . . . . . . . . . . . . . . . . . . . . 33<br />
2.4 MAXIMUM STROKE . . . . . . . . . . . . . . . . . . . . . . . . . . . . . . . . . . . . . . . . . . . . . . . . . . . . . . . . . . . . 34<br />
3. PREPARATORY FUNCTION (G FUNCTION) . . . . . . . . . . . . . . . . . . . . . . . . . . . . . . 35<br />
4. INTERPOLATION FUNCTIONS . . . . . . . . . . . . . . . . . . . . . . . . . . . . . . . . . . . . . . . . . . 41<br />
4.1 POSITIONING (G00) . . . . . . . . . . . . . . . . . . . . . . . . . . . . . . . . . . . . . . . . . . . . . . . . . . . . . . . . . . . . . 42<br />
4.2 SINGLE DIRECTION POSITIONING (G60) . . . . . . . . . . . . . . . . . . . . . . . . . . . . . . . . . . . . . . . . . . 44<br />
4.3 LINEAR INTERPOLATION (G01) . . . . . . . . . . . . . . . . . . . . . . . . . . . . . . . . . . . . . . . . . . . . . . . . . . 46<br />
4.4 CIRCULAR INTERPOLATION (G02, G03) . . . . . . . . . . . . . . . . . . . . . . . . . . . . . . . . . . . . . . . . . . . 48<br />
4.5 HELICAL INTERPOLATION (G02, G03) . . . . . . . . . . . . . . . . . . . . . . . . . . . . . . . . . . . . . . . . . . . . 52<br />
4.6 HELICAL INTERPOLATION B (G02, G03) . . . . . . . . . . . . . . . . . . . . . . . . . . . . . . . . . . . . . . . . . . 53<br />
4.7 SPIRAL INTERPOLATION, CONICAL INTERPOLATION (G02, G03) . . . . . . . . . . . . . . . . . . . . 54<br />
4.8 POLAR COORDINATE INTERPOLATION (G12.1, G13.1) . . . . . . . . . . . . . . . . . . . . . . . . . . . . . . 59<br />
4.9 CYLINDRICAL INTERPOLATION (G07.1) . . . . . . . . . . . . . . . . . . . . . . . . . . . . . . . . . . . . . . . . . . 63<br />
4.10 INVOLUTE INTERPOLATION (G02.2, G03.2) . . . . . . . . . . . . . . . . . . . . . . . . . . . . . . . . . . . . . . . .<br />
66<br />
c–1
Table of Contents<br />
c–2<br />
B–63534EN/02<br />
4.11 EXPONENTIAL INTERPOLATION (G02.3, G03.3) . . . . . . . . . . . . . . . . . . . . . . . . . . . . . . . . . . . . 71<br />
4.12 SMOOTH INTERPOLATION (G05.1) . . . . . . . . . . . . . . . . . . . . . . . . . . . . . . . . . . . . . . . . . . . . . . . 75<br />
4.13 NURBS INTERPOLATION (G06.2) . . . . . . . . . . . . . . . . . . . . . . . . . . . . . . . . . . . . . . . . . . . . . . . . . 79<br />
4.14 HYPOTHETICAL AXIS INTERPOLATION (G07) . . . . . . . . . . . . . . . . . . . . . . . . . . . . . . . . . . . . . 84<br />
4.15 THREAD CUTTING (G33) . . . . . . . . . . . . . . . . . . . . . . . . . . . . . . . . . . . . . . . . . . . . . . . . . . . . . . . . 86<br />
4.16 SKIP FUNCTION (G31) . . . . . . . . . . . . . . . . . . . . . . . . . . . . . . . . . . . . . . . . . . . . . . . . . . . . . . . . . . 88<br />
4.17 MULTISTAGE SKIP (G31) . . . . . . . . . . . . . . . . . . . . . . . . . . . . . . . . . . . . . . . . . . . . . . . . . . . . . . . . 90<br />
4.18 HIGH SPEED SKIP SIGNAL (G31) . . . . . . . . . . . . . . . . . . . . . . . . . . . . . . . . . . . . . . . . . . . . . . . . . 91<br />
4.19 CONTINUOUS HIGH–SPEED SKIP FUNCTION (G31) . . . . . . . . . . . . . . . . . . . . . . . . . . . . . . . . 92<br />
5. FEED FUNCTIONS . . . . . . . . . . . . . . . . . . . . . . . . . . . . . . . . . . . . . . . . . . . . . . . . . . . . . 93<br />
5.1 GENERAL . . . . . . . . . . . . . . . . . . . . . . . . . . . . . . . . . . . . . . . . . . . . . . . . . . . . . . . . . . . . . . . . . . . . . 94<br />
5.2 RAPID TRAVERSE . . . . . . . . . . . . . . . . . . . . . . . . . . . . . . . . . . . . . . . . . . . . . . . . . . . . . . . . . . . . . . 96<br />
5.3 CUTTING FEED . . . . . . . . . . . . . . . . . . . . . . . . . . . . . . . . . . . . . . . . . . . . . . . . . . . . . . . . . . . . . . . . 97<br />
5.4 CUTTING FEEDRATE CONTROL . . . . . . . . . . . . . . . . . . . . . . . . . . . . . . . . . . . . . . . . . . . . . . . . . 102<br />
5.4.1 Exact Stop (G09, G61) Cutting Mode (G64) Tapping Mode (G63) . . . . . . . . . . . . . . . . . . . . . . . . . . . 103<br />
5.4.2 Automatic Corner Override . . . . . . . . . . . . . . . . . . . . . . . . . . . . . . . . . . . . . . . . . . . . . . . . . . . . . . . . . 104<br />
5.4.2.1 Automatic Override for Inner Corners (G62) . . . . . . . . . . . . . . . . . . . . . . . . . . . . . . . . . . . . . . 104<br />
5.4.2.2 Internal Circular Cutting Feedrate Change . . . . . . . . . . . . . . . . . . . . . . . . . . . . . . . . . . . . . . . . 106<br />
5.4.3 Automatic Corner Deceleration . . . . . . . . . . . . . . . . . . . . . . . . . . . . . . . . . . . . . . . . . . . . . . . . . . . . . . 107<br />
5.4.3.1 Corner Deceleration According to the Corner Angle . . . . . . . . . . . . . . . . . . . . . . . . . . . . . . . . 107<br />
5.4.3.2 Corner Deceleration According to the Feedrate Difference between Blocks Along Each Axis . 110<br />
5.5 DWELL (G04) . . . . . . . . . . . . . . . . . . . . . . . . . . . . . . . . . . . . . . . . . . . . . . . . . . . . . . . . . . . . . . . . . . 114<br />
6. REFERENCE POSITION . . . . . . . . . . . . . . . . . . . . . . . . . . . . . . . . . . . . . . . . . . . . . . . . 115<br />
6.1 REFERENCE POSITION RETURN . . . . . . . . . . . . . . . . . . . . . . . . . . . . . . . . . . . . . . . . . . . . . . . . . 116<br />
6.2 FLOATING REFERENCE POSITION RETURN (G30.1) . . . . . . . . . . . . . . . . . . . . . . . . . . . . . . . . 121<br />
7. COORDINATE SYSTEM . . . . . . . . . . . . . . . . . . . . . . . . . . . . . . . . . . . . . . . . . . . . . . . . 122<br />
7.1 MACHINE COORDINATE SYSTEM . . . . . . . . . . . . . . . . . . . . . . . . . . . . . . . . . . . . . . . . . . . . . . . . 123<br />
7.2 WORKPIECE COORDINATE SYSTEM . . . . . . . . . . . . . . . . . . . . . . . . . . . . . . . . . . . . . . . . . . . . . 124<br />
7.2.1 Setting a Workpiece Coordinate System . . . . . . . . . . . . . . . . . . . . . . . . . . . . . . . . . . . . . . . . . . . . . . . . 124<br />
7.2.2 Selecting a Workpiece Coordinate System . . . . . . . . . . . . . . . . . . . . . . . . . . . . . . . . . . . . . . . . . . . . . . 125<br />
7.2.3 Changing Workpiece Coordinate System . . . . . . . . . . . . . . . . . . . . . . . . . . . . . . . . . . . . . . . . . . . . . . . 126<br />
7.2.4 Workpiece Coordinate System Preset (G92.1) . . . . . . . . . . . . . . . . . . . . . . . . . . . . . . . . . . . . . . . . . . . 129<br />
7.2.5 Adding Workpiece Coordinate Systems (G54.1 or G54) . . . . . . . . . . . . . . . . . . . . . . . . . . . . . . . . . . . 131<br />
7.3 LOCAL COORDINATE SYSTEM . . . . . . . . . . . . . . . . . . . . . . . . . . . . . . . . . . . . . . . . . . . . . . . . . . 133<br />
7.4 PLANE SELECTION . . . . . . . . . . . . . . . . . . . . . . . . . . . . . . . . . . . . . . . . . . . . . . . . . . . . . . . . . . . . . 135<br />
8. COORDINATE VALUE AND DIMENSION . . . . . . . . . . . . . . . . . . . . . . . . . . . . . . . . . 136<br />
8.1 ABSOLUTE AND INCREMENTAL PROGRAMMING (G90, G91) . . . . . . . . . . . . . . . . . . . . . . . 137<br />
8.2 POLAR COORDINATE COMMAND (G15, G16) . . . . . . . . . . . . . . . . . . . . . . . . . . . . . . . . . . . . . . 138<br />
8.3 INCH/METRIC CONVERSION (G20, G21) . . . . . . . . . . . . . . . . . . . . . . . . . . . . . . . . . . . . . . . . . . . 141<br />
8.4 DECIMAL POINT PROGRAMMING . . . . . . . . . . . . . . . . . . . . . . . . . . . . . . . . . . . . . . . . . . . . . . . .<br />
142
B–63534EN/02 <br />
9. SPINDLE SPEED FUNCTION (S FUNCTION) . . . . . . . . . . . . . . . . . . . . . . . . . . . . . 143<br />
9.1 SPECIFYING THE SPINDLE SPEED WITH A CODE . . . . . . . . . . . . . . . . . . . . . . . . . . . . . . . . . . 144<br />
9.2 SPECIFYING THE SPINDLE SPEED VALUE DIRECTLY (S5–DIGIT COMMAND) . . . . . . . . . 144<br />
9.3 CONSTANT SURFACE SPEED CONTROL (G96, G97) . . . . . . . . . . . . . . . . . . . . . . . . . . . . . . . . 145<br />
9.4 SPINDLE SPEED FLUCTUATION DETECTION FUNCTION (G25, G26) . . . . . . . . . . . . . . . . . 148<br />
10.TOOL FUNCTION (T FUNCTION) . . . . . . . . . . . . . . . . . . . . . . . . . . . . . . . . . . . . . . . . 151<br />
10.1 TOOL SELECTION FUNCTION . . . . . . . . . . . . . . . . . . . . . . . . . . . . . . . . . . . . . . . . . . . . . . . . . . . 152<br />
10.2 TOOL LIFE MANAGEMENT FUNCTION . . . . . . . . . . . . . . . . . . . . . . . . . . . . . . . . . . . . . . . . . . . 153<br />
10.2.1 Tool Life Management Data . . . . . . . . . . . . . . . . . . . . . . . . . . . . . . . . . . . . . . . . . . . . . . . . . . . . . . . . . 154<br />
10.2.2 Register, Change and Delete of Tool Life Management Data . . . . . . . . . . . . . . . . . . . . . . . . . . . . . . . . 155<br />
10.2.3 Tool Life Management Command in a Machining Program . . . . . . . . . . . . . . . . . . . . . . . . . . . . . . . . . 158<br />
10.2.4 Tool Life . . . . . . . . . . . . . . . . . . . . . . . . . . . . . . . . . . . . . . . . . . . . . . . . . . . . . . . . . . . . . . . . . . . . . . . . 161<br />
11.AUXILIARY FUNCTION . . . . . . . . . . . . . . . . . . . . . . . . . . . . . . . . . . . . . . . . . . . . . . . . . 162<br />
11.1 AUXILIARY FUNCTION (M FUNCTION) . . . . . . . . . . . . . . . . . . . . . . . . . . . . . . . . . . . . . . . . . . . 163<br />
11.2 MULTIPLE M COMMANDS IN A SINGLE BLOCK . . . . . . . . . . . . . . . . . . . . . . . . . . . . . . . . . . . 164<br />
11.3 M CODE GROUP CHECK FUNCTION . . . . . . . . . . . . . . . . . . . . . . . . . . . . . . . . . . . . . . . . . . . . . . 165<br />
11.4 THE SECOND AUXILIARY FUNCTIONS (B CODES) . . . . . . . . . . . . . . . . . . . . . . . . . . . . . . . . . 166<br />
12.PROGRAM CONFIGURATION . . . . . . . . . . . . . . . . . . . . . . . . . . . . . . . . . . . . . . . . . . 167<br />
12.1 PROGRAM COMPONENTS OTHER THAN PROGRAM SECTIONS . . . . . . . . . . . . . . . . . . . . . 169<br />
12.2 PROGRAM SECTION CONFIGURATION . . . . . . . . . . . . . . . . . . . . . . . . . . . . . . . . . . . . . . . . . . . 172<br />
12.3 SUBPROGRAM (M98, M99) . . . . . . . . . . . . . . . . . . . . . . . . . . . . . . . . . . . . . . . . . . . . . . . . . . . . . . . 178<br />
12.4 8–DIGIT PROGRAM NU<strong>MB</strong>ER . . . . . . . . . . . . . . . . . . . . . . . . . . . . . . . . . . . . . . . . . . . . . . . . . . . . 182<br />
13.FUNCTIONS TO SIMPLIFY PROGRAMMING . . . . . . . . . . . . . . . . . . . . . . . . . . . . . 185<br />
13.1 CANNED CYCLE . . . . . . . . . . . . . . . . . . . . . . . . . . . . . . . . . . . . . . . . . . . . . . . . . . . . . . . . . . . . . . . 186<br />
13.1.1 High–Speed Peck Drilling Cycle (G73) . . . . . . . . . . . . . . . . . . . . . . . . . . . . . . . . . . . . . . . . . . . . . . . . 190<br />
13.1.2 Left–Handed Tapping Cycle (G74) . . . . . . . . . . . . . . . . . . . . . . . . . . . . . . . . . . . . . . . . . . . . . . . . . . . . 192<br />
13.1.3 Fine Boring Cycle (G76) . . . . . . . . . . . . . . . . . . . . . . . . . . . . . . . . . . . . . . . . . . . . . . . . . . . . . . . . . . . 194<br />
13.1.4 Drilling Cycle, Spot Drilling (G81) . . . . . . . . . . . . . . . . . . . . . . . . . . . . . . . . . . . . . . . . . . . . . . . . . . . 196<br />
13.1.5 Drilling Cycle Counter Boring Cycle (G82) . . . . . . . . . . . . . . . . . . . . . . . . . . . . . . . . . . . . . . . . . . . . . 198<br />
13.1.6 Peck Drilling Cycle (G83) . . . . . . . . . . . . . . . . . . . . . . . . . . . . . . . . . . . . . . . . . . . . . . . . . . . . . . . . . . 200<br />
13.1.7 Small–Hole Peck Drilling Cycle (G83) . . . . . . . . . . . . . . . . . . . . . . . . . . . . . . . . . . . . . . . . . . . . . . . . . 202<br />
13.1.8 Tapping Cycle (G84) . . . . . . . . . . . . . . . . . . . . . . . . . . . . . . . . . . . . . . . . . . . . . . . . . . . . . . . . . . . . . . 206<br />
13.1.9 Boring Cycle (G85) . . . . . . . . . . . . . . . . . . . . . . . . . . . . . . . . . . . . . . . . . . . . . . . . . . . . . . . . . . . . . . . 208<br />
13.1.10 Boring Cycle (G86) . . . . . . . . . . . . . . . . . . . . . . . . . . . . . . . . . . . . . . . . . . . . . . . . . . . . . . . . . . . . . . . 210<br />
13.1.11 Back Boring Cycle (G87) . . . . . . . . . . . . . . . . . . . . . . . . . . . . . . . . . . . . . . . . . . . . . . . . . . . . . . . . . . . 212<br />
13.1.12 Boring Cycle (G88) . . . . . . . . . . . . . . . . . . . . . . . . . . . . . . . . . . . . . . . . . . . . . . . . . . . . . . . . . . . . . . . 214<br />
13.1.13 Boring Cycle (G89) . . . . . . . . . . . . . . . . . . . . . . . . . . . . . . . . . . . . . . . . . . . . . . . . . . . . . . . . . . . . . . . 216<br />
13.1.14 Canned Cycle Cancel (G80) . . . . . . . . . . . . . . . . . . . . . . . . . . . . . . . . . . . . . . . . . . . . . . . . . . . . . . . . . 218<br />
13.2 RIGID TAPPING . . . . . . . . . . . . . . . . . . . . . . . . . . . . . . . . . . . . . . . . . . . . . . . . . . . . . . . . . . . . . . . . 221<br />
13.2.1 Rigid Tapping (G84) . . . . . . . . . . . . . . . . . . . . . . . . . . . . . . . . . . . . . . . . . . . . . . . . . . . . . . . . . . . . . . 222<br />
13.2.2 Left–Handed Rigid Tapping Cycle (G74) . . . . . . . . . . . . . . . . . . . . . . . . . . . . . . . . . . . . . . . . . . . . . . . 225<br />
13.2.3 Peck Rigid Tapping Cycle (G84 or G74) . . . . . . . . . . . . . . . . . . . . . . . . . . . . . . . . . . . . . . . . . . . . . . . 228<br />
13.2.4 Canned Cycle Cancel (G80) . . . . . . . . . . . . . . . . . . . . . . . . . . . . . . . . . . . . . . . . . . . . . . . . . . . . . . . . . 230<br />
13.3 CANNED GRINDING CYCLE (FOR GRINDING MACHINE) . . . . . . . . . . . . . . . . . . . . . . . . . . . 231<br />
13.3.1 Plunge Grinding Cycle (G75) . . . . . . . . . . . . . . . . . . . . . . . . . . . . . . . . . . . . . . . . . . . . . . . . . . . . . . . . 232<br />
13.3.2 Direct Constant–Dimension Plunge Grinding Cycle (G77) . . . . . . . . . . . . . . . . . . . . . . . . . . . . . . . . .<br />
234<br />
c–3
Table of Contents<br />
c–4<br />
B–63534EN/02<br />
13.3.3 Continuous–Feed Surface Grinding Cycle (G78) . . . . . . . . . . . . . . . . . . . . . . . . . . . . . . . . . . . . . . . . . 236<br />
13.3.4 Intermittent–Feed Surface Grinding Cycle (G79) . . . . . . . . . . . . . . . . . . . . . . . . . . . . . . . . . . . . . . . . . 238<br />
13.4 GRINDING–WHEEL WEAR COMPENSATION BY CONTINUOUS DRESSING<br />
(FOR GRINDING MACHINE) . . . . . . . . . . . . . . . . . . . . . . . . . . . . . . . . . . . . . . . . . . . . . . . . . . . . . 240<br />
13.5 AUTOMATIC GRINDING WHEEL DIAMETER COMPENSATION AFTER DRESSING . . . . . 241<br />
13.5.1 Checking the Minimum Grinding Wheel Diameter (For Grinding <strong>Machine</strong>) . . . . . . . . . . . . . . . . . . . . 241<br />
13.6 IN–FEED GRINDING ALONG THE Y AND Z AXES AT THE END OF TABLE SWING<br />
(FOR GRINDING MACHINE) . . . . . . . . . . . . . . . . . . . . . . . . . . . . . . . . . . . . . . . . . . . . . . . . . . . . . 242<br />
13.7 OPTIONAL ANGLE CHAMFERING AND CORNER ROUNDING . . . . . . . . . . . . . . . . . . . . . . . 243<br />
13.8 EXTERNAL MOTION FUNCTION (G81) . . . . . . . . . . . . . . . . . . . . . . . . . . . . . . . . . . . . . . . . . . . . 246<br />
13.9 FIGURE COPY (G72.1, G72.2) . . . . . . . . . . . . . . . . . . . . . . . . . . . . . . . . . . . . . . . . . . . . . . . . . . . . . 247<br />
13.10 THREE–DIMENSIONAL COORDINATE CONVERSION (G68, G69) . . . . . . . . . . . . . . . . . . . . . 254<br />
13.11 INDEX TABLE INDEXING FUNCTION . . . . . . . . . . . . . . . . . . . . . . . . . . . . . . . . . . . . . . . . . . . . . 261<br />
14.COMPENSATION FUNCTION . . . . . . . . . . . . . . . . . . . . . . . . . . . . . . . . . . . . . . . . . . . 264<br />
14.1 TOOL LENGTH OFFSET (G43, G44, G49) . . . . . . . . . . . . . . . . . . . . . . . . . . . . . . . . . . . . . . . . . . . 265<br />
14.1.1 General . . . . . . . . . . . . . . . . . . . . . . . . . . . . . . . . . . . . . . . . . . . . . . . . . . . . . . . . . . . . . . . . . . . . . . . . . 265<br />
14.1.2 G53, G28, G30, and G30.1 Commands in Tool Length Offset Mode . . . . . . . . . . . . . . . . . . . . . . . . . . 270<br />
14.2 AUTOMATIC TOOL LENGTH MEASUREMENT (G37) . . . . . . . . . . . . . . . . . . . . . . . . . . . . . . . . 273<br />
14.3 TOOL OFFSET (G45–G48) . . . . . . . . . . . . . . . . . . . . . . . . . . . . . . . . . . . . . . . . . . . . . . . . . . . . . . . . 277<br />
14.4 CUTTER COMPENSATION B (G39–G42) . . . . . . . . . . . . . . . . . . . . . . . . . . . . . . . . . . . . . . . . . . . 282<br />
14.4.1 Cutter Compensation Left (G41) . . . . . . . . . . . . . . . . . . . . . . . . . . . . . . . . . . . . . . . . . . . . . . . . . . . . . 285<br />
14.4.2 Cutter Compensation Right (G42) . . . . . . . . . . . . . . . . . . . . . . . . . . . . . . . . . . . . . . . . . . . . . . . . . . . . 287<br />
14.4.3 Corner Offset Circular Interpolation (G39) . . . . . . . . . . . . . . . . . . . . . . . . . . . . . . . . . . . . . . . . . . . . . . 289<br />
14.4.4 Cutter Compensation Cancel (G40) . . . . . . . . . . . . . . . . . . . . . . . . . . . . . . . . . . . . . . . . . . . . . . . . . . . 290<br />
14.4.5 Switch between Cutter Compensation Left and Cutter Compensation Right . . . . . . . . . . . . . . . . . . . . 291<br />
14.4.6 Change of the Cutter Compensation Value . . . . . . . . . . . . . . . . . . . . . . . . . . . . . . . . . . . . . . . . . . . . . . 292<br />
14.4.7 Positive/Negative Cutter Compensation Value and Tool Center Path . . . . . . . . . . . . . . . . . . . . . . . . . . 293<br />
14.5 OVERVIEW OF CUTTER COMPENSATION C (G40–G42) . . . . . . . . . . . . . . . . . . . . . . . . . . . . . 295<br />
14.6 DETAILS OF CUTTER COMPENSATION C . . . . . . . . . . . . . . . . . . . . . . . . . . . . . . . . . . . . . . . . . 301<br />
14.6.1 General . . . . . . . . . . . . . . . . . . . . . . . . . . . . . . . . . . . . . . . . . . . . . . . . . . . . . . . . . . . . . . . . . . . . . . . . . 301<br />
14.6.2 Tool Movement in Start–up . . . . . . . . . . . . . . . . . . . . . . . . . . . . . . . . . . . . . . . . . . . . . . . . . . . . . . . . . 302<br />
14.6.3 Tool Movement in Offset Mode . . . . . . . . . . . . . . . . . . . . . . . . . . . . . . . . . . . . . . . . . . . . . . . . . . . . . . 306<br />
14.6.4 Tool Movement in Offset Mode Cancel . . . . . . . . . . . . . . . . . . . . . . . . . . . . . . . . . . . . . . . . . . . . . . . . 320<br />
14.6.5 Interference Check . . . . . . . . . . . . . . . . . . . . . . . . . . . . . . . . . . . . . . . . . . . . . . . . . . . . . . . . . . . . . . . . 326<br />
14.6.6 Overcutting by Cutter Compensation . . . . . . . . . . . . . . . . . . . . . . . . . . . . . . . . . . . . . . . . . . . . . . . . . . 331<br />
14.6.7 Input Command from MDI . . . . . . . . . . . . . . . . . . . . . . . . . . . . . . . . . . . . . . . . . . . . . . . . . . . . . . . . . . 334<br />
14.6.8 G53, G28, G30, G30.1 and G29 Commands in Cutter Compensation C Mode . . . . . . . . . . . . . . . . . . 335<br />
14.6.9 Corner Circular Interpolation (G39) . . . . . . . . . . . . . . . . . . . . . . . . . . . . . . . . . . . . . . . . . . . . . . . . . . . 354<br />
14.7 THREE–DIMENSIONAL TOOL COMPENSATION (G40, G41) . . . . . . . . . . . . . . . . . . . . . . . . . . 356<br />
14.8 TOOL COMPENSATION VALUES, NU<strong>MB</strong>ER OF COMPENSATION VALUES,<br />
AND ENTERING VALUES FROM THE PROGRAM (G10) . . . . . . . . . . . . . . . . . . . . . . . . . . . . . 360<br />
14.9 SCALING (G50, G51) . . . . . . . . . . . . . . . . . . . . . . . . . . . . . . . . . . . . . . . . . . . . . . . . . . . . . . . . . . . . 362<br />
14.10 COORDINATE SYSTEM ROTATION (G68, G69) . . . . . . . . . . . . . . . . . . . . . . . . . . . . . . . . . . . . . 367<br />
14.11 NORMAL DIRECTION CONTROL (G40.1, G41.1, G42.1 OR G150, G151, G152) . . . . . . . . . . . 373<br />
14.12 PROGRAMMABLE MIRROR IMAGE (G50.1, G51.1) . . . . . . . . . . . . . . . . . . . . . . . . . . . . . . . . . . 378<br />
14.13 GRINDING WHEEL WEAR COMPENSATION . . . . . . . . . . . . . . . . . . . . . . . . . . . . . . . . . . . . . . . 380<br />
14.14 ROTARY TABLE DYNAMIC FIXTURE OFFSET . . . . . . . . . . . . . . . . . . . . . . . . . . . . . . . . . . . . .<br />
384
B–63534EN/02 <br />
15.CUSTOM MACRO . . . . . . . . . . . . . . . . . . . . . . . . . . . . . . . . . . . . . . . . . . . . . . . . . . . . . 392<br />
15.1 VARIABLES . . . . . . . . . . . . . . . . . . . . . . . . . . . . . . . . . . . . . . . . . . . . . . . . . . . . . . . . . . . . . . . . . . . . 393<br />
15.2 SYSTEM VARIABLES . . . . . . . . . . . . . . . . . . . . . . . . . . . . . . . . . . . . . . . . . . . . . . . . . . . . . . . . . . . 397<br />
15.3 ARITHMETIC AND LOGIC OPERATION . . . . . . . . . . . . . . . . . . . . . . . . . . . . . . . . . . . . . . . . . . . 406<br />
15.4 MACRO STATEMENTS AND NC STATEMENTS . . . . . . . . . . . . . . . . . . . . . . . . . . . . . . . . . . . . . 411<br />
15.5 BRANCH AND REPETITION . . . . . . . . . . . . . . . . . . . . . . . . . . . . . . . . . . . . . . . . . . . . . . . . . . . . . 412<br />
15.5.1 Unconditional Branch (GOTO Statement) . . . . . . . . . . . . . . . . . . . . . . . . . . . . . . . . . . . . . . . . . . . . . . 412<br />
15.5.2 Conditional Branch (IF Statement) . . . . . . . . . . . . . . . . . . . . . . . . . . . . . . . . . . . . . . . . . . . . . . . . . . . . 412<br />
15.5.3 Repetition (While Statement) . . . . . . . . . . . . . . . . . . . . . . . . . . . . . . . . . . . . . . . . . . . . . . . . . . . . . . . . 413<br />
15.6 MACRO CALL . . . . . . . . . . . . . . . . . . . . . . . . . . . . . . . . . . . . . . . . . . . . . . . . . . . . . . . . . . . . . . . . . . 416<br />
15.6.1 Simple Call (G65) . . . . . . . . . . . . . . . . . . . . . . . . . . . . . . . . . . . . . . . . . . . . . . . . . . . . . . . . . . . . . . . . . 417<br />
15.6.2 Modal Call (G66) . . . . . . . . . . . . . . . . . . . . . . . . . . . . . . . . . . . . . . . . . . . . . . . . . . . . . . . . . . . . . . . . . 421<br />
15.6.3 Macro Call Using G Code . . . . . . . . . . . . . . . . . . . . . . . . . . . . . . . . . . . . . . . . . . . . . . . . . . . . . . . . . . 423<br />
15.6.4 Macro Call Using an M Code . . . . . . . . . . . . . . . . . . . . . . . . . . . . . . . . . . . . . . . . . . . . . . . . . . . . . . . . 424<br />
15.6.5 Subprogram Call Using an M Code . . . . . . . . . . . . . . . . . . . . . . . . . . . . . . . . . . . . . . . . . . . . . . . . . . . 425<br />
15.6.6 Subprogram Calls Using a T Code . . . . . . . . . . . . . . . . . . . . . . . . . . . . . . . . . . . . . . . . . . . . . . . . . . . . 426<br />
15.6.7 Sample Program . . . . . . . . . . . . . . . . . . . . . . . . . . . . . . . . . . . . . . . . . . . . . . . . . . . . . . . . . . . . . . . . . . 427<br />
15.7 PROCESSING MACRO STATEMENTS . . . . . . . . . . . . . . . . . . . . . . . . . . . . . . . . . . . . . . . . . . . . . . 429<br />
15.7.1 Details of NC Statements and Macro Statements Execution . . . . . . . . . . . . . . . . . . . . . . . . . . . . . . . . . 429<br />
15.7.2 Caution for Using System Variables . . . . . . . . . . . . . . . . . . . . . . . . . . . . . . . . . . . . . . . . . . . . . . . . . . . 431<br />
15.8 REGISTERING CUSTOM MACRO PROGRAMS . . . . . . . . . . . . . . . . . . . . . . . . . . . . . . . . . . . . . . 434<br />
15.9 LIMITATIONS . . . . . . . . . . . . . . . . . . . . . . . . . . . . . . . . . . . . . . . . . . . . . . . . . . . . . . . . . . . . . . . . . . 435<br />
15.10 EXTERNAL OUTPUT COMMANDS . . . . . . . . . . . . . . . . . . . . . . . . . . . . . . . . . . . . . . . . . . . . . . . 436<br />
15.11 INTERRUPTION TYPE CUSTOM MACRO . . . . . . . . . . . . . . . . . . . . . . . . . . . . . . . . . . . . . . . . . . 440<br />
15.11.1 Specification Method . . . . . . . . . . . . . . . . . . . . . . . . . . . . . . . . . . . . . . . . . . . . . . . . . . . . . . . . . . . . . . 441<br />
15.11.2 Details of Functions . . . . . . . . . . . . . . . . . . . . . . . . . . . . . . . . . . . . . . . . . . . . . . . . . . . . . . . . . . . . . . . 442<br />
16.PATTERN DATA INPUT FUNCTION . . . . . . . . . . . . . . . . . . . . . . . . . . . . . . . . . . . . . . 450<br />
16.1 DISPLAYING THE PATTERN MENU . . . . . . . . . . . . . . . . . . . . . . . . . . . . . . . . . . . . . . . . . . . . . . . 451<br />
16.2 PATTERN DATA DISPLAY . . . . . . . . . . . . . . . . . . . . . . . . . . . . . . . . . . . . . . . . . . . . . . . . . . . . . . . . 455<br />
16.3 CHARACTERS AND CODES TO BE USED<br />
FOR THE PATTERN DATA INPUT FUNCTION . . . . . . . . . . . . . . . . . . . . . . . . . . . . . . . . . . . . . . . 459<br />
17.PROGRAMMABLE PARAMETER ENTRY (G10) . . . . . . . . . . . . . . . . . . . . . . . . . . . 461<br />
18.MEMORY OPERATION USING FS15 TAPE FORMAT . . . . . . . . . . . . . . . . . . . . . . 463<br />
19.HIGH SPEED CUTTING FUNCTIONS . . . . . . . . . . . . . . . . . . . . . . . . . . . . . . . . . . . . 464<br />
19.1 HIGH–SPEED CYCLE CUTTING . . . . . . . . . . . . . . . . . . . . . . . . . . . . . . . . . . . . . . . . . . . . . . . . . . 465<br />
19.2 FEEDRATE CLAMPING BY ARC RADIUS . . . . . . . . . . . . . . . . . . . . . . . . . . . . . . . . . . . . . . . . . . 467<br />
19.3 HIGH–SPEED REMOTE BUFFER . . . . . . . . . . . . . . . . . . . . . . . . . . . . . . . . . . . . . . . . . . . . . . . . . . 468<br />
19.3.1 High–Speed Remote Buffer A (G05) . . . . . . . . . . . . . . . . . . . . . . . . . . . . . . . . . . . . . . . . . . . . . . . . . . 468<br />
19.3.2 High–Speed Remote Buffer B (G05) . . . . . . . . . . . . . . . . . . . . . . . . . . . . . . . . . . . . . . . . . . . . . . . . . . 471<br />
19.4 DISTRIBUTION PROCESSING TERMINATION MONITORING FUNCTION<br />
FOR THE HIGH–SPEED MACHINING COMMAND (G05) . . . . . . . . . . . . . . . . . . . . . . . . . . . . . 472<br />
19.5 HIGH–SPEED LINEAR INTERPOLATION (G05) . . . . . . . . . . . . . . . . . . . . . . . . . . . . . . . . . . . . . 473<br />
19.6 ADVANCED PREVIEW CONTROL (G08) . . . . . . . . . . . . . . . . . . . . . . . . . . . . . . . . . . . . . . . . . . . 476<br />
19.7 AI CONTOUR CONTROL FUNCTION/AI NANO CONTOUR CONTROL FUNCTION . . . . . .<br />
478<br />
c–5
Table of Contents<br />
c–6<br />
B–63534EN/02<br />
19.8 HIGH–PRECISION CONTOUR CONTROL . . . . . . . . . . . . . . . . . . . . . . . . . . . . . . . . . . . . . . . . . . 500<br />
19.9 LOOK–AHEAD BELL–SHAPED ACCELERATION/DECELERATION<br />
BEFORE INTERPOLATION TIME CONSTANT CHANGE FUNCTION . . . . . . . . . . . . . . . . . . . 508<br />
19.10 OPTIMUM TORQUE ACCELERATION/DECELERATION . . . . . . . . . . . . . . . . . . . . . . . . . . . . . 514<br />
20.AXIS CONTROL FUNCTIONS . . . . . . . . . . . . . . . . . . . . . . . . . . . . . . . . . . . . . . . . . . . 527<br />
20.1 SIMPLE SYNCHRONOUS CONTROL . . . . . . . . . . . . . . . . . . . . . . . . . . . . . . . . . . . . . . . . . . . . . . 528<br />
20.2 ROTARY AXIS ROLL–OVER . . . . . . . . . . . . . . . . . . . . . . . . . . . . . . . . . . . . . . . . . . . . . . . . . . . . . 531<br />
20.2.1 Rotary Axis Roll–over . . . . . . . . . . . . . . . . . . . . . . . . . . . . . . . . . . . . . . . . . . . . . . . . . . . . . . . . . . . . . 531<br />
20.2.2 Rotary Axis Control . . . . . . . . . . . . . . . . . . . . . . . . . . . . . . . . . . . . . . . . . . . . . . . . . . . . . . . . . . . . . . . 532<br />
20.3 TOOL WITHDRAWAL AND RETURN (G10.6) . . . . . . . . . . . . . . . . . . . . . . . . . . . . . . . . . . . . . . . 533<br />
20.4 TANDEM CONTROL . . . . . . . . . . . . . . . . . . . . . . . . . . . . . . . . . . . . . . . . . . . . . . . . . . . . . . . . . . . . 536<br />
20.5 ANGULAR AXIS CONTROL/ARBITRARY ANGULAR AXIS CONTROL . . . . . . . . . . . . . . . . 537<br />
20.6 CHOPPING FUNCTION (G80, G81.1) . . . . . . . . . . . . . . . . . . . . . . . . . . . . . . . . . . . . . . . . . . . . . . . 539<br />
20.7 HOBBING MACHINE FUNCTION (G80, G81) . . . . . . . . . . . . . . . . . . . . . . . . . . . . . . . . . . . . . . . 545<br />
20.8 SIMPLE ELECTRIC GEAR BOX (G80, G81) . . . . . . . . . . . . . . . . . . . . . . . . . . . . . . . . . . . . . . . . . 551<br />
20.8.1 Simple Electric Gear Box (G80, G81) . . . . . . . . . . . . . . . . . . . . . . . . . . . . . . . . . . . . . . . . . . . . . . . . . 551<br />
20.8.2 Skip Function for EGB Axis (G31.8) . . . . . . . . . . . . . . . . . . . . . . . . . . . . . . . . . . . . . . . . . . . . . . . . . . 556<br />
20.8.3 Spindle Electronic Gear Box . . . . . . . . . . . . . . . . . . . . . . . . . . . . . . . . . . . . . . . . . . . . . . . . . . . . . . . . 559<br />
20.8.4 Electronic Gear Box Automatic Phase Synchronization . . . . . . . . . . . . . . . . . . . . . . . . . . . . . . . . . . . . 568<br />
20.8.5 Electronic Gear Box 2 Pair . . . . . . . . . . . . . . . . . . . . . . . . . . . . . . . . . . . . . . . . . . . . . . . . . . . . . . . . . . 576<br />
21.TWO–PATH CONTROL FUNCTION . . . . . . . . . . . . . . . . . . . . . . . . . . . . . . . . . . . . . . 590<br />
21.1 GENERAL . . . . . . . . . . . . . . . . . . . . . . . . . . . . . . . . . . . . . . . . . . . . . . . . . . . . . . . . . . . . . . . . . . . . . 591<br />
21.2 WAITING FOR PATHS . . . . . . . . . . . . . . . . . . . . . . . . . . . . . . . . . . . . . . . . . . . . . . . . . . . . . . . . . . . 592<br />
21.3 MEMORY COMMON TO PATH . . . . . . . . . . . . . . . . . . . . . . . . . . . . . . . . . . . . . . . . . . . . . . . . . . . . 594<br />
21.4 COPYING A PROGRAM BETWEEN TWO PATHS . . . . . . . . . . . . . . . . . . . . . . . . . . . . . . . . . . . . 595<br />
22.RISC PROCESSOR . . . . . . . . . . . . . . . . . . . . . . . . . . . . . . . . . . . . . . . . . . . . . . . . . . . . 596<br />
22.1 AI HIGH PRECISION CONTOUR CONTROL/AI NANO HIGH PRECISION<br />
CONTOUR CONTROL . . . . . . . . . . . . . . . . . . . . . . . . . . . . . . . . . . . . . . . . . . . . . . . . . . . . . . . . . . . 607<br />
22.1.1 Look–ahead Acceleration/Deceleration Before Interpolation . . . . . . . . . . . . . . . . . . . . . . . . . . . . . . . . 608<br />
22.1.2 Automatic Feedrate Control Function . . . . . . . . . . . . . . . . . . . . . . . . . . . . . . . . . . . . . . . . . . . . . . . . . . 613<br />
22.1.3 Restrictions . . . . . . . . . . . . . . . . . . . . . . . . . . . . . . . . . . . . . . . . . . . . . . . . . . . . . . . . . . . . . . . . . . . . . . 622<br />
22.1.4 The Function List which Can be Used . . . . . . . . . . . . . . . . . . . . . . . . . . . . . . . . . . . . . . . . . . . . . . . . . 625<br />
22.2 CYLINDRICAL INTERPOLATION CUTTING POINT CONTROL (G07.1) . . . . . . . . . . . . . . . . . 633<br />
22.3 TOOL CENTER POINT CONTROL . . . . . . . . . . . . . . . . . . . . . . . . . . . . . . . . . . . . . . . . . . . . . . . . . 643<br />
22.4 TOOL AXIS COMPENSATION IN TOOL AXIS DIRECTION . . . . . . . . . . . . . . . . . . . . . . . . . . . 655<br />
22.5 3–DIMENSIONAL CUTTER COMPENSATION . . . . . . . . . . . . . . . . . . . . . . . . . . . . . . . . . . . . . . . 668<br />
22.5.1 Tool Side Compensation . . . . . . . . . . . . . . . . . . . . . . . . . . . . . . . . . . . . . . . . . . . . . . . . . . . . . . . . . . . . 668<br />
22.5.2 Leading Edge Offset . . . . . . . . . . . . . . . . . . . . . . . . . . . . . . . . . . . . . . . . . . . . . . . . . . . . . . . . . . . . . . . 682<br />
22.5.3 Restrictions . . . . . . . . . . . . . . . . . . . . . . . . . . . . . . . . . . . . . . . . . . . . . . . . . . . . . . . . . . . . . . . . . . . . . . 688<br />
22.6 3–DIMENSIONAL CIRCULAR INTERPOLATION . . . . . . . . . . . . . . . . . . . . . . . . . . . . . . . . . . . . 693<br />
III. OPERATION . . . . . . . . . . . . . . . . . . . . . . . . . . . . . . . . . . . . . . . . . . . . . . . . . . 699<br />
1. GENERAL . . . . . . . . . . . . . . . . . . . . . . . . . . . . . . . . . . . . . . . . . . . . . . . . . . . . . . . . . . . . 701<br />
1.1 MANUAL OPERATION . . . . . . . . . . . . . . . . . . . . . . . . . . . . . . . . . . . . . . . . . . . . . . . . . . . . . . . . . .<br />
702
B–63534EN/02 <br />
1.2 TOOL MOVEMENT BY PROGRAMING–AUTOMATIC OPERATION . . . . . . . . . . . . . . . . . . . . 704<br />
1.3 AUTOMATIC OPERATION . . . . . . . . . . . . . . . . . . . . . . . . . . . . . . . . . . . . . . . . . . . . . . . . . . . . . . . 705<br />
1.4 TESTING A PROGRAM . . . . . . . . . . . . . . . . . . . . . . . . . . . . . . . . . . . . . . . . . . . . . . . . . . . . . . . . . . 707<br />
1.4.1 Check by Running the <strong>Machine</strong> . . . . . . . . . . . . . . . . . . . . . . . . . . . . . . . . . . . . . . . . . . . . . . . . . . . . . . 707<br />
1.4.2 How to View the Position Display Change without Running the <strong>Machine</strong> . . . . . . . . . . . . . . . . . . . . . . 708<br />
1.5 EDITING A PART PROGRAM . . . . . . . . . . . . . . . . . . . . . . . . . . . . . . . . . . . . . . . . . . . . . . . . . . . . . 709<br />
1.6 DISPLAYING AND SETTING DATA . . . . . . . . . . . . . . . . . . . . . . . . . . . . . . . . . . . . . . . . . . . . . . . . 710<br />
1.7 DISPLAY . . . . . . . . . . . . . . . . . . . . . . . . . . . . . . . . . . . . . . . . . . . . . . . . . . . . . . . . . . . . . . . . . . . . . . 713<br />
1.7.1 Program Display . . . . . . . . . . . . . . . . . . . . . . . . . . . . . . . . . . . . . . . . . . . . . . . . . . . . . . . . . . . . . . . . . . 713<br />
1.7.2 Current Position Display . . . . . . . . . . . . . . . . . . . . . . . . . . . . . . . . . . . . . . . . . . . . . . . . . . . . . . . . . . . . 714<br />
1.7.3 Alarm Display . . . . . . . . . . . . . . . . . . . . . . . . . . . . . . . . . . . . . . . . . . . . . . . . . . . . . . . . . . . . . . . . . . . 714<br />
1.7.4 Parts Count Display, Run Time Display . . . . . . . . . . . . . . . . . . . . . . . . . . . . . . . . . . . . . . . . . . . . . . . . 715<br />
1.7.5 Graphic Display . . . . . . . . . . . . . . . . . . . . . . . . . . . . . . . . . . . . . . . . . . . . . . . . . . . . . . . . . . . . . . . . . . 715<br />
1.8 DATA INPUT/OUTPUT . . . . . . . . . . . . . . . . . . . . . . . . . . . . . . . . . . . . . . . . . . . . . . . . . . . . . . . . . . . 716<br />
2. OPERATIONAL DEVICES . . . . . . . . . . . . . . . . . . . . . . . . . . . . . . . . . . . . . . . . . . . . . . 717<br />
2.1 SETTING AND DISPLAY UNITS . . . . . . . . . . . . . . . . . . . . . . . . . . . . . . . . . . . . . . . . . . . . . . . . . . 718<br />
2.1.1 7.2″/8.4″ LCD–Mounted Type CNC Control Unit . . . . . . . . . . . . . . . . . . . . . . . . . . . . . . . . . . . . . . . . 719<br />
2.1.2 9.5″/10.4″ LCD–Mounted Type CNC Control Unit . . . . . . . . . . . . . . . . . . . . . . . . . . . . . . . . . . . . . . . 719<br />
2.1.3 Stand–Alone Type Small MDI Unit . . . . . . . . . . . . . . . . . . . . . . . . . . . . . . . . . . . . . . . . . . . . . . . . . . . 720<br />
2.1.4 Stand–Alone Type Standard MDI Unit . . . . . . . . . . . . . . . . . . . . . . . . . . . . . . . . . . . . . . . . . . . . . . . . . 721<br />
2.1.5 Stand–Alone Type 61 Full Key MDI Unit . . . . . . . . . . . . . . . . . . . . . . . . . . . . . . . . . . . . . . . . . . . . . . 722<br />
2.2 EXPLANATION OF THE KEYBOARD . . . . . . . . . . . . . . . . . . . . . . . . . . . . . . . . . . . . . . . . . . . . . . 723<br />
2.3 FUNCTION KEYS AND SOFT KEYS . . . . . . . . . . . . . . . . . . . . . . . . . . . . . . . . . . . . . . . . . . . . . . . 725<br />
2.3.1 General Screen Operations . . . . . . . . . . . . . . . . . . . . . . . . . . . . . . . . . . . . . . . . . . . . . . . . . . . . . . . . . . 725<br />
2.3.2 Function Keys . . . . . . . . . . . . . . . . . . . . . . . . . . . . . . . . . . . . . . . . . . . . . . . . . . . . . . . . . . . . . . . . . . . 726<br />
2.3.3 Soft Keys . . . . . . . . . . . . . . . . . . . . . . . . . . . . . . . . . . . . . . . . . . . . . . . . . . . . . . . . . . . . . . . . . . . . . . . 727<br />
2.3.4 Key Input and Input Buffer . . . . . . . . . . . . . . . . . . . . . . . . . . . . . . . . . . . . . . . . . . . . . . . . . . . . . . . . . . 743<br />
2.3.5 Warning Messages . . . . . . . . . . . . . . . . . . . . . . . . . . . . . . . . . . . . . . . . . . . . . . . . . . . . . . . . . . . . . . . . 744<br />
2.3.6 Soft Key Configuration . . . . . . . . . . . . . . . . . . . . . . . . . . . . . . . . . . . . . . . . . . . . . . . . . . . . . . . . . . . . 745<br />
2.4 EXTERNAL I/O DEVICES . . . . . . . . . . . . . . . . . . . . . . . . . . . . . . . . . . . . . . . . . . . . . . . . . . . . . . . . 746<br />
2.4.1 FANUC Handy File . . . . . . . . . . . . . . . . . . . . . . . . . . . . . . . . . . . . . . . . . . . . . . . . . . . . . . . . . . . . . . . 748<br />
2.5 POWER ON/OFF . . . . . . . . . . . . . . . . . . . . . . . . . . . . . . . . . . . . . . . . . . . . . . . . . . . . . . . . . . . . . . . . 749<br />
2.5.1 Turning on the Power . . . . . . . . . . . . . . . . . . . . . . . . . . . . . . . . . . . . . . . . . . . . . . . . . . . . . . . . . . . . . . 749<br />
2.5.2 Screen Displayed at Power–on . . . . . . . . . . . . . . . . . . . . . . . . . . . . . . . . . . . . . . . . . . . . . . . . . . . . . . . 750<br />
2.5.3 Power Disconnection . . . . . . . . . . . . . . . . . . . . . . . . . . . . . . . . . . . . . . . . . . . . . . . . . . . . . . . . . . . . . . 751<br />
3. MANUAL OPERATION . . . . . . . . . . . . . . . . . . . . . . . . . . . . . . . . . . . . . . . . . . . . . . . . . 752<br />
3.1 MANUAL REFERENCE POSITION RETURN . . . . . . . . . . . . . . . . . . . . . . . . . . . . . . . . . . . . . . . . 753<br />
3.2 JOG FEED . . . . . . . . . . . . . . . . . . . . . . . . . . . . . . . . . . . . . . . . . . . . . . . . . . . . . . . . . . . . . . . . . . . . . 755<br />
3.3 INCREMENTAL FEED . . . . . . . . . . . . . . . . . . . . . . . . . . . . . . . . . . . . . . . . . . . . . . . . . . . . . . . . . . . 757<br />
3.4 MANUAL HANDLE FEED . . . . . . . . . . . . . . . . . . . . . . . . . . . . . . . . . . . . . . . . . . . . . . . . . . . . . . . . 758<br />
3.5 MANUAL ABSOLUTE ON AND OFF . . . . . . . . . . . . . . . . . . . . . . . . . . . . . . . . . . . . . . . . . . . . . . . 761<br />
3.6 TOOL AXIS DIRECTION HANDLE FEED/TOOL AXIS DIRECTION HANDLE FEED B . . . . 766<br />
3.6.1 Tool Axis Direction Handle Feed . . . . . . . . . . . . . . . . . . . . . . . . . . . . . . . . . . . . . . . . . . . . . . . . . . . . . 766<br />
3.6.2 Tool Axis Normal Direction Handle Feed . . . . . . . . . . . . . . . . . . . . . . . . . . . . . . . . . . . . . . . . . . . . . . . 769<br />
3.7 MANUAL LINEAR/CIRCULAR INTERPOLATION . . . . . . . . . . . . . . . . . . . . . . . . . . . . . . . . . . . 774<br />
3.8 MANUAL RIGID TAPPING . . . . . . . . . . . . . . . . . . . . . . . . . . . . . . . . . . . . . . . . . . . . . . . . . . . . . . . 779<br />
3.9 MANUAL NUMERIC COMMAND . . . . . . . . . . . . . . . . . . . . . . . . . . . . . . . . . . . . . . . . . . . . . . . . .<br />
781<br />
c–7
Table of Contents<br />
c–8<br />
B–63534EN/02<br />
4. AUTOMATIC OPERATION . . . . . . . . . . . . . . . . . . . . . . . . . . . . . . . . . . . . . . . . . . . . . . 789<br />
4.1 MEMORY OPERATION . . . . . . . . . . . . . . . . . . . . . . . . . . . . . . . . . . . . . . . . . . . . . . . . . . . . . . . . . . 790<br />
4.2 MDI OPERATION . . . . . . . . . . . . . . . . . . . . . . . . . . . . . . . . . . . . . . . . . . . . . . . . . . . . . . . . . . . . . . . 793<br />
4.3 DNC OPERATION . . . . . . . . . . . . . . . . . . . . . . . . . . . . . . . . . . . . . . . . . . . . . . . . . . . . . . . . . . . . . . . 797<br />
4.4 SIMULTANEOUS INPUT/OUTPUT . . . . . . . . . . . . . . . . . . . . . . . . . . . . . . . . . . . . . . . . . . . . . . . . . 800<br />
4.5 PROGRAM RESTART . . . . . . . . . . . . . . . . . . . . . . . . . . . . . . . . . . . . . . . . . . . . . . . . . . . . . . . . . . . . 802<br />
4.6 SCHEDULING FUNCTION . . . . . . . . . . . . . . . . . . . . . . . . . . . . . . . . . . . . . . . . . . . . . . . . . . . . . . . 809<br />
4.7 SUBPROGRAM CALL FUNCTION (M198) . . . . . . . . . . . . . . . . . . . . . . . . . . . . . . . . . . . . . . . . . . 814<br />
4.8 MANUAL HANDLE INTERRUPTION . . . . . . . . . . . . . . . . . . . . . . . . . . . . . . . . . . . . . . . . . . . . . . 816<br />
4.9 MIRROR IMAGE . . . . . . . . . . . . . . . . . . . . . . . . . . . . . . . . . . . . . . . . . . . . . . . . . . . . . . . . . . . . . . . . 819<br />
4.10 TOOL WITHDRAWAL AND RETURN . . . . . . . . . . . . . . . . . . . . . . . . . . . . . . . . . . . . . . . . . . . . . . 821<br />
4.11 RETRACE FUNCTION . . . . . . . . . . . . . . . . . . . . . . . . . . . . . . . . . . . . . . . . . . . . . . . . . . . . . . . . . . . 827<br />
4.12 MANUAL INTERVENTION AND RETURN . . . . . . . . . . . . . . . . . . . . . . . . . . . . . . . . . . . . . . . . . 835<br />
4.13 DNC OPERATION WITH MEMORY CARD . . . . . . . . . . . . . . . . . . . . . . . . . . . . . . . . . . . . . . . . . . 837<br />
4.13.1 Specification . . . . . . . . . . . . . . . . . . . . . . . . . . . . . . . . . . . . . . . . . . . . . . . . . . . . . . . . . . . . . . . . . . . . . 837<br />
4.13.2 Operations . . . . . . . . . . . . . . . . . . . . . . . . . . . . . . . . . . . . . . . . . . . . . . . . . . . . . . . . . . . . . . . . . . . . . . 838<br />
4.13.2.1 DNC Operation . . . . . . . . . . . . . . . . . . . . . . . . . . . . . . . . . . . . . . . . . . . . . . . . . . . . . . . . . . . . 838<br />
4.13.2.2 Subprogram Call (M198) . . . . . . . . . . . . . . . . . . . . . . . . . . . . . . . . . . . . . . . . . . . . . . . . . . . . . 839<br />
4.13.3 Limitation and Notes . . . . . . . . . . . . . . . . . . . . . . . . . . . . . . . . . . . . . . . . . . . . . . . . . . . . . . . . . . . . . . 840<br />
4.13.4 Parameter . . . . . . . . . . . . . . . . . . . . . . . . . . . . . . . . . . . . . . . . . . . . . . . . . . . . . . . . . . . . . . . . . . . . . . . 840<br />
4.13.5 Connecting PCMCIA Card Attachment . . . . . . . . . . . . . . . . . . . . . . . . . . . . . . . . . . . . . . . . . . . . . . . . 841<br />
4.13.5.1 Specification Number . . . . . . . . . . . . . . . . . . . . . . . . . . . . . . . . . . . . . . . . . . . . . . . . . . . . . . . . 841<br />
4.13.5.2 Assembling . . . . . . . . . . . . . . . . . . . . . . . . . . . . . . . . . . . . . . . . . . . . . . . . . . . . . . . . . . . . . . . 841<br />
4.13.6 Recommended Memory Card . . . . . . . . . . . . . . . . . . . . . . . . . . . . . . . . . . . . . . . . . . . . . . . . . . . . . . . . 843<br />
5. TEST OPERATION . . . . . . . . . . . . . . . . . . . . . . . . . . . . . . . . . . . . . . . . . . . . . . . . . . . . . 844<br />
5.1 MACHINE LOCK AND AUXILIARY FUNCTION LOCK . . . . . . . . . . . . . . . . . . . . . . . . . . . . . . . 845<br />
5.2 FEEDRATE OVERRIDE . . . . . . . . . . . . . . . . . . . . . . . . . . . . . . . . . . . . . . . . . . . . . . . . . . . . . . . . . . 847<br />
5.3 RAPID TRAVERSE OVERRIDE . . . . . . . . . . . . . . . . . . . . . . . . . . . . . . . . . . . . . . . . . . . . . . . . . . . 848<br />
5.4 DRY RUN . . . . . . . . . . . . . . . . . . . . . . . . . . . . . . . . . . . . . . . . . . . . . . . . . . . . . . . . . . . . . . . . . . . . . . 849<br />
5.5 SINGLE BLOCK . . . . . . . . . . . . . . . . . . . . . . . . . . . . . . . . . . . . . . . . . . . . . . . . . . . . . . . . . . . . . . . . 850<br />
6. SAFETY FUNCTIONS . . . . . . . . . . . . . . . . . . . . . . . . . . . . . . . . . . . . . . . . . . . . . . . . . . 852<br />
6.1 EMERGENCY STOP . . . . . . . . . . . . . . . . . . . . . . . . . . . . . . . . . . . . . . . . . . . . . . . . . . . . . . . . . . . . . 853<br />
6.2 OVERTRAVEL . . . . . . . . . . . . . . . . . . . . . . . . . . . . . . . . . . . . . . . . . . . . . . . . . . . . . . . . . . . . . . . . . . 854<br />
6.3 STORED STROKE CHECK . . . . . . . . . . . . . . . . . . . . . . . . . . . . . . . . . . . . . . . . . . . . . . . . . . . . . . . 855<br />
6.4 STROKE LIMIT CHECK PRIOR TO PERFORMING MOVEMENT . . . . . . . . . . . . . . . . . . . . . . . 859<br />
7. ALARM AND SELF–DIAGNOSIS FUNCTIONS . . . . . . . . . . . . . . . . . . . . . . . . . . . . 862<br />
7.1 ALARM DISPLAY . . . . . . . . . . . . . . . . . . . . . . . . . . . . . . . . . . . . . . . . . . . . . . . . . . . . . . . . . . . . . . . 863<br />
7.2 ALARM HISTORY DISPLAY . . . . . . . . . . . . . . . . . . . . . . . . . . . . . . . . . . . . . . . . . . . . . . . . . . . . . . 865<br />
7.3 CHECKING BY SELF–DIAGNOSTIC SCREEN . . . . . . . . . . . . . . . . . . . . . . . . . . . . . . . . . . . . . . . 866<br />
8. DATA INPUT/OUTPUT . . . . . . . . . . . . . . . . . . . . . . . . . . . . . . . . . . . . . . . . . . . . . . . . . . 869<br />
8.1 FILES . . . . . . . . . . . . . . . . . . . . . . . . . . . . . . . . . . . . . . . . . . . . . . . . . . . . . . . . . . . . . . . . . . . . . . . . . 870<br />
8.2 FILE SEARCH . . . . . . . . . . . . . . . . . . . . . . . . . . . . . . . . . . . . . . . . . . . . . . . . . . . . . . . . . . . . . . . . . .<br />
872
B–63534EN/02 <br />
8.3 FILE DELETION . . . . . . . . . . . . . . . . . . . . . . . . . . . . . . . . . . . . . . . . . . . . . . . . . . . . . . . . . . . . . . . . 874<br />
8.4 PROGRAM INPUT/OUTPUT . . . . . . . . . . . . . . . . . . . . . . . . . . . . . . . . . . . . . . . . . . . . . . . . . . . . . . 875<br />
8.4.1 Inputting a Program . . . . . . . . . . . . . . . . . . . . . . . . . . . . . . . . . . . . . . . . . . . . . . . . . . . . . . . . . . . . . . . 875<br />
8.4.2 Outputting a Program . . . . . . . . . . . . . . . . . . . . . . . . . . . . . . . . . . . . . . . . . . . . . . . . . . . . . . . . . . . . . . 878<br />
8.5 OFFSET DATA INPUT AND OUTPUT . . . . . . . . . . . . . . . . . . . . . . . . . . . . . . . . . . . . . . . . . . . . . . 880<br />
8.5.1 Inputting Offset Data . . . . . . . . . . . . . . . . . . . . . . . . . . . . . . . . . . . . . . . . . . . . . . . . . . . . . . . . . . . . . . 880<br />
8.5.2 Outputting Offset Data . . . . . . . . . . . . . . . . . . . . . . . . . . . . . . . . . . . . . . . . . . . . . . . . . . . . . . . . . . . . . 881<br />
8.6 INPUTTING AND OUTPUTTING PARAMETERS AND<br />
PITCH ERROR COMPENSATION DATA . . . . . . . . . . . . . . . . . . . . . . . . . . . . . . . . . . . . . . . . . . . . 882<br />
8.6.1 Inputting Parameters . . . . . . . . . . . . . . . . . . . . . . . . . . . . . . . . . . . . . . . . . . . . . . . . . . . . . . . . . . . . . . . 882<br />
8.6.2 Outputting Parameters . . . . . . . . . . . . . . . . . . . . . . . . . . . . . . . . . . . . . . . . . . . . . . . . . . . . . . . . . . . . . 883<br />
8.6.3 Inputting Pitch Error Compensation Data . . . . . . . . . . . . . . . . . . . . . . . . . . . . . . . . . . . . . . . . . . . . . . . 884<br />
8.6.4 Outputting Pitch Error Compensation Data . . . . . . . . . . . . . . . . . . . . . . . . . . . . . . . . . . . . . . . . . . . . . 885<br />
8.7 INPUTTING/OUTPUTTING CUSTOM MACRO COMMON VARIABLES . . . . . . . . . . . . . . . . . 886<br />
8.7.1 Inputting Custom Macro Common Variables . . . . . . . . . . . . . . . . . . . . . . . . . . . . . . . . . . . . . . . . . . . . 886<br />
8.7.2 Outputting Custom Macro Common Variable . . . . . . . . . . . . . . . . . . . . . . . . . . . . . . . . . . . . . . . . . . . . 887<br />
8.8 DISPLAYING DIRECTORY OF FLOPPY CASSETTE . . . . . . . . . . . . . . . . . . . . . . . . . . . . . . . . . . 888<br />
8.8.1 Displaying the Directory . . . . . . . . . . . . . . . . . . . . . . . . . . . . . . . . . . . . . . . . . . . . . . . . . . . . . . . . . . . . 889<br />
8.8.2 Reading Files . . . . . . . . . . . . . . . . . . . . . . . . . . . . . . . . . . . . . . . . . . . . . . . . . . . . . . . . . . . . . . . . . . . . 892<br />
8.8.3 Outputting Programs . . . . . . . . . . . . . . . . . . . . . . . . . . . . . . . . . . . . . . . . . . . . . . . . . . . . . . . . . . . . . . 893<br />
8.8.4 Deleting Files . . . . . . . . . . . . . . . . . . . . . . . . . . . . . . . . . . . . . . . . . . . . . . . . . . . . . . . . . . . . . . . . . . . . 894<br />
8.9 OUTPUTTING A PROGRAM LIST FOR A SPECIFIED GROUP . . . . . . . . . . . . . . . . . . . . . . . . . 896<br />
8.10 DATA INPUT/OUTPUT ON THE ALL IO SCREEN . . . . . . . . . . . . . . . . . . . . . . . . . . . . . . . . . . . . 897<br />
8.10.1 Setting Input/Output–Related Parameters . . . . . . . . . . . . . . . . . . . . . . . . . . . . . . . . . . . . . . . . . . . . . . . 898<br />
8.10.2 Inputting and Outputting Programs . . . . . . . . . . . . . . . . . . . . . . . . . . . . . . . . . . . . . . . . . . . . . . . . . . . 899<br />
8.10.3 Inputting and Outputting Parameters . . . . . . . . . . . . . . . . . . . . . . . . . . . . . . . . . . . . . . . . . . . . . . . . . . 904<br />
8.10.4 Inputting and Outputting Offset Data . . . . . . . . . . . . . . . . . . . . . . . . . . . . . . . . . . . . . . . . . . . . . . . . . . 906<br />
8.10.5 Outputting Custom Macro Common Variables . . . . . . . . . . . . . . . . . . . . . . . . . . . . . . . . . . . . . . . . . . . 908<br />
8.10.6 Inputting and Outputting Floppy Files . . . . . . . . . . . . . . . . . . . . . . . . . . . . . . . . . . . . . . . . . . . . . . . . . 909<br />
8.11 DATA INPUT/OUTPUT USING A MEMORY CARD . . . . . . . . . . . . . . . . . . . . . . . . . . . . . . . . . . . 914<br />
8.12 DATA INPUT/OUTPUT BY E<strong>MB</strong>EDDED ETHERNET . . . . . . . . . . . . . . . . . . . . . . . . . . . . . . . . . 926<br />
8.12.1 FTP File Transfer Function . . . . . . . . . . . . . . . . . . . . . . . . . . . . . . . . . . . . . . . . . . . . . . . . . . . . . . . . . . 926<br />
8.12.1.1 Host file list display . . . . . . . . . . . . . . . . . . . . . . . . . . . . . . . . . . . . . . . . . . . . . . . . . . . . . . . . . 926<br />
8.12.1.2 Host file search . . . . . . . . . . . . . . . . . . . . . . . . . . . . . . . . . . . . . . . . . . . . . . . . . . . . . . . . . . . . . 929<br />
8.12.1.3 Host file deletion . . . . . . . . . . . . . . . . . . . . . . . . . . . . . . . . . . . . . . . . . . . . . . . . . . . . . . . . . . . 929<br />
8.12.1.4 NC program input . . . . . . . . . . . . . . . . . . . . . . . . . . . . . . . . . . . . . . . . . . . . . . . . . . . . . . . . . . 930<br />
8.12.1.5 NC program output . . . . . . . . . . . . . . . . . . . . . . . . . . . . . . . . . . . . . . . . . . . . . . . . . . . . . . . . . 932<br />
8.12.1.6 Input/output of various types of data . . . . . . . . . . . . . . . . . . . . . . . . . . . . . . . . . . . . . . . . . . . . 933<br />
8.12.1.7 Checking and changing of the connection host . . . . . . . . . . . . . . . . . . . . . . . . . . . . . . . . . . . . 939<br />
9. EDITING PROGRAMS . . . . . . . . . . . . . . . . . . . . . . . . . . . . . . . . . . . . . . . . . . . . . . . . . . 942<br />
9.1 INSERTING, ALTERING AND DELETING A WORD . . . . . . . . . . . . . . . . . . . . . . . . . . . . . . . . . . 943<br />
9.1.1 Word Search . . . . . . . . . . . . . . . . . . . . . . . . . . . . . . . . . . . . . . . . . . . . . . . . . . . . . . . . . . . . . . . . . . . . . 944<br />
9.1.2 Heading a Program . . . . . . . . . . . . . . . . . . . . . . . . . . . . . . . . . . . . . . . . . . . . . . . . . . . . . . . . . . . . . . . . 946<br />
9.1.3 Inserting a Word . . . . . . . . . . . . . . . . . . . . . . . . . . . . . . . . . . . . . . . . . . . . . . . . . . . . . . . . . . . . . . . . . . 947<br />
9.1.4 Altering a Word . . . . . . . . . . . . . . . . . . . . . . . . . . . . . . . . . . . . . . . . . . . . . . . . . . . . . . . . . . . . . . . . . . 948<br />
9.1.5 Deleting a Word . . . . . . . . . . . . . . . . . . . . . . . . . . . . . . . . . . . . . . . . . . . . . . . . . . . . . . . . . . . . . . . . . . 949<br />
9.2 DELETING BLOCKS . . . . . . . . . . . . . . . . . . . . . . . . . . . . . . . . . . . . . . . . . . . . . . . . . . . . . . . . . . . . 950<br />
9.2.1 Deleting a Block . . . . . . . . . . . . . . . . . . . . . . . . . . . . . . . . . . . . . . . . . . . . . . . . . . . . . . . . . . . . . . . . . . 950<br />
9.2.2 Deleting Multiple Blocks . . . . . . . . . . . . . . . . . . . . . . . . . . . . . . . . . . . . . . . . . . . . . . . . . . . . . . . . . . . 951<br />
9.3 PROGRAM NU<strong>MB</strong>ER SEARCH . . . . . . . . . . . . . . . . . . . . . . . . . . . . . . . . . . . . . . . . . . . . . . . . . . .<br />
952<br />
c–9
Table of Contents<br />
c–10<br />
B–63534EN/02<br />
9.4 SEQUENCE NU<strong>MB</strong>ER SEARCH . . . . . . . . . . . . . . . . . . . . . . . . . . . . . . . . . . . . . . . . . . . . . . . . . . . 953<br />
9.5 DELETING PROGRAMS . . . . . . . . . . . . . . . . . . . . . . . . . . . . . . . . . . . . . . . . . . . . . . . . . . . . . . . . . 955<br />
9.5.1 Deleting One Program . . . . . . . . . . . . . . . . . . . . . . . . . . . . . . . . . . . . . . . . . . . . . . . . . . . . . . . . . . . . . 955<br />
9.5.2 Deleting All Programs . . . . . . . . . . . . . . . . . . . . . . . . . . . . . . . . . . . . . . . . . . . . . . . . . . . . . . . . . . . . . 955<br />
9.5.3 Deleting More than One Program by Specifying a Range . . . . . . . . . . . . . . . . . . . . . . . . . . . . . . . . . . . 956<br />
9.6 EXTENDED PART PROGRAM EDITING FUNCTION . . . . . . . . . . . . . . . . . . . . . . . . . . . . . . . . . 957<br />
9.6.1 Copying an Entire Program . . . . . . . . . . . . . . . . . . . . . . . . . . . . . . . . . . . . . . . . . . . . . . . . . . . . . . . . . 958<br />
9.6.2 Copying Part of a Program . . . . . . . . . . . . . . . . . . . . . . . . . . . . . . . . . . . . . . . . . . . . . . . . . . . . . . . . . . 959<br />
9.6.3 Moving Part of a Program . . . . . . . . . . . . . . . . . . . . . . . . . . . . . . . . . . . . . . . . . . . . . . . . . . . . . . . . . . 960<br />
9.6.4 Merging a Program . . . . . . . . . . . . . . . . . . . . . . . . . . . . . . . . . . . . . . . . . . . . . . . . . . . . . . . . . . . . . . . . 961<br />
9.6.5 Supplementary Explanation for Copying, Moving and Merging . . . . . . . . . . . . . . . . . . . . . . . . . . . . . 962<br />
9.6.6 Replacement of Words and Addresses . . . . . . . . . . . . . . . . . . . . . . . . . . . . . . . . . . . . . . . . . . . . . . . . . 964<br />
9.7 EDITING OF CUSTOM MACROS . . . . . . . . . . . . . . . . . . . . . . . . . . . . . . . . . . . . . . . . . . . . . . . . . . 966<br />
9.8 BACKGROUND EDITING . . . . . . . . . . . . . . . . . . . . . . . . . . . . . . . . . . . . . . . . . . . . . . . . . . . . . . . . 967<br />
9.9 PASSWORD FUNCTION . . . . . . . . . . . . . . . . . . . . . . . . . . . . . . . . . . . . . . . . . . . . . . . . . . . . . . . . . 968<br />
9.10 COPYING A PROGRAM BETWEEN TWO PATHS . . . . . . . . . . . . . . . . . . . . . . . . . . . . . . . . . . . . 970<br />
10.CREATING PROGRAMS . . . . . . . . . . . . . . . . . . . . . . . . . . . . . . . . . . . . . . . . . . . . . . . . 975<br />
10.1 CREATING PROGRAMS USING THE MDI PANEL . . . . . . . . . . . . . . . . . . . . . . . . . . . . . . . . . . . 976<br />
10.2 AUTOMATIC INSERTION OF SEQUENCE NU<strong>MB</strong>ERS . . . . . . . . . . . . . . . . . . . . . . . . . . . . . . . . 977<br />
10.3 CREATING PROGRAMS IN TEACH IN MODE (PLAYBACK) . . . . . . . . . . . . . . . . . . . . . . . . . . 979<br />
10.4 CONVERSATIONAL PROGRAMMING WITH GRAPHIC FUNCTION . . . . . . . . . . . . . . . . . . . . 982<br />
11.SETTING AND DISPLAYING DATA . . . . . . . . . . . . . . . . . . . . . . . . . . . . . . . . . . . . . . 986<br />
11.1 SCREENS DISPLAYED BY FUNCTION KEY POS . . . . . . . . . . . . . . . . . . . . . . . . . . . . . . . . . . . 993<br />
11.1.1 Position Display in the Work Coordinate System . . . . . . . . . . . . . . . . . . . . . . . . . . . . . . . . . . . . . . . . . 994<br />
11.1.2 Position Display in the Relative Coordinate System . . . . . . . . . . . . . . . . . . . . . . . . . . . . . . . . . . . . . . . 996<br />
11.1.3 Overall Position Display . . . . . . . . . . . . . . . . . . . . . . . . . . . . . . . . . . . . . . . . . . . . . . . . . . . . . . . . . . . . 999<br />
11.1.4 Presetting the Workpiece Coordinate System . . . . . . . . . . . . . . . . . . . . . . . . . . . . . . . . . . . . . . . . . . . . 1001<br />
11.1.5 Actual Feedrate Display . . . . . . . . . . . . . . . . . . . . . . . . . . . . . . . . . . . . . . . . . . . . . . . . . . . . . . . . . . . . 1002<br />
11.1.6 Display of Run Time and Parts Count . . . . . . . . . . . . . . . . . . . . . . . . . . . . . . . . . . . . . . . . . . . . . . . . . 1004<br />
11.1.7 Setting the Floating Reference Position . . . . . . . . . . . . . . . . . . . . . . . . . . . . . . . . . . . . . . . . . . . . . . . . 1005<br />
11.1.8 Operating Monitor Display . . . . . . . . . . . . . . . . . . . . . . . . . . . . . . . . . . . . . . . . . . . . . . . . . . . . . . . . . . 1006<br />
11.2 SCREENS DISPLAYED BY FUNCTION KEY PROG<br />
(IN MEMORY MODE OR MDI MODE) . . . . . . . . . . . . . . . . . . . . . . . . . . . . . . . . . . . . . . . . . . . . . 1008<br />
11.2.1 Program Contents Display . . . . . . . . . . . . . . . . . . . . . . . . . . . . . . . . . . . . . . . . . . . . . . . . . . . . . . . . . . 1009<br />
11.2.2 Current Block Display Screen . . . . . . . . . . . . . . . . . . . . . . . . . . . . . . . . . . . . . . . . . . . . . . . . . . . . . . . . 1010<br />
11.2.3 Next Block Display Screen . . . . . . . . . . . . . . . . . . . . . . . . . . . . . . . . . . . . . . . . . . . . . . . . . . . . . . . . . . 1011<br />
11.2.4 Program Check Screen . . . . . . . . . . . . . . . . . . . . . . . . . . . . . . . . . . . . . . . . . . . . . . . . . . . . . . . . . . . . . 1012<br />
11.2.5 Program Screen for MDI Operation . . . . . . . . . . . . . . . . . . . . . . . . . . . . . . . . . . . . . . . . . . . . . . . . . . . 1015<br />
11.2.6 Stamping the Machining Time . . . . . . . . . . . . . . . . . . . . . . . . . . . . . . . . . . . . . . . . . . . . . . . . . . . . . . . 1016<br />
11.3 SCREENS DISPLAYED BY FUNCTION KEY PROG<br />
(IN THE EDIT MODE) . . . . . . . . . . . . . . . . . . . . . . . . . . . . . . . . . . . . . . . . . . . . . . . . . . . . . . . . . . . 1024<br />
11.3.1 Displaying Memory Used and a List of Programs . . . . . . . . . . . . . . . . . . . . . . . . . . . . . . . . . . . . . . . . 1024<br />
11.3.2 Displaying a Program List for a Specified Group . . . . . . . . . . . . . . . . . . . . . . . . . . . . . . . . . . . . . . . . . 1027<br />
11.4 SCREENS DISPLAYED BY FUNCTION KEY OFFSET<br />
SETTING . . . . . . . . . . . . . . . . . . . . . . . . . . . . . . . . . . . 1030<br />
11.4.1 Setting and Displaying the Tool Offset Value . . . . . . . . . . . . . . . . . . . . . . . . . . . . . . . . . . . . . . . . . . . .<br />
1031
B–63534EN/02 <br />
11.4.2 Tool Length Measurement . . . . . . . . . . . . . . . . . . . . . . . . . . . . . . . . . . . . . . . . . . . . . . . . . . . . . . . . . . 1034<br />
11.4.3 Displaying and Entering Setting Data . . . . . . . . . . . . . . . . . . . . . . . . . . . . . . . . . . . . . . . . . . . . . . . . . . 1036<br />
11.4.4 Sequence Number Comparison and Stop . . . . . . . . . . . . . . . . . . . . . . . . . . . . . . . . . . . . . . . . . . . . . . . 1038<br />
11.4.5 Displaying and Setting Run Time, Parts Count, and Time . . . . . . . . . . . . . . . . . . . . . . . . . . . . . . . . . . 1040<br />
11.4.6 Displaying and Setting the Workpiece Origin Offset Value . . . . . . . . . . . . . . . . . . . . . . . . . . . . . . . . . . 1042<br />
11.4.7 Direct Input of Measured Workpiece Origin Offsets . . . . . . . . . . . . . . . . . . . . . . . . . . . . . . . . . . . . . . . 1043<br />
11.4.8 Displaying and Setting Custom Macro Common Variables . . . . . . . . . . . . . . . . . . . . . . . . . . . . . . . . . 1045<br />
11.4.9 Displaying Pattern Data and Pattern Menu . . . . . . . . . . . . . . . . . . . . . . . . . . . . . . . . . . . . . . . . . . . . . . 1046<br />
11.4.10 Displaying and Setting the Software Operator’s Panel . . . . . . . . . . . . . . . . . . . . . . . . . . . . . . . . . . . . . 1048<br />
11.4.11 Displaying and Setting Tool Life Management Data . . . . . . . . . . . . . . . . . . . . . . . . . . . . . . . . . . . . . . . 1050<br />
11.4.12 Displaying and Setting Extended Tool Life Management . . . . . . . . . . . . . . . . . . . . . . . . . . . . . . . . . . . 1053<br />
11.4.13 Displaying and Setting Chopping Data . . . . . . . . . . . . . . . . . . . . . . . . . . . . . . . . . . . . . . . . . . . . . . . . . 1058<br />
11.4.14 Tool Length/Workpiece Origin Measurement B . . . . . . . . . . . . . . . . . . . . . . . . . . . . . . . . . . . . . . . . . . 1059<br />
11.4.15 Displaying and Setting Rotary Table Dynamic Fixture Offset . . . . . . . . . . . . . . . . . . . . . . . . . . . . . . . . 1075<br />
11.5 SCREENS DISPLAYED BY FUNCTION KEY SYSTEM . . . . . . . . . . . . . . . . . . . . . . . . . . . . . . . . . . . 1077<br />
11.5.1 Displaying and Setting Parameters . . . . . . . . . . . . . . . . . . . . . . . . . . . . . . . . . . . . . . . . . . . . . . . . . . . . 1077<br />
11.5.2 Displaying and Setting Pitch Error Compensation Data . . . . . . . . . . . . . . . . . . . . . . . . . . . . . . . . . . . . 1079<br />
11.6 DISPLAYING THE PROGRAM NU<strong>MB</strong>ER, SEQUENCE NU<strong>MB</strong>ER, AND STATUS,<br />
AND WARNING MESSAGES FOR DATA SETTING OR INPUT/OUTPUT OPERATION . . . . . 1082<br />
11.6.1 Displaying the Program Number and Sequence Number . . . . . . . . . . . . . . . . . . . . . . . . . . . . . . . . . . . 1082<br />
11.6.2 Displaying the Status and Warning for Data Setting or Input/Output Operation . . . . . . . . . . . . . . . . . . 1083<br />
11.7 SCREENS DISPLAYED BY FUNCTION KEY MESSAGE . . . . . . . . . . . . . . . . . . . . . . . . . . . . . . . . . . . 1085<br />
11.7.1 External Operator Message History Display . . . . . . . . . . . . . . . . . . . . . . . . . . . . . . . . . . . . . . . . . . . . . 1085<br />
11.8 CLEARING THE SCREEN . . . . . . . . . . . . . . . . . . . . . . . . . . . . . . . . . . . . . . . . . . . . . . . . . . . . . . . . 1087<br />
11.8.1 Erase Screen Display . . . . . . . . . . . . . . . . . . . . . . . . . . . . . . . . . . . . . . . . . . . . . . . . . . . . . . . . . . . . . . 1087<br />
11.8.2 Automatic Erase Screen Display . . . . . . . . . . . . . . . . . . . . . . . . . . . . . . . . . . . . . . . . . . . . . . . . . . . . . . 1088<br />
12.GRAPHICS FUNCTION . . . . . . . . . . . . . . . . . . . . . . . . . . . . . . . . . . . . . . . . . . . . . . . . 1090<br />
12.1 GRAPHICS DISPLAY . . . . . . . . . . . . . . . . . . . . . . . . . . . . . . . . . . . . . . . . . . . . . . . . . . . . . . . . . . . . 1091<br />
12.2 DYNAMIC GRAPHIC DISPLAY . . . . . . . . . . . . . . . . . . . . . . . . . . . . . . . . . . . . . . . . . . . . . . . . . . . 1097<br />
12.2.1 Path Drawing . . . . . . . . . . . . . . . . . . . . . . . . . . . . . . . . . . . . . . . . . . . . . . . . . . . . . . . . . . . . . . . . . . . . 1097<br />
12.2.2 Solid Graphics . . . . . . . . . . . . . . . . . . . . . . . . . . . . . . . . . . . . . . . . . . . . . . . . . . . . . . . . . . . . . . . . . . . 1106<br />
12.3 BACKGROUND DRAWING . . . . . . . . . . . . . . . . . . . . . . . . . . . . . . . . . . . . . . . . . . . . . . . . . . . . . . . 1118<br />
13.HELP FUNCTION . . . . . . . . . . . . . . . . . . . . . . . . . . . . . . . . . . . . . . . . . . . . . . . . . . . . . 1121<br />
14.SCREEN HARDCOPY . . . . . . . . . . . . . . . . . . . . . . . . . . . . . . . . . . . . . . . . . . . . . . . . . 1126<br />
IV. MAINTENANCE<br />
1. METHOD OF REPLACING BATTERY . . . . . . . . . . . . . . . . . . . . . . . . . . . . . . . . . . . 1131<br />
1.1 REPLACING BATTERY FOR LCD–MOUNTED TYPE i SERIES . . . . . . . . . . . . . . . . . . . . . . . . 1132<br />
1.2 REPLACING THE BATTERY FOR STAND–ALONE TYPE i SERIES . . . . . . . . . . . . . . . . . . . . . 1135<br />
1.3 BATTERY IN THE CNC DISPLAY UNIT WITH PC FUNCTIONS (3 VDC) . . . . . . . . . . . . . . . . 1138<br />
1.4 BATTERY FOR SEPARATE ABSOLUTE PULSE CODERS (6 VDC) . . . . . . . . . . . . . . . . . . . . . . 1140<br />
1.5 BATTERY FOR BUILT–IN ABSOLUTE PULSE CODERS (DC6V) . . . . . . . . . . . . . . . . . . . . . . . 1141<br />
1.5.1 Method of Replacing Battery for Servo Amplifier i series . . . . . . . . . . . . . . . . . . . . . . . . . . . . . . . . . 1141<br />
1.5.2 Method of Replacing Battery for Servo Amplifier series . . . . . . . . . . . . . . . . . . . . . . . . . . . . . . . . . .<br />
1147<br />
c–11
APPENDIX<br />
Table of Contents<br />
c–12<br />
B–63534EN/02<br />
H. TAPE CODE LIST . . . . . . . . . . . . . . . . . . . . . . . . . . . . . . . . . . . . . . . . . . . . . . . . . . . . . 1153<br />
I. LIST OF FUNCTIONS AND TAPE FORMAT . . . . . . . . . . . . . . . . . . . . . . . . . . . . . . 1156<br />
J. RANGE OF COMMAND VALUE . . . . . . . . . . . . . . . . . . . . . . . . . . . . . . . . . . . . . . . . 1163<br />
K. NOMOGRAPHS . . . . . . . . . . . . . . . . . . . . . . . . . . . . . . . . . . . . . . . . . . . . . . . . . . . . . . 1166<br />
D.1 INCORRECT THREADED LENGTH . . . . . . . . . . . . . . . . . . . . . . . . . . . . . . . . . . . . . . . . . . . . . . . 1167<br />
D.2 SIMPLE CALCULATION OF INCORRECT THREAD LENGTH . . . . . . . . . . . . . . . . . . . . . . . . . 1169<br />
D.3 TOOL PATH AT CORNER . . . . . . . . . . . . . . . . . . . . . . . . . . . . . . . . . . . . . . . . . . . . . . . . . . . . . . . . 1171<br />
D.4 RADIUS DIRECTION ERROR AT CIRCLE CUTTING . . . . . . . . . . . . . . . . . . . . . . . . . . . . . . . . . 1174<br />
L. STATUS WHEN TURNING POWER ON, WHEN CLEAR AND<br />
WHEN RESET . . . . . . . . . . . . . . . . . . . . . . . . . . . . . . . . . . . . . . . . . . . . . . . . . . . . . . . . 1175<br />
M. CHARACTER–TO–CODES CORRESPONDENCE TABLE . . . . . . . . . . . . . . . . . 1177<br />
N. ALARM LIST . . . . . . . . . . . . . . . . . . . . . . . . . . . . . . . . . . . . . . . . . . . . . . . . . . . . . . . . .<br />
1178
I. GENERAL
B–63534EN/02<br />
1 GENERAL<br />
<br />
GENERAL<br />
3<br />
1. GENERAL<br />
This manual consists of the following parts:<br />
I. GENERAL<br />
Describes chapter organization, applicable models, related manuals,<br />
and notes for reading this manual.<br />
II. PROGRAMMING<br />
Describes each function: Format used to program functions in the NC<br />
language, characteristics, and restrictions. When a program is created<br />
through conversational automatic programming function, refer to the<br />
manual for the conversational automatic programming function<br />
(Table 1).<br />
III. OPERATION<br />
Describes the manual operation and automatic operation of a machine,<br />
procedures for inputting and outputting data, and procedures for<br />
editing a program.<br />
IV. MAINTENANCE<br />
Describes procedures for replacing batteries.<br />
APPENDIX<br />
Lists tape codes, valid data ranges, and error codes.<br />
Some functions described in this manual may not be applied to some<br />
products. For detail, refer to the DESCRIPTIONS manual(B–63522EN).<br />
This manual does not describe parameters in detail. For details on<br />
parameters mentioned in this manual, refer to the manual for parameters<br />
(B–63530EN).<br />
This manual describes all optional functions. Look up the options<br />
incorporated into your system in the manual written by the machine tool<br />
builder.<br />
The models covered by this manual, and their abbreviations are:<br />
Model name Abbreviation<br />
FANUC <strong>Series</strong> <strong>16i</strong>–<strong>MB</strong> <strong>16i</strong>–<strong>MB</strong> <strong>Series</strong> <strong>16i</strong><br />
FANUC <strong>Series</strong> <strong>160i</strong>–<strong>MB</strong> <strong>160i</strong>–<strong>MB</strong> <strong>Series</strong> <strong>160i</strong><br />
FANUC <strong>Series</strong> <strong>160i</strong>s–<strong>MB</strong> <strong>160i</strong>s–<strong>MB</strong> <strong>Series</strong> <strong>160i</strong>s<br />
FANUC <strong>Series</strong> <strong>18i</strong>–<strong>MB</strong>5 <strong>18i</strong>–<strong>MB</strong>5 <strong>Series</strong> <strong>18i</strong><br />
FANUC <strong>Series</strong> <strong>180i</strong>–<strong>MB</strong>5 <strong>180i</strong>–<strong>MB</strong>5 <strong>Series</strong> <strong>180i</strong><br />
FANUC <strong>Series</strong> <strong>180i</strong>s–<strong>MB</strong>5 <strong>180i</strong>s–<strong>MB</strong>5 <strong>Series</strong> <strong>180i</strong>s<br />
FANUC <strong>Series</strong> <strong>18i</strong>–<strong>MB</strong> <strong>18i</strong>–<strong>MB</strong> <strong>Series</strong> <strong>18i</strong>
1. GENERAL GENERAL<br />
B–63534EN/02<br />
<br />
IP<br />
;<br />
Related manuals of <strong>Series</strong><br />
<strong>16i</strong>/<strong>18i</strong>/21i/<strong>160i</strong>/<strong>180i</strong>/210i/16<br />
0is/<strong>180i</strong>s/210is–MODEL B<br />
Model name Abbreviation<br />
FANUC <strong>Series</strong> <strong>180i</strong>–<strong>MB</strong> <strong>180i</strong>–<strong>MB</strong> <strong>Series</strong> <strong>180i</strong><br />
FANUC <strong>Series</strong> <strong>180i</strong>s–<strong>MB</strong> <strong>180i</strong>s–<strong>MB</strong> <strong>Series</strong> <strong>180i</strong>s<br />
Remark)The <strong>18i</strong>–<strong>MB</strong>5, <strong>180i</strong>–<strong>MB</strong>5, <strong>180i</strong>s–<strong>MB</strong>5, <strong>18i</strong>–<strong>MB</strong>, <strong>180i</strong>–<strong>MB</strong>, and<br />
<strong>180i</strong>s–<strong>MB</strong> may be collectively referred to as the <strong>18i</strong>/<strong>180i</strong>/<br />
<strong>180i</strong>s–<strong>MB</strong>.<br />
This manual uses the following symbols:<br />
Indicates a combination of axes such as<br />
X__ Y__ Z (used in PROGRAMMING.).<br />
Indicates the end of a block. It actually corresponds<br />
to the ISO code LF or EIA code CR.<br />
The following table lists the manuals related to <strong>Series</strong> <strong>16i</strong>, <strong>Series</strong> <strong>18i</strong>,<br />
<strong>Series</strong> 21i, <strong>Series</strong> <strong>160i</strong>, <strong>Series</strong> <strong>180i</strong>, <strong>Series</strong> 210i, <strong>Series</strong> <strong>160i</strong>s, <strong>Series</strong><br />
<strong>180i</strong>s, <strong>Series</strong> 210is–MODEL B. This manual is indicated by an<br />
asterisk(*).<br />
Related manuals of<br />
<strong>Series</strong> <strong>16i</strong>/<strong>18i</strong>/21i/<strong>160i</strong>/<strong>180i</strong>/ 210i/<strong>160i</strong>s/<strong>180i</strong>s/210is MODEL B (1/2)<br />
Specification<br />
Manual name<br />
number<br />
DESCRIPTIONS B–63522EN<br />
CONNECTION MANUAL (HARDWARE) B–63523EN<br />
CONNECTION MANUAL (FUNCTION) B–63523EN–1<br />
<strong>Series</strong> <strong>16i</strong>/<strong>18i</strong>/<strong>160i</strong>/<strong>180i</strong>/<strong>160i</strong>s/<strong>180i</strong>s–TB<br />
OPERATOR’S MANUAL<br />
<strong>Series</strong> <strong>16i</strong>/<strong>160i</strong>/<strong>160i</strong>s–<strong>MB</strong>, <strong>Series</strong> <strong>18i</strong>/<strong>180i</strong>/<strong>180i</strong>s–<strong>MB</strong>5,<br />
<strong>Series</strong> <strong>18i</strong>/<strong>180i</strong>/<strong>180i</strong>s–<strong>MB</strong> OPERATOR’S MANUAL<br />
4<br />
B–63524EN<br />
B–63534EN *<br />
<strong>Series</strong> 21i/210i/210is–TB OPERATOR’S MANUAL B–63604EN<br />
<strong>Series</strong> 21i/210i/210is–<strong>MB</strong> OPERATOR’S MANUAL B–63614EN<br />
MAINTENANCE MANUAL B–63525EN<br />
<strong>Series</strong> <strong>16i</strong>/<strong>18i</strong>/<strong>160i</strong>/<strong>180i</strong>/<strong>160i</strong>s/<strong>180i</strong>s–MODEL B<br />
PARAMETER MANUAL<br />
B–63530EN<br />
<strong>Series</strong> 21i/210i/210is–MODEL B PARAMETER MANUAL B–63610EN<br />
PROGRAMMING MANUAL<br />
Macro Compiler/Macro Executor<br />
PROGRAMMING MANUAL<br />
B–61803E–1<br />
C Language Executor PROGRAMMING MANUAL B–62443EN–3<br />
FAPT MACRO COMPILER (For Personal Computer)<br />
PROGRAMMING MANUAL<br />
B–66102E
B–63534EN/02<br />
Related manuals of<br />
SERVO MOTOR i series<br />
GENERAL<br />
5<br />
1. GENERAL<br />
Related manuals of<br />
<strong>Series</strong> <strong>16i</strong>/<strong>18i</strong>/21i/<strong>160i</strong>/<strong>180i</strong>/ 210i/<strong>160i</strong>s/<strong>180i</strong>s/210is MODEL B (2/2)<br />
Specification<br />
Manual name<br />
number<br />
CAP (T series)<br />
FANUC Super CAPi T OPERATOR’S MANUAL B–63284EN<br />
FANUC Symbol CAPi T OPERATOR’S MANUAL B–63304EN<br />
MANUAL GUIDE For Lathe PROGRAMMING MANUAL B–63343EN<br />
MANUAL GUIDE For Lathe OPERATOR’S MANUAL B–63344EN<br />
CAP (M series)<br />
FANUC Super CAPi M OPERATOR’S MANUAL B–63294EN<br />
MANUAL GUIDE For Milling PROGRAMMING MANUAL B–63423EN<br />
MANUAL GUIDE For Milling OPERATOR’S MANUAL B–63424EN<br />
PMC<br />
PMC Ladder Language PROGRAMMING MANUAL B–61863E<br />
PMC C Language PROGRAMMING MANUAL B–61863E–1<br />
Network<br />
I/O Link–II OPERATOR’S MANUAL B–62924EN<br />
Profibus–DP Board OPERATOR’S MANUAL B–62924EN<br />
Ethernet Board/DATA SERVER Board<br />
OPERATOR’S MANUAL<br />
FAST Ethernet Board/FAST DATA SERVER OPERA-<br />
TOR’S MANUAL<br />
B–63354EN<br />
B–63644EN<br />
DeviceNet Board OPERATOR’S MANUAL B–63404EN<br />
PC function<br />
Screen Display Function OPERATOR’S MANUAL B–63164EN<br />
The following table lists the manuals related to SERVO MOTOR i series<br />
Manual name<br />
Specification<br />
number<br />
FANUC AC SERVO MOTOR i seriesDESCRIPTIONS B–65262EN<br />
FANUC AC SERVO MOTOR i series<br />
PARAMETER MANUAL<br />
B–65270EN<br />
FANUC AC SPINDLE MOTOR i seriesDESCRIPTIONS B–65272EN<br />
FANUC AC SPINDLE MOTOR i series<br />
PARAMETER MANUAL<br />
B–65280EN<br />
FANUC SERVO AMPLIFIER i seriesDESCRIPTIONS B–65282EN<br />
FANUC SERVO MOTOR i series<br />
MAINTENANCE MANUAL<br />
B–65285EN
1. GENERAL GENERAL<br />
B–63534EN/02<br />
Related manuals of<br />
SERVO MOTOR series<br />
The following table lists the manuals related to SERVO MOTOR series<br />
6<br />
Manual name<br />
FANUC AC SERVO MOTOR seriesDESCRIPTIONS B–65142<br />
FANUC AC SERVO MOTOR series<br />
PARAMETER MANUAL<br />
Specification<br />
number<br />
B–65150<br />
FANUC AC SPINDLE MOTOR seriesDESCRIPTIONS B–65152<br />
FANUC AC SPINDLE MOTOR α series<br />
PARAMETER MANUAL<br />
B–65160<br />
FANUC SERVO AMPLIFIER seriesDESCRIPTIONS B–65162<br />
FANUC SERVO MOTOR series<br />
MAINTENANCE MANUAL<br />
B–65165<br />
Either of the following servo motors and the corresponding spindle can<br />
be connected to the CNC covered in this manual.<br />
FANUC SERVO MOTOR i series<br />
FANUC SERVO MOTOR series<br />
This manual mainly assumes that the FANUC SERVO MOTOR i series<br />
of servo motor is used. For servo motor and spindle information, refer to<br />
the manuals for the servo motor and spindle that are actually connected.
B–63534EN/02<br />
1.1<br />
GENERAL FLOW OF<br />
OPERATION OF CNC<br />
MACHINE TOOL<br />
GENERAL<br />
7<br />
1. GENERAL<br />
When machining the part using the CNC machine tool, first prepare the<br />
program, then operate the CNC machine by using the program.<br />
1) First, prepare the program from a part drawing to operate the CNC<br />
machine tool.<br />
How to prepare the program is described in the Chapter II.<br />
PROGRAMMING.<br />
2) The program is to be read into the CNC system. Then, mount the<br />
workpieces and tools on the machine, and operate the tools according<br />
to the programming. Finally, execute the machining actually.<br />
How to operate the CNC system is described in the Chapter III.<br />
OPERATION.<br />
Part<br />
drawing<br />
Part<br />
programming<br />
CNC<br />
MACHINE TOOL<br />
CHAPTER II PROGRAMMING CHAPTER III OPERATION<br />
Before the actual programming, make the machining plan for how to<br />
machine the part.<br />
Machining plan<br />
1. Determination of workpieces machining range<br />
2. Method of mounting workpieces on the machine tool<br />
3. Machining sequence in every machining process<br />
4. Machining tools and machining<br />
Decide the machining method in every machining process.<br />
Machining process 1 2 3<br />
Machining procedure<br />
1. Machining method<br />
: Rough<br />
Semi<br />
Finish<br />
2. Machining tools<br />
3. Machining conditions<br />
: Feedrate<br />
Cutting depth<br />
4. Tool path<br />
Face cutting Side cutting<br />
Hole<br />
machining
1. GENERAL GENERAL<br />
B–63534EN/02<br />
Side cutting<br />
8<br />
Tool<br />
Face cutting<br />
Hole machining<br />
Prepare the program of the tool path and machining condition<br />
according to the workpiece figure, for each machining.
B–63534EN/02<br />
1.2<br />
NOTES ON READING<br />
THIS MANUAL<br />
1.3<br />
NOTES ON VARIOUS<br />
KINDS OF DATA<br />
GENERAL<br />
9<br />
1. GENERAL<br />
CAUTION<br />
1 The function of an CNC machine tool system depends not<br />
only on the CNC, but on the combination of the machine<br />
tool, its magnetic cabinet, the servo system, the CNC, the<br />
operator’s panels, etc. It is too difficult to describe the<br />
function, programming, and operation relating to all<br />
combinations. This manual generally describes these from<br />
the stand–point of the CNC. So, for details on a particular<br />
CNC machine tool, refer to the manual issued by the<br />
machine tool builder, which should take precedence over<br />
this manual.<br />
2 Headings are placed in the left margin so that the reader can<br />
easily access necessary information. When locating the<br />
necessary information, the reader can save time by<br />
searching though these headings.<br />
3 This manual describes as many reasonable variations in<br />
equipment usage as possible. It cannot address every<br />
combination of features, options and commands that<br />
should not be attempted.<br />
If a particular combination of operations is not described, it<br />
should not be attempted.<br />
CAUTION<br />
Machining programs, parameters, variables, etc. are stored<br />
in the CNC unit internal non–volatile memory. In general,<br />
these contents are not lost by the switching ON/OFF of the<br />
power. However, it is possible that a state can occur where<br />
precious data stored in the non–volatile memory has to be<br />
deleted, because of deletions from a maloperation, or by a<br />
failure restoration. In order to restore rapidly when this kind<br />
of mishap occurs, it is recommended that you create a copy<br />
of the various kinds of data beforehand.
II. PROGRAMMING
B–63534EN/02<br />
1 <br />
PROGRAMMING<br />
13<br />
1. GENERAL
1. GENERAL PROGRAMMING<br />
B–63534EN/02<br />
1.1<br />
TOOL MOVEMENT<br />
ALONG WORKPIECE<br />
PARTS FIGURE–<br />
INTERPOLATION<br />
Explanations<br />
Tool movement along a<br />
straight line<br />
Tool movement along an<br />
arc<br />
The tool moves along straight lines and arcs constituting the workpiece<br />
parts figure (See II–4).<br />
The function of moving the tool along straight lines and arcs is called the<br />
interpolation.<br />
14<br />
Workpiece<br />
Tool<br />
Program<br />
G01 X_ _ Y_ _ ;<br />
X_ _ ;<br />
Fig. 1.1 (a) Tool movement along a straight line<br />
Workpiece<br />
Tool<br />
Fig. 1.1 (b) Tool movement along an arc<br />
Program<br />
G03X_ _Y_ _R_ _;
B–63534EN/02<br />
PROGRAMMING<br />
15<br />
1. GENERAL<br />
Symbols of the programmed commands G01, G02, ... are called the<br />
preparatory function and specify the type of interpolation conducted in<br />
the control unit.<br />
(a) Movement along straight line<br />
G01 Y_ _;<br />
X– –Y– – – –;<br />
Control unit<br />
Interpolation<br />
a)Movement<br />
along straight<br />
line<br />
b)Movement<br />
along arc<br />
(b) Movement along arc<br />
X axis<br />
Y axis<br />
Fig. 1.1 (c) Interpolation function<br />
G03X––Y––R––;<br />
Tool<br />
movement<br />
NOTE<br />
Some machines move tables instead of tools but this<br />
manual assumes that tools are moved against workpieces.
1. GENERAL PROGRAMMING<br />
B–63534EN/02<br />
1.2<br />
FEED–FEED<br />
FUNCTION<br />
Movement of the tool at a specified speed for cutting a workpiece is called<br />
the feed.<br />
16<br />
mm/min<br />
F<br />
Workpiece<br />
Table<br />
Tool<br />
Fig. 1.2 (a) Feed function<br />
Feedrates can be specified by using actual numerics. For example, to feed<br />
the tool at a rate of 150 mm/min, specify the following in the program:<br />
F150.0<br />
The function of deciding the feed rate is called the feed function (See<br />
II–5).
B–63534EN/02<br />
1.3<br />
PART DRAWING AND<br />
TOOL MOVEMENT<br />
1.3.1<br />
Reference Position<br />
(<strong>Machine</strong>–Specific<br />
Position)<br />
<br />
PROGRAMMING<br />
17<br />
1. GENERAL<br />
A CNC machine tool is provided with a fixed position. Normally, tool<br />
change and programming of absolute zero point as described later are<br />
performed at this position. This position is called the reference position.<br />
Reference position<br />
Tool<br />
Workpiece<br />
Table<br />
Fig. 1.3.1 (a) Reference position<br />
The tool can be moved to the reference position in two ways:<br />
(1)Manual reference position return (See III–3.1)<br />
Reference position return is performed by manual button operation.<br />
(2)Automatic reference position return (See II–6)<br />
In general, manual reference position return is performed first after the<br />
power is turned on. In order to move the tool to the reference position<br />
for tool change thereafter, the function of automatic reference position<br />
return is used.
1. GENERAL PROGRAMMING<br />
B–63534EN/02<br />
1.3.2<br />
Coordinate System on<br />
Part Drawing and<br />
Coordinate System<br />
Specified by CNC –<br />
Coordinate System<br />
Explanations<br />
Coordinate system<br />
Z<br />
18<br />
Y<br />
Part drawing<br />
X<br />
Z<br />
Program<br />
Y<br />
Tool<br />
Workpiece<br />
<strong>Machine</strong> tool<br />
Command<br />
Fig. 1.3.2 (a) Coordinate system<br />
X<br />
Z<br />
<br />
<br />
Coordinate system<br />
CNC<br />
The following two coordinate systems are specified at different locations:<br />
(See II–7)<br />
(1)Coordinate system on part drawing<br />
The coordinate system is written on the part drawing. As the program<br />
data, the coordinate values on this coordinate system are used.<br />
(2)Coordinate system specified by the CNC<br />
The coordinate system is prepared on the actual machine tool table.<br />
This can be achieved by programming the distance from the current<br />
position of the tool to the zero point of the coordinate system to be set.<br />
Program<br />
zero point<br />
Y<br />
230<br />
300<br />
Present tool position<br />
Distance to the zero point of a coordinate<br />
system to be set<br />
Fig. 1.3.2 (b) Coordinate system specified by the CNC<br />
X
B–63534EN/02<br />
Methods of setting the<br />
two coordinate systems<br />
in the same position<br />
PROGRAMMING<br />
19<br />
1. GENERAL<br />
The positional relation between these two coordinate systems is<br />
determined when a workpiece is set on the table.<br />
Coordinate system specified<br />
by the CNC established<br />
on the table<br />
Table<br />
Y Y<br />
Workpiece<br />
X<br />
Coordinate system on<br />
part drawing established<br />
on the workpiece<br />
Fig. 1.3.2 (c) Coordinate system specified by CNC and coordinate<br />
systemon part drawing<br />
The tool moves on the coordinate system specified by the CNC in<br />
accordance with the command program generated with respect to the<br />
coordinate system on the part drawing, and cuts a workpiece into a shape<br />
on the drawing.<br />
Therefore, in order to correctly cut the workpiece as specified on the<br />
drawing, the two coordinate systems must be set at the same position.<br />
To set the two coordinate systems at the same position, simple methods<br />
shall be used according to workpiece shape, the number of machinings.<br />
(1)Using a standard plane and point of the workpiece.<br />
Y<br />
Fixed distance<br />
Program<br />
zero point<br />
Workpiece’s<br />
standard point<br />
Fixed distance<br />
Bring the tool center to the workpiece standard point.<br />
And set the coordinate system specified by CNC at this position.<br />
X<br />
X
1. GENERAL PROGRAMMING<br />
B–63534EN/02<br />
(2)Mounting a workpiece directly against the jig<br />
20<br />
Jig<br />
Program zero point<br />
Meet the tool center to the reference position. And set the coordinate system<br />
specified by CNC at this position. (Jig shall be mounted on the predetermined<br />
point from the reference position.)<br />
(3)Mounting a workpiece on a pallet, then mounting the workpiece and<br />
pallet on the jig<br />
Jig<br />
Pallet<br />
ÂÂÂÂÂÂÂ<br />
ÂÂÂÂÂÂÂ<br />
ÂÂÂÂÂÂÂ<br />
ÂÂÂÂÂÂÂ<br />
Workpiece<br />
ÂÂÂÂÂÂÂ<br />
ÂÂÂÂÂÂÂ<br />
(Jig and coordinate system shall be specified by the same as (2)).<br />
ÂÂÂÂÂÂÂ<br />
ÂÂÂÂÂÂÂ
B–63534EN/02<br />
1.3.3<br />
How to Indicate<br />
Command Dimensions<br />
for Moving the Tool –<br />
Absolute, <strong>Inc</strong>remental<br />
Commands<br />
Explanations<br />
Absolute command<br />
<strong>Inc</strong>remental command<br />
PROGRAMMING<br />
21<br />
1. GENERAL<br />
Command for moving the tool can be indicated by absolute command or<br />
incremental command (See II–8.1).<br />
The tool moves to a point at “the distance from zero point of the<br />
coordinate system” that is to the position of the coordinate values.<br />
<br />
Command specifying movement from<br />
point A to point B<br />
<br />
<br />
<br />
B(10.0,30.0,20.0)<br />
G90 X10.0 Y30.0 Z20.0 ;<br />
Tool<br />
Coordinates of point B<br />
Specify the distance from the previous tool position to the next tool<br />
position.<br />
<br />
<br />
<br />
Y=–30.0<br />
Command specifying movement from<br />
point A to point B<br />
<br />
Z=–10.0<br />
X=40.0<br />
Tool<br />
<br />
G91 X40.0 Y–30.0 Z–10.0 ;<br />
Distance and direction for<br />
movement along each axis
1. GENERAL PROGRAMMING<br />
B–63534EN/02<br />
1.4<br />
CUTTING SPEED –<br />
SPINDLE SPEED<br />
FUNCTION<br />
Examples<br />
The speed of the tool with respect to the workpiece when the workpiece<br />
is cut is called the cutting speed.<br />
As for the CNC, the cutting speed can be specified by the spindle speed<br />
in rpm unit.<br />
min –1 Tool<br />
Tool diameter<br />
Spindle speed N<br />
D mm<br />
22<br />
Workpiece<br />
V: Cutting speed<br />
m/min<br />
<br />
The spindle speed is approximately 250 rpm, which is obtained from<br />
N=1000v/πD. Hence the following command is required:<br />
S250;<br />
Commands related to the spindle speed are called the spindle speed<br />
function ( See II–9) .
B–63534EN/02<br />
1.5<br />
SELECTION OF TOOL<br />
USED FOR VARIOUS<br />
MACHINING – TOOL<br />
FUNCTION<br />
Examples<br />
PROGRAMMING<br />
23<br />
1. GENERAL<br />
When drilling, tapping, boring, milling or the like, is performed, it is<br />
necessary to select a suitable tool. When a number is assigned to each tool<br />
and the number is specified in the program, the corresponding tool is<br />
selected.<br />
01<br />
02<br />
Tool number<br />
ATC magazine<br />
<br />
When the tool is stored at location 01 in the ATC magazine, the tool<br />
can be selected by specifying T01. This is called the tool function (See<br />
II–10).
1. GENERAL PROGRAMMING<br />
B–63534EN/02<br />
1.6<br />
COMMAND FOR<br />
MACHINE<br />
OPERATIONS –<br />
MISCELLANEOUS<br />
FUNCTION<br />
When machining is actually started, it is necessary to rotate the spindle,<br />
and feed coolant. For this purpose, on–off operations of spindle motor and<br />
coolant valve should be controlled.<br />
24<br />
Tool<br />
Workpiece<br />
Coolant<br />
The function of specifying the on–off operations of the components of the<br />
machine is called the miscellaneous function. In general, the function is<br />
specified by an M code (See II–11).<br />
For example, when M03 is specified, the spindle is rotated clockwise at<br />
the specified spindle speed.
B–63534EN/02<br />
1.7<br />
PROGRAM<br />
CONFIGURATION<br />
PROGRAMMING<br />
25<br />
1. GENERAL<br />
A group of commands given to the CNC for operating the machine is<br />
called the program. By specifying the commands, the tool is moved along<br />
a straight line or an arc, or the spindle motor is turned on and off.<br />
In the program, specify the commands in the sequence of actual tool<br />
movements.<br />
Program<br />
Block<br />
Block<br />
Block<br />
Block<br />
⋅<br />
⋅<br />
⋅<br />
⋅<br />
Block<br />
Fig. 1.7 (a) Program configuration<br />
Tool movement sequence<br />
A group of commands at each step of the sequence is called the block.<br />
The program consists of a group of blocks for a series of machining. The<br />
number for discriminating each block is called the sequence number, and<br />
the number for discriminating each program is called the program<br />
number (See II–12).
1. GENERAL PROGRAMMING<br />
B–63534EN/02<br />
Explanations<br />
Block<br />
Program<br />
The block and the program have the following configurations.<br />
;<br />
Sequence<br />
number<br />
Preparatory<br />
function<br />
26<br />
<br />
Dimension word Miscellaneous<br />
function<br />
Spindle<br />
function<br />
Tool<br />
function<br />
End of<br />
block<br />
Fig. 1.7 (b) Block configuration<br />
A block starts with a sequence number to identify the block and ends with<br />
an end–of–block code.<br />
This manual indicates the end–of–block code by ; (LF in the ISO code and<br />
CR in the EIA code).<br />
;<br />
<br />
⋅<br />
⋅<br />
⋅<br />
M30 ;<br />
Program number<br />
Block<br />
Block<br />
Block<br />
⋅<br />
⋅<br />
⋅<br />
End of program<br />
Fig. 1.7 (c) Program configuration<br />
Normally, a program number is specified after the end–of–block (;) code<br />
at the beginning of the program, and a program end code (M02 or M30)<br />
is specified at the end of the program.
B–63534EN/02<br />
Main program and<br />
subprogram<br />
PROGRAMMING<br />
27<br />
1. GENERAL<br />
When machining of the same pattern appears at many portions of a<br />
program, a program for the pattern is created. This is called the<br />
subprogram. On the other hand, the original program is called the main<br />
program. When a subprogram execution command appears during<br />
execution of the main program, commands of the subprogram are<br />
executed. When execution of the subprogram is finished, the sequence<br />
returns to the main program.<br />
Main program<br />
⋅<br />
⋅<br />
M98P1001<br />
⋅<br />
⋅<br />
⋅<br />
M98P1002<br />
⋅<br />
⋅<br />
⋅<br />
M98P1001<br />
⋅<br />
⋅<br />
⋅<br />
Hole #1<br />
Hole #1<br />
Hole #2<br />
Subprogram #1<br />
O1001<br />
M99<br />
Subprogram #2<br />
O1002<br />
M99<br />
Hole #2<br />
Program for<br />
hole #1<br />
Program for<br />
hole #2
1. GENERAL PROGRAMMING<br />
B–63534EN/02<br />
1.8<br />
TOOL FIGURE AND<br />
TOOL MOTION BY<br />
PROGRAM<br />
Explanations<br />
Machining using the end<br />
of cutter – Tool length<br />
compensation function<br />
(See II–14.1)<br />
Machining using the side<br />
of cutter – Cutter<br />
compensation function<br />
(See II–14.4,14.5,14.6)<br />
Usually, several tools are used for machining one workpiece. The tools<br />
have different tool length. It is very troublesome to change the program<br />
in accordance with the tools.<br />
Therefore, the length of each tool used should be measured in advance.<br />
By setting the difference between the length of the standard tool and the<br />
length of each tool in the CNC (data display and setting : see III–11),<br />
machining can be performed without altering the program even when the<br />
tool is changed. This function is called tool length compensation.<br />
Standard<br />
tool<br />
ÇÇÇ<br />
ÇÇÇ<br />
ÇÇÇ<br />
ÇÇÇ<br />
ÇÇÇ<br />
ÇÇÇ<br />
28<br />
H1 H2 H3 H4<br />
Workpiece<br />
ÂÂ<br />
ÂÂ<br />
ÂÂ<br />
ÂÂ<br />
ÂÂ<br />
Because a cutter has a radius, the center of the cutter path goes around the<br />
workpiece with the cutter radius deviated.<br />
Workpiece<br />
Cutter path using cutter<br />
compensation<br />
<strong>Machine</strong>d part<br />
figure<br />
Cutter<br />
If radius of cutters are stored in the CNC (Data Display and Setting : see<br />
III–11), the tool can be moved by cutter radius apart from the machining<br />
part figure. This function is called cutter compensation.
B–63534EN/02<br />
1.9<br />
TOOL MOVEMENT<br />
RANGE – STROKE<br />
PROGRAMMING<br />
29<br />
1. GENERAL<br />
Limit switches are installed at the ends of each axis on the machine to<br />
prevent tools from moving beyond the ends. The range in which tools can<br />
move is called the stroke.<br />
Motor<br />
Limit switch<br />
Specify these distances.<br />
Table<br />
<strong>Machine</strong> zero point<br />
ÇÇÇÇÇÇ<br />
ÇÇÇÇÇÇ<br />
<strong>Tools</strong> cannot enter this area. The area is specified by data in memory or<br />
a program.<br />
ÇÇÇÇÇÇ<br />
Besides strokes defined with limit switches, the operator can define an<br />
area which the tool cannot enter using a program or data in memory. This<br />
function is called stroke check (see III–6.3).
2. CONTROLLED AXES PROGRAMMING<br />
B–63534EN/02<br />
2 CONTROLLED<br />
AXES<br />
30
B–63534EN/02<br />
2.1<br />
CONTROLLED AXES<br />
<strong>Series</strong> <strong>16i</strong>, <strong>Series</strong> <strong>160i</strong>,<br />
<strong>Series</strong> <strong>160i</strong>s<br />
<strong>Series</strong> <strong>18i</strong>, <strong>Series</strong> <strong>180i</strong>,<br />
<strong>Series</strong> <strong>180i</strong>s<br />
PROGRAMMING 2. CONTROLLED AXES<br />
Item<br />
No. of basic controlled<br />
axes<br />
Controlled axes<br />
expansion (total)<br />
Basic simultaneously<br />
controlled axes<br />
Simultaneously controlled<br />
axes expansion (total)<br />
31<br />
<strong>16i</strong>–<strong>MB</strong>, <strong>160i</strong>–<strong>MB</strong>,<br />
<strong>160i</strong>s–<strong>MB</strong><br />
3 axes<br />
Max. 8 axes<br />
(included in Cs axis)<br />
2 axes<br />
<strong>16i</strong>–<strong>MB</strong>, <strong>160i</strong>–<strong>MB</strong>,<br />
<strong>160i</strong>s–<strong>MB</strong><br />
(two–path control)<br />
3 axes for each path<br />
(6 axes in total)<br />
Max. 8 axes for each path<br />
(included in Cs axis)<br />
2 axes for each path<br />
(4 axes in total)<br />
Max. 6 axes Max. 6 axes for each path<br />
NOTE<br />
The number of simultaneously controllable axes for manual<br />
operation jog feed, manual reference position return, or<br />
manual rapid traverse) is 1 or 3 (1 when bit 0 (JAX) of<br />
parameter 1002 is set to 0 and 3 when it is set to 1).<br />
Item<br />
No. of basic controlled<br />
axes<br />
Controlled axes expansion<br />
(total)<br />
Basic simultaneously<br />
controlled axes<br />
Simultaneously controlled<br />
axes expansion (total)<br />
<strong>18i</strong>–<strong>MB</strong>5, <strong>180i</strong>–<strong>MB</strong>5,<br />
<strong>180i</strong>s–<strong>MB</strong>5<br />
3 axes<br />
Max. 6 axes (included in Cs axis)<br />
2 axes<br />
<strong>18i</strong>–<strong>MB</strong>, <strong>180i</strong>–<strong>MB</strong>,<br />
<strong>180i</strong>s–<strong>MB</strong><br />
Max. 5 axes Max. 4 axes<br />
NOTE<br />
The number of simultaneously controllable axes for manual<br />
operation jog feed, manual reference position return, or<br />
manual rapid traverse) is 1 or 3 (1 when bit 0 (JAX) of<br />
parameter 1002 is set to 0 and 3 when it is set to 1).
2. CONTROLLED AXES PROGRAMMING<br />
B–63534EN/02<br />
2.2<br />
AXIS NAME<br />
Limitations<br />
Default axis name<br />
Duplicate axis names<br />
The names of three basic axes are always X, Y, and Z. The name of an<br />
additional axis can be set to A, B, C, U, V, or W by using parameter 1020.<br />
Parameter No. 1020 is used to determine the name of each axis.<br />
When this parameter is set to 0 or a character other than the valid<br />
characters is specified, an axis name from 1 to 8 is assigned by default.<br />
In two–path control, the basic three axis names are fixed to X, Y, and Z<br />
for either path, but the name of an additional axis can be selected from A,<br />
B, C, U, V, and W by parameter 1020. Duplicate axis names cannot be<br />
used in the same path, but the same axis name can be used in different<br />
paths.<br />
When a default axis name (1 to 8) is used, operation in the MEM mode<br />
and MDI mode is disabled.<br />
If a duplicate axis name is specified in the parameter, operation is enabled<br />
only for the axis specified first.<br />
NOTE<br />
In two–path control, axis information displayed on the CRT<br />
screen, such as the current position, may contain an axis<br />
name with a suffix indicating the related path (X1, X2, etc).<br />
This is intended to provide a comprehensible indication of<br />
the path to which the axis belongs. The suffix cannot be<br />
used in a program ; the axis name should be specified as X,<br />
Y, Z, U, V, W, A, B, or C.<br />
32
B–63534EN/02<br />
2.3<br />
INCREMENT SYSTEM<br />
PROGRAMMING 2. CONTROLLED AXES<br />
The increment system consists of the least input increment (for input) and<br />
least command increment (for output). The least input increment is the<br />
least increment for programming the travel distance. The least command<br />
increment is the least increment for moving the tool on the machine. Both<br />
increments are represented in mm, inches, or deg.<br />
The increment system is classified into IS–B and IS–C. Select IS–B or<br />
IS–C using bit 1 (ISC) of parameter 1004. When the IS–C increment<br />
system is selected, it is applied to all axes and the 1/10 increment system<br />
option is required.<br />
Name of incrementsystem<br />
IS–B<br />
IS–C<br />
Least input increment<br />
0.001mm<br />
0.0001inch<br />
0.001deg<br />
0.0001mm<br />
0.00001inch<br />
0.0001deg<br />
33<br />
Least command<br />
increment<br />
0.001mm<br />
0.0001inch<br />
0.001deg<br />
0.0001mm<br />
0.00001inch<br />
0.0001deg<br />
Maximum<br />
stroke<br />
99999.999mm<br />
9999.9999inch<br />
99999.999deg<br />
9999.9999mm<br />
999.99999inch<br />
9999.9999deg<br />
The least command increment is either metric or inch depending on the<br />
machine tool. Set metric or inch to the parameter INM (No.100#0).<br />
For selection between metric and inch for the least input increment, G<br />
code (G20 or G21) or a setting parameter selects it.<br />
Combined use of the inch system and the metric system is not allowed.<br />
There are functions that cannot be used between axes with different unit<br />
systems (circular interpolation, cutter compensation, etc.). For the<br />
increment system, see the machine tool builder’s manual.
2. CONTROLLED AXES PROGRAMMING<br />
B–63534EN/02<br />
2.4<br />
MAXIMUM STROKE<br />
Maximum stroke = Least command increment 99999999<br />
See 2.3 <strong>Inc</strong>remen System.<br />
IS–B<br />
IS–C<br />
34<br />
Table 2.4 (a) Maximum strokes<br />
<strong>Inc</strong>rement system Maximum stroke<br />
Metric machine system 99999.999 mm<br />
99999.999 deg<br />
<strong>Inc</strong>h machine system 9999.9999 inch<br />
99999.999 deg<br />
Metric machine system 9999.9999 mm<br />
9999.9999 deg<br />
<strong>Inc</strong>h machine system 999.99999 inch<br />
9999.9999 deg<br />
NOTE<br />
1 A command exceeding the maximum stroke cannot be<br />
specified.<br />
2 The actual stroke depends on the machine tool.
B–63534EN/02<br />
3 <br />
PROGRAMMING<br />
<br />
35<br />
3. PREPARATORY FUNCTION<br />
(G FUNCTION)<br />
A number following address G determines the meaning of the command<br />
for the concerned block.<br />
G codes are divided into the following two types.<br />
Type Meaning<br />
One–shot G code The G code is effective only in the block in which it is<br />
specified.<br />
Modal G code The G code is effective until another G code of the<br />
same group is specified.<br />
(Example )<br />
G01 and G00 are modal G codes in group 01.<br />
G01X <br />
Z <br />
X<br />
G00Z <br />
G01 is effective in this range.
3. PREPARATORY FUNCTION<br />
(G FUNCTION) PROGRAMMING<br />
B–63534EN/02<br />
Explanations<br />
1. When the clear state (bit 6 (CLR) of parameter No. 3402) is set at<br />
power–up or reset, the modal G codes are placed in the states<br />
described below.<br />
(1) The modal G codes are placed in the states marked with as<br />
indicated in Table 3.<br />
(2) G20 and G21 remain unchanged when the clear state is set at<br />
power–up or reset.<br />
(3) Which status G22 or G23 at power on is set by parameter G23 (No.<br />
3402#7). However, G22 and G23 remain unchanged when the<br />
clear state is set at reset.<br />
(4) The user can select G00 or G01 by setting bit 0 (G01) of parameter<br />
No. 3402.<br />
(5) The user can select G90 or G91 by setting bit 3 (G91) of parameter<br />
No. 3402.<br />
(6) The user can select G17, G18, or G19 by setting bit 1 (parameterG18)<br />
and bit 2 (parameter G19) of parameter No. 3402.<br />
2.G codes other than G10 and G11 are one–shot G codes.<br />
3.When a G code not listed in the G code list is specified, or a G code<br />
that has no corresponding option is specified, P/S alarm No. 010 is<br />
output.<br />
4.Multiple G codes can be specified in the same block if each G code<br />
belongs to a different group. If multiple G codes that belong to the<br />
same group are specified in the same block, only the last G code<br />
specified is valid.<br />
5.If a G code belonging to group 01 is specified in a canned cycle, the<br />
canned cycle is cancelled. This means that the same state set by<br />
specifying G80 is set. Note that the G codes in group 01 are not<br />
affected by a G code specifying a canned cycle.<br />
6.G codes are indicated by group.<br />
7.The group of G60 is switched according to the setting of the MDL bit<br />
(bit 0 of parameter 5431). (When the MDL bit is set to 0, the 00 group<br />
is selected. When the MDL bit is set to 1, the 01 group is selected.)<br />
36
B–63534EN/02<br />
PROGRAMMING<br />
G code list for M series (1/4)<br />
G code Group Function<br />
G00 Positioning<br />
G01 Linear interpolation<br />
G02 Circular interpolation/Helical interpolation CW<br />
G03 01 Circular interpolation/Helical interpolation CCW<br />
G02.2, G03.2 Involute interpolation<br />
G02.3, G03.3 Exponential function interpolation<br />
G02.4, G03.4 Three–dimensional circular interpolation<br />
G04 Dwell, Exact stop<br />
G05 High speed cycle machining<br />
00<br />
G05.1<br />
AI contour/AI nano contour/Smooth interpolation<br />
G05.4 HRV3 on/off<br />
G06.2 01 NURBS interpolation<br />
G07 Hypothetical axis interpolation<br />
G07.1 (G107) Cylindrical interpolation<br />
G08 Advanced prevew control<br />
G09 00 Exact stop<br />
G10 Programmable data input<br />
G10.6 Tool retract and return<br />
G11 Programmable data input mode cancel<br />
G12.1 Polar coordinate interpolation mode<br />
G13.1<br />
21<br />
Polar coordinate interpolation cancel mode<br />
G15<br />
17<br />
Polar coordinates command cancel<br />
G16<br />
Polar coordinates command<br />
37<br />
3. PREPARATORY FUNCTION<br />
(G FUNCTION)<br />
G17 XpYp plane selection Xp: X axis or its parallel axis<br />
G18 02 ZpXp plane selection Yp: Y axis or its parallel axis<br />
G19 YpZp plane selection Zp: Z axis or its parallel axis<br />
G20 Input in inch<br />
06<br />
G21<br />
Input in mm<br />
G22 Stored stroke check function on<br />
04<br />
G23<br />
Stored stroke check function off<br />
G25 Spindle speed fluctuation detection off<br />
24<br />
G26<br />
Spindle speed fluctuation detection on
3. PREPARATORY FUNCTION<br />
(G FUNCTION) PROGRAMMING<br />
B–63534EN/02<br />
G code list for M series (2/4)<br />
G code Group Function<br />
G27 Reference position return check<br />
G28 Automatic return to reference position<br />
G29 Automatic return from reference position<br />
G30 2nd, 3rd and 4th reference position return<br />
00<br />
G30.1<br />
Floating reference point return<br />
G31 Skip function<br />
G31.8 EGB skip function<br />
G31.9 Continuous high–speed skip function<br />
G33 01 Thread cutting<br />
G37 Automatic tool length measurment<br />
00<br />
G39<br />
Corner offset circular interpolation<br />
G40 Cutter compensation cancel/three–dimensional tool compensation cancel<br />
G41 Cutter compensation left/three–dimensional tool compensation<br />
G41.2<br />
07<br />
Three–dimensional cutter compensation (Tool side compensation) left side<br />
G41.3<br />
Three–dimensional cutter compensation (Leading edge offset)<br />
G42 Cutter compensation right<br />
G42.2 Three–dimensional cutter compensation (Tool side compensation) right side<br />
G40.1 (G150) Normal direction control cancel mode<br />
G41.1 (G151) 19 Normal direction control left side on<br />
G42.1 (G152) Normal direction control right side on<br />
G43 Tool length compensation + direction<br />
08<br />
G44<br />
Tool length compensation – direction<br />
G45 Tool offset increase<br />
G46 Tool offset decrease<br />
00<br />
G47<br />
Tool offset double increase<br />
G48 Tool offset double decrease<br />
G49 08 Tool length compensation cancel<br />
G50<br />
11<br />
Scaling cancel<br />
G51<br />
Scaling<br />
G50.1<br />
22<br />
Programmable mirror image cancel<br />
G51.1<br />
Programmable mirror image<br />
38
B–63534EN/02<br />
PROGRAMMING<br />
G code list for M series (3/4)<br />
G code Group Function<br />
G52 Local coordinate system setting<br />
00<br />
G53<br />
<strong>Machine</strong> coordinate system selection<br />
G54<br />
14<br />
Workpiece coordinate system 1 selection<br />
G54.1<br />
Additional workpiece coordinate system selection<br />
G54.2 23 Rotary table dynamic fixture offset<br />
G55 Workpiece coordinate system 2 selection<br />
G56 Workpiece coordinate system 3 selection<br />
G57 14 Workpiece coordinate system 4 selection<br />
G58 Workpiece coordinate system 5 selection<br />
G59 Workpiece coordinate system 6 selection<br />
G60 00 Single direction positioning<br />
G61 Exact stop mode<br />
G62 Automatic corner override<br />
G63<br />
15<br />
Tapping mode<br />
G64 Cutting mode<br />
G65 00 Macro call<br />
G66 Macro modal call<br />
G67<br />
12<br />
Macro modal call cancel<br />
39<br />
3. PREPARATORY FUNCTION<br />
(G FUNCTION)<br />
G68 Coordinate rotation/three–dimensional coordinate conversion<br />
G69<br />
16<br />
Coordinate rotation cancel/three–dimensional coordinate conversion cancel<br />
G72.1 Rotation copy<br />
00<br />
G72.2<br />
Linear copy<br />
G73 Peck drilling cycle<br />
09<br />
G74<br />
Counter tapping cycle<br />
G75 01 Plunge grinding cycle (for grinding machine)<br />
G76 09 Fine boring cycle<br />
G77 Direct constant–dimension plunge grinding cycle(for grinding machine)<br />
G78 01 Continuous–feed surface grinding cycle(for grinding machine)<br />
G79 Intermittent–feed surface grinding cycle(for grinding machine)
3. PREPARATORY FUNCTION<br />
(G FUNCTION) PROGRAMMING<br />
B–63534EN/02<br />
G code list for M series (4/4)<br />
G code Group Function<br />
G80 09 Canned cycle cancel/external operation function cancel<br />
G80.5 24 Synchronization start of electronic gear box (EGB) (for two axes programming)<br />
G81 09 Drilling cycle, spot boring cycle or external operation function<br />
G81.1 00 Chopping function<br />
G81.5 24 Synchronization start of electronic gear box (EGB) (for two axes programming)<br />
G82 Drilling cycle or counter boring cycle<br />
G83 Peck drilling cycle<br />
G84 Tapping cycle<br />
G85 Boring cycle<br />
09<br />
G86<br />
Boring cycle<br />
G87 Back boring cycle<br />
G88 Boring cycle<br />
G89 Boring cycle<br />
G90 Absolute command<br />
03<br />
G91<br />
<strong>Inc</strong>rement command<br />
G92 Setting for work coordinate system or clamp at maximum spindle speed<br />
00<br />
G92.1<br />
Workpiece coordinate system preset<br />
G94<br />
05<br />
Feed per minute<br />
G95<br />
Feed per rotation<br />
G96 Constant surface speed control<br />
G97<br />
13<br />
Constant surface speed control cancel<br />
G98<br />
10<br />
Return to initial point in canned cycle<br />
G99<br />
Return to R point in canned cycle<br />
G160<br />
20<br />
In–feed control function cancel(for grinding machine)<br />
G161<br />
In–feed control function(for grinding machine)<br />
40
B–63534EN/02 PROGRAMMING<br />
4. INTERPOLATION FUNCTIONS<br />
4 INTERPOLATION<br />
FUNCTIONS<br />
41
4. INTERPOLATION FUNCTIONS PROGRAMMING<br />
B–63534EN/02<br />
4.1<br />
POSITIONING (G00)<br />
Format<br />
Explanations<br />
The G00 command moves a tool to the position in the workpiece system<br />
specified with an absolute or an incremental command at a rapid traverse<br />
rate.<br />
In the absolute command, coordinate value of the end point is<br />
programmed.<br />
In the incremental command the distance the tool moves is programmed.<br />
G00 IP_;<br />
IP_:<br />
For an absolute command, the coordinates of an end<br />
position, and for an incremental commnad, the distance<br />
the tool moves.<br />
Either of the following tool paths can be selected according to bit 1 of<br />
parameter LRP No. 1401.<br />
Nonlinear interpolation positioning<br />
The tool is positioned with the rapid traverse rate for each axis<br />
separately. The tool path is normally straight.<br />
Linear interpolation positioning<br />
The tool path is the same as in linear interpolation (G01). The tool<br />
is positioned within the shortest possible time at a speed that is not<br />
more than the rapid traverse rate for each axis.<br />
Linear interpolation positioning<br />
End position<br />
42<br />
Start position<br />
Non linear interpolation positioning<br />
The rapid traverse rate in G00 command is set to the parameter No. 1420<br />
for each axis independently by the machine tool builder. In the<br />
posiitoning mode actuated by G00, the tool is accelerated to a<br />
predetermined speed at the start of a block and is decelerated at the end<br />
of a block. Execution proceeds to the next block after confirming the<br />
in–position.<br />
“In–position ” means that the feed motor is within the specified range.<br />
This range is determined by the machine tool builder by setting to<br />
parameter (No. 1826).<br />
In–position check for each block can be disabled by setting bit 5 (NCI)<br />
of parameter No.1601 accordingly.
B–63534EN/02 PROGRAMMING<br />
4. INTERPOLATION FUNCTIONS<br />
Limitations<br />
The rapid traverse rate cannot be specified in the address F.<br />
Even if linear interpolation positioning is specified, nonlinear<br />
interpolation positioning is used in the following cases. Therefore, be<br />
careful to ensure that the tool does not foul the workpiece.<br />
G28 specifying positioning between the reference and intermediate<br />
positions.<br />
G53<br />
43
4. INTERPOLATION FUNCTIONS PROGRAMMING<br />
B–63534EN/02<br />
4.2<br />
SINGLE DIRECTION<br />
POSITIONING (G60)<br />
Format<br />
Explanations<br />
Examples<br />
For accurate positioning without play of the machine (backlash), final<br />
positioning from one direction is available.<br />
G60 IP_;<br />
Start position<br />
44<br />
Overrun<br />
End position<br />
Temporary stop<br />
Start position<br />
IP_<br />
: For an absolute command, the coordinates of an end<br />
position, and for an incremental commnad, the distance<br />
the tool moves.<br />
An overrun and a positioning direction are set by the parameter (No.<br />
5440). Even when a commanded positioning direction coincides with<br />
that set by the parameter, the tool stops once before the end point.<br />
G60, which is an one–shot G–code, can be used as a modal G–code in<br />
group 01 by setting 1 to the parameter (No. 5431 bit 0 MDL).<br />
This setting can eliminate specifying a G60 command for every block.<br />
Other specifications are the same as those for an one–shot G60 command.<br />
When an one–shot G code is sepcified in the single direction positioning<br />
mode, the one–shot G command is effective like G codes in group 01.<br />
When one–shot<br />
G60 commands are used.<br />
G90;<br />
G60 X0Y0;<br />
G60 X100;<br />
G60 Y100;<br />
G04 X10;<br />
G00 X0Y0;<br />
Single direction<br />
positioning<br />
When modal<br />
G60 command is used.<br />
G90G60;<br />
X0Y0;<br />
X100;<br />
Y100;<br />
G04X10;<br />
G00X0Y0;<br />
Single direction<br />
positioning mode start<br />
Single direction<br />
positioning<br />
Single direction<br />
positioning<br />
mode cancel
B–63534EN/02 PROGRAMMING<br />
4. INTERPOLATION FUNCTIONS<br />
Restrictions<br />
During canned cycle for drilling, no single direction positioning is<br />
effected in Z axis.<br />
No single direction positioning is effected in an axis for which no<br />
overrun has been set by the parameter.<br />
When the move distance 0 is commanded, the single direction<br />
positioning is not performed.<br />
The direction set to the parameter is not effected by mirror image.<br />
The single direction positioning does not apply to the shift motion in<br />
the canned cycles of G76 and G87.<br />
45
4. INTERPOLATION FUNCTIONS PROGRAMMING<br />
B–63534EN/02<br />
4.3<br />
LINEAR<br />
INTERPOLATION<br />
(G01)<br />
Format<br />
Explanations<br />
<strong>Tools</strong> can move along a line<br />
G01 IP_F_;<br />
IP_:For<br />
an absolute command, the coordinates of an end point ,<br />
and for an incremental commnad, the distance the tool moves.<br />
F_:Speed of tool feed (Feedrate)<br />
A tools move along a line to the specified position at the feedrate<br />
specified in F.<br />
The feedrate specified in F is effective until a new value is specified. It<br />
need not be specified for each block.<br />
The feedrate commanded by the F code is measured along the tool path.<br />
If the F code is not commanded, the feedrate is regarded as zero.<br />
The feedrate of each axis direction is as follows.<br />
G01ααββγγζζ Ff ;<br />
Feed rate of α axis direction :<br />
Feed rate of β axis direction :<br />
Feed rate of γ axis direction :<br />
L 2 2 2 2 <br />
Feed rate of ζ axis direction :<br />
46<br />
F <br />
f<br />
L<br />
F <br />
f<br />
L<br />
F <br />
f<br />
L<br />
F <br />
f<br />
L<br />
The feed rate of the rotary axis is commanded in the unit of deg/min (the<br />
unit is decimal point position).<br />
When the straight line axis α(such as X, Y, or Z) and the rotating axisβ<br />
(such as A, B, or C) are linearly interpolated, the feed rate is that in which<br />
the tangential feed rate in the α and β cartesian coordinate system is<br />
commanded by F(mm/min).<br />
β–axis feedrate is obtained ; at first, the time required for distribution is<br />
calculated by using the above fromula, then the β –axis feedrate unit is<br />
changed to deg/min.
B–63534EN/02 PROGRAMMING<br />
4. INTERPOLATION FUNCTIONS<br />
Examples<br />
Linear interpolation<br />
<br />
<br />
A calculation example is as follows.<br />
G91 G01 X20.0B40.0 F300.0 ;<br />
This changes the unit of the C axis from 40.0 deg to 40mm with metric<br />
input. The time required for distribution is calculated as follows:<br />
47<br />
202 402 <br />
300<br />
The feed rate for the C axis is<br />
40<br />
0.14907<br />
<br />
<br />
0.14907 (min)<br />
268.3 degmin<br />
In simultaneous 3 axes control, the feed rate is calculated the same way<br />
as in 2 axes control.<br />
G91 G01X200.0Y100.0F200.0 <br />
100.0<br />
Y axis<br />
0<br />
(Start position)<br />
(End point)<br />
90°<br />
(End position)<br />
200.0<br />
G91G01C–90.0 G300.0 ;Feed rate of 300deg/min<br />
(Start point)<br />
X axis<br />
Feedrate is 300 deg/min
4. INTERPOLATION FUNCTIONS PROGRAMMING<br />
B–63534EN/02<br />
4.4<br />
CIRCULAR<br />
INTERPOLATION<br />
(G02, G03)<br />
Format<br />
The command below will move a tool along a circular arc.<br />
Arc in the XpYp plane<br />
<br />
G03<br />
ZpXp <br />
G18<br />
G02<br />
G02<br />
G03<br />
YpZp <br />
G19<br />
G02<br />
G03<br />
48<br />
Xp_Yp_<br />
Xp_ p_<br />
Yp_ Zp_<br />
I_ J_<br />
R_<br />
I_ K_<br />
R_<br />
J_ K_<br />
R_<br />
F_ ;<br />
F_<br />
F_<br />
Table. 4.4 Description of the Command Format<br />
Command Description<br />
G17 Specification of arc on XpYp plane<br />
G18 Specification of arc on ZpXp plane<br />
G19 Specification of arc on YpZp plane<br />
G02 Circular Interpolation Clockwise direction (CW)<br />
G03 Circular Interpolation Counterclockwise direction (CCW)<br />
X p_<br />
Y p_<br />
Z p_<br />
Command values of X axis or its parallel axis<br />
(set by parameter No. 1022)<br />
Command values of Y axis or its parallel axis<br />
(set by parameter No. 1022)<br />
Command values of Z axis or its parallel axis<br />
(set by parameter No. 1022)<br />
I_ X p axis distance from the start point to the center of an arc<br />
with sign<br />
J_ Y p axis distance from the start point to the center of an arc<br />
with sign<br />
k_ Z p axis distance from the start point to the center of an arc<br />
with sign<br />
R_ Arc radius (with sign)<br />
F_ Feedrate along the arc
B–63534EN/02 PROGRAMMING<br />
4. INTERPOLATION FUNCTIONS<br />
Explanations<br />
<br />
<br />
<br />
<br />
<br />
<br />
“Clockwise”(G02) and “counterclockwise”(G03) on the XpYp plane<br />
(ZpXp plane or YpZp plane) are defined when the XpYp plane is viewed<br />
in the positive–to–negative direction of the Zp axis (Yp axis or Xp axis,<br />
respectively) in the Cartesian coordinate system. See the figure below.<br />
Yp Xp Zp<br />
G03<br />
G02<br />
G02<br />
G02<br />
Xp<br />
Zp Yp<br />
G17 G18 G19<br />
49<br />
G03<br />
G03<br />
The end point of an arc is specified by address Xp, Yp or Zp, and is<br />
expressed as an absolute or incremental value according to G90 or G91.<br />
For the incremental value, the distance of the end point which is viewed<br />
from the start point of the arc is specified.<br />
The arc center is specified by addresses I, J, and K for the Xp, Yp, and Zp<br />
axes, respectively. The numerical value following I, J, or K, however, is<br />
a vector component in which the arc center is seen from the start point,<br />
and is always specified as an incremental value irrespective of G90 and<br />
G91, as shown below.<br />
I, J, and K must be signed according to the direction.<br />
Center<br />
End point (x,y)<br />
y x<br />
x<br />
i<br />
Start<br />
point<br />
z<br />
End point (z,x) End point (y,z)<br />
k<br />
Start<br />
point<br />
Center<br />
z<br />
y<br />
j<br />
Start<br />
point<br />
j i k<br />
I0,J0, and K0 can be omitted. When Xp, Yp , and Zp are omitted (the end<br />
point is the same as the start point) and the center is specified with I, J,<br />
and K, a 360° arc (circle) is specified.<br />
G021; Command for a circle<br />
If the difference between the radius at the start point and that at the<br />
end point exceeds the permitted value in a parameter (No.3410), an P/S<br />
alarm (No.020) occurs.
4. INTERPOLATION FUNCTIONS PROGRAMMING<br />
B–63534EN/02<br />
<br />
<br />
Restrictions<br />
The distance between an arc and the center of a circle that contains the arc<br />
can be specified using the radius, R, of the circle instead of I, J, and K.<br />
In this case, one arc is less than 180°, and the other is more than 180° are<br />
considered. When an arc exceeding 180° is commanded, the radius must<br />
be specified with a negative value. If Xp, Yp, and Zp are all omitted, if<br />
the end point is located at the same position as the start point and when<br />
R is used, an arc of 0° is programmed<br />
G02R ; (The cutter does not move.)<br />
For arc (1)(less than 180°)<br />
G91 G02 X P60.0 Y P20.0 R50.0 F300.0 ;<br />
For arc (2)(greater than 180°)<br />
G91 G02 X P60.0 Y P20.0 R–50.0 F300.0 ;<br />
50<br />
2<br />
r=50mm<br />
Start point r=50mm<br />
Y<br />
1<br />
X<br />
End point<br />
The feedrate in circular interpolation is equal to the feed rate specified by<br />
the F code, and the feedrate along the arc (the tangential feedrate of the<br />
arc) is controlled to be the specified feedrate.<br />
The error between the specified feedrate and the actual tool feedrate is<br />
±2% or less. However, this feed rate is measured along the arc after the<br />
cutter compensation is applied<br />
If I, J, K, and R addresses are specified simultaneously, the arc specified<br />
by address R takes precedence and the other are ignored.<br />
If an axis not comprising the specified plane is commanded, an alarm is<br />
displayed.<br />
For example, if axis U is specified as a parallel axis to X axis when plane<br />
XY is specified, an P/S alarm (No.028)is displayed.<br />
When an arc having a center angle approaching 180° is specified, the<br />
calculated center coordinates may contain an error. In such a case, specify<br />
the center of the arc with I, J, and K.
B–63534EN/02 PROGRAMMING<br />
4. INTERPOLATION FUNCTIONS<br />
Examples<br />
100<br />
60<br />
40<br />
Y axis<br />
0<br />
51<br />
50R<br />
60R<br />
90 120 140 200<br />
<br />
<br />
<br />
<br />
<br />
<br />
<br />
<br />
<br />
<br />
<br />
<br />
<br />
<br />
<br />
X axis
4. INTERPOLATION FUNCTIONS PROGRAMMING<br />
B–63534EN/02<br />
4.5<br />
HELICAL<br />
INTERPOLATION<br />
(G02, G03)<br />
Format<br />
Explanations<br />
Restrictions<br />
Helical interpolation which moved helically is enabled by specifying up<br />
to two other axes which move synchronously with the circular<br />
interpolation by circular commands.<br />
Synchronously with arc of XpYp plane<br />
G17<br />
G02<br />
G03<br />
Synchronously with arc of ZpXp plane<br />
G18<br />
G02<br />
G03<br />
Synchronously with arc of YpZp plane<br />
52<br />
XpYp<br />
XpZp<br />
IJ<br />
R_<br />
IK<br />
<br />
α(β)F<br />
αβ)F_;<br />
G19 G02<br />
JK<br />
YpZp<br />
αβ)F;<br />
G03<br />
R<br />
α,β: Any one axis where circular interpolation is not applied.<br />
Up to two other axes can be specified.<br />
The command method is to simply or secondary add a move command<br />
axis which is not circular interpolation axes. An F command specifies a<br />
feed rate along a circular arc. Therefore, the feed rate of the linear axis<br />
is as follows:<br />
Length of linear axis<br />
F×<br />
Length of circular arc<br />
Determine the feed rate so the linear axis feed rate does not exceed any<br />
of the various limit values.Bit 0 (HFC) of parameter No. 1404 can be used<br />
to prevent the linear axis feedrate from exceeding various limit values.<br />
X<br />
Z<br />
Tool path<br />
The feedrate along the circumference of two circular<br />
interpolated axes is the specified feedrate.<br />
⋅Cutter compensation is applied only for a circular arc.<br />
⋅Tool offset and tool length compensation cannot be used in a block in<br />
which a helical interpolation is commanded.<br />
Y
B–63534EN/02 PROGRAMMING<br />
4. INTERPOLATION FUNCTIONS<br />
4.6<br />
HELICAL<br />
INTERPOLATION B<br />
(G02, G03)<br />
Format<br />
Explanations<br />
Limitations<br />
Helical interpolation B moves the tool in a helical manner. This<br />
interpolation can be executed by specifying the circular interpolation<br />
command together with up to four additional axes in simple<br />
high–precision contour control mode (see II–19.7).<br />
With an arc in the XpYp plane<br />
G17<br />
G03<br />
With an arc in the ZpXp plane<br />
G18<br />
G02<br />
G02<br />
G03<br />
With an arc in the YpZp plane<br />
53<br />
XpYp<br />
XpZp<br />
IJ<br />
R_<br />
IK<br />
<br />
αβγδF<br />
αβγδF<br />
G19 G02<br />
G03<br />
YpZp<br />
JK<br />
R<br />
αβγδF<br />
α, β, γ, δ : Any axis to which circular interpolation is not applied.<br />
Up to four axes can be specified.<br />
Basically, the command can be specified by adding two movement axes<br />
to a standard helical interpolation command (see II–4.5). Address F<br />
should be followed by a tangential velocity, which has been determined<br />
by also taking movement along the linear axes into consideration.<br />
X<br />
Z<br />
Tool path<br />
The feedrate equals the tangential velocity determined by also<br />
taking movement along the linear axes into consideration.<br />
⋅ The command of helical interpolation B can be specified only in AI<br />
contour control mode.<br />
⋅ Cutter compensation is applied only to an arc.<br />
⋅ In a block containing the helical interpolation command, the tool offset<br />
command or tool length compensation command cannot be specified.<br />
Y
4. INTERPOLATION FUNCTIONS PROGRAMMING<br />
B–63534EN/02<br />
4.7<br />
SPIRAL<br />
INTERPOLATION,<br />
CONICAL<br />
INTERPOLATION<br />
(G02, G03)<br />
Format<br />
Spiral interpolation<br />
Spiral interpolation is enabled by specifying the circular interpolation<br />
command together with a desired number of revolutions or a desired<br />
increment (decrement) for the radius per revolution.<br />
Conical interpolation is enabled by specifying the spiral interpolation<br />
command together with one or two additional axes of movement, as well<br />
as a desired increment (decrement) for the position along the additional<br />
axes per spiral revolution.<br />
XpYp plane<br />
G17<br />
ZpXp plane<br />
G18<br />
YpZp plane<br />
G19<br />
G02<br />
G03<br />
G02<br />
G03<br />
G02<br />
G03<br />
54<br />
<br />
Z_X_K_ I_ Q_ L_ F_ ;<br />
Y_ Z_ J_ K_ Q_ L_ F_ ;<br />
X,Y,Z Coordinates of the end point<br />
L Number of revolutions (positive value without a decimal point)(*1)<br />
Q Radius increment or decrement per spiral revolution(*1)<br />
I,J,K Signed distance from the start point to the center<br />
(same as the distance specified for circular interpolation)<br />
F Feedrate<br />
(*1) Either the number of revolutions (L) or the radius increment or<br />
decrement (Q) can be omitted. When L is omitted, the number of<br />
revolutions is automatically calculated from the distance between<br />
the current position and the center, the position of the end point,<br />
and the radius increment or decrement. When Q is omitted, the<br />
radius increment or decrement is automatically calculated from the<br />
distance between the current position and the center, the position<br />
of the end point, and the number of revolutions. If both L and Q are<br />
specified but their values contradict, Q takes precedence. Generally,<br />
either L or Q should be specified. The L value must be a positive<br />
value without a decimal point. To specify four revolutions plus<br />
90°, for example, round the number of revolutions up to five and<br />
specify L5.
B–63534EN/02 PROGRAMMING<br />
4. INTERPOLATION FUNCTIONS<br />
Conical interpolation<br />
XpYp plane<br />
G17<br />
ZpXp plane<br />
G18<br />
YpZp plane<br />
G19<br />
G02<br />
G03<br />
G02<br />
G03<br />
G02<br />
G03<br />
55<br />
<br />
Z_ X_ Y_ K_ I_ J_ Q_ L_ F_ ;<br />
Y_ Z_ X_ J_ K_ I_ Q_ L_ F_ ;<br />
X,Y,Z Coordinates of the end point<br />
L Number of revolutions (positive value without a decimal point)(*1)<br />
Q (Radius increment or decrement per spiral revolution(*1)<br />
I,J,K Two of the three values represent a signed vector from the start<br />
point to the center. The remaining value is a height increment or<br />
decrement per spiral revolution in conical interpolation(*1)(*2)<br />
When the XpYp plane is selected:<br />
The I and J values represent a signed vector from the start point<br />
to the center.<br />
The K value represents a height increment or decrement per<br />
spiral revolution.<br />
When the ZpXp plane is selected:<br />
The K and I values represent a signed vector from the start point<br />
to the center.<br />
The J value represents a height increment or decrement per<br />
spiral revolution.<br />
When the YpZp plane is selected:<br />
The J and K values represent a signed vector from the start point<br />
to the center.<br />
The I value represents a height increment or decrement per spiral<br />
revolution.<br />
F Feedrate (determined by taking movement along the linear axes<br />
into consideration)<br />
(*1) One of the height increment/decrement (I, J, K), radius increment/<br />
decrement (Q), and the number of revolutions (L) must be specified.<br />
The other two items can be omitted.<br />
⋅ Sample command for the XpYp plane<br />
G17<br />
G02<br />
G03<br />
<br />
K_<br />
Q_<br />
L_<br />
<br />
If both L and Q are specified, but their values contradict, Q takes<br />
precedence. If both L and a height increment or decrement are<br />
specified, but their values contradict, the height increment or<br />
decrement takes precedence. If both Q and a height increment or<br />
decrement are specified, but their values contradict, Q takes precedence.<br />
The L value must be a positive value without a decimal<br />
point. To specify four revolutions plus 90°, for example, round the<br />
number of revolutions up to five and specify L5.<br />
(*2) When two axes (of height) other than plane axes are specified, the<br />
height increment or decrement (I, J, K) cannot be specified. Specify<br />
either a desired radius increment or decrement (Q) or a desired<br />
number of revolutions (L).
4. INTERPOLATION FUNCTIONS PROGRAMMING<br />
B–63534EN/02<br />
Explanations<br />
Function of spiral<br />
interpolation<br />
Movement between<br />
blocks<br />
Controlled axes<br />
Cutter compensation C<br />
Feedrate clamping by<br />
arc radius<br />
Dry run<br />
Spiral interpolation in the XY plane is defined as follows:<br />
(X – X0) 2 + (Y – Y0) 2 = (R + Q’) 2<br />
X0 : X coordinate of the center<br />
Y0 : Y coordinate of the center<br />
R : Radius at the beginning of spiral interpolation<br />
Q’ : Variation in radius<br />
When the programmed command is assigned to this function, the<br />
following expression is obtained:<br />
(X – XS – I) 2 + (Y – YS – J) 2 =<br />
θ <br />
<br />
<br />
where<br />
XS : X coordinate of the start point<br />
YS : Y coordinate of the start point<br />
I : X coordinate of the vector from the start point to the center<br />
J : Y coordinate of the vector from the start point to the center<br />
R : Radius at the beginning of spiral interpolation<br />
Q : Radius increment or decrement per spiral revolution<br />
L’ : (Current number of revolutions) – 1<br />
θ : Angle between the start point and the current position<br />
(degrees)<br />
Block overlap between a spiral/conical interpolation block and other<br />
blocks is performed only in simple high–precision contour control mode<br />
(see II–NO TAG). In other modes, the movement is decelerated and<br />
stopped in the block before the spiral/conical interpolation block, after<br />
which interpolation starts. After completion of the spiral/conical<br />
interpolation block, the movement is decelerated and stopped, then the<br />
next block is executed.<br />
For conical interpolation, two axes of a plane and two additional axes, that<br />
is, four axes in total, can be specified. A rotation axis can be specified as<br />
the additional axis.<br />
The spiral or conical interpolation command can be programmed in cutter<br />
compensation C mode. At the start and end points of the block, a virtual<br />
circle around the center of the spiral interpolation is drawn. Cutter<br />
compensation is performed along the virtual circle, then spiral<br />
interpolation is performed about the result of the cutter compensation.<br />
When both the start point and end point are at the center, no virtual circle<br />
can be drawn. If drawing is attempted, P/S alarm No. 5124 is issued.<br />
During spiral interpolation, the function for clamping the feedrate by arc<br />
radius (parameters 1730 to 1732) is enabled. The feedrate may decrease<br />
as the tool approaches the center of the spiral.<br />
When the dry run signal is inverted from 0 to 1 or from 1 to 0 during<br />
movement along an axis, the movement is accelerated or decelerated to<br />
the desired speed without first reducing the speed to zero.<br />
56
B–63534EN/02 PROGRAMMING<br />
4. INTERPOLATION FUNCTIONS<br />
Limitations<br />
Radius<br />
Corner deceleration<br />
Feed functions<br />
Program restart<br />
Retrace<br />
Normal direction control<br />
Examples<br />
Spiral interpolation<br />
In spiral or conical interpolation, R for specifying an arc radius cannot be<br />
specified.<br />
Corner deceleration between the spiral/conical interpolation block and<br />
other blocks can be performed only in simple high–precision contour<br />
control mode.<br />
The functions of feed per rotation, inverse time feed, F command with one<br />
digit, and automatic corner override cannot be used.<br />
A program including spiral or conical interpolation cannot be restarted.<br />
A program including spiral or conical interpolation cannot be retraced.<br />
Spiral interpolation and conical interpolation cannot be specified in<br />
normal direction control mode.<br />
–120–100 –80 –60 –40 –20 0<br />
–20<br />
20 40 60 80 100 120<br />
–40<br />
X axis<br />
57<br />
20. 20.<br />
120<br />
100<br />
80<br />
60<br />
40<br />
20<br />
0<br />
–60<br />
–80<br />
–100<br />
–120<br />
Y axis<br />
The path indicated above is programmed with absolute and incremental<br />
values, as shown below:<br />
This sample path has the following values:<br />
⋅ Start point : (0, 100.0)<br />
⋅ End point (X, Y) : (0, –30.0)<br />
⋅ Distance to the center (I, J) : (0, –100.0)<br />
⋅ Radius increment or decrement (Q) : –20.0<br />
⋅ Number of revolutions (L) : 4.
4. INTERPOLATION FUNCTIONS PROGRAMMING<br />
B–63534EN/02<br />
Conical interpolation<br />
(1)With absolute values, the path is programmed as follows:<br />
G90 G02 X0 Y–30.0 I0 J–100.0 Q–20.0<br />
L4<br />
F300;<br />
(2)With incremental values, the path is programmed as follows:<br />
G91 G02 X0 Y–130.0 I0 J–100.0 Q–20.0<br />
L4<br />
F300;<br />
(Either the Q or L setting can be omitted.)<br />
(0,–37.5,62.5)<br />
+X<br />
58<br />
+Z<br />
–100.0<br />
25.0 25.0<br />
+Y<br />
100.0<br />
25.0<br />
25.0<br />
The sample path shown above is programmed with absolute and<br />
incremental values as follows:<br />
This sample path has the following values:<br />
⋅ Start point : (0, 100.0, 0)<br />
⋅ End point (X, Y, Z) : (0, –37.5, 62.5)<br />
⋅ Distance to the center (I, J) : (0, –100.0)<br />
⋅ Radius increment or decrement (Q) : –25.0<br />
⋅ Height increment or decrement (K) : 25.0<br />
⋅ Number of revolutions (L) : 3<br />
(1)With absolute values, the path is programmed as follows:<br />
K25.0<br />
G90 G02 X0 Y–37.5 Z62.5 I0 J–100.0 Q–25.0<br />
L3<br />
F300;<br />
(2)With incremental values, the path is programmed as follows:<br />
K25.0<br />
G91 G02 X0 Y–137.5 Z62.5 I0 J–100.0 Q–25.0<br />
L3<br />
F300;
B–63534EN/02 PROGRAMMING<br />
4. INTERPOLATION FUNCTIONS<br />
4.8<br />
POLAR COORDINATE<br />
INTERPOLATION<br />
(G12.1, G13.1)<br />
Format<br />
Explanations<br />
Polar coordinate<br />
interpolation plane<br />
Polar coordinate interpolation is a function that exercises contour control<br />
in converting a command programmed in a Cartesian coordinate system<br />
to the movement of a linear axis (movement of a tool) and the movement<br />
of a rotary axis (rotation of a workpiece). This function is useful for<br />
grinding a cam shaft.<br />
G12.1 ;<br />
G13.1 ;<br />
Starts polar coordinate interpolation mode (enables polar<br />
coordinate interpolation)<br />
Specify linear or circular interpolation using coordinates in a<br />
Cartesian coordinate system consisting of a linear axis and<br />
rotary axis (virtual axis).<br />
Polar coordinate interpolation mode is cancelled (for not<br />
performing polar coordinate interpolation)<br />
Specify G12.1 and G13.1 in Separate Blocks.<br />
G12.1 starts the polar coordinate interpolation mode and selects a polar<br />
coordinate interpolation plane (Fig. 4.8 (a)). Polar coordinate<br />
interpolation is performed on this plane.<br />
59<br />
Rotary axis (virtual axis)<br />
(unitmm or inch)<br />
Origin of the local coordinate system (G52 command)<br />
(Or origin of the workpiece coordinate system)<br />
Fig. 4.8 (a) Polar coordinate interpolation plane.<br />
Linear axis<br />
(unit:mm or inch)<br />
When the power is turned on or the system is reset, polar coordinate<br />
interpolation is canceled (G13.1).<br />
The linear and rotation axes for polar coordinate interpolation must be set<br />
in parameters (No. 5460 and 5461) beforehand.<br />
CAUTION<br />
The plane used before G12.1 is specified (plane selected<br />
by G17, G18, or G19) is canceled. It is restored when G13.1<br />
(canceling polar coordinate interpolation) is specified.<br />
When the system is reset, polar coordinate interpolation is<br />
canceled and the plane specified by G17, G18, or G19 is<br />
used.
4. INTERPOLATION FUNCTIONS PROGRAMMING<br />
B–63534EN/02<br />
Distance moved and<br />
feedrate for polar<br />
coordinate interpolation<br />
The unit for coordinates<br />
on the hypothetical axis is<br />
the same as the unit for<br />
the linear axis (mm/inch)<br />
The unit for the feedrate<br />
is mm/min or inch/min<br />
G codes which can be<br />
specified in the polar<br />
coordinate interpolation<br />
mode<br />
<br />
<br />
<br />
Movement along axes<br />
not in the polar<br />
coordinate interpolation<br />
plane in the polar<br />
coordinate interpolation<br />
mode<br />
Current position display<br />
in the polar coordinate<br />
interpolation mode<br />
Limitations<br />
<br />
<br />
<br />
In the polar coordinate interpolation mode, program commands are<br />
specified with Cartesian coordinates on the polar coordinate interpolation<br />
plane. The axis address for the rotation axis is used as the axis address<br />
for the second axis (virtual axis) in the plane. Whether a diameter or<br />
radius is specified for the first axis in the plane is the same as for the<br />
rotation axis regardless of the specification for the first axis in the plane.<br />
The virtual axis is at coordinate 0 immediately after G12.1 is specified.<br />
Polar interpolation is started assuming the angle of 0 for the position of<br />
the tool when G12.1 is specified.<br />
Specify the feedrate as a speed (relative speed between the workpiece and<br />
tool) tangential to the polar coordinate interpolation plane (Cartesian<br />
coordinate system) using F.<br />
G01 . . . . . . . . . . . . Linear interpolation<br />
G02, G03 . . . . . . . Circular interpolation<br />
G04 . . . . . . . . . . . . Dwell, Exact stop<br />
G40, G41, G42 . . . Cutter compensation<br />
(Polar coordinate interpolation is applied to the path<br />
after cutter compensation.)<br />
G65, G66, G67 . . . Custom macro command<br />
G90, G91 . . . . . . . Absolute command, incremental command<br />
G94, G95 . . . . . . . Feed per minute, feed per revolution<br />
The addresses for specifying the radius of an arc for circular interpolation<br />
(G02 or G03) in the polar coordinate interpolation plane depend on the<br />
first axis in the plane (linear axis).<br />
⋅ I and J in the Xp–Yp plane when the linear axis is the X–axis or an axis<br />
parallel to the X–axis.<br />
⋅ J and K in the Yp–Zp plane when the linear axis is the Y–axis or an axis<br />
parallel to the Y–axis.<br />
⋅ K and I in the Zp–Xp plane when the linear axis is the Z–axis or an axis<br />
parallel to the Z–axis.<br />
The radius of an arc can be specified also with an R command.<br />
The tool moves along such axes normally, independent of polar<br />
coordinate interpolation.<br />
Actual coordinates are displayed. However, the remaining distance to<br />
move in a block is displayed based on the coordinates in the polar<br />
coordinate interpolation plane (Cartesian coordinates).<br />
Before G12.1 is specified, a local coordinate system (or workpiece<br />
coordinate system) where the center of the rotary axis is the origin of the<br />
coordinate system must be set. In the G12.1 mode, the coordinate system<br />
must not be changed (G92, G52, G53, relative coordinate reset, G54<br />
through G59, etc.).<br />
60
B–63534EN/02 PROGRAMMING<br />
4. INTERPOLATION FUNCTIONS<br />
<br />
Tool length offset<br />
command<br />
Tool offset command<br />
Program restart<br />
Cutting feedrate for the<br />
rotation axis<br />
WARNING<br />
∆ X<br />
θ1<br />
θ2<br />
θ3<br />
L1<br />
L2<br />
L3<br />
The polar coordinate interpolation mode cannot be started or terminated<br />
(G12.1 or G13.1) in the tool offset mode (G41 or G42). G12.1 or G13.1<br />
must be specified in the tool offset canceled mode (G40).<br />
Tool length offset must be specified in the polar coordinate interpolation<br />
cancel mode before G12.1 is specified. It cannot be<br />
specified in the polar coordinate interpolation mode. Furthermore, no<br />
offset values can be changed in the polar coordinate interpolation mode.<br />
A tool offset must be specified before the G12.1 mode is set. No offset<br />
can be changed in the G12.1 mode.<br />
For a block in the G12.1 mode, the program cannot be restarted.<br />
Polar coordinate interpolation converts the tool movement for a figure<br />
programmed in a Cartesian coordinate system to the tool movement in the<br />
rotation axis (C–axis) and the linear axis (X–axis). When the tool moves<br />
closer to the center of the workpiece, the C–axis component of the<br />
feedrate becomes larger and may exceed the maximum cutting feedrate<br />
for the C–axis (set in parameter (No. 1422)), causing an alarm (see the<br />
figure below). To prevent the C–axis component from exceeding the<br />
maximum cutting feedrate for the C–axis, reduce the feedrate specified<br />
with address F or create a program so that the tool (center of the tool when<br />
cutter compensation is applied) does not move close to the center of the<br />
workpiece.<br />
Consider lines L1, L2, and L3. ∆X is the distance the tool moves per time unit<br />
at the feedrate specified with address F in the Cartesian coordinate system.<br />
As the tool moves from L1 to L2 to L3, the angle at which the tool moves per<br />
time unit corresponding to ∆X in the Cartesian coordinate system increases<br />
fromθ1 toθ 2 to θ3.<br />
In other words, the C–axis component of the feedrate becomes larger as the<br />
tool moves closer to the center of the workpiece. The C component of the<br />
feedrate may exceed the maximum cutting feedrate for the C–axis because<br />
the tool movement in the Cartesian coordinate system has been converted to<br />
the tool movement for the C–axis and the X–axis.<br />
L :Distance (in mm) between the tool center and workpiece center when the tool center is the nearest to the<br />
workpiece center<br />
R :Maximum cutting feedrate (deg/min) of the C axis<br />
Then, a speed specifiable with address F in polar coordinate interpolation can be given by the formula below.<br />
Specify a speed allowed by the formula. The formula provides a theoretical value; in practice, a value slightly<br />
smaller than a theoretical value may need to be used due to a calculation error.<br />
F < L × R ×<br />
π<br />
180<br />
(mm/min)<br />
61
4. INTERPOLATION FUNCTIONS PROGRAMMING<br />
B–63534EN/02<br />
Examples<br />
O0001 ;<br />
N010 T0101<br />
Example of Polar Coordinate Interpolation Program<br />
Based on X Axis(Linear Axis) and C Axis (Rotary Axis)<br />
N205<br />
N204<br />
N206<br />
C’(hypothetical axis)<br />
62<br />
N203<br />
N208<br />
N207<br />
C axis<br />
N202 N201<br />
Path after cutter compensation<br />
Program path<br />
N200<br />
Tool<br />
Z axis<br />
N0100 G90 G00 X60.0 C0 Z_ ; Positioning to start position<br />
N0200 G12.1 ; Start of polar coordinate interpolation<br />
N0201 G42 G01 X20.0 F_ ;<br />
N0202 C10.0 ;<br />
N0203 G03 X10.0 C20.0 R10.0 ;<br />
N0204 G01 X–20.0 ; Geometry program<br />
N0205 C–10.0 ; (program based on cartesian coordinates on<br />
N0206 G03 X–10.0 C–20.0 I10.0 J0 ; X–C’ plane)<br />
N0207 G01 X20.0 ;<br />
N0208 C0 ;<br />
N0209 G40 X60.0 ;<br />
N0210 G13.1 ; Cancellation of polar coordinate interpolation<br />
N0300 Z_ ;<br />
N0400 X_ C_ ;<br />
N0900M30 ;<br />
X axis
B–63534EN/02 PROGRAMMING<br />
4. INTERPOLATION FUNCTIONS<br />
4.9<br />
CYLINDRICAL<br />
INTERPOLATION<br />
(G07.1)<br />
Format<br />
Explanations<br />
Plane selection<br />
(G17, G18, G19)<br />
<br />
Circular interpolation<br />
(G02,G03)<br />
The amount of travel of a rotary axis specified by an angle is once<br />
internally converted to a distance of a linear axis along the outer surface<br />
so that linear interpolation or circular interpolation can be performed with<br />
another axis. After interpolation, such a distance is converted back to the<br />
amount of travel of the rotary axis.<br />
The cylindrical interpolation function allows the side of a cylinder to be<br />
developed for programming. So programs such as a program for<br />
cylindrical cam grooving can be created very easily.<br />
G07.1 IP r ; Starts the cylindrical interpolation mode<br />
(enables : cylindrical interpolation).<br />
:<br />
:<br />
G07.1 IP 0 ; The cylindrical interpolation mode is cancelled.<br />
IP:<br />
An address for the rotation axis<br />
r : The radius of the cylinder<br />
Specify G07.1 IP r ; and G07.1 IP 0; in separate blocks.<br />
G107 can be used instead of G07.1.<br />
Use parameter (No. 1022) to specify whether the rotation axis is the X–,<br />
Y–, or Z–axis, or an axis parallel to one of these axes. Specify the G code<br />
to select a plane for which the rotation axis is the specified linear axis.<br />
For example, when the rotation axis is an axis parallel to the X–axis, G17<br />
must specify an Xp–Yp plane, which is a plane defined by the rotation axis<br />
and the Y–axis or an axis parallel to the Y–axis.<br />
Only one rotation axis can be set for cylindrical interpolation.<br />
A feedrate specified in the cylindrical interpolation mode is a speed on the<br />
developed cylindrical surface.<br />
In the cylindrical interpolation mode, circular interpolation is possible<br />
with the rotation axis and another linear axis. Radius R is used in<br />
commands in the same way as described in II–4.4.<br />
The unit for a radius is not degrees but millimeters (for metric input) or<br />
inches (for inch input).<br />
< Example Circular interpolation between the Z axis and C axis ><br />
For the C axis of parameter (No.1022), 5 (axis parallel with the X axis)<br />
is to be set. In this case, the command for circular interpolation is<br />
G18 Z__C__;<br />
G02 (G03) Z__C__R__;<br />
For the C axis of parameter (No.1022), 6 (axis parallel with the Y axis)<br />
may be specified instead. In this case, however, the command for<br />
circular interpolation is<br />
G19 C__Z__;<br />
G02 (G03) Z__C__R__;<br />
63
4. INTERPOLATION FUNCTIONS PROGRAMMING<br />
B–63534EN/02<br />
Tool offset<br />
Cylindrical interpolation<br />
accuracy<br />
Limitations<br />
Arc radius specification<br />
in the cylindrical<br />
interpolation mode<br />
Circular interpolation<br />
and cutter compensation<br />
Positioning<br />
Coordinate system<br />
setting<br />
<br />
<br />
<br />
Index table indexing<br />
function<br />
To perform tool offset in the cylindrical interpolation mode, cancel any<br />
ongoing cutter compensation mode before entering the cylindrical<br />
interpolation mode. Then, start and terminate tool offset within the<br />
cylindrical interpolation mode.<br />
In the cylindrical interpolation mode, the amount of travel of a rotary axis<br />
specified by an angle is once internally converted to a distance of a linear<br />
axis on the outer surface so that linear interpolation or circular<br />
interpolation can be performed with another axis. After interpolation,<br />
such a distance is converted back to an angle. For this conversion, the<br />
amount of travel is rounded to a least input increment.<br />
So when the radius of a cylinder is small, the actual amount of travel can<br />
differ from a specified amount of travel. Note, however, that such an error<br />
is not accumulative.<br />
If manual operation is performed in the cylindrical interpolation mode<br />
with manual absolute on, an error can occur for the reason described<br />
above.<br />
The actual amount MOTION REV<br />
Specified<br />
value<br />
of travel 2×2πR<br />
MOTION REV<br />
2×2πR<br />
MOTION REV The amount of travel per rotation of the rotation axis<br />
(Setting value of parameter No. 1260)<br />
R : Workpiece radius<br />
:<br />
64<br />
Rounded to the least input increment<br />
In the cylindrical interpolation mode, an arc radius cannot be specified<br />
with word address I, J, or K.<br />
If the cylindrical interpolation mode is started when cutter compensation<br />
is already applied, circular interpolation is not correctly performed in the<br />
cylindrical interpolation mode.<br />
In the cylindrical interpolation mode, positioning operations (including<br />
those that produce rapid traverse cycles such as G28, G53, G73, G74,<br />
G76, G80 through G89) cannot be specified. Before positioning can be<br />
specified, the cylindrical interpolation mode must be cancelled.<br />
Cylindrical interpolation (G07.1) cannot be performed in the positioning<br />
mode (G00).<br />
In the cylindrical interpolation mode, a workpiece coordinate system<br />
(G92, G54 through G59) or local coordinate system (G52) cannot be<br />
specified.<br />
In the cylindrical interpolation mode, the cylindrical interpolation mode<br />
cannot be reset. The cylindrical interpolation mode must be cancelled<br />
before the cylindrical interpolation mode can be reset.<br />
A tool offset must be specified before the cylindrical interpolation mode<br />
is set. No offset can be changed in the cylindrical interpolation mode.<br />
Cylindrical interpolation cannot be specified when the index table index<br />
function is being used.
B–63534EN/02 PROGRAMMING<br />
4. INTERPOLATION FUNCTIONS<br />
Examples<br />
Z<br />
mm<br />
120<br />
110<br />
90<br />
70<br />
60<br />
0<br />
N05<br />
N06<br />
N07<br />
Example of a Cylindrical Interpolation Program<br />
O0001 (CYLINDRICAL INTERPOLATION );<br />
N01 G00 G90 Z100.0 C0 ;<br />
N02 G01 G91 G18 Z0 C0 ;<br />
Z<br />
N03 G07.1 C57299 ; (*)<br />
N04 G90 G01 G42 Z120.0 D01 F250 ;<br />
N05 C30.0 ;<br />
N06 G02 Z90.0 C60.0 R30.0 ;<br />
N07 G01 Z70.0 ;<br />
N08 G03 Z60.0 C70.0 R10.0 ;<br />
N09 G01 C150.0 ;<br />
N10 G03 Z70.0 C190.0 R75.0 ;<br />
N11 G01 Z110.0 C230.0 ;<br />
N12 G02 Z120.0 C270.0 R75.0 ;<br />
N13 G01 C360.0 ;<br />
N14 G40 Z100.0 ;<br />
N15 G07.1 C0 ;<br />
N16 M30 ;<br />
N08 N09 <br />
* A command with a decimal point can also be used.<br />
60 70 150 190 230 270<br />
65<br />
<br />
<br />
<br />
C<br />
R<br />
360<br />
C<br />
de
4. INTERPOLATION FUNCTIONS PROGRAMMING<br />
B–63534EN/02<br />
4.10<br />
INVOLUTE<br />
INTERPOLATION<br />
(G02.2, G03.2)<br />
Format<br />
Involute curve machining can be performed by using involute<br />
interpolation. Involute interpolation ensures continuous pulse distribution<br />
even in high–speed operation in small blocks, thus enabling smooth and<br />
high–speed machining. Furthermore, machining tapes can be created<br />
easily and efficiently, reducing the required length of tape.<br />
Involute interpolation on the X–Y plane<br />
G17 G02.2 X__Y__I__J__R__F__ ;<br />
G17 G03.2 X__Y__I__J__R__F__ ;<br />
Involute interpolation on the Z–X plane<br />
G18 G02.2 Z_X__K__I__R__F__ ;<br />
G18 G03.2 Z_X__K__I__R__F__ ;<br />
Involute interpolation on the Y–Z plane<br />
G19 G02.2 Y__Z__J__K__R__F__ ;<br />
G19 G03.2 Y__Z__J__K__R__F__ ;<br />
Where,<br />
G02.2: Involute interpolation (clockwise)<br />
G03.2: Involute interpolation (counterclockwise)<br />
G17/G18/G19 : X –Y / Z–X / Y–Z plane selection<br />
X, Y, Z : Involute curve end coordinate<br />
I, J, K : Center of the base circle for an involute curve viewed<br />
from the start point<br />
R : Base circle radius<br />
F : Cutting feedrate<br />
Yp Yp<br />
Start point<br />
Ps<br />
J<br />
Yp<br />
P<br />
eEnd<br />
point<br />
I<br />
Base circle<br />
66<br />
0 R<br />
End point<br />
Pe<br />
Po<br />
I<br />
R<br />
0<br />
Pe End point<br />
Xp<br />
Clockwise involute interpolation (G02.2)<br />
0<br />
Yp<br />
Po<br />
Ro<br />
Start point<br />
R<br />
Ps<br />
0<br />
I Po<br />
J J<br />
R<br />
I<br />
Ps<br />
J<br />
Ps<br />
End point<br />
Pe<br />
Start point<br />
Xp Xp<br />
<br />
Xp
B–63534EN/02 PROGRAMMING<br />
4. INTERPOLATION FUNCTIONS<br />
Explanations<br />
Involute curve<br />
Start point and end point<br />
Base circle specification<br />
An involute curve on the X–Y plane is defined as follows ;<br />
X (θ)=R [cos θ+ (θθ ) sin θ] +X<br />
(θ)=R [sin θ (θθ ) cos θ] +Y<br />
where,<br />
X0 , Y0 : Coordinates of the center of a base circle<br />
R : Base circle radius<br />
θ0: Angle of the start point of an involute curve<br />
θ : Angle of the point where a tangent from the current position<br />
to the base circle contacts the base circle<br />
X (θ), Y (θ): Current position on the X–axis and Y–axis<br />
Y<br />
Start point<br />
R<br />
(X0,Y0)<br />
Base circle<br />
67<br />
θ0<br />
θ<br />
Fig. 4.10 (a) Involute Curve<br />
Involute curve<br />
(X,Y)<br />
End point<br />
Involute curves on the Z–X plane and Y–Z plane are defined in the same<br />
way as an involute curve on the X–Y plane.<br />
The end point of an involute curve is specified using address X, Y, or Z.<br />
An absolute value or incremental value is used to specify an X, Y, or Z<br />
value. When using an incremental value, specify the coordinates of the<br />
end point viewed from the start point of the involute curve.<br />
When no end point is specified, P/S alarm No. 241 is issued.<br />
If the specified start point or end point lies within the base circle, P/S<br />
alarm No. 242 is issued. The same alarm is issued if cutter compensation<br />
C causes the offset vector to enter the base circle. Be particularly careful<br />
when applying an offset to the inside of an involute curve.<br />
The center of a base circle is specified with I, J, and K, corresponding to<br />
X, Y, and Z. The value following I, J, or K is a vector component defined<br />
when the center of the base circle is viewed from the start point of the<br />
involute curve; this value must always be specified as an incremental<br />
value, regardless of the G90/G91 setting. Assign a sign to I, J, and K<br />
according to the direction.<br />
If I, J, and K are all left unspecified, or I0J0K0 is specified, P/S alarm No.<br />
241 or No. 242 is issued.<br />
If R is not specified, or R < 0, P/S alarm No. 241 or No. 242 is issued.<br />
X
4. INTERPOLATION FUNCTIONS PROGRAMMING<br />
B–63534EN/02<br />
Choosing from two types<br />
of involute curves<br />
Feedrate<br />
Plane selection<br />
Cutter compensation C<br />
When only a start point and I, J, and K data are given, two types of involute<br />
curves can be created. One type of involute curve extends towards the<br />
base circle, and the other extends away from the base circle. When the<br />
specified end point is closer to the center of the base circle than the start<br />
point, the involute curve extends toward the base circle. In the opposite<br />
case, the involute curve extends away from the base circle.<br />
The cutting feedrate specified in an F code is used as the feedrate for<br />
involute interpolation. The feedrate along the involute curve (feedrate<br />
along the tangent to the involute curve) is controlled to satisfy the<br />
specified feedrate.<br />
As with circular interpolation, the plane to which to apply involute<br />
interpolation can be selected using G17, G18, and G19.<br />
Cutter compensation C can be applied to involute curve machining. As<br />
with linear and circular interpolation, G40, G41, and G42 are used to<br />
specify cutter compensation.<br />
G40 : Cutter compensation cancel<br />
G41 : Cutter compensation left<br />
G42 : Cutter compensation right<br />
Cutter compensation for an involute curve is implemented as described<br />
below.<br />
First, near the start point of an involute curve, an arc with a curvature close<br />
to the curvature of the involute curve is found. Next, an offset intersection<br />
between the arc and the linear line or arc in the previous block is found.<br />
Similarly, an offset intersection is found near the end point. Then, the<br />
involute curve passing through the two points is used as the tool center<br />
path.<br />
In involute interpolation mode, cutter compensation cannot be started or<br />
cancelled.<br />
Programmed<br />
path<br />
Tool center path<br />
R<br />
68<br />
Arc with a curvature<br />
closer to the curvature<br />
of the involute<br />
curve near the start<br />
point<br />
End point<br />
Arc with a curvature closer to the<br />
curvature of the involute curve near<br />
the end point
B–63534EN/02 PROGRAMMING<br />
4. INTERPOLATION FUNCTIONS<br />
Specifiable G codes<br />
Modes that allow<br />
involute interpolation<br />
specification<br />
End point error<br />
The following G codes can be specified in involute interpolation mode:<br />
G04 : Dwell<br />
G10 : Data setting<br />
G17 : X–Y plane selection<br />
G18 : Z–X plane selection<br />
G19 : Y–Z plane selection<br />
G65 : Macro call<br />
G66 : Macro modal call<br />
G67 : Macro modal call cancel<br />
G90 : Absolute command<br />
G91 : <strong>Inc</strong>remental command<br />
Involute interpolation can be specified in the following G code modes:<br />
G41 : Cutter compensation left<br />
G42 : Cutter compensation right<br />
G51 : Scaling<br />
G51.1 : Programmable mirror image<br />
G68 : Coordinate rotation<br />
As shown below the end point may not be located on an involute curve<br />
that passes through the start point.<br />
When an involute curve that passes through the start point deviates from<br />
the involute curve that passes through the end point by more than the value<br />
set in parameter No. 5610, P/S alarm No. 243 is issued.<br />
When there is an end point error, the feedrate is not guaranteed.<br />
Y<br />
Deviation<br />
69<br />
End point<br />
Pe<br />
Start<br />
point<br />
Ps<br />
Path after correction<br />
Correct involute curve<br />
Fig. 4.10 (b) End Point Error in Counterclockwise Involute Interpolation<br />
(G03.2)<br />
X
4. INTERPOLATION FUNCTIONS PROGRAMMING<br />
B–63534EN/02<br />
Limitations<br />
Number of involute curve<br />
turns<br />
Unspecifiable functions<br />
Modes that do not allow<br />
involute interpolation<br />
specification<br />
Cutting accuracy<br />
Both the start point and end point must be within 100 turns from the point<br />
where the involute curve starts. An involute curve can be specified to<br />
make one or more turns in a single block.<br />
If the specified start point or end point is beyond 100 turns from the point<br />
where the involute curve starts, P/S alarm No. 242 is issued.<br />
In involute interpolation mode, chamfer corner R (with an arbitrary<br />
angle), helical cutting, or axis–by–axis scaling functions cannot be<br />
specified.<br />
Involute interpolation cannot be used in the following modes:<br />
G41.1 (G151) : Normal direction control left side on<br />
G42.1 (G152) : Normal direction control right side on<br />
G07.1 (G107) : Cylindrical interpolation<br />
G12.1 : Polar coordinate interpolation mode<br />
G16 : Polar coordinates command<br />
G72.1 : Drawing copy<br />
The curvature of an involute curve varies rather sharply near the base<br />
circle. In such locations, a larger load is applied to the cutter when the<br />
programmed feedrate is used for cutting; in this case, the surface produced<br />
may be somewhat uneven<br />
70
B–63534EN/02 PROGRAMMING<br />
4. INTERPOLATION FUNCTIONS<br />
4.11<br />
<br />
<br />
<br />
Format<br />
Exponential interpolation exponentially changes the rotation of a<br />
workpiece with respect to movement on the rotary axis. Furthermore,<br />
exponential interpolation performs linear interpolation with respect to<br />
another axis. This enables tapered groove machining with a constant<br />
helix angle (constant helix taper machining). This function is best suited<br />
for grooving and grinding tools such as end mills.<br />
<br />
<br />
71<br />
X (Linear axis)<br />
X<br />
positive rotation (ω=0)<br />
β3<br />
A<br />
β2<br />
β1<br />
Helix angle<br />
β β β <br />
G02. 3 X__ Y__ Z__ I__ J__ K__ R__ F__ Q__ ;<br />
Negative rotation (ω=1)<br />
G03. 3 X__ Y__ Z__ I__ J__ K__ R__ F__ Q__ ;<br />
<br />
A (Rotary axis)<br />
X__; Specifies an end point with an absolute or incremental value.<br />
Y__; Specifies an end point with an absolute or incremental value.<br />
Z__ ; Specifies an end point with an absolute or incremental value.<br />
I__ ; Specifies angl I (from 1to 89 deg in units of 0.001deg ).<br />
J__ ; Specifies angle J (from 1 to 89 degin units of 0.001deg).<br />
K__; Specifies the amount to divide the linear axis for exponential<br />
interpolation (span value). Specify a positive value.<br />
When no value is specified, the value specified in parameter<br />
(No. 5643) is used.<br />
R__; Specifies constant R for exponential interpolation.<br />
F__ ; Specifies the initial feedrate.<br />
Specified in the same way as an ordinary F code. Specify a<br />
composite feedrate including a feedrate on the rotary axis.<br />
Q__ ; Specifies the feedrate at the end point.<br />
The same unit used for F is used. The CNC internally performs<br />
interpolation between the initial feedrate (F) and final feedrate<br />
(Q), depending on the travel distance on the linear axis.
4. INTERPOLATION FUNCTIONS PROGRAMMING<br />
B–63534EN/02<br />
Explanations<br />
Exponential relational<br />
expressions<br />
Limitations<br />
Cases where linear<br />
interpolation is<br />
performed<br />
Tool length<br />
compensation / cutter<br />
compensation<br />
Exponential relational expressions for a linear axis and rotary axis are<br />
defined as follows:<br />
θ<br />
X(θ)=R (e k–1)<br />
<br />
1<br />
tan (I)<br />
A()=(–1)<br />
tan (I)<br />
⋅⋅⋅⋅⋅⋅⋅⋅⋅⋅ Movement on the linear axis (1)<br />
θ<br />
360<br />
2π<br />
Where,<br />
⋅⋅⋅⋅⋅⋅⋅⋅⋅⋅ Movement on the linear axis (2)<br />
K =<br />
tan (J)<br />
ω=0/1 ⋅⋅⋅⋅⋅⋅⋅⋅⋅⋅⋅⋅⋅⋅⋅⋅⋅⋅⋅ Rotation direction<br />
R, I, and J are constants, and θ represents an angle (radian)<br />
The following is obtained from Expression (1)<br />
(X)=Kln(<br />
Xtan (I)<br />
R<br />
+1)<br />
When there is movement from X1 to X2 on the linear axis, the<br />
amount of movement on the rotary axis is determined by :<br />
= K{ ln (<br />
X2tan (I)<br />
R<br />
+1) – ln (<br />
X1tan (I)<br />
R<br />
+1)}<br />
Specify Expressions (1) and (2) in the format described earlier.<br />
X (linear axis)<br />
X<br />
72<br />
A<br />
A (rotary axis)<br />
Even when the G02.3 or G03.3 mode is set, linear interpolation is<br />
performed in the following cases:<br />
When the linear axis specified in parameter( No. 5641) is not specified,<br />
or the amount of movement on the linear axis is 0<br />
When the rotary axis specified in parameter (No. 5642) is specified<br />
When the amount for dividing the linear axis (span value) is 0<br />
Neither tool length compensation nor cutter compensation can be used in<br />
the G02.3 and G03.3 modes.
B–63534EN/02 PROGRAMMING<br />
4. INTERPOLATION FUNCTIONS<br />
Examples<br />
CAUTION<br />
The amount for dividing the linear axis for exponential<br />
interpolation (span value) affects figure precision. However,<br />
if an excessively small value is set, the machine may stop<br />
during interpolation. Try to specify an optimal span value<br />
depending on the machine being used.<br />
Constant helix machining for producing a tapered figure<br />
r<br />
U<br />
73<br />
J<br />
X<br />
I<br />
B<br />
X<br />
I<br />
B<br />
J<br />
Constant helix machining for producing a reverse tapered figure<br />
U<br />
r<br />
X<br />
Z<br />
A<br />
A<br />
Z<br />
X
4. INTERPOLATION FUNCTIONS PROGRAMMING<br />
B–63534EN/02<br />
θ<br />
r<br />
Z (θ) = { –Utan (I) }(e k<br />
2<br />
–1)<br />
tan (B)<br />
tan (I)<br />
+Z (0) (3)<br />
X (θ) = {<br />
r<br />
2<br />
θ<br />
–Utan (I) }(e k –1)<br />
1<br />
tan (I)<br />
(4)<br />
A () = (–1) Relational expressions<br />
⋅⋅⋅⋅⋅⋅⋅⋅⋅⋅⋅<br />
⋅⋅⋅⋅⋅⋅⋅⋅⋅⋅⋅⋅⋅⋅⋅⋅⋅⋅⋅⋅<br />
360<br />
where<br />
θ<br />
2π<br />
K <br />
tan (J)<br />
tan (I)<br />
X (), Z (), A () : Absolute value on the X–axis, Z–axis, and<br />
A–axis from the origin<br />
r : Left end diameter<br />
U : Excess length<br />
I : Taper angle<br />
B : Groove bottom taper angle<br />
J : Helix angle<br />
X : Amount of movement on the linear axis<br />
: Helix direction (0: Positive, 1: Negative)<br />
: Workpiece rotation angle<br />
From expressions (3) and (4), the following is obtained ;<br />
Z () = tan (B) X () + Z (0) ⋅⋅⋅⋅⋅⋅⋅⋅⋅⋅⋅⋅⋅⋅⋅⋅⋅⋅⋅ (5)<br />
The groove bottom taper angle (B) is determined from the end<br />
point position on the X–axis and Z–axis according to Expression<br />
5. The amount of movement on the Z–axis is determined from a<br />
groove bottom taper angle (B) and X–axis position.<br />
From Expressions (1) and (4), the following is determined:<br />
R = r/2 – Utan (I) ⋅⋅⋅⋅⋅⋅⋅⋅⋅⋅⋅⋅⋅⋅⋅⋅⋅⋅⋅<br />
(6)<br />
Constant R is determined from the left end diameter (r) and excess<br />
length (U) according to Expression (6). Specify a taper angle (I) in<br />
address I, and specify a helix angle (J) in address J. Note, however,<br />
that a negative value must be specified as the taper angle (I) for<br />
constant helix machining in order to produce a reverse tapered figure.<br />
Select a helix direction with G02.3 or G03.3. The user can<br />
perform constant helix machining to produce a tapered figure or a<br />
reverse tapered figure.<br />
74
B–63534EN/02 PROGRAMMING<br />
4. INTERPOLATION FUNCTIONS<br />
4.12<br />
SMOOTH<br />
INTERPOLATION<br />
(G05.1)<br />
Format<br />
Explanations<br />
Characteristics of<br />
smooth interpolation<br />
Enlarged<br />
Either of two types of machining can be selected, depending on the<br />
program command.<br />
For those portions where the accuracy of the figure is critical, such as<br />
at corners, machining is performed exactly as specified by the program<br />
command.<br />
For those portions having a large radius of curvature where a smooth<br />
figure must becreated, points along the machining path are<br />
interpolated with a smooth curve, calculated from the polygonal lines<br />
specified with the program command (smooth interpolation).<br />
Smooth interpolation can be specified when CDSP (bit 5 of parameter No.<br />
8485) is set to 1 in high–speed contour control mode (between G05<br />
P10000 and G05 P0). Smooth interpolation performed in high–speed<br />
contour control mode is described below. For details of high–speed<br />
contour control, see Section 20.5.<br />
Starting of smooth interpolation mode<br />
G05.1 Q2X0Y0Z0;<br />
Cancelation of smooth interpolation mode<br />
G05.1 Q 0;<br />
To machine a part having sculptured surfaces, such as metal moldings<br />
used in automobiles and airplanes, a part program usually approximates<br />
the sculptured surfaces with minute line segments. As shown in the<br />
following figure, a sculptured curve is normally approximated using line<br />
segments with a tolerance of about 10 m.<br />
10 m<br />
75<br />
: Specified point
4. INTERPOLATION FUNCTIONS PROGRAMMING<br />
B–63534EN/02<br />
When a program approximates a sculptured curve with line segments, the<br />
length of each segment differs between those portions that have mainly<br />
a small radius of curvature and those that have mainly a large radius of<br />
curvature. The length of the line segments is short in those portions<br />
having a small radius of curvature, while it is long in those portions<br />
having a large radius of curvature. The high–precision contour control<br />
moves the tool along a programmed path thus enabling highly precise<br />
machining. This means that the tool movement precisely follows the line<br />
segments used to approximate a sculptured curve. This may result in a<br />
non–smooth machined curve if control is applied to machining a curve<br />
where the radius of curvature is large and changes only gradually.<br />
Although this effect is caused by high–precision machining, which<br />
precisely follows a pre–programmed path, the uneven corners that result<br />
will be judged unsatisfactory when smooth surfaces are required.<br />
Profile<br />
Example of machined<br />
parts<br />
76<br />
Portions having<br />
mainly a small radius<br />
of curvature<br />
Portions having<br />
mainly a large radius<br />
of curvature<br />
Automobile parts Decorative parts, such<br />
as body side moldings<br />
Length of line segment Short Long<br />
Resulting surfaces produced<br />
using high–precision<br />
contour control<br />
Smooth surface even<br />
when machining is performed<br />
exactly as specified<br />
by a program<br />
Uneven surfaces may<br />
result when machining<br />
is performed exactly as<br />
specified by a program<br />
Example of uneven surfaces (polygon) resulting from machining<br />
that precisely follows the line segments.<br />
In smooth interpolation mode, the CNC automatically determines,<br />
according to the program command, whether an accurate figure is<br />
required, such as at corners, or a smooth figure is required where the<br />
radius of curvature is large. If a block specifies a travel distance or<br />
direction which differs greatly from that in the preceding block, smooth<br />
interpolation is not performed for that block. Linear interpolation is<br />
performed exactly as specified by the program command. Programming<br />
is thus very simple.
B–63534EN/02 PROGRAMMING<br />
4. INTERPOLATION FUNCTIONS<br />
Examples<br />
N1<br />
Linear interpolation<br />
N1<br />
Conditions for<br />
performing smooth<br />
interpolation<br />
N17<br />
Commands which cancel<br />
smooth interpolation<br />
N2<br />
N17<br />
N2<br />
N16<br />
Interpolated by smooth curve<br />
N15 N14 N13 N12<br />
N3 N4 N5 N6 N7<br />
N16<br />
Interpolated by smooth curve<br />
N15 N14 N13 N12<br />
N3 N4 N5 N6 N7<br />
77<br />
N11<br />
N8<br />
N11<br />
N8<br />
N10<br />
N9<br />
Linear interpolation<br />
Smooth interpolation is performed when all the following conditions are<br />
satisfied. If any of the following conditions is not satisfied for a block,<br />
that block is executed without smooth interpolation then the conditions<br />
are checked for the next block.<br />
(1)The machining length specified in the block is shorter than the length<br />
specified with parameter No. 8486.<br />
(2)The machining length is other than 0.<br />
(3)The modes are:<br />
G01 : Linear interpolation<br />
G13.1 : Polar coordinate interpolation cancel<br />
G15 : Polar coordinate command cancel<br />
G40 : Cutter compensation cancel<br />
(except for 3–dimensional tool compensation)<br />
G64 : Cutting mode<br />
G80 : Canned cycle cancel<br />
G94 : Feed per minute<br />
(4)Machining is specified only along the axes specified with G05.1Q2.<br />
(5)The block is judged to be unsuitable for smooth interpolation, as<br />
performed with the internal algorithm of the CNC.<br />
N10<br />
(1)Auxiliary and second auxiliary functions<br />
(2)M98, M99 : Subprogram call<br />
M198 : Calling a subprogram in external memory<br />
N9
4. INTERPOLATION FUNCTIONS PROGRAMMING<br />
B–63534EN/02<br />
Limitations<br />
Controlled axes<br />
High–precision contour<br />
control mode<br />
Examples<br />
N1<br />
N17<br />
N2<br />
Smooth interpolation can be specified only for the X–, Y–, and Z–axes<br />
and any axes parallel to these axes (up to three axes at one time).<br />
Commands for turning on and off smooth interpolation mode must be<br />
executed in high–precision contour control mode.<br />
Example program for smooth interpolation<br />
G05 P10000 ; N10 X–1000 Z350 ;<br />
. N11 X–1000 Z175 ;<br />
. N12 X–1000 Z25 ;<br />
G91 ; N13 X–1000 Z– 50 ;<br />
G05. 1 Q2 X0 Y0 Z0 ; N14 X–1000 Z– 50 ;<br />
N01 G01 X1000 Z–300 ; N15 X–1000 Z50 ;<br />
N02 X1000 Z–200 ; N16 X–1000 Z200 ;<br />
N03 X1000 Z–50 ; N17 X–1000 Z300 ;<br />
N04 X1000 Z50 ; G05. 1 Q0 ;<br />
N05 X1000 Z50 ; .<br />
N06 X1000 Z–25 ; .<br />
N07 X1000 Z–175 ; G05 P0 ;<br />
N08 X1000 Z–350 ; .<br />
N09 Y1000 ; .<br />
N16<br />
Interpolated by smooth curve<br />
Interpolated by smooth curve<br />
N15 N14 N13 N12<br />
N3 N4 N5 N6 N7<br />
78<br />
N11<br />
N8<br />
N10<br />
N9<br />
Linear interpolation
B–63534EN/02 PROGRAMMING<br />
4. INTERPOLATION FUNCTIONS<br />
4.13<br />
NURBS<br />
INTERPOLATION<br />
(G06.2)<br />
Many computer–aided design (CAD) systems used to design metal dies<br />
for automobiles and airplanes utilize non–uniform rational B–spline<br />
(NURBS) to express a sculptured surface or curve for the metal dies.<br />
This function enables NURBS curve expression to be directly specified<br />
to the CNC. This eliminates the need for approximating the NURBS<br />
curve with minute line segments. This offers the following advantages:<br />
1.No error due to approximation of a NURBS curve by small line<br />
segments<br />
2.Short part program<br />
3.No break between blocks when small blocks are executed at high speed<br />
4.No need for high–speed transfer from the host computer to the CNC<br />
When this function is used, a computer–aided machining (CAM) system<br />
creates a NURBS curve according to the NURBS expression output from<br />
the CAD system, after compensating for the length of the tool holder, tool<br />
diameter, and other tool elements. The NURBS curve is programmed in<br />
the NC format by using these three defining parameters: control point,<br />
weight, and knot.<br />
CAD (Designing a metal die)<br />
Generating a metal die surface<br />
(NURBS surface or curve)<br />
CAM (Creating an NC part program)<br />
79<br />
Studying the machining<br />
method and others<br />
Tool compensation file<br />
NC part program after tool compensation<br />
(NURBS curve)<br />
NURBS curve (control point, weight, knot)<br />
CNC equipment <strong>Machine</strong> tool<br />
Fig. 4.13 NC part program for machining a metal die according to a<br />
NURBS curve<br />
NURBS interpolation must be specified in high–precision contour<br />
control mode (between G05 P10000 and G05 P0). The CNC executes<br />
NURBS interpolation while smoothly accelerating or decelerating the<br />
movement so that the acceleration on each axis will not exceed the<br />
allowable maximum acceleration of the machine. In this way, the CNC<br />
automatically controls the speed in order to prevent excessive strain being<br />
imposed on the machine. For details of high–precision contour control,<br />
see Section II–19.8.
4. INTERPOLATION FUNCTIONS PROGRAMMING<br />
B–63534EN/02<br />
Format<br />
Explanations<br />
NURBS interpolation<br />
mode<br />
Rank of NURBS<br />
Weight<br />
G05 P10000 ;<br />
...<br />
(Start high–precision contour control mode)<br />
G06.2 [P_]<br />
G01 ...<br />
...<br />
K_ X_ Y_ Z_ [R_] [F_] ;<br />
K_ X_ Y_ Z_ [R_] ;<br />
K_ X_ Y_ Z_ [R_] ;<br />
K_ X_ Y_ Z_ [R_] ;<br />
...<br />
K_ X_ Y_ Z_ [R_] ;<br />
K_ ;<br />
...<br />
K_ ;<br />
G05 P0 ; (End high–precision contour control mode)<br />
G06.2 : Start NURBS interpolation mode<br />
P_ : Rank of NURBS curve<br />
X_ Y_ Z_ : Control point<br />
R_ : Weight<br />
K_ : Knot<br />
F_ : Feedrate<br />
NURBS interpolation mode is selected when G06.2 is programmed in<br />
high–precision contour control mode. G06.2 is a modal G code of group<br />
01. NURBS interpolation mode ends when a G code of group 01 other<br />
than G06.2 (G00, G01, G02, G03, etc.) is specified. NURBS<br />
interpolation mode must end before the command for ending<br />
high–precision contour control mode is programmed.<br />
A rank of NURBS can be specified with address P. The rank setting, if<br />
any, must be specified in the first block. If the rank setting is omitted, a<br />
rank of four (degree of three) is assumed for NURBS. The valid data<br />
range for P is 2 to 4. The P values have the following meanings:<br />
P2: NURBS having a rank of two (degree of one)<br />
P3: NURBS having a rank of three (degree of two)<br />
P4: NURBS having a rank of four (degree of three) (default)<br />
This rank is represented by k in the defining expression indicated in the<br />
description of NURBS curve below. For example, a NURBS curve<br />
having a rank of four has a degree of three. The NURBS curve can be<br />
expressed by the constants t 3 , t 2 , and t 1 .<br />
The weight of a control point programmed in a single block can be<br />
defined. When the weight setting is omitted, a weight of 1.0 is assumed.<br />
80
B–63534EN/02 PROGRAMMING<br />
4. INTERPOLATION FUNCTIONS<br />
Knot<br />
NURBS curve<br />
Reset<br />
Limitations<br />
Controlled axes<br />
Command in NURBS<br />
interpolation mode<br />
Manual intervention<br />
Cutter compensation<br />
The number of specified knots must equal the number of control points<br />
plus the rank value. In the blocks specifying the first to last control points,<br />
each control point and a knot are specified in an identical block. After<br />
these blocks, as many blocks (including only a knot) as the rank value are<br />
specified. The NURBS curve programmed for NURBS interpolation<br />
must start from the first control point and end at the last control point. The<br />
first k knots (where k is the rank) must have the same values as the last<br />
k knots (multiple knots). If the absolute coordinates of the start point of<br />
NURBS interpolation do not match the position of the first control point,<br />
P/S alarm No. 5117 is issued. (To specify incremental values, G06.2 X0<br />
Y0 Z0 K_ must be programmed.)<br />
Using these variables:<br />
k : Rank<br />
Pi : Control point<br />
Wi : Weight<br />
Xi : Knot (Xi Xi + 1)<br />
Knot vector [X0, X1, ..., Xm] (m = n + k)<br />
t : Spline parameter,<br />
the spline basis function N can be expressed with the de Boor–Cox<br />
recursive formula, as indicated below:<br />
N i,1(t) 1(x i t x i1)<br />
0(t x i , x i1 t)<br />
N i,k(t) (t–x i) N i,k–1(t)<br />
x ik–1 –x i (x ik–t) N i1,k–1(t)<br />
x ik–x i1<br />
The NURBS curve P(t) of interpolation can be expressed as follows:<br />
P(t) <br />
n<br />
i0 N i,k(t)w iP i<br />
n<br />
i0 N i,k(t)w i<br />
81<br />
(x0 t xm)<br />
A reset during NURBS interpolation results in the clear state. The modal<br />
code of group 1 enters the state specified in the G01 bit (bit 0 of parameter<br />
3402).<br />
NURBS interpolation can be performed on up to three axes. The axes of<br />
NURBS interpolation must be specified in the first block. A new axis<br />
cannot be specified before the beginning of the next NURBS curve or<br />
before NURBS interpolation mode ends.<br />
In NURBS interpolation mode, any command other than the NURBS<br />
interpolation command (miscellaneous function and others) cannot be<br />
specified.<br />
If manual intervention is attempted while manual absolute mode is set,<br />
P/S alarm No. 5118 is issued.<br />
Cutter compensation cannot be simultaneously executed. NURBS<br />
interpolation can only be specified after cutter compensation has been<br />
canceled.
4. INTERPOLATION FUNCTIONS PROGRAMMING<br />
B–63534EN/02<br />
Alarms<br />
Example<br />
No.<br />
Displayed<br />
message<br />
Description<br />
PS5115 SPL: Error An illegal rank is specified.<br />
No knot is specified.<br />
An illegal knot is specified.<br />
Too many axes are specified.<br />
Other program error.<br />
PS5116 SPL: Error A look–ahead block contains a program error.<br />
82<br />
The knot does not increase at a constant rate.<br />
PS5117 SPL: Error<br />
An inhibited mode is specified in NURBS interpolation<br />
mode.<br />
The first NURBS control point is illegal.<br />
PS5118 SPL: Error An attempt was made to resume NURBS interpolation<br />
after manual intervention in manual<br />
absolute mode.<br />
<br />
G05 P10000;<br />
G90;<br />
...<br />
G06.2 K0. X0. Z0.;<br />
K0. X300. Z100.;<br />
K0. X700. Z100.;<br />
K0. X1300. Z–100.;<br />
K0.5 X1700. Z–100.;<br />
K0.5 X2000. Z0.;<br />
K1.0;<br />
K1.0;<br />
K1.0;<br />
K1.0;<br />
G01 Y0.5;<br />
G06.2 K0. X2000. Z0.;<br />
K0. X1700. Z–100.;<br />
K0. X1300. Z–100.;<br />
K0. X700. Z100.;<br />
K0.5 X300. Z100.;<br />
K0.5 X0.<br />
K1.0;<br />
K1.0;<br />
K1.0;<br />
K1.0;<br />
G01 Y0.5;<br />
G06.2 ...<br />
...<br />
G01 ...<br />
G05P0;<br />
Z0.;
B–63534EN/02 PROGRAMMING<br />
4. INTERPOLATION FUNCTIONS<br />
Z<br />
Y<br />
1000.<br />
83<br />
2000.<br />
X
4. INTERPOLATION FUNCTIONS PROGRAMMING<br />
B–63534EN/02<br />
4.14<br />
HYPOTHETICAL AXIS<br />
INTERPOLATION<br />
(G07)<br />
Format<br />
Explanations<br />
Sine interpolation<br />
Interlock, stroke limit,<br />
and external<br />
deceleration<br />
Handle interrupt<br />
In helical interpolation, when pulses are distributed with one of the<br />
circular interpolation axes set to a hypothetical axis, sine interpolation is<br />
enabled.<br />
When one of the circular interpolation axes is set to a hypothetical axis,<br />
pulse distribution causes the speed of movement along the remaining axis<br />
to change sinusoidally. If the major axis for threading (the axis along<br />
which the machine travels the longest distance) is set to a hypothetical<br />
axis, threading with a fractional lead is enabled. The axis to be set as the<br />
hypothetical axis is specified with G07.<br />
G07 0; Hypothetical axis setting<br />
G07 1; Hypothetical axis cancel<br />
Where, is any one of the addresses of the controlled axes.<br />
The axis is regarded as a hypothetical axis for the period of time from<br />
the G07 0 command until the G07 1 command appears.<br />
Suppose sine interpolation is performed for one cycle in the YZ plane.<br />
The hypothetical axis is then the X axis.<br />
X2 + Y2 = r2 (r is the radius of an arc.)<br />
Y = r SIN ( 2 Z )<br />
1<br />
(1 is the distance traveled along the Z–axis in one cycle.)<br />
r<br />
0<br />
Y<br />
84<br />
<br />
2<br />
1<br />
2<br />
Interlock, stroke limit, and external deceleration can also apply to the<br />
hypothetical axis.<br />
An interrupt caused by the handle also applies to the hypothetical axis.<br />
This means that movement for a handle interrupt is performed.<br />
Z
B–63534EN/02 PROGRAMMING<br />
4. INTERPOLATION FUNCTIONS<br />
Limitations<br />
Manual operation<br />
Move command<br />
Coordinate rotation<br />
Examples<br />
Sine interpolation<br />
Changing the feedrate to<br />
form a sine curve<br />
The hypothetical axis can be used only in automatic operation. In manual<br />
operation, it is not used, and movement takes place.<br />
Specify hypothetical axis interpolation only in the incremental mode.<br />
Hypothetical axis interpolation does not support coordinate rotation.<br />
10.0<br />
0<br />
Y<br />
N001 G07 X0 ;<br />
N002 G91 G17 G03 X–20.2 Y0.0 I–10.0 Z20.0 F100 ;<br />
N003 G01 X10.0 ;<br />
N004 G07 X1 ;<br />
From the N002 to N003 blocks, the X–axis is set to a hypothetical axis.<br />
The N002 block specifies helical cutting in which the Z–axis is the linear<br />
axis. Since no movement takes place along the X axis, movement along<br />
the Y–axis is performed while performing sine interpolation along the<br />
Z–axis.<br />
In the N003 block, there is no movement along the X–axis, and so the<br />
machine dwells until interpolation terminates.<br />
(Sample program)<br />
G07Z0 ; The Z–axis is set to a hypothetical axis.<br />
G02X0Z0I10.0F4. ; The feedrate on the X–axis changes sinusoidally.<br />
G07Z1 ; The use of the Z–axis as a hypothetical axis is<br />
canceled.<br />
4.0<br />
F<br />
85<br />
20.0<br />
Xt<br />
Z
4. INTERPOLATION FUNCTIONS PROGRAMMING<br />
B–63534EN/02<br />
4.15<br />
THREAD CUTTING<br />
(G33)<br />
Format<br />
Explanations<br />
Straight threads with a constant lead can be cut. The position coder<br />
mounted on the spindle reads the spindle speed in real–time. The read<br />
spindle speed is converted to the feedrate per minute to feed the tool.<br />
G33 _<br />
F_ ;<br />
F : Long axis direction lead<br />
86<br />
Z<br />
<br />
In general, thread cutting is repeated along the same tool path in rough<br />
cutting through finish cutting for a screw. Since thread cutting starts when<br />
the position coder mounted on the spindle outputs a 1–turn signal,<br />
threading is started at a fixed point and the tool path on the workpiece is<br />
unchanged for repeated thread cutting. Note that the spindle speed must<br />
remain constant from rough cutting through finish cutting. If not,<br />
incorrect thread lead will occur.<br />
In general, the lag of the servo system, etc. will produce somewhat<br />
incorrect leads at the starting and ending points of a thread cut. To<br />
compensate for this, a thread cutting length somewhat longer than<br />
required should be specified.<br />
Table 4.15 (a) lists the ranges for specifying the thread lead.<br />
mm input<br />
<strong>Inc</strong>h input<br />
Table. 4.15 (a) Ranges of lead sizes that can be specified<br />
Least command<br />
increment<br />
Command value range of the lead<br />
0.001 mm F1 to F50000 (0.01 to 500.00mm)<br />
0.0001 mm F1 to F50000 (0.01 to 500.00mm)<br />
0.0001 inch<br />
F1 to F99999<br />
(0.0001 to 9.9999inch)<br />
0.00001 inch<br />
F1 to F99999<br />
(0.0001 to 9.9999inch)<br />
X
B–63534EN/02 PROGRAMMING<br />
4. INTERPOLATION FUNCTIONS<br />
1 The spindle speed is limited as follows :<br />
1 spindle speed <br />
Spindle speed : min-1 NOTE<br />
Maximum feedrate<br />
Thread lead<br />
Thread lead : mm or inch<br />
Maximum feedrate : mm/min or inch/min ; maximum command–specified feedrate for<br />
feed–per–minute mode or maximum feedrate that is determined based on mechanical<br />
restrictions including those related to motors, whichever is smaller<br />
2 Cutting feedrate override is not applied to the converted feedrate in all machining process from<br />
rough cutting to finish cutting. The feedrate is fixed at 100%<br />
3 The converted feedrate is limited by the upper feedrate specified.<br />
4 Feed hold is disabled during threading. Pressing the feed hold key during thread cutting causes<br />
the machine to stop at the end point of the next block after threading (that is, after the G33 mode<br />
is terminated)<br />
Examples<br />
Thread cutting at a pitch of 1.5mm<br />
G33 Z10. F1.5;<br />
87
4. INTERPOLATION FUNCTIONS PROGRAMMING<br />
B–63534EN/02<br />
4.16<br />
SKIP FUNCTION<br />
(G31)<br />
Format<br />
Explanations<br />
Linear interpolation can be commanded by specifying axial move<br />
following the G31 command, like G01. If an external skip signal is input<br />
during the execution of this command, execution of the command is<br />
interrupted and the next block is executed.<br />
The skip function is used when the end of machining is not programmed<br />
but specified with a signal from the machine, for example, in grinding. It<br />
is used also for measuring the dimensions of a workpiece.<br />
G31 IP_<br />
;<br />
G31: One–shot G code (If is effective only in the block in which it<br />
is specified)<br />
The coordinate values when the skip signal is turned on can be used in a<br />
custom macro because they are stored in the custom macro system<br />
variable #5061 to #5068, as follows:<br />
#5061 X axis coordinate value<br />
#5062 Y axis coordinate value<br />
#5063 Z axis coordinate value<br />
#5064 4th axis coordinate value<br />
#5065 5th axis coordinate value<br />
#5066 6th axis coordinate value<br />
#5067 7th axis coordinate value<br />
#5068 8th axis coordinate value<br />
WARNING<br />
Disable feedrate override, dry run, and automatic<br />
acceleration/deceleration (however, these become<br />
available by setting the parameter SKF No.6200#7 to 1.)<br />
when the feedrate per minute is specified, allowing for an<br />
error in the position of the tool when a skip signal is input.<br />
These functions are enabled when the feedrate per rotation<br />
is specified.<br />
NOTE<br />
If G31 command is issued while cutter compensation C is<br />
applied, an P/S alarm of No.035 is displayed. Cancel the<br />
cutter compensation with the G40 command before the G31<br />
command is specified.<br />
88
B–63534EN/02 PROGRAMMING<br />
4. INTERPOLATION FUNCTIONS<br />
Examples<br />
The next block to G31 is<br />
an incremental<br />
command<br />
The next block to G31 is<br />
an absolute command<br />
for 1 axis<br />
The next block to G31 is<br />
an absolute command<br />
for 2 axes<br />
G31 G91X100.0 F100;<br />
Y50.0;<br />
Y<br />
Skip signal is input here<br />
X<br />
89<br />
100.0<br />
50.0<br />
Actual motion<br />
Motion without skip signal<br />
Fig. 4.16 (a) The next block is an incremental command<br />
G31 G90X200.00 F100;<br />
Y100.0;<br />
Skip signal is input here<br />
Y100.0<br />
X200.0<br />
Actual motion<br />
Motion without skip signal<br />
Fig. 4.16 (b) The next block is an absolute command for 1 axis<br />
G31 G90X200.0 F100;<br />
X300.0 Y100.0;<br />
Y<br />
100<br />
Skip signal is input here<br />
(300,100)<br />
100 200 300<br />
X<br />
Actual motion<br />
Motion without skip signal<br />
Fig 4.16 (c) The next block is an absolute command for 2 axes
4. INTERPOLATION FUNCTIONS PROGRAMMING<br />
B–63534EN/02<br />
4.17<br />
MULTISTAGE SKIP<br />
(G31)<br />
Format<br />
Explanations<br />
Correspondence to skip<br />
signals<br />
In a block specifying P1 to P4 after G31, the multistage skip function<br />
stores coordinates in a custom macro variable when a skip signal (4–point<br />
or 8–point ; 8–point when a high–speed skip signal is used) is turned on.<br />
Parameters No. 6202 to No. 6205 can be used to select a 4–point or<br />
8–point (when a high–speed skip signal is used) skip signal. One skip<br />
signal can be set to match multiple Pn or Qn (n=1,2,3,4) as well as to<br />
match a Pn or Qn on a one–to–one basis. Parameters DS1 to DS8 (No.<br />
6206 #0A#7) can be used for dwell.<br />
A skip signal from equipment such as a fixed–dimension size measuring<br />
instrument can be used to skip programs being executed.<br />
In plunge grinding, for example, a series of operations from rough<br />
machining to spark–out can be performed automatically by applying a<br />
skip signal each time rough machining, semi–fine machining,<br />
fine–machining, or spark–out operation is completed.<br />
Move command<br />
G31 IP IP__<br />
F __ P __ ;<br />
Dwell<br />
IP_<br />
: End point<br />
F_ : Feedrate<br />
P_ : P1–P4<br />
G04 X (P)__ (Q__) ;<br />
X(P)_ : Dwell time<br />
Q_ : Q1 – Q4<br />
Multistage skip is caused by specifying P1, P2, P3, or P4 in a G31 block.<br />
For an explanation of selecting (P1, P2, P3, or P4), refer to the manual<br />
supplied by the machine tool builder.<br />
Specifying Q1, Q2, Q3, or Q4 in G04 (dwell command) enables dwell<br />
skip in a similar way to specifying G31. A skip may occur even if Q is<br />
not specified. For an explanation of selecting (Q1, Q2, Q3, or Q4), refer<br />
to the manual supplied by the machine tool builder.<br />
Parameter Nos. 6202 to 6205 can be used to specify whether the 4–point<br />
or 8–point skip signal is used (when a high–speed skip signal is used).<br />
Specification is not limited to one–to–one correspondence. It is possible<br />
to specify that one skip signal correspond to two or more Pn’s or Qn’s<br />
(n=1, 2, 3, 4). Also, bits 0 (DS1) to 7 (DS8) of parameter No. 6206 can<br />
be used to specify dwell.<br />
CAUTION<br />
Dwell is not skipped when Qn is not specified and<br />
parameters DS1–DS8 (No. 6206#0–#7) are not set.<br />
90
B–63534EN/02 PROGRAMMING<br />
4. INTERPOLATION FUNCTIONS<br />
4.18<br />
HIGH SPEED SKIP<br />
SIGNAL (G31)<br />
Format<br />
The skip function operates based on a high–speed skip signal (connected<br />
directly to the NC; not via the PMC) instead of an ordinary skip signal.<br />
In this case, up to eight signals can be input.<br />
Delay and error of skip signal input is 0 – 2 msec at the NC side (not<br />
considering those at the PMC side).<br />
This high–speed skip signal input function keeps this value to 0.1 msec<br />
or less, thus allowing high precision measurement.<br />
For details, refer to the appropriate manual supplied from the machine<br />
tool builder.<br />
G31 IP_ IP ;<br />
G31: One–shot G code (If is effective only in the block in which it is<br />
specified)<br />
91
4. INTERPOLATION FUNCTIONS PROGRAMMING<br />
B–63534EN/02<br />
4.19<br />
CONTINUOUS<br />
HIGH–SPEED SKIP<br />
FUNCTION (G31)<br />
Format<br />
Explanations<br />
Custom macro variables<br />
High–speed skip signal<br />
End of block<br />
Limitations<br />
Controlled axes<br />
The continuous high–speed skip function enables reading of absolute<br />
coordinates by using the high–speed skip signal. Once a high–speed skip<br />
signal has been input in a G31P90 block, absolute coordinates are read<br />
into custom macro variables #5061 to #5068. The input of a skip signal<br />
does not stops axial movement, thus enabling reading of the coordinates<br />
of two or more points.<br />
The rising and falling edges of the high–speed skip signal can be used as<br />
a trigger, depending on the parameter BHIS (No. 6201#5) setting.<br />
G31 P90 __ F__<br />
__: Skip axis address and amount of travel<br />
Only one axis can be specified. G31 is a one–shot G code.<br />
Once a high–speed skip signal has been input in a G31P90 block, absolute<br />
coordinates are read into custom macro variables #5061 to #5068. These<br />
variables are immediately updated once the tool reaches the next skip<br />
position. The feedrate must, therefore, be specified such that the tool does<br />
not reach the next skip position before the application completes reading<br />
of the variables. For details of the application, refer to the appropriate<br />
manual supplied from the machine tool builder.<br />
#5061 Coordinate along the first axis<br />
#5062 Coordinate along the second axis<br />
#5063 Coordinate along the third axis<br />
<br />
#5068 Coordinate along the eighth axis<br />
This function is enabled only when a high–speed skip signal is used.<br />
The high–speed skip signal to be used is selected with bits 0 to 7 of<br />
parameter No. 6208 (9S1 to 9S8).<br />
The G31P90 block is terminated when the tool reaches the end point.<br />
Only one axis can be specified in the block for the continuous high–speed<br />
skip function (G31P90). If two or more axes are specified, P/S alarm No.<br />
5068 is issued.<br />
92
B–63534EN/02 PROGRAMMING<br />
5. FEED FUNCTIONS<br />
5 <br />
<br />
93
5. FEED FUNCTIONS PROGRAMMING<br />
B–63534EN/02<br />
5.1<br />
GENERAL<br />
Feed functions<br />
Override<br />
Automatic acceleration/<br />
deceleration<br />
The feed functions control the feedrate of the tool. The following two feed<br />
functions are available:<br />
1. Rapid traverse<br />
When the positioning command (G00) is specified, the tool moves at<br />
a rapid traverse feedrate set in the CNC (parameter No. 1420).<br />
2. Cutting feed<br />
The tool moves at a programmed cutting feedrate.<br />
Override can be applied to a rapid traverse rate or cutting feedrate using<br />
the switch on the machine operator’s panel.<br />
To prevent a mechanical shock, acceleration/deceleration is automatically<br />
applied when the tool starts and ends its movement (Fig. 5.1 (a)).<br />
Rapid traverse rate<br />
F R<br />
0<br />
Feed rate<br />
FC<br />
<br />
T C<br />
T <br />
94<br />
T C<br />
T R<br />
F C<br />
T C<br />
F R : Rapid traverse<br />
rate<br />
T R<br />
: Acceleration/<br />
deceleration time<br />
constant for rapid<br />
traverse rate<br />
Time<br />
: Feedrate<br />
: Acceleration/<br />
deceleration time<br />
constant for a cutting<br />
feedrate<br />
Time<br />
Fig. 5.1 (a) Automatic acceleration/deceleration (example)
B–63534EN/02 PROGRAMMING<br />
5. FEED FUNCTIONS<br />
Tool path in a cutting<br />
feed<br />
If the direction of movement changes between specified blocks during<br />
cutting feed, a rounded–corner path may result (Fig. 5.1 (b)).<br />
<br />
0<br />
95<br />
<br />
Programmed path<br />
Actual tool path<br />
Fig. 5.1 (b) Example of Tool Path between Two Blocks<br />
In circular interpolation, a radial error occurs (Fig. 5.1 (c)).<br />
<br />
0<br />
<br />
∆Error<br />
<br />
Programmed path<br />
Actual tool path<br />
Fig. 5.1 (c) Example of Radial Error in Circular Interpolation<br />
The rounded–corner path shown in Fig. 5.1 (b) and the error shown in Fig.<br />
5.1 (c) depend on the feedrate. So, the feedrate needs to be controlled for<br />
the tool to move as programmed.
5. FEED FUNCTIONS PROGRAMMING<br />
B–63534EN/02<br />
5.2<br />
RAPID TRAVERSE<br />
Format<br />
Explanations<br />
G00 IP_ IP ;<br />
G00 : G code (group 01) for positioning (rapid traverse)<br />
IP IP_ ; Dimension word for the end point<br />
The positioning command (G00) positions the tool by rapid traverse. In<br />
rapid traverse, the next block is executed after the specified feedrate<br />
becomes 0 and the servo motor reaches a certain range set by the machine<br />
tool builder (in–position check).<br />
A rapid traverse rate is set for each axis by parameter No. 1420, so no rapid<br />
traverse feedrate need be programmed.<br />
The following overrides can be applied to a rapid traverse rate with the<br />
switch on the machine operator’s panel:F0, 25, 50, 100%<br />
F0: Allows a fixed feedrate to be set for each axis by parameter No. 1421.<br />
For detailed information, refer to the appropriate manual of the machine<br />
tool builder.<br />
96
B–63534EN/02 PROGRAMMING<br />
5. FEED FUNCTIONS<br />
5.3<br />
CUTTING FEED<br />
Format<br />
Explanations<br />
Tangential speed<br />
constant control<br />
Feedrate of linear interpolation (G01), circular interpolation (G02, G03),<br />
etc. are commanded with numbers after the F code.<br />
In cutting feed, the next block is executed so that the feedrate change from<br />
the previous block is minimized.<br />
Four modes of specification are available:<br />
1. Feed per minute (G94)<br />
After F, specify the amount of feed of the tool per minute.<br />
2. Feed per revolution (G95)<br />
After F, specify the amount of feed of the tool per spindle revolution.<br />
3. Inverse time feed (G93)<br />
Specify the inverse time (FRN) after F.<br />
4. F1–digit feed<br />
Specify a desired one–digit number after F. Then, the feedrate set with<br />
the CNC for that number is set.<br />
Feed per minute<br />
G94 ; G code (group 05) for feed per minute<br />
F_ ; Feedrate command (mm/min or inch/min)<br />
Feed per revolution<br />
G95 ; G code (group 05) for feed per revolution<br />
F_ ; Feedrate command (mm/rev or inch/rev)<br />
Inverse time feed (G93)<br />
G93 ; Inverse time feed command<br />
G code (05 group)<br />
F_ ; Feedrate command (1/min)<br />
F1–digit feed<br />
Fn ;<br />
n : Number from 1 to 9<br />
Cutting feed is controlled so that the tangential feedrate is always set at<br />
a specified feedrate.<br />
Y Y<br />
F<br />
Start<br />
point<br />
Center End point<br />
X<br />
X<br />
Linear interpolation Circular interpolation<br />
97<br />
End point<br />
Starting<br />
point<br />
Fig. 5.3 (a) Tangential feedrate (F)<br />
F
5. FEED FUNCTIONS PROGRAMMING<br />
B–63534EN/02<br />
Feed per minute (G94)<br />
Feed per revolution<br />
(G95)<br />
After specifying G94 (in the feed per minute mode), the amount of feed<br />
of the tool per minute is to be directly specified by setting a number after<br />
F. G94 is a modal code. Once a G94 is specified, it is valid until G95 (feed<br />
per revolution) is specified. At power–on, the feed per minute mode is<br />
set.<br />
An override from 0% to 254% (in 1% steps) can be applied to feed per<br />
minute with the switch on the machine operator’s panel. For detailed<br />
information, see the appropriate manual of the machine tool builder.<br />
98<br />
Workpiece<br />
Table<br />
Fig. 5.3 (b) Feed per minute<br />
Feed amount per minute<br />
(mm/min or inch/min)<br />
Tool<br />
WARNING<br />
No override can be used for some commands such as for<br />
threading.<br />
After specifying G95 (in the feed per revolution mode), the amount of<br />
feed of the tool per spindle revolution is to be directly specified by setting<br />
a number after F. G95 is a modal code. Once a G95 is specified, it is valid<br />
until G94 (feed per minute) is specified.<br />
An override from 0% to 254% (in 1% steps) can be applied to feed per<br />
revolution with the switch on the machine operator’s panel. For detailed<br />
information, see the appropriate manual of the machine tool builder.<br />
F<br />
Feed amount per spindle revolution<br />
(mm/rev or inch/rev)<br />
Fig. 5.3 (c) Feed per revolution<br />
CAUTION<br />
When the speed of the spindle is low, feedrate fluctuation<br />
may occur. The slower the spindle rotates, the more<br />
frequently feedrate fluctuation occurs.
B–63534EN/02 PROGRAMMING<br />
5. FEED FUNCTIONS<br />
Inverse time feed (G93)<br />
Explanations<br />
When G93 is specified, the inverse time specification mode (G93 mode)<br />
is set. Specify the inverse time (FRN) with an F code.<br />
A value from 0.001 to 9999.999 can be specified as FRN, regardless of<br />
whether the input mode is inches or metric, or the increment system is<br />
IS–B or IS–C.<br />
F code specification value FRN<br />
F1 0.001<br />
F1 *1 1.000<br />
F1.0 1.000<br />
F9999999 9999.999<br />
F9999 *1 9999.000<br />
F9999.999 9999.999<br />
NOTE<br />
*1 Value specified in fixed–point format with bit 0 (DPI) of parameter<br />
No. 3401 set to 1<br />
For linear interpolation (G01)<br />
1 feedrate<br />
FRN=<br />
time (min) distance<br />
=<br />
To end a block in 1 (min)<br />
FRN =<br />
1<br />
time (min)<br />
=<br />
1<br />
1 (min)<br />
To end a block in 10 (sec)<br />
FRN =<br />
1<br />
time (sec) / 60 =<br />
99<br />
Feedrate:mm/min (for metric input)<br />
inch/min(for inch input)<br />
Distance:mm (for metric input)<br />
inch(for inch input)<br />
= 1<br />
Specify F1.0.<br />
1<br />
= 6 Specify F6.0.<br />
10/60 (sec)<br />
To find the movement time required when F0.5 is specified<br />
1<br />
FRN =<br />
Time (min) =<br />
1<br />
0.5<br />
= 2 2 (min) is required.<br />
To find the movement time required when F10.0 is specified<br />
Time (sec) = 160<br />
FRN<br />
= 60<br />
10<br />
= 6 6 (sec) is required.<br />
For circular interpolation (G01)<br />
FRN=<br />
1<br />
time (min)<br />
=<br />
feedrate<br />
arc radius<br />
Feedrate: mm/min (for metric input)<br />
inch/min(for inch input)<br />
Arc radius: mm (for metric input)<br />
inch(for inch input)<br />
NOTE<br />
In the case of circular interpolation, the feedrate is<br />
calculated notfrom the actual amount of movement in the<br />
block but from the arcradius.
5. FEED FUNCTIONS PROGRAMMING<br />
B–63534EN/02<br />
G93 is a modal G code and belongs to group 05 (includes G95 (feed per<br />
revolution) and G94 (feed per minute)).<br />
When an F value is specified in G93 mode and the feedrate exceeds the<br />
maximum cutting feedrate, the feedrate is clamped to the maximum<br />
cutting feedrate.<br />
In the case of circular interpolation, the feedrate is calculated not from the<br />
actual amount of movement in the block but from the arc radius. This<br />
means that actual machining time is longer when the arc radius is longer<br />
than the arc distance and shorter when the arc radius is shorter than the arc<br />
distance. Inverse time feed can also be used for cutting feed in a canned<br />
cycle.Notes<br />
NOTE<br />
1 In the G93 mode, an F code is not handled as a modal code and<br />
therefore needs to be specified in each block. If an F code is not<br />
specified, P/S alarm (No. 11 (indicating that cutting feedrate<br />
specification is missing)) is issued.<br />
2 When F0 is specified in G93 mode, P/S alarm (No. 11 (indicating<br />
that cutting feedrate specification is missing)) is issued.<br />
3 Inverse time feed cannot be used when PMC axis control is in<br />
effect.<br />
4 If the calculated cutting feedrate is smaller than the allowable<br />
range, P/S alarm (No. 11 (indicating that cutting feedrate<br />
specification is missing)) is issued.<br />
100
B–63534EN/02 PROGRAMMING<br />
5. FEED FUNCTIONS<br />
One–digit F code feed<br />
Cutting feedrate clamp<br />
Reference<br />
When a one–digit number from 1 to 9 is specified after F, the feedrate<br />
set for that number in a parameter (Nos. 1451 to 1459) is used. When<br />
F0 is specified, the rapid traverse rate is applied.<br />
The feedrate corresponding to the number currently selected can be<br />
increased or decreased by turning on the switch for changing F1–digit<br />
feedrate on the machine operator’s panel, then by rotating the manual<br />
pulse generator.<br />
The increment/decrement, ∆F, in feedrate per scale of the manual pulse<br />
generator is as follows:<br />
F Fmax<br />
∆<br />
100X<br />
Fmax : feedrate upper limit for F1–F4 set by parameter (No.1460), or<br />
feedrate upper limit for F5–F9 set by parameter (No.1461)<br />
X :any value of 1–127 set by parameter (No.1450)<br />
The feedrate set or altered is kept even while the power is off. The current<br />
feed rate is displayed on the CRT screen.<br />
A common upper limit can be set on the cutting feedrate along each axis<br />
with parameter No. 1422. If an actual cutting feedrate (with an override<br />
applied) exceeds a specified upper limit, it is clamped to the upper limit.<br />
Parameter No. 1430 can be used to specify the maximum cutting feedrate<br />
for each axis only for linear interpolation and circular interpolation.<br />
When the cutting feedrate along an axis exceeds the maximum feedrate<br />
for the axis as a result of interpolation, the cutting feedrate is clamped to<br />
the maximum feedrate.<br />
NOTE<br />
An upper limit is set in mm/min or inch/min. CNC calculation<br />
may involve a feedrate error of ±2% with respect to a<br />
specified value. However, this is not true for<br />
acceleration/deceleration. To be more specific, this error is<br />
calculated with respect to a measurement on the time the<br />
tool takes to move 500 mm or more during the steady state:<br />
See Appendix C for range of feedrate command value.<br />
101
5. FEED FUNCTIONS PROGRAMMING<br />
B–63534EN/02<br />
5.4<br />
CUTTING FEEDRATE<br />
CONTROL<br />
Cutting feedrate can be controlled, as indicated in Table 5.4 (a).<br />
Table 5.4 (a) Cutting Feedrate Control<br />
Function name G code Validity of G code Description<br />
Exact stop G09<br />
Exact stop mode G61<br />
Cutting mode G64<br />
Tapping mode G63<br />
Auto–<br />
matic<br />
Automatic override for<br />
inner corners<br />
Internal circular cutting<br />
feedrate change<br />
G62<br />
_<br />
This function is valid for specified<br />
blocks only.<br />
Once specified, this function is<br />
valid until G62, G63, or G64 is<br />
specified.<br />
Once specified, this function is<br />
valid until G61, G62, or G63 is<br />
specified.<br />
Once specified, this function is<br />
valid until G61, G62, or G64 is<br />
specified.<br />
Once specified, this function is<br />
valid until G61, G63, or G64 is<br />
specified.<br />
This function is valid in the cutter<br />
compensation mode, regardless of<br />
the G code.<br />
102<br />
The tool is decelerated at the end point<br />
of a block, then an in–position check is<br />
made. Then the next block is executed.<br />
The tool is decelerated at the end point<br />
of a block, then an in–position check is<br />
made. Then the next block is executed.<br />
The tool is not decelerated at the end<br />
point of a block, but the next block is<br />
executed.<br />
The tool is not decelerated at the end<br />
point of a block, but the next block is<br />
executed.<br />
When G63 is specified, feedrate override<br />
and feed hold are invalid.<br />
When the tool moves along an inner<br />
corner during cutter compensation, override<br />
is applied to the cutting feedrate to<br />
suppress the amount of cutting per unit<br />
of time so that a good surface finish can<br />
be produced.<br />
The internal circular cutting feedrate is<br />
changed.<br />
NOTE<br />
1 The purpose of in–position check is to check that the servo<br />
motor has reached within a specified range (specified with<br />
a parameter by the machine tool builder).<br />
In–position check is not performed when bit 5 (NCI) of<br />
parameter No. 1601 is set to 1.<br />
2 Inner corner angle θ: 2°< θ α 178°<br />
(α is a set value)<br />
θ<br />
Tool<br />
Workpiece
B–63534EN/02 PROGRAMMING<br />
5. FEED FUNCTIONS<br />
Format<br />
5.4.1<br />
Exact Stop (G09, G61)<br />
Cutting Mode (G64)<br />
Tapping Mode (G63)<br />
Explanations<br />
Exact stop G09 IP_ ;<br />
Exact stop mode G61 ;<br />
Cutting mode G64 ;<br />
Tapping mode G63 ;<br />
Automatic corner override G62 ;<br />
The inter–block paths followed by the tool in the exact stop mode, cutting<br />
mode, and tapping mode are different (Fig. 5.4.1 (a)).<br />
Y<br />
0<br />
<br />
103<br />
<br />
Position check<br />
Tool path in the exact stop mode<br />
Tool path in the cutting mode or<br />
tapping mode<br />
X<br />
Fig. 5.4.1 (a) Example of Tool Paths from Block (1) to Block (2)<br />
CAUTION<br />
The cutting mode (G64 mode) is set at power–on or system<br />
clear.
5. FEED FUNCTIONS PROGRAMMING<br />
B–63534EN/02<br />
5.4.2<br />
Automatic Corner<br />
Override<br />
5.4.2.1<br />
Automatic Override for<br />
Inner Corners (G62)<br />
Explanations<br />
Override condition<br />
θ<br />
When cutter compensation is performed, the movement of the tool is<br />
automatically decelerated at an inner corner and internal circular area.<br />
This reduces the load on the cutter and produces a smoothly machined<br />
surface.<br />
When G62 is specified, and the tool path with cutter compensation<br />
applied forms an inner corner, the feedrate is automatically overridden<br />
at both ends of the corner.<br />
There are four types of inner corners (Fig. 5.4.2.1 (a)).<br />
2,θθp178, in Fig. 5.4.2.1 (a)<br />
θp is a value set with parameter No. 1711. When θ is approximately<br />
equal to θp, the inner corner is determined with an error of 0.001,or<br />
less.<br />
1. Straight line–straight line Tool<br />
Programmed path<br />
2. Straight line–arc<br />
θ<br />
Cutter center path<br />
3. Arc–straight line 4. Arc–arc<br />
Fig. 5.4.2.1 (a) Inner corner<br />
104<br />
θ<br />
θ
B–63534EN/02 PROGRAMMING<br />
5. FEED FUNCTIONS<br />
Override range<br />
When a corner is determined to be an inner corner, the feedrate is<br />
overridden before and after the inner corner. The distances Ls and Le,<br />
where the feedrate is overridden, are distances from points on the cutter<br />
center path to the corner (Fig. 5.4.2.1 (b), Fig. 5.4.2.1 (c), Fig. 5.4.2.1 (d)).<br />
Ls and Le are set with parameter Nos. 1713 and 1714.<br />
Programmed path<br />
Le Ls<br />
a<br />
Cutter center path<br />
The feedrate is overridden from point a to point b.<br />
FIg. 5.4.2.1 (b) Override Range (Straight Line to Straight Line)<br />
When a programmed path consists of two arcs, the feedrate is overridden<br />
if the start and end points are in the same quadrant or in adjacent quadrants<br />
(Fig. 5.4.2.1 (c)).<br />
a<br />
105<br />
Le<br />
b<br />
Ls<br />
Cutter center path<br />
The feedrate is overridden from point a to b.<br />
Programmed path<br />
Fig. 5.4.2.1 (c) Override Range (Arc to Arc)<br />
Regarding program (2) of an arc, the feedrate is overridden from point a<br />
to point b and from point c to point d (Fig. 5.4.2.1 (d)).<br />
Tool<br />
c<br />
Le<br />
d <br />
Ls Le<br />
Ls<br />
b<br />
Programmed path<br />
<br />
(2)<br />
Cutter center path<br />
Fig. 5.4.2.1 (d) Override Range (Straight Line to Arc, Arc to Straight Line)
5. FEED FUNCTIONS PROGRAMMING<br />
B–63534EN/02<br />
Override value<br />
Limitations<br />
Acceleration/deceleratio<br />
n before interpolation<br />
Start–up/G41, G42<br />
Offset<br />
5.4.2.2<br />
Internal Circular Cutting<br />
Feedrate Change<br />
An override value is set with parameter No. 1712. An override value is<br />
valid even for dry run and F1–digit specification.<br />
In the feed per minute mode, the actual feedrate is as follows:<br />
F × (automatic override for inner corners) × (feedrate override)<br />
Override for inner corners is disabled during acceleration/deceleration<br />
before interpolation.<br />
Override for inner corners is disabled if the corner is preceded by a<br />
start–up block or followed by a block including G41 or G42.<br />
Override for inner corners is not performed if the offset is zero.<br />
For internally offset circular cutting, the feedrate on a programmed path<br />
is set to a specified feedrate (F) by specifying the circular cutting feedrate<br />
with respect to F, as indicated below (Fig. 5.4.2.2). This function is valid<br />
in the cutter compensation mode, regardless of the G62 code.<br />
F Rc<br />
Rp<br />
Rc : Cutter center path radius<br />
Rp : Programmed radius<br />
It is also valid for the dry run and the one–digit F command.<br />
106<br />
Rp<br />
Rc<br />
Cutter center<br />
path<br />
Fig. 5.4.2.2 Internal circular cutting feedrate change<br />
Programmed path<br />
If Rc is much smaller than Rp, Rc/Rp0; the tool stops. A minimum<br />
deceleration ratio (MDR) is to be specified with parameter No. 1710.<br />
When Rc/RpMDR, the feedrate of the tool is (F×MDR).<br />
NOTE<br />
When internal circular cutting must be performed together with override for inner corners, the<br />
feedrate of the tool is as follows:<br />
F (override for the inner corners)×(feedrate override)<br />
Rc<br />
Rp
B–63534EN/02 PROGRAMMING<br />
5. FEED FUNCTIONS<br />
5.4.3<br />
Automatic Corner<br />
Deceleration<br />
5.4.3.1<br />
Corner Deceleration<br />
According to the Corner<br />
Angle<br />
Explanations<br />
Flowchart for feedrate<br />
control<br />
This function automatically controls the feedrate at a corner according to<br />
the corner angle between the machining blocks or the feedrate difference<br />
between the blocks along each axis.<br />
This function is effective when ACD, bit 6 of parameter No. 1601, is set<br />
to 1, the system is in G64 mode (machining mode), and a cutting–feed<br />
block (block A) is followed by another cutting–feed block (block B).<br />
The feedrate between machining blocks is controlled according to the<br />
corner angle between the blocks or the feedrate difference between the<br />
blocks along each axis. These two methods can be switched with CSD,<br />
bit 4 of parameter No. 1602.<br />
This function decelerates the feedrate when the angle between blocks A<br />
and B on the selected plane is smaller than the angle specified in parameter<br />
No. 1740. The function executes block B when the feedrates along both<br />
the first and second axes are smaller than the feedrate specified in<br />
parameter No. 1741. In this case, the function determines that the number<br />
of accumulated pulses is zero.<br />
The flowchart for feedrate control is shown below.<br />
START<br />
Is the corner angle smaller than<br />
the angle specified in parameter<br />
(No. 1740)?<br />
END<br />
107<br />
Yes<br />
Are the feedrates along the X–<br />
and Y–axes smaller than that<br />
specified in parameter<br />
(No. 1741)?<br />
Yes<br />
The number of accumulated<br />
pulses is determined to be zero<br />
and block B is executed<br />
No<br />
No<br />
Further decelerates the<br />
feedrate in block A
5. FEED FUNCTIONS PROGRAMMING<br />
B–63534EN/02<br />
Feedrate and time<br />
Acceleration/<br />
deceleration before<br />
interpolation<br />
Angle between two<br />
blocks<br />
1. Between linear movements<br />
θ<br />
When the corner angle is smaller than the angle specified in the<br />
parameter, the relationship between the feedrate and time is as shown<br />
below. Although accumulated pulses equivalent to the hatched area<br />
remain at time t, the next block is executed because the feedrate of the<br />
automatic acceleration/deceleration circuit is smaller than the<br />
parameter–set value. This function is effective only for movement on<br />
the selected plane.<br />
Feedrate V<br />
Parameter–set feedrate<br />
108<br />
Block A Block B<br />
ÍÍÍÍ<br />
ÍÍÍÍ<br />
Time t<br />
When acceleration/deceleration before interpolation is effective, the<br />
relationship between the feedrate and time is as shown below. When the<br />
angle between blocks A and B on the selected plane is smaller than the<br />
angle specified in parameter (No. 1740), and the feedrates specified in<br />
blocks A and B are larger than that specified in parameter (No. 1777), the<br />
feedrate is decelerated to the parameter–set value in block A, and<br />
accelerated to the feedrate specified in block B. The acceleration depends<br />
on the parameter for acceleration/deceleration before interpolation.<br />
Feedrate<br />
Block A Block B<br />
Parameter–set feedrate<br />
(parameter No. 1777)<br />
Time<br />
The angle between two blocks (blocks A and B) is assumed to be angle<br />
θ, as shown below.<br />
2. Between linear and circular movements<br />
(angle between the linear movement<br />
and tangent to the circular movement)<br />
θ<br />
θ<br />
3. Between circular movements<br />
(angle between the tangents to<br />
the circular movements)<br />
θ
B–63534EN/02 PROGRAMMING<br />
5. FEED FUNCTIONS<br />
Selected plane<br />
Corner roundness<br />
Exact stop<br />
Look–ahead control<br />
Limitations<br />
The machining angle is compared with the angle specified in parameter<br />
(No. 1740) for movements on the selected plane only. Machining<br />
feedrates are compared with that specified in parameter (No. 1741) for<br />
movement along the first and second axes on the selected plane only. This<br />
means, when movement occurs along three or more axes, only that<br />
movement along the first and second axes on the selected plane is<br />
considered.<br />
Corner roundness is determined by the angle and feedrate specified in<br />
parameter (Nos. 1740 and 1741). To always make a sharp corner, set<br />
the angle to zero and the feedrate to 180000 (equivalent to 180<br />
degrees).<br />
When G90 (exact stop) is specified, exact stop is performed irrespective<br />
of the angle and feedrate specified in parameter (Nos. 1740 and 1741).<br />
Those parameters related to automatic corner deceleration in look–ahead<br />
control mode are shown below.<br />
Parameter description<br />
Switching the methods for automatic corner deceleration<br />
Lower limit of feedrate in automatic corner deceleration<br />
based on the angle<br />
Limit angle in corner deceleration based on the<br />
angle<br />
109<br />
Normal<br />
mode<br />
Look–ahead<br />
control<br />
mode<br />
No.1602#4 ←<br />
No.1777 No.1778<br />
No.1740 No.1779<br />
This function cannot be enabled for a single block or during dry run.
5. FEED FUNCTIONS PROGRAMMING<br />
B–63534EN/02<br />
5.4.3.2<br />
Corner Deceleration<br />
According to the<br />
Feedrate Difference<br />
between Blocks Along<br />
Each Axis<br />
Explanations<br />
Flowchart for feedrate<br />
control<br />
Feedrate and time<br />
This function decelerates the feedrate when the difference between the<br />
feedrates at the end point of block A and the start point of block B along<br />
each axis is larger than the value specified in parameter No. 1781. The<br />
function executes block B when the feedrates along all axes are smaller<br />
than the feedrate specified in parameter No. 1741. In this case, the<br />
function determines that the number of accumulated pulses is zero.<br />
The flowchart for feedrate control is shown below.<br />
110<br />
START<br />
Is the feedrate difference between<br />
blocks along each axis larger than<br />
the value specified in parameter<br />
(No. 1781)?<br />
END<br />
Yes<br />
Are the feedrates along all axes No<br />
smaller than that specified in<br />
parameter (No. 1741)? Further decelerates the<br />
feedrate in block A<br />
Yes<br />
The number of accumulated pulses<br />
is determined to be zero and block<br />
B is executed.<br />
When the feedrate difference between blocks along each axis is larger than<br />
the value specified in parameter No. 1781, the relationship between the<br />
feedrate and time is as shown below. Although accumulated pulses<br />
equivalent to the hatched area remain at time t, the next block is executed<br />
because the feedrate of the automatic acceleration/deceleration circuit is<br />
smaller than the feedrate specified in parameter No. 1741.<br />
Feedrate V<br />
Parameter–set feedrate<br />
No<br />
Block A Block B<br />
ÍÍÍÍ<br />
ÍÍÍÍ<br />
Time t
B–63534EN/02 PROGRAMMING<br />
5. FEED FUNCTIONS<br />
Acceleration /<br />
deceleration before<br />
interpolation<br />
When acceleration/deceleration before interpolation is effective, the<br />
relationship between the feedrate and time is as described below.<br />
When the feedrate difference between blocks A and B along each axis is<br />
larger than the value specified in parameter No. 1780, the feedrate is<br />
decelerated to the corner feedrate calculated from the feedrate difference<br />
along each axis.<br />
Let the feedrate be F. Compare the feedrate difference along each axis<br />
(Vc[X], Vc[Y], ...) with the value specified in parameter No. 1780, Vmax.<br />
When the difference exceeds Vmax, calculate R as shown below.<br />
<br />
R=<br />
<br />
Find the maximum value for R among the calculated values for the axes.<br />
Let it be Rmax. Then, the corner feedrate can be obtained as follows:<br />
<br />
Fc=F <br />
<br />
(Example)<br />
N1<br />
111<br />
N2 N1 G01 G91 X80. Y20. F3000 ;<br />
N2 X20. Y80. ;<br />
When this movement is specified, the feedrate along each axis is as<br />
shown in the next figure.<br />
[]<br />
Rmax=<br />
<br />
<br />
F <br />
<br />
From the figure, it can be seen that the feedrate differences along the X–<br />
and Y–axes (Vc[X] and Vc[Y]) exceed Vmax. Calculate Rmax to get<br />
Fc. When the feedrate is decelerated to Fc at the corner, the feedrate<br />
difference along each axis do not exceed Vmax.
5. FEED FUNCTIONS PROGRAMMING<br />
B–63534EN/02<br />
Setting the allowable<br />
feedrate difference along<br />
each axis<br />
Checking the feedrate<br />
difference<br />
Exact stop<br />
Override<br />
Feedrate along<br />
the X–axis<br />
Feedrate along<br />
the Y–axis<br />
Feedrate along<br />
the tangent<br />
at the corner<br />
1<br />
F<br />
Rmax<br />
112<br />
Vmax<br />
Vc [X] Vmax<br />
Vc [Y]<br />
Vmax<br />
N1 N2 t<br />
Without corner deceleration<br />
With corner deceleration<br />
The allowable feedrate difference can be specified for each axis in<br />
parameter No. 1783.<br />
The feedrate difference is also checked during dry–run operation or<br />
during deceleration caused by an external signal, using feedrate<br />
commands specified in a program.<br />
When G90 (exact stop) is specified, exact stop is performed irrespective<br />
of the parameter settings.<br />
If an override is changed during operation, the feedrate difference will<br />
not be checked correctly.
B–63534EN/02 PROGRAMMING<br />
5. FEED FUNCTIONS<br />
Look–ahead control<br />
Limitations<br />
Parameters related to automatic corner deceleration in look–ahead<br />
control mode are shown below.<br />
Parameter description<br />
Switching the methods for automatic corner<br />
deceleration<br />
Allowable feedrate difference (for all axis) in<br />
automatic corner deceleration based on the<br />
feedrate difference<br />
Allowable feedrate difference (for each<br />
axis) in automatic corner deceleration<br />
based on the feedrate difference<br />
113<br />
Normal<br />
mode<br />
Look–ahead<br />
control mode<br />
No.1602#4 No.1602#4<br />
No.1780 No.1780<br />
No.1783 No.1783<br />
This function is not effective for feed–per–rotation commands,<br />
address–F–with–one–digit commands, rigid tapping, and a single block.
5. FEED FUNCTIONS PROGRAMMING<br />
B–63534EN/02<br />
5.5<br />
DWELL (G04)<br />
Format<br />
Explanations<br />
Dwell G04 X_ ; or G04 P_ ;<br />
X_ : Specify a time or spindle speed (decimal point permitted)<br />
P_ : Specify a time or spindle speed (decimal point not permitted)<br />
By specifying a dwell, the execution of the next block is delayed by the<br />
specified time. In addition, a dwell can be specified to make an exact<br />
check in the cutting mode (G64 mode).<br />
When neither P nor X is specified, exact stop is performed.<br />
Bit 1 (DWL) of parameter No. 3405 can specify dwell for each rotation<br />
in feed per rotation mode (G95).<br />
Table 5.5 (a) Command value range of the dwell time<br />
(Command by X)<br />
<strong>Inc</strong>rement system Command value range Dwell time unit<br />
IS–B 0.001 to 99999.999<br />
IS–C 0.0001 to 9999.9999<br />
114<br />
s or rev<br />
Table 5.5 (b) Command value range of the dwell time<br />
(Command by P)<br />
<strong>Inc</strong>rement system Command value range Dwell time unit<br />
IS–B 1 to 99999999 0.001 s or rev<br />
IS–C 1 to 99999999 0.0001 s or rev
B–63534EN/02<br />
6 REFERENCE<br />
POSITION<br />
PROGRAMMING<br />
115<br />
6. REFERENCE POSITION<br />
A CNC machine tool has a special position where, generally, the tool is<br />
exchanged or the coordinate system is set, as described later. This<br />
position is referred to as a reference position.
6. REFERENCE POSITION PROGRAMMING<br />
B–63534EN/02<br />
6.1<br />
REFERENCE<br />
POSITION RETURN<br />
General<br />
Reference position<br />
The reference position is a fixed position on a machine tool to which the<br />
tool can easily be moved by the reference position return function.<br />
For example, the reference position is used as a position at which tools<br />
are automatically changed. Up to four reference positions can be<br />
specified by setting coordinates in the machine coordinate system in<br />
parameters (No. 1240 to 1243).<br />
<br />
Reference position<br />
<strong>Machine</strong> zero point<br />
116<br />
4th reference<br />
position<br />
2nd reference position<br />
3rd reference position<br />
Fig. 6.1 (a) <strong>Machine</strong> zero point and reference positions
B–63534EN/02<br />
Reference position<br />
return and movement<br />
from the reference<br />
position<br />
Reference position<br />
return check<br />
<br />
Reference position<br />
return<br />
Return from reference<br />
position<br />
Reference position<br />
return check<br />
PROGRAMMING<br />
117<br />
6. REFERENCE POSITION<br />
<strong>Tools</strong> are automatically moved to the reference position via an<br />
intermediate position along a specified axis. Or, tools are automatically<br />
moved from the reference position to a specified position via an<br />
intermediate position along a specified axis. When reference position<br />
return is completed, the lamp for indicating the completion of return goes<br />
on.<br />
Reference position return A→B→R<br />
Return from the reference positionR→B→C<br />
A (Start position for<br />
reference position return)<br />
B (Intermediate<br />
position)<br />
R (Reference position)<br />
C (Destination of return from the<br />
reference position)<br />
Fig. 6.1 (b) Reference position return and return form the reference<br />
position<br />
The reference position return check (G27) is the function which checks<br />
whether the tool has correctly returned to the reference position as<br />
specified in the program. If the tool has correctly returned to the reference<br />
position along a specified axis, the lamp for the axis goes on.<br />
<br />
Reference position return<br />
<br />
2nd reference position return<br />
<br />
3rd reference position return<br />
<br />
4th reference position return<br />
: Command specifying the intermediate position<br />
(Absolute/incremental command)<br />
<br />
(P2 can<br />
be omitted.)<br />
: Command specifying the destination of return from reference<br />
position (Absolute/incremental command)<br />
7 <br />
<br />
: Command specifying the reference position<br />
(Absolute/incremental command)
6. REFERENCE POSITION PROGRAMMING<br />
B–63534EN/02<br />
<br />
Reference position<br />
return (G28)<br />
2nd, 3rd, and 4th<br />
reference position return<br />
(G30)<br />
Return from the<br />
reference position (G29)<br />
Reference position<br />
return check (G27)<br />
Setting of the reference<br />
position return feedrate<br />
Positioning to the intermediate or reference positions are performed at the<br />
rapid traverse rate of each axis.<br />
Therefore, for safety, the cutter compensation, and tool length<br />
compensation should be cancelled before executing this command.<br />
The coordinates for the intermediate position are stored in the CNC only<br />
for the axes for which a value is specified in a G28 block. For the other<br />
axes, the previously specified coordinates are used.<br />
Example N1 G28 X40.0 ; Intermediate position (X40.0)<br />
N2 G28 Y60.0 ; Intermediate position (X40.0, Y60.0)<br />
In a system without an absolute–position detector, the first, third, and<br />
fourth reference position return functions can be used only after the<br />
reference position return (G28) or manual reference position return (see<br />
III–3.1) is made. The G30 command is generally used when the automatic<br />
tool changer (ATC) position differs from the reference position.<br />
In general, it is commanded immediately following the G28 command or<br />
G30. For incremental programming, the command value specifies the<br />
incremental value from the intermediate point.<br />
Positioning to the intermediate or reference points are performed at the<br />
rapid traverse rate of each axis.<br />
When the workpiece coordinate system is changed after the tool reaches<br />
the reference position through the intermediate point by the G28<br />
command, the intermediate point also shifts to a new coordinate system.<br />
If G29 is then commanded, the tool moves to to the commanded position<br />
through the intermediate point which has been shifted to the new<br />
coordinate system.<br />
The same operations are performed also for G30 commands.<br />
G27 command positions the tool at rapid traverse rate. If the tool reaches<br />
the reference position, the reference position return lamp lights up.<br />
However, if the position reached by the tool is not the reference position,<br />
an alarm (No. 092) is displayed.<br />
Before a machine coordinate system is established with the first reference<br />
position return after power–on, the manual and automatic reference<br />
position return feedrates and automatic rapid traverse rate conform to the<br />
setting of parameter No. 1428 for each axis. Even after a machine<br />
coordinate system is established lupon the completion of reference<br />
position return, the manual reference postiion return feedrate conforms to<br />
the setting of the parameter.<br />
118
B–63534EN/02<br />
PROGRAMMING<br />
119<br />
6. REFERENCE POSITION<br />
NOTE<br />
1 To this feedrate, a rapid traverse override (F0 ,25,50,100%)<br />
is applied, for which the setting is 100%.<br />
2 After a machine coordinate system has been established<br />
upon the completion of reference position return, the<br />
automatic reference position return feedrate will conform to<br />
the ordinary rapid traverse rate.<br />
3 For the manual rapid traverse rate used before a machine<br />
coordinate system is estavlished upon the completion of<br />
reference position return a jog feedrate or manual rapid<br />
traverse rate can be selected usting RPD (bit 0 of parameter<br />
No. 1401).<br />
Automatic reference position<br />
return (G28)<br />
Automatic rapid traverse<br />
(G00)<br />
Manual reference position<br />
return<br />
Before a coordinate<br />
system is established<br />
After a coordinate<br />
system is established<br />
No. 1428 No.1420<br />
No.1428 No.1420<br />
No.1428 No.1428<br />
Manual rapid traverse rate No.1423 *1 No.1424<br />
NOTE<br />
When parameter No. 1428 is set to 0, the feedrates conform<br />
to the parameter settings shown below.<br />
Automatic reference position<br />
return (G28)<br />
Automatic rapid traverse<br />
(G00)<br />
Manual reference position<br />
return<br />
Before a coordinate<br />
system is established<br />
After a coordinate<br />
system is established<br />
No. 1420 No.1420<br />
No.1420 No.1420<br />
No.1424 No.1424<br />
Manual rapid traverse rate No.1423 *1 No.1424<br />
1420 : Rapid traverse rate<br />
1423 : Jog feedrate<br />
1424 : Manual rapid traverse rate<br />
*1 Setting of parameter No.1424 when RPD (bit 0 of parameter No.1401)<br />
is set to 1.
6. REFERENCE POSITION PROGRAMMING<br />
B–63534EN/02<br />
Restrictions<br />
Status the machine lock<br />
being turned on<br />
First return to the<br />
reference position after<br />
the power has been<br />
turned on (without an<br />
absolute position<br />
detector)<br />
Reference position<br />
return check in an offset<br />
mode<br />
Lighting the lamp when<br />
the programmed position<br />
does not coincide with<br />
the reference position<br />
<br />
Manual reference position<br />
return<br />
Examples<br />
The lamp for indicating the completion of return does not go on when the<br />
machine lock is turned on, even when the tool has automatically returned<br />
to the reference position. In this case, it is not checked whether the tool<br />
has returned to the reference position even when a G27 command is<br />
specified.<br />
When the G28 command is specified when manual return to the reference<br />
position has not been performed after the power has been turned on, the<br />
movement from the intermediate point is the same as in manual return to<br />
the reference position.<br />
In this case, the tool moves in the direction for reference position return<br />
specified in parameter ZMIx (bit 5 of No. 1006). Therefore the specified<br />
intermediate position must be a position to which reference position<br />
return is possible.<br />
In an offset mode, the position to be reached by the tool with the G27<br />
command is the position obtained by adding the offset value. Therefore,<br />
if the position with the offset value added is not the reference position, the<br />
lamp does not light up, but an alarm is displayed instead. Usually, cancel<br />
offsets before G27 is commanded.<br />
When the machine tool system is an inch system with metric input, the<br />
reference position return lamp may also light up even if the programmed<br />
position is shifted from the reference position by the least setting<br />
increment. This is because the least setting increment of the machine tool<br />
system is smaller than its least command increment.<br />
See III–3.1.<br />
G28G90X1000.0Y500.0 ; (Programs movement from A to B)<br />
T1111 ; (Changing the tool at the reference position)<br />
G29X1300.0Y200.0 ; (Programs movement from B to C)<br />
Y<br />
500<br />
300<br />
200<br />
The tool is changed at the reference position<br />
A<br />
200 1000 1300<br />
120<br />
B<br />
C<br />
R<br />
Reference<br />
position<br />
Fig. 6.1 (c) Reference position return and return from the reference<br />
position<br />
X
B–63534EN/02<br />
6.2<br />
FLOATING<br />
REFERENCE<br />
POSITION RETURN<br />
(G30.1)<br />
Format<br />
Explanations<br />
Examples<br />
PROGRAMMING<br />
121<br />
6. REFERENCE POSITION<br />
<strong>Tools</strong> ca be returned to the floating reference position.<br />
A floating reference point is a position on a machine tool, and serves as<br />
a reference point for machine tool operation.<br />
A floating reference point need not always be fixed, but can be moved as<br />
required.<br />
IP <br />
IP Command of the intermediate position of the floating reference<br />
position<br />
(Absolute command/incremental command)<br />
Generally speaking, on a machining center or milling machine, cutting<br />
tools can be replaced only at specific positions. A position where tools can<br />
be replaced is defined as the second or third reference point. Using G30<br />
can easily move the cutting tools back to these points. On some machine<br />
tools, the cutting tools can be replaced at any position unless they interfere<br />
with the workpiece.<br />
With these machines, the cutting tools should be replaced at a position as<br />
close to the workpiece as possible so as to minimize the machine cycle<br />
time. For this purpose, the tool change position is to be changed,<br />
depending on the figure of the workpiece. This operation can easily be<br />
performed using this function. That is, a tool change position suitable for<br />
the workpiece is memorized as a floating reference point. Then command<br />
G30. 1 can easily cause return to the tool change position.<br />
A floating reference point becomes a machine coordinate position<br />
memorized by pressing the soft key [SET FRP] on the current positions<br />
display screen (see III–11.1.7). The G30.1 block first positions the tool<br />
at the intermediate point along the specified axes at rapid traverse rate,<br />
then further moves the tool from the intermediate point to the floating<br />
reference point at rapid traverse rate.<br />
Before using G30.1, cancel cutter compensation and tool length<br />
compensation.<br />
A floating reference point is not lost even if power is turned off.<br />
The function for returning from the reference position (G29) can be used<br />
for moving the tool from the floating reference position (see II–6.1).<br />
G30.1 G90 X50.0 Y40.0 ;<br />
Y<br />
Workpiece<br />
Intermediate position (50,40)<br />
Floating reference<br />
position<br />
X
PROGRAMMING<br />
7. COORDINATE SYSTEM B–63534EN/02<br />
7 COORDINATE<br />
SYSTEM<br />
By teaching the CNC a desired tool position, the tool can be moved to the<br />
position. Such a tool position is represented by coordinates in a<br />
coordinate system. Coordinates are specified using program axes.<br />
When three program axes, the X–axis, Y–axis, and Z–axis, are used,<br />
coordinates are specified as follows:<br />
X_Y_Z_<br />
This command is referred to as a dimension word.<br />
X<br />
40.0<br />
122<br />
25.0<br />
Z<br />
50.0<br />
Fig. 7 Tool Position Specified by X40.0Y50.0Z25.0<br />
Coordinates are specified in one of following three coordinate systems:<br />
(1)<strong>Machine</strong> coordinate system<br />
(2)Workpiece coordinate system<br />
(3)Local coordinate system<br />
The number of the axes of a coordinate system varies from one machine<br />
to another. So, in this manual, a dimension word is represented as IP_.<br />
Y
B–63534EN/02 PROGRAMMING<br />
7. COORDINATE SYSTEM<br />
7.1<br />
MACHINE<br />
COORDINATE<br />
SYSTEM<br />
Format<br />
Explanations<br />
Selecting a machine<br />
coordinate system (G53)<br />
Restrictions<br />
Cancel of the<br />
compensation function<br />
G53 specification<br />
immediately after<br />
power–on<br />
Reference<br />
The point that is specific to a machine and serves as the reference of the<br />
machine is referred to as the machine zero point. A machine tool builder<br />
sets a machine zero point for each machine.<br />
A coordinate system with a machine zero point set as its origin is referred<br />
to as a machine coordinate system.<br />
A machine coordinate system is set by performing manual reference<br />
position return after power–on (see III–3.1). A machine coordinate<br />
system, once set, remains unchanged until the power is turned off.<br />
(G90)G53 IP IP_<br />
;<br />
IP IP_;<br />
Absolute dimension word<br />
When a command is specified the position on a machine coordinate<br />
system, the tool moves to the position by rapid traverse. G53, which is<br />
used to select a machine coordinate system, is a one–shot G code; that is,<br />
it is valid only in the block in which it is specified on a machine coordinate<br />
system. Specify an absolute command (G90) for G53. When an<br />
incremental command (G91) is specified, the G53 command is ignored.<br />
When the tool is to be moved to a machine–specific position such as a tool<br />
change position, program the movement in a machine coordinate system<br />
based on G53.<br />
When the G53 command is specified, cancel the cutter compensation, tool<br />
length offset, and tool offset.<br />
Since the machine coordinate system must be set before the G53<br />
command is specified, at least one manual reference position return or<br />
automatic reference position return by the G28 command must be<br />
performed after the power is turned on. This is not necessary when an<br />
absolute–position detector is attached.<br />
When manual reference position return is performed after power–on, a<br />
machine coordinate system is set so that the reference position is at the<br />
coordinate values of (α, β) set using parameter No.1240.<br />
β<br />
<strong>Machine</strong> zero<br />
123<br />
α<br />
Reference position<br />
<strong>Machine</strong> coordinate system
PROGRAMMING<br />
7. COORDINATE SYSTEM B–63534EN/02<br />
7.2<br />
WORKPIECE<br />
COORDINATE<br />
SYSTEM<br />
7.2.1<br />
Setting a Workpiece<br />
Coordinate System<br />
Format<br />
Setting a workpiece<br />
coordinate system by G92<br />
Explanations<br />
Examples<br />
Z<br />
23.0<br />
0<br />
25.2 X<br />
A coordinate system used for machining a workpiece is referred to as a<br />
workpiece coordinate system. A workpiece coordinate system is to be set<br />
with the CNC beforehand (setting a workpiece coordinate system).<br />
A machining program sets a workpiece coordinate system (selecting a<br />
workpiece coordinate system).<br />
A set workpiece coordinate system can be changed by shifting its origin<br />
(changing a workpiece coordinate system).<br />
A workpiece coordinate system can be set using one of three methods:<br />
(1) Method using G92<br />
A workpiece coordinate system is set by specifying a value after G92<br />
in the program.<br />
(2) Automatic setting<br />
If bit 0 of parameter SPR No. 1201 is set beforehand, a workpiece<br />
coordinate system is automatically set when manual reference<br />
position return is performed (see Part III–3.1.).<br />
(3) Method using G54 to G59<br />
Six workpiece coordinate systems can be set beforehand using the<br />
CRT/MDI panel (see Part III–11.4.6.).<br />
When using an absolute command, establish the workpiece<br />
coordinate system in any of the above ways.<br />
(G90) G92 IP_<br />
IP<br />
Example 1 Example 2<br />
Setting the coordinate system by the<br />
G92X25.2Z23.0; command<br />
(The tool tip is the start point for the program.)<br />
A workpiece coordinate system is set so that a point on the tool, such as<br />
the tool tip, is at specified coordinates. If a coordinate system is set using<br />
G92 during tool length offset, a coordinate system in which the position<br />
before offset matches the position specified in G92 is set.<br />
Cutter compensation is cancelled temporarily with G92.<br />
Setting the coordinate system by the G92X600.0Z1200.0; command<br />
(The base point on the tool holder is the start point for the program.)<br />
124<br />
Z<br />
1200.0<br />
0<br />
Base point<br />
600.0<br />
X<br />
If an absolute command is issued,<br />
the base point moves to<br />
the commanded position. In<br />
order to move the tool tip to the<br />
commanded position, the difference<br />
from the tool tip to the<br />
base point is compensated by<br />
tool length offset.
B–63534EN/02 PROGRAMMING<br />
7. COORDINATE SYSTEM<br />
7.2.2<br />
Selecting a Workpiece<br />
Coordinate System<br />
Examples<br />
The user can choose from set workpiece coordinate systems as described<br />
below. (For information about the methods of setting, see II– 7.2.1.)<br />
(1)Once a workpiece coordinate system is selected by G92 or automatic<br />
workpiece coordinate system setting, absolute commands work with<br />
the workpiece coordinate system.<br />
(2)Choosing from six workpiece coordinate systems set using the MDI<br />
panel<br />
By specifying a G code from G54 to G59, one of the workpiece<br />
coordinate systems 1 to 6 can be selected.<br />
G54 Workpiece coordinate system 1<br />
G55 Workpiece coordinate system 2<br />
G56 Workpiece coordinate system 3<br />
G57 Workpiece coordinate system 4<br />
G58 Workpiece coordinate system 5<br />
G59 Workpiece coordinate system 6<br />
Workpiece coordinate system 1 to 6 are established after reference<br />
position return after the power is turned on. When the power is turned<br />
on, G54 coordinate system is selected.<br />
G90 G55 G00 X40.0 Y100.0 ;<br />
Y<br />
100.0<br />
Workpiece coordinate system 2 (G55)<br />
125<br />
40.0<br />
In this example, positioning is made to<br />
positions (X=40.0, Y=100.0) in workpiece<br />
coordinate system 2.<br />
X<br />
Fig. 7.2.2
PROGRAMMING<br />
7. COORDINATE SYSTEM B–63534EN/02<br />
7.2.3<br />
Changing Workpiece<br />
Coordinate System<br />
Format<br />
Workpiece<br />
coordinate<br />
system 1 (G54)<br />
ZOFS1<br />
<strong>Machine</strong> zero<br />
EXOFS<br />
The six workpiece coordinate systems specified with G54 to G59 can<br />
be changed by changing an external workpiece zero point offset value<br />
or workpiece zero point offset value.<br />
Three methods are available to change an external workpiece zero<br />
point offset value or workpiece zero point offset value.<br />
(1) Inputting from the MDI panel (see III–11.4.6)<br />
(2) Programming by G10 or G92<br />
(3) Using the external data input function<br />
An external workpiece zero point offset value can be changed by<br />
input signal to CNC. Refer to machine tool builder’s manual for<br />
details<br />
Workpiece<br />
coordinate<br />
system 2 (G55)<br />
ZOFS2<br />
EXOFS : External workpiece zero point offset value<br />
ZOFS1 to ZOFS6 : Workpiece zero point offset value<br />
ZOFS3 ZOFS4<br />
126<br />
Workpiece<br />
coordinate<br />
system 3 (G56)<br />
ZOFS5<br />
ZOFS6<br />
Workpiece<br />
coordinate<br />
system 4 (G57)<br />
Workpiece<br />
coordinate<br />
system 5 (G58)<br />
Workpiece<br />
coordinate<br />
system 6 (G59)<br />
Fig. 7.2.3 Changing an external workpiece zero point offset value or workpiece zero point offset value<br />
Changing by G10<br />
Changing by G92<br />
G10 L2 Pp I IP _;<br />
p=0 : External workpiece zero point offset value<br />
p=1 to 6 : Workpiece zero point offset value correspond to workpiece<br />
coordinate system 1 to 6<br />
IP : For an absolute command (G90), workpiece zero point offset for<br />
each axis.<br />
For an incremental command (G91), value to be added to the set<br />
workpiece zero point offset for each axis (the result of addition<br />
becomes the new workpiece zero point offset).<br />
G92 IP _;
B–63534EN/02 PROGRAMMING<br />
7. COORDINATE SYSTEM<br />
Explanations<br />
Changing by G10<br />
Changing by G92<br />
With the G10 command, each workpiece coordinate system can be<br />
changed separately.<br />
By specifying G92IP_;, a workpiece coordinate system (selected with a<br />
code from G54 to G59) is shifted to set a new workpiece coordinate<br />
system so that the current tool position matches the specified coordinates<br />
( IP _).<br />
Then, the amount of coordinate system shift is added to all the workpiece<br />
zero point offset values. This means that all the workpiece coordinate<br />
systems are shifted by the same amount.<br />
WARNING<br />
When a coordinate system is set with G92 after an external<br />
workpiece zero point offset value is set, the coordinate<br />
system is not affected by the external workpiece zero point<br />
offset value. When G92X100.0Z80.0; is specified, for<br />
example, the coordinate system having its current tool<br />
reference position at X = 100.0 and Z = 80.0 is set.<br />
127
PROGRAMMING<br />
7. COORDINATE SYSTEM B–63534EN/02<br />
<br />
Y<br />
160 100<br />
60<br />
G54 Workpiece<br />
coordinate system<br />
Z’<br />
1200.0<br />
Z<br />
A<br />
B<br />
A<br />
Y<br />
100<br />
600.0<br />
G54 workpiece coordinate system<br />
X<br />
100<br />
200<br />
Tool position<br />
1200.0<br />
X’ – Z’ New workpiece coordinate system<br />
X – Z Original workpiece coordinate system<br />
A : Offset value created by G92<br />
B : Workpiece zero point offset value in theG54<br />
C : Workpiece zero point offset value in the G55<br />
X<br />
C<br />
Z<br />
X<br />
X<br />
G55 Workpiece<br />
coordinate system<br />
Z<br />
A<br />
128<br />
If G92X100Y100; is commanded when the tool<br />
is positioned at (200, 160) in G54 mode, workpiece<br />
coordinate system 1 (X’ – Y’) shifted by<br />
vector A is created.<br />
New workpiece coordinate system<br />
Original workpiece coordinate system<br />
600.0<br />
X<br />
X<br />
Suppose that a G54 workpiece coordinate<br />
system is specified. Then, a G55<br />
workpiece coordinate system where<br />
the black circle on the tool (figure at the<br />
left) is at (600.0,12000.0) can be set<br />
with the following command if the relative<br />
relationship between the G54 workpiece<br />
coordinate system and G55<br />
workpiece coordinate system is set correctly:G92X600.0Z1200.0;Also,suppose<br />
that pallets are loaded at two different<br />
positions. If the relative relationship<br />
of the coordinate systems of the<br />
pallets at the two positions is correctly<br />
set by handling the coordinate systems<br />
as the G54 workpiece coordinate system<br />
and G55 workpiece coordinate<br />
system, a coordinate system shift with<br />
G92 in one pallet causes the same<br />
coordinate system shift in the other pallet.<br />
This means that workpieces on two<br />
pallets can be machined with the same<br />
program just by specifying G54 or G55.
B–63534EN/02 PROGRAMMING<br />
7. COORDINATE SYSTEM<br />
7.2.4<br />
Workpiece Coordinate<br />
System Preset (G92.1)<br />
Format<br />
Explanations<br />
The workpiece coordinate system preset function presets a workpiece<br />
coordinate system shifted by manual intervention to the pre–shift<br />
workpiece coordinate system. The latter system is displaced from the<br />
machine zero point by a workpiece zero point offset value.<br />
There are two methods for using the workpiece coordinate system preset<br />
function. One method uses a programmed command (G92.1). The other<br />
uses MDI operations on the absolute position display screen, relative<br />
position display screen, and overall position display screen (III–11.1.4).<br />
G92.1 IP 0 ;<br />
IP<br />
0 ; Specifies axis addresses subject to the workpiece<br />
coordinate system preset operation. Axes that are<br />
not specified are not subject to the preset operation.<br />
When manual reference position return operation is performed in the reset<br />
state, a workpiece coordinate system is shifted by the workpiece zero<br />
point offset value from the machine coordinate system zero point.<br />
Suppose that the manual reference position return operation is performed<br />
when a workpiece coordinate system is selected with G54. In this case,<br />
a workpiece coordinate system is automatically set which has its zero<br />
point displaced from the machine zero point by the G54 workpiece zero<br />
point offset value; the distance from the zero point of the workpiece<br />
coordinate system to the reference position represents the current position<br />
in the workpiece coordinate system.<br />
G54 workpiece zero<br />
point offset value<br />
Reference position<br />
129<br />
G54 workpiece coordinate system<br />
Reference position<br />
Manual reference position return<br />
If an absolute position detector is provided, the workpiece coordinate<br />
system automatically set at power–up has its zero point displaced from<br />
the machine zero point by the G54 workpiece zero point offset value. The<br />
machine position at the time of power–up is read from the absolute<br />
position detector and the current position in the workpiece coordinate<br />
system is set by subtracting the G54 workpiece zero point offset value<br />
from this machine position. The workpiece coordinate system set by<br />
these operations is shifted from the machine coordinate system using the<br />
commands and operations listed next page.
PROGRAMMING<br />
7. COORDINATE SYSTEM B–63534EN/02<br />
Limitations<br />
Cutter compensation,<br />
tool length<br />
compensation, tool<br />
offset<br />
Program restart<br />
Prohibited modes<br />
(a) Manual intervention performed when the manual absolute signal is off<br />
(b) Move command executed in the machine lock state<br />
(c) Movement by handle interrupt<br />
(d) Operation using the mirror image function<br />
(e) Setting the local coordinate system using G52, or shifting the<br />
workpiece coordinate system using G92<br />
In the case of (a) above, the workpiece coordinate system is shifted by the<br />
amount of movement during manual intervention.<br />
Workpiece zero<br />
point offset<br />
value<br />
<strong>Machine</strong> zero point<br />
130<br />
G54 workpiece coordinate<br />
system before manual<br />
intervention<br />
WZo<br />
WZn<br />
Po<br />
Amount of movement<br />
during manual<br />
intervention<br />
Pn<br />
G54 workpiece coordinate<br />
system after manual intervention<br />
In the operation above, a workpiece coordinate system once shifted can<br />
be preset using G code specification or MDI operation to a workpiece<br />
coordinate system displaced by a workpiece zero point offset value from<br />
the machine zero point. This is the same as when manual reference<br />
position return operation is performed on a workpiece coordinate system<br />
that has been shifted. In this example, such G code specification or MDI<br />
operation has the effect of returning workpiece coordinate system zero<br />
point WZn to the original zero point WZo, and the distance from WZo to<br />
Pn is used to represent the current position in the workpiece coordinate<br />
system.<br />
Bit 3 (PPD) of parameter No. 3104 specifies whether to preset relative<br />
coordinates (RELATIVE) as well as absolute coordinates.<br />
When no workpiece coordinate system option (G54 to G59) is selected,<br />
the workpiece coordinate system is preset to the coordinate system set by<br />
automatic workpiece coordinate system setting. When automatic<br />
workpiece coordinate system setting is not selected, the workpiece<br />
coordinate system is preset with its zero point placed at the reference<br />
position.<br />
When using the workpiece coordinate system preset function, cancel<br />
compensation modes: cutter compensation, tool length compensation,<br />
and tool offset. If the function is executed without cancelling these<br />
modes, compensation vectors are temporarily cancelled.<br />
The workpiece coordinate system preset function is not executed during<br />
program restart.<br />
Do not use the workpiece coordinate system preset function when the<br />
scaling, coordinate system rotation, programmable image, or drawing<br />
copy mode is set.
B–63534EN/02 PROGRAMMING<br />
7. COORDINATE SYSTEM<br />
7.2.5<br />
Adding Workpiece<br />
Coordinate Systems<br />
(G54.1 or G54)<br />
Format<br />
Selecting the additional<br />
workpiece coordinate<br />
systems<br />
Setting the workpiece<br />
zero point offset value in<br />
the additional workpiece<br />
coordinate systems<br />
Explanations<br />
Selecting the additional<br />
workpiece coordinate<br />
systems<br />
Setting the workpiece<br />
zero point offset value in<br />
the additional workpiece<br />
coordinate systems<br />
Besides the six workpiece coordinate systems (standard workpiece<br />
coordinate systems) selectable with G54 to G59, 48 additional workpiece<br />
coordinate systems (additional workpiece coordinate systems) can be<br />
used. Alternatively, up to 300 additional workpiece coordinate systems<br />
can be used.<br />
G54.1Pn ; or G54Pn ;<br />
Pn : Codes specifying the additional workpiece coordinate systems<br />
n : 1 to 48 or 1 to 300<br />
G10L20 Pn IP IP_;<br />
Pn : Codes specifying the workpiece coordinate system for setting<br />
the workpiece zero point offset value<br />
n : 1 to 48 or 1 to 300<br />
IP_ IP : Axis addresses and a value set as the workpiece zero point<br />
offset<br />
When a P code is specified together with G54.1 (G54), the corresponding<br />
coordinate system is selected from the additional workpiece coordinate<br />
systems (1 to 48 or 1 to 300).<br />
A workpiece coordinate system, once selected, is valid until another<br />
workpiece coordinate system is selected. Standard workpiece coordinate<br />
system 1 (selectable with G54) is selected at power–on.<br />
G54.1 P1 Additional workpiece coordinate system 1<br />
G54.1 P2 Additional workpiece coordinate system 2<br />
G54.1 P48 Additional workpiece coordinate system 48<br />
G54.1 P300 Additional workpiece coordinate system 300<br />
When an absolute workpiece zero point offset value is specified, the<br />
specified value becomes a new offset value. When an incremental<br />
workpiece zero point offset value is specified, the specified value is added<br />
to the current offset value to produce a new offset value.<br />
As with the standard workpiece coordinate systems, the following<br />
operations can be performed for a workpiece zero point offset in an<br />
additional workpiece coordinate system:<br />
(1)The OFFSET function key can be used to display and set a workpiece<br />
zero point offset value.<br />
(2)The G10 function enables a workpiece zero point offset value to be set<br />
by programming (refer to –7.2.3)<br />
131
PROGRAMMING<br />
7. COORDINATE SYSTEM B–63534EN/02<br />
<br />
<br />
<br />
<br />
<br />
Limitations<br />
<br />
(3)A custom macro allows a workpiece zero point offset value to be<br />
handled as a system variable.<br />
(4)Workpiece zero point offset data can be entered or output as external<br />
data.<br />
(5)The PMC window function enables workpiece zero point offset data<br />
to be read as program command modal data.<br />
When the workpiece origin offset is specified using an absolute value, the<br />
specified value is the new offset. When it is specified using an<br />
incremental value, the specified value is added to the current offset to<br />
obtain the new offset.<br />
A P code must be specified after G54.1 (G54). If G54.1 is not followed<br />
by a P code in the same block, additional workpiece coordinate system<br />
1 (G54.1P1) is assumed.<br />
If a value not within the specifiable range is specified in a P code, an P/S<br />
alarm ( No. 030) is issued.<br />
P codes other than workpiece offset numbers cannot be specified in a<br />
G54.1 (G54) block.<br />
Example) G54.1 (G54) G04 P1000 ;<br />
132
B–63534EN/02 PROGRAMMING<br />
7. COORDINATE SYSTEM<br />
7.3<br />
LOCAL COORDINATE<br />
SYSTEM<br />
Format<br />
Explanations<br />
Reference point<br />
IP_ IP<br />
When a program is created in a workpiece coordinate system, a child<br />
workpiece coordinate system can be set for easier programming. Such a<br />
child coordinate system is referred to as a local coordinate system.<br />
G52 IP _; Setting the local coordinate system<br />
<br />
G52 IP 0 ; Canceling of the local coordinate system<br />
IP IP_<br />
: Origin of the local coordinate system<br />
By specifying G52 IP _;, a local coordinate system can be set in all the<br />
workpiece coordinate systems (G54 to G59). The origin of each local<br />
coordinate system is set at the position specified by IP _ in the workpiece<br />
coordinate system.<br />
When a local coordinate system is set, the move commands in absolute<br />
mode (G90), which is subsequently commanded, are the coordinate<br />
values in the local coordinate system. The local coordinate system can<br />
be changed by specifying the G52 command with the zero point of a new<br />
local coordinate system in the workpiece coordinate system.<br />
To cancel the local coordinate system and specify the coordinate value in<br />
the workpiece coordinate system, match the zero point of the local<br />
coordinate system with that of the workpiece coordinate system.<br />
(Local coordinate system)<br />
(G54 : Workpiece coordinate system 1)<br />
<strong>Machine</strong> coordinate system origin<br />
G55 G56<br />
133<br />
G57<br />
G58<br />
IP_ IP<br />
(<strong>Machine</strong> coordinate system)<br />
Fig. 7.3 Setting the local coordinate system<br />
(Local coordinate system)<br />
(G59 : Workpiece coordinate system 6)
PROGRAMMING<br />
7. COORDINATE SYSTEM B–63534EN/02<br />
WARNING<br />
1 When an axis returns to the reference point by the manual reference point return function,the<br />
zero point of the local coordinate system of the axis matches that of the work coordinate system.<br />
The same is true when the following command is issued:<br />
G52α0;<br />
α:Axis which returns to the reference point<br />
2 The local coordinate system setting does not change the workpiece and machine coordinate<br />
systems.<br />
3 Whether the local coordinate system is canceled at reset depends on the parameter setting.<br />
The local coordinate system is canceled when either CLR, bit 6 of parameter No.3402 or RLC,<br />
bit 3 of parameter No.1202 is set to 1.<br />
4 If coordinate values are not specified for all axes when setting a workpiece coordinate system<br />
with the G92 command, the local coordinate systems of axes for which coordinate values were<br />
not specified are not cancelled, but remain unchanged.<br />
5 G52 cancels the offset temporarily in cutter compensation.<br />
6 Command a move command immediately after the G52 block in the absolute mode.<br />
134
B–63534EN/02 PROGRAMMING<br />
7. COORDINATE SYSTEM<br />
7.4<br />
PLANE SELECTION<br />
Explanations<br />
Examples<br />
Select the planes for circular interpolation, cutter compensation, and<br />
drilling by G–code.<br />
The following table lists G–codes and the planes selected by them.<br />
G code<br />
Selected<br />
plane<br />
G17 Xp Yp plane<br />
G18 Zp Xp plane<br />
G19 Yp Zp plane<br />
135<br />
Table 7.4 Plane selected by G code<br />
Xp Yp Zp<br />
X–axis or an Y–axis or an Z–axis or an<br />
axis parallel axis parallel axis parallel<br />
to it to it to it<br />
Xp, Yp, Zp are determined by the axis address appeared in the block in<br />
which G17, G18 or G19 is commanded.<br />
When an axis address is omitted in G17, G18 or G19 block, it is assumed<br />
that the addresses of basic three axes are omitted.<br />
Parameter No. 1022 is used to specify that an optional axis be parallel to<br />
the each axis of the X, Y–, and Z–axes as the basic three axes.<br />
The plane is unchanged in the block in which G17, G18 or G19 is not<br />
commanded.<br />
When the power is turned on or the CNC is reset, G17 (XY plane), G18<br />
(ZX plane), or G19 (YZ plane) is selected by bits 1 (G18) and 2 (G19) of<br />
parameter 3402.<br />
The movement instruction is irrelevant to the plane selection.<br />
Plane selection when the X–axis is parallel with the U–axis.<br />
G17X_Y_ XY plane,<br />
G17U_Y_ UY plane<br />
G18X_Z_ ZX plane<br />
X_Y_ Plane is unchanged (ZX plane)<br />
G17 XY plane<br />
G18 ZX plane<br />
G17 U_ UY plane<br />
G18Y_ ; ZX plane, Y axis moves regardless without any<br />
relation to the plane.
8. COORDINATE VALUE<br />
AND DIMENSION PROGRAMMING<br />
B–63534EN/02<br />
8 <br />
<br />
This chapter contains the following topics.<br />
8.1 ABSOLUTE AND INCREMENTAL PROGRAMMING (G90, G91)<br />
8.2 POLAR COORDINATE COMMAND (G15, G16)<br />
8.3 INCH/METRIC CONVERSION (G20, G21)<br />
8.4 DECIMAL POINT PROGRAMMING<br />
136
B–63534EN/02<br />
8.1<br />
ABSOLUTE AND<br />
INCREMENTAL<br />
PROGRAMMING<br />
(G90, G91)<br />
<br />
<br />
PROGRAMMING<br />
137<br />
8. COORDINATE VALUE<br />
AND DIMENSION<br />
There are two ways to command travels of the tool; the absolute<br />
command, and the incremental command. In the absolute command,<br />
coordinate value of the end position is programmed; in the incremental<br />
command, move distance of the position itself is programmed. G90 and<br />
G91 are used to command absolute or incremental command,<br />
respectively.<br />
Absolute command<br />
<strong>Inc</strong>remental command<br />
G90 X40.0 Y70.0 ;<br />
G91 X–60.0 Y40.0 ;<br />
70.0<br />
30.0<br />
Y<br />
G90 _<br />
;<br />
G91 _<br />
;<br />
Absolute command<br />
<strong>Inc</strong>remental command<br />
<br />
40.0 100.0<br />
<br />
X
8. COORDINATE VALUE<br />
AND DIMENSION PROGRAMMING<br />
B–63534EN/02<br />
8.2<br />
POLAR COORDINATE<br />
COMMAND<br />
(G15, G16)<br />
<br />
Setting the zero point of<br />
the workpiece<br />
coordinate system as the<br />
origin of the polar<br />
coordinate system<br />
The end point coordinate value can be input in polar coordinates (radius<br />
and angle).<br />
The plus direction of the angle is counterclockwise of the selected plane<br />
first axis + direction, and the minus direction is clockwise.<br />
Both radius and angle can be commanded in either absolute or<br />
incremental command (G90, G91).<br />
G G G16 ;<br />
G IP _ ;<br />
G15 ;<br />
G16 Polar coordinate command<br />
G15<br />
G<br />
G<br />
IP _<br />
138<br />
Starting the polar coordinate command (polar<br />
coordinate mode)<br />
Polar coordinate command<br />
Canceling the polar coordinate command (polar coordinate<br />
mode)<br />
Polar coordinate command cancel<br />
Plane selection of the polar coordinate command<br />
(G17, G18 or G19)<br />
G90 specifies the zero point of the work coordinate system as<br />
the origin of the polar coordinate system, from which a radius<br />
is measured.<br />
G91 specifies the current position as the origin of the polar<br />
coordinate system, from which a radius is measured.<br />
Specifying the addresses of axes constituting the plane selected<br />
for the polar coordinate system, and their values<br />
First axis : radius of polar coordinate<br />
Second axis : angle of polar coordinate<br />
Specify the radius (the distance between the zero point and the point) to<br />
be programmed with an absolute command. The zero point of the work<br />
coordinate system is set as the origin of the polar coordinate system.<br />
When a local coordinate system (G52) is used, the origin of the local<br />
coordinate system becomes the center of the polar coordinates.<br />
Command position<br />
Radius<br />
Angle<br />
Actual position<br />
When the angle is specified<br />
with an absolute command<br />
<br />
Angle<br />
Command position<br />
Actual position<br />
When the angle is specified<br />
with an incremental command
B–63534EN/02<br />
Setting the current<br />
position as the origin of<br />
the polar coordinate<br />
system<br />
<br />
Specifying angles and a<br />
radius with absolute<br />
commands<br />
Specifying angles with<br />
incremental commands<br />
and a radius with<br />
absolute commands<br />
PROGRAMMING<br />
139<br />
8. COORDINATE VALUE<br />
AND DIMENSION<br />
Specify the radius (the distance between the current position and the<br />
point) to be programmed with an incremental command. The current<br />
position is set as the origin of the polar coordinate system.<br />
Radius<br />
Command position<br />
Angle<br />
Actual position<br />
When the angle is specified<br />
with an absolute command<br />
<br />
270°<br />
Y<br />
150°<br />
30°<br />
100mm<br />
Radius<br />
Command position<br />
Angle<br />
Actual position<br />
When the angle is specified<br />
with an incremental command<br />
– The zero point of the work coordinate<br />
system is set as the origin of the polar<br />
coordinate system.<br />
– The XY plane is selected.<br />
N1 G17 G90 G16 ;<br />
Specifying the polar coordinate command and selecting the XY plane<br />
Setting the zero point of the work coordinate system as the origin of the<br />
polar coordinate system<br />
N2 G81 X100.0 Y30.0 Z–20.0 R–5.0 F200.0 ;<br />
Specifying a distance of 100 mm and an angle of 30 degrees<br />
N3 Y150.0 ;<br />
Specifying a distance of 100 mm and an angle of 150 degrees<br />
N4 Y270.0 ;<br />
Specifying a distance of 100 mm and an angle of 270 degrees<br />
N5 G15 G80 ;<br />
Canceling the polar coordinate command<br />
N1 G17 G90 G16;<br />
Specifying the polar coordinate command and selecting the XY plane<br />
Setting the zero point of the work coordinate system as the origin of the<br />
polar coordinate system<br />
<br />
Specifying a distance of 100 mm and an angle of 30 degrees<br />
N3 G91 Y120.0 ;<br />
Specifying a distance of 100 mm and an angle of +120 degrees<br />
N4 Y120.0 ;<br />
Specifying a distance of 100 mm and an angle of +120 degrees<br />
X
8. COORDINATE VALUE<br />
AND DIMENSION PROGRAMMING<br />
B–63534EN/02<br />
Limitations<br />
Specifying a radius in<br />
the polar coordinate<br />
mode<br />
Axes that are not<br />
considered part of a<br />
polar coordinate<br />
command in the polar<br />
coordinate mode<br />
Arbitrary angle<br />
chamfering and corner<br />
rounding<br />
N5 G15 G80 ;<br />
Canceling the polar coordinate command<br />
In the polar coordinate mode, specify a radius for circular interpolation<br />
or helical cutting (G02, G03) with R.<br />
Axes specified for the following commands are not considered part of the<br />
polar coordinate command:<br />
– Dwell (G04)<br />
– Programmable data input (G10)<br />
– Setting the local coordinate system (G52)<br />
– Converting the workpiece coordinate system (G92)<br />
– Selecting the machine coordinate system (G53)<br />
– Stored stroke check (G22)<br />
– Coordinate system rotation (G68)<br />
– Scaling (G51)<br />
Arbitrary angle chamfering and corner rounding cannot be specified in<br />
polar coordinate mode.<br />
140
B–63534EN/02<br />
8.3<br />
INCH/METRIC<br />
CONVERSION<br />
(G20, G21)<br />
<br />
PROGRAMMING<br />
Either inch or metric input can be selected by G code.<br />
G20 ;<br />
G21 ;<br />
<strong>Inc</strong>h input<br />
mm input<br />
141<br />
8. COORDINATE VALUE<br />
AND DIMENSION<br />
This G code must be specified in an independent block before setting the<br />
coordinate system at the beginning of the program. After the G code for<br />
inch/metric conversion is specified, the unit of input data is switched to<br />
the least inch or metric input increment of increment system IS–B or IS–C<br />
(II–2.3). The unit of data input for degrees remains unchanged.The unit<br />
systems for the following values are changed after inch/metric<br />
conversion:<br />
– Feedrate commanded by F code<br />
– Positional command<br />
– Work zero point offset value<br />
– Tool compensation value<br />
– Unit of scale for manual pulse generator<br />
– Movement distance in incremental feed<br />
– Some parameters<br />
When the power is turned on, the G code is the same as that held before<br />
the power was turned off.<br />
WARNING<br />
1 G20 and G21 must not be switched during a program.<br />
2 When switching inch input (G20) to metric input (G21) and vice versa, the tool compensation<br />
value must be re–set according to the least input increment.<br />
However, when bit 0 (OIM) of parameter 5006 is 1, tool compensation values are automatically<br />
converted and need not be re–set.<br />
CAUTION<br />
For the first G28 command after switching inch input to metric input or vice versa, operation from<br />
the intermediate point is the same as that for manual reference position return. The tool moves<br />
from the intermediate point in the direction for reference position return, specified with bit 5<br />
(ZMI) of parameter No. 1006.<br />
NOTE<br />
1 When the least input increment and the least command increment systems are different, the<br />
maximum error is half of the least command increment. This error is not accumulated.<br />
2 The inch and metric input can also be switched using settings (see III–11.4.3).
8. COORDINATE VALUE<br />
AND DIMENSION PROGRAMMING<br />
B–63534EN/02<br />
8.4<br />
DECIMAL POINT<br />
PROGRAMMING<br />
<br />
<br />
Numerical values can be entered with a decimal point. A decimal point<br />
can be used when entering a distance, time, or speed. Decimal points can<br />
be specified with the following addresses:<br />
X, Y, Z, U, V, W, A, B, C, I, J, K, Q, R, and F.<br />
There are two types of decimal point notation: calculator–type notation<br />
and standard notation.<br />
When calculator–type decimal notation is used, a value without decimal<br />
point is considered to be specified in millimeters inch,or deg. When<br />
standard decimal notation is used, such a value is considered to be<br />
specified in least input increments.Select either calculator–type or<br />
standard decimal notation by using the DPI bit (bit 0 of parameter<br />
3401).Values can be specified both with and without decimal point in a<br />
single program.<br />
Program command<br />
X1000<br />
Command value without<br />
decimal point<br />
X1000.0<br />
Command value with<br />
decimal point<br />
142<br />
Pocket calculator<br />
type decimal point<br />
programming<br />
1000mm<br />
Unit : mm<br />
1000mm<br />
Unit : mm<br />
Standard type decimal<br />
point programming<br />
1mm<br />
Unit : Least input increment<br />
(0.001 mm)<br />
1000mm<br />
Unit : mm<br />
WARNING<br />
In a single block, specify a G code before entering a value. The position of decimal point may<br />
depend on the command.<br />
Examples:<br />
G20; Input in inches<br />
X1.0 G04; X1.0 is considered to be a distance and processed as X10000. This command<br />
is equivalent to G04 X10000. The tool dwells for 10 seconds.<br />
G04 X1.0; Equivalent to G04 X1000. The tool dwells for one second.<br />
NOTE<br />
Fractions less than the least input increment are truncated.<br />
Examples:<br />
X1.23456; Truncated to X1.234 when the least input increment is 0.001 mm.<br />
Processed as X1.2345 when the least input increment is 0.0001 inch.<br />
When more than eight digits are specified, an alarm occurs. If a value is entered with a decimal<br />
point, the number of digits is also checked after the value is converted to an integer according<br />
to the least input increment.<br />
Examples:<br />
X1.23456789; P/S alarm 0.003 occurs because more than eight digits are specified.<br />
X123456.7; If the least input increment is 0.001 mm, the value is converted to integer<br />
123456700. Because the integer has more than eight digits, an alarm occurs.
B–63534EN/02<br />
9 SPINDLE<br />
PROGRAMMING<br />
SPEED FUNCTION (S FUNCTION)<br />
143<br />
9. SPINDLE SPEED FUNCTION<br />
(S FUNCTION)<br />
The spindle speed can be controlled by specifying a value following<br />
address S.<br />
This chapter contains the following topics.<br />
9.1 SPECIFYING THE SPINDLE SPEED WITH A CODE<br />
9.2 SPECIFYING THE SPINDLE SPEED VALUE DIRECTLY<br />
(S5–DIGIT COMMAND)<br />
9.3 CONSTANT SURFACE SPEED CONTROL (G96, G97)<br />
9.4 SPINDLE SPEED FLUCTUATION DETECTION FUNCTION<br />
(G25, G26)
9. SPINDLE SPEED FUNCTION<br />
(S FUNCTION) PROGRAMMING<br />
B–63534EN/02<br />
9.1<br />
SPECIFYING THE<br />
SPINDLE SPEED<br />
WITH A CODE<br />
9.2<br />
SPECIFYING THE<br />
SPINDLE SPEED<br />
VALUE DIRECTLY<br />
(S5–DIGIT<br />
COMMAND)<br />
When a value is specified after address S, the code signal and strobe signal<br />
are sent to the machine to control the spindle rotation speed.<br />
A block can contain only one S code. Refer to the appropriate manual<br />
provided by the machine tool builder for details such as the number of<br />
digits in an S code or the execution order when a move command and an<br />
S code command are in the same block.<br />
The spindle speed can be specified directly by address S followed by a<br />
max.five–digit value (min -1 ). The unit for specifying the spindle speed<br />
may vary depending on the machine tool builder. Refer to the appropriate<br />
manual provided by the machine tool builder for details.<br />
144
B–63534EN/02<br />
9.3<br />
CONSTANT<br />
SURFACE SPEED<br />
CONTROL (G96, G97)<br />
<br />
Constant surface speed<br />
control command<br />
Constant surface speed<br />
control cancel command<br />
Constant surface speed<br />
controlled axis<br />
command<br />
Clamp of maximum<br />
spindle speed<br />
PROGRAMMING<br />
145<br />
9. SPINDLE SPEED FUNCTION<br />
(S FUNCTION)<br />
Specify the surface speed (relative speed between the tool and workpiece)<br />
following S. The spindle is rotated so that the surface speed is constant<br />
regardless of the position of the tool.<br />
G96 S ;<br />
↑ Surface speed (m/min or feet/min)<br />
Note : This surface speed unit may change according to machine tool<br />
builder’s specification.<br />
G97 S ;<br />
↑ Spindle speed (min -1 )<br />
Note : This surface speed unit may change according to machine tool<br />
builder’s specification.<br />
G96 Pα ; P0 : Axis set in the parameter (No. 3770)<br />
P1 : X axis, P2 : Y axis, P3 : Z axis, P4 : 4th axis<br />
P5 : 5th axis, P6 : 6th axis, P7 : 7th axis, P8 : 8th axis<br />
G92 S_ ; The maximum spindle speed (min -1 ) follows S.
9. SPINDLE SPEED FUNCTION<br />
(S FUNCTION) PROGRAMMING<br />
B–63534EN/02<br />
<br />
Constant surface speed<br />
control command (G96)<br />
<br />
<br />
<br />
<br />
G96 (constant surface speed control command) is a modal G code. After<br />
a G96 command is specified, the program enters the constant surface<br />
speed control mode (G96 mode) and specified S values are assumed as a<br />
surface speed. A G96 command must specify the axis along which<br />
constant surface speed control is applied. A G97 command cancels the<br />
G96 mode.When constant surface speed control is applied, a spindle<br />
speed higher than the value specified in G92S_; (maximum spindle<br />
speed) is clamped at the maximum spindle speed. When the power is<br />
turned on, the maximum spindle speed is not yet set and the speed is not<br />
clamped.S (surface speed) commands in the G96 mode are assumed as S<br />
= 0 (the surface speed is 0) until M03 (rotating the spindle in the positive<br />
direction) or M04 (rotating the spindle in the negative direction) appears<br />
in the program.<br />
radius (mm)<br />
Fig. 9.3 (a) Relation between workpiece radius, spindle speed<br />
and surface speed<br />
146<br />
Spindle speed (min -1 )<br />
Surface speed<br />
The spindle speed (min -1 ) almost<br />
coincides with the surface speed<br />
(m/min) at approx. 160 mm (radius).<br />
S is 600 m/min.<br />
To execute the constant surface speed control, it is necessary to set the<br />
work coordinate system , and so the coordinate value at the center of the<br />
rotary axis, for example, Z axis, (axis to which the constant surface speed<br />
control applies) becomes zero.<br />
X<br />
0<br />
Fig. 9.3 (b) Example of the workpiece coordinate system for<br />
constant surface speed control<br />
Z
B–63534EN/02<br />
Surface speed specified<br />
in the G96 mode<br />
<br />
<br />
<br />
<br />
<br />
<br />
PROGRAMMING<br />
147<br />
9. SPINDLE SPEED FUNCTION<br />
(S FUNCTION)<br />
G96 mode G97 mode<br />
Specify the surface speed in m/min<br />
(or feet/min)<br />
G97 command<br />
Store the surface speed in m/min<br />
(or feet/min)<br />
The specified<br />
surface<br />
speed is used<br />
Specified<br />
Not specified<br />
Command<br />
for the surface<br />
speed<br />
The stored surface speed (m/min or<br />
feet/min) is used. If no surface speed<br />
is stored, 0 is assumed.<br />
Command for<br />
the spindle<br />
speed<br />
Specified<br />
The specified<br />
spindle speed<br />
(rpm) is used<br />
Not specified<br />
The surface speed (m/min or<br />
feet/min) is converted to the<br />
spindle speed (rpm)<br />
Commands other than G96<br />
G96 command<br />
The constant surface speed control is also effective during threading.<br />
Accordingly, it is recommended that the constant surface speed control<br />
be invalidated with G97 command before starting the scroll threading and<br />
taper threading, because the response problem in the servo system may<br />
not be considered when the spindle speed changes.<br />
In a rapid traverse block specified by G00, the constant surface speed<br />
control is not made by calculating the surface speed to a transient change<br />
of the tool position, but is made by calculating the surface speed based on<br />
the position at the end point of the rapid traverse block, on the condition<br />
that cutting is not executed at rapid traverse.
9. SPINDLE SPEED FUNCTION<br />
(S FUNCTION) PROGRAMMING<br />
B–63534EN/02<br />
9.4<br />
SPINDLE SPEED<br />
FLUCTUATION<br />
DETECTION<br />
FUNCTION (G25, G26)<br />
<br />
With this function, an overheat alarm (No. 704) is raised when the spindle<br />
speed deviates from the specified speed due to machine conditions.<br />
This function is useful, for example, for preventing the seizure of the<br />
guide bushing.<br />
G26 enables spindle speed fluctuation detection.<br />
G25 disables spindle speed fluctuation detection.<br />
G26 Pp Qq Rr ;<br />
G25 ;<br />
148<br />
Spindle fluctuation detection on<br />
Spindle fluctuation detection off<br />
p : Time (in ms) from the issue of a new spindle rotation command (S<br />
command) to the start of checking whether the actual spindle speed is<br />
so fast that an overheat can occur.<br />
When a specified speed is reached within the time period of P, a check<br />
is started at that time.<br />
q : Tolerance (%) of a specified spindle speed<br />
1–actual spindle speed<br />
q 100<br />
specified spindle speed<br />
If a specified spindle speed lies within this range, it is regarded as<br />
having reached the specified value. Then, the checking of an actual<br />
spindle speed is started.<br />
r : Spindle speed fluctuation (%) at which the actual spindle speed is so<br />
fast that an overheat can occur<br />
1–speed that can cause overheat<br />
r 100<br />
specified spindle speed<br />
G26 enables the spindle speed fluctuation detection function, and G25<br />
disables the spindle speed fluctuation detection.<br />
Even if G25 is specified, p, q, and r are not cleared.
B–63534EN/02<br />
<br />
PROGRAMMING<br />
149<br />
9. SPINDLE SPEED FUNCTION<br />
(S FUNCTION)<br />
The fluctuation of the spindle speed is detected as follows:<br />
1. When an alarm is issued after a specified spindle speed is reached<br />
Spindle speed<br />
Check<br />
Specification of<br />
another speed<br />
q<br />
No check<br />
q d<br />
Check<br />
Start of check Alarm<br />
d<br />
r<br />
r<br />
Specified<br />
speed<br />
Actual speed<br />
Time<br />
2. When an alarm is issued before a specified spindle speed is reached<br />
Spindle speed<br />
Check<br />
Specification of<br />
another speed<br />
q<br />
q<br />
p<br />
No check<br />
Check<br />
Start of check Alarm<br />
d<br />
d<br />
r<br />
r<br />
Specified<br />
speed<br />
Actual speed<br />
Time<br />
Specified speed :<br />
(Speed specified by address S and five–digit value)×(spindle override)<br />
Actual speed : Speed detected with a position coder<br />
p : Time elapses since the specified speed changes until a check starts.<br />
q : (Percentage tolerance for a check to start)×(specified speed)<br />
r : (Percentage fluctuation detected as an alarm condition)×(specified speed)<br />
d : Fluctuation detected as an alarm (specified in parameter (No.4913))<br />
An alarm is issued when the difference between the specified speed and the actual<br />
speed exceeds both r and d.
9. SPINDLE SPEED FUNCTION<br />
(S FUNCTION) PROGRAMMING<br />
B–63534EN/02<br />
NOTE<br />
1 When an alarm is issued in automatic operation, a single<br />
block stop occurs. The spindle overheat alarm is indicated<br />
on the screen, and the alarm signal “SPAL” is output (set to<br />
1 for the presence of an alarm). This signal is cleared by<br />
resetting.<br />
2 Even when reset operation is performed after an alarm<br />
occurs, the alarm is issued again unless the cause of the<br />
alarm is corrected.<br />
3 No check is made during spindle stop state (SSTP = 0).<br />
4 By setting the parameter (No. 4913), an allowable range of<br />
speed fluctuations can be set which suppresses the<br />
occurrence of an alarm. However, an alarm is issued one<br />
second later if the actual speed is found to be 0 rpm.<br />
150
B–63534EN/02<br />
10 <br />
General<br />
PROGRAMMING<br />
<br />
151<br />
10. TOOL FUNCTION<br />
(T FUNCTION)<br />
Two tool functions are available. One is the tool selection function, and<br />
the other is the tool life management function.
10. TOOL FUNCTION<br />
(T FUNCTION) PROGRAMMING<br />
B–63534EN/02<br />
10.1<br />
TOOL SELECTION<br />
FUNCTION<br />
By specifying an up to 8–digit numerical value following address T, tools<br />
can be selected on the machine.<br />
One T code can be commanded in a block. Refer to the machine tool<br />
builder’s manual for the number of digits commandable with address T<br />
and the correspondence between the T codes and machine operations.<br />
When a move command and a T code are specified in the same block, the<br />
commands are executed in one of the following two ways:<br />
(i) Simultaneous execution of the move command and T function<br />
commands.<br />
(ii)Executing T function commands upon completion of move command<br />
execution.<br />
The selection of either (i) or (ii) depends on the machine tool builder’s<br />
specifications. Refer to the manual issued by the machine tool builder<br />
for details.<br />
152
B–63534EN/02<br />
10.2<br />
TOOL LIFE<br />
MANAGEMENT<br />
FUNCTION<br />
Tool life management data<br />
Tool group number 1<br />
Tool group number m<br />
Tool group number p<br />
Tool<br />
selection<br />
PROGRAMMING<br />
153<br />
10. TOOL FUNCTION<br />
(T FUNCTION)<br />
<strong>Tools</strong> are classified into various groups, with the tool life (time or<br />
frequency of use) for each group being specified. The function of<br />
accumulating the tool life of each group in use and selecting and using<br />
the next tool previously sequenced in the same group, is called the tool<br />
life management function.<br />
<br />
<br />
Tool<br />
number<br />
Tool group number m<br />
Code specifying<br />
tool compensation<br />
value<br />
Tool life<br />
The first tool life<br />
management data<br />
The nth tool life<br />
management data<br />
Fig. 10.2 (a) Tool life management data (number of n tools)<br />
By choosing a tool from a tool group specified by a machining program,<br />
the tool life can be managed.<br />
Machining program<br />
Command for selecting<br />
tool group m<br />
Tool change command<br />
(M06)<br />
<strong>Machine</strong><br />
Places a selected<br />
tool in<br />
the wait state<br />
Attaches the<br />
tool in the wait<br />
state to<br />
the spindle<br />
(tool change).<br />
Fig. 10.2 (b) Tool Selection by Machining Program<br />
<strong>Machine</strong> and CNC operations<br />
CNC<br />
Automatically selects, from<br />
tool group m, a tool whose<br />
life has not expired.<br />
Starts counting the life of<br />
the tool attached to the<br />
spindle.l<br />
For two–path control, tool life management is applied independently for<br />
each path. Tool life management data is also set for each path.
10. TOOL FUNCTION<br />
(T FUNCTION) PROGRAMMING<br />
B–63534EN/02<br />
10.2.1<br />
Tool Life Management<br />
Data<br />
<br />
Tool group number<br />
Tool life management data consists of tool group numbers, tool numbers,<br />
codes specifying tool compensation values, and tool life value.<br />
The Max. number of groups and the number of tools per group that can<br />
be registered are set by parameter (GS1,GS2 No. 6800#0, #1) (Table<br />
10.2.1 (a)).<br />
Table 10.2.1 (a) The Max. number of groups and tools that can be registered<br />
The Max. number of groups and<br />
tools without optional function<br />
of 512 tool pairs<br />
154<br />
The Max. number of groups<br />
and tools with optional function<br />
of 512 tool pairs<br />
GS1<br />
GS2<br />
(No. 6800#0) (No. 6800#1)<br />
Number of group Number of tool Number of group Number of tool<br />
0 0 16 16 64 32<br />
0 1 32 8 128 16<br />
1 0 64 4 256 8<br />
1 1 128 2 512 4<br />
Tool number<br />
Code specifying tool<br />
compensation value<br />
Tool life value<br />
WARNING<br />
When bits 0 or 1 of parameter GS1,GS2 No.6800 is<br />
changed, re–register tool life management data with the<br />
G10L3 command (for registering and deleting data for all<br />
groups). Otherwise, new data pairs cannot be set.<br />
Specify a four–digit number after T.<br />
Codes specifying tool offset values are classified into H codes (for tool<br />
length offset) and D codes (cutter compensation). The maximum number<br />
of the tool compensation value specification code which can be registered<br />
is 255 when there are 400 tool compensation values (even if the option<br />
for 512 tool life management sets is supported). The maximum number<br />
is 32, 64, 99, 200, 499, or 999 when there are 32, 64, 99, 200, 499, or 999<br />
tool compensation values.<br />
NOTE<br />
When codes specifying tool offset values are not used,<br />
registration can be omitted.<br />
Refer to II– 10.2.2 and II–10.2.4.
B–63534EN/02<br />
10.2.2<br />
Register, Change and<br />
Delete of Tool Life<br />
Management Data<br />
<br />
Register with deleting<br />
all groups<br />
Addition and change of<br />
tool life management<br />
data<br />
Deletion of tool life<br />
management data<br />
Register of tool life count<br />
type<br />
Life value<br />
PROGRAMMING<br />
155<br />
10. TOOL FUNCTION<br />
(T FUNCTION)<br />
In a program, tool life management data can be registered in the CNC unit,<br />
and registered tool life management data can be changed or deleted.<br />
A different program format is used for each of the four types of operations<br />
described below.<br />
After all registered tool life management data is deleted, programmed tool<br />
life management data is registered.<br />
Programmed tool life management data for a group can be added or<br />
changed.<br />
Programmed tool life management data for a group can be deleted.<br />
Count types (time or frequency can be registered for individual groups.<br />
Whether tool life is to be indicated by time (minutes) or by frequency, it<br />
is set by a parameter LTM (No. 6800 #2) .<br />
Maximum value of tool life is as follows.<br />
In case of minute:4300(minutes)<br />
In case of frequency :9999(times)
10. TOOL FUNCTION<br />
(T FUNCTION) PROGRAMMING<br />
B–63534EN/02<br />
Format<br />
Register with deleting<br />
all groups<br />
Addition and change of<br />
tool life management<br />
data<br />
Deletion of tool life<br />
management data<br />
Format<br />
G10L3 ;<br />
P_L_ ;<br />
T_H_D_ ;<br />
T_H_D_ ;<br />
P_L_ ;<br />
T_H_D_ ;<br />
T_H_D_ ;<br />
G11 ;<br />
M02 (M30) ;<br />
Format<br />
G10L3P1 ;<br />
P_L_ ;<br />
T_H_D_ ;<br />
T_H_D_ ;<br />
P_L_ ;<br />
T_H_D_ ;<br />
T_H_D_ ;<br />
G11 ;<br />
M02 (M30) ;<br />
Format<br />
G10L3P2 ;<br />
P_ ;<br />
P_ ;<br />
P_ ;<br />
P_ ;<br />
G11 ;<br />
M02 (M30) ;<br />
156<br />
Meaning of command<br />
G10L3 :Register with deleting all groups<br />
P_ :Group number<br />
L_ :Life value<br />
T_ :Tool number<br />
H_ :Code specifying tool offset value<br />
(H code)<br />
D_ :Code specifying tool offset value<br />
(D code)<br />
G11 :End of registration<br />
Meaning of command<br />
G10L3P1 :Addition and change of group<br />
P_ :Group number<br />
L_ :Life value<br />
T_ :Tool number<br />
H_ :Code specifying tool offset value<br />
(H code)<br />
D_ :Code specifying tool offset value<br />
(D code)<br />
G11 :End of addition and change of<br />
group<br />
Meaning of command<br />
G10L3P2 :Deletion of group<br />
P_ :Group number<br />
G11 :End of deletion of group
B–63534EN/02<br />
Setting a tool life cout<br />
type for groups<br />
PROGRAMMING<br />
Format<br />
G10L3<br />
or<br />
G10L3P1);<br />
P_L_Q_ ;<br />
T_H_D_ ;<br />
T_H_D_ ;<br />
P_L_Q_ ;<br />
T_H_D_ ;<br />
T_H_D_ ;<br />
G11 ;<br />
M02 (M30) ;<br />
157<br />
Meaning of command<br />
Q_ : Life count type (1:Frequency, 2:Time)<br />
10. TOOL FUNCTION<br />
(T FUNCTION)<br />
CAUTION<br />
1 When the Q command is omitted, the value set in bit 7 (LTM)<br />
of parameter No.6800 is used as the life count type.<br />
2 G10L3P1 and G10L3P2 can be specified only when the<br />
extended tool life management function is enabled.<br />
(Parameter EXT (No.6801#6) = 1)
10. TOOL FUNCTION<br />
(T FUNCTION) PROGRAMMING<br />
B–63534EN/02<br />
10.2.3<br />
Tool Life Management<br />
Command in a<br />
Machining Program<br />
<br />
Command<br />
The following command is used for tool life management:<br />
T; Specifies a tool group number.<br />
The tool life management function selects, from a specified group, a<br />
tool whose life has not expired, and outputs its T code. In ,<br />
specify a number calculated by adding the tool life management cancel<br />
number specified in parameter6810 to a group number. For example,<br />
to set tool group 1 when the tool life management cancel number is<br />
100, specify T101;.<br />
NOTE<br />
When is less than a tool life management cancel<br />
number, the T code is treated as an ordinary T code.<br />
M06; Terminates life management for the previously used tools,<br />
and begins counting the life of the new tools selected with<br />
the T code.<br />
WARNING<br />
When an option for speciofying multiple M codes is<br />
selected, specify this code by itself or as the first M code.<br />
H99; Selects the H code of tool life management data for the tool<br />
currently being used.<br />
H00; Cancels tool length offset<br />
D99; Selects the D code of tool life management data for the tool<br />
currently being used.<br />
D00; Cancels cutter compensation<br />
WARNING<br />
H99 or D99 must be specified after the M06 command.<br />
When a code other than H99 or D99 is specified after the<br />
M06 command, the H code and D code of tool life<br />
management data are not selected.<br />
158
B–63534EN/02<br />
Types<br />
Examples<br />
Tool change type A<br />
PROGRAMMING<br />
159<br />
10. TOOL FUNCTION<br />
(T FUNCTION)<br />
For tool life management, the four tool change types indicated below are<br />
available. The type used varies from one machine to another. For details,<br />
refer to the appropriate manual of each machinde tool builder.<br />
Table 10.2.3 Tool Change Type<br />
Tool change<br />
A B C D<br />
type<br />
Tool group<br />
number specified<br />
in the<br />
same block<br />
as the tool<br />
change command<br />
(M06)<br />
Tool life count<br />
timing<br />
Previously<br />
used tools<br />
<strong>Tools</strong> to be used next<br />
Life counting is performed for a tool in the<br />
specified tool group when M06 is specified<br />
next.<br />
Remarks Normally, when a tool group<br />
number is specified by itself,<br />
type B is used. However, no<br />
alarm is raised even if the<br />
tool group number is specified<br />
by itself as type C.<br />
Parameter No. 6800#7<br />
(M6T)=0<br />
No.6801#7<br />
(M6E)=0<br />
No. 6800#7 (M6T)=1<br />
No. 6801#7 (M6E)=0<br />
Life counting<br />
is performed<br />
when a tool<br />
in the tool<br />
group specified<br />
in the<br />
same block<br />
as M06 is<br />
specified.<br />
When only<br />
M06 is specified,<br />
P/S<br />
alarm No.<br />
153 is<br />
issued.<br />
No.6801#7<br />
(M6E)=1<br />
NOTE<br />
When a tool group number is specified and a new tool is<br />
selected, the new tool selection signal is output.<br />
Suppose that the tool life management cancel number is 100.<br />
T101; A tool whose life has not expired is selected from group 1.<br />
(Suppose that tool number 010 is selected.)<br />
M06; Tool life counting is performed for the tool in group 1.<br />
(The life of tool number 010 is counted.)<br />
T102; A tool whose life has not expired is selected from group 2.<br />
(Suppose that tool number 100 is selected.)<br />
M06T101; Tool life counting is performed for the tool in group 2.<br />
(The life of tool number 100 is counted.)<br />
The number of the tool currently used (in group 1) is<br />
output with a T code signal. (Tool number 010 is<br />
output.)
10. TOOL FUNCTION<br />
(T FUNCTION) PROGRAMMING<br />
B–63534EN/02<br />
Tool change type B<br />
and C<br />
Tool change type D<br />
Suppose that the tool life management ignore number is 100.<br />
T101; A tool whose life has not expired is selected from group 1.<br />
(Suppose that tool number 010 is selected.)<br />
M06T102;Tool life counting is performed for the tool in group 1.<br />
(The life of tool number 010 is counted.)<br />
A tool whose life has not expired is selected from group 2.<br />
(Suppose that toolnumber 100 is selected.<br />
M06T103;Tool life counting is lperformed for the tool in group 2.<br />
(The life of tool number 100 is counted.)<br />
A tool whose life has not expired is selected from group 3.<br />
(Suppose that tool number 200 is selected.)<br />
Suppose that the tool life management ignore number is 100.<br />
T101M06;A tool whose life has not expired is selected from group 1.<br />
(Suppose that tool number 010 is selected.)<br />
Tool life counting is performed for the tool in group 1.<br />
T102M06;A tool whose life has not expired is selected from group 2.<br />
(Suppose that tool number 100 is selected.)<br />
Tool life counting is performed for the tool in group 2.<br />
(The life of tool number 100 is counted.)<br />
160
B–63534EN/02<br />
10.2.4<br />
Tool Life<br />
Explanations<br />
Usage count<br />
Usage time<br />
PROGRAMMING<br />
161<br />
10. TOOL FUNCTION<br />
(T FUNCTION)<br />
The life of a tool is specified by a usage frequency (count) or usage time<br />
(in minutes).<br />
The usage count is incremented by 1 for each tool used in a program.<br />
In other words, the usage count is incremented by 1 only when the first<br />
tool group number and tool change command are specified after the<br />
CNC unit enters the automatic operation state from the reset state.<br />
CAUTION<br />
Even if the same tool group number is specified more than<br />
once in a program, the usage count is only incremented by<br />
1 and no new tools are selected.<br />
When a tool change is specified (M06), tool life management is started<br />
for the tools specified by the tool group number. In tool life<br />
management, the time during which a tool is used in the cutting mode<br />
is counted in four second increments., If the tool group is changed<br />
before the incremental time of four seconds elapses, the time is not<br />
counted. The time a tool is used for single block stop, feed hold, rapid<br />
traverse, dwell, machine lock, and interlock is not counted.<br />
NOTE<br />
1 When a tool is selected from available tools, tools are<br />
searched starting from the current tool towards the lasttool<br />
to find a tool whose life has not expired. When thelast tool<br />
is reached during this search, the search restartsfrom the<br />
first tool. When it has been determined that there are no<br />
tools whose life has not expired, the last tool is selected.<br />
When the tool currently being used is changed by tool skip<br />
signal, the next new tool is selected using the method<br />
described here.<br />
2 When tool life is counted by time, the life counting can be<br />
overridden using the tool life count override signal. An<br />
override from 0 to 99.9 can be applied. When 0 is specified,<br />
time is not counted. Before the override capability can be<br />
used, bit 2 of parameter LFV No.6801 must be set.<br />
3 When tool life counting indicates that the life of the last tool<br />
in a group has expired, the tool change signal is output.<br />
When tool life is managed by time, the signal is output when<br />
the life of the last tool in the group has expired. When tool<br />
life is managed by usage frequency (count), the signal is<br />
output when the CNC unit is reset or the tool life count<br />
restart M code is specified.
11. AUXILIARY FUNCTION PROGRAMMING<br />
B–63534EN/02<br />
11 <br />
General<br />
<br />
There are two types of auxiliary functions ; miscellaneous function (M<br />
code) for specifying spindle start, spindle stop program end, and so on,<br />
and secondary auxiliary function (B code) for specifying index table<br />
positioning.<br />
When a move command and miscellaneous function are specified in the<br />
same block, the commands are executed in one of the following two<br />
ways:<br />
i) Simultaneous execution of the move command and miscellaneous<br />
function commands.<br />
ii) Executing miscellaneous function commands upon completion of<br />
move command execution.<br />
The selection of either sequence depends on the machine tool builder’s<br />
specification. Refer to the manual issued by the machine tool builder for<br />
details.<br />
162
B–63534EN/02 PROGRAMMING<br />
11. AUXILIARY FUNCTION<br />
11.1<br />
AUXILIARY<br />
FUNCTION<br />
(M FUNCTION)<br />
Explanations<br />
<br />
<br />
<br />
<br />
<br />
<br />
<br />
<br />
)<br />
<br />
<br />
M198 (Calling a<br />
subprogram)<br />
When a numeral is specified following address M, code signal and a<br />
strobe signal are sent to the machine. The machine uses these signals to<br />
turn on or off its functions.<br />
Usually, only one M code can be specified in one block. In some cases,<br />
however, up to three M codes can be specified for some types of machine<br />
tools.<br />
Which M code corresponds to which machine function is determined by<br />
the machine tool builder.<br />
The machine processes all operations specified by M codes except those<br />
specified by M98, M99,M198 or called subprogram(Parameter No.6071<br />
to 6079), or called custom macro (Parameter No.6080 to 6089). Refer to<br />
the machine tool builder’s instruction manual for details.<br />
The following M codes have special meanings.<br />
This indicates the end of the main program<br />
Automatic operation is stopped and the CNC unit is reset.<br />
This differs with the machine tool builder.<br />
After a block specifying the end of the program is executed,<br />
control returns to the start of the program.<br />
Bit 5 of parameter 3404 (M02) or bit 4 of parameter 3404 (M30) can be<br />
used to disable M02, M30 from returning control to the start of the<br />
program.<br />
Automatic operation is stopped after a block containing M00 is executed.<br />
When the program is stopped, all existing modal information remains<br />
unchanged. The automatic operation can be restarted by actuating the<br />
cycle operation. This differs with the machine tool builder.<br />
Similarly to M00, automatic operation is stopped after a block containing<br />
M01 is executed. This code is only effective when the Optional Stop<br />
switch on the machine operator’s panel has been pressed.<br />
This code is used to call a subprogram. The code and strobe signals are<br />
not sent. See the subprogram II– 12.3 for details .<br />
This code indicates the end of a subprogram.<br />
M99 execution returns control to the main program. The code and strobe<br />
signals are not sent. See the subprogram section 12.3 for details.<br />
This code is used to call a subprogram of a file in the external input/output<br />
function. See the description of the subprogram call function (III–4.7) for<br />
details.<br />
NOTE<br />
The block following M00, M01, M02, or M30 is not pre–read<br />
(buffered). Similarly, ten M codes which do not buffer can<br />
be set by parameters (Nos. 3411 to 3420). Refer to the<br />
machine tool builder’s instruction manual for these M codes.<br />
163
11. AUXILIARY FUNCTION PROGRAMMING<br />
B–63534EN/02<br />
11.2<br />
MULTIPLE M<br />
COMMANDS IN A<br />
SINGLE BLOCK<br />
Explanations<br />
Examples<br />
In general, only one M code can be specified in a block. However, up to<br />
three M codes can be specified at once in a block by setting bit 7 (M3B)<br />
of parameter No. 3404 to 1. Up to three M codes specified in a block are<br />
simultaneously output to the machine. This means that compared with<br />
the conventional method of a single M command in a single block, a<br />
shorter cycle time can be realized in machining.<br />
CNC allows up to three M codes to be specified in one block.<br />
However, some M codes cannot be specified at the same time due to<br />
mechanical operation restrictions. For detailed information about the<br />
mechanical operation restrictions on simultaneous specification of<br />
multiple M codes in one block, refer to the manual of each machine<br />
tool builder.<br />
M00, M01, M02, M30, M98, M99, or M198 must not be specified<br />
together with another M code.<br />
Some M codes other than M00, M01, M02, M30, M98, M99, and<br />
M198 cannot be specified together with other M codes; each of those<br />
M codes must be specified in a single block.<br />
Such M codes include these which direct the CNC to perform internal<br />
operations in addition to sending the M codes themselves to the<br />
machine. To be specified, such M codes are M codes for calling<br />
program numbers 9001 to 9009 and M codes for disabling advance<br />
reading (buffering) of subsequent blocks. Meanwhile, multiple of M<br />
codes that direct the CNC only to send the M codes themselves<br />
(without performing internal operations ) can be specified in a single<br />
block.<br />
One M command<br />
in a single block<br />
M40 ;<br />
M50 ;<br />
M60 ;<br />
G28G91X0Y0Z0 ;<br />
:<br />
:<br />
:<br />
164<br />
Multiple M commands<br />
in a single block<br />
M40M50M60 ;<br />
G28G91X0Y0Z0 ;<br />
:<br />
:<br />
:<br />
:<br />
:
B–63534EN/02 PROGRAMMING<br />
11. AUXILIARY FUNCTION<br />
11.3<br />
M CODE GROUP<br />
CHECK FUNCTION<br />
Explanations<br />
M code setting<br />
Group numbers<br />
The M code group check function checks if a combination of multiple M<br />
codes (up to three M codes) contained in a block is correct.<br />
This function has two purposes. One is to detect if any of the multiple M<br />
codes specified in a block include an M code that must be specified alone.<br />
The other purpose is to detect if any of the multiple M codes specified in<br />
a block include M codes that belong to the same group. In either of these<br />
cases, P/S alarm No. 5016 is issued.<br />
For details on group data setting, refer to the manual available from the<br />
machine tool builder.<br />
Up to 500 M codes can be specified. In general, M0 to M99 are<br />
always specified. M codes from M100 and up are optional.<br />
Group numbers can be set from 0 to 127. Note, however, that 0 and 1<br />
have special meanings. Group number 0 represents M codes that need<br />
not be checked. Group number 1 represents M codes that must be<br />
specified alone.<br />
165
11. AUXILIARY FUNCTION PROGRAMMING<br />
B–63534EN/02<br />
11.4<br />
THE SECOND<br />
AUXILIARY<br />
FUNCTIONS<br />
(B CODES)<br />
Explanations<br />
Valid data range<br />
Specification<br />
Restrictions<br />
Indexing of the table is performed by address B and a following 8–digit<br />
number. The relationship between B codes and the corresponding<br />
indexing differs between machine tool builders.<br />
Refer to the manual issued by the machine tool builder for details.<br />
0 to 99999999<br />
1. To enable the use of a decimal point, set bit 0 (AUP) of parameter<br />
No.3450 to 1.<br />
Command Output value<br />
B10. 10000<br />
B10 10<br />
2. Use bit 0 (DPI) of parameter No. 3401 to specify whether the<br />
magnification for B output will be 1000 or 1 when a decimal<br />
point is omitted.<br />
Command Output value<br />
DPI=1 B1 1000<br />
DPI=0 B1 1<br />
3. Use bit 0 (AUX) of parameter No. 3405 to specify whether the<br />
magnification for B output will be 1000 or 10000 when a<br />
decimal point is omitted for the inch Input system<br />
(only when DPI=1).<br />
Command Output value<br />
AUX=1 B1 10000<br />
AUX=0 B1 1000<br />
Addresses used for the second auxiliary functions (addresses specified<br />
with B or parameter No. 3460) cannot be used as controlled axis names<br />
(parameter No. 1020).<br />
166
B–63534EN/02 PROGRAMMING<br />
12. PROGRAM CONFIGURATION<br />
12 <br />
General<br />
Main program and<br />
subprogram<br />
<br />
There are two program types, main program and subprogram. Normally,<br />
the CNC operates according to the main program. However, when a<br />
command calling a subprogram is encountered in the main program,<br />
control is passed to the subprogram. When a command specifying a<br />
return to the main program is encountered in a subprogram, control is<br />
returned to the main program.<br />
Main program <br />
Instruction 1<br />
Instruction 2<br />
Follow the direction of the<br />
subprogram<br />
Instruction n<br />
Instruction n+1<br />
167<br />
Instruction 1<br />
Instruction 2<br />
<br />
Fig. 12 (a) Main program and Subprogram<br />
The CNC memory can hold up to 400 main programs and subprograms<br />
(63 as standard). A main program can be selected from the stored main<br />
programs to operate the machine. See III–9.3 or III–10 in OPERATION<br />
for the methods of registering and selecting programs.
12. PROGRAM CONFIGURATION PROGRAMMING<br />
B–63534EN/02<br />
Program components<br />
Program section<br />
configuration<br />
A program consists of the following components:<br />
168<br />
Table 12 Program components<br />
Components Descriptions<br />
Tape start Symbol indicating the start of a program file<br />
Leader section Used for the title of a program file, etc.<br />
Program start Symbol indicating the start of a program<br />
Program section Commands for machining<br />
Comment section Comments or directions for the operator<br />
Tape end Symbol indicating the end of a program file<br />
Tape start % TITLE ;<br />
Program section<br />
O0001 ;<br />
(COMMENT)<br />
M30 ;<br />
%<br />
Fig. 12 (b) Program configuration<br />
Leader section<br />
Program start<br />
Comment section<br />
Tape end<br />
A program section consists of several blocks. A program section starts<br />
with a program number and ends with a program end code.<br />
<br />
<br />
Program number O0001 ;<br />
Block 1 N1 G91 G00 X120.0 Y80.0 ;<br />
Block 2 N2 G43 Z–32.0 H01 ;<br />
: :<br />
Block n Nn Z0 ;<br />
Program end M30 ;<br />
A block contains information necessary for machining, such as a move<br />
command or coolant on/off command.Specifying a slash (/) at the start<br />
of a block disables the execution of some blocks (see “optional block<br />
skip” in II–12.2).
B–63534EN/02 PROGRAMMING<br />
12. PROGRAM CONFIGURATION<br />
12.1<br />
PROGRAM<br />
COMPONENTS<br />
OTHER THAN<br />
PROGRAM<br />
SECTIONS<br />
Explanations<br />
Tape start<br />
Leader section<br />
Program start<br />
This section describes program components other than program sections.<br />
See II–12.2 for a program section.<br />
Tape start<br />
Program section<br />
169<br />
% TITLE ;<br />
O0001 ;<br />
(COMMENT)<br />
M30 ;<br />
%<br />
Fig. 12.1 (a) Program configuration<br />
Leader section<br />
Program start<br />
Comment section<br />
Tape end<br />
The tape start indicates the start of a file that contains NC programs.<br />
The mark is not required when programs are entered using SYSTEM P<br />
or ordinary personal computers. The mark is not displayed on the screen.<br />
However, if the file is output,the mark is automatically output at the start<br />
of the file.<br />
Table 12.1 (a) Code of a tape start<br />
Name ISO code EIA code Notation in this manual<br />
Tape start % ER %<br />
Data entered before the programs in a file constitutes a leader section.<br />
When machining is started, the label skip state is usually set by turning<br />
on the power or resetting the system. In the label skip state, all<br />
information is ignored until the first end–of–block code is read. When a<br />
file is read into the CNC unit from an I/O device, leader sections are<br />
skipped by the label skip function.<br />
A leader section generally contains information such as a file header.<br />
When a leader section is skipped, even a TV parity check is not made. So<br />
a leader section can contain any codes except the EOB code.<br />
The program start code is to be entered immediately after a leader section,<br />
that is, immediately before a program section.<br />
This code indicates the start of a program, and is always required to<br />
disable the label skip function.<br />
With SYSTEM P or ordinary personal computers, this code can be entered<br />
by pressing the return key.<br />
Table 12.1 (b) Code of a program start<br />
Name ISO code EIA code Notation in this manual<br />
Program start LF CR ;
12. PROGRAM CONFIGURATION PROGRAMMING<br />
B–63534EN/02<br />
Comment section<br />
NOTE<br />
If one file contains multiple programs, the EOB code for<br />
label skip operation must not appear before a second or<br />
subsequent program number.<br />
Any information enclosed by the control–out and control–in codes is<br />
regarded as a comment.<br />
The user can enter a header, comments, directions to the operator, etc. in<br />
a comment section.<br />
Name<br />
Table 12.1 (c) Codes of a control–in and a control–out<br />
ISO<br />
code<br />
170<br />
EIA<br />
code<br />
Notation in this<br />
manual<br />
Meaning<br />
Control–out ( 2–4–5 ( Start of comment section<br />
Control–in ) 2–4–7 ) End of comment section<br />
When a program is read into memory for memory operation, comment<br />
sections, if any, are not ignored but are also read into memory. Note,<br />
however, that codes other than those listed in the code table in Appendix<br />
A are ignored, and thus are not read into memory.<br />
When data in memory is output on external I/O device(See III–8), the<br />
comment sections are also output.<br />
When a program is displayed on the screen, its comment sections are also<br />
displayed. However, those codes that were ignored when read into<br />
memory are not output or displayed.<br />
During memory operation or DNC operation, all comment sections are<br />
ignored.<br />
The TV check function can be used for a comment section by setting<br />
parameter CTV (bit 1 of No. 0100).<br />
CAUTION<br />
If a long comment section appears in the middle of a<br />
program section, a move along an axis may be suspended<br />
for a long time because of such a comment section. So a<br />
comment section should be placed where movement<br />
suspension may occur or no movement is involved.<br />
NOTE<br />
1 If only a control–in code is read with no matching<br />
control–out code, the read control–in code is ignored.<br />
2 The EOB code cannot be used in a comment.
B–63534EN/02 PROGRAMMING<br />
12. PROGRAM CONFIGURATION<br />
Tape end<br />
A tape end is to be placed at the end of a file containing NC programs.<br />
If programs are entered using the automatic programming system, the<br />
mark need not be entered.<br />
The mark is not displayed on the screen. However, when a file is output,<br />
the mark is automatically output at the end of the file.<br />
If an attempt is made to execute % when M02 or M03 is not placed at the<br />
end of the program, the P/S alarm (No. 5010) is occurred.<br />
171<br />
Table 12.1 (d) Code of a tape end<br />
Name ISO code EIA code Notation in this manual<br />
Tape end % ER %
12. PROGRAM CONFIGURATION PROGRAMMING<br />
B–63534EN/02<br />
12.2<br />
PROGRAM SECTION<br />
CONFIGURATION<br />
Program number<br />
This section describes elements of a program section. See II–12.1 for<br />
program components other than program sections.<br />
Program section<br />
172<br />
% TITLE;<br />
O0001 ;<br />
N1 … ;<br />
(COMMENT)<br />
M30 ;<br />
%<br />
Fig. 12.2 (a) Program configuration<br />
Program number<br />
Sequence number<br />
Comment section<br />
Program end<br />
A program number consisting of address O followed by a four–digit<br />
number is assigned to each program at the beginning registered in<br />
memory to identify the program.<br />
In ISO code, the colon ( : ) can be used instead of O.<br />
When no program number is specified at the start of a program, the<br />
sequence number (N....) at the start of the program is regarded as its<br />
program number. If a five–digit sequence number is used, the lower four<br />
digits are registered as a program number. If the lower four digits are all<br />
0, the program number registered immediately before added to 1 is<br />
registered as a program number. Note, however, that N0 cannot be used<br />
for a program number.<br />
If there is no program number or sequence number at the start of a<br />
program, a program number must be specified using the MDI panel when<br />
the program is stored in memory (See III–8.4 or III–10.1)<br />
NOTE<br />
Program numbers 8000 to 9999 may be used by machine<br />
tool builders, and the user may not be able to use these<br />
numbers.
B–63534EN/02 PROGRAMMING<br />
12. PROGRAM CONFIGURATION<br />
Sequence number and<br />
block<br />
TV check (Vertical parity<br />
check along tape)<br />
A program consists of several commands. One command unit is called a<br />
block. One block is separated from another with an EOB of end of block<br />
code.<br />
173<br />
Table 12.2 (a) EOB code<br />
Name ISO code EIA code Notation in this manual<br />
End of block (EOB) LF CR ;<br />
At the head of a block, a sequence number consisting of address N<br />
followed by a number not longer than five digits (1 to 99999) can be<br />
placed. Sequence numbers can be specified in a random order, and any<br />
numbers can be skipped. Sequence numbers may be specified for all<br />
blocks or only for desired blocks of the program. In general, however, it<br />
is convenient to assign sequence numbers in ascending order in phase<br />
with the machining steps (for example, when a new tool is used by tool<br />
replacement, and machining proceeds to a new surface with table<br />
indexing.)<br />
N300 X200.0 Z300.0 ; A sequence number is underlined.<br />
Fig. 12.2 (b) Sequence number and block (example)<br />
NOTE<br />
N0 must not be used for the reason of file compatibility with<br />
other CNC systems.<br />
Program number 0 cannot be used. So 0 must not be used<br />
for a sequence number regarded as a program number.<br />
A parity check is made for a block on input tape vertically. If the number<br />
of characters in one block (starting with the code immediately after an<br />
EOB and ending with the next EOB) is odd, an P/S alarm (No.002) is<br />
output. No TV check is made only for those parts that are skipped by the<br />
label skip function. Bit 1 (CTV) of parameter No. 0100 is used to specify<br />
whether comments enclosed in parentheses are counted as characters<br />
during TV check. The TV check function can be enabled or disabled by<br />
setting on the MDI unit (See III–11.4.3.).
12. PROGRAM CONFIGURATION PROGRAMMING<br />
B–63534EN/02<br />
Block configuration<br />
(word and address)<br />
A block consists of one or more words. A word consists of an address<br />
followed by a number some digits long. (The plus sign (+) or minus sign<br />
(–) may be prefixed to a number.)<br />
Word = Address + number (Example : X–1000)<br />
For an address, one of the letters (A to Z) is used ; an address defines the<br />
meaning of a number that follows the address. Table 12.2 (b) indicates<br />
the usable addresses and their meanings.<br />
The same address may have different meanings, depending on the<br />
preparatory function specification.<br />
Table 12.2 (b) Major functions and addresses<br />
Function Address Meaning<br />
Program number O (*1) Program number<br />
Sequence number N Sequence number<br />
Preparatory function G Specifies a motion mode (linear, arc,<br />
etc.)<br />
Dimension word X, Y, Z, U,<br />
V, W, A, B,<br />
C<br />
174<br />
Coordinate axis move command<br />
I, J, K Coordinate of the arc center<br />
R Arc radius<br />
Feed function F Rate of feed per minute,<br />
Rate of feed per revolution<br />
Spindle speed function S Spindle speed<br />
Tool function T Tool number<br />
Auxiliary function M On/off control on the machine tool<br />
B Table indexing, etc.<br />
Offset number D, H Offset number<br />
Dwell P, X Dwell time<br />
Program number<br />
designation<br />
Number of<br />
repetitions<br />
P Subprogram number<br />
P Number of subprogram repetitions<br />
Parameter P, Q Canned cycle parameter<br />
NOTE<br />
(*1) In ISO code, the colon ( : ) can also be used as the address<br />
of a program number.<br />
N G_ X_ Y_ F_ S_ T_ M_ ;<br />
Sequence<br />
number<br />
Preparatory<br />
function<br />
Dimension<br />
word<br />
Feed–<br />
function<br />
Spindle<br />
speed<br />
function<br />
Fig. 12.2 (c) 1 block (example)<br />
Tool<br />
function<br />
Miscellaneous<br />
function
B–63534EN/02 PROGRAMMING<br />
12. PROGRAM CONFIGURATION<br />
Major addresses and<br />
ranges of command<br />
values<br />
Major addresses and the ranges of values specified for the addresses are<br />
shown below. Note that these figures represent limits on the CNC side,<br />
which are totally different from limits on the machine tool side. For<br />
example, the CNC allows a tool to traverse up to about 100 m (in<br />
millimeter input) along the X axis.<br />
However, an actual stroke along the X axis may be limited to 2 m for a<br />
specific machine tool.<br />
Similarly, the CNC may be able to control a cutting federate of up to 240<br />
m/min, but the machine tool may not allow more than 3 m/min. When<br />
developing a program, the user should carefully read the manuals of the<br />
machine tool as well as this manual to be familiar with the restrictions on<br />
programming.<br />
Table 12.2 (c) Major addresses and ranges of command values<br />
Function Address Input in mm Input in inch<br />
Program number O (*1) 1–9999 1–9999<br />
Sequence number N 1–99999 1–99999<br />
Preparatory function G 0–99 0–99<br />
Dimension<br />
word<br />
Feed<br />
per<br />
minute<br />
<strong>Inc</strong>rement<br />
system IS–B<br />
<strong>Inc</strong>rement<br />
system IS–C<br />
<strong>Inc</strong>rement<br />
system IS–B<br />
<strong>Inc</strong>rement<br />
system IS–C<br />
175<br />
X, Y, Z,<br />
U, V, W,<br />
A, B, C,<br />
I, J, K, R,<br />
99999.999mm 9999.9999inch<br />
9999.9999mm 999.99999inch<br />
F 1–240000mm/min 0.01–9600.00<br />
inch/min<br />
Feed per revolution F 0.001–500.00<br />
mm/rev<br />
1–100000mm/min 0.01–4000.00<br />
inch/min<br />
0.0001–9.9999<br />
inch/rev<br />
Spindle speed function S 0–20000 0–20000<br />
Tool function T 0–99999999 0–99999999<br />
Auxiliary function M 0–99999999 0–99999999<br />
B 0–99999999 0–99999999<br />
Offset number H, D 0–400 0–400<br />
Dwell <strong>Inc</strong>rement<br />
system IS–B<br />
<strong>Inc</strong>rement<br />
system IS–C<br />
Designation of a program<br />
number<br />
Number of subprogram<br />
repetitions<br />
X, P 0–99999.999s 0–99999.999s<br />
0–9999.9999s 0–9999.9999s<br />
P 1–9999 1–9999<br />
P 1–999 1–999<br />
NOTE<br />
(*1) In ISO code, the colon ( : ) can also be used as the address<br />
of a program number.
12. PROGRAM CONFIGURATION PROGRAMMING<br />
B–63534EN/02<br />
Optional block skip<br />
When a slash followed by a number (/n (n=1 to 9)) is specified at the head<br />
of a block, and optional block skip switch n on the machine operator panel<br />
is set to on, the information contained in the block for which /n<br />
corresponding to switch number n is specified is ignored in DNC<br />
operation or memory operation.<br />
When optional block skip switch n is set to off, the information contained<br />
in the block for which /n is specified is valid. This means that the operator<br />
can determine whether to skip the block containing /n.<br />
Number 1 for /1 can be omitted. However, when two or more optional<br />
block skip switches are used for one block, number 1 for /1 cannot be<br />
omitted.<br />
Example)<br />
(<strong>Inc</strong>orrect) (Correct)<br />
//3 G00X10.0; /1/3 G00X10.0;<br />
This function is ignored when programs are loaded into memory. Blocks<br />
containing /n are also stored in memory, regardless of how the optional<br />
block skip switch is set.<br />
Programs held in memory can be output, regardless of how the optional<br />
block skip switches are set.<br />
Optional block skip is effective even during sequence number search<br />
operation.<br />
Depending on the machine tool, all optional block skip switches (1 to 9)<br />
may not be usable. Refer to manuals of the machine tool builder to find<br />
which switches are usable.<br />
WARNING<br />
1 Position of a slash<br />
A slash (/) must be specified at the head of a block. If a slash<br />
is placed elsewhere, the information from the slash to<br />
immediately before the EOB code is ignored.<br />
2 Disabling an optional block skip switch<br />
Optional block skip operation is processed when blocks are<br />
read from memory or tape into a buffer. Even if a switch is<br />
set to on after blocks are read into a buffer, the blocks<br />
already read are not ignored.<br />
NOTE<br />
TV and TH check<br />
When an optional block skip switch is on. TH and TV checks<br />
are made for the skipped portions in the same way as when<br />
the optional block skip switch is off.<br />
176
B–63534EN/02 PROGRAMMING<br />
12. PROGRAM CONFIGURATION<br />
Program end<br />
The end of a program is indicated by programming one of the following<br />
codes at the end of the program:<br />
Table 12.2 (d) Code of a program end<br />
Code Meaning usage<br />
M02 For main program<br />
M30<br />
M99 For subprogram<br />
If one of the program end codes is executed in program execution, the<br />
CNC terminates the execution of the program, and the reset state is set.<br />
When the subprogram end code is executed, control returns to the<br />
program that called the subprogram.<br />
WARNING<br />
A block containing an optional block skip code such as /M02<br />
; , /M30 ; , or /M99 ; is not regarded as the end of a program,<br />
if the optional block skip switch on the machine operator’s<br />
panel is set to on.<br />
(See “Optional block skip”.)<br />
177
12. PROGRAM CONFIGURATION PROGRAMMING<br />
B–63534EN/02<br />
12.3<br />
SUBPROGRAM<br />
(M98, M99)<br />
Format<br />
Subprogram<br />
configuration<br />
Subprogram call<br />
Explanations<br />
Reference<br />
Main program<br />
O0001 ;<br />
M98P1000 ;<br />
M30 ;<br />
If a program contains a fixed sequence or frequently repeated pattern, such<br />
a sequence or pattern can be stored as a subprogram in memory to simplify<br />
the program.<br />
A subprogram can be called from the main program.<br />
A called subprogram can also call another subprogram.<br />
One subprogram<br />
O ;<br />
M99 ;<br />
178<br />
Subprogram number<br />
(or the colon (:) optionally in the case of ISO)<br />
Program end<br />
M99 need not constitute a separate block as indicated below.<br />
Example) X100.0 Y100.0 M99 ;<br />
M98 P ;<br />
↑<br />
Number of times<br />
the subprogram is<br />
called repeatedly<br />
↑<br />
Subprogram number<br />
When no repetition data is specified, the subprogram is called just once.<br />
When the main program calls a subprogram, it is regarded as a one–level<br />
subprogram call. Thus, subprogram calls can be nested up to four levels<br />
as shown below.<br />
Subprogram Subprogram Subprogram Subprogram<br />
O1000 ;<br />
O2000 ;<br />
O3000 ;<br />
O4000 ;<br />
M98P2000 ;<br />
M99 ;<br />
M98P3000 ;<br />
M99 ;<br />
M98P4000 ;<br />
M99 ;<br />
(One–level nesting) (Two–level nesting) (Three–level nesting)<br />
M99 ;<br />
(Four–level nesting)<br />
A single call command can repeatedly call a subprogram up to 999 times.<br />
For compatibility with automatic programming systems, in the first<br />
block, Nxxxx can be used instead of a subprogram number that follows<br />
O (or :). A sequence number after N is registered as a subprogram number.<br />
See III–10 for the method of registering a subprogram.
B–63534EN/02 PROGRAMMING<br />
12. PROGRAM CONFIGURATION<br />
Examples<br />
NOTE<br />
1 The M98 and M99 code signal and strobe signal are not<br />
output to the machine tool.<br />
2 If the subprogram number specified by address P cannot be<br />
found, an alarm (No. 078) is output.<br />
M98 P51002 ;<br />
This command specifies ”Call the subprogram (number 1002) five times in<br />
succession.” A subprogram call command (M98P_) can be specified in the<br />
same block as a move command.<br />
X1000.0 M98 P1200 ;<br />
This example calls the subprogram (number 1200) after an X movement.<br />
Execution sequence of subprograms called from a main program<br />
Main program<br />
N0010 … ;<br />
N0020 … ;<br />
N0030 M98 P21010 ;<br />
N0040 … ;<br />
N0050 M98 P1010 ;<br />
N0060 … ;<br />
A subprogram can call another subprogram in the same way as a main program<br />
calls a subprogram.<br />
179<br />
1 2 3<br />
Subprogram<br />
O1010 … ;<br />
N1020 … ;<br />
N1030 … ;<br />
N1040 … ;<br />
N1050 … ;<br />
N1060 … M99 ;
12. PROGRAM CONFIGURATION PROGRAMMING<br />
B–63534EN/02<br />
Special Usage<br />
Specifying the sequence<br />
number for the return<br />
destination in the main<br />
program<br />
Using M99 in the main<br />
program<br />
If P is used to specify a sequence number when a subprogram is<br />
terminated, control does not return to the block after the calling block, but<br />
returns to the block with the sequence number specified by P. Note,<br />
however, that P is ignored if the main program is operating in a mode other<br />
than memory operation mode.<br />
This method consumes a much longer time than the normal return method<br />
to return to the main program.<br />
Main program<br />
N0010 … ;<br />
N0020 … ;<br />
N0030 M98 P1010 ;<br />
N0040 … ;<br />
N0050 … ;<br />
N0060 … ;<br />
180<br />
Subprogram<br />
O0010 … ;<br />
N1020 … ;<br />
N1030 … ;<br />
N1040 … ;<br />
N1050 … ;<br />
N1060 M99 P0060 ;<br />
If M99 is executed in a main program, control returns to the start of the<br />
main program. For example, M99 can be executed by placing /M99 ; at<br />
an appropriate location of the main program and setting the optional block<br />
skip function to off when executing the main program. When M99 is<br />
executed, control returns to the start of the main program, then execution<br />
is repeated starting at the head of the main program.<br />
Execution is repeated while the optional block skip function is set to off.<br />
If the optional block skip function is set to on, the /M99 ; block is skipped<br />
; control is passed to the next block for continued execution.<br />
If/M99Pn ; is specified, control returns not to the start of the main<br />
program, but to sequence number n. In this case, a longer time is required<br />
to return to sequence number n.<br />
Optional block skip<br />
OFF<br />
N0010 … ;<br />
N0020 … ;<br />
N0030 … ;<br />
N0040 … ;<br />
N0050 … ;<br />
/ N0060 M99 P0030 ;<br />
N0070 … ;<br />
N0080 M02 ;<br />
Optional block<br />
skip<br />
ON
B–63534EN/02 PROGRAMMING<br />
12. PROGRAM CONFIGURATION<br />
Using a subprogram only<br />
A subprogram can be executed just like a main program by searching for<br />
the start of the subprogram with the MDI.<br />
(See III–9.3 for information about search operation.)<br />
In this case, if a block containing M99 is executed, control returns to the<br />
start of the subprogram for repeated execution. If a block containing<br />
M99Pn is executed, control returns to the block with sequence number n<br />
in the subprogram for repeated execution. To terminate this program, a<br />
block containing /M02 ; or /M30 ; must be placed at an appropriate<br />
location, and the optional block switch must be set to off ; this switch is<br />
to be set to on first.<br />
181<br />
N1010 … ;<br />
N1020 … ;<br />
N1030 … ;<br />
/ N1040 M02 ;<br />
N1050 M99 P1020 ;<br />
Optional block skip<br />
ON
12. PROGRAM CONFIGURATION PROGRAMMING<br />
B–63534EN/02<br />
12.4<br />
8–DIGIT PROGRAM<br />
NU<strong>MB</strong>ER<br />
Explanations<br />
Disabling editing of<br />
programs<br />
File name<br />
Special programs<br />
The 8–digit program number function enables specification of program<br />
numbers with eight digits following address O (O00000001 to<br />
O99999999).<br />
Editing of subprograms O00008000 to O00008999, O00009000 to<br />
O00009999, O80000000 to O89999999, and O90000000 to O99999999<br />
can be disabled.<br />
Parameter Program numbers for which editing is disabled<br />
NE8(No.3202#0) O00008000 to O00008999<br />
NE9(No.3202#4) O00009000 to O00009999<br />
PRG8E(No.3204#3) O80000000 to O89999999<br />
PRG9E(No.3204#4) O90000000 to O99999999<br />
NOTE<br />
When a wrong password has been specified for the<br />
password function (see III–9.9), the settings of NE9 (bit 3 of<br />
parameter No. 3202) and PRG9E (bit 4 of parameter No.<br />
3204) cannot be changed.<br />
For program punch by specifying a range, files are named as follows:<br />
When punching by specifying O00000001 and O00123456:<br />
“O00000001–G”<br />
When punching by specifying O12345678 and O45678900:<br />
“O12345678–G”<br />
When 2–path control is being applied, the file name for the first path is<br />
suffixed with “–1” and that for the second path is suffixed with “–2.”<br />
Special subprogram numbers can be changed by using bit 5 (SPR) of<br />
parameter No. 3204.<br />
1) Macro call using G code<br />
Parameter used to<br />
specify G code<br />
No.6050<br />
No.6051<br />
No.6052<br />
No.6053<br />
No.6054<br />
No.6055<br />
No.6056<br />
No.6057<br />
No.6058<br />
No.6059<br />
182<br />
Program number<br />
When SPR = 0 When SPR = 1<br />
O00009010<br />
O00009011<br />
O00009012<br />
O00009013<br />
O00009014<br />
O00009015<br />
O00009016<br />
O00009017<br />
O00009018<br />
O00009019<br />
O90009010<br />
O90009011<br />
O90009012<br />
O90009013<br />
O90009014<br />
O90009015<br />
O90009016<br />
O90009017<br />
O90009018<br />
O90009019
B–63534EN/02 PROGRAMMING<br />
12. PROGRAM CONFIGURATION<br />
2) Macro call using M code<br />
Parameter used to<br />
specify M code<br />
No.6080<br />
No.6081<br />
No.6082<br />
No.6083<br />
No.6084<br />
No.6085<br />
No.6086<br />
No.6087<br />
No.6088<br />
No.6089<br />
3) Subprogram call using M code<br />
Parameter used to<br />
specify M code<br />
No.6071<br />
No.6072<br />
No.6073<br />
No.6074<br />
No.6075<br />
No.6076<br />
No.6077<br />
No.6078<br />
No.6079<br />
4) Macro call using T code<br />
Parameter used to<br />
specify T code<br />
183<br />
Program number<br />
When SPR = 0 When SPR = 1<br />
O00009020<br />
O00009021<br />
O00009022<br />
O00009023<br />
O00009024<br />
O00009025<br />
O00009026<br />
O00009027<br />
O00009028<br />
O00009029<br />
Program number<br />
O90009020<br />
O90009021<br />
O90009022<br />
O90009023<br />
O90009024<br />
O90009025<br />
O90009026<br />
O90009027<br />
O90009028<br />
O90009029<br />
When SPR = 0 When SPR = 1<br />
O00009001<br />
O00009002<br />
O00009003<br />
O00009004<br />
O00009005<br />
O00009006<br />
O00009007<br />
O00009008<br />
O00009009<br />
Program number<br />
O90009001<br />
O90009002<br />
O90009003<br />
O90009004<br />
O90009005<br />
O90009006<br />
O90009007<br />
O90009008<br />
O90009009<br />
When SPR = 0 When SPR = 1<br />
TCS(No.6001#5) O00009000 O90009000<br />
5) Macro call using ASCII code<br />
Parameter used to<br />
specify ASCII code<br />
No.6090<br />
No.6091<br />
Program number<br />
When SPR = 0 When SPR = 1<br />
O00009004<br />
O00009005<br />
O90009004<br />
O90009005
12. PROGRAM CONFIGURATION PROGRAMMING<br />
B–63534EN/02<br />
External program<br />
number search<br />
Limitations<br />
Subprogram call<br />
DNC<br />
6) Pattern data function<br />
184<br />
Program numaber<br />
When SPR = 0 When SPR = 1<br />
O00009500<br />
O00009501<br />
O00009502<br />
O00009503<br />
O00009504<br />
O00009505<br />
O00009506<br />
O00009507<br />
O00009508<br />
O00009509<br />
O00009510<br />
O90009500<br />
O90009501<br />
O90009502<br />
O90009503<br />
O90009504<br />
O90009505<br />
O90009506<br />
O90009507<br />
O90009508<br />
O90009509<br />
O90009510<br />
External input signals can be used to search for a program number. A<br />
program stored in CNC memory can be selected by externally inputting<br />
a program number, between 1 and 99999999, to the CNC. For details,<br />
refer to the appropriate manual supplied from the machine tool builder.<br />
This function disables subprogram call unless FS15 tape format (see<br />
II–18) is used. This restriction also applies to calling a program in<br />
external I/O devices (M198).<br />
(Example)<br />
M98 P12345678 ;<br />
Subprogram number only. The repetition<br />
count is not included.<br />
The eight–digit program number cannot be used in DNC1, DNC2,<br />
Ethernet, data server, open CNC, and graphic conversation functions.
B–63534EN/02<br />
13 <br />
General<br />
PROGRAMMING<br />
<br />
This chapter explains the following items:<br />
185<br />
13. FUNCTIONS TO SIMPLIFY<br />
PROGRAMMING<br />
13.1 CANNED CYCLE<br />
13.2 RIGID TAPPING<br />
13.3 CANNED GRINDING CYCLE (FOR GRINDING MACHINE)<br />
13.4 GRINDING WHEEL WEAR COMPENSATION BY<br />
CONTINUOUS DRESSING (FOR GRINDING MACHINE)<br />
13.5 AUTOMATIC GRINDING WHEEL DIAMETER<br />
COMPENSATION AFTER DRESSING<br />
13.6 IN–FEED GRINDING ALONG THE Y AND Z AXES AT THE END<br />
OF TABLE SWING (FOR GRINDING MACHINE)<br />
13.7 OPTIONAL ANGLE CHAMFERING AND CORNER ROUNDING<br />
13.8 EXTERNAL MOTION FUNCTION<br />
13.9 FIGURE COPY (G72.1, G72.2)<br />
13.10 THREE–DIMENSIONAL COORDINATE CONVERSION<br />
(G68, G69)<br />
13.11 INDEX TABLE INDEXING FUNCTION
13. FUNCTIONS TO SIMPLIFY<br />
PROGRAMMING PROGRAMMING<br />
B–63534EN/02<br />
13.1<br />
CANNED CYCLE<br />
G code Drilling(–Z direction)<br />
Canned cycles make it easier for the programmer to create programs.<br />
With a canned cycle, a frequently–used machining operation can be<br />
specified in a single block with a G function; without canned cycles,<br />
normally more than one block is required. In addition, the use of canned<br />
cycles can shorten the program to save memory.<br />
Table 13.1 (a) lists canned cycles.<br />
Table 13.1 (a) Canned cycles<br />
Operation at the<br />
bottom of a hole<br />
Retraction(+Z direction) Application<br />
G73 Intermittent feed – Rapid traverse High–speed peck drilling<br />
cycle<br />
G74 Feed Dwell→Spindle CW Feed Left–hand tapping cycle<br />
G76 Feed Oriented spindle<br />
stop<br />
186<br />
Rapid traverse Fine boring cycle<br />
G80 – – – Cancel<br />
G81 Feed – Rapid traverse Drilling cycle, spot drilling<br />
cycle<br />
G82 Feed Dwell Rapid traverse Drilling cycle, counter boring<br />
cycle<br />
G83 Intermittent feed – Rapid traverse Peck drilling cycle<br />
G84 Feed Dwell→Spindle<br />
CCW<br />
Feed Tapping cycle<br />
G85 Feed – Feed Boring cycle<br />
G86 Feed Spindle stop Rapid traverse Boring cycle<br />
G87 Feed Spindle CW Rapid traverse Back boring cycle<br />
G88 Feed Dwell→spindle stop Manual Boring cycle<br />
G89 Feed Dwell Feed Boring cycle
B–63534EN/02<br />
Explanations<br />
Positioning plane<br />
<br />
PROGRAMMING<br />
187<br />
13. FUNCTIONS TO SIMPLIFY<br />
PROGRAMMING<br />
A canned cycle consists of a sequence of six operations (Fig. 13.1 (a))<br />
Operation 1 Positioning of axes X and Y<br />
(including also another axis)<br />
Operation 2 Rapid traverse up to point R level<br />
Operation 3 Hole machining<br />
Operation 4 Operation at the bottom of a hole<br />
Operation 5 Retraction to point R level<br />
Operation 6 Rapid traverse up to the initial point<br />
Operation 1<br />
Operation 2<br />
Point R level<br />
Operation 3<br />
Operation 4<br />
Initial level<br />
Operation 6<br />
Operation 5<br />
Fig. 13.1 Canned cycle operation sequence<br />
Rapid traverse<br />
Feed<br />
The positioning plane is determined by plane selection code G17, G18,<br />
or G19.<br />
The positioning axis is an axis other than the drilling axis.<br />
Although canned cycles include tapping and boring cycles as well as<br />
drilling cycles, in this chapter, only the term drilling will be used to refer<br />
to operations implemented with canned cycles.<br />
The drilling axis is a basic axis (X, Y, or Z) not used to define the<br />
positioning plane, or any axis parallel to that basic axis.<br />
The axis (basic axis or parallel axis) used as the drilling axis is determined<br />
according to the axis address for the drilling axis specified in the same<br />
block as G codes G73 to G89.<br />
If no axis address is specified for the drilling axis, the basic axis is<br />
assumed to be the drilling axis.<br />
Table 13.1 (b) Positioning plane and drilling axis<br />
G code Positioning plane Drilling axis<br />
G17 Xp–Yp plane Zp<br />
G18 Zp–Xp plane Yp<br />
G19 Yp–Zp plane Xp<br />
Xp : X axis or an axis parallel to the X axis<br />
Yp : Y axis or an axis parallel to the Y axis<br />
Zp : Z axis or an axis parallel to the Z axis
13. FUNCTIONS TO SIMPLIFY<br />
PROGRAMMING PROGRAMMING<br />
B–63534EN/02<br />
Examples<br />
Travel distance along the<br />
drilling axis G90/G91<br />
Drilling mode<br />
Assume that the U, V and W axes be parallel to the X, Y, and Z axes<br />
respectively. This condition is specified by parameter No. 1022.<br />
G17 G81 ………Z _ _ : The Z axis is used for drilling.<br />
G17 G81 ………W _ _ : The W axis is used for drilling.<br />
G18 G81 ………Y _ _ : The Y axis is used for drilling.<br />
G18 G81 ………V _ _ : The V axis is used for drilling.<br />
G19 G81 ………X _ _ : The X axis is used for drilling.<br />
G19 G81 ………U _ _ : The U axis is used for drilling.<br />
G17 to G19 may be specified in a block in which any of G73 to G89 is<br />
not specified.<br />
WARNING<br />
Switch the drilling axis after canceling a canned cycle.<br />
NOTE<br />
A parameter FXY (No. 6200 #0) can be set to the Z axis<br />
always used as the drilling axis. When FXY=0, the Z axis<br />
is always the drilling axis.<br />
The travel distance along the drilling axis varies for G90 and G91 as<br />
follows:<br />
G90 (Absolute Command)<br />
Point R<br />
Point Z<br />
188<br />
R<br />
Z<br />
Z=0<br />
G91 (<strong>Inc</strong>remental Command)<br />
Point R<br />
Point Z<br />
G73, G74, G76, and G81 to G89 are modal G codes and remain in effect<br />
until canceled. When in effect, the current state is the drilling mode.<br />
Once drilling data is specified in the drilling mode, the data is retained<br />
until modified or canceled.<br />
Specify all necessary drilling data at the beginning of canned cycles; when<br />
canned cycles are being performed, specify data modifications only.<br />
R<br />
Z
B–63534EN/02<br />
Return point level<br />
G98/G99<br />
Repeat<br />
Cancel<br />
Symbols in figures<br />
PROGRAMMING<br />
189<br />
13. FUNCTIONS TO SIMPLIFY<br />
PROGRAMMING<br />
When the tool reaches the bottom of a hole, the tool may be returned to<br />
point R or to the initial level. These operations are specified with G98 and<br />
G99. The following illustrates how the tool moves when G98 or G99 is<br />
specified. Generally, G99 is used for the first drilling operation and G98<br />
is used for the last drilling operation.<br />
The initial level does not change even when drilling is performed in the<br />
G99 mode.<br />
G98(Return to initial level ) G99(Return to point R level)<br />
Initial level<br />
Point R level<br />
To repeat drilling for equally–spaced holes, specify the number of repeats<br />
in K_.<br />
K is effective only within the block where it is specified.<br />
Specify the first hole position in incremental mode (G91).<br />
If it is specified in absolute mode (G90), drilling is repeated at the same<br />
position.<br />
Number of repeats K The maximum command value = 9999<br />
If K0 is specified, drilling data is stored, but drilling is not performed.<br />
To cancel a canned cycle, use G80 or a group 01 G code.<br />
Group 01 G codes<br />
G00 : Positioning (rapid traverse)<br />
G01 : Linear interpolation<br />
G02 : Circular interpolation or helical interpolation (CW)<br />
G03 : Circular interpolation or helical interpolation (CCW)<br />
G60 : Single direction positioning (when the MDL bit (bit 0 of<br />
parameter 5431) is set to 1)<br />
Subsequent sections explain the individual canned cycles. Figures in<br />
these explanations use the following symbols:<br />
P<br />
OSS<br />
Positioning (rapid traverse G00)<br />
Cutting feed (linear interpolation G01)<br />
Manual feed<br />
Oriented spindle stop<br />
(The spindle stops at a fixed rotation position)<br />
Shift (rapid traverse G00)<br />
Dwell
13. FUNCTIONS TO SIMPLIFY<br />
PROGRAMMING PROGRAMMING<br />
B–63534EN/02<br />
13.1.1<br />
High–Speed Peck<br />
Drilling Cycle (G73)<br />
Format<br />
This cycle performs high–speed peck drilling. It performs intermittent<br />
cutting feed to the bottom of a hole while removing chips from the hole.<br />
G73 X_ Y_ Z_ R_ Q_ F_ K_ ;<br />
X_ Y_: Hole position data<br />
Z_ : The distance from point R to the bottom of the hole<br />
R_ : The distance from the initial level to point R level<br />
Q_ : Depth of cut for each cutting feed<br />
F_ : Cutting feedrate<br />
K_ : Number of repeats (if required)<br />
Point R<br />
q<br />
q<br />
q<br />
G73 (G98) G73 (G99)<br />
190<br />
d<br />
d<br />
Initial level<br />
Point R<br />
q<br />
q<br />
q<br />
d<br />
Point R level<br />
Point Z Point Z<br />
d
B–63534EN/02<br />
<br />
Limitations<br />
Axis switching<br />
Drilling<br />
Q<br />
Cancel<br />
Tool offset<br />
Examples<br />
PROGRAMMING<br />
191<br />
13. FUNCTIONS TO SIMPLIFY<br />
PROGRAMMING<br />
The high–speed peck drilling cycle performs intermittent feeding along<br />
the Z–axis. When this cycle is used, chips can be removed from the hole<br />
easily, and a smaller value can be set for retraction. This allows, drilling<br />
to be performed efficiently. Set the clearance, d, in parameter 5114.<br />
The tool is retracted in rapid traverse.<br />
Before specifying G73, rotate the spindle using a miscellaneous function<br />
(M code).<br />
When the G73 code and an M code are specified in the same block, the<br />
M code is executed at the time of the first positioning operation. The<br />
system then proceeds to the next drilling operation.<br />
When K is used to specify the number of repeats, the M code is executed<br />
for the first hole only; for the second and subsequent holes, the M code<br />
is not executed.<br />
When a tool length offset (G43, G44, or G49) is specified in the canned<br />
cycle, the offset is applied at the time of positioning to point R.<br />
Before the drilling axis can be changed, the canned cycle must be<br />
canceled.<br />
In a block that does not contain X, Y, Z, R, or any other axes, drilling is<br />
not performed.<br />
Specify Q in blocks that perform drilling. If they are specified in a block<br />
that does not perform drilling, they cannot be stored as modal data.<br />
Do not specify a G code of the 01 group (G00 to G03 or G60 (when the<br />
MDL bit (bit 0 of parameter 5431) is set to 1)) and G73 in a single block.<br />
Otherwise, G73 will be canceled.<br />
In the canned cycle mode, tool offsets are ignored.<br />
M3 S2000 ; Cause the spindle to start rotating.<br />
G90 G99 G73 X300. Y–250. Z–150. R–100. Q15. F120. ;<br />
Position, drill hole 1, then return to point R.<br />
Y–550. ; Position, drill hole 2, then return to point R.<br />
Y–750. ; Position, drill hole 3, then return to point R.<br />
X1000. ; Position, drill hole 4, then return to point R.<br />
Y–550. ; Position, drill hole 5, then return to point R.<br />
G98 Y–750. ; Position, drill hole 6, then return to the initial<br />
level.<br />
G80 G28 G91 X0 Y0 Z0 ; Return to the reference position return<br />
M5 ; Cause the spindle to stop rotating.
13. FUNCTIONS TO SIMPLIFY<br />
PROGRAMMING PROGRAMMING<br />
B–63534EN/02<br />
13.1.2<br />
Left–Handed Tapping<br />
Cycle (G74)<br />
Format<br />
Explanations<br />
This cycle performs left–handed tapping. In the left–handed tapping<br />
cycle, when the bottom of the hole has been reached, the spindle rotates<br />
clockwise.<br />
G74 X_ Y_ Z_ R_P_ F_ K_ ;<br />
X_ Y_: Hole position data<br />
Z_ : The distance from point R to the bottom of the hole<br />
R_ : The distance from the initial level to point R level<br />
P_ : Dwell time<br />
F_ : Cutting feedrate<br />
K_ : Number of repeats (if required)<br />
Point R<br />
G74 (G98) G74 (G99)<br />
P<br />
192<br />
Initial level<br />
Spindle<br />
CCW<br />
P<br />
Point Z<br />
Spindle CW<br />
Point R<br />
P<br />
Spindle<br />
CCW<br />
P<br />
Point R level<br />
Point Z<br />
Spindle CW<br />
Tapping is performed by turning the spindle counterclockwise. When the<br />
bottom of the hole has been reached, the spindle is rotated clockwise for<br />
retraction. This creates a reverse thread.<br />
Feedrate overrides are ignored during left–handed tapping. A feed hold<br />
does not stop the machine until the return operation is completed.<br />
Before specifying G74, use a miscellaneous function (M code) to rotate<br />
the spindle counterclockwise.<br />
When the G74 command and an M code are specified in the same block,<br />
the M code is executed at the time of the first positioning operation. The<br />
system then proceeds to the next drilling operation.<br />
When K is used to specify the number of repeats, the M code is executed<br />
for the first hole only; for the second and subsequent holes, the M code<br />
is not executed.<br />
When a tool length offset (G43, G44, or G49) is specified in the canned<br />
cycle, the offset is applied at the time of positioning to point R.
B–63534EN/02<br />
Limitations<br />
Axis switching<br />
Drilling<br />
P<br />
Cancel<br />
Tool offset<br />
Subprogram call<br />
Examples<br />
PROGRAMMING<br />
193<br />
13. FUNCTIONS TO SIMPLIFY<br />
PROGRAMMING<br />
Before the drilling axis can be changed, the canned cycle must be<br />
canceled.<br />
In a block that does not contain X, Y, Z, R, or any other axes, drilling is<br />
not performed.<br />
Specify P in blocks that perform drilling. If it is specified in a block that<br />
does not perform drilling, it cannot be stored as modal data.<br />
Do not specify a G code of the 01 group (G00 to G03 or G60 (when the<br />
MDL bit (bit 0 of parameter 5431) is set to 1)) and G74 in a single block.<br />
Otherwise, G74 will be canceled.<br />
In the canned cycle mode, tool offsets are ignored.<br />
In the canned cycle mode, specify the subprogram call command<br />
M98P_in an independent block.<br />
M4 S100 ; Cause the spindle to start rotating.<br />
G90 G99 G74 X300. Y–250. Z–150. R–120. F120. ;<br />
Position, tapping hole 1, then return to point R.<br />
Y–550. ; Position, tapping hole 2, then return to point R.<br />
Y–750. ; Position, tapping hole 3, then return to point R.<br />
X1000. ; Position, tapping hole 4, then return to point R.<br />
Y–550. ; Position, tapping hole 5, then return to point R.<br />
G98 Y–750. ; Position, tapping hole 6, then return to the<br />
initial level.<br />
G80 G28 G91 X0 Y0 Z0 ; Return to the reference position return<br />
M5 ; Cause the spindle to stop rotating.
13. FUNCTIONS TO SIMPLIFY<br />
PROGRAMMING PROGRAMMING<br />
B–63534EN/02<br />
13.1.3<br />
Fine Boring Cycle<br />
(G76)<br />
Format<br />
Oriented spindle stop<br />
Tool<br />
Shift amount q<br />
The fine boring cycle bores a hole precisely. When the bottom of the hole<br />
has been reached, the spindle stops, and the tool is moved away from the<br />
machined surface of the workpiece and retracted.<br />
G76 X_ Y_ Z_ R_ Q_ P_ F_ K_ ;<br />
X_ Y_: Hole position data<br />
Z_ : The distance from point R to the bottom of the hole<br />
R_ : The distance from the initial level to point R level<br />
Q_ : Shift amount at the bottom of a hole<br />
P_ : Dwell time at the bottom of a hole<br />
F_ : Cutting feedrate<br />
K_ : Number of repeats (if required)<br />
Point R<br />
G76 (G98) G76 (G99)<br />
Spindle CW<br />
Initial level<br />
P<br />
P<br />
OSS Point Z<br />
OSS<br />
q<br />
194<br />
Point R<br />
Spindle CW<br />
q<br />
Point R<br />
level<br />
Point Z<br />
WARNING<br />
Q (shift at the bottom of a hole) is a modal value retained<br />
within canned cycles. It must be specified carefully because<br />
it is also used as the depth of cut for G73 and G83.
B–63534EN/02<br />
Explanations<br />
Limitations<br />
Axis switching<br />
Boring<br />
P/Q<br />
Cancel<br />
Tool offset<br />
Subprogram call<br />
Examples<br />
PROGRAMMING<br />
195<br />
13. FUNCTIONS TO SIMPLIFY<br />
PROGRAMMING<br />
When the bottom of the hole has been reached, the spindle is stopped at<br />
the fixed rotation position, and the tool is moved in the direction opposite<br />
to the tool tip and retracted. This ensures that the machined surface is not<br />
damaged and enables precise and efficient boring to be performed.<br />
Before specifying G76, use a miscellaneous function (M code) to rotate<br />
the spindle.<br />
When the G76 command and an M code are specified in the same block,<br />
the M code is executed at the time of the first positioning operation. The<br />
system then proceeds to the next operation.<br />
When K is used to specify the number of repeats, the M code is executed<br />
for the first hole only; for the second and subsequent holes, the M code<br />
is not executed.<br />
When a tool length offset (G43, G44, or G49) is specified in the canned<br />
cycle, the offset is applied at the time of positioning to point R.<br />
Before the drilling axis can be changed, the canned cycle must be<br />
canceled.<br />
In a block that does not contain X, Y, Z, R, or any additional axes, boring<br />
is not performed.<br />
Be sure to specify a positive value in Q. If Q is specified with a negative<br />
value, the sign is ignored. Set the direction of shift in bits 4 (RD1) and<br />
5 (RD2) of parameter 5101. Specify P and Q in a block that performs<br />
boring. If they are specified in a block that does not perform boring, they<br />
are not stored as modal data.<br />
Do not specify a G code of the 01 group (G00 to G03 or G60 (when the<br />
MDL bit (bit 0 of parameter 5431) is set to 1)) and G76 in a single block.<br />
Otherwise, G76 will be canceled.<br />
In the canned cycle mode, tool offsets are ignored.<br />
In the canned cycle mode, specify the subprogram call command<br />
M98P_in an independent block.<br />
M3 S500 ; Cause the spindle to start rotating.<br />
G90 G99 G76 X300. Y–250.Position, bore hole 1, then return to point R.<br />
Z–150. R–120. Q5. Orient at the bottom of the hole, then shift<br />
by 5 mm.<br />
P1000 F120. ; Stop at the bottom of the hole for 1 s.<br />
Y–550. ; Position, drill hole 2, then return to point R.<br />
Y–750. ; Position, drill hole 3, then return to point R.<br />
X1000. ; Position, drill hole 4, then return to point R.<br />
Y–550. ; Position, drill hole 5, then return to point R.<br />
G98 Y–750. ; Position, drill hole 6, then return to the initial<br />
level.<br />
G80 G28 G91 X0 Y0 Z0 ; Return to the reference position return<br />
M5 ; Cause the spindle to stop rotating.
13. FUNCTIONS TO SIMPLIFY<br />
PROGRAMMING PROGRAMMING<br />
B–63534EN/02<br />
13.1.4<br />
Drilling Cycle, Spot<br />
Drilling (G81)<br />
Format<br />
Explanations<br />
This cycle is used for normal drilling. Cutting feed is performed to the<br />
bottom of the hole. The tool is then retracted from the bottom of the hole<br />
in rapid traverse.<br />
G81 X_ Y_ Z_ R_ F_ K_ ;<br />
X_ Y_: Hole position data<br />
Z_ : The distance from point R to the bottom of the hole<br />
R_ : The distance from the initial level to point R level<br />
F_ : Cutting feedrate<br />
K_ : Number of repeats (if required)<br />
Point R<br />
G81 (G98) G81 (G99)<br />
196<br />
Initial level<br />
Point Z<br />
Point R<br />
Point R level<br />
Point Z<br />
After positioning along the X– and Y–axes, rapid traverse is performed<br />
to point R.<br />
Drilling is performed from point R to point Z.<br />
The tool is then retracted in rapid traverse.<br />
Before specifying G81, use a miscellaneous function (M code) to rotate<br />
the spindle.<br />
When the G81 command and an M code are specified in the same block,<br />
the M code is executed at the time of the first positioning operation. The<br />
system then proceeds to the next drilling operation.<br />
When K is used to specify the number of repeats, the M code is performed<br />
for the first hole only; for the second and subsequent holes, the M code<br />
is not executed.<br />
When a tool length offset (G43, G44, or G49) is specified in the canned<br />
cycle, the offset is applied at the time of positioning to point R.
B–63534EN/02<br />
Restrictions<br />
Axis switching<br />
Drilling<br />
Cancel<br />
Tool offset<br />
Examples<br />
PROGRAMMING<br />
197<br />
13. FUNCTIONS TO SIMPLIFY<br />
PROGRAMMING<br />
Before the drilling axis can be changed, the canned cycle must be<br />
canceled.<br />
In a block that does not contain X, Y, Z, R, or any other axes, drilling is<br />
not performed.<br />
Do not specify a G code of the 01 group (G00 to G03 or G60 (when the<br />
MDL bit (bit 0 of parameter 5431) is set to 1)) and G81 in a single block.<br />
Otherwise, G81 will be canceled.<br />
In the canned cycle mode, tool offsets are ignored.<br />
M3 S2000 ; Cause the spindle to start rotating.<br />
G90 G99 G81 X300. Y–250. Z–150. R–100. F120. ;<br />
Position, drill hole 1, then return to point R.<br />
Y–550. ; Position, drill hole 2, then return to point R.<br />
Y–750. ; Position, drill hole 3, then return to point R.<br />
X1000. ; Position, drill hole 4, then return to point R.<br />
Y–550. ; Position, drill hole 5, then return to point R.<br />
G98 Y–750. ; Position, drill hole 6, then return to the initial<br />
level.<br />
G80 G28 G91 X0 Y0 Z0 ; Return to the reference position return<br />
M5 ; Cause the spindle to stop rotating.
13. FUNCTIONS TO SIMPLIFY<br />
PROGRAMMING PROGRAMMING<br />
B–63534EN/02<br />
13.1.5<br />
Drilling Cycle Counter<br />
Boring Cycle (G82)<br />
Format<br />
Explanations<br />
This cycle is used for normal drilling.<br />
Cutting feed is performed to the bottom of the hole. At the bottom, a dwell<br />
is performed, then the tool is retracted in rapid traverse.<br />
This cycle is used to drill holes more accurately with respect to depth.<br />
G82 X_ Y_ Z_ R_ P_ F_ K_ ;<br />
X_ Y_: Hole position data<br />
Z_ : The distance from point R to the bottom of the hole<br />
R_ : The distance from the initial level to point R level<br />
P_ : Dwell time at the bottom of a hole<br />
F_ : Cutting feed rate<br />
K_ : Number of repeats (if required)<br />
Point R<br />
G82 (G98) G82 (G99)<br />
P<br />
198<br />
Initial level<br />
Point Z<br />
Point R<br />
P<br />
Point R level<br />
Point Z<br />
After positioning along the X– and Y–axes, rapid traverse is performed<br />
to point R.<br />
Drilling is then performed from point R to point Z.<br />
When the bottom of the hole has been reached, a dwell is performed. The<br />
tool is then retracted in rapid traverse.<br />
Before specifying G82, use a miscellaneous function (M code) to rotate<br />
the spindle.<br />
When the G82 command and an M code are specified in the same block,<br />
the M code is executed at the time of the first positioning operation. The<br />
system then proceeds to the next drilling operation.<br />
When K is used to specify the number of repeats, the M code is executed<br />
for the first hole only; for the second and subsequent holes, the M code<br />
is not executed.<br />
When a tool length offset (G43, G44, or G49) is specified in the canned<br />
cycle, the offset is applied at the time of positioning to point R.
B–63534EN/02<br />
Restrictions<br />
Axis switching<br />
Drilling<br />
P<br />
Cancel<br />
<br />
Subprogram call<br />
Examples<br />
PROGRAMMING<br />
199<br />
13. FUNCTIONS TO SIMPLIFY<br />
PROGRAMMING<br />
Before the drilling axis can be changed, the canned cycle must be<br />
canceled.<br />
In a block that does not contain X, Y, Z, R, or any other axes, drilling is<br />
not performed.<br />
Specify P in blocks that perform drilling. If it is specified in a block that<br />
does not perform drilling, it cannot be stored as modal data.<br />
Do not specify a G code of the 01 group (G00 to G03 or G60 (when the<br />
MDL bit (bit 0 of parameter 5431) is set to 1)) and G81 in a single block.<br />
Otherwise, G81 will be canceled.<br />
In the canned cycle mode, tool offsets are ignored.<br />
In the canned cycle mode, specify the subprogram call command<br />
M98P_in an independent block.<br />
M3 S2000 ; Cause the spindle to start rotating.<br />
G90 G99 G82 X300. Y–250. Z–150. R–100. P1000 F120. ;<br />
Position, drill hole 2, and dwell for 1 s at the<br />
bottom of the hole, then return to point R.<br />
Y–550. ; Position, drill hole 2, then return to point R.<br />
Y–750. ; Position, drill hole 3, then return to point R.<br />
X1000. ; Position, drill hole 4, then return to point R.<br />
Y–550. ; Position, drill hole 5, then return to point R.<br />
G98 Y–750. ; Position, drill hole 6, then return to the initial<br />
level.<br />
G80 G28 G91 X0 Y0 Z0 ; Return to the reference position return<br />
M5 ; Cause the spindle to stop rotating.
13. FUNCTIONS TO SIMPLIFY<br />
PROGRAMMING PROGRAMMING<br />
B–63534EN/02<br />
13.1.6<br />
Peck Drilling Cycle<br />
(G83)<br />
Format<br />
Explanations<br />
This cycle performs peck drilling.<br />
It performs intermittent cutting feed to the bottom of a hole while<br />
removing shavings from the hole.<br />
G83 X_ Y_ Z_ R_ Q_ F_ K_ ;<br />
X_ Y_: Hole position data<br />
Z_ : The distance from point R to the bottom of the hole<br />
R_ : The distance from the initial level to point R level<br />
Q_ : Depth of cut for each cutting feed<br />
F_ : Cutting feedrate<br />
K_ : Number of repeats (if required)<br />
Point R<br />
q<br />
q<br />
q<br />
G83 (G98) G83 (G99)<br />
200<br />
Initial level<br />
d<br />
d<br />
Point Z<br />
Point R<br />
q<br />
q<br />
q<br />
Point R level<br />
d<br />
d<br />
Point Z<br />
Q represents the depth of cut for each cutting feed. It must always be<br />
specified as an incremental value.<br />
In the second and subsequent cutting feeds, rapid traverse is performed<br />
up to a d point just before where the last drilling ended, and cutting feed<br />
is performed again. d is set in parameter (No.5115).<br />
Be sure to specify a positive value in Q. Negative values are ignored.<br />
Before specifying G83, use a miscellaneous function (M code) to rotate<br />
the spindle.<br />
When the G83 command and an M code are specified in the same block,<br />
the M code is executed at the time of the first positioning operation. The<br />
system then proceeds to the next drilling operation.<br />
When K is used to specify the number of repeats, the M code is executed<br />
for the first hole only; for the second and subsequent holes, the M code<br />
is not executed.<br />
When a tool length offset (G43, G44, or G49) is specified in the canned<br />
cycle, the offset is applied at the time of positioning to point R.
B–63534EN/02<br />
Limitations<br />
Axis switching<br />
Drilling<br />
Q<br />
Cancel<br />
Tool offset<br />
Examples<br />
PROGRAMMING<br />
201<br />
13. FUNCTIONS TO SIMPLIFY<br />
PROGRAMMING<br />
Before the drilling axis can be changed, the canned cycle must be<br />
canceled.<br />
In a block that does not contain X, Y, Z, R, or any other axes, drilling is<br />
not performed.<br />
Specify Q in blocks that perform drilling. If they are specified in a block<br />
that does not perform drilling, they cannot be stored as modal data.<br />
Do not specify a G code of the 01 group (G00 to G03 or G60 (when the<br />
MDL bit (bit 0 of parameter 5431) is set to 1)) and G82 in a single block.<br />
Otherwise, G82 will be canceled.<br />
In the canned cycle mode, tool offsets are ignored.<br />
M3 S2000 ; Cause the spindle to start rotating.<br />
G90 G99 G83 X300. Y–250. Z–150. R–100. Q15. F120. ;<br />
Position, drill hole 1, then return to point R.<br />
Y–550. ; Position, drill hole 2, then return to point R.<br />
Y–750. ; Position, drill hole 3, then return to point R.<br />
X1000. ; Position, drill hole 4, then return to point R.<br />
Y–550. ; Position, drill hole 5, then return to point R.<br />
G98 Y–750. ; Position, drill hole 6, then return to the initial<br />
level.<br />
G80 G28 G91 X0 Y0 Z0 ; Return to the reference position return<br />
M5 ; Cause the spindle to stop rotating.
13. FUNCTIONS TO SIMPLIFY<br />
PROGRAMMING PROGRAMMING<br />
B–63534EN/02<br />
13.1.7<br />
Small–Hole Peck<br />
Drilling Cycle (G83)<br />
Format<br />
An arbor with the overload torque detection function is used to retract the<br />
tool when the overload torque detection signal (skip signal) is detected<br />
during drilling. Drilling is resumed after the spindle speed and cutting<br />
feedrate are changed. These steps are repeated in this peck drilling cycle.<br />
The mode for the small–hole peck drilling cycle is selected when the M<br />
code in parameter 5163 is specified. The cycle can be started by<br />
specifying G83 in this mode. This mode is canceled when G80 is<br />
specified or when a reset occurs.<br />
G83 X_ Y_ Z_ R_ Q_ F_ I_ K_ P_ ;<br />
Q<br />
X_ Y_: Hole position data<br />
Z_ : Distance from point R to the bottom of the hole<br />
R_ : Distance from the initial level to point R<br />
Q_ : Depth of each cut<br />
F_ : Cutting feedrate<br />
I_: Forward or backward traveling speed (same format as F above)<br />
(If this is omitted, the values in parameters No.5172 and No.5173 are<br />
assumed as defaults.)<br />
K_ : Number of times the operation is repeated (if required)<br />
P_ : Dwell time at the bottom of the hole<br />
(If this is omitted, P0 is assumed as the default.)<br />
∆<br />
G83(G98) G83(G99)<br />
202<br />
∆<br />
Initial level<br />
Point R Point R<br />
Overload torque ∆<br />
Point Z<br />
Overload torque<br />
∆<br />
Point Z<br />
Dwell Dwell<br />
∆ Initial clearance when the tool is retracted to point R and the clearance<br />
from the bottom of the hole in the second or subsequent drilling<br />
(parameter 5174)<br />
Q Depth of each cut<br />
Path along which the tool travels at the rapid traverse rate<br />
Path along which the tool travels (forward or backward) at the rapid<br />
traverse rate during the cycle specified with parameters<br />
Q<br />
Path along which the tool travels at the programmed cutting feedrate<br />
∆<br />
∆
B–63534EN/02<br />
Explanations<br />
Component operations<br />
of the cycle<br />
Specifying an M code<br />
Specifying a G code<br />
Signal indicating that the<br />
cycle is in progress<br />
Overload torque<br />
detection signal<br />
PROGRAMMING<br />
203<br />
13. FUNCTIONS TO SIMPLIFY<br />
PROGRAMMING<br />
*Positioning along the X–axis and Y–axis<br />
*Positioning at point R along the Z–axis<br />
*Drilling along the Z–axis (first drilling, depth of cut Q, incremental)<br />
Retraction (bottom of the hole → small clearance ∆, incremental)<br />
Retraction (bottom of the hole → point R)<br />
Advance (point R → point at a height of clearance ∆ from the bottom of<br />
the hole)<br />
Drilling (second or subsequent drilling, depth of cut Q + ∆ , incremental)<br />
*Dwell<br />
*Return to point R (or initial level) along the Z–axis, cycle end<br />
Acceleration/deceleration during advancing and retraction is controlled<br />
according to the cutting feed acceleration/deceleration time constant.<br />
When retraction is performed, the position is checked at point R.<br />
When the M code in parameter 5163 is specified, the system enters the<br />
mode for the small–hole peck drilling cycle.<br />
This M code does not wait for FIN. Care must be taken when this M code<br />
is specified with another M code in the same block.<br />
(Example) M M03 ; → Waits for FIN.<br />
M03 M ; → Does not wait for FIN.<br />
When G83 is specified in the mode for the small–hole peck drilling cycle,<br />
the cycle is started.<br />
This continuous–state G code remains unchanged until another canned<br />
cycle is specified or until the G code for cancelling the canned cycle is<br />
specified. This eliminates the need for specifying drilling data in each<br />
block when identical drilling is repeated.<br />
In this cycle, the signal indicating that the small–hole peck drilling cycle<br />
is in progress is output after the tool is positioned at the hole position<br />
along the axes not used for drilling. Signal output continues during<br />
positioning to point R along the drilling axis and terminates upon a return<br />
to point R or the initial level. For details, refer to the manual of the<br />
machine tool builder.<br />
A skip signal is used as the overload torque detection signal. The skip<br />
signal is effective while the tool is advancing or drilling and the tool tip<br />
is between points R and Z. (The signal causes a retraction). For details,<br />
refer to the manual of the machine tool builder.
13. FUNCTIONS TO SIMPLIFY<br />
PROGRAMMING PROGRAMMING<br />
B–63534EN/02<br />
Changing the drilling<br />
conditions<br />
Advance and retraction<br />
In a single G83 cycle, drilling conditions are changed for each drilling<br />
operation (advance → drilling → retraction). Bits 1 and 2 of parameter<br />
OLS, NOL No. 5160 can be specified to suppress the change in drilling<br />
conditions.<br />
1. Changing the cutting feedrate<br />
The cutting feedrate programmed with the F code is changed for each<br />
of the second and subsequent drilling operations. In parameters<br />
No.5166 and No.5167, specify the respective rates of change applied<br />
when the skip signal is detected and when it is not detected in the<br />
previous drilling operation.<br />
Cutting feedrate =F×α<br />
α<br />
αα×β β <br />
<br />
<br />
βparameter No. 5166<br />
<br />
β <br />
If the rate of change in cutting feedrate becomes smaller than the rate<br />
specified in parameter 5168, the cutting feedrate is not changed.<br />
The cutting feedrate can be increased up to the maximum cutting<br />
feedrate.<br />
2. Changing the spindle speed<br />
The spindle speed programmed with the S code is changed for each of<br />
the second and subsequent advances. In parameters 5164 and 5165,<br />
specify the rates of change applied when the skip signal is detected and<br />
when it is not detected in the previous drilling operation.<br />
Spindle speed =S×γ<br />
γ<br />
γγ×δ δ <br />
<br />
<br />
βparameter No. 5164<br />
<br />
βparameter No. 5165<br />
When the cutting feedrate reaches the minimum rate, the spindle speed<br />
is not changed. The spindle speed can be increased up to a value<br />
corresponding to the maximum value of S analog data.<br />
Advancing and retraction of the tool are not executed in the same manner<br />
as rapid–traverse positioning. Like cutting feed, the two operations are<br />
carried out as interpolated operations. The speed is subjected to exponen–<br />
tial acceleration/deceleration. Note that the tool life management func–<br />
tion excludes advancing and retraction from the calculation of the tool<br />
life.<br />
204
B–63534EN/02<br />
Specifying address I<br />
Functions that can be<br />
specified<br />
Single block<br />
Feedrate override<br />
Custom macro interface<br />
Restrictions<br />
Subprogram call<br />
PROGRAMMING<br />
205<br />
13. FUNCTIONS TO SIMPLIFY<br />
PROGRAMMING<br />
The forward or backward traveling speed can be specified with address<br />
I in the same format as address F, as shown below:<br />
G83 I1000 ; (without decimal point)<br />
G83 I1000. ; (with decimal point)<br />
Both commands indicate a speed of 1000 mm/min.<br />
Address I specified with G83 in the continuous–state mode continues to<br />
be valid until G80 is specified or until a reset occurs.<br />
In this canned cycle mode, the following functions can be specified:<br />
⋅ Hole position on the X–axis, Y–axis, and additional axis<br />
⋅ Operation and branch by custom macro<br />
⋅ Subprogram (hole position group, etc.) calling<br />
⋅ Switching between absolute and incremental modes<br />
⋅ Coordinate system rotation<br />
⋅ Scaling (This command will not affect depth of cut Q or small clearance<br />
d1.)<br />
⋅ Dry run<br />
⋅ Feed hold<br />
When single–block operation is enabled, drilling is stopped after each<br />
retraction.<br />
The feedrate override function works during cutting, retraction, and<br />
advancing in the cycle.<br />
The number of retractions made during cutting and the number of<br />
retractions made in response to the overload signal received during<br />
cutting can be output to custom macro common variables (#100 to #149)<br />
specified in parameters No.5170 and No.5171. Parameters No.5170 and<br />
No.5171 can specify variable numbers within the range of #100 to #149.<br />
Parameter No.5170 : Specifies the number of the common variable to<br />
which the number of retractions made during<br />
cutting is output.<br />
Parameter No.5171: Specifies the number of the common variable to<br />
which the number of retractions made in response<br />
to the overload signal received during cutting is<br />
output.<br />
In the canned cycle mode, specify the subprogram call command M98P_<br />
in an independent block.
13. FUNCTIONS TO SIMPLIFY<br />
PROGRAMMING PROGRAMMING<br />
B–63534EN/02<br />
Examples<br />
13.1.8<br />
Tapping Cycle<br />
(G84)<br />
Format<br />
N01M03 S___ ;<br />
N02M ;<br />
N03G83 X_ Y_ Z_ R_ Q_ F_ I_ K_ P_ ;<br />
N04X_ Y_ ;<br />
:<br />
:<br />
N10G80 ;<br />
<br />
N01: Specifies forward spindle rotation and spindle speed.<br />
N02: Specifies the M code to execute G83 as the small–hole peck drilling cycle.<br />
The M code is specified in parameter No.5163.<br />
N03: Specifies the small–hole peck drilling cycle. Drilling data (except K and P)<br />
is stored and drilling is started.<br />
N04: Drills a small, deep hole at another position with the same drilling data as<br />
for N03.<br />
N10: Cancels the small–hole peck drilling cycle. The M code specified in N02<br />
is also canceled.<br />
This cycle performs tapping.<br />
In this tapping cycle, when the bottom of the hole has been reached, the<br />
spindle is rotated in the reverse direction.<br />
G84 X_ Y_ Z_ R_P_ F_ K_ ;<br />
X_ Y_: Hole position data<br />
Z_ : The distance from point R to the bottom of the hole<br />
R_ : The distance from the initial level to point R level<br />
P_ : Dwell time<br />
F_ : Cutting feedrate<br />
K_ : Number of repents (if required)<br />
Point R<br />
G84 (G98) G84 (G99)<br />
P<br />
206<br />
Initial level<br />
Spindle CW<br />
P<br />
Point Z<br />
Spindle CCW<br />
Point R<br />
P<br />
Spindle CW<br />
P<br />
Point R level<br />
Point Z<br />
Spindle CCW
B–63534EN/02<br />
Explanations<br />
Limitations<br />
Axis switching<br />
Drilling<br />
P<br />
Cancel<br />
Tool offset<br />
Subprogram call<br />
Examples<br />
PROGRAMMING<br />
207<br />
13. FUNCTIONS TO SIMPLIFY<br />
PROGRAMMING<br />
Tapping is performed by rotating the spindle clockwise. When the bottom<br />
of the hole has been reached, the spindle is rotated in the reverse direction<br />
for retraction. This operation creates threads.<br />
Feedrate overrides are ignored during tapping. A feed hold does not stop<br />
the machine until the return operation is completed.<br />
Before specifying G84, use a miscellaneous function (M code) to rotate<br />
the spindle.<br />
When the G84 command and an M code are specified in the same block,<br />
the M code is executed at the time of the first positioning operation. The<br />
system then proceeds to the next drilling operation.<br />
When the K is used to specify number of repeats, the M code is executed<br />
for the first hole only; for the second and subsequent holes, the M code<br />
is not executed.<br />
When a tool length offset (G43, G44, or G49) is specified in the canned<br />
cycle, the offset is applied at the time of positioning to point R.<br />
Before the drilling axis can be changed, the canned cycle must be<br />
canceled.<br />
In a block that does not contain X, Y, Z, R, or any other axes, drilling is<br />
not performed.<br />
Specify P in blocks that perform drilling. If it is specified in a block that<br />
does not perform drilling, it cannot be stored as modal data.<br />
Do not specify a G code of the 01 group (G00 to G03 or G60 (when the<br />
MDL bit (bit 0 of parameter 5431) is set to 1)) and G84 in a single block.<br />
Otherwise, G84 will be canceled.<br />
In the canned cycle mode, tool offsets are ignored.<br />
In the canned cycle mode, specify the subprogram call command M98P_<br />
in an independent block.<br />
M3 S100 ; Cause the spindle to start rotating.<br />
G90 G99 G84 X300. Y–250. Z–150. R–120. P300 F120. ;<br />
Position, drill hole 1, then return to point R.<br />
Y–550. ; Position, drill hole 2, then return to point R.<br />
Y–750. ; Position, drill hole 3, then return to point R.<br />
X1000. ; Position, drill hole 4, then return to point R.<br />
Y–550. ; Position, drill hole 5, then return to point R.<br />
G98 Y–750. ; Position, drill hole 6, then return to the initial<br />
level.<br />
G80 G28 G91 X0 Y0 Z0 ; Return to the reference position return<br />
M5 ; Cause the spindle to stop rotating.
13. FUNCTIONS TO SIMPLIFY<br />
PROGRAMMING PROGRAMMING<br />
B–63534EN/02<br />
13.1.9<br />
Boring Cycle<br />
(G85)<br />
Format<br />
Explanations<br />
This cycle is used to bore a hole.<br />
G85 X_ Y_ Z_ R_ F_ K_ ;<br />
X_ Y_: Hole position data<br />
Z_ : The distance from point R to the bottom of the hole<br />
R_ : The distance from the initial level to point R level<br />
F_ : Cutting feed rate<br />
K_ : Number of repeats (if required)<br />
Point R<br />
G85 (G98) G85 (G99)<br />
208<br />
Initial level<br />
Point Z<br />
Point R<br />
Point R level<br />
Point Z<br />
After positioning along the X– and Y– axes, rapid traverse is performed<br />
to point R.<br />
Drilling is performed from point R to point Z.<br />
When point Z has been reached, cutting feed is performed to return to<br />
point R.<br />
Before specifying G85, use a miscellaneous function (M code) to rotate<br />
the spindle.<br />
When the G85 command and an M code are specified in the same block,<br />
the M code is executed at the time of the first positioning operation. The<br />
system then proceeds to the next drilling operation.<br />
When K is used to specify the number of repeats, the M code is executed<br />
for the first hole only; for the second and subsequent holes, the M code<br />
is not executed.<br />
When a tool length offset (G43, G44, or G49) is specified in the canned<br />
cycle, the offset is applied at the time of positioning to point R.
B–63534EN/02<br />
Limitations<br />
Axis switching<br />
Drilling<br />
Cancel<br />
Tool offset<br />
Examples<br />
PROGRAMMING<br />
209<br />
13. FUNCTIONS TO SIMPLIFY<br />
PROGRAMMING<br />
Before the drilling axis can be changed, the canned cycle must be<br />
canceled.<br />
In a block that does not contain X, Y, Z, R, or any other axes, drilling is<br />
not performed.<br />
Do not specify a G code of the 01 group (G00 to G03 or G60 (when the<br />
MDL bit (bit 0 of parameter 5431) is set to 1)) and G85 in a single block.<br />
Otherwise, G85 will be canceled.<br />
In the canned cycle mode, tool offsets are ignored.<br />
M3 S100 ; Cause the spindle to start rotating.<br />
G90 G99 G85 X300. Y–250. Z–150. R–120. F120. ;<br />
Position, drill hole 1, then return to point R.<br />
Y–550. ; Position, drill hole 2, then return to point R.<br />
Y–750. ; Position, drill hole 3, then return to point R.<br />
X1000. ; Position, drill hole 4, then return to point R.<br />
Y–550. ; Position, drill hole 5, then return to point R.<br />
G98 Y–750. ; Position, drill hole 6, then return to the initial<br />
level.<br />
G80 G28 G91 X0 Y0 Z0 ; Return to the reference position return<br />
M5 ; Cause the spindle to stop rotating.
13. FUNCTIONS TO SIMPLIFY<br />
PROGRAMMING PROGRAMMING<br />
B–63534EN/02<br />
13.1.10<br />
Boring Cycle<br />
(G86)<br />
Format<br />
Explanations<br />
This cycle is used to bore a hole.<br />
G86 X_ Y_ Z_ R_ F_ K_ ;<br />
X_ Y_: Hole position data<br />
Z_ : The distance from point R to the bottom of the hole<br />
R_ : The distance from the initial level to point R level<br />
F_ : Cutting feed rate<br />
K_ : Number of repeats (if required)<br />
Point R<br />
G86 (G98) G86 (G99)<br />
210<br />
Spindle CW<br />
Initial level<br />
Point Z<br />
Spindle stop<br />
Point R<br />
Spindle CW<br />
Point R level<br />
Point Z<br />
Spindle stop<br />
After positioning along the X– and Y–axes, rapid traverse is performed<br />
to point R.<br />
Drilling is performed from point R to point Z.<br />
When the spindle is stopped at the bottom of the hole, the tool is retracted<br />
in rapid traverse.<br />
Before specifying G86, use a miscellaneous function (M code) to rotate<br />
the spindle.<br />
When the G86 command and an M code are specified in the same block,<br />
the M code is executed at the time of the first positioning operation.<br />
The system then proceeds to the next drilling operation.<br />
When K is used to specify the number of repeats, the M code is executed<br />
for the first hole only; for the second and subsequent holes, the M code<br />
is not executed.<br />
When a tool length offset (G43, G44, or G49) is specified in the canned<br />
cycle, the offset is applied at the time of positioning to point R.
B–63534EN/02<br />
Limitations<br />
Axis switching<br />
Drilling<br />
Cancel<br />
Tool offset<br />
<br />
PROGRAMMING<br />
211<br />
13. FUNCTIONS TO SIMPLIFY<br />
PROGRAMMING<br />
Before the drilling axis can be changed, the canned cycle must be<br />
canceled.<br />
In a block that does not contain X, Y, Z, R, or any other axes, drilling is<br />
not performed.<br />
Do not specify a G code of the 01 group (G00 to G03 or G60 (when the<br />
MDL bit (bit 0 of parameter 5431) is set to 1)) and G86 in a single block.<br />
Otherwise, G86 will be canceled.<br />
In the canned cycle mode, tool offsets are ignored.<br />
M3 S2000 ; Cause the spindle to start rotating.<br />
G90 G99 G86 X300. Y–250. Z–150. R–100. F120. ;<br />
Position, drill hole 1, then return to point R.<br />
Y–550. ; Position, drill hole 2, then return to point R.<br />
Y–750. ; Position, drill hole 3, then return to point R.<br />
X1000. ; Position, drill hole 4, then return to point R.<br />
Y–550. ; Position, drill hole 5, then return to point R.<br />
G98 Y–750. ; Position, drill hole 6, then return to the initial<br />
level.<br />
G80 G28 G91 X0 Y0 Z0 ; Return to the reference position return<br />
M5 ; Cause the spindle to stop rotating.
13. FUNCTIONS TO SIMPLIFY<br />
PROGRAMMING PROGRAMMING<br />
B–63534EN/02<br />
13.1.11<br />
Back Boring Cycle<br />
(G87)<br />
Format<br />
Oriented spindle stop<br />
Tool<br />
Shift amount q<br />
This cycle performs accurate boring.<br />
G87 X_ Y_ Z_ R_ Q_ P_ F_ K_ ;<br />
X_ Y_: Hole position data<br />
Z_ : The distance from the bottom of the hole to point Z<br />
R_ : The distance from the initial level to point R<br />
(the bottom of the hole) level<br />
Q_ : Tool shift amount<br />
P_ : Dwell time<br />
F_ : Cutting feed rate<br />
K_ : Number of repeats (if required)<br />
G87 (G98) G87 (G99)<br />
OSS<br />
Spindle CW<br />
P<br />
Spindle CW<br />
OSS<br />
212<br />
q<br />
Point Z<br />
Point R<br />
Not used<br />
WARNING<br />
Q (shift at the bottom of a hole) is a modal value retained in<br />
canned cycles. It must be specified carefully because it is<br />
also used as the depth of cut for G73 and G83.
B–63534EN/02<br />
Explanations<br />
Restrictions<br />
Axis switching<br />
Boring<br />
P/Q<br />
Cancel<br />
Tool offset<br />
Subprogram call<br />
Examples<br />
PROGRAMMING<br />
213<br />
13. FUNCTIONS TO SIMPLIFY<br />
PROGRAMMING<br />
After positioning along the X– and Y–axes, the spindle is stopped at the<br />
fixed rotation position. The tool is moved in the direction opposite to the<br />
tool tip, positioning (rapid traverse) is performed to the bottom of the hole<br />
(point R).<br />
The tool is then shifted in the direction of the tool tip and the spindle is<br />
rotated clockwise. Boring is performed in the positive direction along the<br />
Z–axis until point Z is reached.<br />
At point Z, the spindle is stopped at the fixed rotation position again, the<br />
tool is shifted in the direction opposite to the tool tip, then the tool is<br />
returned to the initial level. The tool is then shifted in the direction of the<br />
tool tip and the spindle is rotated clockwise to proceed to the next block<br />
operation.<br />
Before specifying G87, use a miscellaneous function (M code) to rotate<br />
the spindle.<br />
When the G87 command and an M code are specified in the same block,<br />
the M code is executed at the time of the first positioning operation.<br />
The system then proceeds to the next drilling operation. When K is used<br />
to specify the number of repeats, the M code is executed for the first hole<br />
only; for the second and subsequent holes, the M code is not executed.<br />
When a tool length offset (G43, G44, or G49) is specified in the canned<br />
cycle, the offset is applied at the time of positioning to point R.<br />
Before the drilling axis can be changed, the canned cycle must be<br />
canceled.<br />
In a block that does not contain X, Y, Z, R, or any additional axes, boring<br />
is not performed.<br />
Be sure to specify a positive value in Q. If Q is specified with a negative<br />
value, the sign is ignored. Set the direction of shift in bits 4 (RD1) and<br />
5 (RD2) of parameter No.5101. Specify P and Q in a block that performs<br />
boring. If they are specified in a block that does not perform boring, they<br />
are not stored as modal data.<br />
Do not specify a G code of the 01 group (G00 to G03 or G60 (when the<br />
MDL bit (bit 0 of parameter 5431) is set to 1)) and G87 in a single block.<br />
Otherwise, G87 will be canceled.<br />
In the canned cycle mode, tool offsets are ignored.<br />
In the canned cycle mode, specify the subprogram call command M98P_<br />
in an independent block.<br />
M3 S500 ; Cause the spindle to start rotating.<br />
G90 G87 X300. Y–250. Position, bore hole 1.<br />
Z–120. R–150. Q5. Orient at the initial level, then shift by 5 mm.<br />
P1000 F120. ; Stop at point Z for 1 s.<br />
Y–550. ; Position, drill hole 2.<br />
Y–750. ; Position, drill hole 3.<br />
X1000. ; Position, drill hole 4.<br />
Y–550. ; Position, drill hole 5.<br />
Y–750. ; Position, drill hole 6<br />
G80 G28 G91 X0 Y0 Z0 ; Return to the reference position return<br />
M5 ; Cause the spindle to stop rotating.
13. FUNCTIONS TO SIMPLIFY<br />
PROGRAMMING PROGRAMMING<br />
B–63534EN/02<br />
13.1.12<br />
Boring Cycle<br />
(G88)<br />
Format<br />
Explanations<br />
This cycle is used to bore a hole.<br />
G88 X_ Y_ Z_ R_ P_ F_ K_ ;<br />
X_ Y_: Hole position data<br />
Z_ : The distance from point R to the bottom of the hole<br />
R_ : The distance from the initial level to point R level<br />
P_ : Dwell time at the bottom of a hole<br />
F_ : Cutting feed rate<br />
K_ : Number of repeats (if required)<br />
Point R<br />
Point Z<br />
G88 (G98) G88 (G99)<br />
P<br />
214<br />
Spindle CW<br />
Initial level<br />
Spindle stop<br />
after dwell<br />
Point R<br />
Point Z<br />
P<br />
Spindle CW<br />
Point R level<br />
Spindle stop<br />
after dwell<br />
After positioning along the X– and Y–axes, rapid traverse is performed<br />
to point R. Boring is performed from point R to point Z. When boring<br />
is completed, a dwell is performed, then the spindle is stopped. The tool<br />
is manually retracted from the bottom of the hole (point Z) to point R.<br />
At point R, the spindle is rotated clockwise, and rapid traverse is<br />
performed to the initial level.<br />
Before specifying G88, use a miscellaneous function (M code) to rotate<br />
the spindle.<br />
When the G88 command and an M code are specified in the same block,<br />
the M code is executed at the time of the first positioning operation. The<br />
system then proceeds to the next drilling operation.<br />
When K is used to specify the number of repeats, the M code is executed<br />
for the first hole only; for the second and subsequent holes, the M code<br />
is not executed.<br />
When a tool length offset (G43, G44, or G49) is specified in the canned<br />
cycle, the offset is applied at the time of positioning to point R.
B–63534EN/02<br />
Limitations<br />
Axis switching<br />
Drilling<br />
P<br />
Cancel<br />
Tool offset<br />
Subprogram call<br />
Examples<br />
PROGRAMMING<br />
215<br />
13. FUNCTIONS TO SIMPLIFY<br />
PROGRAMMING<br />
Before the drilling axis can be changed, the canned cycle must be<br />
canceled.<br />
In a block that does not contain X, Y, Z, R, or any other axes, drilling is<br />
not performed.<br />
Specify P in blocks that perform drilling. If it is specified in a block that<br />
does not perform drilling, it cannot be stored as modal data.<br />
Do not specify a G code of the 01 group (G00 to G03 or G60 (when the<br />
MDL bit (bit 0 of parameter 5431) is set to 1)) and G88 in a single block.<br />
Otherwise, G88 will be canceled.<br />
In the canned cycle mode, tool offsets are ignored.<br />
In the canned cycle mode, specify the subprogram call command M98P_<br />
in an independent block.<br />
M3 S2000 ; Cause the spindle to start rotating.<br />
G90 G99 G88 X300. Y–250. Z–150. R–100. P1000 F120. ;<br />
Position, drill hole 1, return to point R<br />
then stop at the bottom of the hole for 1 s.<br />
Y–550. ; Position, drill hole 2, then return to point R.<br />
Y–750. ; Position, drill hole 3, then return to point R.<br />
X1000. ; Position, drill hole 4, then return to point R.<br />
Y–550. ; Position, drill hole 5, then return to point R.<br />
G98 Y–750. ; Position, drill hole 6, then return to the initial<br />
level.<br />
G80 G28 G91 X0 Y0 Z0 ; Return to the reference position return<br />
M5 ; Cause the spindle to stop rotating.
13. FUNCTIONS TO SIMPLIFY<br />
PROGRAMMING PROGRAMMING<br />
B–63534EN/02<br />
13.1.13<br />
Boring Cycle<br />
(G89)<br />
Format<br />
Explanations<br />
This cycle is used to bore a hole.<br />
G89 X_ Y_ Z_ R_ P_ F_ K_ ;<br />
X_ Y_: Hole position data<br />
Z_ : The distance from point R to the bottom of the hole<br />
R_ : The distance from the initial level to point R level<br />
P_ : Dwell time at the bottom of a hole<br />
F_ : Cutting feed rate<br />
K_ : Number of repeats (if required)<br />
Point R<br />
G89 (G98) G89 (G99)<br />
Point Z<br />
P P<br />
216<br />
Initial level<br />
Point R<br />
Point R level<br />
Point Z<br />
This cycle is almost the same as G85. The difference is that this cycle<br />
performs a dwell at the bottom of the hole.<br />
Before specifying G89, use a miscellaneous function (M code) to rotate<br />
the spindle.<br />
When the G89 command and an M code are specified in the same block,<br />
the M code is executed at the time of the first positioning operation. The<br />
system then proceeds to the next drilling operation.<br />
When K is used to specify the number of repeats, the M code is executed<br />
for the first hole only; for the second and subsequent holes, the M code<br />
is not executed.<br />
When a tool length offset (G43, G44, or G49) is specified in the canned<br />
cycle, the offset is applied at the time of positioning to point R.
B–63534EN/02<br />
Limitations<br />
Axis switching<br />
Drilling<br />
P<br />
Cancel<br />
Tool offset<br />
Subprogram call<br />
Examples<br />
PROGRAMMING<br />
217<br />
13. FUNCTIONS TO SIMPLIFY<br />
PROGRAMMING<br />
Before the drilling axis can be changed, the canned cycle must be<br />
canceled.<br />
In a block that does not contain X, Y, Z, R, or any other axes, drilling is<br />
not performed.<br />
Specify P in blocks that perform drilling. If it is specified in a block that<br />
does not perform drilling, it cannot be stored as modal data.<br />
Do not specify a G code of the 01 group (G00 to G03 or G60 (when the<br />
MDL bit (bit 0 of parameter 5431) is set to 1)) and G89 in a single block.<br />
Otherwise, G89 will be canceled.<br />
In the canned cycle mode, tool offsets are ignored.<br />
In the canned cycle mode, specify the subprogram call command<br />
M98P_in an independent block.<br />
M3 S100 ; Cause the spindle to start rotating.<br />
G90 G99 G89 X300. Y–250. Z–150. R–120. P1000 F120. ;<br />
Position, drill hole 1, return to point R<br />
then stop at the bottom of the hole for 1 s.<br />
Y–550. ; Position, drill hole 2, then return to point R.<br />
Y–750. ; Position, drill hole 3, then return to point R.<br />
X1000. ; Position, drill hole 4, then return to point R.<br />
Y–550. ; Position, drill hole 5, then return to point R.<br />
G98 Y–750. ; Position, drill hole 6, then return to the initial<br />
level.<br />
G80 G28 G91 X0 Y0 Z0 ; Return to the reference position return<br />
M5 ; Cause the spindle to stop rotating.
13. FUNCTIONS TO SIMPLIFY<br />
PROGRAMMING PROGRAMMING<br />
B–63534EN/02<br />
13.1.14<br />
Canned Cycle Cancel<br />
(G80)<br />
Format<br />
Explanations<br />
Examples<br />
G80 cancels canned cycles.<br />
G80 ;<br />
All canned cycles are canceled to perform normal operation. Point R and<br />
point Z are cleared. This means that R = 0 and Z = 0 in incremental mode.<br />
Other drilling data is also canceled (cleared).<br />
M3 S100 ; Cause the spindle to start rotating.<br />
G90 G99 G88 X300. Y–250. Z–150. R–120. F120. ;<br />
Position, drill hole 1, then return to point R.<br />
Y–550. ; Position, drill hole 2, then return to point R.<br />
Y–750. ; Position, drill hole 3, then return to point R.<br />
X1000. ; Position, drill hole 4, then return to point R.<br />
Y–550. ; Position, drill hole 5, then return to point R.<br />
G98 Y–750. ; Position, drill hole 6, then return to the initial level.<br />
G80 G28 G91 X0 Y0 Z0 ;<br />
Return to the reference position return,<br />
canned cycle cancel<br />
M5 ; Cause the spindle to stop rotating.<br />
218
B–63534EN/02<br />
PROGRAMMING<br />
Program example using tool length offset and canned cycles<br />
Y<br />
Z<br />
X<br />
X<br />
Reference position<br />
50<br />
50<br />
30<br />
20<br />
350<br />
100<br />
100<br />
100<br />
100<br />
250<br />
#1 #11<br />
#2<br />
#3<br />
400 150 250 250 150<br />
T 11 T 15 T 31<br />
219<br />
#7<br />
#8<br />
#12<br />
#13<br />
13. FUNCTIONS TO SIMPLIFY<br />
PROGRAMMING<br />
#10<br />
# 11 to 16 Drilling of a 10mm diameter hole<br />
# 17 to 10 Drilling of a 20mm diameter hole<br />
# 11 to 13 Boring of a 95mm diameter hole(depth 50 mm)<br />
Retract position<br />
200 190 150<br />
200<br />
#9<br />
#6<br />
#5<br />
#4<br />
Initial level
13. FUNCTIONS TO SIMPLIFY<br />
PROGRAMMING PROGRAMMING<br />
B–63534EN/02<br />
Offset value +200.0 is set in offset No.11, +190.0 is set in offset No.15, and +150.0 is set in offset No.31<br />
Program example<br />
;<br />
N001 G92X0Y0Z0; Coordinate setting at reference position<br />
N002 G90 G00 Z250.0 T11 M6; Tool change<br />
N003 G43 Z0 H11; Initial level, tool length offset<br />
N004 S30 M3 Spindle start<br />
N005 G99 G81X400.0 R Y–350.0<br />
Z–153,0R–97.0 F120; Positioning, then #1 drilling<br />
N006 Y–550.0; Positioning, then #2 drilling and point R level return<br />
N007 G98Y–750.0; Positioning, then #3 drilling and initial level return<br />
N008 G99X1200.0; Positioning, then #4 drilling and point R level return<br />
N009 Y–550.0; Positioning, then #5 drilling and point R level return<br />
N010 G98Y–350.0; Positioning, then #6 drilling and initial level return<br />
N011 G00X0Y0M5; Reference position return, spindle stop<br />
N012 G49Z250.0T15M6; Tool length offset cancel, tool change<br />
N013 G43Z0H15; Initial level, tool length offset<br />
N014 S20M3; Spindle start<br />
N015 G99G82X550.0Y–450.0 Positioning, then #7 drilling, point R level return<br />
Z–130.0R–97.0P300F70;<br />
N016 G98Y–650.0; Positioning, then #8 drilling, initial level return<br />
N017 G99X1050.0; Positioning, then #9 drilling, point R level return<br />
N018 G98Y–450.0; Positioning, then #10 drilling, initial level return<br />
N019 G00X0Y0M5; Reference position return, spindle stop<br />
N020 G49Z250.0T31M6; Tool length offset cancel, tool change<br />
N021 G43Z0H31; Initial level, tool length offset<br />
N022 S10M3; Spindle start<br />
N023 G85G99X800.0Y–350.0 Positioning, then #11 drilling, point R level return<br />
Z–153.0R47.0F50;<br />
N024 G91Y–200.0K2; Positioning, then #12, 13 drilling. point R level return<br />
N025 G28X0Y0M5; Reference position return, spindle stop<br />
N026 G49Z0; Tool length offset cancel<br />
N027 M0; Program stop<br />
220
B–63534EN/02<br />
13.2<br />
RIGID TAPPING<br />
PROGRAMMING<br />
221<br />
13. FUNCTIONS TO SIMPLIFY<br />
PROGRAMMING<br />
The tapping cycle (G84) and left–handed tapping cycle (G74) may be<br />
performed in standard mode or rigid tapping mode.<br />
In standard mode, the spindle is rotated and stopped along with a<br />
movement along the tapping axis using miscellaneous functions M03<br />
(rotating the spindle clockwise), M04 (rotating the spindle<br />
counterclockwise), and M05 (stopping the spindle) to perform tapping.In<br />
rigid mode, tapping is performed by controlling the spindle motor as if<br />
it were a servo motor and by interpolating between the tapping axis and<br />
spindle.<br />
When tapping is performed in rigid mode, the spindle rotates one turn<br />
every time a certain feed (thread lead) which takes place along the tapping<br />
axis. This operation does not vary even during acceleration or<br />
deceleration.<br />
Rigid mode eliminates the need to use a floating tap required in the<br />
standard tapping mode, thus allowing faster and more precise tapping.
13. FUNCTIONS TO SIMPLIFY<br />
PROGRAMMING PROGRAMMING<br />
B–63534EN/02<br />
13.2.1<br />
Rigid Tapping<br />
(G84)<br />
Format<br />
Explanations<br />
Rigid mode<br />
When the spindle motor is controlled in rigid mode as if it were a servo<br />
motor, a tapping cycle can be sped up.<br />
G84 X_ Y_ Z_ R_ P_ F_ K_ ;<br />
X_ Y_: Hole position data<br />
Z_ : The distance from point R to the bottom of the hole and the<br />
position of the bottom of the hole<br />
R_ : The distance from the initial level to point R level<br />
P_ : Dwell time at the bottom of the hole and at point R when a<br />
return is made<br />
F_ : Cutting feedrate<br />
K_ : Number of repeats (Only for necessity of repeat)<br />
G84.2 X_ Y_ Z_ R_ P_ F_ L_ ; (FS15 format)<br />
L_ : Number of repeats (only for necessity of repeat)<br />
G84(G98) G84(G99)<br />
Spindle stop<br />
Initial level<br />
Operation1<br />
Operation2<br />
Spindle CW<br />
Point R<br />
Operation6<br />
Spindle<br />
P<br />
stop<br />
Spindle CW<br />
Point R<br />
Spindle stop<br />
P<br />
Point R level<br />
Operation3<br />
Point Z<br />
Point Z<br />
P P<br />
Operation4<br />
Spindle stop Spindle CCW Spindle stop Spindle CCW<br />
222<br />
Operation5<br />
Spindle stop<br />
After positioning along the X– and Y–axes, rapid traverse is performed<br />
to point R.<br />
Tapping is performed from point R to point Z. When tapping is<br />
completed, the spindle is stopped and a dwell is performed . The spindle<br />
is then rotated in the reverse direction, the tool is retracted to point R, then<br />
the spindle is stopped. Rapid traverse to initial level is then performed.<br />
While tapping is being performed, the feedrate override and spindle<br />
override are assumed to be 100%.<br />
However, the speed for extraction (operation 5) can be overridden by up<br />
to 2000% depending on the setting at bit 4 (DOV) of parameter No.5200,<br />
bit 3 (OVU) of parameter (No.5201), and parameter No.5211.<br />
Rigid mode can be specified using any of the following methods:<br />
⋅Specify M29 S***** before a tapping command.<br />
⋅Specify M29 S***** in a block which contains a tapping<br />
command.<br />
⋅Specify G84 for rigid tapping (parameter G84 No. 5200 #0 set to 1).
B–63534EN/02<br />
Thread lead<br />
Tool length<br />
compensation<br />
FS15–format command<br />
Limitations<br />
Axis switching<br />
S command<br />
Distribution amount for<br />
the spindle<br />
F command<br />
Unit of F command<br />
M29<br />
P<br />
Cancel<br />
Tool offset<br />
Program restart<br />
PROGRAMMING<br />
223<br />
13. FUNCTIONS TO SIMPLIFY<br />
PROGRAMMING<br />
In feed–per–minute mode, the thread lead is obtained from the<br />
expression, feedrate × spindle speed. In feed–per–revolution mode, the<br />
thread lead equals the feedrate speed.<br />
If a tool length compensation (G43, G44, or G49) is specified in the<br />
canned cycle, the offset is applied at the time of positioning to point R.<br />
Rigid tapping can be performed using FS15–format commands. The<br />
rigid tapping sequence (including data transfer to and from the PMC),<br />
restrictions, and the like are the same as described for the <strong>16i</strong>/<strong>18i</strong>.<br />
Before the drilling axis can be changed, the canned cycle must be<br />
canceled. If the drilling axis is changed in rigid mode, P/S alarm (No.<br />
206) is issued.<br />
If a speed higher than the maximum speed for the gear being used is<br />
specified, P/S alarm (No. 200) is issued.<br />
When the rigid tapping canned cycle is cancelled, the S command used<br />
for rigid tapping is cleared to S0.<br />
For an analog spindle control circuit:<br />
Upon specifying a speed command requiring more than 4096 pulses, in<br />
detection units, within 8 ms, a P/S alarm (No.202) is issued because the<br />
result of such an operation is unpredictable.<br />
For a serial spindle:<br />
Upon specifying a speed command requiring more than 32767 pulses, in<br />
detection units, within 8 ms, a P/S alarm (No.202) is issued because the<br />
result of such an operation is unpredictable.<br />
If a value exceeding the upper limit of cutting feedrate is specified, P/S<br />
alarm (No. 011) is issued.<br />
Metric input <strong>Inc</strong>h input Remarks<br />
G94 1 mm/min 0.01 inch/min Decimal point programming<br />
allowed<br />
G95 0.01 mm/rev 0.0001 inch/rev Decimal point programming<br />
allowed<br />
If an S command and axis movement are specified between M29 and G84,<br />
P/S alarm (No. 203) is issued. If M29 is specified in a tapping cycle, P/S<br />
alarm (No. 204) is issued.<br />
Specify P in a block that performs drilling. If R is specified in a<br />
non–drilling block, it is not stored as modal data.<br />
Do not specify a G code of the 01 group (G00 to G03 or G60 (when the<br />
MDL bit (bit 0 of parameter 5431) is set to 1)) and G84 in a single block.<br />
Otherwise, G84 will be canceled.<br />
In the canned cycle mode, tool offsets are ignored.<br />
A program cannot be restarted during rigid tapping.
13. FUNCTIONS TO SIMPLIFY<br />
PROGRAMMING PROGRAMMING<br />
B–63534EN/02<br />
Subprogram call<br />
Examples<br />
In the canned cycle mode, specify the subprogram call command M98P_<br />
in an independent block.<br />
Z–axis feedrate 1000 mm/min<br />
Spindle speed 1000 min -1<br />
Thread lead 1.0 mm<br />
<br />
G94 ; Specify a feed–per–minute command.<br />
G00 X120.0 Y100.0 ; Positioning<br />
M29 S1000 ; Rigid mode specification<br />
G84 Z–100.0 R–20.0 F1000 ; Rigid tapping<br />
<br />
G95 ; Specify a feed–per–revolution command.<br />
G00 X120.0 Y100.0 ; Positioning<br />
M29 S1000 ; Rigid mode specification<br />
G84 Z–100.0 R–20.0 F1.0 ; Rigid tapping<br />
224
B–63534EN/02<br />
13.2.2<br />
Left–Handed Rigid<br />
Tapping Cycle<br />
(G74)<br />
Format<br />
Explanations<br />
Rigid mode<br />
PROGRAMMING<br />
225<br />
13. FUNCTIONS TO SIMPLIFY<br />
PROGRAMMING<br />
When the spindle motor is controlled in rigid mode as if it were a servo<br />
motor, tapping cycles can be speed up.<br />
G74 X_ Y_ Z_ R_ P_ F_ K_ ;<br />
X_ Y_: Hole position data<br />
Z_ : The distance from point R to the bottom of the hole and<br />
the position of the bottom of the hole<br />
R_ : The distance from the initial level to point R level<br />
P_ : Dwell time at the bottom of the hole and at point R when<br />
return is made.<br />
F_ : Cutting feedrate<br />
K_ : Number of repeats (Only for necessity of repeat)<br />
G84.3 X_ Y_ Z_ R_ P_ F_ L_ ; (FS15 format)<br />
L_ : Number of repeats (Only for necessity of repeat)<br />
G74 (G98) G74 (G99)<br />
Operation1<br />
Operation2<br />
Spindle<br />
CCW<br />
Operation6<br />
Spindle<br />
P stop<br />
Spindle<br />
CCW<br />
P<br />
Spindle<br />
stop<br />
Point R Point R level<br />
Point R Point R level<br />
Spindle stop<br />
Spindle stop<br />
Initial level<br />
Operation3<br />
Operation5<br />
Spindle stop<br />
Point Z<br />
P P<br />
Point Z<br />
Operation4 Spindle CW Spindle stop Spindle CW<br />
After positioning along the X– and Y–axes, rapid traverse is performed<br />
to point R.<br />
Tapping is performed from point R to point Z. When tapping is<br />
completed, the spindle is stopped and a dwell is performed. The spindle<br />
is then rotated in the normal direction, the tool is retracted to point R, then<br />
the spindle is stopped. Rapid traverse to initial level is then performed.<br />
While tapping is being performed, the feedrate override and spindle<br />
override are assumed to be 100%.<br />
However, the speed for extraction (operation 5) can be overridden by up<br />
to 2000% depending on the setting at bit 4 (DOV) of parameter 5200, bit<br />
3 (OVU) of parameter (No.5201), and parameter 5211.<br />
Rigid mode can be specified using any of the following methods:<br />
⋅ Specify M29 S***** before a tapping command.<br />
⋅ Specify M29 S***** in a block which contains a tapping command.<br />
⋅ Specify G84 for rigid tapping. (parameter G84 No. 5200#0 set to1).
13. FUNCTIONS TO SIMPLIFY<br />
PROGRAMMING PROGRAMMING<br />
B–63534EN/02<br />
Thread lead<br />
Tool length<br />
compensation<br />
FS15–format command<br />
Limitations<br />
Axis switching<br />
S command<br />
Distribution amount for<br />
the spindle<br />
F command<br />
Unit of F command<br />
M29<br />
P<br />
Cancel<br />
Tool offset<br />
Subprogram call<br />
In feed–per–minute mode, the thread lead is obtained from the<br />
expression, feedrate × spindle speed. In feed–per–revolution mode, the<br />
thread lead equals the feedrate.<br />
If a tool length offset (G43, G44, or G49) is specified in the canned cycle,<br />
the offset is applied at the time of positioning to point R.<br />
Rigid tapping can be performed using FS15–format commands. The<br />
rigid tapping sequence (including data transfer to and from the PMC),<br />
restrictions, and the like are the same as described for the <strong>16i</strong>/<strong>18i</strong>.<br />
Before the drilling axis can be changed, the canned cycle must be<br />
canceled. If the drilling axis is changed in rigid mode,P/S alarm (No.<br />
206) is issued.<br />
Specifying a rotation speed exceeding the maximum speed for the gear<br />
used causes P/S alarm (No. 200).<br />
When the rigid tapping canned cycle is cancelled, the S command used<br />
for rigid tapping is cleared to S0.<br />
For an analog spindle control circuit:<br />
Upon specifying a speed command requiring more than 4096 pulses, in<br />
detection units, within 8 ms, a P/S alarm (No.202) is issued because the<br />
result of such an operation is unpredictable.<br />
For a serial spindle:<br />
Upon specifying a speed command requiring more than 32767 pulses, in<br />
detection units, within 8 ms, a P/S alarm (No.202) is issued because the<br />
result of such an operation is unpredictable.<br />
Specifying a value that exceeds the upper limit of cutting feedrate causes<br />
P/S alarm (No. 011).<br />
Metric input <strong>Inc</strong>h input Remarks<br />
G94 1 mm/min 0.01 inch/min Decimal point<br />
programming allowed<br />
G95 0.01 mm/rev 0.0001 inch/rev Decimal point<br />
programming allowed<br />
Specifying an S command or axis movement between M29 and G74<br />
causes P/S alarm (No. 203).<br />
Then, specifying M29 in the tapping cycle causes P/S alarm (No. 204).<br />
Specify P in a block that performs drilling. If R is specified in a<br />
non–drilling block, it ss not stored as modal data.<br />
Do not specify a G code of the 01 group (G00 to G03 or G60 (when the<br />
MDL bit (bit 0 of parameter 5431) is set to 1)) and G74 in a single block.<br />
Otherwise, G74 will be canceled.<br />
In the canned cycle mode, tool offsets are ignored.<br />
In the canned cycle mode, specify the subprogram call command M98P_<br />
in an independent block.<br />
226
B–63534EN/02<br />
<br />
PROGRAMMING<br />
227<br />
13. FUNCTIONS TO SIMPLIFY<br />
PROGRAMMING<br />
Z–axis feedrate 1000 mm/min<br />
Spindle speed 1000 min -1<br />
Thread lead 1.0 mm<br />
<br />
G94 ; Specify a feed–per–minute command.<br />
G00 X120.0 Y100.0 ; Positioning<br />
M29 S1000 ; Rigid mode specification<br />
G84 Z–100.0 R–20.0 F1000 ; Rigid tapping<br />
<br />
G95 ; Specify a feed–per–revolution command.<br />
G00 X120.0 Y100.0 ; Positioning<br />
M29 S1000 ; Rigid mode specification<br />
G74 Z–100.0 R–20.0 F1.0 ; Rigid tapping
13. FUNCTIONS TO SIMPLIFY<br />
PROGRAMMING PROGRAMMING<br />
B–63534EN/02<br />
13.2.3<br />
Peck Rigid Tapping<br />
Cycle (G84 or G74)<br />
Format<br />
⋅High–speed peck tapping cycle<br />
(Parameter PCP(No.5200#5=0))<br />
The tool operates at a normal<br />
cutting feedrate. The normal time<br />
constant is used.<br />
Retraction can be overridden.<br />
The retraction time constant is<br />
used.<br />
⋅Peck tapping cycle<br />
(Parameter PCP(No.5200#5=1))<br />
The tool operates at a normal<br />
cutting feedrate. The normal time<br />
constant is used.<br />
Retraction can be overridden.<br />
The retraction time constant is<br />
used.<br />
Retraction can be overridden.<br />
The normal time constant is used.<br />
During a rigid tapping cycle, in–position<br />
check is performed at the end of each<br />
operation of (1) and (2) in the peck tapping<br />
cycle.<br />
Tapping a deep hole in rigid tapping mode may be difficult due to chips<br />
sticking to the tool or increased cutting resistance. In such cases, the peck<br />
rigid tapping cycle is useful.<br />
In this cycle, cutting is performed several times until the bottom of the<br />
hole is reached. Two peck tapping cycles are available: High–speed peck<br />
tapping cycle and standard peck tapping cycle. These cycles are selected<br />
using the PCP bit (bit 5) of parameter 5200.<br />
G84 (or G74) X_ Y_ Z_ R_ P_ Q_ F_ K_ ;<br />
X_ Y_: Hole position data<br />
Z_ : The distance from point R to the bottom of the hole and the<br />
position of the bottom of the hole<br />
R_ : The distance from the initial level to point R level<br />
P_ : Dwell time at the bottom of the hole and at point R when a<br />
return is made<br />
Q_ : Depth of cut for each cutting feed<br />
F_ : The cutting feedrate<br />
K_ : Number of repeats (if required)<br />
Point R<br />
q<br />
q<br />
q<br />
Point R<br />
q<br />
q<br />
q<br />
G84, G74 (G98) G84, G74 (G99)<br />
(1)<br />
(1)<br />
d=retraction distance<br />
228<br />
(2)<br />
(2)<br />
Initial level<br />
Point R level<br />
d<br />
d<br />
Point Z<br />
d=cutting start distance<br />
d<br />
Initial level<br />
Point R level<br />
(3)<br />
d<br />
Point R<br />
q<br />
q<br />
q<br />
Point R<br />
q<br />
q<br />
q<br />
(1)<br />
(1)<br />
(2)<br />
(2)<br />
Point R level<br />
d<br />
d<br />
Point Z<br />
d<br />
Point R level<br />
(3)<br />
Point Z Point Z<br />
d
B–63534EN/02<br />
Explanations<br />
High–speed peck<br />
tapping cycle<br />
Peck tapping cycle<br />
Limitations<br />
Axis switching<br />
S command<br />
Distribution amount for<br />
the spindle<br />
F command<br />
Unit of F<br />
M29<br />
PROGRAMMING<br />
229<br />
13. FUNCTIONS TO SIMPLIFY<br />
PROGRAMMING<br />
After positioning along the X– and Y–axes, rapid traverse is performed<br />
to point R. From point R, cutting is performed with depth Q (depth of cut<br />
for each cutting feed), then the tool is retracted by distance d. The DOV<br />
bit (bit 4) of parameter 5200 specifies whether retraction can be<br />
overridden or not. When point Z has been reached, the spindle is stopped,<br />
then rotated in the reverse direction for retraction.<br />
Set the retraction distance, d, in parameter 5213.<br />
After positioning along the X– and Y–axes, rapid traverse is performed<br />
to point R level. From point R, cutting is performed with depth Q (depth<br />
of cut for each cutting feed), then a return is performed to point R. The<br />
DOV bit (bit 4) of parameter 5200 specifies whether the retraction can be<br />
overridden or not. The moving of cutting feedrate F is performed from<br />
point R to a position distance d from the end point of the last cutting,<br />
which is where cutting is restarted. For this moving of cutting feedrate<br />
F, the specification of the DOV bit (bit 4) of parameter 5200 is also valid.<br />
When point Z has been reached, the spindle is stopped, then rotated in the<br />
reverse direction for retraction.<br />
Set d (distance to the point at which cutting is started) in parameter 5213.<br />
Before the drilling axis can be changed, the canned cycle must be<br />
canceled. If the drilling axis is changed in rigid mode, P/S alarm (No.<br />
206) is issued.<br />
Specifying a rotation speed exceeding the maximum speed for the gear<br />
used causes P/S alarm (No. 200).<br />
When the rigid tapping canned cycle is cancelled, the S command used<br />
for rigid tapping is cleared to S0.<br />
For an analog spindle control circuit:<br />
Upon specifying a speed command requiring more than 4096 pulses, in<br />
detection units, within 8 ms, a P/S alarm (No.202) is issued because the<br />
result of such an operation is unpredictable.<br />
For a serial spindle:<br />
Upon specifying a speed command requiring more than 32767 pulses, in<br />
detection units, within 8 ms, a P/S alarm (No.202) is issued because the<br />
result of such an operation is unpredictable.<br />
Specifying a value that exceeds the upper limit of cutting feedrate causes<br />
alarm (No. 011).<br />
Metric input <strong>Inc</strong>h input Remarks<br />
G94 1 mm/min 0.01 inch/min Decimal point programming<br />
allowed<br />
G95 0.01 mm/rev 0.0001 inch/rev Decimal point programming<br />
allowed<br />
Specifying an S command or axis movement between M29 and G84<br />
causes P/S alarm (No. 203).<br />
Then, specifying M29 in the tapping cycle causes P/S alarm (No. 204).
13. FUNCTIONS TO SIMPLIFY<br />
PROGRAMMING PROGRAMMING<br />
B–63534EN/02<br />
P/Q<br />
Cancel<br />
Tool offset<br />
Subprogram call<br />
13.2.4<br />
Canned Cycle Cancel<br />
(G80)<br />
Specify P and Q in a block that performs drilling. If they are specified in<br />
a block that does not perform drilling, they are not stored as modal data.<br />
When Q0 is specified, the peck rigid tapping cycle is not performed.<br />
Do not specify a group 01 G code (G00 to G03) and G73 in the same block.<br />
If they are specified together, G73 is canceled.<br />
In the canned cycle mode, tool offsets are ignored.<br />
In the canned cycle mode, specify the subprogram call command M98P_<br />
in an independent block.<br />
The rigid tapping canned cycle is canceled. For how to cancel this cycle,<br />
see II–13.1.14.<br />
NOTE<br />
When the rigid tapping canned cycle is cancelled, the S<br />
value used for rigid tapping is also cleared (as if S0 is<br />
specified).<br />
Accordingly, the S command specified for rigid tapping<br />
cannot be used in a subsequent part of the program after<br />
the cancellation of the rigid tapping canned cycle.<br />
After canceling the rigid tapping canned cycle, specify a<br />
new S command as required.<br />
230
B–63534EN/02<br />
13.3<br />
Canned Grinding<br />
Cycle<br />
(FOR GRINDING<br />
MACHINE)<br />
PROGRAMMING<br />
231<br />
13. FUNCTIONS TO SIMPLIFY<br />
PROGRAMMING<br />
Canned grinding cycles make it easier for the programmer to create<br />
programs that include grinding. With a canned grinding cycle, repetitive<br />
operation peculiar to grinding can be specified in a single block with a G<br />
function; without canned grinding cycles, normally more than one block<br />
is required. In addition, the use of canned grinding cycles shortens the<br />
program to save memory. The following four canned grinding cycles are<br />
available:<br />
⋅Plunge grinding cycle (G75)<br />
⋅Direct constant–dimension plunge grinding cycle (G77)<br />
⋅Continuous–feed surface grinding cycle (G78)<br />
⋅Intermittent–feed surface grinding cycle (G79)
13. FUNCTIONS TO SIMPLIFY<br />
PROGRAMMING PROGRAMMING<br />
B–63534EN/02<br />
13.3.1<br />
Plunge Grinding Cycle<br />
(G75)<br />
Format<br />
Explanations<br />
Grinding wheel cutting<br />
Dwell<br />
Grinding<br />
Grinding wheel cutting<br />
<br />
Grinding<br />
(return direction)<br />
A plunge grinding cycle is performed.<br />
G75 I_ J_ K_ X(Z)_ R_ F_ P_ L_ ;<br />
I_: Depth–of–cut 1 (A sign in the command specifies the direction<br />
of cutting.)<br />
J_ : Depth–of–cut 2 (A sign in the command specifies the direction<br />
of cutting.)<br />
K_ : Total depth of cut (A sign in the command specifies the direction<br />
of cutting.)<br />
X(Z)_ : Range of grinding (A sign in the command specifies the<br />
direction of grinding.)<br />
R_ : Feedrate for I and J<br />
F_ : Feedrate for X (Z)<br />
P_ : Dwell time<br />
L_ : Grinding–wheel wear compensation (Only for continuous dressing)<br />
Y<br />
I<br />
J<br />
232<br />
(1) (R)<br />
(2) P<br />
<br />
X(Z)<br />
(3) (F)<br />
(6) (F)<br />
(4) (R)<br />
(5) P<br />
X(Z)<br />
The plunge grinding cycle consists of six operation sequences.<br />
Operations (1) to (6) are repeated until the depth reaches the total depth<br />
of cut specified at address K. In the single block stop mode, operations<br />
(1) to (6) are performed every cycle start.<br />
(1)Cutting is performed along the Y–axis in cutting feed mode for the<br />
amount specified by I (depth of cut 1). The feedrate is specified by R.<br />
(2)Dwell is performed for the time specified by P.<br />
(3)Cutting feed is performed for the amount specified by X (or Z). The<br />
feedrate is specified by F.<br />
(4)Cutting is performed along the Y–axis in cutting feed mode for the<br />
amount specified by J (depth of cut 2). The feedrate is specified by R.<br />
(5)Dwell is performed for the time specified by P.<br />
(6)Feeding is performed in the reverse direction for the amount specified<br />
by X (or Z) at a feedrate specified by F.
B–63534EN/02<br />
Limitations<br />
X(Z), I, J, K<br />
Clear<br />
Operation performed<br />
when the total depth of<br />
cut is reached<br />
PROGRAMMING<br />
233<br />
13. FUNCTIONS TO SIMPLIFY<br />
PROGRAMMING<br />
X, (Z), I, J, and K must all be specified in incremental mode.<br />
I, J, X, and Z in canned cycles are modal data common to G75, G77, G78,<br />
and G79. They remain valid until new data is specified. They are cleared<br />
when a group 00 G code other than G04 or a group 01 G code other than<br />
G75, G77, G78, and G79 is specified.<br />
When the total depth of cut is reached during cutting using I or J, the<br />
subsequent operation sequences (up to ) are executed, then the cycle<br />
terminates. In this case, no further cutting is performed after the total<br />
depth of cut is reached.<br />
Chart of operation in which the total depth of cut is reached by cutting<br />
specified by I and J:<br />
K<br />
K<br />
I<br />
J<br />
I<br />
<br />
<br />
<br />
<br />
Chart of operation in which the total depth of cut is reached during<br />
cutting specified by I and J:<br />
K<br />
K<br />
I<br />
J<br />
I
13. FUNCTIONS TO SIMPLIFY<br />
PROGRAMMING PROGRAMMING<br />
B–63534EN/02<br />
13.3.2<br />
Direct<br />
Constant–Dimension<br />
Plunge Grinding Cycle<br />
(G77)<br />
Format<br />
Explanations<br />
Grinding wheel cutting<br />
Dwell<br />
Grinding<br />
Grinding wheel cutting<br />
<br />
Grinding<br />
(return direction)<br />
A direct constant–dimension plunge grinding cycle is performed.<br />
G77 I_ J_ K_ X(Z)_ R_ F_ P_ L_ ;<br />
I_: Depth–of–cut 1 (A sign in the command specifies the direction<br />
of cutting.)<br />
J_ : Depth–of–cut 2 (A sign in the command specifies the direction<br />
of cutting.)<br />
K_ : Total depth of cut (A sign in the command specifies the direction<br />
of cutting.)<br />
X(Z)_ : Range of grinding (A sign in the command specifies the direction<br />
of grinding.)<br />
R_ : Feedrate for I and J<br />
F_ : Feedrate for X (Z)<br />
P_ : Dwell time<br />
L_ : Grinding–wheel wear compensation (Only for continuous<br />
dressing)<br />
Y<br />
I<br />
J<br />
234<br />
(R)<br />
P<br />
G77<br />
X(Z)<br />
(F)<br />
(F)<br />
(R)<br />
P<br />
X(Z)<br />
The constant–dimension plunge grinding cycle consists of six operation<br />
sequences. Operations to are repeated until the depth reaches the<br />
total depth of cut specified at address K.<br />
Cutting is performed along the Y–axis in cutting feed mode for the<br />
amount specified by I (depth of cut 1). The feedrate is specified by R.<br />
Dwell is performed for the time specified by P.<br />
Cutting feed is performed for the amount specified by X (or Z). The<br />
feedrate is specified by F.<br />
Cutting is performed along the Y–axis in cutting feed mode for the<br />
amount specified by J (depth of cut 2). The feedrate is specified by R.<br />
Dwell is performed for the time specified by P.<br />
Feeding is performed in the reverse direction for the amount specified<br />
by X (or Z) at a feedrate specified by F.
B–63534EN/02<br />
<br />
Limitations<br />
X(Z), I, J, K<br />
Clear<br />
PROGRAMMING<br />
235<br />
13. FUNCTIONS TO SIMPLIFY<br />
PROGRAMMING<br />
When the cycle is performed using G77, a skip signal can be input to<br />
terminate the cycle. When a skip signal is input, the current operation<br />
sequence is interrupted or completed, then the cycle is terminated.<br />
The following shows how the system operates when the skip signal is<br />
input during each operation sequence.<br />
When the skip signal is input during operation sequence 1 or 4 (cutting<br />
feed specified by I or J), cutting is stopped immediately and the tool<br />
returns to the X (Z) coordinate at which the cycle started.<br />
(End)<br />
Skip Signal<br />
(End)<br />
Skip Signal<br />
When the skip signal is input during operation sequence 2 or 5 (dwell),<br />
dwell is stopped immediately and the tool returns to the X (Z)<br />
coordinate at which the cycle started.<br />
When the skip signal is input during operation sequence 3 or 6<br />
(movement), the tool returns to the X (Z) coordinate at which the cycle<br />
started after the movement specified by X (Z) is completed.<br />
(End)<br />
Skip Signal<br />
(End)<br />
Skip Signal<br />
X, (Z), I, J, and K must all be specified in incremental mode.<br />
I, J, X, and Z in canned cycles are modal data common to G75, G77, G78,<br />
and G79. They remain valid until new data is specified. They are cleared<br />
when a group 00 G code other than G04 or a group 01 G code other than<br />
G75, G77, G78, and G79 is specified.
13. FUNCTIONS TO SIMPLIFY<br />
PROGRAMMING PROGRAMMING<br />
B–63534EN/02<br />
13.3.3<br />
Continuous–Feed<br />
Surface Grinding Cycle<br />
(G78)<br />
Format<br />
Explanations<br />
A continuous–feed surface grinding cycle is performed.<br />
G78 I_ (J_) K_ X_ F_ P_ L_ ;<br />
I_: Depth–of–cut 1 (A sign in the command specifies the direction<br />
of cutting.)<br />
J_ : Depth–of–cut 2 (A sign in the command specifies the direction<br />
of cutting.)<br />
K_ : Total depth of cut (A sign in the command specifies the direction<br />
of cutting.)<br />
X_ : Range of grinding (A sign in the command specifies the<br />
direction of grinding.)<br />
F_ : Feed rate<br />
P_ : Dwell time<br />
L_ : Grinding–wheel wear compensation (Only for continuous<br />
dressing)<br />
Z<br />
I<br />
I(J)<br />
236<br />
P(Dwell)<br />
G78<br />
X<br />
(F)<br />
(F)<br />
<br />
P(Dwell)<br />
The continuous–feed surface grinding cycle consists of four operation<br />
sequences. Operations to are repeated until the depth reaches<br />
the total depth of cut specified in address K. In the single block stop mode,<br />
operations to are performed every cycle start.<br />
Dwell<br />
Grinding<br />
Dwell<br />
Grinding (in reverse direction)<br />
X
B–63534EN/02<br />
Restrictions<br />
<br />
I, J, K, X<br />
<br />
Operation performed<br />
when the total depth of<br />
cut is reached<br />
PROGRAMMING<br />
237<br />
13. FUNCTIONS TO SIMPLIFY<br />
PROGRAMMING<br />
When J is omitted, it is assumed to be 1. J is valid only in the block where<br />
it is specified.<br />
X, I, J, and K must all be specified in incremental mode.<br />
I, J, X, and Z in canned cycles are modal data common to G75, G77, G78,<br />
and G79. They remain valid until new data is specified. They are cleared<br />
when a group 00 G code other than G04 or a group 01 G code other than<br />
G75, G77, G78, and G79 is specified.<br />
When the total depth of cut is reached during cutting using I or J, the<br />
subsequent operation sequences (up to ) are executed, then the cycle<br />
terminates. In this case, no further cutting is performed after the total<br />
depth of cut is reached.<br />
Chart of operation in which the total depth of cut is reached by cutting<br />
specified by I and J:<br />
K<br />
K<br />
I<br />
J<br />
I<br />
<br />
<br />
<br />
<br />
<br />
Chart of operation in which the total depth of cut is reached during<br />
cutting specified by I and J:<br />
K<br />
K<br />
I<br />
J<br />
I
13. FUNCTIONS TO SIMPLIFY<br />
PROGRAMMING PROGRAMMING<br />
B–63534EN/02<br />
13.3.4<br />
Intermittent–Feed<br />
Surface Grinding Cycle<br />
(G79)<br />
Format<br />
Explanations<br />
Grinding wheel cutting<br />
Dwell<br />
Grinding<br />
Grinding wheel cutting<br />
<br />
Grinding<br />
(return direction)<br />
An intermittent–feed surface grinding cycle is performed.<br />
G79 I_ J_ K_ X_ R_ F_ P_ L_ ;<br />
I_: Depth–of–cut 1 (A sign in the command specifies the direction<br />
of cutting.)<br />
J_ : Depth–of–cut 2 (A sign in the command specifies the direction<br />
of cutting.)<br />
K_ : Total depth of cut (A sign in the command specifies the direction<br />
of cutting.)<br />
X_ : Range of grinding (A sign in the command specifies the<br />
direction of grinding.)<br />
R_ : Feedrate for I and J<br />
F_ : Feedrate for X<br />
P_ : Dwell time<br />
L_ : Grinding–wheel wear compensation (Only for continuous dressing)<br />
Z<br />
I<br />
J<br />
238<br />
(R)<br />
P<br />
G79<br />
X<br />
(F)<br />
(F)<br />
(R)<br />
P<br />
The intermittent–feed surface grinding cycle consists of six operation<br />
sequences. Operations to are repeated until the depth reaches the<br />
total depth of cut specified at address K. In the single block stop mode,<br />
operations to are performed every cycle start.<br />
Cutting is performed along the Z–axis in cutting feed mode for the<br />
amount specified by I (depth of cut 1). The feedrate is specified by R.<br />
Dwell is performed for the time specified by P.<br />
Cutting feed is performed for the amount specified by X. The feedrate<br />
is specified by F.<br />
Cutting is performed along the Z–axis in cutting feed mode for the<br />
amount specified by J (depth of cut 2). The feedrate is specified by R.<br />
Dwell is performed for the time specified by P.<br />
Feeding is performed in the reverse direction for the amount specified<br />
by X at a feedrate specified by F.<br />
X
B–63534EN/02<br />
<br />
<br />
<br />
PROGRAMMING<br />
239<br />
13. FUNCTIONS TO SIMPLIFY<br />
PROGRAMMING<br />
X, I, J, and K must all be specified in incremental mode.<br />
I, J, X, and Z in canned cycles are modal data common to G75, G77, G78,<br />
and G79. They remain valid until new data is specified. They are cleared<br />
when a group 00 G code other than G04 or a group 01 G code other than<br />
G75, G77, G78, and G79 is specified.
13. FUNCTIONS TO SIMPLIFY<br />
PROGRAMMING PROGRAMMING<br />
B–63534EN/02<br />
13.4<br />
GRINDING–WHEEL<br />
WEAR<br />
COMPENSATION BY<br />
CONTINUOUS<br />
DRESSING<br />
(FOR GRINDING<br />
MACHINE)<br />
Explanations<br />
Specification<br />
Compensation<br />
This function enables continuous dressing.<br />
When G75, G77, G78, or G79 is specified, grinding wheel cutting and<br />
dresser cutting are compensated continuously according to the amount of<br />
continuous dressing during grinding.<br />
Specify an offset number (grinding–wheel wear compensation number)<br />
at address L in the block containing G75. The compensation amount set<br />
in the offset memory area corresponding to the specified number is used<br />
as the amount of dressing.<br />
Up to 400 offset numbers (L1 to L400) can be specified. Compensation<br />
amounts must be set beforehand in offset memory corresponding to offset<br />
numbers from the MDI panel.<br />
When L is omitted or L0 is specified in a surface grinding canned cycle<br />
block, compensation is not performed.<br />
Compensation is performed for every grinding operation (every<br />
movement along the X–axis) in the operation sequences of a canned<br />
grinding cycle. While the tool moves along the X–axis, compensation is<br />
performed along the Y–axis (grinding wheel cutting) and the V–axis<br />
(dresser cutting) for simultaneous three–axis interpolation.<br />
The travel distance (compensation amount) along the Y–axis is the same<br />
as specified dressing amount, and the travel distance along the V–axis is<br />
twice as long (diameter).<br />
240
B–63534EN/02<br />
13.5<br />
AUTOMATIC<br />
GRINDING WHEEL<br />
DIAMETER<br />
COMPENSATION<br />
AFTER DRESSING<br />
13.5.1<br />
Checking the Minimum<br />
Grinding Wheel<br />
Diameter<br />
(For Grinding <strong>Machine</strong>)<br />
PROGRAMMING<br />
241<br />
13. FUNCTIONS TO SIMPLIFY<br />
PROGRAMMING<br />
Compensation amounts set in offset memory can be modified by using the<br />
external tool compensation function or programming (by changing<br />
offsets using custom macro variables).<br />
With these functions, the compensation amount for the diameter of the<br />
dressed grinding wheel can be changed.<br />
If the compensation amount associated with the offset number specified<br />
in the H code is smaller than the minimum grinding wheel diameter<br />
specified in parameter 5030 when programmed compensation (using G43<br />
or G44) is performed, a signal is output to the PMC.<br />
V<br />
Y<br />
X<br />
Grinding<br />
wheel<br />
Dresser<br />
Workpiece<br />
X<br />
a : Amount of dressing<br />
2a<br />
a
13. FUNCTIONS TO SIMPLIFY<br />
PROGRAMMING PROGRAMMING<br />
B–63534EN/02<br />
13.6<br />
IN–FEED GRINDING<br />
ALONG THE Y AND Z<br />
AXES AT THE END<br />
OF TABLE SWING<br />
(FOR GRINDING<br />
MACHINE)<br />
Format<br />
Explanations<br />
G161 R_<br />
Profile program<br />
G160<br />
Restrictions<br />
Profile program<br />
Examples<br />
Every time an external signal is input, cutting is performed by a fixed<br />
amount according to the programmed profile in the specified Y–Z plane.<br />
G161 R_ ;<br />
profile program<br />
G160 ;<br />
Specify the start of an operation mode and profile program. Also specify<br />
the depth of cut in R.<br />
Program a workpiece figure in the Y–Z plane using linear interpolation<br />
(G01) and/or circular interpolation (G02 or G03). One or more blocks can<br />
be specified.<br />
Cancel the operation mode (end of the profile program).<br />
Do not specify codes other than G01, G02, and G03 within the profile<br />
program.<br />
O0001 ;<br />
:<br />
N0 G161 R10.0 ;<br />
N1 G91 G01 Z–70.0 F100 ;<br />
N2 G19 G02 Z–80.0 R67.0 ;<br />
N3 G01 Z–70.0 ;<br />
N4 G160 ;<br />
:<br />
α<br />
70.0 80.0<br />
70.0<br />
N1<br />
242<br />
N2<br />
R=67.000<br />
In the above program, every time the in–feed cutting start signal is input,<br />
the tool is moved by 10.000 along the machining profile shown above.<br />
α= Travel distance for each in–feed control cutting start signal input<br />
The feedrate is programmed with an F code.<br />
N3
B–63534EN/02<br />
13.7<br />
OPTIONAL ANGLE<br />
CHAMFERING AND<br />
CORNER ROUNDING<br />
Format<br />
Explanations<br />
Chamfering<br />
Corner R<br />
PROGRAMMING<br />
243<br />
13. FUNCTIONS TO SIMPLIFY<br />
PROGRAMMING<br />
Chamfering and corner rounding blocks can be inserted automatically<br />
between the following:<br />
⋅Between linear interpolation and linear interpolation blocks<br />
⋅Between linear interpolation and circular interpolation blocks<br />
⋅Between circular interpolation and linear interpolation blocks<br />
⋅Between circular interpolation and circular interpolationblocks<br />
, C_<br />
, R_<br />
Chamfering<br />
<br />
When the above specification is added to the end of a block that specifies<br />
linear interpolation (G01) or circular interpolation (G02 or G03), a<br />
chamfering or corner rounding block is inserted.<br />
Blocks specifying chamfering and corner rounding can be specified<br />
consecutively.<br />
After C, specify the distance from the virtual corner point to the start and<br />
end points. The virtual corner point is the corner point that would exist<br />
if chamfering were not performed.<br />
(1) G91 G01 X100.0 ,C10.0 ;<br />
(2) X100.0 Y100.0 ;<br />
Inserted chamfering block<br />
After R, specify the radius for corner rounding.<br />
(1) G91 G01 X100.0 ,R10.0 ;<br />
(2) X100.0 Y100.0 ;<br />
Center of a circle with radius R<br />
R<br />
C<br />
C<br />
Hypothetical corner intersection
13. FUNCTIONS TO SIMPLIFY<br />
PROGRAMMING PROGRAMMING<br />
B–63534EN/02<br />
Examples<br />
N001 G92 G90 X0 Y0 ;<br />
N002 G00 X10.0 Y10.0 ;<br />
N003 G01 X50.0 F10.0 ,C5.0 ;<br />
N004 Y25.0 ,R8.0 ;<br />
N005 G03 X80.0 Y50.0 R30.0 ,R8.0 ;<br />
N006 G01 X50.0 ,R8.0 ;<br />
N007 Y70.0 ,C5.0 ;<br />
N008 X10.0 ,C5.0 ;<br />
N009 Y10.0 ;<br />
N010 G00 X0 Y0 ;<br />
N011 M0 ;<br />
70.0<br />
60.0<br />
50.0<br />
40.0<br />
30.0<br />
20.0<br />
Y<br />
N009<br />
10.0<br />
N010<br />
N011<br />
N002<br />
N003<br />
0 N001<br />
X<br />
10.0 20.0 30.0 40.0 50.0 60.0 70.0 80.0<br />
244<br />
N008<br />
N007<br />
N004<br />
N006<br />
N005
B–63534EN/02<br />
Restrictions<br />
Plane selection<br />
Next block<br />
Plane switching<br />
Exceeding the move<br />
range<br />
Coordinate system<br />
Travel distance 0<br />
Unavailable G codes<br />
<br />
<br />
PROGRAMMING<br />
245<br />
13. FUNCTIONS TO SIMPLIFY<br />
PROGRAMMING<br />
Chamfering and corner rounding can be performed only in the plane<br />
specified by plane selection (G17, G18, or G19). These functions cannot<br />
be performed for parallel axes.<br />
A block specifying chamfering or corner rounding must be followed by<br />
a block that specifies a move command using linear interpolation (G01)<br />
or circular interpolation (G02 or G03). If the next block does not contain<br />
these specifications, P/S alarm No. 052 is issued.<br />
A chamfering or corner rounding block can be inserted only for move<br />
commands which are performed in the same plane. In a block that comes<br />
immediately after plane switching (G17, G18, or G19 is specified),<br />
neither chamfering nor corner rounding can be specified.<br />
If the inserted chamfering or corner rounding block causes the tool to go<br />
beyond the original interpolation move range, P/S alarm No.055 is issued.<br />
G91 G01 X30.0 ;<br />
G03 X7.5 Y16.0 R37.0 ,C28.0 ;<br />
G03 X67.0 Y–27.0 R55.0 ;<br />
The tool path without<br />
chamfering is indicated<br />
with a solid line.<br />
C<br />
C<br />
Chamfering block to<br />
be inserted<br />
In a block that comes immediately after the coordinate system is changed<br />
(G92, or G52 to G59) or a return to the reference position (G28 to G30)<br />
is specified, neither chamfering nor corner rounding can be specified.<br />
When two linear interpolation operations are performed, the chamfering or<br />
corner rounding block is regarded as having a travel distance of zero if the<br />
angle between the two straight lines is within 1. When linear<br />
interpolation and circular interpolation operations are performed, the corner<br />
rounding block is regarded as having a travel distance of zero if the angle<br />
between the straight line and the tangent to the arc at the intersection is within<br />
1. When two circular interpolation operations are performed, the corner<br />
rounding block is regarded as having a travel distance of zero if the angle<br />
between the tangents to the arcs at the intersection is within 1 .<br />
The following G codes cannot be used in a block that specifies chamfering<br />
or corner rounding. They also cannot be used between chamfering and<br />
corner rounding blocks that define a continuous figure.<br />
⋅G codes of group 00 (except G04)<br />
⋅G68 of group 16<br />
Corner rounding cannot be specified in a threading block.<br />
Arbitrary angle chamfering and corner rounding cannot be enabled for<br />
DNC operation.
13. FUNCTIONS TO SIMPLIFY<br />
PROGRAMMING PROGRAMMING<br />
B–63534EN/02<br />
13.8<br />
EXTERNAL MOTION<br />
FUNCTION<br />
(G81)<br />
Format<br />
Explanations<br />
Restrictions<br />
A block without X or Y<br />
axis<br />
Relationship with canned<br />
cycle G81<br />
Upon completion of positioning in each block in the program, an external<br />
operation function signal can be output to allow the machine to perform<br />
specific operation.<br />
Concerning this operation, refer to the manual supplied by the machine<br />
tool builder.<br />
G81 IP_ ; ( IP_ Axis move command )<br />
Every time positioning for the IP_ move command is completed, the CNC<br />
sends a external operation function signal to the machine. An external<br />
operation signal is output for each positioning operation until canceled by<br />
G80 or a group 01 G code.<br />
No external operation signals are output during execution of a block that<br />
contains neither X nor Y.<br />
G81 can also be used for a drilling canned cycle (II–13.1.4). Whether G81<br />
is to be used for an external motion function or for a drilling canned cycle<br />
is psecified with EXC, bit 1 of parameter No.5101.<br />
246
B–63534EN/02<br />
13.9<br />
FIGURE COPY<br />
(G72.1, G72.2)<br />
Format<br />
PROGRAMMING<br />
247<br />
13. FUNCTIONS TO SIMPLIFY<br />
PROGRAMMING<br />
Machining can be repeated after moving or rotating the figure using a<br />
subprogram.<br />
Rotational copy Xp–Yp plane (specified by G17) : G72.1 P_ L_ Xp_ Yp_ R_ ;<br />
Zp–Xp plane (specified by G18) : G72.1 P_ L_ Zp_ Xp_ R_ ;<br />
Yp–Zp plane (specified by G19) : G72.1 P_ L_ Yp_ Zp_ R ;_<br />
Linear copy<br />
Explanations<br />
First block of the<br />
subprogram<br />
P :Subprogram number<br />
L :Number of times the operation is repeated<br />
Xp :Center of rotation on the Xp axis<br />
(Xp : X–axis or an axis parallel to the X–axis)<br />
Yp :Center of rotation on the Yp axis<br />
(Yp: Y–axis or an axis parallel to the Y–axis)<br />
Zp :Center of rotation on the Zp axis<br />
(Zp: Z–axis or an axis parallel to the Z–axis)<br />
R :Angular displacement<br />
(A positive value indicates a counterclockwise angular displacement.<br />
Specify an incremental value.)<br />
Specify a plane selection command (G17, G18, or G19) to select the plane on<br />
which the rotational copy is made.<br />
Xp–Yp plane (specified by G17) : G72.2 P_ L_ I_ J_ ;<br />
Zp–Xp plane (specified by G18) : G72.2 P_ L_ K_ I_ ;<br />
Yp–Zp plane (specified by G19) : G72.2 P_ L_ J_ K_;<br />
P :Subprogram number<br />
L :Number of times the operation is repeated<br />
I :Shift along the Xp axis<br />
J :Shift along the Yp axis<br />
K :Shift along the Zp axis<br />
Specify a plane selection command (G17, G18, or G19) to select the plane on<br />
which the linear copy is made.<br />
Always specify a move command in the first block of a subprogram that<br />
performs a rotational or linear copy. If the first block contains only the<br />
program number such as O1234; and does not have a move command,<br />
movement may stop at the start point of the figure made by the n–th (n<br />
= 1, 2, 3, ...) copying.<br />
Specify the first move command in the absolute mode.<br />
(Example of an incorrect program)<br />
O1234 ;<br />
G00 G90 X100.0 Y200.0 ;<br />
⋅⋅⋅⋅ ;<br />
⋅⋅⋅⋅ ;<br />
M99 ;
13. FUNCTIONS TO SIMPLIFY<br />
PROGRAMMING PROGRAMMING<br />
B–63534EN/02<br />
Combination of<br />
rotational and linear<br />
copying<br />
Subprogram calling<br />
Specifying the center of<br />
rotation<br />
Specifying address<br />
Address P<br />
Address L<br />
<strong>Inc</strong>rement in angular<br />
displacement or shift<br />
Nesting level of a<br />
subprogram<br />
Block end position<br />
Disagreement between<br />
end point and start point<br />
(Example of a correct program)<br />
O1000 G00 G90 X100.0 Y200.0 ;<br />
⋅⋅⋅⋅ ;<br />
⋅⋅⋅⋅ ;<br />
M99 ;<br />
The linear copy command can be specified in a subprogram for a<br />
rotational copy. Also, the rotational copy command can be specified in<br />
a subprogram for a linear copy.<br />
In a subprogram for rotational or linear copying, M98 for calling another<br />
subprogram or G65 for calling a macro can be specified.<br />
The center of rotation specified with G72.1 is processed as an absolute<br />
position even in the incremental mode.<br />
In a block with G72.1, addresses other than P, L, Xp, Yp, Zp, or R are<br />
ignored. The subprogram number (P), coordinates of the center of<br />
rotation (Xp, Yp, Zp), and angular displacement (R) must be specified.<br />
In a block with G72.2, addresses other than P, L, I, J, or K are ignored.<br />
The subprogram number (P) and shift (I, J, K) must be specified.<br />
If the subprogram number specified with P is not found, P/S alarm No.<br />
078 occurs. If P is not specified, P/S alarm No. 076 occurs.<br />
If L is omitted, the repetition count is assumed to be 1 and the sub–<br />
program is called only once.<br />
In a block with G72.1, an increment in angular displacement is specified<br />
with address R. The angular displacement of the figure made by the n–th<br />
rotation is calculated as follows : R x (n – 1).<br />
In a block with G72.2, an increment in shift is specified with addresses<br />
I, J, and K. The shift of the figure made by the n–th movement is<br />
calculated as follows : (Programmed shift) x (n – 1).<br />
If a subprogram is called by G72.1 or G72.2, the nesting level is increased<br />
by one in the same manner as when M98 is specified.<br />
The coordinates of a figure moved rotationally or linearly (block end<br />
position) can be read from #5001 and subsequent system variables of the<br />
custom macro of rotational or linear copy.<br />
If the end point of the figure made by the n–th copy does not agree with<br />
the start point of the figure to be made by the next (n + 1) copy, the figure<br />
is moved from the end point to the start point, then copying is started.<br />
(Generally, this disagreement occurs if an incorrect angular displacement<br />
or shift is specified.)<br />
248
B–63534EN/02<br />
Start point<br />
Limitations<br />
Y<br />
P1<br />
P2<br />
<br />
P3<br />
<br />
P0<br />
Specifying two or more<br />
commands to copy a<br />
figure<br />
Commands that must not<br />
be specified<br />
PROGRAMMING<br />
P4 P5<br />
<br />
<br />
90<br />
Main program<br />
End point of the first copy<br />
<br />
P6 P7<br />
249<br />
13. FUNCTIONS TO SIMPLIFY<br />
PROGRAMMING<br />
Start point of the second copy<br />
O1000 ;<br />
N10 G92 X–20.0 Y0 ;<br />
N20 G00 G90 X0 Y0 ;<br />
N30 G01 G17 G41 X20. Y0 D01 F10 ; (P0)<br />
N40 Y20. ; (P1)<br />
N50 X30. ; (P2)<br />
N60 G72.2 P2000 L3 I90. J0 ;<br />
Although a shift of 70 mm was required, I90.0 was<br />
specified instead of I70.0. Since an incorrect shift<br />
was specified, the end point of the figure made by<br />
the n–th copy disagrees with the start point of the<br />
figure to be made by the next (n + 1) copy.<br />
Subprogram<br />
O2000 G90 G01 X40. ; (P3)<br />
N100 Y40. ; (P4)<br />
N200 G01 X80. ; (P5)<br />
N300 G01 Y20. ; (P6)<br />
N400 X100. ;<br />
N500 M99;<br />
(P7)<br />
G72.1 cannot be specified more than once in a subprogram for making a<br />
rotational copy (If this is attempted, P/S alarm No.160 will occur). G72.2<br />
cannot be specified more than once in a subprogram for making a linear<br />
copy (If this is attempted, P/S alarm No. 161 will occur).<br />
Within a program that performs a rotational or linear copy, the following<br />
must not be specified:<br />
⋅Command for changing the selected plane (G17 to G19)<br />
⋅Command for specifying polar coordinates<br />
⋅Reference position return command<br />
⋅Coordinate system rotation, scaling, programmable mirror image<br />
The command for rotational or linear copying can be specified after a<br />
command for coordinate system rotation, scaling, or programmable<br />
mirror image is executed.<br />
X
13. FUNCTIONS TO SIMPLIFY<br />
PROGRAMMING PROGRAMMING<br />
B–63534EN/02<br />
Modes that must not be<br />
selected<br />
Unit system<br />
Single block<br />
Specifying cutter<br />
compensation and the<br />
workpiece coordinate<br />
system<br />
Examples<br />
Rotational copy<br />
The figure cannot be copied during chamfering, corner rounding, or tool<br />
offset.<br />
The two axes of the plane for copying a figure must have an identical unit<br />
system.<br />
Single–block stops are not performed in a block with G721.1 or G72.2.<br />
In a subprogram for copying a figure, the G code for cutter compensation<br />
B or C or compensation amount (H or D code) cannot be changed. G92<br />
and G54 to G59 cannot be changed either. Those codes must be specified<br />
before figure copying is started.<br />
250<br />
P6<br />
<br />
P5<br />
Y<br />
120<br />
P3<br />
Start point<br />
P2<br />
P0<br />
P1 X<br />
Main program<br />
O1000 ;<br />
N10 G92 X40.0 Y50.0 ;<br />
N20 G00 G90 X_ Y_ ; (P0)<br />
N30 G01 G17 G41 X_ Y_ D01 F10 ; (P1)<br />
N40 G72.1 P2000 L3 X0 Y0 R120.0 ;<br />
N50 G40 G01 X_ Y_ I_ J_ (P0)<br />
N60 G00 X40.0 Y50.0 ;<br />
N70 M30 ;<br />
Sub program<br />
O2000 G03 X_ Y_ R30.0 ; (P2)<br />
N100 G01 X_ Y_ ; (P3)<br />
N200 G03 X_ Y_ R10.0 ; (P4)<br />
N300 G01 X_ Y_ ; (P5)<br />
N400 G03 X_ Y_ R30.0 ; (P6)<br />
N500 M99;
B–63534EN/02<br />
Rotational copy<br />
(spot boring)<br />
PROGRAMMING<br />
251<br />
Y<br />
60°<br />
13. FUNCTIONS TO SIMPLIFY<br />
PROGRAMMING<br />
Main program<br />
O3000 ;<br />
N10 G92 G17 X80.0 Y50.0 ; (P0)<br />
N20 G72.1 P4000 L6 X0 Y0 R60.0 ;<br />
N30 G80 G00 X80.0 Y50.0 ; (P0)<br />
N40 M30 ;<br />
Subprogram<br />
O4000 N100 G90 G81 X_ Y_ R_ Z_ F_ ; (P1)<br />
N200 M99 ;<br />
P1<br />
P0<br />
Start point<br />
X
13. FUNCTIONS TO SIMPLIFY<br />
PROGRAMMING PROGRAMMING<br />
B–63534EN/02<br />
Linear copy<br />
Start point<br />
Y<br />
P2<br />
P1<br />
P0<br />
Main program<br />
O1000 ;<br />
N10 G92 X–20.0 Y0 ;<br />
N20 G00 G90 X0 Y0 ;<br />
N30 G01 G17 G41 X_ Y_ D01 F10 ; (P0)<br />
N40 Y_ ; (P1)<br />
N50 X_ ; (P2)<br />
N60 G72.2 P2000 L3 I70.0 J0 ;<br />
N70 X_ Y_ ; (P8)<br />
N80 X0 ;<br />
N90 G00 G40 X–20.0 Y0 ;<br />
N100 M30 ;<br />
Subprogram<br />
O2000 G90 G01 X_ ; (P3)<br />
N100 Y_ ; (P4)<br />
N200 G02 X_ I_ ; (P5)<br />
N300 G01 Y_ ; (P6)<br />
N400 X_ ;<br />
N500 M99 ;<br />
(P7)<br />
252<br />
P4<br />
P3<br />
P5<br />
P<br />
6<br />
P7<br />
70 70 70<br />
P8<br />
X
B–63534EN/02<br />
Combination of rotational<br />
copying and linear<br />
copying (bolt hole circle)<br />
PROGRAMMING<br />
Y<br />
253<br />
45<br />
13. FUNCTIONS TO SIMPLIFY<br />
PROGRAMMING<br />
Main program<br />
O1000 ;<br />
N10 G92 G17 X100.0 Y80.0 ; (P0)<br />
N20 G72.1 P2000 X0 Y0 L8 R45.0 ;<br />
N30 G80 G00 X100.0 Y80.0 ; (P0)<br />
N40 M30 ;<br />
Subprogram (rotational copy)<br />
P1<br />
O2000 N100 G72.2 P3000 I0 J_ L3 ;<br />
N200 M99 ;<br />
Subprogram (linear copy)<br />
P0<br />
Start point<br />
O3000 N110 G90 G81 X_ Y_ R_ Z_ F_ ; (P1)<br />
N210 M99 ;<br />
X
13. FUNCTIONS TO SIMPLIFY<br />
PROGRAMMING PROGRAMMING<br />
B–63534EN/02<br />
13.10<br />
THREE–<br />
DIMENSIONAL<br />
COORDINATE<br />
CONVERSION<br />
(G68, G69)<br />
Format<br />
Explanations<br />
Command for<br />
three–dimensional<br />
coordinate conversion<br />
(program coordinate<br />
system)<br />
Coordinate conversion about an axis can be carried out if the center of<br />
rotation, direction of the axis of rotation, and angular displacement are<br />
specified. This function is very useful in three–dimensional machining<br />
by a die–sinking machine or similar machine. For example, if a program<br />
specifying machining on the XY plane is converted by the three–<br />
dimensional coordinate conversion function, the identical machining can<br />
be executed on a desired plane in three–dimensional space.<br />
X<br />
Z<br />
254<br />
Y<br />
Three–dimensional coordinate conversion<br />
Z Y<br />
X<br />
G68 Xp x 1 Yp y 1 Zp z 1 I i1 J j 1 K k 1 R α ; Starting three–dimensional<br />
coordinate conversion<br />
<br />
<br />
<br />
<br />
G69 <br />
Three–dimensional coordinate<br />
conversion mode<br />
Canceling three–dimensional<br />
coordinate conversion<br />
Xp, Yp, Zp: Center of rotation (absolute coordinates) on the X, Y, and Z<br />
axis or parallel axes<br />
I, J, K : Direction of the axis of rotation<br />
R : Angular displacement<br />
N1 G68 Xp x1 Yp y1 Zp z1 I i1 J j1 K k1 R α ;<br />
N2 G68 Xp x2 Yp y2 Zp z2 I i2 J j2 K k2 R β ;<br />
Three–dimensional coordinate conversion can be executed twice.<br />
In the N1 block, specify the center, direction of the axis of rotation, and<br />
angular displacement of the first rotation. When this block is executed,<br />
the center of the original coordinate system is shifted to (x1, y1, z1), then<br />
rotated around the vector (i1, j1, k1) by angular displacement α. The new<br />
coordinate system is called X’Y’Z’. In the N2 block, specify the center,<br />
direction of the axis of rotation, and angular displacement of the second<br />
rotation. In the N2 block, specify coordinates and the angle with the<br />
coordinate system formed after the N1 block in Xp, Yp, Zp, I, J, K, and<br />
R. When the N2 block is executed, the X’Y’Z’ coordinate system is<br />
shifted to (x2, y2, z2), then rotated around the vector (i2, j2, k2) by angular<br />
displacement β . The newest coordinate system is called X’’Y’’Z’’. In the
B–63534EN/02<br />
Format error<br />
Center of rotation<br />
PROGRAMMING<br />
255<br />
13. FUNCTIONS TO SIMPLIFY<br />
PROGRAMMING<br />
subsequent N3 block, coordinates in the X’’Y’’Z’’ coordinate system are<br />
specified with Xp, Yp, and Zp. The X’’Y’’Z’’ coordinate system is called<br />
the program coordinate system.<br />
If (Xp, Yp, Zp) is not specified in the N2 block, (Xp, Yp, Zp) in the N1<br />
block is assumed to be the center of the second rotation (the N1 and N2<br />
blocks have a common center of rotation). If the coordinate system is to<br />
be rotated only once, the N2 block need not be specified.<br />
Example) G68 Xx 0 Yy 0 Zz 0 I0 J0 K1 Rα ;<br />
G68 I1 J0 K0 Rβ ;<br />
Z<br />
Y<br />
X<br />
α<br />
Z<br />
O(x 0,y 0,z 0)<br />
Z’<br />
P (x, y, z)<br />
X, Y, Z : Workpiece coordinate system<br />
X’, Y’, Z’ : Coordinate system formed after the first conversion<br />
X”, Y”, Z” : Coordinate system formed after the second conversion<br />
α : Angular displacement of the first rotation<br />
β : Angular displacement of the second rotation<br />
O (x 0, y 0, z 0): Center of rotation<br />
P (x, y, z) : Coordinates in the X’’Y’’Z’’ coordinate system (program<br />
coordinate system)<br />
If one of the following format errors is detected, P/S alarm No. 5044<br />
occurs:<br />
1. When I, J, or K is not specified in a block with G68<br />
(a parameter of coordinate system rotation is not specified)<br />
2. When I, J, and K are all set to 0 in a block with G68<br />
3. When R is not specified in a block with G68<br />
Specify absolute coordinates with Xp, Yp, and Zp in the G68 block.<br />
β<br />
x<br />
β<br />
y<br />
α<br />
z<br />
Y<br />
Y’
13. FUNCTIONS TO SIMPLIFY<br />
PROGRAMMING PROGRAMMING<br />
B–63534EN/02<br />
Equation for<br />
three–dimensional<br />
coordinate conversion<br />
The following equation shows the general relationship between (x, y, z)<br />
in the program coordinate system and (X, Y, Z) in the original coordinate<br />
system (workpiece coordinate system).<br />
X<br />
Y<br />
Z<br />
X<br />
Y<br />
Z<br />
M 1<br />
M 1<br />
256<br />
x<br />
y<br />
z<br />
<br />
x 1<br />
y 1<br />
z 1<br />
When conversion is carried out twice, the relationship is expressed as follows:<br />
x<br />
x2 M y<br />
y<br />
2 M1 2 <br />
z<br />
z2 x 1<br />
y 1<br />
z 1<br />
X, Y, Z : Coordinates in the original coordinate system<br />
(workpiece coordinate system)<br />
x, y, z : Programmed value<br />
(coordinates in the program coordinate system)<br />
x 1, y 1, z 1 : Center of rotation of the first conversion<br />
x 2, y 2, z 2 : Center of rotation of the second conversion<br />
(coordinates in the coordinate system formed after the<br />
first conversion)<br />
M 1 : First conversion matrix<br />
M 2 : Second conversion matrix<br />
M1 and M2 are conversion matrices determined by an angular displacement and<br />
rotation axis. Generally, the matrices are expressed as shown below:<br />
n1 2 +(1–n1 2 ) cosθ n1n2 (1–cosθ)–n3sinθ n1n3 (1–cosθ)+n2sinθ<br />
n1 n2 (1–cosθ)+n3 sinθ n2 2 +(1–n2 2 ) cosθ n2 n3 (1–cosθ)–n1 sinθ<br />
n1 n3 (1–cosθ)–n2 sinθ n2 n3 (1–cosθ)+n1 sinθ n3 2 +(1–n3 2 ) cosθ<br />
n1 i<br />
: Cosine of the angle made by the rotation axis and X–axis<br />
p<br />
n2 : Cosine of the angle made by the rotation axis and Y–axis<br />
p<br />
j<br />
k<br />
n3 : Cosine of the angle made by the rotation axis and Z–axis<br />
p<br />
θ : Angular displacement<br />
Value p is obtained by the following:<br />
p = i 2 +j 2 +k 2<br />
Conversion matrices for rotation on two–dimensional planes are shown below:<br />
(1) Coordinate conversion on the XY plane<br />
M=<br />
M=<br />
cosθ –sinθ 0<br />
sinθ cosθ 0<br />
0 0 1<br />
(2) Coordinate conversion on the YZ plane<br />
1 0 0<br />
0 cosθ –sinθ<br />
0 sinθ cosθ<br />
(3) Coordinate conversion on the ZX plane<br />
M=<br />
cosθ 0 sinθ<br />
0 1 0<br />
–sinθ 0 cosθ
B–63534EN/02<br />
Three basic axes and<br />
their parallel axes<br />
Specifying the second<br />
conversion<br />
Angular displacement R<br />
G codes that can be<br />
specified<br />
PROGRAMMING<br />
257<br />
13. FUNCTIONS TO SIMPLIFY<br />
PROGRAMMING<br />
Three–dimensional coordinate conversion can be applied to a desired<br />
combination of three axes selected out of the basic three axes (X, Y, Z) and<br />
their parallel axes. The three–dimensional coordinate system subjected<br />
to three–dimensional coordinate conversion is determined by axis<br />
addresses specified in the G68 block. If Xp, Yp, or Zp is not specified,<br />
X, Y, or Z of the basic three axes is assumed. However, if the basic three<br />
axes are not specified in parameter 1022, P/S alarm No. 048 occurs.<br />
In a single G68 block, both a basic axis and a parallel axis cannot be<br />
specified. If this is attempted, P/S alarm No.047 occurs.<br />
(Example)<br />
When U–axis, V–axis, and W–axis are parallel to the X–axis, Y–axis, and<br />
Z–axis respectively<br />
G68 X_ I_ J_ K_ R_ ; XYZ coordinate system<br />
G68 U_V_ Z_ I_ J_ K_ R_ ; UVZ coordinate system<br />
G68 W_ I_ J_ K_ R_ ; XYW coordinate system<br />
Three–dimensional coordinate conversion can be executed twice. The<br />
center of rotation of the second conversion must be specified with the axis<br />
addresses specified for the first conversion. If the axis addresses of the<br />
second conversion are different from the axis addresses of the first<br />
conversion, the different axis addresses are ignored. An attempt to<br />
execute three–dimensional coordinate conversion three or more times<br />
causes P/S alarm No.5043.<br />
A positive angular displacement R indicates a clockwise rotation along<br />
the axis of rotation. Specify angular displacement R in 0.001 degrees<br />
within the range of –360000 to 360000.<br />
The following G codes can be specified in the three–dimensional<br />
coordinate conversion mode:<br />
G00 Positioning<br />
G01 Linear interpolation<br />
G02 Circular interpolation (clockwise)<br />
G03 Circular interpolation (counterclockwise)<br />
G04 Dwell<br />
G10 Data setting<br />
G17 Plane selection (XY)<br />
G18 Plane selection (ZX)<br />
G19 Plane selection (YZ)<br />
G28 Reference position return<br />
G29 Return from the reference position<br />
G30 Return to the second, third, or fourth reference position<br />
G40 Canceling cutter compensation<br />
G41 Cutter compensation to the left<br />
G42 Cutter compensation to the right<br />
G43 <strong>Inc</strong>reasing tool length compensation<br />
G44 Decreasing tool length compensation<br />
G45 <strong>Inc</strong>reasing the tool offset<br />
G46 Decreasing the tool offset<br />
G47 Doubling the tool offset<br />
G48 Halving the tool offset<br />
G49 Canceling tool length compensation<br />
G50.1 Canceling programmable mirror image<br />
G51.1 Programmable mirror image
13. FUNCTIONS TO SIMPLIFY<br />
PROGRAMMING PROGRAMMING<br />
B–63534EN/02<br />
Rapid traverse rate in<br />
drilling of a canned cycle<br />
Compensation functions<br />
Relationship between<br />
three–dimensional and<br />
two–dimensional<br />
coordinate conversion<br />
(G68, G69)<br />
Custom macro system<br />
variables<br />
Reset<br />
Absolute position<br />
display<br />
Three–dimensional rigid<br />
tapping<br />
G53 Selecting the machine coordinate system<br />
G65 Custom macro calling<br />
G66 Continuous–state custom macro calling<br />
G67 Canceling continuous–state custom macro calling<br />
G73 Canned cycle (peck drilling cycle)<br />
G74 Canned cycle (reverse tapping cycle)<br />
G76 Canned cycle (fine boring cycle)<br />
G80 Canceling a canned cycle<br />
G81 to G89 Canned cycle<br />
G90 Absolute mode<br />
G91 <strong>Inc</strong>remental mode<br />
G94 Feed per minute<br />
G95 Feed per rotation<br />
G98 Canned cycle (return to the initial level)<br />
G99 Canned cycle (return to the level of point R)<br />
In the three–dimensional coordinate conversion mode, the rapid traverse<br />
rate in drilling of a canned cycle equals the maximum cutting feedrate.<br />
If tool length compensation, cutter compensation, or tool offset is<br />
specified with three–dimensional coordinate conversion, compensation<br />
is performed first, followed by three–dimensional coordinate conversion.<br />
Three–dimensional and two–dimensional coordinate conversion use<br />
identical G codes (G68 and G69). A G code specified with I, J, and K is<br />
processed as the command for three–dimensional coordinate conversion.<br />
A G code not specified with I, J, and K is processed as the command for<br />
two–dimensional coordinate conversion.<br />
Coordinates on the workpiece coordinate system are assigned to system<br />
variables #5041 to #5048 (current position on each axis).<br />
If a reset occurs during three–dimensional coordinate conversion mode,<br />
the mode is canceled and the continuous–state G code is changed to G69.<br />
The absolute coordinates based on the program or workpiece coordinate<br />
system can be displayed in the three–dimensional coordinate conversion<br />
mode. Specify a desired coordinate system in the DAK bit (bit 6 of<br />
parameter 3106).<br />
By specifying the rigid tapping command in three–dimensional<br />
coordinate conversion mode, tapping can be executed in the direction of<br />
the angle programmed by the three–dimensional coordinate conversion<br />
command.<br />
In three–dimensional coordinate conversion mode, ”Position Error Z”,<br />
displayed on the spindle adjustment screen, is taken from the longitudinal<br />
tapping axis after three–dimensional conversion.<br />
Positioning in three–dimensional coordinate conversion mode must be<br />
linear interpolation positioning (the LRP bit (bit 1 of parameter 1401) is<br />
set to 1).<br />
Three–dimensional rigid tapping cannot be executed for an axis under<br />
simple synchronous control.<br />
258
B–63534EN/02<br />
Limitations<br />
manual intervention<br />
Positioning in the<br />
machine coordinate<br />
system<br />
Specifying rapid traverse<br />
Block with G68 or G69<br />
Mirror image<br />
Position display and<br />
compensation<br />
Three–dimensional<br />
coordinate conversion<br />
and other<br />
continuous–state<br />
commands<br />
PROGRAMMING<br />
259<br />
13. FUNCTIONS TO SIMPLIFY<br />
PROGRAMMING<br />
Three–dimensional coordinate conversion does not affect the degree of<br />
manual intervention or manual handle interrupt.<br />
Three–dimensional coordinate conversion does not affect positioning in<br />
the machine coordinate system (e.g. specified with G28, G30, or G53).<br />
Specify linear rapid traverse when three–dimensional coordinate<br />
conversion is executed. (Set the LRP bit, bit 1 of parameter No.1401, to<br />
1.)<br />
In a block with G68 or G69, other G codes must not be specified. G68<br />
must be specified with I, J, and K.<br />
Programmable mirror image can be specified, but external mirror image<br />
(mirror image by the mirror image signal or setting) cannot be specified.<br />
Three–dimensional coordinate conversion is carried out after the<br />
programmable mirror image function is executed.<br />
To display the absolute position when three–dimensional coordinate<br />
conversion is executed, set bits 4 to 7 of parameter DRL, DRC, DAL, and<br />
DAC No.3104 to 0.<br />
Canned cycles G41, G42, or G51.1 must be nested between G68 and G69.<br />
(Example)<br />
G68 X100. Y100. Z100. I0. J0. K1. R45. ;<br />
G41 D01 ;<br />
<br />
G40 ;<br />
<br />
G69 ;
13. FUNCTIONS TO SIMPLIFY<br />
PROGRAMMING PROGRAMMING<br />
B–63534EN/02<br />
Examples<br />
N1 G90 X0 Y0 Z0 ; Carries out positioning to zero point H.<br />
N2 G68 X10. Y0 Z0 I0 J1 K0 R30. ; Forms new coordinate system X’Y’Z’.<br />
N3 G68 X0 Y–10. Z0 I0 J0 K1 R–90. ; Forms other coordinate system X’’Y’’Z’’.<br />
The origin agrees with (0, –10, 0) in<br />
coordinate system X’Y’Z.<br />
N4 G90 X0 Y0 Z0 ; Carries out positioning to zero point H’’ on<br />
coordinate system X’’Y’’Z’’.<br />
N5 X10. Y10. Z0 ; Carries out positioning to (10, 10, 0) on<br />
coordinate system X’’Y’’Z’’.<br />
Z<br />
260<br />
Y Y’<br />
H<br />
N4<br />
30°<br />
10<br />
Z’<br />
Z”<br />
H”<br />
H’<br />
–10<br />
X”<br />
N5<br />
(10, 10, 0)<br />
X’<br />
Y”<br />
30°<br />
X
B–63534EN/02<br />
13.11<br />
INDEX TABLE<br />
INDEXING FUNCTION<br />
Explanations<br />
Indexing position<br />
<br />
<br />
PROGRAMMING<br />
261<br />
13. FUNCTIONS TO SIMPLIFY<br />
PROGRAMMING<br />
By specifying indexing positions (angles) for the indexing axis (one<br />
rotation axis, A, B, or C), the index table of the machining center can be<br />
indexed.<br />
Before and after indexing, the index table is automatically unclamped or<br />
clamped .<br />
Specify an indexing position with address A, B, or C (set to bit 0 of<br />
parameter ROTx No.1006).<br />
The indexing position is specified by either of the following (depending<br />
on bit 4 of parameter G90 No.5500):<br />
1. Absolute value only<br />
2. Absolute or incremental value depending on the specified G code:<br />
G90 or G91<br />
A positive value indicates an indexing position in the counterclockwise<br />
direction. A negative value indicates an indexing position in the<br />
clockwise direction.<br />
The minimum indexing angle of the index table is the value set to<br />
parameter 5512. Only multiples of the least input increment can be<br />
specified as the indexing angle. If any value that is not a multiple is<br />
specified, an P/S alarm (No. 135) occurs. Decimal fractions can also be<br />
entered. When a decimal fraction is entered, the 1’s digit corresponds to<br />
degree units.<br />
A Value specified for rotation from A to B<br />
(case 2 described above)<br />
G90 B–45.0 ; or<br />
+60°<br />
G91 B–105.0;<br />
0°<br />
–45°<br />
B<br />
The direction of rotation and angular displacement are determined by<br />
either of the following two methods. Refer to the manual written by the<br />
machine tool builder to find out which method is applied.<br />
1. Using the miscellaneous function specified in parameter No. 5511<br />
(Address) (Indexing position) (Miscellaneous function);<br />
Rotation in the negative direction<br />
(Address) (Indexing position);<br />
Rotation in the positive direction (No miscellaneous functions are<br />
specified.)<br />
An angular displacement greater than 360°is rounded down to the<br />
corresponding angular displacement within 360°when bit 2 of<br />
parameter ABS No. 5500 specifies this option.<br />
For example, when G90 B400.0 (miscellaneous function); is specified<br />
at a position of 0 , the table is rotated by 40°in the negative direction.
13. FUNCTIONS TO SIMPLIFY<br />
PROGRAMMING PROGRAMMING<br />
B–63534EN/02<br />
<br />
2. Using no miscellaneous functions<br />
By setting to bits 2, 3, and 4 of parameter ABS, INC,G90 No.5500,<br />
operation can be selected from the following two options.<br />
Select the operation by referring to the manual written by the machine<br />
tool builder.<br />
(1)Rotating in the direction in which an angular displacement<br />
becomes shortest<br />
This is valid only in absolute mode. A specified angular<br />
dis–placement greater than 360° is rounded down to the<br />
correspond–ing angular displacement within 360° when bit 2 of<br />
parameter ABS No.5500 specifies this option.<br />
For example, when G90 B400.0; is specified at a position of 0, the<br />
table is rotated by 40°in the positive direction.<br />
(2)Rotating in the specified direction<br />
In the absolute mode, the value set in bit 2 of parameter ABS<br />
No.5500 determines whether an angular displacement greater than<br />
360° is rounded down to the corresponding angular displacement<br />
within 360°.<br />
In the incremental mode, the angular displacement is not rounded<br />
down.<br />
For example, when G90 B720.0; is specified at a position of 0, the<br />
table is rotated twice in the positive direction, when the angular<br />
displacement is not rounded down.<br />
The table is always rotated around the indexing axis in the rapid traverse<br />
mode.<br />
Dry runs cannot be executed for the indexing axis.<br />
WARNING<br />
If a reset is made during indexing of the index table, a<br />
reference position return must be made before each time<br />
the index table is indexed subsequently.<br />
NOTE<br />
1 Specify the indexing command in a single block. If the<br />
command is specified in a block in which another controlled<br />
axis is specified, P/S alarm (No.136) occurs.<br />
2 The waiting state which waits for completion of clamping or<br />
unclamping of the index table is indicated on diagnostic<br />
screen 12.<br />
3 The miscellaneous function specifying a negative direction<br />
is processed in the CNC.<br />
The relevant M code signal and completion signal are sent<br />
between the CNC and the machine.<br />
4 If a reset is made while waiting for completion of clamping<br />
or unclamping, the clamp or unclamp signal is cleared and<br />
the CNC exits the completion wait state.<br />
262
B–63534EN/02<br />
<br />
<br />
Relative position display<br />
Absolute position display<br />
PROGRAMMING<br />
Table 13.11 (a) Index indexing function and other functions<br />
Item Explanation<br />
Automatic return from the reference position (G29)<br />
2nd reference position return (G30) Impossible to return<br />
Movement in the machine coordinate system Impossible to move<br />
Single direction positioning Impossible to specify<br />
263<br />
13. FUNCTIONS TO SIMPLIFY<br />
PROGRAMMING<br />
This value is rounded down when bit 1 of parameter REL No. 5500<br />
specifies this option.<br />
This value is rounded down when bit 2 of parameterABS No. 5500<br />
specifies this option.<br />
2nd auxiliary function (B code) Possible with any address other than B that of the indexing axis.<br />
Operations while moving the indexing axis<br />
SERVO OFF signal<br />
<strong>Inc</strong>remental commands for indexing the index<br />
table<br />
Operations for indexing the index table<br />
Unless otherwise processed by the machine, feed hold, interlock<br />
and emerrgency stop can be executed. <strong>Machine</strong> lock can be<br />
executed after indexing is completed.<br />
Disabled<br />
The indexing axis is usually in the servo–off state.<br />
The workpiece coordinate system and machine coordinate system<br />
must always agree with each other on the indexing axis (the workpiece<br />
zero point offset value is zero.).<br />
Manual operation is disabled in the JOG, INC, or HANDLE mode.<br />
A manual reference position return can be made. If the axis selection<br />
signal is set to zero during manual reference position return,<br />
movement is stopped and the clamp command is not executed.
14. COMPENSATION FUNCTION PROGRAMMING<br />
B–63534EN/02<br />
14 <br />
<br />
<br />
This chapter describes the following compensation functions:<br />
14.1 TOOL LENGTH OFFSET (G43, G44, G49)<br />
14.2 AUTOMATIC TOOL LENGTH MEASUREMENT (G37)<br />
14.3 TOOL OFFSET (G45–G48)<br />
14.4 CUTTER COMPENSATION B (G39–G42)<br />
14.5 CUTTER COMPENSATION C (G40–G42)<br />
14.6 DETAILS OF CUTTER COMPENSATION C<br />
14.7 THREE–DIMENSIONAL TOOL COMPENSATION (G40, G41)<br />
14.8 TOOL COMPENSATION VALUES, NU<strong>MB</strong>ER OF<br />
COMPENSATION VALUES, AND ENTERING VALUES FROM<br />
THE PROGRAM (G10)<br />
14.9 SCALING (G50, G51)<br />
14.10 COORDINATE SYSTEM ROTATION (G68, G69)<br />
14.11 NORMAL DIRECTION CONTROL<br />
(G40.1, G41.1, G42.1 OR G150, G151, G152)<br />
14.12 PROGRAMMABLE MIRROR IMAGE (G50.1, G51.1)<br />
14.13 GRINDING WHEEL WEAR COMPENSATION<br />
14.14 ROTARY TABLE DYNAMIC FIXTURE OFFSET<br />
264
B–63534EN/02<br />
14.1<br />
TOOL LENGTH<br />
OFFSET<br />
(G43, G44, G49)<br />
14.1.1<br />
General<br />
Format<br />
PROGRAMMING<br />
265<br />
14. COMPENSATION FUNCTION<br />
This function can be used by setting the difference between the tool length<br />
assumed during programming and the actual tool length of the tool used<br />
into the offset memory. It is possible to compensate the difference without<br />
changing the program.<br />
Specify the direction of offset with G43 or G44. Select a tool length offset<br />
value from the offset memory by entering the corresponding address and<br />
number (H code).<br />
Tool assumed during<br />
programming<br />
ÇÇ<br />
ÇÇ<br />
ÇÇ<br />
ÇÇ<br />
ÇÇ<br />
ÇÇ<br />
ÇÇ<br />
Fig. 14.1 Tool length offset<br />
Actual tool<br />
Specify this distance<br />
as the value of tool<br />
length offset.<br />
The following three methods of tool length offset can be used, depending<br />
on the axis along which tool length offset can be made.<br />
⋅Tool length offset A<br />
Compensates for the difference in tool length along the Z–axis.<br />
⋅Tool length offset B<br />
Compensates for the difference in tool length along the X–,Y–,or<br />
Z–axis.<br />
⋅Tool length offset C<br />
Compensates for the difference in tool length along a specified axis.<br />
Tool length offset A<br />
Tool length offset B<br />
Tool length offset C<br />
Tool length offset<br />
cancel<br />
G43 Z_ H_ ;<br />
G44 Z_ H_ ;<br />
G17 G43 Z_ H_ ;<br />
G17 G44 Z_ H_ ;<br />
G18 G43 Y_ H_ ;<br />
G18 G44 Y_ H_ ;<br />
G19 G43 X_ H_ ;<br />
G19 G44 X_ H_ ;<br />
G43 α_ H_ ;<br />
G44 α_ H_ ;<br />
G49 ; or H0 ;<br />
Explanation of each address<br />
G43 : Positive offset<br />
G44 : Negative offset<br />
G17 : XY plane selection<br />
G18 : ZX plane selection<br />
G19 : YZ plane selection<br />
α : Address of a specified<br />
axis<br />
H : Address for specifying<br />
the tool length offset<br />
value
14. COMPENSATION FUNCTION PROGRAMMING<br />
B–63534EN/02<br />
<br />
Selection of tool length<br />
offse<br />
Direction of the offset<br />
Specification of the tool<br />
length offset value<br />
When OFH (bit 2 of<br />
parameter No. 5001) = 0<br />
When OFH (bit 2 of<br />
parameter No. 5001) = 1<br />
Select tool length offset A, B, or C, by setting bits 0 and 1 of parameter<br />
TLC,TLB No. 5001.<br />
When G43 is specified, the tool length offset value (stored in offset<br />
memory) specified with the H code is added to the coordinates of the end<br />
position specified by a command in the program. When G44 is specified,<br />
the same value is subtracted from the coordinates of the end position. The<br />
resulting coordinates indicate the end position after compensation,<br />
regardless of whether the absolute or incremental mode is selected.<br />
If movement along an axis is not specified, the system assumes that a<br />
move command that causes no movement is specified. When a positive<br />
value is specified for tool length offset with G43, the tool is moved<br />
accordingly in the positive direction. When a positive value is specified<br />
with G44, the tool is moved accordingly in the negative direction. When<br />
a negative value is specified, the tool is moved in the opposite direction.<br />
G43 and G44 are modal G codes. They are valid until another G code<br />
belonging to the same group is used.<br />
The tool length offset value assigned to the number (offset number)<br />
specified in the H code is selected from offset memory and added to or<br />
subtracted from the moving command in the program.<br />
(1) Tool length offset A/B<br />
When the offset numbers for tool length offset A/B are specified or<br />
modified, the offset number validation order varies, depending on the<br />
condition, as described below.<br />
O××××;<br />
H01 ;<br />
:<br />
G43Z_ ; (1)<br />
:<br />
G44Z_H02 ; (2)<br />
:<br />
H03 ; (3)<br />
:<br />
O××××;<br />
H01 ;<br />
:<br />
G43Z_ ; (1)<br />
:<br />
G44Z_H02 ; (2)<br />
:<br />
H03 ; (3)<br />
:<br />
266<br />
(1) Offset number H01 is valid.<br />
(2) Offset number H02 is valid.<br />
(3) Offset number H03 is valid.<br />
(1) Offset number H00 is valid.<br />
(2) Offset number H02 is valid.<br />
(3) Offset number H02 is valid.
B–63534EN/02<br />
When OFH (bit 2 of<br />
parameter No. 5001) = 0<br />
When OFH (bit 2 of<br />
parameter No. 5001) = 1<br />
PROGRAMMING<br />
(2) Cutter compensation C<br />
267<br />
14. COMPENSATION FUNCTION<br />
When the offset numbers for cutter compensation C are specified or<br />
modified, the offset number validation order varies, depending on the<br />
condition, as described below.<br />
O××××;<br />
H01 ;<br />
:<br />
G43P_ ; (1)<br />
:<br />
G44P_H02 ; (2)<br />
:<br />
H03 ; (3)<br />
:<br />
O××××;<br />
H01 ;<br />
:<br />
G43P_ ; (1)<br />
:<br />
G44P_H02 ; (2)<br />
:<br />
H03 ; (3)<br />
:<br />
(1)Offset number H01 is valid.<br />
(2)Offset number H02 is valid.<br />
(3)Offset number H03 is valid only for<br />
the axis to which compensation<br />
was applied most recently.<br />
(1) Offset number H00 is valid.<br />
(2) Offset number H02 is valid.<br />
(3) Offset number H02 is valid.<br />
(However, the H number displayed<br />
is changed to 03.)<br />
The tool length offset value may be set in the offset memory through the<br />
CRT/MDI panel.<br />
The range of values that can be set as the tool length offset value is as<br />
follows.<br />
Metric input <strong>Inc</strong>h input<br />
Tool length offset value 0 to ±999.999mm 0 to ±99.9999inch<br />
WARNING<br />
When the tool length offset value is changed due to a<br />
change of the offset number, the offset value changes to the<br />
new tool length offset value, the new tool length offset value<br />
is not added to the old tool length offset value.<br />
H1 : tool length offset value 20.0<br />
H2 : tool length offset value 30.0<br />
G90 G43 Z100.0 H1 ; Z will move to 120.0<br />
G90 G43 Z100.0 H2 ; Z will move to 130.0<br />
CAUTION<br />
When the tool length offset is used and set a parameter<br />
OFH (No. 5001#2) to 0, specify the tool length offset with H<br />
code and the cutter compensation with D code.
14. COMPENSATION FUNCTION PROGRAMMING<br />
B–63534EN/02<br />
Performing tool length<br />
offset along two or more<br />
axes<br />
Tool length offset cancel<br />
NOTE<br />
The tool length offset value corresponding to offset No. 0,<br />
that is, H0 always means 0. It is impossible to set any other<br />
tool length offset value to H0.<br />
Tool length offset B can be executed along two or more axes when the axes<br />
are specified in two or more blocks.<br />
Offset in X and Y axes.<br />
G19 G43 H _ ; Offset in X axis<br />
G18 G43 H _ ; Offset in Y axis<br />
(Offsets in X and Y axes are performed)<br />
If the TAL bit (bit 3 of parameter No. 5001) is set to 1, an alarm will not<br />
occur even when tool length offset C is executed along two or more axes<br />
at the same time.<br />
To cancel tool length offset, specify G49 or H0. After G49 or H0 is<br />
specified, the system immediately cancels the offset mode.<br />
NOTE<br />
After tool length offset B is executed along two or more<br />
axes, offset along all the axes is canceled by specifying<br />
G49. If H0 is specified, only offset along an axis<br />
perpendicular to the specified plane is canceled.<br />
In the case of the offset in three axes or more, if the offset<br />
is canceled by G49 code, the P/S alarm 015 is generated.<br />
Cancel the offset by using G49 and H0.<br />
268
B–63534EN/02<br />
<br />
offset<br />
value<br />
ε=4mm<br />
(1)<br />
Actual position<br />
Programmed<br />
position<br />
PROGRAMMING<br />
<br />
20<br />
30<br />
30<br />
35<br />
30<br />
120<br />
269<br />
3<br />
(13)<br />
⋅<br />
H1=–4.0 <br />
N1 G91 G00 X120.0 Y80.0 ; (1)<br />
N2 G43 Z–32.0 H1 ; (2)<br />
N3 G01 Z–21.0 F1000 ; (3)<br />
N4 G04 P2000 ; (4)<br />
N5 G00 Z21.0 ; (5)<br />
N6 X30.0 Y–50.0 ; (6)<br />
N7 G01 Z–41.0 ; (7)<br />
N8 G00 Z41.0 ; (8)<br />
N9 X50.0 Y30.0 ; (9)<br />
N10 G01 Z–25.0 ; (10)<br />
N11 G04 P2000 ; (11)<br />
N12 G00 Z57.0 H0 ; (12)<br />
N13 X–200.0 Y–60.0 ; (13)<br />
N14 M2 ;<br />
(2)<br />
t1<br />
(6)<br />
14. COMPENSATION FUNCTION<br />
t2<br />
(9)<br />
t3<br />
+Y<br />
30 50 +Z<br />
(12)<br />
18<br />
(3) (5)<br />
(4)<br />
(7) (8)<br />
(10)<br />
(11)<br />
22<br />
8<br />
+X
14. COMPENSATION FUNCTION PROGRAMMING<br />
B–63534EN/02<br />
14.1.2<br />
G53, G28, G30, and<br />
G30.1 Commands in<br />
Tool Length Offset<br />
Mode<br />
Explanations<br />
Tool length offset vector<br />
cancellation<br />
This section describes the tool length offset cancellation and restoration<br />
performed when G53, G28, G30, or G31 is specified in tool length offset<br />
mode. Also described is the timing of tool length offset.<br />
(1)Tool length offset vector cancellation and restoration, performed when<br />
G53, G28, G30, or G30.1 is specified in tool length offset mode<br />
(2)Specification of the G43/G44 command for tool length offset A/B/C,<br />
and independent specification of the H command<br />
When G53, G28, G30, or G30.1 is specified in tool length offset mode,<br />
tool length offset vectors are canceled as described below. However, the<br />
previously specified modal G code remains displayed; modal code<br />
display is not switched to G49.<br />
(1) When G53 is specified<br />
Command Specified axis Common to type A/B/C<br />
G53P_; Tool length offset<br />
axis<br />
270<br />
Other than tool<br />
length offset axis<br />
Canceled upon movement being<br />
performed according to a specified<br />
value<br />
Not canceled<br />
NOTE<br />
When tool length offset is applied to multiple axes, all<br />
specified axes are subject to cancellation.<br />
When tool length offset cancellation is specified at the same time, tool<br />
length offset vector cancellation is performed as indicated below.<br />
Command Specified axis Common to type A/B/C<br />
G49G53P_;<br />
Tool length offset<br />
axis<br />
Other than tool<br />
length offset axis<br />
(2) When G28, G30, or G30.1 is specified<br />
Canceled upon movement being<br />
performed according to a specified<br />
value<br />
Canceled upon movement being<br />
performed according to a specified<br />
value<br />
Command Specified axis Common to type A/B/C<br />
G28P_; Tool length offset<br />
axis<br />
Other than tool<br />
length offset axis<br />
Canceled upon movement to a<br />
reference position being performed<br />
Not canceled
B–63534EN/02<br />
Tool length offset vector<br />
restoration<br />
PROGRAMMING<br />
271<br />
14. COMPENSATION FUNCTION<br />
NOTE<br />
When tool length offset is applied to multiple axes, all<br />
specified axes involved in reference position return are<br />
subject to cancellation.<br />
When tool length offset cancellation is specified at the same time, tool<br />
length offset vector cancellation is performed as indicated below.<br />
Command Specified axis Common to type A/B/C<br />
G49G28P_;<br />
Tool length offset<br />
axis<br />
Other than tool<br />
length offset axis<br />
Canceled upon movement to an<br />
intermediate position being performed<br />
Canceled upon movement to an<br />
intermediate position being performed<br />
Tool length offset vectors, canceled by specifying G53, G28, G30, or<br />
G30.1 in tool length offset mode, are restored as described below.<br />
(1) When OFH (bit 2 of parameter No. 5001) = 0<br />
Type EVO (bit 6 of parameter<br />
No. 5001)<br />
A/B<br />
C<br />
Restoration block<br />
1 Block to be buffered next<br />
0 Block containing an H command<br />
or G43/44 command<br />
Ignored Block containing an H command<br />
Block containing a<br />
G43P_/G44P_ command<br />
(2)When OFH (bit 2 of parameter No. 5001) = 1<br />
In a mode other than tool length offset mode<br />
Type EVO (bit 6 of parameter<br />
No. 5001)<br />
A/B<br />
C<br />
Restoration block<br />
1 Block to be buffered next<br />
0 Block containing an H command<br />
or G43/44 command<br />
Ignored Block containing an H command<br />
Block containing a<br />
G43P_/G44P_ command
14. COMPENSATION FUNCTION PROGRAMMING<br />
B–63534EN/02<br />
In tool length offset mode<br />
Type EVO (bit 6 of parameter<br />
No. 5001)<br />
A/B<br />
C<br />
272<br />
Restoration block<br />
1 Block containing a G43/G44<br />
block<br />
0 Block containing an H command<br />
and G43/44 command<br />
Ignored Block containing a<br />
G43P_H_/G44P_H_ command<br />
WARNING<br />
When tool length offset is applied to multiple axes, all axes<br />
for which G53, G28, G30, and G30.1 are specified are<br />
subject to cancellation. However, restoration is performed<br />
only for that axis to which tool length offset was applied last;<br />
restoration is not performed for any other axes.<br />
NOTE<br />
In a block containing G40, G41, or G42, the tool length<br />
offset vector is not restored.
B–63534EN/02<br />
14.2<br />
AUTOMATIC TOOL<br />
LENGTH<br />
MEASUREMENT<br />
(G37)<br />
Format<br />
Explanations<br />
Setting the workpiece<br />
coordinate system<br />
Specifying G37<br />
PROGRAMMING<br />
273<br />
14. COMPENSATION FUNCTION<br />
By issuing G37 the tool starts moving to the measurement position and<br />
keeps on moving till the approach end signal from the measurement<br />
device is output. Movement of the tool is stopped when the tool tip<br />
reaches the measurement position.<br />
Difference between coordinate value when tool reaches the measurement<br />
position and coordinate value commanded by G37 is added to the tool<br />
length offset amount currently used.<br />
Z<br />
Rapid<br />
traverse<br />
Ç<br />
Ç<br />
A (Start position)<br />
Measurement position is commanded<br />
with G37<br />
B (Deceleration position)<br />
Measurement<br />
feedrate<br />
C (Measurement position)<br />
The tool stops when the approach end<br />
signal goes on.<br />
X<br />
0<br />
Compensation value = (Current compensation value) + [(Coordinates of the<br />
point at which the tool is stopped) – (Coordinates of the programmed measurement<br />
position)]<br />
Fig. 14.2 (a) Automatic tool length measurement<br />
G92 IP_<br />
; Sets the workpiece coordinate system. (It can be set<br />
with G54 to G59. See Chapter 7, “Coordinate System.”)<br />
H; Specifies an offset number for tool length offset.<br />
G90 G37 IP_<br />
; Absolute command<br />
G37 is valid only in the block in which it is specified.<br />
IP _ indicates the X–, Y–, Z–, or fourth axis.<br />
Set the workpiece coordinate system so that a measurement can be made<br />
after moving the tool to the measurement position. The coordinate system<br />
must be the same as the workpiece coordinate system for programming.<br />
Specify the absolute coordinates of the correct measurement position.<br />
Execution of this command moves the tool at the rapid traverse rate<br />
toward the measurement position, reduces the federate halfway, then<br />
continuous to move it until the approach end signal from the measuring<br />
instrument is issued. When the tool tip reaches the measurement position,<br />
the measuring instrument sends an approach end signal to the CNC which<br />
stops the tool.
14. COMPENSATION FUNCTION PROGRAMMING<br />
B–63534EN/02<br />
Changing the offset<br />
value<br />
<br />
The difference between the coordinates of the position at which the tool<br />
reaches for measurement and the coordinates specified by G37 is added<br />
to the current tool length offset value.<br />
Offset value =<br />
(Current compensation value) + [(Coordinates of the position at which the<br />
tool reaches for measurement) – (Coordinates specified by G37)]<br />
These offset values can be manually changed from MDI.<br />
When automatic tool length measurement is executed, the tool moves as<br />
shown in Fig. 14.2 (b). If the approach end signal goes on while the tool<br />
is traveling from point B to point C, an alarm occurs. Unless the approach<br />
end signal goes on before the tool reaches point F, the same alarm occurs.<br />
The P/S alarm number is 080.<br />
Start<br />
position<br />
Rapid<br />
traverse<br />
A B C D E F<br />
274<br />
Deceleration<br />
feedrate<br />
(measurement<br />
feedrate)<br />
Approach end signal ON<br />
Position commanded<br />
by G37<br />
Permitted range of approach end signal<br />
Fig. 14.2 (b) Tool movement to the measurement position
B–63534EN/02<br />
PROGRAMMING<br />
275<br />
14. COMPENSATION FUNCTION<br />
WARNING<br />
When a manual movement is inserted into a movement at<br />
a measurement federate, return the tool to the!position<br />
before the inserted manual movement for restart.<br />
NOTE<br />
1 When an H code is specified in the same block as G37, an<br />
alarm is generated. Specify H code before the block!of<br />
G37.<br />
2 The measurement speed (parameter No. 6241),<br />
deceleration position (parameter No. 6251), and permitted<br />
range of the approach end signal (parameter No. 6254) are<br />
specified by the machine tool builder.<br />
3 When offset memory A is used, the offset value is changed.<br />
When offset memory B is used, the tool wear compensation<br />
value is changed.<br />
When offset memory C is used, the tool wear compensation<br />
value for the H code is changed.<br />
4 The approach end signal is monitored usually every 2 ms.<br />
The following measuring error is generated:<br />
ERRmax. : Fm×1/60×TS/1000 where<br />
TS : Sampling period, for usual 2 (ms)<br />
ERRmax. : maximum measuring error (mm)<br />
Fm<br />
: measurement federate (mm/min.)<br />
For example, when Fm = 1000 mm/min., ERRmax. = 0.003m<br />
5 The tool stops a maximum of 16 ms after the approach end<br />
signal is detected. But the value of the position!at which the<br />
approach end signal was detected (note the value when the<br />
tool stopped) is used to determine the<br />
offset amount. The overrun for 16 ms is:<br />
Qmax. = Fm × 1/60 ×16/1000<br />
Qmax.: maximum overrun (mm)<br />
Fm : measurement federate (mm/min.)
14. COMPENSATION FUNCTION PROGRAMMING<br />
B–63534EN/02<br />
<br />
G92 Z760.0 X1100.0 ; Sets a workpiece coordinate system with<br />
respect to the programmed absolute zero point.<br />
G00 G90 X850.0 ; Moves the tool to X850.0.<br />
That is the tool is moved to a position that is a<br />
specified distance from the measurement<br />
position along the Z–axis.<br />
H01 ; Specifies offset number 1.<br />
G37 Z200.0 ; Moves the tool to the measurement position.<br />
G00 Z204.0 ; Retracts the tool a small distance along the<br />
Z–axis.<br />
For example, if the tool reaches the measurement position with Z198.0;,<br />
the compensation value must be corrected. Because the correct<br />
measurement position is at a distance of 200 mm, the compensation value<br />
is lessened by 2.0 mm (198.0 – 200.0 = –2.0).<br />
760<br />
200<br />
Z<br />
0<br />
276<br />
Measurement<br />
position along Z axis<br />
ÇÇ ÇÇ<br />
ÇÇ ÇÇ<br />
ÇÇ<br />
850 1100 X
B–63534EN/02<br />
14.3<br />
TOOL OFFSET<br />
(G45–G48)<br />
Format<br />
PROGRAMMING<br />
277<br />
14. COMPENSATION FUNCTION<br />
The programmed travel distance of the tool can be increased or decreased<br />
by a specified tool offset value or by twice the offset value.<br />
The tool offset function can also be applied to an additional<br />
axis.<br />
Tool<br />
ÇÇÇ<br />
ÇÇÇ<br />
ÇÇÇ<br />
Workpiece<br />
Tool center path<br />
Programmed path<br />
G45 IP _D_ ; <strong>Inc</strong>rease the travel distance by the tool offset value<br />
G46 IP _D_ ;<br />
G47 IP _D_ ;<br />
G48 IP _D_ ;<br />
Decrease the travel distance by the tool offset value<br />
<strong>Inc</strong>rease the travel distance by twice the tool offset value<br />
Decrease the travel distance by twice the tool offset value<br />
G45 to G48 : One–shot G code for increasing or decreasing the travel<br />
distance<br />
: Command for moving the tool<br />
D : Code for specifying the tool offset value
14. COMPENSATION FUNCTION PROGRAMMING<br />
B–63534EN/02<br />
Explanations<br />
<strong>Inc</strong>rease and decrease<br />
<br />
As shown in Table 14.3(a), the travel distance of the tool is increased or<br />
decreased by the specified tool offset value.<br />
In the absolute mode, the travel distance is increased or decreased as the<br />
tool is moved from the end position of the previous block to the position<br />
specified by the block containing G45 to G48.<br />
G code<br />
G45<br />
G46<br />
G47<br />
G48<br />
Table 14.3 (a) <strong>Inc</strong>rease and decrease of the tool travel distance<br />
When a positive tool offset value<br />
is specified<br />
Start position End position<br />
Start position End position<br />
278<br />
Programmed movement distance<br />
Tool offset value<br />
Actual movement position<br />
When a negative tool offset<br />
value is specified<br />
Start position End position<br />
Start position End position<br />
Start position End position Start position End position<br />
Start position End position Start position End position<br />
If a move command with a travel distance of zero is specified in the<br />
incremental command (G91) mode, the tool is moved by the distance<br />
corresponding to the specified tool offset value.<br />
If a move command with a travel distance of zero is specified in the<br />
absolute command (G90) mode, the tool is not moved.<br />
Once selected by D code, the tool offset value remains unchanged until<br />
another tool offset value is selected.<br />
Tool offset values can be set within the following range:<br />
Table 14.3 (b) Range of tool offset values<br />
Metric input inch input<br />
Tool offset value 0 to ±999.999mm 0 to ±99.9999inch<br />
D0 always indicates a tool offset value of zero.<br />
0 to ±999.999deg 0 to ±999.999deg
B–63534EN/02<br />
PROGRAMMING<br />
279<br />
14. COMPENSATION FUNCTION<br />
WARNING<br />
1 When G45 to G48 is specified to n axes (n=1–6) simultaneously in a motion block, offset is<br />
applied to all n axes.<br />
When the cutter is offset only for cutter radius or diameter in taper cutting, overcutting or<br />
undercutting occurs.<br />
Therefore, use cutter compensation (G40 or G42) shown in II–14.4 or 14.5.<br />
Shape actually cut<br />
Overcutting<br />
ÇÇÇ<br />
ÇÇÇ<br />
G01 X_ F_ ;<br />
G47 X_ Y_ D_ ;<br />
Y_ ;<br />
ÇÇÇ<br />
ÇÇÇ<br />
ÇÇÇ<br />
Y axis<br />
Desired<br />
shape<br />
X axis<br />
Desired shape<br />
ÇÇÇ<br />
ÇÇÇ<br />
Undercutting<br />
ÇÇÇ<br />
ÇÇ<br />
ÇÇ<br />
Y axis<br />
G01 G45 X_ F_ D_;<br />
X_ Y_ ;<br />
G45 Y_ ;<br />
Shape actually cut<br />
X axis<br />
2 G45 to G48 (tool offset) must not be used in the G41 or G42 (cutter compensation) mode.
14. COMPENSATION FUNCTION PROGRAMMING<br />
B–63534EN/02<br />
NOTE<br />
1 When the specified direction is reversed by decrease as shown in the figure below, the tool<br />
moves in the opposite direction.<br />
Movement of the tool<br />
Program command<br />
Start<br />
position End<br />
position<br />
Tool offset value<br />
2 Tool offset can be applied to circular interpolation (G02, G03) with the G45 to G48 commands<br />
only for 1/4 and 3/4 circles using addresses I, J and K by the parameter setting, providing that<br />
the coordinate rotation be not specified at the same time. This function is provided for<br />
compatibility with the conventional CNC tape without any cutter compensation. The function<br />
should not be used when a new CNC program is prepared.<br />
Tool offset for circular interpolation<br />
N4<br />
Programmed tool path<br />
ÇÇ<br />
ÇÇ<br />
N3<br />
ÇÇÇÇÇ<br />
ÇÇÇ<br />
ÇÇÇ<br />
N2<br />
ÇÇÇ<br />
ÇÇÇ<br />
ÇÇÇ<br />
3 D code should be used in tool offset mode (G45 to G48). However, H code can be used by<br />
setting the parameter TPH (No. 5001 because of compatibility with conventional CNC tape<br />
format. The H code must be used under tool length offset cancel (G49).<br />
4 G45 to G48 are ignored in canned cycle mode. Perform tool offset by specifying G45 to G48<br />
before entering canned cycle mode and cancel the offset after releasing the canned cycle<br />
mode.<br />
280<br />
Example<br />
G46 X2.50 ;<br />
Tool offset value<br />
+3.70<br />
N1<br />
Actual tool path<br />
Program<br />
Equivalent command<br />
X–1.20 ;<br />
N1 G46 G00 X_ Y_ D_ ;<br />
N2 G45 G01 Y_ F_ ;<br />
N3 G45 G03 X_ Y_ I_ ;<br />
N4 G01 X_ ;
B–63534EN/02<br />
<br />
40<br />
40<br />
50<br />
ÇÇÇ<br />
ÇÇÇ<br />
Origin<br />
ÇÇÇ<br />
Y axis<br />
N14<br />
PROGRAMMING<br />
N1<br />
80 50<br />
X axis<br />
Program<br />
N13<br />
Program using tool offset<br />
Tool diameter : 20φ<br />
Offset No. : 01<br />
Tool offset value : +10.0<br />
281<br />
N2<br />
N3<br />
14. COMPENSATION FUNCTION<br />
N12<br />
N4<br />
40<br />
N5<br />
N6<br />
N11<br />
30R<br />
30 30<br />
N10<br />
N7<br />
30R<br />
N1 G91 G46 G00 X80.0 Y50.0 D01 ;<br />
N2 G47 G01 X50.0 F120.0 ;<br />
N3 Y40.0 ;<br />
N4 G48 X40.0 ;<br />
N5 Y–40.0 ;<br />
N6 G45 X30.0 ;<br />
N7 G45 G03 X30.0 Y30.0 J30.0 ;<br />
N8 G45 G01 Y20.0 ;<br />
N9 G46 X0 ; Decreases toward the positive direction for<br />
movement amount “0”. The tool moves in the –X<br />
direction by theoffset value.<br />
N10 G46 G02 X–30.0 Y30.0 J30.0 ;<br />
N11 G45 G01 Y0 ; <strong>Inc</strong>rease toward the positive direction for movement<br />
amount “0”. The tool moves in the +Y direction by<br />
the offset value.<br />
N12 G47 X–120.0 ;<br />
N13 G47 Y–80.0 ;<br />
N14 G46 G00 X80.0 Y–50.0 ;<br />
N9<br />
N8
14. COMPENSATION FUNCTION PROGRAMMING<br />
B–63534EN/02<br />
14.4<br />
CUTTER<br />
COMPENSATION B<br />
(G39–G42)<br />
When the tool is moved, the tool path can be shifted by the radius of the<br />
tool (Fig. 14.4).<br />
To make an offset as large as the radius of the tool, first create an offset<br />
vector with a length equal to the radius of the tool (start–up). The offset<br />
vector is perpendicular to the tool path. The tail of the vector is on the<br />
workpiece side and the head points to the center of the tool.<br />
If a linear interpolation, corner offset, or circular interpolation command<br />
is specified after start–up, the tool path can be shifted by the length of the<br />
offset vector during machining.<br />
To return the tool to the start point at the end of machining, cancel the<br />
cutter compensation mode.<br />
Corner offset<br />
Circular<br />
interpolation<br />
Linear<br />
interpolation<br />
Offset vector<br />
Start up<br />
ÇÇ<br />
ÇÇ<br />
Start position<br />
ÇÇ<br />
Corner offset<br />
Circular interpolation<br />
Linear interpolation<br />
282<br />
R1<br />
Cutter<br />
Linear<br />
interpolation<br />
Programmed path<br />
compensation<br />
cancel<br />
Tool center path<br />
Y axis<br />
Fig. 14.4 Outline of Cutter Compensation B<br />
Circular<br />
interpolation<br />
R2<br />
Circular<br />
interpolation<br />
X axis
B–63534EN/02<br />
Format<br />
<br />
<br />
<br />
<br />
<br />
<br />
<br />
<br />
<br />
Explanations<br />
H code<br />
PROGRAMMING<br />
G00 (or G01) G41 (or G42) IR_<br />
H_ ;<br />
G41<br />
G42<br />
_<br />
IR_<br />
H_<br />
: Cutter compensation left (Group 07)<br />
: Cutter compensation right (Group 07)<br />
: Command for axis movement<br />
G39 P_ (or IR_)<br />
;<br />
283<br />
14. COMPENSATION FUNCTION<br />
: <strong>Inc</strong>remental value from the end position. Perpendicular to the offset<br />
vector at the end position.<br />
: Code for specifying the cutter compensation value (1 to 3 digits)<br />
G39 : Corner offset circular interposition (Group 00)<br />
P_<br />
(or) IR_<br />
G40 P_ ; <br />
: <strong>Inc</strong>remental value from the end position. Perpendicular to<br />
the offset vector at the end position.<br />
G40 : Cutter compensation cancel (Group 07)<br />
P_<br />
: Command for axis movement<br />
Offset plane<br />
XpYp<br />
ZpXp<br />
YpZp<br />
Command of the plane selection<br />
G17 ;<br />
G18 ;<br />
G19 ;<br />
IP_<br />
Xp_Yp_<br />
Xp_Zp_<br />
Yp_Zp_<br />
IR_<br />
I_J_<br />
I_K_<br />
J_K_<br />
Specify the number assigned to a cutter compensation value with a 1– to<br />
3–digit number after address H (H code) in the program. The H code can<br />
be specified in any position before the offset cancel mode is first switched<br />
to the cutter compensation mode. The H code need not be specified again<br />
unless the cutter compensation value needs to be changed.<br />
Assign cutter compensation values to the H codes on the MDI panel. For<br />
the specification of the cutter compensation value, see III–11.4.1 in the<br />
section on operation.<br />
The table below shows the range in which the cutter compensation values<br />
can be specified.<br />
Table 14.4 Valid range of cutter compensation values<br />
Metric input inch input<br />
Cutter compensation value 0 to ±999.999mm 0 to ±99.9999inch<br />
NOTE<br />
The cutter compensation value corresponding to offset<br />
No.0, that is, H0 always gets 0. It is impossible to set H0 to<br />
any other cutter compensation value.
14. COMPENSATION FUNCTION PROGRAMMING<br />
B–63534EN/02<br />
Offset plane selection<br />
and offset vector<br />
<br />
Transition from the offset<br />
cancel mode to the<br />
cutter compensation<br />
mode (Start up)<br />
Cutter compensation is carried out in the plane determined by G17, G18<br />
and G19 (G codes for plane selection.). This plane is called the offset<br />
plane. If the offset plane is not specified, G17 is assumed to be<br />
programmed.<br />
Compensation is not executed for the coordinates of a position which is<br />
not in the specified plane. The programmed values are used as they are.<br />
In the sequel, what vector is created, what offset calculation is made, by<br />
an offset command, will be discussed on assumption that an XY plane is<br />
selected. This discussion applies also when another plane is selected.<br />
The offset vector is cleared by reset.<br />
After the power is turned on, the length of the offset vector is set to zero<br />
and the cutter compensation cancel mode is selected.<br />
NOTE<br />
A move command mode at the time of change from the<br />
offset cancel mode to the cutter compensation mode, is<br />
positioning (G00) or linear interpolation (G01). The circular<br />
interpolation (G02, G03) cannot be used.<br />
284
B–63534EN/02<br />
14.4.1<br />
<br />
<br />
Explanations<br />
G00 (positioning) or<br />
G01 (linear interpolation)<br />
PROGRAMMING<br />
285<br />
14. COMPENSATION FUNCTION<br />
G41 offsets the tool towards the left of the workpiece as you see when you<br />
face in the same direction as the movement of the cutting tool.<br />
G41 X_ Y_ I_ J_ H_ ;<br />
specifies a new vector to be created at right angles with the direction of<br />
(I, J) on the end point, and the tool center moves toward the point of the<br />
new vector from that of the old vector on the start point.(I, J) is expressed<br />
in an incremental value from the end point, and is significant only as a<br />
direction, and its amount is arbitrary.<br />
ÇÇÇÇÇ<br />
ÇÇÇÇÇ<br />
ÇÇÇÇÇ<br />
ÇÇÇÇÇ<br />
Start position<br />
ÇÇÇÇÇ<br />
Old vector<br />
Tool center path<br />
New vector<br />
Programmed path<br />
ÇÇÇÇÇ<br />
ÇÇÇÇÇ<br />
ÇÇÇÇÇ<br />
ÇÇÇÇÇ<br />
(X, Y) (I, J)<br />
ÇÇÇÇÇ<br />
In case the old vector is 0, this command specifies the equipment to enter<br />
from the cancel mode into the cutter compensation mode. At this time,<br />
the offset number is specified by the H code.<br />
Start position<br />
ÇÇÇÇÇ<br />
ÇÇÇÇÇ<br />
ÇÇÇÇÇ<br />
Old vector=0<br />
ÇÇÇÇÇ<br />
ÇÇÇÇÇ<br />
Tool center path<br />
Programmed path<br />
ÇÇÇÇÇ<br />
ÇÇÇÇÇ<br />
ÇÇÇÇÇ<br />
New vector<br />
ÇÇÇÇÇ<br />
(X, Y) (I, J)<br />
ÇÇÇÇÇ<br />
Unless otherwise specified, (I, J) are assumed to be equal to (X, Y). When<br />
the following command is specified, a vector perpendicular to a line<br />
connecting the start position and position (X, Y) is created.<br />
G41 X_ Y_ ;<br />
If, however, G00 is specified, each axis moves independently at the rapid<br />
traverse rate.<br />
ÇÇÇÇÇ<br />
ÇÇÇÇÇ<br />
ÇÇÇÇÇ<br />
ÇÇÇÇÇ<br />
Old vector<br />
Tool center path<br />
ÇÇÇÇÇ<br />
ÇÇÇÇÇ<br />
ÇÇÇÇÇ<br />
ÇÇÇÇÇ<br />
Start position<br />
(X, Y)<br />
ÇÇÇÇÇ<br />
Programmed path<br />
ÇÇÇÇÇ<br />
New vector
14. COMPENSATION FUNCTION PROGRAMMING<br />
B–63534EN/02<br />
G02, G03<br />
(Circular interpolation)<br />
G41… ;<br />
:<br />
G02 (or G03) X_ Y_ R_ ;<br />
Above command specifies a new vector to be created to the left looking<br />
toward the direction in which an arc advances on a line connecting the arc<br />
center and the arc end point, and the tool center to move along the arc<br />
advancing from the point of the old vector on the arc start point toward<br />
that of the new vector. This is, however, established on assumption the<br />
old vector is created correctly.<br />
The offset vector is created toward the arc center or opposite direction<br />
against the arc center.<br />
ÇÇÇÇÇ<br />
ÇÇÇÇÇ<br />
ÇÇÇÇÇ<br />
ÇÇÇÇÇ<br />
ÇÇÇÇÇ<br />
Old vector<br />
286<br />
Tool center path<br />
Old vector<br />
Start position<br />
R<br />
Start position<br />
ÇÇÇÇ<br />
ÇÇÇÇ<br />
ÇÇÇÇ<br />
ÇÇÇÇ<br />
ÇÇÇÇ<br />
ÇÇÇÇ<br />
ÇÇÇÇ<br />
ÇÇÇÇ<br />
ÇÇÇÇ<br />
R<br />
Tool center path<br />
(X, Y)<br />
New vector<br />
Programmed path<br />
(X, Y)<br />
ÇÇÇÇÇ<br />
ÇÇÇÇÇ<br />
ÇÇÇÇÇ<br />
ÇÇÇÇÇ<br />
New vector<br />
Programmed path
B–63534EN/02<br />
14.4.2<br />
Cutter Compensation<br />
Right (G42)<br />
Explanations<br />
G00 (positioning) or<br />
G01 (linear interpolation)<br />
PROGRAMMING<br />
287<br />
14. COMPENSATION FUNCTION<br />
G42, contrary to G41, specifies a tool to be offset to the right of work piece<br />
looking toward the direction in which the tool advances.<br />
G42 has the same function as G41, except that the directions of the vectors<br />
created by the commands are the opposite.<br />
G42 X_ Y_ I_ J_ H_ ;<br />
ÇÇÇÇÇ<br />
ÇÇÇÇÇ<br />
ÇÇÇÇÇ<br />
ÇÇÇÇÇ<br />
ÇÇÇÇÇ<br />
G42 X_ Y_ ;<br />
Start position<br />
Start position<br />
ÇÇÇÇÇ<br />
ÇÇÇÇÇ<br />
ÇÇÇÇÇ<br />
ÇÇÇÇÇ<br />
ÇÇÇÇÇ<br />
Programmed path<br />
Old vector<br />
New vector<br />
Tool center path<br />
Programmed path<br />
Old vector<br />
New vector<br />
Tool center path<br />
(X, Y)<br />
ÇÇÇÇ<br />
ÇÇÇÇ<br />
ÇÇÇÇ<br />
ÇÇÇÇ<br />
ÇÇÇÇ<br />
(X, Y)<br />
ÇÇÇÇÇ<br />
ÇÇÇÇÇ<br />
ÇÇÇÇÇ<br />
ÇÇÇÇÇ<br />
ÇÇÇÇÇ<br />
(I, J)<br />
In the case of G00, however, each axis moves independently at the rapid<br />
traverse rate.
14. COMPENSATION FUNCTION PROGRAMMING<br />
B–63534EN/02<br />
G02 or G03<br />
(Circular interpolation)<br />
G42… ;<br />
:<br />
G02 (or G03) X_ Y_ R_;<br />
Programmed path<br />
Start position<br />
288<br />
ÇÇÇÇÇ<br />
ÇÇÇÇÇ<br />
Old vector<br />
Old vector<br />
ÇÇÇÇÇ<br />
ÇÇÇÇÇ<br />
ÇÇÇÇÇ<br />
Programmed path<br />
Start position<br />
ÇÇÇÇ<br />
ÇÇÇÇ<br />
ÇÇÇÇ<br />
ÇÇÇÇ<br />
ÇÇÇÇ<br />
Tool center path<br />
R<br />
ÇÇÇÇ<br />
ÇÇÇÇ<br />
ÇÇÇÇ<br />
ÇÇÇÇ<br />
R<br />
(X, Y)<br />
New vector<br />
(X, Y)<br />
New vector<br />
ÇÇÇÇÇ<br />
ÇÇÇÇÇ<br />
ÇÇÇÇÇ<br />
ÇÇÇÇÇ<br />
Tool center path
B–63534EN/02<br />
14.4.3<br />
Corner Offset Circular<br />
Interpolation (G39)<br />
Format<br />
PROGRAMMING<br />
289<br />
14. COMPENSATION FUNCTION<br />
When the following command is specified in the G01, G02, or G03 mode,<br />
corner offset circular interpolation can be executed with respect to the<br />
radius of the tool.<br />
In offset mode<br />
or<br />
G39<br />
G39<br />
X_Y_<br />
X_Z_<br />
Y_Z_<br />
I_J_<br />
I_K_<br />
J_K_<br />
;<br />
;<br />
A new vector is created to the left (G41) or to the right (G42) looking<br />
toward (X, Y) from the end point at right angles therewith, and the tool<br />
moves along the arc from the point of the old vector toward that of the new<br />
vector. (X, Y, Z) is expressed in a value according to the G90/G91<br />
respectively. (I, J, K) is expressed in an incremental value from the end<br />
point.<br />
Case of G41<br />
Case of G42<br />
Tool center path<br />
ÇÇÇÇ<br />
ÇÇÇÇ<br />
ÇÇÇÇ<br />
ÇÇÇÇ<br />
(X, Y)or(I, J)<br />
Old vector<br />
ÇÇÇÇ<br />
Programmed path<br />
New vector<br />
New vector<br />
(X, Y)or(I, J)<br />
ÇÇÇÇÇ<br />
ÇÇÇÇÇ<br />
ÇÇÇÇÇ<br />
ÇÇÇÇÇ<br />
ÇÇÇÇÇ<br />
Programmed path<br />
Old vector<br />
Tool center path<br />
This command can be given in offset mode, that is, only when G41 or G42<br />
has already been specified. Whether the arc is to turn clockwise or<br />
counterclockwise, is defined by G41 or G42, respectively. This command<br />
is not modal, and executes circular interpolation, whatever the G function<br />
of group 01 may be. The G function of group 01 remains even though this<br />
command is specified.
14. COMPENSATION FUNCTION PROGRAMMING<br />
B–63534EN/02<br />
14.4.4<br />
Cutter Compensation<br />
Cancel (G40)<br />
When the following command is specified in the G00 or G01 mode, the<br />
tool moves from the head of the old vector at the start position to the end<br />
position (X, Y). In the G01 mode, the tool moves linearly. In the G00<br />
mode, rapid traverse is carried out along each axis.<br />
G40 X_ Y_ ;<br />
Old vector<br />
290<br />
ÇÇÇÇÇ<br />
ÇÇÇÇÇ<br />
Start position<br />
ÇÇÇÇÇ<br />
ÇÇÇÇÇ<br />
Tool center path<br />
(X, Y)<br />
ÇÇÇÇÇ<br />
ÇÇÇÇÇ<br />
ÇÇÇÇÇ<br />
Programmed path<br />
ÇÇÇÇÇ<br />
This command changes the mode of the equipment from the cutter<br />
compensation mode to the cancel mode.<br />
When only G40; is specified, and X _ Y _ is not specified, the tool moves<br />
by the old vector amount in the opposite direction.<br />
NOTE<br />
Cutter compensation cannot be canceled in the circular<br />
interpolation (G02, G03) mode.
B–63534EN/02<br />
14.4.5<br />
Switch between Cutter<br />
Compensation Left and<br />
Cutter Compensation<br />
Right<br />
PROGRAMMING<br />
291<br />
14. COMPENSATION FUNCTION<br />
The offset direction is switched from left to right, or from right to left<br />
generally through the offset cancel mode, but can be switched not through<br />
it only in positioning (G00) or linear interpolation (G01). In this case, the<br />
tool path is as shown in Fig 14.4.5.<br />
G41……… ;<br />
G00 G42 X_ Y_ ;<br />
Old vector<br />
ÇÇÇÇÇ<br />
ÇÇÇÇÇ<br />
ÇÇÇÇÇ<br />
ÇÇÇÇÇ<br />
ÇÇÇÇ<br />
ÇÇÇÇÇ<br />
Programmed path<br />
G42……… ;<br />
G00 G41 X_ Y_ ( or I_ J_) F_ ;<br />
Old vector<br />
ÇÇÇÇÇ<br />
ÇÇÇÇÇ<br />
ÇÇÇÇÇ<br />
ÇÇÇÇÇ<br />
ÇÇÇÇÇ<br />
Tool center path<br />
(normally, it is not straight.)<br />
Tool center path<br />
Programmed path<br />
(X, Y)<br />
ÇÇÇÇ<br />
ÇÇÇÇ<br />
ÇÇÇÇ<br />
ÇÇÇÇ<br />
ÇÇÇÇ<br />
ÇÇÇÇ<br />
ÇÇÇÇ<br />
(X, Y)(I, J)<br />
ÇÇÇÇ<br />
Fig. 14.4.5 Switching the Direction of Cutter Compensation<br />
New<br />
vector<br />
New<br />
vector
14. COMPENSATION FUNCTION PROGRAMMING<br />
B–63534EN/02<br />
14.4.6<br />
Change of the Cutter<br />
Compensation Value<br />
The offset amount is changed generally when the tool is changed in the<br />
offset cancel mode, but can be changed in the offset mode only in<br />
positioning (G00) or linear interpolation (G01).<br />
Program as described below:<br />
G00 (or G01) X_ Y_ H_ ; (H_ indicates the number of a new cutter<br />
compensation value.)<br />
Fig. 14.4.6 shows how the tool is moved when the change in<br />
compensation is specified.<br />
ÇÇÇÇÇ<br />
ÇÇÇÇÇ<br />
ÇÇÇÇÇ<br />
ÇÇÇÇÇ<br />
292<br />
ÇÇÇÇÇ<br />
ÇÇÇÇÇ<br />
ÇÇÇÇÇ<br />
ÇÇÇÇÇ<br />
ÇÇÇÇÇ<br />
Start position Programmed path (X, Y)<br />
ÇÇÇÇÇ<br />
ÇÇÇÇÇ<br />
ÇÇÇÇÇ<br />
ÇÇÇÇÇ<br />
ÇÇÇÇÇ<br />
Start position<br />
Tool center path<br />
Old vector<br />
Old vector<br />
New vector<br />
New vector<br />
Programmed path<br />
ÇÇÇÇÇ<br />
ÇÇÇÇÇ<br />
ÇÇÇÇÇ<br />
ÇÇÇÇÇ<br />
(X, Y)<br />
Fig 14.4.6 Change of the cutter compensation value in offset mode
B–63534EN/02<br />
14.4.7<br />
Positive/Negative<br />
Cutter Compensation<br />
Value and Tool Center<br />
Path<br />
PROGRAMMING<br />
293<br />
14. COMPENSATION FUNCTION<br />
If the tool compensation value is made negative (–), it is equal that G41<br />
and G42 are replaced with each other in the process sheet. Consequently,<br />
if the tool center is passing around the outside of the workbench it will<br />
pass around the inside thereof, and vice versa.<br />
Fig. 14.4.7 shows one example. Generally speaking, the cutter<br />
compensation value shall be programmed to be positive (+). When a tool<br />
path is programmed as shown in (1), if the cutter compensation value is<br />
made negative (–), the tool center moves as shown in (2).<br />
If the cutter compensation value is changed to a negative value when tool<br />
path (2) shown in Fig. 14.4.7 is programmed, the tool follows tool path<br />
(1) shown in the same figure.<br />
<br />
ÇÇÇ<br />
ÇÇÇ<br />
ÇÇÇ<br />
Tool center path<br />
Programmed path<br />
ÇÇ<br />
ÇÇ<br />
ÇÇ<br />
Fig. 14.4.7 Tool Center Paths when Positive and Negative<br />
Cutter Compensation Values are Specified<br />
For a cornered figure (involved in corner circular interpolation) in<br />
general, the cutter compensation value naturally cannot be made negative<br />
(–) to cut the inside. In order to cut the inside corner of a cornered figure,<br />
an arc with an appropriate radius must be inserted there to provide smooth<br />
cutting.<br />
WARNING<br />
If the tool length offset is commanded during cutter<br />
compensation, the offset amount of cutter compensation is<br />
also regarded to have been changed.
14. COMPENSATION FUNCTION PROGRAMMING<br />
B–63534EN/02<br />
<br />
20.0<br />
ÇÇ<br />
ÇÇ<br />
ÇÇ<br />
N4<br />
N3<br />
N2<br />
N1<br />
N11<br />
20.0<br />
N10<br />
294<br />
N5<br />
40.0<br />
40.0<br />
N9<br />
N6<br />
Y axis<br />
20.0<br />
20.0<br />
R1=40.0<br />
X axis<br />
N7<br />
R2=20.0<br />
N8<br />
Unit : mm<br />
N1 G91 G17 G00 G41 J1 X20.0 Y20.0 H08 ;<br />
N2 G01 Z–25.0 F100 ;<br />
N3 Y40.0 F250 ;<br />
N4 G39 I40.0 J20.0 ;<br />
N5 X40.0 Y20.0 ;<br />
N6 G39 I40.0 ;<br />
N7 G02 X40.0 Y–40.0 R40.0 ;<br />
N8 X–20.0 Y–20.0 R20.0 ;<br />
N9 G01 X–60.0 ;<br />
N10 G00 Z25.0 ;<br />
N11 G40 X–20.0 Y–20.0 M02 ;<br />
(H08 is a tool offset number, and the cutter radius value should be stored in the<br />
memory corresponding to this number).
B–63534EN/02<br />
14.5<br />
OVERVIEW OF<br />
CUTTER<br />
COMPENSATION C<br />
(G40–G42)<br />
PROGRAMMING<br />
295<br />
14. COMPENSATION FUNCTION<br />
When the tool is moved, the tool path can be shifted by the radius of the<br />
tool (Fig. 14.5 (a)).<br />
To make an offset as large as the radius of the tool, CNC first creates an<br />
offset vector with a length equal to the radius of the tool (start–up). The<br />
offset vector is perpendicular to the tool path. The tail of the vector is on<br />
the workpiece side and the head positions to the center of the tool.<br />
If a linear interpolation or circular interpolation command is specified<br />
after start–up, the tool path can be shifted by the length of the offset vector<br />
during machining.<br />
To return the tool to the start position at the end of machining, cancel the<br />
cutter compensation mode.<br />
Cutter<br />
compensation<br />
cancel<br />
ÇÇÇ<br />
ÇÇÇ<br />
ÇÇÇ<br />
Start–up<br />
Fig. 14.5 (a) Outline of Cutter Compensation C
14. COMPENSATION FUNCTION PROGRAMMING<br />
B–63534EN/02<br />
Format<br />
Start up<br />
(Tool compensation<br />
start)<br />
Cutter compensation<br />
cancel<br />
(offset mode cancel)<br />
Selection of the offset<br />
plane<br />
Explanations<br />
Offset cancel mode<br />
Start Up<br />
Offset mode<br />
G00(or G01)G41(or G42) _<br />
D ;<br />
G41 : Cutter compensation left (Group07)<br />
G42 : Cutter compensation right (Group07)<br />
P_<br />
: Command for axis movement<br />
D_ : Code for specifying as the cutter compensation value(1–3digits)<br />
(D code)<br />
G40<br />
;<br />
G40 : Cutter compensation cancel(Group 07)<br />
P_<br />
(Offset mode cancel)<br />
: Command for axis movement<br />
Offset plane<br />
XpYp<br />
ZpXp<br />
YpZp<br />
296<br />
Command for plane selection<br />
G17 ;<br />
G18 ;<br />
G19 ;<br />
IP_<br />
Xp_Yp_<br />
Xp_Zp_<br />
Yp_Zp_<br />
At the beginning when power is applied the control is in the cancel mode.<br />
In the cancel mode, the vector is always 0, and the tool center path<br />
coincides with the programmed path.<br />
When a cutter compensation command (G41 or G42, nonzero dimension<br />
words in the offset plane, and D code other than D0) is specified in the<br />
offset cancel mode, the CNC enters the offset mode.<br />
Moving the tool with this command is called start–up.<br />
Specify positioning (G00) or linear interpolation (G01) for start–up. If<br />
circular interpolation (G02, G03) is specified, P/S alarm 34 occurs.<br />
When processing the start–up block and subsequent blocks, the CNC<br />
prereads two blocks.<br />
In the offset mode, compensation is accomplished by positioning (G00),<br />
linear interpolation (G01), or circular interpolation (G02, G03). If two or<br />
more blocks that do not move the tool (miscellaneous function, dwell,<br />
etc.) are processed in the offset mode, the tool will make either an<br />
excessive or insufficient cut. If the offset plane is switched in the offset<br />
mode, P/S alarm 37 occurs and the tool is stopped.
B–63534EN/02<br />
Offset mode cancel<br />
Change of the Cutter<br />
compensation value<br />
PROGRAMMING<br />
297<br />
14. COMPENSATION FUNCTION<br />
In the offset mode, when a block which satisfies any one of the following<br />
conditions is executed, the CNC enters the offset cancel mode, and the<br />
action of this block is called the offset cancel.<br />
1. G40 has been commanded.<br />
2. 0 has been commanded as the offset number for cutter<br />
compensation.<br />
When performing offset cancel, circular arc commands (G02 and G03) are<br />
not available. If a circular arc is commanded, an P/S alarm (No. 034) is<br />
generated and the tool stops.<br />
In the offset cancel, the control executes the instructions in that block and<br />
the block in the cutter compensation buffer. In the meantime, in the case<br />
of a single block mode, after reading one block, the control executes it and<br />
stops. By pushing the cycle start button once more, one block is executed<br />
without reading the next block.<br />
Then the control is in the cancel mode, and normally, the block to be<br />
executed next will be stored in the buffer register and the next block is not<br />
read into the buffer for cutter compensation.<br />
Offset cancel mode<br />
Start up<br />
(G41/G42)<br />
Offset modecancel<br />
Offset mode<br />
(G40/D0)<br />
Fig. 14.5 (b) Changing the offset mode<br />
In general, the cutter compensation value shall be changed in the cancel<br />
mode, when changing tools. If the cutter compensation value is changed<br />
in offset mode, the vector at the end point of the block is calculated for<br />
the new cutter compensation value.<br />
Calculated from the cutter<br />
compensation value in the block<br />
N6<br />
N6<br />
Programmed path<br />
N7<br />
Calculated from the cutter<br />
compensation value in the block N7<br />
N8<br />
Fig. 14.5 (c) Changing the Cutter Compensation Value
14. COMPENSATION FUNCTION PROGRAMMING<br />
B–63534EN/02<br />
Positive/negative cutter<br />
compensation value and<br />
tool center path<br />
Cutter compensation<br />
value setting<br />
<br />
Specifying a cutter<br />
compensation value<br />
If the offset amount is negative (–), distribution is made for a figure in<br />
which G41’s and G42’s are all replaced with each other on the program.<br />
Consequently, if the tool center is passing around the outside of the<br />
workpiece, it will pass around the inside, and vice versa.<br />
The figure below shows one example. Generally, the offset amount is<br />
programmed to be positive (+).<br />
When a tool path is programmed as in ((1)), if the offset amount is made<br />
negative (–), the tool center moves as in ((2)), and vice versa.<br />
Consequently, the same tape permits cutting both male and female<br />
shapes, and any gap between them can be adjusted by the selection of the<br />
offset amount. Applicable if start–up and cancel is A type. (See II– 14.6.2<br />
and 14.6.4)<br />
<br />
Tool center path<br />
Fig. 14.5 (d) Tool Center Paths when Positive and Negative<br />
Cutter Compensation Values are Specified<br />
298<br />
ÇÇÇ<br />
ÇÇÇ<br />
ÇÇÇ<br />
Programmed path<br />
ÇÇ<br />
ÇÇ<br />
ÇÇ<br />
Assign a cutter compensation values to the D codes on the MDI panel.<br />
The table below shows the range in which cutter compensation values can<br />
be specified.<br />
mm input inch input<br />
Cutter compensation value 0 to ±999.999mm 0 to ±99.9999inch<br />
NOTE<br />
1 The cutter compensation value corresponding to offset No.<br />
0, that is, D0 always means 0. It is impossible to set D0 to<br />
any other offset amount.<br />
2 Cutter compensation C can be specified by H code with<br />
parameter OFH (No. 5001 #2) set to 1.<br />
The offset vector is the two dimensional vector that is equal to the cutter<br />
compensation value assigned by D code. It is calculated inside the control<br />
unit, and its direction is up–dated in accordance with the progress of the<br />
tool in each block.<br />
The offset vector is deleted by reset.<br />
Specify a cutter compensation value with a number assigned to it. The<br />
number consists of 1 to 3 digits after address D (D code). The D code is<br />
valid until another D code is specified. The D code is used to specify the<br />
tool offset value as well as the cutter compensation value.
B–63534EN/02<br />
Plane selection and<br />
vector<br />
PROGRAMMING<br />
299<br />
14. COMPENSATION FUNCTION<br />
Offset calculation is carried out in the plane determined by G17, G18 and<br />
G19, (G codes for plane selection). This plane is called the offset plane.<br />
Compensation is not executed for the coordinate of a position which is not<br />
in the specified plane. The programmed values are used as they are.<br />
In simultaneous 3 axes control, the tool path projected on the offset plane<br />
is compensated.<br />
The offset plane is changed during the offset cancel mode. If it is<br />
performed during the offset mode, a P/S alarm (No. 37) is displayed and<br />
the machine is stopped.
14. COMPENSATION FUNCTION PROGRAMMING<br />
B–63534EN/02<br />
<br />
ÇÇÇ<br />
ÇÇÇ<br />
ÇÇÇ<br />
C3 (–150,1150)<br />
N1<br />
N2<br />
N11<br />
Start position<br />
650R<br />
N3<br />
N5<br />
N4<br />
P2<br />
(250,900)<br />
P1<br />
(250,550)<br />
Y axis<br />
300<br />
250R<br />
C1(700,1300)<br />
P4(500,1150) P5(900,1150)<br />
P3(450,900)<br />
N10<br />
P9(700,650)<br />
X axis<br />
N6<br />
Unit : mm<br />
650R<br />
N7<br />
P6(950,900) P7<br />
(1150,900)<br />
N9<br />
P8<br />
(1150,550)<br />
C2 (1550,1550)<br />
G92 X0 Y0 Z0 ; . . . . . . . . . . . . . . . . . . . . . . Specifies absolute coordinates.<br />
The tool is positioned at the start position (X0, Y0, Z0).<br />
N1 G90 G17 G00 G41 D07 X250.0 Y550.0 ; Starts cutter compensation (start–up). The tool is shifted to the<br />
left of the programmed path by the distance specified in D07.<br />
In other words the tool path is shifted by the radius of the tool<br />
(offset mode) because D07 is set to 15 beforehand (the radius of<br />
the tool is 15 mm).<br />
N2 G01 Y900.0 F150 ; . . . . . . . . . . . . . . . . . . Specifies machining from P1 to P2.<br />
N3 X450.0 ; . . . . . . . . . . . . . . . . . . . . . . . . . . . Specifies machining from P2 to P3.<br />
N4 G03 X500.0 Y1150.0 R650.0 : . . . . . . . . . Specifies machining from P3 to P4.<br />
N5 G02 X900.0 R–250.0 ; . . . . . . . . . . . . . . . Specifies machining from P4 to P5.<br />
N6 G03 X950.0 Y900.0 R650.0 ; . . . . . . . . . . Specifies machining from P5 to P6.<br />
N7 G01 X1150.0 ; . . . . . . . . . . . . . . . . . . . . . . Specifies machining from P6 to P7.<br />
N8 Y550.0 ; . . . . . . . . . . . . . . . . . . . . . . . . . . . Specifies machining from P7 to P8.<br />
N9 X700.0 Y650.0 ; . . . . . . . . . . . . . . . . . . Specifies machining from P8 to P9.<br />
N10 X250.0 Y550.0 ; . . . . . . . . . . . . . . . . . Specifies machining from P9 to P1.<br />
N11 G00 G40 X0 Y0 ; . . . . . . . . . . . . . . . . Cancels the offset mode.<br />
The tool is returned to the start position (X0, Y0, Z0).<br />
N8
B–63534EN/02<br />
14.6<br />
DETAILS OF CUTTER<br />
COMPENSATION C<br />
14.6.1<br />
General<br />
Inner side and outer side<br />
<br />
PROGRAMMING<br />
301<br />
14. COMPENSATION FUNCTION<br />
This section provides a detailed explanation of the movement of the tool<br />
for cutter compensation C outlined in Section 14.5.<br />
This section consists of the following subsections:<br />
14.6.1 General<br />
14.6.2 Tool Movement in Start–up<br />
14.6.3 Tool Movement in Offset Mode<br />
14.6.4 Tool Movement in Offset Mode Cancel<br />
14.6.5 Interference Check<br />
14.6.6 Over cutting by Cutter Compensation<br />
14.6.7 Input command from MDI<br />
14.6.8 G53,G28,G30 and G29 commands in cutter<br />
compensation C mode<br />
14.6.9 Corner Circular Interpolation (G39)<br />
When an angle of intersection created by tool paths specified with move<br />
commands for two blocks is over 180°, it is referred to as “inner side.”<br />
When the angle is between 0° and 180°, it is referred to as “outer side.”<br />
Inner side<br />
Workpiece<br />
Programmed path<br />
α<br />
Outer side<br />
Programmed path<br />
Workpiece<br />
180°α 0°α
14. COMPENSATION FUNCTION PROGRAMMING<br />
B–63534EN/02<br />
14.6.2<br />
Tool Movement in<br />
Start–up<br />
Explanations<br />
Tool movement around<br />
an inner side of a corner<br />
°α<br />
When the offset cancel mode is changed to offset mode, the tool moves<br />
as illustrated below (start–up):<br />
Linear→Linear<br />
Start position<br />
Linear→Circular<br />
G42<br />
L<br />
G42<br />
Start position<br />
L<br />
302<br />
α<br />
α<br />
S<br />
S<br />
r<br />
r<br />
C<br />
Tool center path<br />
Workpiece<br />
L<br />
Workpiece<br />
Programmed path<br />
Tool center path
B–63534EN/02<br />
Tool movement around<br />
the outside of a corner at<br />
an obtuse angle<br />
°α
14. COMPENSATION FUNCTION PROGRAMMING<br />
B–63534EN/02<br />
Tool movement around<br />
the outside of an acute<br />
angle (α
B–63534EN/02<br />
A block without tool<br />
movement specified at<br />
start–up<br />
PROGRAMMING<br />
305<br />
14. COMPENSATION FUNCTION<br />
If the command is specified at start–up, the offset vector is not created.<br />
G91 G40 … ;<br />
:<br />
N6 X100.0 Y100.0 ;<br />
N7 G41 X0 ;<br />
N8 Y–100.0 ;<br />
N9 Y–100.0 X100.0 ;<br />
N6<br />
SS<br />
N7<br />
N8<br />
N9<br />
S<br />
Programmed path<br />
r<br />
Tool center path<br />
NOTE<br />
For the definition of blocks that do not move the tool, see<br />
II–14.6.3.
14. COMPENSATION FUNCTION PROGRAMMING<br />
B–63534EN/02<br />
14.6.3<br />
<br />
<br />
Explanations<br />
Tool movement around<br />
the inside of a corner<br />
(°α)<br />
In the offset mode, the tool moves as illustrated below:<br />
Linear→Linear<br />
Linear→Circular<br />
Circular→Linear<br />
Circular→Circular<br />
306<br />
α<br />
C<br />
S<br />
α<br />
C<br />
L<br />
α<br />
S<br />
Intersection<br />
S<br />
Intersection<br />
C<br />
Workpiece<br />
L<br />
Workpiece<br />
L<br />
Programmed path<br />
Tool center path<br />
Intersection<br />
S C<br />
L<br />
Tool center path Programmed path<br />
α<br />
Intersection<br />
Workpiece<br />
Workpiece<br />
Programmed path<br />
Tool center path<br />
Programmed path<br />
Tool center path
B–63534EN/02<br />
Tool movement around<br />
the inside α
14. COMPENSATION FUNCTION PROGRAMMING<br />
B–63534EN/02<br />
Tool movement around<br />
the outside corner at an<br />
obtuse angle<br />
(90°α
B–63534EN/02<br />
Tool movement around<br />
the outside corner at an<br />
acute angle<br />
(α
14. COMPENSATION FUNCTION PROGRAMMING<br />
B–63534EN/02<br />
When it is exceptional<br />
End position for the arc is not<br />
on the arc<br />
There is no inner intersection<br />
If the end of a line leading to an arc is programmed as the end of the arc<br />
by mistake as illustrated below, the system assumes that cutter<br />
compensation has been executed with respect to an imaginary circle that<br />
has the same center as the arc and passes the specified end position. Based<br />
on this assumption, the system creates a vector and carries out<br />
compensation. The resulting tool center path is different from that created<br />
by applying cutter compensation to the programmed path in which the<br />
line leading to the arc is considered straight.<br />
r<br />
Imaginary circle<br />
310<br />
Leading of the arc End the arc<br />
Programmed path<br />
C<br />
Center of the arc<br />
S<br />
L<br />
r<br />
L<br />
r<br />
L<br />
Workpiece<br />
Tool center path<br />
The same description applies to tool movement between two circular<br />
paths.<br />
If the cutter compensation value is sufficiently small, the two circular tool<br />
center paths made after compensation intersect at a position (P).<br />
Intersection P may not occur if an excessively large value is specified for<br />
cutter compensation. When this is predicted, P/S alarm No.033 occurs<br />
at the end of the previous block and the tool is stopped. In the example<br />
shown below, tool center paths along arcs A and B intersect at P when a<br />
sufficiently small value is specified for cutter compensation. If an<br />
excessively large value is specified, this intersection does not occur.<br />
Alarm(No.033)occurs and the tod stops<br />
When the cutter compensation value<br />
is large<br />
When the cutter compensation<br />
value is small<br />
Center of the arc B Center of the arc A<br />
Programmed path<br />
Arc A<br />
r<br />
P<br />
r<br />
Arc B
B–63534EN/02<br />
<br />
<br />
<br />
Change in the offset<br />
direction in the offset<br />
mode<br />
PROGRAMMING<br />
311<br />
14. COMPENSATION FUNCTION<br />
If the center of the arc is identical with the start position or end point, P/S<br />
alarm (No. 038) is displayed, and the tool will stop at the end position of<br />
the preceding block.<br />
Alarm(No.038)is displayed and the tool<br />
stops<br />
Tool center path<br />
r<br />
N5 N6<br />
Programmed path<br />
N7<br />
(G41)<br />
N5 G01 X100.0 ;<br />
N6 G02 X100.0 I0 J0 ;<br />
N7 G03 Y–100.0 J–100.0 ;<br />
The offset direction is decided by G codes (G41 and G42) for cutter radius<br />
and the sign of cutter compensation value as follows.<br />
Sign of offset amount<br />
Gcode + –<br />
G41 Left side offset Right side offset<br />
G42 Right side offset Left side offset<br />
The offset direction can be changed in the offset mode. If the offset<br />
direction is changed in a block, a vector is generated at the intersection<br />
of the tool center path of that block and the tool center path of a preceding<br />
block. However, the change is not available in the start–up block and the<br />
block following it.
14. COMPENSATION FUNCTION PROGRAMMING<br />
B–63534EN/02<br />
Tool center path with an intersection<br />
Linear→Linear<br />
Programmed path<br />
Linear→Circular<br />
Programmed path<br />
Circular→Linear<br />
Workpiece<br />
G42<br />
C<br />
312<br />
Workpiece<br />
G42<br />
Tool center path<br />
Workpiece<br />
G42<br />
Tool center path<br />
Programmed path<br />
Tool center path<br />
Circular→Circular<br />
Programmed path<br />
Tool center path<br />
r<br />
Workpiece<br />
r<br />
C<br />
r r<br />
S<br />
L<br />
r<br />
S<br />
L<br />
G42<br />
S<br />
r<br />
C<br />
S<br />
L<br />
C<br />
r<br />
G41<br />
r<br />
L<br />
G41<br />
Workpiece<br />
G41<br />
Workpiece<br />
G41<br />
Workpiece<br />
Workpiece
B–63534EN/02<br />
Tool center path without an intersection<br />
PROGRAMMING<br />
313<br />
14. COMPENSATION FUNCTION<br />
When changing the offset direction in block A to block B using G41 and<br />
G42, if intersection with the offset path is not required, the vector normal<br />
to block B is created at the start point of block B.<br />
Linear→Linear<br />
Linear→Circular<br />
L<br />
(G42)<br />
Workpiece<br />
(G42) (G42)<br />
Programmed path<br />
Tool center path<br />
Programmed path<br />
Tool center path<br />
Tool center path<br />
Programmed path<br />
Circular→Circular<br />
(G41)<br />
S<br />
An arc whose end position<br />
is not on the arc<br />
Programmed path<br />
L<br />
r r<br />
L L<br />
C<br />
S<br />
Tool center path<br />
r<br />
G42<br />
G41<br />
L<br />
L<br />
L<br />
S<br />
r<br />
L<br />
G41<br />
A B<br />
A<br />
(G41) G42<br />
r<br />
C<br />
S<br />
(G42)<br />
r<br />
Center<br />
S<br />
S<br />
C<br />
G41<br />
Workpiece<br />
Center<br />
B
14. COMPENSATION FUNCTION PROGRAMMING<br />
B–63534EN/02<br />
The length of tool center path<br />
larger than the circumference<br />
of a circle<br />
Normally there is almost no possibility of generating this situation.<br />
However, when G41 and G42 are changed, or when a G40 was<br />
commanded with address I, J, and K this situation can occur.<br />
In this case of the figure, the cutter compensation is not performed with<br />
more than one circle circumference: an arc is formed from P1 to P2 as<br />
shown. Depending on the circumstances, an alarm may be displayed due<br />
to the ”Interference Check” described later. To execute a circle with more<br />
than one circumference, the circle must be specified in segments.<br />
Tool center path<br />
(G42)<br />
N5 G01 G91 X500.0 Y–700.0 ;<br />
N6 G41 G02 J–500.0 ;<br />
N7 G42 G01 X500.0 Y700.0 ;<br />
314<br />
Programmed path<br />
P 1<br />
N5<br />
N6<br />
N7<br />
P 2
B–63534EN/02<br />
Temporary cutter<br />
compensation cancel<br />
Specifying G28 (automatic return<br />
to the reference position)<br />
in the offset mode<br />
Specifying G29 (automatic return<br />
from the reference position)<br />
in the offset mode<br />
PROGRAMMING<br />
315<br />
14. COMPENSATION FUNCTION<br />
If the following command is specified in the offset mode, the offset mode<br />
is temporarily canceled then automatically restored. The offset mode can<br />
be canceled and started as described in II–15.6.2 and 15.6.4.<br />
If G28 is specified in the offset mode, the offset mode is canceled at an<br />
intermediate position. If the vector still remains after the tool is returned<br />
to the reference position, the components of the vector are reset to zero<br />
with respect to each axis along which reference position return has been<br />
made.<br />
(G42 G00)<br />
r<br />
G28<br />
S<br />
Intermediate position<br />
S<br />
G00<br />
S<br />
S<br />
Reference position<br />
If G29 is commanded in the offset mode, the offset will be cancelled at<br />
the intermediate point, and the offset mode will be restored automatically<br />
from the subsequent block.<br />
G29 specified immediately after G28<br />
Programmed path<br />
(G42 G00)<br />
(G42 G00)<br />
r<br />
Intermediate position<br />
G28<br />
G29<br />
S<br />
Tool center path<br />
G29 specified not immediately after G28<br />
Programmed path<br />
G29<br />
r<br />
S<br />
Tool center path<br />
S<br />
S<br />
S<br />
S<br />
Reference position<br />
Intermediate position<br />
G29<br />
S<br />
r<br />
r<br />
r<br />
G00<br />
G00
14. COMPENSATION FUNCTION PROGRAMMING<br />
B–63534EN/02<br />
Cutter compensation G<br />
code in the offset mode<br />
Command cancelling the<br />
offset vector temporarily<br />
The offset vector can be set to form a right angle to the moving direction<br />
in the previous block, irrespective of machining inner or outer side, by<br />
commanding the cutter compensation G code (G41, G42) in the offset<br />
mode, independently. If this code is specified in a circular command,<br />
correct circular motion will not be obtained.<br />
When the direction of offset is expected to be changed by the command<br />
of cutter compensation G code (G41, G42), refer to Subsec.15.6.3.<br />
Linear→Linear<br />
Circular→Linear<br />
316<br />
G42 mode<br />
L<br />
Tool center path<br />
G42 mode<br />
r<br />
C<br />
r<br />
A block specified by G42<br />
L<br />
S Intersection<br />
L<br />
S Intersection<br />
Programmed path<br />
A block specified by G42<br />
During offset mode, if G92 (absolute zero point programming) is<br />
commanded,the offset vector is temporarily cancelled and thereafter<br />
offset mode is automatically restored.<br />
In this case, without movement of offset cancel, the tool moves directly<br />
from the intersecting point to the commanded point where offset vector<br />
is canceled. Also when restored to offset mode, the tool moves directly<br />
to the intersecting point.<br />
L<br />
Tool center path<br />
N5<br />
Programmed path<br />
S<br />
N6<br />
(G41)<br />
N5 G91 G01 X300.0 Y700.0 ;<br />
N6 X–300.0 Y600.0 ;<br />
N7 G92 X100.0 Y200.0 ;<br />
N8 G90 G01 X400.0 Y800.0 ;<br />
L L<br />
S<br />
N7<br />
G92 block<br />
N8<br />
S<br />
L
B–63534EN/02<br />
A block without tool<br />
movement<br />
A block without tool movement<br />
specified in offset mode<br />
PROGRAMMING<br />
317<br />
14. COMPENSATION FUNCTION<br />
The following blocks have no tool movement. In these blocks, the tool<br />
will not move even if cutter compensation is effected.<br />
M05 ; . . . . . . . . . . . . . . M code output<br />
S21 ; . . . . . . . . . . . . . . S code output<br />
G04 X10.0 ; . . . . . . . . . Dwell<br />
G10 L11 P01 R10.0 ; Cutter compensation value setting<br />
(G17) Z200.0 ; . . . . . . Move command not included<br />
in the offset plane.<br />
G90 ; . . . . . . . . . . . . . . G code only<br />
G91 X0 ; . . . . . . . . . . . Move distance is zero.<br />
Commands (1)<br />
to (6) are of no<br />
movement.<br />
When a single block without tool movement is commanded in the offset<br />
mode, the vector and tool center path are the same as those when the block<br />
is not commanded. This block is executed at the single block stop point.<br />
N6 G91 X100.0 Y100.0 ;<br />
N7 G04 X100.0 ;<br />
N8 X100.0 ;<br />
N6<br />
L<br />
N7 N8<br />
SS<br />
L<br />
Programmed path<br />
Tool center path<br />
Block N7 is executed here.<br />
However, when the move distance is zero, even if the block is commanded<br />
singly, tool motion becomes the same as that when more than one block<br />
of without tool movement are commanded, which will be described<br />
subsequently.<br />
N6 G91 X100.0 Y100.0 ;<br />
N7 X0 ;<br />
N8 X100.0 ;<br />
N6<br />
N7 N8<br />
L<br />
SS<br />
L<br />
Programmed path<br />
Tool center path<br />
Two blocks without tool movement should not be commanded<br />
consecutively. If commanded, a vector whose length is equal to the offset<br />
value is produced in a normal direction to tool motion in earlier block, so<br />
overcutting may result.<br />
N6 G91 X100.0 Y100.0 ;<br />
N7 S21 ;<br />
N8 G04 X10.0 ;<br />
N9 X100.0 ;<br />
N6<br />
N7 N8<br />
L<br />
N9<br />
L<br />
SSS<br />
Programmed path<br />
Tool center path<br />
Blocks N7 and N8 are executed<br />
here.
14. COMPENSATION FUNCTION PROGRAMMING<br />
B–63534EN/02<br />
Corner movement<br />
When two or more vectors are produced at the end of a block, the tool<br />
moves linearly from one vector to another. This movement is called the<br />
corner movement.<br />
If these vectors almost coincide with each other, the corner movement<br />
isn’t performed and the latter vector is ignored.<br />
Tool center path<br />
Programmed path<br />
318<br />
r<br />
<br />
r<br />
VY<br />
This vector is ignored, if<br />
∆Vx∆V Limit, and<br />
∆V Y∆V Limit<br />
If ∆Vx∆Vlimit and ∆Vy∆Vlimit, the latter vector is ignored. The<br />
∆Vlimit is set in advance by parameter (No. 5010).<br />
If these vectors do not coincide, a move is generated to turn around the<br />
corner. This move belongs to the latter block.<br />
S<br />
N6 N7<br />
This move belongs to block N7, thus, the feedrate<br />
is equal to that in block N7.<br />
If the block N7 is G00 mode, the tool is moved at<br />
G00 mode, while if it is G01, G02, G03, the tool is<br />
moved at G01 mode.<br />
However, if the path of the next block is semicircular or more, the above<br />
function is not performed.<br />
The reason for this is as follows:
B–63534EN/02<br />
Interruption of manual<br />
operation<br />
PROGRAMMING<br />
N4 G41 G91 G01 X150.0 Y200.0 ;<br />
N5 X150.0 Y200.0 ;<br />
N6 G02 J–600.0 ;<br />
N7 G01 X150.0 Y–200.0 ;<br />
N8 G40 X150.0 Y–200.0 ;<br />
Tool center path<br />
319<br />
14. COMPENSATION FUNCTION<br />
P 1<br />
P 2 P 3 P4P 5<br />
N 4<br />
N<br />
N7 5<br />
Programmed path<br />
If the vector is not ignored, the tool path is as follows:<br />
P1 → P2 → P3 → (Circle) → P4 → P5 → P6<br />
But if the distance between P2 and P3 is negligible, the point P3 is<br />
ignored. Therefore, the tool path is as follows:<br />
P2 → P4<br />
Namely, circle cutting by the block N6 is ignored.<br />
For manual operation during the cutter compensation, refer to Section<br />
III–3.5, “ Manual Absolute ON and OFF.”<br />
N 8<br />
P 6<br />
N 6
14. COMPENSATION FUNCTION PROGRAMMING<br />
B–63534EN/02<br />
14.6.4<br />
<br />
<br />
Explanations<br />
Tool movement around<br />
an inside corner<br />
(180°α)<br />
Linear→Linear<br />
Circular→Linear<br />
320<br />
Programmed path<br />
Tool center path<br />
Workpiece<br />
Workpiece<br />
L S<br />
Programmed path Tool center path<br />
C<br />
r<br />
S<br />
α<br />
r<br />
LL<br />
α<br />
G40<br />
L<br />
G40
B–63534EN/02<br />
Tool movement around<br />
an outside corner at an<br />
obtuse angle<br />
°α
14. COMPENSATION FUNCTION PROGRAMMING<br />
B–63534EN/02<br />
Tool movement around<br />
an outside corner at an<br />
acute angle<br />
(α
B–63534EN/02<br />
Tool movement around<br />
the outside linear→linear<br />
at an acute angle less<br />
than 1 degree (α
14. COMPENSATION FUNCTION PROGRAMMING<br />
B–63534EN/02<br />
Block containing G40<br />
and I_J_K_<br />
The previous block contains<br />
G41 or G42<br />
If a G41 or G42 block precedes a block in which G40 and I_, J_, K_ are<br />
specified, the system assumes that the path is programmed as a path from<br />
the end position determined by the former block to a vector determined<br />
by (I,J), (I,K), or (J,K). The direction of compensation in the former block<br />
is inherited.<br />
N1 (G42 mode) ;<br />
N2 G40 Xa Yb I_ J_ ;<br />
(I, J)<br />
324<br />
In the N1 block, the tool center moves towards X.<br />
In the N2 block, the tool moves towards E.<br />
r<br />
N2<br />
X<br />
S<br />
r<br />
N1<br />
(G42)<br />
E(a, b)<br />
G40<br />
Workpiece<br />
Tool center path<br />
Programmed path<br />
In this case, note that the CNC obtains an intersection of the tool path<br />
irrespective of whether inner or outer side machining is specified<br />
X<br />
S<br />
r<br />
r<br />
E<br />
G40<br />
Tool center path<br />
Programmed path<br />
(G42)<br />
(I, J)<br />
When an intersection is not obtainable, the tool comes to the normal<br />
position to the previous block at the end of the previous block.<br />
X<br />
S<br />
r<br />
r<br />
(G42)<br />
G40<br />
E<br />
Tool center path<br />
Programmed path<br />
(I, J)
B–63534EN/02<br />
The length of the tool center<br />
path larger than the circumference<br />
of a circle<br />
PROGRAMMING<br />
325<br />
14. COMPENSATION FUNCTION<br />
In the example shown below, the tool does not trace the circle more than<br />
once. It moves along the arc from P1 to P2. The interference check<br />
function described in II–15.6.5 may raise an alarm.<br />
Tool center path<br />
Programmed path<br />
N5<br />
(G41)<br />
N5 G01 G91 X100.0 ;<br />
N6 G02 J–60.0 ;<br />
N7 G40 G01 X50.0 Y50.0 I–10.0 J–10.0 ;<br />
(I, J)<br />
To make the tool trace a circle more than once, program two or more arcs.<br />
P 1<br />
N7<br />
N6<br />
P2
14. COMPENSATION FUNCTION PROGRAMMING<br />
B–63534EN/02<br />
14.6.5<br />
Interference Check<br />
Explanations<br />
Criteria for detecting<br />
interference<br />
Tool overcutting is called interference. The interference check function<br />
checks for tool overcutting in advance. However, all interference cannot<br />
be checked by this function. The interference check is performed even if<br />
overcutting does not occur.<br />
(1) The direction of the tool path is different from that of the programmed<br />
path (from 90 degrees to 270 degrees between these paths).<br />
326<br />
Tool center path Programmed path<br />
The directions of<br />
these two paths are<br />
different (180°).<br />
The directions of<br />
these two paths are<br />
different (180°).<br />
Tool center path<br />
Programmed path
B–63534EN/02<br />
PROGRAMMING<br />
327<br />
14. COMPENSATION FUNCTION<br />
(2) In addition to the condition (1), the angle between the start point and<br />
end point on the tool center path is quite different from that between<br />
the start point and end point on the programmed path in circular<br />
machining(more than 180 degrees).<br />
Tool center path<br />
N5<br />
Programmed path<br />
Center<br />
(G41)<br />
N5 G01 G91 X800.0 Y200.0 D1 ;<br />
N6 G02 X320.0 Y–160.0 I–200.0 J–800.0 D2 ;<br />
N7 G01 X200.0 Y–500.0 ;<br />
(Tool compensation value corresponding to D1 : r1 = 200.0)<br />
(Tool compensation value corresponding to D2 : r2 = 600.0)<br />
In the above example, the arc in block N6 is placed in the one quadrant.<br />
But after cutter compensation, the arc is placed in the four quadrants.<br />
r1<br />
N6<br />
N7<br />
r2
14. COMPENSATION FUNCTION PROGRAMMING<br />
B–63534EN/02<br />
Correction of<br />
interference in advance<br />
(1) Removal of the vector causing the interference<br />
When cutter compensation is performed for blocks A, B and C and<br />
vectors V1, V2, V3 and V4 between blocks A and B, and V5, V6, V7<br />
and V8 between B and C are produced, the nearest vectors are checked<br />
first. If interference occurs, they are ignored. But if the vectors to be<br />
ignored due to interference are the last vectors at the corner, they<br />
cannot be ignored.<br />
Check between vectors V4 and V5<br />
Interference ––– V4 and V5 are ignored.<br />
Check between V3 and V6<br />
Interference ––– V3 and V6 are ignored<br />
Check between V2 and V7<br />
Interference ––– V2 and V7 are Ignored<br />
Check between V1 and V8<br />
Interference ––––– V1 and V8 are cannot be ignored<br />
If while checking, a vector without interference is detected,<br />
subsequent vectors are not checked. If block B is a circular<br />
movement, a linear movement is produced if the vectors are<br />
interfered.<br />
(Example 1) The tool moves linearly from V1 to V8<br />
Tool<br />
center path<br />
Programmed<br />
path<br />
328<br />
C<br />
V 4, V 5 : Interference<br />
V 3, V 6 : Interference<br />
V 2, V 7 : Interference<br />
V 1, V 8 : No Interference<br />
A<br />
V 1<br />
r V6 V 7<br />
V 5<br />
B<br />
V 2<br />
V 4<br />
O 1 O 2<br />
V 3<br />
V 8<br />
r<br />
C<br />
C
B–63534EN/02<br />
PROGRAMMING<br />
329<br />
14. COMPENSATION FUNCTION<br />
(Example 2) The tool moves linearly from V1, V2, V7, to V8<br />
Tool center<br />
path<br />
C<br />
A<br />
Programmed path<br />
V 1<br />
V 2<br />
V6 V3 r r<br />
V 5<br />
B<br />
V 7<br />
V 4<br />
O 1 O 2<br />
V 8<br />
C<br />
C<br />
V 4, V 5 : Interference<br />
V 3, V 6 : Interference<br />
V 2, V 7 : No Interference<br />
(2) If the interference occurs after correction (1), the tool is stopped with<br />
an alarm.<br />
If the interference occurs after correction (1) or if there are only one<br />
pair of vectors from the beginning of checking and the vectors<br />
interfere, the P/S alarm (No.41) is displayed and the tool is stopped<br />
immediately after execution of the preceding block. If the block is<br />
executed by the single block operation, the tool is stopped at the end<br />
of the block.<br />
Tool center<br />
path<br />
Programmed path<br />
A<br />
Stopped<br />
V 6<br />
V 5 V 2<br />
After ignoring vectors V2 and V5 because of interference, interference<br />
also occurs between vectors V1 and V6. The alarm is displayed and<br />
the tool is stopped.<br />
B<br />
V 1<br />
C
14. COMPENSATION FUNCTION PROGRAMMING<br />
B–63534EN/02<br />
When interference is<br />
assumed although actual<br />
interference does not<br />
occur<br />
(1) Depression which is smaller than the cutter compensation value<br />
Programmed path<br />
330<br />
Tool center path<br />
A<br />
B<br />
Stopped<br />
There is no actual interference, but since the direction programmed in<br />
block B is opposite to that of the path after cutter compensation the tool<br />
stops and an alarm is displayed.<br />
(2) Groove which is smaller than the cutter compensation value<br />
Programmed path Tool center path<br />
Stopped<br />
A B C<br />
Like (1), P/S alarm is displayed because of the interference as the<br />
direction is reverse in block B.<br />
C
B–63534EN/02<br />
14.6.6<br />
<br />
<br />
Explanations<br />
Machining an inside<br />
corner at a radius<br />
smaller than the cutter<br />
radius<br />
Machining a groove<br />
smaller than the tool<br />
radius<br />
PROGRAMMING<br />
331<br />
14. COMPENSATION FUNCTION<br />
When the radius of a corner is smaller than the cutter radius, because the<br />
inner offsetting of the cutter will result in overcuttings, an alarm is<br />
displayed and the CNC stops at the start of the block. In single block<br />
operation, the overcutting is generated because the tool is stopped after<br />
the block execution.<br />
Tool center path<br />
Programmed path<br />
If the CNC does not<br />
stop, overcutting occurs<br />
Workpiece<br />
ÇÇ<br />
ÇÇ<br />
ÇÇ<br />
ÇÇÇÇ<br />
ÇÇÇÇ<br />
An alarm is generated<br />
and the operation<br />
stops<br />
An alarm is generated and<br />
the operation stops here in<br />
single block operation<br />
Since the cutter compensation forces the path of the center of the tool to<br />
move in the reverse of the programmed direction, overcutting will result.<br />
In this case an alarm is displayed and the CNC stops at the start of the<br />
block.<br />
Tool center path<br />
Programmed path<br />
Workpiece<br />
An alarm is displayed and the operation<br />
stops<br />
ÇÇÇÇÇ<br />
ÇÇÇÇÇ<br />
ÇÇÇÇÇ<br />
ÇÇÇÇÇ<br />
Overcutting if the operation would not stop
14. COMPENSATION FUNCTION PROGRAMMING<br />
B–63534EN/02<br />
Machining a step smaller<br />
than the tool radius<br />
Starting compensation<br />
and cutting along the<br />
Z–axis<br />
When machining of the step is commanded by circular machining in the<br />
case of a program containing a step smaller than the tool radius, the path<br />
of the center of tool with the ordinary offset becomes reverse to the<br />
programmed direction. In this case, the first vector is ignored, and the tool<br />
moves linearly to the second vector position. The single block operation<br />
is stopped at this point. If the machining is not in the single block mode,<br />
the cycle operation is continued. If the step is of linear, no alarm will be<br />
generated and cut correctly. However uncut part will remain.<br />
Linear movement Stop position after execution of a single<br />
block<br />
The first vector is ignored<br />
S<br />
Tool center path<br />
332<br />
ÇÇÇÇÇÇÇ<br />
ÇÇÇÇÇÇÇ<br />
ÇÇÇÇÇÇÇ<br />
ÇÇÇÇÇÇÇ<br />
ÇÇÇÇÇÇÇ<br />
ÇÇÇÇÇÇÇ<br />
ÇÇÇÇÇÇÇ<br />
Programmed path<br />
Center of the circular<br />
machining<br />
Workpiece<br />
An overcutting will result if the first vector is not ignored.<br />
However, tool moves linearly.<br />
It is usually used such a method that the tool is moved along the Z axis<br />
after the cutter compensation is effected at some distance from the<br />
workpiece at the start of the machining.<br />
In the case above, if it is desired to divide the motion along the Z axis into<br />
rapid traverse and cutting feed, follow the procedure below.<br />
N1 G91 G00 G41 X500.0 Y500.0 D1 ;<br />
N3 G01 Z–300.0 F100 ;<br />
N6 Y1000.0 F200 ;<br />
After compensation<br />
ÊÊÊÊ<br />
ÊÊÊÊ<br />
N1<br />
ÊÊÊÊ<br />
ÊÊÊÊ<br />
ÊÊÊÊ<br />
Workpiece<br />
N6<br />
N3:Move command in Z axis<br />
(500, 500)<br />
In the program example above, when executing block N1, blocks N3 and<br />
N6 are also entered into the buffer storage, and by the relationship among<br />
them the correct compensation is performed as in the figure above.<br />
Then, if the block N3 (move command in Z axis) is divided as follows:<br />
As there are two move command blocks not included in the selected plane<br />
and the block N6 cannot be entered into the buffer storage, the tool center<br />
path is calculated by the information of N1 in the figure above. That is,<br />
the offset vector is not calculated in start–up and the overcutting may<br />
result.
B–63534EN/02<br />
PROGRAMMING<br />
The above example should be modified as follows:<br />
N1 G91 G00 G41 X500.0 Y500.0 D1 ;<br />
N3 G01 Z–250.0 ;<br />
N5 G01 Z–50.0 F100 ;<br />
N6 Y1000.0 F200 ;<br />
Workpiece<br />
After compensation<br />
333<br />
ÊÊÊÊÊ<br />
ÊÊÊÊÊ<br />
ÊÊÊÊÊ<br />
ÊÊÊÊÊ<br />
N1<br />
N6<br />
ÊÊÊÊÊ<br />
14. COMPENSATION FUNCTION<br />
N3, N5:Move command for the Z axis<br />
(500, 500)<br />
The move command in the same direction as that of the move command<br />
after the motion in Z axis should be programmed.<br />
N1 G91 G00 G41 X500.0 Y400.0 D1 ;<br />
N2 Y100.0 ;<br />
N3 Z–250.0 ;<br />
N5 G01 Z–50.0 F100 ;<br />
N6 Y1000.0 F200 ;<br />
Workpiece<br />
After compensation<br />
ÊÊÊÊ<br />
ÊÊÊÊ<br />
ÊÊÊÊ<br />
ÊÊÊÊ<br />
ÊÊÊÊ<br />
N1<br />
ÊÊÊÊ<br />
N6<br />
N2<br />
N3, N5 : Move command for the Z<br />
axis (2blocks)<br />
(500, 500)<br />
As the block with sequence No. N2 has the move command in the same<br />
direction as that of the block with sequence No. N6, the correct<br />
compensation is performed.
14. COMPENSATION FUNCTION PROGRAMMING<br />
B–63534EN/02<br />
14.6.7<br />
Input Command from<br />
MDI<br />
Cutter compensation C is not performed for commands input from the<br />
MDI.<br />
However, when automatic operation using the absolute commands is<br />
temporarily stopped by the single block function, MDI operation is<br />
performed, then automatic operation starts again, the tool path is as<br />
follows :<br />
In this case, the vectors at the start position of the next block are translated<br />
and the other vectors are produced by the next two blocks. Therefore,<br />
from next block but one, cutter compensation C is accurately performed.<br />
V B1<br />
Command<br />
for MDI<br />
V B2<br />
V B1’<br />
V B2’<br />
334<br />
P B’<br />
P B<br />
P A<br />
P D<br />
P C<br />
V C1’<br />
When position PA, PB, and PC are programmed in an absolute command,<br />
tool is stopped by the single block function after executing the block from<br />
PA to PB and the tool is moved by MDI operation. Vectors VB1 and VB2<br />
are translated to VB1’ and VB2’ and offset vectors are recalculated for the<br />
vectors VC1 and VC2 between block PB–PC and PC–PD.<br />
However, since vector VB2 is not calculated again, compensation is<br />
accurately performed from position PC.<br />
V C1<br />
V C2
B–63534EN/02<br />
14.6.8<br />
G53, G28, G30, G30.1<br />
and G29 Commands in<br />
Cutter Compensation C<br />
Mode<br />
Explanations<br />
G53 command in cutter<br />
compensation C mode<br />
PROGRAMMING<br />
335<br />
14. COMPENSATION FUNCTION<br />
A function has been added which performs positioning by automatically<br />
canceling a cutter compensation vector when G53 is specified in cutter<br />
compensation C mode, then automatically restoring that cutter<br />
compensation vector with the execution of the next move command.<br />
The cutter compensation vector restoration mode is of FS16 type when<br />
CCN (bit 2 of parameter No. 5003) is set to 0; it is of FS15 type when CCN<br />
is set to 1.<br />
When G28, G30, or G30.1 is specified in cutter compensation C mode,<br />
automatic reference position return is performed by automatically<br />
canceling a cutter compensation vector, that cutter compensation vector<br />
automatically being restored with the execution of the next move<br />
command. In this case, the timing and format of cutter compensation<br />
vector cancellation/restoration, performed when CCN (bit 2 of parameter<br />
No. 5003) is set to 1, are changed to FS15 type.<br />
When CCN (bit 2 of parameter No. 5003) is set to 0, the conventional<br />
specification remains applicable.<br />
When G29 is specified in cutter compensation C mode, the cutter<br />
compensation vector is automatically canceled/restored. In this case, the<br />
timing and format of cutter compensation vector cancellation/restoration,<br />
performed when CCN (bit 2 of parameter No. 5003) is set to 1, are<br />
changed to FS15 type.<br />
When CCN (bit 2 of parameter No. 5003) is set to 0, the conventional<br />
specification remains applicable.<br />
When G53 is specified in cutter compensation C mode, the previous block<br />
generates a vector that is perpendicular to the move direction and which<br />
has the same magnitude as the offset value. Then, the offset vector is<br />
canceled when movement to a specified position is performed in the<br />
machine coordinate system. In the next block, offset mode is<br />
automatically resumed.<br />
Note that cutter compensation vector restoration is started when CCN (bit<br />
2 of parameter No. 5003) is set to 0; when CCN is set to 1, an intersection<br />
vector is generated (FS15 type).
14. COMPENSATION FUNCTION PROGRAMMING<br />
B–63534EN/02<br />
(1)G53 specified in offset mode<br />
When CCN (bit 2 of parameter No.5003)=0<br />
Oxxxx;<br />
G90G41_ _;<br />
G53X_Y_;<br />
336<br />
[Type A]<br />
(G41G00)<br />
[Type B]<br />
Start–up<br />
r<br />
s s<br />
G53<br />
G00<br />
Start–up<br />
r<br />
r<br />
s s<br />
G53<br />
G00<br />
When CCN (bit 2 of parameter No.5003)=1<br />
[FS15 Type]<br />
(G41G00)<br />
r<br />
s s<br />
G53<br />
G00<br />
(2) <strong>Inc</strong>remental G53 specified in offset mode<br />
When CCN (bit 2 of parameter No.5003)=0<br />
O××××;<br />
G91G41_ _;<br />
G53X_Y_;<br />
[Type A] Start–up<br />
r<br />
(G91G41G00) s<br />
G53<br />
[Type B]<br />
(G91G41G00) s<br />
G53<br />
r<br />
s<br />
s<br />
s<br />
Start–up<br />
s<br />
r<br />
G90G00<br />
r<br />
r<br />
s<br />
G90G00<br />
r<br />
G00<br />
G00<br />
G00<br />
G00<br />
G00
B–63534EN/02<br />
PROGRAMMING<br />
When CCN (bit2 of parameter No.5003)=1<br />
337<br />
[FS15 Type]<br />
r<br />
(G91G41G00) s<br />
G53<br />
14. COMPENSATION FUNCTION<br />
s<br />
G90G00<br />
G00<br />
(3)G53 specified in offset mode with no movement specified<br />
When CCN (bit2 of parameter No.5003)=0<br />
Oxxxx;<br />
G90G41_ _;<br />
G00X20.Y20. ;<br />
G53X20.Y20. ;<br />
[Type A]<br />
(G41G00)<br />
[Type B]<br />
(G41G00)<br />
Start–up<br />
r<br />
s<br />
G53<br />
Start–up<br />
r<br />
s<br />
G53<br />
r<br />
s<br />
G00<br />
G00<br />
When CCN (bit2 of parameter No.5003)=1<br />
[FS15 Type]<br />
(G41G00)<br />
r<br />
s<br />
G53<br />
G00<br />
r<br />
s<br />
s<br />
G00<br />
G00<br />
G00
14. COMPENSATION FUNCTION PROGRAMMING<br />
B–63534EN/02<br />
WARNING<br />
1 When cutter compensation C mode is set and all–axis machine lock is applied, the G53<br />
command does not perform positioning along the axes to which machine lock is applied. The<br />
vector, however, is preserved. When CCN (bit 2 of parameter No. 5003) is set to 0, the vector<br />
is canceled. (Note that even if the FS15 type is used, the vector is canceled when each–axis<br />
machine lock is applied.)<br />
Example 1: When CCN (bit 2 of parameter No. 5003) = 0,<br />
type A is used, and all–axis machine lock is applied<br />
(G41G00)<br />
Example 2: When CCN (bit 2 of parameter No. 5003) = 1<br />
and all–axis machine lock is applied [FS15 type]<br />
(G41G00)<br />
G53<br />
Example 3: When CCN (bit 2 of parameter No. 5003) = 1<br />
and specified–axis machine lock is applied [FS15 type]<br />
(G41G00)<br />
<br />
s<br />
2 When G53 is specified for a compensation axis in cutter compensation mode, the vectors along<br />
the other axes are also canceled. (This also applies when CCN (bit 2 of parameter No.5003)<br />
is set to 1. When the FS15 type is used, only the vector along a specified axis is canceled.<br />
Note that the FS15 type cancellation differs from the actual FS15 specification in this point.)<br />
Example: When CCN (bit 2 of parameter No.5003)=1[FS 15 type]<br />
(G41X_Z_)<br />
<br />
s<br />
<br />
<br />
s<br />
G53<br />
338<br />
G00<br />
G00<br />
s G00<br />
G53<br />
G53Z_<br />
s<br />
s<br />
s<br />
s<br />
G00<br />
<br />
<br />
<br />
s<br />
G00<br />
G00<br />
G00<br />
G00
B–63534EN/02<br />
PROGRAMMING<br />
339<br />
14. COMPENSATION FUNCTION<br />
NOTE<br />
1 When a G53 command specifies an axis that is not in the cutter compensation C plane, a<br />
perpendicular vector is generated at the end point of the previous block, and the tool does not<br />
move. In the next block, offset mode is automatically resumed (in the same way as when two<br />
or more continuous blocks do not specify any move commands).<br />
Example: When CCN (bit 2 of parameter No. 5003) = 0, and type A is used<br />
(G41G00X_Y_)<br />
G53Z_<br />
G00<br />
2 When a G53 block is specified to become a start–up block, the next block actually becomes<br />
the start–up block. When CCN (bit 2 of parameter No. 5003) is set to 1, an intersection vector<br />
is generated.<br />
s<br />
Example: When CCN (bit 2 of parameter No. 5003) = 0 and type A is used<br />
G00<br />
s<br />
<br />
G41G53<br />
s<br />
<br />
Start–up<br />
s<br />
Start–up<br />
G00<br />
G00<br />
<br />
s<br />
s<br />
G00<br />
G00
14. COMPENSATION FUNCTION PROGRAMMING<br />
B–63534EN/02<br />
G28, G30, or G30.1<br />
command in cutter<br />
compensation C mode<br />
G29 command in cutter<br />
compensation C mode<br />
When G28, G30, or G30.1 is specified in cutter compensation C mode,<br />
an operation of FS15 type is performed if CCN (bit 2 of parameter No.<br />
5003) is set to 1.<br />
This means that an intersection vector is generated in the previous block,<br />
and a perpendicular vector is generated at an intermediate position. Offset<br />
vector cancellation is performed when movement is made from the<br />
intermediate position to the reference position. As part of restoration, an<br />
intersection vector is generated between a block and the next block.<br />
(1)G28, G30, or G30.1, specified in offset mode (with movement to both<br />
an intermediate position and reference position performed)<br />
(a) For return by G29<br />
When CCN (bit 2 of parameter No. 5003) = 0<br />
Oxxxx;<br />
G91G41_ _ _;<br />
G28X40.Y0 ;<br />
G29X45.Y15. ;<br />
340<br />
[Type A]<br />
s<br />
(G42G01)<br />
[Type B]<br />
(G42G01)<br />
s<br />
r<br />
Intermediate<br />
position<br />
G28/30/30.1<br />
s<br />
Intermediate<br />
position<br />
G28/30/30.1<br />
s<br />
When CCN (bit 2 of parameter No. 5003) = 1<br />
[FS15 Type] Intermediate<br />
position<br />
G28/30/30.1<br />
s s<br />
(G42G01)<br />
<br />
s Return posiiton<br />
r G01<br />
G29<br />
s<br />
Reference position or floating<br />
reference position<br />
s<br />
r<br />
G29<br />
Return posiiton<br />
G01<br />
s<br />
Reference position or floating<br />
reference position<br />
G29<br />
s<br />
Return posiiton<br />
G01<br />
s<br />
Reference position or floating<br />
reference position
B–63534EN/02<br />
PROGRAMMING<br />
(b) For return by G00<br />
When CCN (bit 2 of parameter No. 5003) = 0<br />
Oxxxx;<br />
G91G41_ _ _;<br />
G28X40.Y0 ;<br />
[Type A]<br />
341<br />
(G42G01)<br />
[Type B]<br />
(G42G01)<br />
14. COMPENSATION FUNCTION<br />
Intermediate position<br />
G28/30/30.1<br />
s s s G01<br />
<br />
G00 <br />
When CCN (bit 2 of parameter No. 5003) = 1<br />
[FS15 Type]<br />
(G42G01)<br />
s<br />
<br />
s<br />
Reference position or floating<br />
reference position<br />
Intermediate position<br />
G28/30/30.1<br />
s s s G01<br />
<br />
G00 <br />
s<br />
G00<br />
s<br />
Intermediate position<br />
G28/30/30.1<br />
s<br />
s<br />
Reference position or floating<br />
reference position<br />
<br />
G01<br />
Reference position or floating<br />
reference position<br />
(2)G28, G30, or G30.1, specified in offset mode (with movement to an<br />
intermediate position not performed)<br />
(a) For return by G29<br />
When CCN (bit 2 of parameter No. 5003) = 0<br />
O××××;<br />
G91G41_ _ _;<br />
G28X0Y0 ;<br />
G29X0Y0 ;<br />
[Type A]<br />
(G42G01) s G01<br />
[Type B]<br />
r<br />
G28/30/30.1<br />
Reference position or floating<br />
reference position<br />
Intermediate position = return position<br />
G28/30/30.1<br />
G29<br />
(G42G01) s G01 s<br />
r<br />
G29<br />
s<br />
s<br />
s<br />
G01<br />
Intermediate position = return position<br />
Reference position or floating<br />
reference position<br />
G01
14. COMPENSATION FUNCTION PROGRAMMING<br />
B–63534EN/02<br />
When CCN (bit 2 of parameter No. 5003) = 1<br />
[FS15 Type]<br />
342<br />
Intermediate position = return position<br />
(G42G01) s G01 s<br />
r<br />
G28/30/30.1<br />
Reference position or floating<br />
reference position<br />
G29<br />
(b)For return by G00<br />
When CCN (bit 2 of parameter No.5003)=0<br />
Oxxxx;<br />
G91G41_ _ _;<br />
G28X0Y0 ;<br />
[Type A]<br />
r<br />
(G42G01)<br />
s<br />
Intermediate<br />
position<br />
G28/30/30.1<br />
s<br />
G01<br />
Start–up<br />
r<br />
s G01<br />
s G00<br />
Reference position or floating<br />
reference position<br />
[Type B]<br />
r<br />
(G42G01)<br />
s<br />
G28/30/30.1<br />
s<br />
s G01<br />
Start–up<br />
r<br />
Intermediate<br />
position<br />
G00<br />
Reference position or floating<br />
reference position<br />
When CCN (bit 2 of parameter No.5003)=1<br />
[FS15 Type]<br />
s<br />
r<br />
(G41G01) Intermediate<br />
position<br />
G28/30/30.1 s<br />
s G01<br />
G00<br />
Reference position or floating<br />
reference position
B–63534EN/02<br />
PROGRAMMING<br />
343<br />
14. COMPENSATION FUNCTION<br />
(3)G28, G30, or G30.1, specified in offset mode<br />
(with movement to a reference position not performed)<br />
(a) For return by G29<br />
When CCN (bit 2 of parameter No.5003)=0<br />
Oxxxx;<br />
G91G41_ _ _;<br />
G28X40.Y–40.;<br />
G29X40.Y40.;<br />
[Type A]<br />
Return position<br />
(G42G01) s<br />
s G01<br />
r G28/30/30.1<br />
G29<br />
r<br />
s Reference position or floating<br />
reference position=Intermediate<br />
position<br />
[Type B]<br />
Return position<br />
(G42G01)<br />
r<br />
s<br />
G28/30/30.1<br />
G29<br />
s G01<br />
r<br />
s Reference position or floating<br />
reference position=Intermediate<br />
position<br />
When CCN (bit 2 of parameter No.5003)=1<br />
[FS15 Type]<br />
Return position<br />
(G42G01) s<br />
s G01<br />
G28/30/30.1<br />
G29<br />
s<br />
r Reference position or floating<br />
reference position=Intermediate<br />
position<br />
(b)For return by G00<br />
When CCN (bit 2 of parameter No.5003)=0<br />
Oxxxx;<br />
G91G41_ _ _;<br />
G28X40.Y–40.;<br />
[Type A]<br />
r<br />
(G41G01) s<br />
G28/30/30.1<br />
[Type B]<br />
(G41G01)<br />
r<br />
s r s G01<br />
s<br />
G28/30/30.1 s<br />
Start–up<br />
r<br />
G00<br />
s G01<br />
Reference position or floating<br />
reference position=Intermediate<br />
position<br />
G00<br />
Start–up<br />
When CCN (bit 2 of parameter No.5003)=1<br />
[FS15 Type]<br />
Reference position or floating<br />
reference position=Intermediate<br />
position<br />
(G41G01) s<br />
s G01<br />
G28/30/30.1<br />
G00<br />
s<br />
r<br />
Reference position or floating<br />
reference position=Intermediate<br />
position
14. COMPENSATION FUNCTION PROGRAMMING<br />
B–63534EN/02<br />
(4)G28, G30, or G30.1 specified in offset mode (with no movement<br />
performed)<br />
(a) For return by G29<br />
When CCN (bit 2 of parameter No.5003)=0<br />
O××××;<br />
G91G41_ _ _;<br />
G28X0Y0;<br />
G29X0Y0;<br />
344<br />
[Type A]<br />
G28/30/30.1/G29 Intersection vector<br />
(G41G01) r<br />
s G01<br />
G01<br />
Reference position or floating<br />
reference position<br />
=Intermediate position<br />
=return position<br />
[Type B]<br />
(G41G01)<br />
G28/30/30.1/G29<br />
r<br />
s G01<br />
Reference position or floating<br />
reference position<br />
=Intermediate position<br />
=return position<br />
G01<br />
When CCN (bit 2 of parameter No.5003)=1<br />
[FS15 Type]<br />
G28/30/30.1/G29<br />
(G42G01) r<br />
s G01<br />
Reference position or floating G01<br />
reference position<br />
=Intermediate position<br />
=return position<br />
(b)For return by G00<br />
When CCN (bit 2 of parameter No.5003)=0<br />
O××××;<br />
G91G41_ _ _;<br />
G28X0Y0;<br />
[Type A]<br />
G28/30/30.1 Start–up<br />
(G41G01) r<br />
s G00 s<br />
Reference position or floating<br />
reference position<br />
=Intermediate position<br />
G01<br />
[Type B]<br />
G28/30/30.1 Start–up<br />
(G41G01) r<br />
r<br />
s G00 s<br />
Reference position or floating<br />
reference position<br />
=Intermediate position<br />
G01<br />
Intersection vector<br />
Intersection vector
B–63534EN/02<br />
PROGRAMMING<br />
When CCN (bit 2 of parameter No.5003)=1<br />
345<br />
[FS15 Type]<br />
G28/30/30.1<br />
(G41G01) r<br />
s G00<br />
Reference position or floating G01<br />
reference position<br />
=Intermediate position<br />
14. COMPENSATION FUNCTION<br />
WARNING<br />
1 When a G28, G30, or G30.1 command is specified during all–axis machine lock, a<br />
perpendicular offset vector is applied at the intermediate position, and movement to the<br />
reference position is not performed; the vector is preserved. Note, however, that even if the<br />
FS15 type is used, the vector is canceled only when each–axis machine lock is applied.<br />
(The FS15 type preserves the vector even when each–axis machine lock is applied.)<br />
Example1: When CCN (bit 2 of parameter No.5003)=1<br />
and all–axis machine lock is applied<br />
[FS15Type ]<br />
(G42G01)<br />
Intermediate position<br />
r s<br />
G28<br />
Example2: When CCN (bit 2 of parameter No.5003)=1<br />
and each–axis machine lock is applied<br />
[FS15Type]<br />
r<br />
2 When G28, G30, or G30.1 is specified for a compensation axis in cutter compensation mode,<br />
the vectors along the other axes are also canceled. (This also applies when CCN (bit 2 of<br />
parameter No. 5003) is set to 1. When the FS15 type is used, only the vector along a specified<br />
axis is canceled. Note that the FS15 type cancellation differs from the actual FS15 specification<br />
in this point.)<br />
Example: When CCN (bit 2 of parameter No.5003)=1<br />
(G41G00X_Z_)<br />
(G42G01)<br />
Intermediate position<br />
r<br />
s s<br />
r<br />
G28Z_<br />
Intermediate position<br />
s<br />
s<br />
G28<br />
s<br />
s<br />
s<br />
G01<br />
s<br />
G00<br />
s G01<br />
Reference position or floating<br />
reference position<br />
s<br />
G01<br />
G00<br />
G01<br />
Reference position or floating<br />
reference position<br />
Reference position or floating<br />
reference position
14. COMPENSATION FUNCTION PROGRAMMING<br />
B–63534EN/02<br />
NOTE<br />
1 When a G28, G30, or G30.1 command specifies an axis that is not in the cutter compensation<br />
C plane, a perpendicular vector is generated at the end point of the previous block, and the tool<br />
does not move. In the next block, offset mode is automatically resumed (in the same way as<br />
when two or more continuous blocks do not specify any move commands).<br />
Example: When CCN (bit 2 of parameter No. 5003) = 1<br />
2 When a G28, G30, or G30.1 block is specified such that the block becomes a start–up block,<br />
a vector perpendicular to the move direction is generated at an intermediate position, then<br />
subsequently canceled at the reference position. In the next block, an intersection vector is<br />
generated.<br />
Example: When CCN (bit 2 of parameter No.5003)=1<br />
[FS15 Type]<br />
[FS15 Type]<br />
(G41G01X_Y_)<br />
G01<br />
Intermediate position<br />
G28(G30/30.1)Z__<br />
r<br />
s<br />
s<br />
r<br />
s<br />
G01<br />
G42G28<br />
346<br />
s<br />
s<br />
G01<br />
s<br />
s<br />
G01<br />
G01<br />
Reference position or floating<br />
reference position
B–63534EN/02<br />
G29 command in cutter<br />
compensation C mode<br />
PROGRAMMING<br />
347<br />
14. COMPENSATION FUNCTION<br />
When G29 is specified in cutter compensation C mode, an operation of<br />
FS15 type is performed if CCN (bit 2 of parameter No. 5003) is set to 1.<br />
This means that an intersection vector is generated in the previous block,<br />
and vector cancellation is performed when a movement to an intermediate<br />
position is performed. When movement from the intermediate position<br />
to the return position is performed, the vector is restored; an intersection<br />
vector is generated between the block and the next block.<br />
(1)G29 specified in offset mode (with movement to both an intermediate<br />
position and reference position performed)<br />
(a) For specification made immediately after automatic reference<br />
position return<br />
When CCN (bit 2 of parameter No.5003)=0<br />
O××××;<br />
G91G41_ _ _;<br />
G28X40.Y0;<br />
G29X45.Y15.;<br />
[Tlype A]<br />
(G42G01)<br />
[Type B]<br />
(G42G01)<br />
G28/30/30.1<br />
s<br />
r<br />
Intermediate<br />
position<br />
s<br />
G29<br />
Return position<br />
s<br />
G29<br />
G01<br />
s<br />
Reference position or floating<br />
reference position<br />
Intermediate position Return position<br />
s<br />
G28/30/30.1<br />
s s<br />
G01<br />
When CCN (bit 2 of parameter No.5003)=1<br />
[FS15Type]<br />
G28/30/30.1<br />
s<br />
(G42G01)<br />
Intermediate<br />
position<br />
s<br />
r<br />
s<br />
Reference position or floating<br />
reference position<br />
G29<br />
Return position<br />
s<br />
G01<br />
s<br />
Reference position or floating<br />
reference position
14. COMPENSATION FUNCTION PROGRAMMING<br />
B–63534EN/02<br />
(b)For specification made other than immediately after automatic<br />
reference position return<br />
When CCN (bit 2 of parameter No.5003)=0<br />
O××××;<br />
G91G41_ _ _;<br />
G29X40.Y40.;<br />
348<br />
[Type A]<br />
Return position<br />
(G42G01)<br />
s G01<br />
Intermediate<br />
position<br />
r<br />
r<br />
s<br />
G29<br />
[Type B]<br />
Return position<br />
(G42G01)<br />
Intermediate<br />
position<br />
s<br />
r<br />
G01<br />
s G29 s<br />
r<br />
Start–up<br />
When CCN (bit 2 of parameter No.5003)=1<br />
s<br />
Start–up<br />
[FS15 Type]<br />
Return position<br />
s G01<br />
(G42G01)<br />
Intermediate<br />
position<br />
s G29 s<br />
(2)G29 specified in offset mode (with movement to an intermediate<br />
position not performed)<br />
(a) For specification made immediately after automatic reference<br />
position return<br />
When CCN (bit 2 of parameter No.5003)=0<br />
O××××;<br />
G91G41_ _ _;<br />
G28X40.Y–40.;<br />
G29X40.Y40.;<br />
[Type A]<br />
(G42G01)<br />
s<br />
r<br />
[Type B]<br />
(G42G01)<br />
Return position<br />
s<br />
G28/30/30.1 r<br />
G29<br />
s<br />
Return position<br />
s<br />
G28/30/30.1<br />
s G01<br />
r<br />
G29<br />
s<br />
G01<br />
Reference position or floating<br />
reference position=Intermediate<br />
position<br />
Reference position or floating<br />
reference position=Intermediate<br />
position
B–63534EN/02<br />
PROGRAMMING<br />
When CCN (bit 2 of parameter No.5003)=1<br />
[FS15 Type]<br />
349<br />
14. COMPENSATION FUNCTION<br />
Return position<br />
(G42G01) s<br />
s G01<br />
G28/30/30.1<br />
r<br />
s<br />
G29<br />
Reference position or floating<br />
reference position=Intermediate<br />
position<br />
(b)For specification made other than immediately after automatic<br />
reference position return<br />
When CCN (bit 2 of parameter No.5003)=0<br />
O××××;<br />
G91G41_ _ _;<br />
G29X40.Y–40.;<br />
[Type A]<br />
(G42G01)<br />
r<br />
[Type B]<br />
(G42G01)<br />
s<br />
Start–up<br />
s<br />
r<br />
Start–up<br />
Intermediate position<br />
G29<br />
s<br />
r<br />
G01<br />
Intermediate position<br />
G29 G01<br />
s<br />
r r<br />
When CCN (bit 2 of parameter No.5003)=1<br />
[FS15 Type]<br />
Intermediate position<br />
s<br />
G01<br />
Return position<br />
s G01<br />
Return position<br />
(G42G01) s s G01<br />
r<br />
G29<br />
G01<br />
s<br />
Return position
14. COMPENSATION FUNCTION PROGRAMMING<br />
B–63534EN/02<br />
(3)G29 specified in offset mode (with movement to a reference position<br />
not performed)<br />
(a) For specification made immediately after automatic reference<br />
position return<br />
When CCN (bit 2 of parameter No.5003)=0<br />
O××××;<br />
G91G41_ _ _;<br />
G28X0Y0;<br />
G29X0Y0;<br />
350<br />
[Type A]<br />
Intermediate position<br />
=Return position<br />
(G42G01)<br />
s G01 s<br />
r<br />
G01<br />
G28/30/30.1 G29<br />
s<br />
Reference position or floating<br />
reference position<br />
[Type B]<br />
Intermediate position<br />
=Return position<br />
(G42G01)<br />
s G01 s<br />
G28/30/30.1<br />
r G01<br />
G29<br />
s<br />
Reference position or floating<br />
reference position<br />
When CCN (bit 2 of parameter No.5003)=1<br />
[FS15 Type]<br />
Intermediate position<br />
=Return position<br />
(G42G01) s G01 s<br />
r<br />
G28/30/30.1<br />
Reference position or floating<br />
reference position<br />
G29<br />
s<br />
G01
B–63534EN/02<br />
PROGRAMMING<br />
351<br />
14. COMPENSATION FUNCTION<br />
(b)For specification made other than immediately after automatic<br />
reference position return<br />
O××××;<br />
G91G41_ _ _;<br />
G29X0Y0;<br />
[Type A]<br />
(G42G01)<br />
s<br />
r<br />
[Type B]<br />
(G42G01)<br />
s<br />
G29<br />
G29<br />
s<br />
s<br />
G01<br />
s<br />
Intermediate position<br />
=Return position<br />
G01<br />
Intermediate position=<br />
Return position<br />
When CCN (bit 2 of parameter No.5003)=1<br />
[FS15 Type]<br />
(G42G01)<br />
s<br />
G29<br />
s<br />
G01<br />
Intermediate position<br />
=Return position<br />
s G01<br />
G01<br />
s G01
14. COMPENSATION FUNCTION PROGRAMMING<br />
B–63534EN/02<br />
(4)G29 specified in offset mode (with movement to an intermediate<br />
position and reference position not performed)<br />
(a) For specification made immediately after automatic reference<br />
position return<br />
When CCN (bit 2 of parameter No.5003)=0<br />
O××××;<br />
G91G41_ _ _;<br />
G28X0Y0;<br />
G29X0Y0;<br />
352<br />
[Type A]<br />
(G41G01)<br />
G28/30/30.1,G29<br />
r<br />
s G01 s<br />
G01<br />
Reference position or floating<br />
reference position<br />
=Intermediate position<br />
=return position<br />
Intersection vector<br />
s<br />
[Type B]<br />
G28/30/30.1,G29<br />
(G41G01) r<br />
Intersection vector<br />
s G01 s<br />
G01<br />
Reference position or floating<br />
reference position<br />
=Intermediate position<br />
=return position<br />
When CCN (bit 2 of parameter No.5003)=1<br />
[FS15 Type]<br />
G28/30/30.1,G29 Intersection vector<br />
(G42G01) r<br />
s G01 s<br />
G01<br />
Reference position or floating<br />
reference position<br />
=Intermediate position<br />
=return position
B–63534EN/02<br />
PROGRAMMING<br />
353<br />
14. COMPENSATION FUNCTION<br />
(b)For specification made other than immediately after automatic<br />
reference position return<br />
When CCN (bit 2 of parameter No.5003)=0<br />
O××××;<br />
G91G41_ _ _;<br />
G29X0Y0;<br />
[Type A]<br />
(G41G01)<br />
r<br />
s<br />
Intermediate position=return position<br />
[Type B]<br />
G29<br />
G01 G01<br />
G29<br />
s<br />
(G41G01) r G01 G01<br />
s<br />
Intermediate position=return position<br />
When CCN (bit 2 of parameter No.5003)=1<br />
[FS15 Type]<br />
(G41G01)<br />
G29<br />
r<br />
s<br />
G01<br />
s<br />
G01<br />
Intermediate position=return position<br />
NOTE<br />
When a G29 command is specified for an axis that is not in<br />
the cutter compensation C plane in cutter compensation C<br />
mode, a perpendicular vector is generated at the end point<br />
of the previous block, and the tool does not move. In the<br />
next block, an intersection vector is generated (in the same<br />
way as when two or more continuous blocks do not specify<br />
any move commands).<br />
G29Z__<br />
(G41G01X_Y_)<br />
r<br />
s<br />
G01<br />
s<br />
s<br />
G01
14. COMPENSATION FUNCTION PROGRAMMING<br />
B–63534EN/02<br />
14.6.9<br />
Corner Circular<br />
Interpolation (G39)<br />
Format<br />
Explanations<br />
Corner circular<br />
interpolation<br />
G39 without I, J, or K<br />
G39 with I, J, and K<br />
Limitations<br />
Move command<br />
Non–move command<br />
By specifying G39 in offset mode during cutter compensation C, corner<br />
circular interpolation can be performed. The radius of the corner circular<br />
interpolation equals the compensation value.<br />
In offset mode<br />
or<br />
G39 ;<br />
G39<br />
I_J_<br />
I_K_<br />
J_K_<br />
354<br />
;<br />
When the command indicated above is specified, corner circular<br />
interpolation in which the radius equals compensation value can be<br />
performed. G41 or G42 preceding the command determines whether the<br />
arc is clockwise or counterclockwise. G39 is a one–shot G code.<br />
When G39; is programmed, the arc at the corner is formed so that the<br />
vector at the end point of the arc is perpendicular to the start point of the<br />
next block.<br />
When G39 is specified with I, J, and K, the arc at the corner is formed so<br />
that the vector at the end point of the arc is perpendicular to the vector<br />
defined by the I, J, and K values.<br />
In a block containing G39, no move command can be specified.<br />
Two or more consecutive non–move blocks must not be specified after a<br />
block containing G39 without I, J, or K. (A single block specifying a<br />
travel distance of zero is assumed to be two or more consecutive<br />
non–move blocks.) If the non–move blocks are specified, the offset<br />
vector is temporarily lost. Then, offset mode is automatically restored.
B–63534EN/02<br />
Examples<br />
G39 without I, J, or K<br />
G39 with I, J, and K<br />
PROGRAMMING<br />
.<br />
.<br />
.<br />
.<br />
N1 Y10.0 ;<br />
N2 G39 ;<br />
N3 X-10.0 ;<br />
.<br />
.<br />
.<br />
.<br />
(In offset mode)<br />
.<br />
.<br />
.<br />
. (In offset mode)<br />
N1 Y10.0 ;<br />
N2 G39 I–1.0 J2.0 ;<br />
N3 X-10.0 Y20.0 ;<br />
.<br />
.<br />
.<br />
.<br />
355<br />
(0.0, 0.0)<br />
14. COMPENSATION FUNCTION<br />
(10.0, 10.0)<br />
X axis<br />
Y axis<br />
Block N1 Offset vector<br />
X axis<br />
Block N2<br />
Block N3<br />
Programmed path<br />
Tool center path<br />
Y axis<br />
Block N2<br />
Block N1 Offset vector<br />
(0.0, 10.0)<br />
Block N3<br />
Programmed<br />
path<br />
<br />
Tool center<br />
path<br />
(–10.0, 20.0)
14. COMPENSATION FUNCTION PROGRAMMING<br />
B–63534EN/02<br />
14.7<br />
THREE–<br />
DIMENSIONAL TOOL<br />
COMPENSATION<br />
(G40, G41)<br />
Format<br />
Start up<br />
(Starting three–<br />
dimensional tool<br />
compensation)<br />
Canceling<br />
three–dimensional tool<br />
compensation<br />
In cutter compensation C, two–dimensional offsetting is performed for a<br />
selected plane. In three–dimensional tool compensation, the tool can be<br />
shifted three–dimensionally when a three–dimensional offset direction is<br />
programmed.<br />
When the following command is executed in the cutter compensation<br />
cancel mode, the three–dimensional tool compensation mode is set:<br />
G41 Xp_ Yp_ Zp_ I_ J_ K_ D_ ;<br />
Xp : X–axis or a parallel axis<br />
Yp : Y–axis or a parallel axis<br />
Zp : Z–axis or a parallel axis<br />
I<br />
J See “Explanation”.<br />
K<br />
D : Code for specifying as the cutter compensation value<br />
(1–3 digits) (D code)<br />
When the following command is executed in the three–dimensional tool<br />
compensation mode, the cutter compensation cancel mode is set:<br />
⋅When canceling the three–dimensional tool compensation mode and<br />
tool movement at the same time<br />
G40 Xp_ Yp_ Zp_ ;<br />
or<br />
Xp_ Yp_ Zp_ D00 ;<br />
⋅When only canceling the vector<br />
G40;<br />
or<br />
D00;<br />
Selecting offset space The three–dimensional space where three–dimensional tool compensation<br />
is to be executed is determined by the axis addresses specified in the startup<br />
block containing the G41 command. If Xp, Yp, or Zp is omitted, the corresponding<br />
axis, X–, Y–, or Z–axis (the basic three axis), is assumed.<br />
(Example)<br />
When the U–axis is parallel to the X–axis, the V–axis is parallel to the<br />
Y–axis, and the W–axis is parallel to the Z–axis<br />
G41 X_I_J_K_D_; XYZ space<br />
G41 U_V_Z_I_J_K_D_; UVZ space<br />
G41 W_I_J_K_D_; XYW space<br />
356
B–63534EN/02 PROGRAMMING<br />
14. COMPENSATION FUNCTION<br />
Explanations<br />
Three–dimensional tool<br />
compensation vector<br />
Relationship between<br />
three–dimensional tool<br />
compensation and other<br />
compensation functions<br />
In three–dimensional tool compensation mode, the following three<br />
–dimensional compensation vector is generated at the end of each block:<br />
The three–dimensional tool compensation vector is obtained from the<br />
following expressions:<br />
i ⋅ r<br />
Vx =<br />
(Vector component along the Xp–axis)<br />
p<br />
Vy =<br />
Vz =<br />
p=<br />
p=<br />
Programmed path<br />
Path after three–dimensional tool<br />
compensation<br />
Three–dimensional tool<br />
compensation vector<br />
357<br />
j ⋅ r<br />
p<br />
k ⋅ r<br />
p<br />
G41<br />
i 2 + j 2 + k 2<br />
i 2 + j 2 + k 2<br />
G40<br />
(Vector component along the Yp–axis)<br />
(Vector component along the Zp–axis)<br />
In the above expressions, i, j, and k are the values specified in addresses<br />
I, J, and K in the block. r is the offset value corresponding to the<br />
specified offset number. p is the value obtained from the following<br />
expression:<br />
When the user wants to program the magnitude of a three–dimensional<br />
tool compensation vector as well as its direction, the value of p in the<br />
expressions of Vx, Vy, and Vz can be set as a constant in parameter (No.<br />
5011.) If the parameter is set to 0, however, p is determined as follows:<br />
Tool length offset<br />
Tool offset<br />
Cutter<br />
compensation C<br />
The specified path is shifted by three–dimensional tool compensation<br />
and the subsequent path is shifted by tool length<br />
offset.<br />
When tool offset is specified in the three–dimensional tool<br />
compensation mode, an alarm is issued (P/S alarm No.<br />
042).<br />
When addresses I, J, and K are all specified at startup,<br />
three–dimensional tool compensation mode is set. When<br />
not all of the addresses are specified, cutter compensation<br />
C mode is set. Therefore, cutter compensation C cannot be<br />
specified in three–dimensional tool compensation mode<br />
and three–dimensional tool compensation cannot be specified<br />
in cutter compensation C mode.
14. COMPENSATION FUNCTION PROGRAMMING<br />
B–63534EN/02<br />
Specifying I, J, and K<br />
G42<br />
Offset vector in<br />
interpolation<br />
Reference position<br />
return check (G27)<br />
Return to a reference<br />
position (G28, G30,<br />
G30.1)<br />
Alarm issued at startup<br />
Alarm during<br />
three–dimensional tool<br />
compensation<br />
Addresses I, J, and K must all be specified to start three–dimensional tool<br />
compensation. When even one of the three addresses is omitted,<br />
two–dimensional cutter compensation C is activated. When a block<br />
specified in three–dimensional tool compensation mode contains none of<br />
addresses I, J, and K, the same vector as the vector generated in the<br />
previous block is generated at the end of the block.<br />
Generally, G41 is specified to start three–dimensional tool compensation.<br />
Instead of G41, G42 can be specified for startup. With G42, three–<br />
dimensional tool compensation is performed in the opposite direction.<br />
When circular interpolation, helical interpolation (both specified with<br />
G02, G03), or involute interpolation (G02.2, G03.2) is specified, the<br />
vector generated in the previous block is maintained.<br />
Vector generated in the block before an arc<br />
Programmed path<br />
Path after three–dimensional<br />
tool compensation<br />
Three–dimensional tool compensation vector<br />
358<br />
The same vector is<br />
generated.<br />
Before specifying reference position return check (G27), cancel<br />
three–dimensional tool compensation. In the compensation mode, G27<br />
brings the tool to a position shifted by the offset value. If the position the<br />
tool reached is not the reference position, the reference position return<br />
LED does not go on (the P/S alarm No.092 alarm is issued).<br />
When return to the reference position (G28), to the second, third, or fourth<br />
reference position (G30), or to the floating reference position (G30.1) is<br />
specified, the vector is cleared at a middle point.<br />
If one of the following conditions is present at the startup of three–<br />
dimensional tool compensation, an alarm is issued:<br />
Two or more axes are specified in the same direction.<br />
(P/S alarm No.047)<br />
Although Xp, Yp, or Zp is omitted, the basic three axes are not set.<br />
(P/S alarm No.048)<br />
If one of the following G codes is specified in the three–dimensional tool<br />
compensation mode, an alarm is issued:<br />
G05 High–speed cycle machining (P/S alarm178)<br />
G31 Skip function (P/S alarm 036)<br />
G51 Scaling (P/S alarm141)
B–63534EN/02 PROGRAMMING<br />
14. COMPENSATION FUNCTION<br />
Commands that clear the<br />
vector<br />
Commands that generate<br />
the same vector as the<br />
vector in the previous<br />
block<br />
When one of the following G codes is specified in three–dimensional tool<br />
compensation mode, the vector is cleared:<br />
G73 Peck drilling cycle<br />
G74 Reverse tapping cycle<br />
G76 Fine boring<br />
G80 Canned cycle cancel<br />
G81 Drill cycle, spot boring<br />
G82 Drill cycle, counterboring<br />
G83 Peck drilling cycle<br />
G84 Tapping cycle<br />
G85 Boring cycle<br />
G86 Boring cycle<br />
G87 Back boring cycle<br />
G88 Boring cycle<br />
G89 Boring cycle<br />
G53 <strong>Machine</strong> coordinate system selection<br />
When one of the following G codes is specified in three–dimensional tool<br />
compensation mode, the same vector as the vector generated in the<br />
previous block is generated at the end point of the next movement:<br />
G02 Circular or helical interpolation (CW)<br />
G03 Circular or helical interpolation (CCW)<br />
G02.2 Involute interpolation (CW)<br />
G03.2 Involute interpolation (CCW)<br />
G04 Dwell<br />
G10 Data setting<br />
G22 Stored stroke check function enabled<br />
359
14. COMPENSATION FUNCTION PROGRAMMING<br />
B–63534EN/02<br />
14.8<br />
TOOL<br />
COMPENSATION<br />
VALUES, NU<strong>MB</strong>ER<br />
OF COMPENSATION<br />
VALUES, AND<br />
ENTERING VALUES<br />
FROM THE<br />
PROGRAM (G10)<br />
Explanations<br />
Valid range of tool<br />
compensation values<br />
Number of tool<br />
compensation values<br />
and the addresses to be<br />
specified<br />
Tool compensation values include tool geometry compensation<br />
values and tool wear compensation (Fig. 14.8 (a)).<br />
OFS G<br />
OFS W<br />
360<br />
Reference position<br />
ÇÇ<br />
ÇÇ<br />
ÇÇ<br />
ÇÇ<br />
OFSG:Geometric compensation value<br />
OFSW:Wear compensation value<br />
Fig. 14.8 (a) Geometric compensation and wear compensation<br />
Tool compensation values can be entered into CNC memory from the<br />
CRT/MDI panel (see section III–11.4.1) or from a program.<br />
A tool compensation value is selected from the CNC memory when the<br />
corresponding code is specified after address H or D in a program.<br />
The value is used for tool length compensation, cutter compensation, or<br />
the tool offset.<br />
Table 14.8 (a) shows the valid input range of tool compensation values.<br />
Table 14.8 (a) The valid input range of tool compensation value<br />
<strong>Inc</strong>rement<br />
Geometric compensation value Wear compensation value<br />
system<br />
Metric input <strong>Inc</strong>h input Metric input <strong>Inc</strong>h input<br />
IS–B 999.999 mm 99.9999inch 99.999 mm 9.9999 inch<br />
IS–C 999.9999 mm 99.99999inch 99.9999 mm 9.99999 inch<br />
The memory can hold 32, 64, 99, 200, 400, 499, or 999 tool compensation<br />
values (option).<br />
Address D or H is used in the program. The address used depends on<br />
which of the following functions is used: tool length compensation(see<br />
II–14.1), tool offset (see II–14.3), cutter compensation B (see II– 14.4),<br />
or cutter compensation C (see II–14.6).<br />
The range of the number that comes after the address (D or H) depens on<br />
the number of tool compensation values : 0 to 32, 0 to 64, 0 to 99, 0 to<br />
200, 0 to 400, 0 to 499, or 0 to 999.
B–63534EN/02 PROGRAMMING<br />
14. COMPENSATION FUNCTION<br />
Tool compensation<br />
memory and the tool<br />
compensation value to<br />
be entered<br />
Tool compensation memory A, B, or C can be used.<br />
The tool compensation memory determines the tool compensation values<br />
that are entered (set) (Table 14.8 (b)).<br />
Table 14.8 (b) Setting contents tool compensation memory and tool compensation value<br />
Tool compensation value<br />
Tool geometry compensation<br />
value for address D<br />
Tool geometry compensation<br />
value for address H<br />
Tool wear compensation for<br />
value address D<br />
Tool wear compensation<br />
value for address H<br />
Format<br />
Input of tool<br />
compensation value by<br />
programing<br />
Tool compensation<br />
memory A<br />
Set tool geometry + tool<br />
wear compensation values<br />
for addresses D and H (values<br />
can be specified with either<br />
address).<br />
361<br />
Tool compensation<br />
memory B<br />
Set tool geometry com-<br />
pensation values for ad-<br />
dresses D and H (values can<br />
be specified with either address).<br />
set<br />
set<br />
Set tool wear compensation<br />
values for addresses D and<br />
H (values can be specified<br />
set<br />
with either address). set<br />
Tool compensation<br />
memory C<br />
The programming format depends on which tool compensation memory<br />
is used.<br />
Table 14.8 (c) Setting range of Tool compensation memory and<br />
Tool compensation value<br />
Variety of tool compensation memory Format<br />
Tool compensation value (geometry com- G10L11P_R_;<br />
A pensation value+wear compensation value)<br />
B<br />
Geometry compensation value<br />
Wear compensation value<br />
G10L10P_R_;<br />
G10L11P_R_;<br />
Geometry compensation value for H code G10L10P_R_;<br />
C<br />
Geometry compensation value for D code<br />
Wear compensation value for H code<br />
G10L12P_R_;<br />
G10L11P_R_;<br />
Wear compensation value for D code G10L13P_R_;<br />
P : Number of tool compensation<br />
R : Tool compensation value in the absolute command(G90) mode<br />
Value to be added to the specified tool compensation value in the<br />
incremental command(G91) mode (the sum is also a tool<br />
compensation value.)<br />
NOTE<br />
To provide compatibility with the format of older CNC<br />
programs, the system allows L1 to be specified instead of<br />
L11.
14. COMPENSATION FUNCTION PROGRAMMING<br />
B–63534EN/02<br />
14.9<br />
SCALING<br />
(G50, G51)<br />
Format<br />
A programmed figure can be magnified or reduced (scaling).<br />
The dimensions specified with X_, Y_, and Z_ can each be scaled up or<br />
down with the same or different rates of magnification.<br />
The magnification rate can be specified in the program.<br />
Unless specified in the program, the magnification rate specified in the<br />
parameter is applied.<br />
0<br />
Y<br />
P 4<br />
P 1<br />
362<br />
P 4’<br />
P 1’<br />
P 0<br />
P 3’<br />
P 2’<br />
P 0:Scaling center<br />
Fig. 14.9 (a) Scaling(P 1 P 2 P 3 P 4P 1’P 2’P 3’P 4’)<br />
G51X_Y_Z_P_ ; Scaling start<br />
G50 ; Scaling cancel<br />
SCALING UP OR DOWN ALONG ALL AXES<br />
AT THE SAME RATE OF MAGNIFICATION<br />
Format Meaning of command<br />
Scaling is effective.<br />
(Scaling mode)<br />
P 3<br />
P 2<br />
X_Y_Z _ : Absolute command for<br />
center coordinate value<br />
of scaling<br />
P_ : Scaling magnification<br />
G51_X_Y_Z_I_J_K_;Scaling start X_Y_Z_ Absolute command for<br />
G50 Scaling cancel<br />
Scaling up or down along each axes at a different<br />
rate of magnification (mirror image)<br />
Format Meaning of command<br />
Scaling is effective.<br />
(Scaling mode)<br />
center coordinate value<br />
of scaling<br />
I_J_K_ Scaling magnification for<br />
X axis Y axis and Z axis<br />
respectively<br />
WARNING<br />
Specify G51 in a separate block. After the figure is enlarged<br />
or reduced, specify G50 to cancel the scaling mode.<br />
X
B–63534EN/02 PROGRAMMING<br />
14. COMPENSATION FUNCTION<br />
Explanations<br />
Scaling up or down<br />
along all axes at the<br />
same rate of<br />
magnification<br />
Scaling of each axis,<br />
programmable mirror<br />
image<br />
(negative magnification)<br />
Least input increment of scaling magnification is: 0.001 or 0.00001 It is<br />
depended on parameter SCR (No. 5400#7) which value is selected. Then,<br />
set parameter SCLx (No.5401#0) to enable scaling for each axis. If<br />
scaling P is not specified on the block of scaling (G51X_Y_Z_P_ ;), the<br />
scaling magnification set to parameter (No. 5411) is applicable. If X,Y,Z<br />
are omitted, the tool position where the G51 command was specified<br />
serves as the scaling center.<br />
Each axis can be scaled by different magnifications. Also when a negative<br />
magnification is specified, a mirror image is applied. First of all, set a<br />
parameter XSC (No. 5400#6) which validates each axis scaling (mirror<br />
image).<br />
Then, set parameter SCLx (No. 5401#0) to enable scaling along each axis.<br />
Least input increment of scaling magnification of each axis (I, J, K) is<br />
0.001 or 0.00001( set parameter SCR (No. 5400#7)).<br />
Magnification is set to parameter 5421 within the range +0.00001 to<br />
+9.99999 or +0.001 to +999.999<br />
If a negative value is set, mirror image is effected.<br />
If magnification I, J or K is not commanded, a magnification value set to<br />
parameter (No. 5421) is effective. However, a value other than 0 must be<br />
set to the parameter.<br />
NOTE<br />
Decimal point programming can not be used to specify the<br />
rate of magnification (I, J, K).<br />
Y axis<br />
d<br />
c<br />
363<br />
a/b : Scaling magnification of X axis<br />
c/d : Scaling magnification of Y axis<br />
0 : Scaling center<br />
0<br />
b<br />
a<br />
Fig. 14.9 (b) Scaling of each axis<br />
Programmed figure<br />
Scaled figure<br />
X axis
14. COMPENSATION FUNCTION PROGRAMMING<br />
B–63534EN/02<br />
Scaling of circular<br />
interpolation<br />
Even if different magnifications are applie to each axis in circular<br />
interpolation, the tool will not trace an ellipse.<br />
When different magnifications are applied to axes and a circular<br />
interpolation is specified with radius R, it becomes as following figure<br />
14.9 (c) (in the example shown below, a magnification of 2 is applied to<br />
the X–component and a magnification of 1 is applied to the Y–<br />
component.).<br />
G90 G00 X0.0 Y100.0 ;<br />
G51 X0.0 Y0.0 Z0.0 I2000 J1000;<br />
G02 X100.0 Y0.0 R100.0 F500 ;<br />
Above commands are equivalent to the following command:<br />
G90 G00 X0.0 Y100.0 Z0.0 ;<br />
G02 X200.0 Y0.0 R200.0 F500 ;<br />
Magnification of radius R depends on I, or J whichever is larger.<br />
Y<br />
(0,0) (100.0) (200.0)<br />
364<br />
Scaled shape<br />
Fig. 14.9 (c) Scaling for circular interpolation1<br />
When different magnifications are applied to axes and a circular<br />
interpolation is specified with I, J and K, it becomes as following figure<br />
14.9 (d) (In the example shown below, a magnification of 2 is applied to<br />
the X–component and a magnification of 1 is applied to the<br />
Y–component.).<br />
G90 G00 X0.0 Y0.0 ;<br />
G51 X0.0 Y0.0 I2000 J1000;<br />
G02 X100.0 Y0.0 I0.0 J–100.0 F500 ;<br />
Above commands are equivalent to the following commands.<br />
G90 G00 X0.0 Y100.0;<br />
G02 X200.0 Y0.0 I0.0 J–100.0 F500 ;<br />
In this case, the end point does not beet the radius, a linear section is<br />
included.<br />
Y<br />
(200.0)<br />
(100.0)<br />
Scaled shape<br />
(0,0) (100.0) (200.0)<br />
Fig. 14.9 (d) Scaling for circular interpolation 2<br />
X<br />
X
B–63534EN/02 PROGRAMMING<br />
14. COMPENSATION FUNCTION<br />
Tool compensation<br />
Invalid scaling<br />
Commands related to<br />
reference position return<br />
and coordinate system<br />
This scaling is not applicable to cutter compensation values, tool length<br />
offset values, and tool offset values (Fig. 14.9 (e) ).<br />
365<br />
Programmed figure<br />
Scaled figure<br />
Cutter compensation values are not scaled.<br />
Fig. 14.9 (e) Scaling during cutter compensation<br />
Scaling is not applicable to the Z–axis movement in case of the following<br />
canned cycle.<br />
⋅Cut–in value Q and retraction value d of peck drilling cycle (G83, G73).<br />
⋅Fine boring cycle (G76)<br />
⋅Shift value Q of X and Y axes in back boring cycle (G87).<br />
In manual operation, the travel distance cannot be increased or decreased<br />
using the scaling function.<br />
In scaling mode, G28, G30, or commands related to the coordinate system<br />
(G52 to G59) must not be specified. When any of these G codes is<br />
necessary, specify it after canceling scaling mode.<br />
WARNING<br />
1 If a parameter setting value is employed as a scaling magnification without specifying P, the<br />
setting value at G51 command time is employed as the scaling magnification, and a!change<br />
of this value, if any, is not effective.<br />
2 Before specifying the G code for reference position return (G27, G28, G29, G30) or!coordinate<br />
system setting (G92), cancel the scaling mode.<br />
3 If scaling results are rounded by counting fractions of 5 and over as a unit and disregarding<br />
the rest, the move amount may become zero. In this case, the block is!regarded as a no<br />
movement block, and therefore, it may affect the tool movement by!cutter compensation C. See<br />
the description of blocks that do not move the tool at II–14.6.3.
14. COMPENSATION FUNCTION PROGRAMMING<br />
B–63534EN/02<br />
NOTE<br />
1 The position display represents the coordinate value after scaling.<br />
2 When a mirror image was applied to one axis of the specified plane, the following!results:<br />
(1)Circular command Direction of rotation is reversed.<br />
(2)Cutter compensation C . . . . . . . . . . . . . . . . . . . . . . . . . . . . . . . . . Offset direction is reversed.<br />
(3)Coordinate system rotation . . . . . . . . . . . . . . . . . . . . . . . . . . . . . . Rotation angle is reversed.<br />
(4)Cutter compensation B . . . . . . . . . . . . . . . . . . . Offset direction is reversed. (<strong>Inc</strong>luding G39)<br />
Examples<br />
Example of a mirror image program<br />
Subprogram<br />
O9000 ;<br />
G00 G90 X60.0 Y60.0;<br />
G01 X100.0 F100;<br />
G01 Y100.0;<br />
G01 X60.0 Y60.0;<br />
M99;<br />
Main program<br />
N10 G00 G90;<br />
N20M98P9000;<br />
N30 G51 X50.0 Y50.0 I–1000 J1000;<br />
N40 M98 P9000;<br />
N50 G51 X50.0 Y50.0 I–1000 J–1000;<br />
N60 M98 P9000;<br />
N70 G51 X50.0 Y50.0 I1000 J–1000<br />
N80 M98 P9000;<br />
N90 G50;<br />
100<br />
60<br />
50<br />
40<br />
Y<br />
0<br />
366<br />
40<br />
50 60 100<br />
Fig. 14.9 (f) Example of a mirror image program<br />
X
B–63534EN/02 PROGRAMMING<br />
14. COMPENSATION FUNCTION<br />
14.10<br />
COORDINATE<br />
SYSTEM ROTATION<br />
(G68, G69)<br />
Format<br />
A programmed shape can be rotated. By using this function it becomes<br />
possible, for example, to modify a program using a rotation command<br />
when a workpiece has been placed with some angle rotated from the<br />
programmed position on the machine.Further, when there is a pattern<br />
comprising some identical shapes in the positions rotated from a shape,<br />
the time required for programming and the length of the program can be<br />
reduced by preparing a subprogram of the shape and calling it after<br />
rotation.<br />
G17<br />
G18<br />
G19<br />
<br />
<br />
367<br />
Center of rotation<br />
Angle of rotation<br />
Fig. 14.10 (a) Coordinate system rotation<br />
Format<br />
G68 α_β_R_ ; Start rotation of a coordinate system.<br />
Coordinate system rotation mode<br />
(The coordinate system is rotated.)<br />
G69 ; Coordinate system rotation cancel command<br />
Meaning of command<br />
G17 (G18 or G19) : Select the plane in which contains the figure to be<br />
rotated.<br />
α_β_ Absolute command for two of the x_,y_,and Z_ axes<br />
that correspond to the current plane selected by a<br />
command (G17, G18, or G19). The command<br />
specifies the coordinates of the center of rotation for<br />
the values<br />
specified subsequent to G68.<br />
R_ Angular displacement with a positive value indicates<br />
counter clockwise rotation. Bit 0 of parameter 5400<br />
selects whether the specified angular displacement is<br />
alwarys considered an absolute value or is considered<br />
an absolute or incremental value depending on the<br />
specified G code (G90 or G91).<br />
Least input increment: 0.001 deg<br />
Valid data range : –360,000 A360,000
14. COMPENSATION FUNCTION PROGRAMMING<br />
B–63534EN/02<br />
Explanations<br />
G code for selecting a<br />
plane: G17,G18 or G19<br />
<strong>Inc</strong>remental command in<br />
coordinate system<br />
rotation mode<br />
Center of rotation<br />
Angular displacement<br />
Coordinate system<br />
rotation cancel<br />
command<br />
Tool compensation<br />
Relationship with<br />
three–dimensional<br />
coordinate conversion<br />
(G68, G69)<br />
X<br />
Center of<br />
rotation<br />
(α, β)<br />
368<br />
Angle of rotation R (incremental value)<br />
Angle of rotation (absolute value)<br />
Fig. 14.10 (b) Coordinate system rotation<br />
NOTE<br />
When a decimal fraction is used to specify angular<br />
displacement (R_), the 1’s digit corresponds to degree<br />
units.<br />
The G code for selecting a plane (G17,G18,or G19) can be specified<br />
before the block containing the G code for coordinate system rotation<br />
(G68). G17, G18 or G19 must not be designated in the mode of coordinate<br />
system rotation.<br />
The center of rotation for an incremental command programmed after<br />
G68 but before an absolute command is the tool position when G68 was<br />
programmed (Fig. 14.10 (c)).<br />
When α_β_ is not programmed, the tool position when G68 was<br />
programmed is assumed as the center of rotation.<br />
When R_ is not specified, the value specified in parameter 5410 is<br />
assumed as the angular displacement.<br />
The G code used to cancel coordinate system rotation (G69) may be<br />
specified in a block in which another command is specified.<br />
Cutter compensation, tool length compensation, tool offset, and other<br />
compensation operations are executed after the coordinate system is<br />
rotated.<br />
Both coordinate system rotation and three–dimensional coordinate<br />
conversion use the same G codes: G68 and G69. The G code with I, J,<br />
and K is processed as a command for three–dimensional coordinate<br />
conversion. The G code without I, J, and K is processed as a command<br />
for two–dimensional coordinate system rotation.<br />
Z
B–63534EN/02 PROGRAMMING<br />
14. COMPENSATION FUNCTION<br />
Limitations<br />
Commands related to<br />
reference position return<br />
and the coordinate<br />
system<br />
<strong>Inc</strong>remental command<br />
Explanations<br />
Absolute/<strong>Inc</strong>remental<br />
position commands<br />
In coordinate system rotation mode, G codes related to reference position<br />
return (G27, G28, G29, G30, etc.) and those for changing the coordinate<br />
system (G52 to G59, G92, etc.) must not be specified. If any of these G<br />
codes is necessary, specify it only after canceling coordinate system<br />
rotation mode.<br />
The first move command after the coordinate system rotation cancel<br />
command (G69) must be specified with absolute values. If an incremental<br />
move command is specified, correct movement will not be performed.<br />
N1 G92 X5000 Y5000 G69 G17 ;<br />
N2 G68 X7000 Y3000 R60000 ;<br />
N3 G90 G01 X0 Y0 F200 ;<br />
(G91X5000Y5000)<br />
N4 G91 X10000 ;<br />
N5 G02 Y10000 R10000 ;<br />
N6 G03 X10000 I5000 J5000 ;<br />
N7 G01 Y10000 ;<br />
N8 G69 G90 X5000 Y5000 M02 ;<br />
Tool path when the incremental<br />
command is designated in the N3<br />
block (in parenthesis)<br />
369<br />
,<br />
(–500.0,–500.0)<br />
<br />
Tool path after rotation<br />
Originally programmed tool path<br />
Center of rotation<br />
(7000,3000)<br />
Fig. 14.10 (c) Absolute/incremental command during<br />
coordinate system rotation
14. COMPENSATION FUNCTION PROGRAMMING<br />
B–63534EN/02<br />
Examples<br />
Cutter compensation C<br />
and coordinate system<br />
rotation<br />
Scaling and coordinate<br />
system rotation<br />
It is possible to specify G68 and G69 in cutter compensation C mode.<br />
The rotation plane must coincide with the plane of cutter compensa-<br />
tion C.<br />
N1 G92 X0 Y0 G69 G01 ;<br />
N2 G42 G90 X1000 Y1000 F1000 D01 ;<br />
N3 G68 R30000 ;<br />
N4 G91 X2000 ;<br />
N5 G03 Y1000 R1000 J500 ;<br />
N6 G01 X2000 ;<br />
N7 Y1000 ;<br />
N8 G69 G40 G90 X0 Y0 M30 ;<br />
(0, 0)<br />
370<br />
30°<br />
Programmed shape before<br />
coordinate system rotation<br />
Programmed shape<br />
after coordinate<br />
system rotation<br />
Tool path<br />
Fig. 14.10 (d) Cutter compensation C and coordinate system rotation<br />
If a coordinate system rotation command is executed in the scaling mode<br />
(G51 mode), the coordinate value (αβ,) of the rotation center will also be<br />
scaled, but not the rotation angle (R). When a move command is issued,<br />
the scaling is applied first and then the coordinates are rotated.<br />
A coordinate system rotation command (G68) should not be issued in<br />
cutter compensation C mode (G41, G42) on scaling mode (G51). The<br />
coordinate system rotation command should always be specified prior to<br />
setting the cutter compensation C mode.<br />
1. When the system is not in cutter compensation mode C, specify the<br />
commands in the following order :<br />
G51 ; scaling mode start<br />
G68 ; coordinate system rotation mode start<br />
G69 ; coordinate system rotation mode cancel<br />
G50 ; scaling mode cancel
B–63534EN/02 PROGRAMMING<br />
14. COMPENSATION FUNCTION<br />
2. When the system is in cutter compensation model C, specify the<br />
commands in the following order (Fig.14.10(e)) :<br />
(cutter compensation C cancel)<br />
G51 ; scaling mode start<br />
G68 ; coordinate system rotation start<br />
:<br />
G41 ;cutter compensation C mode start<br />
:<br />
G92 X0 Y0 ;<br />
G51 X300.0 Y150.0 P500 ;<br />
G68 X200.0 Y100.0 R45.0 ;<br />
G01 X400.0 Y100.0 ;<br />
Y100.0 ;<br />
X–200.0 ;<br />
Y–100.0 ;<br />
X200.0 ;<br />
200.0<br />
100.0<br />
0<br />
When scaling and coordinate<br />
system rotation are applied<br />
Y<br />
371<br />
200.0 400.0<br />
When only coordinate<br />
system rotation is applied<br />
When only scaling<br />
is applied<br />
Cutting program<br />
Fig. 14.10 (e) Scaling and coordinate system rotation<br />
in cutter compensation C mode<br />
X
14. COMPENSATION FUNCTION PROGRAMMING<br />
B–63534EN/02<br />
Repetitive commands for<br />
coordinate system<br />
rotation<br />
It is possible to store one program as a subprogram and recall subprogram<br />
by changing the angle.<br />
Sample program for when the RIN bit (bit 0 of parameter 5400) is set<br />
to 1.<br />
The specified angular displancement is treated as an absolute or<br />
incremental value depending on the specified G code (G90 or G91).<br />
G92 X0 Y0 G69 G17;<br />
G01 F200 H01 ;<br />
M98 P2100 ;<br />
M98 P072200 ;<br />
G00 G90 X0 Y0 M30 ;<br />
O 2200 G68 X0 Y0 G91 R45.0 ;<br />
G90 M98 P2100 ;<br />
M99 ;<br />
O 2100 G90 G01 G42 X0 Y–10.0 ;<br />
X4.142 ;<br />
X7.071 Y–7.071 ;<br />
G40 ;<br />
M99 ;<br />
372<br />
(0, –10.0)<br />
(0, 0)<br />
Subprogram<br />
Programmed path<br />
When offset is<br />
applied<br />
Fig. 14.10 (f) Coordinate system rotation command
B–63534EN/02 PROGRAMMING<br />
14. COMPENSATION FUNCTION<br />
14.11<br />
NORMAL DIRECTION<br />
CONTROL<br />
(G40.1, G41.1, G42.1<br />
OR G150, G151,<br />
G152)<br />
<br />
Tool<br />
C–axi<br />
When a tool with a rotation axis (C–axis) is moved in the XY plane during<br />
cutting, the normal direction control function can control the tool so that<br />
the C–axis is always perpendicular to the tool path (Fig. 14.11 (a)).<br />
C–axi<br />
Tool<br />
Normal direction (in<br />
which the tool moves)<br />
Fig. 14.11 (a) Sample Movement of the tool<br />
373<br />
Programmed tool pat<br />
G code Function Explanation<br />
G41.1 or G151<br />
G42.1 or G152<br />
G40.1 or G150<br />
Normal direction<br />
control left<br />
Normal direction<br />
control right<br />
Normal direction<br />
control cancel<br />
If the workpiece is to the right of the<br />
tool path looking toward the direction<br />
in which the tool advances,<br />
the normal direction control left<br />
(G41.1 or G151) function is specified.<br />
After G41.1 (or G151) or G42.1 (or<br />
G152) is specified, the normal<br />
direction control function is en-<br />
abled (normal direction control<br />
mode).<br />
When G40.1 (or G150) is specified,<br />
the normal direction control<br />
mode is canceled.
14. COMPENSATION FUNCTION PROGRAMMING<br />
B–63534EN/02<br />
Cutter center path<br />
Programmed path<br />
Fig. 14.11 (b) Normal direction control left (G41.1)<br />
Explanations<br />
<br />
Normal direction control<br />
of the C axis<br />
374<br />
Cutter center path<br />
Center of the arc<br />
Programmed path<br />
Fig. 14.11 (c) Normal direction control right (G42.1)<br />
When viewed from the center of rotation around the C–axis, the angular<br />
displacement about the C–axis is determined as shown in Fig. 14.11 (d).<br />
The positive side of the X–axis is assumed to be 0 , the positive side of<br />
the Y–axis is 90°, the negative side of the X–axis is 180°, and the negative<br />
side of the Y–axis is 270°.<br />
Center of rotation<br />
180°<br />
+Y<br />
90<br />
270<br />
0<br />
Fig. 14.11 (d) Angle of the C axis<br />
When the cancel mode is switched to the normal direction control mode,<br />
the C–axis becomes perpendicular to the tool path at the beginning of the<br />
block containing G41.1 or G42.1.<br />
In the interface between blocks in the normal direction control mode, a<br />
command to move the tool is automatically inserted so that the C–axis<br />
becomes perpendicular to the tool path at the beginning of each block.<br />
The tool is first oriented so that the C–axis becomes perpendicular to the<br />
tool path specified by the move command, then it is moved along the X–<br />
and Y axes.<br />
In the cutter compensation mode, the tool is oriented so that the C–axis<br />
becomes perpendicular to the tool path created after compensation.<br />
In single–block operation, the tool is not stopped between a command for<br />
rotation of the tool and a command for movement along the X– and<br />
Y–axes. A single–block stop always occurs after the tool is moved along<br />
the X– and Y–axes.<br />
+X
B–63534EN/02 PROGRAMMING<br />
14. COMPENSATION FUNCTION<br />
S<br />
Cutter center path<br />
375<br />
N1<br />
Programmed path<br />
S<br />
N2<br />
N3<br />
S<br />
S : Single block stop point<br />
Fig. 14.11 (e) Point at which a Single–Block Stop Occurs in the<br />
Normal Direction Control Mode<br />
Before circular interpolation is started, the C–axis is rotated so that the<br />
C–axis becomes normal to the arc at the start point. During circular<br />
interpolation, the tool is controlled so that the C–axis is always<br />
perpendicular to the tool path determined by circular interpolation.<br />
The tool is controlled so that the C–<br />
axis<br />
is always normal to the tool path determined<br />
by circular interpolation.<br />
Tool center path<br />
Center of the arc<br />
Programmed path<br />
A rotation command is inserted<br />
so that the C–axis becomes normal<br />
to the arc at the start point.<br />
Fig. 14.11 (f) Normal direction control of the circular interpolation<br />
NOTE<br />
During normal direction control, the C axis always rotates<br />
through an angle less than 180 deg. I.e., it rotates in<br />
whichever direction provides the shorter route.
14. COMPENSATION FUNCTION PROGRAMMING<br />
B–63534EN/02<br />
C axis feedrate<br />
Normal direction control<br />
axis<br />
Angle for which figure<br />
insertion is ignored<br />
Movement of the tool inserted at the beginning of each block is executed<br />
at the feedrate set in parameter 5481. If dry run mode is on at that time,<br />
the dry run feedrate is applied. If the tool is to be moved along the X–and<br />
Y–axes in rapid traverse (G00) mode, the rapid traverse feedrate is<br />
applied.<br />
The federate of the C axis during circular interpolation is defined by the<br />
following formula.<br />
Amount of movement of the C axis (deg)<br />
F×<br />
(deg/min)<br />
Length of arc (mm or inch)<br />
F Federate (mm/min or inch/min) specified by the corresponding<br />
block of the arc<br />
Amount of movement of the C axis : The difference in angles at the<br />
beginning and the end of the<br />
block.<br />
NOTE<br />
If the federate of the C axis exceeds the maximum cutting<br />
speed of the C axis specified to parameter No. 1422, the<br />
federate of each of the other axes is clamped to keep the<br />
federate of the C axis below the maximum cutting speed of<br />
the C axis.<br />
A C–axis to which normal–direction control is applied can be assigned<br />
to any axis with parameter No. 5480.<br />
When the rotation angle to be inserted, calculated by normal–direction<br />
control, is smaller than the value set with parameter No. 5482, the<br />
corresponding rotation block is not inserted for the axis to which<br />
normal–direction control is applied. This ignored rotation angle is added<br />
to the next rotation angle to be inserted, the total angle being subject to<br />
the same check at the next block.<br />
If an angle of 360 degrees or more is specified, the corresponding rotation<br />
block is not inserted.<br />
If an angle of 180 degrees or more is specified in a block other than that<br />
for circular interpolation with a C–axis rotation angle of 180 degrees or<br />
more, the corresponding rotation block is not inserted.<br />
376
B–63534EN/02 PROGRAMMING<br />
14. COMPENSATION FUNCTION<br />
Movement for which arc<br />
insertion is ignored<br />
Specify the maximum distance for which machining is performed with<br />
the same normal direction as that of the preceding block.<br />
Linear movement<br />
When distance N2, shown below, is smaller than the set value,<br />
machining for block N2 is performed using the same direction as that<br />
for block N1.<br />
Tool–center path<br />
N1<br />
377<br />
N2<br />
Distance<br />
N3<br />
Programmed path<br />
Circular movement<br />
When the diameter of block N2, shown below, is smaller than the set<br />
value, machining for block N2 is performed using the same normal<br />
direction as that for block N1. The orientation of the axis to which<br />
normal–direction control is applied, relative to the normal direction of<br />
block N2, does not change as machining proceeds along the arc.<br />
Programmed path<br />
N1<br />
N2<br />
Diameter<br />
Tool–center path<br />
NOTE<br />
1 Do not specify any command to the C axis during normal<br />
direction control. Any command specified at this time is<br />
ignored.<br />
2 Before processing starts, it is necessary to correlate the<br />
workpiece coordinate of the C axis with the actual position<br />
of the C axis on the machine using the coordinate system<br />
setting (G92) or the like.<br />
3 The helical cutting option is required to use this function.<br />
Helical cutting cannot be specified in the normal direction<br />
control mode.<br />
4 Normal direction control cannot be performed by the G53<br />
move command.<br />
5 The C–axis must be a rotation axis.<br />
N3
14. COMPENSATION FUNCTION PROGRAMMING<br />
B–63534EN/02<br />
14.12<br />
PROGRAMMABLE<br />
MIRROR IMAGE<br />
(G50.1, G51.1)<br />
Format<br />
A mirror image of a programmed command can be produced with respect<br />
to a programmed axis of symmetry (Fig. 14.12 (a)).<br />
Y<br />
100<br />
60<br />
50<br />
40<br />
0<br />
(2)<br />
378<br />
Axis of symmetry (X=50)<br />
(1)<br />
(3) (4)<br />
0<br />
40<br />
60<br />
100 X<br />
(1) Original image of a programmed command<br />
Axis of symmetry<br />
(Y=50)<br />
(2) Image symmetrical about a line parallel to the Y–axis and crossing<br />
the X–axis at 50<br />
(3) Image symmetrical about point (50, 50)<br />
(4) Image symmetrical about a line parallel to the X–axis and crossing<br />
the Y–axis at 50<br />
Fig. 14.12 (a) Programmable Mirror image<br />
G51.1 IP_<br />
; Setting a programmable image<br />
A mirror image of a command specified in these<br />
blocks is produced with respect to the axis of<br />
symmetry specified by G51.1 IP _;.<br />
G50.1 IP_<br />
; Canceling a programmable mirror image<br />
IP_<br />
: Point (position) and axis of symmetry for producing<br />
a mirror image when specified with G51.1.<br />
Axis of symmetry for producing a mirror image when<br />
specified with G50.1. Point of symmetry is not speci–<br />
fied.
B–63534EN/02 PROGRAMMING<br />
14. COMPENSATION FUNCTION<br />
Explanations<br />
Mirror image by setting<br />
Mirror image on a single<br />
axis in a specified plane<br />
Limitations<br />
Scaling/coordinate<br />
system rotation<br />
Commands related to<br />
reference position return<br />
and coordinate system<br />
If the programmable mirror image function is specified when the<br />
command for producing a mirror image is also selected by a CNC external<br />
switch or CNC setting (see III–4.9), the programmable mirror image<br />
function is executed first.<br />
Applying a mirror image to one of the axes on a specified plane changes<br />
the following commands as follows :<br />
Command Explanation<br />
Circular command G02 and G03 are interchanged.<br />
Cutter compensation G41 and G42 are interchanged.<br />
Coordinate rotation CW and CCW (directions of rotation) are interchanged.<br />
Processing proceeds from program mirror image to scaling and<br />
coordinate rotation in the stated order. The commands should be specified<br />
in this order, and, for cancellation, in the reverse order. Do not specify<br />
G50.1 or G51.1 during scaling or coordinate rotation mode.<br />
In programmable mirror image mode, G codes related to reference<br />
position return (G27, G28, G29, G30, etc.) and those for changing the<br />
coordinate system (G52 to G59, G92, etc.) must not be specified. If any<br />
of these G codes is necessary, specify it only after canceling the<br />
programmable mirror image mode.<br />
379
14. COMPENSATION FUNCTION PROGRAMMING<br />
B–63534EN/02<br />
14.13<br />
GRINDING WHEEL<br />
WEAR<br />
COMPENSATION<br />
Format<br />
Selecting the<br />
compensation center<br />
Start–up<br />
Canceling<br />
compensation mode<br />
Holding the<br />
compensation vector<br />
Explanations<br />
Setting and selecting the<br />
compensation center<br />
Start–up<br />
The grinding wheel compensation function creates a compensation vector<br />
by extending the line between the specified compensation center and the<br />
specified end point, on the specified compensation plane.<br />
Compensation<br />
center<br />
380<br />
Compensation vector<br />
G41 Pn (n=1, 2, 3);<br />
G41 P1; Select the first compensation center<br />
G41 P2; Select the second compensation center<br />
G41 P3; Select the third compensation center<br />
D_; D code other than D0<br />
D0;<br />
G40;<br />
Programmed path<br />
Tool center path<br />
Three compensation centers can be specified by specifying their center<br />
coordinates with parameters No. 5081 to 5086. The G41Pn (n = 1, 2, or<br />
3) command is used to specify which compensation center is to be used.<br />
G41 P1 ; . . . . . Select the first compensation center.<br />
G41 P2 . . . . . Select the second compensation center.<br />
G41 P3 ; . . . . . Select the third compensation center.<br />
When selecting the compensation center, specify P1, P2, or P3 at the same<br />
time with G41. If G41 has been specified without a P command or with<br />
a P command other than P1, P2, and P3, P/S alarm 5069 is issued.<br />
When specifying the compensation center with parameters, use the<br />
workpiece coordinates.<br />
To enter compensation mode, specify the compensation center, then<br />
specify a D code other than D0. A compensation vector is created and the<br />
tool is accordingly moved, even if the block in which the D code has been<br />
specified does not contain a move command.
B–63534EN/02 PROGRAMMING<br />
14. COMPENSATION FUNCTION<br />
Compensation vector<br />
Canceling compensation<br />
mode<br />
Holding the<br />
compensation vector<br />
A compensation vector is created by extending the line between the<br />
compensation center and the specified end point. The length of the<br />
compensation vector equals to the offset value corresponding to the offset<br />
number specified with the D code.<br />
When the offset value is positive, the compensation vector is added to the<br />
specified end point. When the offset value is negative, the compensation<br />
vector is subtracted from the specified end point.<br />
+<br />
Z<br />
+<br />
Z<br />
Compensation<br />
center<br />
Compensation<br />
center<br />
381<br />
Offset value (+)<br />
Offset value (–)<br />
Compensation<br />
vector (+)<br />
Programmed path<br />
Tool center<br />
path<br />
Compensation<br />
vector (–)<br />
Y+<br />
Programmed path<br />
Tool center path<br />
Specifying D0 cancels compensation mode, thus disabling the creation of<br />
a compensation vector.<br />
Specifying G40 selects a mode for holding the current compensation<br />
vector. In this mode, the specified end point is shifted by the same vector<br />
length until a different compensation mode is specified.<br />
Specifying D0 in compensation vector hold mode clears the<br />
compensation vector and cancels compensation mode.<br />
Y+
14. COMPENSATION FUNCTION PROGRAMMING<br />
B–63534EN/02<br />
Circular and helical<br />
interpolation<br />
Circular interpolation in<br />
G40 mode<br />
Exponential interpolation<br />
Compensation plane and<br />
plane selection using<br />
G17/G18/G19<br />
Grinding wheel wear compensation can also be applied to circular<br />
interpolation and helical interpolation. If the radius at the start point<br />
differs from that at the end point, the figure does not become an arc; it<br />
becomes a helix.<br />
Compensation center<br />
382<br />
Arc center<br />
Compensation vector<br />
Tool center path<br />
Programmed path<br />
The compensated values are still subject to arc radius error limit<br />
(parameter No. 3410) check.<br />
Specifying an arc command in G40 mode causes the arc center to be<br />
shifted by the vector length, thus causing the figure to become an arc, not<br />
a helix.<br />
Programmed<br />
arc center<br />
Held vector<br />
Tool center path<br />
Programmed path<br />
Grinding wheel wear compensation can also be applied to exponential<br />
interpolation. Exponential interpolation is performed for the<br />
compensated positions.<br />
A compensation vector is created only on the plane (compensation plane)<br />
corresponding to the axes specified with parameters No. 5071 and 5072<br />
(compensation axes).<br />
In compensation mode (including compensation vector hold mode), a<br />
compensation vector is always created on the compensation plane<br />
specified with parameters (No. 5071 and 5072), regardless of the plane<br />
selected with the G17, G18, or G19 command. For example,<br />
compensation can be performed using the YZ plane as the compensation<br />
plane while circular interpolation is performed on the XY plane (G17).<br />
If a move command has been specified for either compensation axis, in<br />
compensation mode, the compensation vector component of the other<br />
axis may be changed during compensation vector creation, thus causing<br />
the tool to also move along that axis.
B–63534EN/02 PROGRAMMING<br />
14. COMPENSATION FUNCTION<br />
+<br />
Y<br />
+<br />
Y<br />
a<br />
a’<br />
V ay<br />
b’<br />
b<br />
Paths on the XY plane<br />
a’<br />
a<br />
Arc center<br />
Compensation cancel<br />
mode<br />
(Example 1) When the compensation axes are the Y– and Z–axes and<br />
linear interpolation is performed for the X– and Y–axes<br />
Programmed path: a → b, compensated path: a’ → b’<br />
V by<br />
X+<br />
383<br />
+<br />
Y<br />
V ay<br />
V b<br />
Compensation<br />
center Vby a<br />
b<br />
Paths on the YZ plane<br />
a’<br />
b’<br />
Va Vaz (Example 2) When the compensation axes are the Y– and Z–axes and<br />
circular interpolation is performed for the X– and Y–axes<br />
Programmed path: a → b, compensated path: a’ → b’<br />
b’<br />
b<br />
Paths on the XY plane<br />
Changing the coordinate<br />
system<br />
Reference position<br />
return (G28, G30)<br />
Limitations<br />
Changing the<br />
compensation axes<br />
Relationship with other<br />
offset functions<br />
Relationship with the<br />
coordinate change<br />
function<br />
X+<br />
+<br />
Y<br />
V ay<br />
V b<br />
Compensation<br />
center Vby a<br />
b<br />
Paths on the YZ plane<br />
V bz<br />
Z+<br />
a’<br />
b’<br />
V bz<br />
Z+<br />
Va Vaz Compensation cancel mode is selected immediately after power–on or<br />
reset.<br />
Before attempting to change the coordinate system, cancel compensation<br />
mode.<br />
Before attempting to return to the reference point (G28 or G30), cancel<br />
compensation mode.<br />
The compensation axes can be changed only in compensation cancel<br />
mode.<br />
Cutter compensation and three–dimensional tool compensation cannot be<br />
used when grinding wheel wear compensation is enabled on the system.<br />
The tool length offset and tool position offset functions can be used with<br />
grinding wheel wear compensation.<br />
The coordinates of the compensation center are not subject to<br />
programmable mirror image, scaling, or coordinate rotation.
14. COMPENSATION FUNCTION PROGRAMMING<br />
B–63534EN/02<br />
14.14<br />
ROTARY TABLE<br />
DYNAMIC FIXTURE<br />
OFFSET<br />
Format<br />
Fixture offset command<br />
Fixture offset cancel<br />
command<br />
The rotary table dynamic fixture offset function saves the operator the<br />
trouble of re–setting the workpiece coordinate system when the rotary<br />
table rotates before cutting is started. With this function the operator<br />
simply sets the position of a workpiece placed at a certain position on the<br />
rotary table as a reference fixture offset. If the rotary table rotates, the<br />
system automatically obtains a current fixture offset from the angular<br />
displacement of the rotary table and creates a suitable workpiece<br />
coordinate system. After the reference fixture offset is set, the workpiece<br />
coordinate system is prepared dynamically, wherever the rotary table is<br />
located.<br />
The zero point of the workpiece coordinate system is obtained by adding<br />
the fixture offset to the offset from the workpiece reference point.<br />
Z<br />
C<br />
W<br />
Y<br />
384<br />
F<br />
X<br />
<strong>Machine</strong> coordinate<br />
system origin<br />
Y<br />
θ<br />
F 0<br />
θ <br />
Rotation axis<br />
center<br />
Y<br />
W : Workpiece origin offset value<br />
θ : Reference angle<br />
F : Reference fixture offset value<br />
θ : Rotation axis angle<br />
: Fixture offset value<br />
Fig.14.14 (a) Fixture offset<br />
G54.2 Pn ;<br />
n : Reference fixture offset value number (1 to 8)<br />
G54.2 P0 ;<br />
X<br />
X
B–63534EN/02 PROGRAMMING<br />
14. COMPENSATION FUNCTION<br />
Explanations<br />
When a move command<br />
is specified for a rotation<br />
axis in G54.2 mode<br />
Operation at reset<br />
Data setting<br />
When a command to move the tool about a rotation axis involved with a<br />
fixture offset is specified in the G54.2 mode, the coordinates about the<br />
rotation axis at the end of the block are used to calculate a vector. The tool<br />
is moved to the specified position on the workpiece coordinate system<br />
that is indicated by the vector.<br />
Whether to cancel the fixture offset at a reset depends on the settings of<br />
bit 6 (CLR) of parameter No. 3402 and of bit 7 (C23) of parameter No.<br />
3408.<br />
When CLR is set to 0 or CLR and C23 are set to 1, the vector before the<br />
reset is saved.<br />
When CLR is set to 1 and C23 is set to 0, the vector is cleared. The<br />
machine does not move by the cleared vector regardless of the setting of<br />
bit 0 (FTP) of parameter No. 7570, however.<br />
(1) Setting a group of three parameters which specify one rotation axis<br />
and two linear axes constituting the plane of rotation<br />
(Parameter No.7580 to 7588)<br />
In each group, specify the number of the rotation axis as the first<br />
parameter and the numbers of the linear axes as the second and third<br />
parameters. The rotation in the normal direction about the rotation<br />
axis must agree with the rotation from the positive side of the linear<br />
axis set as the second parameter to the positive side of the linear axis<br />
set as the third parameter.<br />
Example) Suppose that a machine has four axes, X, Y, Z, and C. The X–,<br />
Y–, and Z–axes form a right–handed coordinate system. The<br />
C–axis is a rotation axis. When viewed from the positive side<br />
of the Z–axis, a rotation in the normal direction about the<br />
C–axis is treated as the counterclockwise rotation around the<br />
Z–axis.<br />
For this machine, specify the parameters as follows :<br />
First parameter : 4 (C–axis)<br />
Second parameter : 1 (X–axis)<br />
Third parameter : 2 (Y–axis)<br />
Up to three groups of parameters can be set. In calculation of<br />
the fixture offset, the data of the rotation axis specified in the<br />
first group is calculated first. Then, the data of the second and<br />
third groups are calculated.<br />
If a machine has two or more rotation axes and the plane of<br />
rotation depends on the rotation about another rotation axis,<br />
the plane of rotation is set when the angular displacement<br />
about the rotation axis is 0 .<br />
(2) Setting the reference angle of the rotation axis and the corresponding<br />
reference fixture offset<br />
Set the reference angle of the rotation axis and the fixture offset that<br />
corresponds to the reference angle.<br />
385
14. COMPENSATION FUNCTION PROGRAMMING<br />
B–63534EN/02<br />
Inputting and outputting<br />
the fixture offset<br />
C<br />
386<br />
W<br />
Y<br />
F<br />
W: Workpiece origin offset value<br />
F: Fixture offset corresponding to the<br />
reference angle<br />
Set the data on the fixture offset screen (See III–11.4). Eight groups<br />
of data items can be specified.<br />
(3) Setting a parameter for enabling or disabling the fixture offset of each<br />
axis (bit 0 (FAX) of parameter 7575)<br />
For the axis for which the fixture offset is enabled, set the parameter<br />
to 1. This need not be specified for a rotation axis.<br />
(4) Setting the type of fixture offset (bit 1 (FTP) of parameter 6004)<br />
Specify whether to cause a movement according to the increment or<br />
decrement of the fixture offset vector when the vector changes (when<br />
G54.2 is specified or when a rotation axis movement occurs in the<br />
G54.2 mode).<br />
When 0 is set, the movement is made. (The current position on the<br />
workpiece coordinate system does not change. The position on the<br />
machine coordinate system changes.)<br />
When 1 is set, the movement is not made. (The current position on<br />
the workpiece coordinate system changes. The position on the<br />
machine coordinate system does not change.)<br />
The setting of a program and external data can be input and output as<br />
described below :<br />
(1) Setting the reference fixture offset by G10<br />
G10 L21 Pn IP ;<br />
n : Number of fixture offset<br />
IP : Reference fixture offset or reference angle of each axis<br />
This command sets the reference fixture offset or reference angle in<br />
a program.<br />
When the command is executed in the G90 mode, the specified value<br />
is set directly.<br />
When the command is executed in the G91 mode, the specified value<br />
plus a value set before the execution is set.<br />
X
B–63534EN/02 PROGRAMMING<br />
14. COMPENSATION FUNCTION<br />
NOTE<br />
The programmable data input function (G10) is required.<br />
(2) Reading and writing the data by a system variable of a custom macro<br />
System variable number = 5500 + 20n + m<br />
The following system variable number can be used to read and write<br />
the reference fixture offset or reference angle. No data can be written<br />
in the system variable area (5500 to 5508) with n = 0, however.<br />
n : Fixture offset number (1 to 8)<br />
When n is 0, the current offset is indicated.<br />
m : Axis number (1 to number of controlled axes)<br />
System variable 5500 can be used to read the selected offset number.<br />
NOTE<br />
The custom macro function is required.<br />
(3) Reading and writing the data by the PMC window or open CNC<br />
The window function can be used to read and write the custom macro<br />
system variable with the same number as for (2).<br />
NOTE<br />
The NC window function and custom macro function are<br />
required.<br />
(4) Outputting the data to an external device<br />
By selecting on the fixture offset screen, the data can be<br />
output to a Floppy Cassette, memory card or other external device via<br />
RS–232C.<br />
The data is output in the G10 form without a program number.<br />
NOTE<br />
The reader/punch interface function and programmable<br />
data input function (G10) are required.<br />
(5) Input from an external device<br />
Register the data output in step (4) into the CNC memory as a<br />
program and execute the program to input the data.<br />
NOTE<br />
The reader/punch interface function and programmable<br />
data input function (G10) are required.<br />
387
14. COMPENSATION FUNCTION PROGRAMMING<br />
B–63534EN/02<br />
Calculating the Fixture<br />
Offset<br />
X<br />
A<br />
F A<br />
(1) Relationship between the rotation axis and linear axes<br />
First group : 5(B–axis), 1(X–axis) , 3(Z–axis)<br />
Second group : 4(A–axis) , 3(Z–axis) , 2(Y–axis)<br />
Third group : 0, 0, 0<br />
(2) Reference angle and reference fixture offset<br />
X : F0X<br />
Y : F0Y<br />
Z : F0Z<br />
A : φ0<br />
B : θ0<br />
The calculation method is shown below when data is set as above:<br />
O : Rotary table center<br />
F<br />
O<br />
F AX <br />
F AY <br />
W : Workpiece origin offset value<br />
F0 : Fixture offset value when A = φ0 and B = θ0<br />
FA : Fixture offset value when A = 0 and B = 0<br />
F1 : Fixture offset value when A = 0 and B = θ<br />
F : Fixture offset value when A = φ and B = θ<br />
F 1<br />
388<br />
F 0<br />
FA = (FAX, FAY, FAY)<br />
F1 = (F1X, F1Y, F1Z)<br />
F = (FX, FY, FZ)<br />
Then, the following expression is used for fixture offset calculation.<br />
<br />
F AZ <br />
F 1X <br />
F 1Y <br />
<br />
F 1Z <br />
F X <br />
F Y <br />
F Z <br />
<br />
cos( 0 )<br />
0<br />
sin( 0 )<br />
cos()<br />
0<br />
sin()<br />
1<br />
0<br />
0<br />
0<br />
1<br />
0<br />
0<br />
1<br />
0<br />
0<br />
cos( )<br />
sin( )<br />
sin( 0 )<br />
0<br />
1<br />
0<br />
<br />
<br />
Y<br />
0<br />
cos( 0 )<br />
sin( 0 )<br />
cos( 0 ) <br />
0<br />
sin()<br />
0<br />
cos() <br />
<br />
F0X F0Y F<br />
0Z<br />
0<br />
sin( 0 )<br />
cos( 0 ) <br />
F1X F1Y F1Z <br />
<br />
<br />
<br />
<br />
Z<br />
0<br />
sin( 0 )<br />
<br />
<br />
cos( 0 ) <br />
F0X F0Y F0Z
B–63534EN/02 PROGRAMMING<br />
14. COMPENSATION FUNCTION<br />
Limitation<br />
When data is modified in<br />
G54.2 mode<br />
Movement due to a<br />
fixture offset vector<br />
change<br />
When a rotation axis is<br />
manually adjusted<br />
When compensation is<br />
applied to a rotation axis<br />
Command for<br />
suppressing fixture<br />
offset calculation<br />
Rotation axis used for<br />
fixture offset<br />
Rotation axis roll over<br />
Functions that cannot be<br />
specified<br />
In the G54.2 mode, a change made to the setting of parameter No. 7580<br />
to 7588 or to the reference fixture offset becomes effective when the next<br />
G54.2Pn is specified.<br />
It depends on the current continuous–state code of the 01 group whether<br />
a change in the fixture offset vector causes a movement. If the system is<br />
in a mode other than the G00 or G01 mode (G02, G03, etc.), the<br />
movement is made temporarily in the G01 mode.<br />
When the automatic operation is stopped using the SBK stop function<br />
during the G54.2 mode and a manual movement is made about the<br />
rotation axis, the fixture offset vector does not change. The vector is<br />
calculated when a rotation axis command or G54.2 is specified for<br />
automatic operation or MDI operation.<br />
When manual intervention is performed in the manual absolute switch on<br />
status and a rotation axis command is specified in the incremental (G91)<br />
mode, however, the vector is calculated using the coordinates on which<br />
the manual intervention is reflected. This operation is not a specification<br />
of the FS15.<br />
If the ABS bit (bit 3 of parameter 2409) is set to 0 or the G90 mode is<br />
selected when N3 is specified, the coordinate of the C–axis is assumed to<br />
be 40.0(30.0+10.0), which is the specified value, in calculation.<br />
In calculation of the fixture offset, the coordinate of the rotation axis on<br />
the workpiece coordinate system is used. If a tool offset or another offset<br />
is applied, the coordinate before the offset is used.<br />
If the following commands are specified for the rotation axis in the G54.2<br />
mode, the fixture offset vector is not calculated :<br />
Command related to the machine coordinate system : G53<br />
Command specifying a change of the workpiece coordinate<br />
system : G54 to G59, G54.1, G92, G52<br />
Command specifying a return to the reference<br />
position : G27, G28, G29, G30, G30.1<br />
The rotation axis used for polar coordinate interpolation (G12.1) cannot<br />
be set as the rotation axis for the fixture offset.<br />
When using the rotary axis roll over function, always specify 360 degrees<br />
for the amount of travel per revolution of the rotation axis.<br />
In the G54.2 mode, the functions listed below cannot be specified.<br />
Program restart function<br />
Mirror image function<br />
Scaling function<br />
Coordinate system rotation function<br />
High–speed contour control function and AI/AI–nano contour<br />
control function<br />
Fugure copy function<br />
389
14. COMPENSATION FUNCTION PROGRAMMING<br />
B–63534EN/02<br />
Example<br />
Parameter<br />
Parameter 7580=4 (C–axis)<br />
Parameter 7581=1 (X–axis)<br />
Parameter 7582=2 (Y–axis)<br />
Parameter 7583 to 7588=0<br />
Parameter 7575#0(X)=1 (The offset is valid for the X–axis.)<br />
7575#0(Y)=1 (The offset is valid for the Y–axis.)<br />
7570#0=0 (When bit 0 of parameter 7570 is set to 1, the values in<br />
square brackets ([ ]) are calculated.)<br />
Data of fixture offset 1 (n = 1)<br />
C= 180.0 (reference angle)<br />
X= –10.0<br />
Y= 0.0<br />
When these parameters and data are set, the machine operates as shown<br />
below :<br />
Table 14.14 Example of fixture offset<br />
Coordinates Position on the<br />
workpiece coordinate<br />
system (ABSOLUTE)<br />
390<br />
Position on the<br />
machine coordinate<br />
system (MACHINE)<br />
Fixture offset<br />
Program X Y C X Y C X Y C<br />
N1 G90 G00 X0 Y0 C90. ; 0.0 0.0 90.0 0.0 0.0 90.0 0.0 0.0 0.0<br />
N2 G54.2 P1 ; 0.0 0.0 90.0 0.0 10.0 90.0 0.0 10.0 0.0<br />
[0.0 –10.0 90.0] [0.0 0.0 90.0] [0.0 10.0 0.0]<br />
N3 G01 X10. Y2. F100. ; 10.0 2.0 90.0 10.0 12.0 90.0 0.0 10.0 0.0<br />
N4 G02 X2. Y10. R10. ; 2.0 10.0 90.0 2.0 20.0 90.0 0.0 10.0 0.0<br />
N5 G01 X0 Y0 ;<br />
:<br />
0.0 0.0 90.0 0.0 10.0 90.0 0.0 10.0 0.0<br />
The values enclosed in brackets ([ ]) apply when bit 0 (FTP) of parameter<br />
No. 7570 is set to 1.
B–63534EN/02 PROGRAMMING<br />
14. COMPENSATION FUNCTION<br />
C=180k<br />
391<br />
N2<br />
Y<br />
C=90<br />
N5<br />
N3<br />
[N3]<br />
N4<br />
C<br />
X<br />
Zero POINT of the machine<br />
coordinate system<br />
Fig.14.14 (b) Example of fixture offset<br />
When G54.2 P1 is specified in the N2 block, the fixture offset vector (0,<br />
10.0) is calculated. The vector is handled in the same way as the offset<br />
from the workpiece reference point. The current position on the<br />
workpiece coordinate system is (0, –10.0).<br />
If bit 0 (FTP) of parameter 7570 is set to 0, the tool is moved according<br />
to the vector. The resultant position on the workpiece coordinate system<br />
is (0, 0), the position before the command is specified.
15. CUSTOM MACRO PROGRAMMING<br />
B–63534EN/02<br />
15 <br />
<br />
Although subprograms are useful for repeating the same operation, the<br />
custom macro function also allows use of variables, arithmetic and logic<br />
operations, and conditional branches for easy development of general<br />
programs such as pocketing and user–defined canned cycles.A machining<br />
program can call a custom macro with a simple command, just like a<br />
subprogram.<br />
Machining program Custom macro<br />
O0001 ;<br />
:<br />
:<br />
:<br />
G65 P9010 R50.0 L2 ;<br />
:<br />
:<br />
M30 ;<br />
392<br />
O9010 ;<br />
#1=#18/2 ;<br />
G01 G42 X#1 Y#1 F300 ;<br />
G02 X#1 Y–#1 R#1 ;<br />
:<br />
:<br />
:<br />
M99 ;
B–63534EN/02<br />
15.1<br />
VARIABLES<br />
<br />
Variable representation<br />
Types of variables<br />
PROGRAMMING<br />
393<br />
15. CUSTOM MACRO<br />
An ordinary machining program specifies a G code and the travel distance<br />
directly with a numeric value; examples are G100 and X100.0.<br />
With a custom macro, numeric values can be specified directly or using<br />
a variable number. When a variable number is used, the variable value<br />
can be changed by a program or using operations on the MDI panel.<br />
#1=#2+100 ;<br />
G01 X#1 F300 ;<br />
When specifying a variable, specify a number sign (#) followed by a<br />
variable number. General–purpose programming languages allow a name<br />
to be assigned to a variable, but this capability is not available for custom<br />
macros.<br />
Example: #1<br />
An expression can be used to specify a variable number. In such a case,<br />
the expression must be enclosed in brackets.<br />
Example: #[#1+#2–12]<br />
Variables are classified into four types by variable number.<br />
Variable<br />
number<br />
Table 15.1 Types of variables<br />
Type of<br />
variable<br />
#0 Always<br />
null<br />
#1 – #33 Local<br />
variables<br />
#100 – #149 (#199)<br />
#500 – #531 (#999)<br />
Common<br />
variables<br />
#1000 – System<br />
variables<br />
Function<br />
This variable is always null. No value can<br />
be assigned to this variable.<br />
Local variables can only be used within a<br />
macro to hold data such as the results of<br />
operations. When the power is turned off,<br />
local variables are initialized to null. When<br />
a macro is called, arguments are assigned<br />
to local variables.<br />
Common variables can be shared among<br />
different macro programs. When the power<br />
is turned off, variables #100 to #149 are<br />
initialized to null. Variables #500 to #531<br />
hold data even when the power is turned<br />
off. As an option, common variables #150<br />
to #199 and #532 to #999 are also available.<br />
However, when these values are using.<br />
System variables are used to read and<br />
write a variety of NC data items such as<br />
the current position and tool compensation<br />
values.<br />
NOTE<br />
Common variables #150 to #199 and #532 to #999 are<br />
optional.
15. CUSTOM MACRO PROGRAMMING<br />
B–63534EN/02<br />
Range of variable values<br />
Omission of the decimal<br />
point<br />
Referencing variables<br />
Common custom macro<br />
variables for tow paths<br />
(two–path control)<br />
Undefined variable<br />
Local and common variables can have value 0 or a value in the following<br />
ranges :<br />
–10 47 to –10 –29<br />
0<br />
10 –29 to 10 47<br />
If the result of calculation turns out to be invalid, an P/S alarm No. 111<br />
is issued.<br />
When a variable value is defined in a program, the decimal point can be<br />
omitted.<br />
Example:<br />
When #1=123; is defined, the actual value of variable #1 is 123.000.<br />
To reference the value of a variable in a program, specify a word address<br />
followed by the variable number. When an expression is used to specify<br />
a variable, enclose the expression in brackets.<br />
Example: G01X[#1+#2]F#3;<br />
A referenced variable value is automatically rounded according to the<br />
least input increment of the address.<br />
Example:<br />
When G00X#1; is executed on a 1/1000–mm CNC with 12.3456<br />
assigned to variable #1, the actual command is interpreted as<br />
G00X12.346;.<br />
To reverse the sign of a referenced variable value, prefix a minus sign (–)<br />
to #.<br />
Example: G00X–#1;<br />
When an undefined variable is referenced, the variable is ignored up to an<br />
address word.<br />
Example:<br />
When the value of variable #1 is 0, and the value of variable #2 is null,<br />
execution of G00X#1Y#2; results in G00X0;.<br />
For two–path control, macro variables are provided for each path. Some<br />
common variables, however, can be used for both paths, by setting<br />
parameters No. 6036 and 6037 accordingly.<br />
When the value of a variable is not defined, such a variable is referred to<br />
as a “null” variable. Variable #0 is always a null variable. It cannot be<br />
written to, but it can be read.<br />
(a) Quotation<br />
When an undefined variable is quotated, the address itself is also<br />
ignored.<br />
When #1 = < vacant > When #1 = 0<br />
G90 X100 Y #1<br />
<br />
G90 X100<br />
394<br />
G90 X100 Y #1<br />
<br />
G90 X100 Y0
B–63534EN/02<br />
Custom macro variables<br />
common to tool posts<br />
(two–path control)<br />
Displaying variable<br />
Values<br />
PROGRAMMING<br />
395<br />
15. CUSTOM MACRO<br />
(b)Operation<br />
< vacant > is the same as 0 except when replaced by < vacant><br />
When #1 = < vacant > When #1 = 0<br />
#2 = #1<br />
<br />
#2 = < vacant ><br />
#2 = #1*5<br />
<br />
#2 = 0<br />
#2 = #1+#1<br />
<br />
#2 = 0<br />
#2 = #1<br />
<br />
#2 = 0<br />
#2 = #1*5<br />
<br />
#2 = 0<br />
#2 = #1 + #1<br />
<br />
#2 = 0<br />
(c) Conditional expressions<br />
< vacant > differs from 0 only for EQ and NE.<br />
#1 EQ #0<br />
<br />
Established<br />
#1 NE 0<br />
<br />
Established<br />
#1 GE #0<br />
<br />
Established<br />
When #1 = < vacant > When #1 = 0<br />
#1 GT 0<br />
<br />
Not established<br />
#1 EQ #0<br />
<br />
Not established<br />
#1 NE 0<br />
<br />
Not established<br />
#1 GE #0<br />
<br />
Established<br />
#1 GT 0<br />
<br />
Not established<br />
With the two–path control, macro variables are provided for each path.<br />
Specifying parameter Nos. 6036 and 6037 allows some of the common<br />
variables to be used for all paths.<br />
VARIABLE O1234 N12345<br />
NO. DATA NO. DATA<br />
100 123.456 108<br />
101 0.000 109<br />
102 110<br />
103 111<br />
104 112<br />
105 113<br />
106 114<br />
107 115<br />
ACTUAL POSITION (RELATIVE)<br />
X 0.000 Y 0.000<br />
Z 0.000 B 0.000<br />
MEM **** *** *** 18:42:15<br />
[ MACRO ] [ MENU ] [ OPR ] [ ] [ (OPRT) ]<br />
When the value of a variable is blank, the variable is null.
15. CUSTOM MACRO PROGRAMMING<br />
B–63534EN/02<br />
<br />
The mark ******** indicates an overflow (when the absolute<br />
value of a variable is greater than 99999999) or an underflow (when<br />
the absolute value of a variable is less than 0.0000001).<br />
Program numbers, sequence numbers, and optional block skip numbers<br />
cannot be referenced using variables.<br />
Example:<br />
Variables cannot be used in the following ways:<br />
O#1;<br />
/#2G00X100.0;<br />
N#3Y200.0;<br />
396
B–63534EN/02<br />
15.2<br />
SYSTEM VARIABLES<br />
Explanations<br />
Interface signals<br />
Tool compensation<br />
values<br />
PROGRAMMING<br />
397<br />
15. CUSTOM MACRO<br />
System variables can be used to read and write internal NC data such as<br />
tool compensation values and current position data. Note, however, that<br />
some system variables can only be read. System variables are essential<br />
for automation and general–purpose program development.<br />
Signals can be exchanged between the programmable machine controller<br />
(PMC) and custom macros.<br />
Variable<br />
number<br />
#1000–#1015<br />
#1032<br />
#1100–#1115<br />
#1132<br />
Table 15.2 (a) System variables for interface signals<br />
Function<br />
A 16–bit signal can be sent from the PMC to a custom macro.<br />
Variables #1000 to #1015 are used to read a signal bit<br />
by bit. Variable #1032 is used to read all 16 bits of a signal<br />
at one time.<br />
A 16–bit signal can be sent from a custom macro to the<br />
PMC. Variables #1100 to #1115 are used to write a signal<br />
bit by bit. Variable #1132 is used to write all 16 bits of a<br />
signal at one time.<br />
#1133 Variable #1133 is used to write all 32 bits of a signal at one<br />
time from a custom macro to the PMC.<br />
Note, that values from –99999999 to +99999999 can be<br />
used for #1133.<br />
For detailed information, refer to the connection manual<br />
(B–63523EN–1).<br />
Tool compensation values can be read and written using system variables.<br />
Usable variable numbers depend on the number of compensation pairs,<br />
whether a distinction is made between geometric compensation and wear<br />
compensation, and whether a distinction is made between tool length<br />
compensation and cutter compensation. When the number of<br />
compensation pairs is not greater than 200, variables #2001 to #2400 can<br />
also be used.<br />
Table 15.2 (b) System variables for tool compensation memory A<br />
Compensation number System variable<br />
1<br />
:<br />
200<br />
:<br />
999<br />
#10001 (#2001)<br />
:<br />
#10200 (#2200)<br />
:<br />
#10999<br />
Table 15.2 (c) System variables for tool compensation memory B<br />
Compensation<br />
number<br />
1<br />
:<br />
200<br />
:<br />
999<br />
Geometry compensation Wear compensation<br />
#11001 (#2201)<br />
:<br />
#11200 (#2400)<br />
:<br />
#11999<br />
#10001 (#2001)<br />
:<br />
#10200 (#2200)<br />
:<br />
#10999
15. CUSTOM MACRO PROGRAMMING<br />
B–63534EN/02<br />
Macro alarms<br />
Stop with a message<br />
Table 15.2 (d) System variables for tool compensation memory C<br />
Compensation<br />
number Geometric<br />
compensation<br />
1<br />
:<br />
200<br />
:<br />
999<br />
Variable<br />
number<br />
398<br />
Tool length compensation (H)<br />
#11001(#2201)<br />
:<br />
#11201(#2400)<br />
:<br />
#11999<br />
Wear<br />
compensation<br />
#10001(#2001)<br />
:<br />
#10201(#2200)<br />
:<br />
#10999<br />
Cutter compensation<br />
(D)<br />
Geometriccompensation<br />
#13001<br />
:<br />
:<br />
#13999<br />
Table 15.2 (e) System variable for macro alarms<br />
Function<br />
Wear<br />
compensation<br />
#12001<br />
:<br />
:<br />
#12999<br />
#3000 When a value from 0 to 200 is assigned to variable #3000,<br />
the CNC stops with an alarm. After an expression, an alarm<br />
message not longer than 26 characters can be described.<br />
The CRT screen displays alarm numbers by adding 3000 to<br />
the value in variable #3000 along with an alarm message.<br />
Example:<br />
#3000=1(TOOL NOT FOUND);<br />
→ The alarm screen displays ”3001 TOOL NOT FOUND.”<br />
Execution of the program can be stopped, and then a message can be<br />
displayed.<br />
Variable<br />
number<br />
Function<br />
#3006 When “#3006=1 (MESSAGE);” is commanded in the macro,<br />
the program executes blocks up to the immediately previous<br />
one and then stops.<br />
When a message of up to 26 characters, which is enclosed<br />
by a control–in character (“(”) and control–out character (“)”),<br />
is programmed in the same block, the message is displayed<br />
on the external operator message screen.
B–63534EN/02<br />
Time information<br />
Automatic operation<br />
control<br />
PROGRAMMING<br />
Time information can be read and written.<br />
Variable<br />
number<br />
399<br />
15. CUSTOM MACRO<br />
Table 15.2 (f) System variables for time information<br />
Function<br />
#3001 This variable functions as a timer that counts in 1–millisecond<br />
increments at all times. When the power is turned on, the value<br />
of this variable is reset to 0. When 2147483648 milliseconds<br />
is reached, the value of this timer returns to 0.<br />
#3002 This variable functions as a timer that counts in 1–hour increments<br />
when the cycle start lamp is on. This timer preserves its<br />
value even when the power is turned off. When 9544.371767<br />
hours is reached, the value of this timer returns to 0.<br />
#3011 This variable can be used to read the current date (year/month/<br />
day). Year/month/day information is converted to an apparent<br />
decimal number. For example, September 28, 2001 is represented<br />
as 20010928.<br />
#3012 This variable can be used to read the current time (hours/minutes/seconds).<br />
Hours/minutes/seconds information is converted<br />
to an apparent decimal number. For example, 34 minutes<br />
and 56 seconds after 3 p.m. is represented as 153456.<br />
The control state of automatic operation can be changed.<br />
Table 15.2 (g) System variable (#3003) for automatic operation control<br />
#3003 Single block<br />
0 Enabled To be awaited<br />
1 Disabled To be awaited<br />
Completion of an auxiliary<br />
function<br />
2 Enabled Not to be awaited<br />
3 Disabled Not to be awaited<br />
When the power is turned on, the value of this variable is 0.<br />
When single block stop is disabled, single block stop operation is not<br />
performed even if the single block switch is set to ON.<br />
When a wait for the completion of auxiliary functions (M, S, and T<br />
functions) is not specified, program execution proceeds to the next<br />
block before completion of auxiliary functions. Also, distribution<br />
completion signal DEN is not output.
15. CUSTOM MACRO PROGRAMMING<br />
B–63534EN/02<br />
Table 15.2 (h) System variable (#3004) for automatic operation control<br />
#3004 Feed hold Feedrate Override Exact stop<br />
0 Enabled Enabled Enabled<br />
1 Disabled Enabled Enabled<br />
2 Enabled Disabled Enabled<br />
3 Disabled Disabled Enabled<br />
4 Enabled Enabled Disabled<br />
5 Disabled Enabled Disabled<br />
6 Enabled Disabled Disabled<br />
7 Disabled Disabled Disabled<br />
When the power is turned on, the value of this variable is 0.<br />
When feed hold is disabled:<br />
(1) When the feed hold button is held down, the machine stops in the<br />
single block stop mode. However, single block stop operation is not<br />
performed when the single block mode is disabled with variable<br />
#3003.<br />
(2) When the feed hold button is pressed then released, the feed hold lamp<br />
comes on, but the machine does not stop; program execution continues<br />
and the machine stops at the first block where feed hold is enabled.<br />
When feedrate override is disabled, an override of 100% is always<br />
applied regardless of the setting of the feedrate override switch on the<br />
machine operator’s panel.<br />
When exact stop check is disabled, no exact stop check (position<br />
check) is made even in blocks including those which do not perform<br />
cutting.<br />
N1<br />
N2<br />
N3, N4<br />
N5<br />
400<br />
N6<br />
N8, N9,<br />
N10<br />
N7<br />
O0001 ;<br />
N1 G00 G91 X#24 Y#25 ;<br />
N2 Z#18 ;<br />
G04 ;<br />
N3 #3003=3 ;<br />
N4 #3004=7 ;<br />
N5 G01 Z#26 F#9 ;<br />
N6 M04 ;<br />
N7 G01<br />
Z–[ROUND[#18]+ROUND[#26]] ;<br />
G04 ;<br />
N8 #3004=0 ;<br />
N9 #3003=0 ;<br />
N10M03 ;<br />
M99 ;<br />
Fig. 15.2 (a) Example of using variable #3004 in a tapping cycle
B–63534EN/02<br />
<br />
Mirror image<br />
Setting<br />
PROGRAMMING<br />
401<br />
15. CUSTOM MACRO<br />
Settings can be read and written. Binary values are converted to<br />
decimals.<br />
Setting<br />
Setting<br />
#3005<br />
#15 #14 #13 #12 #11 #10 #9 #8<br />
FCV<br />
#7 #6 #5 #4 #3 #2 #1 #0<br />
SEQ INI ISO TVC<br />
#9 (FCV) : Whether to use the FS15 tape format conversion capability<br />
#5 (SEQ) : Whether to automatically insert sequence numbers<br />
#2 (INI) : Millimeter input or inch input<br />
#1 (ISO) : Whether to use EIA or ISO as the output code<br />
#0 (TVC) : Whether to make a TV check<br />
The mirror–image status for each axis set using an external switch or<br />
setting operation can be read through the output signal (mirror–image<br />
check signal). The mirror–image status present at that time can be<br />
checked. (See III–4.9)<br />
The value obtained in binary is converted into decimal notation.<br />
#3007<br />
#7 #6 #5 #4 #3 #2 #1 #0<br />
8th axis 7th axis 6th axis 5th axis 4th axis 3th axis 2th axis 1th axis<br />
For each bit,<br />
0 (mirror–image function is disabled)<br />
or<br />
1 (mirror–image function is enabled)<br />
is indicated.<br />
Example : If #3007 is 3, the mirror–image function is enabled for the first and second axes.<br />
When the mirror–image function is set for a certain axis by both the<br />
mirror–image signal and setting, the signal value and setting value are<br />
ORed and then output.<br />
When mirror–image signals for axes other than the controlled axes are<br />
turned on, they are still read into system variable #3007.<br />
System variable #3007 is a write–protected system variable. If an<br />
attempt is made to write data in the variable, P/S 116 alarm “WRITE<br />
PROTECTED VARIABLE” is issued.
15. CUSTOM MACRO PROGRAMMING<br />
B–63534EN/02<br />
Number of machined<br />
parts<br />
Modal information<br />
The number (target number) of parts required and the number (completion<br />
number) of machined parts can be read and written.<br />
Table 15.2(i) System variables for the number of parts required and the<br />
number of machined parts<br />
Variable number Function<br />
#3901 Number of machined parts (completion number)<br />
#3902 Number of required parts (target number)<br />
NOTE<br />
Do not substitute a negative value.<br />
Modal information specified in blocks up to the immediately preceding<br />
block can be read.<br />
Table 15.2 (j) System variables for modal information<br />
Variable number Function<br />
#4001<br />
#4002<br />
#4003<br />
#4004<br />
#4005<br />
#4006<br />
#4007<br />
#4008<br />
#4009<br />
#4010<br />
#4011<br />
#4012<br />
#4013<br />
#4014<br />
#4015<br />
#4016<br />
:<br />
#4022<br />
#4102<br />
#4107<br />
#4109<br />
#4111<br />
#4113<br />
#4114<br />
#4115<br />
#4119<br />
#4120<br />
#4130<br />
402<br />
G00, G01, G02, G03, G33 (Group 01)<br />
G17, G18, G19 (Group 02)<br />
G90, G91 (Group 03)<br />
(Group 04)<br />
G94, G95 (Group 05)<br />
G20, G21 (Group 06)<br />
G40, G41, G42 (Group 07)<br />
G43, G44, G49 (Group 08)<br />
G73, G74, G76, G80–G89 (Group 09)<br />
G98, G99 (Group 10)<br />
G50, G51 (Group 11)<br />
G65, G66, G67 (Group 12)<br />
G96,G97 (Group 13)<br />
G54–G59 (Group 14)<br />
G61–G64 (Group 15)<br />
G68, G69 (Group 16)<br />
: :<br />
(Group 22)<br />
B code<br />
D code<br />
F code<br />
H code<br />
M code<br />
Sequence number<br />
Program number<br />
S code<br />
T code<br />
P code (number of the currently selected additional<br />
workpiece coordinate system)<br />
Example:<br />
When #1=#4001; is executed, the resulting value in #1 is 0, 1, 2, 3, or<br />
33.<br />
If the specified system variable for reading modal information<br />
corresponds to a G code group which cannot be used, a P/S alarm is<br />
issued.
B–63534EN/02<br />
Current position<br />
PROGRAMMING<br />
Position information cannot be written but can be read.<br />
Variable<br />
number<br />
403<br />
15. CUSTOM MACRO<br />
Table 15.2 (k) System variables for position information<br />
Position<br />
information<br />
Coordinate<br />
system<br />
#5001–#5008 Block end point Workpiece<br />
coordinate<br />
system<br />
#5021–#5028 Current position <strong>Machine</strong><br />
coordinate<br />
system<br />
Tool compensation<br />
value<br />
Not<br />
included<br />
Read<br />
operation<br />
during<br />
movement<br />
Enabled<br />
<strong>Inc</strong>luded Disabled<br />
#5041–#5048 Current position Workpiece<br />
coordinate<br />
#5061–#5068 Skip signal position system Enabled<br />
#5081–#5088 Tool length offset<br />
value<br />
#5101–#5108 Deviated servo<br />
position<br />
Disabled<br />
The first digit (from 1 to 8) represents an axis number.<br />
The tool length offset value currently used for execution rather than the<br />
immediately preceding tool offset value is held in variables #5081 to<br />
5088.<br />
The tool position where the skip signal is turned on in a G31 (skip<br />
function) block is held in variables #5061 to #5068. When the skip<br />
signal is not turned on in a G31 block, the end point of the specified<br />
block is held in these variables.<br />
When read during movement is ”disabled,” this means that expected<br />
values cannot be read due to the buffering (preread) function.
15. CUSTOM MACRO PROGRAMMING<br />
B–63534EN/02<br />
Workpiece coordinate<br />
system compensation<br />
values (workpiece zero<br />
point offset values)<br />
Workpiece zero point offset values can be read and written.<br />
Table 15.2 (l) System variables for workpiece zero point offset values<br />
Variable<br />
number<br />
#5201<br />
:<br />
#5208<br />
#5221<br />
:<br />
#5228<br />
#5241<br />
:<br />
#5248<br />
#5261<br />
:<br />
#5268<br />
#5281<br />
:<br />
#5288<br />
#5301<br />
:<br />
#5308<br />
#5321<br />
:<br />
#5328<br />
#7001<br />
:<br />
#7008<br />
#7021<br />
:<br />
#7028<br />
404<br />
Function<br />
First–axis external workpiece zero point offset value<br />
:<br />
Eighth–axis external workpiece zero point offset value<br />
First–axis G54 workpiece zero point offset value<br />
:<br />
Eighth–axis G54 workpiece zero point offset value<br />
First–axis G55 workpiece zero point offset value<br />
:<br />
Eighth–axis G55 workpiece zero point offset value<br />
First–axis G56 workpiece zero point offset value<br />
:<br />
Eighth–axis G56 workpiece zero point offset value<br />
First–axis G57 workpiece zero point offset value<br />
:<br />
Eighth–axis G57 workpiece zero point offset value<br />
First–axis G58 workpiece zero point offset value<br />
:<br />
Eighth–axis G58 workpiece zero point offset value<br />
First–axis G59 workpiece zero point offset value<br />
:<br />
Eighth–axis G59 workpiece zero point offset value<br />
First–axis workpiece zero point offset value (G54.1 P1)<br />
:<br />
Eighth–axis workpiece zero point offset value<br />
First–axis workpiece zero point offset value (G54.1 P2)<br />
:<br />
Eighth–axis workpiece zero point offset value<br />
: :<br />
#7941<br />
:<br />
#7948<br />
#14001<br />
:<br />
#14008<br />
#14021<br />
:<br />
#14028<br />
First–axis workpiece zero point offset value (G54.1 P48)<br />
:<br />
Eighth–axis workpiece zero point offset value<br />
First–axis workpiece zero point offset value (G54.1 P1)<br />
:<br />
Eighth–axis workpiece zero point offset value<br />
First–axis workpiece zero point offset value (G54.1 P2)<br />
:<br />
Eighth–axis workpiece zero point offset value<br />
: :<br />
#19980<br />
:<br />
#19988<br />
First–axis workpiece zero point offset value (G54.1 P300)<br />
:<br />
Eighth–axis workpiece zero point offset value
B–63534EN/02<br />
PROGRAMMING<br />
The following variables can also be used:<br />
405<br />
15. CUSTOM MACRO<br />
Axis Function Variable number<br />
First axis External workpiece zero point offset #2500 #5201<br />
G54 workpiece zero point offset #2501 #5221<br />
G55 workpiece zero point offset #2502 #5241<br />
G56 workpiece zero point offset #2503 #5261<br />
G57 workpiece zero point offset #2504 #5281<br />
G58 workpiece zero point offset #2505 #5301<br />
G59 workpiece zero point offset #2506 #5321<br />
Second External workpiece zero point offset #2600 #5202<br />
axis<br />
G54 workpiece zero point offset #2601 #5222<br />
G55 workpiece zero point offset #2602 #5242<br />
G56 workpiece zero point offset #2603 #5262<br />
G57 workpiece zero point offset #2604 #5282<br />
G58 workpiece zero point offset #2605 #5302<br />
G59 workpiece zero point offset #2606 #5322<br />
Third axis External workpiece zero point offset #2700 #5203<br />
G54 workpiece zero point offset #2701 #5223<br />
G55 workpiece zero point offset #2702 #5243<br />
G56 workpiece zero point offset #2703 #5263<br />
G57 workpiece zero point offset #2704 #5283<br />
G58 workpiece zero point offset #2705 #5303<br />
G59 workpiece zero point offset #2706 #5323<br />
Fourth axis External workpiece zero point offset #2800 #5204<br />
G54 workpiece zero point offset #2801 #5224<br />
G55 workpiece zero point offset #2802 #5244<br />
G56 workpiece zero point offset #2803 #5264<br />
G57 workpiece zero point offset #2804 #5284<br />
G58 workpiece zero point offset #2805 #5304<br />
G59 workpiece zero point offset #2806 #5324<br />
NOTE<br />
To use variables #2500 to #2806 and #5201 to #5328,<br />
optional variables for the workpiece coordinate systems are<br />
necessary.<br />
Optional variables for 48 additional workpiece coordinate<br />
systems are #7001 to #7948 (G54.1 P1 to G54.1 P48).<br />
Optional variables for 300 additional workpiece coordinate<br />
systems are #14001 to #19988 (G54.1 P1 to G54.1 P300).<br />
With these variables, #7001 to #7948 can also be used.
15. CUSTOM MACRO PROGRAMMING<br />
B–63534EN/02<br />
15.3<br />
ARITHMETIC AND<br />
LOGIC OPERATION<br />
Explanations<br />
Angle units<br />
ARCSIN #i = ASIN[#j];<br />
ARCCOS #i = ACOS[#j];<br />
The operations listed in Table 15.3(a) can be performed on variables. The<br />
expression to the right of the operator can contain constants and/or<br />
variables combined by a function or operator. Variables #j and #K in an<br />
expression can be replaced with a constant. Variables on the left can also<br />
be replaced with an expression.<br />
Table 15.3 (a) Arithmetic and logic operation<br />
Function Format Remarks<br />
Definition #i=#j<br />
Sum<br />
Difference<br />
Product<br />
Quotient<br />
Sine<br />
Arcsine<br />
Cosine<br />
Arccosine<br />
Tangent<br />
Arctangent<br />
Square root<br />
Absolute value<br />
Rounding off<br />
Rounding down<br />
Rounding up<br />
Natural logarithm<br />
Exponential function<br />
OR<br />
XOR<br />
AND<br />
Conversion from BCD to BIN<br />
Conversion from BIN to BCD<br />
406<br />
#i=#j+#k;<br />
#i=#j–#k;<br />
#i=#j*#k;<br />
#i=#j/#k;<br />
#i=SIN[#j];<br />
#i=ASIN[#j];<br />
#i=COS[#j];<br />
#i=ACOS[#j];<br />
#i=TAN[#j];<br />
#i=ATAN[#j]/[#k];<br />
#i=SQRT[#j];<br />
#i=ABS[#j];<br />
#i=ROUND[#j];<br />
#i=FIX[#j];<br />
#i=FUP[#j];<br />
#i=LN[#j];<br />
#i=EXP[#j];<br />
#i=#j OR #k;<br />
#i=#j XOR #k;<br />
#i=#j AND #k;<br />
#i=BIN[#j];<br />
#i=BCD[#j];<br />
An angle is specified in degrees.<br />
90 degrees and 30<br />
minutes is represented as<br />
90.5 degrees.<br />
A logical operation is performed<br />
on binary numbers<br />
bit by bit.<br />
Used for signal exchange<br />
to and from the PMC<br />
The units of angles used with the SIN, COS, ASIN, ACOS, TAN, and<br />
ATAN functions are degrees. For example, 90 degrees and 30 minutes is<br />
represented as 90.5 degrees.<br />
The solution ranges are as indicated below:<br />
When the NAT bit (bit 0 of parameter 6004) is set to 0: 270 to 90<br />
When the NAT bit (bit 0 of parameter 6004) is set to 1: –90 to 90<br />
When #j is beyond the range of –1 to 1, P/S alarm No. 111 is issued.<br />
A constant can be used instead of the #j variable.<br />
The solution ranges from 180° to 0°.<br />
When #j is beyond the range of –1 to 1, P/S alarm No. 111 is issued.<br />
A constant can be used instead of the #j variable.
B–63534EN/02<br />
ARCTAN #i =<br />
ATAN[#j]/[#k];<br />
Natural logarithm #i =<br />
LN[#j];<br />
Exponential function #i =<br />
EXP[#j];<br />
ROUND function<br />
PROGRAMMING<br />
407<br />
15. CUSTOM MACRO<br />
Specify the lengths of two sides, separated by a slash (/).<br />
The solution ranges are as follows:<br />
When the NAT bit (bit 0 of parameter 6004) is set to 0: 0o to 360<br />
[Example] When #1 = ATAN[–1]/[–1]; is specified, #1 is 225.0.<br />
When the NAT bit (bit 0 of parameter 6004) is set to 1: –180 to 180<br />
[Example] When #1 = ATAN[–1]/[–1]; is specified, #1 is –135.0.0.<br />
A constant can be used instead of the #j variable.<br />
Note that the relative error may become 10 –8 or greater.<br />
When the antilogarithm (#j) is zero or smaller, P/S alarm No. 111 is<br />
issued.<br />
A constant can be used instead of the #j variable.<br />
Note that the relative error may become 10 –8 or greater.<br />
When the result of the operation exceeds 3.65 X 10 47 (j is about 110),<br />
an overflow occurs and P/S alarm No. 111 is issued.<br />
A constant can be used instead of the #j variable.<br />
When the ROUND function is included in an arithmetic or logic<br />
operation command, IF statement, or WHILE statement, the ROUND<br />
function rounds off at the first decimal place.<br />
Example:<br />
When #1=ROUND[#2]; is executed where #2 holds 1.2345, the value<br />
of variable #1 is 1.0.<br />
When the ROUND function is used in NC statement addresses, the<br />
ROUND function rounds off the specified value according to the least<br />
input increment of the address.<br />
Example:<br />
Creation of a drilling program that cuts according to the values of<br />
variables #1 and #2, then returns to the original position<br />
Suppose that the increment system is 1/1000 mm, variable #1 holds<br />
1.2345, and variable #2 holds 2.3456. Then,<br />
G00 G91 X–#1; Moves 1.235 mm.<br />
G01 X–#2 F300; Moves 2.346 mm.<br />
G00 X[#1+#2]; Since 1.2345 + 2.3456 = 3.5801, the travel distance<br />
is 3.580, which does not return the tool to the<br />
original position.<br />
This difference comes from whether addition is performed before or<br />
after rounding off. G00X–[ROUND[#1]+ROUND[#2]] must be<br />
specified to return the tool to the original position.
15. CUSTOM MACRO PROGRAMMING<br />
B–63534EN/02<br />
Rounding up and down<br />
to an integer<br />
Abbreviations of<br />
arithmetic and logic<br />
operation commands<br />
Priority of operations<br />
Bracket nesting<br />
With CNC, when the absolute value of the integer produced by an<br />
operation on a number is greater than the absolute value of the original<br />
number, such an operation is referred to as rounding up to an integer.<br />
Conversely, when the absolute value of the integer produced by an<br />
operation on a number is less than the absolute value of the original<br />
number, such an operation is referred to as rounding down to an integer.<br />
Be particularly careful when handling negative numbers.<br />
Example:<br />
Suppose that #1=1.2 and #2=–1.2.<br />
When #3=FUP[#1] is executed, 2.0 is assigned to #3.<br />
When #3=FIX[#1] is executed, 1.0 is assigned to #3.<br />
When #3=FUP[#2] is executed, –2.0 is assigned to #3.<br />
When #3=FIX[#2] is executed, –1.0 is assigned to #3.<br />
When a function is specified in a program, the first two characters of the<br />
function name can be used to specify the function (See III–9.7).<br />
Example:<br />
ROUND → RO<br />
FIX → FI<br />
Functions<br />
Operations such as multiplication and division (*, /, AND)<br />
Operations such as addition and subtraction (+, –, OR, XOR)<br />
Example) #1=#2+#3*SIN[#4];<br />
408<br />
<br />
<br />
<br />
,<br />
<br />
and indicate the order of operations.<br />
Brackets are used to change the order of operations. Brackets can be used<br />
to a depth of five levels including the brackets used to enclose a function.<br />
When a depth of five levels is exceeded, P/S alarm No. 118 occurs.<br />
Example) #1=SIN [ [ [#2+#3] *#4 +#5] *#6] ;<br />
<br />
<br />
<br />
<br />
<br />
to indicate the order of operations.
B–63534EN/02<br />
<br />
Brackets<br />
Operation error<br />
PROGRAMMING<br />
409<br />
15. CUSTOM MACRO<br />
Brackets ([, ]) are used to enclose an expression. Note that parentheses<br />
are used for comments.<br />
Errors may occur when operations are performed.<br />
Operation<br />
Table 15.3 (b) Errors involved in operations<br />
Average<br />
error<br />
Maximum<br />
error<br />
a = b*c 1.55×10 –10 4.66×10 –10<br />
a = b / c 4.66×10 –10 1.88×10 –9<br />
a b <br />
a = b + c<br />
a = b – c<br />
a = SIN [ b ]<br />
a = COS [ b ]<br />
a = ATAN [ b ] / [ c ]<br />
(*4)<br />
1.24×10 –9 3.73×10 –9<br />
2.33×10 –10 5.32×10 –10<br />
5.0×10 –9 1.0×10 –8<br />
1.8×10 –6 3.6×10 –6<br />
Type of error<br />
Relative error(*1)<br />
NOTE<br />
1 The relative error depends on the result of the operation.<br />
2 Smaller of the two types of errors is used.<br />
3 The absolute error is constant, regardless of the result of the<br />
operation.<br />
4 Function TAN performs SIN/COS.<br />
5 If the result of the operation by the SIN, COS, or TAN<br />
function is less than 1.0 x 10 –8 or is not 0 because of the<br />
precision of the operation, the result of the operation can be<br />
normalized to 0 by setting bit 1 (MFZ) of parameter No. 6004<br />
to 1.<br />
The precision of variable values is about 8 decimal digits. When very<br />
large numbers are handled in an addition or subtraction, the expected<br />
results may not be obtained.<br />
Example:<br />
When an attempt is made to assign the following values to variables<br />
#1 and #2:<br />
#1=9876543210123.456<br />
#2=9876543277777.777<br />
the values of the variables become:<br />
#1=9876543200000.000<br />
#2=9876543300000.000<br />
In this case, when #3=#2–#1; is calculated, #3=100000.000 results.<br />
(The actual result of this calculation is slightly different because it is<br />
performed in binary.)<br />
Min<br />
ε<br />
<br />
b<br />
<br />
a<br />
”<br />
c<br />
(*2)<br />
Absolute error(*3)<br />
degrees
15. CUSTOM MACRO PROGRAMMING<br />
B–63534EN/02<br />
Divisor<br />
Also be aware of errors that can result from conditional expressions<br />
using EQ, NE, GE, GT, LE, and LT.<br />
Example:<br />
IF[#1 EQ #2] is effected by errors in both #1 and #2, possibly resulting<br />
in an incorrect decision.<br />
Therefore, instead find the difference between the two variables with<br />
IF[ABS[#1–#2]LT0.001].<br />
Then, assume that the values of the two variables are equal when the<br />
difference does not exceed an allowable limit (0.001 in this case).<br />
Also, be careful when rounding down a value.<br />
Example:<br />
When #2=#1*1000; is calculated where #1=0.002;, the resulting value<br />
of variable #2 is not exactly 2 but 1.99999997.<br />
Here, when #3=FIX[#2]; is specified, the resulting value of variable<br />
#1 is not 2.0 but 1.0. In this case, round down the value after correcting<br />
the error so that the result is greater than the expected number, or round<br />
it off as follows:<br />
#3=FIX[#2+0.001]<br />
#3=ROUND[#2]<br />
When a divisor of zero is specified in a division or TAN[90], P/S alarm<br />
No. 112 occurs.<br />
410
B–63534EN/02<br />
15.4<br />
MACRO<br />
STATEMENTS AND<br />
NC STATEMENTS<br />
<br />
Differences from NC<br />
statements<br />
NC statements that have<br />
the same property as<br />
macro statements<br />
PROGRAMMING<br />
411<br />
15. CUSTOM MACRO<br />
The following blocks are referred to as macro statements:<br />
Blocks containing an arithmetic or logic operation (=)<br />
Blocks containing a control statement (such as GOTO, DO, END)<br />
Blocks containing a macro call command (such as macro calls by<br />
G65, G66, G67, or other G codes, or by M codes)Any block other than<br />
a macro statement is referred to as an NC statement.<br />
Even when single block mode is on, the machine does not stop. Note,<br />
however, that the machine stops in the single block mode when bit 5<br />
of parameter SBM No. 6000 is 1.<br />
Macro blocks are not regarded as blocks that involve no movement in<br />
the cutter compensation mode (seeII–15.7).<br />
NC statements that include a subprogram call command (such as<br />
subprogram calls by M98 or other M codes, or by T codes) and not<br />
include other command addresses except an O,N or L address have the<br />
same property as macro statements.<br />
The blocks not include other command addresses except an O,N,P or<br />
L address have the same property as macro statements.
15. CUSTOM MACRO PROGRAMMING<br />
B–63534EN/02<br />
15.5<br />
BRANCH AND<br />
REPETITION<br />
15.5.1<br />
Unconditional Branch<br />
(GOTO Statement)<br />
15.5.2<br />
Conditional Branch<br />
(IF Statement)<br />
IF[]GOTOn<br />
IF[]THEN<br />
<br />
Conditional expression<br />
In a program, the flow of control can be changed using the GOTO<br />
statement and IF statement. Three types of branch and repetition<br />
operations are used:<br />
Branch and repetition GOTO statement (unconditional branch)<br />
412<br />
IF statement (conditional branch: if ..., then...)<br />
WHILE statement (repetition while ...)<br />
A branch to sequence number n occurs. When a sequence number outside<br />
of the range 1 to 99999 is specified, P/S alarm No. 128 occurs. A sequence<br />
number can also be specified using an expression.<br />
GOTO n ; n: Sequence number (1 to 99999)<br />
Example:<br />
GOTO1;<br />
GOTO#10;<br />
Specify a conditional expression after IF.<br />
If the specified conditional expression is satisfied, a branch to sequence<br />
number n occurs. If the specified condition is not satisfied, the next block<br />
is executed.<br />
If the value of variable #1 is greater than 10, a branch to sequence number<br />
N2 occurs.<br />
If the condition<br />
is not sa-<br />
IF [#1 GT 10] GOTO 2 ;<br />
tisfied Processing If the condition is satisfied<br />
N2 G00 G91 X10.0 ;<br />
:<br />
If the specified conditional expression is satisfied, a predetermined macro<br />
statement is executed. Only a single macro statement is executed.<br />
If the values of #1 and #2 are the same, 0 is assigned to #3.<br />
IF [#1 EQ #2] THEN#3=0 ;<br />
A conditional expression must include an operator inserted between two<br />
variables or between a variable and constant, and must be enclosed in<br />
brackets ([, ]). An expression can be used instead of a variable.
B–63534EN/02<br />
Operators<br />
Sample program<br />
15.5.3<br />
Repetition<br />
(While Statement)<br />
<br />
PROGRAMMING<br />
413<br />
15. CUSTOM MACRO<br />
Operators each consist of two letters and are used to compare two values<br />
to determine whether they are equal or one value is smaller or greater than<br />
the other value. Note that the inequality sign cannot be used.<br />
Table 15.5.2 Operators<br />
Operator Meaning<br />
EQ Equal to(=)<br />
NE Not equal to()<br />
GT Greater than(>)<br />
GE Greater than or equal to()<br />
LT Less than(
15. CUSTOM MACRO PROGRAMMING<br />
B–63534EN/02<br />
Nesting<br />
<br />
Infinite loops<br />
Processing time<br />
Undefined variable<br />
The identification numbers (1 to 3) in a DO–END loop can be used as<br />
many times as desired. Note, however, when a program includes crossing<br />
repetition loops (overlapped DO ranges), P/S alarm No. 124 occurs.<br />
1. The identification numbers<br />
(1 to 3) can be used as many<br />
times as required.<br />
WHILE [ … ] DO 1 ;<br />
Processing<br />
END 1 ;<br />
:<br />
WHILE [ … ] DO 1 ;<br />
Processing<br />
END 1 ;<br />
2. DO ranges cannot overlap.<br />
WHILE [ … ] DO 1 ;<br />
Processing<br />
WHILE [ … ] DO 2 ;<br />
:<br />
END 1 ;<br />
Processing<br />
END 2 ;<br />
414<br />
3. DO loops can be nested to<br />
a maximum depth of three levels.<br />
WHILE [ … ] DO 1 ;<br />
:<br />
WHILE [ … ] DO 2 ;<br />
:<br />
WHILE [ … ] DO 3 ;<br />
END 3 ;<br />
:<br />
END 2 ;<br />
:<br />
END 1 ;<br />
WHILE [ … ] DO 1 ;<br />
IF [ … ] GOTO n ;<br />
END 1 ;<br />
Nn<br />
IF [ … ] GOTO n ;<br />
:<br />
WHILE [ … ] DO 1 ;<br />
Nn … ;<br />
END 1 ;<br />
Processing<br />
4. Control can be transferred to<br />
the outside of a loop.<br />
5. Branches cannot be made to<br />
a location within a loop.<br />
When DO m is specified without specifying the WHILE statement, an<br />
infinite loop ranging from DO to END is produced.<br />
When a branch to the sequence number specified in a GOTO statement<br />
occurs, the sequence number is searched for. For this reason, processing<br />
in the reverse direction takes a longer time than processing in the forward<br />
direction. Using the WHILE statement for repetition reduces processing<br />
time.<br />
In a conditional expression that uses EQ or NE, a and zero have<br />
different effects. In other types of conditional expressions, a is<br />
regarded as zero.
B–63534EN/02<br />
Sample program<br />
PROGRAMMING<br />
415<br />
15. CUSTOM MACRO<br />
The sample program below finds the total of numbers 1 to 10.<br />
O0001;<br />
#1=0;<br />
#2=1;<br />
WHILE[#2 LE 10]DO 1;<br />
#1=#1+#2;<br />
#2=#2+1;<br />
END 1;<br />
M30;
15. CUSTOM MACRO PROGRAMMING<br />
B–63534EN/02<br />
15.6<br />
MACRO CALL<br />
<br />
Differences between<br />
macro calls and<br />
subprogram calls<br />
A macro program can be called using the following methods:<br />
Macro call Simple call (G65)<br />
modal call (G66, G67)<br />
Macro call with G code<br />
Macro call with M code<br />
Subprogram call with M code<br />
Subprogram call with T code<br />
Macro call (G65) differs from subprogram call (M98) as described below.<br />
With G65, an argument (data passed to a macro) can be specified. M98<br />
does not have this capability.<br />
When an M98 block contains another NC command (for example,<br />
G01 X100.0 M98Pp), the subprogram is called after the command is<br />
executed. On the other hand, G65 unconditionally calls a macro.<br />
When an M98 block contains another NC command (for example,<br />
G01 X100.0 M98Pp), the machine stops in the single block mode. On<br />
the other hand, G65 does not stops the machine.<br />
With G65, the level of local variables changes. With M98, the level<br />
of local variables does not change.<br />
416
B–63534EN/02<br />
15.6.1<br />
Simple Call (G65)<br />
<br />
Call<br />
Argument specification<br />
PROGRAMMING<br />
417<br />
15. CUSTOM MACRO<br />
When G65 is specified, the custom macro specified at address P is called.<br />
Data (argument) can be passed to the custom macro program.<br />
G65 P p L ;<br />
P : Number of the program to call<br />
: Repetition count (1 by default)<br />
Argument : Data passed to the macro<br />
O0001 ;<br />
:<br />
G65 P9010 L2 A1.0 B2.0 ;<br />
:<br />
M30 ;<br />
O9010 ;<br />
#3=#1+#2 ;<br />
IF [#3 GT 360] GOTO 9 ;<br />
G00 G91 X#3 ;<br />
N9 M99 ;<br />
After G65, specify at address P the program number of the custom<br />
macro to call.<br />
When a number of repetitions is required, specify a number from 1 to<br />
9999 after address L. When L is omitted, 1 is assumed.<br />
By using argument specification, values are assigned to corresponding<br />
local variables.<br />
Two types of argument specification are available. Argument<br />
specification I uses letters other than G, L, O, N, and P once each.<br />
Argument specification II uses A, B, and C once each and also uses I, J,<br />
and K up to ten times. The type of argument specification is determined<br />
automatically according to the letters used.<br />
Argument specification I<br />
Address Variable Address Variable Address<br />
number<br />
number<br />
A<br />
B<br />
C<br />
D<br />
E<br />
F<br />
H<br />
#1<br />
#2<br />
#3<br />
#7<br />
#8<br />
#9<br />
#11<br />
I<br />
J<br />
K<br />
M<br />
Q<br />
R<br />
S<br />
#4<br />
#5<br />
#6<br />
#13<br />
#17<br />
#18<br />
#19<br />
T<br />
U<br />
V<br />
W<br />
X<br />
Y<br />
Z<br />
Variable<br />
number<br />
#20<br />
#21<br />
#22<br />
#23<br />
#24<br />
#25<br />
#26<br />
Addresses G, L, N, O, and P cannot be used in arguments.<br />
Addresses that need not be specified can be omitted. Local variables<br />
corresponding to an omitted address are set to null.<br />
Addresses do not need to be specified alphabetically. They conform<br />
to word address format.<br />
I, J, and K need to be specified alphabetically, however.<br />
Example<br />
B_A_D_ … J_K_ Correct<br />
B_A_D_ … J_I_ <strong>Inc</strong>orrect
15. CUSTOM MACRO PROGRAMMING<br />
B–63534EN/02<br />
<br />
Format<br />
Mixture of argument<br />
specifications I and II<br />
Position of the decimal<br />
point<br />
Call nesting<br />
Argument specification II<br />
Argument specification II uses A, B, and C once each and uses I, J, and<br />
K up to ten times. Argument specification II is used to pass values such<br />
as three–dimensional coordinates as arguments.<br />
Address Variable<br />
number<br />
A<br />
B<br />
C<br />
I 1<br />
J 1<br />
K 1<br />
I 2<br />
J 2<br />
K 2<br />
I 3<br />
J 3<br />
#1<br />
#2<br />
#3<br />
#4<br />
#5<br />
#6<br />
#7<br />
#8<br />
#9<br />
#10<br />
#11<br />
418<br />
Address Variable<br />
number<br />
K 3<br />
I 4<br />
J 4<br />
K 4<br />
I 5<br />
J 5<br />
K 5<br />
I 6<br />
J 6<br />
K 6<br />
I 7<br />
#12<br />
#13<br />
#14<br />
#15<br />
#16<br />
#17<br />
#18<br />
#19<br />
#20<br />
#21<br />
#22<br />
Address Variable<br />
number<br />
J 7<br />
K 7<br />
I 8<br />
J 8<br />
K 8<br />
I 9<br />
J 9<br />
K 9<br />
I 10<br />
J 10<br />
K 10<br />
#23<br />
#24<br />
#25<br />
#26<br />
#27<br />
#28<br />
#29<br />
#30<br />
#31<br />
#32<br />
#33<br />
Subscripts of I, J, and K for indicating the order of argument<br />
specification are not written in the actual program.<br />
G65 must be specified before any argument.<br />
The CNC internally identifies argument specification I and argument<br />
specification II. If a mixture of argument specification I and argument<br />
specification II is specified, the type of argument specification specified<br />
later takes precedence.<br />
Example<br />
G65 A1.0 B2.0 I–3.0 I4.0 D5.0 P1000;<br />
<br />
#1:1.0<br />
#2:2.0<br />
#3:<br />
#4:–3.0<br />
#5:<br />
#6:<br />
#7:4.0<br />
5.0<br />
When both the I4.0 and D5.0 arguments are commanded for<br />
variable #7 in this example, the latter, D5.0, is valid.<br />
The units used for argument data passed without a decimal point<br />
correspond to the least input increment of each address. The value of an<br />
argument passed without a decimal point may vary according to the<br />
system configuration of the machine. It is good practice to use decimal<br />
points in macro call arguments to maintain program compatibility.<br />
Calls can be nested to a depth of four levels including simple calls (G65)<br />
and modal calls (G66). This does not include subprogram calls (M98).
B–63534EN/02<br />
Local variable levels<br />
PROGRAMMING<br />
419<br />
15. CUSTOM MACRO<br />
Local variables from level 0 to 4 are provided for nesting.<br />
The level of the main program is 0.<br />
Each time a macro is called (with G65 or G66), the local variable level<br />
is incremented by one. The values of the local variables at the previous<br />
level are saved in the CNC.<br />
When M99 is executed in a macro program, control returns to the<br />
calling program. At that time, the local variable level is decremented<br />
by one; the values of the local variables saved when the macro was<br />
called are restored.<br />
Main program<br />
(level 0) Macro (level 1) Macro (level 2) Macro (level 3) Macro<br />
(level 4)<br />
O0001 ;<br />
:<br />
#1=1 ;<br />
G65 P2 A2 ;<br />
:<br />
:<br />
M30 ;<br />
#1 1<br />
:<br />
#33<br />
:<br />
O0002 ;<br />
:<br />
#1=2;<br />
G65 P3 A3 ;<br />
:<br />
:<br />
M99 ;<br />
#1 2<br />
:<br />
#33<br />
:<br />
O0003 ;<br />
:<br />
#1=3;<br />
G65 P4 A4 ;<br />
:<br />
:<br />
M99 ;<br />
#1 3<br />
:<br />
#33<br />
:<br />
O0004 ;<br />
:<br />
#1=4;<br />
G65 P5 A5 ;<br />
:<br />
:<br />
M99 ;<br />
#1 4<br />
:<br />
#33<br />
:<br />
O0005 ;<br />
:<br />
#1=5;<br />
:<br />
:<br />
:<br />
M99 ;<br />
Local variables<br />
(level 0) (Level 1) (Level 2) (Level 3) (Level 4)<br />
Common variables<br />
#100–, #500–<br />
#1 5<br />
:<br />
#33<br />
Variables that can be read from and written to by<br />
macros at different levels<br />
:
15. CUSTOM MACRO PROGRAMMING<br />
B–63534EN/02<br />
Sample program<br />
(bolt hole circle)<br />
Calling format<br />
Program calling a macro<br />
program<br />
A macro is created which drills H holes at intervals of B degrees after a<br />
start angle of A degrees along the periphery of a circle with radius I.<br />
The center of the circle is (X,Y). Commands can be specified in either<br />
the absolute or incremental mode. To drill in the clockwise direction,<br />
specify a negative value for B.<br />
H=4<br />
420<br />
H=3<br />
ÉÉ<br />
ÉÉ<br />
H=2<br />
ÉÉ<br />
H=1<br />
ÉÉÉ<br />
ÉÉ<br />
ÉÉÉÉÉ<br />
B<br />
B<br />
Center (X,Y)<br />
G65 P9100 X x Y y Z z R r F f I i A a B b H h ;<br />
A<br />
Radius I<br />
X: X coordinate of the center of the circle<br />
(absolute or incremental specification) (#24)<br />
Y: Y coordinate of the center of the circle<br />
(absolute or incremental specification) (#25)<br />
Z : Hole depth (#26)<br />
R: Coordinates of an approach point (#18)<br />
F : Cutting feedrate (#9)<br />
I : Radius of the circle (#4)<br />
A: Drilling start angle (#1)<br />
B: <strong>Inc</strong>remental angle (clockwise when a negative value is specified)<br />
(#2)<br />
H: Number of holes (#11)<br />
O0002;<br />
G90 G92 X0 Y0 Z100.0;<br />
G65 P9100 X100.0 Y50.0 R30.0 Z–50.0 F500 I100.0 A0 B45.0 H5;<br />
M30;
B–63534EN/02<br />
Macro program<br />
(called program)<br />
15.6.2<br />
Modal Call (G66)<br />
PROGRAMMING<br />
421<br />
15. CUSTOM MACRO<br />
O9100;<br />
#3=#4003; Stores G code of group 3.<br />
G81 Z#26 R#18 F#9 K0; (Note) Drilling cycle.<br />
Note: L0 can also be used.<br />
IF[#3 EQ 90]GOTO 1; . . . . . . . . Branches to N1 in the G90 mode.<br />
#24=#5001+#24; . . . . . . . . . . . . . Calculates the X coordinate of<br />
the center.<br />
#25=#5002+#25; . . . . . . . . . . . . . Calculates the Y coordinate of<br />
the center.<br />
N1 WHILE[#11 GT 0]DO 1;<br />
. . . . . . . . . . . . . . . . . . . . . . . . . . Until the number of remaining holes<br />
reaches 0<br />
#5=#24+#4*COS[#1]; . . . . . . . . Calculates a drilling position on<br />
the X–axis.<br />
#6=#25+#4*SIN[#1]; . . . . . . . . . . Calculates a drilling position on<br />
the Y–axis.<br />
G90 X#5 Y#6; . . . . . . . . . . . . . . . Performs drilling after moving to<br />
the target position.<br />
#1=#1+#2; . . . . . . . . . . . . . . . . . . Updates the angle.<br />
#11=#11–1; . . . . . . . . . . . . . . . . . . Decrements the number of holes.<br />
END 1;<br />
G#3 G80; . . . . . . . . . . . . . . . . Returns the G code to the original state.<br />
M99;<br />
Meaning of variables:<br />
#3: Stores the G code of group 3.<br />
#5: X coordinate of the next hole to drill<br />
#6: Y coordinate of the next hole to drill<br />
Once G66 is issued to specify a modal call a macro is called after a block<br />
specifying movement along axes is executed. This continues until G67<br />
is issued to cancel a modal call.<br />
G66 P p L ;<br />
P : Number of the program to call<br />
: Repetition count (1 by default)<br />
Argument : Data passed to the macro<br />
O0001 ;<br />
:<br />
G66 P9100 L2 A1.0 B2.0 ;<br />
G00 G90 X100.0 ;<br />
Y200.0 ;<br />
X150.0 Y300.0 ;<br />
G67 ;<br />
:<br />
M30 ;<br />
O9100 ;<br />
:<br />
G00 Z–#1 ;<br />
G01 Z–#2 F300 ;<br />
:<br />
:<br />
:<br />
:<br />
M99 ;
15. CUSTOM MACRO PROGRAMMING<br />
B–63534EN/02<br />
<br />
Call<br />
Cancellation<br />
Call nesting<br />
Modal call nesting<br />
<br />
Sample program<br />
After G66, specify at address P a program number subject to a modal<br />
call.<br />
When a number of repetitions is required, a number from 1 to 9999 can<br />
be specified at address L.<br />
As with a simple call (G65), data passed to a macro program is<br />
specified in arguments.<br />
When a G67 code is specified, modal macro calls are no longer performed<br />
in subsequent blocks.<br />
Calls can be nested to a depth of four levels including simple calls (G65)<br />
and modal calls (G66). This does not include subprogram calls (M98).<br />
Modal calls can be nested by specifying another G66 code during a modal<br />
call.<br />
In a G66 block, no macros can be called.<br />
G66 needs to be specified before any arguments.<br />
No macros can be called in a block which contains a code such as a<br />
miscellaneous function that does not involve movement along an axis.<br />
Local variables (arguments) can only be set in G66 blocks. Note that<br />
local variables are not set each time a modal call is performed.<br />
The same operation as the drilling canned cycle G81 is created using a<br />
custom macro and the machining program makes a modal macro call. For<br />
program simplicity, all drilling data is specified using absolute values.<br />
The canned cycle consists of the following<br />
basic operations:<br />
Operation 1:<br />
Positioning along the X–axis and Y–axis<br />
Operation 2:<br />
Rapid traverse to point R<br />
Operation 3:<br />
Cutting feed to point Z<br />
Operation 4:<br />
Rapid traverse to point R or I<br />
422<br />
Rapid traverse<br />
Cutting feed<br />
Operation 1 Position I<br />
Operation 2<br />
Operation 3<br />
Operation 4<br />
R<br />
Z<br />
Position R<br />
Z=0<br />
Position Z
B–63534EN/02<br />
Calling format<br />
Program that calls a<br />
macro program<br />
Macro program<br />
(program called)<br />
15.6.3<br />
Macro Call Using<br />
G Code<br />
<br />
PROGRAMMING<br />
G65 P9110 X x Y y Z z R r F f L l ;<br />
423<br />
15. CUSTOM MACRO<br />
X: X coordinate of the hole (absolute specification only) . . . . (#24)<br />
Y: Y coordinate of the hole (absolute specification only) . . . . (#25)<br />
Z : Coordinates of position Z (absolute specification only) . . . (#26)<br />
R: Coordinates of position R (absolute specification only) . . . (#18)<br />
F : Cutting feedrate . . . . . . . . . . . . . . . . . . . . . . . . . . . . . . . . . . . (#9)<br />
L : Repetition count<br />
O0001;<br />
G28 G91 X0 Y0 Z0;<br />
G92 X0 Y0 Z50.0;<br />
G00 G90 X100.0 Y50.0;<br />
G66 P9110 Z–20.0 R5.0 F500;<br />
G90 X20.0 Y20.0;<br />
X50.0;<br />
Y50.0;<br />
X70.0 Y80.0;<br />
G67;<br />
M30;<br />
O9110;<br />
#1=#4001; . . . . . . . . . . . . . . Stores G00/G01.<br />
#3=#4003; . . . . . . . . . . . . . . Stores G90/G91.<br />
#4=#4109; . . . . . . . . . . . . . . Stores the cutting feedrate.<br />
#5=#5003; . . . . . . . . . . . . . . Stores the Z coordinate at the start of drilling.<br />
G00 G90 Z#18; . . . . . . . . Positioning at position R<br />
G01 Z#26 F#9; . . . . . . . . . Cutting feed to position Z<br />
IF[#4010 EQ 98]GOTO 1; Return to position I<br />
G00 Z#18; . . . . . . . . . . . . . Positioning at position R<br />
GOTO 2;<br />
N1 G00 Z#5; . . . . . . . . . . . . . Positioning at position I<br />
N2 G#1 G#3 F#4; . . . . . . . . Restores modal information.<br />
M99;<br />
By setting a G code number used to call a macro program in a parameter,<br />
the macro program can be called in the same way as for a simple call<br />
(G65).<br />
O0001 ;<br />
:<br />
G81 X10.0 Y20.0 Z–10.0 ;<br />
:<br />
M30 ;<br />
Parameter No.6050 = 81<br />
O9010 ;<br />
:<br />
:<br />
:<br />
N9 M99 ;<br />
By setting a G code number from 1 to 9999 used to call a custom macro<br />
program (O9010 to O9019) in the corresponding parameter (N0.6050 to<br />
No.6059), the macro program can be called in the same way as with G65.<br />
For example, when a parameter is set so that macro program O9010 can<br />
be called with G81, a user–specific cycle created using a custom macro<br />
can be called without modifying the machining program.
15. CUSTOM MACRO PROGRAMMING<br />
B–63534EN/02<br />
Correspondence<br />
between parameter<br />
numbers and program<br />
numbers<br />
Repetition<br />
Argument specification<br />
<br />
Nesting of calls using G<br />
codes<br />
15.6.4<br />
Macro Call Using an<br />
M Code<br />
<br />
Program number Parameter number<br />
O9010<br />
O9011<br />
O9012<br />
O9013<br />
O9014<br />
O9015<br />
O9016<br />
O9017<br />
O9018<br />
O9019<br />
424<br />
6050<br />
6051<br />
6052<br />
6053<br />
6054<br />
6055<br />
6056<br />
6057<br />
6058<br />
6059<br />
As with a simple call, a number of repetitions from 1 to 9999 can be<br />
specified at address L.<br />
As with a simple call, two types of argument specification are available:<br />
Argument specification I and argument specification II. The type of<br />
argument specification is determined automatically according to the<br />
addresses used.<br />
In a program called with a G code, no macros can be called using a G code.<br />
A G code in such a program is treated as an ordinary G code. In a program<br />
called as a subprogram with an M or T code, no macros can be called using<br />
a G code. A G code in such a program is also treated as an ordinary G code.<br />
By setting an M code number used to call a macro program in a parameter,<br />
the macro program can be called in the same way as with a simple call<br />
(G65).<br />
O0001 ;<br />
:<br />
M50 A1.0 B2.0 ;<br />
:<br />
M30 ;<br />
Parameter No.6080 = 50<br />
O9020 ;<br />
:<br />
:<br />
:<br />
M99 ;<br />
By setting an M code number from 1 to 99999999 used to call a custom<br />
macro program (9020 to 9029) in the corresponding parameter (No.6080<br />
to No.6089), the macro program can be called in the same way as with<br />
G65.
B–63534EN/02<br />
Correspondence<br />
between parameter<br />
numbers and program<br />
numbers<br />
Repetition<br />
Argument specification<br />
<br />
15.6.5<br />
Subprogram Call<br />
Using an M Code<br />
<br />
PROGRAMMING<br />
Program number Parameter number<br />
O9020<br />
O9021<br />
O9022<br />
O9023<br />
O9024<br />
O9025<br />
O9026<br />
O9027<br />
O9028<br />
O9029<br />
425<br />
6080<br />
6081<br />
6082<br />
6083<br />
6084<br />
6085<br />
6086<br />
6087<br />
6088<br />
6089<br />
15. CUSTOM MACRO<br />
As with a simple call, a number of repetitions from 1 to 9999 can be<br />
specified at address L.<br />
As with a simple call, two types of argument specification are available:<br />
Argument specification I and argument specification II. The type of<br />
argument specification is determined automatically according to the<br />
addresses used.<br />
An M code used to call a macro program must be specified at the start<br />
of a block.<br />
In a macro called with a G code or in a program called as a subprogram<br />
with an M or T code, no macros can be called using an M code. An M<br />
code in such a macro or program is treated as an ordinary M code.<br />
By setting an M code number used to call a subprogram (macro program)<br />
in a parameter, the macro program can be called in the same way as with<br />
a subprogram call (M98).<br />
O0001 ;<br />
:<br />
M03 ;<br />
:<br />
M30 ;<br />
Parameter No.6071 = 03<br />
O9001 ;<br />
:<br />
:<br />
:<br />
M99 ;<br />
By setting an M code number from 1 to 99999999 used to call a<br />
subprogram in a parameter (No.6071 toNo. 6079), the corresponding<br />
custom macro program (O9001 to O9009) can be called in the same way<br />
as with M98.
15. CUSTOM MACRO PROGRAMMING<br />
B–63534EN/02<br />
Correspondence<br />
between parameter<br />
numbers and program<br />
numbers<br />
Repetition<br />
Argument specification<br />
M code<br />
<br />
15.6.6<br />
Subprogram Calls<br />
Using a T Code<br />
<br />
Call<br />
<br />
Program number Parameter number<br />
O9001<br />
O9002<br />
O9003<br />
O9004<br />
O9005<br />
O9006<br />
O9007<br />
O9008<br />
O9009<br />
426<br />
6071<br />
6072<br />
6073<br />
6074<br />
6075<br />
6076<br />
6077<br />
6078<br />
6079<br />
As with a simple call, a number of repetitions from 1 to 9999 can be<br />
specified at address L.<br />
Argument specification is not allowed.<br />
An M code in a macro program that has been called is treated as an<br />
ordinary M code.<br />
In a macro called with a G code or in a program called with an M or T code,<br />
no subprograms can be called using an M code. An M code in such a<br />
macro or program is treated as an ordinary M code.<br />
By enabling subprograms (macro program) to be called with a T code in<br />
a parameter, a macro program can be called each time the T code is<br />
specified in the machining program.<br />
O0001 ;<br />
:<br />
T23 ;<br />
:<br />
M30 ;<br />
Bit 5 of parameter 6001 = 1<br />
O9000 ;<br />
:<br />
:<br />
:<br />
M99 ;<br />
By setting bit 5 of parameter TCS No.6001 to 1, the macro program<br />
O9000 can be called when a T code is specified in the machining program.<br />
A T code specified in a machining program is assigned to common<br />
variable #149.<br />
In a macro called with a G code or in a program called with an M or T code,<br />
no subprograms can be called using a T code. A T code in such a macro<br />
or program is treated as an ordinary T code.
B–63534EN/02<br />
15.6.7<br />
Sample Program<br />
Conditions<br />
Operation check<br />
Parameter setting<br />
Variable value setting<br />
Program that calls a<br />
macro program<br />
PROGRAMMING<br />
427<br />
15. CUSTOM MACRO<br />
By using the subprogram call function that uses M codes, the cumulative<br />
usage time of each tool is measured.<br />
The cumulative usage time of each of tools T01 to T05 is measured.<br />
No measurement is made for tools with numbers greater than T05.<br />
The following variables are used to store the tool numbers and<br />
measured times:<br />
#501<br />
#502<br />
#503<br />
#504<br />
#505<br />
Cumulative usage time of tool number 1<br />
Cumulative usage time of tool number 2<br />
Cumulative usage time of tool number 3<br />
Cumulative usage time of tool number 4<br />
Cumulative usage time of tool number 5<br />
Usage time starts being counted when the M03 command is specified<br />
and stops when M05 is specified. System variable #3002 is used to<br />
measure the time during which the cycle start lamp is on. The time<br />
during which the machine is stopped by feed hold and single block<br />
stop operation is not counted, but the time used to change tools and<br />
pallets is included.<br />
Set 3 in parameter No.6071, and set 05 in parameter No.6072.<br />
Set 0 in variables #501 to #505.<br />
O0001;<br />
T01 M06;<br />
M03;<br />
M05; . . . . . . . . . . . . . . . . . . . Changes #501.<br />
T02 M06;<br />
M03;<br />
M05; . . . . . . . . . . . . . . . . . . . Changes #502.<br />
T03 M06;<br />
M03;<br />
M05; . . . . . . . . . . . . . . . . . . . Changes #503.<br />
T04 M06;<br />
M03;<br />
M05; . . . . . . . . . . . . . . . . . . . Changes #504.<br />
T05 M06;<br />
M03;<br />
M05; . . . . . . . . . . . . . . . . . . . Changes #505.<br />
M30;
15. CUSTOM MACRO PROGRAMMING<br />
B–63534EN/02<br />
Macro program<br />
(program called)<br />
O9001(M03); . . . . . . . . . . . . . . . . . . Macro to start counting<br />
M01;<br />
IF[#4120 EQ 0]GOTO 9; . . . . . . . . . No tool specified<br />
IF[#4120 GT 5]GOTO 9; . . . . . . . . . Out–of–range tool number<br />
#3002=0; . . . . . . . . . . . . . . . . . . . . . . . Clears the timer.<br />
N9 M03; . . . . . . . . . . . . . . . . . . . . . . . . Rotates the spindle in the forward<br />
. . . . . . . . . . . . . . . . . . . . . . . . . . . . . . . . . direction.<br />
M99;<br />
O9002(M05); . . . . . . . . . . . . . . . . . . . . . Macro to end counting<br />
M01;<br />
IF[#4120 EQ 0]GOTO 9; . . . . . . . . . No tool specified<br />
IF[#4120 GT 5]GOTO 9; . . . . . . . . . Out–of–range tool number<br />
#[500+#4120]=#3002+#[500+#4120]; Calculates cumulative time.<br />
N9 M05; . . . . . . . . . . . . . . . . . . . . . . . . Stops the spindle.<br />
M99;<br />
428
B–63534EN/02<br />
15.7<br />
PROCESSING<br />
MACRO<br />
STATEMENTS<br />
15.7.1<br />
Details of NC<br />
Statements and Macro<br />
Statements Execution<br />
When the next block is<br />
not buffered<br />
(M codes that are not<br />
buffered, G53, G31, etc.)<br />
PROGRAMMING<br />
429<br />
15. CUSTOM MACRO<br />
For smooth machining, the CNC prereads the NC statement to be<br />
performed next. This operation is referred to as buffering. During AI<br />
contour control mode or AI nano contour control mode, the CNC prereads<br />
not only the next block but also the multiple blocks. And in the cutter<br />
compensation mode (G41, G42), the CNC prereads the NC statements<br />
two or three blocks ahead to find intersections even if the CNC is not in<br />
AI contour control mode nor AI nano contour control mode. Macro<br />
statements for arithmetic expressions and conditional branches are<br />
processed as soon as they are read into the buffer. Therefore, the timing<br />
of the macro statement execution is not always the specified order.<br />
At the blocks containing M00, M01, M02 or M30, blocks containing<br />
M–codes for which buffering is suppressed by setting parameter<br />
(No.3411–3432), and blocks containing prevention buffering G codes<br />
such as G53, the CNC stops to preread the NC statement after that. Then,<br />
the stop of the macro statement execution is guaranteed until such M<br />
codes or G codes complete its execution.<br />
><br />
N1 G31 X100.0 ;<br />
N2 #100=1<br />
:<br />
> :Block being executed<br />
NC statement<br />
execution<br />
Macro statement execution<br />
Buffer<br />
NOTE<br />
In case that you need to execute the macro statement after<br />
completing the block just before the macro statement,<br />
specify M code or G code that are not buffered just before<br />
the macro statement. Specially, in case of reading / writing<br />
the system variables to control signals, coordinates, offset<br />
value, etc., it may different system variable data by the<br />
timing of the NC statement execution. To avoid this<br />
phenomenon, specify such M codes or G codes before the<br />
macro statement, if necessary.<br />
N1<br />
N2
15. CUSTOM MACRO PROGRAMMING<br />
B–63534EN/02<br />
Buffering the next block<br />
in other than cutter<br />
compensation mode<br />
(G41, G42) (normally<br />
prereading one block)<br />
Buffering the next block<br />
in cutter compensation<br />
mode<br />
(G41, G42)<br />
><br />
N1 X100.0 ;<br />
N2 #1=100 ;<br />
N3 #2=200 ;<br />
N4 Y200.0 ;<br />
:<br />
> : Block being executed<br />
: Block read into the buffer<br />
430<br />
NC statement<br />
execution<br />
Macro statement<br />
execution<br />
Buffer<br />
N1<br />
N2 N3<br />
When N1 is being executed, the next NC statement (N4) is read into the<br />
buffer. The macro statements (N2, N3) between N1 and N4 are processed<br />
during execution of N1.<br />
><br />
N1 G01 G41 G91 X50.0 Y30.0 F100 Dd ;<br />
N2 #1=100 ;<br />
N3 X100.0 ;<br />
N4 #2=200 ;<br />
N5 Y50.0 ;<br />
:<br />
NC statement<br />
execution<br />
Macro statement<br />
execution<br />
Buffer<br />
> : Block being executed<br />
: Blocks read into the buffer<br />
N2<br />
When N1 is being executed, the NC statements in the next two blocks (up<br />
to N5) are read into the buffer. The macro statements (N2, N4) between<br />
N1 and N5 are processed during execution of N1.<br />
N3<br />
N1<br />
N4<br />
N5<br />
N4<br />
N3<br />
N4
B–63534EN/02<br />
When the next block<br />
involves no movement in<br />
cutter compensation C<br />
(G41, G42) mode<br />
15.7.2<br />
Caution for Using<br />
System Variables<br />
><br />
PROGRAMMING<br />
N1 G01 G41 X100.0 G100 Dd ;<br />
N2 #1=100 ;<br />
N3 Y100.0 ;<br />
N4 #2=200 ;<br />
N5 M08 ;<br />
N6 #3=300 ;<br />
N7 X200.0 ;<br />
:<br />
NC statement<br />
execution<br />
Macro statement<br />
execution<br />
Buffer<br />
431<br />
N2<br />
> : Block being executed<br />
: Blocks read into the buffer<br />
N3<br />
N1<br />
N4<br />
N5<br />
15. CUSTOM MACRO<br />
When the N1 is being executed, the NC statements in the next two blocks<br />
(up to N5) are read into the buffer. Since N5 is a block that involves no<br />
movement, an intersection cannot be calculated. In this case, the NC<br />
statements in the next three blocks (up to N7) are read. The macro<br />
statements (N2, N4, and N6) between N1 and N7 are processed during<br />
execution of N1.<br />
In case of using the following system variables in macro program and you<br />
need to execute the macro program after completing the block execution<br />
just before the macro program, M code which can prevent buffering<br />
(parameter No.3411–3432) or G53 command block is necessary just<br />
before the macro program.<br />
Meaning<br />
Read<br />
Write<br />
Number of<br />
Variable<br />
Interface signals Read #1000 – #1015 ,<br />
#1032<br />
Tool compensation<br />
values<br />
Write #1100 – #1115 ,<br />
#1132<br />
N6<br />
N7<br />
N3<br />
Note<br />
(In case not to<br />
command M code<br />
preventing buffering<br />
or G53 block.)<br />
The data is read at<br />
buffering a macro program.<br />
The data is written at<br />
buffering a macro program.<br />
Write #10001 – The data is written at<br />
buffering a macro program.<br />
Macro alarms Write #3000 Macro alarm is generated<br />
at maximum 2<br />
blocks before a macro<br />
program.<br />
Program stop with<br />
message<br />
Write #3006 Program stops at<br />
maximum 2 blocks<br />
before a macro program.
15. CUSTOM MACRO PROGRAMMING<br />
B–63534EN/02<br />
Meaning<br />
432<br />
Read<br />
Write<br />
Number of<br />
Variable<br />
Note<br />
(In case not to<br />
command M code<br />
preventing buffering<br />
or G53 block.)<br />
Time information Read #3001,#3002 The data is read / writ-<br />
Write<br />
ten at buffering a macro<br />
program.<br />
Read #3011,#3012 The data is read at<br />
buffering a macro program.<br />
Automatic operation Write #3003, #3004 Setting data is avail-<br />
control<br />
able at maximum 2<br />
blocks before a macro<br />
program.<br />
Settings Write #3005 The data is written at<br />
buffering a macro program.<br />
Mirror image Read #3007 The data is read at<br />
buffering a macro program.<br />
Currently selected Read #4130(P) The data is read at<br />
additional workpiece<br />
coordinate system<br />
#4014<br />
(G54 – G59)<br />
maximum 3 blocks<br />
before a macro program.<br />
Current position Read #5021 – #5028 The uncertain position<br />
(<strong>Machine</strong> coordinate<br />
system)<br />
in moving is read.<br />
Current position Read #5041 – #5048 The uncertain position<br />
(Workpiece coordinate<br />
system)<br />
in moving is read.<br />
Tool length offset Read #5081 – #5088 The offset value of<br />
value<br />
current execution<br />
Deviated servo Read #5101 – #5108<br />
block is read.<br />
The uncertain devi-<br />
position<br />
ation in moving is<br />
read.<br />
Workpiece zero Write #5201 – #5328 The data is written at<br />
point offset value<br />
#7001 – #7948<br />
#14001 –<br />
#19988<br />
buffering a macro program.
B–63534EN/02<br />
Example)<br />
PROGRAMMING<br />
433<br />
15. CUSTOM MACRO<br />
O0001 O2000<br />
N1 X10.Y10.; (Mxx ;) Specify preventing buffering M code or G53<br />
N2 M98P2000; N100 #1=#5041;(Reading X axis current position)<br />
N3 Y200.0; N101 #2=#5042;(Reading Y axis current position)<br />
: :<br />
M99;<br />
In above case, the buffering of N2 block is done and the macro program<br />
of O2000 is read and executed during N1 block of main program O1000<br />
execution. Therefore, the current position readings are executed during<br />
axes movements at N1 block. So the unexpected position data can be read<br />
to #1 and #2 because of axes movements. In this case, please specify M<br />
code preventing buffering Mxx ; (or G53 ;) just before N100 block of<br />
O2000. By this, the position data at completing the execution of N1 block<br />
can be read to #1 and #2 because O2000 is executed after completing the<br />
execution of N1 block of O0001.<br />
NOTE<br />
G53 can not be specified during the canned cycle mode. (In<br />
this case, the alarm 44 is generated.) Therefore, in order to<br />
prevent buffering during the canned cycle mode, please<br />
specify preventing buffering M code.
15. CUSTOM MACRO PROGRAMMING<br />
B–63534EN/02<br />
15.8<br />
REGISTERING<br />
CUSTOM MACRO<br />
PROGRAMS<br />
Custom macro programs are similar to subprograms. They can be<br />
registered and edited in the same way as subprograms. The storage<br />
capacity is determined by the total length of tape used to store both custom<br />
macros and subprograms.<br />
434
B–63534EN/02<br />
15.9<br />
LIMITATIONS<br />
MDI operation<br />
Sequence number<br />
search<br />
Single block<br />
Optional block skip<br />
Operation in EDIT mode<br />
Reset<br />
Display of the PROGRAM<br />
RESTART<br />
Feed hold<br />
Constant values that can<br />
be used in <br />
PROGRAMMING<br />
435<br />
15. CUSTOM MACRO<br />
The macro call command can be specified in MDI mode. During<br />
automatic operation, however, it is impossible to switch to the MDI mode<br />
for a macro program call.<br />
A custom macro program cannot be searched for a sequence number.<br />
Even while a macro program is being executed, blocks can be stopped in<br />
the single block mode.<br />
A block containing a macro call command (G65, G66, or G67) does not<br />
stop even when the single block mode is on. Blocks containing arithmetic<br />
operation commands and control commands can be stopped in single<br />
block mode by setting SBM (bit 5 of parameter 6000) to 1.<br />
Single block stop operation is used for testing custom macro programs.<br />
Note that when a single block stop occurs at a macro statement in cutter<br />
compensation C mode, the statement is assumed to be a block that does<br />
not involve movement, and proper compensation cannot be performed in<br />
some cases. (Strictly speaking, the block is regarded as specifying a<br />
movement with a travel distance 0.)<br />
A / appearing in the middle of an (enclosed in brackets [<br />
] on the right–hand side of an arithmetic expression) is regarded as a<br />
division operator; it is not regarded as the specifier for an optional block<br />
skip code.<br />
By setting NE8 (bit 0 of parameter 3202) and NE9 (bit 4 of parameter<br />
3202) to 1, deletion and editing are disabled for custom macro programs<br />
and subprograms with program numbers 8000 to 8999 and 9000 to 9999.<br />
This prevents registered custom macro programs and subprograms from<br />
being destroyed by accident. When the entire memory is cleared (by<br />
pressing the RESET and DELETE keys at the same time to turn on the power),<br />
the contents of memory such as custom macro programs are deleted.<br />
With a reset operation, local variables and common variables #100 to<br />
#149 are cleared to null values. They can be prevented from clearing by<br />
setting, CLV and CCV (bits 7 and 6 of parameter 6001). System variables<br />
#1000 to #1133 are not cleared.<br />
A reset operation clears any called states of custom macro programs and<br />
subprograms, and any DO states, and returns control to the main program.<br />
As with M98, the M and T codes used for subprogram calls are not<br />
displayed.<br />
When a feed hold is enabled during execution of a macro statement, the<br />
machine stops after execution of the macro statement. The machine also<br />
stops when a reset or alarm occurs.<br />
+0.0000001 to +99999999<br />
–99999999 to –0.0000001<br />
The number of significant digits is 8 (decimal). If this range is exceeded,<br />
P/S alarm No. 003 occurs.
15. CUSTOM MACRO PROGRAMMING<br />
B–63534EN/02<br />
15.10<br />
EXTERNAL OUTPUT<br />
COMMANDS<br />
<br />
Open command POPEN<br />
Data output command<br />
BPRNT<br />
In addition to the standard custom macro commands, the following macro<br />
commands are available. They are referred to as external output<br />
commands.<br />
– BPRNT<br />
– DPRNT<br />
– POPEN<br />
– PCLOS<br />
These commands are provided to output variable values and characters<br />
through the reader/punch interface.<br />
Specify these commands in the following order:<br />
Open command: POPEN<br />
Before specifying a sequence of data output commands, specify this<br />
command to establish a connection to an external input/output device.<br />
Data output command: BPRNT or DPRNT<br />
Specify necessary data output.<br />
Close command: PCLOS<br />
When all data output commands have completed, specify PCLOS to<br />
release a connection to an external input/output device.<br />
POPEN<br />
POPEN establishes a connection to an external input/output device. It<br />
must be specified before a sequence of data output commands. The CNC<br />
outputs a DC2 control code.<br />
BPRNT [ a #b [ c ] … ]<br />
Number of significant decimal places<br />
Variable<br />
Character<br />
The BPRNT command outputs characters and variable values in binary.<br />
(i) Specified characters are converted to the codes according to the<br />
setting data (ISO) that is output at that time.<br />
Specifiable characters are as follows:<br />
– Letters (A to Z)<br />
– Numbers<br />
– Special characters (*, /, +, –, etc.)<br />
An asterisk (*) is output by a space code.<br />
(ii) All variables are stored with a decimal point. Specify a variable<br />
followed by the number of significant decimal places enclosed in<br />
brackets. A variable value is treated as 2–word (32–bit) data,<br />
including the decimal digits. It is output as binary data starting from<br />
the highest byte.<br />
(iii) When specified data has been output, an EOB code is output<br />
according to the setting code (ISO).<br />
(iv) Null variables are regarded as 0.<br />
436
B–63534EN/02<br />
Data output command<br />
DPRNT<br />
Example )<br />
PROGRAMMING<br />
BPRNT [ C** X#100 [3] Y#101 [3] M#10 [0] ]<br />
Variable value<br />
#100=0.40956<br />
#101=–1638.4<br />
#10=12.34<br />
DPRNT [ a #b [ c d ] … ]<br />
437<br />
15. CUSTOM MACRO<br />
LF<br />
12 (0000000C)<br />
M<br />
–1638400(FFE70000)<br />
<br />
410 (0000019A)<br />
X<br />
Space<br />
<br />
Number of significant decimal places<br />
Number of significant digits in the integer part<br />
Variable<br />
Character<br />
The DPRNT command outputs characters and each digit in the value of<br />
a variable according to the code set in the settings (ISO).<br />
(i) For an explanation of the DPRNT command, see Items (i), (iii), and<br />
(iv) for the BPRNT command.<br />
(ii) When outputting a variable, specify # followed by the variable<br />
number, then specify the number of digits in the integer part and the<br />
number of decimal places enclosed in brackets.<br />
One code is output for each of the specified number of digits, starting<br />
with the highest digit. For each digit, a code is output according to<br />
the settings (ISO). The decimal point is also output using a code set<br />
in the settings (ISO).<br />
Each variable must be a numeric value consisting of up to eight<br />
digits. When high–order digits are zeros, these zeros are not output<br />
if PRT (bit1 of parameter 6001) is 1. If parameter PRT is 0, a space<br />
code is output each time a zero is encountered.<br />
When the number of decimal places is not zero, digits in the decimal<br />
part are always output. If the number of decimal places is zero, no<br />
decimal point is output.<br />
When PRT (bit 1 of parameter 6001) is 0, a space code is output to<br />
indicate a positive number instead of +; if parameter PRT is 1, no<br />
code is output.
15. CUSTOM MACRO PROGRAMMING<br />
B–63534EN/02<br />
Close command PCLOS<br />
Required setting<br />
Example )<br />
DPRNT [ X#2 [53] Y#5 [53] T#30 [20] ]<br />
Variable value<br />
#2=128.47398<br />
#5=–91.2<br />
#30=123.456<br />
(1) Parameter PRT(No.6001#1)=0<br />
(2) Parameter PRT(No.6001#1)=0<br />
438<br />
L F<br />
T<br />
Y –<br />
X<br />
sp 23<br />
sp<br />
sp<br />
sp<br />
sp<br />
sp<br />
sp<br />
LF<br />
T23<br />
Y–91.200<br />
X128.474<br />
91200<br />
128474<br />
PCLOS ;<br />
The PCLOS command releases a connection to an external input/output<br />
device. Specify this command when all data output commands have<br />
terminated. DC4 control code is output from the CNC.<br />
Specify the channel use for setting data (I/O channel). According to the<br />
specification of this data, set data items (such as the baud rate) for the<br />
reader/punch interface.<br />
I/O channel 0 : Parameters (No.101, No.102 and No.103)<br />
I/O channel 1 : Parameters (No.111, No.112 and No.113)<br />
I/O channel 2 : Parameters (No.112, No.122 and No.123)<br />
Never specify the output device FANUC Cassette or Floppy for punching.<br />
When specifying a DPRNT command to output data, specify whether<br />
leading zeros are output as spaces (by setting PRT (bit 1 of parameter<br />
6001) to 1 or 0).<br />
To indicate the end of a line of data in ISO code, specify whether to use<br />
only an LF (CRO, of bit 4 of parameter 6001 is 0) or an LF and CR (CRO<br />
of bit 4 of parameter 6001 is 1).
B–63534EN/02<br />
PROGRAMMING<br />
439<br />
15. CUSTOM MACRO<br />
NOTE<br />
1 It is not necessary to always specify the open command<br />
(POPEN), data output command (BPRNT, DPRNT), and<br />
close command (PCLOS) together. Once an open<br />
command is specified at the beginning of a program, it does<br />
not need to be specified again except after a close<br />
command was specified.<br />
2 Be sure to specify open commands and close commands<br />
in pairs. Specify the close command at the end of the<br />
program. However, do not specify a close command if no<br />
open command has been specified.<br />
3 When a reset operation is performed while commands are<br />
being output by a data output command, output is stopped<br />
and subsequent data is erased. Therefore, when a reset<br />
operation is performed by a code such as M30 at the end<br />
of a program that performs data output, specify a close<br />
command at the end of the program so that processing such<br />
as M30 is not performed until all data is output.<br />
4 Abbreviated macro words enclosed in brackets [ ] remains<br />
unchanged. However, note that when the characters in<br />
brackets are divided and input several times, the second<br />
and subsequent abbreviations are converted and input.<br />
5 O can be specified in brackets [ ]. Note that when the<br />
characters in brackets [ ] are divided and input several<br />
times, O is omitted in the second and subsequent inputs.
15. CUSTOM MACRO PROGRAMMING<br />
B–63534EN/02<br />
15.11<br />
INTERRUPTION TYPE<br />
CUSTOM MACRO<br />
<br />
<br />
When a program is being executed, another program can be called by<br />
inputting an interrupt signal (UINT) from the machine. This function is<br />
referred to as an interruption type custom macro function. Program an<br />
interrupt command in the following format:<br />
M96 P ;<br />
M97 ;<br />
440<br />
Enables custom macro interrupt<br />
Disables custom macro interrupt<br />
Use of the interruption type custom macro function allows the user to call<br />
a program during execution of an arbitrary block of another program.<br />
This allows programs to be operated to match situations which vary from<br />
time to time.<br />
(1)When a tool abnormality is detected, processing to handle the<br />
abnormality is started by an external signal.<br />
(2)A sequence of machining operations is interrupted by another<br />
machining operation without the cancellation of the current operation.<br />
(3)At regular intervals, information on current machining is read.<br />
Listed above are examples like adaptive control applications of the<br />
interruption type custom macro function.<br />
M96<br />
Pxxxx;<br />
N;<br />
M97 ;<br />
Interrupt<br />
signal<br />
(UINT)*<br />
Interrupt<br />
signal<br />
(UINT)*<br />
Interrupt<br />
signal<br />
(UINT)*<br />
O xxxx;<br />
M99 (P);<br />
Fig 15.11 Interruption type sustom macro function<br />
When M96Pxxxx is specified in a program, subsequent program<br />
operation can be interrupted by an interrupt signal (UINT) input to<br />
execute the program specified by Pxxxx.
B–63534EN/02<br />
15.11.1<br />
Specification Method<br />
<br />
Interrupt conditions<br />
Specification<br />
PROGRAMMING<br />
441<br />
15. CUSTOM MACRO<br />
CAUTION<br />
When the interrupt signal (UINT, marked by * in Fig. 15.11)<br />
is input after M97 is specified, it is ignored.<br />
And, the interrupt signal must not be input during execution of the<br />
interrupt program.<br />
A custom macro interrupt is available only during program execution. It<br />
is enabled under the following conditions<br />
– When memory operation or MDI operation is selected<br />
– When STL (start lamp) is on<br />
– When a custom macro interrupt is not currently being processed<br />
Generally, the custom macro interrupt function is used by specifying M96<br />
to enable the interrupt signal (UINT) and M97 to disable the signal.<br />
Once M96 is specified, a custom macro interrupt can be initiated by the<br />
input of the interrupt signal (UINT) until M97 is specified or the NC is<br />
reset. After M97 is specified or the NC is reset, no custom macro<br />
interrupts are initiated even when the interrupt signal (UINT) is input. The<br />
interrupt signal (UINT) is ignored until another M96 command is specified.<br />
1<br />
0<br />
Interrupt signal<br />
(UINT)<br />
Effective interrupt<br />
input signal<br />
M96 M97 M96<br />
When UINT is kept on<br />
The interrupt signal (UINT) becomes valid after M96 is specified. Even<br />
when the signal is input in M97 mode, it is ignored. When the signal input<br />
in M97 mode is kept on until M96 is specified, a custom macro interrupt<br />
is initiated as soon as M96 is specified (only when the status–triggered<br />
scheme is employed); when the edge–triggered scheme is employed, the<br />
custom macro interrupt is not initiated even when M96 is specified.<br />
NOTE<br />
For the status–triggered and edge–triggered schemes, see<br />
Item “Custom macro interrupt signal (UINT)” of II– 15.11.2.
15. CUSTOM MACRO PROGRAMMING<br />
B–63534EN/02<br />
15.11.2<br />
Details of Functions<br />
<br />
Subprogram–type<br />
interrupt and macro–type<br />
interrupt<br />
M codes for custom<br />
macro interrupt control<br />
Custom macro interrupts<br />
and NC statements<br />
Type I<br />
(when an interrupt is<br />
performed even in the<br />
middle of a block)<br />
There are two types of custom macro interrupts: Subprogram–type<br />
interrupts and macro–type interrupts. The interrupt type used is selected<br />
by MSB (bit 5 of parameter 6003).<br />
(a) Subprogram–type interrupt<br />
An interrupt program is called as a subprogram. This means that the<br />
levels of local variables remain unchanged before and after the interrupt.<br />
This interrupt is not included in the nesting level of subprogram calls.<br />
(b) Macro–type interrupt<br />
An interrupt program is called as a custom macro. This means that the<br />
levels of local variables change before and after the interrupt. The<br />
interrupt is not included in the nesting level of custom macro calls. When<br />
a subprogram call or a custom macro call is performed within the interrupt<br />
program, this call is included in the nesting level of subprogram calls or<br />
custom macro calls. Arguments cannot be passed from the current<br />
program even when the custom macro interrupt is a macro–type interrupt.<br />
In general, custom macro interrupts are controlled by M96 and M97.<br />
However, these M codes, may already being used for other purposes (such<br />
as an M function or macro M code call) by some machine tool builders.<br />
For this reason, MPR (bit 4 of parameter 6003) is provided to set M codes<br />
for custom macro interrupt control.<br />
When specifying this parameter to use the custom macro interrupt control<br />
M codes set by parameters, set parameters 6033 and 6034 as follows:<br />
Set the M code to enable custom macro interrupts in parameter 6033, and<br />
set the M code to disable custom macro interrupts in parameter 6034.<br />
When specifying that parameter–set M codes are not used, M96 and M97<br />
are used as the custom macro control M codes regardless of the settings<br />
of parameters 6033 and 6034.<br />
The M codes used for custom macro interrupt control are processed<br />
internally (they are not output to external units). However, in terms of<br />
program compatibility, it is undesirable to use M codes other than M96<br />
and M97 to control custom macro interrupts.<br />
When performing a custom macro interrupt, the user may want to<br />
interrupt the NC statement being executed, or the user may not want to<br />
perform the interrupt until the execution of the current block is completed.<br />
MIN (bit 2 of parameter 6003)is used to select whether to perform<br />
interrupts even in the middle of a block or to wait until the end of the<br />
block.<br />
(i) When the interrupt signal (UINT) is input, any movement or dwell<br />
being performed is stopped immediately and the interrupt program<br />
is executed.<br />
(ii) If there are NC statements in the interrupt program, the command in<br />
the interrupted block is lost and the NC statement in the interrupt<br />
program is executed. When control is returned to the interrupted<br />
program, the program is restarted from the next block after the<br />
interrupted block.<br />
442
B–63534EN/02<br />
Type II<br />
(when an interrupt is<br />
performed at the end of<br />
the block)<br />
PROGRAMMING<br />
443<br />
15. CUSTOM MACRO<br />
(iii) If there are no NC statements in the interrupt program, control is<br />
returned to the interrupted program by M99, then the program is<br />
restarted from the command in the interrupted block.<br />
Execution in<br />
progress<br />
Normal program<br />
Interrupt signal (UINT) input<br />
Execution in<br />
progress<br />
Custom macro<br />
interrupt<br />
Interrupted by macro interrupt<br />
ÉÉÉÉ<br />
ÉÉÉÉ<br />
CNC command restart;<br />
when there are no NC statements<br />
in the interrupt program<br />
ÉÉÉÉ<br />
(i) If the block being executed is not a block that consists of several cycle<br />
operations such as a drilling canned cycle and automatic reference<br />
position return (G28), an interrupt is performed as follows:<br />
When an interrupt signal (UINT) is input, macro statements in the<br />
interrupt program are executed immediately unless an NC statement<br />
is encountered in the interrupt program. NC statements are not<br />
executed until the current block is completed.<br />
(ii) If the block being executed consists of several cycle operations, an<br />
interrupt is performed as follows:<br />
When the last movement in the cycle operations is started, macro<br />
statements in the interrupt program are executed unless an NC<br />
statement is encountered. NC statements are executed after all cycle<br />
operations are completed.<br />
Execution in<br />
progress<br />
Normal program<br />
Execution in<br />
progress<br />
Custom macro<br />
interrupt<br />
Interrupt signal (UINT) input<br />
ÉÉÉ<br />
ÉÉÉ<br />
NC statement in the<br />
interrupt program
15. CUSTOM MACRO PROGRAMMING<br />
B–63534EN/02<br />
Conditions for enabling<br />
and disabling the custom<br />
macro interrupt signal<br />
Custom macro interrupt<br />
during execution of a<br />
block that involves cycle<br />
operation<br />
For type I<br />
For type II<br />
The interrupt signal becomes valid after execution starts of a block that<br />
contains M96 for enabling custom macro interrupts. The signal becomes<br />
invalid when execution starts of a block that contains M97.<br />
While an interrupt program is being executed, the interrupt signal<br />
becomes invalid. The signal become valid when the execution of the<br />
block that immediately follows the interrupted block in the main program<br />
is started after control returns from the interrupt program. In type I, if the<br />
interrupt program consists of only macro statements, the interrupt signal<br />
becomes valid when execution of the interrupted block is started after<br />
control returns from the interrupt program.<br />
Even when cycle operation is in progress, movement is interrupted, and<br />
the interrupt program is executed. If the interrupt program contains no<br />
NC statements, the cycle operation is restarted after control is returned to<br />
the interrupted program. If there are NC statements, the remaining<br />
operations in the interrupted cycle are discarded, and the next block is<br />
executed.<br />
When the last movement of the cycle operation is started, macro<br />
statements in the interrupt program are executed unless an NC statement<br />
is encountered. NC statements are executed after cycle operation is<br />
completed.<br />
444
B–63534EN/02<br />
Custom macro interrupt<br />
signal (UINT)<br />
PROGRAMMING<br />
445<br />
15. CUSTOM MACRO<br />
There are two schemes for custom macro interrupt signal (UINT) input:<br />
The status–triggered scheme and edge– triggered scheme. When the<br />
status–triggered scheme is used, the signal is valid when it is on. When<br />
the edge triggered scheme is used, the signal becomes valid on the rising<br />
edge when it switches from off to on status.<br />
One of the two schemes is selected with TSE (bit 3 of parameter 6003).<br />
When the status–triggered scheme is selected by this parameter, a custom<br />
macro interrupt is generated if the interrupt signal (UINT) is on at the time<br />
the signal becomes valid. By keeping the interrupt signal (UINT) on, the<br />
interrupt program can be executed repeatedly.<br />
When the edge–triggered scheme is selected, the interrupt signal (UINT)<br />
becomes valid only on its rising edge. Therefore, the interrupt program<br />
is executed only momentarily (in cases when the program consists of only<br />
macro statements). When the status–triggered scheme is inappropriate,<br />
or when a custom macro interrupt is to be performed just once for the<br />
entire program (in this case, the interrupt signal may be kept on), the<br />
edge–triggered scheme is useful.<br />
Except for the specific applications mentioned above, use of either<br />
scheme results in the same effects. The time from signal input until a<br />
custom macro interrupt is executed does not vary between the two<br />
schemes.<br />
1<br />
0<br />
Interrupt signal (UINT)<br />
Status–triggered<br />
scheme<br />
Edge–triggered<br />
scheme<br />
Interrupt Interrupt Interrupt<br />
execution execution execution<br />
Interrupt<br />
execution<br />
Interrupt<br />
execution<br />
In the above example, an interrupt is executed four times when the status<br />
triggered scheme is used; when the edge– triggered scheme is used, the<br />
interrupt is executed just once.
15. CUSTOM MACRO PROGRAMMING<br />
B–63534EN/02<br />
Return from a custom<br />
macro interrupt<br />
To return control from a custom macro interrupt to the interrupted<br />
program, specify M99. A sequence number in the interrupted program<br />
can also be specified using address P. If this is specified, the program is<br />
searched from the beginning for the specified sequence number. Control<br />
is returned to the first sequence number found.<br />
When a custom macro interrupt program is being executed, no interrupts<br />
are generated. To enable another interrupt, execute M99. When M99 is<br />
specified alone, it is executed before the preceding commands terminate.<br />
Therefore, a custom macro interrupt is enabled for the last command of<br />
the interrupt program. If this is inconvenient, custom macro interrupts<br />
should be controlled by specifying M96 and M97 in the program.<br />
When a custom macro interrupt is being executed, no other custom macro<br />
interrupts are generated; when an interrupt is generated, additional<br />
interrupts are inhibited automatically. Executing M99 makes it possible<br />
for another custom macro interrupt to occur. M99 specified alone in a<br />
block is executed before the previous block terminates. In the following<br />
example, an interrupt is enabled for the Gxx block of O1234. When the<br />
signal is input, O1234 is executed again. O5678 is controlled by M96 and<br />
M97. In this case, an interrupt is not enabled for O5678 (enabled after<br />
control is returned to O1000).<br />
O1000;<br />
M96P1234;<br />
Interrupt<br />
M96P5678<br />
M97<br />
Interrupt<br />
446<br />
O1234<br />
GxxXxxx;<br />
M99;<br />
Interrupt<br />
O5678<br />
M97<br />
GxxXxxx;<br />
M96;<br />
M99;<br />
Interrupt
B–63534EN/02<br />
Custom macro interrupt<br />
and modal information<br />
PROGRAMMING<br />
447<br />
15. CUSTOM MACRO<br />
NOTE<br />
When an M99 block consists only of address O, N, P, L, or<br />
M, this block is regarded as belonging to the previous block<br />
in the program. Therefore, a single–block stop does not<br />
occur for this block. In terms of programming, the following<br />
and are basically the same. (The difference is<br />
whether G is executed before M99 is recognized.)<br />
G X ;<br />
M99 ;<br />
G X M99 ;<br />
A custom macro interrupt is different from a normal program call. It is<br />
initiated by an interrupt signal (UINT) during program execution. In<br />
general, any modifications of modal information made by the interrupt<br />
program should not affect the interrupted program.<br />
For this reason, even when modal information is modified by the interrupt<br />
program, the modal information before the interrupt is restored when<br />
control is returned to the interrupted program by M99.<br />
When control is returned from the interrupt program to the interrupted<br />
program by M99 Pxxxx, modal information can again be controlled by<br />
the program. In this case, the new continuous information modified by<br />
the interrupt program is passed to the interrupted program. Restoration of<br />
the old modal information present before the interrupt is not desirable.<br />
This is because after control is returned, some programs may operate<br />
differently depending on the modal information present before the<br />
interrupt. In this case, the following measures are applicable:<br />
(1)The interrupt program provides modal information to be used after<br />
control is returned to the interrupted program.
15. CUSTOM MACRO PROGRAMMING<br />
B–63534EN/02<br />
Modal information when<br />
control is returned by<br />
M99<br />
Modal information when<br />
control is returned by<br />
M99 P<br />
System variables<br />
(position information<br />
values) for the interrupt<br />
program<br />
(2)After control is returned to the interrupted program, modal<br />
information is specified again as necessary.<br />
O∆∆∆∆<br />
M96Pxxx<br />
N;<br />
Interrupt signal (UINT)<br />
Modal<br />
information remains<br />
unchanged before and<br />
after the interrupt.<br />
448<br />
(Without P specification)<br />
(With P specification)<br />
Oxxx;<br />
Modify modal<br />
information<br />
M99(P);<br />
The new modal information modified by the interrupt program<br />
is present.<br />
The modal information present before the interrupt becomes valid. The<br />
new modal information modified by the interrupt program is made<br />
invalid.<br />
The new modal information modified by the interrupt program remains<br />
valid even after control is returned. The old modal information which was<br />
valid in the interrupted block can be read using custom macro system<br />
variables #4001 to #4120.<br />
Note that when modal information is modified by the interrupt program,<br />
system variables #4001 to #4120 are not changed.<br />
The coordinates of point A can be read using system variables #5001<br />
and up until the first NC statement is encountered.<br />
The coordinates of point A’ can be read after an NC statement with no<br />
move specifications appears.<br />
The machine coordinates and workpiece coordinates of point B’ can<br />
be read using system variables #5021 and up and #5041 and up.<br />
Interrupt generated<br />
B’<br />
A’<br />
Tool center path<br />
A<br />
Offset vector<br />
B<br />
Programmed tool path
B–63534EN/02<br />
Custom macro interrupt<br />
and custom macro<br />
modal call<br />
Custom macro interrupt<br />
and program restart<br />
DNC operation and<br />
interruption type custom<br />
macro<br />
PROGRAMMING<br />
449<br />
15. CUSTOM MACRO<br />
When the interrupt signal (UINT) is input and an interrupt program is<br />
called, the custom macro modal call is canceled (G67). However, when<br />
G66 is specified in the interrupt program, the custom macro modal call<br />
becomes valid. When control is returned from the interrupt program by<br />
M99, the modal call is restored to the state it was in before the interrupt<br />
was generated. When control is returned by M99Pxxxx;, the modal call<br />
in the interrupt program remains valid.<br />
When the interrupt signal (UINT) is input while a return operation is being<br />
performed in the dry run mode after the search operation for program<br />
restart, the interrupt program is called after restart operation terminates<br />
for all axes. This means that interrupt type II is used regardless of the<br />
parameter setting.<br />
“Interruption type custom macro” cannot be done during DNC operation<br />
or executing a program with an external input–output device.
16. PATTERN DATA INPUT<br />
FUNCTION PROGRAMMING<br />
B–63534EN/02<br />
16 <br />
<br />
This function enables users to perform programming simply by extracting<br />
numeric data (pattern data) from a drawing and specifying the numerical<br />
values from the MDI panel.<br />
This eliminates the need for programming using an existing NC language.<br />
With the aid of this function, a machine tool builder can prepare the<br />
program of a hole machining cycle (such as a boring cycle or tapping<br />
cycle) using the custom macro function, and can store it into the program<br />
memory.<br />
This cycle is assigned pattern names, such as BOR1, TAP3, and DRL2.<br />
An operator can select a pattern from the menu of pattern names displayed<br />
on the screen.<br />
Data (pattern data) which is to be specified by the operator should be<br />
created in advance with variables in a drilling cycle.<br />
The operator can identify these variables using names such as DEPTH,<br />
RETURN RELIEF, FEED, MATERIAL or other pattern data names. The<br />
operator assigns values (pattern data) to these names.<br />
450
B–63534EN/02<br />
16.1<br />
DISPLAYING THE<br />
PATTERN MENU<br />
PROGRAMMING<br />
451<br />
16. PATTERN DATA INPUT<br />
FUNCTION<br />
Pressing the OFFSET<br />
SETTING key and [MENU] is displayed on the following<br />
pattern menu screen.<br />
MENU : HOLE PATTERN O0000 N00000<br />
1. TAPPING<br />
2. DRILLING<br />
3. BORING<br />
4. POCKET<br />
5. BOLT HOLE<br />
6. LINE ANGLE<br />
7. GRID<br />
8. PECK<br />
9. TEST PATRN<br />
10. BACK<br />
> _<br />
MDI **** *** *** 16:05:59<br />
[ MACRO ] [ MENU ] [ OPR ] [ ] [(OPRT)]<br />
HOLE PATTERN : This is the menu title. An arbitrary character string<br />
consisting of up to 12 characters can be specified.<br />
BOLT HOLE : This is the pattern name. An arbitrary character<br />
string consisting of up to 10 characters can be<br />
specified, including katakana.<br />
The machine tool builder should specify the character strings for the menu<br />
title and pattern name using the custom macro, and load the character<br />
strings into program memory as a subprogram of program No. 9500.
16. PATTERN DATA INPUT<br />
FUNCTION PROGRAMMING<br />
B–63534EN/02<br />
<br />
<br />
<br />
Menu title : C1 C2 C3 C4 C5 C6 C7 C8 C9C10 C11 C12<br />
C1,C2, ,C12 : Characters in the menu title (12 characters)<br />
Macro instruction<br />
G65 H90 Pp Qq Rr Ii Jj Kk :<br />
H90:Specifies the menu title<br />
p : Assume a1 and a2 to be the codes of characters C1 and C2. Then,<br />
P <br />
452<br />
Code a2 of character C2<br />
Code a1 of character C1<br />
q : Assume a3 and a4 to be the codes of characters C3 and C4. Then,<br />
q=a310 3 +a4<br />
r : Assume a5 and a6 to be the codes of characters C5 and C6. Then,<br />
r=a510 3 +a6<br />
i : Assume a7 and a8 to be the codes of characters C7 and C8. Then,<br />
i=a710 3 +a8<br />
j : Assume a9 and a10 to be the codes of characters C9 and C10. Then,<br />
j=a910 3 +a10<br />
k : Assume a11 and a12 to be the codes of characters C11 and C12.Then,<br />
k=a1110 3 +a12<br />
Example) If the title of the menu is”HOLE PATTERN” then the macro<br />
instruction is as follows:<br />
G65 H90 P072079 Q076069 R032080<br />
HO LE P<br />
I065084 J084069 K082078;<br />
AT TE RN<br />
For codes corresponding to these characters, refer to the table<br />
in II–16.3.
B–63534EN/02<br />
<br />
<br />
<br />
<br />
PROGRAMMING<br />
453<br />
16. PATTERN DATA INPUT<br />
FUNCTION<br />
Pattern name: C1 C2 C3 C4 C5 C6 C7 C8 C9C10<br />
C1, C2, ,C10: Characters in the pattern name (10 characters)<br />
Macro instruction<br />
G65 H91 Pn Qq Rr Ii Jj Kk ;<br />
H91: Specifies the menu title<br />
n : Specifies the menu No. of the pattern name<br />
n=1 to 10<br />
q : Assume a1 and a2 to be the codes of characters C1 and C2. Then,<br />
q=a1 103 +a2<br />
r : Assume a3 and a4 to be the codes of characters C3 and C4. Then,<br />
r=a3 103 +a4<br />
i : Assume a5 and a6 to be the codes of characters C5 and C6. Then,<br />
i=a5 103 +a6<br />
j : Assume a7 and a8 to be the codes of characters C7 and C8. Then,<br />
j=a7 103 +a8<br />
k : Assume a9 and a10 to be the codes of characters C9 and C10. Then,<br />
k=a9 103 +a10<br />
Example) If the pattern name of menu No. 1 is ”BOLT HOLE” then the<br />
macro instruction is as follows.<br />
G65 H91 P1 Q066079 R076084 I032072 J079076 K069032 ;<br />
BO LT H OL E<br />
To select a pattern from the pattern menu screen, enter the corresponding<br />
pattern No. The following is an example.<br />
1 INPUT<br />
The selected pattern No. is assigned to system variable #5900. The<br />
custom macro of the selected pattern can be started by starting a fixed<br />
program (external program No. search) with an external signal then<br />
referring to the system variable #5900 in the program.<br />
NOTE<br />
If each characters of P, Q, R, I, J, and K are not specified in<br />
a macro instruction, two spaces are assigned to each<br />
omitted character.
16. PATTERN DATA INPUT<br />
FUNCTION PROGRAMMING<br />
B–63534EN/02<br />
<br />
Custom macros for the menu title and hole pattern names.<br />
O9500 ;<br />
MENU : HOLE PATTERN O0000 N00000<br />
1. TAPPING<br />
2. DRILLING<br />
3. BORING<br />
4. POCKET<br />
5. BOLT HOLE<br />
6. LINE ANGLE<br />
7. GRID<br />
8. PECK<br />
9. TEST PATRN<br />
10. BACK<br />
> _<br />
MDI **** *** *** 16:05:59<br />
[ MACRO ] [ MENU ] [ OPR ] [ ] [ (OPRT) ]<br />
N1G65 H90 P072 079 Q076 069 R032 080 I 065 084 J 084 069 K082 078 ; HOLE PATTERN<br />
N2G65 H91 P1 Q066 079 R076 084 I 032 072 J 079 076 K069 032 ; 1.BOLT HOLE<br />
N3G65 H91 P2 Q071 082 R073 068 ; 2.GRID<br />
N4G65 H91 P3 Q076 073 R078 069 I 032 065 J 078071 K076069 ; 3.LINE ANGLE<br />
N5G65 H91 P4 Q084 065 R080 080 I 073 078 J 071 032 ; 4.TAPPING<br />
N6G65 H91 P5 Q068 082 R073 076 I 076 073 J 078 071 ; 5.DRILLING<br />
N7G65 H91 P6 Q066079 R082073 I 078 071 ; 6.BORING<br />
N8G65 H91 P7 Q080 079 R067 075 I 069 084 ; 7.POCKET<br />
N9G65 H91 P8 Q080069 R067075 ; 8.PECK<br />
N10G65 H91 P9 Q084 069 R083 084 I032 080 J065 084 K082 078 ; 9.TEST PATRN<br />
N11G65 H91 P10 Q066 065 R067 0750 ;<br />
N12M99 ;<br />
10.BACK<br />
454
B–63534EN/02<br />
16.2<br />
PATTERN DATA<br />
DISPLAY<br />
PROGRAMMING<br />
455<br />
16. PATTERN DATA INPUT<br />
FUNCTION<br />
When a pattern menu is selected, the necessary pattern data is<br />
displayed.<br />
VAR. : BOLT HOLE O0001 N00000<br />
NO. NAME DATA COMMENT<br />
500 TOOL 0.000<br />
501 STANDARD X 0.000 *BOLT HOLE<br />
502 STANDARD Y 0.000 CIRCLE*<br />
503 RADIUS 0.000 SET PATTERN<br />
504 S.ANGL 0.000 DATA TO VAR.<br />
505 HOLES NO 0.000 NO.500–505.<br />
506 0.000<br />
507 0.000<br />
ACTUAL POSITION (RELATIVE)<br />
X 0.000 Y 0.000<br />
Z 0.000<br />
> _<br />
MDI **** *** *** 16:05:59<br />
[ MACRO ] [ MENU ] [ OPR ] [ ] [(OPRT)]<br />
BOLT HOLE : This is the pattern data title. A character string<br />
consisting of up to 12 characters can be set.<br />
TOOL : This is the variable name. A character string<br />
consisting of up to 10 characters can be set.<br />
*BOLT HOLE CIRCLE* :<br />
This is a comment statement. A character string<br />
can be displayed consisting of up to 8 lines, 12<br />
characters per line.<br />
(It is permissible to use katakana in a character string or line.)<br />
The machine tool builder should program the character strings of pattern<br />
data title, pattern name, and variable name using the custom macro, and<br />
load them into the program memory as a subprogram whose No. is 9500<br />
plus the pattern No. (O9501 to O9510).
16. PATTERN DATA INPUT<br />
FUNCTION PROGRAMMING<br />
B–63534EN/02<br />
<br />
<br />
<br />
(the menu title)<br />
<br />
<br />
<br />
Menu title : C1 C2 C3 C4 C5 C6 C7 C8 C9C10C11C12<br />
C1 ,C2, …, C12 : Characters in the menu title (12 characters)<br />
Macro instruction<br />
G65 H92 Pp Qq Rr Ii Jj Kk ;<br />
H92 : Specifies the pattern name<br />
p : Assume a1 and a2 to be the codes of characters C1 and C2. Then,<br />
p=a1 103 +a2<br />
See 16.3 for character codes.<br />
q : Assume a3 and a4 to be the codes of characters C3 and C4. Then,<br />
q=a3 103 +a4<br />
r : Assume a5 and a6 to be the codes of characters C5 and C6. Then,<br />
r=a5 103 +a6<br />
i : Assume a7 and a8 to be the codes of characters C7 and C8. Then,<br />
i=a7 103 +a8<br />
j : Assume a9 and a10 to be the codes of characters C9 and C10. Then,<br />
j=a9 103 +a10<br />
k : Assume a11 and a12 to be the codes of characters C11 and C12. Then,<br />
k=a11 103 +a12<br />
Example) Assume that the pattern data title is ”BOLT HOLE.”The macro<br />
instruction is given as follows:<br />
G65 H92 P066079 Q076084 R032072 I079076 J069032;<br />
BO LT H OL E<br />
Variable name : C1 C2 C3 C4 C5 C6 C7 C8 C9C10<br />
C1, C2, …, C10 : Characters in the variable name (10 characters)<br />
Macro instruction<br />
G65 H93 Pp Qq Rr Ii Jj Kk ;<br />
H93 : Specifies the variable name<br />
p : Specifies the menu No. of the variable name<br />
p=100 to 149 (199), 500 to 531 (999)<br />
q : Assume a1 and a2 to be the codes of characters C1 and C2. Then,<br />
q=a1103 +a2<br />
r : Assume a3 and a4 to be the codes of characters C3 and C4. Then,<br />
r=a3103 +a4<br />
i : Assume a5 and a6 to be the codes of characters C5 and C6. Then,<br />
i=a5103 +a6<br />
j : Assume a7 and a8 to be the codes of characters C7 and C8. Then,<br />
j=a7103 +a8<br />
k : Assume a9 and a10 to be the codes of characters C9 and C10. Then,<br />
k=a9103a+a10 Example) Assume that the variable name of the variable No. 503 is<br />
“RADIUS.” The macro instruction is given as follows:<br />
G65 H93 P503 Q082065 R068073 I085083 ;<br />
RA DI US<br />
456
B–63534EN/02<br />
<br />
<br />
PROGRAMMING<br />
457<br />
16. PATTERN DATA INPUT<br />
FUNCTION<br />
One comment line: C1 C2 C3 C4 C5 C6 C7 C8 C9 C10 C11 C12<br />
C1, C2, …, C12 : Character string in one comment line (12 characters)<br />
Macro instruction<br />
G65 H94 Pp Qq Rr Ii Jj Kk ;<br />
H94 : Specifies the comment<br />
p : Assume a1 and a2 to be the codes of characters C1 and C2. Then,<br />
p=a1 103 +a2<br />
See 17.7 for character codes.<br />
q : Assume a3 and a4 to be the codes of characters C3 and C4. Then,<br />
q=a3 103 +a4<br />
r : Assume a5 and a6 to be the codes of characters C5 and C6. Then,<br />
r=a5 103 +a6<br />
i : Assume a7 and a8 to be the codes of characters C7 and C8. Then,<br />
i=a7 103 +a8<br />
j : Assume a9 and a10 to be the codes of characters C9 and C10. Then,<br />
j=a9 103 +a10<br />
k : Assume a11 and a12 to be the codes of characters C11 and C12. Then,<br />
k=a11 103 +a12<br />
A comment can be displayed in up to eight lines. The comment consists<br />
of the first line to the eighth line in the programmed sequence of G65 H94<br />
for each line.<br />
Example) Assume that the comment is “BOLT HOLE.” The macro<br />
instruction is given as follows:<br />
G65 H94 P042066 Q079076 R084032 I072079 J076069;<br />
*B OL T HO LE
16. PATTERN DATA INPUT<br />
FUNCTION PROGRAMMING<br />
B–63534EN/02<br />
Examples<br />
Macro instruction to describe a parameter title , the variable name, and<br />
a comment.<br />
VAR. : BOLT HOLE O0001 N00000<br />
NO. NAME DATA COMMENT<br />
500 TOOL 0.000<br />
501 STANDARD X 0.000 *BOLT HOLE<br />
502 STANDARD Y 0.000 CIRCLE*<br />
503 RADIUS 0.000 SET PATTERN<br />
504 S.ANGL 0.000 DATA TO VAR.<br />
505 HOLES NO 0.000 NO.500–505.<br />
506 0.000<br />
507 0.000<br />
ACTUAL POSITION (RELATIVE)<br />
X 0.000 Y 0.000<br />
Z 0.000<br />
> _<br />
MDI **** *** *** 16:05:59<br />
[ MACRO ] [ MENU ] [ OPR ] [ ] [(OPRT)]<br />
O9501 ;<br />
N1G65 H92 P066 079 Q076 084 R032 072 I 079 076 J069 032 ; VAR : BOLT HOLE<br />
N2G65 H93 P500 Q084 079 R079076 ; #500 TOOL<br />
N3G65 H93 P501 Q075 073 R074 085 I078 032 J088 032 ; #501 KIJUN X<br />
N4G65 H93 P502 Q075 073 R074 085 I 078 032 J089 032 ; #502 KIJUN Y<br />
N5G65 H93 P503 Q082 065 R068 073 I 085 083 ; #503 RADIUS<br />
N6G65 H93 P504 Q083 046 R032 065 I 078 071 J 076 032 ; #504 S.ANGL<br />
N7G65 H93 P505 Q072 079 R076 069 I 083 032 J078 079 K046 032 ; #505 HOLES NO<br />
N8G65 H94 ; Comment<br />
N9G65 H94 P042 066 Q079 076 R084 032 I072 079 J076 069 ;<br />
* BOLT HOLE<br />
N10G65 H94 R032 067 I073 082 J067 076 K069 042 ; CIRCLE *<br />
N11G65 H94 P083 069 Q084 032 080 065 I084 084 J069 082 K078 032 ; SET PATTERN<br />
N12G65 H94 P068 065 Q084 065 R032 084 I079 032 J086 065 K082046 ; DATA NO VAR.<br />
N13G65 H94 P078 079 Q046 053 R048 048 I045 053 J048 053 K046 032; No.500–505<br />
N14M99 ;<br />
458
B–63534EN/02<br />
16.3<br />
CHARACTERS AND<br />
CODES TO BE USED<br />
FOR THE PATTERN<br />
DATA INPUT<br />
FUNCTION<br />
PROGRAMMING<br />
Character<br />
459<br />
16. PATTERN DATA INPUT<br />
FUNCTION<br />
Table. 16.3 (a) Characters and codes to be used for the<br />
pattern data input function<br />
Code Comment Char-<br />
Code Comment<br />
acter<br />
A 065 6 054<br />
B 066 7 055<br />
C 067 8 056<br />
D 068 9 057<br />
E 069 032 Space<br />
F 070 ! 033 Exclama–<br />
tion mark<br />
G 071 ” 034 Quotation<br />
mark<br />
H 072 # 035 Hash sign<br />
I 073 $ 036 Dollar sign<br />
J 074 % 037 Percent<br />
K 075 & 038 Ampersand<br />
L 076 ’ 039 Apostrophe<br />
M 077 ( 040 Left<br />
parenthesis<br />
N 078 ) 041 Right<br />
parenthesis<br />
O 079 * 042 Asterisk<br />
P 080 + 043 Plus sign<br />
Q 081 , 044 Comma<br />
R 082 – 045 Minus sign<br />
S 083 . 046 Period<br />
T 084 / 047 Slash<br />
U 085 : 058 Colon<br />
V 086 ; 059 Semicolon<br />
W 087 < 060 Left angle<br />
bracket<br />
X 088 = 061 Equal sign<br />
Y 089 > 062 Right angle<br />
bracket<br />
Z 090 ? 063 Question<br />
mark<br />
0 048 @ 064 HAt”mark<br />
1 049 [ 091 Left square<br />
bracket<br />
2 050 ^ 092<br />
3 051 ¥ 093 Yen sign<br />
4 052 ] 094 Right squar<br />
bracket<br />
5 053 _ 095 Underscore<br />
NOTE<br />
Right and left parentheses cannot be used.
16. PATTERN DATA INPUT<br />
FUNCTION PROGRAMMING<br />
B–63534EN/02<br />
Table 16.3 (b) Numbers of subprograms employed in the pattern data input function<br />
Subprogram No. Function<br />
O9500 Specifies character strings displayed on the pattern data menu.<br />
O9501 Specifies a character string of the pattern data corresponding to pattern No.1<br />
O9502 Specifies a character string of the pattern data corresponding to pattern No.2<br />
O9503 Specifies a character string of the pattern data corresponding to pattern No.3<br />
O9504 Specifies a character string of the pattern data corresponding to pattern No.4<br />
O9505 Specifies a character string of the pattern data corresponding to pattern No.5<br />
O9506 Specifies a character string of the pattern data corresponding to pattern No.6<br />
O9507 Specifies a character string of the pattern data corresponding to pattern No.7<br />
O9508 Specifies a character string of the pattern data corresponding to pattern No.8<br />
O9509 Specifies a character string of the pattern data corresponding to pattern No.9<br />
O9510 Specifies a character string of the pattern data corresponding to pattern No.10<br />
Table. 16.3 (c) Macro instructions used in the pattern data input function<br />
G code H code Function<br />
G65 H90 Specifies the menu title.<br />
G65 H91 Specifies the pattern name.<br />
G65 H92 Specifies the pattern data title.<br />
G65 G93 Specifies the variable name.<br />
G65 H94 Specifies the comment.<br />
Table. 16.3 (d) System variables employed in the pattern data input function<br />
System variable Function<br />
#5900 Pattern No. selected by user.<br />
460
B–63534EN/02<br />
17 <br />
General<br />
Format<br />
Explanations<br />
<br />
(R_)<br />
<br />
PROGRAMMING<br />
461<br />
17. PROGRAMMABLE PARAMETER<br />
ENTRY (G10)<br />
<br />
The values of parameters can be entered in a lprogram. This function is<br />
used for setting pitch error compensation data when attachments are<br />
changed or the maximum cutting feedrate or cutting time constants are<br />
changed to meet changing machining conditions.<br />
<br />
G10L50; Parameter entry mode setting<br />
N_R_; For parameters other than the axis type<br />
N_P_R_; For axis type parameters<br />
G11; Parameter entry mode cancel<br />
<br />
N_: Parameter No. (4digids) or compensation position No. for pitch errors<br />
compensation +10,000 (5digid)<br />
R_: Parameter setting value (Leading zeros can be omitted.)<br />
P_: Axis No. 1 to 8 (Used for entering axis type parameters)<br />
Do not use a decimal point in a value set in a parameter (R_).<br />
a decimal point cannot be used in a custom macro variable for R_either.<br />
Specify an axis number (P_) from 1 to 8 (up to eight axes) for an axis type<br />
parameter. The control axes are numbered in the order in which they are<br />
displayed on theCNC display.<br />
For example, specity P2 for the control axis which is displayed second.<br />
WARNING<br />
1 Do not fail to perform reference point return manually after<br />
changing the pitch error compensation data or backlash<br />
compensation data. Without this, the machine position can<br />
deviate from the correct position.<br />
2 The canned–cycle mode must be cancelled before entering<br />
of parameters. When not cancelled, the drilling motion may<br />
be activated.<br />
NOTE<br />
Other NC statements cannot be specified while in<br />
parameter input mode.
17. PROGRAMMABLE PARAMETER<br />
ENTRY (G10) PROGRAMMING<br />
B–63534EN/02<br />
Examples<br />
1. Set bit 2 (SBP) of bit type parameter No. 3404<br />
G10L50 ; Parameter entry mode<br />
N3404 R 00000100 ; SBP setting<br />
G11 ; cancel parameter entry mode<br />
2. Change the values for the Z–axis (3rd axis) and A–axis (4th axis) in<br />
axis type parameter No. 1322 (the coordinates of stored stroke limit<br />
2 in the positive direction for each axis).<br />
G10L50 ; Parameter entry mode<br />
N1322P3R4500 ; Modify Z axis<br />
N1322P4R12000 ; Modify A axis<br />
G11 ; cancel parameter entry mode<br />
462
B–63534EN/02<br />
18 MEMORY<br />
General<br />
Explanations<br />
Address for the cutter<br />
compensation offset<br />
number<br />
Subprogram call<br />
Address for the canned<br />
cycle repetition count<br />
PROGRAMMING<br />
463<br />
18. MEMORY OPERATION USING<br />
FS15 TAPE FORMAT<br />
OPERATION USING FS15 TAPE FORMAT<br />
Memory operation of the program registered by FS15 tape format is<br />
possible with setting of the setting parameter (No. 0001#1).<br />
Data formats for cutter compensation, subprogram calling, and canned<br />
cycles are different between the <strong>Series</strong> 16/18 and <strong>Series</strong> 15. The <strong>Series</strong><br />
15 data formats can be processed for memory operation.Other data<br />
formats must comply with the <strong>Series</strong> 16/18.When a value out of the<br />
specified range for the <strong>Series</strong> 16/18 is registered, an alarm occurs.<br />
Functions not available in the <strong>Series</strong> 16/18 cannot be registered or used<br />
for memory operation.<br />
Offset numbers are specified by address D in the <strong>Series</strong> 15. When an<br />
offset number is specified by address D, the modal value specified by<br />
address H is replaced with the offset number specified by address D.<br />
If a subprogram number of more than four digits is specified, the four<br />
low–order digits are regarded as the subprogram number. If no repeat<br />
count is specified, 1 is assumed.<br />
Table 18 (a) Subprogram call data format<br />
CNC Data format<br />
<strong>Series</strong> 15 M98 P L ;<br />
P : Subprogram number<br />
L : Repetition count (1 to 9999)<br />
<strong>Series</strong> 16/18 M98 P ;<br />
Repetition count Subprogram number<br />
(1 to 9999)<br />
The <strong>Series</strong> 15 and <strong>Series</strong> 16/18 use different addresses for the repeat count<br />
for canned cycles as listed in Table 18 (b).<br />
Table 18 (b) Address for times of repetition of canned cycle<br />
CNC Address<br />
<strong>Series</strong> 15 L<br />
<strong>Series</strong> 16/18 K
19. HIGH SPEED CUTTING FUNCTIONS PROGRAMMING<br />
B–63534EN/02<br />
19 <br />
<br />
464
B–63534EN/02 PROGRAMMING 19. HIGH SPEED CUTTING FUNCTIONS<br />
19.1<br />
HIGH–SPEED CYCLE<br />
CUTTING<br />
General<br />
Format<br />
This function can convert the machining profile to a data group that can<br />
be distributed as pulses at high–speed by the macro compiler and macro<br />
executor. The function can also call and execute the data group as a<br />
machining cycle using the CNC command (G05 command).<br />
G05 P10 L ;<br />
P10 is number of the machining cycle to be called first:<br />
P10001 to P10999<br />
L is repetition count of the machining cycle<br />
(L1 applies when this parameter is omitted.) :<br />
L1 to L999<br />
Call and execute the data for the high speed cutting cycle specified by the<br />
macro compiler and macro executor using the above command.<br />
Cycle data can be prepared for up to 999 cycles. Select the machining<br />
cycle by address P. More than one cycle can be called and executed in<br />
series using the cycle connection data in the header.<br />
Specify the repetition count of the called machining cycle by address L.<br />
The repetition count in the header can be specified for each cycle.<br />
The connection of cycles and their repetition count are explained below<br />
with an example.<br />
Example) Assume the following:<br />
Cycle 1 Cycle connection data 2 Repetition count 1<br />
Cycle 2 Cycle connection data 3 Repetition count 3<br />
Cycle 3 Cycle connection data 0 Repetition count 1<br />
G05 P10001 L2 ;<br />
The following cycles are executed in sequence:<br />
Cycles 1, 2, 2, 2, 3, 1, 2, 2, 2, and3<br />
NOTE<br />
1 An alarm is issued if the function is executed in the G41/G42<br />
mode.<br />
2 Single block stop, dry run/feedrate override, automatic<br />
acceleration/deceleration and handle interruption are<br />
disabled during high–speed cycle machining.<br />
465
19. HIGH SPEED CUTTING FUNCTIONS PROGRAMMING<br />
B–63534EN/02<br />
<br />
<br />
<br />
466<br />
<br />
115 The contents of the header are invalid. This alarm is issued in<br />
the following cases.<br />
1. The header corresponding to the number of the specified call<br />
machining cycle was not found.<br />
2. A cycle connection data value is not in the valid range (0 to<br />
999).<br />
3. The number of data items in the header is not in the valid<br />
range (1 to 32767).<br />
4. The first variable No. for storing data in the executable format<br />
is not in the valid range (#20000 to #85535).<br />
5. The last variable No. for storing data in the executable format<br />
exceeds the limit (#85535).<br />
6. The first variable No. for start data in the executable format<br />
overlaps with a variable No. used in the header.<br />
178 High–speed cycle machining was specified in the G41/G42<br />
mode.<br />
179 The number of control axes specified in parameter 7510 exceeds<br />
the maximum number.
B–63534EN/02 PROGRAMMING 19. HIGH SPEED CUTTING FUNCTIONS<br />
19.2<br />
<br />
<br />
<br />
When an arc is cut at a high speed in circular interpolation, a radial error<br />
exists between the actual tool path and the programmed arc. An<br />
approximation of this error can be obtained from the following<br />
expression:<br />
<br />
0<br />
r<br />
467<br />
∆Error<br />
∆r= (T1 2 +T2 2 1<br />
)<br />
2<br />
<br />
<br />
Programmed path<br />
Actual path<br />
<br />
∆r : Maximum radial error (mm)<br />
v : Feedrate (mm/s)<br />
r : Arc radius (mm)<br />
T1 : Time constant (s) for exponential acceleration/deceleration of<br />
cutting feed<br />
T2 : Time constant of the servo motor (s)<br />
When actual machining is performed, radius r of the arc to be machined<br />
and permissible error Dr are given. Then, maximum allowable feedrate<br />
v (mm/min) is determined from the above expression.<br />
The function for clamping the feedrate by the arc radius automatically<br />
clamps the feedrate of arc cutting to the value set in a parameter. This<br />
function is effective when the specified feedrate may cause the radial<br />
error for an arc with a programmed radius to exceed the permissible<br />
degree of error.<br />
For details, refer to the relevant manual published by the machine tool<br />
builder.
19. HIGH SPEED CUTTING FUNCTIONS PROGRAMMING<br />
B–63534EN/02<br />
19.3<br />
HIGH–SPEED<br />
REMOTE BUFFER<br />
19.3.1<br />
High–Speed Remote<br />
Buffer A (G05)<br />
A remote buffer can continuously supply a large amount of data to the<br />
CNC at high speeds when connected to the host computer or input/output<br />
equipment via a serial interface.<br />
CNC<br />
Remote<br />
buffer<br />
468<br />
RS–232–C / RS–422<br />
Host<br />
computer<br />
Input/output<br />
equipment<br />
When the remote buffer is connected online to the host computer, fast and<br />
reliable DNC operation is possible.<br />
The remote buffer function includes high–speed remote buffer A and<br />
high–speed remote buffer B for high–speed machining. High–speed<br />
remote buffer A uses binary data. High–speed remote buffer B uses NC<br />
language. For details on remote buffer specifications, refer to the<br />
“Remote Buffer Supplement” (B–61802E–1).<br />
Specify G05 only in a block using normal NC command format. Then<br />
specify move data in the special format explained below. When zero is<br />
specified as the travel distance along all axes, normal NC command<br />
format can be used again for subsequent command specification.<br />
Host computer<br />
RS–232–C / RS–422<br />
CNC<br />
Remote buffer
B–63534EN/02 PROGRAMMING 19. HIGH SPEED CUTTING FUNCTIONS<br />
Format<br />
Explanations<br />
Selecting the unit time<br />
Travel distance data<br />
VBinary input operation enabled : G05;<br />
VBinary input operation disabled : The travel distance along<br />
all axes are set to zero.<br />
VData format for binary input operation<br />
Data<br />
sequence<br />
469<br />
Byte<br />
High byte<br />
Low byte<br />
High byte<br />
Low byte<br />
Check byte<br />
<br />
High byte<br />
Low byte<br />
1st axis<br />
2nd axis<br />
Nth axis<br />
In the data format for binary input operation, the travel distance<br />
along each axis (2 bytes) per unit time is specified. The travel distances<br />
along all axes are placed sequentially from the first axis,<br />
then a check byte is added. (The data length for one block is [2 x N<br />
+ 1] bytes).<br />
All data must be specified in binary.<br />
The unit time (in ms) can be selected by setting bits 4, 5, and 6 of<br />
parameter IT0,IT1,IT2 No. 7501.<br />
The following unit is used for specifying the travel distance along each<br />
axis. (A negative travel distance is indicated in 2’s complement.)<br />
<strong>Inc</strong>rement system IS–B IS–C Unit<br />
Millimeter machine 0.001 0.0001 mm<br />
<strong>Inc</strong>h machine 0.0001 0.00001 inch<br />
The data format of the travel distance is as follows. The bits marked * are<br />
used to specify a travel distance per unit time.
19. HIGH SPEED CUTTING FUNCTIONS PROGRAMMING<br />
B–63534EN/02<br />
Check Byte<br />
Transfer speed<br />
Cutter compensation<br />
Feed hold and interlock<br />
Mirror image<br />
Acceleration /<br />
deceleration type<br />
Limitations<br />
Modal command<br />
Invalid functions<br />
Memory registration<br />
15 14 13 12 11 10 9 8 7 6 5 4 3 2 1 0<br />
* * * * * * * 0 * * * * * * * 0<br />
Example: When the travel distance is 700 µm per unit time<br />
(millimeter machine with increment system IS–B)<br />
15 14 13 12 11 10 9 8 7 6 5 4 3 2 1 0<br />
0 0 0 0 1 0 1 0 0 1 1 1 1 0 0<br />
All bytes of the block except for the check byte ([2*N] bytes) are summed<br />
up, and any bits above 8th bit are discarded.<br />
The CNC reads (2 x N + 1)–byte data (where N is the number of axes) for<br />
every unit time that is set in the parameter. To allow the CNC to continue<br />
machining without interruption, the following minimum baud rate is<br />
required for data transfer between the host and remote buffer:<br />
11<br />
(2×N+) × ×1000 baud (T : Unit time)<br />
T<br />
If G05 is specified in cutter compensation mode, the P/S 178 alarm is<br />
issued.<br />
Feed hold and interlock are effective.<br />
The mirror image function (programmable mirror image and setting<br />
mirror image) cannot be turned on or off in the G05 mode.<br />
In binary input operation mode, when tool movement starts and stops in<br />
cutting feed mode, exponential acceleration/deceleration is performed<br />
(the acceleration/deceleration time constant set in parameter No. 1622 is<br />
used).<br />
In binary input operation mode, only linear interpolation as specified in<br />
the defined data format is executed (equivalent to the incremental<br />
command for linear interpolation).<br />
The single block, feedrate override, and maximum cutting feedrate clamp<br />
functions have no effect. The program restart, block restart, and<br />
high–speed machining functions cannot be used. In addition, miscella–<br />
neous functions cannot be executed in binary operation.<br />
No data can be stored in memory.<br />
470<br />
0
B–63534EN/02 PROGRAMMING 19. HIGH SPEED CUTTING FUNCTIONS<br />
19.3.2<br />
High–Speed Remote<br />
Buffer B (G05)<br />
Format<br />
Explanations<br />
Specified data<br />
Number of controlled<br />
axes<br />
Limitations<br />
<strong>Inc</strong>remental command<br />
Functions that cannot be<br />
specified<br />
Feedrate clamp<br />
Binary data format<br />
High–speed remote buffer A uses binary data. On the other hand,<br />
high–speed remote buffer B can directly use NC language coded with<br />
equipment such as an automatic programming unit to perform high–speed<br />
machining.<br />
G05P01 ; Start high–speed machining<br />
G05P00 ; End high–speed machining<br />
Example :<br />
O1234 ;<br />
<br />
G05P01 ; ← Start high–speed machining<br />
X_ Y_ Z_ ;<br />
<br />
G05P00 ; ← End high–speed machining<br />
<br />
M02 ;<br />
The following data can be specified during high–speed machining:<br />
Address Data<br />
X Travel distance along the X–axis<br />
Y Travel distance along the Y–axis<br />
Z Travel distance along the Z–axis<br />
F Cutting feedrate<br />
Data other than the above cannot be specified.<br />
Be sure to set 3 in parameter No. 7510 as the number of controlled axes.<br />
Move commands can be specified only in incremental mode.<br />
Cutter compensation B and C cannot be specified. The feedrate cannot<br />
be overridden.<br />
The maximum cutting feedrate clamp function is disabled.<br />
The format of high–speed remote buffer A can also be used for<br />
high–speed remote buffer B. This format, however, cannot be used<br />
together with NC language within the same program.<br />
471
19. HIGH SPEED CUTTING FUNCTIONS PROGRAMMING<br />
B–63534EN/02<br />
19.4<br />
DISTRIBUTION<br />
PROCESSING<br />
TERMINATION<br />
MONITORING<br />
FUNCTION FOR THE<br />
HIGH–SPEED<br />
MACHINING<br />
COMMAND (G05)<br />
Explanations<br />
High–speed machining<br />
command<br />
Distribution processing<br />
termination<br />
During high–speed machining, the distribution processing status is<br />
monitored. When distribution processing terminates, P/S alarm No. 000<br />
and P/S alarm No. 179 are issued upon completion of the high–speed<br />
machining command (according to the setting of ITPDL (bit 7 of<br />
parameter No. 7501)).<br />
These P/S alarms can be canceled only by turning off the CNC power.<br />
High–speed machining using the high–speed remote buffer A function,<br />
high–speed remote buffer B function, and high–speed cycle function<br />
based on the G05 command<br />
Failure to perform normal distribution processing because distribution<br />
processing required for high–speed machining exceeded the CNC<br />
processing capacity, or because distribution data sent from the host was<br />
delayed for some reason while the high–speed remote buffer A or G<br />
function was being used<br />
Alarm<br />
Alarm No. Message Contents<br />
000 PLEASE<br />
TURN OFF<br />
POWER<br />
179 PARAM.<br />
(PRM No.<br />
7510)<br />
SETTING<br />
ERROR<br />
472<br />
During high–speed machining, distribution processing<br />
was terminated.<br />
Related parameters:<br />
Remote buffer transfer baud rate (parameter<br />
No. 133)<br />
Number of controlled axes in high–speed machining<br />
(parameter No. 7150)<br />
High–speed axis selection during high–speed<br />
machining (bit 0 of parameter No. 7510)
B–63534EN/02 PROGRAMMING 19. HIGH SPEED CUTTING FUNCTIONS<br />
19.5<br />
HIGH–SPEED<br />
LINEAR<br />
INTERPOLATION<br />
(G05)<br />
Format<br />
Explanations<br />
High–speed linear<br />
interpolation mode<br />
Commands in<br />
high–speed linear<br />
interpolation mode<br />
X/Y/Z/C–axis incremental<br />
traveling distance<br />
Cutting feedrate<br />
The high–speed linear interpolation function processes a move command<br />
related to a controlled axis not by ordinary linear interpolation but by<br />
high–speed linear interpolation. The function enables the high–speed<br />
execution of an NC program including a series of minute amounts of<br />
travel.<br />
G05 P2 ; Start high–speed linear interpolation<br />
G05 P0 ; End high–speed linear interpolation<br />
A block for specifying G05 must not contain any other command.<br />
The high–speed linear interpolation start command G05 P2; places the<br />
system in high–speed linear interpolation mode, in which high–speed<br />
linear interpolation is executed. The high–speed linear interpolation end<br />
command G05 P0; places the system in the standard NC program<br />
operation mode.<br />
At power–up or in the NC reset state, the system enters the standard NC<br />
program operation mode.<br />
The commands that can be programmed in high–speed linear<br />
interpolation mode are:<br />
X/Y/Z/C–axis incremental travel distance command, cutting feedrate<br />
command, and high–speed linear interpolation end command.<br />
In high–speed linear interpolation mode, an address other than those<br />
listed in the following table is ignored.<br />
Address Description<br />
X–––.––– X–axis incremental travel distance<br />
Y–––.––– Y–axis incremental travel distance<br />
Z–––.––– Z–axis incremental travel distance<br />
C–––.––– C–axis incremental travel distance<br />
G05 P0 ; High–speed linear interpolation end command<br />
A travel distance specified in high–speed linear interpolation mode is<br />
regarded as being an incremental travel distance, regardless of the<br />
G90/G91 mode setting.<br />
Specify a cutting feedrate in high–speed linear interpolation mode. If no<br />
cutting feedrate is specified, the modal F value is assumed.<br />
Maximum Interpolation period: Interpolation period:<br />
feedrate<br />
8 msec<br />
4 msec<br />
(IS–B, metric input) 122,848 mm/min 245,696 mm/min<br />
(IS–B, inch input) 12,284.8 inch/min 24,569.6 inch/nim<br />
(IS–C, metric input) 12,284 mm/min 24,569 mm/min<br />
(IS–C, inch input) 1,228.48 inch/min 2,456.96 inch/min<br />
473
19. HIGH SPEED CUTTING FUNCTIONS PROGRAMMING<br />
B–63534EN/02<br />
Interpolation period<br />
Limitations<br />
Controlled axes<br />
Enabled interpolation<br />
Absolute command<br />
Feed per rotation<br />
Cutter compensation<br />
Modes related to the<br />
coordinate system<br />
(Maximum feedrate) =<br />
8<br />
122,848 (IS–B, metric input)<br />
(interpolation period)<br />
Minimum Interpolation period: Interpolation period:<br />
feedrate<br />
8 msec<br />
4 msec<br />
(IS–B, metric input) 4 mm/min 8 mm/min<br />
(IS–B, inch input) 0.38 inch/min 0.76 inch/mim<br />
(IS–C, metric input) 4 mm/min 8 mm/min<br />
(IS–C, inch input) 0.38 inch/min 0.76 inch/min<br />
8<br />
(Minimum feedrate) = 4 (IS–B, metric input)<br />
(interpolation period)<br />
In high–speed linear interpolation mode, the NC interpolation period can<br />
be changed. As the interpolation period decreases, the machining speed<br />
and precision increase.<br />
IT2, IT1, and IT0 bits (bits 6, 5, and 4 of parameter 7501)<br />
IT2 IT1 IT0 Interpolation period<br />
0<br />
0<br />
0<br />
0<br />
1<br />
0<br />
1<br />
0<br />
1<br />
1<br />
474<br />
0<br />
0<br />
1<br />
1<br />
1<br />
8 msec in high–speed linear interpolation mode<br />
4 msec in high–speed linear interpolation mode<br />
2 msec in high–speed linear interpolation mode<br />
1 msec in high–speed linear interpolation mode<br />
0.5 msec in high–speed linear interpolation mode<br />
Up to four axes can be controlled. The names of the controlled axes are<br />
X, Y, Z, and C. Any other axis name is ignored. Set X, Y, Z, then C in<br />
axis name setting parameter 1020.<br />
Only the linear interpolation function can be executed. Circular<br />
interpolation and other interpolation functions cannot be executed.<br />
Movement cannot be specified by absolute values. A specified travel<br />
distance is always considered as an incremental travel distance, regardless<br />
of the G90/G91 mode setting.<br />
The feed per rotation command cannot be specified. Feed per minute is<br />
always assumed, regardless of the G94/G95 mode setting.<br />
High–speed linear interpolation commands cannot be specified in cutter<br />
compensation mode (G41/G42). If the high–speed linear interpolation<br />
start command is specified in cutter compensation mode, P/S alarm No.<br />
178 is issued.<br />
The high–speed interpolation commands cannot be specified in polar<br />
coordinate interpolation mode (G12.1), scaling mode (G51), or<br />
coordinate system rotation mode.
B–63534EN/02 PROGRAMMING 19. HIGH SPEED CUTTING FUNCTIONS<br />
Single–block operation<br />
Feed hold<br />
Cutting feed override<br />
Maximum cutting<br />
feedrate for each axis<br />
Custom macro/optional<br />
block skip<br />
Comment<br />
G codes<br />
Example<br />
Single–block operation is disabled in high–speed linear interpolation<br />
mode.<br />
:<br />
G05 P2 ;<br />
X10 Z20 F1000 ;<br />
:<br />
:<br />
Handled as a single block<br />
:<br />
Y30 ;<br />
G05 P0 ;<br />
:<br />
Feed hold is disabled in high–speed linear interpolation mode.<br />
The cutting feed override function is enabled. Because of the intermediate<br />
buffer between high–speed linear interpolation processing and axis move<br />
command processing, the override is applied only after the elapse of a<br />
slight delay after the override signal is switched.<br />
The maximum cutting feedrate for each axis (parameter 1430) is invalid<br />
in high–speed linear interpolation mode. The maximum cutting feedrate<br />
for all axes (parameter 1422) becomes valid.<br />
No macro variables or macro statements can be used in high–speed linear<br />
interpolation mode. If their use is attempted, P/S alarm No. 009 is issued.<br />
When an optional block skip symbol / is specified, P/S alarm No. 009 is<br />
issued as well.<br />
No comment can be specified.<br />
If a G code other than G05 P0 is specified in high–speed linear<br />
interpolation mode, P/S alarm No. 010 is issued.<br />
<br />
NC program<br />
O0001 ;<br />
G00 X0 Y0 Z0 ;<br />
:<br />
:<br />
:<br />
G05 P2 ;<br />
X10 Y20 F1000 ;<br />
X5 Y6 Z7 ;<br />
:<br />
:<br />
:<br />
G05 P0 ;<br />
G00 DDD ;<br />
:<br />
:<br />
:<br />
M02 ;<br />
%<br />
475<br />
Standard operation mode<br />
High–speed linear interpolation<br />
start command<br />
High–speed linear interpolation<br />
mode (high–speed linear<br />
interpolation)<br />
High–speed linear interpolation<br />
end command<br />
Standard operation mode
19. HIGH SPEED CUTTING FUNCTIONS PROGRAMMING<br />
B–63534EN/02<br />
19.6<br />
ADVANCED<br />
PREVIEW CONTROL<br />
(G08)<br />
Format<br />
Explanations<br />
<br />
<br />
Limitations<br />
G08 command<br />
Functions that can be<br />
specified<br />
This function is designed for high–speed precise machining. With this<br />
function, the delay due to acceleration/deceleration and the delay in the<br />
servo system which increase as the feedrate becomes higher can be<br />
suppressed.<br />
The tool can then follow specified values accurately and errors in the<br />
machining profile can be reduced.<br />
This function becomes effective when advanced preview control mode is<br />
entered.<br />
For details, refer to the relevant manual published by the machine tool<br />
builder.<br />
G08 P_<br />
P1 : Turn on advanced preview control mode.<br />
P0 : Turn off advanced preview control mode.<br />
In advanced preview control mode, the following functions are available:<br />
(1) Linear acceleration/deceleration before interpolation<br />
(2) Automatic corner deceleration function<br />
For details on the above functions, see the descriptions of the functions.<br />
Each function, specific parameters are provided.<br />
Advanced preview control mode is canceled by reset.<br />
Specify G08 code only in a block.<br />
In the advanced preview control mode, the optional functions listed below<br />
can be specified.<br />
NOTE<br />
To use a function other than the following optional functions,<br />
turn the advanced preview control mode off, specify the<br />
desired function, then turn the mode on again.<br />
476
B–63534EN/02 PROGRAMMING 19. HIGH SPEED CUTTING FUNCTIONS<br />
⋅ Inverse time feed<br />
⋅ High–precision contour control<br />
⋅ Axis control by the PMC<br />
(Bits 4 (G8R) and 3 (G8C) of parameter No. 8004 can be set to also use<br />
this function in the look–ahead control mode.)<br />
⋅ Single direction positioning<br />
⋅ Polar coordinate command<br />
⋅ Helical interpolation<br />
⋅ Rigid tapping<br />
(Bit 5 (G8S) of parameter No. 1602 can be set to also use this function<br />
in the look–ahead control mode. The serial spindle parameters must<br />
also be set.)<br />
⋅ Program restart<br />
⋅ External deceleration<br />
⋅ Simple synchronous control<br />
⋅ Sequence number comparison and stop<br />
⋅ Position switch<br />
(Bit 3 (PSF) of parameter No. 6901 can be set to also use this function<br />
in the look–ahead control mode.)<br />
⋅ Cs contour control<br />
(Bit 5 (G8S) of parameter No. 1602 can be set to also use this function<br />
in the look–ahead control mode. The serial spindle parameters must<br />
also be set.)<br />
⋅ Constant surface speed control<br />
⋅ Spindle speed fluctuation detection<br />
⋅ Spindle synchronous control<br />
⋅ Simple spindle synchronization<br />
⋅ Custom macro B<br />
⋅ Optional–angle chamfering/corner rounding<br />
⋅ <strong>Inc</strong>h/metric conversion<br />
⋅ Programmable mirror image<br />
⋅ Canned cycle<br />
⋅ Automatic corner override<br />
(Only the internal circular cutting feedrate change is valid.)<br />
⋅ Scaling<br />
⋅ Coordinate system rotation<br />
⋅ Three–dimensional coordinate conversion<br />
⋅ Workpiece coordinate system<br />
⋅ Figure copy<br />
⋅ Workpiece coordinate system preset<br />
⋅ Cutter compensation B<br />
⋅ Cutter compensation C<br />
⋅ Corner circular interpolation<br />
⋅ Tool offset<br />
⋅ Tool life management<br />
⋅ Tool length measurement<br />
⋅ Graphic display<br />
⋅ Dynamic graphic display<br />
⋅ Feed per revolution<br />
477
19. HIGH SPEED CUTTING FUNCTIONS PROGRAMMING<br />
B–63534EN/02<br />
19.7<br />
AI CONTOUR<br />
CONTROL<br />
FUNCTION/AI NANO<br />
CONTOUR CONTROL<br />
FUNCTION<br />
Overview<br />
Explanation<br />
Format<br />
The AI contour control/AI nano contour control function is provided for<br />
high–speed, high–precision machining. This function enables<br />
suppression of acceleration/deceleration delays and servo delays that<br />
become larger with increases in the feedrate and reduction of machining<br />
profile errors.<br />
Look–ahead acceleration/deceleration before interpolation is enabled for<br />
up to 40 blocks in AI contour control or for up to 180 blocks in AI nano<br />
contour control. This enables execution of smooth acceleration/<br />
deceleration extending over multiple blocks and higher machining.<br />
The AI nano contour control function calculates a position command to<br />
be output to the digital servo in nanometers (nm) with nano–interpolation,<br />
so the machine can be moved smoothly and the surface precision is<br />
improved.<br />
This function is enabled by setting the AI contour control or AI nano<br />
contour control mode.<br />
G05.1 Q _ ;<br />
Q1 : AI contour control/AI nano contour control mode on<br />
Q0 : AI contour control/AI nano contour control mode off<br />
NOTE<br />
1 Always specify G05.1 in an independent block.<br />
2 The AI contour control/AI nano contour control mode is also<br />
canceled by a reset.<br />
3 When the AI nano contour control option is installed, bit 0<br />
(NAN) of parameter No. 7053 is set to 1 to set the AI contour<br />
control mode.<br />
478
B–63534EN/02 PROGRAMMING 19. HIGH SPEED CUTTING FUNCTIONS<br />
Functions valid in the AI<br />
contour control/AI nano<br />
contour control mode<br />
Nano–interpolation (only<br />
in the AI nano contour<br />
control mode)<br />
NC program<br />
Uses a conventional<br />
program.<br />
Look–ahead linear<br />
acceleration/deceleration<br />
before interpolation<br />
The functions listed below are valid in the AI contour control/AI nano<br />
contour control mode:<br />
⋅ Nano–interpolation (only in the AI nano contour control mode)<br />
⋅ Look–ahead linear acceleration/deceleration before interpolation<br />
⋅ Look–ahead bell–shaped acceleration/deceleration before interpolation<br />
(The option of look–ahead bell–shaped acceleration/deceleration<br />
before interpolation is required.)<br />
⋅ Automatic corner deceleration<br />
⋅ Feedrate clamping by acceleration<br />
⋅ Feedrate clamping by arc radius<br />
⋅ Block overlap (up to five blocks)<br />
⋅ Advanced preview feed forward<br />
Nano–interpolation calculates a position command to be output to the<br />
digital servo in nanometers (nm) for a conventional program (IS–B or<br />
IS–C command). Using the calculation results, a smooth position<br />
command is output to the servo, so the machine can be moved smoothly<br />
and the surface precision is improved.<br />
Nano–<br />
interpolation<br />
Calculates the<br />
position precisely.<br />
479<br />
High–precision<br />
servo control<br />
Combination with HRV<br />
control improves the<br />
follow–up ability.<br />
Servo motor<br />
NOTE<br />
The positioning precision depends on the detection unit.<br />
For a cutting feed command in the feed per minute mode, linear<br />
acceleration/deceleration can be applied before interpolation, that is, for<br />
the specified feedrate by reading up to 40 blocks (in the AI contour control<br />
mode) or 180 blocks (in the AI nano contour control mode) in advance.<br />
With acceleration/deceleration after interpolation, the interpolated data is<br />
changed because acceleration/deceleration is applied to the data. With<br />
acceleration/deceleration before interpolation, the interpolated data<br />
cannot be changed by acceleration/deceleration because acceleration/<br />
deceleration is applied to the feedrate data before interpolation. For this<br />
reason, the interpolated data can always be applied to the specified<br />
straight line or curve to eliminate machining profile errors caused by<br />
acceleration/deceleration delays.
19. HIGH SPEED CUTTING FUNCTIONS PROGRAMMING<br />
B–63534EN/02<br />
Linear acceleration/deceleration<br />
before<br />
interpolation<br />
Feedrate<br />
calculation<br />
Specified<br />
feedrate<br />
Interpolation<br />
calculation<br />
Linear interpolation,<br />
circular interpolation, etc.<br />
Distribution<br />
pulse<br />
(Example of deceleration)<br />
480<br />
Acceleration/<br />
deceleration<br />
after<br />
interpolation<br />
Servo<br />
control<br />
Deceleration is started in a prior block so that the feedrate specified for<br />
the target block is reached at the execution.<br />
Feedrate<br />
F3<br />
F2<br />
F1<br />
N1<br />
Point1<br />
N2<br />
Point2<br />
Specified feedrate<br />
Feedrate determined by<br />
acceleration/deceleration<br />
before interpolation<br />
Time<br />
To decelerate from feedrate F3 to F2, deceleration must start with point 1.<br />
To decelerate from feedrate F2 to F1, deceleration must start with point 2.<br />
Multiple blocks can be read in advance to perform deceleration extending<br />
over several blocks.<br />
(Example of acceleration)<br />
Acceleration is performed so that the feedrate specified for the target<br />
block is reached at the execution.<br />
Feedrate<br />
F3<br />
F2<br />
F1<br />
N1<br />
N2<br />
Specified feedrate<br />
Feedrate determined by<br />
acceleration/deceleration<br />
before interpolation<br />
Time
B–63534EN/02 PROGRAMMING 19. HIGH SPEED CUTTING FUNCTIONS<br />
Look–ahead bell–shaped<br />
acceleration/deceleration<br />
before interpolation<br />
Feedrate<br />
tb<br />
Acceleration<br />
tb<br />
ta<br />
tc<br />
tb<br />
tb<br />
ta ta<br />
tc tc<br />
Linear acceleration/deceleration before interpolation for cutting feed in<br />
the AI contour control/AI nano contour control mode can be changed to<br />
bell–shaped acceleration/deceleration before interpolation. With<br />
bell–shaped acceleration/deceleration before interpolation, smooth<br />
acceleration/deceleration can be applied to the cutting feedrate to reduce<br />
the shock on the machine by fluctuations in acceleration that are involved<br />
in changes in the cutting feedrate.<br />
To use this function, the option of look–ahead bell–shaped acceleration/<br />
deceleration before interpolation is required.<br />
tb<br />
tb<br />
ta<br />
tc<br />
481<br />
tb<br />
tb<br />
12.<br />
Time<br />
Time<br />
Linear acceleration/<br />
deceleration<br />
Bell–shaped acceleration/<br />
deceleration<br />
ta Depends on the linear acceleration.<br />
tb Time constant for bell–shaped<br />
acceleration/deceleration<br />
tc Bell–shaped acceleration/<br />
deceleration time<br />
tc = ta + tb<br />
ta is not constant and depends<br />
on the specified feedrate.<br />
Specified feedrate<br />
ta =<br />
Linear acceleration<br />
tb is constant.<br />
tc = ta + tb<br />
Linear acceleration/<br />
deceleration<br />
Bell–shaped acceleration/<br />
deceleration<br />
ta Depends on the linear acceleration.<br />
tb Time constant for bell–shaped<br />
acceleration/deceleration<br />
tc Bell–shaped acceleration/<br />
deceleration time
19. HIGH SPEED CUTTING FUNCTIONS PROGRAMMING<br />
B–63534EN/02<br />
Deceleration<br />
Fa<br />
Fb<br />
Acceleration<br />
Fb<br />
Fa<br />
Automatic corner<br />
deceleration<br />
Feedrate<br />
N1<br />
N1<br />
When the feedrate is changed, deceleration and acceleration are<br />
performed as follows:<br />
For deceleration: Bell–shaped deceleration is started in the preceding<br />
block so that deceleration terminates by the beginning of the block in<br />
which the feedrate is changed.<br />
For acceleration: Bell–shaped acceleration is started after the<br />
beginning of the block in which the feedrate is changed.<br />
482<br />
N2<br />
N2<br />
Time<br />
Time<br />
Between contiguous two blocks, the feedrate difference for an axis may<br />
exceed the setting (parameter No. 1783). In this case, the feedrate at the<br />
corner is calculated as follows based on the axis for which the ratio of the<br />
actual feedrate difference to the allowable feedrate difference is the<br />
largest. Deceleration is performed so that the feedrate is reached at the<br />
interface of the blocks.<br />
The change in the feedrate for each axis (Vx, Vy, ...) during movement at<br />
the specified feedrate F is compared with the setting of parameter No.<br />
1783 (Vprm–x, Vprm–y, ...). If the change in the feedrate for any axis<br />
exceeds the setting of the parameter, the following expression is used:<br />
Rmax max Vx<br />
Vprm x ,<br />
Vy<br />
Vprm y ,,,<br />
The required feedrate (Fc) is obtained as follows and deceleration is<br />
performed at the corner:<br />
Fc F 1<br />
Rmax<br />
For example, assume that the tool move direction changes by 90 degrees<br />
from movement along the X–axis to that along the Y–axis. Also assume<br />
that the specified feedrate is 1000 mm/min and the allowable feedrate<br />
difference (parameter No. 1783) is 500 mm/min. Deceleration is<br />
performed as shown in the figure below:
B–63534EN/02 PROGRAMMING 19. HIGH SPEED CUTTING FUNCTIONS<br />
Feedrate along the X–axis<br />
Feedrate along the Y–axis<br />
Tangential feedrate<br />
Tool path when deceleration<br />
is not performed at the corner<br />
Feedrate<br />
F1000<br />
F500<br />
Feedrate<br />
F1000<br />
F500<br />
Feedrate<br />
F1000<br />
F500<br />
N1<br />
N1<br />
N1<br />
N2<br />
483<br />
N1 G01 G91 X100. F1000 ;<br />
N2 Y100. ;<br />
Tool path when deceleration is<br />
performed at the corner<br />
N2<br />
N2<br />
When deceleration is not performed<br />
at the corner<br />
When deceleration is performed<br />
at the corner<br />
Time<br />
Time<br />
Time
19. HIGH SPEED CUTTING FUNCTIONS PROGRAMMING<br />
B–63534EN/02<br />
Feedrate clamping by<br />
acceleration<br />
When continuous minute straight lines form curves as shown in the<br />
example in the figure below, the feedrate difference for each axis at each<br />
corner is not so large. For this reason, deceleration according to the<br />
feedrate difference is not effective. Continuous small feedrate differences<br />
make a large acceleration for each axis as a whole, however.<br />
In this case, deceleration is performed to suppress the shock on the<br />
machine and machining errors caused by too large acceleration. The<br />
feedrate is decreased so that the acceleration for each axis that is obtained<br />
using the expression below does not exceed the allowable acceleration<br />
setting for all axes.<br />
The allowable acceleration is set based on the maximum cutting feedrate<br />
(parameter No. 1432) and time required to reach the feedrate (parameter<br />
No. 1785).<br />
Acceleration for each axis =<br />
Feedrate difference for each axis at each corner<br />
max<br />
Travel distance in preceding block<br />
F<br />
, Travel distance in following block<br />
F<br />
The decreased feedrate is obtained for each corner. The decreased feedrate<br />
obtained at the start or end point of the block, whichever is lower, is used<br />
as the actual feedrate.<br />
(Example) In the example below, deceleration is performed because the<br />
acceleration (gradient of each dotted line in the feedrate<br />
graphs) from N2 to N4 and from N6 to N8 is too large.<br />
484<br />
N1<br />
N2<br />
N6<br />
N7<br />
N5<br />
N3<br />
N4<br />
N8<br />
N9
B–63534EN/02 PROGRAMMING 19. HIGH SPEED CUTTING FUNCTIONS<br />
N1<br />
N5<br />
N9<br />
Feedrate clamping by<br />
arc radius<br />
485<br />
N1<br />
N5<br />
The maximum allowable feedrate v for an arc of radius r specified in a<br />
program is calculated using the arc radius R and maximum allowable<br />
feedrate V (setting of a parameter) for the radius as follows so that the<br />
acceleration in an arc block does not exceed the allowable value. If the<br />
specified feedrate exceeds the feedrate v, the feedrate is automatically<br />
clamped to the feedrate v.<br />
Maximum allowable feedrate V2<br />
R<br />
R : Arc radius V : Feedrate for arc radius R<br />
then, the maximum allowable feedrate v for an arc of radius r can be<br />
obtained using the following expression:<br />
v (rR) V<br />
NOTE<br />
As the specified arc radius becomes smaller, the maximum<br />
allowable feedrate v becomes lower. If the maximum<br />
allowable feedrate v is lower than the setting of parameter<br />
No. 1732 (lower feedrate limit for feedrate clamping by arc<br />
radius), it can be assumed to be the setting of the parameter<br />
to prevent the maximum allowable feedrate from becoming<br />
too low.<br />
N9
19. HIGH SPEED CUTTING FUNCTIONS PROGRAMMING<br />
B–63534EN/02<br />
Rapid traverse<br />
By setting the corresponding parameter, the linear or non–linear<br />
interpolation type can be selected. (In the AI nano contour control mode,<br />
the non–linear interpolation type cannot be selected.)<br />
When the linear interpolation type is selected, acceleration/deceleration<br />
is performed before interpolation and linear interpolation type<br />
positioning is used for movement. For acceleration/deceleration, linear<br />
or bell–shaped acceleration/deceleration can be selected by setting the<br />
corresponding parameter. (To select bell–shaped acceleration/deceleration,<br />
the option of bell–shaped acceleration/deceleration for rapid traverse is<br />
required.)<br />
The feedrate during movement and acceleration for acceleration/deceleration<br />
before interpolation are obtained as follows:<br />
(1) Feedrate during movement<br />
The minimum value obtained using the following expression for each<br />
axis along which movement is done is used as the feedrate during<br />
movement:<br />
Rapid traverse rate for each axis (parameter No. 1420) =<br />
Amount of travel in block<br />
Amount of travel for each axis<br />
(2) Acceleration for acceleration/deceleration before interpolation<br />
For linear acceleration/deceleration<br />
The minimum value obtained using the following expression for each<br />
axis along which movement is done is used as the acceleration for linear<br />
acceleration/deceleration before interpolation during movement:<br />
Rapid traverse rate for each axis (parameter No. 1420)<br />
Time constant for each axis (parameter No. 1620) <br />
Amount of travel in block<br />
Amount of travel for each axis<br />
For bell–shaped acceleration/deceleration<br />
The time constant set in parameter No. 1621 (time constant for<br />
bell–shaped acceleration/deceleration for rapid traverse for each axis) for<br />
the axis for which the minimum value is obtained using the above<br />
expression is applied to the feedrate obtained using the above<br />
acceleration.<br />
486
B–63534EN/02 PROGRAMMING 19. HIGH SPEED CUTTING FUNCTIONS<br />
Feedrate<br />
tb<br />
ta<br />
tc<br />
tb<br />
tb<br />
ta<br />
tc<br />
487<br />
tb<br />
Time<br />
Linear acceleration/<br />
deceleration<br />
Bell–shaped acceleration/<br />
deceleration<br />
ta Depends on the linear acceleration.<br />
tb Time constant for bell–shaped<br />
acceleration/deceleration<br />
tc Bell–shaped acceleration/<br />
deceleration time<br />
tc = ta + tb<br />
ta<br />
tb
19. HIGH SPEED CUTTING FUNCTIONS PROGRAMMING<br />
B–63534EN/02<br />
Feedrate<br />
F<br />
T/2 F/A<br />
T<br />
If the feedrate during movement is F, the acceleration for linear<br />
acceleration/deceleration is A, the time constant for bell–shaped<br />
acceleration/deceleration is T, the time required for acceleration/<br />
deceleration can be obtained as follows:<br />
Time required for acceleration/deceleration<br />
= F/A (linear acceleration/deceleration)<br />
= F/A+T (bell–shaped acceleration/deceleration)<br />
T/2<br />
T<br />
488<br />
F/A : Time required for linear acceleration<br />
T : Time required for rounding the corner<br />
Time<br />
When the non–linear interpolation type is selected, movement is<br />
performed at the feedrate set in parameter No. 1420 with<br />
acceleration/deceleration set in parameter No. 1620. The corresponding<br />
value can be set in parameter No. 1621 to select bell–shaped<br />
acceleration/deceleration. (To select bell–shaped acceleration/deceleration,<br />
the option of bell–shaped acceleration/deceleration for rapid traverse is<br />
required.)<br />
NOTE<br />
Rapid traverse block overlap is disabled.<br />
To use bell–shaped acceleration/deceleration, the option of<br />
bell–shaped acceleration/deceleration for rapid traverse is<br />
required.<br />
In the AI nano contour control mode, the non–linear<br />
interpolation type cannot be selected.
B–63534EN/02 PROGRAMMING 19. HIGH SPEED CUTTING FUNCTIONS<br />
Involute interpolation<br />
(only in the AI contour<br />
control mode)<br />
During involute interpolation, the following overrides are applied to the<br />
specified cutting feedrate. By this function, a good cutting surface with<br />
higher machining precision can be obtained.<br />
(1)Override for inward offset in cutter compensation<br />
(2)Override near the base circle<br />
(1) (Override for inward offset in cutter compensation<br />
When cutter compensation C is applied to involute interpolation, control<br />
is exercised in ordinary involute interpolation so that the tangential<br />
feedrate on the tool–center path always keeps the specified feedrate.<br />
Under the control, the actual cutting feedrate (feedrate around the<br />
perimeter of the tool (cutting point) on the path specified in the program)<br />
changes because the curvature of the involute curve changes every<br />
moment. If the tool is offset in the inward direction of the involute curve<br />
in particular, the actual cutting feedrate becomes higher than the specified<br />
feedrate as the tool gets nearer to the base circle.<br />
For smooth machining, it is desirable to control the actual cutting feedrate<br />
so that the feedrate keeps the specified feedrate. This function calculates<br />
the override commensurate with the curvature of the involute curve which<br />
changes every moment in involute interpolation, in particular, with<br />
inward offset. The function also controls the actual cutting feedrate<br />
(tangential feedrate at the cutting point) so that it always keeps the<br />
specified feedrate.<br />
Base circle<br />
489<br />
Rcp<br />
Tool–center path<br />
Rofs<br />
Cutting point<br />
Path specified in the program<br />
The override is calculated as follows:<br />
OVRa <br />
Rcp<br />
100<br />
Rcp Rofs<br />
Rcp : Radius of curvature at the center of the tool of the involute<br />
curve passing through the center of the tool<br />
Rofs : Radius of the cutter
19. HIGH SPEED CUTTING FUNCTIONS PROGRAMMING<br />
B–63534EN/02<br />
100<br />
OVR2<br />
OVR3<br />
OVR4<br />
OVR5<br />
OVRlo<br />
(2) Override near the base circle<br />
In a part near the base circle where the change in the curvature of the<br />
involute curve is relatively significant, cutting at the feedrate as specified<br />
in the program may put a heavy load on the cutter, resulting in a rough<br />
cutting surface. This function automatically decelerates the movement of<br />
the tool in a part near the base circle where the change in the curvature of<br />
the involute curve is significant according to the settings of parameters to<br />
decrease the load on the cutter for a fine cutting surface.<br />
If the radius of curvature at the cutting point reaches a value within the<br />
range specified in parameter (Rlmt1) to (Rlmt5), the corresponding<br />
override listed below is applied:<br />
When Rlmt1 > RcpRofsRlmt2:<br />
OVRb <br />
100 OVR2<br />
(Rcp Rofs Rlmt2) OVR2<br />
Rlmt1 Rlmt2<br />
When Rlmt2 > RcpRofsRlmt3:<br />
OVRb <br />
OVR2 OVR3<br />
(Rcp Rofs Rlmt3) OVR3<br />
Rlmt2 Rlmt3<br />
When Rlmt3 > RcpRofsRlmt4:<br />
OVRb <br />
OVR3 OVR4<br />
(Rcp Rofs Rlmt4) OVR4<br />
Rlmt3 Rlmt4<br />
When Rlmt4 > RcpRofsRlmt5:<br />
OVRb <br />
OVR4 OVR5<br />
(Rcp Rofs Rlmt5) OVR5<br />
Rlmt4 Rlmt5<br />
Set Rlmt1 to Rlmt5 and OVR2 to OVR5 in parameter Nos. 5611 to 5615<br />
and 5616 to 5619, respectively. Rcp ( Rofs means Rcp + Rofs for inward<br />
offset or Rcp – Rofs for outward offset.<br />
Rlmt5 Rlmt4 Rlmt3 Rlmt2<br />
Rlmt1<br />
If the calculated override is lower than the lower limit set in the<br />
corresponding parameter, it is clamped to the lower override limit.<br />
490
B–63534EN/02 PROGRAMMING 19. HIGH SPEED CUTTING FUNCTIONS<br />
Corresponding<br />
parameter numbers in<br />
the normal mode,<br />
advanced preview<br />
control mode, and AI<br />
contour control/AI nano<br />
contour control mode<br />
NOTE<br />
1 When the override near the base circle is enabled, the<br />
override for inward offset in cutter compensation is disabled.<br />
These overrides cannot be enabled simultaneously.<br />
2 When the distance from the center of the base circle to the<br />
start point is the same as that from the center of the base<br />
circle to the end point, that is, for a circle, circular<br />
interpolation is used. For this reason, no automatic override<br />
is applied.<br />
3 If there is an end point error, the feedrate is not guaranteed.<br />
4 If there is an end point error, the remaining distance required<br />
for acceleration/deceleration before interpolation may not<br />
be obtained exactly. In this case, alarm 242 occurs.<br />
5 For other restrictions, refer to the operator’s manual.<br />
6 In the AI nano contour control mode, involute interpolation<br />
cannot be specified.<br />
In the following tables, AI control means the AI contour control/AI nano<br />
contour control mode.<br />
(1)Parameters related to linear acceleration/deceleration before<br />
interpolation<br />
491<br />
Parameter<br />
Normal<br />
Parameter number<br />
Advanced<br />
preview<br />
control<br />
AI<br />
contour<br />
Acceleration/deceleration type (A or B) FWB/1602#0 None<br />
Parameter 1 for setting the acceleration 1630 1770<br />
Parameter 2 for setting the acceleration 1631 1771<br />
Feedrate at which an overtravel alarm occurs 1784<br />
(2)Parameters related to automatic corner deceleration<br />
Parameter<br />
Method for determining whether to perform<br />
automatic corner deceleration (angle/feedrate<br />
difference)<br />
Lower feedrate limit (control according to the<br />
angle)<br />
Angle at which automatic corner deceleration<br />
is performed (control according to the angle)<br />
Allowable feedrate difference for all axes<br />
(control according to the feedrate difference)<br />
Allowable feedrate difference for each axis<br />
(control according to the feedrate difference)<br />
Acceleration/deceleration type<br />
(Type A/Type B)<br />
Normal<br />
Parameter number<br />
Advanced<br />
preview<br />
control<br />
AI<br />
contour<br />
CSD/1602#4 None<br />
1778 1777 None<br />
1740 1779 None<br />
1780 None<br />
1783<br />
FWB/1602#0 None
19. HIGH SPEED CUTTING FUNCTIONS PROGRAMMING<br />
B–63534EN/02<br />
(3) Parameter related to feedrate clamping by acceleration<br />
492<br />
Parameter<br />
Parameter for determining the allowable acceleration<br />
Normal<br />
(4)Parameters related to feedrate clamping by arc radius<br />
Parameter<br />
Normal<br />
Parameter number<br />
Advanced<br />
preview<br />
control<br />
AI<br />
contour<br />
None 1785<br />
Parameter number<br />
Advanced<br />
preview<br />
control<br />
Arc radius corresponding to the upper feedrate<br />
limit<br />
1731<br />
Upper feedrate limit at arc radius R 1730<br />
Lower clamped feedrate limit 1732<br />
AI<br />
contour<br />
(5)Parameters related to involute interpolation (only in the AI contour<br />
control mode)(*1)<br />
Parameter<br />
Normal<br />
Parameter number<br />
Advanced<br />
preview<br />
control<br />
Initial angle error limit 5610<br />
Override near the base circle: Radius of curvature<br />
AI<br />
contour<br />
None 5611 to<br />
5615<br />
Override near the base circle: Override None 5616 to<br />
5619<br />
Lower override limit None 5620<br />
(6)Other parameters<br />
Parameter<br />
Normal<br />
Parameter number<br />
Advanced<br />
preview<br />
control<br />
AI<br />
contour<br />
Precision of radius errors in circular interpolation<br />
PCIR1/3403#0 None<br />
Maximum cutting feedrate (common to all<br />
axes)<br />
1422 1431 1422<br />
Maximum cutting feedrate (for each axis) 1430 1432<br />
Rapid traverse movement type* LRP/1401#1 AIR/<br />
7054#1<br />
LRP/<br />
1401#1<br />
Time constant for bell–shaped acceleration/<br />
deceleration for rapid traverse<br />
1621
B–63534EN/02 PROGRAMMING 19. HIGH SPEED CUTTING FUNCTIONS<br />
Alarms<br />
Notes<br />
Parameter<br />
493<br />
Normal<br />
Parameter number<br />
Advanced<br />
preview<br />
control<br />
AI<br />
contour<br />
Arc radius corresponding to the upper fee-<br />
1731<br />
drate limit<br />
* For AI nano–contour control, the rapid traverse movement type is not set<br />
with a parameter, but is always linear interpolation positioning.<br />
Number<br />
5110 IMPROPER G CODE<br />
(G05.1 Q1 MODE)<br />
5111 IMPROPER MODAL<br />
G CODE<br />
(G05.1 Q1)<br />
5112 G08 CAN NOT BE<br />
COMMANDED<br />
(G05.1 Q1)<br />
5114 CAN NOT ERROR IN<br />
MDI MODE<br />
(G05.1 Q1)<br />
5156 ILLEGAL AXIS<br />
OPERATION<br />
(AICC)<br />
5157 PARAMETER 0<br />
(AICC)<br />
Message Description<br />
An unspecifiable G code was specified in<br />
the AI contour control/AI nano contour<br />
control mode.<br />
An unavailable modal G code was found<br />
when the AI contour control/AI nano contour<br />
control mode was specified.<br />
The look–ahead control command (G08)<br />
was specified in the AI contour control/AI<br />
nano contour control mode.<br />
Intervention by manual operation was performed<br />
during execution of the G28, G30,<br />
G30.1, or G53 command (linear interpolation<br />
type) in the AI contour control mode.<br />
After that, automatic operation was restarted<br />
at a position other than the stop<br />
position.<br />
In the AI contour control/AI nano contour<br />
control mode, the controlled axis selection<br />
signal (PMC axis control) changed.<br />
In the AI contour control/AI nano contour<br />
control mode, the simple synchronous<br />
axis selection signal changed.<br />
The setting of the parameter for specifying<br />
the maximum cutting feedrate (No. 1422,<br />
1432, or 1420) is 0.<br />
The setting of the parameter for specifying<br />
acceleration/deceleration before interpolation<br />
(No. 1770 or 1771) is 0.<br />
1) This function requires the AI contour control function or AI nano<br />
contour control function option.<br />
When the AI contour control function option is installed, the<br />
look–ahead control function (G08P1) can also be specified. When the<br />
AI nano contour control function option is installed, the AI contour<br />
control function and look–ahead control function (G08P1) can also be<br />
specified.
19. HIGH SPEED CUTTING FUNCTIONS PROGRAMMING<br />
B–63534EN/02<br />
Specifications<br />
2) When the total distance of blocks read in advance reaches the distance<br />
for decelerating from the current feedrate, deceleration is started.<br />
When look–ahead operation proceeds and the total distance of blocks<br />
increases by termination of deceleration, acceleration is started again.<br />
If a series of blocks with a small amount of travel are specified, the<br />
deceleration and acceleration may be alternated, which prevents the<br />
feedrate from being constant. In this case, specify a lower feedrate.<br />
3) When the dry run signal is inverted from ”0” to ”1” or from ”1” to ”0”<br />
during movement along an axis, acceleration/deceleration is<br />
performed to the specified feedrate without deceleration to feedrate 0.<br />
4) If a non–movement block or one–shot G code command such as G04<br />
is found in the AI contour control/AI nano contour control mode, the<br />
movement is decelerated and temporarily stopped in the preceding<br />
block.<br />
5) For acceleration/deceleration after interpolation, use linear or<br />
bell–shaped acceleration/deceleration. Exponential acceleration/<br />
deceleration cannot be used.<br />
Axis control Can be specified. Cannot be specified.<br />
Name Function<br />
Number of controlled axes 3 to 8<br />
To use four to eight axes, another option is required.<br />
Number of simultaneously controlled<br />
axes<br />
494<br />
Up to 6<br />
To use three or more simultaneously controlled<br />
axes, another option is required.<br />
Axis name The basic three axes are fixed to X, Y, and Z.<br />
Other axes are any of U, V, W, A, B, and C.<br />
Least input increment 0.001 mm, 0.001 deg, 0.0001 inch<br />
One–tenth input increment 0.0001 mm, 0.0001 deg, 0.00001 inch<br />
One–tenth input increment for each axis cannot be<br />
used.<br />
Simple synchronous control If the AI contour control/AI nano contour control<br />
option is installed, however, switching between<br />
synchronous and normal operation cannot be<br />
performed during automatic operation (when<br />
the automatic operation signal (OP) is set to 1)<br />
regardless of whether the AI contour control/AI<br />
nano contour control mode is set. In this case,<br />
switching causes a PS213 alarm.<br />
Twin table <br />
Angular axis/arbitrary angular axis<br />
control<br />
<br />
Tandem control Full preloading cannot be performed, however.<br />
Chopping <br />
Hobbing machine function <br />
Simple electric gear box <br />
Learning control <br />
Foreseeing repetition control <br />
<strong>Inc</strong>h/metric conversion<br />
(G20, G21)<br />
(*1)<br />
Interlock <br />
Interlock for each axis Movement along all axes stops.<br />
To stop movement only along the interlock axis<br />
in non–linear interpolation type positioning in<br />
the AI contour control mode, set bit 5 (AIL) of<br />
parameter No. 7054 to 1 and bit 4 (XIK) of parameter<br />
No. 1002 to 0.
B–63534EN/02 PROGRAMMING 19. HIGH SPEED CUTTING FUNCTIONS<br />
Name Function<br />
<strong>Machine</strong> lock When the machine lock signal for each axis<br />
(MLK1 to MLK8) is turned on or off, acceleration/deceleration<br />
is not applied to the axis for<br />
which machine lock is performed.<br />
Stroke check before movement <br />
Mirror image <br />
Stored pitch error compensation <br />
Gradient compensation <br />
Straightness compensation <br />
Position switch Set bit 3 (PSF) of parameter No. 6901 to 1.<br />
When this parameter is set to 1, the signal output<br />
timing changes.<br />
Abnormal load detection <br />
Manual handle interruption (AI contour control)<br />
Manual handle interruption is disabled during<br />
switching to the AI contour control mode.<br />
(AI nano contour control)<br />
External pulse synchronization <br />
Flexible synchronization <br />
Interpolation functions<br />
Can be specified. Cannot be specified.<br />
Name Function<br />
Positioning (G00) <br />
Single direction positioning (G60) To perform single direction positioning in the AI<br />
contour control/AI nano contour control mode,<br />
set bit 4 (ADP) of parameter No. 7055 to 1.<br />
Exact stop (G09) <br />
Exact stop mode (G61) <br />
Tapping mode (G63) <br />
Linear interpolation (G01) <br />
Circular interpolation (G02, G03) (Circular interpolation for multiple quadrants is<br />
enabled.)<br />
Exponential interpolation<br />
(G02.3, G03.3)<br />
<br />
Dwell (G04) (Dwell with the time in seconds or speed specified)<br />
For dwell with the speed specified, another<br />
option is required.<br />
Polar coordinate interpolation<br />
(G12.1, G13.1)<br />
<br />
Cylindrical interpolation (G07.1) <br />
Helical interpolation (G02, G03) (Circular interpolation + linear interpolation for<br />
up to four axes)<br />
When the helical interpolation option is<br />
installed, linear interpolation for up to two axes<br />
is performed. When the helical interpolation B<br />
option is installed, linear interpolation for up to<br />
four axes is performed. Specify the feedrate<br />
including the helical axis in the feedrate command.<br />
Involute interpolation<br />
(G02.2, G03.2)<br />
<br />
Hypothetical axis interpolation<br />
(G07)<br />
<br />
Spiral interpolation and conical in- (AI contour control)<br />
terpolation (G02, G03)<br />
(AI nano contour control)<br />
Smooth interpolation (G05.1) <br />
Threading and synchronous feed<br />
(G33)<br />
<br />
495
19. HIGH SPEED CUTTING FUNCTIONS PROGRAMMING<br />
B–63534EN/02<br />
Name Function<br />
Skip function (G31) (*1)<br />
High–speed skip function (G31) (*1)<br />
Continuous high–speed skip<br />
(G31)<br />
<br />
Multistage skip function (G31 Px) (*1)<br />
Reference position return (G28) (*1)<br />
To execute G28 in the status in which the reference<br />
position is not established, set bit 2 (ALZ)<br />
of parameter No. 7055 to 1.<br />
Reference position return check<br />
(G27)<br />
(*1)<br />
2nd, 3rd, and 4th reference position<br />
return (G30)<br />
(*1)<br />
Floating reference position return<br />
(G30.1)<br />
(*1)<br />
Normal direction control<br />
(AI contour control)<br />
(G41.1, G42.1)<br />
Set bit 2 (ANM) of parameter No. 5484 to 1.<br />
(AI nano contour control)<br />
Gentle curve normal direction<br />
control<br />
<br />
Continuous dressing <br />
In–feed control (G161) <br />
Index table indexing (*1)<br />
To set follow–up of the index table indexing<br />
axis (fourth axis), set bit 7 (NAH4) of parameter<br />
No. 1819 and bit 0 (NMI4) of parameter No.<br />
7052 to 1.<br />
High–speed cycle cutting (G05) <br />
High–speed linear interpolation<br />
(G05P2)<br />
<br />
Feed functions Can be specified. Cannot be specified.<br />
Name Function<br />
Rapid traverse rate Up to 240 m/min (0.001 mm)<br />
Up to 100 m/min (0.0001 mm)<br />
Rapid traverse rate override F0, 25, 50, 100 %<br />
Rapid traverse rate override in increments<br />
of 1%<br />
0 to 100 %<br />
Feed per minute (G94) <br />
Feed per revolution (G95) <br />
Cutting feedrate clamp <br />
Bell–shaped acceleration/deceleration<br />
for rapid traverse<br />
<br />
Positioning according to the optimum<br />
acceleration<br />
<br />
Linear acceleration/deceleration<br />
after cutting feed interpolation<br />
<br />
Bell–shaped acceleration/deceleration<br />
after cutting feed interpolation<br />
<br />
Linear acceleration/deceleration (Up to 40 blocks are read in advance in the AI<br />
before cutting feed interpolation contour control mode.)<br />
(Up to 180 blocks are read in advance in the AI<br />
nano contour control mode.)<br />
Feedrate override 0 to 254 %<br />
Second feedrate override <br />
Single–digit F code feed To enable feedrate change using a manual<br />
handle, set bit 1 (AF1) of parameter No. 7055<br />
to 1.<br />
496
B–63534EN/02 PROGRAMMING 19. HIGH SPEED CUTTING FUNCTIONS<br />
Name Function<br />
Inverse time feed (G93) <br />
Override cancel <br />
External deceleration <br />
Look–ahead bell–shaped accel- <br />
eration/deceleration before interpolation<br />
High–precision contour control <br />
(G05P10000)<br />
NURBS interpolation (G06.2) <br />
Program input Can be specified. Cannot be specified.<br />
Name Function<br />
Control in/control out command () <br />
Optional block skip command <br />
(/n: n is a number.)<br />
Absolute command (G90)/ <br />
incremental command (G91)<br />
Decimal point programming/pock- <br />
et calculator type decimal point<br />
programming<br />
10–fold input unit <br />
Plane selection (G17, G18, G19) <br />
Rotation axis specification <br />
Rotation axis roll over <br />
Polar coordinate command (G16) <br />
Local coordinate system (G52) (*1)<br />
<strong>Machine</strong> coordinate system (G53) (*1)<br />
Workpiece coordinate system<br />
(G54 to G59)<br />
(G54.1Pxx)<br />
<br />
Workpiece coordinate system<br />
(G92)<br />
(*1)<br />
Workpiece coordinate system preset<br />
(G92.1)<br />
(*1)<br />
Arbitrary angle chamfering/corner<br />
rounding<br />
<br />
Programmable data input (G10) (*1)<br />
Only the tool offset value, workpiece origin offset,<br />
and parameter can be changed.<br />
Custom macro B See the description of ”Notes on using custom<br />
macros.”<br />
Addition of custom macro common<br />
variables<br />
<br />
Pattern data input <br />
Interruption type custom macro <br />
Canned cycle (G73 to G89) (*1)<br />
Initial level return (G98)/<br />
point R level return (G99)<br />
(*1)<br />
Small hole peck drilling cycle<br />
(G83)<br />
<br />
Arc radius R programming <br />
Automatic corner override (G62) Set bit 0 (ACO) of parameter No. 7055 to 1.<br />
Automatic corner deceleration <br />
Feedrate clamping by arc radius <br />
Scaling (G51) <br />
Coordinate system rotation (G68) <br />
497
19. HIGH SPEED CUTTING FUNCTIONS PROGRAMMING<br />
B–63534EN/02<br />
Name Function<br />
Three–dimensional coordinate<br />
conversion (G68)<br />
<br />
Programmable mirror image<br />
(G51.1)<br />
<br />
Figure copy (G72.1, G72.2) <br />
Retrace <br />
F15 tape format <br />
Auxiliary functions/spindle–speed functions<br />
Can be specified. Cannot be specified.<br />
Name Function<br />
Miscellaneous function (Mxxxx) The function code and function strobe signals<br />
are output only.<br />
Second auxiliary function (Bxxxx) The function code and function strobe signals<br />
are output only.<br />
High–speed M/S/T/B interface <br />
Multiple miscellaneous function<br />
specification<br />
<br />
M code group check <br />
Spindle–speed function (Sxxxx) <br />
Spindle synchronous control <br />
Simple spindle synchronous control<br />
<br />
Rigid tapping (*1)<br />
Set bit 5 (G8S) of parameter No. 1602 or bit 3<br />
(ACR) of parameter No. 7051 to 1. (AI contour<br />
control)<br />
(*1)<br />
Set bit 3 (ACR) of parameter No. 7051 to 1.<br />
(AI nano contour control)<br />
Three–dimensional rigid tapping <br />
Tool compensation functions<br />
Can be specified. Cannot be specified.<br />
Name Function<br />
Tool function (Txxxx) The function code and function strobe signals<br />
are output only.<br />
Tool offset memory B <br />
Tool offset memory C <br />
Tool length compensation<br />
(G43, G44, G49)<br />
<br />
Tool offset (G45 to G48) <br />
Cutter compensation B<br />
(G39 to G42)<br />
<br />
Cutter compensation C<br />
(G40, G41, G42)<br />
<br />
Three–dimensional tool compensation<br />
<br />
Tool life management <br />
Automatic tool length measurement<br />
<br />
Tool length/workpiece origin measurement<br />
B<br />
<br />
Grinding–wheel wear compensation<br />
<br />
498
B–63534EN/02 PROGRAMMING 19. HIGH SPEED CUTTING FUNCTIONS<br />
<br />
<br />
<br />
<br />
Other functions Can be specified. Cannot be specified.<br />
Name Function<br />
Cycle start/feed hold <br />
Dry run <br />
Single block <br />
Sequence number comparison<br />
and stop<br />
<br />
Program restart For the time constant for acceleration/deceleration<br />
during movement to the restart position,<br />
the following parameters are used:<br />
When exponential acceleration/deceleration is<br />
used: Parameter Nos. 1624 and 1625<br />
When linear/bell–shaped acceleration/deceleration<br />
is used: Parameter No. 1622<br />
To set the acceleration/deceleration type, use<br />
bits 0 and 1 of parameter No. 1610.<br />
Tool retract and recover <br />
Rigid tapping return <br />
Macro executor<br />
(execution macro)<br />
<br />
MDI operation <br />
Manual intervention <br />
NOTE<br />
The above tables include a function that another option is<br />
required for specifying.<br />
1 Multiple blocks are not read in advance.<br />
When G05.1 Q1 is specified, the modal G codes must be set as listed<br />
below. If one of these conditions is satisfied, a PS5111 alarm occurs.<br />
G00<br />
G01<br />
G02<br />
G03<br />
G code(s) Description<br />
499<br />
Positioning<br />
Linear interpolation<br />
Circular interpolation (CW)<br />
Circular interpolation (CCW)<br />
G13.1 Polar coordinate interpolation cancel mode<br />
G15 Polar coordinate command cancel<br />
G25 Spindle speed fluctuation detection off<br />
G40 Cutter compensation cancel<br />
G40.1 Normal direction control cancel mode<br />
G49 Tool length compensation cancel<br />
G50 Scaling cancel<br />
G50.1 Programmable mirror image cancel<br />
G64 Cutting mode<br />
G67 Macro modal call cancel<br />
G69 Coordinate system rotation cancel<br />
G80 Canned cycle cancel<br />
G94 Feed per minute<br />
G97 Constant surface speed control cancel<br />
G160 In–feed control function cancel
19. HIGH SPEED CUTTING FUNCTIONS PROGRAMMING<br />
B–63534EN/02<br />
19.8<br />
HIGH–PRECISION<br />
CONTOUR CONTROL<br />
Format<br />
Explanations<br />
HPCC mode<br />
Data that can be<br />
specified<br />
Some machining errors are due to the CNC. Such errors include<br />
machining errors caused by acceleration/deceleration after interpolation.<br />
To eliminate these errors, the following functions are performed at high<br />
speed by an RISC processor. These functions are called high–precision<br />
contour control functions.<br />
(1)Function for multiple–block look–ahead acceleration/deceleration<br />
before interpolation. This function eliminates machining errors due<br />
to acceleration/deceleration.<br />
(2)Automatic speed control function which enables smooth acceleration/<br />
deceleration by considering changes in the figure and speed and<br />
allowable acceleration for the machine. This is performed by reading<br />
multiple blocks in advance.<br />
For details on high–precision contour control using RISC, refer to the<br />
relevant manual published by the machine tool builder.<br />
G05P10000 ; Start HPCC mode<br />
G05P0 ; End HPCC mode<br />
The mode used to perform high–precision contour control using RISC is<br />
called HPCC mode.<br />
To start the HPCC mode in a certain block, specify G05P10000 before<br />
that block. To end the HPCC mode, specify G05P0 at the point at which<br />
to end the mode.<br />
The following data can be specified in HPCC mode:<br />
G00 : Positioning (Note)<br />
G01 : Linear interpolation<br />
G02 : Circular interpolation or helical interporation (CW)<br />
G02.2 : Involute interpolation (CW)<br />
G03 : Circular interpolation or helical interporation (CCW)<br />
G03.2 : Involute interpolation (CCW)<br />
G17 : Plane selection (XpYp plane)<br />
where, Xp is the X–axis or a parallel axis;<br />
G18 : Plane selection (ZpXp plane)<br />
where, Yp is the Y–axis or a parallel axis;<br />
G19 : Plane selection (YpZp plane)<br />
where, Zp is the Z–axis or a parallel axis.<br />
G38 : Cutter compensation C with vector held<br />
G40 : Cutter compensation cancel<br />
G41 : Cutter compensation, left<br />
G42 : Cutter compensation, right<br />
G50 : Scaling cancel<br />
G51 : Start scaling<br />
G68 : Start coordinate system rotation<br />
G69 : Coordinate system rotation cancel<br />
500
B–63534EN/02 PROGRAMMING 19. HIGH SPEED CUTTING FUNCTIONS<br />
G73, G74, G76, G81 to G89<br />
: Canned cycle, rigid tapping<br />
G80 : Canned cycle cancel<br />
G90 : Absolute command<br />
G91 : <strong>Inc</strong>remental command<br />
Dxxx : Specifying a D code<br />
Fxxxxx : Specifying an F code<br />
Nxxxxx : Specifying a sequence number<br />
G05P10000 : Setting the HPCC mode<br />
G05P0 : Canceling the HPCC mode<br />
I, J, K, R : I, J, K, and R specified for circular interpolation<br />
Data for movement along axis : Data for moving the tool along the<br />
axis set in parameter No. 1020 (any<br />
axis selected from X, Y, Z, U, V, W, A,<br />
B, and C)<br />
( ) : Control–in and control–out commands<br />
(comment specification)<br />
/n : Optional block skip command (n is a number.)<br />
Mxxxx : Auxiliary function (Note)<br />
Sxxxx : Auxiliary function (Note)<br />
Txxxx : Auxiliary function (Note)<br />
Bxxxx : Auxiliary function (Note)<br />
M98, M198, etc. : Subprogram call<br />
NOTE<br />
1 G00, auxiliary functions, subprogram call (M98, M198), and macro<br />
call M and T codes can be specified in the HPCC mode only when<br />
bit 1 of parameter MSU No. 8403 is 1. If these codes are specified<br />
when MSU is not 1, an alarm is issued.<br />
(Alarm No.5012 for G00 and alarm No.9 for auxiliary functions and<br />
subprogram calls)<br />
2 To specify the following functions in HPCC mode, the following<br />
parameters are required. Specifying any of the following functions<br />
without setting the corresponding parameter causes an alarm.<br />
Helical interpolation : Parameter G02 (No.8485*)<br />
(Alarm to be issued: No.28)<br />
Involute interpolation : Parameter INV (No. 8485)<br />
(Alarm to be issued: No.10)<br />
Scaling, coordinate rotation : Parameter G51 (No. 8485)<br />
(Alarm to be issued: No.10)<br />
Canned cycle, rigid tapping : Parameter G81 (No.8485)<br />
(Alarm to be issued: No.5000)<br />
501
19. HIGH SPEED CUTTING FUNCTIONS PROGRAMMING<br />
B–63534EN/02<br />
When unspecifiable data<br />
is specified<br />
Cutter compensation C<br />
In the HPCC mode, specifying unspecifiable data causes an alarm No.<br />
5000. To specify a program containing unspecifiable data, specify G05P0<br />
to exit from the HPCC mode before specifying the program.<br />
< Sample program ><br />
Main program Subprogram<br />
O0001 ;<br />
G05P10000 ; HPCC–ON<br />
G00X100.Y200. ;<br />
G91G01X100Y200Z300F2000 ;<br />
X200Y300Z400 ;<br />
X300Y400Z500 ;<br />
X400Y500Z600 ;<br />
X300Y400Z500 ;<br />
M98P0002 ; SUB PROGRAM<br />
X10. ;<br />
G05P0 ; HPCC–OFF<br />
G90G51X0Y0Z0 ;<br />
X500Y400Z300 ;<br />
X600Y500Z400 ;<br />
G50 ;<br />
G05 P10000 ; HPCC–ON<br />
X100Y200 ;<br />
X200Y400 ;<br />
G05P0 ; HPCC–OFF<br />
G04X3. ;<br />
M30 ;<br />
502<br />
O0002 ;<br />
G00X50.Y50. ;<br />
M11 ;<br />
G02I20.F3000 ;<br />
G01X100. ;<br />
G03I80. ;<br />
G01X–50. ;<br />
G02I100.F5000 ;<br />
<br />
G01X200.Y300.F1500 ;<br />
X50.Y100.Z150. ;<br />
T24 ;<br />
M99 ;<br />
Note) When bit 1 of parameter MSU<br />
No. 8403 is 1<br />
When the cutter compensation C option is provided, cutter compensation<br />
C is enabled even in HPCC mode. Operation in the offset mode is the<br />
same as when HPCC mode is not set, except in the following cases:<br />
When the end point for an arc does not lie on the arc<br />
In the HPCC mode, when the end point for an arc does not lie on the<br />
arc, the start point and end point are connected with a smooth curve;<br />
no arc leading line is created. In this case, the system assumes an<br />
imaginary circle to perform cutter compensation C. The center of the<br />
imaginary circle is the same as the center of the arc, but the imaginary<br />
circle passes through the end point. Under the assumption that cutter<br />
compensation has been performed with respect to the imaginary circle,<br />
the system creates a vector and performs compensation.<br />
Programmed path<br />
r<br />
Center<br />
Imaginary circle<br />
Arc end point<br />
S<br />
L<br />
L<br />
r<br />
L
B–63534EN/02 PROGRAMMING 19. HIGH SPEED CUTTING FUNCTIONS<br />
When the offset mode is canceled temporarily<br />
In the HPCC mode, automatic reference position return (G28) and<br />
automatic return from the reference position (G29) cannot be<br />
specified. Therefore, commands that must cancel the offset mode<br />
temporarily cannot be specified.<br />
When using cutter compensation C in the HPCC mode, note the following<br />
points:<br />
(1)When G05 P10000 and G05 P0, and G41/G42 and G40 are to be<br />
specified together, G41/G42 to G40 must be nested between G05<br />
P10000 and G05 P0. This means that HPCC mode cannot be started<br />
or canceled in cutter compensation (G41/G42) mode. If such a<br />
specification is made, the P/S alarm No.0178 or P/S alarm No.5013<br />
P/S alarm is issued.<br />
(Example of a correct program)<br />
<br />
G05 P10000 ;<br />
<br />
G41 X__ Y__ D01 ;<br />
<br />
G40 X__ Y__ ;<br />
<br />
G42 X__ Y__ D02 ;<br />
<br />
G40 X__ Y__ ;<br />
<br />
G05 P0 ;<br />
<br />
G41 X__ Y__ D01 ;<br />
<br />
G05 P10000 ;<br />
503<br />
Cutter compensation<br />
(G41) mode<br />
Cutter compensation<br />
(G42) mode<br />
(Example of an incorrect program 1)<br />
<br />
(Example of an incorrect program (2))<br />
<br />
G05 P10000 ;<br />
<br />
G41 X__ Y__ D01 ;<br />
<br />
G05 P0 ;<br />
HPCC mode<br />
When the start of HPCC mode is specified<br />
in cutter compensation mode, the P/S<br />
alarm No.0178 is issued.<br />
When cancellation of HPCC mode is specified<br />
in cutter compensation mode, the P/S alarm<br />
No.5013 alarm is issued.
19. HIGH SPEED CUTTING FUNCTIONS PROGRAMMING<br />
B–63534EN/02<br />
(2)When a block containing no movement operation is specified together<br />
with the cutter compensation cancel code (G40), a vector with a length<br />
equal to the offset value is created in a direction perpendicular to the<br />
movement direction of the previous block. Cutter compensation mode<br />
is canceled while this vector still remains. This vector is canceled<br />
when the next move command is executed.<br />
N6<br />
504<br />
N7 N8<br />
N6 G91 X100. Z100. ;<br />
N7 G40 ;<br />
N8 G05 P0 ;<br />
<br />
<br />
<br />
N6 G91 X100. Z100. ;<br />
N7 G40 ;<br />
N8 X100. ;<br />
<br />
If cutter compensation mode is canceled while a vector still remains<br />
and HPCC mode is canceled before a move command is specified,<br />
the P/S alarm No.5013 is issued.<br />
The P/S alarm No. 5013 is issued.<br />
(3)When an offset value is changed during cutter compensation C in<br />
HPCC mode, the new offset value is not used until a block specifying<br />
a D code appears.
B–63534EN/02 PROGRAMMING 19. HIGH SPEED CUTTING FUNCTIONS<br />
Positioning and auxiliary<br />
functions<br />
When bit 1 of parameter MSU No. 8403 is set to 1, G00, M, S, T, and B<br />
codes can be specified even in HPCC mode. When specifying these codes<br />
in HPCC mode, note the following:<br />
(1) When a G00, M, S, T, or B code is specified in cutter compensation<br />
mode, the offset vector created in the previous block is maintained.<br />
(Example 1) When the following program is executed for<br />
machining with offset value D1 set to 10 mm, the start<br />
point of N6 is determined by the vector created<br />
between N3 and N4:<br />
N1 N2<br />
505<br />
N5 N6<br />
N3 N4<br />
This vector is used as the vector<br />
between N4 and N6.<br />
Programmed path<br />
Tool path<br />
An incorrect offset value is<br />
used in this range.<br />
N7<br />
N8<br />
O0001 ;<br />
G92 G90 X–10. Y20. ;<br />
G05 P10000 ;<br />
N1 G01 G42 X0 D1 F1000 ;<br />
N2 X20. ;<br />
N3 X40. Y0 ;<br />
N4 X60. Y20 ;<br />
N5 M01 ;<br />
N6 X80. ;<br />
N7 X90. Y–20. ;<br />
N8 G40 Y–50. ;<br />
G05 P0 ;<br />
M30<br />
(Example 2) When the following program is executed for<br />
machining with offset value D1 set to 10 mm, the start<br />
point of N5 is determined by the vector created<br />
between N3 and N4. If the simplified G00 execution<br />
function is enabled (by setting bit 7 of parameter SG0<br />
No. 8403 to 1), a correct vector can be obtained at the<br />
intersection of N4 and N5.<br />
N1 N2<br />
N3 N4<br />
This vector is used as the vector between<br />
N7<br />
N4 and N5, and N5 and N6.<br />
O0001 ;<br />
G92 G90 X–10. Y20. ;<br />
G05 P10000 ;<br />
N1 G01 G42 X0 D1 F1000 ;<br />
Programmed path<br />
N2 X20. ;<br />
Tool path<br />
N3 X40. Y0 ;<br />
An incorrect offset value is N4 X60. Y20 ;<br />
used in this range.<br />
N5 G00 X80. ;<br />
N6 G01 X90. Y–20. ;<br />
N7 G40. Y–50. ;<br />
G05 P0 ;<br />
M30<br />
N5<br />
N6
19. HIGH SPEED CUTTING FUNCTIONS PROGRAMMING<br />
B–63534EN/02<br />
Status display<br />
(2) When G00 is specified with bit 7 of parameter SG0 No. 8403 set to 1,<br />
the following points should be noted:<br />
⋅Since the G00 command is replaced by the G01 command, the tool<br />
moves at the feedrate set in parameter No. 8481 even when data is<br />
specified for two axes.<br />
Example) If the following is specified when parameter No. 8481 is<br />
set to 1000 mm/min, F1000 is used instead of F1414<br />
G00 X100. Y100. ;<br />
Since the G00 command is replaced by the G01 command, rapid<br />
traverse override is disabled and cutting feed override is enabled.<br />
For acceleration/deceleration after interpolation, the time constant<br />
used for cutting feed acceleration/deceleration after interpolation<br />
is selected.<br />
Linear and bell–shaped acceleration/deceleration before inter–<br />
polation in HPCC mode is enabled.<br />
No position check is performed.<br />
Linear interpolation type positioning is performed.<br />
When G05P10000 is specified, “HPCC” starts blinking at the right–<br />
bottom of the screen. While “HPCC” is blinking, the system performs<br />
automatic operation in HPCC mode.<br />
Display example for when the system is in HPCC mode<br />
(Program screen)<br />
PROGRAM(MEMORY)<br />
506<br />
O1234 N00010<br />
G05 P10000 ; Executed block<br />
N10 X10. Y10. Z10. ;<br />
N20 X10. Y10. Z10. ;<br />
/ N30 X10. Y10. Z10. ;<br />
/2 N40 X10. Y10. Z10. ;<br />
N50 X10. Y10. Z10. ;<br />
N60 X10. Y10. Z10. ;<br />
N70 (FANUC <strong>Series</strong> 16) ;<br />
N80 X10. Y10. Z10. ;<br />
N90 X10. Y10. Z10. ;<br />
N100 X10. Y10. Z10. ;<br />
N110 X10. Y10. Z10. ;<br />
G05 P0 ;<br />
Block being executed<br />
MEM STRT MTN * * * 01 : 23 : 45 HPCC<br />
PRGRM<br />
NEXT<br />
(OPRT)
B–63534EN/02 PROGRAMMING 19. HIGH SPEED CUTTING FUNCTIONS<br />
Limitations<br />
Modes that can be<br />
specified<br />
Single block<br />
Second feedrate override<br />
and optional block skip<br />
Invalid command<br />
MDI operation<br />
Interlock<br />
Mirror image and<br />
machine lock<br />
Calculator–type input<br />
Program reset<br />
Custom macro<br />
Scaling<br />
Before G05P10000 can be specified, the following modal values must be<br />
set. If they are not set, the P/S alarm No. 5012 is issued.<br />
G code Meaning<br />
G13.1 Cancels polar coordinate interpolation.<br />
G15 Cancels a polar coordinate command.<br />
G40 Cancels cutter compensation (M series).<br />
G40.1 Cancels normal direction control (for the M series only).<br />
G50 Cancels scaling.<br />
G50.1 Cancels the programmable mirror image function.<br />
G64 Cutting mode<br />
G69 Cancels coordinate conversion.<br />
G80 Cancels canned cycles.<br />
G94 Feed per minute<br />
G97 Cancels constant surface speed control.<br />
M97 Cancels interrupt type macros.<br />
The G05P10000 block cannot be executed in the single block mode.<br />
The second feedrate override and optional block skip functions cannot be<br />
used in HPCC mode unless these options are provided.<br />
Externally–requested deceleration, feed at address F with one digit, and<br />
automatic corner override commands are ignored.<br />
Switching to the MDI mode cannot be performed in HPCC mode. In<br />
addition, MDI operation is not possible.<br />
Interlock (for each axis and in each direction) is disabled in HPCC mode.<br />
In HPCC mode, never change the external mirror image signal (DI<br />
signal), parameter–set mirror image, and each–axis machine lock.<br />
In HPCC mode, calculator type input (when bit 0 of parameter DPI No.<br />
3401 is 1) is ignored.<br />
A program containing G05P10000; cannot be restarted.<br />
No custom macros can be specified in HPCC mode.<br />
In scaling for each axis, a negative magnification cannot be used to create<br />
a mirror image.<br />
507
19. HIGH SPEED CUTTING FUNCTIONS PROGRAMMING<br />
B–63534EN/02<br />
19.9<br />
LOOK–AHEAD<br />
BELL–SHAPED<br />
ACCELERATION/DEC<br />
ELERATION BEFORE<br />
INTERPOLATION<br />
TIME CONSTANT<br />
CHANGE FUNCTION<br />
General<br />
In Look–ahead bell–shaped acceleration/deceleration before<br />
interpolation, the speed during acceleration/deceleration is as shown in<br />
the figure below.<br />
Specified<br />
speed<br />
Speed<br />
Non–linear<br />
acceleration/deceleration<br />
508<br />
T1<br />
Linear<br />
acceleration/deceleration<br />
T2 T2<br />
Non–linear<br />
acceleration/deceleration<br />
Time<br />
T1: Time determined from the specified speed and the specified acceleration<br />
Specified acceleration:<br />
In case of AI contour control (AICC)<br />
and AI nano contour control (AI nanoCC)<br />
Parameter No.1770/Parameter No.1771<br />
In case of AI High precision contour control (AI–HPCC)<br />
and AI nano High precision contour control (AI–nanoHPCC)<br />
Parameter No.8400/Parameter No.8401 (or No.19510)<br />
T2: Acceleration change time<br />
In case of AICC and AI nanoCC : Parameter No.1772<br />
In case of AI–HPCC and AI–nanoHPCC : Parameter No.8416<br />
Fig.19.9 (a)<br />
The time T1, shown above, varies with the specified speed. If the<br />
specified speed is low, the speed will be as shown below, causing linear<br />
acceleration/deceleration not reaching the specified acceleration.
B–63534EN/02 PROGRAMMING 19. HIGH SPEED CUTTING FUNCTIONS<br />
Specified<br />
speed<br />
Speed<br />
T1<br />
509<br />
Linear acceleration/deceleration not reaching specified acceleration/deceleration<br />
T2<br />
T1<br />
Fig.19.9 (b)<br />
Time<br />
If linear acceleration/deceleration not reaching the specified acceleration<br />
occurs in AI contour control (AICC) mode or AI Nano contour control<br />
(AI nanoCC) mode or AI High Precision Contour control (AI–HPCC)<br />
mode or AI Nano High Precision Contour control (AI–nanoHPCC) mode<br />
as shown above, this function shortens the acceleration/deceleration time<br />
by changing the internal acceleration for acceleration/deceleration before<br />
interpolation and the bell–shaped time constant in order to generate an<br />
acceleration/deceleration pattern as close as possible to that permits<br />
optimum bell–shaped acceleration/deceleration before interpolation for<br />
the specified speed.<br />
Optimum bell–shaped acceleration/deceleration before interpolation, as<br />
mentioned here, refers to bell–shaped acceleration/deceleration before<br />
interpolation in which<br />
if T2 > T1, T1 and T2 are changed to T1’ and T2’ as shown in the figure<br />
below so that linear acceleration/deceleration not reaching the specified<br />
acceleration/deceleration does not occur.<br />
This function becomes effective for the Acceleration /deceleration before<br />
look–ahead interpolation in AI contour control mode or AI Nano contour<br />
control mode or AI High Precision Contour control mode or AI Nano<br />
Contour control mode..
19. HIGH SPEED CUTTING FUNCTIONS PROGRAMMING<br />
B–63534EN/02<br />
Description<br />
Methods of specifying the<br />
acceleration/deceleration<br />
reference speed<br />
Specified speed<br />
Speed<br />
510<br />
Non–linear acceleration/deceleration<br />
T1’<br />
T2’ T2’<br />
Fig.19.9 (c)<br />
Time<br />
The acceleration/deceleration reference speed is the feedrate used as the<br />
reference for calculating optimum acceleration. In Fig.19.9 (c), it is<br />
equivalent to the specified speed used to determine T1’ and T2’.<br />
There are three methods for specifying the acceleration/deceleration<br />
reference speed.<br />
(1) Specifying the speed using an F in a G05.1 Q1 (AICC or AI nanoCC)<br />
block or G05 P10000 (AI–HPCC or AI–nanoHPCC) block<br />
(2) Setting the speed on Parameter<br />
(3) Setting the speed specified with the F command issued at the start of<br />
cutting as the reference speed<br />
NOTE<br />
This function is effective if BCG (No. 7055 bit 3) is 1 in AI<br />
contour control mode or AI Nano contour control mode , or<br />
if BCG (No.19501#6) is 1 in AI High Precision Contour<br />
control mode or AI Nano High Precision Contour control<br />
mode.
B–63534EN/02 PROGRAMMING 19. HIGH SPEED CUTTING FUNCTIONS<br />
(1) Specifying the speed<br />
in a G05.1 Q1 block or<br />
G05 P10000 block<br />
(2) Setting the speed on<br />
the Parameter<br />
If an F command is used in a G05.1 Q1 (AICC or AI nanoCC) block or<br />
G05 P10000 (AI–HPCC or AI–nanoHPCC) block, the speed specified<br />
with the F command is assumed the acceleration/deceleration reference<br />
speed.<br />
This acceleration/deceleration reference speed is cleared upon a reset.<br />
After the acceleration/deceleration reference speed is cleared upon a reset<br />
or after the power is turned off and then on again, the<br />
acceleration/deceleration reference speed specified for parameter No.<br />
7066 (AICC or AI nanoCC) or No.19520 (AI–HPCC or AI–nanoHPCC)<br />
will be used. (Method (2), described later)<br />
If the acceleration/deceleration reference speed specified for the<br />
parameter is 0, the feedrate assumed at the start of cutting will be assumed<br />
the acceleration/deceleration reference speed. (Method (3), described<br />
later)<br />
(Program example)<br />
G05.1 Q1 F5000 ; ··· Sets the reference speed to 5000 mm/min.<br />
The F command used in a G05.1 block is used to<br />
specify the acceleration/deceleration reference speed,<br />
and is also used as a normal F command.<br />
Even if the feedrate is changed during the execution of the machining<br />
program, the acceleration/deceleration reference speed specified with the<br />
above command remains in effect. If this occurs, the machining time may<br />
become longer because machining is performed at the feedrate different<br />
from the acceleration/deceleration reference speed.<br />
For this reason, the acceleration/deceleration reference speed to be<br />
specified with the above command should be as close as possible to the<br />
actual machining speed.<br />
NOTE<br />
The G05.1Q1Fxxxx, G05P10000Fxxxx command must be<br />
issued in feed per minute (G94) mode.<br />
If this command is issued in another mode, the speed<br />
specified with this command will be generated the alarm<br />
(PS5111).<br />
the acceleration/deceleration reference speed is set in parameter No. 7066<br />
(AICC or AI nanoCC) or No.19520 (AI–HPCC or AI–nanoHPCC).<br />
Because these parameters must be set in input unit, when the input unit<br />
is changed, these parameters must be changed.<br />
This method is used if the G05.1Q1 block or G05 P10000 block does not<br />
have an F command.<br />
511
19. HIGH SPEED CUTTING FUNCTIONS PROGRAMMING<br />
B–63534EN/02<br />
(3) Using the speed<br />
specified with the F<br />
command issued at<br />
the start of cutting as<br />
the reference speed<br />
Acceleration/deceleratio<br />
n parameter calculation<br />
method<br />
The speed specified with the F command issued when a cutting block<br />
group (such as G01 and G02) starts is assumed the<br />
acceleration/deceleration reference speed,<br />
This method is used if the G05.1Q1 block or G05 P10000 block does not<br />
have an F command and the parameter of the acceleration/deceleration<br />
reference speed is set to 0.<br />
(G00)<br />
G01 X––– Y––– Z––– F*** ;<br />
X––– Y––– Z–––<br />
X––– Y––– Z–––<br />
X––– Y––– Z–––<br />
G00 ;<br />
512<br />
Cutting block group<br />
Even if an F command is issued before a cutting block group and the F<br />
command is effective to the cutting block group modally, the speed<br />
specified with the modal F effective at the start of cutting will be assumed<br />
the acceleration/deceleration reference speed.<br />
Optimum bell–shaped acceleration/deceleration before interpolation, as<br />
mentioned here, refers to bell–shaped acceleration/deceleration before<br />
interpolation in which linear acceleration/deceleration not reaching the<br />
specified acceleration/deceleration does not occur if T2 > T1. Calculation<br />
is performed as described below.<br />
(1) If the bell–shaped acceleration/deceleration before interpolation time<br />
constant T2’ is calculated under the condition that the bell–shaped<br />
acceleration/deceleration before interpolation must not have a linear<br />
portion,<br />
<br />
<br />
<br />
<br />
<br />
T2: Acceleration change time specified for bell–shaped acceleration/<br />
deceleration before interpolation<br />
F: Acceleration/deceleration reference speed<br />
A: Acceleration for the acceleration/deceleration before interpolation
B–63534EN/02 PROGRAMMING 19. HIGH SPEED CUTTING FUNCTIONS<br />
(2) A proper acceleration is determined under the condition that the<br />
acceleration change must be about the same as the setting so that<br />
parameter changes do not cause considerable shock to the machine,<br />
that is:<br />
Acceleration after change Acceleration before change<br />
=<br />
Acceleration change time Acceleration change time<br />
after change before change<br />
The acceleration change time is regarded to be the sum of the<br />
acceleration change time of bell–shaped acceleration/deceleration<br />
and the time constant of acceleration/deceleration after interpolation,<br />
and the acceleration A’ for the acceleration/deceleration before<br />
interpolation is determined as follows:<br />
<br />
<br />
<br />
<br />
<br />
A: Acceleration for the acceleration/deceleration before interpolation<br />
Tc:Time constant of acceleration/deceleration after interpolation<br />
Acceleration/deceleration is performed using T2’ and A’, determined<br />
as described above.<br />
513
19. HIGH SPEED CUTTING FUNCTIONS PROGRAMMING<br />
B–63534EN/02<br />
19.10<br />
OPTIMUM TORQUE<br />
ACCELERATION/DEC<br />
ELERATION<br />
General<br />
This function enables acceleration/deceleration in accordance with the<br />
torque characteristics of the motor and the characteristics of the machines<br />
due to its friction and gravity and performs linear type positioning with<br />
optimum acceleration/deceleration during AI high precision contour<br />
control mode or AI nano high precision contour control mode.<br />
Usually, because of the friction of the machine, gravity, the torque<br />
characteristics of the motor, and other factors, the acceleration/deceleration<br />
performance (torque for acceleration/deceleration) is different with direction<br />
of movement, acceleration or deceleration. In this function, acceleration<br />
pattern of rapid traverse for the following situations, plus movement and<br />
acceleration, plus movement and deceleration, minus movement and<br />
acceleration, minus movement and deceleration can be set into parameters<br />
according to the torque for acceleration/deceleration of each situation.<br />
Acceleration/deceleration can be performed according to these parameter<br />
setting, so that the most of the capability of the motor can be used and<br />
positioning time can be reduced.<br />
Speed<br />
Acceleration<br />
Acceleration<br />
and<br />
+ move<br />
Acc/Dec pattern is the same way in each condition.<br />
514<br />
Deceleration<br />
and<br />
+ move<br />
Acceleration<br />
and<br />
– move<br />
Deceleration<br />
and<br />
– move<br />
Fig.19.10 (a) Conventional acceleration/declaration<br />
Time<br />
Time
B–63534EN/02 PROGRAMMING 19. HIGH SPEED CUTTING FUNCTIONS<br />
Description<br />
Calculation of the<br />
reference acceleration<br />
Setting optimum torque<br />
acceleration/deceleration<br />
Speed<br />
Acceleration<br />
Acceleration<br />
and<br />
+ move<br />
Acc/Dec pattern can be changed in each condition.<br />
515<br />
Deceleration<br />
and<br />
+ move<br />
Acceleration<br />
and<br />
– move<br />
Deceleration<br />
and<br />
– move<br />
Fig.19.10 (b) Acceleration/deceleration with this function<br />
Time<br />
Time<br />
Optimum torque acceleration/deceleration selects the acceleration pattern set<br />
with parameters on the basis of the axial movement direction and the<br />
acceleration/deceleration state, determines the acceleration for each axis<br />
from the current speed, and controls the tangential acceleration/deceleration<br />
for rapid traverse in AI high precision contour control and AI nano high<br />
precision contour control mode.<br />
The reference acceleration is the standard acceleration to set the<br />
acceleration pattern, usually this is the same as the acceleration for rapid<br />
traverse at the selecting a motor.<br />
Reference acceleration[mm/sec2 No.14201000 (Rapid traverse rate)<br />
] =<br />
No.177360(Acc/Dec Time Constant of rapid traverse)<br />
By setting both FAP, bit 0 of parameter No. 19540, and FRP, bit 5 of<br />
parameter No. 19501, to 1 and setting parameter to determine the reference<br />
acceleration (No. 1420 and No.1773 ) as below, the acceleration/deceleration<br />
for rapid traverse in AI high precision contour control and AI nano high<br />
precision contour control mode will be optimum torque acceleration/<br />
deceleration. When Optimum torque acceleration/deceleration is enabled,<br />
linear type positioning for rapid traverse is selected automatically in AI high<br />
precision contour control and AI nano high precision contour control mode<br />
even if the parameter LRP, bit 1 of parameter No. 1401, is set to 0 (nonlinear<br />
type is selected). If rapid traverse is subject to optimum torque acceleration/<br />
deceleration, after–interpolation acceleration/deceleration does not apply to<br />
rapid traverse.
19. HIGH SPEED CUTTING FUNCTIONS PROGRAMMING<br />
B–63534EN/02<br />
Cases in which optimum<br />
torque acceleration/<br />
deceleration is disabled<br />
Setting acceleration<br />
pattern data<br />
Table. 19.10 (a) Optimum torque acceleration/deceleration<br />
FAP<br />
19540#0<br />
FRP<br />
19501#5<br />
1 1<br />
Before–<br />
interpolation<br />
acc/dec for<br />
rapid<br />
traverse<br />
516<br />
Reference<br />
accelera–<br />
tion<br />
No.1420<br />
&<br />
No.1773<br />
Bell–shaped<br />
acceleration<br />
change time<br />
Acceleration<br />
pattern<br />
No.1774 See “Setting accelerationpattern<br />
data”<br />
To enable bell–shaped acceleration/deceleration in addition to optimum<br />
torque acceleration/declaration, set HRB, bit 0 of parameter No. 19504<br />
to 1and the bell–shaped acceleration change time with parameter<br />
No.1774.<br />
In case that optimum torque acceleration/deceleration is disabled,<br />
acceleration/deceleration for rapid traverse will be after–interpolation<br />
acceleration/deceleration or before interpolation acceleration/deceleration.<br />
When the command having the following restriction is commanded,<br />
optimum torque acceleration/deceleration is disabled.<br />
(Restriction)<br />
Optimum torque acceleration/deceleration is disabled at the command<br />
with the restriction ”AI high precision contour control mode or the AI<br />
nano high precision contour control mode is automatically canceled once<br />
and the buffering is inhibited” which is mentioned in the specification<br />
manual for AI high precision contour control mode or the AI NANO high<br />
precision contour control.<br />
For example, during the following commands which includes the<br />
M,S,T,B code, optimum torque acceleration/deceleration is disabled;<br />
1. G00100.M13; (G00 with M code)<br />
2. G00100.S1000; (G00 with S code)<br />
3. G00100.T01; (G00 with T code)<br />
4. G00100.B20; (G00 with B code)<br />
acceleration<br />
Aa<br />
Ab<br />
P0<br />
P1<br />
Fa<br />
P2<br />
P3<br />
P4 P5<br />
Fb<br />
Fig.19.10 (c) Setting acceleration pattern<br />
Acceleration pattern<br />
Speed
B–63534EN/02 PROGRAMMING 19. HIGH SPEED CUTTING FUNCTIONS<br />
Set the speed and the acceleration at each of the acceleration setting points<br />
P0 to P5 for each condition, plus movement and acceleration, plus<br />
movement and deceleration, minus movement and acceleration, minus<br />
movement and deceleration, and for each axis.<br />
The line joining the acceleration setting points is regarded a acceleration<br />
pattern.<br />
For example, while the speed is between Fa and Fb in the previous figure,<br />
the acceleration is calculated with Aa and Ab. Tangential acceleration is<br />
controlled not to exceed the calculated acceleration for each axis.<br />
Table. 19.10 (b) Parameters for acceleration pattern<br />
Acceler Speed Acceleration parameter<br />
ation<br />
setting<br />
point<br />
parameter<br />
During acceleration<br />
During During<br />
movement movement<br />
During deceleration<br />
During During<br />
movement movement<br />
in plus in minus in plus in minus<br />
direction direction direction direction<br />
P0 (Speed 0) No.19545 No.19551 No.19557 No.19563<br />
P1 No.19541 No.19546 No.19552 No.19558 No.19564<br />
P2 No.19542 No.19547 No.19553 No.19559 No.19565<br />
P3 No.19543 No.19548 No.19554 No.19560 No.19566<br />
P4 No.19544 No.19549 No.19555 No.19561 No.19567<br />
P5 No.1420 No.19550 No.19556 No.19562 No.19568<br />
The speed at P0 is 0, and the speed at P5 is the rapid traverse rate specified<br />
with parameter (No. 1420). The speeds at P1 to P4 are to be set into speed<br />
parameters Nos. 19541 to 19544 as ratio to the rapid traverse speed<br />
(parameter No. 1420).<br />
Any acceleration setting point for which the speed parameter (one of Nos.<br />
19541 to 19544) is set to 0 will be skipped, and the next point whose speed<br />
parameter is set to a non–zero value will be joined together as acceleration<br />
pattern.<br />
The accelerations at P0 to P5 are to be set into acceleration parameters<br />
Nos. 19545 to 19568 as ratio to the reference acceleration. If any of the<br />
acceleration parameters Nos. 19545 to 19568 is set to 0, the acceleration<br />
is assumed 100% (Reference acceleration). Acceleration parameters<br />
should be set to 0 at the acceleration setting point whose speed parameter<br />
is set to 0.<br />
If this function is enabled and both parameter No.1773 and No. 1620 for<br />
an axis are set to 0, the following values are assumed as the reference<br />
acceleration for that axis:<br />
1000.0 mm/sec/sec, 100.0 inch/sec/sec, 100.0 degrees/sec/sec<br />
517
19. HIGH SPEED CUTTING FUNCTIONS PROGRAMMING<br />
B–63534EN/02<br />
Example of setting<br />
acceleration pattern data<br />
In this example, the machine is equipped with the aM30/4000i?.<br />
Motor speed at rapid traverse is 3000 (min –1 ).<br />
Torque(Nm)<br />
150<br />
100<br />
50<br />
0<br />
0 1000 2000<br />
Speed(min<br />
3000 4000<br />
-1 )<br />
Fig.19.10 (d) Speed–torque characteristics of model 30/4000i<br />
Specifications of the motor model 30/4000i<br />
Rotor inertia : 0.0099 (Kgm 2 )<br />
Maximum torque : 100 (Nm) Speed : 0 to 2000 (min –1 )<br />
Torque at rapid traverse : 79 (Nm) Speed : 3000 (min –1 )<br />
Minimum torque : 58 (Nm) Speed : 4000 (min –1 )<br />
It assumes that 10 (Nm) is needed for the friction torque, so that the torque<br />
for acceleration/deceleration is shown as the following figure.<br />
Because the friction torque is different on each machine, it is necessary<br />
to observe the actual torque output on the machine.<br />
Maximum torque :90(=100–10) (Nm) Speed: 0 to 2000 (min –1 )<br />
Torque at rapid traverse :69(=79–10) (Nm) Speed: 3000 (min –1 )<br />
Minimum torque :48(=58–10) (Nm) Speed: 4000 (min –1 )<br />
Torque(Nm)<br />
100<br />
80<br />
60<br />
40<br />
20<br />
0<br />
0 1000 2000 3000 4000<br />
Speed(min-1 )<br />
Fig.19.10 (e) Torque for Acc/Dec with consideration of friction<br />
518
B–63534EN/02 PROGRAMMING 19. HIGH SPEED CUTTING FUNCTIONS<br />
Let the torque be x (Nm), the inertia be y(Kgm2), and the ball screw pitch<br />
p(mm), then the acceleration A is calculated as follows:<br />
<br />
<br />
<br />
<br />
<br />
<br />
519<br />
<br />
<br />
<strong>Machine</strong> specification is assumed as follows,<br />
Ball screw pitch : 16 (mm)<br />
Inertia : The machine inertia is to be 2.0 times higher than that<br />
of the rotor.<br />
(Rotor inertia: 0.0099 (Kgm2 ))<br />
The acceleration at maximum torque is,<br />
<br />
<br />
The acceleration at rapid traverse is,<br />
<br />
<br />
From the above data, the parameters related to acceleration pattern is<br />
given in the table below.<br />
The example assumes that the acceleration is the same regardless of<br />
whether acceleration or deceleration is in progress or whether the<br />
movement is in the plus or minus direction.<br />
Rapid<br />
traverse<br />
rate<br />
Table. 19.10 (c) Example of setting parameters related to<br />
acceleration pattern (1/2)<br />
Referenceacceleration<br />
Speed at<br />
P1<br />
Speeds<br />
at P2 to<br />
P4<br />
Acceleration<br />
at P0<br />
Parameter<br />
No.<br />
1420 48000. mm/<br />
min<br />
Setting Unit Remarks<br />
The ball screw pitch is assumed<br />
16 mm, so that the rapid<br />
traverse rate is 48000 mm/min<br />
at the maximum speed 3000<br />
(min –1 ).<br />
1773 194 msec Reference acceleration is<br />
= 4124 (mm/sec2 48000/60<br />
194/1000<br />
)<br />
19541 6666 0.01% 66.66% is set at P1 because<br />
the torque 90(Nm) is constant<br />
up to 2000 (min –1 ) (32000mm/<br />
min).<br />
0.6666=32000/48000<br />
19542 to<br />
19544<br />
19545,19551<br />
19557,19563<br />
0 0.01% P2 to P4 are skipped because<br />
the torque drops almost linearly<br />
from the speed 2000 (min -1 ) to<br />
3000 (min -1 ).<br />
18712 0.01% At P0, 90(Nm) can be used for<br />
the acceleration/deceleration,<br />
so set the ratio 7717 (mm/sec 2 )<br />
to 4124 (mm/sec 2 ).<br />
1.8712 = 7717/4124
19. HIGH SPEED CUTTING FUNCTIONS PROGRAMMING<br />
B–63534EN/02<br />
Table. 19.10 (c) Example of setting parameters related to<br />
acceleration pattern (2/2)<br />
Acceleration<br />
at P1<br />
Acceleration<br />
at P2<br />
to P4<br />
Acceleration<br />
at P5<br />
Parameter<br />
No.<br />
19546,19552<br />
19558,19564<br />
19547–19549<br />
19553–19555<br />
19559–19561<br />
19565–19567<br />
19550,19556<br />
19562,19568<br />
520<br />
Setting Unit Remarks<br />
18712 0.01% At P1, 90(Nm) can be used for<br />
the acceleration/deceleration,<br />
so set the ratio 7717 (mm/sec 2 )<br />
to 4124 (mm/sec 2 ).<br />
1.8712 = 7717/4124<br />
0 0.01% 0 is set because P2 to P4 are<br />
skipped.<br />
14345 0.01% At P5, 69(Nm) can be used for<br />
the acceleration/deceleration,<br />
so set the ratio 5916 (mm/sec 2 )<br />
to 4124 (mm/sec 2 ).<br />
1.4345 = 5916/4124<br />
With the above parameter settings, the acceleration pattern will be shown<br />
as the following figure. The acceleration is 7716 (mm/sec 2 ) in case speed<br />
is up to 32000 (mm/min) and acceleration is calculated according to the<br />
following figure in case speed is from 32000 (mm/min) up to 48000<br />
(mm/min).<br />
Acceleration mm/sec/sec<br />
9000<br />
8000<br />
7000<br />
6000<br />
5000<br />
4000<br />
3000<br />
2000<br />
1000<br />
0<br />
P0<br />
0 16000 32000 48000<br />
Speed mm/min<br />
Fig.19.10 (f) Acceleration pattern with consideration of friction<br />
NOTE<br />
The values in the model 30/4000i speed–torque<br />
characteristic diagram are just typical ones. The values will<br />
change depending on the digital servo software,<br />
parameters, input voltage, and other factors.<br />
The optimum acceleration will, therefore, change due to the<br />
characteristics of the machine.<br />
P1<br />
P5
B–63534EN/02 PROGRAMMING 19. HIGH SPEED CUTTING FUNCTIONS<br />
Examples of setting if<br />
the acceleration pattern<br />
differs depending on<br />
whether acceleration or<br />
deceleration is in<br />
progress and whether<br />
the movement is in the<br />
minus or plus direction<br />
From the effect of gravity and friction, torque for acceleration/deceleration<br />
is different on each condition, such as acceleration, deceleration or plus move<br />
(up), minus move (down).<br />
The following example is for the vertical axis and gravity and friction torque<br />
are assumed as follows.<br />
Torque of gravity : 20 (Nm)<br />
Torque of friction : 10 (Nm)<br />
Because these value are different on each machine, it is necessary to observe<br />
the output torque on the actual machine for deciding acceleration pattern<br />
The conditions are the same as the previous example.<br />
Motor speed at rapid traverse : 3000 (min –1 )<br />
Ball screw pitch : 16 (mm)<br />
Inertia : The machine inertia is to be 2.0<br />
times higher than that of the rotor.<br />
Rotor inertia : 0.0099 (Kgm2 )<br />
Maximum torque : 100 (Nm) Speed: 0 to 2000 (min –1 )<br />
Torque at rapid traverse : 79 (Nm) Speed: 3000 (min –1 )<br />
Minimum torque : 58 (Nm) Speed: 4000 (min –1 )<br />
(1) In case of plus move (up) and acceleration<br />
Because torque of Gravity and friction work against the output torque of<br />
motor, the torque for acceleration/deceleration is as follows.<br />
Maximum torque : 70(=100–20–10) (Nm)<br />
Speed: 0 to 2000 (min –1 )<br />
Torque at rapid traverse : 49(=79–20–10) (Nm)<br />
Speed: 3000 (min –1 )<br />
Minimum torque : 28(=58–20–10) (Nm)<br />
Speed: 4000 (min –1 )<br />
Torque(Nm)<br />
80<br />
60<br />
40<br />
20<br />
P0 P1<br />
0<br />
0 1000 2000<br />
Speed(min<br />
3000 4000<br />
–1 )<br />
Fig.19.10(g) Torque for Acc/Dec in case of + move and acceleration<br />
521<br />
P5
19. HIGH SPEED CUTTING FUNCTIONS PROGRAMMING<br />
B–63534EN/02<br />
Parameter setting is as follows,<br />
Acceleration<br />
at<br />
P0<br />
Acceleration<br />
at<br />
P1<br />
Acceleration<br />
at<br />
P2 –P4<br />
Acceleration<br />
at<br />
P5<br />
Acceleration (mm/sec )<br />
2<br />
7000<br />
6000<br />
5000<br />
4000<br />
3000<br />
2000<br />
1000<br />
0<br />
Parameter<br />
No.<br />
19545 14554 0.01<br />
%<br />
19546 14554 0.01<br />
%<br />
19547–19549 0 0.01<br />
%<br />
19550 10187 0.01<br />
%<br />
P0<br />
522<br />
Setting Unit Remarks<br />
At P0, 70(Nm) can be used for<br />
the acceleration/deceleration, so<br />
set the ratio 6002 (mm/sec2 ) to<br />
4124 (mm/sec2 ). 1.4554 =<br />
6002/4124<br />
At P1, 70(Nm) can be used for<br />
the acceleration/deceleration, so<br />
set the ratio 6002 (mm/sec2 ) to<br />
4124 (mm/sec2 ). 1.4554 =<br />
6002/4124<br />
0 is set because P2 to P4 are<br />
skipped.<br />
At P5, 49(Nm) can be used for<br />
the acceleration/deceleration, so<br />
set the ratio 4201 (mm/sec 2 ) to<br />
4124 (mm/sec 2 ). 1.0187 =<br />
4201/4124<br />
0 16000 32000 48000<br />
Speed (mm/min)<br />
Fig.19.10(h) Acceleration pattern in case of + move and acceleration<br />
(2) In case of plus move (up) and deceleration<br />
Because torque of Gravity and friction work forward to the output torque<br />
of motor, the torque for acceleration/deceleration is as follows.<br />
Maximum torque : 130(=100+20+10) (Nm)<br />
Speed: 0 to 2000 (min –1 )<br />
Torque at rapid traverse : 109(=79+20+10) (Nm)<br />
Speed: 3000 (min –1 )<br />
Minimum torque : 88(=58+20+10) (Nm)<br />
Speed: 4000 (min –1 )<br />
P1<br />
P5
B–63534EN/02 PROGRAMMING 19. HIGH SPEED CUTTING FUNCTIONS<br />
Torque(Nm)<br />
P0 P1<br />
150<br />
100<br />
50<br />
0<br />
0 1000 2000<br />
Speed(min<br />
3000 4000<br />
–1 )<br />
Fig.19.10(i) Torque for Acc/Dec in case of + move and deceleration<br />
Parameter setting is as follows,<br />
Acceleration<br />
at<br />
P0<br />
Acceleration<br />
at<br />
P1<br />
Acceleration<br />
at<br />
P2 –P4<br />
Acceleration<br />
at<br />
P5<br />
Acceleration (mm/sec )<br />
2<br />
11500<br />
11000<br />
10500<br />
10000<br />
9500<br />
9000<br />
8500<br />
Parameter<br />
No.<br />
19557 27027 0.01<br />
%<br />
19558 27027 0.01<br />
%<br />
19559–19561 0 0.01<br />
%<br />
19562 22662 0.01<br />
%<br />
P0<br />
523<br />
P5<br />
Setting Unit Remarks<br />
At P0, 130(Nm) can be used for<br />
the acceleration/deceleration, so<br />
set the ratio 11146 (mm/sec2 ) to<br />
4124 (mm/sec2 ). 2.7027 =<br />
11146/4124<br />
At P1, 130(Nm) can be used for<br />
the acceleration/deceleration, so<br />
set the ratio 11146 (mm/sec2 ) to<br />
4124 (mm/sec2 ). 2.7027 =<br />
11146/4124<br />
0 is set because P2 to P4 are<br />
skipped.<br />
At P5, 109(Nm) can be used for<br />
the acceleration/deceleration, so<br />
set the ratio 9346 (mm/sec 2 ) to<br />
4124 (mm/sec 2 ). 2.2662 =<br />
9346/4124<br />
8000<br />
0 16000 32000 48000<br />
Speed (mm/min)<br />
Fig.19.10(j) Acceleration pattern in case of + move and deceleration<br />
P1<br />
P5
19. HIGH SPEED CUTTING FUNCTIONS PROGRAMMING<br />
B–63534EN/02<br />
(3) In case of minus move (down) and acceleration<br />
Because torque of Gravity works forward to the output torque of motor<br />
and torque of friction works against the output torque of motor, torque for<br />
acceleration/deceleration is as follows.<br />
Maximum torque : 110(=100+20–10) (Nm)<br />
Speed: 0 to 2000 (min –1 )<br />
Torque at rapid traverse : 89(=79+20–10) (Nm)<br />
Speed: 3000 (min –1 )<br />
Minimum torque : 68(=58+20–10) (Nm)<br />
Speed: 4000 (min –1 )<br />
Torque(Nm)<br />
150<br />
100<br />
50<br />
P0 P1<br />
0<br />
0 1000 2000<br />
Speed(min<br />
3000 4000<br />
-1 )<br />
Fig.19.10(k) Torque for Acc/Dec in case of – move and acceleration<br />
Parameter setting is as follows,<br />
Acceleration<br />
at<br />
P0<br />
Acceleration<br />
at<br />
P1<br />
Acceleration<br />
at<br />
P2 –P4<br />
Acceleration<br />
at<br />
P5<br />
Acceleration (mm/sec )<br />
2<br />
10000<br />
9000<br />
8000<br />
7000<br />
6000<br />
5000<br />
4000<br />
3000<br />
2000<br />
1000<br />
0<br />
Parameter<br />
No.<br />
19551 22869 0.01<br />
%<br />
19552 22869 0.01<br />
%<br />
19553–19555 0 0.01<br />
%<br />
19556 18504 0.01<br />
%<br />
P0<br />
524<br />
P5<br />
Setting Unit Remarks<br />
At P0, 110(Nm) can be used for<br />
the acceleration/deceleration, so<br />
set the ratio 9431 (mm/sec2 ) to<br />
4124 (mm/sec2 ). 2.2869 =<br />
9431/4124<br />
At P1, 110(Nm) can be used for<br />
the acceleration/deceleration, so<br />
set the ratio 9431 (mm/sec2 ) to<br />
4124 (mm/sec2 ). 2.2869 =<br />
9431/4124<br />
0 is set because P2 to P4 are<br />
skipped.<br />
At P5, 89(Nm) can be used for<br />
the acceleration/deceleration, so<br />
set the ratio 7631 (mm/sec 2 ) to<br />
4124 (mm/sec 2 ). 1.8504 =<br />
7631/4124<br />
0 16000 32000 48000<br />
Speed (mm/min)<br />
Fig.19.10(l) Acceleration pattern in case of – move and acceleration<br />
P1<br />
P5
B–63534EN/02 PROGRAMMING 19. HIGH SPEED CUTTING FUNCTIONS<br />
(4) In case of minus move (down) and deceleration<br />
Because torque of Gravity works against the output torque of motor and<br />
torque of friction works forward to the output torque of motor, torque for<br />
acceleration/deceleration is as follows.<br />
Maximum torque : 90(=100–20+10) (Nm)<br />
Speed: 0 to 2000 (min –1 )<br />
Torque at rapid traverse : 69(=79–20+10) (Nm)<br />
Speed: 3000 (min –1 )<br />
Minimum torque : 48(=58–20+10) (Nm)<br />
Speed: 4000 (min –1 )<br />
Torque(Nm)<br />
100<br />
80<br />
60<br />
40<br />
20<br />
0<br />
P0 P1<br />
0 1000 2000<br />
Speed(min<br />
3000 4000<br />
–1 )<br />
Fig.19.10(m) Torque for Acc/Dec in case of – move and deceleration<br />
Parameter setting is as follows,<br />
Acceleration<br />
at<br />
P0<br />
Acceleration<br />
at<br />
P1<br />
Acceleration<br />
at<br />
P2 –P4<br />
Acceleration<br />
at<br />
P5<br />
Parameter<br />
No.<br />
19563 18712 0.01<br />
%<br />
19564 18712 0.01<br />
%<br />
19565–19567 0 0.01<br />
%<br />
19568 14345 0.01<br />
%<br />
525<br />
P5<br />
Setting Unit Remarks<br />
At P0, 90(Nm) can be used for<br />
the acceleration/deceleration, so<br />
set the ratio 7717 (mm/sec2 ) to<br />
4124 (mm/sec2 ). 1.8712 =<br />
7717/4124<br />
At P1, 90(Nm) can be used for<br />
the acceleration/deceleration, so<br />
set the ratio 7717 (mm/sec2 ) to<br />
4124 (mm/sec2 ). 1.8712 =<br />
7717/4124<br />
0 is set because P2 to P4 are<br />
skipped.<br />
At P5, 69(Nm) can be used for<br />
the acceleration/deceleration, so<br />
set the ratio 5916 (mm/sec 2 ) to<br />
4124 (mm/sec 2 ). 1.4345 =<br />
5916/4124
19. HIGH SPEED CUTTING FUNCTIONS PROGRAMMING<br />
B–63534EN/02<br />
Limitations<br />
Linear type positioning<br />
Modes and conditions<br />
Target axes<br />
Acceleration pattern<br />
Tool center point control<br />
Acceleration (mm/sec )<br />
2<br />
9000<br />
8000<br />
7000<br />
6000<br />
5000<br />
4000<br />
3000<br />
2000<br />
1000<br />
0<br />
P0<br />
0 16000 32000 48000<br />
Speed (mm/min)<br />
Fig.19.10(n) Acceleration pattern in case of – move and deceleration<br />
When Optimum torque acceleration/deceleration is enabled, linear type<br />
positioning for rapid traverse is selected automatically in AI high<br />
precision contour control and AI nano high precision contour control<br />
mode even if the parameter LRP, bit 1 of parameter No. 1401, is set to 0<br />
(nonlinear type is selected).<br />
Optimum torque acceleration/deceleration is enabled when AI high<br />
precision contour control or AI nano high precision contour control mode<br />
is active and the conditions under which AI high precision contour control<br />
and AI nano high precision contour control are satisfied.<br />
Optimum torque acceleration/deceleration can be performed on axes<br />
which are selected by parameter No.7510.<br />
In the same direction move, it is necessary that the acceleration during<br />
deceleration is set 1/3 of one during acceleration at least.<br />
Also, the acceleration pattern data must be set so that the time required<br />
for the deceleration from the rapid traverse rate to a speed of 0 does not<br />
exceed 4000 (msec). This does not include the acceleration change time<br />
of bell–shaped acceleration/deceleration.<br />
If the deceleration acceleration ratio or the time required for the<br />
deceleration to a speed of 0 exceeds the above range, P/S alarm (P/S5455)<br />
will be issued at the time rapid traverse is executed.<br />
A slight error will occur between the specified acceleration and the actual<br />
acceleration.<br />
Optimum torque acceleration/deceleration is disabled in tool center point<br />
control mode (except startup and cancellation). If this occurs, the<br />
acceleration/deceleration for rapid traverse follows the reference<br />
acceleration.<br />
526<br />
P1<br />
P5
B–63534EN/02 PROGRAMMING<br />
20. AXIS CONTROL FUNCTIONS<br />
20 <br />
<br />
527
20. AXIS CONTROL FUNCTIONS PROGRAMMING<br />
B–63534EN/02<br />
20.1<br />
SIMPLE<br />
SYNCHRONOUS<br />
CONTROL<br />
Explanations<br />
Synchronous operation<br />
It is possible to change the operating mode for two or more specified axes<br />
to either synchronous operation or normal operation by an input signal<br />
from the machine.<br />
Synchronous control can be performed for up to four pairs of axes with<br />
the <strong>Series</strong> <strong>16i</strong>/<strong>160i</strong>/<strong>160i</strong>s, or up to three pairs with the <strong>Series</strong><br />
<strong>18i</strong>/<strong>180i</strong>/<strong>180i</strong>s, according to the parameter setting (parameter No. 8311).<br />
The following operating modes are applicable to machines having two<br />
tables driven independently by separate control axes. The following<br />
example is of a machine with two tables driven independently by the Y<br />
axis and V axis. If the axis names and axis sets that are actually being used<br />
differ from those in the example, substitute the actual names for those<br />
below.<br />
528<br />
Y<br />
X<br />
Fig. 20 (a) Example of axis configuration of the machine operated<br />
by simple synchronous control<br />
This mode is used for, for example, machining large workpieces that<br />
extend over two tables.<br />
While operating one axis with a move command, it is possible to<br />
synchronously move the other axis. In the synchronous mode, the axis<br />
to which the move command applies is called the master axis, and the axis<br />
that moves synchronously with the master axis is called the slave axis.<br />
In this example, it is assumed that Y axis is the master axis and V axis is<br />
the slave axis. Here, the Y axis and the V axis move synchronously in<br />
accordance with program command Yyyyy issued to the Y axis (master<br />
axis).<br />
Synchronous operation is possible during automatic operation, jog feed,<br />
manual handle feed using the manual pulse generator, and incremental<br />
feed, but is not possible during manual reference position return.<br />
V<br />
Z
B–63534EN/02 PROGRAMMING<br />
20. AXIS CONTROL FUNCTIONS<br />
Normal operation<br />
Switching between<br />
synchronous operation<br />
and normal operation<br />
Automatic reference<br />
position return<br />
Automatic reference<br />
position return check<br />
Specifying the slave axis<br />
Master axis and slave<br />
axis<br />
Displaying actual speed<br />
for master axis only<br />
This operating mode is used for machining different workpieces on each<br />
table. The operation is the same as in ordinary CNC control, where the<br />
movement of the master axis and slave axis is controlled by the<br />
independent axis address (Y and V). It is possible to issue the move<br />
commands to both the master axis and slave axis in the same block.<br />
(1) The Y axis moves normally according to program command Yyyyy<br />
issued to the master axis.<br />
(2) The V axis moves normally according to program command Vvvvv<br />
issued to the slave axis.<br />
(3) The Y axis and the V axis move simultaneously according to program<br />
command YyyyyVvvvv.<br />
Both automatic and manual operations are the same as in ordinary<br />
CNC control.<br />
For how to switch between the synchronous operation and normal<br />
operation modes, refer to the relevant manual published by the machine<br />
tool builder.<br />
When the automatic reference position return command (G28) and the<br />
2nd/3rd/4th reference position return command (G30) are issued during<br />
synchronous operation, the V axis follows the same movement as the Y<br />
axis returns to the reference position. After the return movement is<br />
complete, the reference position return complete signal of the V axis goes<br />
on when that of the Y axis goes on.<br />
As a rule, commands G28 and G30 must be issued in the normal operating<br />
mode.<br />
When the automatic reference position return check command (G27) is<br />
issued during synchronous operation, the V axis and Y axis move in<br />
tandem. If both the Y axis and the V axis have reached their respective<br />
reference positions after the movement is complete, the reference position<br />
return complete signals go on. If either axis is not at the reference<br />
position, an alarm is issued. As a rule, command G27 must be issued in<br />
the normal operating mode.<br />
When a move command is issued to the slave axis during synchronous<br />
operation, a P/S alarm (No. 213) is issued.<br />
The axis to be used as the master axis is set in parameter No. 8311.<br />
The slave axis is selected by an external signal.<br />
Setting bit 7 (SMF) of parameter No. 3105 to 1 suppresses display of the<br />
actual speed of the slave axes.<br />
529
20. AXIS CONTROL FUNCTIONS PROGRAMMING<br />
B–63534EN/02<br />
Limitations<br />
Setting a coordinate<br />
system<br />
Externally–requested<br />
deceleration, interlock,<br />
and machine lock<br />
Pitch error<br />
compensation<br />
Manual absolute<br />
Synchronization error<br />
check using positional<br />
deviation<br />
Synchronization error<br />
check using machine<br />
coordinates<br />
Synchronization<br />
Compensation for<br />
out–of–synchronism<br />
Manual reference<br />
position return<br />
In synchronous axis control, commands that require no axis motion, such<br />
as the workpiece coordinate system setup command (G92) and the local<br />
coordinate system setup command (G52), are set to the Y axis by program<br />
command Yyyyy issued to the master axis.<br />
For signals such as external deceleration, interlock, and machine lock,<br />
only the signals issued to the master axis are valid in the synchronous<br />
operating mode. Signals issued to other axes are ignored.<br />
Both the pitch error and backlash are compensated independently for the<br />
master axis and the slave axis.<br />
Turn on the manual absolute switch during synchronous operation. If it<br />
is off, the slave axis may not move correctly.<br />
The difference between the master axis and slave axis in servo positional<br />
deviation is always monitored. If the difference exceeds the parameter–<br />
set limit, an P/S alarm (No. 213) is issued.<br />
The difference between the master axis and slave axis in machine<br />
coordinates is always monitored. If the difference exceeds the parameter–<br />
set limit, an servo alarm (No. 407) is issued.<br />
When the power is turned on, compensation pulses are output for the slave<br />
axis to match the machine position of the master axis with the machine<br />
position of the slave axis. (This is enabled only when the absolute<br />
position detection function is used.)<br />
Compensation for out–of–synchronism (where the difference between<br />
the master and slave axes in servo positional deviation is always<br />
monitored and the servo motor for the slave axis is compensated to reduce<br />
the difference) is not performed.<br />
When the machine is manually returned to the reference position during<br />
synchronous operation, both the master axis and the slave axis move<br />
synchronously until the acceleration movement is complete. However,<br />
grid detection thereafter is carried out independently.<br />
530
B–63534EN/02 PROGRAMMING<br />
20. AXIS CONTROL FUNCTIONS<br />
20.2<br />
ROTARY AXIS<br />
ROLL–OVER<br />
20.2.1<br />
Rotary Axis Roll–over<br />
Explanations<br />
<br />
The roll–over function prevents coordinates for the rotation axis from<br />
overflowing. The roll–over function is enabled by setting bit 0 of<br />
parameter ROAx 1008 to 1.<br />
For an incremental command, the tool moves the angle specified in the<br />
command. For an absolute command, the coordinates after the tool has<br />
moved are values set in parameter No. 1260, and rounded by the angle<br />
corresponding to one rotation. The tool moves in the direction in which<br />
the final coordinates are closest when bit 1 of parameter RABx No. 1008<br />
is set to 0. Displayed values for relative coordinates are also rounded by<br />
the angle corresponding to one rotation when bit 2 of parameter RRLx No.<br />
1008 is set to 1.<br />
Assume that axis A is the rotating axis and that the amount of movement<br />
per rotation is 360.000 (parameter No. 1260 = 360000). When the<br />
following program is executed using the roll–over function of the rotating<br />
axis, the axis moves as shown below.<br />
G90 A0 ;<br />
531<br />
Sequence<br />
number<br />
Actual<br />
movement<br />
value<br />
Absolute coordinate<br />
value after movement<br />
end<br />
N1 G90 A–150.0 ; N1 –150 210<br />
N2 G90 A540.0 ; N2 –30 180<br />
N3 G90 A–620.0 ; N3 –80 100<br />
N4 G91 A380.0 ; N4 +380 120<br />
N5 G91 A–840.0 ; N5 –840 0<br />
Relative<br />
coordinate value –720°<br />
Absolute<br />
–0°<br />
coordinate value<br />
N1<br />
N2<br />
N3<br />
N4<br />
N5<br />
–360°<br />
–0° –0°<br />
180°<br />
100°<br />
210°(Absolute)<br />
–0° 360°<br />
120°<br />
NOTE<br />
This function cannot be used together with the indexing<br />
function of the index table.<br />
–0°
20. AXIS CONTROL FUNCTIONS PROGRAMMING<br />
B–63534EN/02<br />
20.2.2<br />
Rotary Axis Control<br />
Explanations<br />
Notes<br />
This function controls a rotary axis as specified by an absolute command.<br />
With this function, the sign of the value specified in the command is<br />
interpreted as the direction of rotation, and the absolute value of the<br />
specified value is interpreted as the coordinates of the target end position.<br />
This function is valid when rotary axis roll–over is enabled (ROAx bit (bit<br />
0 of parameter 1008) is set to 1).<br />
If the RAAx bit (bit 3 of parameter 1008) is set to 1, an absolute command<br />
specified for the roll–over rotary axis is interpreted as follows: The sign<br />
and absolute value of the value specified in the command represent the<br />
direction of rotation and the end position of movement respectively.<br />
If the RAAx bit (bit 3 of parameter 1008) is set to 0, the setting by the<br />
RABx bit (bit 1 of parameter 1008) becomes significant.<br />
NOTE<br />
1 This function can be used only when the corresponding<br />
option is provided.<br />
2 This function is valid for a roll–over rotary axis.<br />
3 If the RAAx bit (bit 3 of parameter 1008) is set to 1, the RABx<br />
bit (bit 1 of parameter 1008) is ignored. To select a rotary<br />
motion of a shorter travel distance, set both RAAx and RABx<br />
to 0.<br />
4 This function is not supported when the machine coordinate<br />
system of the PMC axis control function is selected.<br />
532
B–63534EN/02 PROGRAMMING<br />
20. AXIS CONTROL FUNCTIONS<br />
20.3<br />
TOOL WITHDRAWAL<br />
AND RETURN (G10.6)<br />
Format<br />
To replace the tool damaged during machining or to check the status of<br />
machining, the tool can be withdrawn from a workpiece. The tool can<br />
then be advanced again to restart machining efficiently.<br />
The tool withdrawal and return operation consists of the following four<br />
steps:<br />
⋅ Retract<br />
The tool is retracted to a predefined position using the TOOL WITHDRAW<br />
switch.<br />
⋅ Withdrawal<br />
The tool is moved to the tool–change position manually.<br />
⋅ Return<br />
The tool returns to the retract position.<br />
⋅ Repositioning<br />
The tool returns to the interrupted position.<br />
For the tool withdrawal and return operations, see III–4.10.<br />
: Position where the TOOL WITHDRAW switch was turned on<br />
: Programmed position<br />
: Position to which the tool is retracted by manual operation<br />
: Retraction path<br />
: Manual operation (withdraw path)<br />
: Return path<br />
: Repositioning<br />
Specify a retraction axis and distance in the following format:<br />
Specify the amount of retraction, using G10.6.<br />
G10.6 IP _ ;<br />
IP<br />
_ : In incremental mode, retraction distance from the position<br />
where the retract signal is turned on<br />
In the absolute mode, retraction distance to an absolute position<br />
The specified amount of retraction is effective until G10.6 is next<br />
executed. To cancel the retraction, specify the following:<br />
G10.6 ; (as a single block containing no other commands)<br />
533<br />
Y<br />
Z<br />
X
20. AXIS CONTROL FUNCTIONS PROGRAMMING<br />
B–63534EN/02<br />
Explanations<br />
Retraction<br />
Withdrawal<br />
Return<br />
Repositioning<br />
When the TOOL WITHDRAW switch on the machine operator’s panel<br />
is turned on during automatic operation or in the automatic operation stop<br />
or hold state, the tool is retracted the length of the programmed retraction<br />
distance. This operation is called retraction. The position at which<br />
retraction is completed is called the retraction position. Upon completion<br />
of retraction, the RETRACT POSITION LED on the machine operator’s<br />
panel goes on.<br />
When the TOOL WITHDRAW switch is turned on during execution of<br />
a block in automatic operation, execution of the block is interrupted<br />
immediately and the tool is retracted. After retraction is completed, the<br />
system enters the automatic operation hold state.<br />
If the retraction distance and direction are not programmed, retraction is<br />
not performed. In this state, the tool can be withdrawn and returned.<br />
When the TOOL WITHDRAW switch is turned on in the automatic<br />
operation stop or hold state, the tool is retracted, then the automatic<br />
operation stop or hold state is entered again.<br />
When the TOOL WITHDRAW switch is turned on, the tool withdraw<br />
mode is set. When the tool withdraw mode is set, the TOOL BEING<br />
WITHDRAWN LED on the machine operator’s panel goes on.<br />
When the manual mode is set, the tool can be moved manually (Manual<br />
continuous feed or manual handle feed) to replace the tool or measure a<br />
machined workpiece. This operation is called a withdrawal. The tool<br />
withdrawal path is automatically memorized by the CNC.<br />
When the mode is returned to automatic operation mode and the TOOL<br />
RETURN switch on the machine operator’s panel is turned off, the CNC<br />
automatically moves the tool to the retraction position by tracing the<br />
manually–moved tool path backwards. This operation is called a return.<br />
Upon completion of a return to the retraction position, the<br />
RETRACTIONS POSITION LED comes on.<br />
When the cycle start button is pressed while the tool is in the retraction<br />
position, the tool moves to the position where the TOOL WITHDRAW<br />
switch was turned on. This operation is called repositioning. Upon<br />
completion of repositioning, the TOOL BEING WITHDRAWN LED is<br />
turned off, indicating that the tool withdrawal mode has terminated.<br />
Operation after completion of repositioning depends on the automatic<br />
operation state when the tool withdrawal mode is set.<br />
(1) When the tool withdrawal mode is set during automatic operation,<br />
operation is resumed after completion of repositioning.<br />
(2) When the tool withdrawal mode is set when automatic operation is<br />
held or stopped, the original automatic operation hold or stop state is<br />
set after completion of repositioning. When the cycle start button is<br />
pressed again, automatic operation is resumed.<br />
534
B–63534EN/02 PROGRAMMING<br />
20. AXIS CONTROL FUNCTIONS<br />
Limitations<br />
offset<br />
<strong>Machine</strong> lock, mirror<br />
image, and scaling<br />
Thread cutting<br />
Drilling canned cycle<br />
Reset<br />
Retraction command<br />
If the origin, presetting, or workpiece origin offset value (or External<br />
workpiece origin offset value) is changed after retraction is specified with<br />
G10.6 in absolute mode, the change is not reflected in the retraction<br />
position. After such changes are made, the retraction position must be<br />
respecified with G10.6.<br />
When the tool is damaged, automatic operation can be interrupted with<br />
a tool withdrawal and return operation in order to replace the tool. Note<br />
that if the tool offset value is changed after tool replacement, the change<br />
is ignored when automatic operation is resumed from the start point or<br />
other point in the interrupted block.<br />
When withdrawing the tool manually in the tool withdrawal mode, never<br />
use the machine lock, mirror–image, or scaling function.<br />
Tool withdrawal and return operation cannot be performed during thread<br />
cutting.<br />
Tool withdrawal and return operation cannot be performed during a<br />
drilling canned cycle.<br />
Upon reset, the retraction data specified in G10.6 is cleared. Retraction<br />
data needs to be specified again.<br />
The tool withdrawal and return function is enabled even when the<br />
retraction command is not specified. In this case, retraction and<br />
repositioning are not performed.<br />
WARNING<br />
The retraction axis and retraction distance specified in<br />
G10.6 need to be changed in an appropriate block<br />
according to the figure being machined. Be very careful<br />
when specifying the retraction distance; an incorrect<br />
retraction distance may damage the workpiece, machine, or<br />
tool.<br />
535
20. AXIS CONTROL FUNCTIONS PROGRAMMING<br />
B–63534EN/02<br />
20.4<br />
TANDEM CONTROL<br />
When enough torque for driving a large table cannot be produced by only<br />
one motor, two motors can be used for movement along a single axis.<br />
Positioning is performed by the main motor only. The submotor is used<br />
only to produce torque. With this tandem control function, the torque<br />
produced can be doubled.<br />
Table<br />
536<br />
Ball screw<br />
Fig. 20.4 (a) Example of operation<br />
Main motor<br />
Submotor<br />
In general, the NC regards tandem control as being performed for one<br />
axis. However, for servo parameter management and servo alarm<br />
monitoring, tandem control is regarded as being performed for two axes.<br />
For details, refer to the relevant manual published by the machine tool<br />
builder.
B–63534EN/02 PROGRAMMING<br />
20. AXIS CONTROL FUNCTIONS<br />
20.5<br />
ANGULAR AXIS<br />
CONTROL/<br />
ARBITRARY<br />
ANGULAR AXIS<br />
CONTROL<br />
Explanations<br />
<br />
Invalidity of normal axis<br />
When the angular axis makes an angle other than 90° with the<br />
perpendicular axis, the angular axis control function controls the distance<br />
traveled along each axis according to the inclination angle. For the<br />
ordinary angular axis control function, the angular axis is always the<br />
Y–axis and the perpendicular axis is always the Z–axis. For angular axis<br />
control B, however, arbitrary axes can be specified as the angular and<br />
perpendicular axes, using parameters. A program, when created, assumes<br />
that the angular axis and perpendicular axis intersect at right angles.<br />
However, the actual distance traveled is controlled according to an<br />
inclination angle.<br />
537<br />
+Y<br />
θ<br />
Program coordinate system<br />
+Y Coordinate system actually used<br />
(Angular axis)<br />
+Z (Perpendicular axis)<br />
θ : <strong>Inc</strong>lination angle<br />
When the angular axis is the Y–axis and the perpendicular axis is the<br />
Z–axis, the amount of travel along each axis is controlled according to the<br />
formulas shown below.<br />
The distance traveled along the Y–axis is determined by the following<br />
formula:<br />
Ya=Yp/cosθ<br />
The distance traveled along the Z–axis is corrected by the inclination of<br />
the Y–axis, and is determined by the following formula:<br />
Za=Zp–Yp*tanθ<br />
The speed component along the Y–axis is determined by the following<br />
formula:<br />
Fa=Fp/cosθ<br />
Ya, Za, Fa : Actual distance and speed<br />
Yp, Zp, Fp : Programmed distance and speed<br />
The angular and perpendicular axes for which angular axis control is to<br />
be applied must be specified beforehand, using parameters (No. 8211 and<br />
8212).<br />
Parameter AAC (No. 8200#0) enables or disables the inclined axis<br />
control function. If the function is enabled, the distance traveled along<br />
each axis is controlled according to an inclination angle parameter (No.<br />
8210).<br />
Parameter AZR (No. 8200#2) enables angular axis manual reference<br />
point return only with a distance along the angular axis.<br />
By setting the normal axis/angular axis control invalid signal NOZAGC<br />
to 1, slanted axis control only for the angular axis can be available.<br />
In this time the angular axis are converted to those along the slanted<br />
coordinate system without affecting commands to normal axis.
20. AXIS CONTROL FUNCTIONS PROGRAMMING<br />
B–63534EN/02<br />
Absolute and relative<br />
position display<br />
<strong>Machine</strong> position display<br />
An absolute and a relative position are indicated in the programmed<br />
Cartesian coordinate system.<br />
A machine position indication is provided in the machine coordinate<br />
system where an actual movement is taking place according to an<br />
inclination angle. However, when inch/metric conversion is performed,<br />
a position is indicated which incorporates inch/metric conversion applied<br />
to the results of inclination angle operation.<br />
WARNING<br />
1 After angular axis control parameter setting, be sure to<br />
perform manual reference position return operation.<br />
2 If once manual reference position return has been<br />
performed along the angular axis, also perform manual<br />
reference position return along the perpendicular axis.<br />
P/S alarm No.090 is issued when an attempt is made to<br />
manually return to the reference position along the<br />
perpendicular axis although the angular axis is not on the<br />
reference point.<br />
3 Once the tool has been moved along the angular axis when<br />
perpendicular/angular axis control disable signal NOZAGC<br />
has been set to 1, manual reference position return must be<br />
performed.<br />
4 Before attempting to manually move the tool along the<br />
angular and perpendicular axes simultaneously, set<br />
perpendicular/angular axis control disable signal NOZAGC<br />
to 1.<br />
NOTE<br />
1 For arbitrary angular axis control B, if the same axis number<br />
has been specified in both parameters No.8211 and 8212,<br />
or if a value outside the valid data range has been specified<br />
for either parameter, the angular and perpendicular axes<br />
become the following:<br />
Angular axis: Second axis<br />
Perpendicular axis: Third axis<br />
2 If an inclination angle close to 0° or ±90° is set, an error can<br />
occur. (A range from ±20° to ±60° should be used.)<br />
3 Before a perpendicular axis reference position return check<br />
(G27) can be made, angular axis reference position return<br />
operation must be completed.<br />
538
B–63534EN/02 PROGRAMMING<br />
20. AXIS CONTROL FUNCTIONS<br />
20.6<br />
CHOPPING<br />
FUNCTION<br />
(G80, G81.1)<br />
Format<br />
Explanations<br />
Chopping activated by<br />
signal input<br />
Chopping feedrate<br />
(feedrate of movement to<br />
point R)<br />
Chopping feedrate<br />
(feedrate of movement<br />
from point R)<br />
When contour grinding is performed, the chopping function can be used<br />
to grind the side face of a workpiece. By means of this function, while<br />
the grinding axis (the axis with the grinding wheel) is being moved<br />
vertically, a contour program can be executed to instigate movement<br />
along other axes.<br />
In addition, a servo delay compensation function is supported for<br />
chopping operations. When the grinding axis is moved vertically at high<br />
speed, a servo delay and acceleration/deceleration delay occur. These<br />
delays prevent the tool from actually reaching the specified position. The<br />
servo delay compensation function compensates for any displacement by<br />
increasing the feedrate. Thus, grinding can be performed almost up to the<br />
specified position.<br />
There are two types of chopping functions: that specified by<br />
programming, and that activated by signal input. For details of the<br />
chopping function activated by signal input, refer to the manual provided<br />
by the machine tool builder.<br />
G81.1 Z__ Q__ R__ F__ ;<br />
Z : Upper dead point<br />
(For an axis other than the Z–axis, specify the axis address.)<br />
Q : Distance between the upper dead point and lower dead point<br />
(Specify the distance as an incremental value, relative to the<br />
upper dead point.)<br />
R : Distance from the upper dead point to point R<br />
(Specify the distance as an incremental value, relative to the<br />
upper dead point.)<br />
F : Feedrate during chopping<br />
G80; Cancels chopping<br />
Before chopping can be started, the chopping axis, reference position,<br />
upper dead point, lower dead point, and chopping feedrate must be set<br />
using the parameter screen (or the chopping screen).<br />
For details, refer to the manual provided by the machine tool builder.<br />
From the start of chopping to point R, the tool moves at the rapid traverse<br />
rate (specified by parameter No. 1420).<br />
The override function can be used for either the normal rapid traverserate<br />
or chopping feedrate, one of which can be selected by setting CPRPD (bit<br />
0 of parameter No. 8360).<br />
When the chopping feedrate is overridden, settings between 110% and<br />
150% are clamped to 100%.<br />
Between point R, reached after the start of chopping, and the point where<br />
the chopping is canceled, the tool moves at the chopping feedrate<br />
(specified by parameter No. 8374).<br />
539
20. AXIS CONTROL FUNCTIONS PROGRAMMING<br />
B–63534EN/02<br />
Setting chopping data<br />
Chopping after the upper<br />
dead point or lower dead<br />
point has been changed<br />
The chopping feedrate is clamped to the maximum chopping feedrate (set<br />
with parameter No. 8375) if the specified feedrate is greater than the<br />
maximum chopping feedrate.<br />
The feedrate can be overridden by 0% to 150% by applying the chopping<br />
feedrate override signal.<br />
Set the following chopping data:<br />
Chopping axis: Parameter No. 8370<br />
Reference point (point R): Parameter No. 8371<br />
Upper dead point: Parameter No. 8372<br />
Lower dead point: parameter No. 8373<br />
Chopping feedrate: Parameter No. 8374<br />
Maximum chopping feedrate: Parameter No. 8375<br />
All data items other than the chopping axis and maximum chopping<br />
feedrate can be set on the chopping screen.<br />
For details of how to set chopping data on the chopping screen, refer to<br />
III 11.4.13 Displaying and Setting Chopping Data.<br />
When the upper dead point or lower dead point is changed while chopping<br />
is being performed, the tool moves to the position specified by the old<br />
data. Then, chopping is continued using the new data.<br />
While chopping is being performed, data can be changed only on the<br />
chopping screen. Changing the data on the parameter screen has no effect<br />
on the current chopping operation.<br />
When movement according to the new data starts, the servo delay<br />
compensation function stops the servo delay compensation for the old<br />
data, and starts the servo delay compensation for the new data.<br />
The following describes the operations performed after the data has been<br />
changed.<br />
(1)When the upper dead point is changed during movement from the<br />
upper dead point to the lower dead point<br />
Previous upper dead point<br />
Previous lower dead point<br />
540<br />
New upper dead point<br />
The tool first moves to the lower dead point, then to the new upper<br />
dead point.<br />
Once movement to the lower dead point has been completed, the<br />
previous servo delay compensation is set to 0, and servo delay<br />
compensation is performed based on the new data.
B–63534EN/02 PROGRAMMING<br />
20. AXIS CONTROL FUNCTIONS<br />
(2)When the lower dead point is changed during movement from the<br />
upper dead point to the lower dead point<br />
Previous upper dead point<br />
New lower dead point<br />
Previous lower dead point<br />
The tool first moves to the previous lower dead point, then to the upper<br />
dead point, and finally to the new lower dead point.<br />
Once movement to the upper dead point has been completed, the<br />
previous servo delay compensation is set to 0, and servo delay<br />
compensation is performed based on the new data.<br />
(3)When the upper dead point is changed during movement from the<br />
lower dead point to the upper dead point<br />
Previous upper dead point<br />
Previous lower dead point<br />
541<br />
New upper dead point<br />
The tool first moves to the previous upper dead point, then to the lower<br />
dead point, and finally to the new upper dead point.<br />
Once movement to the lower dead point has been completed, the<br />
previous servo delay compensation is set to 0, and servo delay<br />
compensation is performed based on the new data.<br />
(4)When the lower dead point is changed during movement from the<br />
lower dead point to the upper dead point<br />
Previous upper dead point<br />
Previous lower dead point<br />
New lower dead point<br />
The tool first moves to the upper dead point, then to the new lower<br />
dead point.<br />
Once movement to the upper dead point has been completed, the<br />
previous servo delay compensation is set to 0, and servo delay<br />
compensation is performed based on the new data.
20. AXIS CONTROL FUNCTIONS PROGRAMMING<br />
B–63534EN/02<br />
Servo delay<br />
compensation function<br />
Upper dead point<br />
Lower dead point<br />
Time<br />
Point R<br />
When high–speed chopping is performed with the grinding axis, a servo<br />
delay and acceleration/deceleration delay occur. These delays prevent the<br />
tool from actually reaching the specified position. The control unit<br />
measures the difference between the specified position and the actual tool<br />
position, and automatically compensates for the displacement of the tool.<br />
To compensate for this displacement, an amount of travel equal to the<br />
distance between the upper and lower dead points, plus an appropriate<br />
compensation amount, is specified. When a chopping command is<br />
specified, the feedrate is determined so that the chopping count per unit<br />
time equals the specified count. When the difference between the<br />
displacement of the tool from the upper dead point and the displacement<br />
of the tool from the lower dead point becomes smaller than the setting of<br />
parameter No. 8377, after the start of chopping, the control unit performs<br />
compensation.<br />
When compensation is applied, the chopping axis moves beyond the<br />
specified upper dead point and lower dead point, and the chopping<br />
feedrate increases gradually.<br />
When the difference between the actual machine position and the<br />
specified position becomes smaller than the effective area setting<br />
(parameter No. 1826), the control unit no longer applies compensation,<br />
allowing the tool to continue moving at its current feedrate.<br />
A coefficient for the compensation amount for the displacement<br />
generated by the servo delay incurred by chopping and the delay incurred<br />
during acceleration/deceleration can be specified in parameter No. 8376.<br />
L2 L4 L6<br />
L1 L3 L5<br />
Displacement between the tool and the upper dead point: L2, L4, L6<br />
Displacement between the tool and the lower dead point: L1, L3, L5<br />
Compensation starts when:<br />
| L3 – L2 | < (parameter No. 8377)<br />
When the following condition is satisfied, compensation is no longer applied,<br />
and the tool continues to move at its current feedrate:<br />
| L6 | < effective area setting (parameter No. 1826)<br />
542
B–63534EN/02 PROGRAMMING<br />
20. AXIS CONTROL FUNCTIONS<br />
Mode switching during<br />
chopping<br />
Reset during chopping<br />
Stopping chopping<br />
Background editing<br />
Single block signal<br />
Limitations<br />
Workpiece coordinate<br />
system<br />
PMC axis<br />
Mirror image<br />
Move command during<br />
chopping<br />
Advanced preview<br />
control<br />
If the mode is changed during chopping, chopping does not stop. In<br />
manual mode, the chopping axis cannot be moved manually. It can,<br />
however, be moved manually by means of the manual interrupt.<br />
When a reset is performed during chopping, the tool immediately moves<br />
to point R, after which chopping mode is canceled.<br />
If an emergency stop or servo alarm occurs during chopping, mode is<br />
canceled, and the tool stops immediately.<br />
The following table lists the operations and commands that can be used<br />
to stop chopping, the positions at which chopping stops, and the operation<br />
performed after chopping stops:<br />
Operation/command Stop position<br />
G80 Point R Canceled<br />
CHPST: “0” The tool moves to the lower<br />
dead point, then to point R.<br />
543<br />
Operation after<br />
chopping stops<br />
Canceled<br />
*CHLD: “0” Point R Restart after *CHLD<br />
goes “1”<br />
Reset Point R Canceled<br />
Emergency stop The tool stops immediately. Canceled<br />
Servo alarm The tool stops immediately. Canceled<br />
P/S alarm The tool moves to the lower<br />
dead point, then to point R.<br />
OT alarm The tool moves from the upper<br />
or lower point to point R.<br />
Canceled<br />
Canceled<br />
When an alarm or battery alarm is issued during background editing, the<br />
tool does not stop at point R.<br />
Even when single block signal SBK is input during chopping, chopping<br />
continues.<br />
While chopping is being performed, do not change the workpiece<br />
coordinate system for the chopping axis.<br />
When the chopping axis is selected as the PMC axis, chopping is not<br />
started.<br />
While chopping is being performed, never attempt to apply the mirror<br />
image function about the chopping axis.<br />
If a move command is specified for the chopping axis while chopping is<br />
being performed, a P/S 5050 alarm is issued.<br />
This function does not support the advanced preview control function.
20. AXIS CONTROL FUNCTIONS PROGRAMMING<br />
B–63534EN/02<br />
Program restart<br />
Examples<br />
Upper dead point<br />
(Z100. )<br />
Lower dead point<br />
(Z75. )<br />
Time<br />
Point R<br />
(Z110. )<br />
When a program contains G codes for starting chopping (G81.1) and<br />
stopping chopping (G80), an attempt to restart that program results in a<br />
P/S 5050 alarm being output.<br />
When a program that does not include the chopping axis is restarted<br />
during chopping, the coordinates and amount of travel set for the<br />
chopping axis are not affected after the restart of the program.<br />
G90 G81.1 Z100. Q–25. R10. F3000 ;<br />
Perform rapid traverse to position the tool to Z110. (point R).<br />
Then, perform reciprocating movement along the Z–axis between<br />
Z100. (upper dead point) and Z75. (lower dead point) at 3000<br />
mm/min. Chopping override is enabled.<br />
To cancel chopping, specify the following command:<br />
G80 ;<br />
The tool stops at point R.<br />
544
B–63534EN/02 PROGRAMMING<br />
20. AXIS CONTROL FUNCTIONS<br />
20.7<br />
HOBBING MACHINE<br />
FUNCTION (G80, G81)<br />
Format<br />
Spindle<br />
Explanations<br />
C–axis<br />
Setting the C–axis<br />
Maintaining the<br />
synchronization status<br />
Gears can be cut by turning the workpiece (C–axis) in sync with the<br />
rotation of the spindle (hob axis) connected to a hob.<br />
Also, a helical gear can be cut by turning the workpiece (C–axis) in sync<br />
with the motion of the Z–axis (axial feed axis).<br />
Gear material<br />
G81 T_ L_ Q_ P_ ;<br />
545<br />
Hob<br />
Helical gear<br />
T : Number of teeth (Specifiable range: 1 to 5000)<br />
L : Number of hob threads (Specifiable range: 1 to 20 with a sign)<br />
⋅ The sign of L specifies the direction of rotation of the C–axis.<br />
⋅ If L is positive, the C–axis rotates in the positive direction (+).<br />
⋅ If L is negative, the C–axis rotates in the negative direction (–).<br />
Q : Module or diametral pitch<br />
For metric input, specify a module.<br />
(Unit: 0.00001 mm, Specifiable range: 0.01 to 25.0 mm)<br />
For inch input, specify a diametral pitch.<br />
(Unit: 0.00001 inch –1 , Specifiable range: 0.01 to 250.0 inch –1 )<br />
P : Gear helix angle<br />
(Unit: 0.0001 deg, Specifiable range: –90.0 to +90.0 deg)<br />
P and Q must be specified when a helical gear is to be cut.<br />
G80; Cancels synchronization between the hob axis and C–axis.<br />
The C–axis (workpiece) is usually the fourth axis. However, any axis can<br />
be set as the C–axis by setting the corresponding parameter appropriately<br />
(parameter No. 7710).<br />
The synchronization status is maintained provided:<br />
⋅ The interlock signal for the C–axis is turned on.<br />
⋅ The feed hold state exists.
20. AXIS CONTROL FUNCTIONS PROGRAMMING<br />
B–63534EN/02<br />
Releasing the<br />
synchronization status<br />
Helical gear<br />
compensation<br />
Synchronization between the hob axis and C–axis can also be canceled<br />
when:<br />
⋅ The power is turned off.<br />
⋅ An emergency stop or servo alarm occurs.<br />
⋅ A reset (external reset signal, reset & rewind signal, or reset key on the<br />
MDI panel) is issued.<br />
By setting bit 0 (HBR) of parameter No. 7700, the release of the<br />
synchronization status by a reset can be suppressed.<br />
When a helical gear is to be cut, compensation for the C–axis is needed<br />
according to the amount of travel along the Z–axis (third axis) (axial feed)<br />
and gear helix angle.<br />
Helical gear compensation is performed by adding compensation pulses,<br />
calculated using the formula below, to the C–axis which is synchronized<br />
with the hob axis:<br />
Zsin (P)<br />
Compensation angle =<br />
or<br />
πTQ<br />
360 (For metric input)<br />
Compensation angle =<br />
where<br />
ZQsin (P)<br />
πT<br />
360 (For inch input)<br />
Compensation angle : Signed absolute value (deg)<br />
Z : Amount of travel along the Z–axis after the<br />
specification of G81 (mm or inches)<br />
Total amount of travel along the Z–axis in both<br />
automatic and manual modes<br />
P : Signed gear helix angle (deg)<br />
T : Number of teeth<br />
Q : Module (mm) or diametral pitch (inch –1 )<br />
The values of P, T, and Q must be programmed.<br />
546
B–63534EN/02 PROGRAMMING<br />
20. AXIS CONTROL FUNCTIONS<br />
Direction of helical gear<br />
compensation<br />
(a)<br />
+Z +C<br />
– Z<br />
C : +<br />
Z : +<br />
P : +<br />
Compensation<br />
direction : +<br />
(e)<br />
+Z – C<br />
– Z<br />
C: –<br />
Z : +<br />
P : +<br />
Compensation<br />
direction : –<br />
(e)<br />
+Z – C<br />
– Z<br />
C: –<br />
Z : +<br />
P : +<br />
Compensation<br />
direction : +<br />
1 When bit 2 (HDR) of parameter No. 7700 = 1<br />
(b)<br />
+Z +C<br />
– Z<br />
C : +<br />
Z : +<br />
P: –<br />
Compensation<br />
direction : –<br />
(f)<br />
+Z – C<br />
– Z<br />
C: –<br />
Z : +<br />
P: –<br />
Compensation<br />
direction : +<br />
547<br />
(c)<br />
+Z +C<br />
– Z<br />
C : +<br />
Z: –<br />
P : +<br />
Compensation<br />
direction : –<br />
(g)<br />
+Z – C<br />
– Z<br />
C: –<br />
Z: –<br />
P : +<br />
Compensation<br />
direction : +<br />
(d)<br />
+Z +C<br />
– Z<br />
C : +<br />
Z: –<br />
P: –<br />
Compensation<br />
direction : +<br />
(h)<br />
+Z – C<br />
– Z<br />
C: –<br />
Z: –<br />
P: –<br />
Compensation<br />
direction : –<br />
2 When bit 2 (HDR) of parameter No. 7700 = 0 (Items (a) to (d) are the<br />
same as for 1.)<br />
(f)<br />
+Z – C<br />
– Z<br />
C: –<br />
Z : +<br />
P: –<br />
Compensation<br />
direction : –<br />
(g)<br />
+Z – C<br />
– Z<br />
C: –<br />
Z: –<br />
P : +<br />
Compensation<br />
direction : –<br />
(h)<br />
+Z – C<br />
– Z<br />
C: –<br />
Z: –<br />
P: –<br />
Compensation<br />
direction : +
20. AXIS CONTROL FUNCTIONS PROGRAMMING<br />
B–63534EN/02<br />
Setting the helical gear<br />
axial feed axis<br />
C–axis servo delay<br />
compensation (G82, G83,<br />
G84)<br />
The Z–axis (axial feed axis) is usually the third axis. However, any axis<br />
can be set as the Z–axis by setting the corresponding parameter<br />
appropriately (parameter No. 7709).<br />
The servo delay is proportional to the speed of the hob axis. Therefore,<br />
in a cycle where rough machining and finish machining are performed at<br />
different hob axis speeds, compensation for the servo delay is required.<br />
The servo delay is calculated as follows:<br />
<br />
<br />
where<br />
<br />
<br />
<br />
E : C–axis servo delay compensation . . . (deg)<br />
Fc : C–axis speed when G83 is specified . . . (deg/min)<br />
Ks : Servo loop gain (LPGIN of parameter No. 1825)<br />
(sec –1 . . . )<br />
C : Delay incurred in the CNC . . . (sec)<br />
M : Delay compensation magnification 1 in the CNC<br />
(SVCMP1 of parameter No. 7715)<br />
L : Delay incurred by smoothing, as specified by<br />
parameter No. 7701 . . . (sec)<br />
Sup : Remaining pulse error caused by acceleration/<br />
deceleration . . . (deg)<br />
N : C–axis servo delay compensation magnification 2<br />
(SVCMP2 of parameter No. 7714)<br />
When the hob axis speed is changed, C–axis servo delay compensation<br />
is performed using the following two methods:<br />
Compensation is specified both before and after the speed is<br />
changed. Each time G83 is specified, compensation for the delay<br />
at that time is applied.<br />
Before the speed is changed, the servo delay is recorded. After the<br />
speed is changed, compensation for the difference between the<br />
recorded delay and that observed when the command is specified<br />
is performed.<br />
The latter method, in which the compensation before speed change is<br />
recorded, can be used by setting bit 5 (DLY) of parameter No. 7701 to 1.<br />
This method, in comparison with that where the amount of compensation<br />
is not recorded, offers the advantage of processing being possible at<br />
higher speeds.<br />
548
B–63534EN/02 PROGRAMMING<br />
20. AXIS CONTROL FUNCTIONS<br />
⋅ Method in which compensation for the delay when a command is<br />
specified is performed (G82, G83)<br />
G82: Cancels C–axis servo delay compensation.<br />
G83: Executes C–axis servo delay compensation.<br />
(Example)<br />
G81 T__ L__ ; ···Starts synchronization.<br />
M03 S100 ; ···Rotates the hob axis.<br />
G04 P2000 ; ···Dwell to assure constant hob axis rotation.<br />
G01 G83 F__ ; ···Performs C–axis delay compensation.<br />
G01 X__ F__ ;<br />
·<br />
·<br />
G82 ; ···Cancels C–axis servo delay.<br />
S200 ; ···Changes the speed.<br />
G04 P2000 ; ···Dwell to assure constant hob axis rotation.<br />
G01 G83 F__ ; ···Performs C–axis delay compensation.<br />
⋅ Method in which the delay before change is recorded (G82, G83,<br />
G84)<br />
G82: Cancels C–axis servo delay compensation.<br />
G83: Performs compensation for the difference between the C–axis<br />
servo delay, observed when G83 is specified, and the delay<br />
recorded by G84.<br />
G84: Records the C–axis servo delay observed when G84 is specified.<br />
(The recorded value remains as is until G81 is specified or<br />
another G84 is specified.)<br />
(Example)<br />
G81 T__ L__ ; · · · Starts synchronization.<br />
M03 S100 ; · · · Rotates the hob axis.<br />
G04 P2000 ; · · · Dwell to assure constant hob axis rotation.<br />
G84 ; · · · Records the C–axis servo delay at the<br />
current speed.<br />
G01 X__ F__ ;<br />
·<br />
·<br />
·<br />
S200 ; · · · Changes the speed.<br />
G04 P2000 ; · · · Dwell to assure constant hob axis rotation<br />
G01 G83 F__; · · · Performs C–axis servo delay compensation.<br />
⋅ Notes<br />
Specify the G83 block in G01 mode. Also, specify a feedrate using<br />
the F code.<br />
Once G83 has been specified, another G83 command cannot be<br />
specified until compensation is canceled by specifying G82, or<br />
C–axis synchronization is canceled.<br />
Specify G83 once a constant hob axis rotation speed has been<br />
achieved.<br />
549
20. AXIS CONTROL FUNCTIONS PROGRAMMING<br />
B–63534EN/02<br />
C–axis synchronous<br />
shift<br />
Manual setting of<br />
one–rotation signal<br />
Retract function<br />
Limitations<br />
Setting a rotation axis<br />
Gear ratio of the spindle<br />
(bob axis) and Position<br />
coder<br />
In C–axis servo delay compensation (G83), compensation is not<br />
applied to the integer part of the gear pitch. The compensation<br />
direction is opposite to that of the C–axis rotation.<br />
C–axis handle interrupt<br />
During synchronization between the hob axis and C–axis, manual<br />
handle interrupt can be performed for the C–axis. The C–axis is<br />
shifted by the amount of the handle interrupt.<br />
For details of handle interrupts, refer to the relevant manual supplied<br />
by the machine tool builder.<br />
Synchronous shift by programming<br />
During synchronization between the hob axis and C–axis, the C–axis<br />
can be interrupted using G01. In this case, be careful not to exceed the<br />
maximum cutting speed.<br />
Example: Hob shifting during synchronization<br />
G01 Y__ C__ F__ ;<br />
When the rotation of the position coder is stopped, the position of the<br />
one–rotation signal is shifted in the CNC as if the one–rotation signal had<br />
been output with the position coder at the current position.<br />
For details, refer to the relevant manual supplied by the machine tool<br />
builder.<br />
In both automatic and manual operation mode, retract movement can be<br />
made over the distance specified by parameter No. 7741, along the axis<br />
set by bit 0 (RTRx) of parameter No. 7730.<br />
For details, refer to the relevant manual supplied by the machine tool<br />
builder.<br />
Set a rotation axis as the C–axis (workpiece axis). (Bit 0 (RoTx) of<br />
parameter No. 1006 = 1)<br />
Set parameter No.7700#5 to 0 and also set the gear ratio of the spindle<br />
(bob axis) to the position coder in parameter No.7711.<br />
550
B–63534EN/02 PROGRAMMING<br />
20. AXIS CONTROL FUNCTIONS<br />
20.8<br />
SIMPLE ELECTRIC<br />
GEAR BOX<br />
(G80, G81)<br />
20.8.1<br />
Simple Electric Gear<br />
Box (G80, G81)<br />
Format<br />
In the same way as with the hobbing machine function, to machine<br />
(grind/cut) a gear, the rotation of the workpiece axis connected to a servo<br />
motor is synchronized with the rotation of the tool axis (grinding<br />
wheel/hob) connected to the spindle motor. To synchronize the tool axis<br />
with the workpiece axis, an electric gear box (EGB) function is used for<br />
direct control using a digital servo system. With the EGB function, the<br />
workpiece axis can trace tool axis speed variations without causing an<br />
error, thus machining gears with great precision.<br />
Some conditions must be satisfied for setting the workpiece axis and tool<br />
axis. For details, refer to the relevant manual provided by the machine<br />
tool builder.<br />
G81 T _ L _ Q _ P _ ; Starts synchronization.<br />
S_ M03 (or M04) ; Starts tool axis rotation.<br />
M05 ; Stops tool axis rotation.<br />
G80 ; Cancels synchronization.<br />
T : Number of teeth (Specifiable range: 1 to 1000)<br />
L : Number of hob threads<br />
(Specifiable range: –21 to +21 with 0 excluded)<br />
Q : Module or diametral pitch<br />
Specify a module in the case of metric input.<br />
(Unit: 0.00001 mm, Specifiable range: 0.01 to 25.0 mm)<br />
Specify a diametral pitch in the case of inch input.<br />
(Unit: 0.00001 inch –1 , Specifiable range: 0.01 to 25.0 inch –1 )<br />
P : Gear helix angle<br />
(Unit: 0.0001 deg, Specifiable range: –90.0 to 90.0 deg.)<br />
* When specifying Q and P, the user can use a decimal point.<br />
551
20. AXIS CONTROL FUNCTIONS PROGRAMMING<br />
B–63534EN/02<br />
Explanations<br />
Synchronization control<br />
1 Start of synchronization<br />
When synchronization mode is set with G81, the synchronization<br />
switch of the EGB function is closed, and synchronization between the<br />
tool axis and workpiece axis starts. At this time, synchronization<br />
mode signal SYNMOD is turned on. During synchronization, the<br />
rotation of the tool axis and workpiece axis is controlled so that the<br />
relationship between T (number of teeth) and L (number of hob<br />
threads) can be maintained. Moreover, the synchronous relationship<br />
is maintained regardless of whether the operation is automatic or<br />
manual during synchronization.<br />
G81 cannot be specified again during synchronization. Moreover, the<br />
specification of T, L, Q, and P cannot be modified during<br />
synchronization.<br />
2 Start of tool axis rotation<br />
When the rotation of the tool axis starts, the rotation of the workpiece<br />
starts so that the synchronous relationship specified in the G81 block<br />
can be maintained.<br />
The rotation direction of the workpiece axis depends on the rotation<br />
direction of the tool axis. That is, when the rotation direction of the<br />
tool axis is positive, the rotation direction of the workpiece axis is also<br />
positive; when the rotation direction of the tool axis is negative, the<br />
rotation direction of the workpiece axis is also negative. However, by<br />
specifying a negative value for L, the rotation direction of the<br />
workpiece axis can be made opposite to the rotation direction of the<br />
tool axis.<br />
During synchronization, the machine coordinates of the workpiece<br />
axis and EGB axis are updated as synchronous motion proceeds. On<br />
the other hand, a synchronous move command has no effect on the<br />
absolute and relative coordinates.<br />
3 Termination of tool axis rotation<br />
In synchronism with gradual stop of the tool axis, the workpiece axis<br />
is decelerated and stopped. By specifying the command below after<br />
the spindle stops, synchronization is canceled, and the EGB<br />
synchronization switch is opened. At this time, the synchronization<br />
mode signal (SYNMOD) is turned off.<br />
4 Cancellation of synchronization<br />
The position of the workpiece axis after travel during synchronization<br />
is reflected in the absolute coordinates when synchronization is<br />
canceled; from this point, absolute command programming is enabled<br />
for the workpiece axis. By setting bit 0 (HOBRST) of parameter No.<br />
7700 to 0, synchronization can also be canceled upon reset.<br />
* The synchronization mode is canceled by a servo alarm, PS000<br />
alarm, or emergency stop.<br />
552
B–63534EN/02 PROGRAMMING<br />
20. AXIS CONTROL FUNCTIONS<br />
Helical gear<br />
compensation<br />
When a helical gear is to be produced, the compensation of workpiece axis<br />
rotation is needed according to the travel distance on the Z–axis (axial<br />
feed).<br />
Helical gear compensation is performed by adding compensation pulses<br />
calculated from the formula below to the workpiece axis:<br />
Z sin (P)<br />
Compensation angle =<br />
or<br />
T Q<br />
360 (For metric input)<br />
Z Q sin (P)<br />
Compensation angle =<br />
T<br />
where<br />
360 (For inch input)<br />
Compensation angle: Signed absolute value (deg)<br />
Z : Amount of travel on the Z–axis after the specification of G81<br />
(mm or inch)<br />
P : Signed gear helix angle (deg)<br />
T : Number of teeth<br />
Q: Module (mm) or diametral pitch (inch –1 )<br />
The values of P, T, and Q are to be programmed.<br />
553
20. AXIS CONTROL FUNCTIONS PROGRAMMING<br />
B–63534EN/02<br />
Direction of helical gear<br />
compensation<br />
+Z<br />
– Z<br />
+Z<br />
– Z<br />
+Z<br />
– Z<br />
(a)<br />
C : +<br />
Z : +<br />
P : +<br />
Compensation<br />
direction : +<br />
(e)<br />
C : –<br />
Z : +<br />
P : +<br />
Compensation<br />
direction : –<br />
(e)<br />
C : –<br />
Z : +<br />
P : +<br />
Compensation<br />
direction : +<br />
+C<br />
–C<br />
–C<br />
+Z<br />
– Z<br />
+Z<br />
– Z<br />
1 When bit 2 (HDR) of parameter No. 7700 = 1<br />
(b)<br />
C : +<br />
Z : +<br />
P : –<br />
Compensation<br />
direction : –<br />
+Z<br />
– Z<br />
(f)<br />
C : –<br />
Z : +<br />
P : –<br />
Compensation<br />
direction : +<br />
+C<br />
–C<br />
554<br />
+Z<br />
– Z<br />
(c)<br />
C : +<br />
Z : –<br />
P : +<br />
Compensation<br />
direction : –<br />
+Z<br />
– Z<br />
(g)<br />
C : –<br />
Z : –<br />
P : +<br />
Compensation<br />
direction : +<br />
+C<br />
–C<br />
+Z<br />
– Z<br />
+Z<br />
– Z<br />
(d)<br />
+C<br />
C : +<br />
Z : –<br />
P : –<br />
Compensation<br />
direction : +<br />
(h)<br />
C : –<br />
Z : –<br />
P : –<br />
Compensation<br />
direction : –<br />
2 When bit 2 (HDR) of parameter No. 7700 = 0 (Items (a) to (d) are<br />
the same as for 1.)<br />
(f)<br />
C : –<br />
Z : +<br />
P : –<br />
Compensation<br />
direction : –<br />
–C<br />
+Z<br />
– Z<br />
(g)<br />
C : –<br />
Z : –<br />
P : +<br />
Compensation<br />
direction : –<br />
–C<br />
+Z<br />
– Z<br />
(h)<br />
–C<br />
–C<br />
C : –<br />
Z : –<br />
P : –<br />
Compensation<br />
direction : +
B–63534EN/02 PROGRAMMING<br />
20. AXIS CONTROL FUNCTIONS<br />
Coordinates in helical<br />
compensation<br />
Retraction<br />
Feedrate at retraction<br />
Retraction during<br />
automatic operation<br />
Synchronization<br />
coefficient<br />
Manual handle interrupt<br />
Move command during<br />
synchronization<br />
Limitations<br />
Feed hold during<br />
retraction<br />
Retraction when alarm is<br />
issued<br />
Rapid traverse during<br />
synchronization<br />
Maximum speed<br />
G code command during<br />
synchronization<br />
Drilling canned cycle<br />
In helical compensation, the machine coordinates and absolute<br />
coordinates of the workpiece axis (4th axis) are updated by the amount of<br />
helical compensation.<br />
By turning on the retract signal RTRCT (on a rising edge) in automatic<br />
operation mode or manual operation mode, a retract movement can be<br />
made over the distance specified in parameter No. 7741 on the axis set in<br />
bit 0 (RTRx) of parameter No. 7730. Upon completion of retract<br />
operation, the retract completion signal RTRCTF is output.<br />
For retract operation, the feedrate specified in parameter No. 7740 is used.<br />
During retract operation, the feedrate override capability is disabled.<br />
When the retract signal is turned on in automatic operation, retract<br />
operation is performed, and automatic operation is stopped at the same<br />
time.<br />
A synchronization coefficient is internally represented using a fraction<br />
(K2/K1) to eliminate an error. The formula below is used for calculation.<br />
(, : Number of detector pulses per rotation of the tool axis, and number<br />
of detector pulses per rotation of the workpiece axis (parameter Nos. 7772<br />
and 7773), respectively)<br />
Synchronization coefficient = K2 L <br />
= <br />
K1 T <br />
In the formula above, K2/K1 is obtained by reducing the right side to<br />
lowest terms, but K1 and K2 must satisfy the following restriction:<br />
–2147483648 K2 –2147483647<br />
1 K1 65535<br />
When this restriction is not satisfied, the PS181 alarm is issued when G81<br />
is specified.<br />
During synchronization, a manual handle interrupt can be used for the<br />
workpiece axis and other servo axes.<br />
During synchronization, a move command can be programmed for the<br />
workpiece axis and other servo axes. Note, however, that incremental<br />
command programming for cutting feed must be used to specify a<br />
workpiece axis move command.<br />
For retract movement, the feed hold capability is disabled.<br />
This function does not include a retract function used when an alarm is<br />
issued.<br />
In synchronization mode, a cutting feedrate can be specified for the<br />
workpiece axis (4th axis). Rapid traverse cannot be specified using G00.<br />
The maximum speeds of the tool axis and workpiece axis depend on the<br />
detectors used.<br />
During synchronization, G00, G28, G27, G29, G30, G53, G20, and G21<br />
cannot be specified.<br />
When this function is used, the drilling canned cycle cannot be used.<br />
555
20. AXIS CONTROL FUNCTIONS PROGRAMMING<br />
B–63534EN/02<br />
Examples<br />
20.8.2<br />
Skip Function for EGB<br />
Axis (G31.8)<br />
O1000 ;<br />
N0010 M19 ; Performs tool axis orientation.<br />
N0020 G28 G91 C0 ; Performs reference position return<br />
operation of the workpiece axis.<br />
N0030 G81 T20 L1 ; Starts synchronization between the tool<br />
axis and workpiece axis.<br />
(The workpiece axis rotates 18° when<br />
the tool axis makes one rotation.)<br />
N0040 S300 M03 ; Rotates the tool axis at 300 min -1 .<br />
N0050 G01 X F ; Makes a movement on the X–axis<br />
(for cutting).<br />
N0060 G01 Z F ; Makes a movement on the Z–axis<br />
(for machining).<br />
– – – – – – – – – – – – – – – – ;<br />
– – – – – – – – – – – – – – – – ;<br />
N0100 G01 X F ; Makes a movement on the X–axis<br />
(for retraction).<br />
N0110 M05 ; Stops the tool axis.<br />
N0120 G80 ; Cancels synchronization between the<br />
tool axis and workpiece axis.<br />
N0130 M30 ;<br />
This function provides the capability that skip function or high speed skip<br />
function can be commanded for work axis in the EGB(Electronic Gear<br />
Box) synchronization mode.<br />
The features are as follows.<br />
– The program block to enable the function is not interrupted until the<br />
total number of skip signal inputs reaches a value specified in the same<br />
block.<br />
– The synchronization by EGB is not stopped by any of skip signal<br />
inputs.<br />
– The machine coordinate position of the EGB axis (work axis) at each<br />
time of the signal inputs is stored in one of consecutive custom macro<br />
variables. The top number of the variables is specified in the block.<br />
– The total number of the inputs is stored in another specified variable.<br />
As for the EGB function, see the chapter “1.14 Simple Electric Gear Box”<br />
of the Connection Manual (Functions) B–63523EN–1.<br />
556
B–63534EN/02 PROGRAMMING<br />
20. AXIS CONTROL FUNCTIONS<br />
Format<br />
Explanations<br />
Examples<br />
G81 T_ L_ ; (EGB mode on)<br />
G31.8 G91 a0 P_ Q_ R_ ; (EGB skip command)<br />
: EGB axis (Work axis)<br />
P : The top number of the consecutive custom macro variables in<br />
which the machine coordinate positions of the EGB axis (work<br />
axis) at the skip signal inputs are stored.<br />
Q : The maximum allowable number of the skip signal inputs.<br />
(Range of command value: 1 – 200)<br />
R : The number of the custom macro variable in which the total<br />
number of the inputs is stored.<br />
This data is usually the same as the value specified by Q.<br />
Therefore this is not necessarily specified. Specify it when the<br />
total number should be confirmed.<br />
G31.8 is a one–shot G code.<br />
During the execution of the G31.8 block, the machine coordinate<br />
positions of the EGB axis (work axis) at the skip signal inputs are stored<br />
in the consecutive custom macro variables where the top number of the<br />
variables is specified by P and the maximum allowable number of the skip<br />
signal inputs is specified by Q.<br />
The total number of the skip signal inputs (i.e. the same value specified<br />
by Q) is stored in the variable specified by R.<br />
G81 T200 L2 ; (EGB mode on)<br />
X_ ;<br />
Z_ ;<br />
G31.8 G91 C0 P500 Q200 R1 ; (EGB skip command)<br />
After 200 times of skip signal inputs, 200 machine coordinate positions<br />
of the C axis are stored respectively in the consecutive custom macro<br />
variables #500 – #699.<br />
The total number of skip signal inputs (i.e. 200) is stored in the custom<br />
macro variable #1.<br />
557
20. AXIS CONTROL FUNCTIONS PROGRAMMING<br />
B–63534EN/02<br />
Alarms<br />
NOTE<br />
1 In the G31.8 block, only the EGB axis (work axis) should be<br />
commanded. When another axis is commanded, the P/S<br />
alarm (No.5068) will occur.<br />
2 If P is not specified in the G31.8 block, the P/S alarm<br />
(No.5068) will occur.<br />
3 If R is not specified in the G31.8 block, the total number of<br />
skip signal inputs is not stored in the custom macro variable.<br />
4 The numbers of custom macro variables specified by P and<br />
R must be the existing ones. If any nonexistent variable is<br />
specified, the P/S alarm (No.115) will occur.<br />
If all the variables ranged by P and Q are not among the<br />
existing ones, the P/S alarm (No.115) will occur, too.<br />
5 You can select the type of skip functions, normal skip<br />
function or high speed skip function, by the parameter<br />
HSS(No.6200#4).<br />
When high speed skip is selected, you can select a valid<br />
signal among high speed skip signals by setting parameter<br />
9S1 to 9S8 (No.6208#0 to #7).<br />
6 The parameters No.6201#0 and #1 are not effective for the<br />
G31.8 function.<br />
The machine coordinate positions stored in macro variables<br />
do not include any compensation amount based on position<br />
errors and servo time constant (loop gain).<br />
Number<br />
5068 G31.8 FORMAT ER-<br />
ROR<br />
Message Contents<br />
558<br />
When skip function for EGB axis (G31.8)<br />
is specified, there are wrong command as<br />
follows:<br />
– Movement command is specified for<br />
EGB axis (work axis).<br />
– More than one axis has been specified<br />
– P has not been specified in G31.8<br />
block.<br />
– Q has been specified out of range.
B–63534EN/02 PROGRAMMING<br />
20. AXIS CONTROL FUNCTIONS<br />
20.8.3<br />
Spindle Electronic<br />
Gear Box<br />
General<br />
A gear can be shaped (grind/cut) by the synchronization of the workpiece<br />
axis rotation to the tool axis (grinding axis /hob) rotation by using two<br />
spindles as a tool axis and a workpiece axis. To synchronize these two<br />
axes, the Electronic gear box (EGB) is used.<br />
In the Spindle EGB, the synchronous pulse is produced from the feedback<br />
pulse of the position detector attached to the tool axis (master axis) in the<br />
motor control, and the workpiece axis (slave axis) rotates with the pulse.<br />
Feedback pulse from Master side to Slave side is forwarded by the<br />
communication between spindle amplifiers.<br />
The specifications of the Spindle EGB control are as follows:<br />
1) The Spindle EGB synchronization is started by specifying T<br />
command (number of teeth) and L command (number of hob threads),<br />
which determine the synchronous ratio, in G81 block. The Spindle<br />
EGB synchronization is canceled by specifying G80.<br />
2) The synchronous ratio is calculated from T and L command in G81<br />
block and the number of position detector pulses per rotation about<br />
the tool and the workpiece axis (parameter setting).<br />
3) This function has the retract function like the hobbing function.<br />
4) The cutting helical gear is performed by specifying Q command<br />
(module or diametral pitch) and P command (gear helix angle) in G81<br />
block.<br />
5) The Spindle EGB synchronization is maintained regardless of<br />
whether the operation is automatic or manual.<br />
559
20. AXIS CONTROL FUNCTIONS PROGRAMMING<br />
B–63534EN/02<br />
CNC<br />
ÔÔÔÔÔ<br />
Cs<br />
command<br />
ÔÔÔÔÔ<br />
ÔÔÔÔÔ<br />
ÔÔÔÔÔ<br />
Cs<br />
command<br />
ÔÔÔÔÔ<br />
ÔÔÔÔÔ<br />
+<br />
ÔÔ<br />
+<br />
2 nd spindle (Slave)<br />
+<br />
–<br />
Position<br />
control<br />
Position gain<br />
ÔÔÔÔÔ<br />
ÔÔÔÔÔÔ<br />
ÔÔÔÔÔ<br />
ÔÔÔÔÔ<br />
ÔÔÔÔÔÔÔ<br />
1 st spindle (Master)<br />
Position feedback<br />
α s<br />
ÔÔÔÔ<br />
ÔÔÔÔ<br />
ÔÔÔÔÔ<br />
* The master axis can use the rotation command with spindle mode.<br />
Explanations<br />
Format<br />
+<br />
–<br />
560<br />
+<br />
+<br />
EGB mode<br />
Velocity feedback<br />
–<br />
Velocity<br />
control (PI)<br />
ÔÔÔÔ ÔÔÔ<br />
ÔÔÔÔ<br />
ÔÔÔ<br />
ÔÔÔÔ<br />
ÔÔÔÔÔ<br />
ÔÔÔÔ ÔÔÔ<br />
ÔÔÔÔ<br />
ÔÔÔÔÔÔÔÔÔ<br />
K2<br />
K1<br />
ÔÔÔ<br />
ÔÔÔ<br />
ÔÔÔ<br />
ÔÔÔ<br />
Position feedback<br />
Velocity feedback<br />
–<br />
Position<br />
Velocity<br />
control<br />
control (PI)<br />
Position gain +<br />
Fig. 20.8.3 (a) Block diagram for Spindle EGB control<br />
Built–in<br />
motor &<br />
Detector<br />
Work–<br />
piece<br />
(Gear)<br />
K2/K1 : Synchronous ratio<br />
α : Feedforward ratio<br />
ÔÔÔÔÔÔÔÔÔ<br />
ÔÔÔÔÔÔÔÔÔ<br />
Built–in<br />
motor &<br />
Detector<br />
Tool<br />
(Hob)<br />
ÔÔÔÔ ÔÔÔ<br />
ÔÔÔÔ<br />
ÔÔÔ<br />
ÔÔÔÔ<br />
ÔÔÔÔÔ<br />
ÔÔÔ<br />
ÔÔÔÔ<br />
ÔÔÔÔ<br />
G81 T_ L_ Q_ P_ ; Starts synchronization.<br />
G80 ; Cancels synchronization.<br />
T : Number of teeth (Specifiable range : 1 to 1000)<br />
L : Number of hob threads (Specifiable range : –200 to 200 with 0<br />
excluded)<br />
Q : Module or diametral pitch<br />
Specify a module in the case of metric input.<br />
(Unit : 0.00001mm, Specifiable range : 0.01 to 25.0mm)<br />
Specify a diametral in the case of inch input.<br />
(Unit : 0.00001inch –1 , Specifiable range : 0.01 to 25.0inch –1 )<br />
P : Gear helix angle<br />
(Unit : 0.0001deg, Specifiable range : –90.0 to 90.0deg)
B–63534EN/02 PROGRAMMING<br />
20. AXIS CONTROL FUNCTIONS<br />
Parameter setting<br />
Starting/canceling of<br />
synchronization<br />
NOTE<br />
Specify G81 and G80 code only in a block.<br />
The following parameters should be set for the Spindle EGB control.<br />
(1) Master axis number (Parameter No.7771) * Only Cs contour axis<br />
(2) Slave axis number (Parameter No.7710)<br />
(3) Number of position detector pulses per rotation about master axis<br />
(Parameter No.7772)<br />
(4) Number of position detector pulses per rotation about slave axis<br />
(Parameter No.7773)<br />
(5) Spindle EGB master axis enable (Parameter No.4352#7)<br />
(6) Spindle EGB slave axis enable (Parameter No.4352#6)<br />
(7) Number of sinusoidal waves from master spindle position<br />
detector(Parameter No.4386)<br />
NOTE<br />
The master axis number should be set smaller than the<br />
slave axis number.<br />
When the rotation of the tool axis (master axis) starts after G81 is<br />
specified, the EGB synchronization starts with the synchronous<br />
relationship specified in G81 block, and the rotation of the workpiece axis<br />
(slave axis) starts. When the EGB synchronization starts, the<br />
synchronization mode signal SYNMOD is turned to “1”.<br />
When the rotation of the tool axis is stopped, the workpiece axis stopped<br />
in synchronism. Then the EGB synchronization is canceled by specifying<br />
G80. When the EGB synchronization is canceled, the synchronization<br />
mode signal SYNMOD is turned to “0”.<br />
G81 cannot be specified again during the EGB synchronization.<br />
Moreover, the specification of T, L, Q, and P cannot be modified during<br />
the synchronization. Specify the starting and canceling of<br />
synchronization at the tool axis (master axis) stopping.<br />
561
20. AXIS CONTROL FUNCTIONS PROGRAMMING<br />
B–63534EN/02<br />
Synchronization start<br />
command (G81)<br />
Synchronization mode<br />
Synchronization mode signal<br />
SYNMOD<br />
Tool axis rotation command<br />
Tool axis stop command<br />
Tool axis rotation speed<br />
Work piece axis rotation<br />
speed<br />
Synchronization cancel<br />
command (G80)<br />
Program example<br />
Fig. 20.8.3 (b) Example timing for starting/canceling synchronization<br />
O1000 ;<br />
N00010 G80 ;<br />
N00020 G28 G91 B0 C0 ; Performs reference position return<br />
operation of the tool and the workpiece<br />
axis.<br />
N00030 G81 T20 L1 ; Starts synchronization.<br />
N00040 Mxx ; Rotates the tool axis by velocity<br />
command of PMC axis control.<br />
N00050 G04 X1000 ; Waits until rotation of the tool axis is<br />
constant.<br />
N00060 G01 X_ F_ ; Makes movement on the X–axis(for<br />
cutting).<br />
N00070 G01 Z_ F_ ; Makes movement on the Z–axis(for<br />
machining).<br />
– – – – – – – – – – – – ;<br />
– – – – – – – – – – – – ;<br />
562
B–63534EN/02 PROGRAMMING<br />
20. AXIS CONTROL FUNCTIONS<br />
Helical gear<br />
compensation<br />
N00100 G01 X_ F_ ; Makes movement on the X–axis(for<br />
retraction).<br />
N00110 Myy ; Stops the tool axis.<br />
N00120 G80 ; Cancels synchronization.<br />
N00130 M30 ;<br />
When a helical gear is to be produced, the compensation of the workpiece<br />
axis rotation is needed according to the travel distance on the Z–axis (axial<br />
feed axis: parameter No. 7709 setting). Helical gear compensation is<br />
performed by adding compensation pulses calculated from the formula<br />
below to the workpiece axis.<br />
Z sin(P)<br />
Compensation angle 360 (For metric input)<br />
T Q<br />
or<br />
Z Q sin(P)<br />
Compensation angle 360 (For inch input)<br />
T<br />
where<br />
Compensation angle : Signed absolute value (deg)<br />
Z : Amount of travel on the Z–axis after the specification of G81 (mm<br />
or inch)<br />
P : Signed gear helix angle (deg)<br />
T : Number of teeth<br />
Q: Module (mm) or diametral pitch (inch –1 )<br />
The values of P, T, Q, are to be programmed.<br />
In helical gear compensation, the machine coordinates and absolute<br />
coordinates of the workpiece axis are updated by the amount of helical<br />
gear compensation. When P command and Q command are not specified<br />
in G81 block, helical gear compensation is not performed.<br />
The direction of helical gear compensation is determined by bit 2 (HDR)<br />
of parameter No.7700 (1 is usually specified). The compensation<br />
direction is shown in figure 2.4.<br />
563
20. AXIS CONTROL FUNCTIONS PROGRAMMING<br />
B–63534EN/02<br />
(a)<br />
+Z +C<br />
– Z<br />
C : +<br />
Z : +<br />
P : +<br />
: +<br />
(e)<br />
+Z – C<br />
– Z<br />
C : –<br />
Z : +<br />
P : +<br />
: –<br />
(e)<br />
+Z – C<br />
– Z<br />
C : –<br />
Z : +<br />
P : +<br />
: +<br />
(1) When bit 2 (HDR) of parameter No.7700 is 1.<br />
(b)<br />
+Z +C<br />
– Z<br />
C : +<br />
Z : +<br />
P : –<br />
: –<br />
(f)<br />
+Z – C<br />
– Z<br />
C : –<br />
Z : +<br />
P : –<br />
: +<br />
564<br />
(c)<br />
+Z +C<br />
– Z<br />
C : +<br />
Z : –<br />
P : +<br />
: –<br />
(g)<br />
+Z – C<br />
– Z<br />
C : –<br />
Z : –<br />
P : +<br />
: +<br />
(d)<br />
+Z +C<br />
– Z<br />
C : +<br />
Z : –<br />
P : –<br />
: +<br />
(h)<br />
+Z – C<br />
– Z<br />
C : –<br />
Z : –<br />
P : –<br />
: –<br />
(2) When bit 2 (HDR) of parameter No.7700 is 0. (Items (a) to (d) are the<br />
same as for (1))<br />
(f)<br />
+Z – C<br />
– Z<br />
C : –<br />
Z : +<br />
P : –<br />
: –<br />
(g)<br />
+Z – C<br />
– Z<br />
C : –<br />
Z : –<br />
P : +<br />
: –<br />
Fig. 20.8.3 (c) Direction of helical gear compensation<br />
(h)<br />
+Z – C<br />
– Z<br />
C : –<br />
Z : –<br />
P : –<br />
: +
B–63534EN/02 PROGRAMMING<br />
20. AXIS CONTROL FUNCTIONS<br />
Synchronous ratio<br />
The synchronous ratio of the Spindle EGB control is internally<br />
represented using a fraction. The fraction is calculated from T and L<br />
command in G81 block and the number of position detector pulses per<br />
rotation about the tool and the workpiece axis (parameter setting).<br />
Synchronous ratio : K2<br />
<br />
L <br />
<br />
K1 T <br />
L : Hob threads<br />
T : Number of teeth of the work<br />
: Number of position detector pulses per revolution about the tool<br />
axis (Parameter No.7772)<br />
: Number of position detector pulses per revolution about the<br />
workpiece axis (Parameter No.7773)<br />
This synchronous ratio is reduced to the lowest term, and it has the<br />
following limit.<br />
565<br />
–32767 < K2 < 32767<br />
1 < K1 < 65535<br />
When K2 or K1 is out of this range, P/S alarm (No.181) occurs.<br />
The values of K2 and K1 are set to the parameter No.4387 and No.4388<br />
automatically when G81 is specified. If T is not specified in G81 block,<br />
P/S alarm (No.181) occurs. If L is not specified in G81 block, the<br />
synchronous ratio is calculated as L = 1.<br />
Example) When the pulses for one rotation (360000) are specified to the<br />
tool axis (master axis) on the following conditions, the pulses for position<br />
control are distributed as Fig.20.8.3(d).<br />
Hob threads L : 10<br />
Number of teeth of the work T : 100<br />
Number of pulse per one revolution of position detector on the tool<br />
axis : 360000<br />
Number of pulse per one revolution of position detector on the work<br />
axis : 360000<br />
Synchronous ratio : K2<br />
K1<br />
<br />
L <br />
<br />
T <br />
10<br />
<br />
360000<br />
<br />
1<br />
100 360000 10
20. AXIS CONTROL FUNCTIONS PROGRAMMING<br />
B–63534EN/02<br />
Slave axis<br />
Cs command<br />
Master axis<br />
Cs command<br />
0<br />
360000<br />
Retract function<br />
Limitations<br />
*CMR<br />
(*1)<br />
0<br />
+<br />
+<br />
566<br />
–<br />
+<br />
36000<br />
Position feedback<br />
36000<br />
*CMR<br />
(*1) 360000<br />
Motor<br />
Fig. 20.8.3 (d) Pulse distribution<br />
–<br />
Motor Workpiece Detector<br />
EGB<br />
K2/K1 : Synchronous ratio<br />
*K2/K1<br />
(*1/10)<br />
Tool axis Detector<br />
360000<br />
As Fig. 20.8.3 (d), when 360000 pulses (Number of pulse for one rotation<br />
of the master axis) are specified, the pulses for slave axis by EGB are equal<br />
to the value which is multiplied to the number of pulse for one rotation<br />
of the slave axis by the ratio of Hob thread and number of teeth (rotation<br />
ratio between master axis and slave axis).<br />
360000 1/10 = 36000<br />
When the retract signal RTRCT is turned to “1” in auto mode<br />
(MEM, MDI, etc.) or manual mode (HNDL, JOG etc.), the axis set in bit<br />
0 (RTR) of the parameter No.7730 moves (retracts) by the amount set in<br />
the parameter No.7741.<br />
NOTE<br />
1 Feedrate in retract is set to the parameter No.7740. Then<br />
the feedrate override is not effective.<br />
2 During the movement in retract, feed hold is not effective.<br />
3 In case that retract signal is turned to “1” in auto mode, the<br />
movement of the auto mode is hold and the retract<br />
movement is done.<br />
1) The EGB synchronization is not canceled by RESET when bit 0<br />
(HBR) of parameter No.7700 is set to 1. Set 1 to this parameter<br />
usually.<br />
2) The EGB synchronization performed even under the following<br />
operation of the slave axis.
B–63534EN/02 PROGRAMMING<br />
20. AXIS CONTROL FUNCTIONS<br />
– Interlock<br />
– Feed hold<br />
– <strong>Machine</strong> lock<br />
3) The EGB synchronization should be started and canceled at the stop<br />
of the master and the slave axis. It means that the tool axis (master<br />
axis) rotation should be started while the synchronization mode<br />
signal SYNMOD is “1” (Refer to Fig.2.3 Example timing<br />
for starting/canceling synchronization). If the tool axis (master axis)<br />
starts to rotate before the synchronization mode signal<br />
SYNMOD is “1”, the synchronization does not perform<br />
correctly.<br />
4) Reference position return of Cs contouring control axis for master and<br />
slave axis should be performed before G81 is specified. In the<br />
synchronization mode, reference position return cannot be<br />
performed. Do not change to reference position return mode in the<br />
synchronization mode.<br />
5) In case that the parameters for axis setting (No.7710,7771,4352) are<br />
not set correctly, P/S alarm (No.010) occurs when G81 specified.<br />
6) When G28/G27/G29G30/G30.1/G53 is specified in the synchronization<br />
mode, P/S alarm (No.184) occurs. G28/G27/G29/G30/G30.1/G53<br />
should not be specified in the synchronization mode.<br />
7) During HPCC mode with RISC, the high–speed cycle cutting, the<br />
high–speed liner interpolation, the high–speed remote buffer A, the<br />
high–speed remote buffer B of DNC operation, and AI contour<br />
control, this function is not available.<br />
8) The slave axis position display is updated by synchronous pulse as<br />
follows :<br />
– <strong>Machine</strong> position display is updated.<br />
– Absolute position display and relative position display are not<br />
updated. When the synchronization is canceled, the pulses of the<br />
synchronization are added to the absolute position display of the<br />
slave axis.<br />
9) The rotation direction of the workpiece axis depends on the rotation<br />
direction of the tool axis. That is, when the rotation direction of the<br />
tool axis is positive, the rotation direction of the workpiece axis is also<br />
positive; when the rotation direction of the tool axis is negative, the<br />
rotation direction of the workpiece axis is also negative. However, by<br />
specifying a negative value for L, the rotation direction of the<br />
workpiece axis can be made opposite to the rotation direction of the<br />
tool axis.<br />
10)During synchronization, a move command can be programmed for<br />
the workpiece axis. Note, however, that incremental command<br />
programming for cutting feed must be used to specify the workpiece<br />
axis move command.<br />
11)The synchronization mode is canceled by servo alarm, spindle alarm,<br />
P/S alarm (No.000), or emergency stop.<br />
12)The synchronization is not maintained in servo off status of the slave<br />
axis.<br />
13)When the EGB control is used, the drilling canned cycle cannot be<br />
used.<br />
14)The actual feedrate is displayed without the flexible synchronous<br />
pulse.<br />
567
20. AXIS CONTROL FUNCTIONS PROGRAMMING<br />
B–63534EN/02<br />
Alarms<br />
20.8.4<br />
Electronic Gear Box<br />
Automatic Phase<br />
Synchronization<br />
Number<br />
Message Contents<br />
010 IMPROPER G–CODE Parameters for axis setting are not set correctly<br />
regarding G81. (No.7710,7771,4352,<br />
or Cs axis setting).<br />
Confirm the parameter setting.<br />
181 FORMAT ERROR IN<br />
G81 BLOCK<br />
184 ILLEGAL COMMAND<br />
IN G81<br />
186 PARAMETER SETTING<br />
ERROR<br />
568<br />
G81 block format error<br />
1)T(number of teeth) has not been<br />
instructed.<br />
2)Data outside the command range was<br />
instructed by either T, L, Q, or P.<br />
3)Calculation of the synchronous ratio has<br />
overflowed.<br />
Modify the program.<br />
A command not to be instructed during<br />
synchronization was instructed.<br />
1)The slave axis is specified by G00, G28,<br />
G27, G29, G30.<br />
2)<strong>Inc</strong>h/metric conversion by G20, G21<br />
was instructed.<br />
3)Cs contour control mode is not selected.<br />
Parameter error regarding G81<br />
1)The slave axis has not been set to be a<br />
rotate axis.<br />
In the electronic gear box (EGB), when synchronization start or<br />
cancellation is specified, synchronization is not started or canceled<br />
immediately.<br />
Instead, acceleration/deceleration is executed first. Therefore,<br />
synchronization can be started or canceled while the spindle is rotating.<br />
Also, synchronization ratio can be changed while the spindle is rotating.<br />
At synchronization start, automatic phase synchronization is performed<br />
such that the workpiece axis position matches the position corresponding<br />
to the spindle one–rotation signal. With this synchronization, the same<br />
operation is performed as synchronization start caused by a one–rotation<br />
signal in hobbing synchronization when using the functions of a hobbing<br />
machine.<br />
The spindle corresponds to the EGB master axis and the workpiece axis<br />
corresponds to an EGB slave axis (Servo axis or Cs contouring axis).
B–63534EN/02 PROGRAMMING<br />
20. AXIS CONTROL FUNCTIONS<br />
Acceleration/deceleration<br />
type<br />
Acceleration/deceleration<br />
plus automatic phase<br />
synchronization type<br />
Format<br />
Acceleration/deceleration<br />
type<br />
Spindle<br />
speed<br />
Workpiece–<br />
axis speed<br />
Spindle<br />
speed<br />
Workpiece–<br />
axis speed<br />
Synchronization start command<br />
569<br />
Synchronization<br />
cancellation command<br />
Synchronization<br />
state<br />
Acceleration Deceleration<br />
Synchronization start command<br />
Synchronization<br />
cancellation command<br />
Automatic Synchro-<br />
Acceleration phase<br />
synchronization<br />
nization<br />
state<br />
Deceleration<br />
G81 T_ L_ R1; Synchronization start<br />
G80 R1; Synchronization end<br />
T : Number of teeth (range of valid settings: 1–1000)<br />
L : Number of hob threads (range of valid settings: –21 to +21,<br />
excluding 0)<br />
When L is positive, the direction of rotation about the workpiece<br />
axis is positive (+ direction).<br />
When L is negative, the direction of rotation about the workpiece<br />
axis is negative (– direction).
20. AXIS CONTROL FUNCTIONS PROGRAMMING<br />
B–63534EN/02<br />
Acceleration/deceleration<br />
plus automatic phase<br />
synchronization type<br />
Explanations<br />
Acceleration/deceleration<br />
type<br />
G81 T_ L_ R2; Synchronization start<br />
G80 R2; Synchronization end<br />
Spindle<br />
speed<br />
Workpiece–<br />
axis speed<br />
T : Number of teeth (range of valid settings: 1–1000)<br />
L : Number of hob threads (range of valid settings: –21 to +21,<br />
excluding 0)<br />
When L is positive, the direction of rotation about the workpiece<br />
axis is positive (+ direction).<br />
When L is negative, the direction of rotation about the workpiece<br />
axis is negative (– direction).<br />
G81R1 command<br />
execution<br />
Acceleration<br />
Synchronization mode<br />
SYNMOD<br />
G80R1 command execution<br />
Deceleration<br />
Synchronization start command<br />
570<br />
Synchronization<br />
cancellation command<br />
Synchronization<br />
state<br />
Acceleration Deceleration<br />
1. Specify G81R1 to start synchronization.<br />
When G81R1 is specified, acceleration according to the acceleration<br />
rate set in the parameter (No.2135,2136 or No.4384,4385) is performed<br />
on the workpiece axis (slave axis). Once the synchronization feedrate is<br />
reached, synchronization mode signal SYNMOD is set to 1,<br />
and the G81R1 block is terminated.<br />
2. For cancellation, specify G80R1 while the tool is moved away from<br />
the workpiece.
B–63534EN/02 PROGRAMMING<br />
20. AXIS CONTROL FUNCTIONS<br />
Acceleration/deceleration<br />
plus automatic phase<br />
synchronization type<br />
3. When G80R1 is specified, the EGB mode check signal is set to 0, and<br />
deceleration according to the acceleration rate set in the parameter<br />
(No. 2135,2136 or No.4384,4385) is started immediately. When the<br />
speed is reduced to 0, the G80R1 block is terminated.<br />
CAUTION<br />
1 Linear acceleration/deceleration applies to synchronization<br />
start/cancellation.<br />
2 In automatic synchronization cancellation due to Reset or<br />
P/S alarm (No.000), deceleration is executed and<br />
synchronization is canceled.<br />
Spindle<br />
speed<br />
Workpiece–<br />
axis speed<br />
G81R2 command<br />
execution<br />
Acceleration<br />
Synchronization mode signal<br />
SYNMOD<br />
Deceleration<br />
Synchronization start command<br />
Automatic phase synchronization<br />
G80R2 command execution<br />
571<br />
Synchronization<br />
cancellation command<br />
Automatic Synchro-<br />
Acceleration phase<br />
synchronization<br />
nization<br />
state<br />
Deceleration<br />
1. Move the workpiece axis to the position that corresponds to that of the<br />
one–rotation signal of the spindle.
20. AXIS CONTROL FUNCTIONS PROGRAMMING<br />
B–63534EN/02<br />
2. Specify G81R2 to start synchronization.<br />
When G81R2 is specified, the workpiece axis is accelerated with the<br />
acceleration according to the acceleration rate set in the parameter<br />
(No.2135,2136 or No.4384,4385). When the synchronization speed is<br />
reached, phase synchronization is performed automatically. Upon the<br />
completion of phase synchronization, synchronization mode signal<br />
SYNMOD is set to 1, and the G81R2 block is terminated.<br />
3. For cancellation, specify G80R2 while the tool is moved away from<br />
the workpiece.<br />
4. When G80R2 is specified, the synchronization mode signal is set to<br />
0, and deceleration according to the acceleration rate set in the<br />
parameter (No.2135,2136 or No.4384,4385) is started immediately.<br />
When the speed is reduced to 0, the G80R2 block is terminated.<br />
572
B–63534EN/02 PROGRAMMING<br />
20. AXIS CONTROL FUNCTIONS<br />
CAUTION<br />
1 In automatic phase synchronization, specify the speed in parameter No.7776 and the<br />
movement direction in parameter PHD, bit 7 of No. 7702.<br />
In phase synchronization, rapid–traverse linear acceleration/deceleration (with the time<br />
constant specified in parameter No. 1620) is performed.<br />
The workpiece–axis speed is obtained by superposing the speed in automatic phase<br />
synchronization onto the speed corresponding to spindle rotation.<br />
In consideration of this superposition, specify a position deviation limit in parameter No. 1828.<br />
2 The one–rotation signal used for automatic phase synchronization is issued not by the spindle<br />
position coder but by the separate pulse coder attached to the spindle and used to collect EGB<br />
feedback information. This means that the orientation position based on the one–rotation<br />
signal issued by the spindle position coder does not match the position used as the reference<br />
for the workpiece axis when establishing phase synchronization for automatic phase<br />
synchronization based on G81R2.<br />
Moreover, the one–rotation signal of the separate pulse coder must be turned on for each<br />
rotation of the spindle.<br />
3 With the use of parameter No.7777, the position at which the phase of the workpiece axis is<br />
matched can be shifted from the position corresponding to the one–rotation signal in automatic<br />
phase matching.<br />
4 In automatic phase synchronization, when a synchronization command is issued again in a<br />
synchronization state, movement about the workpiece axis is performed such that the position<br />
corresponding to the one–rotation signal of the spindle matches the position about the<br />
workpiece axis specified in the G81R2 synchronization start command executed first.<br />
5 In automatic phase synchronization, movement is performed about the workpiece axis from the<br />
current position to the nearest phase position in the phase synchronization movement direction<br />
specified by the parameter.<br />
6 Linear acceleration/deceleration applies to synchronization start/cancellation.<br />
7 The acceleration/deceleration plus automatic phase synchronization type can be executed by<br />
the PHS parameter, bit 6 of No.7702, without specifying an R2 command in a G81 or G80 block.<br />
8 In automatic synchronization cancellation due to Reset or P/S alarm (No.000), deceleration is<br />
executed and synchronization is canceled.<br />
9 This item is for spindle EGB.<br />
If the control mode of the master axis is the speed control, it is necessary to execute the position<br />
coder orientation before that the automatic phase synchronization is started. In this case,<br />
RFCHK3 (PRM4016#7) of the master axis must be set “0” to keep memorizing the one–rotation<br />
signal position of the spindle in the speed control mode.<br />
10 This item is for spindle EGB.<br />
If the control mode of the master axis is Cs contouring, it is necessary to execute the reference<br />
point return before that the automatic phase synchronization is started.<br />
11 The acceleration rate parameter(No.2135,2136 or No.4384,4385) must not be changed in the<br />
synchronization mode.<br />
12 Do not cancel the synchronous mode by the reset when this function is used. (Set “1” in<br />
patameter No.7700#0 HBR.)<br />
573
20. AXIS CONTROL FUNCTIONS PROGRAMMING<br />
B–63534EN/02<br />
Examples<br />
Acceleration/deceleration<br />
type<br />
Acceleration/deceleration<br />
plus automatic phase<br />
synchronization type<br />
M03 ; Clockwise spindle rotation command<br />
G81 T_ L_ R1 ; Synchronization start command<br />
G00 X_ ; Positions the workpiece at the machining position.<br />
Machining in the synchronous state<br />
G00 X_ ; Retract the workpiece from the tool.<br />
G81 T_ L_ R1 ; Synchronization ratio change.<br />
G00 X_ ; Positions the workpiece at the machining position.<br />
Machining in the synchronous state<br />
G00 X_ ; Retract the workpiece from the tool.<br />
G80 R1 ; Synchronization cancel command<br />
M03 ; Clockwise spindle rotation command<br />
G00 G90 C_ ; C–axis positioning<br />
G81 T_ L_ R2 ; Synchronization start command<br />
G00 X_ ; Positions the workpiece at the machining position.<br />
Machining in the synchronous state<br />
G00 X_ ; Retract the workpiece from the tool.<br />
G81 T_ L_ R2 ; Synchronization ratio change.<br />
G00 X_ ; Positions the workpiece at the machining position.<br />
Machining in the synchronous state<br />
G00 X_ ; Retract the workpiece from the tool.<br />
G80 R2 ; Synchronization cancel command<br />
574
B–63534EN/02 PROGRAMMING<br />
20. AXIS CONTROL FUNCTIONS<br />
About the direction of<br />
the rotation (This item is<br />
for spindle EGB.)<br />
Alarms<br />
+ Command<br />
+<br />
–<br />
a/A<br />
The EGB automatic phase synchronization is made on the premise that<br />
the rotation of the slave axis is the same direction as the master axis. Refer<br />
to the following chart.<br />
Kp/S<br />
+ Feedback<br />
+ EGB command<br />
+<br />
–<br />
Kp/S<br />
+ Feedback<br />
575<br />
Sensor Motor Spindle<br />
[Master axis]<br />
[Slave axis]<br />
Sensor Motor Spindle<br />
+ Direction<br />
+ Direction<br />
When this function is used, the SFR/SRV function in Cs contouring mode<br />
(*) can not use. If you want to change the rotary direction of the master<br />
axis, you should change the sign of the master axis command.<br />
(*)The SFR/SRV function in Cs contouring mode<br />
The SFR/SRV signal is a serial spindle control signal that determines<br />
the direction of rotation of the spindle in Cs contouring mode.<br />
Number<br />
181 EGB AUTO PHASE<br />
FORMAT ERROR<br />
Message Contents<br />
Format error in block in which G80 or G81<br />
was specified by EGB automatic phase<br />
synchronization<br />
(1) R is data outside of the instruction<br />
range.<br />
(2) Before the G81R2 command, the<br />
master spindle isn’t returned to in the<br />
reference point. (In case of Spindle<br />
EGB)
20. AXIS CONTROL FUNCTIONS PROGRAMMING<br />
B–63534EN/02<br />
20.8.5<br />
Electronic Gear Box 2<br />
Pair<br />
General<br />
Configuration examples<br />
of controlled axes<br />
CNC<br />
Spindle (master axis)<br />
First axis X (omitted)<br />
Second axis Y (omitted)<br />
Third axis<br />
Slave axis<br />
C<br />
EGB<br />
+<br />
Fourth axis<br />
Dummy axis<br />
Follow–up<br />
+<br />
Fifth axis<br />
Slave axis<br />
V<br />
EGB<br />
Sixth axis<br />
Dummy axis<br />
Follow–up<br />
+<br />
–<br />
+<br />
–<br />
–<br />
+ +<br />
–<br />
Position<br />
control<br />
Error counter<br />
Position<br />
control<br />
Error counter<br />
Synchronization<br />
switch<br />
Synchronization<br />
switch<br />
The Electronic Gear Box is a function for rotating a workpiece in sync with<br />
a rotating tool, or to move a tool in sync with a rotating workpiece. With this<br />
function, the high–precision machining of gears, threads, and the like can be<br />
implemented. A desired synchronization ratio can be programmed.<br />
Up to two sets of axes can be synchronized. A gear grinding machine can<br />
be controlled, for instance, by using one axis for rotating the workpiece in<br />
sync with the tool and another axis for performing dressing in sync with the<br />
tool.<br />
The electronic gear box is hereinafter called an EGB function.<br />
Spindle : EGB master axis serving as a tool axis<br />
First axis : X<br />
Second axis : Y<br />
Third axis : C axis (EGB slave axis serving as a workpiece axis)<br />
Fourth axis : C axis (EGB dummy axis, which cannot be used as a usual<br />
controlled axis)<br />
Fifth axis : V axis (EGB slave axis serving as a dressing axis)<br />
Sixth axis : V axis (EGB dummy axis, which cannot be used as a usual<br />
controlled axis)<br />
Speed/current<br />
control<br />
Speed/current<br />
control<br />
K 1<br />
K 2<br />
Fig.20.8.5<br />
576<br />
Spindle<br />
amplifier<br />
Servo<br />
amplifier<br />
Motor<br />
Detector<br />
K 1 : Synchronization factor<br />
Servo<br />
amplifier<br />
Motor<br />
Detector<br />
Motor<br />
K 2 : Synchronization factor<br />
Spindle<br />
Tool axis<br />
C–axis<br />
Workpiece axis<br />
V–axis<br />
Detector<br />
Dressing axis
B–63534EN/02 PROGRAMMING<br />
20. AXIS CONTROL FUNCTIONS<br />
Explanations<br />
Synchronization start<br />
Format<br />
NOTE<br />
A sampling period of 1 ms is applied when feedback pulses<br />
are read from the master axis; the synchronization pulses<br />
for a slave axis are calculated according to synchronization<br />
coefficient K; and the pulses are specified for position<br />
control of the slave axis.<br />
When the ratio of the master–axis travel to the slave–axis travel is<br />
specified, synchronization starts.<br />
G81.5<br />
T t<br />
P p<br />
j<br />
0 L l<br />
;<br />
Master–axis travel Slave–axis travel<br />
Specify the master–axis travel in either of the following ways.<br />
1. Master–axis speed<br />
T t : Master–axis speed (1 t 1000)<br />
2. Master–axis pulse count<br />
P p : Master–axis pulse count (1 p 999999999)<br />
Specify a pulse count on the condition that four pulses<br />
correspond to one period in the A and B phases.<br />
Specify the slave–axis travel in either of the following ways.<br />
1. Slave–axis travel<br />
j : Slave–axis address<br />
j : Slave–axis travel indicated in units of the minimum<br />
travel increments<br />
(the range of valid settings for usual axis movement<br />
applies)<br />
When j = 0, the specified command is regarded as<br />
being a command for the slave–axis speed,<br />
described below. In this case, if L is not specified, an<br />
alarm is output.<br />
2. Slave–axis speed<br />
0 Ll : Slave–axis address<br />
l : Slave axis speed (1 l 21)<br />
CAUTION<br />
1 A move command can be issued by a program to the slave<br />
axis or other axes during synchronization. In this case, the<br />
command shall be an incremental command.<br />
2 A G00, G27, G28, G29, G30, G30.1,G33 or G53 command<br />
cannot be issued to the slave axis in synchronization mode.<br />
3 Controlled–axis detach cannot be used for the master axis<br />
or the slave axis.<br />
577
20. AXIS CONTROL FUNCTIONS PROGRAMMING<br />
B–63534EN/02<br />
Synchronization end<br />
Format<br />
Description of<br />
commands compatible<br />
with those for a hobbing<br />
machine<br />
NOTE<br />
1 A manual handle interruption can be issued to the slave axis<br />
or other axes during synchronization.<br />
2 The maximum feedrates for the master axis and the slave<br />
axis are limited according to the position detectors used.<br />
3 An inch/metric conversion command (G20 or G21) cannot<br />
be specified in synchronization mode.<br />
4 The machine coordinates for the slave/dummy axis are<br />
updated in synchronization mode.<br />
With a G80.5 0 command, synchronization is canceled.<br />
is the address of the slave axis.<br />
1. Canceling synchronization for each axis by issuing a command<br />
Synchronization of the slave axis specified by ? is canceled.<br />
A cancellation command can be issued only for one axis in one block.<br />
When 0 is not specified, the synchronization of all currently<br />
synchronized axes is canceled.<br />
When a synchronization cancellation command is issued, the absolute<br />
coordinates for the slave axis are updated according to the amount of<br />
travel during synchronization. For a rotation axis, the value obtained<br />
by rounding off the amount of travel during synchronization to the<br />
nearest 360 degrees is added to the absolute coordinates.<br />
2. Canceling synchronization by a reset<br />
For an axis for which a parameter is set to allow synchronization to be<br />
canceled by a reset, HBR, bit 0 of No. 7700, is set to 0, allowing<br />
synchronization to be canceled by a reset. When a manual absolute<br />
signal is on, the absolute coordinates are updated.<br />
3. Others<br />
Synchronization is automatically canceled under the following<br />
conditions.<br />
(1) Emergency stop<br />
(2) Servo alarm<br />
(3) P/S alarm No.000 (indicating that the power should be<br />
turned off)<br />
A command compatible with that for a hobbing machine can be used as<br />
a synchronization command.<br />
Such a command cannot be used when a canned–cycle option is provided.<br />
Specify which axes starts synchronization with such a command by using<br />
parameter No. 7710.<br />
(1)Synchronization start<br />
When the following command is specified, synchronization of spindle<br />
axis and C axis starts<br />
578
B–63534EN/02 PROGRAMMING<br />
20. AXIS CONTROL FUNCTIONS<br />
G81 T_(L_)(Q_P_);<br />
T : Number of teeth (range of valid settings: 1 to 1000)<br />
L : Number of hob threads (range of valid settings: –21 to +21,<br />
excluding 0)<br />
The sign of L determines the direction of rotation<br />
for the workpiece axis.<br />
When L is positive, the direction of rotation for the workpiece<br />
axis is positive (+ direction).<br />
When L is negative, the direction of rotation for the workpiece<br />
axis is negative (– direction).<br />
When L is not specified, the number of hob threads is regarded<br />
as being 1.<br />
Q : Module or diametral pitch<br />
In metric input, specify a module<br />
(unit : 0.00001 mm, range of valid settings : 0.1 to 25.0 mm).<br />
In inch input, specify a diametral pitch<br />
(unit : 0.00001 [1/inch], range of valid settings: 0.1 to 254.0 [1/inch])<br />
P : Twisted angle of a gear<br />
(unit : 0.00001 degrees, range of valid settings : –90.0 to 90.0<br />
degrees)<br />
Specify P and Q to use helical gear compensation. In this case, if only one<br />
of P and Q is specified, an alarm (P/S 181) is generated.<br />
The decimal point can be specified in Q and P.<br />
When a G81 command is issued to change to synchronization mode, the<br />
EGB mode confirmation signal for the workpiece axis becomes “1” and<br />
synchronization starts between the spindle and the workpiece axis.<br />
During synchronization, control is performed such that the ratio of the<br />
spindle speed to the workpiece–axis speed is the same as that of T<br />
(number of teeth) to L (number of hob threads).<br />
When a G81 command is again specified during synchronization without<br />
canceling synchronization, an alarm (P/S 181) is generated.<br />
(2)Synchronization end<br />
When the following command is specified, sysnchronization is<br />
cancelled.<br />
G80;<br />
Synchronization of all synchronized axes is canceled.<br />
When a synchronization cancellation command is issued, the absolute<br />
coordinates for the slave axis are updated according to the amount of<br />
travel during synchronization.<br />
For a rotation axis, the value obtained by rounding off the amount of<br />
travel during synchronization to the nearest 360 degrees is added to the<br />
absolute coordinates.<br />
In a G80 block, do not specify addresses other than O or N.<br />
(3)Helical gear compensation<br />
For a helical gear, the workpiece axis is subjected to compensation for<br />
movement along the Z axis (axial feed axis) according to the twisted<br />
angle of the gear.<br />
Helical gear compensation is performed with the following data.<br />
Compensation angle <br />
579<br />
Z sin(P)<br />
360 (In metric input)<br />
T Q
20. AXIS CONTROL FUNCTIONS PROGRAMMING<br />
B–63534EN/02<br />
Compensation direction<br />
in helical gear<br />
compensation<br />
+Z<br />
–Z<br />
+Z<br />
–Z<br />
+Z<br />
–Z<br />
When the HDR bit is set to 1<br />
(a)<br />
+C<br />
C : +, Z : +, P : +<br />
Compensation direction : +<br />
(e)<br />
–C<br />
C : –, Z : +, P : +<br />
Compensation direction : –<br />
Z Q sin(P)<br />
Compensation angle 360 (In inch input)<br />
T<br />
Where,<br />
Compensation angle : Absolute value with sign (degrees)<br />
Z : Amount of travel along the Z axis after a<br />
G81 command is issued (mm or inch)<br />
P : Twisted angle of the gear with sign (degrees)<br />
: Ratio of the circumference of a circle to its<br />
diameter<br />
T : Number of teeth<br />
Q : Module (mm) or diametral pitch (1/inch)<br />
Use P, T, and Q specified in the G81 block.<br />
Parameter HDR (bit 2 of No. 7700)<br />
(b)<br />
C : +, Z : +, P : +<br />
Compensation direction : –<br />
(f)<br />
C : –, Z : +, P : –<br />
Compensation direction : +<br />
(c) (d)<br />
+C +C +C<br />
When the HDR bit is set to 0 ((a), (b), (c), and (d) are the same as when the HDR bit is set to 1)<br />
(e)<br />
–C<br />
C : –, Z : +, P : +<br />
Compensation direction : +<br />
(f)<br />
C : –, Z : +, P : –<br />
Compensation direction : +<br />
580<br />
C : +, Z : –, P : +<br />
Compensation direction : –<br />
C : +, Z : –, P : –<br />
Compensation direction : +<br />
(g) (h)<br />
–C –C –C<br />
C : –, Z : –, P : +<br />
Compensation direction : +<br />
C : –, Z : –, P : –<br />
Compensation direction : –<br />
(g) (h)<br />
–C –C –C<br />
C : –, Z : –, P : –<br />
Compensation direction : –<br />
C : –, Z : –, P : –<br />
Compensation direction : +
B–63534EN/02 PROGRAMMING<br />
20. AXIS CONTROL FUNCTIONS<br />
Examples<br />
(1) When the master axis is the spindle, and the slave axis is the C–axis<br />
1. G81.5 T10 C0 L1 ;<br />
Synchronization between the master axis and C–axis is started at<br />
the ratio of one rotation about the C–axis to ten rotations about the<br />
master axis.<br />
2. G81.5 T10 C0 L–1 ;<br />
Synchronization between the master axis and C–axis is started at<br />
the ratio of one rotation about the C–axis to ten rotations about the<br />
master axis.<br />
In this case, however, the direction of rotation is opposite to that of<br />
1. above.<br />
3. G81.5 T1 C3.26 ;<br />
Synchronization between the master axis and C–axis is started at<br />
the ratio of a 3.26–degree rotation about the C–axis per one rotation<br />
about the master axis.<br />
4. G81.5 P10000 C–0.214 ;<br />
Synchronization between the master axis and C–axis is started at<br />
the ratio of a –0.214 degree rotation about the C–axis to 10,000<br />
feedback pulses from the pulse coder of the master axis.<br />
(2) When the master axis is the spindle, the slave axis is the V–axis (linear<br />
axis), and inch/metric conversion is performed<br />
1. For a millimeter machine and metric input<br />
G81.5 T1 V1.0 ;<br />
Synchronization between the master axis and V–axis is started at<br />
the ratio of a 1.00 mm movement along the V–axis per rotation<br />
about the master axis.<br />
2. For a millimeter machine and inch input<br />
G81.5 T1 V1.0 ;<br />
Synchronization between the master axis and V–axis is started at<br />
the ratio of a 1.0 inch movement (25.4 mm) along the V–axis per<br />
rotation about the master axis.<br />
(3) When two groups of axes are synchronized simultaneously<br />
Based on the controlled axis configuration described in Fig.20.8.5,<br />
the sample program below synchronizes the spindle with the V–axis<br />
while the spindle is synchronized with the C–axis.<br />
581
20. AXIS CONTROL FUNCTIONS PROGRAMMING<br />
B–63534EN/02<br />
O0100 ;<br />
...............<br />
N01 Mxx ;<br />
N02 G00 G90 C... ;<br />
N03 G81.5 T10 C0 L1 ;<br />
N04 Myy S300<br />
;N05 G01 G91 X... Y... F... ;<br />
.......<br />
N06 Mzz ;<br />
.......<br />
N10 G00 G90 V... ;<br />
N11 G81.5 P12000 V0.5 ;<br />
N12 Myy S300<br />
;N20 M98 P9500 ;<br />
N21 Mzz ;<br />
N30 G80.5 V0 ;<br />
.......<br />
.......<br />
N31 Myy S300 ;<br />
N32 G01 G91 X... Y... F... ;<br />
.......<br />
.......<br />
N40 Mzz ;<br />
N41 G80.5 C0 ;<br />
Performs spindle orientation.<br />
Positions the C–axis.<br />
Starts synchronization at the ratio of<br />
one rotation about the C–axis to ten<br />
spindle rotations.<br />
Rotates the spindle.<br />
Makes movements for grinding.<br />
Stops the spindle.<br />
Positions the dressing axis.<br />
Starts synchronization at the ratio of a<br />
0.5 mm movement along the V–axis<br />
every 12,000 pulses on the spindle.<br />
Rotates the spindle.<br />
A subprogram for dressing is called.<br />
Stops the spindle.<br />
Cancels V–axis synchronization.<br />
Rotates the spindle<br />
Makes movements for grinding<br />
Stops the spindle.<br />
Cancels C–axis synchronization.<br />
582<br />
V–axis synchronization mode<br />
C–axis synchronization mode<br />
Grinding<br />
Dressing<br />
Grinding<br />
Thus, the synchronizations of two groups can be started and canceled<br />
independently of each other.<br />
(4) Command specification for hobbing machines<br />
Based on the controlled axis configuration described in Fig.20.8.5,<br />
the sample program below sets the C–axis (in parameter 7710) for<br />
starting synchronization with the spindle according to the command<br />
specification method for hobbing machines.
B–63534EN/02 PROGRAMMING<br />
20. AXIS CONTROL FUNCTIONS<br />
Synchronization Ratio<br />
Specification Range<br />
O1234 ;<br />
...........<br />
...........<br />
N01 G81 T20 L1 ; Starts synchronization with the spindle and<br />
C–axis at the ratio of a 1/20 rotation about the<br />
C–axis to one spindle rotation.<br />
N02 Mxx S300 ; Rotates the spindle at 300 min –1 .<br />
N03 X... F... ; Makes a movement along the X–axis (for<br />
cutting).<br />
N04 Y... F... ; Makes a movement along the Y–axis (for<br />
grinding). Axes such as the C–axis, X–axis,<br />
and Y–axis can be specified as required.<br />
N05 X... F... ; Makes a movement along the X–axis (for<br />
retraction).<br />
N06 Mzz ; Stops the spindle.<br />
N07 G80 ; Cancels the synchronization between the<br />
spindle and C–axis.<br />
The programmed ratio (synchronization ratio) of a movement along the<br />
slave axis to a movement along the master axis is converted to a detection<br />
unit ratio inside the NC. If such converted data (detection unit ratio)<br />
exceeds a certain allowable data range in the NC, synchronization cannot<br />
be established correctly, and an alarm (P/S 181) is issued.<br />
Even when a programmed master axis movement and a programmed<br />
slave axis movement are within specifiable ranges, a detection unit ratio<br />
obtained by conversion can exceed the allowable range, thus resulting in<br />
an alarm.<br />
Let K be a synchronization ratio. The internal data corresponding K is the<br />
amount of slave axis movement (Kn) represented in the detection unit<br />
divided by the amount of master axis movement (Kd) represented in the<br />
detection unit; this fraction is represented as Kn/Kd (reduced to its lowest<br />
terms) as indicated below.<br />
K Kn Amount of slave axis movement represented in the detection unit<br />
<br />
Kd Amount of master axis movement represented in the detection unit<br />
Kn and Kd must lie within the following ranges:<br />
–2147483648 Kn 2147483647<br />
1 Kd 65535<br />
When Kn or Kd exceeds its allowable range above, an alarm is issued.<br />
In conversion to the detection unit, when the CMR (command<br />
multiplication: parameter 1820) is a fraction or when inch/millimeter<br />
conversion is used, the fraction is directly converted without modification<br />
so that no error can occur in the conversion of specified amounts of<br />
movement.<br />
During conversion, the amount of movement is multiplied by 254/100 for<br />
inch input on a millimeter machine, and 100/254 for metric input on an<br />
inch machine. Thus, Kn and Kd can become large numbers. If a<br />
synchronization ratio cannot be reduced to its lowest terms, an alarm<br />
condition is likely to occur.<br />
583
20. AXIS CONTROL FUNCTIONS PROGRAMMING<br />
B–63534EN/02<br />
Example 1)<br />
Based on the controlled axis configuration described in Fig.20.8.5,<br />
suppose that the spindle and V–axis are as follows:<br />
Spindle pulse coder : 72000pulse/rev (4 pulses for<br />
one A/B phase cycle)<br />
C–axis least command increment : 0.001 degree<br />
C–axis CMR : 5<br />
V–axis least command increment : 0.001mm<br />
V–axis CMR : 5<br />
Then, the C–axis detection unit is 0.0002 degree. The V–axis detection<br />
unit is 0.0002 mm. In this case, the synchronization ratio (Kn, Kd) is<br />
related with a command as indicated below. Here, let Pm and Ps be the<br />
amounts of movements represented in the detection unit on the master<br />
axis and slave axis specified in a synchronization start command,<br />
respectively.<br />
(1)When the master axis is the spindle, and the slave axis is the C–axis<br />
(a) Command : G81.5 T10 C0 L1 ;<br />
Operation : Synchronization between the spindle and C–axis is<br />
started at the ratio of one rotation about the C–axis<br />
to ten spindle rotations.<br />
Pm : (Number of pulses per spindle rotation)10<br />
rotations → 7200010<br />
Ps : (Amount of movement per rotation about the<br />
C–axis)<br />
CMR(one rotation) → 36000051<br />
Kn<br />
<br />
360000 5 1<br />
<br />
5<br />
Kd 72000 10 2<br />
Both Kn and Kd are within the allowable range. No alarm is output.<br />
(b) Command : G81.5 T10 C0 L–1 ;<br />
Operation : Synchronization between the spindle and C–axis is<br />
started at the ratio of one rotation about the C–axis<br />
to ten spindle rotations.<br />
In this case, however, the direction of rotation is<br />
opposite to that of (a) above.<br />
Pm : (Number of pulses per spindle rotation)10<br />
revolutions → 7200010<br />
Ps : (Amount of movement per rotation about the<br />
C–axis)<br />
CMR(one rotation) → –36000051<br />
Kn<br />
<br />
360000 5 1<br />
<br />
5<br />
Kd 72000 10 2<br />
Both Kn and Kd are within the allowable range. No alarm is<br />
output.<br />
(c) Command : G81.5 T1 C3.263 ;<br />
Operation : Synchronization between the spindle and C–axis is<br />
started at the ratio of a 3.263–degree rotation about<br />
the C–axis to one spindle rotation.<br />
Pm : (Number of pulses per spindle rotation)1 rotation<br />
→ 720001<br />
Ps : (Amount of C–axis movement)CMR → 3263<br />
5<br />
Kn<br />
<br />
3263 5<br />
<br />
3263<br />
Kd 72000 1 14400<br />
584
B–63534EN/02 PROGRAMMING<br />
20. AXIS CONTROL FUNCTIONS<br />
Both Kn and Kd are within the allowable range. No alarm is<br />
output.<br />
In this sample program, when T1 is specified for the master axis,<br />
the synchronization ratio (fraction) of the CMR of the C–axis to<br />
the denominator Kd can always be reduced to lowest terms, thus<br />
Kd falls in the allowable range. So, the specifiable range of C is<br />
as follows:<br />
–99999999 C 99999999<br />
(d) Command : G81.5 T10 C3.263 ;<br />
Operation : Synchronization between the spindle and C–axis is<br />
started at the ratio of a 3.263–degree rotation about<br />
the C–axis to ten spindle rotations.<br />
Pm : (Number of pulses per spindle rotation)10<br />
rotations → 7200010<br />
Ps : (Amount of the C–axis movement)CMR →<br />
32635<br />
Kn<br />
<br />
3263 5<br />
<br />
3263<br />
Kd 72000 10 14400<br />
In this case, an alarm is issued because Kd exceeds the specifiable<br />
range.<br />
(e) Command : G81.5 P10000 C–0.214 ;<br />
Operation : Synchronization between the spindle and C–axis is<br />
started at the ratio of a –0.214 degree rotation of the<br />
C–axis to 10,000 feedback pulses from the pulse<br />
coder of the spindle.<br />
Pm : (Specified number of feedback pulses from the pulse<br />
coder of the spindle) → 10000<br />
Ps : (Amount of C–axis movement)CMR → –214<br />
5<br />
Kn<br />
<br />
214 5<br />
<br />
107<br />
Kd 10000 1000<br />
Both Kn and Kd are within the allowable range. No alarm is<br />
output.<br />
(2)When the master axis is the spindle, the slave axis is the V–axis (linear<br />
axis), and inch/metric conversion is performed<br />
(a) For a millimeter machine and metric input<br />
Command : G81.5 T1 V1.0 ;<br />
Operation : Synchronization between the spindle and V–axis is<br />
started at the ratio of a 1.00 mm movement along<br />
the V–axis per spindle rotation.<br />
Pm : (Number of pulses per spindle rotation)1<br />
rotation → 720001<br />
Ps : (Amount of V–axis movement)CMR → 1000<br />
5<br />
Kn<br />
<br />
1000 5<br />
<br />
5<br />
Kd 72000 72<br />
Both Kn and Kd are within the allowable range. No alarm is<br />
output.<br />
(b) For a millimeter machine and inch input<br />
Command : G81.5 T1 V1.0 ;<br />
Operation : Synchronization between the spindle and V–axis is<br />
started at the ratio of a 1.0 inch movement (25.4<br />
mm) along the V–axis per spindle rotation.<br />
Pm : (Number of pulses per spindle rotation)1<br />
revolution → 720001<br />
585
20. AXIS CONTROL FUNCTIONS PROGRAMMING<br />
B–63534EN/02<br />
Example 2)<br />
Ps : (Amount of V–axis movement)CMR254 <br />
100 → 100005254 100<br />
Kn<br />
<br />
10000 5 254<br />
<br />
127<br />
Kd 72000 100 72<br />
Both Kn and Kd are within the allowable range. No alarm is<br />
output.<br />
(c) For a millimeter machine and inch input<br />
Command : G81.5 T1 V0.0013 ;<br />
Operation : Synchronization between the spindle and V–axis is<br />
started at the ratio of a 0.0013 inch (0.03302 mm)<br />
movement along the V–axis per spindle rotation.<br />
Pm : (Number of pulses per spindle rotation)1<br />
rotation → 720001<br />
Ps : (Amount of V–axis movement)CMR254 <br />
100 → 135254 100<br />
Kn<br />
<br />
13 5 254<br />
<br />
1651<br />
Kd 72000 100 720000<br />
In this case, an alarm is issued because Kd exceeds the specifiable<br />
range.<br />
Based on the controlled axis configuration described in Fig.20.8.5,<br />
suppose that the spindle and V–axis are as follows:<br />
Spindle pulse coder : 72000 pulse/rev (4 pulses for<br />
one A/B phase cycle)<br />
C–axis least command increment : 0.001 degree<br />
C–axis CMR : 1/2<br />
V–axis least command increment : 0.001mm<br />
V–axis CMR : 1/2<br />
Then, the C–axis detection unit is 0.002 degree. The V–axis detection<br />
unit is 0.002 mm. In this case, the synchronization ratio (Kn, Kd) is<br />
related with a command as indicated below. Here, let Pm and Ps be<br />
the amounts of movements represented in the detection unit for the<br />
master axis and slave axis specified in a synchronization start<br />
command, respectively.<br />
(1)When the master axis is the spindle, and the slave axis is the C–axis<br />
(a) Command : G81.5 T1 C3.263 ;<br />
Operation : Synchronization between the spindle and C–axis is<br />
started at the ratio of a 3.263–degree rotation about<br />
the C–axis per spindle rotation.<br />
Pm : (Number of pulses per spindle rotation)1<br />
rotation → 720001<br />
Ps : (Amount of C–axis movement)CMR → 3263<br />
1 2<br />
Kn<br />
<br />
3263 1<br />
<br />
163<br />
Kd 72000 2 7200<br />
In this case, an alarm is issued because Kd exceeds the specifiable<br />
range.<br />
(b) Command : G81.5 T1 C3.26 ;<br />
Operation : Synchronization between the spindle and C–axis is<br />
started at the ratio of a 3.26–degree rotation about<br />
the C–axis per spindle rotation.<br />
Pm : (Number of pulses per spindle rotation)<br />
1 revolution → 720001<br />
586
B–63534EN/02 PROGRAMMING<br />
20. AXIS CONTROL FUNCTIONS<br />
Retraction function<br />
Notes on parameter<br />
settings<br />
Ps : (Amount of C–axis movement)CMR<br />
→ 3260 1 2<br />
Kn<br />
<br />
3260 1<br />
<br />
163<br />
Kd 72000 2 7200<br />
(a) causes an alarm to be output because the values cannot be<br />
abbreviated. (b) causes no alarm because the ratio of the travel<br />
distances can be abbreviated to a simple ratio.<br />
When retract signal RTRCT is set to 1 (on the rising edge of the signal),<br />
retraction is performed according to the retract value set in parameter No.<br />
7741 and the feedrate set in parameter No. 7740.<br />
The tool does not move along an axis for which the amount of retraction<br />
is set to 0.<br />
After retraction, retraction completion signal RTRCTF is output.<br />
CAUTION<br />
1 Retract operation is performed at the feedrate specified in<br />
parameter No. 7740.<br />
2 Feed hold cannot be applied to retraction.<br />
3 In this case, the feedrate override capability is disabled.<br />
NOTE<br />
1 When the retract signal goes on during automatic operation,<br />
retract operation is performed, and automatic operation is<br />
stopped.<br />
2 Automatic operation cannot be performed in retraction.<br />
Note the following points when specifying parameters for the electronic<br />
gear box.<br />
1. Arrange the controlled axes such that a slave axis appears before a<br />
dummy axis.<br />
(Example)<br />
Example of incorrect setting Example of correct setting<br />
Servo axis<br />
Servo axis<br />
Axis name number<br />
Axis name number<br />
(No.1023)<br />
(No.1023)<br />
X 1 X 1<br />
Y 2 Y 2<br />
C (dummy axis) 3 C (slave axis) 3<br />
C (slave axis) 4 C (dummy axis) 4<br />
2. Do not use a name which is usually not allowed to be used as an axis<br />
address, such as D.<br />
3. Specify the same values for an EGB slave axis and an EGB dummy<br />
axis in the following parameters.<br />
587
20. AXIS CONTROL FUNCTIONS PROGRAMMING<br />
B–63534EN/02<br />
1004#7 Ten times minimum input increment<br />
1001#0 <strong>Inc</strong>h/metric switching (rotation axis/linear axis)<br />
1006#1 Shape of machine coordinate system (rotation axis/linear<br />
axis)<br />
1006#2 Shape of machine coordinate system for pitch error<br />
compensation (rotation axis/linear axis)<br />
1420 Rapid traverse rate<br />
1421 Rapid–traverse override F0 speed<br />
1820 Command multiplication<br />
4. Specify the amount of travel per rotation about a rotation axis for a<br />
slave axis in a parameter No. 1260.<br />
5. Make the specification for a dummy axis in the following way.<br />
1815#1 Whether to use separate detectors. Although an EGB<br />
dummy axis uses the interface of a separate detector, set<br />
these parameters to 0.<br />
6. If the following parameters are not specified, an alarm (SV 417 servo<br />
parameter invalid) may be generated. In such a case, make the<br />
specification as described below.<br />
20XX Specify the same value for both a slave axis and a<br />
dummy axis.<br />
2084, 2085 Flexible feed gear.<br />
Set parameters Nos. 2084 and 2085 to 1 for the<br />
dummy axis.<br />
7. Specify as large a feed–forward coefficient as possible to reduce the<br />
synchronization error. For details of parameter setting, see Feed–forward<br />
setting of Geometric error suppression function in FANUC AC SERVO<br />
MOTOR αi series Parameter Manual (B–65270EN) or FANUC AC<br />
SERVO MOTOR α series Parameter Manual (B–65150EN).<br />
588
B–63534EN/02 PROGRAMMING<br />
20. AXIS CONTROL FUNCTIONS<br />
Alarms<br />
Number<br />
P/S 181 FORMAT ERROR IN<br />
G81 BLOCK<br />
P/S 184 ILLEGAL COMMAND<br />
IN G81<br />
P/S 186 PARAMETER SETTING<br />
ERROR<br />
589<br />
Message Contents<br />
Format error in the block in which EGB<br />
was specified<br />
(1) The axis during synchronization by<br />
EGB is specified by G81.5 again.<br />
(2) U–axis is specified by G81.5/G80.5<br />
with U–axis control.<br />
(3) Format error in the block in which<br />
G81.5/G80.5 was specified.<br />
⋅ Data is specified to more than 2<br />
slave axes in one block. Or nothing<br />
is specified to the slave axis.<br />
⋅ Data specified to the slave axis is<br />
neither ‘0 Lxx’ nor ‘xx’.<br />
⋅ Data is specified to more than 2<br />
master axes in one block.<br />
⋅ Data is specified to the axis which<br />
is neither the master nor the slave<br />
axis.<br />
⋅ One of T, P or a codes is specified<br />
redundantly.<br />
⋅ Out of range data is specified by<br />
one of T or L codes<br />
⋅ An overflow occurred during calculation<br />
of the synchronization coefficient.<br />
An illegal instruction was issued during<br />
synchronization by EGB.<br />
(1) Slave axis was specified by G00,<br />
G27, G28, G29, and G30 G codes.<br />
(2) <strong>Inc</strong>h/metric conversion was specified<br />
by G20 or G21 G codes.<br />
Erroneous EGB parameter setting<br />
The number of pulses (parameter Nos.<br />
7782, 7783) per rotation is not set.
21. TWO–PATH CONTROL<br />
FUNCTION PROGRAMMING<br />
B–63534EN/02<br />
21 <br />
<br />
590
B–63534EN/02<br />
21.1<br />
GENERAL<br />
Controlling two path<br />
independently at the<br />
same time<br />
PROGRAMMING<br />
591<br />
21. TWO–PATH CONTROL<br />
FUNCTION<br />
The two–path control function is designed for use on a machining center<br />
where two systems are operated independently to simultaneously perform<br />
cutting.<br />
The operations of two path are programmed independently of each other,<br />
and each program is stored in program memory for each path. When<br />
automatic operation is to be performed, each path is activated after<br />
selecting a program for machining with path 1 and a program for<br />
machining with path 2 from the programs stored in program memory for<br />
each path. Then the programs selected for the paths are executed<br />
independently at the same time. When path 1 and path 2 need to wait for<br />
each other during machining, the waiting function is available (Section<br />
21.2)<br />
Just one MDI is provided for the two paths. Before operation and display<br />
on the MDI, the path selection signal is used to switch between the two<br />
paths.<br />
Transport device<br />
Transfer Line<br />
CNC<br />
2–path control<br />
Machining center (Left)<br />
Machining center (Right)<br />
WARNING<br />
Simultaneous operation of the two paths or the operation of<br />
only a single tool post can be selected by pressing a key on<br />
the machine operator’s panel. For details, refer to the<br />
manual supplied by the machine tool builder.
21. TWO–PATH CONTROL<br />
FUNCTION PROGRAMMING<br />
B–63534EN/02<br />
21.2<br />
WAITING FOR PATHS<br />
Explanations<br />
<br />
Path 1 program<br />
01357 ;<br />
G50 X Z ;<br />
G00 X Z T0101 ;<br />
S1000 M03 ;<br />
M100 ;<br />
N1100 G01 X Z F ;<br />
N1199 ;<br />
M101 ;<br />
M102 ;<br />
N1300 ;<br />
G00 X Z T0505 ;<br />
N1399 ;<br />
M103 ;<br />
M30 ;<br />
<br />
Control based on M codes is used to cause one path to wait for the other<br />
during machining. By specifying an M code in a machining program for<br />
each path, the two paths can wait for each other at a specified block. When<br />
an M code for waiting is specified in a block for one path during automatic<br />
operation, the other path waits for the same M code to be specified before<br />
staring the execution of the next block. This function is called the paths<br />
waiting function.<br />
A range of M codes used as M codes for waiting is to be set in the<br />
parameters (Nos. 8110 and 8111) before hand.<br />
M100 to M103 are used as M codes for waiting.<br />
Parameter setting:No. 8110=100<br />
(Minimum M code for waiting: M100)<br />
No. 8111=103<br />
(Maximum M code for waiting: M103)<br />
Path 2 program<br />
02468 ;<br />
G50 X Z ;<br />
G00 X Z T0202 ;<br />
S2000 M03 ;<br />
M100 ;<br />
N2100 G01 X Z F ;<br />
N2199 ;<br />
M101 ;<br />
N2200 S3000 ;<br />
G00 X Z T0202 ;<br />
N2299 ;<br />
M102 ;<br />
N2300 ;<br />
G00 X Z T0707 ;<br />
N2399 ;<br />
M103 ;<br />
M30 ;<br />
<br />
592<br />
Waiting<br />
Simultaneous,<br />
independent operation<br />
of path 1 (N1100 to<br />
N1199) and path 2<br />
(N2100 to N2199)<br />
Waiting<br />
Operation of path 2<br />
(N2200 to N2299)<br />
only<br />
Waiting<br />
Simultaneous,<br />
independent operation<br />
of path 1 (N1300 to<br />
N1399) and path 2<br />
(N2300 to N2399)<br />
Waiting<br />
End of program
B–63534EN/02<br />
PROGRAMMING<br />
593<br />
21. TWO–PATH CONTROL<br />
FUNCTION<br />
NOTE<br />
1 An M code for waiting must always be specified in a single block.<br />
2 If one path is waiting because of an M code for waiting specified, and a different M code for<br />
waiting is specified with the other path, an P/S alarm (No. 160) is raised, In this case, both paths<br />
stop operation.<br />
3 PMC–CNC interface<br />
Unlike other M codes, the M code for waiting is not output to the PMC.<br />
4 Operation of a single path<br />
If the operation of a single path is required, the M code for waiting need not be deleted. By using<br />
the NOWT signal to specify that waiting be ignored (G0063, #1), the M code for waiting in a<br />
machining program can be ignored. For details, refer to the manual supplied by the machine<br />
tool builder.
21. TWO–PATH CONTROL<br />
FUNCTION PROGRAMMING<br />
B–63534EN/02<br />
21.3<br />
MEMORY COMMON<br />
TO PATH<br />
Explanations<br />
Custom macro common<br />
variables<br />
A machine with two paths have different custom macro common<br />
variables and tool compensation memory areas for path 1 and 2. Paths 1<br />
and 2 can share the custom macro common variables and tool<br />
compensation memory areas provided certain parameters are specified<br />
accordingly.<br />
Paths 1 and 2 can share all or part of custom macro common variables<br />
#100 to #149 and #500 to #531, provided parameters 6036 and 6037 are<br />
specified accordingly. (The data for the shared variables can be written<br />
or read from either path.) See Section 15.1 of Part II.<br />
594
B–63534EN/02<br />
21.4<br />
COPYING A<br />
PROGRAM<br />
BETWEEN TWO<br />
PATHS<br />
Explanations<br />
Single–program copy<br />
Specified–range copy<br />
PROGRAMMING<br />
595<br />
21. TWO–PATH CONTROL<br />
FUNCTION<br />
In a CNC supporting two–path control, specified machining programs<br />
can be copied between the two paths by setting bit 0 (PCP) of parameter<br />
No. 3206 to 1. A copy operation can be performed by specifying either<br />
a single program or a range. For information about operations, see<br />
Section 9.10 in Part III.<br />
Copy source number : 0001<br />
Copy destination number : Not set<br />
Copy source Copy destination<br />
O0001 O0001<br />
Copy source number : 0001<br />
Copy destination : 0010<br />
Copy source Copy destination<br />
O0001 O0010<br />
Copy source number : 0001 to 0100<br />
Copy destination number : Not set<br />
Copy source Copy destination<br />
O0001<br />
O0010<br />
O0100<br />
O1000<br />
O2000<br />
O0001<br />
O0010<br />
O0100<br />
Copy source number : 0001 to 0100<br />
Copy destination : 1000<br />
Copy source Copy destination<br />
O0001<br />
O0010<br />
O0100<br />
O1000<br />
O2000<br />
O1000<br />
O1001<br />
O1002
22. RISC PROCESSOR PROGRAMMING<br />
B–63534EN/02<br />
22 <br />
General<br />
Expansion of RISC<br />
commnd<br />
<br />
The following functions are executed at high speed with RISC processor.<br />
AI high precision contour control<br />
AI NANO high precision contour control<br />
Cylindrical interpolation cutting point control<br />
Tool center point control<br />
Tool axis compensation in tool axis direction<br />
3–dimensional cutter compensation<br />
3–dimensional circular interpolation<br />
The parameter(No.19600#0–#5) setting expands the following functions<br />
which is executed with RISC processor.<br />
5–axis control mode function<br />
mode ON mode OFF<br />
G51 G50 Scaling<br />
G51.1 G50.1 Programmable mirror image<br />
G54.2 Pn<br />
(n=1–8)<br />
596<br />
G54.2 P0 Rotary table dynamic fixture offset<br />
G68 G69 Coordinate system rotation<br />
G68 I_J_K_ G69 3–dimensional coordinate system<br />
conversion<br />
G41,G42 G40 Cutter compensation C<br />
AI high precision contour control, AI NANO high precision contour<br />
control, Tool center point control, Tool axis compensation in tool axis<br />
direction, 3–dimensional cutter compensation and 3–dimensional<br />
circular interpolation can be used in the mode of above mentioned<br />
functions when the above mentioned function is set to be executed with<br />
RISC processor.<br />
Please refer to paragraph of restrictions for the restriction in this case.<br />
AI high precision contour control, AI NANO high precision contour<br />
control, Tool center point control, Tool axis compensation in tool axis<br />
direction, 3–dimensional cutter compensation and 3–dimensional<br />
circular interpolation can be used only when the state of the above<br />
mentioned functions is canceling when the above mentioned function is<br />
set to be executed with CNC.<br />
The alarm(P/S5012) occurs if AI high precision contour control, AI<br />
NANO high precision contour control, Tool center point control, Tool<br />
axis compensation in tool axis direction, 3–dimensional cutter<br />
compensation and 3–dimensional circular interpolation is used when the<br />
state of the above mentioned function is not canceling.
B–63534EN/02 PROGRAMMING<br />
22. RISC PROCESSOR<br />
5–axis control mode<br />
Restriction –1<br />
The state to execute the each function of AI high precision contour<br />
control, AI NANO high precision contour control, Tool center point<br />
control, Tool axis compensation in tool axis direction, 3–dimensional<br />
cutter compensation and 3–dimensional circular interpolation is<br />
generically called five axis control mode.<br />
The function set in the expansion of RISC command is included, too.<br />
The following commands can not be used in the AI High Precision<br />
Contour Control mode or AI NANO High Precision Contour Control<br />
mode. The alarm is issued if the function was used.<br />
Custom macro<br />
Exponential interpolation –G02.3,G03.3<br />
Dwell –G04<br />
High Speed Cutting Function relation –G05<br />
AI contour control<br />
(G05P10000 and G05P0 are excluded)<br />
–G05.1Q1,G5.1Q0<br />
Hypothetical axis interpolation –G07<br />
Advanced preview control –G08<br />
(Please use AI High Precision Contour Control)<br />
Polar coordinate interpolation –G12.1,G13.1<br />
Polar coordinate command –G15,G16<br />
Reference position return check –G27<br />
Reference point return –G28<br />
2nd. Reference point return –G30<br />
3rd/4th reference point return –G30<br />
Skip –G31<br />
Thread cutting –G33<br />
Automatic tool length measurement –G37<br />
Normal direction control –G40.1,G41.1,G42.1<br />
Cutter compensation B –G41,G42,G39<br />
(Cutter compensation C is available)<br />
3–dimensional tool compensation –G41<br />
Wheel wear compensation –G41<br />
Tool offset –G45,G46,G47,G48<br />
Local coordinate system –G52<br />
<strong>Machine</strong> coordinate system –G53<br />
Single direction positioning –G60<br />
Automatic corner override –G62<br />
Tapping mode –G63<br />
Macro call –G65,G66,G67<br />
Figure copying<br />
(SubProgram call is available)<br />
–G72.1,G72.2<br />
Simple electric gear box –G80,G81<br />
Functions for hobbing machine –G80,G81<br />
597
22. RISC PROCESSOR PROGRAMMING<br />
B–63534EN/02<br />
Restriction –2<br />
Restriction –3<br />
Restriction –4<br />
External operation function –G81<br />
Chopping function –G81.1<br />
Setting a workpiece coordinate system –G92<br />
Workpiece coordinate system preset –G92.1<br />
Feed per revolution –G95<br />
Constant surface speed control –G96,G97<br />
Infeed control –G160,G161<br />
The following functions can not be used in the AI High Precision Contour<br />
Control mode, the AI NANO High Precision Contour Control mode or<br />
the 5–axis control mode.<br />
Flexible synchronous control<br />
Sequence number comparison and stop<br />
It is not possible to stop by the sequence number in the AI High<br />
Precision Contour Control mode , in the AI Nano High Precision<br />
Contour Control mode or in the 5–axis control mode.<br />
Index table indexing<br />
Retrace function<br />
Do not use retrace function in the program which uses the AI<br />
High Precision Contour Control mode or the AI Nano High<br />
Precision Contour Control or 5–axis control mode.<br />
Rotary axis control<br />
Gentle curve normal direction control<br />
Tool life management<br />
Tool life value is counted in the AI High Precision Contour<br />
Control mode or in the AI Nano AI High Precision Contour<br />
Control mode. However , do not use the command related to the<br />
tool life management function.<br />
Macro executor (Execution macro)<br />
Manual handle interruption<br />
Feedrate change of F1 digit feed by manual pulse generator<br />
External deceleration (External deceleration is not aviailable )<br />
The following commands can not be used in the 5–axis control mode. The<br />
alarm is issued if the function was used.<br />
– M,S,T and B function with motion command<br />
– NURBS interpolation –G06.2<br />
– Workpiece coordinate system –G54–G59, G54.1<br />
– Canned cycle –G73 to G79,<br />
G80 to G89,G98,G99<br />
– Manual interruption operaton<br />
– Tool retract and recover<br />
In the 5–axis control mode, the following functions cannot be used, The<br />
warning message is displayed on the screen when the following functions<br />
are used. :<br />
598
B–63534EN/02 PROGRAMMING<br />
22. RISC PROCESSOR<br />
Restriction –5<br />
Restriction –6<br />
Restriction –7<br />
Restriction –8<br />
– MDI intervention<br />
When the following function is used, the function which executed with<br />
RISC processor cannot be used.<br />
Angular axis control<br />
Arbitary angular axis control<br />
The following modal G code are placed in the cleared state when the reset<br />
is executed in AI high precision contour control mode , AI NANO high<br />
precision contour control mode or 5–axis control mode,<br />
[Modal status] [Clear status]<br />
– 3–dimensional circular<br />
interpolation<br />
–G02.4/G03.4 –G00 or G01<br />
– NURBS interpolation –G06.2 –G00 or G01<br />
– Cutter compensation C –G41/G42 –G40<br />
– 3–dimensional cutter<br />
compensation<br />
–G41.2,G42.2,G41.3–G40<br />
– Tool axis compensation<br />
in tool axis direction –G43.1 –G49<br />
– Tool center point control –G43.4 –G49<br />
– Scaling –G51 –G50<br />
– Programmable mirror<br />
image<br />
–G51.1 –G50.1<br />
– Rotary table dynamic<br />
fixture offset<br />
–G54.2Pn –G54.2P0<br />
– Coordinate system<br />
rotation<br />
–G68 –G69<br />
– 3–dimensional coordinate –G68<br />
conversion<br />
–G69<br />
(The alarm(P/S5453) occur when the program is restart after reset is<br />
executed if the parameter D3R(No.5400#2) =1 in 3–dimensional<br />
coordinate system conversion mode.<br />
This alarm can be canceled by both key and key<br />
operations pushed at the same time.)<br />
The alarm (P/S5000) occurs if, in any of the following modes, an attempt<br />
is made to issue a command that will cause the system to enter 5–axis<br />
control mode (tool center point control, tool axis compensation in tool<br />
axis direction, 3–dimensional cutter compensation, 3–dimensional<br />
circular interpolation, or a function expanded with bits 0 to 5 of parameter<br />
No. 19600 to be executed on a RISC processor).<br />
Advanced preview control<br />
AI contour control<br />
AI namo contour control<br />
The limitation may be attached about the combination of the NC<br />
instructions occasionaly. Refer the description of the each functions.<br />
599
22. RISC PROCESSOR PROGRAMMING<br />
B–63534EN/02<br />
The Function list which<br />
can be used<br />
Axis control<br />
Item Specifications Note<br />
Controlled axes 3 axes<br />
Controlled paths 1–path<br />
Simultaneously controlled axes 2 axes<br />
Controlled axis expansion Up to 8 axes<br />
Simultaneously controlled axis expansion<br />
Up to 6 axes<br />
Axis control by PMC The axis which is used in the AI High<br />
Precision Contour Control mode or in<br />
the AI nano High Precision Contour<br />
Control mode can not be used as the<br />
control axis of the PMC Axis Control in<br />
the AI High Precision Contour Control<br />
mode or in the AI nano High Precision<br />
Contour Control mode<br />
Cs contour control The nano interpolation and the Advanced<br />
preview feed–forward function<br />
are canceled once when the command<br />
for Cs axis in AI high precision contour<br />
control mode or AI nano high precision<br />
contour control mode<br />
Axis name 3 basic axes: X,Y,Z; Additional axes:<br />
U,V,W,A,B, or C<br />
Twin table control Synchronized operation/individual operation/a<br />
normal drive cannot be<br />
changed in the AI high precision contour<br />
control mode or in the AI nano<br />
high precision contour control mode<br />
Please include all the twin table control<br />
axes to the maximum control axis<br />
number (parameter No.7510) of RISC.<br />
Simple synchronous control Synchronized operation/individual operation/a<br />
normal drive cannot be<br />
changed in the AI high precision contour<br />
control mode or in the AI nano<br />
high precision contour control mode<br />
Please include all the simple synchronous<br />
control axes to the maximum<br />
control axis number (parameter<br />
No.7510) of RISC.<br />
Least input increment 0.001mm,0.001deg,0.0001inch<br />
<strong>Inc</strong>remental System 1/10 0.0001mm,0.0001deg,0.00001inch<br />
<strong>Inc</strong>h/metric conversion <strong>Inc</strong>h mode / metric mode cannot be<br />
changed in the AI high precision contour<br />
control mode or in the AI nano<br />
high precision contour control mode.<br />
600
B–63534EN/02 PROGRAMMING<br />
22. RISC PROCESSOR<br />
Axis control<br />
Item<br />
Interlock All axes/each axis<br />
<strong>Machine</strong> lock All axes/each axis<br />
Emergency stop<br />
Specifications<br />
Stored stroke check 1 The stroke limit cannot be set by the<br />
stroke limit external setting signal in the<br />
AI high precision contour control mode<br />
or in the AI nano high precision contour<br />
control mode. Overrun on the OT limit<br />
does not occur in the AI high precision<br />
contour control mode or in the AI nano<br />
high precision contour control mode.<br />
Stored stroke check 2 The AI high precision contour control<br />
mode or the AI nano high precision<br />
contour control mode is automatically<br />
canceled once and the buffering is inhibited<br />
if G22 or G23 is used in the AI<br />
high Precision Contour Control mode<br />
or in the AI high Precision Contour<br />
Control mode,<br />
Mirror image Do not change the state of the signal in<br />
the AI High Precision Contour Control<br />
mode or AI nano High Precision Contour<br />
Control mode.<br />
Backlash compensation for each rapid<br />
traverse and cutting feed<br />
Operation<br />
Automatic operation<br />
MDI operation The AI high precision contour control<br />
mode or the AI nano high precision<br />
contour control mode is automatically<br />
canceled once and the buffering is inhibited<br />
if the MDI operation is used in<br />
the AI high Precision Contour Control<br />
mode or in the AI high Precision Contour<br />
Control mode. At this time,<br />
G05P10000 or G05P0 can not be used<br />
by the MDI operation.<br />
Cycle start/Feed hold<br />
Program stop/Program end<br />
Reset<br />
Program restart Program restart function is performed<br />
with folowing functions:<br />
NURBS interpolation, and Cylindrical<br />
intyerpolation<br />
Dry run<br />
Single block<br />
601<br />
Note
22. RISC PROCESSOR PROGRAMMING<br />
B–63534EN/02<br />
Interpolation functions<br />
Item Specifications Note<br />
Positioning G00 The AI high precision contour control<br />
function or AI nano high precision contour<br />
control functions except the advanced<br />
preview feed–forward function<br />
, multi buffer function , and the nano<br />
interpolation become invalid.<br />
Cutting mode G64<br />
Linear interpolation G01<br />
Circular interpolation G02,G03<br />
Helical interpolation (Circular interpolation) + (Linear interpolation<br />
for up to 2 axes)<br />
Helical interpolation B (Circular interpolation) + (Linear interpolation<br />
for up to 4 axes)<br />
Involute interpolation G02.2,G03.2<br />
3–dimensional circular interpolation G02.4,G03.4 The position is checked at the end<br />
point of the block which cancel 3 dimensional<br />
circular interpolation or at<br />
the end point of the previous block of<br />
the 3 dimensional circular interpolation<br />
if 3 dimensional circular interpolation is<br />
used except in AI high precision contour<br />
control mode or AI nano high precision<br />
contour control mode.<br />
Smooth interpolation G05.1 This function can be used in AI high<br />
precision contour control mode or AI<br />
nano high precision contour control<br />
mode.<br />
NURBS interpolation G06.2 This function can be used in AI high<br />
precision contour control mode or AI<br />
nano high precision contour control<br />
mode.<br />
Cylindrical interpolation G07.1 This function can be used in AI high<br />
precision contour control mode or AI<br />
nano high precision contour control<br />
mode.<br />
Cylindrical interpolation cutting point<br />
control<br />
Conical / spiral interpolation G02,G03<br />
Feed functions<br />
Feed per minute G94<br />
Cutting feedrate clamp<br />
Linear acceleration/deceleration of cutting<br />
feed after interpolation<br />
G07.1 This function can be used in AI high<br />
precision contour control mode or AI<br />
nano high precision contour control<br />
mode.<br />
602
B–63534EN/02 PROGRAMMING<br />
22. RISC PROCESSOR<br />
Feed functions<br />
Item<br />
Bell–type acceleration/deceleration of<br />
cutting feed after interpolation<br />
Specifications<br />
Feedrate override 0 to 254% (1% step)<br />
2nd. Feedrate override 0 to 254% (1% step)<br />
F1 digit feed Using the manual pulse generator can<br />
not change Feedrate.<br />
Inverse time feed G93<br />
Look–ahead liner–type acceleration/<br />
deceleration before interpolation.<br />
Look–ahead bell–type acceleration/<br />
deceleration before interpolation<br />
AI high–precision contour control<br />
AI nano high–precision contour contreol<br />
Program input<br />
Acceleration change time constant<br />
type<br />
Tape code Automatic recognition of EIA/ISO<br />
Program format Word address format<br />
Control in/out<br />
Optional block skip<br />
Absolute/incremental programming G90/G91<br />
Input unit 10 time multiply<br />
Plane selection G17,G18,G19<br />
Rotary axis roll over<br />
Workpiece coordinate system selection<br />
Addition of workpiece coordinate system<br />
pair<br />
Manual absolute ON/OFF<br />
603<br />
Note<br />
G54 to G59 The AI high precision contour control<br />
mode or the AI nano high precision<br />
contour control mode is automatically<br />
canceled once and the buffering is inhibited<br />
if this function is used in the AI<br />
high Precision Contour Control mode<br />
or in the AI high Precision Contour<br />
Control mode.<br />
48 sets / 300 sets The AI high precision contour control<br />
mode or the AI nano high precision<br />
contour control mode is automatically<br />
canceled once and the buffering is inhibited<br />
if this function is used in the AI<br />
high Precision Contour Control mode<br />
or in the AI high Precision Contour<br />
Control mode.
22. RISC PROCESSOR PROGRAMMING<br />
B–63534EN/02<br />
Program input<br />
Item<br />
Specifications<br />
Programmable parameter input G10 The AI high precision contour control<br />
mode or the AI nano high precision<br />
contour control mode is automatically<br />
canceled once and the buffering is inhibited<br />
if this function is used in the AI<br />
high Precision Contour Control mode<br />
or in the AI high Precision Contour<br />
Control mode.<br />
External memory and sub program<br />
calling function<br />
M198<br />
Subprogram call M98<br />
Circular interpolation by R programming<br />
Scaling G50,G51 The mode of AI high precision contour<br />
control or of AI nano high precision<br />
contour control is permitted to change<br />
ON and OFF in scaling mode by setting<br />
the parameter.<br />
The alarm (P/S5012) occurs if the<br />
mode of AI high precision contour control<br />
or of AI nano high precision contour<br />
control is changed in scaling mode<br />
(G51) when the parameter is not set.<br />
The scaling mirror image by a negative<br />
magnification can not be done.<br />
Coordinate system rotation G68,G69 The mode of AI high precision contour<br />
control or of AI nano high precision<br />
contour control is permitted to change<br />
ON and OFF in coordinate system<br />
rotation mode by setting the parameter.<br />
The alarm (P/S5012) occurs if the<br />
mode of AI high precision contour control<br />
or of AI nano high precision contour<br />
control is changed in coordinate<br />
system rotation mode (G51) when the<br />
parameter is not set.<br />
3–dimensional coordinate system conversion<br />
604<br />
Note<br />
G68,G69 The mode of AI high precision contour<br />
control or of AI nano high precision<br />
contour control is permitted to change<br />
ON and OFF in 3–dimensional coordinate<br />
system conversion mode by setting<br />
the parameter. The alarm<br />
(P/S5012) occurs if the mode of AI<br />
high precision contour control or of AI<br />
nano high precision contour control is<br />
changed in 3–dimensional coordinate<br />
system conversion when the parameter<br />
is not set.
B–63534EN/02 PROGRAMMING<br />
22. RISC PROCESSOR<br />
Item<br />
Miscellaneous/spindle functions<br />
Specifications<br />
Miscellaneous function The AI high precision contour control<br />
mode or the AI nano high precision<br />
contour control mode is automatically<br />
canceled once and the buffering is inhibited<br />
if this function is used in the AI<br />
high Precision Contour Control mode<br />
or in the AI high Precision Contour<br />
Control mode.<br />
2nd. Auxiliary function The AI high precision contour control<br />
mode or the AI nano high precision<br />
contour control mode is automatically<br />
canceled once and the buffering is inhibited<br />
if this function is used in the AI<br />
high Precision Contour Control mode<br />
or in the AI high Precision Contour<br />
Control mode.<br />
1 block plural M commands The AI high precision contour control<br />
mode or the AI nano high precision<br />
contour control mode is automatically<br />
canceled once and the buffering is inhibited<br />
if this function is used in the AI<br />
high Precision Contour Control mode<br />
or in the AI high Precision Contour<br />
Control mode.<br />
It is possible to command up to 3.<br />
Spindle speed function The AI high precision contour control<br />
mode or the AI nano high precision<br />
contour control mode is automatically<br />
canceled once and the buffering is inhibited<br />
if this function is used in the AI<br />
high Precision Contour Control mode<br />
or in the AI high Precision Contour<br />
Control mode.<br />
Tool functions<br />
Tool function (T8–digit) The AI high precision contour control<br />
mode or the AI nano high precision<br />
contour control mode is automatically<br />
canceled once and the buffering is inhibited<br />
if this function is used in the AI<br />
high Precision Contour Control mode<br />
or in the AI high Precision Contour<br />
Control mode.<br />
Tool length compensation G43<br />
Cutter compensation G38,G39,G40,G41,G42 The buffering is inhibited when the<br />
command which automatically cancel<br />
AI high precision contour control mode<br />
or AI nano high precision contour control<br />
mode is used.<br />
So the tool offset vector is held.<br />
605<br />
Note
22. RISC PROCESSOR PROGRAMMING<br />
B–63534EN/02<br />
Tool functions<br />
Item<br />
3–dimensional tool compensation G41.2,G42.2<br />
G41.3<br />
Tool axis direction tool length compensation<br />
Specifications<br />
606<br />
Note<br />
The command which automatically<br />
cancel AI high precision contour control<br />
mode or AI nano high precision<br />
contour control mode can not be used.<br />
However M,S,T and B command can<br />
be used without the command that<br />
move some axes. In this case, the offset<br />
vector is held because the buffering<br />
is inhibited.<br />
G43.1 The command which automatically<br />
cancel AI high precision contour control<br />
mode or AI nano high precision<br />
contour control mode can not be used.<br />
However M,S,T and B command can<br />
be used without the command that<br />
move some axes. In this case, the offset<br />
vector is held because the buffering<br />
is inhibited.<br />
Tool center point control G43.4,G43.5 The command which automatically<br />
cancel AI high precision contour control<br />
mode or AI nano high precision<br />
contour control mode can not be used.<br />
However M,S,T and B command can<br />
be used without the command that<br />
move some axes. In this case, the offset<br />
vector is held because the buffering<br />
is inhibited.<br />
Rotary table dynamic fixture offset G54.2 The mode of AI high precision contour<br />
control or of AI nano high precision<br />
contour control is permitted to change<br />
ON and OFF in rotary table dynamic<br />
fixture offset mode by setting the parameter.<br />
The alarm (P/S5012) occurs if<br />
the mode of AI high precision contour<br />
control or of AI nano high precision<br />
contour control is changed in rotary<br />
table dynamic fixture offset mode when<br />
the parameter is not set.
B–63534EN/02 PROGRAMMING<br />
22. RISC PROCESSOR<br />
22.1<br />
AI HIGH PRECISION<br />
CONTOUR CONTROL/<br />
AI NANO HIGH<br />
PRECISION CONTOUR<br />
CONTROL<br />
General<br />
Format<br />
Functions enabled<br />
This function is designed to achieve high–speed, high–precision<br />
machining with a program involving a sequence of very small straight<br />
lines and NURBS curved lines, like those used for metal die machining.<br />
This function can suppress the servo system delay and delay caused by<br />
acceleration/deceleration that increase as a higher feedrate is used.<br />
This function can be used to ensure that the tool strictly traces the<br />
specified values, thus minimizing machining profile errors and achieving<br />
high–speed, high–precision machining.<br />
HPCC stands for high precision contour control. In AI High Precision<br />
Countour Control mode, acceleration/deceleration is performed more<br />
precisely than in the conventional HPCC mode, resulting in an increase<br />
in the cutting speed.<br />
AI Nano High Precision Countour Control can use the Nano interpolation<br />
with all functions of AI High Precision Countour Control.<br />
The output from the NC to the servo is usually in units of detection units.<br />
This function allows output to the servo in units of thousandths of<br />
detection units, thereby improving machining precision. This is<br />
particularly effective for improving the surface roughness.<br />
Note that the positioning precision depends on the machine conditions,<br />
such as the resolution of the detector.<br />
AI Nano High Precision Countour Control is the same as a AI High<br />
Precision Countour Control excluding being able to use the Nano<br />
interpolation.<br />
In the following explanations, only AI High Precision Countour Control<br />
is described.<br />
The following command turns AI high precision contour control mode on<br />
and off.<br />
In AI high precision contour control mode, ”AI HPCC” flashes at the<br />
lower right corner of the screen.<br />
In AI nano high precision contour control mode, ”NANO HP” flashes.<br />
G05 P10000 : AI High Precision Countour Control mode on<br />
G05 P0 : AI High Precision Countour Control mode off<br />
Specify G05 alone in a block.<br />
In AI High Precision Countour Control mode, the following functions are<br />
enabled:<br />
Thus, this function can be used to ensure that the tool strictly traces the<br />
specified values, thus minimizing machining profile errors for<br />
higher–speed, higher–precision machining.<br />
607
22. RISC PROCESSOR PROGRAMMING<br />
B–63534EN/02<br />
22.1.1<br />
Look–ahead<br />
Acceleration/Decelerati<br />
on Before Interpolation<br />
Acceleration/<br />
deceleration types<br />
Look–ahead linear<br />
acceleration/deceleration<br />
before interpolation<br />
Example of deceleration<br />
(1) Linear acceleration/deceleration before interpolation or bell–shaped<br />
acceleration/deceleration before interpolation<br />
(Acceleration change time constant type)<br />
(2) Deceleration function based on feedrate differences at corners<br />
(3) Advanced feed–forward function<br />
(4) Feedrate determination based on acceleration on each axis<br />
(5) Deceleration function based on Z–axis fall angle<br />
(6) 200–block multi–buffer function<br />
There are two types of acceleration/deceleration, the linear<br />
acceleration/deceleration type and the bell–shaped acceleration/<br />
deceleration type. When bit 7(BDO) and bit 1(NBL) of parameter<br />
No.8402 is set to 1 or bit 3(RSB) of parameter No.1603 is set to 1,<br />
bell–shaped acceleration/deceleration is assumed. Bell–shaped<br />
acceleration / deceleration produces smoother acceleration / deceleration.<br />
Deceleration starts in advance so that the feedrate specified for a block can<br />
be attained when the block is executed.<br />
F3<br />
F2<br />
F1<br />
Feedrate<br />
608<br />
P1<br />
N1<br />
P2<br />
N2<br />
Programmed speed<br />
Feedrate obtained by<br />
acceleration/<br />
deceleration<br />
before interpolation<br />
Time<br />
To decrease the feedrate from F3 to F2, deceleration must be started from<br />
P1.<br />
To decrease the feedrate from F2 to F1, deceleration must be started from<br />
P2.<br />
Because multiple blocks are read in advance, deceleration can be<br />
performed over all those blocks.
B–63534EN/02 PROGRAMMING<br />
22. RISC PROCESSOR<br />
Example of acceleration<br />
Look–ahead bell–shaped<br />
acceleration/deceleration<br />
before interpolation<br />
Setting an acceleration<br />
Acceleration is performed so that the feedrate specified for a block is<br />
attained when the block is executed.<br />
F3<br />
F2<br />
F1<br />
Feedrate<br />
N1<br />
609<br />
N2<br />
Programmed speed<br />
Feedrate obtained by<br />
acceleration/<br />
deceleration<br />
before interpolation<br />
Time<br />
If “1” is set to bit 7(BDO) and bit 1(NBL) of parameter No.8402 or bit<br />
3(RSB) of parameter No.1603, bell–shaped acceleration/deceleration is<br />
applied as the acceleration/deceleration before interpolation.<br />
A permissible acceleration for the linear acceleration/deceleration of each<br />
axis is set in parameter 19510. Acceleration change time (B) (period of<br />
transition from constant speed state (A) to constant acceleration/<br />
deceleration state (C)) is set in parameter 8416 (common to all axes). In<br />
the constant acceleration/deceleration state (C), acceleration/deceleration<br />
is performed with the maximum tangential acceleration not exceeding the<br />
permissible acceleration of each axis specified in parameter 19510.<br />
The acceleration change time specified in parameter 8416 is held<br />
constant, regardless of the tangential acceleration.<br />
Tangential feedrate<br />
(A) (B) (C) (B) (A) (B) (C) (B) (A)<br />
Time set in parameter 8416<br />
An optimum gradient is automatically<br />
calculated from the setting made in<br />
parameter 19510.
22. RISC PROCESSOR PROGRAMMING<br />
B–63534EN/02<br />
Method of determining<br />
the tangent acceleration<br />
Tangent feedrate<br />
20ms<br />
20ms 20ms<br />
Acceleration<br />
1000mm/sec 2<br />
gradient<br />
Acceleration/deceleration is performed with the largest tangent<br />
acceleration/deceleration that does not exceed the acceleration set for<br />
each axis.<br />
(Example)<br />
X–axis permissible acceleration: 1000 mm/sec 2<br />
Y–axis permissible acceleration: 1200 mm/sec 2<br />
Acceleration change time: 20 msec<br />
Program:<br />
N1 G01 G91 X20. F6000 Move on the X–axis.<br />
G04 X0.01<br />
N2 Y20. Move on the Y–axis.<br />
G04 X0.01<br />
N3 X20. Y20. Move in the XY direction (at 45 degrees).<br />
The acceleration in N3 is 1414 mm/sec 2 . At this point, the acceleration<br />
on the X–axis is equal to the set value (1000 mm/sec 2 ).<br />
1200mm/sec 2<br />
gradient<br />
610<br />
20ms<br />
1414mm/sec 2<br />
gradient<br />
Acceleration is performed so that the feedrate programmed for a block is<br />
attained at the beginning of the block.<br />
Feedrate<br />
N1<br />
N2<br />
N3 N4 N5<br />
Speed control by bell–shaped acceleration/<br />
deceleration before interpolation<br />
Programmed speed<br />
Time
B–63534EN/02 PROGRAMMING<br />
22. RISC PROCESSOR<br />
Deceleration<br />
Deceleration based on a<br />
distance<br />
Single–block commands<br />
during look–ahead<br />
bell–shaped<br />
acceleration/deceleration<br />
before interpolation<br />
control<br />
Deceleration starts in advance so that the feedrate programmed for a block<br />
is attained at the beginning of the block.<br />
Deceleration can be performed over several blocks.<br />
Feedrate<br />
Deceleration<br />
start point<br />
611<br />
Deceleration<br />
start point<br />
Speed control by<br />
bell–shaped acceleration/<br />
deceleration before<br />
interpolation<br />
Programmed speed<br />
Time<br />
If the total distance of the blocks read ahead becomes shorter than or equal<br />
to the deceleration distance obtained from the current feedrate,<br />
deceleration starts.<br />
If the total distance of the blocks read ahead during deceleration increases,<br />
acceleration is performed.<br />
If the blocks of a small amount of travel are successively specified,<br />
deceleration and acceleration may be performed alternately, making the<br />
feedrate inconsistent. To avoid this, decrease the programmed feedrate.<br />
If a single–block command is executed during look–ahead bell–shaped<br />
acceleration/deceleration control, the following control is applied.<br />
(1) If acceleration/deceleration is performed when the single–block<br />
command is executed<br />
(a) If A + B Remaining amount of travel in the block executed<br />
when the single–block command is executed<br />
Deceleration is performed for a stop so that the feedrate falls to<br />
zero at the point at which the block executed when the<br />
single–block command was executed terminates.<br />
Feedrate<br />
Single–block command<br />
###<br />
###<br />
A<br />
###<br />
###<br />
###<br />
""<br />
""" ""<br />
B<br />
"" """<br />
""" ###<br />
""<br />
""" ###<br />
""<br />
Time<br />
A: Amount of travel to a point where the target feedrate is<br />
attained and the current acceleration/deceleration ends<br />
B : Amount of travel corresponding to deceleration from the<br />
feedrate attained at the end of acceleration/deceleration to 0
22. RISC PROCESSOR PROGRAMMING<br />
B–63534EN/02<br />
(b) If A + B > Remaining amount of travel in the block being<br />
executed when the single–block command is executed<br />
A stop state may continue over several blocks.<br />
The stop is made as described later.<br />
Feedrate<br />
Single–block command<br />
$$$<br />
%%%<br />
%%% $$ $$$<br />
A<br />
$$$<br />
%%% $$<br />
%%% $$ $$$<br />
$$$ """ $$<br />
%%%<br />
"""<br />
%%% $$ $$$<br />
612<br />
B<br />
Stop state continuing over multiple blocks<br />
Time<br />
A: Amount of travel to a point where the target feedrate is<br />
attained and the current acceleration/deceleration ends<br />
B : Amount of travel corresponding to deceleration from the<br />
feedrate attained at the end of acceleration/deceleration to 0<br />
(2) If acceleration/deceleration is not performed when the single–block<br />
command is executed<br />
(a) ARemaining amount of travel in the block being executed<br />
when the single–block command is executed<br />
Movement is decelerated and stopped so that the feedrate falls to<br />
zero at the end of the block which was being executed when the<br />
single–block command was executed.<br />
Feedrate<br />
Single–block command<br />
%%%<br />
%% %%%<br />
A<br />
%%% %%<br />
%% """<br />
%%%<br />
%% """<br />
%%%<br />
Time<br />
A: Amount of travel corresponding to deceleration from the<br />
current feedrate to 0
B–63534EN/02 PROGRAMMING<br />
22. RISC PROCESSOR<br />
22.1.2<br />
Automatic Feedrate<br />
Control Function<br />
(b) If A > Remaining amount of travel in the block being executed<br />
when the single–block command is executed<br />
A stop state may continue over several blocks.<br />
The stop is made as described later.<br />
Feedrate<br />
Single–block command<br />
###<br />
## ###<br />
### ##<br />
## ###<br />
### &&& ##<br />
&&& ## ###<br />
613<br />
A<br />
Stop state continuing over multiple blocks<br />
Time<br />
A: Amount of travel corresponding to deceleration from the<br />
current feedrate to 0<br />
(3) Stopping a movement if the stop may continue over several blocks<br />
Acceleration/deceleration is performed over several blocks to<br />
decrease the feedrate to zero.<br />
Feedrate<br />
Single–block command<br />
Time<br />
In AI High Precision Countour Control mode, the feedrate is<br />
automatically controlled by the reading–ahead of blocks.<br />
The feedrate is determined using the following conditions. If the<br />
specified feedrate exceeds the determined feedrate, acceleration/<br />
deceleration before interpolation is performed to achieve the determined<br />
feedrate.<br />
(1) Feedrate changes on each axis at a corner and the permissible feedrate<br />
change that has been set<br />
(2) Expected acceleration on each axis and the permissible acceleration<br />
that has been set
22. RISC PROCESSOR PROGRAMMING<br />
B–63534EN/02<br />
Feedrate control<br />
conditions<br />
(3) Cutting load that is expected from the travel direction on the Z–axis<br />
The machining error is decreased<br />
because of the deceleration by<br />
difference in feedrate.<br />
614<br />
The machining error is decreased<br />
because of the deceleration with<br />
the acceleration.<br />
Fig. 22.1.2 (a)<br />
Specified tool path<br />
Tool path assumed<br />
when Al High Precision<br />
Contour Control is not<br />
used<br />
Tool path assumed<br />
when Al High Precision<br />
Contour Control is used<br />
To enable this function, set the desired values for the following<br />
parameters:<br />
Parameter No. 8410:<br />
Permissible feedrate difference used when the feedrate is to be<br />
determined from the feedrate difference at a corner<br />
Parameter No. 8470:<br />
Permissible acceleration when the feedrate is to be determined<br />
from the acceleration<br />
For details, see the explanation of these parameters.<br />
In automatic feedrate control mode, the feedrate is controlled as described<br />
below:<br />
(a) From the feedrate difference on each axis at a corner, the feedrate<br />
in the corner is determined, and deceleration is performed to<br />
achieve the feedrate at the corner.<br />
Y<br />
Y<br />
(Example)<br />
X<br />
N1<br />
N3<br />
Specified<br />
F<br />
N2<br />
N1<br />
N2<br />
N3 t<br />
(b) From the acceleration on each axis at the corners at the start and<br />
end points of each block, the feedrate in the block is determined,<br />
and deceleration is performed so that the feedrate in the block is<br />
equal to or less than the determined feedrate.<br />
(Example)<br />
X<br />
N1<br />
N8<br />
N2 N3<br />
Specified<br />
feedrate<br />
N7 N6<br />
N4<br />
N5<br />
N1<br />
N2 N3 N6 N7<br />
N8 t
B–63534EN/02 PROGRAMMING<br />
22. RISC PROCESSOR<br />
Deceleration based on<br />
the feedrate difference at<br />
a corner<br />
Z<br />
(c) During descent on the Z–axis, the cutting load increases, and<br />
override is applied according to the Z–axis descent angle.<br />
(Example)<br />
X<br />
N1 N2<br />
615<br />
Specified<br />
feedrate<br />
N3<br />
N1 N2<br />
N3 t<br />
With look–ahead acceleration/deceleration before interpolation, the<br />
tangent feedrate is changed smoothly. Thus, no path error occurs due to<br />
acceleration/deceleration delay. With this acceleration/declaration,<br />
however, acceleration/deceleration is not performed for any feedrate<br />
change on any axis that may be made where the travel direction changes.<br />
By using the function for deceleration based on the feedrate difference at<br />
a corner, if a feedrate change occurs on an axis at a corner, the feedrate is<br />
determined so that any feedrate difference exceeding the permissible<br />
feedrate difference on that axis that has been set for parameter No. 8410<br />
does not occur, and deceleration is automatically performed.
22. RISC PROCESSOR PROGRAMMING<br />
B–63534EN/02<br />
(Example)<br />
Program<br />
N1 G01 G91 X100. F5000<br />
N2 Y100.<br />
Tangent feedrate<br />
X–axis feedrate<br />
Y–axis feedrate<br />
The tangent feedrate is<br />
smooth, but the feedrate<br />
on each axis is not.<br />
N1<br />
The deceleration<br />
based on the feedrate<br />
difference is used.<br />
616<br />
N2<br />
Tangent feedrate<br />
X–axis feedrate<br />
Y–axis feedrate<br />
The feedrate difference becomes<br />
small, and the feedrate on each<br />
axis becomes smooth.<br />
The method of deceleration based on the feedrate difference differs<br />
depending on the setting made for parameter FNW (bit 6 of No. 19500).<br />
If “0” is set, the largest feedrate that does not exceed the permissible<br />
feedrate difference set for parameter No. 8410 is assumed to be the<br />
deceleration feedrate. In this case, the deceleration feedrate differs if the<br />
travel direction differs, even if the shape is the same.
B–63534EN/02 PROGRAMMING<br />
22. RISC PROCESSOR<br />
Example of determining<br />
the feedrate with the<br />
acceleration on each<br />
axis<br />
Example<br />
(Example)<br />
If parameter FNW (bit 6 of No. 19500) = 0 and the<br />
permissible feedrate difference = 500 mm/min (on all axes)<br />
Deceleration to<br />
500 mm/min<br />
617<br />
Deceleration to<br />
354 mm/min<br />
If “1” is set, the feedrate is determined not only with the condition that the<br />
permissible feedrate difference and permissible acceleration on each axis<br />
are not exceeded, but also that the deceleration feedrate is constant<br />
regardless of the travel direction if the shape is the same.<br />
If 1 is set for this parameter, the deceleration feedrate determined with the<br />
feedrate difference or acceleration may be up to 30% lower than that<br />
determined if 0 is set.<br />
(Example)<br />
If parameter FNW (bit 6 of No. 19500) = 1 and<br />
permissible feedrate difference = 500 mm/min (on all axes)<br />
Deceleration to<br />
354 mm/min<br />
Deceleration to<br />
354 mm/min<br />
When consecutive small lines are used to form a curve, as in the example<br />
shown in the figure below, the feedrate differences on each axis at the<br />
individual corners are not very large. Thus, deceleration with the feedrate<br />
differences is not effective. Consecutive small feedrate differences,<br />
however, cause a large acceleration on each axis, as a whole.<br />
In such a case, deceleration can be performed to reduce the impact on the<br />
machine and the machining error caused by too large an acceleration. The<br />
deceleration feedrate is determined to be the feedrate that does not cause<br />
the acceleration on each axis to exceed the permissible acceleration set for<br />
parameter No. 8470.<br />
The deceleration feedrate is determined for each corner. The actual<br />
feedrate is the smaller of the deceleration feedrate determined at the start<br />
point of the block and that determined at the end point.<br />
In the following example, the acceleration (gradient of the broken line in<br />
the feedrate graph) at too large at corners N2 to N4 and N6 to N8 and,<br />
therefore, deceleration is performed.
22. RISC PROCESSOR PROGRAMMING<br />
B–63534EN/02<br />
X–axis<br />
feedrate<br />
Y–axis<br />
feedrate<br />
Tangent<br />
feedrate<br />
Y<br />
X<br />
N1<br />
N7<br />
N6<br />
N8<br />
N5<br />
N2<br />
N4<br />
N3<br />
N1 N5 N9 N1 N5 N9<br />
Fig. 22.1.2 (b) Example of Determining the Feedrate with the Acceleration<br />
618<br />
N9<br />
The method of determining the feedrate with the acceleration differs<br />
depending on the setting of parameter FNW (bit 6 of No. 19500).<br />
If “0” is set, the highest feedrate that does not cause the permissible<br />
acceleration set for parameter No. 8470 to be exceeded is assumed to be<br />
the deceleration feedrate. In this case, the deceleration feedrate differs<br />
depending on the travel direction even if the shape is the same, as shown<br />
in the figure below.<br />
(Example)If a circular shape with a radius of 10 mm is specified<br />
with small line blocks<br />
Parameter FNW (bit 6 of No. 19500) = 0<br />
Permissible acceleration = 1000 mm/s2 (on all axes)<br />
The feedrate is<br />
higher in these<br />
directions.<br />
Tangent feedrate<br />
F6000<br />
Time
B–63534EN/02 PROGRAMMING<br />
22. RISC PROCESSOR<br />
Example of determining<br />
the feedrate with the<br />
cutting load<br />
If “1” is set, the feedrate is determined with not only the condition that the<br />
permissible acceleration on each axis is not exceeded but also the<br />
condition that the deceleration feedrate is constant regardless of the travel<br />
direction if the shape is the same.<br />
If 1 is set for this parameter, the deceleration feedrate determined with the<br />
feedrate difference or acceleration may be up to 30% lower than that<br />
determined if 0 is set.<br />
(Example)If a circular shape with a radius of 10 mm is specified<br />
with small line blocks<br />
Parameter FNW (bit 6 of No. 19500) = 1,<br />
radius = 10 mm, permissible acceleration = 1000 mm/s2 (on all axes)<br />
The tangent<br />
feedrate is<br />
constant.<br />
619<br />
Tangent feedrate<br />
F6000<br />
Time<br />
NOTE<br />
In circular interpolation, the tangent feedrate is constant<br />
regardless of the setting of the parameter.<br />
This function is enabled when parameter ZAG (bit 4 of No. 8451) is set<br />
to 1.<br />
((((((<br />
((((((<br />
((((((<br />
’’’’’’’’<br />
((((((<br />
’’’’’’’’<br />
Fig. 22.1.2 (c) During ascent on the Z–axis<br />
’’’’’’’’<br />
<br />
((((((<br />
((((((<br />
((((((<br />
’’’’’’’’<br />
’’’’’’’’<br />
’’’’’’’’<br />
Fig. 22.1.2 (d) During descent on the Z–axis
22. RISC PROCESSOR PROGRAMMING<br />
B–63534EN/02<br />
Usually, the cutting resistance is higher when machining is performed<br />
with the bottom of the cutter, as shown in Fig. 22.1.2 (c) an when<br />
machining is performed with the side of the cutter, as shown in Fig. 22.1.2<br />
(d). Deceleration is, therefore, required. In AI High Precision Countour<br />
Control, the tool travel direction on the Z–axis is used as a condition for<br />
calculating the machining feedrate.<br />
The descent angle during descent on the Z–axis (angle formed by the XY<br />
plane and the tool center path) is as shown in Fig. 22.1.2 (d). The descent<br />
angle is divided into four areas, and the override values for the individual<br />
areas are set for the following parameters:<br />
Parameter No. 8456 for area 2<br />
Parameter No. 8457 for area 3<br />
Parameter No. 8458 for area 4<br />
For area 1, however, no parameter is available, and an override of 100%<br />
is used at all times. The feedrate obtained according to other feedrate<br />
control is multiplied by the override value of the area to which descent<br />
angle belongs.<br />
Area1 0°
B–63534EN/02 PROGRAMMING<br />
22. RISC PROCESSOR<br />
Ignoring F code<br />
commands<br />
Override to a determined<br />
feedrate<br />
CAUTION<br />
1 The function for determining the feedrate with the cutting<br />
feed is effective only when the tool is parallel with the<br />
Z–axis. Thus, it may not be possible to apply this function,<br />
depending on the structure of the machine used.<br />
2 In the function for determining the feedrate with the cutting<br />
feed, the travel direction on the Z–axis is determined with<br />
the appropriate NC command. If, therefore, manual<br />
intervention is performed on the Z–axis with manual<br />
absolute on, or if a mirror image is applied on the Z–axis, the<br />
direction on the Z–axis cannot be determined. When using<br />
the function for determining the feedrate with the cutting<br />
load, do not use these functions.<br />
3 When performing three–dimensional coordinate conversion,<br />
determine the descent angle on the Z–axis using the<br />
converted coordinate system.<br />
In a block in which automatic feedrate control is enabled, all feed<br />
commands (F commands) can be ignored by setting parameter NOF (bit<br />
7 of No. 8451). The term feed commands, as used here, refer to the<br />
following commands:<br />
(1) Modal F commands before the block in which automatic feedrate<br />
control is enabled<br />
(2) F commands and modal F commands in the block in which automatic<br />
feedrate control is enabled<br />
When the F commands are ignored, it is assumed that the upper feedrate<br />
limit specified for parameter No. 8465 is specified.<br />
Note, however, that any issued F commands and modal F commands are<br />
stored within the CNC.<br />
Thus, in a block in which automatic feedrate control changes from the<br />
enabled state to the disabled state, the modal values of the F commands<br />
described in 1 and 2 described above are used as modal F commands,<br />
instead of the modal values of the F commands calculated by automatic<br />
feedrate control.<br />
The following gives the specifications of override to a feedrate<br />
determined by functions such as deceleration based on feedrate difference<br />
in look–ahead acceleration/deceleration before interpolation and<br />
deceleration based on acceleration rate in AI High Precision Countour<br />
Control.<br />
– When bit 3 (OVR) of parameter No. 8459 = 0<br />
The conventional specifications apply.<br />
Override is invalid for deceleration functions such as deceleration<br />
based on feedrate difference and deceleration based on acceleration<br />
rate.<br />
– When bit 3 (OVR) of parameter No. 8459 = 1<br />
Override is valid for deceleration functions such as deceleration based<br />
on feedrate difference and deceleration based on acceleration rate.<br />
621
22. RISC PROCESSOR PROGRAMMING<br />
B–63534EN/02<br />
Another example of<br />
determining the feedrate<br />
Miscellaneous<br />
22.1.3<br />
Restrictions<br />
Restriction–1<br />
When bit 3 (OVR) of parameter No. 8459 is 1, the following feedrates can<br />
be overridden:<br />
– Feedrate decelerated by deceleration based on feedrate difference in<br />
look–ahead acceleration/deceleration before interpolation<br />
– Feedrate decelerated by deceleration based on acceleration rate in AI<br />
High Precision Countour Control.<br />
– Feedrate decelerated by deceleration based on acceleration rate in<br />
circular interpolation<br />
– Feedrate decelerated by acceleration clamp in involute interpolation<br />
– Minimum feedrate for deceleration based on acceleration rate in AI<br />
High Precision Countour Control and circular interpolation<br />
– Maximum feedrate of AI High Precision Countour Control.<br />
Even when the feedrate is overridden, the resulting feedrate does not<br />
exceed the maximum cutting feedrate (parameter No. 1422 or No.1430<br />
or No.1432).<br />
If the calculated feedrate exceeds either the upper limit (parameter No.<br />
8465) for automatic feedrate control that is set for the appropriate<br />
parameter or the feedrate specified with an F command, clamping is<br />
performed with the smaller of the upper limit feedrate and the feedrate<br />
specified with the F command.<br />
If the feedrate calculated by the deceleration function based on the<br />
acceleration is smaller than the lower feedrate limit for the deceleration<br />
function based on the acceleration of AI High Precision Countour Control<br />
set for parameter No. 19511, the lower feedrate limit is used for the<br />
feedrate. If, however, the specified feedrate is smaller than the lower<br />
feedrate limit, the specified feedrate is used.<br />
In AI high precision contour control mode or in AI nano high precision<br />
contour control mode, 3–dimensional coordinate conversion, coordinate<br />
system rotation, scaling, and rotary table dynamic fixture offset can be<br />
executed.<br />
In the mode of each of the 3–dimensional coordinate conversion,<br />
coordinate system rotation, scaling, and rotary table dynamic fixture<br />
offset functions, AI high precision contour control mode or AI nano high<br />
precision contour control mode can be turned on and off with the<br />
appropriate parameter settings.<br />
For the function which can be used and limitations in the AI High<br />
Precision Contour Control mode or in the AI NANO High Precision<br />
Contour Control mode, refer to the “Function List which can be used” and<br />
“Restrictions”.<br />
The following functions can be used but the state can not be changed in<br />
the AI High Precision Contour Control mode or in the AI NANO High<br />
Precision Contour Control mode.<br />
<strong>Inc</strong>h/metric conversion (An alarm(P/S5000) is issued if the state is<br />
changed by G20 or G21)<br />
622
B–63534EN/02 PROGRAMMING<br />
22. RISC PROCESSOR<br />
Restriction –2<br />
Restriction –3<br />
Mirror image (Do not change the state of the signal).<br />
F1 digit feed (Feedrate can not be changed by using the manual pulse<br />
generator.)<br />
The AI high Precision Contour Control mode or the AI Nano high<br />
Precision Contour Control mode is automatically canceled once and the<br />
buffering is inhibited if the following function is used in the AI high<br />
Precision Contour Control mode or in the AI high Precision Contour<br />
Control mode.<br />
MDI operation<br />
Workpiece coordinate system selection(G54 to G59)<br />
Programmable parameter input(G10)<br />
Miscellaneous function<br />
2nd. Auxiliary function<br />
1 block plural M commands<br />
Spindle speed function<br />
Tool function<br />
Fixed cycle(G73,G74,G76,G80 to G89,G98,G99)<br />
(Set the parameter(No.5200#0=1) which an M code specifying the<br />
rigid tapping mode is not used if the rigid tapping is used )<br />
The following commands can not be used in the AI High Precision<br />
Contour Control mode or AI NANO High Precision Contour Control<br />
mode. The alarm is issued if the function was used.<br />
Custom macro<br />
Exponential interpolation –G02.3,G03.3<br />
Dwell –G04<br />
High Speed Cutting Function relation –G05<br />
(G05P10000 and G05P0 are excluded)<br />
AI contour control –G05.1Q1,G5.1Q0<br />
Hypothetical axis interpolation –G07<br />
Advanced preview control –G08<br />
(Please use AI High Precision Contour Control)<br />
Polar coordinate interpolation –G12.1,G13.1<br />
Polar coordinate command –G15,G16<br />
Reference position return check –G27<br />
Reference point return –G28<br />
2nd. Reference point return –G30<br />
3rd/4th reference point return –G30<br />
Skip –G31<br />
Thread cutting –G33<br />
Automatic tool length measurement –G37<br />
Normal direction control –G40.1,G41.1,G42.1<br />
Cutter compensation B –G41,G42,G39<br />
(Cutter compensation C is available)<br />
623
22. RISC PROCESSOR PROGRAMMING<br />
B–63534EN/02<br />
Restriction –4<br />
3–dimensional tool compensation –G41<br />
Wheel wear compensation –G41<br />
Tool offset –G45,G46,G47,G48<br />
Local coordinate system –G52<br />
<strong>Machine</strong> coordinate system –G53<br />
Single direction positioning –G60<br />
Automatic corner override –G62<br />
Tapping mode –G63<br />
Macro call –G65,G66,G67<br />
(SubProgram call is available)<br />
Figure copying –G72.1,G72.2<br />
Simple electric gear box –G80,G81<br />
Functions for hobbing machine –G80,G81<br />
External operation function –G81<br />
Chopping function –G81.1<br />
Setting a workpiece coordinate system –G92<br />
Workpiece coordinate system preset –G92.1<br />
Feed per revolution –G95<br />
Constant surface speed control –G96,G97<br />
Infeed control –G160,G161<br />
The following functions can not be used in the AI High Precision Contour<br />
Control mode or AI NANO High Precision Contour Control mode.<br />
Flexible synchronous control<br />
Sequence number comparison and stop<br />
It is not possible to stop by the sequence number in the AI High<br />
Precision Contour Control mode or in the AI Nano High<br />
Precision Contour Control mode.<br />
Index table indexing<br />
Retrace function<br />
Do not use retrace function in the program which uses the AI<br />
High Precision Contour Control mode or the AI Nano High<br />
Precision Contour Control.<br />
Rotary axis control<br />
Gentle curve normal direction control<br />
Tool life management<br />
Tool life value is counted in the AI High Precision Contour<br />
Control mode or in the AI Nano AI High Precision Contour<br />
Control mode. However , do not use the command related to the<br />
tool life management function.<br />
Macro executor (Execution macro)<br />
Manual handle interruption<br />
624
B–63534EN/02 PROGRAMMING<br />
22. RISC PROCESSOR<br />
Restriction –5<br />
Restriction –6<br />
22.1.4<br />
The Function List<br />
which Can be Used<br />
Axis control<br />
When the following function is used, a AI High Precision Contour<br />
Control and the AI Nano High Precision Contour Control cannot be used.<br />
Angular axis control<br />
Arbitary angular axis control<br />
The limitation may be attached about the combination of the NC<br />
instructions occasionaly.<br />
Refer the description of the each functions.<br />
NOTE<br />
1 If the permissible acceleration set for one axis is two or more times<br />
greater than that set for another, the feedrate may decrease<br />
temporarily at those corners where the travel direction changes<br />
abruptly.<br />
2 If the machine lock signal is turned on during travel in look–ahead<br />
acceleration/deceleration before interpolation mode, the machine<br />
enters the machine lock state after the end of deceleration.<br />
3 If there is a block with no travel or a one–shot G code command<br />
such as G04 in look–ahead acceleration/deceleration before<br />
interpolation mode, deceleration is performed for a stop in the<br />
preceding block.<br />
4 If the dry run signal changes from “0” to “1” or from “1” to “0” during<br />
travel on an axis, acceleration/deceleration is performed to achieve<br />
the prescribed feedrate without deceleration to feedrate 0.<br />
The function for deceleration with the feedrate difference at a<br />
corner is effective even during dry run.<br />
Item Specifications Note<br />
Controlled axes 3 axes<br />
Controlled paths 1–path<br />
Simultaneously controlled axes 2 axes<br />
Controlled axis expansion Up to 8 axes<br />
Simultaneously controlled axis expansion<br />
Up to 6 axes<br />
625
22. RISC PROCESSOR PROGRAMMING<br />
B–63534EN/02<br />
Axis control<br />
Item<br />
Specifications<br />
Axis control by PMC The axis which is used in the AI High<br />
Precision Contour Control mode or in<br />
the AI nano High Precision Contour<br />
Control mode can not be used as the<br />
control axis of the PMC Axis Control in<br />
the AI High Precision Contour Control<br />
mode or in the AI nano High Precision<br />
Contour Control mode<br />
Cs contour control The nano interpolation and the Advanced<br />
preview feed–forward function<br />
are canceled once when the command<br />
for Cs axis in AI high precision contour<br />
control mode or AI nano high precision<br />
contour control mode<br />
Axis name 3 basic axes: X,Y,Z; Additional axes:<br />
U,V,W,A,B, or C<br />
Twin table control Synchronized operation/individual operation/a<br />
normal drive cannot be<br />
changed in the AI high precision contour<br />
control mode or in the AI nano<br />
high precision contour control mode<br />
Please include all the twin table control<br />
axes to the maximum control axis<br />
number (parameter No.7510) of RISC.<br />
Simple synchronous control Synchronized operation/individual operation/a<br />
normal drive cannot be<br />
changed in the AI high precision contour<br />
control mode or in the AI nano<br />
high precision contour control mode<br />
Please include all the simple synchronous<br />
control axes to the maximum<br />
control axis number (parameter<br />
No.7510) of RISC.<br />
Least input increment 0.001mm,0.001deg,0.0001inch<br />
<strong>Inc</strong>remental System 1/10 0.0001mm,0.0001deg,0.00001inch<br />
<strong>Inc</strong>h/metric conversion <strong>Inc</strong>h mode / metric mode cannot be<br />
changed in the AI high precision contour<br />
control mode or in the AI nano<br />
high precision contour control mode.<br />
Interlock All axes/each axis<br />
<strong>Machine</strong> lock All axes/each axis<br />
Emergency stop<br />
Stored stroke check 1 The stroke limit cannot be set by the<br />
stroke limit external setting signal in<br />
the AI high precision contour control<br />
mode or in the AI nano high precision<br />
contour control mode. Overrun on the<br />
OT limit does not occur in the AI high<br />
precision contour control mode or in<br />
the AI nano high precision contour<br />
control mode.<br />
626<br />
Note
B–63534EN/02 PROGRAMMING<br />
22. RISC PROCESSOR<br />
Axis control<br />
Item<br />
Specifications<br />
Stored stroke check 2 The AI high precision contour control<br />
mode or the AI nano high precision<br />
contour control mode is automatically<br />
canceled once and the buffering is inhibited<br />
if G22 or G23 is used in the AI<br />
high Precision Contour Control mode<br />
or in the AI high Precision Contour<br />
Control mode,<br />
Mirror image Do not change the state of the signal in<br />
the AI High Precision Contour Control<br />
mode or AI nano High Precision Contour<br />
Control mode.<br />
Backlash compensation for each rapid<br />
traverse and cutting feed<br />
Operation<br />
Automatic operation<br />
MDI operation The AI high precision contour control<br />
mode or the AI nano high precision<br />
contour control mode is automatically<br />
canceled once and the buffering is inhibited<br />
if the MDI operation is used in<br />
the AI high Precision Contour Control<br />
mode or in the AI high Precision Contour<br />
Control mode. At this time,<br />
G05P10000 or G05P0 can not be used<br />
by the MDI operation.<br />
Cycle start/Feed hold<br />
Program stop/Program end<br />
Reset<br />
Program restart Program restart function can not be<br />
used in NURBS interpolation, smooth<br />
interpolation, and cylindrical interpolation.<br />
Dry run<br />
Single block<br />
Interpolation functions<br />
Positioning G00 The AI high precision contour control<br />
function or AI nano high precision contour<br />
control functions except the advanced<br />
preview feed–forward function,<br />
multi buffer function , and the nano interpolation<br />
become invalid.<br />
Exact stop mode G61<br />
Exact stop G09<br />
Cutting mode G64<br />
627<br />
Note
22. RISC PROCESSOR PROGRAMMING<br />
B–63534EN/02<br />
Item<br />
Interpolation functions<br />
Linear interpolation G01<br />
Circular interpolation G02,G03<br />
Specifications<br />
Helical interpolation (Circular interpolation) + (Linear interpolation<br />
for up to 2 axes)<br />
Helical interpolation B (Circular interpolation) + (Linear interpolation<br />
for up to 4 axes)<br />
Involute interpolation G02.2,G03.2<br />
3–dimensional circular interpolation G02.4,G03.4 The position is checked at the end<br />
point of the block which cancel 3 dimensional<br />
circular interpolation or at<br />
the end point of the previous block of<br />
the 3 dimensional circular interpolation<br />
if 3 dimensional circular interpolation is<br />
used except in AI high precision contour<br />
control mode or AI nano high precision<br />
contour control mode.<br />
Smooth interpolation G05.1 This function can be used in AI high<br />
precision contour control mode or AI<br />
nano high precision contour control<br />
mode.<br />
NURBS interpolation G06.2 This function can be used in AI high<br />
precision contour control mode or AI<br />
nano high precision contour control<br />
mode.<br />
Cylindrical interpolation G07.1 This function can be used in AI high<br />
precision contour control mode or AI<br />
nano high precision contour control<br />
mode.<br />
Cylindrical interpolation cutting point<br />
control<br />
Conical / spiral interpolation G02,G03<br />
Feed functions<br />
Feed per minute G94<br />
Cutting feedrate clamp<br />
Linear acceleration/deceleration of cutting<br />
feed after interpolation<br />
Bell–type acceleration/deceleration of<br />
cutting feed after interpolation<br />
Feedrate override 0 to 254% (1% step)<br />
2nd. Feedrate override 0 to 254% (1% step)<br />
628<br />
Note<br />
G07.1 This function can be used in AI high<br />
precision contour control mode or AI<br />
nano high precision contour control<br />
mode.
B–63534EN/02 PROGRAMMING<br />
22. RISC PROCESSOR<br />
Feed functions<br />
Item<br />
Specifications<br />
F1 digit feed Using the manual pulse generator can<br />
not change Feedrate.<br />
Inverse time feed G93 External deceleration<br />
External deceleration<br />
Look ahead liner–type acceleration/<br />
deceleration before interpolation.<br />
Look ahead Bell–type acceleration/<br />
deceleration before interpolation<br />
Program input<br />
Acceleration change time constant<br />
type<br />
Tape code Automatic recognition of EIA/ISO<br />
Program format Word address format<br />
Control in/out<br />
Optional block skip<br />
Absolute/incremental programming G90/G91<br />
Input unit 10 time multiply<br />
Plane selection G17,G18,G19<br />
Rotary axis roll over<br />
Workpiece coordinate system selection<br />
Addition of workpiece coordinate sys–<br />
tem pair<br />
Manual absolute ON/OFF<br />
629<br />
Note<br />
G54 to G59 The AI high precision contour control<br />
mode or the AI nano high precision<br />
contour control mode is automatically<br />
canceled once and the buffering is inhibited<br />
if this function is used in the AI<br />
high Precision Contour Control mode<br />
or in the AI high Precision Contour<br />
Control mode.<br />
48 sets / 300 sets The AI high precision contour control<br />
mode or the AI nano high precision<br />
contour control mode is automatically<br />
canceled once and the buffering is inhibited<br />
if this function is used in the AI<br />
high Precision Contour Control mode<br />
or in the AI high Precision Contour<br />
Control mode.<br />
Programmable parameter input G10 The AI high precision contour control<br />
mode or the AI nano high precision<br />
contour control mode is automatically<br />
canceled once and the buffering is inhibited<br />
if this function is used in the AI<br />
high Precision Contour Control mode<br />
or in the AI high Precision Contour<br />
Control mode.
22. RISC PROCESSOR PROGRAMMING<br />
B–63534EN/02<br />
Program input<br />
Item<br />
External memory and sub program<br />
calling function<br />
M198<br />
Subprogram call M98<br />
Circular interpolation by R programming<br />
Specifications<br />
Scaling G50,G51 The mode of AI high precision contour<br />
control or of AI nano high precision<br />
contour control is permitted to change<br />
ON and OFF in scaling mode by setting<br />
the parameter.<br />
The alarm (P/S5012) occurs if the<br />
mode of AI high precision contour control<br />
or of AI nano high precision contour<br />
control is changed in scaling mode<br />
(G51) when the parameter is not set.<br />
The scaling mirror image by a negative<br />
magnification can not be done.<br />
Coordinate system rotation G68,G69 The mode of AI high precision contour<br />
control or of AI nano high precision<br />
contour control is permitted to change<br />
ON and OFF in coordinate system<br />
rotation mode by setting the parameter.<br />
The alarm (P/S5012) occurs if the<br />
mode of AI high precision contour control<br />
or of AI nano high precision contour<br />
control is changed in coordinate<br />
system rotation mode (G51) when the<br />
parameter is not set.<br />
3–dimensional coordinate system conversion<br />
Miscellaneous/spindle functions<br />
630<br />
Note<br />
G68,G69 The mode of AI high precision contour<br />
control or of AI nano high precision<br />
contour control is permitted to change<br />
ON and OFF in 3–dimensional coordinate<br />
system conversion mode by setting<br />
the parameter. The alarm<br />
(P/S5012) occurs if the mode of AI<br />
high precision contour control or of AI<br />
nano high precision contour control is<br />
changed in 3–dimensional coordinate<br />
system conversion when the parameter<br />
is not set.<br />
Miscellaneous function The AI high precision contour control<br />
mode or the AI nano high precision<br />
contour control mode is automatically<br />
canceled once and the buffering is inhibited<br />
if this function is used in the AI<br />
high Precision Contour Control mode<br />
or in the AI high Precision Contour<br />
Control mode.
B–63534EN/02 PROGRAMMING<br />
22. RISC PROCESSOR<br />
Item<br />
Miscellaneous/spindle functions<br />
Specifications<br />
2nd. Auxiliary function The AI high precision contour control<br />
mode or the AI nano high precision<br />
contour control mode is automatically<br />
canceled once and the buffering is inhibited<br />
if this function is used in the AI<br />
high Precision Contour Control mode<br />
or in the AI high Precision Contour<br />
Control mode.<br />
1 block plural M commands The AI high precision contour control<br />
mode or the AI nano high precision<br />
contour control mode is automatically<br />
canceled once and the buffering is inhibited<br />
if this function is used in the AI<br />
high Precision Contour Control mode<br />
or in the AI high Precision Contour<br />
Control mode.<br />
It is possible to command up to 3.<br />
Spindle speed function The AI high precision contour control<br />
mode or the AI nano high precision<br />
contour control mode is automatically<br />
canceled once and the buffering is inhibited<br />
if this function is used in the AI<br />
high Precision Contour Control mode<br />
or in the AI high Precision Contour<br />
Control mode.<br />
Tool functions<br />
Tool function (T8–digit) The AI high precision contour control<br />
mode or the AI nano high precision<br />
contour control mode is automatically<br />
canceled once and the buffering is inhibited<br />
if this function is used in the AI<br />
high Precision Contour Control mode<br />
or in the AI high Precision Contour<br />
Control mode.<br />
Tool retract & recover G10.6 Issue the G10.6 command prior to the<br />
G05 P10000 command that causes<br />
the system to enter AI high precision<br />
contour control or AI nano contour control<br />
mode. The alarm (P/S 5000) occurs<br />
if it is issued in this mode.<br />
Tool length compensation G43<br />
Cutter compensation C G38,G39,G40,G41,G42 The buffering is inhibited when the<br />
command which automatically cancel<br />
AI high precision contour control mode<br />
or AI nano high precision contour control<br />
mode is used.<br />
So the tool offset vector is held.<br />
631<br />
Note
22. RISC PROCESSOR PROGRAMMING<br />
B–63534EN/02<br />
Tool functions<br />
Item<br />
3–dimensional tool compensation G41.2,G42.2<br />
G41.3<br />
Tool axis direction tool length compensation<br />
Specifications<br />
632<br />
Note<br />
The command which automatically<br />
cancel AI high precision contour control<br />
mode or AI nano high precision<br />
contour control mode can not be used.<br />
However M,S,T and B command can<br />
be used without the command that<br />
move some axes. In this case, the offset<br />
vector is held because the buffering<br />
is inhibited.<br />
G43.1 The command which automatically<br />
cancel AI high precision contour control<br />
mode or AI nano high precision<br />
contour control mode can not be used.<br />
However M,S,T and B command can<br />
be used without the command that<br />
move some axes. In this case, the offset<br />
vector is held because the buffering<br />
is inhibited.<br />
Tool center point control G43.4,G43.5 The command which automatically<br />
cancel AI high precision contour control<br />
mode or AI nano high precision<br />
contour control mode can not be used.<br />
However M,S,T and B command can<br />
be used without the command that<br />
move some axes. In this case, the offset<br />
vector is held because the buffering<br />
is inhibited.<br />
Rotary table dynamic fixture offset G54.2 The mode of AI high precision contour<br />
control or of AI nano high precision<br />
contour control is permitted to change<br />
ON and OFF in rotary table dynamic<br />
fixture offset mode by setting the parameter.<br />
The alarm (P/S5012) occurs if<br />
the mode of AI high precision contour<br />
control or of AI nano high precision<br />
contour control is changed in rotary<br />
table dynamic fixture offset mode when<br />
the parameter is not set.
B–63534EN/02 PROGRAMMING<br />
22. RISC PROCESSOR<br />
22.2<br />
CYLINDRICAL<br />
INTERPOLATION<br />
CUTTING POINT<br />
CONTROL (G07.1)<br />
General<br />
The conventional cylindrical interpolation function controls the tool<br />
center so that the tool axis always moves along a specified path on the<br />
cylindrical surface, towards the rotation axis (cylindrical axis) of the<br />
workpiece. On the other hand, this function controls the tool so that the<br />
tangents to the tool and a contour figure cutting surface always pass<br />
through the rotation center of a workpiece<br />
As shown in Fig.22.2 (a), control is exercised along the offset axis<br />
(Y–axis) direction that is perpendicular to the tool, tool center axis, and<br />
workpiece rotation center axis. Therefore, contour figure on the cutting<br />
side can be assumed to be the same anytime without depending on the<br />
amount of the cutter compensation.<br />
This function can be used in AI high precision contour control mode or<br />
in AI NANO high precision contour control mode.<br />
Cutting<br />
side<br />
Command<br />
Position<br />
Cutting<br />
side<br />
Conventional cylindrical<br />
interpolation<br />
Workpiece<br />
Rotation Rotation<br />
Command<br />
Position<br />
Shape on the cutting side changes depending<br />
on the amount of cutter compensation<br />
because the tool path is<br />
compensated by moving the rotation<br />
axis.<br />
633<br />
Cutting side<br />
Command Position<br />
Tool<br />
Tool<br />
center<br />
In the case of the amount of the<br />
cutter compensation is large;<br />
Rotation Workpiece<br />
Rotation<br />
Cutting<br />
side<br />
Cylindrical interpolation based<br />
on this function<br />
Y–axis<br />
Y–axis<br />
Command<br />
Position<br />
Shape on the cutting side does not depend<br />
on the amount of cutter compensation<br />
by moving the Y axis.<br />
The cutting side is always vertical to<br />
the cylinder.<br />
Fig. 22.2 (a) Comparison with Conventional Interpolation
22. RISC PROCESSOR PROGRAMMING<br />
B–63534EN/02<br />
Format<br />
Explanations<br />
Cutting point<br />
compensation<br />
G05 P10000 ; Sets AI High precision contour control mode.<br />
:<br />
G07.1 IPr ; Sets cylindrical interpolation mode.<br />
:<br />
..G41(G42).. Sets cutter compensation mode.<br />
:<br />
..G40.. Clear cutter compensation mode.<br />
:<br />
G07.1 IP0 ; Clears cylindrical interpolation mode.<br />
G05 P0 ; Clears AI high precison contour control mode.<br />
IP : One rotation axis address<br />
r : Cylinder radius of rotation axis<br />
Specify each of G07.1 IPr; and G07.1 IP0; singly in a block.<br />
(1) Cutting point compensation between blocks<br />
As shown in Fig. 22.2 (b), cutting point compensation is achieved by<br />
moving between blocks N1 and N2.<br />
1) Let C1 and C2 be the heads of the vectors normal to N1 and N2<br />
from S1, which is the intersection of the tool center paths of blocks<br />
N1 and N2<br />
2) After the tool moves to S1 according to the command of N1, the<br />
tool moves through V on the C–axis as a result of cutting point<br />
compensation, then through –V <br />
r along the Y–axis.<br />
180<br />
Z–axis<br />
N1<br />
634<br />
C2<br />
V<br />
S1<br />
C1<br />
N2<br />
V : C–axis component of C1 – C2<br />
C1 : Cutting surface of block N1<br />
C2 : Cutting surface of block N2<br />
Y–axis<br />
Cutting surface<br />
of block N2<br />
Programmed path<br />
C–axis on the<br />
cylindrical surface<br />
Fig. 22.2 (b) Cutting Point Compensation between Blocks<br />
(2) Cutting point compensation in a circular command block<br />
As shown in<br />
Fig. 22.2 (c), the movement required for cutting point compensation<br />
is made simultaneously with circular interpolation in block N1.
B–63534EN/02 PROGRAMMING<br />
22. RISC PROCESSOR<br />
1) Let C0 be the head of the vector normal to N1 from S0, which is<br />
the tool center position at the start point of circular block N1. Let<br />
C1 be the head of the similar vector at the end point.<br />
2) As the tool moves from S0 to S1, a superimposed movement is<br />
made by the C–axis component of (C1 – C2) (V in the figure) on<br />
the C–axis, and a superimposed movement is made by<br />
–V <br />
r along the Y–axis. along the Y–axis. That is, the<br />
180<br />
following expressions are valid. As movement is made through<br />
L as shown in<br />
Fig. 22.2 (c), the superimposed movements are made on the C–axis<br />
and Y–axis as follows:<br />
C V<br />
Y <br />
180 (V)r<br />
V : Cutting point compensation value (V2 – V1) for<br />
movement of L<br />
V1 : C–axis component of the vector normal to N1 from the<br />
tool center of the start point of L<br />
V2 : C–axis component of the vector normal to N1 from the<br />
tool center of the end point of L<br />
R : Arc radius<br />
Z–axis<br />
S0<br />
Tool center path<br />
635<br />
L<br />
V2<br />
V1<br />
N1<br />
C0<br />
R<br />
S1<br />
C0 : Cutting surface at the start<br />
point of block N1<br />
C1 : Cutting surface at the end point<br />
of block N1<br />
C1<br />
O<br />
Y–axis<br />
V :C–axis component of C1 – C0<br />
V<br />
C0<br />
Programmed path<br />
C–axis on the<br />
cylindrical surface<br />
Fig. 22.2 (c) Cutting Point Compensation in a Circular Command Block<br />
(3) When cutting point compensation is not applied between blocks<br />
When, as shown in Fig. 22.2 (d) and Fig. 22.2 (e), the cutting point<br />
compensation value (V in the figures) is less than the value set in<br />
parameter No. 6112, one of the operations below is performed. (The<br />
operation that is performed depends on the setting of bit 6 (CYS) of<br />
parameter No. 6004.<br />
1) When bit 6 (CYS) of parameter No. 6004 is set to 1<br />
Cutting point compensation is not applied between blocks N1 and<br />
N2, but is applied when block N2 is executed.
22. RISC PROCESSOR PROGRAMMING<br />
B–63534EN/02<br />
Z–axis<br />
N1<br />
V<br />
C2<br />
636<br />
S1<br />
C1<br />
Tool center path<br />
N2<br />
Programmed path<br />
Y–axis<br />
V : C–axis component of C2 – C1<br />
C1 : Cutting surface of block N1<br />
C2<br />
: Cutting surface after the end of<br />
block N1<br />
S2<br />
C2<br />
N3<br />
C–axis on the<br />
cylindrical surface<br />
Fig. 22.2 (d) When Bit 6 (CYS) of Parameter No. 6004 Is Set to 1<br />
2) When bit 6 (CYS) of parameter No. 6004 is set to 0<br />
Cutting point compensation is not performed between blocks N1<br />
and N2. Whether to apply cutting point compensation between<br />
block N2 and N3 is determined by taking the cutting point<br />
compensation value between blocks N2 and N3 (V1 in the figure)<br />
into consideration.<br />
Z–axis<br />
N1<br />
S1<br />
C1<br />
Tool center path<br />
N2<br />
Programmed path<br />
V :C–axis component of C2 – C1<br />
C1 : Cutting surface of blocks N1<br />
and N2<br />
C2 : Cutting surface at the end of<br />
block N3<br />
V<br />
C2<br />
Y–axis<br />
S2<br />
C1<br />
N3<br />
C–axis on the<br />
cylindrical surface<br />
Fig. 22.2 (e) When Bit 6 (CYS) of Parameter No. 6004 Is 0
B–63534EN/02 PROGRAMMING<br />
22. RISC PROCESSOR<br />
3) When the amount of travel (L1) of block N2 is less than the value<br />
set in parameter No. 6113, as shown in Fig. 22.2 (f), cutting point<br />
compensation is not applied between blocks N1 and N2. Instead,<br />
block N2 is executed with the cutting point compensation of the<br />
previous block. When the amount of travel (L2) of block N3 is<br />
greater than the value set in parameter No. 6113, cutting point<br />
compensation is applied between blocks N2 and N3.<br />
Z–axis<br />
N1<br />
637<br />
C1<br />
L1<br />
N2<br />
Programmed path<br />
V : C–axis component of C2 – C1<br />
C1 : Cutting surface of blocks N1 and N2<br />
C2 : Cutting surface at the end of block N3<br />
C2<br />
Y–axis<br />
V<br />
C1<br />
N3<br />
L2<br />
Tool center path<br />
C–axis on the<br />
cylindrical surface<br />
Fig. 22.2 (f) When the Amount of Travel (L1) of Block N2 Is Less Than the<br />
Parameter Value<br />
4) When, as shown in Fig. 22.2 (g), the diameter of an arc (R in the<br />
figure) is less than the value set in parameter No. 6113, cutting<br />
point compensation is not applied simultaneously with circular<br />
interpolation
22. RISC PROCESSOR PROGRAMMING<br />
B–63534EN/02<br />
Feedrate during cutting<br />
point compensation<br />
Z–axis<br />
L1<br />
638<br />
S1<br />
N1<br />
C1<br />
R<br />
N2<br />
V : Cutting point compensation between<br />
blocks N2 and N3<br />
C1 : Cutting surface of blocks N1 and N2<br />
C2 : Cutting surface of block N3<br />
S2<br />
C2<br />
V<br />
C1<br />
Y–axis<br />
N3<br />
Tool center path<br />
Programmed path<br />
C–axis on the<br />
cylindrical surface<br />
Fig. 22.2 (g) When the Diameter of an Arc Is Less Than the Parameter<br />
Value<br />
(1) The tool moves at a specified feedrate while cutting point<br />
compensation is being applied between blocks.<br />
(2) The actual speed indication and feedrate during circular interpolation<br />
are as described below.<br />
Actual speed indication<br />
The speed component of each axis after cutting point compensation<br />
at a point in time during circular interpolation is as follows:<br />
Fz’=Fz – – – Speed component of linear axis<br />
Fc’=Fc+(Vce–Vcs) – – – Speed component of rotation axis<br />
<br />
Fy’=–(Vce–Vcs) – – – Speed component of offset axis<br />
<br />
Fz : Speed component of a cylindrical interpolation linear axis<br />
before cutting point compensation<br />
Fc : Speed component of cylindrical interpolation rotation axis<br />
before cutting point compensation<br />
Vcs: Rotation axis component of a tool contact point vector (Vs<br />
in the figure) at the start point at a point in time<br />
Vce: Rotation axis component of tool contact point vector (Ve in<br />
the figure) at the end point at a point in time<br />
r : Radius of the cylinder of a rotation axis<br />
Accordingly, the actual speed indication during circular<br />
interpolation is greater than the specified value when |Fc’| ><br />
|Fc|(inner offset of the arc). Conversely, the actual speed<br />
indication during circular interpolation is less than the<br />
specified value when |Fc’| < |Fc|(outer offset of the arc).
B–63534EN/02 PROGRAMMING<br />
22. RISC PROCESSOR<br />
Usable G codes<br />
Parameter<br />
Limitation<br />
Overcutting during inner<br />
corner cutting<br />
Z–axis<br />
639<br />
Vs<br />
Vcs<br />
Fc’<br />
Fc<br />
Ve<br />
Vce<br />
Y–axis<br />
Programmed path<br />
Fz = Fz’<br />
Tool center path<br />
Tool<br />
C–axis<br />
Fig. 22.2 (h) Actual Speed Indication during Circular Interpolation<br />
(1) In any of the following G code modes, cylindrical interpolation<br />
cutting point compensation can be specified:<br />
G17,G18,G19 : Plane selection<br />
G22 : Stored stroke check function on<br />
G64 : Cutting mode<br />
G90,G91 : Absolute command programming, incremental<br />
command programming<br />
G94 : Feed per minute<br />
(2) Any of the following G codes can be specified in cylindrical<br />
interpolation cutting point compensation mode:<br />
G01,G02 ,G03 : Linear interpolation, circular interpolation<br />
G04 : Dwell<br />
G40,G41,G42 : Cutter compensation<br />
G40.1–G42. : Normal direction control<br />
G64 : Cutting mode<br />
G65–G67 : Macro call<br />
G90,G91 : Absolute command programming, incremental<br />
command programming<br />
Set to use this function as parameter CYA (No.19530#5)=1.<br />
Theoretically, when the inner area of a corner is cut using linear<br />
interpolation as shown in Fig. 22.2 (i), this function slightly overcuts the<br />
inner walls of the corner. This overcutting can be avoided by specifying<br />
a value of R that is slightly greater than the radius of the tool at the corner.
22. RISC PROCESSOR PROGRAMMING<br />
B–63534EN/02<br />
Setting the minimum<br />
input increment for an<br />
offset axis (Y–axis)<br />
Workpiece radius<br />
specification<br />
Roll over function of<br />
rotation axis<br />
Program restart<br />
Examples<br />
Example of cylindrical<br />
interpolation cutting<br />
point compensation<br />
640<br />
Tool Tool<br />
Overcut portion<br />
Fig. 22.2 (i) Overcutting<br />
Set the same minimum input increment for an offset axis and linear axis<br />
when cylindrical interpolation is performed.<br />
When specifying the radius of a workpiece, use the minimum input<br />
increment (with no decimal point) for the linear axis used in cylindrical<br />
interpolation.<br />
When the rotation axis using the roll over function is specified as the<br />
rotation axis used for cylindrical interpolation, the roll over function is<br />
disabled in cylindrical interpolation mode. The roll over function is<br />
automatically enabled when cylindrical interpolation mode is released.<br />
During a program restart, G07.1 for cylindrical interpolation mode cannot<br />
be specified. PS/0175 occurs if G07.1 is specified.<br />
The sample program below indicates the positional relationships between<br />
a workpiece and tool.<br />
O0001(CYLINDRICAL INTERPOLATION1) ;<br />
N01 G00 G90 Z100.0 C0 ;<br />
N02 G01 G91 G19 Z0 C0 ;<br />
N03 G07.1 C57299 ;<br />
N04 G01 G42 G90 Z120.0 D01 F250. ; – – – (1)<br />
N05 C20.0 ; – – – (2)<br />
N06 G02 Z110.0 C60.0 R10.0 ; – – – (3)<br />
N07 G01 Z100.0 ; – – – (4)<br />
N08 G03 Z60.0 C70.0 R40.0 ; – – – (5)<br />
:<br />
M30 ;
B–63534EN/02 PROGRAMMING<br />
22. RISC PROCESSOR<br />
(mm)<br />
120<br />
30<br />
Z–axis Z–axis<br />
(1) (2)<br />
90<br />
80<br />
70<br />
60<br />
(3)<br />
(4)<br />
(5)<br />
20 30 60 70 (deg)<br />
641<br />
Tool<br />
Tool center path<br />
Tool<br />
C–axis on the<br />
Cylindrical<br />
surface<br />
Programmed path<br />
C–axis on the Cylindrical surface<br />
Fig. 22.2 (j) Path of Sample Program for Cylindrical Interpolation Cutting<br />
Point Compensation<br />
Positional relationship between the<br />
workpiece and tool of (1)<br />
Y–axis<br />
Rotaion<br />
0°<br />
Positional relationship between the<br />
workpiece and tool of (3) and (4)<br />
20°<br />
Y–axis<br />
Rotaion<br />
60°<br />
Workpiece<br />
Cutting<br />
surface<br />
Tool<br />
Tool<br />
center<br />
Workpiece<br />
Cutting<br />
surface<br />
Tool<br />
Tool<br />
center<br />
Positional relationship between<br />
the workpiece and tool of (2)<br />
0°<br />
Rotaion<br />
20°<br />
Positional relationship between<br />
the workpiece and tool of (5)<br />
Rotaion<br />
60° 70°<br />
Y–axis<br />
Y–axis<br />
Fig. 22.2 (k) Positional Relationships between Workpiece and Tool of<br />
Sample Program<br />
The cutting surfaces in the rotation axis direction in (3) and (4) are the<br />
same, even when the cutter compensation is changed.
22. RISC PROCESSOR PROGRAMMING<br />
B–63534EN/02<br />
Alarm<br />
Number Message Contents<br />
0015 TOO MANY AXES COMMANDED A move command was specified for more axes than can be<br />
controlled by simultaneous axis control.<br />
Either add on the simultaneous axis control extension option,<br />
or divide the number of programmed move axes into<br />
two blocks.<br />
0175 ILLEGAL G107 COMMAND An axis which cannot perform cylindrical interpolation was<br />
specified.<br />
More than one axis was specified in a G07.1 block. An attempt<br />
was made to cancel cylindrical interpolation for an<br />
axis that was not in the cylindrical interpolation mode.<br />
For the cylindrical interpolation axis, set not “0” but one of<br />
5, 6 or 7 (parallel axis specification) to parameter No. 1022<br />
to instruct the arc with axis of rotation (ROT parameter No.<br />
1006#1 is set to “1” and parameter No. 1260 is set) ON.<br />
0176 IMPROPER G–CODE IN G107 A G code was specified that cannot be specified in the cylindrical<br />
interpolation mode.<br />
This alarm also is generated when an 01 group G code<br />
was in the G00 mode or code G00 was instructed.<br />
Cancel the cylindrical interpolation mode before instructing<br />
code G00.<br />
642
B–63534EN/02 PROGRAMMING<br />
22. RISC PROCESSOR<br />
22.3<br />
TOOL CENTER<br />
POINT CONTROL<br />
General<br />
On a five–axis machine having two rotation axes that turn a tool, tool<br />
length compensation can be performed momentarily even in the middle<br />
of a block.<br />
This tool length compensation is classified into one of two types based<br />
on the programming method. In the explanation of this function, the two<br />
rotation axes are assumed to be the B– and C–axes.<br />
(1) Type 1<br />
The rotation axis position (B, C) is specified.<br />
The CNC applies tool length compensation according to the<br />
compensation amount along the tool axis whose orientation is<br />
calculated from the specified rotation axis position. This means that<br />
compensation is performed by moving the three linear axes.<br />
(2) Type 2<br />
The tool axis orientation (I, J, K) is specified.<br />
The CNC controls the two rotation axes so that the tool is oriented as<br />
specified, and performs tool length compensation in tool axis<br />
direction according to the compensation amount. This means that<br />
compensation is performed by moving the two rotation axes and three<br />
linear axes.<br />
Tool center point control (type 1) differs from tool length compensation<br />
in tool axis direction as shown below:<br />
Pivot tool length compensation (type 1)<br />
The path of the tool tip center is linear as specified.<br />
Tool length compensation along the tool axis<br />
The path of the tool tip center is not linear.<br />
643<br />
Tool pivot point<br />
= interpolation<br />
path<br />
(not linear)<br />
Tool tip center path<br />
(linear)<br />
Tool pivot point<br />
= interpolation path<br />
(linear)<br />
Tool tip center path<br />
(not linear)<br />
Fig. 22.3 (a) Difference between Tool Center Point Control and Tool<br />
Length Compensation in Tool Axis Direction
22. RISC PROCESSOR PROGRAMMING<br />
B–63534EN/02<br />
Format<br />
Specifying tool center<br />
point control (type 1)<br />
Specifying tool center<br />
point control (type 2)<br />
Canceling tool center<br />
point control<br />
Description<br />
Specification of tool<br />
center point control<br />
NOTE<br />
The length from the tool tip to tool pivot point must equal the<br />
sum of the tool length compensation amount and tool holder<br />
offset value.<br />
G43.4 H_;<br />
H : Offset number<br />
G43.5 I_ J_ K_ H_ Q_;<br />
I,J,K : Tool axis orientation<br />
H : Offset number<br />
Q : Tool inclination angle (degrees)<br />
NOTE<br />
1 When I, J, and K are all omitted from a block, the<br />
compensation vector in the previous block is used.<br />
2 When any of I, J, and K is omitted, the omitted I, J, or K is<br />
assumed to be 0.<br />
3 Movement of the rotation axes is controlled by shortcut<br />
control so that the amount of movement does not exceed<br />
180.<br />
G49 ;<br />
The tool compensation vector changes in the following cases:<br />
Type 1 : The offset value is changed, or the rotation axis position (B,<br />
C) is specified.<br />
Type 2 : The offset value is changed, or the tool axis orientation (I, J,<br />
K) is specified.<br />
As the tool compensation vector changes, movement is performed along<br />
the X–, Y–, and Z–axes by an amount equal to the change. The time at<br />
which the tool compensation vector is calculated is as follows:<br />
Tool center point control : Calculated momentarily even in the middle<br />
of a block.<br />
Tool length compensation in tool axis direction: Calculated only at the<br />
end point of a block.<br />
644
B–63534EN/02 PROGRAMMING<br />
22. RISC PROCESSOR<br />
<strong>Inc</strong>lination of the tool<br />
Programmed point<br />
When only the rotation axis position is specified in tool center point<br />
control (type 1) mode, and when only I, J, and K are specified in tool<br />
center point control (type 2) mode, the tool tip center position remains<br />
unchanged before and after the specification. (Also, while the rotation<br />
axes are being moved, the tool tip center does not move.)<br />
For tool center point control (type 2), the inclination angle of the tool can<br />
be specified with address Q of G43.5. The inclination angle of the tool<br />
is the difference in the angle between the tool orientation specified by (I,<br />
J, K) and the tool orientation set for actual machining.<br />
If the tool orientation specified by (I, J, K) matches the tool orientation<br />
set for actual machining, Q need not be specified.<br />
Tool orientation specified by (I,J,K) Tool orientation during actual machining<br />
645<br />
<strong>Inc</strong>lination angle of the tool<br />
Machining direction<br />
Example: For machining with the tool tilted toward the machining<br />
direction by 2 degrees, specify the following:<br />
G43.5 I_ J_ K_ H_ Q2.0<br />
In programming, the position of the tool tip center is specified.<br />
Ball–end mill<br />
Tool tip center<br />
Programmed path
22. RISC PROCESSOR PROGRAMMING<br />
B–63534EN/02<br />
Linear interpolation<br />
(G01)<br />
Specification of rotation<br />
axes<br />
Flat–end mill<br />
Corner–radius–end mill<br />
646<br />
Tool tip center<br />
Programmed path<br />
Tool tip center<br />
Programmed path<br />
When linear interpolation (G01) is specified in tool center point control<br />
mode, the feedrate is controlled so that the tool tip center moves at a<br />
specified feedrate.<br />
(1)Type 1<br />
When only the rotation axes are specified in tool center point control<br />
(type 1) mode, the feedrate of the rotation axes is set to the maximum<br />
cutting feedrate (parameter No. 1422 or No.1430 or No.1432).<br />
(2)Type 2<br />
In tool center point control (type 2) mode, the rotation axes cannot be<br />
specified. If the rotation axes are specified, alarm (5421) occurs.
B–63534EN/02 PROGRAMMING<br />
22. RISC PROCESSOR<br />
Positioning (G00)<br />
Operation at start and<br />
cancellation<br />
Operation of tool center<br />
point control (type 1)<br />
Operation of tool center<br />
point control (type 2)<br />
NOTE<br />
1 Set the following parameters:<br />
(1)Bit 1 (LRP) of parameter No.1401 = 1: Linear–type rapid<br />
traverse<br />
(2)Bit 5 (FRP) of parameter No.19501 = 1: Acceleration/<br />
deceleration before interpolation is used in rapid traverse<br />
(3)Parameter No.1620: Time constant used for acceleration/<br />
deceleration for rapid traverse<br />
(4)Parameter No.1621: Time constant T2 used for bell–<br />
shaped acceleration/deceleration for rapid traverse<br />
2 If the above settings are not made, or if look–ahead<br />
acceleration/deceleration before interpolation is not valid,<br />
axis movement may be performed at a higher feedrate than<br />
the rapid traverse rate.<br />
(1)Type 1<br />
When tool center point control (type 1) starts (G43.4H_) and when it<br />
is canceled (G49), the CNC calculates the compensation vector only<br />
at the end of the block.<br />
(2)Type 2<br />
When tool center point control (type 2) starts (G43.5H_) and when it<br />
is canceled (G49), the CNC calculates the compensation vector only<br />
at the end of the block.<br />
The following items are the same as for tool length compensation in tool<br />
axis direction:<br />
– <strong>Machine</strong> configuration example and equation for rotation axis<br />
calculation<br />
– Tool holder offset<br />
– Specification of angular displacement in a parameter<br />
– Zero–point compensation for the rotation axes<br />
– Rotation axis offset<br />
The following item is the same as for tool length compensation in tool axis<br />
direction :<br />
– Tool holder offset<br />
Positioning(G00) and linear interpolation(G01) is made on all five axes<br />
simultaneously to the position (x, y, z, b, c) calculated as shown below.,<br />
647
22. RISC PROCESSOR PROGRAMMING<br />
B–63534EN/02<br />
Example of machine<br />
configuration and<br />
expression for rotation<br />
axis calculation<br />
l<br />
x = X + l<br />
y = Y + l<br />
z = Z + l<br />
b = tan<br />
c = tan<br />
( I,<br />
J , K)<br />
( X , Y , Z )<br />
−1<br />
−1<br />
J<br />
I<br />
I<br />
I<br />
I<br />
2<br />
2<br />
2<br />
2<br />
+ J<br />
I + J<br />
K<br />
648<br />
I<br />
+ J<br />
J<br />
2<br />
+ J<br />
K<br />
( x,<br />
y,<br />
z)<br />
2<br />
2<br />
2<br />
+ K<br />
+ K<br />
+ K<br />
2<br />
2<br />
2<br />
x , y,<br />
z : Tool center position<br />
b, c : Rotation axis position<br />
X , Y , Z : tip position<br />
(programmed position)<br />
I , J , K : Tool axis direction<br />
l : Tool offset value<br />
All positions are represented by absolute<br />
coordinates.<br />
(1)When the rotation axes are the A– and C–axes, and the tool axis is the<br />
Z–axis<br />
A<br />
a tan1 I2 J2 <br />
K<br />
1 c tan<br />
I<br />
–J<br />
Workpiece<br />
C<br />
X<br />
A<br />
Z<br />
C<br />
Y
B–63534EN/02 PROGRAMMING<br />
22. RISC PROCESSOR<br />
(2)When the rotation axes are the B– and C–axes, and the tool axis is the<br />
Z–axis<br />
649<br />
B<br />
b tan1 I2 J2 <br />
K<br />
Workpiece<br />
C<br />
Z<br />
C B<br />
1 c tan<br />
J<br />
I<br />
(3)When the rotation axes are the A– and B–axes, and the tool axis is the<br />
X–axis<br />
X<br />
A<br />
Y<br />
1 a tan<br />
J<br />
–K<br />
Z<br />
B<br />
b tan 1 J 2 K 2<br />
<br />
I<br />
A<br />
B<br />
Workpiece<br />
X<br />
Y
22. RISC PROCESSOR PROGRAMMING<br />
B–63534EN/02<br />
Tool life management<br />
(4)When the rotation axes are the A– and B–axes, and the tool axis is the<br />
Z–axis (master axis : B–axis)<br />
A<br />
a tan1 J<br />
I2 K2 <br />
b tan 1 I K<br />
650<br />
Workpiece<br />
(5)When the rotation axes are the A– and B–axes, and the tool axis is the<br />
Z–axis (master axis : A–axis)<br />
B<br />
1 a tan<br />
–J<br />
K<br />
b tan1 I<br />
J2 K2 <br />
Workpiece<br />
When tool life management is used, the tool length compensation amount<br />
of the tool used is used for tool center point control.<br />
Y<br />
B<br />
Z<br />
B<br />
A<br />
Z<br />
B<br />
A<br />
Y<br />
A<br />
X<br />
X
B–63534EN/02 PROGRAMMING<br />
22. RISC PROCESSOR<br />
Three–dimensional<br />
cutter compensation<br />
Three–dimensional<br />
coordinate conversion<br />
Rotation axis rollover<br />
Restrictions<br />
Look–ahead<br />
acceleration/deceleration<br />
before interpolation<br />
Tool center point control and three–dimensional cutter compensation can<br />
be used at the same time.<br />
Three–dimensional cutter compensation is applied to a specified tool tip<br />
point. Three–dimensional cutter compensation, however, is not<br />
performed momentarily in the middle of a block; it is performed only at<br />
the end of a block.<br />
When tool center point control (type 2) is used during three–dimensional<br />
coordinate conversion, the tool axis orientation (I, J, K) is also subjected<br />
to three–dimensional coordinate conversion.<br />
NOTE<br />
Whenever using tool center point control (type 2), set bit 2<br />
(ROAx) of parameter No. 1008 to 1 to perform rotation axis<br />
rollover.<br />
When using tool center point control, also use look–ahead acceleration/<br />
deceleration before interpolation. If look–ahead acceleration/deceleration<br />
before interpolation is not used, the feedrate may exceed the maximum<br />
cutting feedrate as a result of tool center point control, which will cause<br />
alarm P/S5422 to be issued.<br />
Example:<br />
651<br />
Interpolation path<br />
Tool tip center path<br />
In the above example, the feedrate is controlled so that the tool tip center<br />
moves at a specified feedrate. As a result, a higher feedrate than the<br />
specified feedrate is detected on the interpolation path. In such a case, if<br />
look–ahead acceleration/deceleration before interpolation is used, the<br />
feedrate is clamped so that the feedrate on the interpolation path does not<br />
exceed the maximum cutting feedrate. If look–ahead acceleration/<br />
deceleration before interpolation is not used, the feedrate on the<br />
interpolation path may become higher than the maximum cutting<br />
feedrate, resulting in alarm P/S5422 being issued.
22. RISC PROCESSOR PROGRAMMING<br />
B–63534EN/02<br />
Functions resulting in<br />
the same operation as<br />
tool length<br />
compensation in tool<br />
axis direction<br />
Restriction of commands<br />
Unavailable commands<br />
When the following functions are used in tool center point control mode,<br />
the same operation as tool length compensation in tool axis direction<br />
results:<br />
– Specification of an axis not related to tool center point control<br />
– The following G functions of group 01:<br />
Circular interpolation, helical interpolation (G02, G03)<br />
Involute interpolation (G2.2, G3.2)<br />
Three–dimensional circular interpolation (G2.4, G3.4)<br />
– Inverse time feed (G93)<br />
The following functions can be used but the state can not be changed in<br />
tool center point control mode.<br />
<strong>Inc</strong>h/metric conversion (An alarm(P/S5000) is issued if the state is<br />
changed by G20 or G21)<br />
Mirror image (Do not change the state of the signal).<br />
Tool life management function<br />
The tool length compensation use the amount of the tool specified by<br />
tool life management function. The command for the tool life<br />
management function have to command before tool axis direction tool<br />
length compensation mode.<br />
F1 digit feed (Feedrate can not be changed by using the manual pulse<br />
generator.)<br />
The following commands can not be used in tool center point control<br />
mode. The alarm is issued if the function was used.<br />
Custom macro<br />
Exponential interpolation –G02.3,G03.3<br />
Dwell –G04<br />
High Speed Cutting Function relation –G05<br />
AI contour control<br />
(G05P10000 and G05P0 are excluded)<br />
–G05.1Q1,G5.1Q0<br />
Hypothetical axis interpolation –G07<br />
Cylindrical interpolation –G07.1<br />
Advanced preview control –G08<br />
(Please use AI High Precision Contour Control)<br />
Polar coordinate interpolation –G12.1,G13.1<br />
Polar coordinate command –G15,G16<br />
Reference position return check –G27<br />
Reference point return –G28<br />
2nd. Reference point return –G30<br />
3rd/4th reference point return –G30<br />
Skip –G31<br />
Thread cutting –G33<br />
Automatic tool length measurement –G37<br />
Normal direction control –G40.1,G41.1,G42.1<br />
Cutter compensation B –G41,G42,G39<br />
(Cutter compensation C is available)<br />
652
B–63534EN/02 PROGRAMMING<br />
22. RISC PROCESSOR<br />
Unavailable functions<br />
3–dimensional tool compensation –G41<br />
Wheel wear compensation –G41<br />
Tool offset –G45,G46,G47,G48<br />
Programmable mirror image –G50.1,G51.1<br />
Local coordinate system –G52<br />
<strong>Machine</strong> coordinate system –G53<br />
Single direction positioning –G60<br />
Automatic corner override –G62<br />
Tapping mode –G63<br />
Macro call –G65,G66,G67<br />
Figure copying<br />
(SubProgram call is available)<br />
–G72.1,G72.2<br />
Canned cycle –G73–G70,G80,G81–G89,<br />
G98,G99<br />
Simple electric gear box –G80,G81<br />
Functions for hobbing machine –G80,G81<br />
External operation function –G81<br />
Chopping function –G81.1<br />
Small hole peck drilling cycle –G83<br />
Setting a workpiece coordinate<br />
system<br />
–G92<br />
Workpiece coordinate system<br />
preset<br />
–G92.1<br />
Feed per revolution –G95<br />
Constant surface speed control –G96,G97<br />
Infeed control –G160,G161<br />
Workpiece coordinate system<br />
selection<br />
–G54 to G59, G54.1<br />
M,S,T and B functions with motion command<br />
Conical / spiral interpolation<br />
In tool center point control mode, the functions listed below cannot be<br />
used.<br />
If these functions are used, the compensation vector of the previous block<br />
is used as is.<br />
– The following G functions of group 01:<br />
Spline interpolation (G06.1)<br />
Smooth interpolation (G05.1 Q2)<br />
NURBS interpolation (G06.2)<br />
In the mode for this function, the following functions cannot be used, The<br />
warning message is displayed on the screen when the following functions<br />
are used. :<br />
MDI operation<br />
653
22. RISC PROCESSOR PROGRAMMING<br />
B–63534EN/02<br />
Other Restrictions<br />
Alarms<br />
In the mode for this function, the following functions cannot be used, The<br />
alarm(P/S5196) is issued when the following functions are used. :<br />
– Manual interruption operation<br />
– Tool retract and recover<br />
The following functions can not be used in tool center point control mode.<br />
Flexible synchronous control<br />
Sequence number comparison and stop<br />
It is not possible to stop by the sequence number in tool center point<br />
control mode.<br />
Index table indexing<br />
Retrace function<br />
Do not use retrace function in the program which uses tool center<br />
point control mode.<br />
Rotary axis control<br />
Gentle curve normal direction control<br />
Tool life management<br />
Tool life value is counted in tool center point control mode.<br />
However , do not use the command related to the tool life<br />
management function.<br />
Macro executor (Execution macro)<br />
Manual handle interruption<br />
External deceleration ( external deceleration is not effected )<br />
When the following function is used, tool center point control cannot be<br />
used.<br />
Angular axis control<br />
Arbitary angular axis control<br />
The limitation may be attached about the combination of the NC<br />
instructions occasionaly.<br />
Refer the description of the each functions.<br />
Number Message Description<br />
5425 ILLEGAL OFFSET VAL-<br />
UE<br />
5420 ILLEGAL PARAMETER<br />
IN G43.4/G43.5<br />
5421 ILLEGAL COMMAND<br />
IN G43.4/G43.5<br />
5422 EXCESS VELOCITY IN<br />
G43.4/G43.5<br />
654<br />
The offset number is illegal.<br />
There is an illegal parameter relating to<br />
tool center point control.<br />
Rotation axes are specified in tool center<br />
point control (type 2).<br />
As a result of tool center point control,<br />
the feedrate along an axis exceeds the<br />
maximum cutting feedrate.
B–63534EN/02 PROGRAMMING<br />
22. RISC PROCESSOR<br />
22.4<br />
TOOL AXIS<br />
COMPENSATION IN<br />
TOOL AXIS<br />
DIRECTION<br />
General<br />
Format<br />
Command for tool length<br />
compensation in tool<br />
axis direction<br />
Command for<br />
cancellation of tool<br />
length compensation in<br />
tool axis direction<br />
When a 5–axis machine that has two axes for rotating the tool is used, tool<br />
length compensation can be performed in a specified tool axis direction<br />
on a rotation axis. When a rotation axis is specified in tool length<br />
compensation in tool axis direction mode, tool length compensation is<br />
applied in a specified tool axis direction on the rotation axis by the<br />
compensation value specified in the H code. That is, movement is made<br />
along the three linear axes (Xp, Yp, Zp).<br />
Unless otherwise noted in the explanation of this function, the two<br />
rotation axes are assumed to be the B–axis and C–axis.<br />
655<br />
B<br />
Workpiece<br />
Tool axis direction<br />
C<br />
Z<br />
C B<br />
Fig. 22.4 (a) Tool Length Compensation in Tool Axis Direction<br />
G43.1 Hn ;<br />
n : Offset number<br />
G49 ;<br />
X<br />
Y
22. RISC PROCESSOR PROGRAMMING<br />
B–63534EN/02<br />
Explanations<br />
Command for tool length<br />
compensation in tool<br />
axis direction<br />
Examples of machine<br />
configuration and<br />
rotation axis calculation<br />
formats<br />
The tool compensation vector changes as the offset value changes or<br />
movement is made on a rotation axis. When the tool compensation vector<br />
changes, movement is made according to the change value along the<br />
X–axis, Y–axis, and Z–axis.<br />
When the command specifies movement on a rotation axis only, the<br />
position of the tool tip is the same both before and after execution of the<br />
command. (During rotation axis movement, however, the tool tip<br />
moves.)<br />
Let Vx, Vy, Vz, Lc, a, b, and c be as follows :<br />
Vx,Vy,Vz : Tool compensation vectors along the X–axis, Y–axis,<br />
and Z–axis<br />
Lc : Offset value<br />
a,b,c : Absolute coordinates on the A–axis, B–axis and<br />
C–axis<br />
Then, the tool compensation vector on each axis in each machine<br />
configuration is indicated below.<br />
(1)A–axis and C–axis, with the tool axis on the Z–axis<br />
656<br />
A<br />
Workpiece<br />
Vx = Lc * sin(a) * sin(c)<br />
Vy = –Lc * sin(a) * cos(c)<br />
Vz = Lc * cos(a)<br />
C<br />
X<br />
A<br />
Z<br />
C<br />
Y
B–63534EN/02 PROGRAMMING<br />
22. RISC PROCESSOR<br />
(2)B–axis and C–axis, with the tool axis on the Z–axis<br />
657<br />
B<br />
Workpiece<br />
Vx = Lc * sin(b) * cos(c)<br />
Vy = Lc * sin(b) * sin(c)<br />
Vz = Lc * cos(b)<br />
(3)A–axis and B–axis, with the tool axis on the X–axis<br />
X<br />
A<br />
Y<br />
Z<br />
Vx = Lc * cos(b)<br />
Vy = Lc * sin(b) * sin(a)<br />
Vz = –Lc * sin(b) * cos(a)<br />
B<br />
A<br />
C<br />
B<br />
Z<br />
Workpiece<br />
C B<br />
X<br />
Y
22. RISC PROCESSOR PROGRAMMING<br />
B–63534EN/02<br />
(4)A–axis and B–axis, with the tool axis on the Z–axis, and the B–axis<br />
used as the master<br />
A<br />
658<br />
Workpiece<br />
Vx = Lc * cos(a) * sin(b)<br />
Vy = –Lc * sin(a)<br />
Vz = Lc * cos(a) * cos(b)<br />
(5)A–axis and B–axis, with the tool axis on the Z–axis, and the A–axis<br />
used as the master<br />
B<br />
Workpiece<br />
Vx = Lc * sin(b)<br />
Vy = –Lc * sin(a) * cos(b)<br />
Vz = Lc * cos(a) * cos(b)<br />
Y<br />
B<br />
Z<br />
B<br />
A<br />
Z<br />
B<br />
A<br />
Y<br />
A<br />
X<br />
X
B–63534EN/02 PROGRAMMING<br />
22. RISC PROCESSOR<br />
Tool holder offset<br />
Parameter–based<br />
rotation angle<br />
specification<br />
Rotation axis origin<br />
compensation<br />
Rotation axis offset<br />
The machine–specific length from the rotation center of the tool rotation<br />
axes (A– and B–axes, A– and C–axes, and B– and C–axes) to the tool<br />
mounting position is referred to as the tool holder offset. Unlike a tool<br />
length offset value, a tool holder offset value is set in parameter No.<br />
19666. When tool length compensation in tool axis direction is applied,<br />
the sum of the tool holder offset and tool length offset is handled as a tool<br />
length for compensation calculation.<br />
Rotation<br />
center<br />
659<br />
Tool holder<br />
offset<br />
Tool length offset<br />
Fig. 22.4 (b) Tool Holder Offset<br />
Tool<br />
length<br />
A tool compensation vector is found from the coordinates on the rotation<br />
axes for controlling the tool axis direction. However, the configuration<br />
of some machines is such that the tool axis is inclined using a fixed<br />
attachment. In such a case, the rotation angles of the rotation axes can be<br />
set using parameters.<br />
Set bit 1 (RAP) of parameter No. 19650 to 1, and set the coordinates in<br />
parameter No. 19658.<br />
This function compensates for a slight shift of the rotation axis origin<br />
caused, for example, by thermal displacement. Specify a compensation<br />
value in parameter No. 19660.<br />
When the tool axis is on the Z–axis, and the rotation axes are the B–axis<br />
and C–axis, a compensation vector is calculated as follows :<br />
Xp = Lc * sin(B–Bz) * cos(C–Cz)<br />
Yp = Lc * sin(B–Bz) * sin(C–Cz)<br />
Zp = Lc * cos(B–Bz)<br />
Xp,Yp,Zp : Compensation pulse on each axis after origin shift<br />
compensation<br />
Lc : Offset value<br />
B,C : <strong>Machine</strong> position on B–axis and C–axis<br />
Bz,Cz : Origin compensation value on B–axis and C–axis<br />
Set offsets relative to the rotation angles of the rotation axes in parameter<br />
No. 19659. The compensation vector calculation formula is the same as<br />
that used for rotation axis origin compensation, except that Bp and Cp are<br />
changed to rotation axis offsets.<br />
When rotation axis origin compensation and rotation offsetting are set at<br />
the same time, both compensations are performed.<br />
When the tool axis is on the Z–axis, and the rotation axes are the B–axis<br />
and C–axis, compensation vector calculation is performed as follows :
22. RISC PROCESSOR PROGRAMMING<br />
B–63534EN/02<br />
Control Point<br />
Compensation of Tool<br />
Length Compensation in<br />
Tool Axis Direction<br />
Explanation<br />
Compensation of the<br />
rotation centers of two<br />
rotation axes<br />
Xp = Lc * sin(B–(Bz+Bo)) * cos(C–(Cz+Co))<br />
Yp = Lc * sin(B–(Bz+Bo)) * sin(C–(Cz+Co))<br />
Zp = Lc * cos(B–(Bz+Bo))<br />
Bz,Cz : B–axis and C–axis origin compensation values<br />
Bo,Co : B–axis and C–axis rotation axis offset values<br />
Normally, the control point of tool length compensation in tool axis<br />
direction is the point of intersection of the centers of two rotation axes.<br />
The machine coordinates also indicate this control point.<br />
This section explains the compensation performed when the centers of the<br />
two rotation axes do not intersect and also explains how to place the<br />
control point at a convenient position on the machine.<br />
Compensation when the rotation centers of two rotation axes do not match<br />
is performed.<br />
The length from the tool mounting position to the first rotation axis center<br />
is set as the tool holder offset value in parameter No. 19666.<br />
The vector from the first rotation axis center to the second rotation axis<br />
center is set as the rotation center compensation vector in parameter No.<br />
19661. Since parameter No. 19661 is an axis type parameter, the<br />
compensation amount for three axes (X, Y, and Z) can be set in this<br />
parameter.<br />
Rotation center<br />
compensation<br />
vector<br />
A<br />
A axis center<br />
660<br />
Workpiece<br />
Tool holder<br />
offset<br />
Tool length<br />
compensation amount<br />
B axis center<br />
Fig. 22.4 (c) Compensation of Rotation Centers of Two Rotation Axes<br />
Y<br />
B<br />
B<br />
Z<br />
A<br />
X
B–63534EN/02 PROGRAMMING<br />
22. RISC PROCESSOR<br />
Spindle center<br />
Compensation<br />
According to the machine type, set the values listed in the following table:<br />
Table 22.4 (a) Setting the Tool Holder Offset and Rotation Center<br />
Compensation Vector<br />
<strong>Machine</strong> type Tool holder offset<br />
Parameter No. 19666<br />
(1)A– and C– axes.<br />
Tool axis is Z–<br />
axis.<br />
(2)B– and C–axes.<br />
Tool axis is Z–<br />
axis.<br />
(3)A– and B–axes.<br />
Tool axis is X–<br />
axis.<br />
(4)A– and B–axes.<br />
Tool axis is Z–<br />
axis.<br />
B–axis is master.<br />
(5)A– and B–axes.<br />
Tool axis is<br />
Z–axis.<br />
A–axis is master.<br />
661<br />
Length from tool mounting<br />
position to A–axis center<br />
Length from tool mounting<br />
position to B–axis center<br />
Length from tool mounting<br />
position to B–axis center<br />
Length from tool mounting<br />
position to A–axis center<br />
Length from tool mounting<br />
position to B–axis center<br />
Rotation center<br />
compensation vector<br />
Parameter No. 19661<br />
Vector from A–axis center<br />
to C–axis center<br />
Vector from B–axis center<br />
to C–axis center<br />
Vector from B–axis center<br />
to A–axis center<br />
Vector from A–axis center<br />
to B–axis center<br />
Vector from B–axis center<br />
to A–axis center<br />
NOTE<br />
When using the spindle center compensation described<br />
below, set the length from the tool mounting position to the<br />
spindle center as the tool holder offset.<br />
Compensation of the spindle center is performed.The amount of spindle<br />
center compensation is set in parameter No. 19662. Since parameter No.<br />
19662 is an axis type parameter, the compensation amount for three axes<br />
(X, Y, and Z) can be set in this parameter.
22. RISC PROCESSOR PROGRAMMING<br />
B–63534EN/02<br />
<strong>Machine</strong> coordinate origin<br />
Shifting the control point<br />
Workpice coordinate origin<br />
662<br />
Second rotation axis<br />
center (control point)<br />
Rotation center compensation<br />
vector parameter (No. 19661)<br />
First rotation axis center<br />
Spindle center compensation<br />
vector parameter (No. 19662)<br />
Spindle center<br />
Tool holder offset<br />
parameter (No. 19666)<br />
Tool mounting position<br />
Tool length<br />
compensation amount<br />
Tool tip<br />
(programmed point)<br />
Fig. 22.4 (d) Spindle Center Compensation<br />
Conventionally, the center of a rotation axis was used as the control point.<br />
The control point can now be shifted as shown in the figure below.<br />
Then, when the rotation axis is at the 0–degree position also in tool length<br />
compensation in tool axis direction (G43.1), the control point can be set<br />
to the same position as that for ordinary tool length compensation (G43).<br />
The control point here is indicated with machine coordinates.<br />
When linear interpolation is specified, for example, this control point<br />
moves linearly.
B–63534EN/02 PROGRAMMING<br />
22. RISC PROCESSOR<br />
Ordinary tool length<br />
compensation (G43)<br />
Bit 5 (SVC) of<br />
parameter No. 19665<br />
Control<br />
point<br />
Tool length compensation in tool axis<br />
direction(G43.1) :<br />
When tool is not tilted<br />
Workpiece coordinate origin<br />
<strong>Machine</strong> coordinate origin<br />
663<br />
Control point<br />
before shift<br />
Shift<br />
vector<br />
Control point<br />
Fig. 22.4 (e) Shift of the Control Point<br />
Tool length compensation in tool axis<br />
direction (G43.1) :<br />
When tool is tilted<br />
Tool length<br />
compensation<br />
vector<br />
The method of shifting the control point can be selected using the<br />
following parameters:<br />
Table 22.4 (b) Methods of Shifting the Control Point<br />
Bit 4 (SPR) of<br />
parameter No. 19665<br />
Shift of control point<br />
0 – As in the conventional case, the control point is not shifted.<br />
1 0 The control point is shifted, and the shift vector is calculated automatically<br />
as follows:<br />
– (rotation center compensation vector (parameter No. 19661))<br />
+ spindle center compensation vector (parameter No. 19662))<br />
+ tool holder offset along tool axis (parameter No. 19666))<br />
1 1 The control point is shifted, and the shift vector is the vector set in parameter<br />
No. 19667.<br />
Equation for each<br />
machine type<br />
Vx, Vy, Vz : Tool length compensation vector<br />
A, B, C : Absolute coordinates of A–, B–, and C–axes<br />
To : Tool offset value<br />
Ho : Tool holder offset value<br />
Jx, Jy, Jz : Rotation center compensation vector<br />
Cx, Cy, Cz : Spindle center compensation vector<br />
Sx, Sy, Sz : Shift vector
22. RISC PROCESSOR PROGRAMMING<br />
B–63534EN/02<br />
Restriction<br />
Limitation of Functions<br />
Suppose the above. Then, the tool length compensation vector for each<br />
axis is calculated depending on the machine type, as follows:<br />
(1)A– and C–axes. The tool axis is the Z–axis.<br />
Vx C sin C 0 <br />
Vy<br />
cos sin C cos C 0<br />
Vz 0 0 1 1<br />
0 0<br />
0 cos A sin A<br />
0 sin A cos A Cx <br />
Cy Jx Jy<br />
To Ho Cz Jz Sx Sy<br />
Sz (2)B– and C–axes. The tool axis is the Z–axis.<br />
Vx C sin C 0 cos B 0 sin B<br />
Vy<br />
cos sin C cos C 0<br />
0 1 0<br />
Vz 0 0 1 sin B 0 cos B Cx <br />
Cy Jx Jy<br />
To Ho Cz Jz Sx Sy<br />
Sz (3)A– and B–axes. The tool axis is the X–axis.<br />
Vx 0 0 cos B 0 sin B Ho Cx<br />
Vy<br />
1 0 cos A sin A<br />
0 1 0 To Cy Vz 0 sin A cos A sin B 0 cos B Cz<br />
Jx Jy<br />
Jz Sx Sy<br />
Sz (4)A– and B–axes. The tool axis is the Z–axis, and the B–axis is the<br />
master.<br />
Vx cos B 0 sin B<br />
Vy<br />
<br />
0 1 0 Vz sin B 0 cos B 1<br />
0 0<br />
0 cos A sin A<br />
0 sin A cos A Cx <br />
Cy Jx Jy<br />
To Ho Cz Jz Sx Sy<br />
Sz (5)A– and B–axes. The tool axis is the Z–axis, and the A–axis is the<br />
master.<br />
Vx 0 0 cos B 0 sin B<br />
Vy<br />
1 0 cos A sin A<br />
0 1 0<br />
Vz 0 sin A cos A sin B 0 cos B Cx <br />
Cy Jx Jy<br />
To Ho Cz Jz Sx Sy<br />
Sz The shift vector (Sx, Sy, Sz) is calculated as follows:<br />
(A) When bit 5 (SVC) of parameter No.19665 = 0, the vector is set to 0.<br />
(B) When bit 5 (SVC) of parameter No.19665 = 1, and bit 4 (SPR) of<br />
parameter No. 19665 = 0:<br />
When the machine type is other than (3)<br />
Sx Cx Jx<br />
Sy<br />
Cy Jy<br />
Sz Cz Jz Ho When the machine type is (3)<br />
Sx Jx Ho<br />
Sy<br />
Cx Cy Jy<br />
Sz Cz Jz <br />
(C) When bit 5 (SVC) of parameter No.19665 = 1, and bit 4 (SPR) of<br />
parameter No. 19665 = 1, the vector specified in parameter No. 19667<br />
is set.<br />
In the mode for this function, the following functions can be used, but the<br />
condition of each function cannot be changed<br />
– <strong>Inc</strong>h/metric conversion<br />
The alarm is issued when the condition is changed by G20 or G21<br />
command.<br />
664
B–63534EN/02 PROGRAMMING<br />
22. RISC PROCESSOR<br />
Commands that cannot<br />
be specified<br />
– Mirror image<br />
The condition of DI signal cannot be changed.<br />
– Tool life management function<br />
The tool length compensation use the amount of the tool specified by<br />
tool life management function. The command for the tool life<br />
management function have to command before tool axis direction tool<br />
length compensation mode.<br />
– One–digit F code feed<br />
The feedrate cannot be changed by using manual pulse generator.<br />
In the mode for this function, the following commands cannot be used.<br />
The alarm is issued when the following commands are orderd. :<br />
– Custom macro B<br />
– Exponentioal interpolation –G02.3,G03.3<br />
– Dwell –G04<br />
– Function concerning high–speed<br />
machining<br />
–G05<br />
(exclude G05P10000 and 05P0)<br />
– AI precision control –G05.1Q1,G5.1Q0<br />
– Hypothetical axis interpolation –G07<br />
– Cylindrical interpolation –G07.1<br />
– Advanced preview control –G08<br />
(Please use AI HPCC function)<br />
– Polar coordinate interpolation –G12.1,G13.1<br />
– Polar coordinate command –G15,G16<br />
– Reference position return check –G27<br />
– Reference position return –G28<br />
– 2nd Reference position return –G30<br />
– 3rd/4th Reference position return –G30<br />
– Skip –G31<br />
– Threading –G33<br />
– Automatic tool length measurement –G37<br />
– Normal direction control –G40.1,G41.1,G42.1<br />
– Cutter compensation B –G41,G42,G39<br />
–<br />
(Cutter compensation C is available)<br />
3 dimensional cutter compensation –G41<br />
– Wheel wear compensaton –G41<br />
– Tool offset –G45,G46,G47,G48<br />
– Programmable mirror image –G50.1,G51.1<br />
– Local coordinate system –G52<br />
– <strong>Machine</strong> coordinate system –G53<br />
– Single direction positioning –G60<br />
– Automatic corner override –G62<br />
– Tapping mode –G63<br />
– Macro call –G65,G66,G67<br />
(Sub program call is available)<br />
665
22. RISC PROCESSOR PROGRAMMING<br />
B–63534EN/02<br />
Function that cannot be<br />
specified<br />
– Figure copy –G72.1,G72.2<br />
– Canned cycles –G73–G79,G80,G81–G89,<br />
G98,G99<br />
– Electric gear box –G80,G81<br />
– Function for hobbing machine –G80,G81<br />
– External motion function –G81<br />
– Chopping –G81.1<br />
– Small–hole peck drilling cycle –G83<br />
– Changing workpiece coordinate system<br />
–G92<br />
– workpiece coordinate system preset –G92.1<br />
– Feed per revolution –G95<br />
– Constant surface speed control –G96,G97<br />
– Infeed control –G160,G161<br />
– NURBS interpolation –G06.2<br />
– Workpiece coordinate system –G54,G54.1,G55,G56,G57,<br />
G58,G59<br />
– M,S,T and B functions with motion command<br />
In the mode for this function, the following functions cannot be used, The<br />
warning message is displayed on the screen when the following functions<br />
are used. :<br />
– MDI intervention<br />
In the mode for this function, the following functions cannot be used, The<br />
alarm(P/S5196) is issued when the following functions are used. :<br />
– Manual interruption operation<br />
– Tool retract and recover<br />
And , in the mode for this function, the following functions cannot be<br />
used.<br />
– Flexible synchronous control<br />
– Sequence number comparison and stop<br />
(The program is not stop at the specified sequence block in tool axis<br />
direction tool length compensation mode.)<br />
– Index table indexing<br />
– Retrace function<br />
Retrace function cannot be used by the program which uses tool axis<br />
direction tool length compensation.<br />
– Rotary axis control<br />
– Gentle normal direction control<br />
– Thc command for the tool life management function<br />
(Tool life time is able to be counted in this mode, but the command for<br />
the tool life management function cannot be used.)<br />
– Macro executor ( Execution macro )<br />
– Manual handle interruption operation<br />
666
B–63534EN/02 PROGRAMMING<br />
22. RISC PROCESSOR<br />
Others<br />
Alarms<br />
– External deceleration<br />
External decelaration is not available in this mode.<br />
tool axis direction tool length compensation function cannot be used with<br />
the following function.<br />
– Angular axis control<br />
– Arbitrary angular axis contol<br />
The limitation attaches about the combination of other NC instructions<br />
occasionally.<br />
Please refer to the manual of the each function.<br />
Number Message Contents<br />
5196 ILLEGAL AXIS OPERA-<br />
TION<br />
5435 PARAMETER OUT OF<br />
RANGE (TLAC)<br />
5436 PARAMTER SETTING<br />
ERROR 1 (TLAC)<br />
5437 PARAMETER SETTING<br />
ERROR 2 (TLAC)<br />
667<br />
A function which cannot be used during<br />
HPCC function ¡¡or 5–axis control function<br />
is being executed was commanded.<br />
Illegal parameter setting. (Set value is<br />
out of range.)<br />
Illegal parameter setting. (axis of rotation<br />
setting)<br />
Illegal parameter setting (tool axis setting)
22. RISC PROCESSOR PROGRAMMING<br />
B–63534EN/02<br />
22.5<br />
3–DIMENSIONAL<br />
CUTTER<br />
COMPENSATION<br />
22.5.1<br />
Tool Side<br />
Compensation<br />
Format<br />
Tool side<br />
compensation(left)<br />
Tool side<br />
compensation(right)<br />
Tool side offset cancel<br />
The 3–dimensional cutter compensation function is used with machines<br />
that can control the direction of tool axis movement by using rotation axes<br />
(such as the B– and C–axes). This function performs cutter compensation<br />
by calculating a tool vector from the positions of the rotation axes, then<br />
calculating a compensation vector in a plane (compensation plane) that<br />
is perpendicular to the tool vector.<br />
There are two types of cutter compensation : Tool side compensation and<br />
leading edge compensation. Which is used depends on the type of<br />
machining.<br />
Tool side compensation is a type of cutter compensation that performs<br />
3–dimensional compensation on a plane (compensation plane)<br />
perpendicular to a tool direction vector.<br />
Compensation<br />
plane<br />
668<br />
Tool vector<br />
Cutter compensation<br />
vector<br />
Cutter<br />
compensation amount<br />
Fig. 22.5.1 (a) Tool side compensation<br />
Programmed tool path<br />
(before compensation)<br />
G41.2 X_ Y_ Z_ D_ ;<br />
If type C of cancellation operation is selected at start–up, never<br />
specify a move command such as X_Y_Z_ in the G41.2 block.<br />
G42.2 X_ Y_ Z_ D_ ;<br />
If type C of cancellation operation is selected at start–up, never<br />
specify a move command such as X_Y_Z_ in the G42.2 block.<br />
G40 X_ Y_ Z_ ;<br />
Y<br />
Tool center<br />
path(after<br />
compensation)<br />
Z<br />
X
B–63534EN/02 PROGRAMMING<br />
22. RISC PROCESSOR<br />
Explanations<br />
Operation at<br />
compensation start–up<br />
and cancellation<br />
(1) Type A<br />
Type A operation is similar to cutter compensation as shown below.<br />
Operation in linear interpolation<br />
Tool<br />
G41.2<br />
Operation in circular interpolation<br />
G42.2<br />
669<br />
Tool<br />
:Tool center path<br />
:Programmed tool path<br />
G40<br />
:Tool center path<br />
:Programmed tool path<br />
G40<br />
Fig. 22.5.1 (b) Operation at compensation start–up and cancellation<br />
(Type A)<br />
(2) Type B<br />
Type B operation is similar to cutter compensation as shown below.<br />
Operation in linear interpolation<br />
Tool<br />
G41.2<br />
:Tool center path<br />
:Programmed tool path<br />
G40
22. RISC PROCESSOR PROGRAMMING<br />
B–63534EN/02<br />
Operation in circular interpolation<br />
G42.2<br />
670<br />
Tool<br />
:Tool center path<br />
:Programmed tool path<br />
G40<br />
Fig. 22.5.1 (c) Operation at compensation start–up and cancellation<br />
(Type B)<br />
(3) Type C<br />
As shown in the following figures, when G41.2, G42.2, or G40 is<br />
specified, a block is inserted which moves the tool perpendicularly<br />
to the movement direction specified in the next block by the distance<br />
of the tool radius.<br />
Operation in linear interpolation<br />
Tool<br />
G41.2<br />
Operation in circular interpolation<br />
G42.2<br />
.<br />
Tool<br />
:Tool center path<br />
:Programmed tool path<br />
:Tool center path<br />
:Programmed tool path<br />
G40<br />
Fig. 22.5.1 (d) Operation at compensation start–up and cancellation<br />
(Type C)<br />
G40
B–63534EN/02 PROGRAMMING<br />
22. RISC PROCESSOR<br />
Operation in the<br />
compensation mode<br />
NOTE<br />
For type C operation, the following conditions must be satisfied<br />
when tool side compensation is started up or canceled :<br />
1 The block containing G40, G41.2, or G42.2 must be<br />
executed in the G00 or G01 mode.<br />
2 The block containing G40, G41.2, or G42.2 must have no<br />
move command.<br />
3 The block after the block containing G41.2 or G42.2 must<br />
contain a G00, G01, G02, or G03 move command.<br />
Changing of offset directions and offset values, holding of vectors,<br />
interference checks, and so on are performed in the same way as for cutter<br />
compensation. G39 (corner rounding) cannot be specified. So, note the<br />
following :<br />
(1) When the tool center path goes outside the programmed tool path at<br />
a corner, a linear movement block, instead of an arc movement block,<br />
is inserted to move the tool around the corner. When the tool center<br />
path goes inside the programmed tool path, no block is inserted.<br />
Tool<br />
A linear movement block is inserted<br />
Workpiece<br />
Example (1)–1 When going around the outside<br />
of a corner with an<br />
acute angle<br />
671<br />
:Tool center path<br />
:Programmed tool path<br />
:Tool offset value<br />
Tool<br />
No block is inserted<br />
Workpiece<br />
Example (1)–2 When going around the inside<br />
of a corner with an<br />
acute angle<br />
Fig. 22.5.1 (e) Operation in the compensation mode (1)–1, 2<br />
In the above examples, the term “inside” means that the tool center<br />
path is positioned inside the programmed tool path at a corner, and<br />
“outside” means that the tool center path is positioned outside the<br />
programmed tool path. In Example (1)–3, the relationship between<br />
the tool center path and the programmed tool path is the same as in<br />
Example (1)–1; the tool center path is positioned outside the<br />
programmed tool path. Example (1)–4 has the same relationship as<br />
Example (1)–2, where the tool center path is positioned inside the<br />
programmed tool path.
22. RISC PROCESSOR PROGRAMMING<br />
B–63534EN/02<br />
Workpiece<br />
Actual tool<br />
Reference tool<br />
672<br />
:Tool center path<br />
:Programmed tool path<br />
:Tool offset value<br />
Actual tool<br />
Reference tool<br />
Workpiece<br />
Example(1)–3 Example(1)–4<br />
Fig. 22.5.1 (f) Operation in the compensation mode (1)–3, 4<br />
(2) When the tool moves at a corner, the feedrate of the previous block<br />
is used if the corner is positioned before a single–block stop point; if<br />
the corner is after a single–block stop point, the feedrate of the next<br />
block is used.<br />
Tool<br />
P’ P<br />
Q1’<br />
F100<br />
Q<br />
N2 N3<br />
Example(2)–1<br />
Q2’(Single block stop point)<br />
R<br />
R’<br />
:Tool center path<br />
:Programmed tool path<br />
Program(2)–1<br />
:<br />
N1 G90G41.2 Xp Yp Zp Bp Cp D1 ;<br />
N2 G01Xq Yq Zq F100 ;<br />
N3 Xr Yr Zr F200 ;<br />
:<br />
Fig. 22.5.1 (g) Operation in the compensation mode (2)<br />
In the above example, the single block stop point of N2 is Q2’, so that<br />
the feedrates along paths P’–Q1’ and Q1’–Q2’ are the same, namely,<br />
F100.<br />
(3) When a command is specified to make the tool retrace the path<br />
specified in the previous block, the tool path can match the locus of<br />
the previous block by changing the G code to change the offset<br />
direction. If the G code is left unchanged, the operation shown in<br />
Example (3)–2 results :
B–63534EN/02 PROGRAMMING<br />
22. RISC PROCESSOR<br />
Example(3)–1 Tool movement when<br />
changing G41.2 to G42.2<br />
(G41.2 mode)<br />
G91 G01 X100.0<br />
G42.2 X–100.0<br />
673<br />
:Tool center path<br />
:Programmed tool path<br />
Example(3)–2 Tool movement when the<br />
G code is left unchanged<br />
(G41.2 mode)<br />
G91 G01 X100.0<br />
X–100.0<br />
Fig. 22.5.1 (h) Operation in the compensation mode (3)<br />
(4) Even when the tool movement changes linear to circular (helical),<br />
circular (helical) to linear, or circular (helical) to circular (helical), the<br />
start, end, and center points of a circular (helical) movement are<br />
projected on the compensation plane that is perpendicular to the tool<br />
axis, a compensation vector is calculated for the plane, then the vector<br />
is added to the originally specified position to obtain the command<br />
position. Then the tool is moved linearly or circularly (helically) to<br />
the obtained command position. In this case, the tool moves<br />
circularly (helically) in the currently selected plane. The tool does not<br />
move circularly (helically) in the compensation plane. Therefore,<br />
when the tool compensation is for circular movement, the<br />
compensation plane must be the XY, YZ, or ZX plane.<br />
X<br />
Tool<br />
Tool axis<br />
Start point End point<br />
Move command<br />
Tool center path created in the<br />
compensation plane<br />
(Compensation plane = XY plane)<br />
Z<br />
Projected<br />
Actual offset vector<br />
Actual tool center path<br />
Y<br />
Offset vector created in<br />
the compensation plane<br />
Fig. 22.5.1 (i) Operation in the compensation mode (4)
22. RISC PROCESSOR PROGRAMMING<br />
B–63534EN/02<br />
Compensation vector<br />
calculation<br />
P<br />
674<br />
e2<br />
Q<br />
V D<br />
e3<br />
e1=V T<br />
Fig. 22.5.1 (j) Compensation vector calculation<br />
In above figure, cutter compensation vector VD at point Q is calculated<br />
as follows :<br />
(1) Calculating the tool vector (VT)<br />
(2) Calculating the coordinate conversion matrix (M)<br />
Coordinate systems are defined as follows :<br />
– Coordinate system C1 : {O; X, Y, Z}<br />
Cartesian coordinate system whose fundamental vectors are the<br />
following unit vectors along the X–, Y–, and Z–axes :<br />
(1, 0, 0)<br />
(0, 1, 0)<br />
(0, 0, 1)<br />
– Coordinate system C2 : {O; e2, e3, e1}<br />
Cartesian coordinate system whose fundamental vectors are the<br />
following unit vectors :<br />
e2<br />
e3<br />
e1<br />
where, e2, e3, and e1 are defined as follows :<br />
e1 = VT<br />
e2 = b2 / |b2| , b2 = a2 – (a2,e1)– e1<br />
e3 = b3 / |b3| , b3 = a3 – (a3,e1)– e1 – (a3,e2)– e2<br />
a2 is an arbitrary vector linearly independent of e1, and<br />
a3 is an arbitrary vector linearly indepen dent of e2 and e1.<br />
The coordinate conversion matrix M from coordinate system C1 to<br />
C2, and the coordinate conversion matrix M –1 from coordinate system<br />
C2 to C1 are expressed as :<br />
M e2<br />
e3<br />
e1 , M–1 ( t e2 t e3 t e1)<br />
R<br />
X<br />
Z<br />
Y
B–63534EN/02 PROGRAMMING<br />
22. RISC PROCESSOR<br />
(3) Converting coordinates from coordinate system C1 to coordinate<br />
system C2<br />
The coordinates of the start and end points P and Q of a block and<br />
coordinates of the end point R of the next block in coordinate system<br />
C1 are converted to coordinates P’, Q’, and R’ in coordinate system<br />
C2, respectively, by using the following expressions :<br />
P MP<br />
Q QP<br />
R MR<br />
(4) Calculating the intersection vector (VD’) in the compensation plane<br />
{O; e2, e3}<br />
In the coordinates in coordinate system C2 obtained in (3), two<br />
components (the e1 component, the component of the tool direction,<br />
is excluded) are used to calculate intersection vector VD’ in the<br />
compensation plane.<br />
e3<br />
Q’<br />
675<br />
R’<br />
V D’<br />
Fig. 22.5.1 (k) Compensation vector calculation<br />
The e1 component of VD’ is assumed to be always 0. The calculation<br />
is similar to the calculation of cutter compensation C. Although one<br />
vector is obtained in this example, up to four vectors may be<br />
calculated.<br />
If the difference between the e2 and e3 components (in the<br />
compensation plane) between two points is smaller than the value set<br />
in parameter No. 6114 in intersection vector calculation, the block is<br />
assumed to specify no movement. In this case, intersection calculation<br />
is performed using the coordinates of one block ahead.<br />
(5) Converting the intersection vector from coordinate system C2 to<br />
coordinate system C1<br />
From the following expression, vector VD’ in coordinate system C2<br />
is converted to vector VD in coordinate system C1 :<br />
V D M –1 V D<br />
Vector VD is the compensation vector in the original XYZ coordinate<br />
system.<br />
P’<br />
e2
22. RISC PROCESSOR PROGRAMMING<br />
B–63534EN/02<br />
Calculation used when<br />
the compensation plane<br />
is changed<br />
(1) When a rotation axis and linear axis are specified at the same time<br />
When a rotation axis and linear axis are specified in the same block<br />
in the G41.2 or G42.2 mode (the compensation plane changes<br />
frequently), the cutter compensation vector is calculated using the<br />
coordinates of the rotation axis at each point at which the vector is<br />
obtained.<br />
<br />
G90 G00 X0 Y0 Z0 B0 C0 ;<br />
G01 F1000 ;<br />
N1 G42.2 Xp Yp Zp Bp Cp D1 ;<br />
N2 Xq Yq Zq Bq Cq ;<br />
N3 Xr Yr Zr Br Cr ;<br />
N4 Xs Ys Zs Bs Cs ;<br />
:<br />
Vector calculation at the end point (Q) of block N2<br />
– The tool vector (VT) and coordinate conversion matrix (M) are<br />
calculated using the coordi nates (Bq, Cq) of the rotation axis at point<br />
Q.<br />
– The cutter compensation vector is calculated using the resultant<br />
coordinates into which three points, P, Q, and R, are converted by<br />
matrix M.<br />
P<br />
N1<br />
O<br />
N2<br />
676<br />
P’<br />
Q<br />
Q’<br />
N3<br />
Fig. 22.5.1 (l) When a Rotation Axis and Linear Axis Are Specified at the<br />
Same Time<br />
(2) When a rotation axis is specified alone<br />
When a rotation axis is specified alone in the G41.2 or G42.2 mode<br />
(the compensation plane changes), the cutter compensation vector is<br />
calculated as follows :<br />
<br />
G90 G00 X0 Y0 Z0 B0 C0 ;<br />
G01 F1000 ;<br />
N1 G42.2 Xp Yp Zp D1 ;<br />
N2 Xq Yq Zq ;<br />
N3 Br Cr ;<br />
N4 Xs Ys Zs ;<br />
:<br />
R’<br />
S’<br />
R<br />
N4<br />
S
B–63534EN/02 PROGRAMMING<br />
22. RISC PROCESSOR<br />
Interference check made<br />
when the compensation<br />
plane is changed<br />
Vector calculation at the end point (Q) of block N2<br />
– The tool vector (VT) and coordinate conversion matrix (MN2) are<br />
calculated using the coordinates (B = 0, C = 0) of the rotation axis at<br />
point Q.<br />
– The cutter compensation vector (VN2) is calculated using the resultant<br />
coordinates into which three points, P, Q, and S, are converted by<br />
matrix MN2.<br />
Vector calculation at the end point of block N3<br />
– The coordinate conversion matrix (MN3) is calculated using the<br />
coordinates (Br, Cr) of the rotation axis at point R.<br />
– The cutter compensation vector (VN3) is calculated from the following<br />
expression :<br />
VN3 = MN3–1(MN2–VN2)<br />
P<br />
N1<br />
O<br />
N2<br />
P’<br />
677<br />
Q=R(N3)<br />
V N2=V 3<br />
Q’=R’<br />
N4<br />
Fig. 22.5.1 (m) When a rotation axis is specified alone<br />
An interference check is made when the compensation plane (plane<br />
perpendicular to a tool direction vector) is changed.<br />
<br />
If the program below is executed, a PS0272 alarm (overcutting due to<br />
offsetting) is issued from N4.<br />
O100 F3000<br />
N1 G90 G00 X0 Y0 Z0 A–46 C180<br />
N2 G41.2 D1<br />
N3 G01 X100<br />
N4 Y–200 Z–200<br />
N5 A45<br />
N6 Y–400 Z0<br />
N7 X0<br />
N8 Y–200 Z–200<br />
N9 A–46<br />
N10 Y0 Z0<br />
N11 G40<br />
M30<br />
S’<br />
S
22. RISC PROCESSOR PROGRAMMING<br />
B–63534EN/02<br />
C<br />
45°<br />
N8<br />
678<br />
N9<br />
N10<br />
Z<br />
N7<br />
N3<br />
N6<br />
N5<br />
Y<br />
N4<br />
Fig. 22.5.1 (n) Conceptual Diagram<br />
Vb<br />
Z<br />
Va<br />
Va: Tool direction vector when A = –46<br />
Vb: Tool direction vector when A=45<br />
A : End point of N3<br />
B : End point of N4<br />
C : End point of N6<br />
B<br />
46°<br />
Fig. 22.5.1 (o) Tool Direction Vector<br />
V2<br />
V1<br />
B’ C’<br />
A’ : Point A projected onto the compensation plane<br />
B’ : Point B projected onto the compensation plane<br />
C’ : Point C projected onto the compensation plane<br />
Fig. 22.5.1 (p) Compensation Vector at the End Point (Point B) of N4<br />
(on Compensation Plane)<br />
Y<br />
e3<br />
A’<br />
A<br />
X<br />
e2
B–63534EN/02 PROGRAMMING<br />
22. RISC PROCESSOR<br />
The move direction of A’B’ is opposite to that of B’C’, so that two<br />
compensation vectors, V1 and V2, are produced at point B’ (end point of<br />
N4). There is a possibility of overcutting in this case, so an alarm<br />
(PS0272) is issued from N4.<br />
(1) Conditions for issuing the interference alarm<br />
Suppose that the tool direction vector changes considerably from one<br />
block to another due to a move command for a rotation axis. In this<br />
case, an interference alarm is assumed because compensation vectors<br />
are regarded as being generated in the wrong directions when the path<br />
angle difference on the compensation plane is large, even though the<br />
angle difference of the directions of compensation vectors to be<br />
generated by those blocks is small.<br />
Here, the compensation plane is perpendicular to the tool direction<br />
(Va in Fig. 14.14.1(q)) of the first of the two blocks.<br />
Specifically, the conditions below are used for issuing the alarm.<br />
C<br />
Ua : Vector AB<br />
Ub : Vector BC<br />
Va : Tool direction vector between A and B<br />
Vb : Tool direction vector between B and C<br />
Wa : Va Ua<br />
Wb: Vb Ub<br />
(Here, represents an outer product operator.)<br />
679<br />
Vb<br />
Wb<br />
Ub<br />
X<br />
Z<br />
B<br />
Va<br />
Wa<br />
Fig. 22.5.1 (q) Conceptual Diagram<br />
Ua<br />
Y<br />
A
22. RISC PROCESSOR PROGRAMMING<br />
B–63534EN/02<br />
680<br />
B’<br />
Rb<br />
C’<br />
A’ : Point A projected onto the compensation plane<br />
B’ : Point B projected onto the compensation plane<br />
C’ : Point C projected onto the compensation plane<br />
Ra : Vector A’B’<br />
Rb : Vector B’C’<br />
Fig. 22.5.1 (r) Programmed Path (on the Compensation Plane) before and<br />
after the End Point (Point B) of N4<br />
When all the following conditions are satisfied, an alarm (PS0272)<br />
Issued.<br />
(a) The tool direction vector changes remarkably.<br />
: Angle for determination set in parameter No. 6261 (The default<br />
is 45°.)<br />
(Va,Vb) cos()(Here, (Va,Vb) means an inner product.)<br />
(b)The difference between the directions of the compensation vectors<br />
to be generated is small.<br />
Wa : Direction of a compensation vector to be generated by the AB<br />
block.<br />
Wb: Direction of a compensation vector to be generated by the BC<br />
block.<br />
Wa = Va Ua<br />
Wb = Vb Ub<br />
(Wa,Wb) 0<br />
(c) The path angle difference on the compensation plane is large.<br />
(Ra,Rb) < 0<br />
(2) Suppressing the issue of the alarm with a Q command<br />
By inserting a Q command into a block that issued the alarm, the issue<br />
of the alarm can be suppressed.<br />
(a) Q1 command<br />
By inserting a Q1 command, a vertical vector is generated.<br />
Example) N4 Y–200 Z–200 Q1<br />
Ra<br />
e3<br />
A’<br />
e2
B–63534EN/02 PROGRAMMING<br />
22. RISC PROCESSOR<br />
At point B’, a vector (V) perpendicular to A’B’ is generated.<br />
681<br />
B’<br />
V<br />
C’<br />
Fig. 22.5.1 (s) Q1 Command<br />
A vertical vector can also be generated by specifying G41.2 or<br />
G42.1 in the next block as indicated in the example below.<br />
Example) N6 G41.2 Y–400 Z0<br />
(b)Q2 command<br />
With a program specifying a linear–to–linear connection, up to two<br />
compensation vectors are generated. In this case, the second vector<br />
is deleted by inserting a Q2 command. The Q2 command has no<br />
effect on circular interpolation.<br />
Example) N4 Y–200 Z–200 Q2<br />
V1<br />
B’<br />
C’<br />
The second vector (V2) is deleted, and only V1 is used as a compensation vector.<br />
Fig. 22.5.1 (t) Q2 Command<br />
(c) Q3 command<br />
By inserting a Q3 command, the issue of the alarm can be suppressed.<br />
Example) N4 Y–200 Z–200 Q3<br />
V2<br />
V1<br />
B’<br />
The two vectors (V1 and V2) are not deleted.<br />
C’<br />
Fig. 22.5.1 (u) Q3 Command<br />
e3<br />
A’<br />
e3<br />
A’<br />
e3<br />
A’<br />
e2<br />
e2<br />
e2
22. RISC PROCESSOR PROGRAMMING<br />
B–63534EN/02<br />
22.5.2<br />
Leading Edge Offset<br />
Format<br />
Leading edge offset<br />
Leading edge offset<br />
cancel<br />
Explanations<br />
Operation at<br />
compensation start–up<br />
and cancellation<br />
Leading edge offset is a type of cutter compensation that is used when a<br />
workpiece is machined with the edge of a tool. A tool is automatically<br />
shifted by a specified cutter compensation value on the line where a plane<br />
formed by a tool direction vector and tool movement direction intersects<br />
a plane perpendicular to the tool axis direction.<br />
Tool used<br />
Reference<br />
tool<br />
Cutter compensation<br />
vector Cutter compensation<br />
amount<br />
G41.3 D_ ;<br />
G40 ;<br />
682<br />
Tool vector<br />
Fig. 22.5.2 (a) Reading edge offset<br />
Tool center path<br />
(after<br />
compensation)<br />
Programmed<br />
tool path<br />
NOTE<br />
1 G41.3 can be specified only in the G00 or G01 mode. In a<br />
block containing G41.3 or G40, only the addresses D, O,<br />
and N can be specified.<br />
2 The block after a block containing a G41.3 command must<br />
contain a move command. In that block, however, tool<br />
movement in the same direction as the tool axis direction or<br />
the opposite direction cannot be specified.<br />
3 No continuous–state G code that belongs to the same<br />
group as G00 and G01 can be specified in the G41.3 mode.<br />
Unlike tool side compensation the operation performed at leading edge<br />
compensation start–up and cancellation does not vary. When G41.3 is<br />
specified, the tool is moved by the amount of compensation (VC) in the<br />
plane formed by the movement vector (VM) of the block after a G41.3<br />
block and the tool vector (VT) obtained at the time of G41.3 specification.<br />
The tool movement is perpendicular to the tool vector. When G40 is<br />
specified, the tool is moved to cancel VC. The following illustrates how<br />
the compensation is performed.
B–63534EN/02 PROGRAMMING<br />
22. RISC PROCESSOR<br />
Operation in the<br />
compensation mode<br />
(1) When the tool vector is inclined in the direction the tool moves<br />
Tool<br />
683<br />
Tool vector(V T)<br />
: Tool center path<br />
G41.3(VC) VM G40<br />
: Programmed tool path<br />
Fig. 22.5.2 (b) When the tool vector is inclined in the direction the tool<br />
moves<br />
(2) When the tool vector is inclined in the direction opposite to the<br />
direction the tool moves<br />
Tool<br />
G41.3(V C)<br />
Tool vector(V T)<br />
V M<br />
: Tool center path<br />
: Programmed tool path<br />
Fig. 22.5.2 (c) When the tool vector is inclined in the direction opposite to<br />
the direction the tool moves<br />
The tool center moves so that a compensation vector (VC) perpendicular<br />
to the tool vector (VT) is created in the plane formed by the tool vector<br />
(VT) at the end point of each block and the movement vector (VM) of the<br />
next block.<br />
Tool center path (after compensation)<br />
V T1<br />
G40<br />
Programmed tool path<br />
VC1 VM1 VM2<br />
VC2<br />
VM3 VMn: Movement vector of block n<br />
VTn : Tool vector at the end of block n<br />
VCn : Compensation vector of block n (that lies in the VTn– VMn+1 plane, and is<br />
perpendicular to VTn)<br />
V T2<br />
Fig. 22.5.2 (d) Operation in the compensation mode<br />
If a G code or M code that suppresses buffering is specified in the<br />
compensation mode, however, the compensation vector created<br />
immediately before the specification is maintained.<br />
When a block involving no movement (including a block containing a<br />
move command for a rotation axis only) is specified, the movement vector<br />
of the block after the block involving no movement is used to create a<br />
compensation vector as shown below.
22. RISC PROCESSOR PROGRAMMING<br />
B–63534EN/02<br />
Block immediately<br />
before the offset cancel<br />
command (G40)<br />
Method of compensation<br />
vector calculation<br />
Tool center path(after compensation)<br />
VT1 Programmed path<br />
684<br />
VC1 VM1 VM2<br />
V C2 = V C3<br />
V T2<br />
V M4<br />
There is one block that<br />
specifies no movement.<br />
Fig. 22.5.2 (e) There is one block that specifies no movement.<br />
If block 3 involves no movement, the compensation vector of block 2<br />
(VC2) is created so that it is perpendicular to VT2 and lies in the plane<br />
formed by the movement vector (VM4) of block 4 and the tool vector<br />
(VT2) at the end point of block 2.<br />
NOTE<br />
If two or more successive blocks involve no movement, the<br />
previously created compensation vector is maintained.<br />
However, such specification should be avoided.<br />
In the block immediately before the compensation cancel command<br />
(G40), a compensation vector is created from the movement vector of that<br />
block and the tool vector at the end point of the block as shown below :<br />
Tool center path (after compensation)<br />
VT1 G40<br />
VC1 VC2<br />
Programmed path<br />
VM1 VM2<br />
Fig. 22.5.2 (f) Block Immediately before G40<br />
The compensation vector (VC2) of block 2 is created so that it is<br />
perpendicular to VT2 and lies in the plane formed by the tool vector (VT2)<br />
at the end point of block 2 and the movement vector (VM2) of block 2.<br />
In leading edge compensation, the compensation vector is calculated as<br />
follows :<br />
(1) Tool vector<br />
(2) Movement vector<br />
The movement vector (VMn+1) of block n+1 is obtained from the<br />
following expression :<br />
V Mn1 <br />
<br />
Xn1 Xn<br />
Yn1 Yn<br />
Zn1 Zn<br />
<br />
<br />
<br />
V T2<br />
Xn : Absolute coordinate value of X axis at<br />
end point of block n<br />
Yn : Absolute coordinate value of Y axis at<br />
end point of block n<br />
Zn : Absolute coordinate value of Z axis at<br />
end point of block n<br />
(3) Compensation vector<br />
The direction of the compensation vector (VCn) of block n is defined<br />
as follows :<br />
(a) (VMn+1, VTn) > 0 (0deg < < 90deg.)
B–63534EN/02 PROGRAMMING<br />
22. RISC PROCESSOR<br />
V Cn<br />
V Cn<br />
685<br />
<br />
<br />
V Tn<br />
V Tn<br />
V Mn+1<br />
V Mn+1<br />
Direction of V Cn<br />
(V Mn+1 V Tn) V Tn<br />
represents the included angle<br />
between VMn+1 and VTn. (0° 180°)<br />
Fig. 22.5.2 (g) Direction of the compensation vector (1)<br />
(b)(VMn+1,VTn) < 0 (90deg < < 180deg.)<br />
V Tn<br />
V Tn<br />
<br />
<br />
V Cn<br />
V Cn<br />
V Mn+1<br />
V Mn+1<br />
Direction of V C1<br />
– (V Mn+1 V Tn) V Tn<br />
Fig. 22.5.2 (h) Direction of the compensation vector (2)<br />
The compensation vector (VCn) of block n is calculated from VTn and<br />
VMn+1 as described below.<br />
R=Offset value<br />
V V<br />
TX<br />
VTY V<br />
TZ<br />
VMn1 V<br />
MX<br />
VMY V<br />
MZ<br />
V V<br />
X<br />
VY V<br />
Z<br />
<br />
<br />
(VMn1 VTn) VTn VTZ (VMZVTX VMXVTZ) VTY (VMXVTY VMYVTX) VTX (VMXVTY VMYVTX) VTZ (VMYVTZ VMZVTY) VTY (VMYVTZ VMZVTY) VTX (VMZVTX VMXVTZ) <br />
Then,<br />
(a) When(VMn+1, VTn) > 0 (0deg. < < 90deg.)<br />
V Cn <br />
<br />
R<br />
V<br />
x2 V<br />
r2 V<br />
z2 <br />
<br />
VX VY VZ <br />
<br />
<br />
(b)When(VMn+1, VTn) < 0 (90deg. < < 180deg.)<br />
V Cn <br />
<br />
R<br />
V<br />
x2 V<br />
r2 V<br />
z2 V<br />
X<br />
VY V<br />
Z
22. RISC PROCESSOR PROGRAMMING<br />
B–63534EN/02<br />
Compensation<br />
performed when is<br />
approximately 0deg.,<br />
90deg., or 180deg.<br />
When the included angle between VMn+1 and VTn is regarded as 0deg.,<br />
180deg., or 90deg., the compensation vector is created in a different way.<br />
So, when creating an NC program, note the following points :<br />
(1) Setting a variation range for regarding as 0deg., 180deg., or 90deg.<br />
When the included angle () between the tool vector (VT) and the<br />
movement vector (VM) becomes approximately 0deg., 180deg., or<br />
90deg., the system regards as 0deg., 180deg., or 90deg., then<br />
creates a compensation vector which is different from the normal<br />
compensation vector. The variation range used for regarding as<br />
0deg., 180deg., and 90deg. is or in parameter 6115.<br />
For example, suppose that the angle set in parameter 6115 is .<br />
(a) If 0 , is regarded as 0deg.<br />
686<br />
<br />
V Mn+1<br />
V Tn<br />
Fig. 22.5.2 (i) Determination of =0deg.<br />
(b)If (180–) 180, is regarded as 180deg.<br />
V Mn+1<br />
<br />
V Tn<br />
Fig. 22.5.2 (j) Determination of =180deg.<br />
(c) If (90–) (90+) , is regarded as 90deg.<br />
V Tn<br />
∆<br />
∆<br />
V Tn<br />
<br />
V Mn+1<br />
Fig. 22.5.2 (k) Determination of =90deg.<br />
∆<br />
V Mn+1<br />
(2) Compensation vector when is regarded as 0deg.or 180deg.<br />
If is regarded as 0deg.or 180deg.when G41.3 is specified to start<br />
leading edge compensation, alarm PS998 is issued. This means that<br />
the tool vector of the current block and the movement vector of the<br />
∆
B–63534EN/02 PROGRAMMING<br />
22. RISC PROCESSOR<br />
next block must not point in the same direction or in opposite<br />
directions at start–up.<br />
The previously created compensation vector is maintained other than<br />
at start–up at all times.<br />
If the included angles between VT2 and VM3, VT3 andVM4, and VT4<br />
and VM4, and VT4 and VM5 are regarded as 05, the compensation<br />
vector VC1 of block 1 is maintained as the compensation vectors VC2,<br />
VC3, and VC4, of blocks 2, 3, and 4, respectively.<br />
Tool center path<br />
(after compensation)<br />
VC1 VM1 Programmed<br />
Path<br />
687<br />
V T1<br />
V M2<br />
V C2<br />
VT2V V<br />
C3 V VC4<br />
C5<br />
T3 VT4 VM3 VM4 VM5 Fig. 22.5.2 (l) When =0deg.Is Determined<br />
If the included angles between VT2 and VM3, VT3 andVM4, and VT4<br />
and VM5 are regarded as 180deg., the compensation vector VC1 of<br />
block 1 is maintained as the compensation vectors VC2, VC3, and VC4<br />
of blocks 2, 3, and 4, respectively.<br />
Tool center path<br />
(after compensation)<br />
V T1<br />
Programmed<br />
Path<br />
V M1<br />
V C1<br />
V T2<br />
V M2<br />
V C2<br />
V T3<br />
V M3<br />
V C3<br />
V M4<br />
V T4<br />
V C4<br />
V T5<br />
V M5<br />
Fig. 22.5.2 (m) When =180deg. Is Determined<br />
(3) Compensation vector when is regarded as 90deg.<br />
If the previous compensation vector (VCn–1) points in the opposite<br />
direction ((VMn VTn–1) VTn–1 direction) to VMn with respect to<br />
VTn–1, the current compensation vector (VCn) is created so it points<br />
in the (VMn+1 VTn) VTn direction.<br />
Tool center path<br />
(after compensation)<br />
VC1 VM1 Programmed<br />
Path<br />
V T1<br />
V M2<br />
V T2<br />
V C2<br />
V M3<br />
V T3<br />
V C3<br />
V M4<br />
V T4<br />
V C4<br />
V M5<br />
Fig. 22.5.2 (n) When =90deg. Is Determined (1)<br />
If the previous compensation vector (VCn–1) points in the same<br />
direction ( –(VMn VTn–1) VTn–1 direction) as VMn with respect to<br />
VTn–1 , the current compensation vector (VCn) is created so it points in the<br />
–(VMn+1 ( VTn) VTn direction.<br />
V C5<br />
V C5<br />
V T5<br />
V M6<br />
V T5<br />
V M6<br />
V M6
22. RISC PROCESSOR PROGRAMMING<br />
B–63534EN/02<br />
22.5.3<br />
Restrictions<br />
G41.2, G42.2, and G41.3<br />
modes<br />
Canned cycle command<br />
<br />
<br />
<br />
<br />
<br />
Tool center path<br />
(after compensation)<br />
V M1<br />
V T1<br />
Programmed<br />
Path<br />
V C1<br />
688<br />
V M2<br />
V T2<br />
V C2<br />
V M3<br />
V T3<br />
V C3<br />
V M4<br />
V T4<br />
V C4<br />
V T5<br />
V M5<br />
Fig. 22.5.2 (o) When =90deg. Is Determined (2)<br />
G41.2, G42.2, G41.3, and G40 are continuous–state G codes that belong<br />
to the same group. Therefore, the G41.2, G42.2, and G41.3 modes cannot<br />
exist at the same time.<br />
Specify a canned cycle command in the compensation cancel mode<br />
(G40).<br />
In the compensation mode, never successively specify two or more blocks<br />
that involve no movement. Blocks involving no movement include :<br />
– M05; M code output<br />
– S21; S code output<br />
– G04X1000; Dwell<br />
– G22X100000; Machining area setting<br />
– G10P01R100; Offset value setting<br />
– (G17)Z2000; Movement not in the offset plane (movement in<br />
the tool axis direction)<br />
– G90;,O10;,N20; Block containing no move command<br />
– Blocks regarded as involving no movement according to parameter<br />
6114 (for tool side compensation only)<br />
Resetting the system in a compensation mode (G41.2, G42.2, or G41.3)<br />
always results in the cancellation mode (G40).<br />
In the mode for this function, the following functions can be used, but the<br />
condition of each function cannot be changed<br />
– <strong>Inc</strong>h/metric conversion<br />
The alarm is issued when the condition is changed by G20 or G21<br />
command.<br />
– Mirror image<br />
The condition of DI signal cannot be changed.<br />
– Tool life management function<br />
The tool length compensation use the amount of the tool specified by<br />
tool life management function. The command for the tool life<br />
management function have to command before the 3 dimensional<br />
cutter compensation mode.<br />
V C5<br />
V M6
B–63534EN/02 PROGRAMMING<br />
22. RISC PROCESSOR<br />
<br />
<br />
– One–digit F code feed<br />
The feedrate cannot be changed by using manual pulse generator.<br />
In the mode for this function, the following commands cannot be used.<br />
The alarm is issued when the following commands are orderd. :<br />
– Custom macro B<br />
– Exponentioal interpolation –G02.3,G03.3<br />
– Dwell –G04<br />
– Function concerning high–speed<br />
machining<br />
–G05<br />
(exclude G05P10000 and 05P0)<br />
– AI precision control –G05.1Q1,G5.1Q0<br />
– Hypothetical axis interpolation –G07<br />
– Cylindrical interpolation –G07.1<br />
– Advanced preview control –G08<br />
(Please use AI HPCC function)<br />
– Polar coordinate interpolation –G12.1,G13.1<br />
– Polar coordinate command –G15,G16<br />
– Reference position return check –G27<br />
– Reference position return –G28<br />
– 2nd Reference position return –G30<br />
– 3rd/4th Reference position return –G30<br />
– Skip –G31<br />
– Threading –G33<br />
– Automatic tool length measurement –G37<br />
– Normal direction control –G40.1,G41.1,G42.1<br />
– Cutter compensation B , C –G41,G42,G39<br />
– 3 dimensional cutter compensation –G41<br />
– Wheel wear compensaton –G41<br />
– Tool offset –G45,G46,G47,G48<br />
– Programmable mirror image –G50.1,G51.1<br />
– Local coordinate system –G52<br />
– <strong>Machine</strong> coordinate system –G53<br />
– Single direction positioning –G60<br />
– Automatic corner override –G62<br />
– Tapping mode –G63<br />
– Macro call –G65,G66,G67<br />
– Figure copy<br />
(Sub program call is available)<br />
–G72.1,G72.2<br />
– Canned cycles –G73–G79,G80,G81–G89,<br />
G98,G99<br />
– Electric gear box –G80,G81<br />
– Function for hobbing machine –G80,G81<br />
– External motion function –G81<br />
– Chopping –G81.1<br />
689
22. RISC PROCESSOR PROGRAMMING<br />
B–63534EN/02<br />
<br />
<br />
<br />
– Small–hole peck drilling cycle –G83<br />
– Changing workpiece coordinate system<br />
–G92<br />
– workpiece coordinate system preset –G92.1<br />
– Feed per revolution –G95<br />
– Constant surface speed control –G96,G97<br />
– Infeed control –G160,G161<br />
– NURBS interpolation –G06.2<br />
– Workpiece coordinate system –G54,G54.1,G55,G56,G57,<br />
G58,G59<br />
– M,S,T and B functions with motion command<br />
In the mode for this function, the following functions cannot be used, The<br />
warning message is displayed on the screen when the following functions<br />
are used. :<br />
– MDI intervention<br />
In the mode for this function, the following functions cannot be used, The<br />
alarm(P/S5196) is issued when the following functions are used. :<br />
– Manual interruption operation<br />
– Tool retract and recover<br />
And , in the mode for this function, the following functions cannot be<br />
used.<br />
– Flexible synchronous control<br />
– Sequence number comparison and stop<br />
(The program is not stop at the specified sequence block in 3<br />
dimensional cutter compensation mode.)<br />
– Index table indexing<br />
– Retrace function<br />
Retrace function cannot be used by the program which uses 3<br />
dimensional cutter compensation.<br />
– Rotary axis control<br />
– Gentle normal direction control<br />
– Thc command for the tool life management function<br />
(Tool life time is able to be counted in this mode, but the command for<br />
the tool life management function cannot be used.)<br />
– Macro executor ( Execution macro )<br />
– Manual handle interruption operation<br />
– External deceleration<br />
External decelaration is not available in this mode.<br />
3 dimensional cutter compensation function cannot be used with the<br />
following function.<br />
– Angular axis control<br />
– Arbitrary angular axis contol<br />
The limitation attaches about the combination of other NC instructions<br />
occasionally.<br />
Please refer to the manual of the each function.<br />
690
B–63534EN/02 PROGRAMMING<br />
22. RISC PROCESSOR<br />
Alarms<br />
Number Message Contents<br />
0037 CRC:PLANE CHANGE An attempt was made to change the<br />
plane in the cutter compensation mode.<br />
To change the plane, cancel the cutter<br />
compensation mode.<br />
0041 CRC:INTERFERENCE The depth of the cut is too great during<br />
cutter compensation. Check the program.<br />
The criteria for judging interference are<br />
as follows:<br />
(1) The direction of movement of the<br />
programmed block differs from the<br />
direction of movement of the corresponding<br />
tool center path block by<br />
90° or more or 270° or less.The<br />
check in this case can be disabled<br />
by setting CNC parameter No.<br />
6001#1 to “1”.<br />
(2) In the case of an arc, the difference<br />
in angle between the start and end<br />
points of the programmed block differs<br />
by 180° or more with the difference<br />
in angle between the start and<br />
end points of the corresponding tool<br />
center path block.<br />
0033 CRC:NO INTERSEC-<br />
TION<br />
5196 ILLEGAL AXIS OPERA-<br />
TION<br />
5405 ILLEGAL PARAMETER<br />
IN G41.2/G42.2<br />
5406 G41.3/G40 FORMAT<br />
ERROR<br />
5407 ILLEGAL COMMAND<br />
IN G41.3<br />
691<br />
There is not point of intersection of the<br />
compensated tool center path during<br />
cutter compensation.<br />
A function which cannot be used during<br />
HPCC function ¡¡or 5–axis control function<br />
is being executed was commanded.<br />
The parameter settings (parameter Nos.<br />
19610 to 19619) for determining the<br />
relationship between the axis of rotation<br />
and the rotation plane are incorrect.<br />
(1) A move instruction was specified in<br />
a block in which the G41.3 or G40<br />
code is specified.<br />
(2) A G or M code which suppresses<br />
buffering was specified in the block<br />
in which the G41.3 code was specified.<br />
(1) A G code other than G00 or G01 in<br />
group 01 was specified in the G41.3<br />
mode.<br />
(2) An offset (G code in group 07) was<br />
specified in the G41.3 mode.<br />
(3) The block following the block in<br />
which G41.3 (startup) was specified<br />
did not contain a move command.
22. RISC PROCESSOR PROGRAMMING<br />
B–63534EN/02<br />
Number Message<br />
Contents<br />
5408 G41.3 ILLEGAL<br />
START_UP<br />
5409 ILLEGAL PARAMETER<br />
IN G41.3<br />
692<br />
(1) The G41.3 G code (startup) was<br />
specified in a group 01 mode for other<br />
than G00 and G01.<br />
(2) The angle formed by the tool direction<br />
vector and the movement direction<br />
vector was 0° or 180° degrees<br />
at startup.<br />
The parameter settings (parameter Nos.<br />
19610 to 19619) for determining the<br />
relationship between the axis of rotation<br />
and the rotation plane are incorrect.
B–63534EN/02 PROGRAMMING<br />
22. RISC PROCESSOR<br />
22.6<br />
3–DIMENSIONAL<br />
CIRCULAR<br />
INTERPOLATION<br />
General<br />
Format<br />
Explanations<br />
G code group<br />
Start point, mid–point,<br />
and end point<br />
Specifying an intermediate and end point on an arc enables circular<br />
interpolation in a 3–dimensional space.<br />
The command format is as follows:<br />
G02.4XX1 YY1 ZZ1 αα1 ββ1 ; First block (mid–point of the arc)<br />
XX1 YY1 ZZ1 αα1 ββ1 ; Second block (end point of the arc)<br />
Or,<br />
G03.4XX1 YY1 ZZ1 αα1 ββ1 ; First block (mid–point of the arc)<br />
XX1 YY1 ZZ1 αα1 ββ1 ; Second block (end point of the arc)<br />
α,β : Arbitrary axes other than the 3–dimensional circular<br />
interpolation axis (up to two axes)<br />
G02.4 and G03.4 are modal G codes of group 01. They therefore remain<br />
effective until another G code in group 01 is specified.<br />
An arc in a 3–dimensional space is uniquely defined with its start point<br />
(current position) and a specified intermediate point and end point, as<br />
shown below. Two command blocks are used to define this arc. The first<br />
command block specifies the tool path between the start point and<br />
intermediate point. The second command block specifies the tool path<br />
between the intermediate point and end point.<br />
693
22. RISC PROCESSOR PROGRAMMING<br />
B–63534EN/02<br />
Movement along axes<br />
other than the<br />
3–dimensional circular<br />
interpolation axis<br />
<strong>Inc</strong>remental commands<br />
Direction of rotation<br />
Single block<br />
Start point assumed if<br />
3–dimensional circular<br />
interpolations are<br />
specified consecutively<br />
Velocity command<br />
Deceleration<br />
Z<br />
X<br />
Start point<br />
694<br />
Y<br />
Mid–point<br />
(X1,Y1,Z1)<br />
Fig.22.6 Start, Mid, and End Points<br />
End point<br />
(X2,Y2,Z2)<br />
If the modal code is changed by specifying a code such as G01 with the<br />
end point not specified, the arc cannot be obtained, and alarm PS5432 is<br />
issued. During MDI operation, alarm PS5432 is also issued if a cycle start<br />
is applied with only the mid–point specified.<br />
In addition to the 3–dimensional circular interpolation axis (X/Y/Z), up<br />
to two arbitrary axes (α/β) can be specified at a time. If α/β are omitted<br />
from the first block (mid–point specification) and are specified only in the<br />
second block (end point specification), the tool moves to the specified<br />
point along the α/β axes during movement from the mid–point of the arc<br />
to the end point. If α/β are omitted from the second block (end point<br />
specification) and are specified only in the first block (mid–point<br />
specification), the tool moves to the specified point along the α/β axes<br />
during movement from the start point of the arc to the mid–point.<br />
With an incremental command, the position of the mid–point relative to<br />
the start point must be specified in the first block, and the position of the<br />
end point relative to the mid–point must be specified in the second block.<br />
The direction of rotation cannot be specified. The movement is the same<br />
regardless of whether G02.4 or G03.4 is specified.<br />
When operation is performed using a single block, one cycle start causes<br />
movement from the start point to the end point. A single–block stop is<br />
not performed between the first block (mid–point specification) and the<br />
second block (end point specification).<br />
If 3–dimensional circular interpolations are specified consecutively, the<br />
end point in one interpolation is assumed to be the start point in the next<br />
interpolation.<br />
Specify a tangential velocity along an arc in the three–dimensional space.<br />
In a mode other than AI high–precision contour control mode or AI<br />
nano–based high–precision contour control mode, deceleration is applied<br />
at the end point of the block immediately before the block that commands<br />
three–dimensional circular interpolation or the end point of that block.<br />
Then in–position check is performed.
B–63534EN/02 PROGRAMMING<br />
22. RISC PROCESSOR<br />
Limitation<br />
Cases in which linear<br />
interpolation is<br />
performed<br />
Whole circles<br />
Compensation functions<br />
Manual absolute<br />
Background graphic<br />
<br />
If the start point, mid–point, and end–point are on the same line, linear<br />
interpolation is performed.<br />
If the start point coincides with the mid–point, the mid–point<br />
coincides with the end point, or the end point coincides with the start<br />
point, linear interpolation is performed up to the end point.<br />
If the start point, mid–point, and end–point are on the same line and<br />
the end point lies between the start point and the mid–point, the tool<br />
first moves with linear interpolation from the start point to the<br />
mid–point, then returns from the mid–point to the end point with linear<br />
interpolation. Thus, the tool always passes through the specified<br />
point.<br />
Start point<br />
695<br />
End point<br />
Mid–point<br />
A whole circle (360 arc) cannot be specified. (This corresponds to the<br />
case in which linear interpolation is performed, as described earlier.)<br />
Before using this function, cancel the compensation functions of group<br />
07, such as cutter radius compensation.<br />
While this function is in use, manual intervention is not possible with the<br />
manual absolute switch set to the ON position. If intervention is<br />
performed, alarm PS0713 is issued when operation restarts.<br />
This function cannot be used with background graphic drawing.<br />
In the mode for this function, the following functions can be used, but the<br />
condition of each function cannot be changed<br />
– <strong>Inc</strong>h/metric conversion<br />
The alarm is issued when the condition is changed by G20 or G21<br />
command.<br />
– Mirror image<br />
The condition of DI signal cannot be changed.<br />
– Tool life management function<br />
The tool length compensation use the amount of the tool specified by<br />
tool life management function. The command for the tool life<br />
management function have to command before the 3 dimensional<br />
cutter compensation mode.<br />
– One–digit F code feed<br />
The feedrate cannot be changed by using manual pulse generator.
22. RISC PROCESSOR PROGRAMMING<br />
B–63534EN/02<br />
<br />
<br />
In the mode for this function, the following commands cannot be used.<br />
The alarm is issued when the following commands are orderd. :<br />
– Custom macro B<br />
– Exponentioal interpolation –G02.3,G03.3<br />
– Dwell –G04<br />
– Function concerning high–speed<br />
machining<br />
–G05<br />
(exclude G05P10000 and 05P0)<br />
– AI precision control –G05.1Q1,G5.1Q0<br />
– Hypothetical axis interpolation –G07<br />
– Cylindrical interpolation –G07.1<br />
– Advanced preview control –G08<br />
(Please use AI HPCC function)<br />
– Polar coordinate interpolation –G12.1,G13.1<br />
– Polar coordinate command –G15,G16<br />
– Reference position return check –G27<br />
– Reference position return –G28<br />
– 2nd Reference position return –G30<br />
– 3rd/4th Reference position return –G30<br />
– Skip –G31<br />
– Threading –G33<br />
– Automatic tool length measurement –G37<br />
– Normal direction control –G40.1,G41.1,G42.1<br />
– Cutter compensation B , C –G41,G42,G39<br />
– 3 dimensional cutter compensation –G41<br />
– Wheel wear compensaton –G41<br />
– Tool offset –G45,G46,G47,G48<br />
– Programmable mirror image –G50.1,G51.1<br />
– Local coordinate system –G52<br />
– <strong>Machine</strong> coordinate system –G53<br />
– Single direction positioning –G60<br />
– Automatic corner override –G62<br />
– Tapping mode –G63<br />
– Macro call –G65,G66,G67<br />
– Figure copy<br />
(Sub program call is available)<br />
–G72.1,G72.2<br />
– Canned cycles –G73–G79,G80,G81–G89,<br />
G98,G99<br />
– Electric gear box –G80,G81<br />
– Function for hobbing machine –G80,G81<br />
– External motion function –G81<br />
– Chopping –G81.1<br />
– Small–hole peck drilling cycle –G83<br />
– Changing workpiece coordinate system<br />
–G92<br />
696
B–63534EN/02 PROGRAMMING<br />
22. RISC PROCESSOR<br />
<br />
<br />
– workpiece coordinate system preset –G92.1<br />
– Feed per revolution –G95<br />
– Constant surface speed control –G96,G97<br />
– Infeed control –G160,G161<br />
– NURBS interpolation –G06.2<br />
– Workpiece coordinate system –G54,G54.1,G55,G56,G57,<br />
G58,G59<br />
– Three–dimensional coordinate conversion<br />
–G68<br />
– Coordinate system rotation –G68<br />
– Scaling -G50, G51<br />
– Programmable mirror image –G50.1, G51.1<br />
– Exact stop mode –G61<br />
– Cutter compensation –G40, G41, G42<br />
– Three–dimensional cutter compensation<br />
–G40, G41.2, G41.3, G42.2<br />
– Data setting –G10<br />
– Exact stop –G09<br />
– Miscellaneous function<br />
– Second auxiliary function<br />
– Spindle function<br />
– Tool function<br />
In the mode for this function, the following functions cannot be used, The<br />
warning message is displayed on the screen when the following functions<br />
are used. :<br />
– MDI intervention<br />
In the mode for this function, the following functions cannot be used, The<br />
alarm(P/S5196) is issued when the following functions are used. :<br />
– Manual interruption operation<br />
– Tool retract and recover<br />
And , in the mode for this function, the following functions cannot be<br />
used.<br />
– Flexible synchronous control<br />
– Sequence number comparison and stop<br />
(The program is not stop at the specified sequence block in 3<br />
dimensional cutter compensation mode.)<br />
– Index table indexing<br />
– Retrace function<br />
Retrace function cannot be used by the program which uses 3<br />
dimensional cutter compensation.<br />
– Rotary axis control<br />
– Gentle normal direction control<br />
– Thc command for the tool life management function<br />
(Tool life time is able to be counted in this mode, but the command for<br />
the tool life management function cannot be used.)<br />
697
22. RISC PROCESSOR PROGRAMMING<br />
B–63534EN/02<br />
<br />
Alarm<br />
– Macro executor ( Execution macro )<br />
– Manual handle interruption operation<br />
– External deceleration<br />
External decelaration is not available in this mode.<br />
– Arbitrary chanfering/Corner rounding<br />
3 dimensional cutter compensation function cannot be used with the<br />
following function.<br />
– Angular axis control<br />
– Arbitrary angular axis contol<br />
The limitation attaches about the combination of other NC instructions<br />
occasionally.<br />
Please refer to the manual of the each function.<br />
Number Message Contents<br />
0710 ILLEGAL COMMAND<br />
IN 3–D CIR<br />
0712 G02.4/G03.4 FORMAT<br />
ERROR<br />
0713 MANUAL INTERVEN-<br />
TION IN G02.4/G03.4<br />
(ABS ON)<br />
698<br />
In a model state in which a 3–dimensional<br />
circular interpolation (G02.4 or<br />
G03.4) cannot be commanded, an attempt<br />
for such interpolation was made.<br />
An invalid code was commanded while<br />
in three–dimensional circular interpolation<br />
mode. This happens when:<br />
An M, S, T, or B code was commanded<br />
while a command that cancels<br />
three–dimensional circular interpolation<br />
was being executed (such a cancel<br />
command is another G code in<br />
group 01).<br />
The specified command was not one<br />
that cancels three–dimensional circular<br />
interpolation and includes<br />
G05P10000 or G05P0.<br />
Three–dimensional circular interpolation<br />
(G02.4 or G03.4) was commanded incorrectly.<br />
While 3–dimensional circular interpolation<br />
mode (G02.4 or G03.4) is in progress,<br />
manual operation was performed<br />
with the manual absolute switch turned<br />
on.
III. OPERATION
B–63534EN/02 OPERATION<br />
1. GENERAL<br />
1 <br />
701
1. GENERAL OPERATION<br />
B–63534EN/02<br />
1.1<br />
MANUAL<br />
OPERATION<br />
Explanations<br />
Manual reference<br />
position return<br />
(See Section III–3.1)<br />
The CNC machine tool has a position used to determine the machine<br />
position.<br />
This position is called the reference position, where the tool is replaced<br />
or the coordinate are set. Ordinarily, after the power is turned on, the tool<br />
is moved to the reference position.<br />
Manual reference position return is to move the tool to the reference<br />
position using switches and pushbuttons located on the operator’s panel.<br />
702<br />
Reference position<br />
Tool<br />
<strong>Machine</strong> operator’s panel<br />
Fig. 1.1 (a) Manual reference position return<br />
The tool can be moved to the reference position also with program<br />
commands.<br />
This operation is called automatic reference position return (See Section<br />
II–6).
B–63534EN/02 OPERATION<br />
1. GENERAL<br />
The tool movement by<br />
manual operation<br />
Using machine operator’s panel switches, pushbuttons, or the manual<br />
handle, the tool can be moved along each axis.<br />
Tool<br />
703<br />
<strong>Machine</strong> operator’s panel<br />
Workpiece<br />
Fig. 1.1 (b) The tool movement by manual operation<br />
Manual<br />
pulse<br />
generator<br />
The tool can be moved in the following ways:<br />
(i) Jog feed (See Section III–3.2)<br />
The tool moves continuously while a pushbutton remains pressed.<br />
(ii) <strong>Inc</strong>remental feed (See Section III–3.3)<br />
The tool moves by the predetermined distance each time a button is<br />
pressed.<br />
(iii) Manual handle feed (See Section III–3.4)<br />
By rotating the manual handle,the tool moves by the distance<br />
corresponding to the degree of handle rotation.
1. GENERAL OPERATION<br />
B–63534EN/02<br />
1.2<br />
TOOL MOVEMENT<br />
BY PROGRAMING–<br />
AUTOMATIC<br />
OPERATION<br />
Explanations<br />
<br />
MDI operation<br />
DNC operation<br />
Automatic operation is to operate the machine according to the created<br />
program. It includes memory, MDI and DNC operations. (See Section<br />
III–4).<br />
Program<br />
01000 ;<br />
M_S_T ;<br />
G92_X_;<br />
G00... ;<br />
G01...... ;<br />
.<br />
.<br />
.<br />
.<br />
704<br />
Tool<br />
Fig. 1.2 (a) Tool Movement by Programming<br />
After the program is once registered in memory of CNC, the machine can<br />
be run according to the program instructions. This operation is called<br />
memory operation.<br />
CNC <strong>Machine</strong><br />
Memory<br />
Fig. 1.2 (b) Memory Operation<br />
After the program is entered, as an command group, from the MDI<br />
keyboard, the machine can be run according to the program. This<br />
operation is called MDI operation.<br />
CNC<br />
MDI keyboard<br />
Manual program<br />
input<br />
Fig. 1.2 (c) MDI operation<br />
<strong>Machine</strong><br />
In this mode of operation, the program is not registered in the CNC<br />
memory. It is read from the external input/output devices instead. This<br />
is called DNC operation. This mode is useful when the program is too<br />
large to fit the CNC memory.
B–63534EN/02 OPERATION<br />
1. GENERAL<br />
1.3<br />
AUTOMATIC<br />
OPERATION<br />
Explanations<br />
Program selection<br />
Start and stop<br />
Select the program used for the workpiece. Ordinarily, one program is<br />
prepared for one workpiece. If two or more programs are in memory,<br />
select the program to be used, by searching the program number (Section<br />
III–9.3).<br />
In memory or on a tape<br />
O1001 Program number<br />
G92 ––––––<br />
M30<br />
O1002<br />
G92<br />
––––––<br />
M30<br />
O1003<br />
G92<br />
––––––<br />
M30<br />
705<br />
Work–1 program<br />
Program number<br />
Program number<br />
search<br />
Work–2 program<br />
Automaticoperation<br />
Program number<br />
Work–3 program<br />
Fig. 1.3 (a) Program Selection for Automatic Operation<br />
Pressing the cycle start pushbutton causes automatic operation to start.<br />
By pressing the feed hold or reset pushbutton, automatic operation pauses<br />
or stops. By specifying the program stop or program termination<br />
command in the program, the running will stop during automatic<br />
operation. When one process machining is completed, automatic<br />
operation stops. (See Section III–4)<br />
Cycle start<br />
Feed hold<br />
Reset<br />
Program stop<br />
Program end<br />
Stop<br />
Start<br />
Stop caused<br />
by program<br />
Automatic operation<br />
Fig. 1.3 (b) Start and Stop for Automatic Operation
1. GENERAL OPERATION<br />
B–63534EN/02<br />
Handle interruption<br />
While automatic operation is being executed, tool movement can overlap<br />
automatic operation by rotating the manual handle. (See Section III–4.8)<br />
Programmed<br />
depth of cut<br />
<br />
Depth of cut by<br />
handle interruption<br />
706<br />
Tool position during<br />
automatic operation<br />
Tool position after<br />
handle interruption<br />
Fig. 1.3 (c) Handle Interruption for Automatic Operation
B–63534EN/02 OPERATION<br />
1. GENERAL<br />
1.4<br />
TESTING A<br />
PROGRAM<br />
1.4.1<br />
Check by Running the<br />
<strong>Machine</strong><br />
Explanations<br />
Dry run<br />
Feedrate override<br />
Before machining is started, the automatic running check can be<br />
executed. It checks whether the created program can operate the machine<br />
as desired. This check can be accomplished by running the machine<br />
actually or viewing the position display change (without running the<br />
machine) (See Section III–5).<br />
Remove the workpiece, check only movement of the tool. Select the tool<br />
movement rate using the dial on the operator’s panel. (See Section<br />
III–5.4)<br />
707<br />
Table<br />
Fig. 1.4.1 (a) Dry run<br />
Tool<br />
Check the program by changing the feedrate specified in the program.<br />
(See Section III–5.2)<br />
Feed rate specified by program :<br />
100 mm/min.<br />
Feed rate after feed rate override (20%) :<br />
20 mm/min.<br />
Workpiece<br />
Fig. 1.4.1 (b) Feedrate Override<br />
Tool
1. GENERAL OPERATION<br />
B–63534EN/02<br />
Single block<br />
1.4.2<br />
How to View the<br />
Position Display<br />
Change without<br />
Running the <strong>Machine</strong><br />
Explanations<br />
<strong>Machine</strong> lock<br />
Auxiliary function lock<br />
When the cycle start pushbutton is pressed, the tool executes one<br />
operation then stops. By pressing the cycle start again, the tool executes<br />
the next operation then stops. The program is checked in this manner.<br />
(See Section III–5.5)<br />
Cycle start<br />
Stop<br />
Stop<br />
Workpiece<br />
708<br />
Cycle start<br />
Tool<br />
<br />
Cycle start<br />
Fig. 1.4.1 (c) Single Block<br />
X<br />
Y<br />
Z<br />
MDI<br />
Stop<br />
The tool remains stopped, and only the<br />
positional displays of the axes change.<br />
Fig. 1.4.2 <strong>Machine</strong> Lock<br />
Cycle start<br />
Tool<br />
When automatic running is placed into the auxiliary function lock mode<br />
during the machine lock mode (See Sections III–5.1), all auxiliary<br />
functions (spindle rotation, tool replacement, coolant on/off, etc.) (See<br />
Section III–5.1) are disabled.
B–63534EN/02 OPERATION<br />
1. GENERAL<br />
1.5<br />
EDITING A PART<br />
PROGRAM<br />
After a created program is once registered in memory, it can be corrected<br />
or modified from the MDI panel (See Section III–9).<br />
This operation can be executed using the part program storage/edit<br />
function.<br />
Program registration<br />
CNC CNC<br />
CNC tape (program)<br />
709<br />
Tape reader<br />
Fig. 1.5 (a) Part Program Editing<br />
Program correction or modification<br />
MDI
1. GENERAL OPERATION<br />
B–63534EN/02<br />
1.6<br />
DISPLAYING AND<br />
SETTING DATA<br />
Explanations<br />
Offset value<br />
The operator can display or change a value stored in CNC internal<br />
memory by key operation on the MDI screen (See III–11).<br />
Screen Keys<br />
MDI<br />
Screen Keys<br />
MDI<br />
710<br />
Data setting<br />
Data display<br />
Fig. 1.6 (a) Displaying and Setting Data<br />
Setting<br />
Display<br />
CNC memory<br />
Geometry Wear com-<br />
compensation pensation<br />
Tool compensation<br />
number1<br />
Tool compensation<br />
number2<br />
Tool compensation<br />
number3<br />
⋅ ⋅ ⋅ ⋅ ⋅ ⋅ ⋅ ⋅ ⋅ ⋅ ⋅ ⋅ ⋅ ⋅ ⋅ ⋅<br />
⋅ ⋅ ⋅ ⋅ ⋅ ⋅ ⋅ ⋅ ⋅ ⋅ ⋅ ⋅ ⋅ ⋅ ⋅ ⋅<br />
12.3<br />
20.0<br />
⋅ ⋅ ⋅<br />
⋅ ⋅ ⋅<br />
⋅ ⋅ ⋅<br />
25.0<br />
40.0<br />
⋅ ⋅ ⋅<br />
⋅ ⋅ ⋅<br />
⋅ ⋅ ⋅<br />
CNC memory<br />
Fig. 1.6 (b) Displaying and Setting Offset Values<br />
The tool has the tool dimension (length, diameter). When a workpiece is<br />
machined, the tool movement value depends on the tool dimensions.<br />
By setting tool dimension data in CNC memory beforehand,<br />
automatically generates tool routes that permit any tool to cut the<br />
workpiece specified by the program. Tool dimension data is called the<br />
offset value (See Section III–11.4.1).
B–63534EN/02 OPERATION<br />
1. GENERAL<br />
Displaying and setting<br />
operator’s setting data<br />
<strong>Machine</strong>d<br />
shape<br />
711<br />
1st tool path<br />
2nd tool path<br />
Offset value of the 1st tool<br />
Offset value of the 2nd tool<br />
Fig. 1.6 (c) Offset Value<br />
Apart from parameters, there is data that is set by the operator in<br />
operation. This data causes machine characteristics to change.<br />
For example, the following data can be set:<br />
<strong>Inc</strong>h/Metric switching<br />
Selection of I/O devices<br />
Mirror image cutting on/off<br />
The above data is called setting data (See Section III–11.4.3).<br />
Screen Keys<br />
Program<br />
Setting<br />
Displaying<br />
Setting data<br />
⋅<strong>Inc</strong>h/Metric switching<br />
⋅Selection of I/O device<br />
⋅Mirror image ON/OFF setting<br />
⋅<br />
⋅<br />
⋅<br />
CNC Memory<br />
Automatic<br />
operation<br />
Operational<br />
characteristics<br />
Movement of<br />
the machine<br />
Fig. 1.6 (d) Displaying and Setting Operator’s setting data
1. GENERAL OPERATION<br />
B–63534EN/02<br />
Displaying and setting<br />
parameters<br />
Data protection key<br />
The CNC functions have versatility in order to take action in<br />
characteristics of various machines.<br />
For example, CNC can specify the following:<br />
Rapid traverse rate of each axis<br />
Whether increment system is based on metric system or inch system.<br />
How to set command multiply/detect multiply (CMR/DMR)<br />
Data to make the above specification is called parameters (See Section<br />
III–11.5.1).<br />
Parameters differ depending on machine tool.<br />
Screen Keys<br />
MDI<br />
712<br />
Program<br />
Setting<br />
Display<br />
Parameter<br />
Rapid traverse rate<br />
Position control<br />
Reference position return<br />
Backlash compensation data<br />
Pitch error compensation<br />
data<br />
⋅<br />
⋅<br />
⋅<br />
CNC memory<br />
Operational<br />
characteristics<br />
Automatic<br />
operation<br />
Fig. 1.6 (e) Displaying and setting parameters<br />
Movement<br />
of the<br />
machine<br />
A key called the data protection key can be defined. It is used to prevent<br />
part programs, offset values, parameters, and setting data from being<br />
registered, modified, or deleted erroneously (See Section III–11).<br />
Screen Keys<br />
MDI<br />
Data Setting<br />
Program<br />
Offset value<br />
Parameters<br />
Setting data<br />
CNC memory<br />
Protection Key<br />
Registration / modification inhibition<br />
Signal<br />
Fig. 1.6 (f) Data Protection Key<br />
<strong>Machine</strong> operator’s<br />
panel<br />
Data protection<br />
key
B–63534EN/02 OPERATION<br />
1. GENERAL<br />
1.7<br />
DISPLAY<br />
1.7.1<br />
Program Display<br />
The contents of the currently active program are displayed. In addition,<br />
the programs scheduled next and the program list are displayed.<br />
(See Section III–11.2.1)<br />
Active program number<br />
<br />
<br />
<br />
<br />
<br />
N5 G02 X900.0 R–250.0 ;<br />
<br />
<br />
<br />
<br />
<br />
<br />
<br />
MEM STOP * * * * * * 13 : 18 : 14<br />
PRGRM<br />
713<br />
O1100 N00005<br />
<br />
Currently executed program<br />
The cursor indicates the currently executed location<br />
<br />
SYSTEM EDITION B0A1 – 03<br />
PROGRAM NO. USED ’ 10 FREE ’ 53<br />
MEMORY AREA USED ’ 960 FREE ’ 5280<br />
PROGRAM LIBRARY LIST<br />
O0001 O0002 O0010 O0020 O0040 O0050<br />
O0100 O0200 O1000 O1100<br />
<br />
EDIT **** *** *** 13 : 18 : 14<br />
Active sequence number<br />
O1100 N00003<br />
PRGRM <br />
JK<br />
Program<br />
content
1. GENERAL OPERATION<br />
B–63534EN/02<br />
1.7.2<br />
Current Position<br />
Display<br />
1.7.3<br />
Alarm Display<br />
The current position of the tool is displayed with the coordinate values.<br />
The distance from the current position to the target position can also be<br />
displayed. (See Section III–11.1.1 to 11.1.3)<br />
Y<br />
714<br />
<br />
Workpiece coordinate system<br />
<br />
X 150.000<br />
Y 300.000<br />
Z 100.000<br />
<br />
<br />
RUN TIME 0H41M CYCLE TIME 0H 0M22S<br />
* * * * * * * * * *<br />
19 : 47 : 45<br />
ABS <br />
<br />
O0003 N00003<br />
<br />
When a trouble occurs during operation, error code and alarm message are<br />
displayed on the screen. (See Section III–7.1)<br />
See APPENDIX G for the list of error codes and their meanings.<br />
<br />
<br />
O1000 N00003<br />
<br />
MEM STOP * * * * * * ALM 19 : 55 : 22
B–63534EN/02 OPERATION<br />
1. GENERAL<br />
1.7.4<br />
Parts Count Display,<br />
Run Time Display<br />
1.7.5<br />
Graphic Display<br />
When this option is selected, two types of run time and number of parts<br />
are displayed on the screen. (See Section lll–11.4.5)<br />
ACTUAL POSITION (ABSOLUTE)<br />
X 150.000<br />
Y 300.000<br />
Z 100.000<br />
<br />
RUN TIME 0H16M CYCLE TIME 0H 1M 0S<br />
715<br />
O0003 N00003<br />
<br />
* * * *<br />
FIN<br />
20 : 22 : 23<br />
ABS <br />
<br />
Programmed tool movement can be displayed on the following planes:<br />
(See Section III–12)<br />
1) XY plane<br />
2) YZ plane<br />
3) XZ plane<br />
4) Three dimensional display<br />
(1) Y<br />
(2)<br />
Display on the XY plane<br />
(3) (4)<br />
Z<br />
Display on the XZ plane<br />
X<br />
Z<br />
X Y<br />
Fig. 1.7.5 (a) Graphic display<br />
X<br />
Display on the YZ plane<br />
Z<br />
Y<br />
Three dimensional display (isometric)
1. GENERAL OPERATION<br />
B–63534EN/02<br />
1.8<br />
DATA INPUT/OUTPUT<br />
Memory<br />
Program<br />
Offset<br />
Parameters<br />
.<br />
.<br />
.<br />
CNC<br />
Reader/puncher<br />
interface<br />
Programs, offset values, parameters, etc. input in CNC memory can be<br />
output to paper tape, cassette, or a floppy disk for saving. After once<br />
output to a medium, the data can be input into CNC memory.<br />
SYSTEM P<br />
716<br />
Portable tape reader<br />
FANUC PPR<br />
FANUC Floppy<br />
cassette adaptor<br />
Automatic programming system<br />
Memory card<br />
adapter<br />
(incorporated CNC)<br />
Fig. 1.8 (a) Data Output<br />
Paper tape<br />
FANUC Floppy Cassette<br />
Floppy disk<br />
Memory card
B–63534EN/02 OPERATION<br />
2. OPERATIONAL DEVICES<br />
2 <br />
<br />
The available operational devices include the setting and display unit<br />
attached to the CNC, the machine operator’s panel, and external<br />
input/output devices such as a, Handy File and etc.<br />
717
OPERATION<br />
2. OPERATIONAL DEVICES B–63534EN/02<br />
2.1<br />
SETTING AND<br />
DISPLAY UNITS<br />
The setting and display units are shown in Subsections 2.1.1 to 2.1.5 of<br />
Part III.<br />
7.2”/8.4” LCD–Mounted type CNC Control Unit . . . . . . . III–2.1.1<br />
9.5”/10.4” LCD–Mounted type CNC Control Unit . . . . . . III–2.1.2<br />
Stand–Alone Type Small MDI Unit . . . . . . . . . . . . . . . . . III–2.1.3<br />
Stand–Alone Type Standard MDI Unit . . . . . . . . . . . . . . . III–2.1.4<br />
Stand–Alone Type 61 Full Key MDI Unit . . . . . . . . . . . . III–2.1.5<br />
718
B–63534EN/02 OPERATION<br />
2. OPERATIONAL DEVICES<br />
2.1.1<br />
7.2″/8.4″ LCD–Mounted<br />
Type CNC Control Unit<br />
2.1.2<br />
9.5″/10.4″ LCD–Mounted<br />
Type CNC Control Unit<br />
719
OPERATION<br />
2. OPERATIONAL DEVICES B–63534EN/02<br />
2.1.3<br />
Stand–Alone Type<br />
Small MDI Unit<br />
Function keys<br />
Address/numeric keys<br />
Cursor keys<br />
Page change keys<br />
720<br />
Shift key<br />
Cancel (CAN) key<br />
Input key<br />
Edit keys<br />
Help key<br />
Reset key
B–63534EN/02 OPERATION<br />
2. OPERATIONAL DEVICES<br />
2.1.4<br />
Stand–Alone Type<br />
Standard MDI Unit<br />
Help key<br />
Reset key<br />
Shift key Page change keys Cursor keys<br />
Address/numeric keys<br />
721<br />
Function keys<br />
Edit keys<br />
Cancel (CAN) key<br />
Input key
OPERATION<br />
2. OPERATIONAL DEVICES B–63534EN/02<br />
2.1.5<br />
Stand–Alone Type 61<br />
Full Key MDI Unit<br />
Address/numeric keys<br />
Shift key<br />
Help key<br />
Reset key<br />
Cancel (CAN) key Input key<br />
Edit keys<br />
722<br />
Function keys<br />
Page change keys<br />
Cursor keys
B–63534EN/02 OPERATION<br />
2. OPERATIONAL DEVICES<br />
2.2<br />
EXPLANATION OF<br />
THE KEYBOARD<br />
Table 2.2 Explanation of the MDI keyboard<br />
Number Name Explanation<br />
1 RESET key Press this key to reset the CNC, to cancel an alarm, etc.<br />
RESET<br />
2 HELP key Press this button to use the help function when uncertain about the operation of<br />
an MDI key (help function).<br />
HELP<br />
In case of <strong>160i</strong>/<strong>180i</strong>/<strong>160i</strong>s/<strong>180i</strong>s, this key is assigned to “Esc” key of the personal<br />
computer.<br />
3 Soft keys The soft keys have various functions, according to the Applications. The soft key<br />
functions are displayed at the bottom of the screen.<br />
4 Address and numeric keys Press these keys to input alphabetic, numeric, and other characters.<br />
N<br />
(<br />
4 …<br />
5 SHIFT key Some keys have two characters on their keytop. Pressing the key<br />
switches the characters. Special character Ê is displayed on the screen when a<br />
SHIFT<br />
character indicated at the bottom right corner on the keytop can be entered.<br />
6 INPUT key When an address or a numerical key is pressed, the data is input to the buffer,<br />
INPUT<br />
and it is displayed on the screen. To copy the data in the key input buffer to the<br />
offset register, etc., press the INPUT key. This key is equivalent to the [INPUT]<br />
key of the soft keys, and either can be pressed to produce the same result.<br />
7 Cancel key Press this key to delete the last character or symbol input to the key input buffer.<br />
When the key input buffer displays<br />
CAN<br />
>N001X100Z_<br />
and the cancel CAN key is pressed, Z is canceled and<br />
>N001X100_<br />
is displayed.<br />
8 Program edit keys Press these keys when editing the program.<br />
ALTER INSERT DELETE<br />
ALTER : Alteration<br />
(In case of <strong>160i</strong>/<strong>180i</strong>/<strong>160i</strong>s/<strong>180i</strong>s, this key is assigned<br />
to “Tab” key of the personal computer.)<br />
INSERT<br />
DELETE<br />
: Insertion<br />
: Deletion<br />
9 Function keys Press theses keys to switch display screens for each function.<br />
…<br />
See lll – 2.3 for detailas of the function keys.<br />
POS PROG<br />
723
OPERATION<br />
2. OPERATIONAL DEVICES B–63534EN/02<br />
Table 2.2 Explanation of the MDI keyboard<br />
Number Name<br />
Explanation<br />
10 Cursor move keys There are four different cursor move keys.<br />
: This key is used to move the cursor to the right or in the forward<br />
direction. The cursor is moved in short units in the forward direction.<br />
: This key is used to move the cursor to the left or in the reverse<br />
direction. The cursor is moved in short units in the reverse direction.<br />
: This key is used to move the cursor in a downward or forward<br />
direction. The cursor is moved in large units in the forward direction.<br />
: This key is used to move the cursor in an upward or reverse direction.<br />
The cursor is moved in large units in the reverse direction.<br />
11 Page change keys Two kinds of page change keys are described below.<br />
Explanations<br />
PAGE<br />
PAGE<br />
Key operation with<br />
2–path control<br />
PAGE<br />
PAGE<br />
: This key is used to changeover the page on the screen in the<br />
forward direction.<br />
: This key is used to changeover the page on the screen in the<br />
reverse direction.<br />
In the 2–path control, be sure to select the tool post for which data is<br />
specified, using the path selection switch on the machine operator’s panel.<br />
Then, perform keyboard operation, such as displaying or specifying<br />
various data items, and editing a program.<br />
724
B–63534EN/02 OPERATION<br />
2. OPERATIONAL DEVICES<br />
2.3<br />
FUNCTION KEYS<br />
AND SOFT KEYS<br />
2.3.1<br />
General Screen<br />
Operations<br />
POS<br />
PROG<br />
SYSTEM MESSAGE GRAPH<br />
OFFSET<br />
CUSTOM<br />
SETTING<br />
Function keys<br />
(OPRT)<br />
Chapter selection<br />
soft keys Operation<br />
selection<br />
key<br />
Return menu key Continuous menu key<br />
The function keys are used to select the type of screen (function) to be<br />
displayed. When a soft key (section select soft key) is pressed<br />
immediately after a function key, the screen (section) corresponding to the<br />
selected function can be selected.<br />
1 Press a function key on the MDI panel. The chapter selection soft<br />
keys that belong to the selected function appear.<br />
2 Press one of the chapter selection soft keys. The screen for the<br />
selected chapter appears. If the soft key for a target chapter is not<br />
displayed, press the continuous menu key (next–menu key).<br />
In some cases, additional chapters can be selected within a chapter.<br />
3 When the target chapter screen is displayed, press the operation<br />
selection key to display data to be manipulated.<br />
4 To redisplay the chapter selection soft keys, press the return menu<br />
key.<br />
The general screen display procedure is explained above. However,<br />
the actual display procedure varies from one screen to another. For<br />
details, see the description of individual operations.<br />
725
OPERATION<br />
2. OPERATIONAL DEVICES B–63534EN/02<br />
2.3.2<br />
Function Keys<br />
POS<br />
PROG<br />
OFFSET<br />
SETTING<br />
SYSTEM<br />
MESSAGE<br />
GRAPH<br />
CUSTOM<br />
Function keys are provided to select the type of screen to be displayed.<br />
The following function keys are provided on the MDI panel:<br />
Press this key to display the position screen.<br />
Press this key to display the program screen.<br />
Press this key to display the offset/setting screen.<br />
Press this key to display the system screen.<br />
Press this key to display the message screen.<br />
Press this key to display the graphics screen.<br />
Press this key to display the custom screen (conversational macro<br />
screen).<br />
In case of <strong>160i</strong>/<strong>180i</strong>/<strong>160i</strong>s/<strong>180i</strong>s, this key is assigned to “Ctrl” key of the<br />
personal computer.<br />
In case of <strong>160i</strong>/<strong>180i</strong>/<strong>160i</strong>s/<strong>180i</strong>s, this key is assigned to “Alt” key of the<br />
personal computer.<br />
726
B–63534EN/02 OPERATION<br />
2. OPERATIONAL DEVICES<br />
2.3.3<br />
Soft Keys<br />
To display a more detailed screen, press a function key followed by a soft<br />
key. Soft keys are also used for actual operations.<br />
The following illustrates how soft key displays are changed by pressing<br />
each function key.<br />
The symbols in the following figures mean as shown below :<br />
<br />
<br />
<br />
: Indicates screens<br />
: Indicates a screen that can be displayed by pressing a<br />
function key(*1)<br />
: Indicates a soft key(*2)<br />
: Indicates input from the MDI panel.<br />
: Indicates a soft key displayed in green.<br />
: Indicates the continuous menu key (rightmost soft key)(*3).<br />
*1 Press function keys to switch between screens that are used frequently.<br />
*2 Some soft keys are not displayed depending on the option<br />
configuration.<br />
*3 In some cases, the continuous menu key is omitted when the 12 soft<br />
keys display unit is used.<br />
727
OPERATION<br />
2. OPERATIONAL DEVICES B–63534EN/02<br />
POSITION SCREEN<br />
POS<br />
[ABS]<br />
Absolute coordinate display<br />
Monitor screen<br />
[(OPRT)] [PTSPRE] [EXEC]<br />
[RUNPRE] [EXEC]<br />
[REL] [(OPRT)] [PRESET]<br />
ORIGIN [ALLEXE]<br />
[ALL]<br />
Relative coordinate display<br />
Current position display<br />
Handle interruption<br />
[HNDL]<br />
[MONI]<br />
POS<br />
[WORK] [ALLEXE]<br />
(Axis name)<br />
(Axis name) [EXEC]<br />
[PTSPRE] [EXEC]<br />
[RUNPRE] [EXEC]<br />
[(OPRT)] [PRESET]<br />
ORIGIN [ALLEXE]<br />
(Axis name) [EXEC]<br />
[PTSPRE] [EXEC]<br />
[RUNPRE] [EXEC]<br />
[(OPRT)] [PTSPRE] [EXEC]<br />
[RUNPRE] [EXEC]<br />
[(OPRT)] [PTSPRE] [EXEC]<br />
[RUNPRE] [EXEC]<br />
728<br />
[EXEC]
B–63534EN/02 OPERATION<br />
2. OPERATIONAL DEVICES<br />
PROGRAM SCREEN<br />
PROG<br />
Program display screen<br />
[PRGRM]<br />
[CHECK]<br />
[(OPRT)] [BG–EDT]<br />
(O number)<br />
<br />
(N number)<br />
[REWIND]<br />
Program check display screen<br />
[ABS]<br />
[REL]<br />
<br />
<br />
[(OPRT)]<br />
Current block display screen<br />
[CURRNT]<br />
[(OPRT)] [BG–EDT]<br />
Next block display screen<br />
[NEXT]<br />
[(OPRT)] [BG–EDT]<br />
Program restart display screen<br />
[RSTR]<br />
(2)(Continued on the next page)<br />
[P TYPE]<br />
[Q TYPE]<br />
[F SRH]<br />
[(OPRT)] [BG–EDT]<br />
See “When the soft key [BG–EDT] is pressed”<br />
[O SRH]<br />
[N SRH]<br />
[CAN]<br />
(N number)<br />
[BG–EDT]<br />
(O number)<br />
(N number)<br />
[REWIND]<br />
[P TYPE]<br />
[Q TYPE]<br />
[F SRH]<br />
729<br />
[EXEC]<br />
PROG<br />
See “When the soft key [BG–EDT] is pressed”<br />
[O SRH]<br />
[N SRH]<br />
[CAN]<br />
(N number)<br />
[EXEC]<br />
See “When the soft key [BG–EDT] is pressed”<br />
See “When the soft key [BG–EDT] is pressed”<br />
See “When the soft key [BG–EDT] is pressed”<br />
1/2
OPERATION<br />
2. OPERATIONAL DEVICES B–63534EN/02<br />
(2)<br />
[FL.SDL] [PRGRM]<br />
File directory display screen<br />
Return to (Program display)<br />
[DIR] [(OPRT)] [SELECT]<br />
Schedule operation display screen<br />
[SCHDUL] [(OPRT)] [CLEAR]<br />
730<br />
(Schedule data)<br />
(number) [F SET]<br />
[EXEC]<br />
[CAN]<br />
[EXEC]<br />
[INPUT]<br />
2/2
B–63534EN/02 OPERATION<br />
2. OPERATIONAL DEVICES<br />
PROGRAM SCREEN<br />
PROG<br />
Program display<br />
[PRGRM]<br />
(1)(Continued on the next page)<br />
<br />
<br />
[(OPRT)] [BG–EDT] <br />
(O number) [O SRH]<br />
(Address) [SRH↓]<br />
(Address)<br />
[REWIND]<br />
[SRH↑]<br />
[F SRH] [CAN]<br />
(N number) [EXEC]<br />
[READ] [CHAIN]<br />
[STOP]<br />
[CAN]<br />
(The cursor moves to the end of a program.)<br />
(O number) [EXEC]<br />
[PUNCH] [STOP]<br />
[CAN]<br />
(O number) [EXEC]<br />
[DELETE] [CAN]<br />
(N number) [EXEC]<br />
[EX–EDT] [COPY] [CRSR∼]<br />
[∼CRSR]<br />
[∼BTTM]<br />
[ALL]<br />
(O number) [EXEC]<br />
[MOVE] [CRSR∼]<br />
[∼CRSR]<br />
[∼BTTM]<br />
[ALL]<br />
(O number) [EXEC]<br />
[MERGE] [∼CRSR]<br />
[∼BTTM]<br />
(O number) [EXEC]<br />
[CHANGE] (Address) [BEFORE]<br />
731<br />
PROG<br />
(Address) [AFTER] [SKIP]<br />
[1–EXEC]<br />
[EXEC]<br />
1/2
OPERATION<br />
2. OPERATIONAL DEVICES B–63534EN/02<br />
(1)<br />
[LIB]<br />
Program directory display<br />
Graphic Conversational Programming<br />
[C.A.P.]<br />
[(OPRT)] [BG–EDT] <br />
(O number) [O SRH] <br />
[READ] [CHAIN]<br />
[STOP]<br />
[CAN]<br />
(O number)<br />
[PUNCH] [STOP]<br />
[CAN]<br />
(O number)<br />
[PRGRM]<br />
[G.MENU]<br />
<br />
(G number) [BLOCK] (Data) [INPUT] INSERT<br />
When a G number is omitted, the standard screen appears.<br />
[(OPRT)] [INPUT]<br />
Floppy directory display<br />
[FLOPPY]<br />
732<br />
[EXEC]<br />
[EXEC]<br />
[PRGRM] <br />
[DIR] [(OPRT)] [F SRH] ( number)<br />
[CAN]<br />
[EXEC]<br />
[READ] (number)<br />
(O number)<br />
[STOP]<br />
[CAN]<br />
[EXEC]<br />
[PUNCH] (number)<br />
(O number)<br />
[STOP]<br />
[CAN]<br />
[EXEC]<br />
[DELETE] (number)<br />
[CAN]<br />
[EXEC]<br />
[F SET]<br />
[F SET]<br />
[O SET]<br />
[F SET]<br />
[O SET]<br />
[F SET]<br />
2/2
B–63534EN/02 OPERATION<br />
2. OPERATIONAL DEVICES<br />
PROGRAM SCREEN<br />
PROG<br />
Program display<br />
[PRGRM]<br />
[MDI]<br />
Program input screen<br />
<br />
<br />
[(OPRT)] [BG–EDT]<br />
[(OPRT)] [BG–EDT]<br />
Current block display screen<br />
[CURRNT]<br />
Next block display screen<br />
[NEXT]<br />
(Address)<br />
(Address)<br />
[REWIND]<br />
[(OPRT)] [BG–EDT]<br />
[(OPRT)] [BG–EDT]<br />
Program restart display screen<br />
[RSTR]<br />
[(OPRT)] [BG–EDT]<br />
[SRH↓]<br />
[SRH↑]<br />
733<br />
PROG<br />
See “When the soft key [BG–EDT] is pressed”<br />
See “When the soft key [BG–EDT] is pressed”<br />
See “When the soft key [BG–EDT] is pressed”<br />
See “When the soft key [BG–EDT] is pressed”<br />
See “When the soft key [BG–EDT] is pressed”
OPERATION<br />
2. OPERATIONAL DEVICES B–63534EN/02<br />
PROGRAM SCREEN<br />
PROG<br />
PROG<br />
Program display<br />
[PRGRM]<br />
<br />
<br />
[(OPRT)] [BG–EDT]<br />
Current block display screen<br />
[CURRNT]<br />
Next block display screen<br />
[NEXT]<br />
[(OPRT)] [BG–EDT]<br />
[(OPRT)] [BG–EDT]<br />
Program restart display screen<br />
[RSTR]<br />
PROGRAM SCREEN<br />
Program display<br />
[PRGRM]<br />
[LIB]<br />
[(OPRT)] [BG–EDT]<br />
Program directory display<br />
734<br />
PROG<br />
See “When the soft key [BG–EDT] is pressed”<br />
See “When the soft key [BG–EDT] is pressed”<br />
See “When the soft key [BG–EDT] is pressed”<br />
See “When the soft key [BG–EDT] is pressed”<br />
<br />
<br />
[(OPRT)] [BG–EDT]<br />
(O number)<br />
(Address)<br />
(Address)<br />
[REWIND]<br />
PROG<br />
See “When the soft key [BG–EDT] is pressed”<br />
[O SRH] <br />
[SRH↓]<br />
[SRH↑]<br />
[(OPRT)] [BG–EDT] See “When the soft key [BG–EDT] is pressed”<br />
(O number) [O SRH]
B–63534EN/02 OPERATION<br />
2. OPERATIONAL DEVICES<br />
PROGRAM SCREEN<br />
PROG<br />
Program display<br />
[PRGRM]<br />
(1)(Continued on the next page)<br />
PROG<br />
<br />
<br />
[(OPRT)] [BG–END]<br />
(O number) [O SRH]<br />
(Address) [SRH↓]<br />
(Address)<br />
[REWIND]<br />
[SRH↑]<br />
[F SRH] [CAN]<br />
(N number) [EXEC]<br />
[READ] [CHAIN]<br />
[STOP]<br />
[CAN]<br />
(The cursor moves to the end of a program.)<br />
(O number) [EXEC]<br />
[PUNCH] [STOP]<br />
[CAN]<br />
(O number) [EXEC]<br />
[DELETE] [CAN]<br />
(N number) [EXEC]<br />
[EX–EDT] [COPY] [CRSR∼]<br />
[∼CRSR]<br />
[∼BTTM]<br />
[ALL]<br />
(O number) [EXEC]<br />
[MOVE] [CRSR∼]<br />
[∼CRSR]<br />
[∼BTTM]<br />
[ALL]<br />
(O number) [EXEC]<br />
[MERGE] [∼CRSR]<br />
[∼BTTM]<br />
(O number) [EXEC]<br />
[CHANGE] (Address) [BEFORE]<br />
735<br />
(Address) [AFTER] [SKIP]<br />
[1–EXEC]<br />
[EXEC]<br />
1/2
OPERATION<br />
2. OPERATIONAL DEVICES B–63534EN/02<br />
(1)<br />
[LIB]<br />
Program directory display<br />
[C.A.P.]<br />
[(OPRT)] [BG–EDT]<br />
(O number) [O SRH]<br />
[READ] [CHAIN]<br />
[STOP]<br />
[CAN]<br />
(O number)<br />
[PUNCH] [STOP]<br />
[CAN]<br />
(O number)<br />
Graphic Conversational Programming<br />
736<br />
[EXEC]<br />
[EXEC]<br />
[PRGRM]<br />
[G.MENU]<br />
<br />
(G number) [BLOCK] (Data) [INPUT]<br />
When a G number is omitted, the standard screen appears.<br />
[(OPRT)] [INPUT]<br />
Floppy directory display<br />
[FLOPPY]<br />
[PRGRM] <br />
[DIR] [(OPRT)] [F SRH]<br />
[READ]<br />
[PUNCH]<br />
[DELETE]<br />
<br />
(number)<br />
[CAN]<br />
[EXEC]<br />
(number)<br />
(O number)<br />
[STOP]<br />
[CAN]<br />
[EXEC]<br />
(number)<br />
(O number)<br />
[STOP]<br />
[CAN]<br />
[EXEC]<br />
(number)<br />
[CAN]<br />
[EXEC]<br />
INSERT<br />
[F SET]<br />
[F SET]<br />
[O SET]<br />
[F SET]<br />
[O SET]<br />
[F SET]<br />
2/2
B–63534EN/02 OPERATION<br />
2. OPERATIONAL DEVICES<br />
OFFSET/SETTING SCREEN<br />
OFFSET<br />
SETTING<br />
(1)<br />
Tool offset screen<br />
[OFFSET]<br />
Setting screen<br />
[SETING]<br />
[WORK]<br />
[(OPRT)]<br />
[(OPRT)]<br />
[(OPRT)]<br />
(Number)<br />
(Axis name)<br />
(Numeral)<br />
(Numeral)<br />
<br />
(Number)<br />
[ON:1]<br />
[OFF:0]<br />
(Numeral)<br />
(Numeral)<br />
Work coordinate system setting screen<br />
Macro variables display screen<br />
[MACRO]<br />
[(OPRT)]<br />
[NO SRH]<br />
[INP.C.]<br />
[+INPUT]<br />
[INPUT]<br />
[CLEAR] [ALL]<br />
[WEAR]<br />
[GEOM]<br />
[READ] [CAN]<br />
[WEAR]<br />
[PUNCH] [CAN]<br />
[EXEC]<br />
[NO SRH]<br />
[+INPUT]<br />
[INPUT]<br />
(Number) [NO SRH]<br />
(Numeral) [+INPUT]<br />
(Numeral) [INPUT]<br />
(Numeral) [INPUT]<br />
(Number) [NO SRH]<br />
(Axis name) [INP.C.]<br />
(Numeral) [INPUT]<br />
[PUNCH]<br />
[CAN]<br />
[EXEC]<br />
737<br />
OFFSET<br />
SETTING<br />
1/2
OPERATION<br />
2. OPERATIONAL DEVICES B–63534EN/02<br />
(1)<br />
Pattern data input screen<br />
[MENU]<br />
[OPR]<br />
[(OPRT)]<br />
(Number)<br />
Software operator’s panel screen<br />
Tool life management setting screen<br />
[TOOLLF]<br />
[(OPRT)]<br />
Modem card screen<br />
[MODEM]<br />
[MD.MON]<br />
[MD.SET]<br />
Fixture offset (ACT) screen<br />
[F–ACT]<br />
Fixture offset screen<br />
[F OFFSET]<br />
[(OPRT)]<br />
(Number)<br />
[CLEAR]<br />
(Numeral)<br />
[NO SRH]<br />
[PUNCH]<br />
[+INPUT]<br />
[INPUT]<br />
[SELECT]<br />
[NO SRH]<br />
[CAN]<br />
[EXEC]<br />
[INPUT]<br />
[CAN]<br />
[EXEC]<br />
738<br />
2/2
B–63534EN/02 OPERATION<br />
2. OPERATIONAL DEVICES<br />
SYSTEM SCREEN<br />
SYSTEM<br />
Parameter screen<br />
[PARAM]<br />
[DGNOS]<br />
[PMC]<br />
[(OPRT)]<br />
Diagnosis screen<br />
PMC screen<br />
[(OPRT)]<br />
System configuration screen<br />
[SYSTEM]<br />
<br />
(Number)<br />
[ON:1]<br />
[OFF:0]<br />
(Numeral)<br />
(Numeral)<br />
739<br />
[NO SRH]<br />
[+INPUT]<br />
[INPUT]<br />
[READ] [CAN]<br />
[EXEC]<br />
[PUNCH] [CAN]<br />
[EXEC]<br />
(Number)<br />
[NO SRH]<br />
ID information screen : i servo information screen<br />
[SYSTEM]<br />
[SV–INF]<br />
ID information screen : i spindle information screen<br />
[SYSTEM]<br />
[SP–INF]<br />
(4)<br />
(Continued on the next page)<br />
SYSTEM<br />
1/2<br />
Note) Search for the start of the file using<br />
the PRGRM screen for read/punch.
OPERATION<br />
2. OPERATIONAL DEVICES B–63534EN/02<br />
(4)<br />
Pitch error compensation screen<br />
[PITCH]<br />
Servo parameter screen<br />
[SV.PRM]<br />
Waveform diagnosis screen<br />
[W.DGNS]<br />
[SV.SET]<br />
[SV.TUN]<br />
Spindle parameter screen<br />
[SP.PRM]<br />
[(OPRT)]<br />
[SP.SET]<br />
[SP.TUN]<br />
[SP.MON]<br />
(No.)<br />
[ON:1]<br />
[OFF:0]<br />
(Numeral)<br />
(Numeral)<br />
[(OPRT)]<br />
[SV.TRC] [(OPRT)]<br />
[(OPRT)]<br />
[NO SRH]<br />
[W.PRM]<br />
[W.GRPH] [STSRT]<br />
[TIME→]<br />
[←TIME]<br />
[H–DOBL]<br />
[H–HALF]<br />
[STSRT]<br />
[CH–1↑]<br />
[CH–1↓]<br />
[V–DOBL]<br />
[V–HALF]<br />
[STSRT]<br />
[CH–2↑]<br />
[CH–2↓]<br />
[V–DOBL]<br />
[V–HALF]<br />
[+INPUT]<br />
[INPUT]<br />
[READ] [CAN]<br />
[EXEC]<br />
[PUNCH] [CAN]<br />
[EXEC]<br />
[ON:1]<br />
[OFF:0]<br />
(Numeral) [INPUT]<br />
[TRACE]<br />
[TRNSF]<br />
[ON:1]<br />
[OFF:0]<br />
[INPUT]<br />
740<br />
Note) Search for the start of the file using<br />
the PRGRM screen for read/punch.<br />
2/2
B–63534EN/02 OPERATION<br />
2. OPERATIONAL DEVICES<br />
<br />
MESSAGE<br />
Alarm display screen<br />
[ALARM]<br />
Message display screen<br />
[MSG]<br />
[HISTRY]<br />
<br />
HELP<br />
Alarm history screen<br />
Alarm detail screen<br />
[ALAM]<br />
<br />
[(OPRT)] [CLEAR]<br />
Operation method screen<br />
[OPR]<br />
[PARA]<br />
<br />
[(OPRT)] [SELECT]<br />
Parameter table screen<br />
[(OPRT)] [SELECT]<br />
741<br />
MESSAGE<br />
HELP
OPERATION<br />
2. OPERATIONAL DEVICES B–63534EN/02<br />
GRAPHIC SCREEN<br />
Tool path graphics<br />
Solid graphics<br />
GRAPH<br />
GRAPH<br />
<br />
Tool path graphics<br />
[PARAM]<br />
[EXEC] [(OPRT)] [AUTO]<br />
[STSRT]<br />
[STOP]<br />
[REWIND]<br />
[CLEAR]<br />
[ZOOM] [(OPRT)] [EXEC]<br />
[←]<br />
[POS]<br />
[→]<br />
[↑]<br />
[↓]<br />
Solid graphics<br />
[PARAM]<br />
[BLANK] [(OPRT)] [ANEW]<br />
[+ROT]<br />
[–ROT]<br />
[+TILT]<br />
[–TILT]<br />
[EXEC] [(OPRT)] [A.ST]<br />
[F.ST]<br />
[STOP]<br />
[REWIND]<br />
[REVIEW] [(OPRT)] [ANEW]<br />
[+ROT]<br />
[–ROT]<br />
[+TILT]<br />
[–TILT]<br />
[PARAM]<br />
[3–PLN] [(OPRT)] [ ]<br />
[←]<br />
[→]<br />
[↑]<br />
[↓]<br />
742<br />
GRAPH
B–63534EN/02 OPERATION<br />
2. OPERATIONAL DEVICES<br />
2.3.4<br />
Key Input and Input<br />
Buffer<br />
When an address and a numerical key are pressed, the character<br />
corresponding to that key is input once into the key input buffer. The<br />
contents of the key input buffer is displayed at the bottom of the CRT<br />
screen.<br />
In order to indicate that it is key input data, a “>” symbol is displayed<br />
immediately in front of it. A “_” is displayed at the end of the key input<br />
data indicating the input position of the next character.<br />
Key input buffer display<br />
743<br />
<br />
<br />
[ ] [ ] [ ] [ ] [ ]<br />
Fig. 2.3.4 Key input buffer display<br />
<br />
To input the lower character of the keys that have two characters inscribed<br />
on them, first press the SHIFT key and then the key in question.<br />
When the SHIFT key is pressed, “_” indicating the next character input<br />
position changes to “~”. Now lowercase characters can be entered (shift<br />
state).<br />
When a character is input in shift status the shift status is canceled.<br />
Furthermore, if the SHIFT key is pressed in shift status, the shift status is<br />
canceled.<br />
It is possible to input up to 32 characters at a time in the key input buffer.<br />
Press the CAN key to cancel a character or symbol input in the key input<br />
buffer.<br />
(Example)<br />
When the key input buffer displays<br />
>N001X100Z_<br />
and the cancel CAN key is pressed, Z is canceled and<br />
>N001X100_<br />
is displayed.
OPERATION<br />
2. OPERATIONAL DEVICES B–63534EN/02<br />
2.3.5<br />
Warning Messages<br />
After a character or number has been input from the MDI panel, a data<br />
check is executed when INPUT key or a soft key is pressed. In the case of<br />
incorrect input data or the wrong operation a flashing warning message<br />
will be displayed on the status display line.<br />
Display of key input<br />
buffer<br />
Warning message<br />
display<br />
Status display<br />
Soft key display<br />
744<br />
<br />
<br />
[ ] [ ] [ ] [ ] [ ]<br />
Fig. 2.3.5 Warning message display<br />
Table 2.3.5 Warning Messages<br />
Warning message Content<br />
FORMAT ERROR The format is incorrect.<br />
<br />
WRITE PROTECT Key input is invalid because of data protect key<br />
or the parameter is not write enabled.<br />
DATA IS OUT OF RANGE The input value exceeds the permitted range.<br />
TOO MANY DIGITS The input value exceeds the permitted number<br />
of digits.<br />
WRONG MODE Parameter input is not possible in any mode<br />
other than MDI mode.<br />
EDIT REJECTED It is not possible to edit in the current CNC<br />
status.
B–63534EN/02 OPERATION<br />
2. OPERATIONAL DEVICES<br />
2.3.6<br />
Soft Key Configuration<br />
There are 12 soft keys in the 10.4″LCD/MDI or 9.5″LCD/MDI. As<br />
illustrated below, the 5 soft keys on the right and those on the right and<br />
left edges operate in the same way as the 7.2″LCD or 8.4″ LCD, whereas<br />
the 5 keys on the left hand side are expansion keys dedicated to the<br />
10.4″LCD or 9.5″LCD.<br />
10.4″LCD, 9.5″LCD soft key<br />
ÇÇÇÇÇÇÇÇÇ<br />
ÇÇÇÇÇÇÇÇÇ<br />
745<br />
7.2″LCD, 8.4″ LCD soft key<br />
10.4″LCD, 9.5″LCD dedicated expansion soft keys<br />
Fig. 2.3.6 (a) LCD soft key configuration<br />
Whenever a position display appears in the left half of the screen after a<br />
function key other than POS is pressed, the soft keys on the left half of<br />
the soft key display area are displayed as follows:<br />
ABS REL ALL HNDL<br />
The soft key corresponding to the position display is indicated in reverse<br />
video.<br />
This manual may refer to 10.4″and 9.5″LCD display units as 12 soft key<br />
types, and 7.2″ and 8.4″ LCD display units as 7 soft key types.
OPERATION<br />
2. OPERATIONAL DEVICES B–63534EN/02<br />
2.4<br />
EXTERNAL I/O<br />
DEVICES<br />
External input/output devices such as FANUC Handy File and so forth are<br />
available. For details on the devices, refer to the manuals listed below.<br />
746<br />
Table 2.4 (a) External I/O device<br />
Device name Usage<br />
FANUC Handy File Easy–to–use, multi function<br />
input/output device. It is<br />
designed for FA equipment<br />
and uses floppy disks.<br />
Max.<br />
storage<br />
capacity<br />
Reference<br />
manual<br />
3600m B–61834E<br />
The following data can be input/output to or from external input/output<br />
devices:<br />
1. Programs<br />
2. Offset data<br />
3. Parameters<br />
4. Custom macro common variables<br />
For how to input or output data and input data from or output it to a<br />
memory card, see III–8.
B–63534EN/02 OPERATION<br />
2. OPERATIONAL DEVICES<br />
<br />
Before an external input/output device can be used, parameters must be<br />
set as follows.<br />
CNC<br />
MAIN CPU BOARD OPTION–1 BOARD<br />
Channel 1 Channel 2 Channel 3<br />
JD5A JD5B<br />
JD5C JD6A<br />
RS–232–C<br />
Reader/<br />
puncher<br />
I/O CHANNEL=0<br />
or<br />
I/O CHANNEL=1<br />
747<br />
RS–232–C<br />
Reader/<br />
puncher<br />
RS–232–C<br />
Host<br />
computer<br />
RS–422<br />
Host<br />
computer<br />
I/O CHANNEL=2 I/O CHANNEL=3 I/O CHANNEL=3<br />
This CNC has a total of three channels of reader/puncher and remote<br />
buffer interfaces. It also has a memory card interface. The input/output<br />
device to be used is specified by setting the channel (interface) connected<br />
to that device in setting parameter I/O CHANNEL.<br />
The specified data, such as a baud rate and the number of stop bits, of an<br />
input/output device connected to a specific channel must be set in<br />
parameters for that channel in advance. (These settings are not required<br />
for the memory card interface.)<br />
For channel 1, two combinations of parameters to specify the input/output<br />
device data are provided.<br />
The following shows the interrelation between the reader/punch interface<br />
parameters for the channels.
OPERATION<br />
2. OPERATIONAL DEVICES B–63534EN/02<br />
2.4.1<br />
FANUC Handy File<br />
Input/output channel<br />
number (parameter<br />
0020)<br />
0020<br />
I/O CHANNEL<br />
Specify a channel for an<br />
input/output device.<br />
I/O CHANNEL<br />
= 0 : Channel 1<br />
= 1 : Channel 1<br />
= 2 : Channel 2<br />
= 3 : Channel 3<br />
Parameter Number<br />
748<br />
I/O CHANNEL=0<br />
(channel 1)<br />
I/O CHANNEL=1<br />
(channel 1)<br />
I/O CHANNEL=2<br />
(channel 2)<br />
I/O CHANNEL=3<br />
(channel 3)<br />
Memory Card =4<br />
interface<br />
0101 Stop bit and other data<br />
0102<br />
Number specified for<br />
the input/output device<br />
0103 Baud rate<br />
0111 Stop bit and other data<br />
0112 Number specified for<br />
the input/output device<br />
0113 Baud rate<br />
0121<br />
0122<br />
0123<br />
0131<br />
0132<br />
0133<br />
0134<br />
0135<br />
Stop bit and other data<br />
Number specified for<br />
the input/output device<br />
Baud rate<br />
Stop bit and other data<br />
Number specified for<br />
the input/output device<br />
Baud rate<br />
Selection of protocol<br />
Selection of RS–422<br />
or RS–232C, and<br />
other data<br />
The Handy File is an easy–to–use, multi function floppy disk<br />
input/output device designed for FA equipment. By operating the Handy<br />
File directly or remotely from a unit connected to the Handy File,<br />
programs can be transferred and edited.<br />
The Handy File uses 3.5–inch floppy disks, which do not have the<br />
problems of paper tape (i.e., noisy during input/output, easily broken, and<br />
bulky).<br />
One or more programs (up to 1.44M bytes, which is equivalent to the<br />
memory capacity of 3600–m paper tape) can be stored on one floppy disk.<br />
RS–232–C or<br />
RS–422 Interface<br />
(Punch panel, etc.)<br />
RS–422<br />
Interface<br />
RS–232–C<br />
Interface<br />
FANUC<br />
Handy File
B–63534EN/02 OPERATION<br />
2. OPERATIONAL DEVICES<br />
2.5<br />
POWER ON/OFF<br />
2.5.1<br />
Turning on the Power<br />
Procedure<br />
Procedure of turning on the power<br />
1 Check that the appearance of the CNC machine tool is normal.<br />
(For example, check that front door and rear door are closed.)<br />
2 Turn on the power according to the manual issued by the machine<br />
tool builder.<br />
3 After the power is turned on, check that the position screen is<br />
displayed. An alarm screen is displayed if an alarm occurs upon<br />
power–on. If the screen shown in Section III–2.5.2 is displayed, a<br />
system failure may have occurred.<br />
ACTUAL POSITION(ABSOLUTE) O1000 N00010<br />
X 123.456<br />
Y 363.233<br />
Z 0.000<br />
PART COUNT 5<br />
RUN TIME 0H15M CYCLE TIME 0H 0M38S<br />
ACT.F 3000 MM/M S 0 T0000<br />
MEM STRT MTN *** 09:06:35<br />
[ ABS ] [ REL ] [ ALL ] [ HNDL ] [ OPRT ]<br />
Fig. 2.5.1 Position screen (Seven soft key type)<br />
4 Check that the fan motor is rotating.<br />
WARNING<br />
Until the positional or alarm screen is displayed at the power<br />
on, do not touch them. Some keys are used for the<br />
maintenance or special operation purpose. When they are<br />
pressed, unexpected operation may be caused.<br />
749
OPERATION<br />
2. OPERATIONAL DEVICES B–63534EN/02<br />
2.5.2<br />
Screen Displayed at<br />
Power–on<br />
Slot status display<br />
If a hardware failure or installation error occurs, the system displays one<br />
of the following three types of screens then stops.<br />
Information such as the type of printed circuit board installed in each slot<br />
is indicated. This information and the LED states are useful for failure<br />
recovery.<br />
Physical slot number<br />
(primary)<br />
SLOT CONFIGURATION DISPLAY<br />
0 : 003E4000<br />
1 : 30464202<br />
2 : 00504303<br />
3 :<br />
4 :<br />
5 :<br />
750<br />
0 :<br />
1 :<br />
2 :<br />
3 :<br />
4 :<br />
5 :<br />
Physical slot number<br />
(secondary)<br />
Information such as the module ID of an installed printed circuit board<br />
Types of printed circuit boards<br />
Internally–assigned slot number<br />
Module function<br />
For more information about the types of printed circuit boards and module<br />
functions, refer to the maintenance manual (B–63525EN).
B–63534EN/02 OPERATION<br />
2. OPERATIONAL DEVICES<br />
Screen indicating<br />
module setting status<br />
Display of software<br />
configuration<br />
2.5.3<br />
Power Disconnection<br />
Procedure<br />
B0H1 – 01<br />
SLOT 01 (3046) : END END: Setting completed<br />
SLOT 02 (3050) : Blank: Setting not completed<br />
751<br />
Module ID<br />
Slot number<br />
B0H1 – 01 CNC control software<br />
SERVO : 90B0–01<br />
SUB : xxxx–xx<br />
OMM : yyyy–yy<br />
PMC : zzzz–zz<br />
Digital servo ROM<br />
Sub CPU (remote buffer)<br />
Order–made macro/macro<br />
compiler<br />
PMC<br />
The software configuration can be displayed on the system configuration<br />
screen also.<br />
Refer to the MAINTENANCE MANUAL (B–63525EN) for the system<br />
configuration screen.<br />
Power Disconnection<br />
1 Check that the LED indicating the cycle start is off on the operator’s<br />
panel.<br />
2 Check that all movable parts of the CNC machine tool is stopping.<br />
3 If an external input/output device such as the Handy File is connected<br />
to the CNC, turn off the external input/output device.<br />
4 Continue to press the POWER OFF pushbutton for about 5 seconds.<br />
5 Refer to the machine tool builder’s manual for turning off the power<br />
to the machine.
3. MANUAL OPERATION OPERATION<br />
B–63534EN/02<br />
3 <br />
<br />
MANUAL OPERATION are six kinds as follows :<br />
3.1 Manual reference position return<br />
3.2 Jog feed<br />
3.3 <strong>Inc</strong>remental feed<br />
3.4 Manual handle feed<br />
3.5 Manual absolute on and off<br />
3.6 Tool axis direction handle feed/Tool axis direction handle feed B<br />
3.7 Manual linear/circular interpolation<br />
3.8 Manual rigid tapping<br />
3.9 Manual numeric command<br />
752
B–63534EN/02 OPERATION<br />
3. MANUAL OPERATION<br />
3.1<br />
MANUAL<br />
REFERENCE<br />
POSITION RETURN<br />
EDIT<br />
HANDLE<br />
F0<br />
MEMORY<br />
JOG<br />
MODE<br />
REMOTE MDI<br />
ZERO<br />
RETURN TEACH<br />
RAPID TRAVERSE<br />
OVERRIDE (%)<br />
25 50<br />
AXIS DIRECTION<br />
+C +Z +Y<br />
–X<br />
RAPID<br />
–Y –Z<br />
+X<br />
–C<br />
100<br />
The tool is returned to the reference position as follows :<br />
The tool is moved in the direction specified in parameter ZMI (bit 5 of No.<br />
1006) for each axis with the reference position return switch on the<br />
machine operator’s panel. The tool moves to the deceleration point at the<br />
rapid traverse rate, then moves to the reference position at the FL speed.<br />
The rapid traverse rate and FL speed are specified in parameters (No.<br />
1420,1421, and 1425).<br />
Fourstep rapid traverse override is effective during rapid traverse.<br />
When the tool has returned to the reference position, the reference<br />
position return completion LED goes on. The tool generally moves along<br />
only a single axis, but can move along three axes simultane ously when<br />
specified so in parameter JAX(bit 0 of No.1002).<br />
ÇÇ<br />
ÇÇ<br />
Rapid traverse motion<br />
Rapid traverse rate<br />
(rapid traverse override is<br />
effective)<br />
ÇÇ<br />
753<br />
Deceleration<br />
point<br />
Procedure for Manual Reference Position Return<br />
Procedure<br />
ÇÇ<br />
ÇÇ<br />
Decelerated<br />
motion<br />
FL speed<br />
ÇÇ<br />
Reference<br />
position<br />
1 Press the reference position return switch, one of the mode selection<br />
swithces.<br />
2 To decerease the feedrate, press a rapid traverse override switch.<br />
When the tool has returned to the reference position, the reference<br />
position return completion LED goes on.<br />
3 Press the feed axis and direction selection switch corresponding to the<br />
axis and direction for reference position return. Continue pressing the<br />
switch until the tool returns to the reference position. The tool can be<br />
moved along three axes simultaneously when specified so in an<br />
appropriate parameter setting. The tool moves to the deceleration<br />
point at the rapid traverse rate, then moves to the reference position at<br />
the FL speed set in a parameter.<br />
4 Perform the same operations for other axes, if necessary.<br />
The above is an example. Refer to the appropriate manual provided by<br />
the machine tool builder for the actual operations.<br />
X<br />
PRO-<br />
GRAM<br />
STOP<br />
ZERO POSITION<br />
MIRRROR IMAGE<br />
Y Z C X2 Y2 Z2 X Y Z<br />
M02/<br />
M30<br />
MANU<br />
ABS<br />
SPINDLE<br />
ORI TAP<br />
ATC<br />
READY MC?
3. MANUAL OPERATION OPERATION<br />
B–63534EN/02<br />
Explanations<br />
Automatically setting the<br />
coordinate system<br />
<br />
<br />
<br />
<br />
<br />
<br />
Bit 0 (ZPR) of parameter No. 1201 is used for automatically setting the<br />
coordinate system. When ZPR is set, the coordinate system is<br />
automatically determined when manual reference position return is<br />
performed.<br />
When , and are set in parameter 1250, the workpiece coordinate<br />
system is determined so that reference point on the tool holder or the<br />
position of the tip of the reference tool is X= , Y = , Z = when<br />
reference position return is performed. This has the same effect as<br />
specifying the following command for reference position return:<br />
G92XYZ;<br />
However, when options of the workpiece coordinate system is selected,<br />
it is not able to use.<br />
Once the REFERENCE POSITION RETURN COMPLETION LED<br />
lights at the completion of reference position return, the tool does not<br />
move unless the REFERENCE POSITION RETURN switch is turned<br />
off.<br />
The REFERENCE POSITION RETURN COMPLETION LED is<br />
extinguished by either of the following operations:<br />
– Moving from the reference position.<br />
– Entering an emergency stop state.<br />
For the distance (Not in the deceleration condition) to return the tool to<br />
the reference position, refer to the manual issued by the machine tool<br />
builder.<br />
754
B–63534EN/02 OPERATION<br />
3. MANUAL OPERATION<br />
3.2<br />
JOG FEED<br />
EDIT<br />
HANDLE<br />
MEMORY<br />
JOG<br />
MODE<br />
REMOTE MDI<br />
ZERO<br />
RETURN<br />
ÂÂ<br />
ÂÂ<br />
TEACH<br />
AXIS DIRECTION Procedure<br />
+C +Z +Y<br />
–X<br />
RAPID<br />
–Y –Z<br />
+X<br />
–C<br />
0 2000<br />
JOG FEED RATE <br />
RAPID TRAVERSE<br />
OVERRIDE (%)<br />
F0 25 50 100<br />
In the jog mode, pressing a feed axis and direction selection switch on the<br />
machine operator’s panel continuously moves the tool along the selected<br />
axis in the selected direction.<br />
The jog feedrate is specified in a parameter (No.1423)<br />
The jog feedrate can be adjusted with the jog feedrate override dial.<br />
Pressing the rapid traverse switch moves the tool at the rapid traverse<br />
feedrate (No. 1424) regardless of the postiotion of the jog feedrate<br />
override dial. This function is called the manual rapid traverse.<br />
Manual operation is allowed for one axis at a time. 3 axes can be<br />
selected at a time by parameter JAX (No.1002#0).<br />
Procedure for JOG feed<br />
X<br />
755<br />
Z<br />
ÇÇ<br />
ÇÇ<br />
Y<br />
ÇÇ<br />
While a switch is pressed, the<br />
tool moves in the direction<br />
specified by the switch.<br />
1 Press the jog switch, one of the mode selection switches.<br />
2 Press the feed axis and direction selection switch corresponding to the<br />
axis and direction the tool is to be moved. While the switch is pressed,<br />
the tool moves at the feedrate specified in a parameter (No. 1423).<br />
The tool stops when the switch is released.<br />
3 The jog feedrate can be adjusted with the jog feedrate override dial.<br />
4 Pressing the rapid traverse switch while pressing a feed axis and<br />
direction selection switch moves the tool at the rapid traverse rate<br />
while the rapid traverse switch is pressed. Rapid traverse override by<br />
the rapid traverse override switches is effective during rapid traverse.<br />
The above is an example. Refer to the appropriate manual provided<br />
by the machine tool builder for the actual operations.
3. MANUAL OPERATION OPERATION<br />
B–63534EN/02<br />
Limitations<br />
<br />
<br />
<br />
<br />
<br />
Feedrate, time constant and method of automatic acceleration/<br />
deceleration for manual rapid traverse are the same as G00 in programmed<br />
command.<br />
Changing the mode to the jog mode while pressing a feed axis and<br />
direction selection switch does not enable jog feed. To enable jog feed,<br />
enter the jog mode first, then press a feed axis and direction selection<br />
switch.<br />
If reference position return is not performed after power–on, pushing<br />
RAPID TRAVERSE button does not actuate the rapid traverse but the<br />
remains at the JOG feedrate. This function can be disabled by setting<br />
parameter RPD (No.1401#01).<br />
756
B–63534EN/02 OPERATION<br />
3. MANUAL OPERATION<br />
3.3<br />
INCREMENTAL FEED<br />
X10<br />
Procedure for <strong>Inc</strong>remental Feed<br />
X100<br />
X1 X1000<br />
AXIS DIRECTION<br />
+C +Z +Y<br />
–X<br />
RAPID<br />
–Y –Z<br />
+X<br />
–C<br />
In the incremental (INC) mode, pressing a feed axis and direction<br />
selection switch on the machine operator’s panel moves the tool one step<br />
along the selected axis in the selected direction. The minimum distance<br />
the tool is moved is the least input increment. Each step can be 10, 100,<br />
or 1000 times the least input increment.<br />
This mode is effective when a manual pulse generator is not<br />
connected.<br />
X<br />
757<br />
Z<br />
Tool<br />
Each time a switch is<br />
pressed, the tool moves<br />
one step in the direction<br />
specified by the switch.<br />
1 Press the INC switch, one of the mode selection switches.<br />
2 Select the distance to be moved for each step with the<br />
magnification dial<br />
3 Press the feed axis and direction selection switch corresponding to<br />
the axis and direction the tool is to be moved. Each time a switch<br />
is pressed, the tool moves one step. The feedrate is the same as the<br />
jog feedrate.<br />
4 Pressing the rapid traverse switch while pressing a feed axis and<br />
direction selection switch moves the tool at the rapid traverse rate.<br />
Rapid traverse override by the rapid traverse override switch is<br />
effective during rapid traverse.<br />
The above is an example. Refer to the appropriate manual provided<br />
by the machine tool builder for the actual operations.<br />
Y
3. MANUAL OPERATION OPERATION<br />
B–63534EN/02<br />
3.4<br />
MANUAL HANDLE<br />
FEED<br />
EDIT<br />
HANDLE<br />
JOG<br />
MODE<br />
MEMORY REMOTE<br />
ZERO<br />
RETURN<br />
In the handle mode, the tool can be minutely moved by rotating the<br />
manual pulse generator on the machine operator’s panel. Select the axis<br />
along which the tool is to be moved with the handle feed axis selection<br />
switches.<br />
The minimum distance the tool is moved when the manual pulse<br />
generator is rotated by one graduation is equal to the least input increment.<br />
Or the distance the tool is moved when the manual pulse generator is<br />
rotated by one graduation can be magnified by 10 times or by one of the<br />
two magnifications specified by parameters (No. 7113 and 7114).<br />
Procedure for Manual Handle Feed<br />
MDI<br />
TEACH<br />
Manual pulse generator<br />
X<br />
Z<br />
758<br />
ÇÇ<br />
ÇÇ<br />
ÇÇ<br />
Y<br />
Manual pulse generator<br />
1 Press the HANDLE switch, one of the mode selection switches.<br />
2 Select the axis along which the tool is to be moved by pressing a<br />
handle feed axis selection switch.<br />
3 Select the magnification for the distance the tool is to be moved by<br />
pressing a handle feed magnification switch. The minimum distance<br />
the tool is moved when the manual pulse generator is rotated by one<br />
graduation is equal to the least input increment.<br />
4 Move the tool along the selected axis by rotating the handle. Rotating<br />
the handle 360 degrees moves the tool the distance equivalent to 100<br />
graduations.<br />
The above is an example. Refer to the appropriate manual provided<br />
by the machine tool builder for the actual operations.
B–63534EN/02 OPERATION<br />
3. MANUAL OPERATION<br />
<br />
Availability of manual<br />
pulse generator in Jog<br />
mode (JHD)<br />
Availability of manual<br />
pulse generator in<br />
TEACH IN JOG mode<br />
(THD)<br />
A command to the MPG<br />
exceeding rapid traverse<br />
rate (HPF)<br />
Movement direction of<br />
an axis to the rotation of<br />
MPG (HNG X)<br />
Parameter JHD (bit 0 of No. 7100) enables or disables the manual handle<br />
feed in the JOG mode.<br />
When the parameter JHD( bit 0 of No. 7100) is set 1,both manual handle<br />
feed and incremental feed are enabled.<br />
Parameter THD (bit 1 of No. 7100) enables or disables the manual handle<br />
feed in the TEACH IN JOG mode.<br />
Parameter HPF (bit 4 of No. 7100) or (No. 7117) specifies as follows:<br />
• Parameter HPF (bit 4 of No. 7100)<br />
Set value 0 : The feedrate is clamped at the rapid traverse rate and<br />
generated pulses exceeding the rapid traverse rate are<br />
ignored.(The distance the tool is moved may not match<br />
the graduations on the manual pulse generator.)<br />
Set value 1 : The feedrate is clamped at the rapid traverse rate and<br />
generated pulses exceeding the rapid traverse rate are not<br />
ignored but accumulated in the CNC.<br />
(No longer rotating the handle does not immediately stop<br />
the tool. The tool is moved by the pulses accumulated<br />
in the CNC before it stops.)<br />
• Parameter HPF (No. 7117) (It is available when parameter HPF is 0.)<br />
Set value 0 : The feedrate is clamped at the rapid traverse rate and<br />
generated pulses exceeding the rapid traverse rate are<br />
ignored.(The distance the tool is moved may not match<br />
the graduations on the manual pulse generator.)<br />
Other than 0 : The feedrate is clamped at the rapid traverse rate and<br />
generated pulses exceeding the rapid traverse rate are not<br />
ignored but accumulated in the CNC until the limit<br />
specified in parameter No. 7117 is reached.<br />
(No longer rotating the handle does not immediately stop<br />
the tool. The tool is moved by the pulses accumulated<br />
in the CNC before it stops.)<br />
Parameter HNGx (No. 7102 #0) switches the direction of MPG in which<br />
the tool moves along an axis, corresponding to the direction in which the<br />
handle of the manual pulse generator is rotated.<br />
759
3. MANUAL OPERATION OPERATION<br />
B–63534EN/02<br />
<br />
Number of MPGs<br />
Up to three manual pulse generators can be connected, one for each axis.<br />
The three manual pulse generators can be simultaneously operated.<br />
WARNING<br />
Rotating the handle quickly with a large magnification such<br />
as x100 moves the tool too fast. The feedrate is clamped<br />
at the rapid traverse feedrate.<br />
NOTE<br />
Rotate the manual pulse generator at a rate of five rotations<br />
per second or lower. If the manual pulse generator is<br />
rotated at a rate higher than five rotations per second, the<br />
tool may not stop immediately after the handle is no longer<br />
rotated or the distance the tool moves may not match the<br />
graduations on the manual pulse generator.<br />
760
B–63534EN/02 OPERATION<br />
3. MANUAL OPERATION<br />
3.5<br />
MANUAL ABSOLUTE<br />
ON AND OFF<br />
Whether the distance the tool is moved by manual operation is added to<br />
the coordinates can be selected by turning the manual absolute switch on<br />
or off on the machine operator’s panel. When the switch is turned on, the<br />
distance the tool is moved by manual operation is added to the<br />
coordinates. When the switch is turned off, the distance the tool is moved<br />
by manual operation is not added to the coordinates.<br />
O<br />
761<br />
Y axis<br />
P1<br />
P2<br />
Manual operation<br />
X axis<br />
The coordinates values change by the amount of manual operation.<br />
O1<br />
Y1<br />
Fig. 3.5 (a) Coordinates with the switch ON<br />
O2<br />
Y2<br />
P1<br />
P2<br />
The coordinates do not change.<br />
Fig. 3.5 (b) Coordinates with the switch OFF<br />
X1<br />
X2
3. MANUAL OPERATION OPERATION<br />
B–63534EN/02<br />
Explanation<br />
Manual operation after<br />
the end of block<br />
<br />
<br />
The following describes the relation between manual operation and<br />
coordinates when the manual absolute switch is turned on or off, using a<br />
program example.<br />
G01G90<br />
X100.0Y100.0F010<br />
X200.0Y150.0<br />
X300.0Y200.0<br />
762<br />
; <br />
; <br />
; <br />
The subsequent figures use the following notation:<br />
Movement of the tool when the switch is on<br />
Movement of the tool when the switch is off<br />
The coordinates after manual operation include the distance the tool is<br />
moved by the manual operation. When the switch is off, therefore, subtract<br />
the distance the tool is moved by the manual operation.<br />
Coordinates when block has been executed after manual operation<br />
(X–axis +20.0, Y–axis +100.0) at the end of movement of block.<br />
Y<br />
Manual<br />
operation<br />
(1.0 , 00.0)<br />
(120.0 , 200.0)<br />
(220.0 , 250.0)<br />
(200.0 , 150.0)<br />
X<br />
Switch ON<br />
Switch OFF<br />
Coordinates when the feed hold button is pressed while block is being<br />
executed, manual operation (Y–axis + 75.0) is performed, and the cycle<br />
start button is pressed and released.<br />
Y<br />
(150.0 , 200.0)<br />
(200.0 , 225.0)<br />
Manual<br />
operation<br />
(200.0 , 150.0)<br />
(150.0 , 125.0)<br />
(300.0 , 275.0)<br />
(300.0 , 200.0)<br />
X<br />
Switch ON<br />
Switch OFF
B–63534EN/02 OPERATION<br />
3. MANUAL OPERATION<br />
When reset after a<br />
manual operation<br />
following a feed hold<br />
When a movement<br />
command in the next<br />
block is only one axis<br />
When the next move<br />
block is an incremental<br />
Manual operation during<br />
cutter compensation<br />
Coordinates when the feed hold button is pressed while block is being<br />
executed, manual operation (Y–axis +75.0) is performed, the control unit<br />
is reset with the RESET button, and block is read again<br />
Y<br />
(150.0 , 200.0)<br />
Manual<br />
operation<br />
(100.0 , 100.0)<br />
763<br />
(200.0,225.0)<br />
(200.0,150.0)<br />
(150.0 , 125.0)<br />
(300.0 , 275.0)<br />
(300.0 , 200.0)<br />
Switch ON<br />
X<br />
Switch OFF<br />
When there is only one axis in the following command, only the<br />
commanded axis returns.<br />
N1G01X100.0Y100.0F500;<br />
N2X200.0;<br />
N3Y150.0;<br />
Switch ON<br />
Switch OFF<br />
Y<br />
Manual<br />
operation<br />
(200.0 , 150.0)<br />
N3<br />
N2 (200.0 , 100.0)<br />
N1<br />
(100.0 , 100.0)<br />
When the following commands are incremental commands, operation is<br />
the same as when the switch is OFF.<br />
When the switch is OFF<br />
After manual operation is performed with the switch OFF during cutter<br />
compensation, automatic operation is restarted then the tool moves<br />
parallel to the movement that would have been performed if manual<br />
movement had not been performed. The amount of separation equals to<br />
the amount that was performed manually.<br />
Cutter path after<br />
manual operation<br />
Manual<br />
operation<br />
Cutter path<br />
Programmed path<br />
X
3. MANUAL OPERATION OPERATION<br />
B–63534EN/02<br />
When the switch is ON during cutter compensation<br />
Operation of the machine upon return to automatic operation after manual<br />
intervention with the switch is ON during execution with an absolute<br />
command program in the cutter compensation mode will be described.<br />
The vector created from the remaining part of the current block and the<br />
beginning of the next block is shifted in parallel. A new vector is created<br />
based on the next block, the block following the next block and the<br />
amount of manual movement. This also applies when manual operation<br />
is performed during cornering.<br />
Manual operation performed in other than cornering<br />
Assume that the feed hold was applied at point PH while moving from PA<br />
to PB of programmed path PA, PB, and PC and that the tool was manually<br />
moved to PH’. The block end point PB moves to the point PB’ by the<br />
amount of manual movement, and vectors VB1 and VB2 at PB also move<br />
to VB1’ and VB2’. Vectors VC1 and VC2 between the next two blocks PB<br />
– PC and PC – PD are discarded and new vectors VC1’ and VC2’ (VC2’ =<br />
VC2 in this example) are produced from the relation between PB’ – PC and<br />
PC – PD. However, since VB2’ is not a newly calculated vector, correct<br />
offset is not performed at block PB’ – PC. Offset is correctly performed<br />
after PC.<br />
764<br />
V B1<br />
VB1’ Cutter path after<br />
manual operation<br />
V B2<br />
V B2’<br />
P’ B<br />
P B<br />
P H’<br />
P H<br />
P A<br />
P C<br />
P D<br />
V C1’<br />
V C1<br />
V C2<br />
Programmed path<br />
(absolute command)<br />
Cutter path before<br />
manual operation<br />
Manual operation
B–63534EN/02 OPERATION<br />
3. MANUAL OPERATION<br />
Manual operation during cornering<br />
This is an example when manual operation is performed during cornering.<br />
VA2’, VB1’, and VB2’ are vectors moved in parallel with VA2, VB1 and VB2<br />
by the amount of manual movement. The new vectors are calculated<br />
from VC1 and VC2. Then correct cutter compensation is performed for the<br />
blocks following Pc.<br />
Cutter path after<br />
manual operation<br />
765<br />
V B1<br />
V B1’<br />
V B2<br />
V B2’<br />
P B<br />
V A2’<br />
P A<br />
P C<br />
VA2 V<br />
P A1<br />
P H<br />
A’<br />
P H’<br />
V A1’<br />
V C1’<br />
V C1<br />
V C2<br />
Programmed path<br />
(absolute command)<br />
Cutter path before<br />
manual operation<br />
<br />
Manual operation after single block stop<br />
Manual operation was performed when execution of a block was<br />
terminated by single block stop.<br />
Vectors VB1 and VB2 are shifted by the amount of manual operation.<br />
Sub–sequent processing is the same as case a described above. An MDI<br />
operation can also be interveneted as well as manual operation. The<br />
movement is the same as that by manual operation.<br />
Cutter path after<br />
manual operation<br />
VB2 V B1<br />
Manual<br />
operation<br />
V B1’<br />
V B2’<br />
P B’<br />
P B<br />
P A<br />
P C<br />
V C1’<br />
V C1<br />
Cutter path before<br />
manual operation<br />
V C2<br />
Programmed path<br />
(absolute command)
3. MANUAL OPERATION OPERATION<br />
B–63534EN/02<br />
3.6<br />
TOOL AXIS<br />
DIRECTION HANDLE<br />
FEED/TOOL AXIS<br />
DIRECTION HANDLE<br />
FEED B<br />
3.6.1<br />
Tool Axis Direction<br />
Handle Feed<br />
<br />
EDIT<br />
HANDLE<br />
MEMORY<br />
JOG<br />
MODE<br />
REMOTE<br />
ZERO<br />
RETURN<br />
ÂÂ<br />
ÂÂ<br />
MDI<br />
TEACH<br />
Tool axis direction handle feed moves the tool over a specified distance<br />
by handle feed in the direction of the tool axis tilted by the rotation of the<br />
rotary axis.<br />
Tool axis direction handle feed B has the function of tool axis direction<br />
handle feed, and also has the tool axis normal direction handle feed which<br />
is handle feed at right angles to the tool axis.<br />
These functions are used, for example, with 5–axis engraving machines.<br />
When the tool axis direction handle mode is selected and the manual pulse<br />
generator is rotated, the tool is moved by the specified travel distance in<br />
the direction of the tool axis tilted by the rotation of the rotary axis.<br />
766<br />
A&C,<br />
B&C<br />
Tool Axis Normal Direction Handle Feed<br />
1 Select the HANDLE switch from the mode selection switches.<br />
2 Select the tool axis direction handle feed switch.<br />
3 Select the tool axis direction handle feed mode axis as the handle feed<br />
axis for the first manual pulse coder (parameter No. 7121).<br />
4 When the handle is turned, the tool moves in the tool axis direction by<br />
the corresponding distance.<br />
When both the tool axis direction handle feed mode and tool axis<br />
right–angle direction handle feed mode are selected, neither mode is<br />
set, but the ordinary handle mode is set.<br />
The procedure above is only an example. Refer to the relevant manual<br />
published by the machine tool builder for other possible operations.
B–63534EN/02 OPERATION<br />
3. MANUAL OPERATION<br />
Explanations<br />
Axis configuration<br />
Pulse distribution to<br />
basic axes<br />
Assume that the rotary axes for basic axes X, Y, and Z are A, B, and C,<br />
respectively. Assume also that the Z–axis represents the tool axis.<br />
Depending on the axis configuration of the machine, four types of tool<br />
axis directions are available. Specify the direction with parameter No.<br />
7120.<br />
<br />
(1) A–C axis type (2) B–C axis type<br />
A<br />
A A<br />
X Y<br />
X<br />
767<br />
Z (tool axis) Z (tool axis)<br />
C<br />
Y<br />
(3) A–B axis (A–axis master) type (4) A–B axis (B–axis master) type<br />
B B<br />
X<br />
Z (tool axis) Z (tool axis)<br />
The figure below shows handle pulse (Hp) distribution to the X–axis,<br />
Y–axis, and Z–axis for each of the four directions.<br />
(1) A–C axis type<br />
Xp = Hp sin (a) sin (c)<br />
Yp = –Hp sin (a) cos (c)<br />
Zp = Hp cos (a)<br />
X<br />
c<br />
a<br />
Hpxy<br />
Hp<br />
Xp<br />
Z<br />
a<br />
Zp<br />
B<br />
C<br />
Y<br />
Y<br />
Yp Y
3. MANUAL OPERATION OPERATION<br />
B–63534EN/02<br />
(2) B–C axis type<br />
Xp = Hpsin (b)cos (c)<br />
Yp = Hpsin (b)sin (c)<br />
Zp = Hpcos (b)<br />
(3) A–B axis (A axis master) type<br />
Xp = Hpsin (b)<br />
Yp = –Hpcos (b)sin (a)<br />
Zp = Hpcos (b)cos (a)<br />
(4)A–B axis (B axis master) type<br />
Xp = Hpcos (a)sin (b)<br />
Yp = –Hpsin (a)<br />
Zp = Hpcos (a)cos (b)<br />
768<br />
Y<br />
C<br />
Zp<br />
Yp<br />
X<br />
Zp<br />
X<br />
X<br />
b<br />
Hpxy<br />
a<br />
b<br />
Hp<br />
Xp<br />
Yp<br />
b<br />
b<br />
Z<br />
a<br />
Zp<br />
Z<br />
Xp<br />
Xp<br />
Z<br />
Yp<br />
Y<br />
Y
B–63534EN/02 OPERATION<br />
3. MANUAL OPERATION<br />
Setting basic axes and<br />
rotary axes<br />
Tool axis direction<br />
Setting for 4–axis<br />
machines<br />
Restrictions<br />
Axis configuration<br />
3.6.2<br />
Tool Axis Normal<br />
Direction Handle Feed<br />
A– and C–axes<br />
B– and C–axes<br />
Tool<br />
Transverse direction<br />
of the tool (X–axis)<br />
Workpiece<br />
In the figures above, a, b, and c represent the positions (angles) of the<br />
A–axis, B–axis, and C–axis from the machine zero point; those values<br />
present when the tool axis direction handle feed mode is set or a reset<br />
occurs are used. To change the feed direction, reenter the tool axis<br />
direction handle feed mode, or press the reset key.<br />
For tool axis direction determination, the coordinates (rotation angles) of<br />
rotary axes can be set using bits 3 and 4 (3D1X and 3D2X) of parameter<br />
No. 7104, and parameter Nos. 7144 and 7145.<br />
Basic axes X, Y, and Z are determined by parameter No. 1022 (plane<br />
selection). Rotary axes A, B, and C are determined by parameter No.<br />
1020 (axis name).<br />
The direction of the tool X axis is determined by setting bit 0 (TLX) of<br />
parameter No. 7104.<br />
This function is usually used with 5–axis machines. However, 4–axis<br />
machines (One axis is for rotation) can be used by setting bit 2 (CXC) of<br />
parameter No. 7104 to 1.<br />
If either of the two axes selected in type specification based on the axis<br />
configuration is nonexistent as an axis, P/S alarm No. 5015 is issued.<br />
When the tool axis normal direction handle mode is selected and the<br />
manual pulse generator is rotated, the tool is moved by the specified travel<br />
distance in the direction normal to the tool axis tilted by the rotation of<br />
the rotary axis.<br />
A&C , B&C<br />
769<br />
Center of rotation<br />
Longitudinal direction<br />
of the tool<br />
Transverse direction<br />
of the tool (Y–axis)<br />
X<br />
A<br />
Z<br />
C<br />
B<br />
Y
3. MANUAL OPERATION OPERATION<br />
B–63534EN/02<br />
<br />
EDIT<br />
HANDLE<br />
MEMORY<br />
JOG<br />
MODE<br />
REMOTE<br />
ZERO<br />
RETURN<br />
ÂÂ<br />
ÂÂ<br />
Explanations<br />
MDI<br />
TEACH<br />
Axis configuration<br />
Tool Axis Direction Handle Feed<br />
1 Select the HANDLE switch from the mode selection switches.<br />
2 Select the tool axis normal direction handle feed switch.<br />
3 Select the tool axis direction handle feed mode axis as the handle feed<br />
axis for the first manual pulse coder (parameter No. 7141, No. 7142).<br />
4 When the handle is turned, the tool moves in normal direction to the<br />
tool axis direction by the corresponding distance.<br />
When both the tool axis direction handle feed mode and tool axis<br />
right–angle direction handle feed mode are selected, neither mode is<br />
set, but the ordinary handle mode is set.<br />
The procedure above is only an example. Refer to the relevant manual<br />
published by the machine tool builder for other possible operations.<br />
Assume that the rotary axes for basic axes X, Y, and Z are A, B, and C,<br />
respectively. Assume also that the Z–axis represents the tool axis.<br />
Depending on the axis configuration of the machine, two types of tool axis<br />
directions in which X–axis direction and Y–axis direction are available.<br />
Specify the direction with parameter No. 7120.<br />
<br />
(1) A–C axis type (2) B–C axis type<br />
A<br />
770<br />
Z (tool axis) Z (tool axis)<br />
C<br />
Y X<br />
Y<br />
B<br />
C
B–63534EN/02 OPERATION<br />
3. MANUAL OPERATION<br />
Pulse distribution to<br />
basic axes<br />
The figure below shows handle pulse (Hp) distribution to the X–axis,<br />
Y–axis, and Z–axis for each of the four directions.<br />
(1) A–C axis type (X–axis direction)<br />
Xp = HpCOS (C)<br />
Yp = HpSIN (C)<br />
Zp = 0<br />
0’<br />
Xp<br />
C<br />
C<br />
771<br />
Yp<br />
0<br />
Hp(X direction)<br />
X’<br />
(2) A–C axis type (Y–axis direction)<br />
Xp = –HpCOS (A)SIN (C)<br />
Yp = HpCOS (A)COS (C)<br />
Zp = HpSIN (A)<br />
Yp<br />
X<br />
Hpxy<br />
C<br />
A<br />
0<br />
Z<br />
Y<br />
The XY plane is drawn because<br />
A– and C–axes are specified<br />
and because rotation<br />
about the A–axis, which is on<br />
the X–axis, does not cause the<br />
tool to rotate about the X–axis<br />
at the tool tip. Suppose that<br />
the Z–axis on this side of the<br />
XY plane is positive.<br />
Hp (Y direction)<br />
X Y<br />
C<br />
Zp<br />
Xp
3. MANUAL OPERATION OPERATION<br />
B–63534EN/02<br />
(3) B–C axis type (X–axis direction)<br />
Xp = HpCOS (B)COS (C)<br />
Yp = HpCOS (B)SIN (C)<br />
Zp = –HpSIN (B)<br />
Hp X<br />
(X direction)<br />
(4) B–C axis type (Y–axis direction)<br />
Xp = –HpSIN (C)<br />
Yp = HpCOS (C)<br />
Zp = 0<br />
X<br />
C<br />
Hpxy<br />
0’<br />
Yp<br />
X’<br />
Y<br />
772<br />
Xp<br />
C<br />
Xp<br />
Yp<br />
0’<br />
C Hp(Y direction)<br />
Y’<br />
Y<br />
0<br />
C<br />
Zp<br />
B<br />
0<br />
Z<br />
The XY plane is drawn because<br />
B– and C–axes are<br />
specified and because rotation<br />
about the B–axis, which is<br />
on the Y–axis, does not cause<br />
the tool to rotate about the Y–<br />
axis at the tool tip. Suppose<br />
that the Z–axis on this side of<br />
the XY plane is positive.<br />
In the figures above, a, b, and c represent the positions (angles) of the<br />
A–axis, B–axis, and C–axis from the machine zero point; those values<br />
present when the tool axis direction handle feed mode is set or a reset<br />
occurs are used. To change the feed direction, reenter the tool axis<br />
direction handle feed mode, or press the reset key.<br />
For tool axis direction determination, the coordinates (rotation angles) of<br />
rotary axes can be set using bits 3 and 4 (3D1X and 3D2X) of parameter<br />
No. 7104, and parameter Nos. 7144 and 7145.
B–63534EN/02 OPERATION<br />
3. MANUAL OPERATION<br />
Setting basic axes and<br />
rotary axes<br />
Tool axis direction<br />
Setting for 4–axis<br />
machines<br />
Restrictions<br />
Axis configuration<br />
Basic axes X, Y, and Z are determined by parameter No. 1022 (plane<br />
selection). Rotary axes A, B, and C are determined by parameter No.<br />
1020 (axis name).<br />
The direction of the tool X axis is determined by setting bit 0 (TLX) of<br />
parameter No. 7104.<br />
This function is usually used with 5–axis machines. However, 4–axis<br />
machines (One axis is for rotation) can be used by setting bit 2 (CXC) of<br />
parameter No. 7104 to 1.<br />
If either of the two axes selected in type specification based on the axis<br />
configuration is nonexistent as an axis, P/S alarm No. 5015 is issued.<br />
Moreover, the A–C axis type or B–C axis type must be selected as the axis<br />
configuration type.<br />
773
3. MANUAL OPERATION OPERATION<br />
B–63534EN/02<br />
3.7<br />
MANUAL<br />
LINEAR/CIRCULAR<br />
INTERPOLATION<br />
In manual handle feed or jog feed, the following types of feed operations<br />
are enabled in addition to the conventional feed operation along a<br />
specified single axis (X–axis, Y–axis, Z–axis, and so forth) based on<br />
simultaneous 1–axis control:<br />
Feed along a tilted straight line in the XY plane (linear feed) based on<br />
simultaneous 2–axis control<br />
Feed along a circle in the XY plane (circular feed) based on<br />
simultaneous 2–axis control<br />
Y Y<br />
Workpiece<br />
Tool<br />
Tool<br />
X X<br />
<br />
774<br />
Workpiece<br />
NOTE<br />
The X–axis and Y–axis must be the first controlled axis and second controlled axis,<br />
respectively.<br />
<br />
Procedure for Manual Linear/Circular Interpolation<br />
1 To perform manual handle feed, select manual handle feed mode. To<br />
perform jog feed, select jog feed mode.<br />
2 To perform manual handle feed, select a feed axis (for simultaneous<br />
1–axis feed along the X–axis, Y–axis, or Z–axis, or for simultaneous<br />
linear or circular 2–axis feed along a specified straight line or circle in<br />
the XY plane) subject to manual handle feed operation. Use the<br />
handle feed axis select switch for this selection.<br />
To perform jog feed, select a feed axis and direction with the feed axis<br />
direction select switch. While a feed axis and its direction are<br />
specified, the tool moves in the specified axis direction or along a<br />
straight line or circle at the jog feedrate specified in parameter No.<br />
1423.<br />
3 For manual handle feed<br />
The tool is moved along a specified axis by turning the respective<br />
manual handle. The feedrate depends on the speed at which the<br />
manual handle is turned. A distance to be traveled by the tool when<br />
the manual handle is turned by one pulse can be selected using the<br />
manual handle feed travel distance magnification switch.
B–63534EN/02 OPERATION<br />
3. MANUAL OPERATION<br />
Explanations<br />
Definition of a straight<br />
line/circle<br />
Manual handle feed<br />
For jog feed<br />
The feedrate can be overridden using the manual feedrate override<br />
dial.<br />
The procedure above is just an example. For actual operations, refer<br />
to the relevant manual provided by the machine tool builder.<br />
For feed along an axis, no straight line/circle definition is required. For<br />
linear feed or circular feed, a straight line or circle must be defined<br />
beforehand. (For circular feed, for example, data such as a radius and the<br />
center of a circle must be set.) For details, refer to the relevant manual<br />
provided by the machine tool builder.<br />
In manual handle feed, the tool can be moved along a specified axis<br />
(X–axis, Y–axis, Z–axis, ..., or the 8th axis), or can be moved along a<br />
tilted straight line (linear feed) or a circle (circular feed).<br />
(1)Feed along a specified axis (simultaneous 1–axis control)<br />
By turning a manual handle, the tool can be moved along the desired<br />
axis (such as X–axis, Y–axis, and Z–axis) on a simultaneous 1–axis<br />
control basis. (This mode of feed is the conventional type of manual<br />
handle feed.)<br />
Y<br />
775<br />
Path of travel using the Y–axis handle<br />
Path of travel using the X–axis handle<br />
Feed along a specified axis<br />
X
3. MANUAL OPERATION OPERATION<br />
B–63534EN/02<br />
(2)Linear feed (simultaneous 2–axis control)<br />
By turning a manual handle, the tool can be moved along the straight<br />
line parallel to a specified straight line on a simultaneous 2–axis<br />
control basis. This manual handle is referred to as the guidance handle.<br />
Moreover, by turning another manual handle, the tool can be moved<br />
at right angles to a specified straight line on a simultaneous 2–axis<br />
control basis. This manual handle is referred to as the approach<br />
handle. When the guidance handle or approach handle is turned<br />
clockwise or counterclockwise, the tool travels forward or backward<br />
along the respective path.<br />
Y<br />
776<br />
Tool<br />
Path of travel using<br />
the approach handle<br />
Specified straight line<br />
Path of travel using the<br />
guidance handle<br />
Linear feed<br />
(3)Circular feed (simultaneous 2–axis control)<br />
By turning a manual handle, the tool can be moved from the current<br />
position along the concentric circle that has the same center as a<br />
specified circle on a simultaneous 2–axis control basis. This manual<br />
handle is referred to as the guidance handle. Moreover, by turning<br />
another manual handle, the tool can be moved along the normal to a<br />
specified circle on a simultaneous 2–axis control basis. This manual<br />
handle is referred to as the approach handle. When the guidance<br />
handle or approach handle is turned clockwise or counterclockwise,<br />
the tool travels forward or backward along the respective path.<br />
Feedrate<br />
Y<br />
Circular feed<br />
X<br />
Path of travel using the<br />
approach handle<br />
Specified circle<br />
Path of travel using the<br />
guidance handle<br />
X
B–63534EN/02 OPERATION<br />
3. MANUAL OPERATION<br />
Feedrate for manual<br />
handle feed<br />
Manual handle selection<br />
Direction of movement<br />
using manual handles<br />
Jog feed (JOG)<br />
The feedrate depends on the speed at which a manual handle is turned.<br />
A distance to be traveled by the tool (along a tangent in the case of linear<br />
or circular feed) when a manual handle is turned by one pulse can be<br />
selected using the manual handle feed travel distance magnification<br />
switch.<br />
The <strong>Series</strong> 16/18 has three manual pulse generator interfaces to allow up<br />
to three manual handles to be connected. For information about how to<br />
use the manual handles connected to the interfaces (whether to use each<br />
manual handle as a handle for feed along an axis, as a guidance handle,<br />
or as an approach handle), refer to the relevant manual provided by the<br />
machine tool builder.<br />
The user can specify the direction of the tool moved along a straight line<br />
or circle (for example, whether to make a clockwise or counterclockwise<br />
movement along a circle) when the guidance handle or approach handle<br />
is turned clockwise or counterclockwise. For details, refer to the relevant<br />
manual provided by the machine tool builder.<br />
In jog feed, the tool can be moved along a specified axis (X–axis, Y–axis,<br />
Z–axis, ..., or the 8th axis), or can be moved along a tilted straight line<br />
(linear feed) or a circle (circular feed).<br />
(1)Feed along a specified axis (simultaneous 1–axis control)<br />
While a feed axis and its direction are specified with the feed axis<br />
direction select switch, the tool moves in the specified axis direction<br />
at the feedrate specified in parameter No. 1423. The feedrate can be<br />
overridden using the manual feedrate override dial.<br />
(2)Linear feed (simultaneous 2–axis control)<br />
By defining a straight line beforehand, the tool can be moved as<br />
follows:<br />
While a feed axis and its direction are selected using the feed axis<br />
direction select switch, the tool moves along a straight line parallel<br />
to the specified straight line on a simultaneous 2–axis control basis.<br />
While a feed axis and its direction are selected using the feed axis<br />
direction select switch, the tool moves at right angles to the<br />
specified straight line on a simultaneous 2–axis control basis.<br />
The feedrate in the tangential direction is specified in parameter No.<br />
1410. The feedrate can be overridden using the manual feedrate<br />
override dial.<br />
(3)Circular feed (simultaneous 2–axis control)<br />
By defining a circle beforehand, the tool can be moved as follows:<br />
While a feed axis and its direction are selected using the feed axis<br />
direction select switch, the tool moves from the current position<br />
along the concentric circle that has the same center as the specified<br />
circle.<br />
While a feed axis and its direction are selected using the feed axis<br />
direction select switch, the tool moves along the normal to the<br />
specified circle.<br />
The feedrate in the tangential direction is specified in parameter No.<br />
1410. The feedrate can be overridden using the manual feedrate<br />
override dial.<br />
777
3. MANUAL OPERATION OPERATION<br />
B–63534EN/02<br />
Manual handle feed in<br />
JOG mode<br />
Limitations<br />
Mirror image<br />
Even in JOG mode, manual handle feed can be enabled using bit 0 (JHD)<br />
of parameter No. 7100. In this case, however, manual handle feed is<br />
enabled only when the tool is not moved along any axis by jog feed.<br />
Never use the mirror image function when performing manual operation.<br />
(Perform manual operation when the mirror image switch is off, and<br />
mirror image setting is off.)<br />
778
B–63534EN/02 OPERATION<br />
3. MANUAL OPERATION<br />
3.8<br />
MANUAL RIGID<br />
TAPPING<br />
<br />
Procedure for Manual Rigid Tapping<br />
For execution of rigid tapping, set rigid mode, then switch to handle mode<br />
and move the tapping axis with a manual handle. For more information<br />
about rigid tapping, see Section II–13.2 and refer to the relevant manual<br />
provided by the machine tool builder.<br />
1 Stop the spindle and servo axes, then set MDI mode by pressing the<br />
MDI switch among the mode selection switches.<br />
2 Enter and execute the following program:<br />
M29 S1000 ;<br />
G91 G84 Z0 F1000 ;<br />
The program above is required to determine a screw lead and set rigid<br />
tapping mode. In this program, a tapping axis must always be<br />
specified. Specify a value that does not operate the tapping axis.<br />
WARNING<br />
In this MDI programming, never specify commands to<br />
position the tool at a drilling position and at point R.<br />
Otherwise, the tool moves along an axis.<br />
3 When the entered program is executed, rigid tapping mode is set.<br />
4 After rigid mode is set upon completion of MDI program execution,<br />
switch to the handle mode by pressing the handle switch among the<br />
mode selection switches.<br />
CAUTION<br />
At this time, never press the reset key. Otherwise, rigid<br />
mode is canceled.<br />
5 To perform rigid tapping, select a tapping axis with the handle feed<br />
axis select switch, and move the tapping axis with the manual handle.<br />
779
3. MANUAL OPERATION OPERATION<br />
B–63534EN/02<br />
Explanations<br />
Manual rigid tapping<br />
Cancellation of rigid<br />
mode<br />
Spindle rotation<br />
direction<br />
Arbitrary tapping axis<br />
Specification of M29 and<br />
G84 in the same block<br />
Specification of manual<br />
handle feed faster than<br />
the rapid traverse rate<br />
Limitations<br />
Excessive error check<br />
Tool axis direction<br />
handle feed<br />
Extraction override<br />
Number of repeats<br />
Positioning of the tool to<br />
a drilling position<br />
Manual rigid tapping is enabled by setting bit 0 (HRG) of parameter No.<br />
5203 to 1.<br />
To cancel rigid mode, specify G80 as same the normal rigid tapping.<br />
When the reset key is pressed, rigid mode is canceled, but the canned cycle<br />
is not canceled.<br />
When the rigid mode switch is to be set to off for rigid mode cancellation<br />
(when bit 2 (CRG) of parameter No. 5200 is set to 0), the G80 command<br />
ends after the rigid mode switch is set to off.<br />
The rotation direction of the spindle is determined by a specified tapping<br />
cycle G code and the setting of bit 1 (HRM) of parameter No. 5203. For<br />
example, when the HRM parameter is set to 0 in G84 mode, the spindle<br />
makes forward rotations as the tapping axis moves in the minus direction.<br />
(When the tapping axis moves in the plus direction, the spindle makes<br />
reverse rotations.)<br />
By setting bit 0 (FXY) of parameter No. 5101 to 1, an arbitrary tapping<br />
axis can be selected. In this case, specify a G code for plane selection and<br />
tapping axis address when rigid mode is set in MDI mode.<br />
In an MDI program for setting rigid mode, G84 can be used as a rigid<br />
tapping G code, or M29 and G84 can be specified in the same block.<br />
Set bit 0 (HPF) of parameter No. 7100 to 0 so that when manual handle<br />
feed is specified which is faster than the rapid traverse rate, the handle<br />
pulses beyond the rapid traverse rate are ignored.<br />
In manual rigid tapping, only an excessive error during movement is<br />
checked.<br />
Tool axis direction handle feed is disabled.<br />
In manual rigid tapping, the extraction override function is disabled, and<br />
the use of an acceleration/deceleration time constant for extraction is<br />
disabled.<br />
In MDI programming, never specify K0 and L0, which are used to specify<br />
that the number of repeats is 0 and to disable the execution of a G84 block.<br />
If K0 or L0 is specified, rigid mode cannot be set.<br />
When positioning the tool to a drilling position, select the X–axis or<br />
Y–axis with the axis select switch in handle mode. Never use the method<br />
of positioning to a drilling position in MDI mode or MEM mode. The<br />
method can operate the tapping axis.<br />
780
B–63534EN/02 OPERATION<br />
3. MANUAL OPERATION<br />
3.9<br />
MANUAL NUMERIC<br />
COMMAND<br />
<br />
EDIT<br />
HANDLE<br />
MEMORY<br />
JOG<br />
MODE<br />
The manual numeric command function allows data programmed<br />
through the MDI to be executed in jog mode. Whenever the system is<br />
ready for jog feed, a manual numeric command can be executed. The<br />
following eight functions are supported:<br />
(1)Positioning (G00)<br />
(2)Linear interpolation (G01)<br />
(3)Automatic reference position return (G28)<br />
(4)2nd/3rd/4th reference position return (G30)<br />
(5)M codes (miscellaneous functions)<br />
(6)S codes (spindle functions)<br />
(7)T codes (tool functions)<br />
(8)B codes (second auxiliary functions)<br />
By setting the following parameters, the commands for axial motion and<br />
the M, S, T, and B functions can be disabled:<br />
(1)Positioning (G00): . . . . . . . . . . . . . . . . . . . . .<br />
(2)Linear interpolation (G01): . . . . . . . . . . . . . . . Bit 0 (JAXx) of<br />
(3)Automatic reference position return (G28): . . parameter No. 7010<br />
(4)2nd/3rd/4th reference position return (G30): .<br />
(5)M codes (miscellaneous functions):<br />
. . . . . . . . . . . . . . . . . . . . . . . . . . . Bit 0 (JMF) of parameter No. 7002<br />
(6)S codes (spindle functions): . . . . Bit 1 (JSF) of parameter No. 7002<br />
(7)T codes (tool functions): . . . . . . . Bit 2 (JSF) of parameter No. 7002<br />
(8)B codes (second auxiliary functions):<br />
. . . . . . . . . . . . . . . . . . . . . . . . . . . Bit 3 (JBF) of parameter No. 7002<br />
Procedure Manual numeric command<br />
REMOTE MDI<br />
ZERO<br />
RETURN<br />
TEACH<br />
1 Press the jog switch (one of the mode selection switches).<br />
2 Press function key PROG .<br />
3 Press soft key [JOG] on the screen. The following manual numeric<br />
command screen is displayed.<br />
Example 1: When the maximum number of controlled axes is six<br />
PROGRAM (JOG) O0010 N00020<br />
G00 P (ABSOLUTE) (DISTANCE TO GO)<br />
X X 0.000 X 0.000<br />
Y Y 0.000 Y 0.000<br />
Z Z 0.000 Z 0.000<br />
U U 0.000 U 0.000<br />
V V 0.000 V 0.000<br />
W W 0.000 W 0.000<br />
M<br />
S<br />
T<br />
B<br />
>_<br />
JOG<br />
PRGRM<br />
* * * * * * * * * *<br />
781<br />
00 : 00 : 00<br />
JOG CURRNT NEXT (OPRT)
3. MANUAL OPERATION OPERATION<br />
B–63534EN/02<br />
Example 2: When the maximum number of controlled axes is 7 or 8<br />
PROGRAM (JOG) O0010 N00020<br />
G00 P (ABSOLUTE) (DISTANCE TO GO)<br />
X X 0.000 X 0.000<br />
Y Y 0.000 Y 0.000<br />
Z Z 0.000 Z 0.000<br />
U U 0.000 U 0.000<br />
V V 0.000 V 0.000<br />
W W 0.000 W 0.000<br />
A A 0.000 A 0.000<br />
C C 0.000 C 0.000<br />
M T<br />
S B<br />
>_<br />
JOG * * * * * * * * * * 00 : 00 : 00<br />
PRGRM<br />
782<br />
JOG CURRNT NEXT (OPRT)<br />
4 Enter the required commands by using address keys and numeric keys<br />
on the MDI panel, then press soft key [INPUT] or the INPUT key to set<br />
the entered data.<br />
PROGRAM (JOG) O0010 N00020<br />
G00 P (ABSOLUTE) (DISTANCE TO GO)<br />
X 10.000 X 0.000 X 0.000<br />
Y Y 0.000 Y 0.000<br />
Z Z 0.000 Z 0.000<br />
U U 0.000 U 0.000<br />
V V 0.000 V 0.000<br />
W W 0.000 W 0.000<br />
M<br />
S<br />
T<br />
B<br />
>Z120.5_<br />
JOG<br />
* * * * * * * * * *<br />
The following data can be set:<br />
00 : 00 : 00<br />
CLEAR INPUT<br />
1. G00: Positioning<br />
2. G01: Linear interpolation<br />
3. G28: Automatic reference position return<br />
4. G30: 2nd/3rd/4th reference position return<br />
5. M codes: Miscellaneous functions<br />
6. S codes: Spindle functions<br />
7. T codes: Tool functions<br />
8. B codes: Second auxiliary functions<br />
The set data is maintained even when the screen or mode is changed.
B–63534EN/02 OPERATION<br />
3. MANUAL OPERATION<br />
Explanations<br />
Positioning<br />
NOTE<br />
When an alarm state exists, data cannot be set.<br />
5 Press the cycle start switch on the machine operator’s panel to start<br />
command execution. The status is indicated as ”MSTR.” (When the<br />
9” screen is being used, the actual feedrate ”ACT.F” and spindle<br />
speed ”SACT” appear on the key input line.) The automatic operation<br />
signal, STL, can be turned on by setting bit 2 (JST) of parameter No.<br />
7001.<br />
~ ~<br />
ACT.F 1000 SACT 0<br />
JOG MSTR *** MTN 00 : 00 : 00<br />
~ ~<br />
NOTE<br />
If the cycle start switch is pressed while an alarm state<br />
exists, a ”START IMPOSSIBLE” warning is generated, and<br />
the entered data cannot be executed.<br />
6 Upon the completion of execution, the ”MSTR” status indication is<br />
cleared from the screen, and automatic operation signal STL is turned<br />
off. The set data is cleared entirely. G codes are set to G00 or G01<br />
according to the setting of bit 0 (G01) of parameter No. 3402.<br />
An amount of travel is given as a numeric value, preceded by an address<br />
such as X, Y, or Z. This is always regarded as being an incremental<br />
command, regardless of whether G90 or G91 is specified.<br />
The tool moves along each axis independently at the rapid traverse rate.<br />
Linear interpolation type positioning (where the tool path is linear) can<br />
also be performed by setting bit 1 (LRP) of parameter No. 1401.<br />
Feedrate<br />
(parameter)<br />
Automatic<br />
acceleration/<br />
deceleration<br />
(parameter)<br />
783<br />
Manual rapid traverse selection switch<br />
Jog feedrate for each axis<br />
(No. 1423)<br />
Exponential acceleration/<br />
deceleration in jog feed for<br />
each axis<br />
(No. 1624)<br />
Off On<br />
Rapid traverse rate for each<br />
axis<br />
(No. 1420)<br />
Linear acceleration/<br />
deceleration in rapid traverse<br />
for each axis<br />
(No. 1620)<br />
Override Manual feed override Rapid traverse override
3. MANUAL OPERATION OPERATION<br />
B–63534EN/02<br />
Linear interpolation<br />
(G01)<br />
Automatic reference<br />
position return (G28)<br />
NOTE<br />
When the manual rapid traverse selection switch is set to<br />
the OFF position, the jog feedrate for each axis is clamped<br />
such that a parameter–set feedrate, determined by bit 1<br />
(LRP) of parameter No. 1401 as shown below, is not<br />
exceeded.<br />
LRP = 0: Manual rapid traverse rate for each axis<br />
(parameter No. 1424)<br />
LRP = 1: Rapid traverse rate for each axis<br />
(parameter No. 1420)<br />
An amount of travel is given as a numeric value, preceded by an address<br />
such as X, Y, or Z. This is always regarded as being an incremental<br />
command, regardless of whether G90 or G91 is specified. Axial<br />
movements are always performed in incremental mode even during<br />
scaling or polar coordinate interpolation. In addition, movement is<br />
always performed in feed per minute mode regardless of the specification<br />
of G94 or G95.<br />
Feedrate<br />
(parameter)<br />
Automatic acceleration/deceleration<br />
(parameter)<br />
784<br />
Dry run feedrate<br />
(No. 1410)<br />
Exponential acceleration/deceleration<br />
in cutting feed for each axis<br />
(No. 1622)<br />
Override Manual feed override<br />
NOTE<br />
Since the feedrate is always set to the dry run feedrate,<br />
regardless of the setting of the dry run switch, the feedrate<br />
cannot be specified using F. The feedrate is clamped such<br />
that the maximum cutting feedrate, set in parameter No.<br />
1422, is not exceeded.<br />
The tool returns directly to the reference position without passing through<br />
any intermediate points, regardless of the specified amount of travel. For<br />
axes for which no move command is specified, however, a return<br />
operation is not performed.<br />
Feedrate<br />
(parameter)<br />
Automatic acceleration/deceleration<br />
(parameter)<br />
Rapid traverse rate<br />
(No. 1420)<br />
Linear acceleration/deceleration in<br />
rapid traverse for each axis<br />
(No. 1620)<br />
Override Rapid traverse override
B–63534EN/02 OPERATION<br />
3. MANUAL OPERATION<br />
2nd, 3rd, or 4th reference<br />
position return (G30)<br />
M codes (miscellaneous<br />
functions)<br />
S codes (spindle<br />
functions)<br />
T codes (tool functions)<br />
The tool returns directly to the 2nd, 3rd, or 4th reference position without<br />
passing through any intermediate points, regardless of the specified<br />
amount of travel. To select a reference position, specify P2, P3, or P4 in<br />
address P. If address P is omitted, a return to the second reference position<br />
is performed.<br />
Feedrate<br />
(parameter)<br />
Automatic acceleration/deceleration<br />
(parameter)<br />
785<br />
Rapid traverse rate for each axis<br />
(No. 1420)<br />
Linear acceleration/deceleration in<br />
rapid traverse for each axis<br />
(No. 1620)<br />
Override Rapid traverse override<br />
NOTE<br />
The function for 3rd/4th reference position return is optional.<br />
⋅ When the option is not selected<br />
Return to the 2nd reference position is performed,<br />
regardless of the specification of address P.<br />
⋅ When the option is selected<br />
If neither P2, P3, nor P4 is specified in address P, a<br />
”START IMPOSSIBLE” warning is generated, and the<br />
entered data cannot be executed.<br />
After address M, specify a numeric value of no more than the number of<br />
digits specified by parameter No. 3030. When M98 or M99 is specified,<br />
it is executed but not output to the PMC.<br />
NOTE<br />
Neither subprogram calls nor custom macro calls can be<br />
performed using M codes.<br />
After address S, specify a numeric value of no more than the number of<br />
digits specified by parameter No. 3031.<br />
NOTE<br />
Subprogram calls cannot be performed using S codes.<br />
After address T, specify a numeric value of no more than the number of<br />
digits specified by parameter No. 3032.<br />
NOTE<br />
Subprogram calls cannot be performed using T codes.
3. MANUAL OPERATION OPERATION<br />
B–63534EN/02<br />
B codes (second<br />
auxiliary functions)<br />
Data input<br />
After address B, specify a numeric value of no more than the number of<br />
digits specified by parameter No. 3033.<br />
NOTE<br />
1 B codes can be renamed ”U,” ”V,” ”W,” ”A,” or ”C” by setting<br />
parameter No. 3460. If the new name is the same as an axis<br />
name address, ”B” is used. When ”B” is used, and axis<br />
name ”B” exists, ”B” is used as the axis address. In this<br />
case, no second auxiliary function can be specified.<br />
2 Subprogram calls cannot be performed using B codes.<br />
(1)When addresses and numeric values of a command are typed, then soft<br />
key [INPUT] is pressed, the entered data is set. In this case, the input<br />
unit is either the least input increment or calculator–type input format,<br />
according to the setting of bit 0 (DPI) of parameter No. 3401.<br />
The INPUT key on the MDI panel can be used instead of soft key<br />
[INPUT].<br />
(2)Commands can be typed successively.<br />
(3)Key entry is disabled during execution.<br />
If soft key [INPUT] or the INPUT key on the MDI panel is pressed during<br />
execution, an ”EXECUTION/MODE SWITCHING IN PROGRESS”<br />
warning is output.<br />
(4)If input data contains an error, the following warnings may appear:<br />
Warning Description<br />
FORMAT ERROR<br />
TOO MANY DIGITS<br />
786<br />
⋅ A G code other than G00, G01, and G28 has been<br />
entered.<br />
⋅ An address other than those displayed on the manual<br />
numeric command screen has been entered.<br />
A value that exceeds the following limitations has been<br />
entered.<br />
⋅ Address G: 2 digits<br />
⋅ Address P: 1 digit<br />
⋅ Axis address: 8 digits<br />
⋅ M, S, T, B: The parameter–set number of digits<br />
NOTE<br />
Even when the memory protection key is set, key input can<br />
nevertheless be performed.
B–63534EN/02 OPERATION<br />
3. MANUAL OPERATION<br />
Erasing data<br />
Halting execution<br />
Modal information<br />
Jog feed<br />
Limitations<br />
Constant surface speed<br />
control<br />
M, S, T, and B functions<br />
Jog feed<br />
Mirror image<br />
(1)When soft key [CLEAR] is pressed, followed by soft key [EXEC], all<br />
the set data is cleared. In this case, however, the G codes are set to G00<br />
or G01, depending on the setting of bit 0 (G01) of parameter No. 3402.<br />
Data can also be cleared by pressing the RESET key on the MDI panel.<br />
(2)If soft key [CLEAR] is pressed during execution, an<br />
”EXECUTION/MODE SWITCHING IN PROGRESS” warning is<br />
output.<br />
If one of the following occurs during execution, execution is halted, and<br />
the data is cleared in the same way as when soft key [CLEAR] is pressed.<br />
The remaining distance to be traveled is canceled.<br />
(1) When a feed hold is applied<br />
(2) When the mode is changed to other than jog feed mode<br />
(3) When an alarm is generated<br />
(4) When a reset or emergency stop is applied<br />
The M, S, T, and B functions remain effective even upon the occurrence<br />
of the above events, with the exception of (4).<br />
Modal G codes and addresses used in automatic operation or MDI<br />
operation are not affected by the execution of commands specified using<br />
the manual numeric command function.<br />
When the tool is moved along an axis using a feed axis and<br />
direction selection switch on the manual numeric command screen, the<br />
remaining amount of travel is always shown as ”0”.<br />
S codes cannot be specified in constant surface speed control mode.<br />
While automatic operation is halted, manual numeric commands can be<br />
executed. In the following cases, however, a ”START IMPOSSIBLE”<br />
warning is output, and command execution is disabled.<br />
(1)When an M, S, T, or B function is already being executed, a manual<br />
numeric command containing an M, S, T, or B function cannot be<br />
executed.<br />
(2)When an M, S, T, or B function is already being executed, and that<br />
function alone is specified or a block specifying that function also<br />
contains another function (such as a move command or dwell<br />
function) which has already been completed, a manual numeric<br />
command cannot be executed.<br />
When a manual numeric command is specified while the tool is being<br />
moved along an axis by using a feed axis and direction selection switch,<br />
the axial movement is interrupted, and the manual numeric command is<br />
executed. Therefore, the tool cannot be moved along an axis by using a<br />
feed axis and direction selection switch during execution of a manual<br />
numeric command.<br />
A mirror image cannot be produced for the direction of a specified axial<br />
movement.<br />
787
3. MANUAL OPERATION OPERATION<br />
B–63534EN/02<br />
REF mode<br />
Indexing of the index<br />
table and chopping<br />
The manual numeric command screen appears even when the mode is<br />
changed to REF mode. If, however, an attempt is made to set and execute<br />
data, a ”WRONG MODE” warning is output and the attempt fails.<br />
Commands cannot be specified for an axis along which operation is being<br />
performed during indexing or chopping.<br />
If such an axis is specified for execution, a ”START IMPOSSIBLE”<br />
warning is output.<br />
788
OPERATION<br />
B–63534EN/02 4. AUTOMATIC OPERATION<br />
4 <br />
<br />
Programmed operation of a CNC machine tool is referred to as automatic<br />
operation.<br />
This chapter explains the following types of automatic operation:<br />
• MEMORY OPERATION<br />
Operation by executing a program registered in CNC memory<br />
• MDI OPERATION<br />
Operation by executing a program entered from the MDI panel<br />
DNC OPERATION<br />
Operation while reading a program from an input/output device<br />
SIMULTANEOUS INPUT/OUTPUT<br />
Program execution and memory registration can be performed<br />
simultaneously.<br />
• PROGRAM RESTART<br />
Restarting a program for automatic operation from an intermediate<br />
point<br />
• SCHEDULING FUNCTION<br />
Scheduled operation by executing programs (files) registered in an<br />
external input/output device (Handy File, Floppy Cassette, or FA Card)<br />
• SUBPROGRAM CALL FUNCTION<br />
Function for calling and executing subprograms (files) registered in an<br />
external input/output device (Handy File, Floppy Cassette, or FA<br />
Card) during memory operation<br />
• MANUAL HANDLE INTERRUPTION<br />
Function for performing manual feed during movement executed by<br />
automatic operation<br />
• MIRROR IMAGE<br />
Function for enabling mirror–image movement along an axis during<br />
automatic operation<br />
• TOOL WITHDRAWAL AND RETURN<br />
Function for withdrawing the tool from a workpiece and for returning<br />
the tool to restart machining<br />
• RETRACE FUNCTION<br />
Function for moving the tool in the reverse direction to retrace the path<br />
followed, and for moving the tool in the forward direction again along<br />
the retraced path.<br />
• MANUAL INTERVENTION AND RETURN<br />
Function restarting automatic operation by returning the tool to the<br />
position where manual intervention was started during automatic<br />
operation<br />
• RETREAT AND RETRY FUNCTIONS<br />
This function enables machining to be restarted from the start block.<br />
• MEMORY CARD–BASED DNC OPERATION<br />
Automatic operation by a program written to a memory card<br />
789
OPERATION<br />
4. AUTOMATIC OPERATION B–63534EN/02<br />
4.1<br />
MEMORY<br />
OPERATION<br />
Procedure<br />
Programs are registered in memory in advance. When one of these<br />
programs is selected and the cycle start switch on the machine operator’s<br />
panel is pressed, automatic operation starts, and the cycle start LED goes<br />
on.<br />
When the feed hold switch on the machine operator’s panel is pressed<br />
during automatic operation, automatic operation is stopped temporarily.<br />
When the cycle start switch is pressed again, automatic operation is<br />
restarted.<br />
When the RESET key on the MDI panel is pressed, automatic operation<br />
terminates and the reset state is entered.<br />
For the two–path control, the programs for the two tool posts can be<br />
executed simultaneously so the two tool posts can operate independently<br />
at the same time.<br />
The following procedure is given as an example. For actual operation,<br />
refer to the manual supplied by the machine tool builder.<br />
Procedure for Memory Operation<br />
1 Press the MEMORY mode selection switch.<br />
2 Select a program from the registered programs. To do this, follow the<br />
steps below.<br />
2–1 Press PROG to display the program screen.<br />
2–2 Press address O .<br />
2–3 Enter a program number using the numeric keys.<br />
2–4 Press the [O SRH] soft key.<br />
3 For the two–path control, select the tool post to be operated with the<br />
tool post selection switch on the machine operator’s panel.<br />
4 Press the cycle start switch on the machine operator’s panel.<br />
Automatic operation starts, and the cycle start LED goes on. When<br />
automatic operation terminates, the cycle start LED goes off.<br />
5 To stop or cancel memory operation midway through, follow the<br />
steps below.<br />
a. Stopping memory operation<br />
Press the feed hold switch on the machine operator’s panel. The<br />
feed hold LED goes on and the cycle start LED goes off. The<br />
machine responds as follows:<br />
(i) When the machine was moving, feed operation decelerates<br />
and stops.<br />
(ii) When dwell was being performed, dwell is stopped.<br />
(iii) When M, S, or T was being executed, the operation is stopped<br />
after M, S, or T is finished.<br />
When the cycle start switch on the machine operator’s panel is<br />
pressed while the feed hold LED is on, machine operation restarts.<br />
790
OPERATION<br />
B–63534EN/02 4. AUTOMATIC OPERATION<br />
Explanation<br />
Memory operation<br />
Stopping and terminating<br />
memory operation<br />
()<br />
()<br />
<br />
)<br />
<br />
<br />
b. Terminating memory operation<br />
Press the RESET key on the MDI panel.<br />
Automatic operation is terminated and the reset state is entered.<br />
When a reset is applied during movement, movement decelerates<br />
then stops.<br />
After memory operation is started, the following are executed:<br />
(1) A one–block command is read from the specified program.<br />
(2) The block command is decoded.<br />
(3) The command execution is started.<br />
(4) The command in the next block is read.<br />
(5) Buffering is executed. That is, the command is decoded to allow<br />
immediate execution.<br />
(6) Immediately after the preceding block is executed, execution of the<br />
next block can be started. This is because buffering has been<br />
executed.<br />
(7) Hereafter, memory operation can be executed by repeating the<br />
steps (4) to.(6)<br />
Memory operation can be stopped using one of two methods: Specify a<br />
stop command, or press a key on the machine operator’s panel.<br />
– The stop commands include M00 (program stop), M01 (optional<br />
stop), and M02 and M30 (program end).<br />
– There are two keys to stop memory operation: The feed hold key<br />
and reset key.<br />
Memory operation is stopped after a block containing M00 is executed.<br />
When the program is stopped, all existing modal information remains<br />
unchanged as in single block operation. The memory operation can be<br />
restarted by pressing the cycle start button. Operation may vary<br />
depending on the machine tool builder. Refer to the manual supplied by<br />
the machine tool builder.<br />
Similarly to M00, memory operation is stopped after a block containing<br />
M01 is executed. This code is only effective when the Optional Stop<br />
switch on the machine operator’s panel is set to ON. Operation may vary<br />
depending on the machine tool builder. Refer to the manual supplied by<br />
the machine tool builder.<br />
When M02 or M30 (specified at the end of the main program) is read,<br />
memory operation is terminated and the reset state is entered.<br />
In some machines, M30 returns control to the top of the program. For<br />
details, refer to the manual supplied by the machine tool builder.<br />
When Feed Hold button on the operator’s panel is pressed during memory<br />
operation, the tool decelerates to a stop at a time.<br />
Automatic operation can be stopped and the system can be made to the<br />
reset state by using RESET key on the MDI panel or external reset signal.<br />
When reset operation is applied to the system during a tool moving status,<br />
the motion is slowed down then stops.<br />
791
OPERATION<br />
4. AUTOMATIC OPERATION B–63534EN/02<br />
Optional block skip<br />
Cycle start for the<br />
two–path control<br />
Calling a subprogram<br />
stored in an external<br />
input/output device<br />
When the optional block skip switch on the machine operator’s panel is<br />
turned on, blocks containing a slash (/) are ignored.<br />
For the two–path control, a cycle start switch is provided for each tool<br />
post. This allows the operator to activate a single tool posts to operate<br />
them at the same time in memory operation or MDI operation. In general,<br />
select the tool post to be operated with the tool post selection switch on<br />
the machine operator’s panel and then press the cycle start button to<br />
activate the selected tool post. (The procedure may vary with the machine<br />
tool builder. Refer to the appropriate manual issued by the machine tool<br />
builder.)<br />
A file (subprogram) in an external input/output device such as a Floppy<br />
Cassette can be called and executed during memory operation. For<br />
details, see Section 4.7.<br />
792
OPERATION<br />
B–63534EN/02 4. AUTOMATIC OPERATION<br />
4.2<br />
MDI OPERATION<br />
Procedure<br />
Procedure for MDI Operation<br />
In the MDI mode, a program consisting of up to 10 lines can be created<br />
in the same format as normal programs and executed from the MDI panel.<br />
MDI operation is used for simple test operations.<br />
The following procedure is given as an example. For actual operation,<br />
refer to the manual supplied by the machine tool builder.<br />
1 Press the MDI mode selection switch.<br />
For the two–path control, select the tool post for which a program is to<br />
be created with the tool post selection switch. Create a separate<br />
program for each tool post.<br />
2 Press the PROG function key on the MDI panel to select the program<br />
screen. The following screen appears:<br />
PROGRAM ( MDI )<br />
<br />
G00 G90 G94 G40 G80 G50 G54 G69<br />
G17 G22 G21 G49 G98 G67 G64 G15<br />
B HM<br />
T D<br />
F S<br />
>_<br />
MDI * * * * * * * * * * 20 : 40 : 05<br />
PRGRM MDI CURRNT NEXT (OPRT)<br />
Program number O0000 is entered automatically.<br />
793<br />
0010 00002<br />
3 Prepare a program to be executed by an operation similar to normal<br />
program editing. M99 specified in the last block can return control to<br />
the beginning of the program after operation ends. Word insertion,<br />
modification, deletion, word search, address search, and program<br />
search are available for programs created in the MDI mode. For<br />
program editing, see III–9.<br />
4 To entirely erase a program created in MDI mode,use one of the<br />
following methods:<br />
a. Enter address O , then press the DELETE key on the MDI panel.<br />
b. Alternatively, press the RESET key. In this case, set bit 7 of<br />
parameter MCL No. 3203 to 1 in advance.
OPERATION<br />
4. AUTOMATIC OPERATION B–63534EN/02<br />
5 To execute a program, set the cursor on the head of the program. (Start<br />
from an intermediate point is possible.) Push Cycle Start button on<br />
the operator’s panel. By this action, the prepared program will start.<br />
(For the two–path control, select the tool post to be operated with the<br />
tool post selection switch on the machine operator’s panel<br />
beforehand.) When the program end (M02, M30) or ER(%) is<br />
executed, the prepared program will be automatically erased and the<br />
operation will end.<br />
By command of M99, control returns to the head of the prepared<br />
program.<br />
PROGRAM ( MDI )<br />
O0001 N00003<br />
O0000<br />
M03 ;<br />
G00 X100.0 Y200 <br />
G01 Z120.0 F500 ;<br />
M93 P9010 ;<br />
G00 Z0.0 ;<br />
%<br />
G00 G90 G94 G40 G80 G50 G54 G69<br />
G17 G22 G21 G49 G98 G67 G64 G15<br />
B HM<br />
T D<br />
F<br />
>_<br />
S<br />
MDI **** *** *** 12 : 42 : 39<br />
PRGRM MDI CURRNT NEXT (OPRT)<br />
6 To stop or terminate MDI operation in midway through, follow the<br />
steps below.<br />
a. Stopping MDI operation<br />
Press the feed hold switch on the machine operator’s panel. The<br />
feed hold LED goes on and the cycle start LED goes off. The<br />
machine responds as follows:<br />
(i) When the machine was moving, feed operation decelerates<br />
and stops.<br />
(ii) When dwell was being performed, dwell is stopped.<br />
(iii) When M, S, or T was being executed, the operation is stopped<br />
after M, S, or T is finished.<br />
When the cycle start switch on the machine operator’s panel is<br />
pressed, machine operation restarts.<br />
b. Terminating MDI operation<br />
Press the RESET key on the MDI panel.<br />
Automatic operation is terminated and the reset state is entered.<br />
When a reset is applied during movement, movement decelerates<br />
then stops.<br />
794
OPERATION<br />
B–63534EN/02 4. AUTOMATIC OPERATION<br />
Explanation<br />
<br />
<br />
Editing a program during<br />
MDI operation<br />
Limitations<br />
Program registration<br />
Number of lines in a<br />
program<br />
Subprogram nesting<br />
The previous explanation of how to execute and stop memory operation<br />
also applies to MDI operation, except that in MDI operation, M30 does<br />
not return control to the beginning of the program (M99 performs this<br />
function).<br />
Programs prepared in the MDI mode will be erased in the following cases:<br />
In MDI operation, if M02, M30 or ER(%) is executed.<br />
(If bit 6 (MER) of parameter No. 3203 is set to 1, however, the<br />
program is erased when execution of the last block of the program<br />
is completed by single–block operation.)<br />
In MEMORY mode, if memory operation is performed.<br />
In EDIT mode, if any editing is performed.<br />
Background editing is performed.<br />
When the O and DELETE keys are pressed.<br />
Upon reset when bit 7 (MCL) of parameter No. 3203 is set to 1<br />
After the editing operation during the stop of MDI operation was done,<br />
operation starts from the current cursor position.<br />
A program can be edited during MDI operation. The editing of a program,<br />
however, is disabled until the CNC is reset, when bit 5 (MIE) of parameter<br />
No. 3203 is set accordingly.<br />
Programs created in MDI mode cannot be registered.<br />
A program can have as many lines as can fit on one page of the screen.<br />
A program consisting of up to six lines can be created. When parameter<br />
MDL (No. 3107 #7) is set to 0 to specify a mode that suppresses the<br />
display of continuous–state information, a program of up to 10 lines can<br />
be created.<br />
If the created program exceeds the specified number of lines, % (ER) is<br />
deleted (prevents insertion and modification).<br />
Calls to subprograms (M98) can be specified in a program created in the<br />
MDI mode. This means that a program registered in memory can be<br />
called and executed during MDI operation. In addition to the main<br />
program executed by automatic operation, up to two levels of subprogram<br />
nesting are allowed (when the custom macro option is provided, up to four<br />
levels are allowed).<br />
Main program<br />
O0000;<br />
M98P 1000;<br />
M30;<br />
795<br />
Subprogram<br />
Subprogram<br />
O1000; O2000;<br />
M98P 2000; M98P 3000;<br />
M99; M99;<br />
One–level nesting Two–level nesting<br />
Fig. 4.2 (a) Nesting Level of Subprograms Called from the MDI Program
OPERATION<br />
4. AUTOMATIC OPERATION B–63534EN/02<br />
<br />
<br />
When the custom macro option is provided, macro programs can also be<br />
created, called, and executed in the MDI mode. However, macro call<br />
commands cannot be executed when the mode is changed to MDI mode<br />
after memory operation is stopped during execution of a subprogram.<br />
When a program is created in the MDI mode, an empty area in program<br />
memory is used. If program memory is full, no programs can be created<br />
in the MDI mode.<br />
796
OPERATION<br />
B–63534EN/02 4. AUTOMATIC OPERATION<br />
4.3<br />
DNC OPERATION<br />
<br />
Program check screen<br />
(Seven soft key type<br />
LCD)<br />
By activating automatic operation during the DNC operation mode<br />
(RMT), it is possible to perform machining (DNC operation) while a<br />
program is being read in via reader/puncher interface, or remote buffer.<br />
If the floppy cassette directory display option is available, it is possible<br />
to select files (programs) saved in an external input/output unit of a floppy<br />
format (Handy File, Floppy Cassettes, or FA card) and specify (schedule)<br />
the sequence and frequency of execution for automatic operation.<br />
(see III–4.6)<br />
To use the DNC operation function, it is necessary to set the parameters<br />
related to the reader/punch interface, and remote buffer in advance.<br />
DNC OPERATION<br />
1 Search for the program (file) to be executed.<br />
2 Press the REMOTE switch on the machine operator’s panel to set<br />
RMT mode, then press the cycle start switch. The selected file is<br />
executed. For details of the use of the REMOTE switch, refer to the<br />
relevant manual supplied by the machine tool builder.<br />
PROGRAM CHECK O0001 N00020<br />
N020 X100.0 Z100.0 (DNC–PROG) ;<br />
N030 X200.0 Z200.0 ;<br />
N050 X400.0 Z400.0 ;<br />
(RELATIVE) (DIST TO GO) G00 G17 G90<br />
X 100.000 X 0.000 G22 G94 G21<br />
Y 100.000 Y 0.000 G41 G49 G80<br />
Z 0.000 Z 0.000 G98 G50 G67<br />
A 0.000 A 0.000 B<br />
C 0.000 C 0.000 H M<br />
HD.T NX.T D M<br />
F S M<br />
ACT.F SACT REPEAT<br />
RMT STRT MTN *** *** 21:20:05<br />
[ ABS ] [ REL ] [ ] [ ] [ (OPRT) ]<br />
797
OPERATION<br />
4. AUTOMATIC OPERATION B–63534EN/02<br />
Program screen<br />
(Seven soft key type LCD)<br />
Program screen<br />
(Twelve soft key type LCD)<br />
Explanations<br />
PROGRAM O0001 N00020<br />
N020 X100.0 Z100.0 (DNC–PROG) ;<br />
N030 X200.0 Z200.0 ;<br />
N040 X300.0 Z300.0 ;<br />
N050 X400.0 Z400.0 ;<br />
N060 X500.0 Z500.0 ;<br />
N070 X600.0 Z600.0 ;<br />
N080 X700.0 Z400.0 ;<br />
N090 X800.0 Z400.0 ;<br />
N100 x900.0 z400.0 ;<br />
N110 x1000.0 z1000.0 ;<br />
N120 x800.0 z800.0 ;<br />
RMT STRT MTN *** *** 21:20:05<br />
[ PRGRM ] [ CHECK ] [ ] [ ] [ (OPRT) ]<br />
PROGRAM<br />
N020 X100.0 (DNC–PROG) ;<br />
N030 X90.0 ;<br />
N040 X80.0 ;<br />
N050 X70.0 ;<br />
N060 X60.0 ;<br />
N070 X50.0 ;<br />
N080 X40.0 ;<br />
N090 X30.0 ;<br />
N100 X20.0 ;<br />
N110 X10.0 ;<br />
N120 X0.0 ;<br />
N130 Z100.0 ;<br />
N140 Z90.0 ;<br />
N150 Z80.0 ;<br />
N160 Z70.0 ;<br />
N170 Z60.0 ;<br />
798<br />
F0001 N00020<br />
N180 Z50.0 ;<br />
N190 Z40.0 ;<br />
N200 Z30.0 ;<br />
N210 Z20.0 ;<br />
N220 Z10.0 ;<br />
N230 Z0.0 ;<br />
N240 M02 ;<br />
%<br />
RMT STRT MTN *** *** 22:23:24<br />
PRGR CHEC (OPR<br />
M K T)<br />
During DNC operation, the program currently being executed is<br />
displayed on the program check screen and program screen.<br />
The number of displayed program blocks depends on the program being<br />
executed.<br />
Any comment enclosed between a control–out mark (() and control–in<br />
mark ()) within a block is also displayed.<br />
During DNC operation, programs stored in memory can be called.<br />
During DNC operation, macro programs stored in memory can be<br />
called.
OPERATION<br />
B–63534EN/02 4. AUTOMATIC OPERATION<br />
Limitations<br />
Limit on number of<br />
characters<br />
M198 (command for<br />
calling a program from<br />
within an external<br />
input/output unit)<br />
Custom macro<br />
M99<br />
Alarm<br />
In program display, no more than 256 characters can be displayed.<br />
Accordingly, character display may be truncated in the middle of a block.<br />
In DNC operation, M198 cannot be executed. If M198 is executed, P/S<br />
alarm No. 210 is issued.<br />
In DNC operation, custom macros can be specified, but no repeat<br />
instruction and branch instruction can be programmed. If a repeat<br />
instruction or branch instruction is executed, P/S alarm No. 123 is issued.<br />
When reserved words (such as IF, WHILE, COS, and NE) used with<br />
custom macros in DNC operation are displayed during program display,<br />
a blank is inserted between adjacent characters.<br />
Example<br />
[During DNC operation]<br />
#102=SIN[#100] ; → #102 = S I N[#100] ;<br />
IF[#100NE0]GOTO5 ; → I F[#100NE0] G O T O 5 ;<br />
When control is returned from a subprogram or macro program to the<br />
calling program during DNC operation, it becomes impossible to use a<br />
return command (M99P****) for which a sequence number is specified.<br />
Number Message Contents<br />
086 DR SIGNAL OFF When entering data in the memory by<br />
using Reader / Puncher interface, the<br />
ready signal (DR) of reader / puncher<br />
was turned off.<br />
Power supply of I/O unit is off or cable is<br />
not connected or a P.C.B. is defective.<br />
123 CAN NOT USE MACRO<br />
COMMAND IN DNC<br />
210 CAN NOT COMAND<br />
M198/M199<br />
799<br />
Macro control command is used during<br />
DNC operation.<br />
Modify the program.<br />
Or M198 is executed in the DNC operation.<br />
Modify the program.
OPERATION<br />
4. AUTOMATIC OPERATION B–63534EN/02<br />
4.4<br />
SIMULTANEOUS<br />
INPUT/OUTPUT<br />
<br />
Basic simultaneous<br />
input procedure<br />
Program check screen<br />
Basic simultaneous output<br />
procedure<br />
While an automation operation is being performed, a program input from<br />
an I/O device connected to the reader/punch interface can be executed and<br />
output through the reader/punch interface at the same time.<br />
Simultaneous Input/Output<br />
1 Search for the program (file) to be output and executed.<br />
2 Press the REMOTE switch on the machine operator’s panel to set<br />
RMT mode. For details of the use of the REMOTE switch, refer to the<br />
relevant manual supplied by the machine tool builder.<br />
3 Set the simultaneous output operation mode select signal to 1.<br />
4 Press the cycle start switch.<br />
5 Program output and execution is performed on a block–by–block<br />
basis.<br />
PROGRAM CHECK F0001 N00100<br />
N100 X100. Y100. ;<br />
N200 G01 X50. Y50. ;<br />
N300 G00 X0 Y0 ;<br />
(RELATIVE) (DIST TO GO) G00 G17 G90<br />
X 100.000 X 0.000 G22 G94 G21<br />
Y 100.000 Y 0.000 G40 G49 G80<br />
Z 0.000 Z 0.000 G98 G50 G67<br />
A 0.000 A 0.000 B<br />
C 0.000 C 0.000 H M<br />
HD.T NX.T D M<br />
F S M<br />
ACT.F SACT REPEAT<br />
RMT STRT MTN *** *** 21:20:05<br />
[ ABS ] [ REL ] [ ] [ ] [ (OPRT) ]<br />
When a program is displayed, three blocks are displayed: the block<br />
currently being executed and the next two to be executed. When the single<br />
block function is selected, only the block currently being executed is<br />
displayed.<br />
Any comment enclosed between a control–out mark (() and control–in<br />
mark ()) within a block is not displayed.<br />
1 Search for the program (file) to be output and executed.<br />
2 Press the REMOTE switch on the machine operator’s panel to set<br />
RMT mode. For details of the use of the REMOTE switch, refer to the<br />
relevant manual supplied by the machine tool builder.<br />
3 Set the simultaneous output operation mode select signal to 1.<br />
4 Press the cycle start switch.<br />
5 Program output and execution is performed on a block–by–block<br />
basis.<br />
800
OPERATION<br />
B–63534EN/02 4. AUTOMATIC OPERATION<br />
Limitations<br />
M198 (command for<br />
calling a program from<br />
within an external<br />
input/output unit)<br />
Macro control command<br />
Alarm<br />
File name<br />
Sub program call<br />
Alarm<br />
M198 cannot be executed in the input, output and run simultaneous mode.<br />
An attempt to do so results in alarm No. 210.<br />
A macro control command cannot be executed in the input, output and run<br />
simultaneous mode. An attempt to do so results in P/S alarm No. 123.<br />
If an alarm condition occurs during the input, output and run simultaneous<br />
mode, a block being processed when the alarm condition occurs and all<br />
blocks before that are input or output.<br />
In the output and run simultaneous mode, if a device used is a floppy disk<br />
drive or FA card, the file name is the execution program number.<br />
When a program is being executed in the output and run simultaneous<br />
mode, if a subprogram is called, only the main program is output.<br />
Number Message Contents<br />
123<br />
210<br />
222<br />
CAN NOT USE MACRO<br />
COMMAND IN DNC<br />
CAN NOT COMMAND<br />
M198/M199<br />
DNC OP. NOT AL-<br />
LOWED IN BG.–EDIT<br />
801<br />
Macro control command is used during<br />
DNC operation.<br />
Modify the program.<br />
M198 or M199 is executed in the DNC<br />
operation. M198 is executed in the<br />
DNC operation. Modify the program.<br />
Input and output are executed at a time<br />
in the background edition.<br />
Execute a correct operation.
OPERATION<br />
4. AUTOMATIC OPERATION B–63534EN/02<br />
4.5<br />
PROGRAM RESTART<br />
This function specifies Sequence No. of a block to be restarted when a tool<br />
is broken down or when it is desired to restart machining operation after<br />
a day off, and restarts the machining operation from that block. It can also<br />
be used as a high–speed program check function.<br />
There are two restart methods: the P–type method and Q–type method.<br />
P TYPE<br />
Q TYPE<br />
Operation can be restarted anywhere. This restart method is<br />
used when operation is stopped because of a broken tool.<br />
802<br />
Program start point (machining start point)<br />
Restart position<br />
ÇÇ<br />
ÇÇ<br />
Return operation<br />
Before operation can be restarted, the machine must be moved<br />
to the programmed start point (machining start point)<br />
Program start point<br />
(machining start point)<br />
ÇÇ<br />
ÇÇ<br />
ÇÇ<br />
Restart position<br />
Return operation
OPERATION<br />
B–63534EN/02 4. AUTOMATIC OPERATION<br />
Procedure 1<br />
[ P TYPE ]<br />
[ Q TYPE ]<br />
Procedure 2<br />
[COMMON TO P TYPE /<br />
Q TYPE]<br />
<br />
<br />
Frequency<br />
Procedure for Program Restart by Specifying a Sequence Number<br />
[Q TYPE]<br />
or<br />
[P TYPE]<br />
Sequence number<br />
[Q TYPE]<br />
or<br />
[P TYPE]<br />
Sequence number<br />
1 Retract the tool and replace it with a new one. When necessary,<br />
change the offset. (Go to step 2.)<br />
1 When power is turned ON or emergency stop is released, perform all<br />
necessary operations at that time, including the reference position<br />
return.<br />
2 Move the machine manually to the program starting point (machining<br />
start point), and keep the modal data and coordinate system in the<br />
same conditions as at the machining start.<br />
3 If necessary, modify the offset amount.<br />
1 Turn the program restart switch on the machine operator’s panel ON.<br />
2 Press PROG key to display the desired program.<br />
3 Find the program head.<br />
4 Enter the sequence number of the block to be restarted, then press th<br />
[P TYPE] or [Q TYPE] soft key.<br />
If the same sequence number appears more than once, the location of<br />
the target block must be specified. Specify a frequency and a<br />
sequence number.<br />
803
OPERATION<br />
4. AUTOMATIC OPERATION B–63534EN/02<br />
5 The sequence number is searched for, and the program restart screen<br />
appears on the LCD display.<br />
PROGRAM RESTART<br />
DESTINATION<br />
X 57. 096<br />
Y 56. 877<br />
Z 56. 943<br />
DISTANCE TO GO<br />
1 X 1. 459<br />
2 Y 10. 309<br />
3 Z 7. 320<br />
804<br />
O0002 N01000<br />
M 1 2<br />
1 2<br />
1 2<br />
1 2<br />
1 2<br />
1 ********<br />
******** ********<br />
T********<br />
S *****<br />
********<br />
MEM **** *** ***<br />
S 0 T0000<br />
10 : 10 : 40<br />
RSTR<br />
FL.SDL<br />
(OPRT)<br />
DESTINATION shows the position at which machining is to restart.<br />
DISTANCE TO GO shows the distance from the current tool position<br />
to the position where machining is to restart. A number to the left of<br />
each axis name indicates the order of axes (determined by parameter<br />
setting) along which the tool moves to the restart position.<br />
The coordinates and amount of travel for restarting the program can<br />
be displayed for up to five axes. If your system supports six or more<br />
axes, pressing the [RSTR] soft key again displays the data for the<br />
sixth and subsequent axes. (The program restart screen displays only<br />
the data for CNC–controlled axes.)<br />
M: Fourteen most recently specified M codes<br />
T: Two most recently specified T codes<br />
S: Most recently specified S code<br />
B: Most recently specified B code<br />
Codes are displayed in the order in which they are specified. All<br />
codes are cleared by a program restart command or cycle start in the<br />
reset state.<br />
6 Turn the program re–start switch OFF. At this time, the figure at the<br />
left side of axis name DISTANCE TO GO blinks.<br />
7 Check the screen for the M, S, T, and B codes to be executed. If they<br />
are found, enter the MDI mode, then execute the M, S, T, and B<br />
functions. After execution, restore the previous mode.<br />
These codes are not displayed on the program restart screen.<br />
8 Check that the distance indicated under DISTANCE TO GO is correct.<br />
Also check whether there is the possibility that the tool might hit a<br />
workpiece or other objects when it moves to the machining restart<br />
position. If such a possibility exists, move the tool manually to a<br />
position from which the tool can move to the machining restart<br />
position without encountering any obstacles.<br />
9 Press the cycle start button. The tool moves to the machining restart<br />
position at the dry run feedrate sequentially along axes in the order<br />
specified by parameter settings (No. 7310). Machining is then<br />
restarted.
OPERATION<br />
B–63534EN/02 4. AUTOMATIC OPERATION<br />
Procedure 1<br />
[ P TYPE ]<br />
[ Q TYPE ]<br />
Procedure 2<br />
[COMMON TO P TYPE /<br />
Q TYPE]<br />
<br />
Procedure for Program Restart by Specifying a Block Number<br />
[Q TYPE]<br />
or<br />
[P TYPE]<br />
Block number<br />
1 Retract the tool and replace it with a new one. When necessary,<br />
change the offset. (Go to step 2.)<br />
1 When power is turned ON or emergency stop is released, perform all<br />
necessary operations at that time, including the reference position<br />
return.<br />
2 Move the machine manually to the program starting point (machining<br />
start point), and keep the modal data and coordinate system in the<br />
same conditions as at the machining start.<br />
3 If necessary, modify the offset amount.<br />
1 Turn the program restart switch on the machine operator’s panel ON.<br />
2 Press PROG key to display the desired program.<br />
3 Find the program head. Press function RESET key.<br />
4 Enter the number of the block to be restarted then press the [P TYPE]<br />
or [Q TYPE] soft key. The block number cannot exceed eight digits.<br />
5 The block number is searched for, and the program restart screen<br />
appears on the CRT display.<br />
PROGRAM RESTART<br />
DESTINATION<br />
X 57. 096<br />
Y 56. 877<br />
Z 56. 943<br />
DISTANCE TO GO<br />
X 1. 459<br />
Y 10. 309<br />
Z 7. 320<br />
805<br />
O0002 N01000<br />
M 1 2<br />
1 2<br />
1 2<br />
1 2<br />
1 2<br />
1 ********<br />
******** ********<br />
T********<br />
S *****<br />
********<br />
MEM **** *** ***<br />
S 0 T0000<br />
10 : 10 : 40<br />
RSTR<br />
FL.SDL<br />
(OPRT)<br />
DESTINATION shows the position at which machining is to restart.<br />
DISTANCE TO GO shows the distance from the current tool position<br />
to the position where machining is to restart. A number to the left of<br />
each axis name indicates the order of axes (determined by parameter<br />
setting) along which the tool moves to the restart position.
OPERATION<br />
4. AUTOMATIC OPERATION B–63534EN/02<br />
Explanations<br />
Block number<br />
The coordinates and amount of travel for restarting the program can<br />
be displayed for up to five axes. If your system supports six or more<br />
axes, pressing the [RSTR] soft key again displays the data for the<br />
sixth and subsequent axes. (The program restart screen displays only<br />
the data for CNC–controlled axes.)<br />
M: Fourteen most recently specified M codes<br />
T: Two most recently specified T codes<br />
S: Most recently specified S code<br />
B: Most recently specified B code<br />
Codes are displayed in the order in which they are specified. All<br />
codes are cleared by a program restart command or cycle start in the<br />
reset state.<br />
6 Turn the program re–start switch OFF. At this time, the figure at the<br />
left side of axis name DISTANCE TO GO blinks.<br />
7 Check the screen for the M, S, T, and B codes to be executed. If they<br />
are found, enter the MDI mode, then execute the M, S, T, and B<br />
functions. After execution, restore the previous mode.<br />
These codes are not displayed on the program restart screen.<br />
8 Check that the distance indicated under DISTANCE TO GO is correct.<br />
Also check whether there is the possibility that the tool might hit a<br />
workpiece or other objects when it moves to the machining restart<br />
position. If such a possibility exists, move the tool manually to a<br />
position from which the tool can move to the machining restart<br />
position without encountering any obstacles.<br />
9 Press the cycle start button. The tool moves to the machining restart<br />
position at the dry run feedrate sequentially along axes in the order<br />
specified by parameter settings (No. 7310). Machining is then<br />
restarted.<br />
When the CNC is stopped, the number of executed blocks is displayed on<br />
the program screen or program restart screen. The operator can specify<br />
the number of the block from which the program is to be restarted, by<br />
referencing the number displayed on the CRT. The displayed number<br />
indicates the number of the block that was executed most recently. For<br />
example, to restart the program from the block at which execution<br />
stopped, specify the displayed number, plus one.<br />
The number of blocks is counted from the start of machining, assuming<br />
one NC line of a CNC program to be one block.<br />
806<br />
< Example 1 ><br />
CNC Program Number of blocks<br />
O 0001 ;<br />
G90 G92 X0 Y0 Z0 ;<br />
G01 X100. F100 ;<br />
G03 X01 –50. F50 ;<br />
M30 ;<br />
1<br />
2<br />
3<br />
4<br />
5
OPERATION<br />
B–63534EN/02 4. AUTOMATIC OPERATION<br />
Storing / clearing the<br />
block number<br />
Block number when a<br />
program is halted or<br />
stopped<br />
MDI intervention<br />
Block number exceeding<br />
eight digits<br />
Limitations<br />
P–type restart<br />
<br />
807<br />
< Example 2 ><br />
CNC Program Number of blocks<br />
O 0001 ;<br />
G90 G92 X0 Y0 Z0 ;<br />
G90 G00 Z100. ;<br />
G81 X100. Y0. Z–120. R–80. F50. ;<br />
#1 = #1 + 1 ;<br />
#2 = #2 + 1 ;<br />
#3 = #3 + 1 ;<br />
G00 X0 Z0 ;<br />
M30 ;<br />
Macro statements are not counted as blocks.<br />
The block number is held in memory while no power is supplied. The<br />
number can be cleared by cycle start in the reset state.<br />
The program screen usually displays the number of the block currently<br />
being executed. When the execution of a block is completed, the CNC<br />
is reset, or the program is executed in single–block stop mode, the<br />
program screen displays the number of the program that was executed<br />
most recently.<br />
When a CNC program is halted or stopped by feed hold, reset, or<br />
single–block stop, the following block numbers are displayed:<br />
Feed hold : Block being executed<br />
Reset : Block executed most recently<br />
Single–block stop : Block executed most recently<br />
For example, when the CNC is reset during the execution of block 10, the<br />
displayed block number changes from 10 to 9.<br />
When MDI intervention is performed while the program is stopped by<br />
single–block stop, the CNC commands used for intervention are not<br />
counted as a block.<br />
When the block number displayed on the program screen exceeds eight<br />
digits, the block number is reset to 0 and counting continues.<br />
Under any of the following conditions, P–type restart cannot be<br />
performed:<br />
⋅ When automatic operation has not been performed since the power<br />
was turned on<br />
⋅ When automatic operation has not been performed since an<br />
emergency stop was released<br />
⋅ When automatic operation has not been performed since the<br />
coordinate system was changed or shifted (change in an external<br />
offset from the workpiece reference point)<br />
The block to be restarted need not be the block which was interrupted;<br />
operation can restart with any block. When P–type restart is performed,<br />
the restart block must use the same coordinate system as when operation<br />
was interrupted.<br />
1<br />
2<br />
3<br />
4<br />
4<br />
4<br />
4<br />
5<br />
6
OPERATION<br />
4. AUTOMATIC OPERATION B–63534EN/02<br />
<br />
<br />
<br />
<br />
<br />
Alarm<br />
When single block operation is ON during movement to the restart<br />
position, operation stops every time the tool completes movement along<br />
an axis. When operation is stopped in the single block mode, MDI<br />
intervention cannot be performed.<br />
During movement to the restart position, manual intervention can be used<br />
to perform a return operation for an axis if it has not yet been performed<br />
for the axis. A return operation cannot be done further on axes for which<br />
a return has already been completed.<br />
Never reset during the time from the start of a search at restart until<br />
machining is restarted. Otherwise, restart must be performed again from<br />
the first step.<br />
Regardless of whether machining has started or not, manual operation<br />
must be performed when the manual absolute mode is on.<br />
If no absolute–position detector (absolute pulse coder) is provided, be<br />
sure to perform reference position return after turning on the power and<br />
before performing restart.<br />
Alarm No. Contents<br />
071<br />
094<br />
095<br />
096<br />
097<br />
098<br />
099<br />
5020<br />
The specified block number for restarting the program is not<br />
found.<br />
After interruption, a coordinate system was set, then P–type<br />
restart was specified.<br />
808<br />
After interruption, the coordinate system shift was changed,<br />
then P–type restart was specified.<br />
After interruption, the coordinate system was changed, then<br />
P–type restart was specified.<br />
When automatic operation has not been performed since<br />
the power was turned on, emergency stop was released, or<br />
P/S alarm 094 to 097 was reset, P–type restart was specified.<br />
After the power was turned on, restart operation was performed<br />
without reference position return, but a G28 command<br />
was found in the program.<br />
A move command was specified from the MDI panel during<br />
a restart operation.<br />
An erroneous parameter was specififed for restarting a program.<br />
WARNING<br />
As a rule, the tool cannot be returned to a correct position under the following conditions.<br />
Special care must be taken in the following cases since none of them cause an alarm:<br />
Manual operation is performed when the manual absolute mode is OFF.<br />
Manual operation is performed when the machine is locked.<br />
When the mirror image is used.<br />
When manual operation is performed in the course of axis movement for returning operation.<br />
When the program restart is commanded for a block between the block for skip cutting and<br />
subsequent absolute command block.
OPERATION<br />
B–63534EN/02 4. AUTOMATIC OPERATION<br />
4.6<br />
SCHEDULING<br />
FUNCTION<br />
The schedule function allows the operator to select files (programs)<br />
registered on a floppy–disk in an external input/output device (Handy<br />
File, Floppy Cassette, or FA Card) and specify the execution order and<br />
number of repetitions (scheduling) for performing automatic operation.<br />
It is also possible to select only one file from the files in the external<br />
input/output device and execute it during automatic operation.<br />
This function is effective, when the floppy cassette directory display<br />
option is avairable and the floppy cassette is selected as the valid I/O<br />
device.<br />
FILE DIRECTORY<br />
FILE NO. FILE NAME<br />
809<br />
0001 O0010<br />
0002 O0020<br />
0003 O0030<br />
0004 O0040<br />
List of files in an external input/output device<br />
Set file number and<br />
number of repetitions.<br />
ORDER FILE NO REPETITION<br />
01 0002 2<br />
02 0003 1<br />
03 0004 3<br />
04 0001 2<br />
Scheduling screen<br />
Executing automatic operation
OPERATION<br />
4. AUTOMATIC OPERATION B–63534EN/02<br />
Procedure<br />
Procedure for executing<br />
one file<br />
Procedure for Scheduling Function<br />
1 Press the MEMORY switch on the machine operator’s panel, then<br />
press the PROG function key on the MDI panel.<br />
2 Press the rightmost soft key (continuous menu key), then press the<br />
[FL. SDL] soft key. A list of files registered in the Floppy Cassette is<br />
displayed on screen No. 1. To display more files that are not<br />
displayed on this screen, press the page key on the MDI panel. Files<br />
registered in the Floppy Cassette can also be displayed successively.<br />
FILE DIRECTORY O0001 N00000<br />
CURRENT SELECTED : SCHEDULE<br />
NO. FILE NAME (METER) VOL<br />
0000 SCHEDULE<br />
0001 PARAMETER 58.5<br />
0002 ALL PROGRAM 11.0<br />
0003 O0001 1.9<br />
0004 O0002 1.9<br />
0005 O0010 1.9<br />
0006 O0020 1.9<br />
0007 O0040 1.9<br />
0008 O0050 1.9<br />
MEM **** *** *** 19 : 14 : 47<br />
PRGRM DIR SCHDUL (OPRT)<br />
810<br />
Screen No.1<br />
3 Press the [(OPRT)] and [SELECT] soft keys to display “SELECT<br />
FILE NO.” (on screen No. 2). Enter a file number, then press the [F<br />
SET] and [EXEC] soft keys. The file for the entered file number is<br />
selected, and the file name is indicated after “CURRENT<br />
SELECTED:”.<br />
FILE DIRECTORY<br />
CURRENT SELECTED:O0040<br />
O0001 N00000<br />
NO. FILE NAME (METER) VOL<br />
0000 SCHEDULE<br />
0001 PARAMETER 58.5<br />
0002 ALL PROGRAM 11.0<br />
0003 O0001 1.9<br />
0004 O0002 1.9<br />
0005 O0010 1.9<br />
0006 O0020 1.9<br />
0007 O0040 1.9<br />
0008 O0050 1.9<br />
SELECT FILE NO.=7<br />
>_<br />
MEM **** *** *** 19 : 17 : 10<br />
F SET EXEC<br />
Screen No.2
OPERATION<br />
B–63534EN/02 4. AUTOMATIC OPERATION<br />
Procedure for executing<br />
the scheduling function<br />
4 Press the REMOTE switch on the machine operator’s panel to enter<br />
the RMT mode, then press the cycle start switch. The selected file is<br />
executed. For details on the REMOTE switch, refer to the manual<br />
supplied by the machine tool builder. The selected file number is<br />
indicated at the upper right corner of the screen as an F number<br />
(instead of an O number).<br />
FILE DIRECTORY<br />
CURRENT SELECTED:O0040<br />
RMT **** *** *** 13 : 27 : 54<br />
PRGRM<br />
DIR SCHDUL<br />
811<br />
Screen No.3<br />
F0007 N00000<br />
(OPRT)<br />
1 Display the list of files registered in the Floppy Cassette. The display<br />
procedure is the same as in steps 1 and 2 for executing one file.<br />
2 On screen No. 2, press the [(OPRT)] and [SELECT] soft keys to<br />
display “SELECT FILE NO.”<br />
3 Enter file number 0, and press the [F SET], and [EXEC] soft keys.<br />
“SCHEDULE” is indicated after “CURRENT SELECTED:”.<br />
4 Press the leftmost soft key (return menu key) and the [SCHDUL] soft<br />
key. Screen No. 4 appears.<br />
FILE DIRECTORY<br />
F0000 N02000<br />
ORDER FILE NO. REQ.REP CUR.REP<br />
01<br />
02<br />
03<br />
04<br />
05<br />
06<br />
07<br />
08<br />
09<br />
10<br />
<br />
MEM **** *** *** 22 : 07 : 00<br />
PRGRM DIR<br />
Screen No.4<br />
SCHDUL (OPRT)
OPERATION<br />
4. AUTOMATIC OPERATION B–63534EN/02<br />
Explanations<br />
Specifying no file<br />
number<br />
Endless repetition<br />
Clear<br />
Return to the program<br />
screen<br />
Restrictions<br />
Number of repetitions<br />
Number of files<br />
registered<br />
M code<br />
Move the cursor and enter the file numbers and number of repetitions<br />
in the order in which to execute the files. At this time, the current<br />
number of repetitions “CUR.REP” is 0.<br />
5 Press the REMOTE switch on the machine operator’s panel to enter<br />
the RMT mode, then press the start switch. The files are executed in<br />
the specified order. When a file is being executed, the cursor is<br />
positioned at the number of that file.<br />
The current number of repetitions CUR.REP is increased when M02<br />
or M30 is executed in the program being run.<br />
FILE DIRECTORY<br />
O0000 N02000<br />
ORDER FILE NO. REQ.REP CUR.REP<br />
01 0007<br />
5 5<br />
02 0003 23 23<br />
03 0004 9999 156<br />
04<br />
05<br />
06<br />
07<br />
08<br />
09<br />
10<br />
0005 LOOP 0<br />
RMT **** *** *** 10 : 10 : 40<br />
PRGRM DIR SCHDUL (OPRT)<br />
812<br />
Screen No.5<br />
If no file number is specified on screen No. 4 (the file number field is left<br />
blank), program execution is stopped at that point. To leave the file<br />
number field blank, press numeric key 0 then INPUT .<br />
If a negative value is set as the number of repetitions, is<br />
displayed, and the file is repeated indefinitely.<br />
When the [(OPRT)], [CLEAR], and [EXEC] soft keys are pressed on<br />
screen No. 4, all data is cleared. However, these keys do not function<br />
while a file is being executed.<br />
When the soft key [PRGRM] is pressed on screen No. 1, 2, 3, 4, or 5, the<br />
program screen is displayed.<br />
Up to 9999 can be specified as the number of repetitions. If 0 is set for a<br />
file, the file becomes invalid and is not executed.<br />
By pressing the page key on screen No. 4, up to 20 files can be registered.<br />
When M codes other than M02 and M30 are executed in a program, the<br />
current number of repetitions is not increased.
OPERATION<br />
B–63534EN/02 4. AUTOMATIC OPERATION<br />
Displaying the floppy<br />
disk directory during file<br />
execution<br />
<br />
<br />
Scheduling function for<br />
the two–path control<br />
<br />
During the execution of file, the floppy directory display of background<br />
editing cannot be referenced.<br />
To resume automatic operation after it is suspended for scheduled<br />
operation, press the reset button.<br />
The scheduling function can be used only for a single tool post.<br />
Alarm No. Description<br />
086 An attempt was made to execute a file that was not registered<br />
in the floppy disk.<br />
210 M198 and M099 were executed during scheduled operation,<br />
or M198 was executed during DNC operation.<br />
813
OPERATION<br />
4. AUTOMATIC OPERATION B–63534EN/02<br />
4.7<br />
SUBPROGRAM CALL<br />
FUNCTION (M198)<br />
Format<br />
Explanation<br />
The subprogram call function is provided to call and execute subprogram<br />
files stored in an external input/output device(Handy File, FLOPPY<br />
CASSETTE, FA Card)during memory operation.<br />
When the following block in a program in CNC memory is executed, a<br />
subprogram file in the external input/output device is called:<br />
To use this function, the Floppy Cassette directory display option must<br />
be installed.<br />
1. FS15 tape format<br />
M198 P L∆∆∆∆ ;<br />
2. Other than FS15 tape format<br />
M198 P ∆∆∆∆ ;<br />
814<br />
Number of repetitions<br />
File number for a file in the I/O device<br />
I/O devices call instruction<br />
File number for a file<br />
in the I/O device<br />
Number of repetitions<br />
I/O devices call instruction<br />
The subprogram call function is enabled when parameter No.0102 for the<br />
input/output device is set to 3. When the custom macro option is provided,<br />
either format 1 or 2 can be used. A different M code can be used for a<br />
subprogram call depending on the setting of parameter No.6030. In this<br />
case, M198 is executed as a normal M code. The file number is specified<br />
at address P. If the SBP bit (bit 2) of parameter No.3404 is set to 1, a<br />
program number can be specified. When a file number is specified at<br />
address P, Fxxxx is indicated instead of Oxxxx.<br />
Programs in memory<br />
execution mode<br />
Program in the external<br />
input/output device<br />
<br />
<br />
<br />
<br />
<br />
: First call/return<br />
: Second call/return<br />
: Third call/return<br />
Fig. 4.7 (a) Program Flow When M198 is Specified
OPERATION<br />
B–63534EN/02 4. AUTOMATIC OPERATION<br />
Restrictions<br />
Subprogram call<br />
function with two–path<br />
control<br />
For the two–path control, subprograms in a floppy cassette cannot be<br />
called for the two tool posts at the same time.<br />
NOTE<br />
1 When M198 in the program of the file saved in a floppy<br />
cassette is executed, a P/S alarm (No.210) is given. When<br />
a program in the memory of CNC is called and M198 is<br />
executed during execution of a program of the file saved in<br />
a floppy cassette, M198 is changed to an ordinary M–code.<br />
When MDI is intervened and M198 is executed after M198<br />
is commanded in the memory mode, M198 is changed to an<br />
ordinary M–code. When the reset operation is done in the<br />
MDI mode after M198 is commanded in the MEMORY<br />
mode, it does not influence on the memory operation and<br />
the operation is continued by restarting it in the MEMORY<br />
mode.<br />
815
OPERATION<br />
4. AUTOMATIC OPERATION B–63534EN/02<br />
4.8<br />
MANUAL HANDLE<br />
INTERRUPTION<br />
The movement by manual handle operation can be done by overlapping<br />
it with the movement by automatic operation in the automatic operation<br />
mode.<br />
Programmed<br />
depth of cut<br />
<br />
Depth of cut by<br />
handle interruption<br />
816<br />
Tool position during<br />
automatic operation<br />
Tool position after<br />
handle interruption<br />
Fig 4.8 Manual Handle Interruption<br />
Handle interruption axis selection signals<br />
For the handle interruption axis selection signals, refer to the manual<br />
supplied by the machine tool builder.<br />
During automatic operation, handle interruption is enabled for an axis<br />
if the handle interruption axis selection signal for that axis is on.<br />
Handle interruption is performed by turning the handle of the manual<br />
pulse generator.<br />
WARNING<br />
The travel distance by handle interruption is determined<br />
according to the amount by which the manual pulse<br />
generator is turned and the handle feed magnification (x1,<br />
x10, xM, xN).<br />
Since this movement is not accelerated or decelerated, it is<br />
very dangerous to use a large magnification value for<br />
handle interruption.<br />
The move amount per scale at x1 magnification is 0.001 mm<br />
(metric output) or 0.0001 inch (inch output).<br />
NOTE<br />
Handle interruption is disabled when the machine is locked<br />
during automatic operation.
OPERATION<br />
B–63534EN/02 4. AUTOMATIC OPERATION<br />
Explanations<br />
Relation with other<br />
functions<br />
Position display<br />
Travel distance display<br />
The following table indicates the relation between other functions and the<br />
movement by handle interrupt.<br />
Display Relation<br />
<strong>Machine</strong> lock <strong>Machine</strong> lock is effective. The tool does not move<br />
even when this signal turns on.<br />
Interlock Interlock is effective. The tool does not move even<br />
when this signal turns on.<br />
Mirror image Mirror image is not effective. Interrupt functions on<br />
the plus direction by plus direction command, even if<br />
this signal turns on.<br />
The following table shows the relation between various position display<br />
data and the movement by handle interrupt.<br />
Display Relation<br />
Absolute<br />
coordinate value<br />
Relative<br />
coordinate value<br />
<strong>Machine</strong><br />
coordinate value<br />
817<br />
Handle interruption does not change absolute<br />
coordinates.<br />
Handle interruption does not change relative<br />
coordinates.<br />
<strong>Machine</strong> coordinates are changed by the travel<br />
distance specified by handle interruption.<br />
Press the function key POS , then press the chapter selection soft key<br />
[HNDL].<br />
The move amount by the handle interrupt is displayed. The following 4<br />
kinds of data are displayed concurrently.<br />
HANDLE INTERRUPTION<br />
O0000 N02000<br />
(INPUT UNIT) (OUTPUT UNIT)<br />
X 69.594 X 69.594<br />
Y 137.783 Y 137.783<br />
Z –61.439 Z –61.439<br />
(RELATIVE)<br />
(DISTANCE TO GO)<br />
X 0.000 X 0.000<br />
Y 0.000 Y 0.000<br />
Z 0.000 Z 0.000<br />
PART COUNT 287<br />
RUN TIME 1H 12M CYCLE TIME 0H 0M 0S<br />
MDI **** *** *** 10 : 29 : 51<br />
ABS REL ALL (OPRT)<br />
HNDL
OPERATION<br />
4. AUTOMATIC OPERATION B–63534EN/02<br />
Display for five–axis<br />
systems or better<br />
(a) INPUT UNIT : Handle interrupt move amount in input unit<br />
system<br />
Indicates the travel distance specified by handle<br />
interruption according to the least input<br />
increment.<br />
(b) OUTPUT UNI : Handle interrupt move amount in output unit<br />
system<br />
Indicates the travel distance specified by handle<br />
interruption according to the least command<br />
increment.<br />
(c) RELATIVE : Position in relative coordinate system<br />
These values have no effect on the travel distance<br />
specified by handle interruption.<br />
(d) DISTANCE TO GO : The remaining travel distance in the current<br />
block has no effect on the travel distance<br />
specified by handle interruption.<br />
The handle interrupt move amount is cleared when the manual reference<br />
position return ends every axis.<br />
Systems having five or more axes provide the same display as the overall<br />
position display. See III–11.1.3.<br />
818
OPERATION<br />
B–63534EN/02 4. AUTOMATIC OPERATION<br />
4.9<br />
MIRROR IMAGE<br />
Procedure<br />
During automatic operation, the mirror image function can be used for<br />
movement along an axis. To use this function, set the mirror image switch<br />
to ON on the machine operator’s panel, or set the mirror image setting to<br />
ON from the MDI panel.<br />
Y<br />
Y–axis mirror image goes on.<br />
Tool<br />
819<br />
Fig 4.9 Mirror Image<br />
Programmed tool path<br />
Tool path after the mirror<br />
image function is used<br />
The following procedure is given as an example. For actual operation,<br />
refer to the manual supplied by the machine tool builder.<br />
1 Press the single block switch to stop automatic operation. When the<br />
mirror image function is used from the begining of operation, this step<br />
is omitted.<br />
2 Press the mirror image switch for the target axis on the machine<br />
operator’s panel.<br />
Alternatively, turn on the mirror image setting by following the steps<br />
below:<br />
2–1 Set the MDI mode.<br />
2–2 Press the OFFSET<br />
SETTING function key.<br />
2–3 Press the [SETING] soft key for chapter selection to display the<br />
setting screen.<br />
SETTING (MIRROR IMAGE) O0020 N00001<br />
MIRROR IMAGE X = 1 (0 : OFF 1 : ON)<br />
MIRROR IMAGE Y = 0 (0 : OFF 1 : ON)<br />
MIRROR IMAGE Z = 0 (0 : OFF 1 : OM)<br />
<br />
MEM **** *** *** 14 : 47 : 57<br />
OFFSET SETING WORK (OPRT)<br />
X
OPERATION<br />
4. AUTOMATIC OPERATION B–63534EN/02<br />
Explanations<br />
Limitations<br />
2–4 Move the cursor to the mirror image setting position, then set the<br />
target axis to 1.<br />
3 Enter an automatic operation mode (memory mode or MDI mode),<br />
then press the cycle start button to start automatic operation.<br />
The mirror image function can also be turned on and off by setting bit<br />
0 of parameter 0012 (MIRx) to 1 or 0.<br />
For the mirror image switches, refer to the manual supplied by the<br />
machine tool builder.<br />
The direction of movement during manual operation, the direction of<br />
movement from an intemidiate point to the reference position during<br />
automatic reference position return (G28), the direction of approach<br />
during unidirectional positioning (G60), and the shift direction in a boring<br />
cycle (G76, G87) cannot be reserved.<br />
820
OPERATION<br />
B–63534EN/02 4. AUTOMATIC OPERATION<br />
4.10<br />
TOOL WITHDRAWAL<br />
AND RETURN<br />
<br />
<br />
The tool can be withdrawn from a workpiece in order to replace the tool<br />
when it is damaged during machining, or merely to check the status of<br />
machining. The tool can then be advanced again to restart machining<br />
efficiently.<br />
: Position where the TOOL WITHDRAW switch is turned on<br />
: Programmed position<br />
: Position to which the tool is retracted by manual operation<br />
Retraction path<br />
Manual operation (withdraw path)<br />
Return path<br />
Repositioning<br />
Procedure for tool withdrawal and return<br />
Specify a retraction axis and distance in command G10.6IP_<br />
beforehand.In the sample program below, the N20 block specifies that the<br />
Z–axis is the retraction axis and the retraction distance is to be 50 mm.<br />
N10<br />
821<br />
N30<br />
Y<br />
Z<br />
Y<br />
Z<br />
(Sample program)<br />
N10 G91 Z–50. ;<br />
N20 G10.6 Z50. ;<br />
N30 G01 X150. F500. ;<br />
X<br />
X
OPERATION<br />
4. AUTOMATIC OPERATION B–63534EN/02<br />
<br />
<br />
<br />
Suppose that the TOOL WITHDRAW switch on the machine operator’s<br />
panel is turned on when the tool is positioned at point A during execution<br />
of the N30 block.<br />
N30<br />
822<br />
A<br />
<strong>Machine</strong> operator’s panel<br />
TOOL<br />
BEING<br />
WITH-<br />
DRAWN<br />
TOOL<br />
WITH-<br />
DRAW<br />
RETRAC-<br />
TION<br />
POSITION<br />
TOOL<br />
RETURN<br />
Next, the tool withdrawal mode is set and the TOOL BEING<br />
WITHDRAWN LED goes on. At this time, automatic operation is<br />
temporarily halted. The tool is then retracted by the programmed<br />
distance. If point A is the end point of the block, retraction is performed<br />
after automatic operation is stopped.Retraction is based on linear<br />
interpolation. The dry run feedrate is used for retraction.Upon<br />
completion of retraction, the RETRACT POSITION LED on the<br />
operator’s panel goes on.<br />
N30<br />
Point E<br />
A<br />
<strong>Machine</strong> operator’s panel<br />
TOOL BE-<br />
ING WITH-<br />
DRAWN<br />
TOOL<br />
WITH<br />
DRAW<br />
During retraction, the screen displays PTRR and STRT.<br />
MEM STRT MTN 0 : 00 : 00 PTRR<br />
RETRAC-<br />
TION<br />
POSITION<br />
TOOL<br />
RETURN<br />
PTRR blinks in the field for indicating states such as the program<br />
editing status.<br />
STRT is displayed in the automatic operation status field.<br />
MTN is displayed in the field for indicating status such as movement<br />
along an axis.
OPERATION<br />
B–63534EN/02 4. AUTOMATIC OPERATION<br />
<br />
<br />
Set the manual operation mode, then withdraw the tool. For manual<br />
operation, either jog feed or handle feed is possible.<br />
E point<br />
A point<br />
823<br />
2<br />
1<br />
3<br />
4<br />
12<br />
5 6<br />
Y<br />
10<br />
8<br />
Z<br />
11<br />
7<br />
9<br />
X
OPERATION<br />
4. AUTOMATIC OPERATION B–63534EN/02<br />
<br />
<br />
<br />
After withdrawing the tool and any additional operation such as replacing<br />
the tool, move the tool back to the previous retraction position.<br />
To return the tool to the retraction position, return the mode to automatic<br />
operation mode, then turn the TOOL RETURN switch on the operator’s<br />
panel on then off again. The tool returns to the retraction position at the<br />
dry run feedrate, regardless of whether the dry run switch is on or off.<br />
When the tool has returned to the retraction position, the RETRACTION<br />
POSITION LED comes on.<br />
E point<br />
A point<br />
824<br />
2<br />
1<br />
3 4<br />
5 6<br />
During return operation, the CRT screen displays PTRR and MSTR.<br />
MEM MSTR MTN 0 : 00 : 00 PTRR<br />
PTRR blinks in the field for indicating states such as program editing<br />
status.<br />
MSTR is displayed in the automatic operation status field.<br />
MTN is displayed in the field for indicating states such as movement<br />
along an axis.<br />
12<br />
Y<br />
11<br />
10<br />
8<br />
Z<br />
7<br />
9<br />
X
OPERATION<br />
B–63534EN/02 4. AUTOMATIC OPERATION<br />
<br />
<br />
Explanation 1<br />
Retraction<br />
When no retraction<br />
distance is specified<br />
Retraction from the<br />
automatic operation<br />
hold or stop state<br />
Stopping retraction<br />
Repositioning<br />
immediately after<br />
retraction<br />
While the tool is at the retraction position (point E in the figure below)<br />
and the RETRACTION POSITION LED is on, press the cycle start<br />
switch. The tool is then repositioned at the point where retraction was<br />
started (i.e. where the TOOL WITHDRAW switch was turned on).<br />
825<br />
N30A ⊗<br />
E point<br />
Upon completion of repositioning, the tool withdraw mode is cancelled,<br />
and the TOOL BEING WITHDRAWN LED goes off and restart N30.<br />
If no retraction distance or direction required for retraction are specified,<br />
retraction is not performed when the TOOL WITHDRAW switch on the<br />
operator’s panel is turned on. Instead, the block being executed in<br />
automatic operation is interrupted (automatic operation is held or<br />
stopped). In this state, the tool can be withdrawn and returned.<br />
E point<br />
N30A point<br />
When the single block switch is turned on during automatic operation, or<br />
the TOOL WITHDRAW switch is turned on after the automatic operation<br />
hold or stop state is set by feed hold: Retraction is performed, then the<br />
automatic operation hold or stop state is set again.<br />
During retraction, feed hold operation is ignored. However, reset<br />
operation is enabled (retraction is stopped at reset). When an alarm is<br />
issued during retraction, the retraction is stopped immediately.<br />
After retraction is completed, tool repositioning can be started without<br />
performing the withdraw and return operations.
OPERATION<br />
4. AUTOMATIC OPERATION B–63534EN/02<br />
Explanation 2<br />
Withdrawal<br />
Axis selection<br />
Path memorization<br />
Reset<br />
Explanaiton 3 Return<br />
Return path<br />
Single block<br />
Interruption of return<br />
operation<br />
Feed hold<br />
Explanation 4<br />
Repositioning<br />
Feed hold<br />
Operation after<br />
completion of<br />
repositioning<br />
To move the tool along an axis, select the corresponding axis selection<br />
signal. Never specify axis selection signals for two or more axes at a time.<br />
When the tool is moved in manual operation along an axis, the control unit<br />
memorizes up to ten paths of movements. If the tool is stopped after being<br />
moved along a selected axis and is then moved along another selected<br />
axis, the position where this switch takes place is memorized. After ten<br />
paths have been memorized, the control unit does not memorize any<br />
additional switching points.<br />
Upon reset, memorized position data is lost and the tool withdraw mode<br />
is cancelled.<br />
When there are more than ten return paths, the tool first moves to the tenth<br />
position, then to the ninth position, then to the eighth position, and so<br />
forth until the retraction position is reached.<br />
The single block switch is enabled during return operation. If the single<br />
block switch is turned off, continuous return operation is performed. If<br />
the single block switch is turned off, the tool stops at each memorized<br />
position. In this case, return operation can be resumed by turning the<br />
TOOL RETURN switch on then off again.<br />
When an alarm is issued during return operation, return operation stops.<br />
The feed hold function is enabled during return operation.<br />
The feed hold function is disabled during repositioning.<br />
The operation after completion of repositioning depends on the automatic<br />
operation state present when the TOOL WITHDRAW switch is turned on.<br />
1. When automatic operation is being started<br />
After completion of repositioning, the interrupted execution of the<br />
block is resumed.<br />
2. When automatic operation is held or stopped<br />
After completion of repositioning, the tool stops once at the<br />
repositioned point, then the original automatic operation hold or stop<br />
state is set. When the cycle start switch is pressed, automatic operation<br />
is resumed.<br />
826
OPERATION<br />
B–63534EN/02 4. AUTOMATIC OPERATION<br />
4.11<br />
RETRACE FUNCTION<br />
<br />
Forward movement →<br />
Reverse movement<br />
Procedure for Retrace Operation<br />
With the retrace function, the tool can be moved in the reverse direction<br />
(reverse movement) by using the REVERSE switch during automatic<br />
operation to trace the programmed path. The retrace function also enables<br />
the user to move the tool in the forward direction again (forward return<br />
movement) along the retraced path until the retrace start position is<br />
reached. When the tool reaches the retrace start position, the tool resumes<br />
movement according to the program.<br />
To move the tool in the forward direction, turn off the REVERSE switch<br />
on the operator’s panel, then press the cycle start switch. If the REVERSE<br />
switch on the operator’s panel is on, the tool moves in the reverse direction<br />
or completes reverse movement.<br />
Three methods are available for moving the tool in the reverse direction<br />
along the programmed path.<br />
1) When the tool is moving in the forward direction, turn on the<br />
REVERSE switch on the operator’s panel during block execution.<br />
2) When the tool is moving in the forward direction, turn on the<br />
REVERSE switch on the operator’s panel after a single block stop.<br />
3) When the tool is moving in the forward direction, turn on the<br />
REVERSE switch on the operator’s panel after a feed hold stop.<br />
In the case of 1) above, the tool starts reverse movement after completion<br />
of the block currently being executed (after execution up to the position<br />
of a single block stop). Turning on the REVERSE switch on the<br />
operator’s panel does not immediately start reverse movement.<br />
Cycle start<br />
(forward movement started)<br />
827<br />
REVERSE swtch rurned on<br />
<br />
<br />
<br />
In the case of 2) above, the tool starts reverse movement at the position<br />
of a single block stop when the cycle start switch is pressed.<br />
Cycle start<br />
(forward movement started)<br />
Single block stop<br />
REVERSE switch<br />
turned on cycle start<br />
<br />
<br />
<br />
In the case of 3) above, the tool starts reverse movement at the position<br />
of a feed hold stop when the cycle start switch is pressed.
OPERATION<br />
4. AUTOMATIC OPERATION B–63534EN/02<br />
Reverse movement →<br />
Forward return movement<br />
<br />
<br />
828<br />
Feed hold stop<br />
REVERSE switch<br />
rurned on cycle start<br />
<br />
<br />
<br />
Three methods are available for moving the tool in the forward direction<br />
again along the retraced path.<br />
1) When the tool is moving in the reverse direction, turn off the<br />
REVERSE switch on the operator’s panel during block execution.<br />
2) When the tool is moving in the reverse direction, turn off the<br />
REVERSE switch on the operator’s panel after a single block stop.<br />
3) When the tool is moving in the reverse direction, turn off<br />
theREVERSE switch on the operator’s panel after a feed hold stop.<br />
In the case of 1) above, the tool starts forward return movement after<br />
completion of the block currently being executed (after execution up to<br />
the position of a single block stop). Turning off the REVERSE switch on<br />
the operator’s panel does not immediately start forward return movement.<br />
Cycle start<br />
(forward movement started)<br />
Forward return<br />
movement<br />
started<br />
REVERSE<br />
switch<br />
turned off<br />
<br />
<br />
<br />
<br />
<br />
In the case of 2) above, the tool starts forward return movement at the<br />
position of a single block stop when the cycle start switch is pressed.<br />
Cycle start<br />
(forward movement started)<br />
Single block stop<br />
REVERSE switch<br />
turned off<br />
Cycle start<br />
Forward return movement started<br />
<br />
<br />
Forward movement<br />
Reverse movement<br />
Forward return<br />
movemnt<br />
In the case of 3) above, the tool starts forward return movement at the<br />
position of a feed hold stop when the cycle start switch is pressed.
OPERATION<br />
B–63534EN/02 4. AUTOMATIC OPERATION<br />
Reverse movement →<br />
Reverse movement<br />
completion → Forward<br />
return movement<br />
Forward return movement<br />
→ Forward movement<br />
Feed hold stop<br />
REVERSE<br />
switch turned off<br />
Cycle start<br />
829<br />
Cycle start<br />
(forward movement started)<br />
Forward return<br />
movement started<br />
Reverse movement<br />
started<br />
<br />
<br />
<br />
<br />
When there are no more blocks for which to perform reverse movement<br />
(when the tool has moved back to the initial forward movement block or<br />
the tool has not yet started forward movement), the reverse movement<br />
completion state is entered and operation stops.<br />
Even when the cycle start switch is pressed with the REVERSE switch<br />
on the operator’s panel turned on, no operation is performed (the reverse<br />
movement completion state remains unchanged). When the cycle start<br />
switch is pressed after turning off the REVERSE switch on the operator’s<br />
panel, the tool starts forward return movement or forward movement.<br />
Reverse movement<br />
completed<br />
REVERSE switch<br />
turned off<br />
Cycle start<br />
Cycle start<br />
(forward movement started)<br />
Forward return<br />
movement<br />
started<br />
Reverse movement<br />
started<br />
<br />
<br />
<br />
When the tool completes a forward return movement up to the block<br />
where reverse movement was started, the tool automatically resumes<br />
forward movement. Programmed commands are read and program<br />
execution is continued. No particular operation is required to resume<br />
forward movement.<br />
When tool movement switches from forward return movement to forward<br />
movement, the display of RTRY (Re–TRY) in the lower–right corner of<br />
the CRT screen disappears.<br />
Cycle start<br />
(forward movement started)<br />
Forward return movement started<br />
Reverse movement started<br />
Forward movement<br />
started<br />
<br />
<br />
<br />
If the tool moves in the reverse direction after a feed hold stop, the tool<br />
stops forward return movement at the position of the feed hold stop, then<br />
resumes forward movement. If the tool moves in the reverse direction<br />
after a single block stop, the tool also stops forward return movement at<br />
the position of the single block stop.
OPERATION<br />
4. AUTOMATIC OPERATION B–63534EN/02<br />
Explanations<br />
Forward movement and<br />
reverse movement<br />
Forward return<br />
movement<br />
Reverse movement<br />
completion<br />
Cycle start<br />
(forward movement started)<br />
830<br />
Feed hold stop<br />
Reverse movement<br />
signal=1,cycle start<br />
Reverse movement<br />
started<br />
Forward movement started<br />
Forward return movement started<br />
<br />
<br />
<br />
<br />
In automatic operation, a program is usually executed in the order that<br />
commands are specified. This mode of execution is referred to as forward<br />
movement. The retrace function can execute in reverse, program blocks<br />
that have already been executed. This mode of execution is referred to as<br />
reverse movement. In reverse movement, the tool can retrace the tool path<br />
followed by forward movement.<br />
A program can be executed in the reverse direction only for those blocks<br />
that have already been executed in the forward direction.<br />
Approximately 40 to 80 blocks can be executed in the reverse direction,<br />
depending on the program.<br />
During reverse movement, the REVERSE MOVEMENT LED is on and<br />
RVRS blinks in the lower–right corner of the screen to indicate that the<br />
tool is undergoing reverse movement.<br />
The tool can perform reverse movement one block at a time when the<br />
single block mode is set.<br />
The tool can be moved again along the retraced path of the blocks in the<br />
forward direction up to the block where reverse movement was started.<br />
This movement is referred to as forward return movement. In forward<br />
return movement, the tool moves along the same path as forward<br />
movement up to the position where reverse movement started.<br />
When the tool returns to the block where reverse movement was started,<br />
the tool resumes forward movement according to the program.<br />
In forward return movement, the REVERSE MOVEMENT LED is off<br />
and RTRY (Re–TRY) blinks in the lower–right corner of the screen to<br />
indicate that the tool is undergoing forward return movement. When the<br />
tool switches from forward return movement to forward movement,<br />
RTRY (Re–TRY) disappears from the lower–right corner of the screen.<br />
The tool can perform forward return movement one block at a time when<br />
the single block mode is set.<br />
When there are no more blocks for which to perform reverse movement<br />
(when the tool has moved back along the path of all memorized blocks<br />
or the tool has not yet started forward movement), operation stops. This<br />
is referred to as reverse movement completion.<br />
Upon reverse movement completion, the REVERSE MOVEMENT LED<br />
goes off, and RVED (ReVerse EnD) blinks in the lower–right corner of<br />
the screen to indicate that reverse movement is completed.
OPERATION<br />
B–63534EN/02 4. AUTOMATIC OPERATION<br />
Reset<br />
Feedrate<br />
Limitations<br />
Block that disables<br />
reverse movement<br />
Upon reset (when the RESET key on the MDI panel is pressed, the<br />
external reset signal is applied, or the reset and rewind signal is applied),<br />
the memorized reverse movement blocks are cleared.<br />
A feedrate for reverse movement can be specified using parameter (No.<br />
1414). When this parameter is set to 0, the feedrate used for forward<br />
movement is used.<br />
For forward return movement, the feedrate for forward movement is<br />
always used.<br />
In reverse movement and forward return movement, the feedrate override<br />
function, rapid traverse override function, and dry run function are<br />
enabled.<br />
Reverse movement stops when any of the commands or modes listed<br />
below appears. If an attempt is made during forward movement to stop<br />
forward movement with feed hold stop and then move the tool in the<br />
reverse direction when any of the commands and modes below is<br />
specified, the reverse movement completion state occurs.<br />
⋅ Involute interpolation (G02.2/ G03.2)<br />
⋅ Exponential interpolation (G02.3/ G03.3)<br />
⋅ Cylindrical interpolation (G07.1, G107)<br />
⋅ Polar coordinate interpolation mode (G12.1)<br />
⋅ <strong>Inc</strong>h/metric conversion (G20/ G21)<br />
⋅ Reference position return check (G27)<br />
⋅ Return to reference position (G28)<br />
⋅ Return from reference position (G29)<br />
⋅ 2nd, 3rd, and 4th reference position return (G30)<br />
⋅ Floating reference position return (G30.1)<br />
⋅ Thread cutting (G33)<br />
⋅ <strong>Machine</strong> coordinate system selection (G53)<br />
⋅ Chopping operation command (G81.1)<br />
(See the chopping function described later.)<br />
⋅ Rigid tapping cycle (M29, G84)<br />
⋅ High speed cycle machining (G05)<br />
⋅ High speed remote buffer A (G05)<br />
⋅ High speed remote buffer B (G05)<br />
⋅ High precision contour control (RISC) (G05)<br />
⋅ Advanced preview control (G08)<br />
⋅ Cs contour control<br />
831
OPERATION<br />
4. AUTOMATIC OPERATION B–63534EN/02<br />
Circular<br />
interpolation(G02,G03)<br />
Interrupt–type custom<br />
macro<br />
Tool life management<br />
Switching automatic<br />
operation mode<br />
Positioning (G00)<br />
Dwell (G04)<br />
Programmable data<br />
setting (G10)<br />
Stored stroke check<br />
function on/off (G22,G23)<br />
Be sure to specify the radius of an arc with R.<br />
WARNING<br />
If an end point is not correctly placed on an arc (if a leading<br />
line is produced) when an arc center is specified using I, J,<br />
and K, the tool does not perform correct reverse movement.<br />
1. Never initiate an interrupt during reverse movement.<br />
2. Never perform reverse movement for an interrupte block and the<br />
program that has issure the interrupt.<br />
The retrace function does not support the tool life management funciton.<br />
If the operation mode is switched after a single block stop from memory<br />
operation to MDI operation or vice versa during reverse movement or<br />
forward return movement, reverse movement, forward return movement,<br />
and forward movement can no longer be performed. To restart operation,<br />
return the mode to the original mode, then press the cycle start switch.<br />
When the tool is positioned based on nonlinear interpolation by setting<br />
bit 1 (LRP) of parameter No. 1401 to 0, the path of the tool for reverse<br />
movement does not match the path for forward movement. The path for<br />
forward return movement is the same as the path for forward movement.<br />
When the tool is positioned based on linear interpolation by setting bit 1<br />
(LRP) of parameter No. 1401 to 1, the path of the tool for reverse<br />
movement matches the path for forward movement.<br />
Positioning based on nonlinear<br />
interpolation (LRP=0)<br />
Y<br />
X<br />
832<br />
Positioning based on linear<br />
interpolation (LRP=1)<br />
<br />
<br />
<br />
<br />
The dwell command (G04) is executed in reverse movement and forward<br />
return movement in the same way as during ordinary operation.<br />
A tool compensation value, parameter, pitch error data, workpiece zero<br />
point offset value, and tool life management setting specified or modified<br />
using the programmable data setting code (G10) are ignored in reverse<br />
movement and forward return movement.<br />
The on/off state of the stored stroke check function present at the end of<br />
forward movement remains unchanged during reverse movement and<br />
forward return movement. This means that the actual on/off state may<br />
differ from the modal G22/G23 indication. When reverse movement or<br />
forward return movement is cancelled upon reset, the modal G22/G23<br />
indication at that time becomes valid.<br />
The setting of an area with G22 X_Y_Z_I_J_K at the end of forward<br />
movement remains unchanged.
OPERATION<br />
B–63534EN/02 4. AUTOMATIC OPERATION<br />
Skip funtion (G31),<br />
automatic tool length<br />
measurement (G37)<br />
Chopping function<br />
(G81.1)<br />
Inverse time feed (G93)<br />
Constant surface speed<br />
control on/off (G96,G97)<br />
Clamping maximum<br />
spindle speed<br />
(G92Sxxxx)<br />
In reverse movement and forward return movement, the skip signal and<br />
automatic tool length measurement signal are ignored. In reverse<br />
movement and forward return movement, the tool moves along the path<br />
actually followed in forward movement.<br />
Forward return<br />
movement<br />
<br />
<br />
Forward movement<br />
(actual path)<br />
833<br />
When the signal is not applied<br />
(G31) (Programmed path)<br />
<br />
<br />
Whether the chopping operation is performed in reverse movement and<br />
forward return movement is determined by whether the chopping<br />
operation was performed at the end of forward movement.<br />
If the tool starts reverse movement with the chopping mode off and moves<br />
in the reverse direction along the path of a block where the chopping mode<br />
is on, the chopping axis maintains its position at point R.<br />
When a block specifying G81.1 (chopping command) appears during<br />
reverse movement, reverse movement ends and operation stops.<br />
Along the path of a block where the tool moved according to inverse time<br />
feed in forward movement, the tool moves in the reverse direction<br />
according to the feedrate specified by parameter No. 1414 (= 0) for reverse<br />
movement.<br />
If parameter No. 1414 for specifying the feedrate for reverse movement<br />
is not set (= 0), the tool moves in the reverse direction at the same feedrate<br />
as during forward movement.<br />
If the on/off mode of constant surface speed control is specified in reverse<br />
movement, the specified mode is used in subsequent reverse movement.<br />
In other words, when a block specifying G96Sxxxx; appears in reverse<br />
movement, constant surface speed control is on for subsequent reverse<br />
movement. When a block specifying G97Sxxxx; appears in reverse<br />
movement, constant surface speed control is off for subsequent reverse<br />
movement.<br />
Note that the on/off mode of constant surface speed control in forward<br />
movement is reversed in reverse movement.<br />
If the command for clamping maximum spindle speed is specified in<br />
reverse movement, the specified clamp is applied to subsequent reverse<br />
movement. In other words, when G92Sxxxx appears in reverse<br />
movement, the spindle speed is clamped at Sxxxx. Note, however, that<br />
the spindle speed is clamped only when the G96 mode is set.
OPERATION<br />
4. AUTOMATIC OPERATION B–63534EN/02<br />
Auxiliary function<br />
Tool compensation value<br />
Custom macro operation<br />
Manual intervention<br />
Tool withdrawal and<br />
return function<br />
Mirror image<br />
The M, S, and T functions, and secondary auxiliary functions (B<br />
functions) are output directly in reverse movement and forward return<br />
movement.<br />
When an M, S, or T function, or secondary auxiliary function (B function)<br />
is specified in a block containing a move command, the function and the<br />
move command are output at the same time in forward movement, reverse<br />
movement, and forward return movement. This means that the position<br />
where an M, S, or T function, or secondary auxiliary function (B function)<br />
is output differs in forward movement, reverse movement, and forward<br />
return movement.<br />
Even if a cutter compensation value or tool length compensation value is<br />
modified in reverse movement or forward return movement, the tool<br />
moves according to the compensation value used when the block was<br />
executed in the forward movement.<br />
All custom macro operations are ignored in reverse movement and<br />
forward return movement.<br />
The values of macro variables present at the end of forward movement<br />
remain unchanged.<br />
When the tool has been moved by manual intervention, return the tool to<br />
the original position before moving the tool in the reverse direction after<br />
a feed hold stop or single block stop.In reverse movement, the tool cannot<br />
move along the path made during manual intervention. All movements<br />
made by manual intervention are ignored in reverse movement and<br />
forward return movement.<br />
The tool cannot move along the path retraction or repositioning<br />
performed using the tool withdrawal and return function. All retraction<br />
and repositioning operations are ignored in reverse movement and<br />
forward return movement.<br />
When a block with the mirror image function specified by a signal or<br />
setting is memorized in forward movement, the mirror image function is<br />
eliminated; the block is memorized as originally programmed.<br />
Accordingly, in reverse movement and forward return movement, the tool<br />
moves along the programmed path.In reverse movement or forward<br />
return movement, the mirror image function can be specified by a signal<br />
or setting.<br />
When the tool performs reverse movement or forward return movement<br />
for a block where the mirror image function is specified by the<br />
programmable mirror image code (G51.1), the tool moves along the<br />
actual path incorporating the mirror image function.<br />
834
OPERATION<br />
B–63534EN/02 4. AUTOMATIC OPERATION<br />
4.12<br />
MANUAL<br />
INTERVENTION AND<br />
RETURN<br />
Explanations<br />
Manual absolute on/off<br />
Override<br />
Return operation<br />
Single block<br />
Cancellation<br />
MDI mode<br />
Limitations<br />
Enabling and disabling<br />
manual intervention and<br />
return<br />
Offset<br />
<strong>Machine</strong> lock, mirror<br />
image, and scaling<br />
In cases such as when tool movement along an axis is stopped by feed hold<br />
during automatic operation so that manual intervention can be used to<br />
replace the tool: When automatic operation is restarted, this function<br />
returns the tool to the position where manual intervention was started.<br />
To use the conventional program restart function and tool withdrawal and<br />
return function, the switches on the operator’s panel must be used in<br />
conjunction with the MDI keys. This function does not require such<br />
operations.<br />
Before this function can be used, MIN (bit 0 of parameter No. 7001) must<br />
be set to 1.<br />
In manual absolute off mode, the tool does not return to the stop position,<br />
but instead operates according to the manual absolute on/off function.<br />
For the return operation, the dry run feedrate is used, and the jog feedrate<br />
override function is enabled.<br />
Return operation is performed according to positioning based on<br />
nonlinear interpolation.<br />
If the single block stop switch is on during return operation, the tool stops<br />
at the stop position and restarts movement when the cycle start switch is<br />
pressed.<br />
If a reset occurs or an alarm is issued during manual intervention or the<br />
return operation, this function is cancelled.<br />
This function can be used in the MDI mode as well.<br />
This function is enabled only when the automatic operation hold LED is<br />
on. When there is no travel distance remaining, this function has no effect<br />
even if a feed hold stop is performed with the automatic operation hold<br />
signal *SP (bit 5 of G008).<br />
When the tool is replaced using manual intervention for a reason such as<br />
damage, the tool movement cannot be restarted by a changed offset in the<br />
middle of the interrupted block.<br />
When performing manual intervention, never use the machine lock,<br />
mirror image, or scaling functions.<br />
835
OPERATION<br />
4. AUTOMATIC OPERATION B–63534EN/02<br />
Example<br />
1. The N1 block cuts a workpiece<br />
Tool<br />
Block start point<br />
B<br />
836<br />
N1<br />
N1 Point A<br />
Point B<br />
Manual<br />
intervention<br />
N1 Point A<br />
N1 Point A<br />
N2<br />
N2<br />
N2<br />
N2<br />
2. The tool is stopped by pressing the feed hold switch in<br />
the middle of the N1 block (point A).<br />
3. After retracting the tool manually to point B, tool movement is restarted.<br />
4. After automatic return to point A at the dry run feedrate, the remaining<br />
move command of the N1 block is executed.<br />
WARNING<br />
When performing manual intervention, pay particular<br />
attention of machining and the shape of the workpiece so<br />
that the machine and tool are not damaged.
OPERATION<br />
B–63534EN/02 4. AUTOMATIC OPERATION<br />
4.13<br />
DNC OPERATION<br />
WITH MEMORY<br />
CARD<br />
4.13.1<br />
Specification<br />
Normal Memory<br />
operation by<br />
memory in the<br />
CNC<br />
Memory in CNC<br />
(Program)<br />
Memory in CNC<br />
(Program)<br />
Normal Memory<br />
operation by memory<br />
in the CNC<br />
“DNC operation with Memory Card” is a function that it is possible to<br />
perform machining with executing the program in the memory card,<br />
which is assembled to the memory card interface, where is the left side<br />
of the screen.<br />
There are two methods to use this function as follows.<br />
(a) By starting automatic operation (cycle start) during the DNC<br />
operation mode (RMT), it is possible to perform machining (DNC<br />
operation) while a program is being read from a memory card, as by<br />
using the external input/output unit such as a floppy cassette and so on.<br />
(Fig. 4.13.1 (a))<br />
(b)It is possible to read sub–programs written in the memory card and<br />
execute them by the command Subprogram call (M198). (Fig. 4.13.1<br />
(b))<br />
Execution of programs<br />
Memory Card<br />
(Program)<br />
Fig. 4.13.1 (a)<br />
Execution of programs<br />
Memory Card<br />
(Sub Program)<br />
Fig. 4.13.1 (b)<br />
837<br />
DNC operation<br />
with Memory<br />
card<br />
Subprogram<br />
Call (M198)<br />
It is possible to do the DNC<br />
operation with Memory card<br />
instead of the normal memory<br />
operation by memory in the CNC.<br />
It is possible to execute the<br />
subprogram in the memory card<br />
during memory operation.
OPERATION<br />
4. AUTOMATIC OPERATION B–63534EN/02<br />
4.13.2<br />
Operations<br />
4.13.2.1<br />
DNC Operation<br />
Procedure<br />
NOTE<br />
1 To use this function, it is necessary to set the parameter of<br />
No.20 to 4 by setting screen.<br />
No.20 [I/O CHANEL: Setting to select an input/output unit]<br />
Setting value is 4.: It means using the memory card<br />
interface.<br />
2 When CNC control unit is a stand–alone type, the memory<br />
card interface on the left side of the screen of the display unit<br />
is available. But the interface on the control unit is not<br />
available.<br />
Please set the parameter of No.0020 to 4 in the setting screen in advance.<br />
(1)Change to RMT mode.<br />
(2)Push [PROGRAM] function key.<br />
(3)Push [ > ] soft key (continuance menu).<br />
(4)When [DNC–CD] soft key is pushed, the following screen is<br />
displayed.<br />
(5)The screen can be scrolled by page key. An arbitrary file number is<br />
input, and [F SRH] soft key is pushed. Then the arbitrary file name<br />
is displayed at the top of DNC operation (memory card) screen.<br />
(6)When the file number that is executed is input and the [DNC–ST] soft<br />
key is pushed, the file name that is selected is set to DNC FILE.<br />
(7)When the cycle start is done, the program that is selected is executed.<br />
838
OPERATION<br />
B–63534EN/02 4. AUTOMATIC OPERATION<br />
4.13.2.2<br />
Subprogram Call (M198)<br />
Format<br />
Explanation<br />
When the following block in a program in CNC memory is executed, a<br />
subprogram file in memory card is called.<br />
1. Normal format<br />
M198 P ∆∆∆∆ ;<br />
2. FS15 tape format<br />
M198 P L∆∆∆∆ ;<br />
839<br />
File number for a file in<br />
the memory card<br />
Number of repetition<br />
Memory card call instruction<br />
File number of repetition<br />
File number for a file in the<br />
memory card<br />
Memory card call instruction<br />
When the custom macro option is provided, both format 1 and 2 can be<br />
used. A different M code can be used for a subprogram call depending<br />
on the setting of parameter No. 6030. In this case, M198 is executed as<br />
a normal M code. The file number is specified at address P. If the SBP<br />
(bit 2) of parameter No. 3404 is set to 1, a program number can be<br />
specified. When a file number is specified at address P, Fxxxx is indicated<br />
instead of Oxxxx.<br />
NOTE<br />
Please set the parameter of No. 0020 to 4 in the setting<br />
screen in advance.
OPERATION<br />
4. AUTOMATIC OPERATION B–63534EN/02<br />
4.13.3<br />
Limitation and Notes<br />
4.13.4<br />
Parameter<br />
0138<br />
#7<br />
DNM<br />
(1)The memory card can not be accessed, such as display of memory card<br />
list and so on, during the DNC operation with memory card.<br />
(2)It is possible to execute the DNC operation with memory card on multi<br />
path system. However, it is not possible to call programs from the<br />
plural paths at the same time.<br />
(3)The selection of DNC operation file that is set at DNC OPERATION<br />
screen is cleared by the power supply turn off and on. After the power<br />
supply is turned on again, it is necessary to select the DNC operation<br />
file again.<br />
(4)Please do not pull out and insert memory card during the DNC<br />
operation with memory card.<br />
(5)It is not possible to call a program in the memory card from the DNC<br />
operation program.<br />
(6)In case of using this function, the PMCIA card attachment written at<br />
section 6 must be used to prevent a poor connection or drop out of the<br />
memory card from occurring by vibration of the machine.<br />
(7)In case of the stand–alone type i series that the display unit is a Display<br />
link unit, this function can not be used.<br />
(8)The memory card interface on the stand–alone type controller is not<br />
available. Please use the memory card interface on the display unit.<br />
#6 #5 #4 #3 #2 #1 #0<br />
[Data type] Bit<br />
#7 (DNM) The DNC operation with memory card function is<br />
0 : disable.<br />
1 : enable.<br />
840
OPERATION<br />
B–63534EN/02 4. AUTOMATIC OPERATION<br />
4.13.5<br />
Connecting PCMCIA<br />
Card Attachment<br />
4.13.5.1<br />
Specification Number<br />
4.13.5.2<br />
Assembling<br />
Attachment guide<br />
Specification Remarks<br />
A02B–0236–K160 For 7.2″ LCD or 8.4″ LCD<br />
A02B–0236–K161 For 9.5″ LCD or 10.4″ LCD<br />
1) How to assemble to the unit<br />
Assemble an attachment guide and a control unit to the cabinet by<br />
screwing together as follow figure.<br />
The attachment guide is 1.6mm thick. Pay attention for the length of<br />
the screws when you assemble them.<br />
841
OPERATION<br />
4. AUTOMATIC OPERATION B–63534EN/02<br />
2) How to mount the card<br />
(a) Insert the card to slit of the attachment. Please pay attention to the<br />
direction of the card. (Please mach the direction of ditch on the<br />
card.)<br />
(b)Push up the card to the upper end of the attachment.<br />
3) Assembling of the attachment<br />
Insert the memory card with the attachment into the memory card<br />
interface as following figure. And, fix the attachment guide by<br />
screwing the screw of the attachment guide by manual.<br />
Memory card interface<br />
screw to fix the attachment<br />
842<br />
attachment
OPERATION<br />
B–63534EN/02 4. AUTOMATIC OPERATION<br />
4.13.6<br />
Recommended<br />
Memory Card<br />
4) Appearance after connection<br />
NOTE<br />
1 In both case of stand–alone type i series and LCD–mounted<br />
type i series, the memory card interface where is the left side<br />
of the screen of the display unit. (The memory card interface<br />
on the stand–alone type controller is not available.)<br />
2 It is impossible to assemble the display unit and the<br />
attachment guide from inside of the cabinet.<br />
3 The memory card must be used in the condition, as the<br />
coolant cannot be poured directly on it.<br />
Maker Type Capacity<br />
Hitachi LTD HB289016A4 16<strong>MB</strong><br />
843<br />
HB289032A4 32<strong>MB</strong><br />
HB289160A4 160<strong>MB</strong><br />
Matushita electric BN–012AB 12<strong>MB</strong><br />
BN–020AB 20<strong>MB</strong><br />
BN–040AB 40<strong>MB</strong><br />
SanDisk SDP3B–4 4<strong>MB</strong><br />
SDP3B–20 20<strong>MB</strong><br />
SDP3B–40 40<strong>MB</strong>
5. TEST OPERATION OPERATION<br />
B–63534EN/02<br />
5 <br />
<br />
The following functions are used to check before actual machining<br />
whether the machine operates as specified by the created program.<br />
5.1 <strong>Machine</strong> Lock and Auxiliary Function Lock<br />
5.2 Feedrate Override<br />
5.3 Rapid Traverse Override<br />
5.4 Dry Run<br />
5.5 Single Block<br />
844
B–63534EN/02 OPERATION<br />
5. TEST OPERATION<br />
5.1<br />
MACHINE LOCK AND<br />
AUXILIARY<br />
FUNCTION LOCK<br />
<strong>Machine</strong> Lock<br />
Auxiliary Function Lock<br />
To display the change in the position without moving the tool, use<br />
machine lock.<br />
There are two types of machine lock: all–axis machine lock, which stops<br />
the movement along all axes, and specified–axis machine lock, which<br />
stops the movement along specified axes only. In addition, auxiliary<br />
function lock, which disables M, S, and T commands, is available for<br />
checking a program together with machine lock.<br />
Workpiece<br />
845<br />
Tool<br />
<br />
<br />
<br />
MDI<br />
The tool does not move but the<br />
position along each axis changes<br />
on the display.<br />
Fig. 5.1 <strong>Machine</strong> lock<br />
Procedure for <strong>Machine</strong> Lock and Auxiliary Function Lock<br />
Press the machine lock switch on the operator’s panel. The tool does not<br />
move but the position along each axis changes on the display as if the tool<br />
were moving.<br />
Some machines have a machine lock switch for each axis. On such<br />
machines, press the machine lock switches for the axes along which the<br />
tool is to be stopped. Refer to the appropriate manual provided by the<br />
machine tool builder for machine lock.<br />
WARNING<br />
The positional relationship between the workpiece<br />
coordinates and machine coordinates may differ before and<br />
after automatic operation using machine lock. In such a<br />
case, specify the workpiece coordinate system by using a<br />
coordinate setting command or by performing manual<br />
reference position return.<br />
Press the auxiliary function lock switch on the operator’s panel. M, S, T<br />
and B codes are disabled and not executed. Refer to the appropriate<br />
manual provided by the machine tool builder for auxiliary function lock.
5. TEST OPERATION OPERATION<br />
B–63534EN/02<br />
Restrictions<br />
M, S, T, B command by<br />
only machine lock<br />
Reference position<br />
return under <strong>Machine</strong><br />
Lock<br />
<br />
<br />
M, S, T and B commands are executed in the machine lock state.<br />
When a G27, G28, or G30 command is issued in the machine lock state,<br />
the command is accepted but the tool does not move to the reference<br />
position and the reference position return LED does not go on.<br />
M00, M01, M02, M30, M98, and M99 commands are executed even in<br />
the auxiliary function lock state. M codes for calling a subprogram<br />
(parameters No. 6071 to 6079) and those for calling a custom macro<br />
(parameter No. 6080 to 6089) are also executed.<br />
846
B–63534EN/02 OPERATION<br />
5. TEST OPERATION<br />
5.2<br />
FEEDRATE<br />
OVERRIDE<br />
0 200<br />
JOG FEED RATE OVERRIDE<br />
<br />
Override Range<br />
Override during thread<br />
A programmed feedrate can be reduced or increased by a percentage (%)<br />
selected by the override dial.This feature is used to check a program.<br />
For example, when a feedrate of 100 mm/min is specified in the program,<br />
setting the override dial to 50% moves the tool at 50 mm/min.<br />
Feedrate 100 mm/min<br />
(Specified by programmed)<br />
Feedrate 50 mm/min after<br />
feedrate override<br />
Procedure for Feedrate Override<br />
847<br />
Workpiece<br />
Tool<br />
Fig. 5.2 Feedrate override<br />
Check the machining<br />
by altering the feedrate<br />
from the value specified<br />
in the program.<br />
Set the feedrate override dial to the desired percentage (%) on the machine<br />
operator’s panel, before or during automatic operation.<br />
On some machines, the same dial is used for the feedrate override dial and<br />
jog feedrate dial. Refer to the appropriate manual provided by the<br />
machine tool builder for feedrate override.<br />
The override that can be specified ranges from 0 to 254%. For individual<br />
machines, the range depends on the specifications of the machine tool<br />
builder.<br />
During threading, the override is ignored and the feedrate remains as<br />
specified by program.
5. TEST OPERATION OPERATION<br />
B–63534EN/02<br />
5.3<br />
RAPID TRAVERSE<br />
OVERRIDE<br />
Procedure<br />
LOW<br />
25 50<br />
100<br />
Rapid traverse override<br />
<br />
Rapid Traverse Override<br />
An override of four steps (F0, 25%, 50%, and 100%) can be applied to the<br />
rapid traverse rate. F0 is set by a parameter (No. 1421).<br />
848<br />
ÇÇ<br />
ÇÇ<br />
ÇÇ<br />
Rapid traverse<br />
rate10m/min<br />
Override<br />
50%<br />
Fig. 5.3 Rapid traverse override<br />
ÇÇ<br />
ÇÇ<br />
5m/min<br />
ÇÇ<br />
Select one of the four feedrates with the rapid traverse override switch<br />
during rapid traverse. Refer to the appropriate manual provided by the<br />
machine tool builder for rapid traverse override.<br />
The following types of rapid traverse are available. Rapid traverse<br />
override can be applied for each of them.<br />
1) Rapid traverse by G00<br />
2) Rapid traverse during a canned cycle<br />
3) Rapid traverse in G27, G28, G29, G30, G53<br />
4) Manual rapid traverse<br />
5) Rapid traverse of manual reference position return
B–63534EN/02 OPERATION<br />
5. TEST OPERATION<br />
5.4<br />
DRY RUN<br />
<br />
<br />
<br />
SINGLE<br />
BLOCK<br />
DRY<br />
RUN<br />
OPT<br />
STOP<br />
MST<br />
LOCK<br />
BLOCK<br />
SKIP<br />
WORK<br />
LIGHT<br />
Procedure for Dry Run<br />
MC<br />
LOCK<br />
The tool is moved at the feedrate specified by a parameter regardless of<br />
the feedrate specified in the program. This function is used for checking<br />
the movement of the tool under the state taht the workpiece is removed<br />
from the table.<br />
849<br />
Table<br />
Fig. 5.4 Dry run<br />
Tool<br />
Press the dry run switch on the machine operator’s panel during automatic<br />
operation.<br />
The tool moves at the feedrate specified in a parameter. The rapid traverse<br />
switch can also be used for changing the feedrate.<br />
Refer to the appropriate manual provided by the machine tool builder for<br />
dry run.<br />
The dry run feedrate changes as shown in the table below according to the<br />
rapid traverse switch and parameters.<br />
Rapid traverse<br />
Program command<br />
button Rapid traverse Feed<br />
ON Rapid traverse rate Dry run feedrateMax.JV *2)<br />
OFF Dry run speedJV,or<br />
rapid traverse rate *1)<br />
Dry run feedrateJV<br />
*2)<br />
Max. cutting feedrate . . . . . Setting by parameter No.1422<br />
Rapid traverse rate . . . . . . . Setting by parameter No.1420<br />
Dry run feedrate . . . . . . . . . Setting by parameter No.1410<br />
JV: Jog feedrate override<br />
*1) Dry run feedrate x JV when parameter RDR (bit 6 of No. 1401) is<br />
1. Rapid traverse rate when parameter RDR is 0.<br />
*2) Clamped to the maximum cutting feedrate<br />
JVmax: Maximum value of jog feedrate override
5. TEST OPERATION OPERATION<br />
B–63534EN/02<br />
5.5<br />
SINGLE BLOCK<br />
<br />
Pressing the single block switch starts the single block mode. When the<br />
cycle start button is pressed in the single block mode, the tool stops after<br />
a single block in the program is executed. Check the program in the single<br />
block mode by executing the program block by block.<br />
Cycle start<br />
Stop<br />
Procedure for Single block<br />
850<br />
Stop<br />
Cycle start<br />
Workpiece<br />
Fig. 5.5 (a) Single block<br />
Cycle start<br />
Stop<br />
Tool<br />
1 Press the single block switch on the machine operator’s panel. The<br />
execution of the program is stopped after the current block is<br />
executed.<br />
2 Press the cycle start button to execute the next block. The tool stops<br />
after the block is executed.<br />
Refer to the appropriate manual provided by the machine tool builder<br />
for single block execution.
B–63534EN/02 OPERATION<br />
5. TEST OPERATION<br />
Explanation<br />
Reference position<br />
return and single block<br />
Single block during a<br />
canned cycle<br />
Subprogram call and<br />
single block<br />
If G28 to G30 are issued, the single block function is effective at the<br />
intermediate point.<br />
In a canned cycle, the single block stop points are the end of , , and<br />
shown below. When the single block stop is made after the point <br />
or , the feed hold LED lights.<br />
851<br />
<br />
<br />
<br />
<br />
<br />
<br />
<br />
<br />
Fig. 5.5 (b) Single block during canned cycle<br />
Single block stop is not performed in a block containing M98P_;. M99;<br />
or G65.<br />
However, single block stop is even performed in a block with M98P_ or<br />
M99 command, if the block contains an address other than O, N, P, L.
6. SAFETY FUNCTIONS OPERATION<br />
B–63534EN/02<br />
6 <br />
<br />
To immediately stop the machine for safety, press the Emergency stop<br />
button. To prevent the tool from exceeding the stroke ends, Overtravel<br />
check and Stroke check are available. This chapter describes emergency<br />
stop., overtravel check, and stroke check.<br />
852
B–63534EN/02 OPERATION<br />
6. SAFETY FUNCTIONS<br />
6.1<br />
EMERGENCY STOP<br />
<br />
If you press Emergency Stop button on the machine operator’s panel, the<br />
machine movement stops in a moment.<br />
853<br />
EMERGENCY STOP<br />
Red<br />
Fig. 6.1 Emergency stop<br />
This button is locked when it is pressed. Although it varies with the<br />
machine tool builder, the button can usually be unlocked by twisting it.<br />
EMERGENCY STOP interrupts the current to the motor.<br />
Causes of trouble must be removed before the button is released.
6. SAFETY FUNCTIONS OPERATION<br />
B–63534EN/02<br />
6.2<br />
OVERTRAVEL<br />
Explanation<br />
Overtravel during<br />
automatic operation<br />
Overtravel during<br />
manual operation<br />
Releasing overtravel<br />
Alarm<br />
When the tool tries to move beyond the stroke end set by the machine tool<br />
limit switch, the tool decelerates and stops because of working the limit<br />
switch and an OVER TRAVEL is displayed.<br />
Deceleration and stop<br />
854<br />
Stroke end<br />
Limit switch<br />
Fig. 6.2 Overtravel<br />
When the tool touches a limit switch along an axis during automatic<br />
operation, the tool is decelerated and stopped along all axes and an<br />
overtravel alarm is displayed.<br />
In manual operation, the tool is decelerated and stopped only along the<br />
axis for which the tool has touched a limit switch. The tool still moves<br />
along the other axes.<br />
Press the reset button to reset the alarm after moving the tool to the safety<br />
direction by manual operation. For details on operation, refer to the<br />
operator’s manual of the machine tool builder.<br />
Alarm<br />
No.<br />
Message Description<br />
506 Overtravel: +n<br />
507 Overtravel: –n<br />
The tool has exceeded the hardware–specified<br />
overtravel limit along the positive nth axis<br />
(n: 1 to 8).<br />
The tool has exceeded the hardware–specified<br />
overtravel limit along the negative nth axis<br />
(n: 1 to 8).<br />
Y
B–63534EN/02 OPERATION<br />
6. SAFETY FUNCTIONS<br />
6.3<br />
STORED STROKE<br />
CHECK<br />
Explanation<br />
Stored stroke check 1<br />
Stored stroke check 2<br />
(G22, G23)<br />
Three areas which the tool cannot enter can be specified with stored stroke<br />
check 1, stored stroke check 2, and stored stroke check 3.<br />
ÇÇÇÇÇÇÇÇÇÇÇÇÇÇ<br />
ÇÇÇÇÇÇÇÇ<br />
ÇÇÇÇÇÇÇÇÇÇÇÇÇÇ<br />
(I,J,K)<br />
ÇÇÇÇÇÇÇÇÇÇÇÇÇÇ<br />
ÇÇÇÇÇÇÇÇ<br />
ÇÇÇÇÇÇÇÇ<br />
ÇÇÇÇÇÇÇÇÇÇÇÇÇÇ<br />
ÇÇÇÇÇÇÇÇÇÇÇÇÇÇ<br />
ÇÇÇÇÇÇÇÇ<br />
ÇÇÇÇÇÇÇÇÇÇÇÇÇÇ<br />
ÇÇ<br />
ÇÇÇÇÇÇÇÇÇ Ç<br />
ÇÇÇÇÇÇÇÇÇ<br />
ÇÇÇÇÇÇÇÇÇ<br />
ÇÇÇÇÇÇÇ<br />
(I,J,K) ÇÇÇÇÇÇÇÇÇ<br />
ÇÇÇÇÇÇÇ<br />
ÇÇ<br />
(1)Forbidden area is inside.<br />
: Forbidden area for the tool<br />
855<br />
(2)Forbidden area is outside<br />
Fig. 6.3 (a) Stroke check<br />
(X,Y,Z)<br />
(X,Y,Z)<br />
When the tool exceeds a stored stroke limit, an alarm is displayed and the<br />
tool is decelerated and stopped.<br />
When the tool enters a forbidden area and an alarm is generated, the tool<br />
can be moved in the reverse direction from which the tool came.<br />
Parameters (Nos. 1320, 1321 or Nos. 1326, 1327) set boundary. Outside<br />
the area of the set limits is a forbidden area. The machine tool builder<br />
usually sets this area as the maximum stroke.<br />
Parameters (Nos. 1322, 1323) or commands set these boundaries. Inside<br />
or outside the area of the limit can be set as the forbidden area. Parameter<br />
OUT (No. 1300#0) selects either inside or outside as the forbidden area.<br />
In case of program command a G22 command forbids the tool to enter the<br />
forbidden area, and a G23 command permits the tool to enter the<br />
forbidden area. Each of G22; and G23; should be commanded<br />
independently of another commands in a block.<br />
The command below creates or changes the forbidden area:
6. SAFETY FUNCTIONS OPERATION<br />
B–63534EN/02<br />
Stored stroke check 3<br />
G 22X_Y_Z_I_J_K_;<br />
856<br />
(I,J,K)<br />
ÇÇÇÇÇÇÇÇ<br />
ÇÇÇÇÇÇÇÇ<br />
ÇÇÇÇÇÇÇÇ<br />
X>I, Y>J, Z>K<br />
ÇÇÇÇÇÇÇÇ<br />
X–I >ζ (In least command increment)<br />
Y–J >ζ (In least command increment)<br />
Z–K >ζ ((In least command increment)<br />
ζ (mm)=<br />
F<br />
7500<br />
F=Rapid traverse speed (mm/min)<br />
(X,Y,Z)<br />
Fig. 6.3 (b) Creating or changing the forbidden area using a program<br />
When setting the area by parameters, points A and B in the figure below<br />
must be set.<br />
B (I,J,K)<br />
ÇÇÇÇÇÇÇÇ<br />
ÇÇÇÇÇÇÇÇ<br />
X>I, Y>J, Z>K<br />
X–I >ζ (In least command increment)<br />
Y–J >ζ (In least command increment)<br />
Z–K >ζ ((In least command increment)<br />
ζ (mm)=<br />
ÇÇÇÇÇÇÇÇ<br />
ÇÇÇÇÇÇÇÇ<br />
F<br />
7500<br />
F=Rapid traverse speed (mm/min)<br />
A (X,Y,Z)<br />
Fig. 6.3 (c) Creating or changing the forbidden area using a parameters<br />
In stored stroke check 2, even if you mistake the order of the coordinate<br />
value of the two points, a rectangular, with the two points being the<br />
apexes, will be set as the area.<br />
When you set the forbidden area through parameters (Nos. 1322, 1323),<br />
the data should be specified by the distance from the machine coordinate<br />
system in the least command increment. (Output increment)<br />
If it is set by a G22 command, specify the data by the distance from the<br />
machine coordinate system in the least input increment (Input increment.)<br />
The programmed data are then converted into the numerical values in the<br />
least command increment, and the values are set as the parameters.<br />
Set the boundary with parameters No. 1324 and 1325. The area inside the<br />
boundary becomes the forbidden area.
B–63534EN/02 OPERATION<br />
6. SAFETY FUNCTIONS<br />
Checkpoint for the<br />
forbidden area<br />
Forbidden area<br />
over lapping<br />
Overrun amount of<br />
stored stroke limit<br />
Effective time for a<br />
forbidden area<br />
Confirm the checking position (the top of the tool or the tool chuck) before<br />
programming the forbidden area.<br />
If point A (The top of the tool) is checked in Fig. 6.3 (d) , the distance “a”<br />
should be set as the data for the stored stroke limit function. If point B<br />
(The tool chuck) is checked, the distance “b” must be set. When checking<br />
the tool tip (like point A), and if the tool length varies for each tool, setting<br />
the forbidden area for the longest tool requires no re–setting and results<br />
in safe operation.<br />
<br />
<br />
<br />
<br />
ÇÇÇÇÇÇÇÇÇÇÇÇÇÇ<br />
ÇÇÇÇÇÇÇÇÇÇÇÇÇÇ<br />
Area can be set in piles.<br />
857<br />
B<br />
A<br />
Fig. 6.3 (d) Setting the forbidden area<br />
ÇÇÇÇÇÇÇÇÇÇ<br />
ÇÇÇÇÇÇÇÇÇÇ<br />
a<br />
ÇÇÇÇÇÇÇÇÇÇ ÇÇÇÇÇÇ<br />
ÇÇÇÇÇÇ<br />
ÇÇÇÇÇÇÇÇÇÇ<br />
ÇÇÇÇÇÇÇÇÇÇ<br />
ÇÇÇÇÇÇÇÇÇÇ<br />
Fig. 6.3 (e) Setting the forbidden area over lapping<br />
Unnecessary limits should be set beyond the machine stroke.<br />
If the maximum rapid traverse rate is F (mm/min), the maximum overrun<br />
amount, L (mm), of the stored stroke limit is obtained from the following<br />
expression:<br />
L (mm) = F/7500<br />
The tool enters the specified inhibited area by up to L (mm). Bit 7 (BFA)<br />
of parameter No. 1300 can be used to stop the tool when it reaches a point<br />
L mm short of the specified area. In this case, the tool will not enter the<br />
inhibited area.<br />
Each limit becomes effective after the power is turned on and manual<br />
reference position return or automatic reference position return by G28<br />
has been performed.<br />
After the power is turned on, if the reference position is in the forbidden<br />
area of each limit, an alarm is generated immediately. (Only in G22 mode<br />
for stored stroke limit 2).<br />
b
6. SAFETY FUNCTIONS OPERATION<br />
B–63534EN/02<br />
Releasing the alarms<br />
Change from G23 to<br />
G22 in a forbidden area<br />
Timing for displaying<br />
an alarm<br />
Setting a forbidden area<br />
for two–path control<br />
Alarms<br />
If the enters a forbidden area and an alarm is generated, the tool can be<br />
moved only in the backward direction. To cancel the alarm, move the tool<br />
backward until it is outside the forbidden area and reset the system. When<br />
the alarm is canceled, the tool can be moved both backward and forward.<br />
When G23 is switched to G22 in the forbidden area, the following results.<br />
(1)When the forbidden area is inside, an alarm is informed in the next<br />
move.<br />
(2)When the forbidden area is outside, an alarm is informed immediately.<br />
Parameter BFA (bit 7 of No. 1300) selects whether an alarm is displayed<br />
immediately before the tool enters the forbidden area or immediately after<br />
the tool has entered the forbidden area.<br />
For two–path control, set a fobidden area for each path.<br />
NOTE<br />
In setting a forbidden area, if the two points to be set are the<br />
same, the area is as follows:<br />
(1) When the forbidden area is stored stroke check 1, all areas<br />
are forbidden areas.<br />
(2) When the forbidden area is stored stroke check 2 or stored<br />
stroke check 3, all areas are movable areas.<br />
Alarm<br />
Number<br />
Message Contents<br />
500 OVER TRAVEL: +n Exceeded the n–th axis (1–8) + side stored<br />
stroke limit I.<br />
501 OVER TRAVEL: –n Exceeded the n–th axis (1–8)<br />
stored stroke limit I.<br />
side<br />
502 OVER TRAVEL: +n Exceeded the n–th axis (1–8) + side stored<br />
stroke limit II.<br />
503 OVER TRAVEL: –n Exceeded the n–th axis (1–8)<br />
stored stroke limit II.<br />
side<br />
504 OVER TRAVEL: +n Exceeded the n–th axis (1–8) + side stored<br />
stroke limit III.<br />
505 OVER TRAVEL: –n Exceeded the n–th axis (1–8)<br />
stored stroke limit III.<br />
side<br />
858
B–63534EN/02 OPERATION<br />
6. SAFETY FUNCTIONS<br />
6.4<br />
STROKE LIMIT<br />
CHECK PRIOR TO<br />
PERFORMING<br />
MOVEMENT<br />
During automatic operation, before the movement specified by a given<br />
block is started, whether the tool enters the inhibited area defined by<br />
stored stroke limit 1, 2, or 3 is checked by determining the position of the<br />
end point from the current position of the machine and a specified amount<br />
of travel. If the tool is found to enter the inhibited area defined by a stored<br />
stroke limit, the tool is stopped immediately upon the start of movement<br />
for that block, and an alarm is displayed.<br />
WARNING<br />
Whether the coordinates of the end point, reached as a<br />
result of traversing the distance specified in each block, are<br />
in a inhibited area is checked. In this case, the path followed<br />
by a move command is not checked. However, if the tool<br />
enters the inhibited area defined by stored stroke limit 1, 2,<br />
or 3, an alarm is issued. (See the examples below.)<br />
Example 1)<br />
Inhibited area defined by<br />
stored stroke limit 1 or 2<br />
859<br />
a<br />
End point<br />
Start point<br />
The tool is stopped at point a according<br />
to stored stroke limit 1 or 2.<br />
Inhibited area defined by<br />
stored stroke limit 1 or 2<br />
End point<br />
Immediately upon movement commencing<br />
from the start point, the tool is stopped to<br />
enable a stroke limit check to be performed<br />
before movement.
6. SAFETY FUNCTIONS OPERATION<br />
B–63534EN/02<br />
Explanations<br />
Limitations<br />
<strong>Machine</strong> lock<br />
G23<br />
Program restart<br />
Manual intervention<br />
following a feed hold<br />
stop<br />
A block consisting of<br />
multiple operations<br />
Example 2)<br />
Start point<br />
Inhibited area defined by<br />
stored stroke limit 1 or 2<br />
Inhibited area defined by<br />
stored stroke limit 1 or 2<br />
Immediately upon movement commencing<br />
from the start point, the tool is stopped to<br />
enable a stroke limit check to be performed<br />
before movement.<br />
860<br />
a<br />
End point<br />
The tool is stopped at point a according<br />
to stored stroke limit 1 or 2.<br />
End point<br />
When a stroke limit check prior to movement is performed, whether to<br />
check the movement performed by a G31 (skip) block and G37 (automatic<br />
tool length measurement) block can be determined using NPC (bit 2 of<br />
parameter No. 1301).<br />
If machine lock is applied at the start of movement, no stroke limit check<br />
made before movement is performed.<br />
When stored stroke limit 2 is disabled (G23 mode), no check is made to<br />
determine whether the tool enters the inhibited area defined by stored<br />
stroke limit 2.<br />
When a program is restarted, an alarm is issued if the restart position is<br />
within a inhibited area.<br />
When the execution of a block is restarted after manual intervention<br />
following a feed hold stop, no alarm is issued even if the end point<br />
following a manual intervention is within a inhibited area.<br />
If a block consisting of multiple operations (such as a canned cycle and<br />
exponential interpolation) is executed, an alarm is issued at the start point<br />
of any operation whose end point falls within a inhibited area.
B–63534EN/02 OPERATION<br />
6. SAFETY FUNCTIONS<br />
Cyrindrical interpolation<br />
mode<br />
Polar coordinate<br />
interpolation mode<br />
Angular axis control<br />
Simple synchronous<br />
control<br />
Three–dimensional<br />
coordinate conversion<br />
Drawing<br />
PMC axis control<br />
High–speed<br />
high–precision contour<br />
control (HPCC)<br />
Alarm<br />
In cylindrical interpolation mode, no check is made.<br />
In polar coordinate interpolation mode, no check is made.<br />
When the angulalr axis control option is selected, no check is made.<br />
In simple synchronous control, only the master axis is checked; no slave<br />
axes are checked.<br />
In three–dimensional coordinate conversion mode, no check is made.<br />
No check is performed while drawing is being performed as part of<br />
dynamic graphic display (only drawing (no machining) is being<br />
performed).<br />
No check is made for a movement based on PMC axis control.<br />
No check is made for a movement based on high–speed, high–precision<br />
contour control (HPCC).<br />
Number Message Contents<br />
The pre–movement stroke limit check re-<br />
510 OVER TRAVEL : +n<br />
veals that the block end point enters the<br />
prohibited area for the positive stroke limit<br />
along the n axis. Correct the program.<br />
511 OVER TRAVEL : –n<br />
861<br />
The pre–movement stroke limit check reveals<br />
that the block end point enters the<br />
prohibited area for the negative stroke limit<br />
along the n axis. Correct the program.
7. ALARM AND SELF–DIAGNOSIS<br />
FUNCTIONS OPERATION<br />
B–63534EN/02<br />
7 <br />
<br />
When an alarm occurs, the corresponding alarm screen appears to indicate<br />
the cause of the alarm. The causes of alarms are classified by error codes.<br />
Up to 25 previous alarms can be stored and displayed on the screen (alarm<br />
history display).<br />
The system may sometimes seem to be at a halt, although no alarm is<br />
displayed. In this case, the system may be performing some processing.<br />
The state of the system can be checked using the self–diagnostic function.<br />
862
B–63534EN/02<br />
7.1<br />
ALARM DISPLAY<br />
Explanations<br />
Alarm screen<br />
Another method for<br />
alarm displays<br />
OPERATION<br />
When an alarm occurs, the alarm screen appears.<br />
ALARM MESSAGE<br />
100 PARAMETER WRITE ENABLE<br />
510 OVER TR1AVEL :+X<br />
520 OVER TRAVEL :+2<br />
530 OVER TRAVEL :+3<br />
ARALM<br />
863<br />
7. ALARM AND SELF–DIAGNOSIS<br />
FUNCTIONS<br />
0000 00000<br />
MDI **** *** *** ALM<br />
S 0 T0000<br />
18 : 52 : 05<br />
MSG HISTRY<br />
In some cases, the alarm screen does not appear, but an ALM is displayed<br />
at the bottom of the screen.<br />
PARAMETER (RS232C INTERFACE) O1000 N00010<br />
0100 ENS NCR CTV<br />
0 0 0 0 0 0 0 0<br />
0101 NFD XIK ASI SB2<br />
0 0 0 0 0 0 0 1<br />
0102 DEVICE NUM. (CH0) 2<br />
0103 BAUDRATE (CH0) 10<br />
0111 NFD ASI SB2<br />
0 0 0 0 0 0 0 0<br />
0112 DEVICE NUM. (CH1) 0<br />
0113 BAUDRATE (CH1) 0<br />
<br />
S 0 T0000<br />
MEM * * * * * * * * * * ALM 08 : 41 : 27<br />
NO.SRH<br />
ON:1<br />
OFF:0<br />
+INPUT<br />
In this case, display the alarm screen as follows:<br />
1. Press the function key MESSAGE .<br />
2. Press the chapter selection soft key [ALARM].<br />
INPUT
7. ALARM AND SELF–DIAGNOSIS<br />
FUNCTIONS OPERATION<br />
B–63534EN/02<br />
Reset of the alarm<br />
Error codes<br />
Error codes and messages indicate the cause of an alarm. To recover from<br />
an alarm, eliminate the cause and press the reset key.<br />
The error codes are classified as follows:<br />
No. 000 to 255 : P/S alarm (Program errors) (*)<br />
No. 300 to 349 : Absolute pulse coder (APC) alarms<br />
No. 350 and 399 : Serial pulse coder (SPC) alarms<br />
No. 400 to 499 : Servo alarms<br />
No. 500 to 599 : Overtravel alarms<br />
No. 700 to 739 : Overheat alarms<br />
No. 740 to 748 : Rigid tapping alarms<br />
No. 749 to 799 : Spindle alarms<br />
No. 900 to 999 : System alarms<br />
No. 5000 to : P/S alarm (Program errors)<br />
* For an alarm (No. 000 to 255) that occurs in association with<br />
background operation, the indication “xxxBP/S alarm” is provided<br />
(where xxx is an alarm number). Only a BP/S alarm is provided for<br />
No. 140.<br />
See the error code list in the Appendix G for details of the error codes.<br />
864
B–63534EN/02<br />
7.2<br />
ALARM HISTORY<br />
DISPLAY<br />
Procedure<br />
OPERATION<br />
865<br />
7. ALARM AND SELF–DIAGNOSIS<br />
FUNCTIONS<br />
Up to 25 of the most recent CNC alarms are stored and displayed on the<br />
screen.<br />
Display the alarm history as follows:<br />
Procedure for Alarm History Display<br />
1 Press the function key MESSAGE .<br />
2 Press the chapter selection soft key [HISTRY].<br />
The alarm history appears.<br />
The following information items are displayed.<br />
(1)The date the alarm was issued<br />
(2)Alarm No.<br />
(3)Alarm message (some contains no message)<br />
(4)Page No.<br />
3 Change the page by the 1–page change key.<br />
4 To delete the recorded information, press the softkey [(OPRT)] then<br />
the [DELETE] key.<br />
ALARM HISTORY O0 N0<br />
(1)01.02.14 16:43:48<br />
(2)010 (3)MPROPER G–CODE<br />
01.02.13 8:22:21<br />
506 OVER TRAVEL : +1<br />
01.02.12 20:15:43<br />
417 SERVO ALARM : X AXIS DGTL PARAM<br />
MEM **** *** *** 19 : 47 : 45<br />
PAGE=1<br />
(4)<br />
ALARM MSG HISTRY (OPRT)
7. ALARM AND SELF–DIAGNOSIS<br />
FUNCTIONS OPERATION<br />
B–63534EN/02<br />
7.3<br />
CHECKING BY<br />
SELF–DIAGNOSTIC<br />
SCREEN<br />
<br />
Explanations<br />
Self diagnostic screen at<br />
2–path control<br />
Procedure for Diagnois<br />
The system may sometimes seem to be at a halt, although no alarm has<br />
occurred. In this case, the system may be performing some processing.<br />
The state of the system can be checked by displaying the self–diagnostic<br />
screen.<br />
1 Press the function key SYSTEM .<br />
2 Press the chapter select key [DGNOS].<br />
3 The diagnostic screen has more than 1 pages. Select the screen by the<br />
following operation.<br />
(1) Change the page by the 1–page change key.<br />
(2) Method by soft key<br />
– Key input the number of the diagnostic data to be displayed.<br />
– Press [N SRCH].<br />
DIAGNOSTIC (GENERAL) O0000 N0000<br />
000 WAITING FOR FIN SIGNAL :0<br />
001 MOTION :0<br />
002 DWELL :0<br />
003 IN–POSITION CHECK :0<br />
004 FEEDRATE OVERRIDE 0% :0<br />
005 INTERLOCK/START–LOCK :0<br />
006 SPINDLE SPEED ARRIVAL CHECK :0<br />
<br />
EDIT **** *** *** 14 : 51 : 55<br />
PARAM DGNOS PMC SYSTEM (OPRT)<br />
For the two–path control, the diagnostic screen for the path selected with<br />
the path selection switch is displayed. When displaying the diagnostic<br />
screen for the other tool post, specify the path with the tool post selection<br />
switch.<br />
866
B–63534EN/02<br />
Explanations<br />
OPERATION<br />
867<br />
7. ALARM AND SELF–DIAGNOSIS<br />
FUNCTIONS<br />
Diagnostic numbers 000 to 015 indicate states when a command is being<br />
specified but appears as if it were not being executed. The table below<br />
lists the internal states when 1 is displayed at the right end of each line on<br />
the screen.<br />
Table 7.3 (a) Alarm displays when a command is specified but appears as if it were not being executed<br />
No. Display Internal status when 1 is displayed<br />
000 WAITING FOR FIN SIGNAL M, S. T function being executed<br />
001 MOTION Move command in automatic operation being executed<br />
002 DWELL Dwell being executed<br />
003 IN–POSITION CHECK In–position check being executed<br />
004 FEEDRATE OVERRIDE 0% Cutting feed override 0%<br />
005 INTERLOCK/START–LOCK Interlock ON<br />
006 SPINDLE SPEED ARRIVAL CHECK Waiting for spindle speed arrival signal to turn on<br />
010 PUNCHING Data being output via reader puncher interface<br />
011 READING Data being input via reader puncher interface<br />
012 WAITING FOR (UN) CLAMP Waiting for index table clamp/unclamp before B axis index<br />
table indexing start/after B axis index table indexing<br />
end to complete<br />
013 JOG FEEDRATE OVERRIDE 0% Jog override 0%<br />
014 WAITING FOR RESET.ESP.RRW.OFF Emergency stop, external reset, reset & rewind, or MDI<br />
panel reset key on<br />
015 EXTERNAL PROGRAM<br />
NU<strong>MB</strong>ER SEARCH<br />
External program number searching<br />
Diagnostic numbers 020 to 025 indicate states when an automatic<br />
operation is stopped or paused.<br />
Table 7.3 (b) Alarm displays when an automatic operation is stopped or paused.<br />
No. Display Internal status when 1 is displayed<br />
020 CUT SPEED UP/DOWN Set when emergency stop turns on or when servo alarm<br />
occurs<br />
021 RESET BUTTON ON Set when reset key turns on<br />
022 RESET AND REWIND ON Reset and rewind turned on<br />
023 EMERGENCY STOP ON Set when emergency stop turns on<br />
024 RESET ON Set when external reset, emergency stop, reset, or reset<br />
& rewind key turns on<br />
025 STOP MOTION OR DWELL A flag which stops pulse distribution. It is set in the following<br />
cases.<br />
(1) External reset turned on.<br />
(2) Reset & rewind turned on.<br />
(3) Emergency stop turned on.<br />
(4) Feed hold turned on.<br />
(5) The MDI panel reset key turned on.<br />
(6) Switched to the manual mode(JOG/HANDLE/INC).<br />
(7) Other alarm occurred.<br />
(There is also alarm which is not set.)
7. ALARM AND SELF–DIAGNOSIS<br />
FUNCTIONS OPERATION<br />
B–63534EN/02<br />
The table below shows the signals and states which are enabled when each<br />
diagnostic data item is 1. Each combination of the values of the diagnostic<br />
data indicates a unique state.<br />
020 CUT SPEED UP/DOWN<br />
021 RESET BUTTON ON<br />
022 RESET AND REWIND ON<br />
023 EMERGENCY STOP ON<br />
024 RESET ON<br />
025 STOP MOTION OR DWELL<br />
Emergency stop signal input<br />
External reset signal input<br />
MDI reset button turned on<br />
Reset & rewind input<br />
Servo alarm generation<br />
Changed to another mode or feed hold<br />
Single block stop<br />
868<br />
1<br />
0<br />
0<br />
1<br />
1<br />
1<br />
0<br />
0<br />
0<br />
0<br />
1<br />
1<br />
0 0<br />
1<br />
0<br />
0<br />
1<br />
1<br />
0<br />
0<br />
0<br />
1<br />
0<br />
0<br />
0<br />
0<br />
0<br />
0<br />
0<br />
1 0 0<br />
1 1 1<br />
Diagnostic numbers 030 and 031 indicate TH alarm states.<br />
Diagnostic numbers 030 and 031 indicate TH alarm states.<br />
No. Display Meaning of data<br />
030 CHARACTER NU<strong>MB</strong>ER TH DATA The position of the character which caused TH alarm is<br />
displayed by the number of characters from the beginning<br />
of the block at TH alarm<br />
031 TH DATA Read code of character which caused TH alarm<br />
0<br />
0<br />
0<br />
0<br />
0<br />
0
B–63534EN/02 OPERATION<br />
8. DATA INPUT/OUTPUT<br />
8 <br />
<br />
NC data is transferred between the NC and external input/output devices<br />
such as the Handy File.<br />
The memory card interface located to the left of the display can be used<br />
to read information on a memory card in the CNC or write it to the card.<br />
The following types of data can be entered and output :<br />
1.Program<br />
2.Offset data<br />
3.Parameter<br />
4.Pitch error compensation data<br />
5.Custom macro common variable<br />
Before an input/output device can be used, the input/output related<br />
parameters must be set.<br />
For how to set parameters, see III–2 “OPERATIONAL DEVICES”.<br />
<br />
<br />
<br />
RS–232–C or<br />
RS–422 interface<br />
(Punch panel etc...)<br />
869<br />
<br />
<br />
<br />
<br />
FANUC<br />
Handy File
8. DATA INPUT/OUTPUT OPERATION<br />
B–63534EN/02<br />
8.1<br />
FILES<br />
Explanations<br />
<br />
<br />
<br />
Of the external input/output devices, the FANUC Handy File use floppy<br />
disks as their input/output medium.<br />
In this manual, these input/output medium is generally referred to as a<br />
floppy.<br />
Unlike an NC tape, a floppy allows the user to freely choose from several<br />
types of data stored on one medium on a file–by–file basis.<br />
Input/output is possible with data extending over more than one floppy<br />
disk.<br />
The unit of data, which is input/output between the floppy and the CNC<br />
by one input/output operation (pressing the VREADW or VPUNCHW<br />
key), is called a HfileI. When inputting CNC programs from, or<br />
outputting them to the floppy, for example, one or all programs within the<br />
CNC memory are handled as one file.<br />
Files are assigned automatically file numbers 1,2,3,4 and so on, with the<br />
lead file as 1.<br />
File 1 File 2 File 3<br />
File n Blank<br />
When one file has been entered over two floppies, LEDs on the adaptor<br />
flash alternately on completion of data input/output between the first<br />
floppy and the CNC, prompting floppy replacement. In this case, take the<br />
first floppy out of the adaptor and insert a second floppy in its place. Then,<br />
data input/output will continue automatically.<br />
Floppy replacement is prompted when the second floppy and later is<br />
required during file search–out, data input/output between the CNC and<br />
the floppy, or file deletion.<br />
Floppy 1<br />
Floppy 2<br />
File 1 File 2 File 3 File (k–1) File k<br />
Continuation of<br />
file k<br />
870<br />
File (k+1) File n Blank<br />
Since floppy replacement is processed by the input/output device, no<br />
special operation is required. The CNC will interrupt data input/output<br />
operation until the next floppy is inserted into the adaptor.<br />
When reset operation is applied to the CNC during a request for floppy<br />
replacement, the CNC is not reset at once, but reset after the floppy has<br />
been replaced.
B–63534EN/02 OPERATION<br />
8. DATA INPUT/OUTPUT<br />
<br />
<br />
The floppy is provided with the write protect switch. Set the switch to<br />
the write enable state. Then, start output operation.<br />
Write protect switch of a cassette<br />
(1) Write–protected<br />
(Only reading is<br />
possible.)<br />
871<br />
(2) Write–enabled<br />
(Reading, writing,<br />
and deletion are possible.)<br />
Fig. 8.1 Protect swtich<br />
Once written in the cassette or card, data can subsequently be read out by<br />
correspondence between the data contents and file numbers. This<br />
correspondence cannot be verified, unless the data contents and file<br />
numbers are output to the CNC and displayed. The data contents can be<br />
displayed with display function for directory of floppy disk<br />
(See Section III–8.8).<br />
To display the contents,write the file numbers and the contents on the<br />
memo column which is the back of floppy.<br />
(Entry example on MEMO)<br />
File 1 CNC parameters<br />
File 2 Offset data<br />
File 3 NC program O0100<br />
⋅ ⋅<br />
⋅ ⋅<br />
⋅ ⋅<br />
File (n–1) NC program O0500<br />
File n NC program O0600
8. DATA INPUT/OUTPUT OPERATION<br />
B–63534EN/02<br />
8.2<br />
FILE SEARCH<br />
<br />
Explanation<br />
File heading<br />
<br />
When the program is input from the floppy, the file to be input first<br />
must be searched.<br />
For this purpose, proceed as follows:<br />
File 1<br />
872<br />
File 2 File 3<br />
File n Blank<br />
File searching of the file n<br />
1 Press the EDIT or MEMORY switch on the machine operator’s<br />
panel.<br />
2 Press function key PROG , then the program contents display screen or<br />
program check screen appears.<br />
3 Press soft key [(OPRT)].<br />
4 Press the rightmost soft key (next–menu key).<br />
5 Enter address N.<br />
6 Enter the number of the file to search for.<br />
⋅ N0<br />
The beginning of the cassette or card is searched.<br />
⋅ One of N1 to N9999<br />
Of the file Nos. 1 to 9999, a designated file is searched.<br />
⋅ N–9999<br />
The file next to that accessed just before is searched.<br />
⋅ N–9998<br />
When N–9998 is designated, N–9999 is automatically inserted<br />
each time a file is input or output. This condition is reset by the<br />
designation of N1,N1 to 9999, or N9999 or reset.<br />
7 Press soft keys [F SRH] and [EXEC].<br />
The specified file is searched for.<br />
The same result is obtained both by sequentially searching the files by<br />
specifying Nos. N1 to N9999 and by first searching one of N1 to N9999<br />
and then using the N–9999 searching method. The searching time is<br />
shorter in the latter case.
B–63534EN/02 OPERATION<br />
8. DATA INPUT/OUTPUT<br />
<br />
Alarm No. Description<br />
86<br />
The ready signal (DR) of an input/output device is off.<br />
An alarm is not immediately indicated in the CNC even when an<br />
alarm occurs during head searching (when a file is not found, or<br />
the like).<br />
An alarm is given when the input/output operation is performed<br />
after that. This alarm is also raised when N1 is specified for writing<br />
data to an empty floppy. (In this case, specify No.)<br />
873
8. DATA INPUT/OUTPUT OPERATION<br />
B–63534EN/02<br />
8.3<br />
FILE DELETION<br />
<br />
Explanations<br />
File deletion<br />
<br />
<br />
<br />
Files stored on a floppy can be deleted file by file as required.<br />
1 Insert the floppy into the input/output device so that it is ready for<br />
writing.<br />
2 Press the EDIT switch on the machine operator’s panel.<br />
3 Press function key PROG<br />
appears.<br />
, then the program contents display screen<br />
4 Press soft key [(OPRT)]<br />
5 Press the rightmost soft key (next–menu key).<br />
6 Enter address N.<br />
7 Enter the number (from 1 to 9999) of the file to delete.<br />
8 Press soft key [DELETE] and then press soft key [DELETE].<br />
The file specified in step 7 is deleted.<br />
When a file is deleted, the file numbers after the deleted file are each<br />
decremented by one. Suppose that a file numbered k was deleted. In this<br />
case, files are renumbered as follows:<br />
Before deletion after deletion<br />
1 to (k>1) 1 to (k>1)<br />
k Deleted<br />
(k+1) to n k to (n>1)<br />
Set the write protect switch to the write enable state to delete the files.<br />
874
B–63534EN/02 OPERATION<br />
8. DATA INPUT/OUTPUT<br />
8.4<br />
PROGRAM<br />
INPUT/OUTPUT<br />
8.4.1<br />
Inputting a Program<br />
<br />
Explanations<br />
<br />
<br />
<br />
<br />
Inputting a program<br />
This section describes how to load a program into the CNC from a floppy<br />
or NC tape.<br />
1 Make sure the input device is ready for reading.<br />
For the two–path control, select the tool post for which a program to<br />
be input is used with the tool post selection switch.<br />
2 Press the EDIT switch on the machine operator’s panel.<br />
3 When using a floppy, search for the required file according to the<br />
procedure in III–8.2.<br />
4 Press function key PROG , then the program contents display screen or<br />
program directory screen appears.<br />
5 Press soft key [(OPRT)].<br />
6 Press the rightmost soft key (next–menu key).<br />
7 After entering address O, specify a program number to be assigned to<br />
the program. When no program number is specified here, the<br />
program number used on the floppy or NC tape is assigned.<br />
8 Press soft keys [READ] and [EXEC]<br />
The program is input and the program number specified in step 7 is<br />
assigned to the program.<br />
If a program is input while the data protect key on the machine operator’s<br />
panel turns ON, the program loaded into the memory is verified against<br />
the contents of the floppy or NC tape.<br />
If a mismatch is found during collation, the collation is terminated with<br />
an alarm (P/S No. 079).<br />
If the operation above is performed with the data protection key turns<br />
OFF, collation is not performed, but programs are registered in memory.<br />
When a tape holds multiple programs, the tape is read up to ER (or %).<br />
O1111 M02; O2222 M30; O3333 M02; ER(%)<br />
875
8. DATA INPUT/OUTPUT OPERATION<br />
B–63534EN/02<br />
<br />
<br />
<br />
<br />
Additional program input<br />
• When a program is entered without specifying a program number.<br />
⋅ The O–number of the program on the NC tape is assigned to the<br />
program.<br />
If the program has no O–number, the N–number in the first block is<br />
assigned to the program.<br />
⋅ When the program has neither an O–number nor N–number, the<br />
previous program number is incremented by one and the result is<br />
assigned to the program.<br />
⋅ When the program does not have an O–number but has a five–digit<br />
sequence number at the start of the program, the lower four digits of<br />
the sequence number are used as the program number. If the lower<br />
four digits are zeros, the previously registered program number is<br />
incremented by one and the result is assigned to the program.<br />
• When a program is entered with a program number<br />
The O–number on the NC tape is ignored and the specified number is<br />
assigned to the program. When the program is followed by additional<br />
programs, the first additional program is given the program number.<br />
Additional program numbers are calculated by adding one to the last<br />
program.<br />
The method of registration operation is the same as the method of<br />
foreground operation. However, this operation registers a program in the<br />
background editing area. As with edit operation, the operations described<br />
below are required at the end to register a program in foreground program<br />
memory.<br />
[(OPRT)] [BG–END]<br />
You can input a program to be appended to the end of a registered<br />
program.<br />
Registered program Input program Program after input<br />
1234 ; 5678 ; 1234 ;<br />
; ; ;<br />
; ; ;<br />
; ; ;<br />
; ; ;<br />
% % %<br />
5678 ;<br />
;<br />
;<br />
;<br />
;<br />
%<br />
In the above example, all lines of program O5678 are appended to the end<br />
of program O1234. In this case, program number O5678 is not registered.<br />
When inputting a program to be appended to a registered program, press<br />
the [READ] soft key without specifying a program number in step 8.<br />
Then, press the [CHAIN] and [EXEC] soft keys.<br />
In entire program input, all lines of a program are appended, except for<br />
its O number.<br />
When canceling additional input mode, press the reset key or the [CAN]<br />
or [STOP] soft key.<br />
876
B–63534EN/02 OPERATION<br />
8. DATA INPUT/OUTPUT<br />
Defining the same<br />
program number as that<br />
of an existing program<br />
<br />
Pressing the [CHAIN] soft key positions the cursor to the end of the<br />
registered program. Once a program has been input, the cursor is<br />
positioned to the start of the new program.<br />
Additional input is possible only when a program has already been<br />
registered.<br />
If an attempt has been made to register a program having the same number<br />
as that of a previously registered program, P/S alarm 073 is issued and the<br />
program cannot be registered.<br />
Alarm No. Description<br />
70<br />
The size of memory is not sufficient to store the input programs<br />
73<br />
An attempt was made to store a program with an existing program<br />
number.<br />
79<br />
The verification operation found a mismatch between a program<br />
loaded into memory and the contents of the program on<br />
the floppy or NC tape.<br />
877
8. DATA INPUT/OUTPUT OPERATION<br />
B–63534EN/02<br />
8.4.2<br />
Outputting a Program<br />
<br />
Explanations<br />
(Output to a floppy)<br />
<br />
<br />
<br />
<br />
<br />
<br />
Outputting a program<br />
A program stored in the memory of the CNC unit is output to a floppy or<br />
NC tape.<br />
1 Make sure the output device is ready for output.<br />
For the two–path control, select the tool post for which a program to<br />
be output is used with the tool post selection switch.<br />
2 To output to an NC tape, specify the punch code system (ISO or EIA)<br />
using a parameter.<br />
3 Press the EDIT switch on the machine operator’s panel.<br />
4 Press function key PROG , then the program contents display screen or<br />
program directory screen appears.<br />
5 Press soft key [(OPRT)].<br />
6 Press the rightmost soft key (next–menu key).<br />
7 Enter address O.<br />
8 Enter a program number. If –9999 is entered, all programs stored in<br />
memory are output.<br />
To output multiple programs at one time, enter a range as follows :<br />
O∆∆∆∆,O<br />
Programs No.∆∆∆∆ to No. are output.<br />
The program library screen displays program numbers in ascending<br />
order when bit 4 (SOR) of parameter No. 3107 is set to 1.<br />
9 Press soft keys [PUNCH] and [EXEC]<br />
The specified program or programs are output.<br />
When output is conducted to the floppy, the program is output as the new<br />
file after the files existing in the floppy. New files are to be written from<br />
the beginning with making the old files invalid, use the above output<br />
operation after the N0 head searching.<br />
When P/S alarm (No. 86) occurs during program output, the floppy is<br />
restored to the condition before the output.<br />
When program output is conducted after N1 to N9999 head searching, the<br />
new file is output as the designated n–th position. In this case, 1 to n–1<br />
files are effective, but the files after the old n–th one are deleted. If an<br />
alarm occurs during output, only the 1 to n–1 files are restored.<br />
To efficiently use the memory in the cassette or card, output the program<br />
by setting parameter NFD (No. 0101#7,No. 0111#7 or 0121#7) to 1. This<br />
parameter makes the feed is not output, utilizing the memory efficiently.<br />
878
B–63534EN/02 OPERATION<br />
8. DATA INPUT/OUTPUT<br />
<br />
<br />
<br />
Explanations<br />
(Output to an NC tape)<br />
<br />
<br />
<br />
<br />
<br />
Head searching with a file No. is necessary when a file output from the<br />
CNC to the floppy is again input to the CNC memory or compared with<br />
the content of the CNC memory. Therefore, immediately after a file is<br />
output from the CNC to the floppy, record the file No. on the memo.<br />
Punch operation can be performed in the same way as in the foreground.<br />
This function alone can punch out a program selected for foreground<br />
operation.<br />
(Program No.) [PUNCH] [EXEC]: Punches out a specified program.<br />
H–9999I [PUNCH] [EXEC]: Punches out all programs.<br />
A program is output to paper tape in the following format:<br />
879<br />
ER<br />
(%)<br />
Program<br />
ER<br />
(%)<br />
Feed of 3 feet Feed of 3 feet<br />
If three–feet feeding is too long, press the CAN key during feed<br />
punching to cancel the subsequent feed punching.<br />
A space code for TV check is automatically punched.<br />
When a program is punched in ISO code, two CR codes are punched after<br />
an LF code.<br />
LF CR CR<br />
By setting NCR (bit 3 of parameter No. 0100), CRs can be omitted so that<br />
each LF appears without a CR.<br />
Press the RESET key to stop punch operation.<br />
All programs are output to paper tape in the following format.<br />
ER Program Program Program ER<br />
(%)<br />
(%)<br />
Feed of 1–feet<br />
The sequence of the programs punched is undefined.<br />
Feed of 3–feet
8. DATA INPUT/OUTPUT OPERATION<br />
B–63534EN/02<br />
8.5<br />
OFFSET DATA INPUT<br />
AND OUTPUT<br />
8.5.1<br />
Inputting Offset Data<br />
<br />
Inputting offset data<br />
Offset data is loaded into the memory of the CNC from a floppy or NC<br />
tape. The input format is the same as for offset value output. See III– 8.5.2.<br />
When an offset value is loaded which has the same offset number as an<br />
offset number already registered in the memory, the loaded offset data<br />
replaces existing data.<br />
1 Make sure the input device is ready for reading.<br />
For the two–path control, select the tool post for which offset data to<br />
be input is used with the tool post selection switch.<br />
2 Press the EDIT switch on the machine operator’s panel.<br />
3 When using a floppy, search for the required file according to the<br />
procedure in III–8.2.<br />
4 Press function key OFFSET<br />
SETTING , then the tool compensation screen appears.<br />
5 Press soft keys [(OPRT)].<br />
6 Press rightmost soft key (next menu key).<br />
7 Press soft keys [READ] and [EXEC].<br />
8 The input offset data will be displayed on the screen after completion<br />
of input operation.<br />
880
B–63534EN/02 OPERATION<br />
8. DATA INPUT/OUTPUT<br />
8.5.2<br />
Outputting Offset Data<br />
<br />
Explanations<br />
<br />
<br />
<br />
All offset data is output in a output format from the memory of the CNC<br />
to a floppy or NC tape.<br />
1 Make sure the output device is ready for output.<br />
For the two–path control, select the tool post for which offset data to<br />
be input is used with the tool post selection switch.<br />
2 Specify the punch code system (ISO or EIA) using a parameter.<br />
3 Press the EDIT switch on the machine operator’s panel.<br />
4 Press function key OFFSET<br />
SETTING , then the tool compensation screen appears.<br />
5 Press soft key [(OPRT)].<br />
6 Press the rightmost soft key (next–menu key)<br />
7 Press soft keys [PUNCH] and [EXEC].<br />
Offset data is output in the output format described below.<br />
Output format is as follows:<br />
Format<br />
(1)For tool compensation memory A<br />
G10 G90 P_R_;<br />
where P_: Offset No.<br />
R_: Tool compensation amount<br />
With OSI/Ethernet or DNC1/Ethernet, the output format is as<br />
follows:<br />
(2)For tool compensation memory B<br />
Setting/changing the geometric compensation amount<br />
G10 G90 L10 P_R_;<br />
Setting/changing the wear compensation amount<br />
G10 G90 L11 P_R_;<br />
(3)For tool compensation memory C<br />
Setting/changing the geometric compensation amount for H code<br />
G10 G90 L10 P_R_;<br />
Setting/changing the geometric compensation amount for D code<br />
G10 G90 L12 P_R_;<br />
Setting/changing the wear compensation amount for H code<br />
G10 G90 L11 P_R_;<br />
Setting/changing the wear compensation amount for D code<br />
G10 G90 L13 P_R_;<br />
The L1 command may be used instead of L11 for format compatibility of<br />
the conventional CNC.<br />
When the floppy disk directory display function is used, the name of the<br />
output file is OFFSET.<br />
881
8. DATA INPUT/OUTPUT OPERATION<br />
B–63534EN/02<br />
8.6<br />
INPUTTING AND<br />
OUTPUTTING<br />
PARAMETERS AND<br />
PITCH ERROR<br />
COMPENSATION<br />
DATA<br />
8.6.1<br />
Inputting Parameters<br />
<br />
Inputting parameters<br />
Parameters and pitch error compensation data are input and output from<br />
different screens, respectively. This chapter describes how to enter them.<br />
Parameters are loaded into the memory of the CNC unit from a floppy or<br />
NC tape. The input format is the same as the output format. See III–8.6.2.<br />
When a parameter is loaded which has the same data number as a<br />
parameter already registered in the memory, the loaded parameter<br />
replaces the existing parameter.<br />
1 Make sure the input device is ready for reading.<br />
For the two–path control, select the tool post for which parameters to<br />
be input are used with the tool post selection switch.<br />
2 When using a floppy, search for the required file according to the<br />
procedure in III–8.2.<br />
3 Press the EMERGENCY STOP button on the machine operator’s<br />
panel.<br />
4 Press function key OFFSET<br />
SETTING .<br />
5 Press the soft key [SETING] for chapter selection, then the setting<br />
screen appears.<br />
6 Enter 1 in response to the prompt for “PARAMETER WRITE<br />
(PWE)” in setting data. Alarm P/S100 (indicating that parameters can<br />
be written) appears.<br />
7 Press soft key SYSTEM .<br />
8 Press chapter selection soft key [PARAM], then the parameter screen<br />
appears.<br />
9 Press soft key [(OPRT)].<br />
10 Press the rightmost soft key (next–menu key).<br />
11 Press soft keys [READ] and [EXEC].<br />
Parameters are read into memory. Upon completion of input, the<br />
“INPUT” indicator at the lower–right corner of the screen disappears.<br />
12 Press function key OFFSET<br />
SETTING .<br />
13 Press soft key [SETING] for chapter selection.<br />
14 Enter 0 in response to the prompt for “PARAMETER WRITE<br />
(PWE)” in setting data.<br />
882
B–63534EN/02 OPERATION<br />
8. DATA INPUT/OUTPUT<br />
8.6.2<br />
Outputting Parameters<br />
<br />
Explanations<br />
<br />
Suppressing output of<br />
parameters set to 0<br />
Outputting parameters<br />
15 Turn the power to the CNC back on.<br />
16 Release the EMERGENCY STOP button on the machine operator’s<br />
panel.<br />
All parameters are output in the defined format from the memory of the<br />
CNC to a floppy or NC tape.<br />
1 Make sure the output device is ready for output.<br />
For the two–path control, select the tool post for which parameters to<br />
be input are used with the tool post selection switch.<br />
2 Specify the punch code system (ISO or EIA) using a parameter.<br />
3 Press the EDIT switch on the machine operator’s panel.<br />
4 Press function key SYSTEM , then the parameter screen appears.<br />
5 Press chapter selection soft key [PARAM].<br />
6 Press soft key [(OPRT)].<br />
7 Press rightmost soft key (next–menu key).<br />
8 Press soft keys [PUNCH].<br />
9 To output all parameters, press the [ALL] soft key. To output only<br />
parameters which are set to other than 0, press the [NON–0] soft key.<br />
10 Press soft key [EXEC].<br />
All parameters are output in the defined format.<br />
Output format is as follows:<br />
N . . . P . . . . ;<br />
N . . . A1P . A2P . . AnP . . ;<br />
N . . . P . . . . ;<br />
N . . . : Parameter No.<br />
A . . . : Axis No.(n is the number of control axis)<br />
P . . . : Parameter setting value .<br />
To suppress the output of the following parameters, press the [PUNCH]<br />
soft key then [NON–0] soft key.<br />
883<br />
Other than axis type Axis type<br />
Bit type Parameter for which all bits<br />
are set to 0<br />
Parameter for an axis for<br />
which all bits are set to 0.<br />
Value type Paramter whose value is 0. Parameter for an axis for<br />
which the value is 0.
8. DATA INPUT/OUTPUT OPERATION<br />
B–63534EN/02<br />
<br />
8.6.3<br />
Inputting Pitch Error<br />
Compensation Data<br />
<br />
Pitch error compensation data<br />
When the floppy disk directory display function is used, the name of the<br />
output file is PARAMETER.<br />
Once all parameters have been output, the output file is named ALL<br />
PARAMETER. Once only parameters which are set to other than 0 have<br />
been output, the output file is named NON–0. PARAMETER.<br />
Pitch error compensation data are loaded into the memory of the CNC<br />
from a floppy or NC tape. The input format is the same as the output<br />
format. See III–8.6.4. When a pitch error compensation data is loaded<br />
which has the corresponding data number as a pitch error compensation<br />
data already registered in the memory, the loaded data replaces the<br />
existing data.<br />
1 Make sure the input device is ready for reading.<br />
For the two–path control, select the tool post for which pitch error<br />
compensation data to be input is used with the tool post selection<br />
switch.<br />
2 When using a floppy, search for the required file according to the<br />
procedure in III–8.2.<br />
3 Press the EMERGENCY STOP button on the machine operator’s<br />
panel.<br />
4 Press function key OFFSET<br />
SETTING .<br />
5 Press the soft key [SETING] for chapter selection.<br />
6 Enter 1 in response to the prompt for writing parameters (PWE).<br />
Alarm P/S100 (indicating that parameters can be written) appears.<br />
7 Press soft key SYSTEM .<br />
8 Press the rightmost soft key (next–menu key)and press<br />
chapter selection soft key [PITCH].<br />
9 Press soft key [(OPRT)].<br />
10 Press the rightmost soft key (next–menu key).<br />
11 Press soft keys [READ] and [EXEC].<br />
Parameters are read into memory. Upon completion of input, the<br />
“INPUT” indicator at the lower–right corner of the screen disappears.<br />
12 Press function key OFFSET<br />
SETTING .<br />
13 Press soft key [SETING] for chapter selection.<br />
14 Enter 0 in response to the prompt for “PARAMETER WRITE<br />
(PWE)” in setting data.<br />
884
B–63534EN/02 OPERATION<br />
8. DATA INPUT/OUTPUT<br />
Explanations<br />
Pitch error<br />
compensation<br />
8.6.4<br />
Outputting Pitch Error<br />
Compensation Data<br />
Explanations<br />
<br />
<br />
15 Turn the power to the CNC back on.<br />
16 Release the EMERGENCY STOP button on the machine operator’s<br />
panel.<br />
Parameters 3620 to 3624 and pitch error compensation data must be set<br />
correctly to apply pitch error compensation correctly (See III–11.5.2).<br />
All pitch error compensation data are output in the defined format from<br />
the memory of the CNC to a floppy or NC tape.<br />
Procedure for Outputting Pitch Error Compensation Data<br />
1 Make sure the output device is ready for output.<br />
For the two–path control, select the tool post for which pitch error<br />
compensation data to be output is used with the tool post selection<br />
switch.<br />
2 Specify the punch code system (ISO or EIA) using a parameter.<br />
3 Press the EDIT switch on the machine operator’s panel.<br />
4 Press function key SYSTEM .<br />
5 Press the rightmost soft key<br />
selection soft key [PITCH].<br />
(next–menu key) and press chapter<br />
6 Press soft key [(OPRT)].<br />
7 Press rightmost soft key (next–menu key).<br />
8 Press soft keys [PUNCH] and [EXEC].<br />
All pitch error compensation data are output in the defined format.<br />
Output format is as follows :<br />
N10000 P.... ;<br />
N11023 P.... ;<br />
N : Pitch error compensation point + 10000<br />
P : Pitch error compensation data<br />
When bi–directional pitch error compensation is used, output format is<br />
as follows :<br />
N20000 P.... ;<br />
N21023 P.... ;<br />
N23000 P.... ;<br />
N24023 P.... ;<br />
N : Pitch error compensation point + 20000<br />
P : Pitch error compensation data<br />
When the floppy disk directory display function is used, the name of the<br />
output file is “PITCH ERROR”.<br />
885
8. DATA INPUT/OUTPUT OPERATION<br />
B–63534EN/02<br />
8.7<br />
INPUTTING/<br />
OUTPUTTING<br />
CUSTOM MACRO<br />
COMMON<br />
VARIABLES<br />
8.7.1<br />
Inputting Custom<br />
Macro Common<br />
Variables<br />
<br />
Explanations<br />
<br />
The value of a custom macro common variable (#500 to #999) is loaded<br />
into the memory of the CNC from a floppy or NC tape. The same format<br />
used to output custom macro common variables is used for input. See<br />
III–8.7.2. For a custom macro common variable to be valid, the input data<br />
must be executed by pressing the cycle start button after data is input.<br />
When the value of a common variable is loaded into memory, this value<br />
replaces the value of the same common variable already existing (if any)<br />
in memory.<br />
Inputting custom macro common variables<br />
1 Register the program which has been output, as described in Section<br />
III–8.7.2, in memory according to the program input procedure<br />
described in Section III–8.4.1.<br />
2 Press the MEMORY switch on the machine operator’s panel upon<br />
completing input.<br />
3 Press the cycle start button to execute the loaded program.<br />
4 Display the macro vriable screen to chek whether the values of the<br />
common variables have been set correctly.<br />
Display of the macro variable screen<br />
⋅ Press function key OFFSET<br />
SETTING .<br />
⋅ Press the rightmost soft key (next–menu key).<br />
⋅ Press soft key [MACRO].<br />
⋅ Select a variable with the page keys or numeric keys and<br />
soft key [NO.SRH].<br />
The common variables (#500 to #531) can be input and output.<br />
When the option for adding a common variable is specified, values from<br />
#500 to #999 can be input and output. #100 to #199 can be input and<br />
output when bit 3 (PU5) of parameter No. 6001 is set to 1.<br />
886
B–63534EN/02 OPERATION<br />
8. DATA INPUT/OUTPUT<br />
8.7.2<br />
Outputting Custom<br />
Macro Common<br />
Variable<br />
<br />
Explanations<br />
<br />
<br />
<br />
Custom macro common variables (#500 to #999) stored in the memory<br />
of the CNC can be output in the defined format to a floppy or NC tape.<br />
Outputting custom macro common variable<br />
1 Make sure the output device is ready for output.<br />
2 Specify the punch code system (ISO or EIA) using a parameter.<br />
3 Press the EDIT switch on the machine operator’s panel.<br />
4 Press function key OFFSET<br />
SETTING .<br />
5 Press the rightmost soft key (next–menu key), then press soft<br />
key [MACRO].<br />
6 Press soft key [(OPRT)].<br />
7 Press the rightmost soft key (next–menu key).<br />
8 Press soft keys [PUNCH] and [EXEC].<br />
Common variables are output in the defined format.<br />
The output format is as follows:<br />
%<br />
;<br />
#500=[25283*65536+65536]/134217728 . . . . . . . . . . . . (1)<br />
#501=#0; . . . . . . . . . . . . . . . . . . . . . . . . . . . . . . . . . . . . . . . . (2)<br />
#502=0; . . . . . . . . . . . . . . . . . . . . . . . . . . . . . . . . . . . . . . . . . (3)<br />
#503= . . . . . . . . . . . . . . . . ;<br />
. . . . . . . . . . . . . . . . . . . . . . . ;<br />
. . . . . . . . . . . . . . . . . . . . . . . ;<br />
#531= . . . . . . . . . . . . . . . . ;<br />
M02;<br />
%<br />
(1)The precision of a variable is maintained by outputting the value of the<br />
variable as .<br />
(2)Undefined variable<br />
(3)When the value of a variable is 0<br />
When the floppy disk directory display function is used, the name of the<br />
output file is “MACRO VAR”.<br />
The common variables (#500 to #531) can be input and output.<br />
When the option for adding a common variable is specified, values from<br />
#500 to #999 can be input and output.<br />
#100 to #199 can be input and output when bit 3 (PU5) of parameter No.<br />
6001 is set to 1.<br />
887
8. DATA INPUT/OUTPUT OPERATION<br />
B–63534EN/02<br />
8.8<br />
DISPLAYING<br />
DIRECTORY OF<br />
FLOPPY CASSETTE<br />
On the floppy directory display screen, a directory of the FANUC Handy<br />
File, FANUC Floppy Cassette, or FANUC FA Card files can be displayed.<br />
In addition, those files can be loaded, output, and deleted.<br />
DIRECTORY (FLOPPY)<br />
NO. FILE NAME<br />
0001 PARAMETER<br />
0002 O0001<br />
0003 O0002<br />
0004 O0010<br />
0005 O0040<br />
0006 O0050<br />
0007 O0100<br />
0008 O1000<br />
0009 O9500<br />
EDIT **** *** *** 11 : 51 : 12<br />
888<br />
O0001 N00000<br />
(METER) VOL<br />
58.5<br />
1.9<br />
1.9<br />
1.3<br />
1.3<br />
1.9<br />
1.9<br />
1.9<br />
1.6<br />
PRGRM DIR<br />
(OPRT)
B–63534EN/02 OPERATION<br />
8. DATA INPUT/OUTPUT<br />
8.8.1<br />
Displaying the<br />
Directory<br />
<br />
Displaying the directory of floppy cassette files<br />
Use the following procedure to display a directory of all the<br />
files stored in a floppy:<br />
1 Press the EDIT switch on the machine operator’s panel.<br />
2 Press function key PROG .<br />
3 Press the rightmost soft key (next–menu key).<br />
4 Press soft key [FLOPPY].<br />
5 Press page key PAGE or<br />
6 The screen below appears.<br />
DIRECTORY (FLOPPY)<br />
NO. FILE NAME<br />
0001 PARAMETER<br />
0002 O0001<br />
0003 O0002<br />
0004 O0010<br />
0005 O0040<br />
0006 O0050<br />
0007 O0100<br />
0008 O1000<br />
0009 O9500<br />
889<br />
PAGE<br />
EDIT **** *** *** 11 : 53 : 04<br />
F SRH<br />
.<br />
READ PUNCH DELETE<br />
Fig. 8.8.1 (a)<br />
O0001 N00000<br />
(METER) VOL<br />
58.5<br />
1.9<br />
1.9<br />
1.3<br />
1.3<br />
1.9<br />
1.9<br />
1.9<br />
1.6<br />
7 Press a page key again to display another page of the directory.
8. DATA INPUT/OUTPUT OPERATION<br />
B–63534EN/02<br />
<br />
Use the following procedure to display a directory of files<br />
starting with a specified file number :<br />
1 Press the EDIT switch on the machine operator’s panel.<br />
2 Press function key PROG .<br />
3 Press the rightmost soft key (next–menu key).<br />
4 Press soft key [FLOPPY].<br />
5 Press soft key [(OPRT)].<br />
6 Press soft key [F SRH].<br />
7 Enter a file number.<br />
8 Press soft keys [F SET] and [EXEC].<br />
9 Press a page key to display another page of the directory.<br />
10 Press soft key [CAN] to return to the soft key display shown in the<br />
screen of Fig 8.8.1 (a).<br />
DIRECTORY (FLOPPY)<br />
NO. FILE NAME<br />
0005 O0040<br />
0006 O0050<br />
0007 O0100<br />
0008 O1000<br />
0009 O9500<br />
SEARCH<br />
FILE NO. <br />
<br />
EDIT **** *** *** 11 : 54 : 19<br />
890<br />
O0001 N00000<br />
(METER) VOL<br />
F SET CAN EXEC<br />
Fig. 8.8.1 (b)<br />
1.3<br />
1.9<br />
1.9<br />
1.9<br />
1.6
B–63534EN/02 OPERATION<br />
8. DATA INPUT/OUTPUT<br />
Explanations<br />
<br />
<br />
NO:Displays the file number<br />
FILE NAME: Displays the file name.<br />
(METER) : Converts and prints out the file capacity to paper tape<br />
length.You can also produce H<br />
(FEET) I by setting the INPUT UNIT to INCH of the setting data.<br />
VOL. : When the file is multi–volume, that state is displayed.<br />
(Ex.) Floppy or card A<br />
Floppy or card B<br />
Floppy or card C<br />
891<br />
C01<br />
C02<br />
C(number)means CONTINUE<br />
L(number)means LAST<br />
number number of floppies or cards<br />
L03
8. DATA INPUT/OUTPUT OPERATION<br />
B–63534EN/02<br />
8.8.2<br />
Reading Files<br />
<br />
Reading files<br />
The contents of the specified file number are read to the memory of NC.<br />
1 Press the EDIT switch on the machine operator’s panel.<br />
For the two–path control, select the tool post for which a file is to be<br />
input in memory with the tool post selection switch.<br />
2 Press function key PROG .<br />
3 Press the rightmost soft key (next–menu key).<br />
4 Press soft key [FLOPPY].<br />
5 Press soft key [(OPRT)].<br />
6 Press soft key [READ].<br />
DIRECTORY (FLOPPY)<br />
O0001 N00000<br />
NO. FILE NAME<br />
(METER) VOL<br />
0001 PARAMETER<br />
0002 O0001<br />
0003 O0002<br />
0004 O0010<br />
0005 O0040<br />
0006 O0050<br />
0007 O0100<br />
0008 O1000<br />
0009 O9500<br />
58.5<br />
1.9<br />
1.9<br />
1.3<br />
1.3<br />
1.9<br />
1.9<br />
1.9<br />
1.6<br />
READ<br />
FILE NO. =<br />
>_<br />
PROGRAM NO. =<br />
**** *** *** 11 : 55 : 04<br />
F SET<br />
7 Enter a file number.<br />
8 Press soft key [F SET].<br />
892<br />
O SET STOP<br />
CAN<br />
EXEC<br />
9 To modify the program number, enter the program number, then press<br />
soft key [O SET].<br />
10 Press soft key [EXEC]. The file number indicated in the lower–left<br />
corner of the screen is automatically incremented by one.<br />
11 Press soft key [CAN] to return to the soft key display shown in<br />
the screen of Fig. 8.8.1.(a).
B–63534EN/02 OPERATION<br />
8. DATA INPUT/OUTPUT<br />
8.8.3<br />
Outputting Programs<br />
<br />
Outputting programs<br />
Any program in the memory of the CNC unit can be output to a floppy<br />
as a file.<br />
1 Press the EDIT switch on the machine operator’s panel.<br />
For the two–path control, select the tool post for which a file is to be<br />
input in memory with the tool post selection switch.<br />
2 Press function key PROG .<br />
3 Press the rightmost soft key (next–menu key).<br />
4 Press soft key [FLOPPY].<br />
5 Press soft key [(OPRT)].<br />
6 Press soft key [PUNCH].<br />
DIRECTORY (FLOPPY)<br />
O0002 N01000<br />
NO. FILE NAME<br />
(METER) VOL<br />
0001 PARAMETER<br />
0002 O0001<br />
0003 O0002<br />
0004 O0010<br />
0005 O0040<br />
0006 O0050<br />
0007 O0100<br />
0008 O1000<br />
0009 O9500<br />
PUNCH<br />
FILE NO. =<br />
>_<br />
58.5<br />
1.9<br />
1.9<br />
1.3<br />
1.3<br />
1.9<br />
1.9<br />
1.9<br />
1.6<br />
PROGRAM NO. =<br />
EDIT **** *** *** 11 : 55 : 26<br />
F SET<br />
893<br />
O SET STOP<br />
CAN<br />
EXEC<br />
7 Enter a program number. To write all programs into a single file, enter<br />
–9999 in the program number field. In this case, the file name<br />
“ALL.PROGRAM” is registered.<br />
8 Press soft key [O SET].<br />
9 Press soft key [EXEC]. The program or programs specified in step 7<br />
are written after the last file on the floppy. To output the program after<br />
deleting files starting with an existing file number, key in the file<br />
number, then press soft key [F SET] followed by soft key [EXEC].<br />
10 Press soft key [CAN] to return to the soft key display shown in<br />
the screen of Fig. 8.8.1 (a).
8. DATA INPUT/OUTPUT OPERATION<br />
B–63534EN/02<br />
8.8.4<br />
Deleting Files<br />
<br />
Deleting files<br />
The file with the specified file number is deleted.<br />
1 Press the EDIT switch on the machine operator’s panel.<br />
2 Press function key PROG .<br />
3 Press the rightmost soft key (next–menu key).<br />
4 Press soft key [FLOPPY].<br />
5 Press soft key [(OPRT)].<br />
6 Press soft key [DELETE].<br />
DIRECTORY (FLOPPY)<br />
O0001 N00000<br />
NO. FILE NAME<br />
(METER) VOL<br />
0001 PARAMETER<br />
0002 O0001<br />
0003 O0002<br />
0004 O0010<br />
0005 O0040<br />
0006 O0050<br />
0007 O0100<br />
0008 O1000<br />
0009 O9500<br />
DELETE<br />
58.5<br />
1.9<br />
1.9<br />
1.3<br />
1.3<br />
1.9<br />
1.9<br />
1.9<br />
1.6<br />
FILE NO. =<br />
>_<br />
NAME=<br />
EDIT **** *** *** 11 : 55 : 51<br />
F SET<br />
894<br />
F NAME<br />
CAN<br />
EXEC<br />
7 Specify the file to be deleted.<br />
When specifying the file with a file number, type the number and<br />
press soft key [F SET]. When specifying the file with a file name,<br />
type the name and press soft key [F NAME].<br />
8 Press soft key [EXEC].<br />
The file specified in the file number field is deleted. When a file is<br />
deleted, the file numbers after the deleted file are each decremented<br />
by one.<br />
9 Press soft key [CAN] to return to the soft key display shown in<br />
the screen of Fig. 8.8.1 (a).
B–63534EN/02 OPERATION<br />
8. DATA INPUT/OUTPUT<br />
<br />
Inputting file numbers<br />
and program numbers<br />
with keys<br />
I/O devices<br />
Significant digits<br />
Collation<br />
<br />
If [F SET] or [O SET] is pressed without key inputting file number and<br />
program number, file number or program number shows blank. When<br />
0 is entered for file numbers or program numbers, 1 is displayed.<br />
To use channel 0 ,set a device number in parameter (No. 102).<br />
Set the I/O device number to parameter (No. 112) when cannel 1 is used.<br />
Set it to (No. 0122) when channel 2 is used.<br />
For the numeral input in the data input area with FILE No. and<br />
PROGRAM No., only lower 4 digits become valid.<br />
When the data protection key on the machine operator’s panel<br />
is ON, no programs are read from the floppy. They are verified against<br />
the contents of the memory of the CNC instead.<br />
Alarm No. Contents<br />
71<br />
An invalid file number or program number was entered.<br />
(Specified program number is not found.)<br />
79<br />
Verification operation found a mismatch between a program<br />
loaded into memory and the contents of the floppy<br />
The dataset–ready signal (DR) for the input/output device is<br />
86<br />
turned off. (The no file error or duplicate file error occurred on<br />
the input/output device because an invalid file number, program<br />
number, or file name was entered.<br />
895
8. DATA INPUT/OUTPUT OPERATION<br />
B–63534EN/02<br />
8.9<br />
OUTPUTTING A<br />
PROGRAM LIST FOR<br />
A SPECIFIED GROUP<br />
<br />
CNC programs stored in memory can be grouped according to their<br />
names, thus enabling the output of CNC programs in group units. Section<br />
III–11.3.2 explains the display of a program listing for a specified group.<br />
Procedure for Outputting a Program List for a Specified Group<br />
BG–EDT O–SRH GROUP<br />
READ<br />
PUNCH<br />
AL–GRP STOP CAN<br />
EXEC<br />
1 Display the program list screen for a group of programs, as described<br />
in Section III–11.3.2.<br />
PROGRAM DIRECTORY (GROUP) O0001 N00010<br />
PROGRAM (NUM.) MEMORY (CHAR.)<br />
USED: 60 3321<br />
FREE: 2 429<br />
O0020 (GEAR–1000 MAIN )<br />
O0040 (GEAR–1000 SUB–1 )<br />
O0200 (GEAR–1000 SUB–2 )<br />
O2000 (GEAR–1000 SUB–3 )<br />
<br />
EDIT **** *** *** *** 16 : 52 : 13<br />
PRGRM DIR (OPRT)<br />
2 Press the [(OPRT)] operation soft key.<br />
3 Press the right–most soft key (continuous menu key).<br />
4 Press the [PUNCH] operation soft key.<br />
5 Press the [AL–GRP] operation soft key.<br />
The CNC programs in the group for which a search is made are<br />
output. When these programs are output to a floppy disk, they are<br />
output to a file named GROUP.PROGRAM.<br />
896
B–63534EN/02 OPERATION<br />
8. DATA INPUT/OUTPUT<br />
8.10<br />
DATA INPUT/OUTPUT<br />
ON THE ALL IO<br />
SCREEN<br />
To input/output a particular type of data, the corresponding screen is<br />
usually selected. For example, the parameter screen is used for parameter<br />
input from or output to an external input/output unit, while the program<br />
screen is used for program input or output. However, programs,<br />
parameters, offset data, and macro variables can all be input and output<br />
using a single common screen, that is, the ALL IO screen.<br />
READ/PUNCH (PROGRAM) O1234 N12345<br />
I/O CHANNEL 3 TV CHECK OFF<br />
DEVICE NUM. 0 PUNCH CODE ISO<br />
BAUDRATE 4800 INPUT CODE ASCII<br />
STOP BIT 2 FEED OUTPUT FEED<br />
NULL INPUT (EIA) NO EOB OUTPUT (ISO) CR<br />
TV CHECK (NOTES) ON BAUDRATE CLK. INNER<br />
CD CHECK (232C) OFF RESET/ALARM ON<br />
PARITY BIT OFF SAT COMMAND HOST<br />
INTERFACE RS422 COM PROTCOL A<br />
END CODE<br />
(0:EIA 1:ISO)>1_<br />
EXT COM CODE ASCII<br />
MDI<br />
**** *** *** *** 12:34:56<br />
PRGRM PARAM OFFSET MACRO (OPRT)<br />
Fig. 8.10 ALL IO screen (when channel 3 is being<br />
used for input/output)<br />
897
8. DATA INPUT/OUTPUT OPERATION<br />
B–63534EN/02<br />
8.10.1<br />
Setting<br />
Input/Output–Related<br />
Parameters<br />
<br />
Input/output–related parameters can be set on the ALL IO screen.<br />
Parameters can be set, regardless of the mode.<br />
Setting input/output–related parameters<br />
1 Press function key SYSTEM .<br />
2 Press the rightmost soft key (next–menu key) several times.<br />
3 Press soft key [ALL IO] to display the ALL IO screen.<br />
NOTE<br />
1 If program or floppy is selected in EDIT mode, the program<br />
directory or floppy screen is displayed.<br />
2 When the power is first turned on, program is selected by<br />
default.<br />
READ/PUNCH (PROGRAM) O1234 N12345<br />
I/O CHANNEL 3 TV CHECK OFF<br />
DEVICE NUM. 0 PUNCH CODE ISO<br />
BAUDRATE 4800 INPUT CODE ASCII<br />
STOP BIT 2 FEED OUTPUT FEED<br />
NULL INPUT (EIA) NO EOB OUTPUT (ISO) CR<br />
TV CHECK (NOTES) ON BAUDRATE CLK. INNER<br />
CD CHECK (232C) OFF RESET/ALARM ON<br />
PARITY BIT OFF SAT COMMAND HOST<br />
INTERFACE RS422 COM PROTCOL A<br />
END CODE<br />
(0:EIA 1:ISO)>1_<br />
EXT COM CODE ASCII<br />
MDI **** *** *** *** 12:34:56<br />
PRGRM PARAM OFFSET MACRO (OPRT)<br />
NOTE<br />
Baud rate clock, CD check (232C), reset/alarm report, and<br />
the parity bit for parameter No. 134, as well as the<br />
communication code, end code, communication protocol,<br />
interface, and SAT command for parameter No. 135 are<br />
displayed only when channel 3 is being used for<br />
input/output.<br />
4 Select the soft key corresponding to the desired type of data (program,<br />
parameter, and so forth).<br />
5 Set the parameters corresponding to the type of input/output unit to be<br />
used. (Parameter setting is possible regardless of the mode.)<br />
898
B–63534EN/02 OPERATION<br />
8. DATA INPUT/OUTPUT<br />
8.10.2<br />
Inputting and<br />
Outputting Programs<br />
<br />
File search<br />
A program can be input and output using the ALL IO screen.<br />
When entering a program using a cassette or card, the user must specify<br />
the input file containing the program (file search).<br />
1 Press soft key [PRGRM] on the ALL IO screen, described in Section<br />
8.10.1.<br />
2 Select EDIT mode. A program directory is displayed.<br />
3 Press soft key [(OPRT)]. The screen and soft keys change as shown<br />
below.<br />
⋅ A program directory is displayed only in EDIT mode. In all other<br />
modes, the ALL IO screen is displayed.<br />
899<br />
O0001 N00010<br />
PROGRAM (NUM.) MEMORY (CHAR.)<br />
USED : 60 3321<br />
FREE : 2 429<br />
O0010 O0001 O0003 O0002 O0555 O0999<br />
O0062 O0004 O0005 O1111 O0969 O6666<br />
O0021 O1234 O0588 O0020 O0040<br />
<br />
EDIT **** *** *** *** 14:46:09<br />
F SRH READ PUNCH DELETE (OPRT)<br />
4 Enter address N.<br />
5 Enter the number of the file to be found.<br />
⋅ N0<br />
The first floppy file is found.<br />
⋅ One of N1 to N9999<br />
Among the files numbered from 1 to 9999, a specified file is found.<br />
⋅ N–9999<br />
The file immediately after that used most recently is found.<br />
⋅ N–9998<br />
When –9998 is specified, the next file is found. Then, each time<br />
a file input/output operation is performed, N–9999 is automatically<br />
inserted. This means that subsequent files can be sequentially<br />
found automatically.<br />
This state is canceled by specifying N0, N1 to N9999, or N–9999,<br />
or upon a reset.
8. DATA INPUT/OUTPUT OPERATION<br />
B–63534EN/02<br />
Explanations<br />
CAN<br />
EXEC<br />
Difference between N0<br />
and N1<br />
Alarm issue during file<br />
search<br />
File search using N–9999<br />
6 Press soft keys [F SRH] and [EXEC].<br />
The specified file is found.<br />
When a file already exists in a cassette or card, specifying N0 or N1 has<br />
the same effect. If N1 is specified when there is no file on the cassette or<br />
card, an alarm is issued because the first file cannot be found. Specifying<br />
N0 places the head at the start of the cassette or card, regardless of whether<br />
the cassette/card already contains files. So, no alarm is issued in this case.<br />
N0 can be used, for example, when a program is written into a new<br />
cassette or card, or when a previously used cassette or card is used once<br />
all the files it contains have been erased.<br />
If an alarm (file search failure, for example) is generated during file<br />
search, the CNC does not issue an alarm immediately. However, a P/S<br />
alarm (No. 086) is issued if input/output is subsequently performed on<br />
that file.<br />
Instead of sequentially searching for files by specifying actual file<br />
numbers every time, the user can specify the first file number, then find<br />
the subsequent files by specifying N–9999. When N–9999 is specified,<br />
the time required for file search can be reduced.<br />
900
B–63534EN/02 OPERATION<br />
8. DATA INPUT/OUTPUT<br />
<br />
Inputting a program<br />
STOP<br />
CAN<br />
EXEC<br />
1 Press soft key [PRGRM] on the ALL IO screen, described in Section<br />
8.10.1.<br />
2 Select EDIT mode. A program directory is displayed.<br />
3 Press soft key [(OPRT)]. The screen and soft keys change as shown<br />
below.<br />
⋅ A program directory is displayed only in EDIT mode. In all other<br />
modes, the ALL IO screen is displayed.<br />
901<br />
O0001 N00010<br />
PROGRAM (NUM.) MEMORY (CHAR.)<br />
USED : 60 3321<br />
FREE : 2 429<br />
O0010 O0001 O0003 O0002 O0555 O0999<br />
O0062 O0004 O0005 O1111 O0969 O6666<br />
O0021 O1234 O0588 O0020 O0040<br />
<br />
EDIT **** *** *** *** 14:46:09<br />
F SRH READ PUNCH DELETE (OPRT)<br />
4 To specify a program number to be assigned to an input program,<br />
enter address O, followed by the desired program number.<br />
If no program number is specified, the program number in the file or<br />
on the NC tape is assigned as is.<br />
5 Press soft key [READ], then [EXEC].<br />
The program is input with the program number specified in step 4<br />
assigned.<br />
To cancel input, press soft key [CAN].<br />
To stop input prior to its completion, press soft key [STOP].
8. DATA INPUT/OUTPUT OPERATION<br />
B–63534EN/02<br />
<br />
Outputting programs<br />
STOP<br />
CAN<br />
EXEC<br />
1 Press soft key [PRGRM] on the ALL IO screen, described in Section<br />
8.10.1.<br />
2 Select EDIT mode. A program directory is displayed.<br />
3 Press soft key [(OPRT)]. The screen and soft keys change as shown<br />
below.<br />
⋅ A program directory is displayed only in EDIT mode. In all other<br />
modes, the ALL IO screen is displayed.<br />
902<br />
O0001 N00010<br />
PROGRAM (NUM.) MEMORY (CHAR.)<br />
USED : 60 3321<br />
FREE : 2 429<br />
O0010 O0001 O0003 O0002 O0555 O0999<br />
O0062 O0004 O0005 O1111 O0969 O6666<br />
O0021 O1234 O0588 O0020 O0040<br />
<br />
EDIT **** *** *** *** 14:46:09<br />
F SRH READ PUNCH DELETE (OPRT)<br />
4 Enter address O.<br />
5 Enter a desired program number.<br />
If –9999 is entered, all programs in memory are output.<br />
To output a range of programs, enter O∆∆∆∆, O.. The<br />
programs numbered from ∆∆∆∆ to are output.<br />
When bit 4 (SOR) of parameter No. 3107 for sorted display is set to 1<br />
on the program library screen, programs are output in order, starting<br />
from those having the smallest program numbers.<br />
6 Press soft key [PUNCH], then [EXEC].<br />
The specified program or programs are output. If steps 4 and 5 are<br />
omitted, the currently selected program is output.<br />
To cancel output, press soft key [CAN].<br />
To stop output prior to its completion, press soft key [STOP].
B–63534EN/02 OPERATION<br />
8. DATA INPUT/OUTPUT<br />
<br />
Explanations<br />
Deleting files<br />
CAN<br />
File numbers after<br />
deletion<br />
Write protect<br />
EXEC<br />
1 Press soft key [PRGRM] on the ALL IO screen, described in Section<br />
8.10.1.<br />
2 Select EDIT mode. A program directory is displayed.<br />
3 Press soft key [(OPRT)]. The screen and soft keys change as shown<br />
below.<br />
⋅ A program directory is displayed only in EDIT mode. In all other<br />
modes, the ALL IO screen is displayed.<br />
903<br />
O0001 N00010<br />
PROGRAM (NUM.) MEMORY (CHAR.)<br />
USED : 60 3321<br />
FREE : 2 429<br />
O0010 O0001 O0003 O0002 O0555 O0999<br />
O0062 O0004 O0005 O1111 O0969 O6666<br />
O0021 O1234 O0588 O0020 O0040<br />
<br />
EDIT **** *** *** *** 14:46:09<br />
F SRH READ PUNCH DELETE (OPRT)<br />
4 Press soft key [DELETE].<br />
5 Enter a file number, from 1 to 9999, to indicate the file to be deleted.<br />
6 Press soft key [EXEC].<br />
The k–th file, specified in step 5, is deleted.<br />
After deletion of the k–th file, the previous file numbers (k+1) to n are<br />
decremented by 1 to k to (n–1).<br />
Before deletion After deletion<br />
1 to (k–1) 1 to (k–1)<br />
K Delete<br />
(k+1) to n k to (n–1)<br />
Before a file can be deleted, the write protect switch of the cassette must<br />
be set to make the cassette writable.
8. DATA INPUT/OUTPUT OPERATION<br />
B–63534EN/02<br />
8.10.3<br />
Inputting and<br />
Outputting Parameters<br />
<br />
Inputting parameters<br />
CAN<br />
EXEC<br />
Parameters can be input and output using the ALL IO screen.<br />
1 Press soft key [PARAM] on the ALL IO screen, described in Section<br />
8.10.1.<br />
2 Select EDIT mode.<br />
3 Press soft key [(OPRT)]. The screen and soft keys change as shown<br />
below.<br />
READ/PUNCH (PARAMETER) O1234 N12345<br />
I/O CHANNEL 3 TV CHECK OFF<br />
DEVICE NUM. 0 PUNCH CODE ISO<br />
BAUDRATE 4800 INPUT CODE ASCII<br />
STOP BIT 2 FEED OUTPUT FEED<br />
NULL INPUT (EIA) NO EOB OUTPUT (ISO) CR<br />
TV CHECK (NOTES) ON BAUDRATE CLK. INNER<br />
CD CHECK (232C) OFF RESET/ALARM ON<br />
PARITY BIT OFF COM CODE ASCII<br />
END CODE EXT COM PROTCOL A<br />
INTERFACE<br />
(0:EIA 1:ISO)>1_<br />
RS422 SAT COMMAND HOST<br />
MDI<br />
**** *** *** *** 12:34:56<br />
904<br />
READ PUNCH<br />
4 Press soft key [READ], then [EXEC].<br />
The parameters are read, and the ”INPUT” indicator blinks at the<br />
lower–right corner of the screen. Upon the completion of input, the<br />
”INPUT” indicator is cleared from the screen.<br />
To cancel input, press soft key [CAN].
B–63534EN/02 OPERATION<br />
8. DATA INPUT/OUTPUT<br />
<br />
Outputting parameters<br />
CAN<br />
EXEC<br />
1 Press soft key [PARAM] on the ALL IO screen, described in Section<br />
8.10.1.<br />
2 Select EDIT mode.<br />
3 Press soft key [(OPRT)]. The screen and soft keys change as shown<br />
below.<br />
READ/PUNCH (PARAMETER) O1234 N12345<br />
I/O CHANNEL 3 TV CHECK OFF<br />
DEVICE NUM. 0 PUNCH CODE ISO<br />
BAUDRATE 4800 INPUT CODE ASCII<br />
STOP BIT 2 FEED OUTPUT FEED<br />
NULL INPUT (EIA) NO EOB OUTPUT (ISO) CR<br />
TV CHECK (NOTES) ON BAUDRATE CLK. INNER<br />
CD CHECK (232C) OFF RESET/ALARM ON<br />
PARITY BIT OFF COM CODE ASCII<br />
END CODE EXT COM PROTCOL A<br />
INTERFACE<br />
(0:EIA 1:ISO)>1_<br />
RS422 SAT COMMAND HOST<br />
MDI<br />
**** *** *** *** 12:34:56<br />
905<br />
READ PUNCH<br />
4 Press soft key [PUNCH], then [EXEC].<br />
The parameters are output, and the ”OUTPUT” indicator blinks at the<br />
lower–right corner of the screen. Upon the completion of output, the<br />
”OUTPUT” indicator is cleared from the screen.<br />
To cancel output, press soft key [CAN].
8. DATA INPUT/OUTPUT OPERATION<br />
B–63534EN/02<br />
8.10.4<br />
Inputting and<br />
Outputting Offset Data<br />
<br />
Inputting offset data<br />
CAN<br />
EXEC<br />
Offset data can be input and output using the ALL IO screen.<br />
1 Press soft key [OFFSET] on the ALL IO screen, described in Section<br />
8.10.1.<br />
2 Select EDIT mode.<br />
3 Press soft key [(OPRT)]. The screen and soft keys change as shown<br />
below.<br />
READ/PUNCH (OFFSET) O1234 N12345<br />
I/O CHANNEL 3 TV CHECK OFF<br />
DEVICE NUM. 0 PUNCH CODE ISO<br />
BAUDRATE 4800 INPUT CODE ASCII<br />
STOP BIT 2 FEED OUTPUT FEED<br />
NULL INPUT (EIA) NO EOB OUTPUT (ISO) CR<br />
TV CHECK (NOTES) ON BAUDRATE CLK. INNER<br />
CD CHECK (232C) OFF RESET/ALARM ON<br />
PARITY BIT OFF COM CODE ASCII<br />
END CODE EXT COM PROTCOL A<br />
INTERFACE<br />
(0:EIA 1:ISO)>1_<br />
RS422 SAT COMMAND HOST<br />
MDI<br />
**** *** *** *** 12:34:56<br />
906<br />
READ PUNCH<br />
4 Press soft key [READ], then [EXEC].<br />
The offset data is read, and the ”INPUT” indicator blinks at the<br />
lower–right corner of the screen.<br />
Upon the completion of input, the ”INPUT” indicator is cleared from<br />
the screen.<br />
To cancel input, press soft key [CAN].
B–63534EN/02 OPERATION<br />
8. DATA INPUT/OUTPUT<br />
<br />
Outputting offset data<br />
CAN<br />
EXEC<br />
1 Press soft key [OFFSET] on the ALL IO screen, described in Section<br />
8.10.1.<br />
2 Select EDIT mode.<br />
3 Press soft key [(OPRT)]. The screen and soft keys change as shown<br />
below.<br />
READ/PUNCH (OFFSET) O1234 N12345<br />
I/O CHANNEL 3 TV CHECK OFF<br />
DEVICE NUM. 0 PUNCH CODE ISO<br />
BAUDRATE 4800 INPUT CODE ASCII<br />
STOP BIT 2 FEED OUTPUT FEED<br />
NULL INPUT (EIA) NO EOB OUTPUT (ISO) CR<br />
TV CHECK (NOTES) ON BAUDRATE CLK. INNER<br />
CD CHECK (232C) OFF RESET/ALARM ON<br />
PARITY BIT OFF COM CODE ASCII<br />
END CODE EXT COM PROTCOL A<br />
INTERFACE<br />
(0:EIA 1:ISO)>1_<br />
RS422 SAT COMMAND HOST<br />
MDI<br />
**** *** *** *** 12:34:56<br />
907<br />
READ PUNCH<br />
4 Press soft key [PUNCH], then [EXEC].<br />
The offset data is output, and the ”OUTPUT” indicator blinks at the<br />
lower–right corner of the screen. Upon the completion of output, the<br />
”OUTPUT” indicator is cleared from the screen.<br />
To cancel output, press soft key [CAN].
8. DATA INPUT/OUTPUT OPERATION<br />
B–63534EN/02<br />
8.10.5<br />
Outputting Custom<br />
Macro Common<br />
Variables<br />
<br />
Custom macro common variables can be output using the ALL IO screen.<br />
Outputting custom macro common variables<br />
CAN<br />
EXEC<br />
1 Press soft key [MACRO] on the ALL IO screen, described in Section<br />
8.10.1.<br />
2 Select EDIT mode.<br />
3 Press soft key [(OPRT)]. The screen and soft keys change as shown<br />
below.<br />
READ/PUNCH (MACRO) O1234 N12345<br />
I/O CHANNEL 3 TV CHECK OFF<br />
DEVICE NUM. 0 PUNCH CODE ISO<br />
BAUDRATE 4800 INPUT CODE ASCII<br />
STOP BIT 2 FEED OUTPUT FEED<br />
NULL INPUT (EIA) NO EOB OUTPUT (ISO) CR<br />
TV CHECK (NOTES) ON BAUDRATE CLK. INNER<br />
CD CHECK (232C) OFF RESET/ALARM ON<br />
PARITY BIT OFF COM CODE ASCII<br />
END CODE EXT COM PROTCOL A<br />
INTERFACE<br />
(0:EIA 1:ISO)>1_<br />
RS422 SAT COMMAND HOST<br />
MDI<br />
**** *** *** *** 12:34:56<br />
908<br />
READ PUNCH<br />
4 Press soft key [PUNCH], then [EXEC].<br />
The custom macro common variables are output, and the ”OUTPUT”<br />
indicator blinks at the lower–right corner of the screen. Upon the<br />
completion of output, the ”OUTPUT” indicator is cleared from the<br />
screen.<br />
To cancel output, press soft key [CAN].<br />
NOTE<br />
To input a macro variable, read the desired custom macro<br />
statement as a program, then execute the program.
B–63534EN/02 OPERATION<br />
8. DATA INPUT/OUTPUT<br />
8.10.6<br />
Inputting and<br />
Outputting Floppy<br />
Files<br />
<br />
F SET<br />
Displaying a file directory<br />
CAN<br />
EXEC<br />
The ALL IO screen supports the display of a directory of floppy files, as<br />
well as the input and output of floppy files.<br />
1 Press the rightmost soft key (next–menu key) on the ALL IO<br />
screen, described in Section 8.10.1.<br />
2 Press soft key [FLOPPY].<br />
3 Select EDIT mode. The floppy screen is displayed.<br />
4 Press soft key [(OPRT)]. The screen and soft keys change as shown<br />
below.<br />
The floppy screen is displayed only in EDIT mode. In all other<br />
modes, the ALL IO screen is displayed.<br />
READ/PUNCH (FLOPPY) O1234 N12345<br />
><br />
MDI<br />
**** *** *** *** 12:34:56<br />
F SRH READ PUNCH<br />
5 Press soft key [F SRH].<br />
909<br />
DELETE<br />
6 Enter the number of the desired file, then press soft key [F SET].<br />
7 Press soft key [EXEC]. A directory is displayed, with the specified<br />
file uppermost. Subsequent files in the directory can be displayed by<br />
pressing the page key.
8. DATA INPUT/OUTPUT OPERATION<br />
B–63534EN/02<br />
READ/PUNCH (FLOPPY)<br />
O1234 N12345<br />
No. FILE NAME<br />
(Meter) VOL<br />
0001 PARAMETER<br />
46.1<br />
0002<br />
0003<br />
0004<br />
0005<br />
0006<br />
0007<br />
0008<br />
0009<br />
ALL.PROGRAM<br />
O0001<br />
O0002<br />
O0003<br />
O0004<br />
O0005<br />
O0010<br />
O0020<br />
12.3<br />
11.9<br />
11.9<br />
11.9<br />
11.9<br />
11.9<br />
11.9<br />
11.9<br />
F SRH<br />
File No.=2<br />
>2_<br />
EDIT **** *** *** *** 12:34:56<br />
F SRH CAN EXEC<br />
A directory in which the first file is uppermost can be displayed<br />
simply by pressing the page key. (Soft key [F SRH] need not be<br />
pressed.)<br />
910
B–63534EN/02 OPERATION<br />
8. DATA INPUT/OUTPUT<br />
<br />
F SET O SET STOP<br />
Inputting a file<br />
CAN<br />
EXEC<br />
1 Press the rightmost soft key (next–menu key) on the ALL IO<br />
screen, described in Section 8.10.1.<br />
2 Press soft key [FLOPPY].<br />
3 Select EDIT mode. The floppy screen is displayed.<br />
4 Press soft key [(OPRT)]. The screen and soft keys change as shown<br />
below.<br />
The floppy screen is displayed only in EDIT mode. In all other<br />
modes, the ALL IO screen is displayed.<br />
READ/PUNCH (FLOPPY) O1234 N12345<br />
><br />
MDI<br />
**** *** *** *** 12:34:56<br />
F SRH READ PUNCH<br />
5 Press soft key [READ].<br />
911<br />
DELETE<br />
6 Enter the number of a file or program to be input.<br />
⋅ Setting a file number: Enter the number of the desired file, then<br />
press soft key [F SET].<br />
⋅ Setting a program number: Enter the number of the desired<br />
program, then press soft key [O SET].<br />
7 Press soft key [EXEC].<br />
The specified file or program is read, and the ”INPUT” indicator<br />
blinks at the lower–right corner of the screen. Upon the completion of<br />
input, the ”INPUT” indicator is cleared from the screen.
8. DATA INPUT/OUTPUT OPERATION<br />
B–63534EN/02<br />
<br />
F SET O SET STOP<br />
Outputting a file<br />
CAN<br />
EXEC<br />
1 Press the rightmost soft key (next–menu key) on the ALL IO<br />
screen, described in Section 8.10.1.<br />
2 Press soft key [FLOPPY].<br />
3 Select EDIT mode. The floppy screen is displayed.<br />
4 Press soft key [(OPRT)]. The screen and soft keys change as shown<br />
below.<br />
The floppy screen is displayed only in EDIT mode. In all other<br />
modes, the ALL IO screen is displayed.<br />
READ/PUNCH (FLOPPY) O1234 N12345<br />
><br />
MDI<br />
**** *** *** *** 12:34:56<br />
F SRH READ PUNCH<br />
5 Press soft key [PUNCH].<br />
912<br />
DELETE<br />
6 Enter the number of the program to be output, together with a desired<br />
output file number.<br />
⋅ Setting a file number: Enter the number of the desired file, then<br />
press soft key [F SET].<br />
⋅ Setting a program number: Enter the number of the desired<br />
program, then press soft key [O SET].<br />
7 Press soft key [EXEC].<br />
The specified program is output, and the ”OUTPUT” indicator blinks<br />
at the lower–right corner of the screen. Upon the completion of<br />
output, the ”OUTPUT” indicator is cleared from the screen.<br />
If no file number is specified, the program is written at the end of the<br />
currently registered files.
B–63534EN/02 OPERATION<br />
8. DATA INPUT/OUTPUT<br />
<br />
F SET<br />
Deleting a file<br />
CAN<br />
EXEC<br />
1 Press the rightmost soft key (next–menu key) on the ALL IO<br />
screen, described in Section 8.10.1.<br />
2 Press soft key [FLOPPY].<br />
3 Select EDIT mode. The floppy screen is displayed.<br />
4 Press soft key [(OPRT)]. The screen and soft keys change as shown<br />
below.<br />
The floppy screen is displayed only in EDIT mode. In all other<br />
modes, the ALL IO screen is displayed.<br />
READ/PUNCH (FLOPPY) O1234 N12345<br />
><br />
MDI<br />
**** *** *** *** 12:34:56<br />
F SRH READ PUNCH<br />
5 Press soft key [DELETE].<br />
913<br />
DELETE<br />
6 Enter the number of the desired file, then press soft key [F SET].<br />
7 Press soft key [EXEC]. The specified file is deleted. After the file has<br />
been deleted, the subsequent files are shifted up.
8. DATA INPUT/OUTPUT OPERATION<br />
B–63534EN/02<br />
8.11<br />
DATA INPUT/OUTPUT<br />
USING A MEMORY<br />
CARD<br />
By setting the I/O channel (parameter No. 0020) to 4, files on a memory<br />
card inserted into the memory card interface located to the left of the<br />
display can be referenced. Different types of data such as part programs,<br />
parameters, and offset data on a memory card can also be input and output<br />
in text file format.<br />
The major functions are listed below.<br />
⋅ Displaying a directory of stored files<br />
The files stored on a memory card can be displayed on the directory<br />
screen.<br />
⋅ Searching for a file<br />
A search is made for a file on a memory card and, if found, it is<br />
displayed on the directory screen.<br />
⋅ Reading a file<br />
Text–format files can be read from a memory card.<br />
⋅ Writing a file<br />
Data such as part programs can be stored to a memory card in text file<br />
format.<br />
⋅ Deleting a file<br />
A file can be selected and deleted from a memory card.<br />
Writing a file<br />
Reading a file<br />
914<br />
<br />
Displaying a directory<br />
Searching for a file<br />
Deleting a file<br />
Memory card
B–63534EN/02 OPERATION<br />
8. DATA INPUT/OUTPUT<br />
<br />
Displaying a directory of stored files<br />
1 Press the EDIT switch on the machine operator’s panel.<br />
2 Press function key PROG .<br />
3 Press the rightmost soft key (next–menu key).<br />
4 Press soft key [CARD]. The screen shown below is displayed. Using<br />
page keys and , the screen can be scrolled.<br />
DIRECTORY (M–CARD)<br />
O0034 N00045<br />
No. FILE NAME SIZE DATE<br />
0001 O1000 123456 96/07/10<br />
0002 O1001 118458 96/07/30<br />
0003 O0002 113250 96/07/30<br />
0004 O2000 173456 96/07/31<br />
0005 O2001 113444 96/07/31<br />
0006 O3001 118483 96/08/02<br />
0007 O3300 111406 96/08/05<br />
0008 O3400 112420 96/07/31<br />
0009 O3500 117460 96/07/31<br />
~ ~<br />
PROG DIR +<br />
(OPRT)<br />
5 Comments relating to each file can be displayed by pressing soft key<br />
[DIR+].<br />
DIRECTORY (M–CARD)<br />
O0034 N00045<br />
No. FILE NAME COMMENT<br />
0001 O1000 (COMMENT )<br />
0002 O1001 (SUB PROGRAM )<br />
0003 O0002 (12345678 )<br />
0004 O2000 ( )<br />
0005 O2001 ( )<br />
0006 O3001 (SKIP–K )<br />
0007 O3300 (HI–SPEED )<br />
0008 O3400 ( )<br />
0009 O3500 (TEST PROGRAM)<br />
~ ~<br />
PROG DIR +<br />
(OPRT)<br />
6 Repeatedly pressing soft key [DIR+] toggles the screen between the<br />
display of comments and the display of sizes and dates.<br />
Any comment described after the O number in the file is displayed.<br />
Up to 18 characters can be displayed on the screen.<br />
915
8. DATA INPUT/OUTPUT OPERATION<br />
B–63534EN/02<br />
<br />
F SRH F READ N READ<br />
Searching for a file<br />
PUNCH<br />
DELETE<br />
1 Press the EDIT switch on the machine operator’s panel.<br />
2 Press function key PROG .<br />
3 Press the rightmost soft key (next–menu key).<br />
4 Press soft key [CARD]. The screen shown below is displayed.<br />
DIRECTORY (M–CARD)<br />
O0034 N00045<br />
No. FILE NAME SIZE DATE<br />
0001 O1000 123456 96/07/10<br />
0002 O1001 118458 96/07/30<br />
0003 O0002 113250 96/07/30<br />
0004 O2000 173456 96/07/31<br />
0005 O2001 113444 96/07/31<br />
0006 O3001 118483 96/08/02<br />
0007 O3300 111406 96/08/05<br />
0008 O3400 112420 96/07/31<br />
0009 O3500 117460 96/07/31<br />
~ ~<br />
PROG DIR +<br />
(OPRT)<br />
5 Press soft key [(OPRT)].<br />
6 Set the number of the desired file number with soft key [F SRH].<br />
Then, start the search by pressing soft key [EXEC]. If found, the file is<br />
displayed at the top of the directory screen.<br />
When a search is made for file number 19<br />
DIRECTORY (M–CARD)<br />
O0034 N00045<br />
No. FILE NAME COMMENT<br />
0019 O1000 (MAIN PROGRAM)<br />
0020 O1010 (SUBPROGRAM–1)<br />
0021 O1020 (COMMENT )<br />
0022 O1030 (COMMENT )<br />
~ ~<br />
916
B–63534EN/02 OPERATION<br />
8. DATA INPUT/OUTPUT<br />
<br />
F SRH F READ N READ<br />
Reading a file<br />
PUNCH<br />
DELETE<br />
1 Press the EDIT switch on the machine operator’s panel.<br />
2 Press function key PROG.<br />
3 Press the rightmost soft key (next–menu key).<br />
4 Press soft key [CARD]. Then, the screen shown below is displayed.<br />
DIRECTORY (M–CARD)<br />
O0034 N00045<br />
No. FILE NAME SIZE DATE<br />
0001 O1000 123456 96/07/10<br />
0002 O1001 118458 96/07/30<br />
0003 O0002 113250 96/07/30<br />
0004 O2000 173456 96/07/31<br />
0005 O2001 113444 96/07/31<br />
0006 O3001 118483 96/08/02<br />
0007 O3300 111406 96/08/05<br />
0008 O3400 112420 96/07/31<br />
0009 O3500 117460 96/07/31<br />
~ ~<br />
PROG DIR +<br />
(OPRT)<br />
5 Press soft key [(OPRT)].<br />
6 To specify a file number, press soft key [F READ]. The screen shown<br />
below is displayed.<br />
DIRECTORY (M–CARD)<br />
O0001 N00010<br />
No. FILE NAME COMMENT<br />
0019 O1000 (MAIN PROGRAM)<br />
0020 O1010 (SUBPROGRAM–1)<br />
0021 O1030 (COMMENT )<br />
~ ~<br />
READ<br />
FILE NAME=20 PROGRAM No.=120<br />
><br />
EDIT *** **** *** ****<br />
15:40:21<br />
F NAME O SET STOP CAN EXEC<br />
7 Enter file number 20 from the MDI panel, then set the file number by<br />
pressing soft key [F SET]. Next, enter program number 120, then set<br />
the program number by pressing soft key [O SET]. Then, press soft<br />
key [EXEC].<br />
⋅ File number 20 is registered as O0120 in the CNC.<br />
⋅ Set a program number to register a read file with a separate O<br />
number. If no program number is set, the O number in the file name<br />
column is registered.<br />
917
8. DATA INPUT/OUTPUT OPERATION<br />
B–63534EN/02<br />
8 To specify a file with its file name, press soft key [N READ] in step 6<br />
above. The screen shown below is displayed.<br />
DIRECTORY (M–CARD)<br />
O0001 N00010<br />
No. FILE NAME COMMENT<br />
0012 O0050 (MAIN PROGRAM)<br />
0013 TESTPRO (SUB PROGRAM–1)<br />
0014 O0060 (MACRO PROGRAM)<br />
~ ~<br />
READ FILE NAME =TESTPRO<br />
PROGRAM No. =1230<br />
><br />
EDIT *** **** *** ****<br />
15:40:21<br />
F NAME O SET STOP CAN EXEC<br />
9 To register file name TESTPRO as O1230, enter file name TESTPRO<br />
from the MDI panel, then set the file name with soft key [F NAME].<br />
Next, enter program number 1230, then set the program number with<br />
soft key [O SET]. Then, press soft key [EXEC].<br />
918
B–63534EN/02 OPERATION<br />
8. DATA INPUT/OUTPUT<br />
<br />
F SRH F READ N READ<br />
Writing a file<br />
PUNCH<br />
DELETE<br />
1 Press the EDIT switch on the machine operator’s panel.<br />
2 Press function key PROG .<br />
3 Press the rightmost soft key (next–menu key).<br />
4 Press soft key [CARD]. The screen shown below is displayed.<br />
DIRECTORY (M–CARD)<br />
O0034 N00045<br />
No. FILE NAME SIZE DATE<br />
0001 O1000 123456 96/07/10<br />
0002 O1001 118458 96/07/30<br />
0003 O0002 113250 96/07/30<br />
0004 O2000 173456 96/07/31<br />
0005 O2001 113444 96/07/31<br />
0006 O3001 118483 96/08/02<br />
0007 O3300 111406 96/08/05<br />
0008 O3400 112420 96/07/31<br />
0009 O3500 117460 96/07/31<br />
~ ~<br />
PROG DIR +<br />
(OPRT)<br />
5 Press soft key [(OPRT)].<br />
6 Press soft key [PUNCH].<br />
7 Enter a desired O number from the MDI panel, then set the program<br />
number with soft key [O SET].<br />
When soft key [EXEC] is pressed after the setting shown below has<br />
been made, for example, the file is written under program number<br />
O1230.<br />
~ ~<br />
PUNCH FILE NAME =<br />
PROGRAM No. =1230<br />
><br />
EDIT *** **** *** **** 15:40:21<br />
F NAME O SET STOP CAN EXEC<br />
8 In the same way as for O number setting, enter a desired file name<br />
from the MDI panel, then set the file name with soft key [F SET].<br />
When soft key [EXEC] is pressed after the setting shown below has<br />
been made, for example, the file is written under program number<br />
O1230 and file name ABCD12.<br />
~ ~<br />
PUNCH FILE NAME =ABCD12<br />
PROGRAM No. =1230<br />
><br />
EDIT *** **** *** **** 15:40:21<br />
F NAME O SET STOP CAN EXEC<br />
919
8. DATA INPUT/OUTPUT OPERATION<br />
B–63534EN/02<br />
Explanations<br />
Registering the same file<br />
name<br />
Writing all programs<br />
File name restrictions<br />
When a file having the same name is already registered in the memory<br />
card, the existing file will be overwritten.<br />
To write all programs, set program number = –9999. If no file name is<br />
specified in this case, file name PROGRAM.ALL is used for registration.<br />
The following restrictions are imposed on file name setting:<br />
. <br />
<br />
Not longer than 8 Extension not longer<br />
characters than 3 characters<br />
920
B–63534EN/02 OPERATION<br />
8. DATA INPUT/OUTPUT<br />
<br />
F SRH F READ N READ<br />
Deleting a file<br />
PUNCH<br />
DELETE<br />
1 Press the EDIT switch on the machine operator’s panel.<br />
2 Press function key PROG .<br />
3 Press the rightmost soft key (next–menu key).<br />
4 Press soft key [CARD]. The screen shown below is displayed.<br />
DIRECTORY (M–CARD)<br />
O0034 N00045<br />
No. FILE NAME SIZE DATE<br />
0001 O1000 123456 96/07/10<br />
0002 O1001 118458 96/07/30<br />
0003 O0002 113250 96/07/30<br />
0004 O2000 173456 96/07/31<br />
0005 O2001 113444 96/07/31<br />
0006 O3001 118483 96/08/02<br />
0007 O3300 111406 96/08/05<br />
0008 O3400 112420 96/07/31<br />
0009 O3500 117460 96/07/31<br />
~ ~<br />
PROG DIR +<br />
(OPRT)<br />
5 Press soft key [(OPRT)].<br />
6 Set the number of the desired file with soft key [DELETE], then press<br />
soft key [EXEC]. The file is deleted, and the directory screen is<br />
displayed again.<br />
DIRECTORY (M–CARD)<br />
O0034 N00045<br />
No. FILE NAME COMMENT<br />
0019 O1000 (MAIN PROGRAM)<br />
0020 O1010 (SUBPROGRAM–1)<br />
0021 O1020 (COMMENT )<br />
0022 O1030 (COMMENT )<br />
~<br />
File name O1020 is deleted.<br />
~<br />
921<br />
When file number 21 is deleted<br />
DIRECTORY (M–CARD)<br />
O0034 N00045<br />
No. FILE NAME COMMENT<br />
0019 O1000 (MAIN PROGRAM)<br />
0020 O1010 (SUBPROGRAM–1)<br />
0021 O1020 (COMMENT )<br />
0022 O1030 (COMMENT )<br />
~ ~<br />
File number 21 is assigned to the next file name.
8. DATA INPUT/OUTPUT OPERATION<br />
B–63534EN/02<br />
<br />
Batch input/output with a memory card<br />
On the ALL IO screen, different types of data including part programs,<br />
parameters, offset data, pitch error data, custom macros, and workpiece<br />
coordinate system data can be input and output using a memory card; the<br />
screen for each type of data need not be displayed for input/output.<br />
Memory card ALL IO screen<br />
922<br />
<br />
Data item name<br />
Part program<br />
Parameter<br />
Offset data<br />
Pitch error data<br />
Custom macro<br />
Workpiece coordinate system<br />
data<br />
(additional coordinate systems)<br />
1 Press the EDIT switch on the machine operator’s panel.<br />
2 Press function key SYSTEM .<br />
3 Press the rightmost soft key (next–menu key) several times.<br />
4 Press soft key [ALL IO]. The screen shown below is displayed.<br />
READ/PUNCH (PROGRAM)<br />
O0001 N00001<br />
No. FILE NAME SIZE DATE<br />
*0001 O0222 332010 96–04–06<br />
*0002 O1003 334450 96–05–04<br />
*0003 MACROVAR.DAT 653400 96–05–12<br />
*0004 O0002 341205 96–05–13<br />
[PROGRAM]<br />
*O0001 O0002 O0003 O0005 O0100 O0020<br />
*O0006<br />
*O0330<br />
><br />
O0004 O0110 O0200 O2200 O0441<br />
EDIT *** **** *** ****<br />
10:07:37<br />
PROG PARAM OFFSET<br />
(OPRT)<br />
Upper part : Directory of files on the memory card<br />
Lower part : Directory of registered programs<br />
5 With cursor keys and , the user can choose between upper<br />
part scrolling and lower part scrolling. (An asterisk (*) displayed at<br />
the left edge indicates the part for which scrolling is possible.)<br />
: Used for memory card file directory scrolling.<br />
: Used for program directory scrolling.<br />
6 With page keys<br />
program directory.<br />
and , scroll through the file directory or
B–63534EN/02 OPERATION<br />
8. DATA INPUT/OUTPUT<br />
Explanations<br />
Each data item<br />
Program directory<br />
display<br />
Using each function<br />
When this screen is displayed, the program data item is selected. The soft<br />
keys for other screens are displayed by pressing the rightmost soft key<br />
(next–menu key).<br />
MACRO PITCH WORK<br />
(OPRT)<br />
When a data item other than program is selected, the screen displays only<br />
a file directory.<br />
A data item is indicated, in parentheses, on the title line.<br />
READ/PUNCH (PARAMETER)<br />
O0001 N00001<br />
No. FILE NAME SIZE DATE<br />
0001 O0222 332010 96/04/06<br />
0002 O1003 334450 96/05/04<br />
0003 MACROVAR.DAT 653400 96/05/12<br />
0004 O0003 334610 96/05/04<br />
0005 O0001 334254 96/06/04<br />
0006 O0002 333750 96/06/04<br />
0007 CNCPARAM.DAT 334453 96/06/04<br />
~ ~<br />
Program directory display does not match bit 0 (NAM) of parameter No.<br />
3107, or bit 4 (SOR) of parameter No. 3107.<br />
Display the following soft keys with soft key [(OPRT)].<br />
F SRH F READ N READ PUNCH DELETE<br />
The operation of each function is the same as on the directory (memory<br />
card) screen. Soft key [O SET], used for program number setting, and the<br />
”PROGRAM NU<strong>MB</strong>ER =” indication are not displayed for data items<br />
other than program.<br />
[F SRH] : Finds a specified file number.<br />
[F READ] : Reads a specified file number.<br />
[PUNCH] : Writes a file.<br />
[N READ] : Reads a file under a specified file name.<br />
[DELETE] : Deletes a specified file number.<br />
NOTE<br />
With a memory card, RMT mode operation and the<br />
subprogram call function (based on the M198 command)<br />
cannot be used.<br />
923
8. DATA INPUT/OUTPUT OPERATION<br />
B–63534EN/02<br />
Format<br />
Error messages<br />
File format and error messages<br />
All files that are read from and written to a memory card are of text format.<br />
The format is described below.<br />
A file starts with % or LF, followed by the actual data. A file always ends<br />
with %. In a read operation, data between the first % and the next LF is<br />
skipped. Each block ends with an LF, not a semicolon (;).<br />
⋅ LF: 0A (hexadecimal) of ASCII code<br />
⋅ When a file containing lowercase letters, kana characters, and several<br />
special characters (such as $, \, and !) is read, those letters and<br />
characters are ignored.<br />
Example:<br />
%<br />
O0001(MEMORY CARD SAMPLE FILE)<br />
G17 G49 G97<br />
G92 X–11.3 Y2.33<br />
⋅<br />
⋅<br />
M30<br />
%<br />
⋅ ASCII code is used for input/output, regardless of the setting<br />
parameter (ISO/EIA).<br />
⋅ Bit 3 of parameter No. 0100 can be used to specify whether the end of<br />
block code (EOB) is output as ”LF” only, or as ”LF, CR, CR.”<br />
If an error occurs during memory card input/output, a corresponding error<br />
message is displayed.<br />
~ ~<br />
0028 O0003 777382 01–06–14<br />
M–CARD ERROR <br />
FILE No. =<br />
><br />
1 PROGRAM No. =13<br />
EDIT *** **** *** **** 15:40:21<br />
F SET O SET STOP CAN EXEC<br />
represents a memory card error code.<br />
924
B–63534EN/02 OPERATION<br />
8. DATA INPUT/OUTPUT<br />
Memory Card Error<br />
Codes<br />
Code Meaning<br />
99 A part preceding the FAT area on the memory card is destroyed.<br />
102 The memory card does not have sufficient free space.<br />
105 No memory card is mounted.<br />
106 A memory card is already mounted.<br />
110 The specified directory cannot be found.<br />
111 There are too many files under the root directory to allow a<br />
directory to be added.<br />
114 The specified file cannot be found.<br />
115 The specified file is protected.<br />
117 The file has not yet been opened.<br />
118 The file is already open.<br />
119 The file is locked.<br />
121 The memory card does not have sufficient free space.<br />
122 The specified file name is invalid.<br />
124 The extension of the specified file is invalid.<br />
129 A non–corresponding function was specified.<br />
130 The specification of a device is invalid.<br />
131 The specification of a pathname is invalid.<br />
133 Multiple files are open at the same time.<br />
135 The device is not formatted.<br />
140 The file has the read/write disabled attribute.<br />
925
8. DATA INPUT/OUTPUT OPERATION<br />
B–63534EN/02<br />
8.12<br />
DATA INPUT/OUTPUT<br />
BY E<strong>MB</strong>EDDED<br />
ETHERNET<br />
8.12.1<br />
FTP File Transfer<br />
Function<br />
8.12.1.1<br />
Host file list display<br />
<br />
The operation of the FTP file transfer function is described below.<br />
A list of the files held on the hard disk embedded to the host computer is<br />
displayed.<br />
1 Press the function key PROG .<br />
2 Press the continuous menu key at the right end of the soft key display.<br />
3 Press the [HOST] soft key. The host file list screen appears. The<br />
Ethernet functions currently available are displayed.<br />
The upper row displays the usable embedded Ethernet function<br />
device.<br />
The embedded port or PCMCIA card is displayed.<br />
The lower row displays the usable Ethernet option boards. When no<br />
option board is installed, no information is displayed.<br />
4 When you press the [E<strong>MB</strong>EDD] soft key, a list of the files held on the<br />
host computer specified with the embedded Ethernet port is<br />
displayed.<br />
926
B–63534EN/02 OPERATION<br />
8. DATA INPUT/OUTPUT<br />
NOTE<br />
Depending on the FTP server software, the number of<br />
displayed programs may differ between the host file list<br />
screen above and the host file list (detail) screen described<br />
below.<br />
5 When a list of files is larger than one page, the screen display can be<br />
switched using the page keys PAGE<br />
PAGE<br />
.<br />
6 Press the [UPDATE] soft key to update the screen display.<br />
7 Press the [SWITCH] soft key. The host file list (detail) screen<br />
appears.<br />
927
8. DATA INPUT/OUTPUT OPERATION<br />
B–63534EN/02<br />
Display items<br />
Number of registered<br />
program files<br />
Currently connected<br />
host<br />
SWITCH<br />
UPDATE<br />
STOP<br />
SEARCH<br />
DELETE<br />
READ<br />
List of operations<br />
NOTE<br />
The host file list (detail) screen shown above is an example<br />
of screen display, and information displayed may vary<br />
according to the specification of the FTP server used with<br />
the host computer.<br />
The number of files registered in the directory (folder) of the host<br />
computer currently connected is displayed.<br />
The number of the host currently connected is displayed.<br />
This operation switches between normal display and detail display.<br />
This operation updates information displayed.<br />
This operation stops [SEARCH] operation.<br />
This operation updates screen information so that a file specified by its<br />
file number is placed at the start of the list.<br />
This operation deletes a file held on the hard disk embedded to the host<br />
computer.<br />
This operation reads a file held on the hard disk embedded to the host<br />
computer to the CNC part program storage. This soft key is displayed<br />
only when 9 is set as the input/output device number of the CNC, and the<br />
CNC is placed in the EDIT mode.<br />
928
B–63534EN/02 OPERATION<br />
8. DATA INPUT/OUTPUT<br />
PUNCH<br />
8.12.1.2<br />
Host file search<br />
<br />
8.12.1.3<br />
Host file deletion<br />
<br />
This operation outputs a file held in the CNC part program storage to the<br />
hard disk embedded to the host computer. This soft key is displayed only<br />
when 9 is set as the input/output device number of the CNC, and the CNC<br />
is placed in the EDIT mode.<br />
When a list of the files held on the hard disk embedded to the host<br />
computer is displayed, a file can be placed at the start of the list by<br />
specifying its file number.<br />
1 Display the host file list screen.<br />
2 Press the [SEARCH] soft key.<br />
3 Type the file number of a file to be displayed at the start of the list with<br />
the MDI keys.<br />
[Input format]<br />
<br />
4 Press the [EXEC] soft key.<br />
5 During search, “SEARCH” blinks in the lower–right corner of the<br />
screen.<br />
A file held on the hard disk embedded to the host computer can be deleted.<br />
1 Display the host file list screen.<br />
2 Press the [DELETE] soft key.<br />
3 Type the file number or file name of a file to be deleted, with the MDI<br />
keys.<br />
[Input format]<br />
<br />
or<br />
<br />
4 Press the [EXEC] soft key.<br />
5 During deletion, “DELETE” blinks in the lower–right corner of the<br />
screen.<br />
NOTE<br />
1 When a file number is used for deletion, only a file displayed<br />
on the host file list screen can be deleted.<br />
2 The information displayed at the right end of the host file list<br />
(detail) screen is recognized as a file name. So, when<br />
deleting a host file from the host file list (detail) screen by<br />
specifying its file number, check that a file name is displayed<br />
at the right end of the screen, before specifying the file<br />
number.<br />
929
8. DATA INPUT/OUTPUT OPERATION<br />
B–63534EN/02<br />
8.12.1.4<br />
NC program input<br />
<br />
For the host file list screen<br />
A file (NC program) on the host computer can be read to the CNC<br />
memory.<br />
1 Place the CNC in the EDIT mode.<br />
2 Display the host file list screen.<br />
3 Press the [READ] soft key.<br />
4 Type the file number or file name of an NC program to be input, with<br />
the MDI keys.<br />
[Input format]<br />
<br />
or<br />
<br />
5 Press the [EXEC] soft key.<br />
6 During input, “INPUT” blinks in the lower–right corner of the screen.<br />
CAUTION<br />
1 If the CNC memory holds an NC program that has the same<br />
O number as that of an NC program to be input, the NC<br />
program in the CNC memory is overwritten when bit 2 of<br />
parameter No. 3201 is set to 1.<br />
2 If an NC program is input when bit 0 of parameter No. 3201<br />
is set to 1, all NC programs in the CNC memory are<br />
automatically deleted before NC program input.<br />
[Example of use]<br />
When a file with the file name O0001.DAT held on the hard disk<br />
embedded to the host computer is to be input to the CNC memory, enter<br />
O001.DAT. Note, however, that the O number input to the CNC memory<br />
depends on the O number described in the file named O0001.DAT.<br />
NOTE<br />
When a file is input from this screen to the CNC memory, the<br />
O number described in the file is input.<br />
930
B–63534EN/02 OPERATION<br />
8. DATA INPUT/OUTPUT<br />
<br />
For the program screen<br />
1 Place the CNC in the EDIT mode.<br />
2 Press the function key PROG .<br />
3 Press the continuous menu key at the right end of the soft key display.<br />
4 Press the [PRGRM] soft key. The program screen appears.<br />
5 Press the [(OPRT)] soft key.<br />
6 Press the continuous menu key at the right end of the soft key display.<br />
7 Press the [READ] soft key.<br />
8 Type the O number of an NC program to be input, with the MDI keys.<br />
[Input format]<br />
<br />
9 Press the [EXEC] soft key.<br />
10 During input, “INPUT” blinks in the lower–right corner of the screen.<br />
CAUTION<br />
1 If the CNC memory holds an NC program that has the same<br />
O number as that of an NC program to be input, the NC<br />
program in the CNC memory is overwritten when bit 2 of<br />
parameter No. 3201 is set to 1.<br />
2 If an NC program is input when bit 0 of parameter No. 3201<br />
is set to 1, all NC programs in the CNC memory are<br />
automatically deleted before NC program input.<br />
NOTE<br />
The valid O number of a file to be input to the CNC memory<br />
is Oxxxx (with xxxx representing a number) only.<br />
931
8. DATA INPUT/OUTPUT OPERATION<br />
B–63534EN/02<br />
8.12.1.5<br />
NC program output<br />
<br />
<br />
For the host file list screen<br />
For the program screen<br />
A file (NC program) in the CNC memory can be output to the host<br />
computer.<br />
1 Place the CNC in the EDIT mode.<br />
2 Display the host file list screen.<br />
3 Press the [PUNCH] soft key.<br />
4 Type the O number of an NC program to be output, with the MDI<br />
keys.<br />
[Input format]<br />
<br />
5 Press the [EXEC] soft key.<br />
6 During output, “OUTPUT” blinks in the lower–right corner of the<br />
screen.<br />
[Example of use]<br />
When an NC program (O0001) in the CNC memory is to be output to the<br />
hard disk embedded to the host computer, enter O0001.<br />
NOTE<br />
An outputted file name is Oxxxx.<br />
1 Place the CNC in the EDIT mode.<br />
2 Press the function key PROG .<br />
3 Press the continuous menu key at the right end of the soft key display.<br />
4 Press the [PRGRM] soft key. The program screen appears.<br />
5 Press the [(OPRT)] soft key.<br />
6 Press the continuous menu key at the right end of the soft key display.<br />
7 Press the [PUNCH] soft key.<br />
8 Type the O number of an NC program to be output, with the MDI<br />
keys.<br />
[Input format]<br />
<br />
932
B–63534EN/02 OPERATION<br />
8. DATA INPUT/OUTPUT<br />
8.12.1.6<br />
Input/output of various<br />
types of data<br />
<br />
File name<br />
Parameter input<br />
File format, restrictions<br />
9 Press the [EXEC] soft key.<br />
10 During output, “OUTPUT” blinks in the lower–right corner of the<br />
screen.<br />
NOTE<br />
An outputted file name is Oxxxx.<br />
With the FTP file transfer function, the types of data listed below can be<br />
input/output. This subsection describes the input/output method.<br />
A) NC parameter<br />
B) Tool offset value<br />
C) Custom macro variable<br />
D) Workpiece orogin offset value<br />
E) Pitch error compensation data<br />
F) M code group<br />
G) Operation history data<br />
The file (NC parameter) on the host computer can be input to the CNC<br />
memory.<br />
1 Place the CNC in the EDIT mode.<br />
2 Press the function key SYSTEM .<br />
3 Press the continuous menu key at the right end of the soft key display.<br />
4 Press the [PARAM] soft key. The parameter screen appears.<br />
5 Press the [(OPRT)] soft key.<br />
6 Press the continuous menu key at the right end of the soft key display.<br />
7 Press the [READ] soft key.<br />
8 Press the [EXEC] soft key.<br />
9 During input, “INPUT” blinks in the lower–right corner of the screen.<br />
The fixed file name PRAMETER is used.<br />
Refer to the operator’s manual of each CNC.<br />
933
8. DATA INPUT/OUTPUT OPERATION<br />
B–63534EN/02<br />
<br />
File name<br />
Parameter output<br />
File format, restrictions<br />
<br />
File name<br />
Tool offset value input<br />
File format, restrictions<br />
The file (NC parameter) in the CNC memory can be output to the host<br />
computer.<br />
1 Place the CNC in the EDIT mode.<br />
2 Press the function key SYSTEM .<br />
3 Press the continuous menu key at the right end of the soft key display.<br />
4 Press the [PARAM] soft key. The parameter screen appears.<br />
5 Press the [(OPRT)] soft key.<br />
6 Press the continuous menu key at the right end of the soft key display.<br />
7 Press the [PUNCH] soft key.<br />
8 Press the [EXEC] soft key.<br />
9 During output, “OUTPUT” blinks in the lower–right corner of the<br />
screen.<br />
The fixed file name PRAMETER is used.<br />
Refer to the operator’s manual of each CNC.<br />
The file (tool offset value) on the host computer can be input to the CNC<br />
memory.<br />
1 Place the CNC in the EDIT mode.<br />
2 Press the function key OFFSET<br />
SETTING .<br />
3 Press the continuous menu key at the right end of the soft key display.<br />
4 Press the [OFFSET] soft key. The tool compensation screen appears.<br />
5 Press the [(OPRT)] soft key.<br />
6 Press the continuous menu key at the right end of the soft key display.<br />
7 Press the [READ] soft key.<br />
8 Press the [EXEC] soft key.<br />
9 During input, “INPUT” blinks in the lower–right corner of the screen.<br />
The fixed file name TOOLOFS is used.<br />
Refer to the operator’s manual of each CNC.<br />
934
B–63534EN/02 OPERATION<br />
8. DATA INPUT/OUTPUT<br />
<br />
File name<br />
Tool offset value output<br />
File format, restrictions<br />
<br />
File name<br />
File format, restrictions<br />
The file (tool offset value) in the CNC memory can be output to the host<br />
computer.<br />
1 Place the CNC in the EDIT mode.<br />
2 Press the function key OFFSET<br />
SETTING .<br />
3 Press the continuous menu key at the right end of the soft key display.<br />
4 Press the [OFFSET] soft key. The tool compensation screen appears.<br />
5 Press the [(OPRT)] soft key.<br />
6 Press the continuous menu key at the right end of the soft key display.<br />
7 Press the [PUNCH] soft key.<br />
8 Press the [EXEC] soft key.<br />
Workpiece origin offset value input<br />
9 During output, “OUTPUT” blinks in the lower–right corner of the<br />
screen.<br />
The fixed file name TOOLOFS is used.<br />
Refer to the operator’s manual of each CNC.<br />
The file (workpiece origin offset value) on the host computer can be input<br />
to the CNC memory.<br />
1 Place the CNC in the EDIT mode.<br />
2 Press the function key OFFSET<br />
SETTING .<br />
3 Press the continuous menu key at the right end of the soft key display.<br />
4 Press the [WORK] soft key. The workpiece coordinate system setting<br />
screen appears.<br />
5 Press the [(OPRT)] soft key.<br />
6 Press the continuous menu key at the right end of the soft key display.<br />
7 Press the [READ] soft key.<br />
8 Press the [EXEC] soft key.<br />
9 During input, “INPUT” blinks in the lower–right corner of the screen.<br />
The fixed file name WORKOFS is used.<br />
Refer to the operator’s manual of each CNC.<br />
935
8. DATA INPUT/OUTPUT OPERATION<br />
B–63534EN/02<br />
<br />
File name<br />
File format, restrictions<br />
<br />
File name<br />
File format, restrictions<br />
Workpiece origin offset value output<br />
Pitch error compensation input<br />
The file (workpiece origin offset value) in the CNC memory can be output<br />
to the host computer.<br />
1 Place the CNC in the EDIT mode.<br />
2 Press the function key OFFSET<br />
SETTING .<br />
3 Press the continuous menu key at the right end of the soft key display.<br />
4 Press the [WROK] soft key. The workpiece coordinate system setting<br />
screen appears.<br />
5 Press the [(OPRT)] soft key.<br />
6 Press the continuous menu key at the right end of the soft key display.<br />
7 Press the [PUNCH] soft key.<br />
8 Press the [EXEC] soft key.<br />
9 During output, “OUTPUT” blinks in the lower–right corner of the<br />
screen.<br />
The fixed file name WORKOFS is used.<br />
Refer to the operator’s manual of each CNC.<br />
The file (pitch error compensation) on the host computer can be input to<br />
the CNC memory.<br />
1 Place the CNC in the EDIT mode.<br />
2 Press the function key SYSTEM .<br />
3 Press the continuous menu key at the right end of the soft key display.<br />
4 Press the [PITCH] soft key. The pitch error setting screen appears.<br />
5 Press the [(OPRT)] soft key.<br />
6 Press the continuous menu key at the right end of the soft key display.<br />
7 Press the [READ] soft key.<br />
8 Press the [EXEC] soft key.<br />
9 During input, “INPUT” blinks in the lower–right corner of the screen.<br />
The fixed file name PITCH is used.<br />
Refer to the operator’s manual of each CNC.<br />
936
B–63534EN/02 OPERATION<br />
8. DATA INPUT/OUTPUT<br />
<br />
File name<br />
File format, restrictions<br />
<br />
File name<br />
Pitch error compensation output<br />
M code group input<br />
File format, restrictions<br />
The file (pitch error compensation) in the CNC memory can be output to<br />
the host computer.<br />
1 Place the CNC in the EDIT mode.<br />
2 Press the function key SYSTEM .<br />
3 Press the continuous menu key at the right end of the soft key display.<br />
4 Press the [PITCH] soft key. The pitch error setting screen appears.<br />
5 Press the [(OPRT)] soft key.<br />
6 Press the continuous menu key at the right end of the soft key display.<br />
7 Press the [PUNCH] soft key.<br />
8 Press the [EXEC] soft key.<br />
9 During output, “OUTPUT” blinks in the lower–right corner of the<br />
screen.<br />
The fixed file name PITCH is used.<br />
Refer to the operator’s manual of each CNC.<br />
The file (M code group) on the host computer can be input to the CNC<br />
memory.<br />
1 Place the CNC in the EDIT mode.<br />
2 Press the function key SYSTEM .<br />
3 Press the continuous menu key at the right end of the soft key display.<br />
4 Press the [M–CODE] soft key. The M code group setting screen<br />
appears.<br />
5 Press the [(OPRT)] soft key.<br />
6 Press the continuous menu key at the right end of the soft key display.<br />
7 Press the [READ] soft key.<br />
8 Press the [EXEC] soft key.<br />
9 During input, “INPUT” blinks in the lower–right corner of the screen.<br />
The fixed file name M–CODE is used.<br />
Refer to the operator’s manual of each CNC.<br />
937
8. DATA INPUT/OUTPUT OPERATION<br />
B–63534EN/02<br />
<br />
File name<br />
M code group output<br />
File format, restrictions<br />
<br />
File name<br />
File format, restrictions<br />
Operation history data input<br />
The file (M code group) in the CNC memory can be output to the host<br />
computer.<br />
1 Place the CNC in the EDIT mode.<br />
2 Press the function key SYSTEM .<br />
3 Press the continuous menu key at the right end of the soft key display.<br />
4 Press the [M–CODE] soft key. The M code group setting screen<br />
appears.<br />
5 Press the [(OPRT)] soft key.<br />
6 Press the continuous menu key at the right end of the soft key display.<br />
7 Press the [PUNCH] soft key.<br />
8 Press the [EXEC] soft key.<br />
9 During output, “OUTPUT” blinks in the lower–right corner of the<br />
screen.<br />
The fixed file name M–CODE is used.<br />
Refer to the operator’s manual of each CNC.<br />
The file (operation history data) on the host computer can be input to the<br />
CNC memory.<br />
1 Place the CNC in the EDIT mode.<br />
2 Press the function key SYSTEM .<br />
3 Press the continuous menu key at the right end of the soft key display.<br />
4 Press the [OPEHIS] soft key. The operation history screen appears.<br />
5 Press the [(OPRT)] soft key.<br />
6 Press the continuous menu key at the right end of the soft key display.<br />
7 Press the [READ] soft key.<br />
8 Press the [EXEC] soft key.<br />
9 During input, “INPUT” blinks in the lower–right corner of the screen.<br />
The fixed file name HISTORY is used.<br />
Refer to the operator’s manual of each CNC.<br />
938
B–63534EN/02 OPERATION<br />
8. DATA INPUT/OUTPUT<br />
<br />
File name<br />
File format, restrictions<br />
Operation history data output<br />
8.12.1.7<br />
Checking and changing<br />
of the connection host<br />
<br />
The file (operation history data) in the CNC memory can be output to the<br />
host computer.<br />
1 Place the CNC in the EDIT mode.<br />
2 Press the function key SYSTEM .<br />
3 Press the continuous menu key at the right end of the soft key display.<br />
4 Press the [OPEHIS] soft key. The operation history screen appears.<br />
5 Press the [(OPRT)] soft key.<br />
6 Press the continuous menu key at the right end of the soft key display.<br />
7 Press the [PUNCH] soft key.<br />
8 Press the [EXEC] soft key.<br />
9 During output, “OUTPUT” blinks in the lower–right corner of the<br />
screen.<br />
The fixed file name HISTORY is used.<br />
Refer to the operator’s manual of each CNC.<br />
The host computer to which the FTP file transfer function attempts to<br />
make a connection as the current communication destination can be<br />
checked.<br />
1 Press the function key PROG .<br />
2 Press the continuous menu key at the right end of the soft key display.<br />
3 Press the [CONECT] soft key. The connection host change screen<br />
appears. The Ethernet functions currently available are displayed.<br />
939
8. DATA INPUT/OUTPUT OPERATION<br />
B–63534EN/02<br />
The upper row displays the usable embedded Ethernet function<br />
device.<br />
The embedded port or PCMCIA card is displayed.<br />
The lower row displays the usable Ethernet option boards. When no<br />
option board is installed, no information is displayed.<br />
4 When you press the [E<strong>MB</strong>EDD] soft key, a list of the connection host<br />
computers specified with the embedded Ethernet port is displayed.<br />
If the usable embedded Ethernet function device is the PCMCIA card,<br />
the [PCMCIA] soft key is displayed instead of the [E<strong>MB</strong>EDD] soft<br />
key. When you press the [PCMCIA] soft key, a list of the connection<br />
host computers specified with the PCMCIA Ethernet card is<br />
displayed.<br />
940
B–63534EN/02 OPERATION<br />
8. DATA INPUT/OUTPUT<br />
Display items<br />
Port number, IP address,<br />
user name, login DIR<br />
CON–1<br />
CON–2<br />
CON–3<br />
List of operations<br />
NOTE<br />
The title of the host computer that is the current<br />
communication destination of the data server board is<br />
displayed in reverse video.<br />
5 The connected host can be changed by pressing the [CON–1],<br />
[CON–2], or [CON–3] soft key.<br />
Those values that are set on the Ethernet parameter setting screen are<br />
displayed.<br />
This operation changes the connected host to host 1.<br />
This operation changes the connected host to host 2.<br />
This operation changes the connected host to host 3.<br />
941
9. EDITING PROGRAMS OPERATION<br />
B–63534EN/02<br />
9 <br />
General<br />
<br />
Search for part<br />
of program to be<br />
edited<br />
Inserting, altering,<br />
and deleting<br />
programs<br />
This chapter describes how to edit programs registered in the CNC.<br />
Editing includes the insertion, modification, deletion, and replacement of<br />
words. Editing also includes deletion of the entire program and automatic<br />
insertion of sequence numbers. The extended part program editing<br />
function can copy, move, and merge programs. This chapter also<br />
describes program number search, sequence number search, word search,<br />
and address search, which are performed before editing the program.<br />
Registration<br />
Editing<br />
1) Program number search: See III–9.3.<br />
2) Sequence number search: See III–9.4.<br />
3) Word search: See III–9.1.1.<br />
4) Address search: See III–9.1.1.<br />
1) Inserting, altering, and deleting a word: See III–9.1.3 to 9.1.5.<br />
2) Replacing words and addresses: See III–9.6.6.<br />
3) Deleting blocks: See III–9.2.<br />
4) Copying, moving, and merging programs: See III–9.6.1 and 9.6.5.<br />
5) Deleting programs: See III–9.5.<br />
Output Execution<br />
942
B–63534EN/02 OPERATION<br />
9. EDITING PROGRAMS<br />
9.1<br />
INSERTING,<br />
ALTERING AND<br />
DELETING A WORD<br />
Explanation<br />
Concept of word and<br />
editing unit<br />
This section outlines the procedure for inserting, modifying, and deleting<br />
a word in a program registered in memory.<br />
Procedure for inserting, altering and deleting a word<br />
1 Select EDIT mode.<br />
2 Press PROG <br />
3 Select a program to be edited.<br />
If a program to be edited is selected, perform the operation 4.<br />
If a program to be edited is not selected, search for the program<br />
number.<br />
4 Search for a word to be modified.<br />
⋅ Scan method<br />
⋅ Word search method<br />
5 Perform an operation such as altering, inserting, or deleting a word.<br />
A word is an address followed by a number. With a custom macro, the<br />
concept of word is ambiguous.<br />
So the editing unit is considered here.<br />
The editing unit is a unit subject to alteration or deletion in one operation.<br />
In one scan operation, the cursor indicates the start of an editing unit.<br />
An insertion is made after an editing unit.<br />
Definition of editing unit<br />
(i) Program portion from an address to immediately before the next<br />
address<br />
(ii)An address is an alphabet, IF, WHILE, GOTO, END, DO=,or ; (EOB).<br />
According to this definition, a word is an editing unit.<br />
The word “word,” when used in the description of editing, means an<br />
editing unit according to the precise definition.<br />
WARNING<br />
The user cannot continue program execution after altering, inserting, or deleting data of the<br />
program by suspending machining in progress by means of an operation such as a single block<br />
stop or feed hold operation during program execution. If such a modification is made, the<br />
program may not be executed exactly according to the contents of the program displayed on<br />
the screen after machining is resumed. So, when the contents of memory are to be modified<br />
by part program editing, be sure to enter the reset state or reset the system upon completion<br />
of editing before executing the program.<br />
943
9. EDITING PROGRAMS OPERATION<br />
B–63534EN/02<br />
9.1.1<br />
<br />
A word can be searched for by merely moving the cursor through the text<br />
(scanning), by word search, or by address search.<br />
Procedure for scanning a program<br />
1 Press the cursor key .<br />
The cursor moves forward word by word on the screen; the cursor is<br />
displayed at a selected word.<br />
2 Press the cursor key .<br />
The cursor moves backward word by word on the screen; the cursor is<br />
displayed at a selected word.<br />
Example) When Z1250.0 is scanned<br />
Program<br />
O0050 ;<br />
O0050 N01234<br />
N01234 X100.0<br />
S12 ;<br />
N56789 M03 ;<br />
M02 ;<br />
%<br />
Z1250.0 ;<br />
3 Holding down the cursor key<br />
continuously.<br />
or scans words<br />
4 The first word of the next block is searched for when the cursor key<br />
is pressed.<br />
5 The first word of the previous block is searched for when the cursor<br />
key is pressed.<br />
6 Holding down the cursor key<br />
head of a block continuously.<br />
or moves the cursor to the<br />
7 Pressing the page key<br />
PAGE<br />
displays the next page and searches for<br />
8 Pressing the page key<br />
the first word of the page.<br />
displays the previous page and searches<br />
PAGE<br />
9<br />
for the first word of the page.<br />
Holding down the page key PAGE<br />
or displays one page after<br />
another.<br />
944<br />
PAGE
B–63534EN/02 OPERATION<br />
9. EDITING PROGRAMS<br />
<br />
Procedure for searching a word<br />
Example) of Searching for S12<br />
PROGRAM O0050 N01234<br />
O0050 ;<br />
N01234 X100.0 Z1250.0 ;<br />
S12 ;<br />
N56789 M03 ;<br />
M02 ;<br />
%<br />
1 Key in address S .<br />
2 Key in 1 2 .<br />
⋅ S12 cannot be searched for if only S1 is keyed in.<br />
⋅ S09 cannot be searched for by keying in only S9.<br />
To search for S09, be sure to key in S09.<br />
945<br />
N01234 is being<br />
searched for/<br />
scanned currently.<br />
S12 is searched<br />
for.<br />
3 Pressing the [SRH↓] key starts search operation.<br />
Upon completion of search operation, the cursor is displayed at S12.<br />
Pressing the [SRH↑] key rather than the [SRH↓] key performs search<br />
operation in the reverse direction.<br />
Procedure for searching an address<br />
Example) of Searching for M03<br />
PROGRAM O0050 N01234<br />
O0050 ;<br />
N01234 X100.0 Z1250.0 ;<br />
S12 ;<br />
N56789 M03 ;<br />
M02 ;<br />
%<br />
1 Key in address M .<br />
N01234 is being<br />
searched for/<br />
scanned currently.<br />
M03 is searched<br />
for.<br />
2 Press the [SRH↓] key.<br />
Upon completion of search operation, the cursor is displayed at M03.<br />
Pressing the [SRH↑] key rather than the [SRH↓] key performs search<br />
operation in the reverse direction.<br />
<br />
The word or address being searched for was not found.
9. EDITING PROGRAMS OPERATION<br />
B–63534EN/02<br />
9.1.2<br />
<br />
The cursor can be jumped to the top of a program. This function is called<br />
heading the program pointer. This section describes the three methods<br />
for heading the program pointer.<br />
Procedure for Heading a Program<br />
Method 1<br />
Method 2<br />
Method 3<br />
1 Press RESET when the program screen is selected in EDIT mode.<br />
When the cursor has returned to the start of the program, the contents<br />
of the program are displayed from its start on the screen.<br />
Search for the program number.<br />
1 Press address O ,when a program screen is selected in the<br />
MEMORY or EDIT mode<br />
2 Input a program number.<br />
3 Press the soft key [O SRH].<br />
1 Select [MEMORY] or [EDIT] mode<br />
2 Press PROG <br />
3 Press the [(OPRT)] key.<br />
4 Press the [REWIND] key.<br />
946
B–63534EN/02 OPERATION<br />
9. EDITING PROGRAMS<br />
9.1.3<br />
Inserting a Word<br />
Procedure<br />
Procedure for inserting a word<br />
1 Search for or scan the word immediately before a word to be inserted.<br />
2 Key in an address to be inserted.<br />
3 Key in data.<br />
Example of Inserting T15<br />
4 Press the INSERT key.<br />
1 Search for or scan Z1250.<br />
Program O0050 N01234<br />
O0050 ;<br />
N01234 X100.0 Z1250.0 ;<br />
S12 ;<br />
N56789 M03 ;<br />
M02 ;<br />
%<br />
2 Key in T 1 5 <br />
3 Press the INSERT key.<br />
Program O0050 N01234<br />
O0050 ;<br />
N01234 X100.0 Z1250.0 T15 ;<br />
S12 ;<br />
N56789 M03 ;<br />
M02 ;<br />
%<br />
947<br />
Z1250.0 is<br />
searched for/<br />
scanned.<br />
T15 is inserted.
9. EDITING PROGRAMS OPERATION<br />
B–63534EN/02<br />
9.1.4<br />
Altering a Word<br />
Procedure<br />
Procedure for altering a word<br />
1 Search for or scan a word to be altered.<br />
2 Key in an address to be inserted.<br />
3 Key in data.<br />
4 Press the ALTER key.<br />
Example of changing T15 to M15<br />
1 Search for or scan T15.<br />
Program<br />
O0050 ;<br />
O0050 N01234<br />
N01234 X100.0 Z1250.0<br />
S12 ;<br />
N56789 M03 ;<br />
M02 ;<br />
%<br />
T15 ;<br />
2 Key in M 1 5 .<br />
3 Press the ALTER key.<br />
Program O0050 N01234<br />
O0050 ;<br />
N1234 X100.0 Z1250.0 M15 ;<br />
S12 ;<br />
N5678 M03 ;<br />
M02 ;<br />
%<br />
948<br />
T15 is searched<br />
for/scanned.<br />
T15 is changed to<br />
M15.
B–63534EN/02 OPERATION<br />
9. EDITING PROGRAMS<br />
9.1.5<br />
Deleting a Word<br />
Procedure<br />
Procedure for deleting a word<br />
1 Search for or scan a word to be deleted.<br />
2 Press the DELETE key.<br />
Example of deleting X100.0<br />
1 Search for or scan X100.0.<br />
Program<br />
O0050 ;<br />
O0050 N01234<br />
N01234<br />
S12 ;<br />
X100.0 Z1250.0 M15 ;<br />
N56789 M03 ;<br />
M02 ;<br />
%<br />
2 Press the DELETE key.<br />
O0050 N01234<br />
O0050 ;<br />
N01234 Z1250.0 M15 ;<br />
S12 ;<br />
N56789 M03 ;<br />
M02 ;<br />
%<br />
949<br />
X100.0 is<br />
searched for/<br />
scanned.<br />
X100.0 is deleted.
9. EDITING PROGRAMS OPERATION<br />
B–63534EN/02<br />
9.2<br />
DELETING BLOCKS<br />
9.2.1<br />
Deleting a Block<br />
Procedure<br />
Procedure for deleting a block<br />
A block or blocks can be deleted in a program.<br />
The procedure below deletes a block up to its EOB code; the cursor<br />
advances to the address of the next word.<br />
1 Search for or scan address N for a block to be deleted.<br />
2 Key in EOB .<br />
3 Press the DELETE .<br />
Example of deleting a block of N01234<br />
1 Search for or scan N01234.<br />
Program O0050 N01234<br />
O0050 ;<br />
N01234 Z1250.0 M15 ;<br />
S12 ;<br />
N56789 M03 ;<br />
M02 ;<br />
%<br />
2 Key in EOB .<br />
3 Press the DELETE key.<br />
Program O0050 N01234<br />
O0050 ;<br />
S12 ;<br />
N56789 M03 ;<br />
M02 ;<br />
%<br />
950<br />
N01234 is<br />
searched for/<br />
scanned.<br />
Block containing<br />
N01234 has<br />
been deleted.
B–63534EN/02 OPERATION<br />
9. EDITING PROGRAMS<br />
9.2.2<br />
Deleting Multiple<br />
Blocks<br />
The blocks from the currently displayed word to the block with a specified<br />
sequence number can be deleted.<br />
Procedure for deleting multiple blocks<br />
1 Search for or scan a word in the first block of a portion to be deleted.<br />
2 Key in address N .<br />
3 Key in the sequence number for the last block of the portion to be<br />
deleted.<br />
4 Press the DELETE key.<br />
Example of deleting blocks from a block containing N01234 to a block containing N56789<br />
Procedure<br />
1 Search for or scan N01234.<br />
Program O0050 N01234<br />
O0050 ;<br />
N01234 Z1250.0 M15 ;<br />
S12 ;<br />
N56789 M03 ;<br />
M02 ;<br />
%<br />
2 Key in N 5 6 7 8 9 .<br />
Program O0050 N01234<br />
O0050 ;<br />
N01234 Z1250.0 M15 ;<br />
S12 ;<br />
N56789 M03 ;<br />
M02 ;<br />
%<br />
3 Press the DELETE key.<br />
Program O0050 N01234<br />
O0050 ;<br />
M02 ;<br />
%<br />
951<br />
N01234 is<br />
searched for/<br />
scanned.<br />
Underlined<br />
part is deleted.<br />
Blocks from block<br />
containing<br />
N01234 to block<br />
containing<br />
N56789 have<br />
been deleted.
9. EDITING PROGRAMS OPERATION<br />
B–63534EN/02<br />
9.3<br />
PROGRAM NU<strong>MB</strong>ER<br />
SEARCH<br />
Alarm<br />
When memory holds multiple programs, a program can be searched for.<br />
There are three methods as follows.<br />
Procedure for program number search<br />
Method 1<br />
Method 2<br />
Method 3<br />
1 Select EDIT or MEMORY mode.<br />
2 Press PROG to display the program screen.<br />
3 Key in address O .<br />
4 Key in a program number to be searched for.<br />
5 Press the [O SRH] key.<br />
6 Upon completion of search operation, the program number searched<br />
for is displayed in the upper–right corner of the CRT screen<br />
If the program is not found , P/S alarm No. 71 occurs.<br />
1 Select EDIT or MEMORY mode.<br />
2 Press PROG to display the program screen.<br />
3 Press the [O SRH] key.<br />
In this case, the next program in the directory is searched for .<br />
This method searches for the program number (0001 to 0015)<br />
corresponding to a signal on the machine tool side to start automatic<br />
operation. Refer to the relevant manual prepared by the machine tool<br />
builder for detailed information on operation.<br />
1 Select MEMORY mode.<br />
2 Set the reset state(*1)<br />
⋅The reset state is the state where the LED for indicating that<br />
automatic operation is in progress is off. (Refer to the relevant<br />
manual of the machine tool builder.)<br />
3 Set the program number selection signal on the machine tool side to a<br />
number from 01 to 15.<br />
⋅ If the program corresponding to a signal on the machine tool<br />
side is not registered, P/S alarm (No. 059) is raised.<br />
4 Press the cycle start button.<br />
⋅ When the signal on the machine tool side represents 00,<br />
program number search operation is not performed.<br />
No. Contents<br />
59<br />
71<br />
952<br />
The program with the selected number cannot be searched<br />
during external program number search.<br />
The specified program number was not found during<br />
program number search.
B–63534EN/02 OPERATION<br />
9. EDITING PROGRAMS<br />
9.4<br />
SEQUENCE NU<strong>MB</strong>ER<br />
SEARCH<br />
Sequence number search operation is usually used to search for a<br />
sequence number in the middle of a program so that execution can be<br />
started or restarted at the block of the sequence number.<br />
Example) Sequence number 02346 in a program (O0002) is<br />
searched for.<br />
Selected program<br />
Target sequence<br />
number is found.<br />
Procedure for sequence number search<br />
1 Select MEMORY mode.<br />
2 Press PROG .<br />
953<br />
Program<br />
O0001 ;<br />
N01234 X100.0 Z100.0 ;<br />
S12 ;<br />
:<br />
O0002 ;<br />
N02345 X20.0 Z20.0 ;<br />
N02346 X10.0 Y10.0 ;<br />
:<br />
O0003 ;<br />
:<br />
This section is<br />
searched starting at<br />
the beginning.<br />
(Search operation is<br />
performed only within a<br />
program.)<br />
3 ⋅ If the program contains a sequence number to be searchedfor,<br />
perform the operations 4 to 7 below.<br />
⋅ If the program does not contain a sequence number to be searched<br />
for,select the program number of the program that contains the<br />
sequence number to be searched for.<br />
4 Key in address N .<br />
5 Key in a sequence number to be searched for.<br />
6 Press the [N SRH] key.<br />
7 Upon completion of search operation, the sequence number searched<br />
for is displayed in the upper–right corner of the CRT screen.<br />
If the specified sequence number is not found in the program currently<br />
selected, P/S alarm No. 060 occurs.
9. EDITING PROGRAMS OPERATION<br />
B–63534EN/02<br />
Explanations<br />
Operation during Search<br />
Checking during search<br />
Limitations<br />
Searching in<br />
sub–program<br />
Alarm<br />
Those blocks that are skipped do not affect the CNC. This means that the<br />
data in the skipped blocks such as coordinates and M, S, and T codes does<br />
not alter the CNC coordinates and modal values.<br />
So, in the first block where execution is to be started or restarted by using<br />
a sequence number search command, be sure to enter required M, S, and<br />
T codes and coordinates. A block searched for by sequence number<br />
search usually represents a point of shifting from one process to another.<br />
When a block in the middle of a process must be searched for to restart<br />
execution at the block, specify M, S, and T codes, G codes, coordinates,<br />
and so forth as required from the MDI after closely checking the machine<br />
tool and NC states at that point.<br />
During search operation, the following checks are made:<br />
⋅ Optional block skip<br />
⋅ P/S alarm (No. 003 to 010)<br />
During sequence number search operation, M98Pxxxx (subprogram call)<br />
is not executed. So a P/S alarm (No.060) is raised if an attempt is made<br />
to search for a sequence number in a subprogram called by the program<br />
currently selected.<br />
Main program Subprogram<br />
O1234<br />
:<br />
:<br />
M98 P5678 ;<br />
:<br />
:<br />
954<br />
O5678<br />
:<br />
N88888<br />
:<br />
M99 ;<br />
:<br />
If an attempt is made to search for N8888 in the example above, an alarm is raised.<br />
Number Contents<br />
60<br />
Command sequence number was not found in the sequence<br />
number search.
B–63534EN/02 OPERATION<br />
9. EDITING PROGRAMS<br />
9.5<br />
DELETING<br />
PROGRAMS<br />
9.5.1<br />
Deleting One Program<br />
9.5.2<br />
Deleting All Programs<br />
Programs registered in memory can be deleted,either one program by one<br />
program or all at once. Also, More than one program can be deleted by<br />
specifying a range.<br />
A program registered in memory can be deleted.<br />
Procedure for deleting one program<br />
1 Select the EDIT mode.<br />
2 Press PROG to display the program screen.<br />
3 Key in address O .<br />
4 Key in a desired program number.<br />
5 Press the DELETE key.<br />
The program with the entered program number is deleted.<br />
All programs registered in memory can be deleted.<br />
Procedure for deleting all programs<br />
1 Select the EDIT mode.<br />
2 Press PROG to display the program screen.<br />
3 Key in address O .<br />
4 Key in –9999.<br />
5 Press edit key DELETE to delete all programs.<br />
955
9. EDITING PROGRAMS OPERATION<br />
B–63534EN/02<br />
9.5.3<br />
Deleting More than<br />
One Program by<br />
Specifying a Range<br />
Programs within a specified range in memory are deleted.<br />
Procedure for deleting more than one program by specifying a range<br />
1 Select the EDIT mode.<br />
2 Press PROG to display the program screen.<br />
3 Enter the range of program numbers to be deleted with address and<br />
numeric keys in the following format:<br />
OXXXX,OYYYY<br />
where XXXX is the starting number of the programs to be deleted and<br />
YYYY is the ending number of the programs to be deleted.<br />
4 Press edit key DELETE to delete programs No. XXXX to No. YYYY.<br />
956
B–63534EN/02 OPERATION<br />
9. EDITING PROGRAMS<br />
9.6<br />
EXTENDED PART<br />
PROGRAM EDITING<br />
FUNCTION<br />
With the extended part program editing function, the operations described<br />
below can be performed using soft keys for programs that have been<br />
registered in memory.<br />
Following editing operations are available :<br />
⋅ All or part of a program can be copied or moved to another program.<br />
⋅ One program can be merged at free position into other programs.<br />
⋅ A specified word or address in a program can be replaced with another<br />
word or address.<br />
957
9. EDITING PROGRAMS OPERATION<br />
B–63534EN/02<br />
9.6.1<br />
Copying an Entire<br />
Program<br />
COPY<br />
Numeric keys<br />
A new program can be created by copying a program.<br />
Before copy<br />
Oxxxx<br />
A<br />
958<br />
Copy<br />
Oxxxx<br />
A<br />
After copy<br />
Oyyyy<br />
Fig. 9.6.1 Copying an Entire Program<br />
In Fig. 9.6.1, the program with program number xxxx is copied to a newly<br />
created program with program number yyyy. The program created by<br />
copy operation is the same as the original program except the program<br />
number.<br />
Procedure of copying an entire program<br />
Continuous<br />
menu key<br />
0 <br />
9<br />
(OPRT)<br />
(EX–EDT)<br />
ALL<br />
EXEC<br />
1 Enter the EDIT mode.<br />
2 Press function key PROG .<br />
3 Press soft key [(OPRT)].<br />
4 Press the continuous menu key.<br />
5 Press soft key [EX–EDT].<br />
6 Check that the screen for the program to be copied is selected<br />
and press soft key [COPY].<br />
7 Press soft key [ALL].<br />
8 Enter the number of the new program (with only numeric keys ) and<br />
press the INPUT key.<br />
9 Press soft key [EXEC].<br />
A
B–63534EN/02 OPERATION<br />
9. EDITING PROGRAMS<br />
9.6.2<br />
Copying Part of a<br />
Program<br />
CRSR<br />
CRSR BTTM<br />
Numeric keys <br />
A new program can be created by copying part of a program.<br />
Before copy<br />
Oxxxx Oxxxx<br />
A<br />
B<br />
C<br />
959<br />
Copy<br />
After copy<br />
Oyyyy<br />
Fig. 9.6.2 Copying Part of a Program<br />
In Fig. 9.6.2, part B of the program with program number xxxx is copied<br />
to a newly created program with program number yyyy. The program for<br />
which an editing range is specified remains unchanged after copy<br />
operation.<br />
Procedure for copying part of a program<br />
0 9<br />
EXEC<br />
1 Perform steps 1 to 6 in III–9.6.1.<br />
2 Move the cursor to the start of the range to be copied and press soft key<br />
[CRSR].<br />
3 Move the cursor to the end of the range to be copied and press soft key<br />
[CRSR] or [BTTM] (in the latter case, the range to the end of the<br />
program is copied regardless of the position of the cursor).<br />
4 Enter the number of the new program (with only numeric keys) and<br />
press the INPUT key.<br />
5 Press soft key [EXEC].<br />
A<br />
B<br />
C<br />
B
9. EDITING PROGRAMS OPERATION<br />
B–63534EN/02<br />
9.6.3<br />
Moving Part of a<br />
Program<br />
CRSR<br />
MOVE<br />
Numeric keys<br />
CRSR BTTM<br />
0 <br />
9<br />
A new program can be created by moving part of a program.<br />
Before copy<br />
Oxxxx Oxxxx<br />
A<br />
B<br />
C<br />
960<br />
Copy<br />
After copy<br />
Oyyyy<br />
Fig. 9.6.3 Moving Part of a Program<br />
In Fig. 9.6.3, part B of the program with program number xxxx is moved<br />
to a newly created program with program number yyyy; part B is deleted<br />
from the program with program number xxxx.<br />
Procedure for moving part of a program<br />
EXEC<br />
1 Perform steps 1 to 5 in III–9.6.1.<br />
2 Check that the screen for the program to be moved is selected and<br />
press soft key [MOVE].<br />
3 Move the cursor to the start of the range to be moved and press soft<br />
key [CRSR].<br />
4 Move the cursor to the end of the range to be moved and press soft key<br />
[CRSR] or [BTTM](in the latter case, the range to the end of the<br />
program is copied regardless of the position of the cursor).<br />
5 Enter the number of the new program (with only numeric keys) and<br />
press the INPUT key.<br />
6 Press soft key [EXEC].<br />
A<br />
C<br />
B
B–63534EN/02 OPERATION<br />
9. EDITING PROGRAMS<br />
9.6.4<br />
Merging a Program<br />
’CRSR<br />
Numeric keys<br />
MERGE<br />
Another program can be inserted at an arbitrary position in the current<br />
program.<br />
Oxxxx<br />
A<br />
C<br />
Before merge<br />
961<br />
Oyyyy<br />
B<br />
Merge<br />
location<br />
Merge<br />
Oxxxx<br />
After merge<br />
Fig. 9.6.4 Merging a program at a specified location<br />
A<br />
B<br />
C<br />
Oyyyy<br />
In Fig. 9.6.4, the program with program number XXXX is merged with the<br />
program with program number YYYY. The OYYYY program remains<br />
unchanged after merge operation.<br />
Procedure for merging a program<br />
BTTM’<br />
0 <br />
9<br />
EXEC<br />
1 Perform steps 1 to 5 in III–9.6.1.<br />
2 Check that the screen for the program to be edited is selected and press<br />
soft key [MERGE].<br />
3 Move the cursor to the position at which another program is to be<br />
inserted and press soft key [’CRSR] or [BTTM’](in the latter case,<br />
the end of the current program is displayed).<br />
4 Enter the number of the program to be inserted (with only numeric<br />
keys) and press the INPUT key.<br />
5 Press soft key [EXEC].<br />
The program with the number specified in step 4 is inserted before the<br />
cursor positioned in step 3.<br />
B
9. EDITING PROGRAMS OPERATION<br />
B–63534EN/02<br />
9.6.5<br />
Supplementary<br />
Explanation for<br />
Copying, Moving and<br />
Merging<br />
Explanations<br />
Setting an editing range<br />
Without specifying a<br />
program number<br />
Editing when the system<br />
waiting for a program<br />
number to be entered<br />
Limitations<br />
<br />
<br />
The setting of an editing range start point with [CRSR] can be changed<br />
freely until an editing range end point is set with [CRSR] or [BTTM].<br />
If an editing range start point is set after an editing range end point, the<br />
editing range must be reset starting with a start point.<br />
The setting of an editing range start point and end point remains valid until<br />
an operation is performed to invalidate the setting.<br />
One of the following operations invalidates a setting:<br />
⋅ An edit operation other than address search, word search/scan, and<br />
search for the start of a program is performed after a start point or end<br />
point is set.<br />
⋅ Processing is returned to operation selection after a start point or end<br />
point is set.<br />
In copying program and moving program, if [EXEC] is pressed without<br />
specifying a program number after an editing range end point is set, a<br />
program with program number O0000 is registered as a work program.<br />
This O0000 program has the following features:<br />
⋅ The program can be edited in the same way as a general program.<br />
(Do not run the program.)<br />
⋅ If a copy or move operation is newly performed, the previous<br />
information is deleted at execution time, and newly set information<br />
(all or part of the program) is reregistered. (In merge operation, the<br />
previous information is not deleted.) However, the program, when<br />
selected for foreground operation, cannot be reregistered in the<br />
background. (A BP/S alarm No. 140 is raised.) When the program is<br />
reregistered, a free area is produced. Delete such a free area with the<br />
RESET key.<br />
⋅ When the program becomes unnecessary, delete the program by a<br />
normal editing operation.<br />
When the system is waiting for a program number to be entered,<br />
no edit operation can be performed.<br />
If a program number is specified by 5 or more digits, a format error is<br />
generated.<br />
962
B–63534EN/02 OPERATION<br />
9. EDITING PROGRAMS<br />
Alarm<br />
<br />
<br />
<br />
963<br />
<br />
<br />
<br />
<br />
RESET<br />
PROG
9. EDITING PROGRAMS OPERATION<br />
B–63534EN/02<br />
9.6.6<br />
Replacement of<br />
Words and Addresses<br />
BEFORE<br />
AFTER<br />
SKIP<br />
Examples<br />
1–EXEC<br />
Replace one or more specified words.<br />
Replacement can be applied to all occurrences or just one occurrence of<br />
specified words or addresses in the program.<br />
Procedure for hange of words or addresses<br />
CHANGE<br />
EXEC<br />
Replace X100 with Y200<br />
Replace X100Y200 with<br />
X30<br />
Replace IF with WHILE<br />
Replace X with ,C10<br />
1 Perform steps 1 to 5 in III–9.6.1.<br />
2 Press soft key [CHANGE].<br />
3 Enter the word or address to be replaced.<br />
4 Press soft key [BEFORE].<br />
5 Enter the new word or address.<br />
6 Press soft key [AFTER].<br />
7 Press soft key [EXEC] to replace all the specified words or addresses<br />
after the cursor.<br />
Press soft key [1–EXEC] to search for and replace the first occurrence<br />
of the specified word or adress after the cursor.<br />
Press soft key [SKIP] to only search for the first occurrence of the<br />
specified word or address after the cursor.<br />
[CHANGE] X 1 0 0 [BEFORE] Y 2 0 0<br />
[AFTER][EXEC]<br />
[CHANGE] X 1 0 0 Y 2 0 0 [BEFORE]<br />
X 3 0 [AFTER][EXEC]<br />
[CHANGE] I F [BEFORE] W H I L E [AFTER]<br />
[EXEC]<br />
[CHANGE] X [BEFORE] , C 1 0 [AFTER][EXEC]<br />
964
B–63534EN/02 OPERATION<br />
9. EDITING PROGRAMS<br />
Explanation<br />
Replacing custom<br />
macros<br />
Restrictions<br />
The number of<br />
characters for<br />
replacement<br />
The characters for<br />
replacement<br />
The following custom macro words are replaceable:<br />
IF, WHILE, GOTO, END, DO, BPRNT, DPRINT, POPEN, PCLOS<br />
The abbreviations of custom macro words can be specified.<br />
When abbreviations are used, however, the screen displays the<br />
abbreviations as they are key input, even after soft key [BEFORE] and<br />
[AFTER] are pressed.<br />
Up to 15 characters can be specified for words before or after replacement.<br />
(Sixteen or more characters cannot be specified.)<br />
Words before or after replacement must start with a character representing<br />
an address.(A format error occurs.)<br />
965
9. EDITING PROGRAMS OPERATION<br />
B–63534EN/02<br />
9.7<br />
EDITING OF<br />
CUSTOM MACROS<br />
Explanations<br />
Editing unit<br />
Abbreviations of custom<br />
macro word<br />
Unlike ordinary programs, custom macro programs are modified,<br />
inserted, or deleted based on editing units.<br />
Custom macro words can be entered in abbreviated form.<br />
Comments can be entered in a program.<br />
Refer to the III–10.1 for the comments of a program.<br />
When editing a custom macro already entered, the user can move the<br />
cursor to each editing unit that starts with any of the following characters<br />
and symbols:<br />
(a) Address<br />
(b) # located at the start of the left side of a substitution statement<br />
(c) /, (,=, and ;<br />
(d) First character of IF, WHILE, GOTO, END, DO, POPEN, BPRNT,<br />
DPRNT and PCLOS<br />
On the screen, a blank is placed before each of the above characters and<br />
symbols.<br />
(Example) Head positions where the cursor is placed<br />
N001 X–#100 ;<br />
#1 =123 ;<br />
N002 /2 X[12/#3] ;<br />
N003 X–SQRT[#3/3[#4+1]] ;<br />
N004 X–#2 Z#1 ;<br />
N005 #5 =1+2–#10 ;<br />
IF[#1NE0] GOTO10 ;<br />
WHILE[#2LE5] DO1 ;<br />
#[200+#2] =#210 ;<br />
#2 =#2+1 ;<br />
END1 ;<br />
When a custom macro word is altered or inserted, the first two characters<br />
or more can replace the entire word.<br />
Namely,<br />
WHILE → WH GOTO → GO XOR → XO AND → AN<br />
SIN → SI ASIN → AS COS → CO ACOS → AC<br />
TAN → TA ATAN → AT SQRT → SQ ABS → AB<br />
BCD → BC BIN → BI FIX → FI FUP → FU<br />
ROUND → RO END → EN EXP → EX THEN → TH<br />
POPEN → PO BPRNT → BP DPRNT → DP PCLOS → PC<br />
(Example) Keying in<br />
WH [AB [#2 ] LE RO [#3 ] ]<br />
has the same effect as<br />
WHILE [ABS [#2 ] LE ROUND [#3 ] ]<br />
The program is also displayed in this way.<br />
966
B–63534EN/02 OPERATION<br />
9. EDITING PROGRAMS<br />
9.8<br />
BACKGROUND<br />
EDITING<br />
Explanation<br />
Alarms during<br />
background editing<br />
Editing a program while executing another program is called background<br />
editing. The method of editing is the same as for ordinary editing<br />
(foreground editing).<br />
A program edited in the background should be registered in foreground<br />
program memory by performing the following operation:<br />
During background editing, all programs cannot be deleted at once.<br />
Procedure for background editing<br />
1 Enter EDIT or MEMORY mode.<br />
Memory mode is allowed even while the program is being executed.<br />
2 Press function key PROG .<br />
3 Press soft key [(OPRT)], then press soft key [BG–EDT].<br />
The background editing screen is displayed (PROGRAM<br />
(BG–EDIT) is displayed at the top left of the screen).<br />
4 Edit a program on the background editing screen in the same way as<br />
for ordinary program editing.<br />
5 After editing is completed, press soft key [(OPRT)], then press soft<br />
key [BG–EDT]. The edited program is registered in foreground<br />
program memory.<br />
Alarms that may occur during background editing do not affect<br />
foreground operation. Conversely, alarms that may occur during<br />
foreground operation do not affect background editing. In background<br />
editing, if an attempt is made to edit a program selected for foreground<br />
operation, a BP/S alarm (No. 140) is raised. On the other hand, if an<br />
attempt is made to select a program subjected to background editing<br />
during foreground operation (by means of subprogram calling or program<br />
number search operation using an external signal), a P/S alarm (Nos. 059,<br />
078) is raised in foreground operation. As with foreground program<br />
editing, P/S alarms occur in background editing. However, to distinguish<br />
these alarms from foreground alarms, BP/S is displayed in the data input<br />
line on the background editing screen.<br />
967
9. EDITING PROGRAMS OPERATION<br />
B–63534EN/02<br />
9.9<br />
PASSWORD<br />
FUNCTION<br />
<br />
<br />
Explanations<br />
Setting parameter<br />
PASSWD<br />
Changing parameter<br />
PASSWD<br />
The password function (bit 4 (NE9) of parameter No. 3202) can be locked<br />
using parameter No. 3210 (PASSWD) and parameter No. 3211<br />
(KEYWD) to protect program Nos. 9000 to 9999. In the locked state,<br />
parameter NE9 cannot be set to 0. In this state, program Nos. 9000 to 9999<br />
cannot be modified unless the correct keyword is set.<br />
A locked state means that the value set in the parameter PASSWD differs<br />
from the value set in the parameter KEYWD. The values set in these<br />
parameters are not displayed. The locked state is released when the value<br />
already set in the parameter PASSWD is also set in parameter KEYWD.<br />
When 0 is displayed in parameter PASSWD, parameter PASSWD is not<br />
set.<br />
Procedure for locking and unlocking<br />
1 Set the MDI mode.<br />
2 Enable parameter writing. At this time, P/S alarm No. 100 is issued<br />
on the CNC.<br />
3 Set parameter No. 3210 (PASSWD). At this time, the locked state is<br />
set.<br />
4 Disable parameter writing.<br />
5 Press the RESET key to release the alarm state.<br />
1 Set the MDI mode.<br />
2 Enable parameter writing. At this time, P/S alarm No. 100 is issued<br />
on the CNC.<br />
3 In parameter No. 3211 (KEYWD), set the same value as set in<br />
parameter No. 3210 (PASSWD) for locking. At this time, the locked<br />
state is released.<br />
4 Set bit 4 (NE9) of parameter No. 3202 to 0.<br />
5 Disable parameter writing.<br />
6 Press the RESET key to release the alarm state.<br />
7 Subprograms from program Nos. 9000 to 9999 can now be edited.<br />
The locked state is set when a value is set in the parameter PASSWD.<br />
However, note that parameter PASSWD can be set only when the locked<br />
state is not set (when PASSWD = 0, or PASSWD = KEYWD). If an<br />
attempt is made to set parameter PASSWD in other cases, a warning is<br />
given to indicate that writing is disabled. When the locked state is set<br />
(when PASSWD = 0 and PASSWD = KEYWD), parameter NE9 is<br />
automatically set to 1. If an attempt is made to set NE9 to 0, a warning<br />
is given to indicate that writing is disabled.<br />
Parameter PASSWD can be changed when the locked state is released<br />
(when PASSWD = 0, or PASSWD = KEYWD). After step 3 in the<br />
procedure for unlocking, a new value can be set in the parameter<br />
PASSWD. From that time on, this new value must be set in parameter<br />
KEYWD to release the locked state.<br />
968
B–63534EN/02 OPERATION<br />
9. EDITING PROGRAMS<br />
Setting 0 in parameter<br />
PASSWD<br />
Re–locking<br />
When 0 is set in the parameter PASSWD, the number 0 is displayed, and<br />
the password function is disabled. In other words, the password function<br />
can be disabled by either not setting parameter PASSWD at all, or by<br />
setting 0 in parameter PASSWD after step 3 of the procedure for<br />
unlocking. To ensure that the locked state is not entered, care must be<br />
taken not to set a value other than 0 in parameter PASSWD.<br />
After the locked state has been released, it can be set again by setting a<br />
different value in parameter PASSWD, or by turning the power to the NC<br />
off then on again to reset parameter KEYWD.<br />
CAUTION<br />
Once the locked state is set, parameter NE9 cannot be set<br />
to 0 and parameter PASSWD cannot be changed until the<br />
locked state is released or the memory all–clear operation<br />
is performed. Special care must be taken in setting<br />
parameter PASSWD.<br />
969
9. EDITING PROGRAMS OPERATION<br />
B–63534EN/02<br />
9.10<br />
COPYING A<br />
PROGRAM<br />
BETWEEN TWO<br />
PATHS<br />
<br />
For a 2–path control CNC, setting bit 0 (PCP) of parameter No. 3206 to<br />
1 enables the copying of a specified machining program from one path to<br />
another. Single–program copy and specified–range copy are supported.<br />
Procedure for copying a program between two paths<br />
1 Select EDIT mode for both paths.<br />
2 Press function key PROG .<br />
3 Press soft key [(OPRT)].<br />
4 Press soft key [P COPY].<br />
The following soft keys appear:<br />
PROGRAM<br />
O1357 (HEAD–1 MAIN PROGRAM) ;<br />
N010 G90 G00 X200.0 Z220.0 ;<br />
N020 T0101 ;<br />
N030 S30000 M03 ;<br />
N040 G40 G00 X40.0 Z180.0 ;<br />
N080 X100.0 Z80.0 ;<br />
N090 Z60.0 ;<br />
N100 X140.0 Z40.0 ;<br />
>_<br />
EDIT **** *** *** 14:25:36<br />
PATH1 PATH2<br />
970<br />
O1357 N00130<br />
HEAD1<br />
CAN<br />
5 Press soft key [PATH1] or [PATH2] to select the path from which a<br />
program is to be copied.<br />
(Example) Pressing soft key [PATH1] causes an operation guidance,<br />
shown below, to appear on the screen.<br />
SOURCE : PATH1 =1357<br />
DEST : PATH2 = REPLACE : OFF<br />
>_<br />
EDIT **** *** *** 14:25:36<br />
SOURCE DEST REPLACE CAN<br />
HEAD1<br />
EXEC<br />
⋅ First, the program currently selected for the copy source path is<br />
displayed as the program to be copied. If no program has been<br />
selected for the copy source path, ”0000” is displayed.
B–63534EN/02 OPERATION<br />
9. EDITING PROGRAMS<br />
6 Select one or more programs to be copied.<br />
⋅ Single–program copy<br />
(1)Enter the number of the program to be copied.<br />
→ ””<br />
(2)Press soft key [SOURCE] to set the number.<br />
→ SOURCE:PATH?=””<br />
⋅ Specified–range copy<br />
(1)Enter the range of the programs to be copied, as a number.<br />
→ ”–”<br />
Range symbol<br />
[Entry format] –<br />
Range end (largest) number<br />
Range start (smallest) number<br />
(2)Press soft key [SOURCE] to set the number.<br />
→ SOURCE:PATH?=”–”<br />
⋅ To cancel the selection of the program(s) to be copied, press<br />
[SOURCE] again.<br />
7 Select the copy destination number.<br />
The selected program(s) can be copied by assigning numbers other<br />
than their original numbers.<br />
(1)Type the destination number.<br />
→ ”∆∆∆∆”<br />
(2)Press soft key [DEST] to set the number.<br />
→ DEST:PATH?=”∆∆∆∆”<br />
⋅ Pressing [DEST] without entering any number causes the original<br />
program number(s) to be used as is.<br />
⋅ To cancel the set number, press [DEST] again.<br />
⋅ For specified–range copy, the set number is assigned to the first<br />
program of the specified range. The subsequent programs are<br />
assigned numbers obtained by repeatedly incrementing the set<br />
number by one.<br />
8 Specify replacement.<br />
If any number to be assigned to a program to be copied is already<br />
being used for a program registered for the destination path, specify<br />
whether the existing program is to be replaced with that to be copied.<br />
If replacement is currently disabled, pressing soft key [REPLACE]<br />
enables replacement. Pressing [REPLACE] repeatedly toggles<br />
between replacement being enabled and disabled.<br />
”REPLACE=ON” indicates that replacement is enabled.<br />
”REPLACE=OFF” indicates that replacement is disabled.<br />
9 Press soft key [EXEC] to start copying.<br />
971
9. EDITING PROGRAMS OPERATION<br />
B–63534EN/02<br />
Explanations<br />
Operation flow<br />
Background editing<br />
Yes<br />
Copy completed<br />
Program screen<br />
Edit mode/BG edit mode<br />
Set the data protection key to ON (enable editing)<br />
Soft key for starting setting for copy between paths [P COPY]<br />
Copy source selection soft key [PATH1] or [PATH2]<br />
<br />
<br />
Set<br />
Set<br />
<br />
No<br />
<br />
To be replaced<br />
972<br />
Not set (selected O number)<br />
Not set (selected O number)<br />
REPLACE=ON REPLACE=OFF<br />
Start copying: soft key [EXEC]<br />
Alarm termination<br />
Not to be replaced<br />
Copying can also be performed during background editing.
B–63534EN/02 OPERATION<br />
9. EDITING PROGRAMS<br />
Major related alarms<br />
Restrictions<br />
Conditions under which<br />
copying cannot be<br />
performed<br />
Specified–range copy<br />
Major related alarm numbers<br />
Alarm number Description Relevant path<br />
P/S 70,70 BP/S0<br />
P/S 71,71 BP/S<br />
P/S 72,72 BP/S<br />
P/S 73,73 BP/S<br />
P/S 75,75 BP/S<br />
973<br />
Insufficient free memory<br />
Specified program not found<br />
Too many programs<br />
Duplicate registration<br />
Protected program number<br />
Copy destination<br />
Copy source<br />
Copy destination<br />
Copy destination<br />
Copy source/destination<br />
⋅ BP/S indicates an alarm output during background editing.<br />
⋅ Each alarm is issued to the path for which the operation causing the<br />
alarm is being performed.<br />
Copying is not performed under any of the following conditions:<br />
⋅ The data protection key for the copy destination path is set to OFF.<br />
⋅ The specified O number is protected.<br />
⋅ The specified O number is already being used for a program registered<br />
for the copy destination path (if replacement is disabled).<br />
⋅ The part program storage for the copy destination path does not have<br />
sufficient free space.<br />
⋅ The copy source or destination path is placed in the alarm state.<br />
During background editing, however, only P/S alarms 000 and 101<br />
disable copying.<br />
During specified–range copy, if the part program storage for the copy<br />
destination path becomes insufficient, if the maximum number of<br />
programs which can be registered for the destination path is exceeded, if<br />
a specified program number has already been registered for the<br />
destination path, or if a specified program number is protected, an alarm<br />
is issued immediately and copying is stopped.<br />
Copy destination Copy source<br />
O0001<br />
O0020<br />
O0200<br />
←<br />
←<br />
←<br />
Insufficient storage,<br />
duplicate registration,<br />
protected number, or maximum<br />
number of programs exceeded<br />
↓<br />
Alarm issued, copying stopped<br />
O0001<br />
O0020<br />
O0200<br />
O1100<br />
O2000
9. EDITING PROGRAMS OPERATION<br />
B–63534EN/02<br />
Replacement<br />
Even if replacement is enabled, the program is not replaced if the part<br />
program storage for the copy destination path does not have sufficient free<br />
space. During background editing, copying by replacing the currently<br />
running program is not allowed.<br />
CAUTION<br />
Once the copying of a program between paths has been<br />
started, it cannot be canceled. Carefully confirm all the<br />
settings before starting copying.<br />
974
B–63534EN/02 OPERATION<br />
10. CREATING PROGRAMS<br />
10 <br />
<br />
Programs can be created using any of the following methods:<br />
⋅ MDI keyboard<br />
⋅ PROGRAMMING IN TEACH IN MODE<br />
⋅ CONVERSATIONAL PROGRAMMING INPUT WITH GRAPHIC<br />
FUNCTION<br />
⋅ CONVERSATIONAL AUTOMATIC PROGRAMMING FUNCTION<br />
⋅ AUTOMATIC PROGRAM PREPARATION DEVICE (FANUC<br />
SYSTEM P)<br />
This chapter describes creating programs using the MDI panel, Teach IN<br />
mode, and conversational programming with graphic function. This<br />
chapter also describes the automatic insertion of sequence numbers.<br />
975
10. CREATING PROGRAMS OPERATION<br />
B–63534EN/02<br />
10.1<br />
CREATING<br />
PROGRAMS USING<br />
THE MDI PANEL<br />
Procedure<br />
Explanation<br />
Comments in a program<br />
Programs can be created in the EDIT mode using the program editing<br />
functions described in III–9.<br />
Procedure for Creating Programs Using the MDI Panel<br />
1 Enter the EDIT mode.<br />
2 Press the PROG key.<br />
3 Press address key O and enter the program number.<br />
4 Press the INSERT key.<br />
5 Create a program using the program editing functions described in<br />
III–9.<br />
Comments can be written in a program using the control in/out codes.<br />
Example) O0001 (FANUC SERIES 16) ;<br />
M08 (COOLANT ON) ;<br />
When the INSERT key is pressed after the control–out code “(”,<br />
comments, and control–in code “)” have been typed, the typed<br />
comments are registered.<br />
When the INSERT key is pressed midway through comments, to enter<br />
the rest of comments later, the data typed before the INSERT key is<br />
pressed may not be correctly registered (not entered, modified, or lost)<br />
because the data is subject to an entry check which is performed in<br />
normal editing.<br />
Note the following to enter a comment:<br />
Control–in code “)” cannot be registered by itself.<br />
Comments entered after the INSERT key is pressed must not begin with<br />
a number, space, or address O.<br />
If an abbreviation for a macro is entered, the abbreviation is converted<br />
into a macro word and registered (see Section 9.7).<br />
Address O and subsequent numbers, or a space can be entered but are<br />
omitted when registered.<br />
976
B–63534EN/02 OPERATION<br />
10. CREATING PROGRAMS<br />
10.2<br />
AUTOMATIC<br />
INSERTION OF<br />
SEQUENCE<br />
NU<strong>MB</strong>ERS<br />
Procedure<br />
Sequence numbers can be automatically inserted in each block when a<br />
program is created using the MDI keys in the EDIT mode.<br />
Set the increment for sequence numbers in parameter 3216.<br />
Procedure for automatic insertion of sequence numbers<br />
1 Set 1 for SEQUENCE NO. (see III–11.4.3).<br />
2 Enter the EDIT mode.<br />
3 Press PROG to display the program screen.<br />
4 Search for or register the number of a program to be edited and move<br />
the cursor to the EOB (;) of the block after which automatic insertion<br />
of sequence numbers is started.<br />
When a program number is registered and an EOB (;) is entered with<br />
the INSERT key, sequence numbers are automatically inserted starting<br />
with 0. Change the initial value, if required, according to step 10, then<br />
skip to step 7.<br />
5 Press address key N and enter the initial value of N.<br />
6 Press INSERT .<br />
7 Enter each word of a block.<br />
8 Press EOB .<br />
977
10. CREATING PROGRAMS OPERATION<br />
B–63534EN/02<br />
9 Press INSERT . The EOB is registered in memory and sequence numbers<br />
are automatically inserted. For example, if the initial value of N is 10<br />
and the parameter for the increment is set to 2, N12 inserted and<br />
displayed below the line where a new block is specified.<br />
PROGRAM O0040 N00012<br />
O0040 ;<br />
N10 G92 X0 Y0 Z0 ;<br />
N12<br />
%<br />
<br />
EDIT **** *** *** 13 : 18 : 08<br />
PRGRM<br />
978<br />
LIB C.A.P (OPRT)<br />
10 In the example above, if N12 is not necessary in the next block,<br />
pressing the DELETE key after N12 is displayed deletes N12.<br />
To insert N100 in the next block instead of N12, enter N100 and<br />
press ALTER after N12 is displayed. N100 is registered and initial<br />
value is changed to 100.
B–63534EN/02 OPERATION<br />
10. CREATING PROGRAMS<br />
10.3<br />
CREATING<br />
PROGRAMS IN<br />
TEACH IN MODE<br />
(PLAYBACK)<br />
<br />
Examples<br />
When the playback option is selected, the TEACH IN JOG mode and<br />
TEACH IN HANDLE mode are added. In these modes, a machine position<br />
along the X, Y, and Z axes obtained by manual operation is stored in<br />
memory as a program position to create a program.<br />
The words other than X, Y, and Z, which include O, N, G, R, F, C, M, S,<br />
T, P, Q, and EOB, can be stored in memory in the same way as in EDIT<br />
mode.<br />
Procedure for Creating Programs in TEACH IN Mode<br />
The procedure described below can be used to store a machine position<br />
along the X, Y, and Z axes.<br />
1 Select the TEACH IN JOG mode or TEACH IN HANDLE mode.<br />
2 Move the tool to the desired position with jog or handle.<br />
3 Press PROG key to display the program screen. Search for or register<br />
the number of a program to be edited and move the cursor to the<br />
position where the machine position along each axis is to be<br />
registered (inserted).<br />
4 Key in address X .<br />
5 Press the INSERT key. Then a machine position along the X axis is<br />
stored in memory.<br />
(Example) X10.521 Absolute positon (for mm input)<br />
X10521 Data stored in memory<br />
6 Similarly, key in Y , then press the INSERT key. Then a machine<br />
position along the Y axis is stored in memory. Further, key in Z ,<br />
then press the INSERT key. Then a machine position along the Z axis is<br />
stored in memory.<br />
All coordinates stored using this method are absolute coordinates.<br />
O1234 ;<br />
N1 G92 X10000 Y0 Z10000 ;<br />
N2 G00 G90 X3025 Y23723 ;<br />
N3 G01 Z–325 F300 ;<br />
N4 M02 ;<br />
X<br />
979<br />
P0<br />
(10.0, 0, 10.0)<br />
Z<br />
P1<br />
(3.025, 23.723, 10.0)<br />
Y<br />
(3.025, 23.723, –0.325)<br />
P2
10. CREATING PROGRAMS OPERATION<br />
B–63534EN/02<br />
1 Set the setting data SEQUENCE NO. to 1 (on). (The incremental value<br />
parameter (No. 3216) is assumed to be “1”.)<br />
2 Select the TEACH IN HANDLE mode.<br />
3 Make positioning at position P0 by the manual pulse generator.<br />
4 Select the program screen.<br />
5 Enter program number O1234 as follows:<br />
O 1 2 3 4 INSERT<br />
This operation registers program number O1234 in memory.<br />
Next, press the following keys:<br />
EOB INSERT<br />
An EOB (;) is entered after program number O1234. Because no<br />
number is specified after N, sequence numbers are automatically<br />
inserted for N0 and the first block (N1) is registered in memory.<br />
6 Enter the P0 machine position for data of the first block as follows:<br />
G 9 2 INSERT X INSERT Y INSERT Z<br />
INSERT EOB INSERT<br />
This operation registers G92X10000Y0Z10000; in memory. The<br />
automatic sequence number insertion function registers N2 of the<br />
second block in memory.<br />
7 Position the tool at P1 with the manual pulse generator.<br />
8 Enter the P1 machine position for data of the second block as follows:<br />
G 0 0 INSERT G 9 0 X INSERT Y<br />
INSERT EOB INSERT<br />
This operation registers G00G90X3025Z23723; in memory. The<br />
automatic sequence number insertion function registers N3 of the third<br />
block in memory.<br />
9 Position the tool at P2 with the manual pulse generator.<br />
10 Enter the P2 machine position for data of the third block as follows:<br />
G 0 1 INSERT Z INSERT F 3 0 0<br />
INSERT EOB INSERT<br />
This operation registers G01Z –325F300; in memory.<br />
The automatic sequence number insertion function registers N4 of the<br />
fourth block in memory.<br />
11 Register M02; in memory as follows:<br />
M 0 2 INSERT EOB INSERT<br />
N5 indicating the fifth block is stored in memory using the automatic<br />
sequence number insertion function. Press the DELETE key to delete it.<br />
This completes the registration of the sample program.<br />
980
B–63534EN/02 OPERATION<br />
10. CREATING PROGRAMS<br />
Explanations<br />
Checking contents of the<br />
memory<br />
Registering a position<br />
with compensation<br />
Registering commands<br />
other than position<br />
commands<br />
The contents of memory can be checked in the TEACH IN mode by using<br />
the same procedure as in EDIT mode.<br />
PROGRAM O1234 N00004<br />
RELATIVE ABSOLUTE<br />
X –6.975 X 3.025<br />
Y 23.723 Y 23.723<br />
Z –10.325 Z –0.325<br />
O1234 ;<br />
N1 G92 X10000 Y0 Z10000 ;<br />
N2 G00 G90 X3025 Y23723 ;<br />
N3 G01 Z–325 F300 ;<br />
N4 M02 ;<br />
%<br />
_<br />
THND * * * * * * * * * * 14 : 17 : 27<br />
PRGRM LIB<br />
(OPRT)<br />
When a value is keyed in after keying in address X , Y , or Z ,<br />
then the INSERT key is pressed, the value keyed in for a machine position<br />
is added for registration. This operation is useful to correct a machine<br />
position by key–in operation.<br />
Commands to be entered before and after a machine position must be<br />
entered before and after the machine position is registered, by using the<br />
same operation as program editing in EDIT mode.<br />
981
10. CREATING PROGRAMS OPERATION<br />
B–63534EN/02<br />
10.4<br />
CONVERSATIONAL<br />
PROGRAMMING<br />
WITH GRAPHIC<br />
FUNCTION<br />
Procedure 1<br />
Creating a program<br />
Programs can be created block after block on the conversational screen<br />
while displaying the G code menu.<br />
Blocks in a program can be modified, inserted, or deleted using the G code<br />
menu and conversational screen.<br />
Procedure for Conversational Programming with Graphic Function<br />
1 Enter the EDIT mode.<br />
2 Press PROG . If no program is registered, the following screen is<br />
displayed. If a program is registered, the program currently selected<br />
is displayed.<br />
PROGRAM O0000 N0000<br />
<br />
EDIT **** *** *** 11 : 59 : 46<br />
PRGRM<br />
982<br />
LIB C.A.P (OPRT)<br />
3 Key in the program number of a program to be registered after keying<br />
in address O, then press INSERT . For example, when a program with<br />
program number 10 is to be registered, key in O 1 0 , then<br />
press INSERT . This registers a new program O0010.
B–63534EN/02 OPERATION<br />
10. CREATING PROGRAMS<br />
4 Press the [C.A.P] soft key. The following G code menu is displayed<br />
on the screen.<br />
If soft keys different from those shown in step 2 are displayed, press<br />
the menu return key to display the correct soft keys.<br />
PROGRAM O1234 N00004<br />
G00 : POSITIONING<br />
G01 : LINEAR IPL<br />
G02 : CIRCULAR IPL. CW<br />
G03 : CIRCULAR IPL. CCW<br />
G04 : DWELL<br />
G09 : EXACT STOP CHECK<br />
G10 : OFFSET&TLC VALUE SETTING (0)<br />
G17 : XY PLANE<br />
G18 : ZX PLANE<br />
G19 : YZ PLANE<br />
G20 : INCH<br />
G21 : METRIC<br />
<br />
EDIT **** *** *** 14 : 26 : 15<br />
PRGRM<br />
983<br />
G.MENU<br />
BLOCK<br />
5 Key in the G code corresponding to a function to be programmed.<br />
When the positioning function is desired, for example, the G code<br />
menu lists the function with the G code G00. So key in G00. If the<br />
screen does not indicate a function to be programmed, press the page<br />
key to display the next G code menu screen. Repeat this<br />
operation until a desired function appears. If a desired function is not<br />
a G code, key in no data.<br />
6 Press the soft key [BLOCK] to display a detailed screen for a keyed in<br />
G code. The figure below shows an example of detailed screen for<br />
G00.<br />
PROGRAM<br />
G00 : POSITIONING<br />
EDIT **** *** *** 14 : 32 : 57<br />
PRGRM G.MENU BLOCK<br />
O1234 N00000<br />
G00 G G G<br />
X 100. Y 50.0<br />
Z (X, Y, Z, )<br />
H OFFSET NO.<br />
M<br />
S<br />
T<br />
B<br />
<br />
(OPRT)<br />
When no keys are pressed, the standard details screen is displayed.
10. CREATING PROGRAMS OPERATION<br />
B–63534EN/02<br />
Procedure <br />
a block<br />
PROGRAM<br />
G G G G<br />
X Y<br />
Z<br />
H F<br />
R M<br />
S T<br />
B I<br />
J K<br />
P Q<br />
L<br />
:<br />
EDIT **** *** *** 14 : 41 : 10<br />
PRGRM G.MENU BLOCK<br />
984<br />
O0010 N00000<br />
(OPRT)<br />
7 Move the cursor to the block to be modified on the program screen.<br />
At this time, a data address with the cursor blinks.<br />
8 Enter numeric data by pressing the numeric keys and press the<br />
[INPUT] soft key or INPUT key. This completes the input of one data<br />
item.<br />
9 Repeat this operation until all data required for the entered G code is<br />
entered.<br />
10 Press the INSERT key. This completes the registration of data of one<br />
block in program memory. On the screen, the G code menu screen is<br />
displayed, allowing the user to enter data for another block. Repeat<br />
the procedure starting with 5 as required.<br />
11 After registering all programs, press the [PRGRM] soft key. The<br />
registered programs are converted to the converssational format and<br />
displayed.<br />
12 Press the RESET key to return to the program head.<br />
1 Move the cursor to the block to be modified on the program screen<br />
and press the [C.A.P] soft key. Or, press the [C.A.P] soft key first to<br />
display the conversational screen, then press the<br />
key until the block to be modified is displayed.<br />
or page<br />
2 When data other than a G code is to be altered, just move the cursor to<br />
the data and key in a desired value, then press the [INPUT] soft key or<br />
INPUT key.<br />
3 When a G code is to be altered, press the menu return key and the<br />
soft key [G.MENU]. Then the G code menu appears. Select a desired<br />
G code, then key in the value. For example, to specify a cutting feed,<br />
since the G code menu indicates G01, key in G01. Then press the soft<br />
key [BLOCK]. The detailed screen of the G code is displayed, so enter<br />
the data.
B–63534EN/02 OPERATION<br />
10. CREATING PROGRAMS<br />
Procedure <br />
Inserting a block<br />
Procedure <br />
Deleting a block<br />
4 After data is changed completely, press the ALTER key. This operation<br />
replaces an entire block of a program.<br />
1 On the conversational screen, display the block immediately before a<br />
new block is to be inserted, by using the page keys. On the program<br />
screen, move the cursor with the page keys and cursor keys to<br />
immediately before the point where a new block is to be inserted.<br />
2 Press the soft key [G.MENU] to display the G code menu. Then enter<br />
new block data.<br />
3 When input of one block of data is completed in step 2, press the INSERT<br />
key. This operation inserts a block of data.<br />
1 On the conversational screen, display the contents of a block to be<br />
deleted, then press the DELETE key.<br />
2 The contents of the block displayed are deleted from program<br />
memory. Then the contents of the next block are displayed on the<br />
conversational screen.<br />
985
11. SETTING AND DISPLAYING DATA OPERATION<br />
B–63534EN/02<br />
11 <br />
General<br />
Explanations<br />
⋅Screen transition chart<br />
OFFSET<br />
HELP POS PROG SETTING CUSTOM<br />
SYSTEM<br />
MESSAGE<br />
<br />
GRAPH<br />
MDI function keys<br />
(Shaded keys ( ) are described<br />
in this chapter.)<br />
<br />
To operate a CNC machine tool, various data must be set on the MDI panel<br />
for the CNC. The operator can monitor the state of operation with data<br />
displayed during operation.<br />
This chapter describes how to display and set data for each function.<br />
The screen transition for when each function key on the MDI panel is<br />
pressed is shown below. The subsections referenced for each screen are<br />
also shown. See the appropriate subsection for details of each screen and<br />
the setting procedure on the screen. See other chapters for screens not<br />
described in this chapter.<br />
See Chapter 7 for the screen that appears when function key MESSAGE is<br />
pressed. See Chapter 12 for the screen that appears when function key<br />
GRAPH is pressed. See Chapter 13 for the screen that appears when function<br />
key HELP is pressed. In general, function key CUSTOM is prepared by the<br />
machine tool builder and used for macros. Refer to the manual issued by<br />
the machine tool builder for the screen that appears when function key<br />
CUSTOM is pressed.<br />
The machine may have a data protection key to protect part programs,<br />
tool compensation values, setting data, and custom macro variables.<br />
Refer to the manual issued by the machine tool builder for where the data<br />
protection key is located and how to use it.<br />
986
B–63534EN/02 OPERATION<br />
11. SETTING AND DISPLAYING DATA<br />
POSITION DISPLAY SCREEN<br />
Current position screen<br />
POS<br />
POS<br />
ABS REL ALL HNDL (OPRT)<br />
<br />
<br />
<br />
⇒ <br />
<br />
<br />
<br />
⇒ <br />
<br />
<br />
⇒ <br />
<br />
<br />
⇒ <br />
Current position screen<br />
<br />
<br />
⇒ <br />
<br />
<br />
<br />
⇒ <br />
<br />
<br />
<br />
⇒ <br />
<br />
<br />
⇒ <br />
<br />
<br />
⇒ <br />
<br />
<br />
⇒ <br />
<br />
<br />
<br />
⇒ <br />
<br />
<br />
<br />
⇒ <br />
<br />
<br />
⇒ <br />
<br />
<br />
⇒ <br />
<br />
<br />
⇒ <br />
987<br />
<br />
<br />
⇒ <br />
MONI (OPRT)
11. SETTING AND DISPLAYING DATA OPERATION<br />
B–63534EN/02<br />
PROGRAM SCREEN<br />
Program screen<br />
MEM<br />
PRGRM CHECK CURRNT NEXT (OPRT)<br />
<br />
<br />
⇒ <br />
<br />
<br />
<br />
⇒ <br />
<br />
<br />
<br />
<br />
⇒ <br />
Program screen<br />
MEM<br />
<br />
<br />
<br />
PROG<br />
<br />
<br />
<br />
⇒ <br />
<br />
<br />
<br />
<br />
⇒ <br />
988<br />
<br />
<br />
<br />
⇒ <br />
<br />
<br />
⇒ <br />
(Displayed in the<br />
MDI mode)<br />
RSTR FL.SDL (OPRT)<br />
<br />
<br />
⇒ <br />
MDI<br />
PRGRM<br />
<br />
<br />
<br />
<br />
⇒ <br />
<br />
<br />
<br />
<br />
PROG<br />
*: Displayed in MDI mode
B–63534EN/02 OPERATION<br />
11. SETTING AND DISPLAYING DATA<br />
PROGRAM SCREEN<br />
Program screen<br />
EDIT<br />
PRGRM LIB C.A.P. (OPRT)<br />
<br />
<br />
⇒ <br />
Program screen<br />
EDIT<br />
<br />
<br />
<br />
⇒ <br />
<br />
<br />
PROG<br />
989<br />
<br />
<br />
<br />
⇒ .4<br />
FLOPPY (OPRT)<br />
<br />
<br />
<br />
⇒ <br />
PROG
11. SETTING AND DISPLAYING DATA OPERATION<br />
B–63534EN/02<br />
OFFSET/SETTING SCREEN<br />
Tool offset value<br />
OFFSET SETTING WORK (OPRT)<br />
<br />
<br />
⇒ <br />
<br />
<br />
⇒ <br />
<br />
<br />
⇒ <br />
Tool offset value<br />
<br />
<br />
⇒ <br />
<br />
⇒ <br />
<br />
<br />
<br />
⇒ <br />
<br />
<br />
⇒ <br />
<br />
⇒ <br />
<br />
<br />
⇒ <br />
<br />
OFFSET<br />
SETTING<br />
<br />
<br />
⇒ <br />
MACRO MENU OPR TOOLLF (OPRT)<br />
<br />
<br />
<br />
<br />
<br />
<br />
<br />
<br />
<br />
<br />
<br />
<br />
<br />
<br />
<br />
⇒ <br />
<br />
<br />
<br />
<br />
<br />
<br />
<br />
990<br />
<br />
<br />
<br />
<br />
<br />
<br />
<br />
OFFSET<br />
SETTING
B–63534EN/02 OPERATION<br />
11. SETTING AND DISPLAYING DATA<br />
SYSTEM SCREEN<br />
Parameter screen<br />
SYSTEM<br />
PARAM DGNOS PMC SYSTEM (OPRT)<br />
<br />
<br />
⇒ <br />
<br />
⇒ <br />
Parameter screen<br />
<br />
<br />
<br />
⇒ <br />
PITCH SV.PRM SP.PRM (OPRT)<br />
<br />
<br />
⇒ <br />
<br />
991<br />
SYSTEM
11. SETTING AND DISPLAYING DATA OPERATION<br />
B–63534EN/02<br />
s<br />
The table below lists the data set on each screen.<br />
Table. 11 Setting screens and data on them<br />
No. Setting screen Contents of setting<br />
1 Tool offset value Tool offset value<br />
Tool length offset value<br />
Cutter compensation value<br />
992<br />
Reference<br />
item<br />
III–11.4.1<br />
Tool length measurement III–11.4.2<br />
2 Setting data(handy) Parameter write<br />
TV check<br />
Punch code<br />
Input unit (mm/inch)<br />
I/O channel<br />
Automatic insert of Sequence No.<br />
Conversion of tape format (F15)<br />
III–11.4.3<br />
Sequence number comparison and stop III–11.4.4<br />
3 Setting data (mirror image) Mirror image III–11.4.3<br />
4 Setting data (timer) Parts required III–11.4.5<br />
5 Macro variables Custom macro common variables<br />
(#100 to #149) or (#100 to #199)<br />
(#500 to #531) or (#500 to #599)<br />
III–11.4.8<br />
6 Parameter Parameter III–11.5.1<br />
7 Pitch error Pitch error compensation data III–11.5.2<br />
8 software operator’s panel Mode selection<br />
Jog feed axis selection<br />
Jog rapid traverse<br />
Axis selection for Manual pulse generator<br />
Multiplication for manual pulse generator<br />
Jog feedrate<br />
Feedrate override<br />
Rapid traverse override<br />
Optional block skip<br />
Single block<br />
<strong>Machine</strong> lock<br />
Dry run<br />
Protect key<br />
Feed hold<br />
9 Tool life data<br />
(Tool life management)<br />
10 Tool life data<br />
(Extended tool life management)<br />
11 Work coordinate system<br />
setting<br />
12 Current position display<br />
screen<br />
III–11.4.10<br />
Life count III–11.4.11<br />
Life count type (cycle or minute)<br />
Life value<br />
Life counter<br />
Tool number<br />
H code<br />
D code<br />
New tool group<br />
New tool number<br />
Skipping tool<br />
Clearing tool<br />
III–11.4.12<br />
Work origin offset value III–11.4.6<br />
Floating reference position III–11.1.7
B–63534EN/02 OPERATION<br />
11. SETTING AND DISPLAYING DATA<br />
11.1<br />
SCREENS<br />
DISPLAYED BY<br />
FUNCTION KEY<br />
#POS#<br />
POS<br />
Press function key POS to display the current position of the tool.<br />
The following three screens are used to display the current position of the<br />
tool:<br />
⋅Position display screen for the work coordinate system.<br />
⋅Position display screen for the relative coordinate system.<br />
⋅Overall position display screen.<br />
The above screens can also display the feedrate, run time, and the number<br />
of parts. In addition, a floating reference position can be set on these<br />
screens.<br />
Function key POS can also be used to display the load on the servo motor<br />
and spindle motor and the rotation speed of the spindle motor (operating<br />
monitor display).<br />
Function key POS can also be used to display the screen for displaying<br />
the distance moved by handle interruption. See III– 4.8 for details on this<br />
screen.<br />
993
11. SETTING AND DISPLAYING DATA OPERATION<br />
B–63534EN/02<br />
11.1.1<br />
Position Display in the<br />
Work Coordinate<br />
System<br />
Displays the current position of the tool in the workpiece coordinate<br />
system. The current position changes as the tool moves. The least input<br />
increment is used as the unit for numeric values. The title at the top of<br />
the screen indicates that absolute coordinates are used.<br />
Display procedure for the current position screen in the workpiece coordinate system<br />
1 Press function key POS .<br />
2 Press soft key [ABS].<br />
3 Press the [ABS] soft key one more time to display the coordinates<br />
along axes other than the six standard axes.<br />
Display with one–path control<br />
ACTUAL POSITION(ABSOLUTE) O1000 N00010<br />
Display with two–path control<br />
(7 soft keys display unit)<br />
X 123.456<br />
Y 363.233<br />
Z 0.000<br />
RUN TIME 0H15M<br />
PART COUNT 5<br />
CYCLE TIME 0H 0M38S<br />
ACT.F 3000 MM/M S 0 T0000<br />
MEM STRT MTN *** 09:06:35<br />
[ ABS ] [ REL ] [ ALL ] [ HNDL ] [ OPRT ]<br />
ACTUAL POSITION(ABSOLUTE) O1000 N00010<br />
X1 100.000<br />
Z1 200.000<br />
X1 300.000<br />
RUN TIME 0H15M<br />
PART COUNT 5<br />
CYCLE TIME 0H 0M38S<br />
ACT.F 3000 MM/M S 0 T0000<br />
MEM STRT MTN *** 09:06:35 HEAD1<br />
[ ABS ] [ REL ] [ ALL ] [ HNDL ] [(OPRT)]<br />
994
B–63534EN/02 OPERATION<br />
11. SETTING AND DISPLAYING DATA<br />
Display with two–path control<br />
(12 soft keys display unit)<br />
Explanations<br />
Display including<br />
compensation values<br />
Displaying the sixth and<br />
subsequent axes<br />
ACTUAL POSITION O1000 N10010<br />
X1<br />
Y1<br />
Z1<br />
(ACTUAL) (ACTUAL)<br />
100.000<br />
200.000<br />
300.000<br />
X2<br />
Y2<br />
Z2<br />
400.000<br />
500.000<br />
600.000<br />
(ACTUAL SPEED) F : 0MM/MIN<br />
S : 0RPM<br />
(PARTS COUNT) 114<br />
(RUN TIME) 5H 3M<br />
(CYCLE TIME) 0H 0M 6S<br />
995<br />
ALL<br />
O2000 N20010<br />
(ACTUAL SPEED) F : 0MM/MIN<br />
S : 0RPM<br />
(PARTS COUNT) 114<br />
(RUN TIME) 5H 3M<br />
(CYCLE TIME) 0H 0M 6S<br />
MEM STOP *** *** 12:34:56 HEAD1<br />
ABS REL<br />
Bits 6 and 7 of parameter 3104 (DAL, DAC) can be used to select whether<br />
the displayed values include tool length offset and cutter compensation.<br />
Only the coordinates for the first to fifth axes are displayed initially<br />
whenever when there are six or more controlled axes. Pressing the [ABS]<br />
soft key displays the coordinates for the sixth and subsequent axes.
11. SETTING AND DISPLAYING DATA OPERATION<br />
B–63534EN/02<br />
11.1.2<br />
Position Display in the<br />
Relative Coordinate<br />
System<br />
Displays the current position of the tool in a relative coordinate system<br />
based on the coordinates set by the operator. The current position changes<br />
as the tool moves. The increment system is used as the unit for numeric<br />
values. The title at the top of the screen indicates that relative coordinates<br />
are used.<br />
Display procedure for the current position screen with the relative coordinate system<br />
Display with one–path control<br />
Display with two–path control<br />
(7 soft keys display unit)<br />
1 Press function key POS .<br />
2 Press soft key [REL].<br />
3 Press the [REL] soft key one more time to display the coordinates<br />
along axes other than the six standard axes.<br />
ACTUAL POSITION(RELATIVE) O1000 N00010<br />
X 123.456<br />
Y 363.233<br />
Z 0.000<br />
PART COUNT 5<br />
RUN TIME 0H15M CYCLE TIME 0H 0M38S<br />
ACT.F 3000 MM/M S 0 T0000<br />
MEM STRT MTN *** 09:06:35<br />
[ ABS ] [ REL ] [ ALL ] [ HNDL ] [ OPRT ]<br />
See Explanations for the procedure for setting the coordinates.<br />
ACTUAL POSITION(RELATIVE) O1000 N00010<br />
X1 100.000<br />
Y1 200.000<br />
Z 1<br />
300.000<br />
PART COUNT 5<br />
RUN TIME 0H15M CYCLE TIME 0H 0M38S<br />
ACT.F 3000 MM/M S 0 T0000<br />
MEM STRT MTN *** 09:06:35 HEAD1<br />
[ ABS ] [ REL ] [ ALL ] [ HNDL ] [(OPRT)]<br />
996
B–63534EN/02 OPERATION<br />
11. SETTING AND DISPLAYING DATA<br />
Display with two–path control)<br />
(12 soft keys display unit)<br />
Explanations<br />
Setting the relative<br />
coordinates<br />
<br />
X<br />
246.912<br />
Y 913.780<br />
Z 578.246<br />
>X<br />
MEM<br />
PRESET ORIGIN<br />
<br />
ABS REL ALL (OPRT)<br />
ORIGIN<br />
ALLEXE<br />
ACTUAL POSITION O1000 N10010<br />
O2000 N20010<br />
(RELATIVE) (RELATIVE)<br />
X1 Y1 Z1 100.000<br />
200.000<br />
300.000<br />
X2 Y2 Z2 400.000<br />
500.000<br />
600.000<br />
(ACTUAL SPEED) F : 0MM/MIN<br />
S : 0RPM<br />
(PARTS COUNT) 114<br />
(RUN TIME) 5H 3M<br />
(CYCLE TIME) 0H 0M 6S<br />
997<br />
(ACTUAL SPEED) F : 0MM/MIN<br />
S : 0RPM<br />
(PARTS COUNT) 114<br />
(RUN TIME) 5H 3M<br />
(CYCLE TIME) 0H 0M 6S<br />
MEM STOP *** *** 12:34:56 HEAD1<br />
ABS REL ALL HNDL (OPRT) <br />
The current position of the tool in the relative coordinate system can be<br />
reset to 0 or preset to a specified value as follows:<br />
Procedure to set the axis coordinate to a specified value<br />
Procedure to reset all axes<br />
EXEC<br />
1 Enter an axis address (such as X or Y) on the screen for the relative<br />
coordinates. The indication for the specified axis blinks and the soft<br />
keys change as shown on the left.<br />
2 ⋅ To reset the coordinate to 0, press soft key [ORGIN]. The relative<br />
coordinate for the blinking axis is reset to 0.<br />
⋅ To preset the coordinate to a specified value, enter the value and<br />
press soft key [PRESET]. The relative coordinate for the blinking<br />
axis is set to the entered value.<br />
1 Press soft key [(OPRT)].<br />
2 Press soft key [ORIGIN].<br />
3 Press soft key [ALLEXE].<br />
The relative coordinates for all axes are reset to 0.
11. SETTING AND DISPLAYING DATA OPERATION<br />
B–63534EN/02<br />
Display including<br />
compensation values<br />
Presetting by setting a<br />
coordinate system<br />
Displaying the sixth and<br />
subsequent axes<br />
Bits 6 and 7 of parameter 3104 (DRL, DRC) can be used to select whether<br />
the displayed values include tool length offset and cutter compensation.<br />
Bit 3 of parameter 3104 (PPD) is used to specify whether the displayed<br />
positions in the relative coordinate system are preset to the same values<br />
as in the workpiece coordinate system when a coordinate system is set by<br />
a G92 command or when the manual reference position return is made.<br />
Only the coordinates for the first to fifth axes are displayed initially<br />
whenever when there are six or more controlled axes. Pressing the [ABS]<br />
soft key displays the coordinates for the sixth and subsequent axes.<br />
998
B–63534EN/02 OPERATION<br />
11. SETTING AND DISPLAYING DATA<br />
11.1.3<br />
Overall Position<br />
Display<br />
<br />
Displays the following positions on a screen : Current positions of the<br />
tool in the workpiece coordinate system, relative coordinate system, and<br />
machine coordinate system, and the remaining distance. The relative<br />
coordinates can also be set on this screen. See III–11.1.2 for the<br />
procedure.<br />
Procedure for displaying overall position display screen<br />
Display with one–path control<br />
Display with two–path control<br />
(7 soft keys display unit)<br />
1 Press function key POS .<br />
2 Press soft key [ALL].<br />
ACTUAL POSITION O1000 N00010<br />
(RELATIVE)<br />
X 246.912<br />
Y 913.780<br />
Z 1578.246<br />
(MACHINE)<br />
X 0.000<br />
Y 0.000<br />
Z 0.000<br />
999<br />
(ABSOLUTE)<br />
X 123.456<br />
Y 456.890<br />
Z 789.123<br />
(DISTANCE TO GO)<br />
X 0.000<br />
Y 0.000<br />
Z 0.000<br />
PART COUNT 5<br />
RUN TIME 0H15M CYCLE TIME 0H 0M38S<br />
ACT.F 3000 MM/M S 0 T0000<br />
MEM **** *** *** 09:06:35<br />
[ ABS ] [ REL ] [ ALL ] [ HNDL ] [ OPRT ]<br />
ACTUAL POSITION O1000 N00010<br />
(RELATIVE)<br />
X1 100.000<br />
Y1 200.000<br />
Z1 300.000<br />
(MACHINE)<br />
X1 100.000<br />
Y1 200.000<br />
Z1 300.000<br />
(ABSOLUTE)<br />
X1 100.000<br />
Y1 200.000<br />
Z1 300.000<br />
(DISTANCE TO GO)<br />
X1 000.000<br />
Y1 000.000<br />
Z1 000.000<br />
Z2 000.000<br />
PART COUNT 5<br />
RUN TIME 0H15M CYCLE TIME 0H 0M38S<br />
ACT.F 3000 MM/M S 0 T0000<br />
MEM **** *** *** 09:06:35 HEAD1<br />
[ ABS ] [ REL ] [ ALL ] [ HNDL ] [(OPRT)]
11. SETTING AND DISPLAYING DATA OPERATION<br />
B–63534EN/02<br />
Display with two–path control<br />
(12 soft keys display unit)<br />
Explanations<br />
Coordinate display<br />
<br />
<br />
<br />
Displaing the sixth and<br />
subsequent axes<br />
Displaying the fifth and<br />
subsequent axes<br />
Resetting the relative<br />
coordinates<br />
ACTUAL POSITION O1000 N10010<br />
(RELATIVE) (ABSOLUTE)<br />
X1 100.000 X1 100.000<br />
Y1 100.000 Y1 100.000<br />
Z1 300.000 Z1 300.000<br />
(MACHINE)<br />
X1 100.000<br />
Y1 200.000<br />
Z1 300.000<br />
(ACTUAL SPEED) F : 0MM/MIN<br />
S : 0RPM<br />
(PARTS COUNT) 114<br />
(RUN TIME) 5H 3M<br />
(CYCLE TIME) 0H 0M 6S<br />
1000<br />
(DISTANCE TO GO)<br />
X1 000.000<br />
Y1 000.000<br />
Z1 000.000<br />
(RELATIVE)<br />
X1 100.000<br />
Y1 200.000<br />
Z1 300.000<br />
(MACHINE)<br />
X1 100.000<br />
Y1 200.000<br />
Z1 300.000<br />
O2000 N20010<br />
(ABSOLUTE)<br />
X1 100.000<br />
Y1 200.000<br />
Z1 300.000<br />
(DISTANCE TO GO)<br />
X1 000.000<br />
Y1 000.000<br />
Z1 000.000<br />
(ACTUAL SPEED) F : 0MM/MIN<br />
S : 0RPM<br />
(PARTS COUNT) 114<br />
(RUN TIME) 5H 3M<br />
(CYCLE TIME) 0H 0M 6S<br />
MEM STOP *** *** 12:34:56 HEAD1<br />
ABS REL ALL<br />
<br />
The current positions of the tool in the following coordinate systems are<br />
displayed at the same time:<br />
Current position in the relative coordinate system<br />
(relative coordinate)<br />
Current position in the work coordinate system<br />
(absolute coordinate)<br />
Current position in the machine coordinate system<br />
(machine coordinate)<br />
Distance to go (distance to go)<br />
The distance remaining is displayed in the MEMORY or MDI mode. The<br />
distance the tool is yet to be moved in the current block is displayed.<br />
The least command increment is used as the unit for values displayed in<br />
the machine coordinate system. However, the least input increment can<br />
be used by setting bit 0 (MCN) of parameter 3104.<br />
Only the coordinates for the first to fifth axes are displayed initially<br />
whenever there are six or more controlled axes. Pressing the [ALL] soft<br />
key displays the coordinates for the sixth and subsequent axes.<br />
Relative coordinates cannot be displayed together with absolute<br />
coordinates whenever there are five or more controlled axes. Pressing the<br />
[ALL] soft key toggles the display between absolute and relative<br />
coordinates.<br />
The total position display screen also supports the resetting of the relative<br />
coordintes to 0 or presetting of them to specified values. See the procedure<br />
for resetting the relative coordintes described in Subsection III–11.1.2
B–63534EN/02 OPERATION<br />
11. SETTING AND DISPLAYING DATA<br />
11.1.4<br />
Presetting the<br />
Workpiece Coordinate<br />
System<br />
<br />
ABS REL ALL <br />
<br />
<br />
Explanations<br />
Operation mode<br />
Presetting relative<br />
coordinates<br />
A workpiece coordinate system shifted by an operation such as manual<br />
intervention can be preset using MDI operations to a pre–shift workpiece<br />
coordinate system. The latter coordinate system is displaced from the<br />
machine zero point by a workpiece zero point offset value.<br />
A command (G92.1) can be programmed to preset a workpiece coordinate<br />
system. (See II–7.2.4 in the section for programming.)<br />
Procedure for Presetting the Workpiece Coordinate System<br />
1 Press function key POS .<br />
2 Press soft key [(OPRT)].<br />
3 When [WRK–CD] is not displayed, press the continuous menu<br />
key .<br />
4 Press soft key [WRK–CD].<br />
5 Press soft key [ALLAXS] to preset all axes.<br />
6 To preset a particular axis in step 5, enter the axis name ( X , Y ,<br />
...) and 0 , then press soft key [AXS–CD].<br />
This function can be executed when the reset state or automatic operation<br />
stop state is entered, regardless of the operation mode.<br />
As with absolute coordinates, bit 3 (PPD) of parameter No. 3104 is used<br />
to specify whether to preset relative coordinates (RELATIVE).<br />
1001
11. SETTING AND DISPLAYING DATA OPERATION<br />
B–63534EN/02<br />
11.1.5<br />
Actual Feedrate<br />
Display<br />
<br />
The actual feedrate on the machine (per minute) can be displayed on a<br />
current position display screen or program check screen by setting bit 0<br />
(DPF) of parameter 3105. On the 12 soft keys display unit, the actual<br />
feedrate is always displayed.<br />
Display procedure for the actual feedrate on the current position display screen<br />
<br />
<br />
<br />
<br />
1 Press function key POS to display a current position display screen.<br />
ACTUAL POSITION(ABSOLUTE) O1000 N00010<br />
X 123.456<br />
Y 363.233<br />
Z 0.000<br />
PART COUNT 5<br />
RUN TIME 0H15M CYCLE TIME 0H 0M38S<br />
ACT.F 3000 MM/M S 0 T0000<br />
MEM STRT MTN *** 09:06:35<br />
[ ABS ] [ REL ] [ ALL ] [ HNDL ] [ OPRT ]<br />
Actual feedrate is displayed after ACT.F.<br />
The actual feedrate is displayed in units of millimeter/min or inch/min<br />
(depending on the specified least input increment) under the display of the<br />
current position.<br />
The actual rate is calculated by the following expression:<br />
Fact <br />
<br />
n<br />
i1<br />
(fi) 2<br />
where<br />
n : Number of axes<br />
fi : Cutting feed rate in the tangential direction of each axis or rapid<br />
traverse rate<br />
Fact : Actual feedrate displayed<br />
The display unit: mm/min (metric input).<br />
inch/min (<strong>Inc</strong>h input, Two digits below the decimal<br />
point are displayed.)<br />
The feedrate along the PMC axis can be omitted by setting bit 1 (PCF) of<br />
parameter 3105.<br />
In the case of feed per revolution and thread cutting, the actual feedrate<br />
displayed is the feed per minute rather than feed per revolution.<br />
1002
B–63534EN/02 OPERATION<br />
11. SETTING AND DISPLAYING DATA<br />
<br />
<br />
<br />
<br />
In the case of movement of rotary axis, the speed is displayed in units of<br />
deg/min but is displayed on the screen in units of input system at that time.<br />
For example, when the rotary axis moves at 50 deg/min, the following is<br />
displayed: 0.50 INCH/M<br />
The program check screen also displays the actual feedrate.<br />
1003
11. SETTING AND DISPLAYING DATA OPERATION<br />
B–63534EN/02<br />
11.1.6<br />
Display of Run Time<br />
and Parts Count<br />
The run time, cycle time, and the number of machined parts are displayed<br />
on the current position display screens.<br />
Procedure for displaying run time and parts count on the current position display screen<br />
<br />
<br />
PART COUNT<br />
<br />
<br />
<br />
<br />
<br />
<strong>Inc</strong>rementing the number<br />
of machined parts<br />
1 Press function key POS to display a current position display screen.<br />
ACTUAL POSITION(RELATIVE) O1000 N00010<br />
X 123.456<br />
Y 363.233<br />
Z 0.000<br />
PART COUNT 5<br />
RUN TIME 0H15M CYCLE TIME 0H 0M38S<br />
ACT.F 3000 MM/M S 0 T0000<br />
MEM STRT MTN *** 09:06:35<br />
[ ABS ] [ REL ] [ ALL ] [ HNDL ] [ OPRT ]<br />
The number of machined parts (PART COUNT), run time (RUN<br />
TIME), and cycle time (CYCLE TIME) are displayed under the<br />
current position.<br />
Indicates the number of machined parts. The number is incremented each<br />
time M02, M30, or an M code specified by parameter 6710 is executed.<br />
Indicates the total run time during automatic operation, excluding the stop<br />
and feed hold time.<br />
Indicates the run time of one automatic operation, excluding the stop and<br />
feed hold time. This is automatically preset to 0 when a cycle start is<br />
performed at reset state. It is preset to 0 even when power is removed.<br />
Details of the run time and the number of machined parts are displayed<br />
on the setting screen. See III–11.4.5.<br />
The number of machined parts and run time cannot be set on current<br />
position display screens. They can be set by parameters No. 6711, 6751,<br />
and 6752 or on the setting screen.<br />
Bit 0 (PCM) of parameter 6700 is used to specify whether the number of<br />
machined parts is incremented each time M02, M30, or an M code<br />
specified by parameter 6710 is executed, or only each time an M code<br />
specified by parameter 6710 is executed.<br />
1004
B–63534EN/02 OPERATION<br />
11. SETTING AND DISPLAYING DATA<br />
11.1.7<br />
Setting the Floating<br />
Reference Position<br />
<br />
ABS REL ALL (OPRT)<br />
SET FRP<br />
ALLEXE<br />
Explanations<br />
To perform floating reference position return with a G30.1 command, the<br />
floating reference position must be set beforehand.<br />
Procedure for setting the floating reference position<br />
EXEC<br />
<br />
<br />
1 Press function key POS<br />
current position.<br />
to display a screen used for displaying the<br />
2 Move the tool to the floating reference position by jogging.<br />
3 Press soft key [(OPRT)].<br />
4 Press soft key [SET FRP].<br />
5 To register the floating reference positions for all axes, press soft key<br />
[ALLEXE].<br />
To register the floating reference position of a specific axis, enter the<br />
name of the axis [ X , Y , etc.), then press soft key [EXEC]. Two<br />
or more names can be entered consecutively (e.g.,<br />
X Y Z [EXEC]).<br />
The above operation stores the floating reference position. It can be<br />
checked with parameter (no. 1244).<br />
6 In step 4, the floating reference position along a specified axis can<br />
also be stored by entering the axis name (such as X<br />
pressing soft key [SET FRP].<br />
or Y ) and<br />
By parameter FPC (bit 3 of parameter 1201), the relative position can be<br />
preset to 0 when a floating reference position is registered.<br />
1005
11. SETTING AND DISPLAYING DATA OPERATION<br />
B–63534EN/02<br />
11.1.8<br />
Operating Monitor<br />
Display<br />
<br />
Explanations<br />
<br />
<br />
<br />
<br />
Load meter<br />
The reading on the load meter can be displayed for each servo axis and<br />
the serial spindle by setting bit 5 (OPM) of parameter 3111 to 1. The<br />
reading on the speedometer can also be displayed for the serial spindle.<br />
Procedure for displaying the operating monitor<br />
[<br />
1 Press function key POS to display a current position display screen.<br />
2 Press the continuous–menu key .<br />
3 Press soft key [MONI].<br />
OPERATING MONITOR O0001 N00001<br />
(LOAD METER)<br />
X : * * * 80% S1 : 201%<br />
Y : * * * * * 0% (SPEED METER RPM)<br />
Z : * * * * * 0% S1 : * * * 1500<br />
PART COUNT 5<br />
RUN TIME 0H15M CYCLE TIME 0H 0M38S<br />
ACT.F 3000 MM/M<br />
MEM STRT MTN *** 09:06:35<br />
[ MONI ] [ ] [ ] [ ] [ (OPRT) ]<br />
The reading on the load meter can be displayed for up to eight servo axes<br />
by setting parameters 3151 to 3158.<br />
When all these parameters are set to 0, data is displayed only to the 3rd<br />
axis.<br />
When serial spindles are used, the reading on the load meter and<br />
speedometer can be displayed only for the main serial spindle.<br />
The bar graph for the load meter shows load up to 200% (only a value is<br />
displayed for load exceeding 200%). The bar graph for the speedometer<br />
shows the ratio of the current spindle speed to the maximum spindle speed<br />
(100%).<br />
The reading on the load meter depends on servo parameter 2086 and<br />
spindle parameter 4127.<br />
1006
B–63534EN/02 OPERATION<br />
11. SETTING AND DISPLAYING DATA<br />
<br />
<br />
Although the speedometer normally indicates the speed of the spindle<br />
motor, it can also be used to indicate the speed of the spindle by setting<br />
bit 6 (OPS) of parameter 3111 to 1.<br />
The spindle speed to be displayed during operation monitoring is<br />
calculated from the speed of the spindle motor (see the formula below).<br />
The spindle speed can therefore be displayed, during operation<br />
monitoring, even when no position coder is used. To display the correct<br />
spindle speed, however, the maximum spindle speed for each gear<br />
(spindle speed at each gear ratio when the spindle motor rotates at the<br />
maximum speed) must be set in parameters No. 3741 to 3744.<br />
The input of the clutch and gear signals for the first serial spindle is used<br />
to determine the gear which is currently selected. Control the input of the<br />
CTH1A and CTH2A signals according to the gear selection, by referring<br />
to the table below.<br />
(Formula for calculating the spindle speed to be displayed)<br />
Spindle speed<br />
displayed during =<br />
operation monitoring<br />
1007<br />
Speed of spindle motor<br />
Maximum speed of<br />
spindle motor<br />
Maximum spindle<br />
× speed with the<br />
gear being used<br />
The following table lists the correspondence between clutch and gear<br />
selection signals CTH1A and CTH2A, used to determine the gear being<br />
used, and parameters:<br />
CTH1A CTH2A Parameter<br />
Serial<br />
spindle<br />
spec<br />
0 0 =No.3741 (Maximum spindle speed with gear 1) HIGH<br />
0 1 =No.3742 (Maximum spindle speed with gear 2) MEDIUM<br />
HIGH<br />
1 0 =No.3743 (Maximum spindle speed with gear 3) MEDIUM<br />
LOW<br />
1 1 =No.3744 (Maximum spindle speed with gear 4) LOW<br />
The speed of the spindle motor and spindle can be displayed, during<br />
operation monitoring, only for the first serial spindle and the spindle<br />
switching axis for the first serial spindle. It cannot be displayed for the<br />
second spindle.<br />
If the value of a load meter exceeds 100%, the bar graph turns purple.
11. SETTING AND DISPLAYING DATA OPERATION<br />
B–63534EN/02<br />
11.2<br />
SCREENS<br />
DISPLAYED BY<br />
PROG<br />
FUNCTION KEY #PROG#<br />
(IN MEMORY MODE<br />
OR MDI MODE)<br />
This section describes the screens displayed by pressing function key<br />
PROG in MEMORY or MDI mode.The first four of the following screens<br />
display the execution state for the program currently being executed in<br />
MEMORY or MDI mode and the last screen displays the command values<br />
for MDI operation in the MDI mode:<br />
1. Program contents display screen<br />
2. Current block display screen<br />
3. Next block display screen<br />
4. Program check screen<br />
5. Program screen for MDI operation<br />
6. Stamping the machining time<br />
Function key PROG can also be pressed in MEMORY mode to display the<br />
program restart screen and scheduling screen.<br />
See III–4.5 for the program restart screen.<br />
See III–4.6 for the scheduling screen.<br />
1008
B–63534EN/02 OPERATION<br />
11. SETTING AND DISPLAYING DATA<br />
11.2.1<br />
Program Contents<br />
Display<br />
Explanations<br />
<br />
Displays the program currently being executed in MEMORY or MDI<br />
mode.<br />
Procedure for displaying the program contents<br />
1 Press function key PROG to display the program screen.<br />
2 Press chapter selection soft key [PRGRM].<br />
The cursor is positioned at the block currently being executed.<br />
PROGRAM<br />
O2000 ;<br />
O2000 N00130<br />
N100 G92 X0 Y0 Z70. ;<br />
N110 G91 G00 Y–70. ;<br />
N120 Z–70. ;<br />
N130 G42 G39 I–17.5 ;<br />
N140 G41 G03 X–17.5 Y17.5 R17.5 ;<br />
N150 G01 X–25. ;<br />
N160 G02 X27.5 Y27.5 R27.5 ;<br />
N170 G01 X20. ;<br />
N180 G02 X45. Y45. R45. ;<br />
> _ S 0 T0000<br />
MEM STRT *** 16:05:59<br />
[ PRGRM ] [ CHECK ] [ CURRNT ] [ NEXT ] [ (OPRT) ]<br />
On the 12 soft keys display unit, the contents of the program are displayed<br />
on the right half of the screen or on the entire screen (switched each time<br />
soft key [PRGRM] is pressed).<br />
PROGRAM<br />
O0003 ;<br />
N001 G92X0Y0Z0;<br />
N002 G90 G00 Z250.0 T11 M6;<br />
N003 G43 Z0 H11;<br />
N004 S30 M3<br />
N005 G99 G81X400.0 R Y–350.0<br />
Z–153.0R–97.0 F120;<br />
N006 Y–550.0;<br />
N007 G98Y–750.0;<br />
N008 G99X1200.0;<br />
N009 Y–550.0;<br />
N010 G98Y–350.0;<br />
N011 G00X0Y0M5;<br />
N012 G49Z250.0T15M6;<br />
N013 G43Z0H15;<br />
N014 S20M3;<br />
1009<br />
O0006 N00000<br />
N015 G99G82X550.0Y–450.0<br />
Z–130.0R–97.0P300F70;<br />
N016 G98Y–650.0;<br />
N017 G99X1050.0;<br />
N018 G98Y–450.0;<br />
N019 G00X0Y0M5;<br />
N020 G49Z250.0T31M6;<br />
N021 G43Z0H31;<br />
N022 S10M3;<br />
N023 G85G99X800.0Y–350.0<br />
Z–153.0R47.0F50;<br />
N024 G91Y–200.0K2;<br />
N025 G28X0Y0M5;<br />
N026 G49Z0;<br />
N027 M0;<br />
EDIT **** *** *** 07:12:55<br />
↑ ↓
11. SETTING AND DISPLAYING DATA OPERATION<br />
B–63534EN/02<br />
11.2.2<br />
Current Block Display<br />
Screen<br />
<br />
Explanations<br />
<br />
Displays the block currently being executed and modal data in the<br />
MEMORY or MDI mode.<br />
Procedure for displaying the current block display screen<br />
1 Press function key PROG .<br />
2 Press chapter selection soft key [CURRNT].<br />
The block currently being executed and modal data are displayed.<br />
The screen displays up to 22 modal G codes and up to 11 G codes<br />
specified in the current block.<br />
PROGRAM O2000 N00130<br />
(CURRNT) (MODAL)<br />
G01 X 17.500 G67 G01 F 2000<br />
G17 F 2000 G54 G17<br />
G41 H 2 G64 G91<br />
G80 G69 G22<br />
G15 G94<br />
G40 .1 G21 H 2 D<br />
G25 G41<br />
G49 T<br />
G80<br />
G98 S<br />
G50<br />
> _ S 0 T0000<br />
MEM STRT *** 16:05:59<br />
[ PRGRM ] [ CHECK ] [ CURRNT ] [ NEXT ] [ (OPRT) ]<br />
The current block display screen is not provided for 12 soft keys display<br />
unit. Press soft key [PRGRM] to display the contents of the program on<br />
the right half of the screen. The block currently being executed is<br />
indicated by the cursor. Modal data is displayed on the left half of the<br />
screen. The screen displays up to 18 modal G codes.<br />
ACTUAL POSITION<br />
(ABSOLUTE)<br />
X 0.000<br />
Y 0.000<br />
Z 30.000<br />
(MODAL)<br />
<br />
<br />
<br />
<br />
<br />
<br />
<br />
<br />
<br />
1010<br />
O3001 N00000<br />
F 0<br />
PROGRAM<br />
O3001 ;<br />
G40 ;<br />
G49 M06 T9 ;<br />
G0 G54 G90 X0 Y0 ;<br />
G43 Z30. H5 S6000 M3 ;<br />
M0 ;<br />
X17.5 Y–22 ;<br />
Z–6.5 ;<br />
G10 P11 R0.995 F500 ;<br />
M30 ;<br />
%<br />
>_<br />
MEM **** *** *** 07:07:40<br />
MM/MIN
B–63534EN/02 OPERATION<br />
11. SETTING AND DISPLAYING DATA<br />
11.2.3<br />
Next Block Display<br />
Screen<br />
<br />
Displays the block currently being executed and the block to be executed<br />
next in the MEMORY or MDI mode.<br />
Procedure for displaying the next block display screen<br />
1 Press function key PROG .<br />
2 Press chapter selection soft key [NEXT].<br />
The block currently being executed and the block to be executed next<br />
are displayed.<br />
The screen displays up to 11 G codes specified in the current block<br />
and up to 11 G codes specified in the next block.<br />
PROGRAM O2000 N00130<br />
(CURRNT) (NEXT)<br />
G01 X 17.500 G39 I –17.500<br />
G17 F 2000 G42<br />
G41<br />
G80<br />
H 2<br />
> _ S 0 T0000<br />
MEM STRT *** 16:05:59<br />
[ PRGRM ][ CHECK ][ CURRNT ][ NEXT ][ (OPRT) ]<br />
1011
11. SETTING AND DISPLAYING DATA OPERATION<br />
B–63534EN/02<br />
11.2.4<br />
Program Check Screen<br />
<br />
Display with one–path control<br />
(7 soft keys display unit)<br />
Display with two–path control<br />
(7 soft keys display unit)<br />
Displays the program currently being executed, current position of the<br />
tool, and modal data in the MEMORY mode.<br />
Procedure for displaying the program check screen<br />
1 Press function key PROG .<br />
2 Press chapter selection soft key [CHECK].<br />
The program currently being executed, current position of the tool,<br />
and modal data are displayed.<br />
PROGRAM O2000 N00130<br />
O0010 ;<br />
G92 G90 X100. Y200. Z50. ;<br />
G00 X0 Y0 Z0 ;<br />
G01 Z250. F1000 ;<br />
(ABSOLUTE)(DIST TO GO) G00 G94<br />
G80<br />
X 0.000 X 0.000 G17 G21 G98<br />
Y 0.000 Y 0.000 G90 G40 G50<br />
Z 0.000 Z 0.000 G22 G49 G67<br />
B<br />
H M<br />
T D<br />
F S<br />
> _ S 0 T0000<br />
MEM STRT *** 16:05:59<br />
[ PRGRM ][ CHECK ][ CURRNT ][ NEXT ][ (OPRT) ]<br />
PROGRAM<br />
O0010;<br />
O2000 N00130<br />
G92 G90 X100. Y200.0 Z50. ;<br />
G00 X0 Y0 Z0 ;<br />
G01 Z250. F1000 ;<br />
(ABSOLUTE) (DIST TO GO) G00 G94 G80<br />
X1 0.000 X1 0.000 G17 G21 G98<br />
Y1 0.000 Y1 0.000 G90 G40 G50<br />
Z1 0.000 Z1 0.000 G22 G49<br />
B<br />
G67<br />
H M<br />
T D<br />
F S<br />
MEM STRT *** 16:05:59 HEAD1<br />
[ PRGRM ] [ CH ECK ] [ CURRNT ] [ NEXT ] [ (OPRT) ]<br />
1012
B–63534EN/02 OPERATION<br />
11. SETTING AND DISPLAYING DATA<br />
Display with two–path control<br />
(12 soft keys display unit)<br />
Explanations<br />
<br />
<br />
Modal G codes<br />
Display during automatic<br />
operation<br />
T codes<br />
PROGRAM CHECK O1000 N01010<br />
O0010 ;<br />
G92 G90 X100.0 Y200. Z50. ;<br />
G00 X0 Y0 Z0 ;<br />
G01 Z250. F1000 ;<br />
X50. Y20. ;<br />
(RELATIVE) (ABSOLUTE) (DIST TO GO)<br />
X1 0.000 X1 0.000 X1 0.000<br />
Y1 0.000 Y1 0.000 Y1 0.000<br />
Z1 0.000 Z1 0.000 Z1 0.000<br />
(MODAL)<br />
G00 G22 G40 G98 M<br />
G17 G94 G49 G50 M<br />
G90 G21 G80 G67 M<br />
H T<br />
B<br />
F 1000.000 (ACT.F) 0MM/MIN<br />
S 20 (ACT.S) 0RPM<br />
>_<br />
1013<br />
PROGRAM CHECK O2000 N02010<br />
O0020 ;<br />
G28 X10. Y10. Z10. ;<br />
G00 X50. Y20. Z–50. ;<br />
X100. ;<br />
G01 Z–100. F2000 ;<br />
(RELATIVE) (ABSOLUTE) (DIST TO GO)<br />
X2 0.000 X2 0.000 X2 0.000<br />
Y2 0.000 Y2 0.000 Y2 0.000<br />
Z2 0.000 Z2 0.000 Z2 0.000<br />
(MODAL)<br />
G00 G98 G25 G67 M<br />
G97 G21 G22 G54 M<br />
G69 G40 G90 G18 M<br />
B<br />
H T<br />
F 0.000 (ACT.F) 0MM/MIN<br />
S 30 (ACT.S) 0RPM<br />
S 0 T0000<br />
MEM STOP *** *** 14:00:00 HEAD1<br />
PRGRM CHECK NEXT (OPRT) <br />
The screen displays up to four blocks of the current program, starting from<br />
the block currently being executed. The block currently being executed<br />
is displayed in reverse video. During DNC operation, however, only three<br />
blocks can be displayed.<br />
The position in the workpiece coordinate system or relative coordinate<br />
system and the remaining distance are displayed. The absolute positions<br />
and relative positions are switched by soft keys [ABS] and [REL].<br />
When there are six or more controlled axes, pressing the [ABS] soft key<br />
toggles the display between the absolute coordinates for the first to fifth<br />
axes and those for the sixth to eighth axes. Pressing the [REL] soft key<br />
toggles the relative coordinate display in the same way.<br />
Up to 12 modal G codes are displayed.<br />
During automatic operation, the actual speed, SACT, and repeat count are<br />
displayed. The key input prompt (>_) is displayed otherwise.<br />
Then bit 2 (PCT) of parameter No. 3108 is set to 1, the T codes specified<br />
with the PMC (HD.T/NX.T) are displayed instead of those specified in<br />
the program. Refer to the FANUC PMC Programming Manual<br />
(B–61863E) for details of HD.T/NX.T.
11. SETTING AND DISPLAYING DATA OPERATION<br />
B–63534EN/02<br />
<br />
The program check screen is not provided for 12 soft keys display unit.<br />
Press soft key [PRGRM] to display the contents of the program on the<br />
right half of the screen. The block currently being executed is indicated<br />
by the cursor. The current position of the tool and modal data are<br />
displayed on the left half of the screen.<br />
Up to 18 modal G codes are displayed.<br />
ACTUAL POSITION<br />
(ABSOLUTE)<br />
X 0.000<br />
Y 0.000<br />
Z 30.000<br />
1014<br />
O3001 N00000<br />
F 0<br />
MM/MIN<br />
(MODAL)<br />
<br />
PROGRAM<br />
O3001 ;<br />
G40 ;<br />
G49 M06 T9 ;<br />
G0 G54 G90 X0 Y0 ;<br />
G43 Z30. H5 S6000 M3 ;<br />
M0 ;<br />
X17.5 Y–22 ;<br />
<br />
Z–6.5 ;<br />
G10 P11 R0.995 F500 ;<br />
<br />
M30 ;<br />
<br />
%<br />
<br />
>_<br />
<br />
MEM **** *** *** 07:07:40
B–63534EN/02 OPERATION<br />
11. SETTING AND DISPLAYING DATA<br />
11.2.5<br />
Program Screen for<br />
MDI Operation<br />
Procedure<br />
Explanations<br />
<br />
<br />
Displaying during<br />
automatic operation<br />
Displays the program input from the MDI and modal data in the MDI<br />
mode.<br />
Procedure for displaying the program screen for MDI operation<br />
Program<br />
Modal information<br />
1 Press function key PROG .<br />
2 Press chapter selection soft key [MDI].<br />
The program input from the MDI and modal data are displayed.<br />
PROGRAM (MDI) O2000 N00130<br />
O0000 G00 X100.0 Z200.0 ;<br />
M03 ;<br />
G01 Z120.0 F500 ;<br />
M98 P9010 ;<br />
G00 Z0.0 ;<br />
%<br />
G00 G90 G94 G40 G80 G50 G54 G69<br />
G17 G22 G21 G49 G98 G67 G64 G15<br />
H M<br />
T D<br />
F S<br />
> _ S 0 T0000<br />
MDI **** *** *** 16:05:59<br />
[ PRGRM ] [ MDI ] [ CURRNT ] [ NEXT ] [ (OPRT) ]<br />
See III–4.2 for MDI operation.<br />
The modal data is displayed when bit 7 (MDL) of parameter 3107 is set<br />
to 1. Up to 16 modal G codes are displayed. On the 12 soft keys display<br />
unit, however, the contents of the program are displayed on the right half<br />
of the screen and the modal data is displayed on the left half of the screen,<br />
regardless of this parameter.<br />
During automatic operation, the actual speed, SACT, and repeat count are<br />
displayed. The key input prompt (>_) is displayed otherwise.<br />
1015
11. SETTING AND DISPLAYING DATA OPERATION<br />
B–63534EN/02<br />
11.2.6<br />
Stamping the<br />
Machining Time<br />
<br />
<br />
<br />
When a machining program is executed, the machining time of the main<br />
program is displayed on the program machining time display screen. The<br />
machining times of up to ten main programs are displayed in<br />
hours/minutes/seconds. When more than ten programs are executed, data<br />
for the oldest programs is discarded.<br />
Procedure for Stamping Machining Time<br />
1 Select the memory operation mode, then press the RESET key.<br />
2 Select the program screen, then select a program whose machining<br />
time is to be calculated.<br />
3 Execute the program to perform actual machining.<br />
4 When the RESET key is pressed, or M02 or M30 is executed, the<br />
machining time count operation stops. When the machining time<br />
display screen is selected, the program number of the stopped main<br />
program and its machining time are displayed.<br />
To display the machining time display screen, use the procedure<br />
below. (Machining time data can be displayed in any mode and<br />
during background editing.)<br />
Press the function key PROG .<br />
Press the rightmost soft key once or twice to display soft key [TIME].<br />
Press soft key [TIME]. The machining time display screen appears.<br />
PROGRAM (TIME) O0010 N00002<br />
NO. TIME<br />
O0020 12H48M02S<br />
> _<br />
EDIT **** *** *** 16:52:13<br />
[ TIME ] [ ] [ ] [ ] [ (OPRT) ]<br />
1016<br />
Machining time display screen
B–63534EN/02 OPERATION<br />
11. SETTING AND DISPLAYING DATA<br />
5 To calculate the machining times of additional programs, repeat the<br />
above procedure. The machining time display screen displays the<br />
executed main program numbers and their machining times<br />
sequentially.<br />
Note, that machining time data cannot be displayed for more than ten<br />
main programs. When more than ten programs are executed, data for<br />
the oldest programs is discarded. The screens below show how the<br />
screen display changes from the initial state where the machining times<br />
of ten main programs (O0020, O0040, ..., and O0200) are displayed<br />
to the state where the machining time of the main program O0220 is<br />
calculated.<br />
PROGRAM (TIME) O0000 N00000<br />
NO. TIME<br />
O0020 12H48M01S<br />
O0040 0H48M01S<br />
O0060 4H16M01S<br />
O0080 0H16M01S<br />
O0100 1H20M01S<br />
O0120 2H08M02S<br />
O0140 2H32M01S<br />
O0160 0H51M01S<br />
O0180 15H04M01S<br />
O0200 0H56M01S<br />
>_<br />
EDIT **** *** *** 16:52:13<br />
[ TIME ][ ][ ][ ][(OPRT) ]<br />
PROGRAM (TIME) O0000 N00000<br />
NO. TIME<br />
O0040 0H48M01S<br />
O0060 4H16M01S<br />
O0080 0H16M01S<br />
O0100 1H20M01S<br />
O0120 2H08M02S<br />
O0140 2H32M01S<br />
O0160 0H51M01S<br />
O0180 15H04M01S<br />
O0200 0H56M01S<br />
O0220 0H03M01S<br />
>_<br />
EDIT **** *** *** 16:52:20<br />
[ TIME ][ ][ ][ ][(OPRT) ]<br />
1017
11. SETTING AND DISPLAYING DATA OPERATION<br />
B–63534EN/02<br />
<br />
<br />
<br />
1 To insert the calculated machining time of a program in a program as a<br />
comment, the machining time of the program must be displayed on<br />
the machining time display screen. Before stamping the machining<br />
time of the program, check that the machining time display screen<br />
shows the program number<br />
2 Set the part program storage and edit mode or background edit state<br />
and select the program screen. Then select the program whose<br />
machining time is to be inserted.<br />
3 Suppose that the machining time of O0100 is displayed on the<br />
machining time display screen.Press soft key [(OPRT)] to display the<br />
operation soft keys. Then, hold down the rightmost soft key until soft<br />
key [TIME–INSERT] appears. When soft key [TIME–INSERT] is<br />
pressed, the cursor moves to the start of the program, and the<br />
machining time of the program is inserted after the program number.<br />
PROGRAM O0100 N00000<br />
O0100 ;<br />
N10 G92 X100. Z10. ;<br />
N20 S1500 M03 ;<br />
N30 G00 X20.5 Z5. T0101 ;<br />
N40 G01 X–10. F25. ;<br />
N50 G02 X–16.5 Z–12. R2. ;<br />
N60 G01 X40. ;<br />
N70 X42. Z–13. ;<br />
N80 Z–50. ;<br />
N90 X44. Z–51. ;<br />
N100 X80. ;<br />
EDIT *** *** *** *** 16:05:59<br />
[ INS–TM ] [ ] [ ] [ ] [ ]<br />
PROGRAM O0100 N00000<br />
O0100 (001H20M01S) ;<br />
N10 G92 X100. Z10. ;<br />
N20 S1500 M03 ;<br />
N30 G00 X20.5 Z5. T0101 ;<br />
N40 G01 Z–10. F25. ;<br />
N50 G02 X16.5 Z–12. R2. ;<br />
N60 G01 X40. ;<br />
N70 X42. Z–13. ;<br />
N80 Z–50. ;<br />
N90 X44. Z–51. ;<br />
N100 X80. ;<br />
EDIT *** *** *** *** 16:05:59<br />
[ INS–TM ] [ ] [ ] [ ] [ ]<br />
1018
B–63534EN/02 OPERATION<br />
11. SETTING AND DISPLAYING DATA<br />
4 If a comment already exists in the block containing the program<br />
number of a program whose machining time is to be inserted, the<br />
machining time is inserted after the existing comment.<br />
PROGRAM O0100 0N0000<br />
O0100 (SHAFT XSF001) ;<br />
N10 G92 X100. Z10. ;<br />
N20 S1500 M03 ;<br />
N30 G00 X20.5 Z5. T0101 ;<br />
N40 G01 X–10. F25. ;<br />
N50 G02 X16.5 Z–12. R2. ;<br />
N60 G01 X40. ;<br />
N70 X42. Z–13. ;<br />
N80 Z–50. ;<br />
N90 X44. Z–51. ;<br />
N100 X80. ;<br />
EDIT *** *** *** *** 16:52:13<br />
[ INS–TM ] [ ] [ ] [ ] [ ]<br />
PROGRAM O0100 N00000<br />
O0100 (SHAFT XSF001)(001H20M01S) ;<br />
N10 G92 X100. Z10. ;<br />
N20 S1500 M03 ;<br />
N30 G00 X20.5 Z5. T0101 ;<br />
N40 G01 Z–10. F25. ;<br />
N50 G02 X16.5 Z–12. R2. ;<br />
N60 G01 X40. ;<br />
N70 X42. Z–13. ;<br />
N80 Z–50. ;<br />
N90 X44. Z–51. ;<br />
N100 X80. ;<br />
EDIT *** *** *** *** 16:52:13<br />
[ INS–TM ] [ ] [ ] [ ] [ ]<br />
5 The machining time of a program inserted as a comment can be<br />
displayed after an existing program comment on the program<br />
directory screen.<br />
PROGRAM DIRECTORY O0001 N00010<br />
PROGRAM (NUM.) MEMORY (CHAR.)<br />
USED: 60 3321<br />
FREE: 2 429<br />
O0020 (GEAR XGR001 ):(012H48M01S)<br />
O0002 (GEAR XGR002 ):(000H48M01S)<br />
O0010 (BOLT YBT001 ):(004H16M01S)<br />
O0020 (BOLT YBT002 ):(000H16M01S)<br />
O0040 (SHAFT XSF001):(001H20M01S)<br />
O0050 (SHAFT XSF002):(002H08M01S)<br />
O0100 (SHAFT XSF011 ):(002H32M02S)<br />
O0200<br />
>_<br />
(PLATE XPL100 ):(000H51M01S)<br />
EDIT **** *** *** 14:46:09<br />
[ PRGRM ] [ DIR ] [ ] [ ] [ (OPRT) ]<br />
1019
11. SETTING AND DISPLAYING DATA OPERATION<br />
B–63534EN/02<br />
Explanations<br />
Machining time<br />
Stamping the machining<br />
time<br />
Program directory<br />
Limitations<br />
Alarm<br />
M02<br />
Stamping the machining<br />
time<br />
Machining time is counted from the initial start after a reset in memory<br />
operation mode to the next reset. If a reset does not occur during<br />
operation, machining time is counted from the start to M03 (or M30).<br />
However, note that the time during which operation is held is not counted,<br />
but the time used to wait for completion of M, S, T, and/or B functions<br />
is counted.<br />
The displayed machining time can be inserted (stamped) as a comment<br />
in a program stored in memory. Machining time is inserted as a comment<br />
after the program number.<br />
The machining time inserted after a program number can be displayed on<br />
the program directory screen by setting bit 0 (NAM) of parameter No.<br />
3107 to 1. This lets the user know the machining time of each program.<br />
This information is useful as reference data when planning processing.<br />
When program execution is terminated by an alarm during the machining<br />
time count, the machining time until the alarm is released is counted.<br />
If the user specifies that M02 does not reset the CNC but returns<br />
completion signal FIN to the CNC to restart the program from the<br />
beginning successively (with bit 5 (M02) of parameter No. 3404 set to 0),<br />
the machining time count stops when M02 returns completion signal FIN.<br />
When the machining time of a program to be stamped is not displayed on<br />
the machining time display screen, the machining time cannot be inserted<br />
into the program even if soft key [INS–TM] is pressed.<br />
1020
B–63534EN/02 OPERATION<br />
11. SETTING AND DISPLAYING DATA<br />
Program directory<br />
When the machining time inserted into a program is displayed on the<br />
program directory screen and the comment after the program number<br />
consists of only machining time data, the machining time is displayed in<br />
both the program name display field and machining time display field.<br />
If machining time data is inserted into a program as shown below, the<br />
program directory screen does not display the data or displays only part<br />
of the data.<br />
Example 1 Program directory screen when a program name<br />
longer than 16 characters<br />
PROGRAM O0100 N00000<br />
O0240 (SHAFT XSF301 MATERIAL=FC25)<br />
(001H20M01S);<br />
N10 G92 X100. Z10. ;<br />
N20 S1500 M03 ;<br />
N30 G00 X20.5 Z5. T0101 ;<br />
N40 G01 Z–10. F25. ;<br />
N50 G02 X16.5 Z–12. R2. ;<br />
N60 G01 X40. ;<br />
N70 X42. Z–13. ;<br />
N80 Z–50. ;<br />
N90 X44. Z–51. ;<br />
EDIT *** *** *** *** 16:52:13<br />
[ INS–TM ] [ ] [ ] [ ] [ ]<br />
All characters after the first 16 characters of the<br />
program comment are discarded and the machining time<br />
display field is left blank.<br />
PROGRAM DIRECTORY O0001 N00010<br />
PROGRAM (NUM.) MEMORY (CHAR.)<br />
USED: 60 3321<br />
FREE: 2 429<br />
O0240 (SHAFT XSF301 ) : ( )<br />
>_<br />
EDIT **** *** *** 16:52:13<br />
[ PRGRM ] [ DIR ] [ ] [ ] [ (OPRT) ]<br />
1021
11. SETTING AND DISPLAYING DATA OPERATION<br />
B–63534EN/02<br />
Example 2 Program directory screen when two or more machining<br />
times are stamped.<br />
PROGRAM O0260 N00000<br />
O0260 (SHAFT XSF302) (001H15M59S)<br />
(001H20M01S) ;<br />
N10 G92 X100. Z10. ;<br />
N20 S1500 M03 ;<br />
N30 G00 X20.5 Z5. T0101 ;<br />
N40 G01 Z–10. F25. ;<br />
N50 G02 X16.5 Z–12. R2. ;<br />
N60 G01 X40. ;<br />
N70 X42. Z–13. ;<br />
N80 Z–50. ;<br />
N90 X44. Z–51. ;<br />
EDIT *** *** *** *** 16:52:13<br />
[ INS–TM ] [ ] [ ] [ ] [ ]<br />
Only the first machining time is displayed.<br />
PROGRAM DIRECTORY O0001 N00010<br />
PROGRAM (NUM.) MEMORY (CHAR.)<br />
USED: 60 3321<br />
FREE: 2 429<br />
O0260 (SHAFT XSF302 ) : (001H15M59S)<br />
>_<br />
EDIT **** *** *** 16:52:13<br />
[ PRGRM ] [ DIR ] [ ] [ ] [ (OPRT) ]<br />
1022
B–63534EN/02 OPERATION<br />
11. SETTING AND DISPLAYING DATA<br />
Correcting the<br />
machining time<br />
Example 3 Program directory screen when inserted machining time data<br />
does not conform to the format hhhHmmMssS (3–digit<br />
number followed by H, 2–digit number followed by M, and<br />
2–digit number followed by S, in this order)<br />
PROGRAM O0280 N00000<br />
O0280 (SHAFT XSF303) (1H10M59S)<br />
N10 G92 X100. Z10. ;<br />
N20 S1500 M03 ;<br />
N30 G00 X20.5 Z5. T0101 ;<br />
N40 G01 Z–10. F25. ;<br />
N50 G02 X16.5 Z–12. R2. ;<br />
N60 G01 X40. ;<br />
N70 X42. Z–13. ;<br />
N80 Z–50. ;<br />
N90 X44. Z–51. ;<br />
N100 X80. ;<br />
EDIT *** *** *** *** 16:52:13<br />
[ INS–TM ] [ ] [ ] [ ] [ ]<br />
The machining time display field is blank.<br />
PROGRAM DIRECTORY O0001 N00010<br />
PROGRAM (NUM.) MEMORY (CHAR.)<br />
USED: 60 3321<br />
FREE: 2 429<br />
O0260 (SHAFT XSF302 ) : (001H15M59S)<br />
O0280 (SHAFT XSF303 ) : ( )<br />
>_<br />
EDIT **** *** *** 16:52:13<br />
[ PRGRM ] [ DIR ] [ ] [ ] [ (OPRT) ]<br />
If an incorrect machining time is calculated (such as when a reset occurs<br />
during program execution), reexecute the program to calculate the correct<br />
machining time. If the machining time display screen displays multiple<br />
programs with the same program number, select the machining time of the<br />
latest program number for insertion into the program.<br />
1023
11. SETTING AND DISPLAYING DATA OPERATION<br />
B–63534EN/02<br />
11.3<br />
SCREENS<br />
DISPLAYED BY<br />
PROG<br />
FUNCTION KEY #PROG#<br />
(IN THE EDIT MODE)<br />
11.3.1<br />
Displaying Memory<br />
Used and a List of<br />
Programs<br />
<br />
This section describes the screens displayed by pressing function key<br />
PROG in the EDIT mode. Function key PROG in the EDIT mode can<br />
display the program editing screen and the program list screen (displays<br />
memory used and a list of programs). Pressing function key PROG in the<br />
EDIT mode can also display the conversational graphics programming<br />
screen and the floppy file directory screen. See III–9 and 10 for the<br />
program editing screen and conversational graphics programming screen.<br />
See III–8 for the floppy file directory screen.<br />
Displays the number of registered programs, memory used, and a list of<br />
registered programs.<br />
Procedure for displaying memory used and a list of programs<br />
1 Select the EDIT mode.<br />
2 Press function key PROG .<br />
3 Press chapter selection soft key [DIR].<br />
PROGRAM DIRECTORY O0001 N00010<br />
PROGRAM (NUM.) MEMORY (CHAR.)<br />
USED: 60 3321<br />
FREE: 2 429<br />
O0010 O0001 O0003 O0002 O0555 O0999<br />
O0062 O0004 O0005 O1111 O0969 O6666<br />
O0021 O1234 O0588 O0020 O0040<br />
> _ S 0 T0000<br />
MDI **** *** *** 16:05:59<br />
[ PRGRM ] [ DIR ] [ ] [ C.A.P. ] [ (OPRT) ]<br />
1024
B–63534EN/02<br />
Explanations<br />
Details of memory used<br />
<br />
<br />
Order in which programs<br />
are displayed in the<br />
program library list<br />
OPERATION<br />
1025<br />
11. SETTING AND DISPLAYING DATA<br />
PROGRAM NO. USED<br />
PROGRAM NO. USED : The number of the programs registered<br />
(including the subprograms)<br />
FREE : The number of programs which can be<br />
registered additionally.<br />
MEMORY AREA USED<br />
MEMORY AREA USED : The capacity of the program memory in which<br />
data is registered (indicated by the number of<br />
characters).<br />
FREE : The capacity of the program memory which<br />
can be used additionally (indicated by the<br />
number of characters).<br />
Program Nos. registered are indicated.<br />
Also, the program name can be displayed in the program table by setting<br />
parameter NAM (No. 3107#0) to 1.<br />
PROGRAM DIRECTORY O0001 N00010<br />
PROGRAM (NUM.) MEMORY (CHAR.)<br />
USED: 60 3321<br />
FREE: 2 429<br />
O0001 (MACRO–GCODE.MAIN)<br />
O0002 (MACRO–GCODE.SUB1)<br />
O0010 (TEST–PROGRAM.ARTHMETIC NO.1)<br />
O0020 (TEST–PROGRAM.F10–MACRO)<br />
O0040 (TEST–PROGRAM.OFFSET)<br />
O0050<br />
O0100 (INCH/MM CONVERT CHECK NO.1)<br />
O0200 (MACRO–MCODE.MAIN)<br />
> _<br />
EDIT **** *** *** 16:05:59<br />
[ PRGRM ] [ DIR ] [ ] [ C.A.P. ] [ (OPRT) ]<br />
Always enter a program name between the control out and control in<br />
codes immediately after the program number.<br />
Up to 31 characters can be used for naming a program within the<br />
parentheses. If 31 characters are exceeded, the exceeded characters are<br />
not displayed.<br />
Only program number is displayed for the program without any program<br />
name.<br />
∆∆∆∆…∆ <br />
<br />
Programs are displayed in the same order that they are registered in the<br />
program library list. However, if bit 4 (SOR) of parameter 3107 is set to<br />
1, programs are displayed in the order of program number starting from<br />
the smallest one.
11. SETTING AND DISPLAYING DATA OPERATION<br />
B–63534EN/02<br />
Order in which programs<br />
are registered<br />
When no program has been deleted from the list, each program is<br />
registered at the end of the list.<br />
If some programs in the list were deleted, then a new program is<br />
registered, the new program is inserted in the empty location in the list<br />
created by the deleted programs.<br />
Example) When bit 4 (SOR) of parameter 3107 is 0<br />
1. After clearing all programs, register programs O0001, O0002, O0003,<br />
O0004, and O0005 in this order. The program library list displays the<br />
programs in the following order:<br />
O0001, O0002, O0003, O0004, O0005<br />
2. Delete O0002 and O0004. The program library list displays the<br />
programs in the following order:<br />
O0001, O0003, O0005<br />
3. Register O0009. The program library list displays the programs in the<br />
following order:<br />
O0001, O0009, O0003, O0005<br />
1026
B–63534EN/02<br />
11.3.2<br />
Displaying a Program<br />
List for a Specified<br />
Group<br />
<br />
OPERATION<br />
1027<br />
11. SETTING AND DISPLAYING DATA<br />
In addition to the normal listing of the numbers and names of CNC<br />
programs stored in memory, programs can be listed in units of groups,<br />
according to the product to be machined, for example.<br />
To assign CNC programs to the same group, assign names to those<br />
programs, beginning each name with the same character string.<br />
By searching through the program names for a specified character string,<br />
the program numbers and names of all the programs having names<br />
including that string are listed.<br />
Procedure for Displaying a Program List for a Specified Group<br />
BG–EDT O–SRH GROUP<br />
(NAME)<br />
PR–GRP<br />
1 Enter EDIT or background editing mode.<br />
2 Press the PROG function key.<br />
3 Press the PROG<br />
list.<br />
function key or [DIR] soft key to display the program<br />
PROGRAM DIRECTORY O0001 N00010<br />
PROGRAM (NUM.) MEMORY (CHAR.)<br />
USED: 60 3321<br />
FREE: 2 429<br />
O0020 (GEAR–1000 MAIN)<br />
O0040 (GEAR–1000 SUB–1)<br />
O0060 (SHAFT–2000 MAIN)<br />
O0100 (SHAFT–2000 SUB–1)<br />
O0200 (GEAR–1000 SUB–2)<br />
O1000 (FRANGE–3000 MAIN)<br />
O2000 (GEAR–1000 SUB–3)<br />
O3000 (SHAFT–2000 SUB–2)<br />
> _<br />
EDIT **** *** *** *** 16:52:13<br />
[ PRGRM ] [ DIR ] [ ] [ ] [ (OPRT) ]<br />
4 Press the [(OPRT)] operation soft key.<br />
5 Press the [GROUP] operation soft key.<br />
6 Press the [NAME] operation soft key.<br />
7 Enter the character string corresponding to the group for which a<br />
search is to be made, using the MDI keys. No restrictions are imposed<br />
on the length of a program name. Note, however, that search is made<br />
based on only the first 32 characters.<br />
Example: To search for those CNC programs having names that<br />
begin with character string “GEAR–1000,” enter the<br />
following:<br />
>GEAR–1000*_
11. SETTING AND DISPLAYING DATA OPERATION<br />
B–63534EN/02<br />
Explanations<br />
* and ?<br />
EXEC<br />
8 Pressing the [EXEC] operation soft key displays the group–unit<br />
program list screen, listing all those programs whose name includes<br />
the specified character string.<br />
PROGRAM DIRECTORY (GROUP) O0001 N00010<br />
PROGRAM (NUM.) MEMORY (CHAR.)<br />
USED: 60 3321<br />
FREE: 2 429<br />
O0020 (GEAR–1000 MAIN)<br />
O0040 (GEAR–1000 SUB–1)<br />
O0200 (GEAR–1000 SUB–2)<br />
O2000 (GEAR–1000 SUB–3)<br />
> _<br />
EDIT **** *** *** *** 16:52:25<br />
[ PRGRM ] [ DIR ] [ ] [ ] [ (OPRT) ]<br />
[Group–unit program list screen displayed<br />
when a search is made for “GEAR–1000*”]<br />
When the program list consists of two or more pages, the pages can be<br />
changed by using a page key.<br />
In the above example, the asterisk (*) must not be omitted. The asterisk<br />
indicates an arbitrary character string (wild card specification).<br />
“GEAR–1000*” indicates that the first nine characters of the target<br />
program names must be “GEAR–1000,” followed by an arbitrary<br />
character string. If only “GEAR–1000” is entered, a search is made only<br />
for those CNC programs having the nine–character name “GEAR–1000.”<br />
A question mark (?) can be used to specify a single arbitrary character.<br />
For example, entering “????–1000” enables a search to be made for<br />
programs having names which start with four arbitrary characters,<br />
followed by “–1000”.<br />
1028
B–63534EN/02<br />
When the specified<br />
character string cannot<br />
be found<br />
Holding the group for<br />
which a search is made<br />
Group for which<br />
previous search was<br />
made<br />
Examples<br />
OPERATION<br />
1029<br />
11. SETTING AND DISPLAYING DATA<br />
[Example of using wild cards]<br />
(Entered character string) (Group for which the search will be made)<br />
(a) “*” CNC programs having any name<br />
(b) “*ABC” CNC programs having names which end<br />
with “ABC”<br />
(c) “ABC*” CNC programs having names which start<br />
with “ABC”<br />
(d) “*ABC*” CNC programs having names which<br />
include “ABC”<br />
(e) “?A?C” CNC programs having four–character<br />
names, the second and fourth characters<br />
of which are A and C, respectively<br />
(f) “??A?C” CNC programs having five–character<br />
names, the third and fifth characters of<br />
which are A and C, respectively<br />
(g) “123*456” CNC programs having names which start<br />
with “123” and which end with “456”<br />
If no program is located as a result of a search for an entered character<br />
string, warning message “DATA NOT FOUND” is displayed on the<br />
program list screen.<br />
A group–unit program list, generated by a search, is held until the power<br />
is turned off or until another search is performed.<br />
After changing the screen from the group–unit program list to another<br />
screen, pressing the [PR–GRP] operation soft key (displayed in step 6)<br />
redisplays the group–unit program list screen, on which the program<br />
names for the previously searched group are listed. Using this soft key<br />
eliminates the need to enter the relevant character string again to redisplay<br />
the search results after changing the screen.<br />
Assume that the main programs and subprograms for machining gear part<br />
number 1000 all have names which include character string<br />
“GEAR–1000.” The numbers and names of those programs can be listed<br />
by searching through the names of all CNC programs for character string<br />
“GEAR–1000.” This function facilitates the management of the CNC<br />
programs stored in large–capacity memory.
11. SETTING AND DISPLAYING DATA OPERATION<br />
B–63534EN/02<br />
11.4<br />
SCREENS<br />
DISPLAYED BY<br />
FUNCTION KEY<br />
OFFSET<br />
SETTING<br />
#OFFSETSETTING#<br />
Press function key OFFSET<br />
SETTING to display or set tool compensation values and<br />
other data.<br />
This section describes how to display or set the following data:<br />
1. Tool offset value<br />
2. Settings<br />
3. Run time and part count<br />
4. Workpiece origin offset value<br />
5. Custom macro common variables<br />
6. Pattern menu and pattern data<br />
7. Software operator’s panel<br />
8. Tool life management data<br />
9. Chopping data<br />
10. Rotary table dynamic fixture offset data<br />
This section also describes measurement of tool length and the sequence<br />
number comparison and stop function.<br />
The pattern menu, pattern data, software operator’s panel, and tool life<br />
management data depend on the specifications of the machine tool<br />
builder. See the manual issued by the machine tool builder for details.<br />
1030
B–63534EN/02<br />
11.4.1<br />
Setting and Displaying<br />
the Tool Offset Value<br />
<br />
OPERATION<br />
1031<br />
11. SETTING AND DISPLAYING DATA<br />
Tool offset values, tool length offset values, and cutter compensation<br />
values are specified by D codes or H codes in a program. Compensation<br />
values corresponding to D codes or H codes are displayed or set on the<br />
screen.<br />
Procedure for setting and displaying the tool offset value<br />
1 Press function key OFFSET<br />
SETTING .<br />
For the two–path control, select the tool post for which tool<br />
compensation values are to be displayed with the tool post selection<br />
switch.<br />
2 Press chapter selection soft key [OFFSET] or press OFFSET<br />
SETTING<br />
times until the tool compensation screen is displayed.<br />
several<br />
The screen varies according to the type of tool offset memory.<br />
OFFSET O0001 N00000<br />
NO. DATA NO. DATA<br />
001 1.000 009 0.000<br />
002 –2.000 010 –7.500<br />
003 0.000 011 12.000<br />
004 5.000 012 –20.000<br />
005 0.000 013 0.000<br />
006 0.000 014 0.000<br />
007 0.000 015 0.000<br />
008 0.000 016 0.000<br />
ACTUAL POSITION (RELATIVE)<br />
X 0.000 Y 0.000<br />
Z 0.000<br />
> _<br />
MDI **** *** *** 16:05:59<br />
[ OFFSET ] [ SETING ] [ WORK ] [ ] [ (OPRT) ]<br />
Tool offset memory A<br />
OFFSET O0001 N00000<br />
NO. GEOM(H) WEAR(H) GEOM(D) WEAR(D)<br />
001 10.000 0.000 0.000 0.000<br />
002 –1.000 0.000 0.000 0.000<br />
003 0.000 0.000 0.000 0.000<br />
004 20.000 0.000 0.000 0.000<br />
005 0.000 0.000 0.000 0.000<br />
006 0.000 0.000 0.000 0.000<br />
007 0.000 0.000 0.000 0.000<br />
008 0.000 0.000 0.000 0.000<br />
ACTUAL POSITION (RELATIVE)<br />
X 0.000 Y 0.000<br />
Z 0.000<br />
> _<br />
MDI **** *** *** 16:05:59<br />
[ OFFSET ] [ SETING ] [ WORK ] [ ] [ (OPRT) ]<br />
Tool offset memory C
11. SETTING AND DISPLAYING DATA OPERATION<br />
B–63534EN/02<br />
Explanations<br />
<br />
<br />
<br />
Disabling entry of<br />
compensation values<br />
3 Move the cursor to the compensation value to be set or changed using<br />
page keys and cursor keys, or enter the compensation number for the<br />
compensation value to be set or changed and press soft key<br />
[NO.SRH].<br />
4 To set a compensation value, enter a value and press soft key [INPUT].<br />
To change the compensation value, enter a value to add to the current<br />
value (a negative value to reduce the current value) and press soft key<br />
[+INPUT]. Or, enter a new value and press soft key [INPUT].<br />
A decimal point can be used when entering a compensation value.<br />
An external input/output device can be used to input or output a tool offset<br />
value. See III–8. A tool length offset value can be set by measuring the<br />
tool length as described in the next subsection.<br />
There are tool offset memories A, B, and C, which are classified as<br />
follows:<br />
Tool offset memory A<br />
D codes and H codes are treated the same. Tool geometry compensation<br />
and tool wear compensation are treated the same.<br />
Tool offset memory B<br />
D codes and H codes are treated the same. Tool geometry compensation<br />
and tool wear compensation are treated differently.<br />
Tool offset memory C<br />
D codes and H codes are treated differently. Tool geometry<br />
compensation and tool wear compensation are treated differently.<br />
The entry of compensation values may be disabled by setting bit 0 (WOF)<br />
and bit 1 (GOF) of parameter 3290 (not applied to tool offset memory A).<br />
And then, the input of tool compensation values from the MDI can be<br />
inhibited for a specified range of offset numbers. The first offset number<br />
for which the input of a value is inhibited is set in parameter No. 3294.<br />
The number of offset numbers, starting from the specified first number,<br />
for which the input of a value is inhibited is set in parameter No. 3295.<br />
Consecutive input values are set as follows:<br />
1) When values are input for offset numbers, starting from one for which<br />
input is not inhibited to one for which input is inhibited, a warning is<br />
issued and values are set only for those offset numbers for which input<br />
is not inhibited.<br />
2) When values are input for offset numbers, starting from one for which<br />
input is inhibited to one for which input is not inhibited, a warning is<br />
issued and no values are set.<br />
1032
B–63534EN/02<br />
12 soft keys display unit<br />
OPERATION<br />
OFFSET<br />
NO. DATA NO. DATA<br />
001 0.000 017 0.000<br />
002 0.000 018 0.000<br />
003 0.000 019 0.000<br />
004 0.000 020 0.000<br />
005 0.000 021 0.000<br />
006 0.000 022 0.000<br />
007 0.000 023 0.000<br />
008 0.000 024 0.000<br />
009 0.000 025 0.000<br />
010 0.000 026 0.000<br />
011 0.000 027 0.000<br />
012 0.000 028 0.000<br />
013 0.000 029 0.000<br />
014 0.000 030 0.000<br />
015 0.000 031 0.000<br />
016 0.000 032 0.000<br />
>_<br />
1033<br />
11. SETTING AND DISPLAYING DATA<br />
O0000 N00000<br />
ACTUAL POSITION (RELATIVE)<br />
X–12345.678<br />
Y–12345.678<br />
Z–12345.678<br />
A–12345.678<br />
B–12345.678<br />
C–12345.678<br />
7–12345.678<br />
8–12345.678<br />
MDI **** *** *** 20:45:00<br />
OFFSET<br />
Tool offset memory A<br />
OFFSET<br />
(LENGTH) (RADIUS) ACTUAL POSITION<br />
<br />
<br />
O0000 N00000<br />
NO. GEOM WEAR GEOM WEAR (RELATIVE)<br />
001 0.000 0.000 0.000 0.000 X 0.000<br />
002 0.000 0.000 0.000 0.000 Y 0.000<br />
003 0.000 0.000 0.000 0.000 Z 0.000<br />
004 0.000 0.000 0.000 0.000 A 0.000<br />
005 0.000 0.000 0.000 0.000 B 0.000<br />
006 0.000 0.000 0.000 0.000 C 0.000<br />
007 0.000 0.000 0.000 0.000 7 0.000<br />
008 0.000 0.000 0.000 0.000 8 0.000<br />
009 0.000 0.000 0.000 0.000<br />
010 0.000 0.000 0.000 0.000<br />
011 0.000 0.000 0.000 0.000<br />
012 0.000 0.000 0.000 0.000<br />
013 0.000 0.000 0.000 0.000<br />
014 0.000 0.000 0.000 0.000<br />
015 0.000 0.000 0.000 0.000<br />
016 0.000 0.000 0.000 0.000<br />
>_<br />
MDI **** *** *** 20:45:00<br />
OFFSET<br />
Tool offset memory C<br />
SETTING<br />
(OPRT)
11. SETTING AND DISPLAYING DATA OPERATION<br />
B–63534EN/02<br />
11.4.2<br />
Tool Length<br />
Measurement<br />
<br />
The length of the tool can be measured and registered as the tool length<br />
offset value by moving the reference tool and the tool to be measured until<br />
they touch the specified position on the machine.<br />
The tool length can be measured along the X–, Y–, or Z–axis.<br />
Procedure for tool length measurement<br />
1 Use manual operation to move the reference tool until it touches the<br />
specified position on the machine (or workpiece.)<br />
2 Press function key POS several times until the current position<br />
display screen with relative coordinates is displayed.<br />
ACTUAL POSITION(RELATIVE) O1000 N00010<br />
X 123.456<br />
Y 363.233<br />
Z 0.000<br />
PART COUNT 5<br />
RUN TIME 0H15M CYCLE TIME 0H 0M38S<br />
ACT.F 3000 MM/M S 0 T0000<br />
MEM STRT MTN *** 09:06:35<br />
[ ABS ] [ REL ] [ ALL ] [ HNDL ] [ OPRT ]<br />
3 Reset the relative coordinate for the Z–axis to 0 (see III–11.1.2 for<br />
details).<br />
4 Press function key OFFSET<br />
SETTING<br />
screen is displayed.<br />
several times until the tool compensation<br />
5 Use manual operation to move the tool to be measured until it touches<br />
the same specified position. The difference between the length of the<br />
reference tool and the tool to be measured is displayed in the relative<br />
coordinates on the screen.<br />
6 Move the cursor to the compensation number for the target tool (the<br />
cursor can be moved in the same way as for setting tool compensation<br />
values).<br />
7 Press the address key Z .<br />
If either X or Y key is depressed instead of Z key, the X or Y<br />
axis relative coordinate value is input as an tool length compensation<br />
value.<br />
1034
B–63534EN/02<br />
INP.C.<br />
OPERATION<br />
1035<br />
11. SETTING AND DISPLAYING DATA<br />
8 Press the soft key [INP.C.]. The Z axis relative coordinate value is<br />
input and displayed as an tool length offset value.<br />
Reference<br />
tool<br />
ÇÇ<br />
ÇÇ<br />
ÇÇ<br />
ÇÇ<br />
ÇÇÇ<br />
ÇÇÇ<br />
ÇÇÇ<br />
The difference is set as a tool<br />
length offset value<br />
A prefixed position
11. SETTING AND DISPLAYING DATA OPERATION<br />
B–63534EN/02<br />
11.4.3<br />
Displaying and<br />
Entering Setting Data<br />
Procedure<br />
Data such as the TV check flag and punch code is set on the setting data<br />
screen. On this screen, the operator can also enable/disable parameter<br />
writing, enable/disable the automatic insertion of sequence numbers in<br />
program editing, and perform settings for the sequence number<br />
comparison and stop function.<br />
See III–10.2 for automatic insertion of sequence numbers.<br />
See III–11.4.4 for the sequence number comparison and stop function.<br />
This subsection describes how to set data.<br />
Procedure for setting the setting data<br />
1 Select the MDI mode.<br />
2 Press function key OFFSET<br />
SETTING .<br />
3 Press soft key [SETING] to display the setting data screen.<br />
This screen consists of several pages.<br />
Press page key PAGE or<br />
PAGE<br />
until the desired screen is displayed.<br />
An example of the setting data screen is shown below.<br />
SETTING (HANDY) O0001 N00000<br />
PARAMETER WRITE = 1 (0:DISABLE 1:ENABLE)<br />
TV CHECK = 0 (0:OFF 1:ON)<br />
PUNCH CODE = 1 (0:EIA 1:ISO)<br />
INPUT UNIT = 0 (0:MM 1:INCH)<br />
I/O CHANNEL = 0 (0–3:CHANNEL NO.)<br />
SEQUENCE NO. = 0 (0:OFF 1:ON)<br />
TAPE FORMAT = 0 (0:NO CNV 1:F15)<br />
SEQUENCE STOP = 0 (PROGRAM NO.)<br />
SEQUENCE STOP<br />
> _<br />
= 0 (SEQUENCE NO.)<br />
MDI **** *** *** 16:05:59<br />
[ OFFSET ] [ SETING ] [ WORK ] [ ] [ (OPRT) ]<br />
SETTING (HANDY) O0001 N00000<br />
MIRROR IMAGE X = 0 (0:OFF 1:ON)<br />
MIRROR IMAGE Y = 0 (0:OFF 1:ON)<br />
MIRROR IMAGE Z = 0 (0:OFF 1:ON)<br />
> _<br />
MDI **** *** *** 16:05:59<br />
[ OFFSET ] [ SETING ] [ WORK ] [ ] [ (OPRT) ]<br />
1036
B–63534EN/02<br />
Contents of settings<br />
PARAMETER WRITE<br />
TV CHECK<br />
PUNCH CODE<br />
INPUT UNIT<br />
I/O CHANNEL<br />
SEQUENCE STOP<br />
TAPE FORMAT<br />
<br />
MIRROR IMAGE<br />
Others<br />
OPERATION<br />
1037<br />
11. SETTING AND DISPLAYING DATA<br />
4 Move the cursor to the item to be changed by pressing cursor keys<br />
, , , or .<br />
5 Enter a new value and press soft key [INPUT].<br />
Setting whether parameter writing is enabled or disabled.<br />
0 : Disabled<br />
1 : Enabled<br />
Setting to perform TV check.<br />
0 : No TV check<br />
1 : Perform TV check<br />
Setting code when data is output through reader puncher interface.<br />
0 : EIA code output<br />
1 : ISO code output<br />
Setting a program input unit, inch or metric system<br />
0 : Metric<br />
1 : <strong>Inc</strong>h<br />
Using channel of reader/puncher interface.<br />
0 : Channel 0<br />
1 : Channel 1<br />
2 : Channel 2<br />
3 : Channel 3<br />
Setting of whether to perform automatic insertion of the sequence number<br />
or not at program edit in the EDIT mode.<br />
0 : Does not perform automatic sequence number insertion.<br />
1 : Perform automatic sequence number insertion.<br />
Setting the F15 tape format conversion.<br />
0 : Tape format is not converted.<br />
1 : Tape format is converted.<br />
See II. PROGRAMMING for the F15 tape format.<br />
Setting the sequence number with which the operation stops for the<br />
sequence number comparison and stop function and the number of the<br />
program to which the sequence number belongs<br />
Setting of mirror image ON/OFF for each axes.<br />
0 : Mirror image off<br />
1 : Mirror image on<br />
can also be pressed to display the SETTING<br />
(TIMER) screen. See III–11.4.5 for this screen.<br />
Page key PAGE or PAGE
11. SETTING AND DISPLAYING DATA OPERATION<br />
B–63534EN/02<br />
11.4.4<br />
Sequence Number<br />
Comparison and Stop<br />
<br />
If a block containing a specified sequence number appears in the program<br />
being executed, operation enters single block mode after the block is<br />
executed.<br />
Procedure for sequence number comparison and stop<br />
1 Select the MDI mode.<br />
2 Press function key OFFSET<br />
SETTING .<br />
3 Press chapter selection soft key [SETING].<br />
4 Press page key PAGE<br />
is displayed.<br />
or<br />
1038<br />
PAGE<br />
several times until the following screen<br />
SETTING (HANDY) O0001 N00000<br />
PARAMETER WRITE = 1 (0:DISABLE 1:ENABLE)<br />
TV CHECK = 0 (0:OFF 1:ON)<br />
PUNCH CODE = 1 (0:EIA 1:ISO)<br />
INPUT UNIT = 0 (0:MM 1:INCH)<br />
I/O CHANNEL = 0 (0–3:CHANNEL NO.)<br />
SEQUENCE NO. = 0 (0:OFF 1:ON)<br />
TAPE FORMAT = 0 (0:NO CNV 1:F10/11)<br />
SEQUENCE STOP = 0 (PROGRAM NO.)<br />
SEQUENCE STOP = 11 (SEQUENCE NO.)<br />
> _<br />
MDI **** *** *** 16:05:59<br />
[ OFFSET ] [ SETING ] [ WORK ] [ ] [ (OPRT) ]<br />
5 Enter in (PROGRAM NO.) for SEQUENCE STOP the number (1 to<br />
9999) of the program containing the sequence number with which<br />
operation stops.<br />
6 Enter in (SEQUENCE NO.) for SEQUENCE STOP (with five or less<br />
digits) the sequence number with which operation is stopped.<br />
7 When automatic operation is executed, operation enters single block<br />
mode at the block containing the sequence number which has been<br />
set.
B–63534EN/02<br />
Explanations<br />
Sequence number after<br />
the program is executed<br />
Exceptional blocks<br />
<br />
When the same<br />
sequence number is<br />
found several times in<br />
the program<br />
Block to be repeated a<br />
specified number of<br />
times<br />
OPERATION<br />
1039<br />
11. SETTING AND DISPLAYING DATA<br />
After the specified sequence number is found during the execution of the<br />
program, the sequence number set for sequence number compensation<br />
and stop is decremented by one. When the power is turned on, the setting<br />
of the sequence number is 0.<br />
If the predetermined sequence number is found in a block in which all<br />
commands are those to be processed within the CNC control unit, the<br />
execution does not stop at that block.<br />
Example<br />
N1 #1=1 ;<br />
N2 IF [#1 EQ 1] GOTO 08 ;<br />
N3 GOTO 09 ;<br />
N4 M98 P1000 ;<br />
N5 M99 ;<br />
In the example shown above, if the predetermined sequence number is<br />
found, the execution of the program does not stop.<br />
If the predetermined sequence number is found in a block which has a<br />
canned–cycle command, the execution of the program stops after the<br />
return operation is completed.<br />
If the predetermined sequence number appears twice or more in a<br />
program, the execution of the program stops after the block in which the<br />
predetermined sequence number is found for the first time is executed.<br />
If the predetermined sequence number is found in a block which is to be<br />
executed repeatedly, the execution of the program stops after the block is<br />
executed specified times.
11. SETTING AND DISPLAYING DATA OPERATION<br />
B–63534EN/02<br />
11.4.5<br />
Displaying and Setting<br />
Run Time, Parts Count,<br />
and Time<br />
<br />
Display items<br />
<br />
<br />
Various run times, the total number of machined parts, number of parts<br />
required, and number of machined parts can be displayed. This data can<br />
be set by parameters or on this screen (except for the total number of<br />
machined parts and the time during which the power is on, which can be<br />
set only by parameters).<br />
This screen can also display the clock time. The time can be set on the<br />
screen.<br />
Procedure for Displaying and Setting Run Time, Parts Count and Time<br />
1 Select the MDI mode.<br />
2 Press function key OFFSET<br />
SETTING .<br />
3 Press chapter selection soft key [SETING].<br />
4 Press page key PAGE<br />
is displayed.<br />
or<br />
1040<br />
PAGE<br />
PARTS TOTAL = 14<br />
PARTS REQUIRED = 0<br />
PARTS COUNT = 23<br />
POWER ON = 4H 31M<br />
OPERATING TIME = 0H 0M 0S<br />
CUTTING TIME = 0H 37M 5S<br />
FREE PURPOSE = 0H 0M 0S<br />
CYCLE TIME = 0H 0M 0S<br />
DATE = 2001/07/05<br />
TIME = 11:32:52<br />
several times until the following screen<br />
SETTING (TIMER) O0001 N00000<br />
> _<br />
MDI **** *** *** 16:05:59<br />
[ OFFSET ] [ SETING ] [ WORK ] [ ] [ (OPRT) ]<br />
5 To set the number of parts required, move the cursor to PARTS<br />
REQUIRED and enter the number of parts to be machined.<br />
6 To set the clock, move the cursor to DATE or TIME, enter a new date<br />
or time, then press soft key [INPUT].<br />
This value is incremented by one when M02, M30, or an M code specified<br />
by parameter 6710 is executed. This value cannot be set on this screen.<br />
Set the value in parameter 6712.<br />
It is used for setting the number of machined parts required.<br />
When the “0” is set to it, there is no limitation to the number of parts.<br />
Also, its setting can be made by the parameter (NO. 6713).
B–63534EN/02<br />
<br />
<br />
<br />
<br />
<br />
<br />
<br />
Limitations<br />
<br />
Restrictions<br />
<br />
settings<br />
<br />
OPERATION<br />
1041<br />
11. SETTING AND DISPLAYING DATA<br />
This value is incremented by one when M02, M30, or an M code specified<br />
by parameter 6710 is executed. The value can also be set by parameter<br />
6711. In general, this value is reset when it reaches the number of parts<br />
required. Refer to the manual issued by the machine tool builder for<br />
details.<br />
Displays the total time which the power is on. This value cannot be set<br />
on this screen but can be preset in parameter 6750.<br />
Indicates the total run time during automatic operation, excluding the<br />
stop and feed hold time.<br />
This value can be preset in parameter 6751 or 6752.<br />
Displays the total time taken by cutting that involves cutting feed such as<br />
linear interpolation (G01) and circular interpolation (G02 or G03). This<br />
value can be preset in parameter 6753 or 6754.<br />
This value can be used, for example, as the total time during which coolant<br />
flows. Refer to the manual issued by the machine tool builder for details.<br />
Indicates the run time of one automatic operation, excluding the stop and<br />
feed hold time. This is automatically preset to 0 when a cycle start is<br />
performed at reset state. It is preset to 0 even when power is removed.<br />
Displays the current date and time. The date and time can be set on this<br />
screen.<br />
When the command of M02 or M30 is executed, the total number of<br />
machined parts and the number of machined parts are incremented by one.<br />
Therefore, create the program so that M02 or M30 is executed every time<br />
the processing of one part is completed. Furthermore, if an M code set<br />
to the parameter (NO. 6710) is executed, counting is made in the similar<br />
manner. Also, it is possible to disable counting even if M02 or M30 is<br />
executed (parameter PCM (No. 6700#0) is set to 1). For details, see the<br />
manual issued by machine tool builders.<br />
Negative value cannot be set. Also, the setting of “M” and “S” of run time<br />
is valid from 0 to 59.<br />
Negative value may not be set to the total number of machined parts.<br />
Neither negative value nor the value exceeding the value in the following<br />
table can be set.<br />
Item Maximum value Item Maximum value<br />
Year 2085 Hour 23<br />
Month 12 Minute 59<br />
Day 31 Second 59
11. SETTING AND DISPLAYING DATA OPERATION<br />
B–63534EN/02<br />
11.4.6<br />
Displaying and Setting<br />
the Workpiece Origin<br />
Offset Value<br />
<br />
Displays the workpiece origin offset for each workpiece coordinate<br />
system (G54 to G59, G54.1 P1 to G54.1 P48 and G54.1 P1 to G54.1<br />
P300) and external workpiece origin offset. The workpiece origin offset<br />
and external workpiece origin offset can be set on this screen.<br />
Procedure for Displaying and Setting the Workpiece Origin Offset Value<br />
1 Press function key OFFSET<br />
SETTING .<br />
2 Press chapter selection soft key [WORK].<br />
The workpiece coordinate system setting screen is displayed.<br />
WORK COORDINATES O0001 N00000<br />
(G54)<br />
NO. DATA<br />
00 X 0.000<br />
(EXT) Y 0.000<br />
Z 0.000<br />
01 X 20.000<br />
(G54) Y 50.000<br />
Z 30.000<br />
1042<br />
NO. DATA<br />
02 X 152.580<br />
(G55) Y 234.000<br />
Z 112.000<br />
03 X 300.000<br />
(G56) Y 200.000<br />
Z 189.000<br />
> _ S 0 T0000<br />
MDI **** *** *** 16:05:59<br />
[ OFFSET ] [ SETING ] [ WORK ] [ ] [ (OPRT) ]<br />
3 The screen for displaying the workpiece origin offset values consists<br />
of two or more pages. Display a desired page in either of the<br />
following two ways:<br />
Press the page up PAGE or page down<br />
PAGE<br />
key.<br />
Enter the workpiece coordinate system number (0 : external<br />
workpiece origin offset, 1 to 6: workpiece coordinate systems G54<br />
to G59, P1 to P48 : workpiece coordinate systems G54.1 P1 to<br />
G54.1 P48, P1 to P300 : workpiece coordinate systems G54.1 P1<br />
to G54.1 P300) and press operation selection soft key [NO.SRH].<br />
4 Turn off the data protection key to enable writing.<br />
5 Move the cursor to the workpiece origin offset to be changed.<br />
6 Enter a desired value by pressing numeric keys, then press soft key<br />
[INPUT]. The entered value is specified in the the workpiece origin<br />
offset value. Or, by entering a desired value with numeric keys and<br />
pressing soft key [+INPUT], the entered value can be added to the<br />
previous offset value.<br />
7 Repeat 5 and 6 to change other offset values.<br />
8 Turn on the data protection key to disable writing.
B–63534EN/02<br />
11.4.7<br />
Direct Input of<br />
Measured Workpiece<br />
Origin Offsets<br />
<br />
OPERATION<br />
1043<br />
11. SETTING AND DISPLAYING DATA<br />
This function is used to compensate for the difference between the<br />
programmed workpiece coordinate system and the actual workpiece<br />
coordinate system. The measured offset for the origin of the workpiece<br />
coordinate system can be input on the screen such that the command<br />
values match the actual dimensions.<br />
Selecting the new coordinate system matches the programmed coordinate<br />
system with the actual coordinate system.<br />
Procedure for Direct Inputting of Measured Workpiece Origin Offsets<br />
Programmed<br />
workpiece origin<br />
New offset<br />
Origin<br />
O’<br />
Previous<br />
offset<br />
Y<br />
y<br />
O<br />
Surface A<br />
β<br />
Surface B<br />
1 When the workpiece is shaped as shown above, position the reference<br />
tool manually until it touches surface A of the workpiece.<br />
2 Retract the tool without changing the Y coordinate.<br />
3 Measure distance α between surface A and the programmed origin of<br />
the workpiece coordinate system as shown above.<br />
4 Press function key OFFSET<br />
SETTING .<br />
α<br />
X<br />
x
11. SETTING AND DISPLAYING DATA OPERATION<br />
B–63534EN/02<br />
Limitations<br />
Consecutive input<br />
During program<br />
execution<br />
5 To display the workpiece origin offset setting screen, press the<br />
chapter selection soft key [WORK].<br />
WORK COORDINATES O1234 N56789<br />
(G54)<br />
NO. DATA NO. DATA<br />
00 X 0.000 02 X 0.000<br />
(EXT) Y 0.000 (G55) Y 0.000<br />
Z 0.000 Z 0.000<br />
01 X 0.000 03 X 0.000<br />
(G54) Y 0.000 (G56) Y 0.000<br />
Z 0.000 Z 0.000<br />
> Z100. S 0 T0000<br />
MDI **** *** *** 16:05:59<br />
[ NO.SRH ] [ MEASUR ] [ ] [ +INPUT ] [ INPUT ]<br />
6 Position the cursor to the workpiece origin offset value to be set.<br />
7 Press the address key for the axis along which the offset is to be set<br />
(Y–axis in this example).<br />
8 Enter the measured value (α) then press the [MEASUR] soft key.<br />
9 Move the reference tool manually until it touches surface B of the<br />
workpiece.<br />
10 Retract the tool without changing the X coordinate.<br />
11 Measure distance β then enter the distance at X on the screen in the<br />
same way as in steps 7 and 8.<br />
Offsets for two or more axes cannot be input at the same time.<br />
This function cannot be used while a program is being executed.<br />
1044
B–63534EN/02<br />
11.4.8<br />
Displaying and Setting<br />
Custom Macro<br />
Common Variables<br />
<br />
MACRO<br />
OPERATION<br />
1045<br />
11. SETTING AND DISPLAYING DATA<br />
Displays common variables (#100 to #149 or #100 to #199, and #500 to<br />
#531 or #500 to #999) on the CRT. When the absolute value for a common<br />
variable exceeds 99999999, ******** is displayed. The values for<br />
variables can be set on this screen. Relative coordinates can also be set<br />
to valiables.<br />
Procedure for displaying and setting custom macro common variables<br />
Continuous menu key<br />
1 Press function key OFFSET<br />
SETTING .<br />
2 Press the continuous menu key , then press chapter selection<br />
soft key [MACRO].The following screen is displayed:<br />
VARIABLE<br />
NO. DATA NO. DATA<br />
O0001 N00000<br />
100 1000.000 108 0.000<br />
101 0.000 109 40000.000<br />
102 –50000.000 110 153020.00<br />
103 0.000 111 0001.000<br />
104 1238501.0 112 0.000<br />
105 0.000 113 20000.000<br />
106 0.000 114 0.000<br />
107 0.000 115 0.000<br />
ACTUAL POSITION (RELATIVE)<br />
X 0.000 Y 0.000<br />
Z 0.000<br />
> _ S 0 T0000<br />
MDI **** *** *** 16:05:59<br />
[ NO.SRH ] [ ] [ INP.C. ] [ ] [ INPUT ]<br />
3 Move the cursor to the variable number to set using either of the<br />
following methods:<br />
– Enter the variable number and press soft key [NO.SRH].<br />
– Move the cursor to the variable number to set by pressing page keys<br />
PAGE and/or<br />
PAGE<br />
and cursor keys , , , and/or .<br />
4 Enter data with numeric keys and press soft key [INPUT].<br />
5 To set a relative coordinate in a variable, press address key X ,<br />
Y , or Z , then press soft key [INP.C.].<br />
6 To set a blank in a variable, just press soft key [INPUT]. The value<br />
field for the variable becomes blank.
11. SETTING AND DISPLAYING DATA OPERATION<br />
B–63534EN/02<br />
11.4.9<br />
Displaying Pattern<br />
Data and Pattern Menu<br />
<br />
MENU<br />
This subsection uses an example to describe how to display or set<br />
machining menus (pattern menus) created by the machine tool builder.<br />
Refer to the manual issued by the machine tool builder for the actual<br />
pattern menus and pattern data. See II. PROGRAMMING for the pattern<br />
data entry function.<br />
Procedure for displaying the pattern data and the pattern menu<br />
Continuous menu key<br />
1 Press function key OFFSET<br />
SETTING .<br />
2 Press the continuous menu key , then press chapter selection<br />
soft key [MENU].<br />
The following screen (pattern menu screen) is displayed:<br />
MENU : HOLE PATTERN O0000 N00000<br />
1. TAPPING<br />
2. DRILLING<br />
3. BORING<br />
4. POCKET<br />
5. BOLT HOLE<br />
6. LINE ANGLE<br />
7. GRID<br />
8. PECK<br />
9.<br />
10.<br />
> _<br />
MDI **** *** *** 16:05:59<br />
[ MACRO ] [ MENU ] [ OPR ] [ ] [ (OPRT) ]<br />
3 Enter a pattern number and press soft key [SELECT].<br />
In this example, press 5 , then press [SELECT].<br />
The following screen (pattern data screen) is displayed:<br />
VAR. : BOLT HOLE O0001 N00000<br />
NO. NAME DATA COMMENT<br />
500 TOOL 0.000<br />
501 STANDARD X 0.000 *BOLT HOLE<br />
502 STANDARD Y 0.000 CIRCLE*<br />
503 RADIUS 0.000 SET PATTERN<br />
504 S. ANGL 0.000 DATA TO VAR.<br />
505 HOLES NO 0.000 NO.500–505.<br />
506 0.000<br />
507 0.000<br />
ACTUAL POSITION (RELATIVE)<br />
X 0.000<br />
> _ Z 0.000<br />
Y 0.000<br />
MDI **** *** *** 16:05:59<br />
[ OFFSET ] [SETING] [ ] [ ] [ (OPRT) ]<br />
1046
B–63534EN/02<br />
Explanations<br />
Explanation of the<br />
pattern menu screen<br />
Explanation of the<br />
pattern data screen<br />
OPERATION<br />
4 Enter necessary pattern data and press INPUT .<br />
1047<br />
11. SETTING AND DISPLAYING DATA<br />
5 After entering all necessary data, enter the MEMORY mode and press<br />
the cycle start button to start machining.<br />
HOLE PATTERN : Menu title<br />
An optional character string can be displayed within 12 characters.<br />
BOLE HOLE : Pattern name<br />
An optional character string can be displayed within 10 characters.<br />
The machine tool builder should program character strings of menu title<br />
and pattern name by custom macro, and load them into the program<br />
memory.<br />
BOLT HOLE : Pattern data title<br />
An optional character string can be displayed within 12 characters.<br />
TOOL : Variable name<br />
An optional character string can be displayed within 10 characters.<br />
BOLT HOLE CIRCLE : Comment statement<br />
An optional character string comment can be displayed up to 12<br />
characters/line by 8 lines.<br />
The machine tool builder should program the character strings of variable<br />
name and comment statement by custom macro, and load them into the<br />
program memory.
11. SETTING AND DISPLAYING DATA OPERATION<br />
B–63534EN/02<br />
11.4.10<br />
Displaying and Setting<br />
the Software<br />
Operator’s Panel<br />
<br />
MOPR<br />
With this function, functions of the switches on the machine operator’s<br />
panel can be controlled from the CRT/MDI panel.<br />
Jog feed can be performed using numeric keys.<br />
Procedure for displaying and setting the software operator’s panel<br />
Continuous menu key<br />
1 Press function key OFFSET<br />
SETTING .<br />
2 Press the continuous menu key , then press chapter selection soft<br />
key [OPR].<br />
3 The screen consists of several pages.<br />
Press page key PAGE or<br />
PAGE<br />
until the desired screen is displayed.<br />
OPERATOR’S PANEL O0000 N00000<br />
MODE : MDI MEM EDIT HNDL JOG REF<br />
STEP MULTI. : *1 *10 *100<br />
RAPID OVRD. : 100% 50% 25% F0<br />
JOG FEED : 2.0%<br />
**************<br />
FEED OVRD. : 100%<br />
***<br />
ACTUAL POSITION (ABSOLUTE)<br />
X 0.000 Y 0.000<br />
Z<br />
>_<br />
0.000<br />
MDI **** *** *** 16:05:59<br />
[ MACRO ] [ ] [ OPR ] [TOOLLF] [ (OPRT) ]<br />
OPERATOR’S PANEL O0000 N00000<br />
BLOCK SKIP : OFF ON<br />
SINGLE BLOCK : OFF ON<br />
MACHINE LOCK : OFF ON<br />
PROTECT KEY : PROTECT RELEASE<br />
FEED HOLD : OFF<br />
ACTUAL POSITION (ABSOLUTE)<br />
X 0.000 Y 0.000<br />
Z 0.000<br />
S 0 T0000<br />
MDI **** *** *** 16:05:59<br />
[ MACRO ] [ ] [ OPR ] [ TOOLLF ] [ (OPRT) ]<br />
1048
B–63534EN/02<br />
<br />
Valid operations<br />
Display<br />
Screens on which jog<br />
feed is valid<br />
Jog feed and arrow keys<br />
<br />
<br />
OPERATION<br />
1049<br />
11. SETTING AND DISPLAYING DATA<br />
4 Move the cursor to the desired switch by pressing cursor key or<br />
.<br />
5 Push the cursor move key or to match the mark to an<br />
arbitrary position and set the desired condition.<br />
6 Press one of the following arrow keys to perform jog feed. Press the<br />
7<br />
5 key together with an arrow key to perform jog rapid traverse.<br />
1<br />
8<br />
4 5 6<br />
2<br />
9<br />
3<br />
The valid operations on the software operator’s panel are shown below.<br />
Whether to use the CRT/MDI panel or machine operator’s panel for each<br />
group of operations can be selected by parameter 7200.<br />
Group1 : Mode selection<br />
Group2 : Selection of jog feed axis, jog rapid traverse<br />
Group3 : Selection of manual pulse generator feed axis, selection of<br />
manual pulse magnification x1, x10, x100<br />
Group4 : Jog federate, federate override, rapid traverse override<br />
Group5 : Optional block skip, single block, machine lock, dry run<br />
Group6 : Protect key<br />
Group7 : Feed hold<br />
The groups for which the machine operator’s panel is selected by<br />
parameter 7200 are not displayed on the software operator’s panel.<br />
When the CRT indicates other than the software operator’s panel screen<br />
and diagnostic screen, jog feed is not conducted even if the arrow key is<br />
pushed.<br />
The feed axis and direction corresponding to the arrow keys can be set<br />
with parameters (Nos. 7210 to 7217).<br />
Eight optionally definable switches are added as an extended function of<br />
the software operator’s panel. The name of these switches can be set by<br />
parameters (Nos. 7220 to 7283) as character strings of max. 8 characters.<br />
For the meanings of these switches, refer to the manual issued by machine<br />
tool builder.
11. SETTING AND DISPLAYING DATA OPERATION<br />
B–63534EN/02<br />
11.4.11<br />
Displaying and Setting<br />
Tool Life Management<br />
Data<br />
<br />
Tool life data can be displayed to inform the operator of the current state<br />
of tool life management. Groups which require tool changes are also<br />
displayed.The tool life counter for each group can be preset to an arbitrary<br />
value. Tool data (execution data) can be reset or cleared. To register or<br />
modify tool life management data, a program must be created and<br />
executed. See Explanations in this section for details.<br />
When bit 6 (EXT) of parameter 6801 is 1, extended tool life management<br />
applies. See III–11.4.12.<br />
Procedure for display and setting the tool life management data<br />
TOOLLF<br />
1 Press function key OFFSET<br />
SETTING .<br />
2 Press the continuous menu key to display chapter selection soft<br />
key [TOOLLF].<br />
3 Press softkey [TOOLLF].<br />
4 One page displays data on two groups. Pressing page key<br />
PAGE<br />
or PAGE successively displays data on the following groups. Up<br />
to four group Nos., for which the Tool Change signal is being issued,<br />
are displayed at the bottom of each page. An arrow shown in the<br />
figure is displayed for five or more groups, if exists.<br />
TOOL LIFE DATA : O3000 N00060<br />
SELECTED GROUP 000<br />
GROUP 001 : LIFE 0150 COUNT 0000<br />
0034 0078 0012 0056<br />
0090 0035 0026 0061<br />
0000 0000 0000 0000<br />
0000 0000 0000 0000<br />
GROUP 002 : LIFE 1400 COUNT 0000<br />
0062 0024 0044 0074<br />
0000 0000 0000 0000<br />
0000 0000 0000 0000<br />
0000 0000 0000 0000<br />
TO BE CHANGED : 003 004 005 006 –––><br />
> _<br />
MEM **** *** *** 16:05:59<br />
[ MACRO ] [ ] [ OPR ] [ TOOLLF ] [ (OPRT) ]<br />
1050
B–63534EN/02<br />
OPERATION<br />
1051<br />
11. SETTING AND DISPLAYING DATA<br />
5 To display the page containing the data for a group, enter the group<br />
number and press soft key [NO.SRH].<br />
The cursor can be moved to an arbitrary group by pressing cursor key<br />
or .<br />
6 To change the value in the life counter for a group, move the cursor to<br />
the group, enter a new value (four digits), and press [INPUT]. The life<br />
counter for the group indicated by the cursor is preset to the entered<br />
value. Other data for the group is not changed.<br />
7 To reset the tool data, move the cursor on the group to reset, then press<br />
the [(OPRT)], [CLEAR], and [EXEC] soft keys in this order.<br />
All execution data for the group indicated by the cursor is cleared<br />
together with the marks (@, #, or *).
11. SETTING AND DISPLAYING DATA OPERATION<br />
B–63534EN/02<br />
<br />
<br />
TOOL LIFE DATA : O3000 N00060<br />
SELECTED GROUP 000<br />
GROUP 001 : LIFE 0150 COUNT 0007<br />
1052<br />
* 0034 # 0078 @ 0012 0056<br />
0090 0035 0026 0061<br />
0000 0000 0000 0000<br />
0000 0000 0000 0000<br />
GROUP 002 : LIFE 1400 COUNT 0000<br />
0062 0024 0044 0074<br />
0000 0000 0000 0000<br />
0000 0000 0000 0000<br />
0000 0000 0000 0000<br />
TO BE CHANGED : 003 004 005 006 –––><br />
> _<br />
MEM **** *** *** 16:05:59<br />
[ MACRO ] [ ] [ OPR ] [ TOOLLF ][ (OPRT) ]<br />
The first line is the title line.<br />
In the second line the group number of the current command is<br />
displayed.<br />
When there is no group number of the current command, 0 is displayed.<br />
In lines 3 to 7 the tool life data of the group is displayed.<br />
The third line displays group number, life and the count used.<br />
The life count is chosen by parameter LTM (No. 6800#2) as either<br />
minutes(or hours) or number of times used.<br />
In lines 4 to 5, tool numbers are displayed. In this case, the tool is<br />
selected in the order, 0034 → 0078 → 0012 → 056 → 0090 ...<br />
The meaning of each mark before the tool numbers is :<br />
* : Shows the life has finished.<br />
# : Shows that the skip command has been accepted.<br />
@ : Shows that the tool is currently being used.<br />
The life counter counts for tool with @.<br />
“*” is displayed when the next command is issued by the group to<br />
which it belongs.<br />
Lines 8 to 12 are next group life data to the group displayed in lines 3<br />
to 7.<br />
In the thirteenth line the group number when the tool change signal is<br />
being emitted is displayed. The group number display appears in<br />
ascending order. When it cannot be completely displayed, “–––>” is<br />
displayed.
B–63534EN/02<br />
11.4.12<br />
Displaying and Setting<br />
Extended Tool Life<br />
Management<br />
Procedure<br />
NO.SRH CLEAR EDIT<br />
OPERATION<br />
1053<br />
11. SETTING AND DISPLAYING DATA<br />
The extended tool life management function provides more detailed data<br />
display and more data editing functions than the ordinary tool life<br />
management function.<br />
Moreover, if the tool life is specified in units of time, the time which has<br />
been set can be increased or reduced (life count override).<br />
When bit 6 (EXT) of parameter 6801 is set to 0, the ordinary tool life<br />
management function applies. See III–11.4.11.<br />
Procedure for displaying and Setting extended tool life management<br />
(OPRT)<br />
Continuous menu key<br />
1 Press function key OFFSET<br />
SETTING .<br />
2 Press the continuous menu key to display chapter selection soft<br />
key [TOOLLF].<br />
3 Press soft key [TOOLLF] to display the tool life management data<br />
screen.<br />
On this screen, place the cursor on a group of items to be edited.<br />
4 Press soft key [(OPRT)].<br />
5 Press soft key [EDIT].<br />
The extended tool life management data editing screen for the group<br />
indicated by the cursor is the displayed.<br />
LIFE DATA EDIT GROUP : 001 O0010 N00001<br />
TYPE : 1 (1:C 2:M) NEXT GROUP: ***<br />
LIFE : 9800 USE GROUP : ***<br />
COUNT : 6501 SELECTED GROUP : 001<br />
NO. STATE T–CODE H–CODE D–CODE<br />
01 * 0034 011 005<br />
02 # 0078 000 033<br />
03 @ 0012 004 018<br />
04 * 0056 000 000<br />
05 0090 000 000<br />
06 * 0076 023 012<br />
> _<br />
MDI **** *** *** 16:05:59<br />
[ INSERT ] [ DELETE ] [ STATE ] [ END ] [ INPUT ]<br />
Tool life management data can be edited as follows:<br />
6 Select the MDI mode.<br />
7 Stop, pause, or reset the CNC by the feed hold, single block stop, or<br />
reset operation (tool life management data cannot be edited while data<br />
is set by a program.).<br />
The following editing can be performed. See each step for details:<br />
⋅ Setting the life count type, life value, current life count,<br />
and tool data (T, H, or D code) : 7–1<br />
⋅ Adding a tool group : 7–2<br />
⋅ Adding a tool number (T code) : 7–3
11. SETTING AND DISPLAYING DATA OPERATION<br />
B–63534EN/02<br />
⋅ Deleting a tool group : 7–4<br />
⋅ Deleting tool data (T, H, or D code) : 7–5<br />
⋅ Skipping a tool : 7–6<br />
⋅ Clearing the life count<br />
(resetting the life) : 7–7<br />
7–1 Setting the life count type, life value, current life count, and tool<br />
data (T, H, or D code)<br />
(1)Position the cursor on the data item to be changed.<br />
(2)Enter a desired value.<br />
(3)Press the softkey [INPUT].<br />
7–2 Adding a tool group<br />
(1) In step 3, select a group for which no data is set and display the<br />
editing screen.<br />
(2) Enter tool numbers.<br />
(3) Press soft key [INSERT].<br />
⋅ In this case, the type of the life counter is determined by the setting of<br />
LTM (No. 6800#2), and 0 is set in both the life expectancy and life<br />
counter.<br />
⋅ 0 is set in both the H code and D code.<br />
⋅ The cursor remains on the tool number until the T code is specified.<br />
7–3 Adding a tool number<br />
(1) Move the cursor to the tool data (T, H, or D code) after which a new<br />
number is to be added.<br />
(2) Enter the tool number.<br />
(3) Press soft key [INSERT]<br />
Example),Inserting tool No. 1500 between No. 1 and No. 2.<br />
NO. STATE T–CODE H–CODE D–CODE<br />
01 * 0034 11 5<br />
02 # 0078 0 33<br />
Move the cursor to 5 in D–CODE column and press soft key<br />
[INSERT].<br />
NO. STATE T–CODE H–CODE D–CODE<br />
01 * 0034 11 5<br />
02 1500 0 0<br />
03 # 0078 0 33<br />
1054
B–63534EN/02<br />
OPERATION<br />
7–4 Deleting a tool group<br />
1055<br />
11. SETTING AND DISPLAYING DATA<br />
(1) In step 3, position the cusor on a group to be deleted and display the<br />
editing screen.<br />
(2) Press soft key [DELETE].<br />
(3) Press soft key [GROUP].<br />
(4) Press soft key [EXEC].<br />
7–5 Deleting tool data (T, H, or D code)<br />
(1) <br />
<br />
(2) Press soft key [DELETE].<br />
(3) Press soft key [].<br />
⋅ The line containing the cursor is deleted.<br />
⋅ When a tool with mark @ (being used) is deleted, mark @ shifts to the<br />
tool whose life has expired most recently or which has been skipped.<br />
In this case, marks * and # are displayed in reverse video. <br />
7–6 Skipping a tool<br />
(1) Position the cursor on the data item (T, H, or D code) for the tool to<br />
be skipped.<br />
(2) Press soft key [STATE].<br />
(3) Press soft key [SKIP].<br />
7–7 Clearing the life count (resetting the life)<br />
(1) Position the cursor on the data item (T, H, or D code) of the tool to be<br />
cleared.<br />
(2) Press soft key [STATE].<br />
(3) Press soft key [CLEAR].<br />
8 To complete the edit operation, press soft key [END].<br />
The tool life management screen is displayed again.
11. SETTING AND DISPLAYING DATA OPERATION<br />
B–63534EN/02<br />
Explanations<br />
Displays<br />
LIFE DATA EDIT GROUP : 001 O0010 N00001<br />
TYPE : 1 (1:C 2:M) NEXT GROUP: ***<br />
LIFE : 9800 USE GROUP : ***<br />
COUNT : 6501 SELECTED GROUP : 001<br />
NO. STATE T–CODE H–CODE D–CODE<br />
01 * 0034 011 005<br />
02 # 0078 000 033<br />
03 @ 0012 004 018<br />
04 * 0056 000 000<br />
05 0090 000 000<br />
06 * 0076 023 012<br />
> _<br />
MDI **** *** *** 16:05:59<br />
[ INSERT ] [ DELETE ] [ STATE ] [ END ] [ INPUT ]<br />
NEXT GROUP :<br />
Number of the tool group whose life is to be calculated by the next M06<br />
command<br />
USE GROUP :<br />
Number of the tool group whose life is being calculated<br />
SELECTED GROUP :<br />
Number of the tool group whose life is being calculated or was calculated<br />
last<br />
TYPE: 1: Life count is represented in units of cycles.<br />
TYPE: 2 : Life count is represented in units of minutes.<br />
LIFE : Life expectancy<br />
COUNT : Life counter<br />
STATE : State of the tool<br />
Tool state In use Not in use<br />
Available @ _(Space)<br />
Skip #<br />
<br />
Skipped w <br />
(Note)<br />
<br />
NOTE<br />
When bit 3 (EMD) of parameter 6801 is set to 0, @ is<br />
displayed until the next tool is selected.<br />
T–CODE : Tool number<br />
H–CODE : H code<br />
D–CODE : D code<br />
1056
B–63534EN/02<br />
Tool life management<br />
screen<br />
Life count override<br />
Display of the mark<br />
indicating that the life of<br />
a tool has expired<br />
Influence of changes in<br />
data<br />
OPERATION<br />
1057<br />
11. SETTING AND DISPLAYING DATA<br />
When the extended tool life management function is provided, the<br />
following items are added to the tool life management screen:<br />
NEXT: Tool group to be used next<br />
USE: Tool group in use<br />
Life counter type for each tool group (C: Cycles, M: Minutes)<br />
TOOL LIFE DATA O0001 N00001<br />
NEXT *** USE *** SELECTED GROUP: 001<br />
GROUP 001 : C LIFE 9800 COUNT 6501<br />
*0034 #0078 @0012 *0056<br />
0090 *0076<br />
GROUP 002 : C LIFE 9800 COUNT 1001<br />
*0011 #0022 *0201 *0144<br />
*0155 #0066 0176 0188<br />
0019 0234 0007 0112<br />
0156 0090 0016 0232<br />
TO BE CHANGED : 006 012 013 014 –––><br />
> _ S 0 T0000<br />
MDI **** *** *** 16:05:59<br />
[ NO.SRH ] [ ] [ CLEAR ] [ EDIT ] [ INPUT ]<br />
The tool life count can be overridden provided that the life counter is<br />
indicated in units of minutes and LFV (bit 2 of parameter 6801) is 1.<br />
Override values can be specified using the override switch on the<br />
operator’s panel within the range from 0 to 99.9. If 0 is specified, tool life<br />
is not counted. If the count of actual cutting time is less than 4 seconds,<br />
the override value is invalid.<br />
Example<br />
When cutting is performed for 10 minutes with an override of 0.1, the tool<br />
life counter counts one minute.<br />
The symbol * for indicating that the life of a tool has expired can be<br />
displayed either when the machine starts using the next tool or when the<br />
life of the tool actually expires. Either of these methods can be selected<br />
using EMD (bit 3 of parameter 6801).<br />
Modification of the life expectancy or life counter does not affect the<br />
tool states or tool change signal.<br />
When the type of the life counter is changed, be sure to change the life<br />
expectancy and life count as well.
11. SETTING AND DISPLAYING DATA OPERATION<br />
B–63534EN/02<br />
11.4.13<br />
Displaying and Setting<br />
Chopping Data<br />
<br />
CHOP<br />
Explanations<br />
Numerical input<br />
Teaching the position<br />
G81.1<br />
Chopping data, including the reference point (R point), upper dead point,<br />
lower dead point, and chopping feedrate, can be displayed and set by<br />
using the chopping screen.<br />
Procedure for displaying and setting chopping data<br />
1 Press the OFFSET<br />
SETTING function key.<br />
2 Press the continuous menu key<br />
displayed.<br />
several times until [CHOP] is<br />
3 Press the [CHOP] soft key.<br />
The following chopping screen appears:<br />
CHOPPING PARAMETER O1000 N10000<br />
R (REFERENCE) POINT = 50.000<br />
UPPER DEAD POINT = 40.000<br />
LOWER DEAD POINT = 10.000<br />
CHOPPING FEED RATE = 2000<br />
> _<br />
MDI **** *** *** 22:07:08<br />
[ ] [ ] [ TEACH ] [ +INPUT ] [ INPUT ]<br />
Position the cursor to the item to be set.<br />
Enter data, then press the [INPUT] soft key.<br />
To append the entered data to the current data, press the [+INPUT] soft<br />
key.<br />
The set data is displayed.<br />
The reference point (R point), upper dead point, and lower dead point can<br />
be set by teaching the current position (absolute coordinates).<br />
Move the current position (absolute coordinates) along the chopping<br />
axis to the position to be taught.<br />
Position the cursor to the item to be set.<br />
Press the [TEACH] soft key, then the [EXEC] soft key.<br />
The current position (absolute coordinates) is set for that item.<br />
The data for each item displayed on the chopping screen can also be<br />
changed by executing a G81.1 command.<br />
1058
B–63534EN/02<br />
Limitations<br />
Chopping feedrate<br />
Data setting conditions<br />
11.4.14<br />
Tool Length/Workpiece<br />
Origin Measurement B<br />
<br />
EDIT<br />
HANDLE<br />
MEMORY<br />
JOG<br />
MODE<br />
OPERATION<br />
1059<br />
11. SETTING AND DISPLAYING DATA<br />
If bit 7 (CHPX) of parameter No. 8360 is set to 1, the chopping feedrate<br />
cannot be set by using the chopping screen.<br />
The chopping screen can be used to set chopping data regardless of the<br />
current mode, even during automatic or manual operation that includes<br />
chopping. If the level of memory protection signal KEY2 (G046#4) is<br />
currently low, however, chopping data cannot be set.<br />
To enable measurement of the tool length, the following functions are<br />
supported: automatic measurement of the tool length by using a program<br />
command (G37) (automatic tool length measurement, described in<br />
Section II.14.2) and measurement of the tool length by manually moving<br />
the tool until it touches a reference position, such as the workpiece top<br />
surface (tool length measurement, described in Subsection III.11.4.2). In<br />
addition to these functions, tool length/workpiece origin measurement B<br />
is supported to simplify the tool length measurement procedure, thus<br />
facilitating and reducing the time required for machining setup. This<br />
function also facilitates the measurement of the workpiece origin offsets.<br />
This function allows the operator to specify T/M code commands or<br />
reference position return, by means of a manual numeric command, while<br />
the tool length offset measurement screen is displayed.<br />
Procedure for measuring the tool length offset value<br />
REMOTE MDI<br />
ZERO<br />
RETURN<br />
TEACH<br />
The tool length offset value can be measured by manually moving the tool<br />
until it touches the workpiece or a reference block. For details of this<br />
operation, refer to the manual supplied by the machine tool builder.<br />
1 Move the tool to the tool change position by means of manual<br />
reference position return, for example.<br />
2 Press mode selection switch HANDLE or JOG.<br />
3 Set the tool offset value measurement mode switch on the machine<br />
operator’s panel to ON. The tool length offset measurement screen,<br />
shown below, appears and ”OFST” blinks in the status display at the<br />
bottom of the screen.<br />
The tool length offset measurement screen varies slightly depending<br />
on whether tool length offset memory A, B (geometry compensation<br />
and wear compensation are treated differently), or C (geometry<br />
compensation and wear compensation are treated differently, and<br />
cutter compensation and tool length compensation are treated<br />
differently) is used.
11. SETTING AND DISPLAYING DATA OPERATION<br />
B–63534EN/02<br />
OFFSET 01234 N12345<br />
No. GEOMETRY (MACHINE)<br />
001 100.000 X–12345.678<br />
002 200.000 Y–12345.678<br />
003 300.000 Z–12345.678<br />
004 400.000 A–12345.678<br />
005 500.000 B–12345.678<br />
006 600.000 C–12345.678<br />
007 700.000 U–12345.678<br />
008 800.000 V–12345.678<br />
009 900.000 (T) 12345678<br />
010 –999.999 (M) 12345678<br />
(HM) –12345.678<br />
><br />
JOG **** *** *** ALM 13:14:15 OFST<br />
OFFSET SETTING WORK (OPRT)<br />
Tool length offset measurement screen for tool offset memory A<br />
OFFSET 01234 N12345<br />
No. GEOMETRY WEAR (MACHINE)<br />
001 100.000 100.000 X–12345.678<br />
002 200.000 200.000 Y–12345.678<br />
003 300.000 300.000 Z–12345.678<br />
004 400.000 400.000 A–12345.678<br />
005 500.000 500.000 B–12345.678<br />
006 600.000 600.000 C–12345.678<br />
007 700.000 700.000 U–12345.678<br />
008 800.000 800.000 V–12345.678<br />
009 900.000 900.000 (T) 12345678<br />
010 –999.999 –999.999 (M) 12345678<br />
(HM) –12345.678<br />
><br />
JOG **** *** *** ALM 13:14:15 OFST<br />
OFFSET SETTING WORK (OPRT)<br />
Tool length offset measurement screen for tool offset memory B<br />
OFFSET 01234 N12345<br />
(LENGTH) (MACHINE)<br />
No. GEOMETRY WEAR X–12345.678<br />
001 100.000 100.000 Y–12345.678<br />
002 200.000 200.000 Z–12345.678<br />
003 300.000 300.000 A–12345.678<br />
004 400.000 400.000 B–12345.678<br />
005 500.000 500.000 C–12345.678<br />
006 600.000 600.000 U–12345.678<br />
007 700.000 700.000 V–12345.678<br />
008 800.000 800.000 (T) 12345678<br />
009 900.000 900.000 (M) 12345678<br />
010 –999.999 –999.999 (HM) –12345.678<br />
><br />
JOG **** *** *** ALM 13:14:15 OFST<br />
OFFSET SETTING WORK (OPRT)<br />
Tool length offset measurement screen for tool offset memory C<br />
1060
B–63534EN/02<br />
OPERATION<br />
1061<br />
11. SETTING AND DISPLAYING DATA<br />
NOTE<br />
RESET<br />
Pressing the key resets the displayed T and M<br />
addresses to 0. Once MEM or MDI mode has been<br />
selected, however, the modal T and M codes are displayed.<br />
4 Use the numeric keys to enter the distance from the base measurement<br />
surface to the measurement surface, then press soft key [HM INPUT]<br />
to set the distance. For details of the measurement surface and base<br />
measurement surface, see Explanations, below.<br />
5 Select the tool for which the tool length offset value is to be measured.<br />
While ”OFST” is blinking at the bottom of the tool length offset<br />
measurement screen, a T code or M code can be specified in manual<br />
handle feed or jog feed mode (manual numeric command). First,<br />
enter Ttttt (where tttt is a T code number), then press the cycle start<br />
button on the machine operator’s panel or MDI panel. The Ttttt<br />
command is executed, thus selecting the tool to be measured. Then,<br />
usually, enter the M06 command to move the tool to the spindle<br />
position. Once the tool for which the tool length offset is to be<br />
measured has been selected at the spindle position, position the cursor<br />
to the tool offset number with which the tool length offset for the<br />
selected tool is to be stored. The positioning of the cursor to the offset<br />
number is usually done by the operator. Some machines, however,<br />
automatically position the cursor to an appropriate tool offset number<br />
upon the completion of tool selection, if bit 5 (QNI) of parameter No.<br />
5005 is set to 1.<br />
6 Perform manual handle feed or jog feed to move the tool until it<br />
touches the measurement surface of the workpiece or reference block.<br />
7 Press soft key [MEASURE B]. The tool length offset is stored in the<br />
tool offset memory. If tool offset memory B or C is being used, the<br />
tool length offset is set as the tool geometry value, while 0 is set as the<br />
tool wear offset. The cursor remains positioned to the set tool offset<br />
number. To automatically advance the cursor to the next tool offset<br />
number upon the completion of the setting an offset, press soft key<br />
[MEASURE B+], instead of [MEASURE B].<br />
8 Once the tool length offset has been set, the tool is automatically<br />
moved to the tool change position.<br />
9 This completes tool length offset measurement for a single tool. To<br />
measure the tool length offsets of other tools, repeat steps 5 to 8.<br />
10 Once the tool length offsets of all tools have been measured, set the<br />
tool offset measurement mode switch on the machine operator’s<br />
panel to OFF. The ”OFST” blinking indication is cleared from the<br />
bottom of the screen.
11. SETTING AND DISPLAYING DATA OPERATION<br />
B–63534EN/02<br />
Explanations<br />
Definition of tool length<br />
offset value<br />
<strong>Machine</strong> zero<br />
point<br />
(Reference tool<br />
tip position)<br />
Reference<br />
tool<br />
OFSL01<br />
OFSL01 : Tool length offset for tool T01<br />
OFSL02 : Tool length offset for tool T02<br />
OFSL03 : Tool length offset for tool T03<br />
In general, the tool length offset value can be defined in either of the<br />
following two ways. Both methods are based on the same concept: The<br />
difference between the tip position of the tool and that of a reference tool<br />
is used as the tool offset.<br />
(1)Definition 1<br />
The first method involves using the actual tool length as the tool length<br />
offset. In this case, the reference tool is an imaginary tool which has<br />
its tip at the machine zero point when the machine is positioned to the<br />
Z–axis machine zero point. The difference between the tip position of<br />
the tool to be measured and that of the reference tool, that is, the<br />
distance along the Z–axis from the machine zero point to the tip of the<br />
tool when the machine is positioned to the Z–axis machine zero point,<br />
is defined as the tool length offset.<br />
Tool<br />
T01<br />
1062<br />
OFSL02<br />
Tool<br />
T02<br />
OFSL03<br />
Tool<br />
T03<br />
Also, with this function, the tool is manually moved by means of jog<br />
feed until its tip touches the top surface of the workpiece or reference<br />
block. This surface is called the measurement surface. Assume that<br />
the top surface of the machines table is set as the measurement surface,<br />
although this is actually not allowed because the machine would be<br />
damaged. In such a case, distance L from the machine zero point to<br />
the machine table top surface is specific to that machine. Set distance<br />
L in a parameter (No. 5022). Assume Zt to be the machine coordinate<br />
of the tool at the position where it would touch the machine table top<br />
surface if that surface were set as the measurement surface. The tool<br />
length offset (OFSL) can then be easily calculated from L and Zt.<br />
Because the machine table top surface cannot actually be used as the<br />
measurement surface, however, that surface is defined as the base<br />
measurement surface and the distance from the base measurement<br />
surface to the actual measurement surface, that is, the height of the<br />
workpiece or reference block (Hm) must be set. The tool length offset<br />
value (OFSL) can thus be obtained from the formula shown below.
B–63534EN/02<br />
<strong>Machine</strong> zero<br />
point<br />
(Reference tool<br />
tip position)<br />
Base measurement<br />
surface<br />
L<br />
Zt<br />
OFSL Tool<br />
01<br />
Measurement<br />
surface<br />
OPERATION<br />
Zm<br />
Reference block<br />
Measurement<br />
surface<br />
1063<br />
Hm<br />
11. SETTING AND DISPLAYING DATA<br />
OFSL Tool<br />
T01<br />
Zm<br />
Workpiece<br />
<strong>Machine</strong> table <strong>Machine</strong> table<br />
L : Distance from the reference tool tip position to the base measurement surface (machine coordinate<br />
of the measurement surface)<br />
Hm : Distance from the base measurement surface to the actual measurement surface<br />
Zm : Distance from the tip of the tool to be measured to the measurement surface when the tool is<br />
positioned to the machine zero point<br />
(Zt : Distance from the tip of the tool to be measured to the base measurement surface when the tool is<br />
positioned to the machine zero point)<br />
OFSL : Tool length offset value (OFSL = Zm – Hm – L)<br />
!Hm<br />
Defining the actual tool length as the tool length offset has the<br />
advantage of eliminating the need for remeasuring, even if the<br />
workpiece is changed, provided the tool is not worn. Another<br />
advantage is that the tool length offset need not be re–set when<br />
multiple workpieces are machined. In this case, assign a workpiece<br />
coordinate system to each workpiece, using G54 to G59, and set the<br />
workpiece origin offset for each workpiece. For an explanation of how<br />
to measure the workpiece origin offset, see ”Measuring the workpiece<br />
origin offset”, below.
11. SETTING AND DISPLAYING DATA OPERATION<br />
B–63534EN/02<br />
<strong>Machine</strong><br />
zero point<br />
Reference<br />
tool<br />
Workpiece<br />
coordinate<br />
system origin<br />
(2)Definition 2<br />
In the second definition method, the tool length offset is the distance<br />
from the tool tip position to the workpiece coordinate system origin<br />
when the machine is positioned to the Z–axis zero point. A tool length<br />
offset defined in this way will be equal to the difference between the<br />
length of the tool to be measured and that of the reference tool, in the<br />
same way as with definition 1. The reference tool for definition 2 is,<br />
however, an imaginary tool which has a tip at the workpiece coordinate<br />
system origin when the machine is positioned to the Z–axis zero point.<br />
Tool<br />
T01<br />
OFSL01<br />
OFSL01 : Tool length offset for tool T01<br />
OFSL02 : Tool length offset for tool T02<br />
OFSL03 : Tool length offset for tool T03<br />
1064<br />
Tool<br />
T02<br />
OFSL02<br />
Workpiece<br />
Tool<br />
T03<br />
OFSL03
B–63534EN/02<br />
<strong>Machine</strong><br />
zero point<br />
Workpiece coordinate<br />
system origin<br />
(base measurement<br />
surface)<br />
Measurement<br />
surface<br />
OFSL<br />
Tool<br />
T01<br />
OPERATION<br />
1065<br />
11. SETTING AND DISPLAYING DATA<br />
The base measurement surface for this definition is located at the<br />
workpiece coordinate system origin. Because the tip of the reference<br />
tool is also located at the workpiece coordinate system origin, distance<br />
L from the reference tool tip position to the base measurement surface<br />
is 0. Set, therefore, 0 in the parameter for distance L (No. 5022). The<br />
actual measurement surface is usually the same as the base<br />
measurement surface, located at the workpiece coordinate system<br />
origin. If, however, the measurement surface is the top surface of the<br />
reference block, or if the workpiece coordinate system origin is located<br />
on other than the top surface of the workpiece (for example, when the<br />
origin is shifted from the workpiece top surface by an amount equal<br />
to the cutting allowance), set the distance from the base measurement<br />
surface to the actual measurement surface as Hm, such that the tool<br />
length offset (OFSL) can be calculated using the same formula as that<br />
used for definition 1.<br />
Zm<br />
Reference block<br />
Hm<br />
Measurement<br />
surface<br />
OFSL<br />
Tool<br />
T01<br />
Zm<br />
Workpiece<br />
<strong>Machine</strong> table <strong>Machine</strong> table<br />
L : Distance from the reference tool tip position to the base measurement surface (= 0)<br />
Hm : Distance from the base measurement surface to the actual measurement surface<br />
Zm : Distance from the tip of the tool to be measured to the measurement surface when the<br />
tool is positioned to the machine zero point<br />
OFSL : Tool length offset (OFSL = Zm – Hm – L)<br />
Hm
11. SETTING AND DISPLAYING DATA OPERATION<br />
B–63534EN/02<br />
Measuring the tool<br />
length offset along a<br />
specified axis<br />
Tool change position<br />
The reference tool for definition 2 has a tip at the workpiece coordinate<br />
system origin when the machine is positioned to the Z–axis zero point.<br />
Whenever the workpiece is changed, therefore, the tool length offset<br />
must be remeasured. Remeasuring is not, however, necessary if the<br />
difference between the workpiece coordinate system origin for a new<br />
workpiece and that when the tool length offset value was measured is<br />
set as the new workpiece origin offset (any of G54 to G59). In such<br />
a case, the tool length offset need not be modified, even when the<br />
workpiece is changed.<br />
Taking a different point of view, definition 2 can be thought of as<br />
setting the workpiece origin offset as the tool length offset for each<br />
tool.<br />
Because the tool is usually mounted in parallel with the Z–axis, the tool<br />
length offset is measured by moving the tool along the Z–axis. Some<br />
machines, however, have their W–axis in parallel with the Z–axis, making<br />
it necessary to measure the tool length offset by moving the tool along the<br />
W–axis. Moreover, some machines, when fitted with an attachment,<br />
support the mounting of the tool in parallel with an axis other than the<br />
Z–axis. For such a machine, the tool length offset can be measured along<br />
a specified axis by setting bit 2 (TMA) of parameter No. 5007 to 1. To<br />
measure the tool length offset along an axis other than the Z–axis, first set<br />
distance L from the reference tool tip position to the base measurement<br />
surface, for each of the axes along which the tool length offset may be<br />
measured, in parameter No. 5022, in addition to distance L along the<br />
Z–axis. Next, set distance Hm from the base measurement surface to the<br />
actual measurement surface for the axis along which the tool length offset<br />
is to be measured (see Explanations, below). Finally, move the tool along<br />
that axis until it touches the workpiece or reference block, then enter the<br />
name of that axis before pressing soft key [MEASURE B] or [MEASURE<br />
B+]. When the tool offset is measured along the W–axis, for example,<br />
enter W then press soft key [MEASURE B] or [MEASURE B+].<br />
The tool change position must be set beforehand, using bits 1 (TC3) and<br />
0 (TC2) of parameter No. 5007.<br />
TC3 TC2 Meaning<br />
0 0 The tool change position is the first reference position<br />
(G28)<br />
0 1 The tool change position is the second reference position<br />
(G30 P2)<br />
1 0 The tool change position is the third reference position<br />
(G30 P3)<br />
1 1 The tool change position is the fourth reference position<br />
(G30 P4)<br />
1066
B–63534EN/02<br />
Measuring the Z–axis<br />
workpiece origin offset<br />
EDIT<br />
HANDLE<br />
MEMORY<br />
JOG<br />
MODE<br />
OPERATION<br />
Procedure for measuring the workpiece origin offset<br />
REMOTE MDI<br />
ZERO<br />
RETURN<br />
TEACH<br />
1067<br />
11. SETTING AND DISPLAYING DATA<br />
In addition to the workpiece origin offset along the tool lengthwise axis,<br />
that is, the Z–axis, the workpiece origin offsets along the X– and Y–axes,<br />
on a plane perpendicular to the Z–axis, can also be measured easily. The<br />
workpiece origin offsets along the X– and Y–axes can be measured<br />
regardless of whether the workpiece origin is located on a surface of the<br />
workpiece or at the center of a hole to be machined. For details of this<br />
measurement, refer to the manual supplied by the machine tool builder.<br />
1 Select a tool using an MDI command, then move it to the spindle<br />
position (see the explanation of the procedure for measuring the tool<br />
length offset). The tool length offset for the selected tool must be<br />
measured beforehand.<br />
2 Press mode selection switch HANDLE or JOG.<br />
3 Set the workpiece origin offset measurement mode switch on the<br />
machine operator’s panel to ON. The workpiece origin offset screen<br />
appears and ”WOFS” blinks in the status display at the bottom of the<br />
screen.<br />
4 Enter the tool length offset for the selected tool. Enter the offset using<br />
numeric keys then press soft key [TL INPUT].<br />
WORK COORDINATES<br />
(G54)<br />
01234 N12345<br />
No. DATA NO. DATA<br />
00 X–12345.678 02 X–12345.678<br />
(EXT) Y–12345.678 (G55) Y–12345.678<br />
Z–12345.678 Z–12345.678<br />
A–12345.678 A–12345.678<br />
01 X–12345.678 03 X–12345.678<br />
(G54) Y–12345.678 (G56) Y–12345.678<br />
Z–12345.678 Z–12345.678<br />
A–12345.678 A–12345.678<br />
(MACHINE) Z–12345.678 (TL) –12345.678<br />
><br />
JOG **** *** *** ALM 13:14:15 WOFS<br />
OFFSET SETTING WORK (OPRT)<br />
5 Position the cursor to the workpiece origin offset number to be used to<br />
store the offset (any of G54 to G59). No problem will arise even if the<br />
cursor is positioned to the offset for other than the Z–axis.<br />
6 Move the tool by means of manual handle feed or jog feed until it<br />
touches the top surface of the workpiece.<br />
7 Enter the axis name, Z, press soft key [MEASURE B], then press soft<br />
key [INPUT]. The Z–axis workpiece origin offset value is set and the<br />
cursor is positioned to the set Z–axis workpiece origin offset. There is<br />
no need to enter Z provided the parameter has been set so that only the<br />
Z–axis workpiece origin offset is to be measured (bit 3 (WMA) of No.<br />
5007 = 0).
11. SETTING AND DISPLAYING DATA OPERATION<br />
B–63534EN/02<br />
Measuring the X–/Y–axis<br />
workpiece origin offset<br />
based on a reference<br />
surface<br />
Measuring the X–/Y–axis<br />
workpiece origin offset<br />
based on a reference<br />
hole<br />
EDIT<br />
HANDLE<br />
MEMORY<br />
JOG<br />
MODE<br />
REMOTE MDI<br />
ZERO<br />
RETURN<br />
TEACH<br />
To set the workpiece origin on other than the workpiece top surface<br />
(for example, when the origin is shifted from the workpiece top<br />
surface by an amount equal to the cutting allowance), enter the<br />
amount of shift (S in the following figure) using the numeric keys,<br />
press soft key [MEASURE B], then press soft key [INPUT].<br />
Workpiece<br />
origin<br />
S<br />
1068<br />
Workpiece<br />
8 To measure any subsequent workpiece origins, retract the tool from<br />
the workpiece, then repeat steps 5 to 7.<br />
To set the X– or Y–axis workpiece origin offset on a specified surface of<br />
the workpiece, set bit 3 (WMA) of parameter No. 5007 to 1, then follow<br />
the same procedure as that for measuring the Z–axis workpiece origin<br />
offset. In step 4, however, enter the cutter compensation value for the<br />
selected tool, instead of the tool length offset. After entering the cutter<br />
compensation value with the numeric keys, press soft key [TL INPUT].<br />
NOTE<br />
When entering the cutter compensation value, ensure that<br />
its sign is entered correctly.<br />
⋅ When the measurement surface is located in the positive<br />
(+) direction relative to the tool, enter a minus (–) sign.<br />
⋅ When the measurement surface is located in the<br />
negative (–) direction relative to the tool, enter a plus (+)<br />
sign.<br />
1 Connect a measurement probe, fitted with a sensor, to the spindle.<br />
2 Press mode selection switch HANDLE or JOG.<br />
3 Set the workpiece origin offset measurement mode switch on the<br />
machine operator’s panel to ON. The workpiece origin offset screen<br />
appears and ”WOFS” blinks in the status display at the bottom of the<br />
screen, indicating that the preparation required prior to measuring the<br />
workpiece origin offset has been completed.<br />
4 Position the cursor to the workpiece origin offset number to be used to<br />
store the offset (any of G54 to G59). No problem will arise even if the<br />
cursor is positioned to the offset for other than the X– or Y–axis.<br />
5 Move the tool by means of manual handle feed or jog feed until the<br />
measurement probe touches the circumference of the hole. Do not<br />
move the tool along more than one axis at any one time.
B–63534EN/02<br />
Explanations<br />
Z–axis workpiece origin<br />
offset<br />
OPERATION<br />
1069<br />
11. SETTING AND DISPLAYING DATA<br />
6 As soon as the sensor detects contact with the circumference, input a<br />
skip signal to the machine, thus stopping the axial movement of<br />
manual handle feed or jog feed. Simultaneously, the position at<br />
which feed stopped is stored as the first measurement point. The<br />
machine coordinates of the stored measurement point are displayed at<br />
the bottom right of the screen, as follows:<br />
WORK COORDINATES 01234 N12345<br />
(G54) (TL) –12345.678<br />
No. DATA (MACHINE)<br />
00 X–12345.678 X–12345.678<br />
(EXT) Y–12345.678 Y–12345.678<br />
Z–12345.678 Z–12345.678<br />
A–12345.678 (HOLE MEASURED)<br />
#1 X–12345.678<br />
00 X–12345.678 Y–12345.678<br />
(G54) Y–12345.678 #2 X–12345.678<br />
Z–12345.678 Y–12345.678<br />
A–12345.678 #3 X–12345.678<br />
Y–12345.678<br />
><br />
JOG **** *** *** ALM 13:14:15 WOFS<br />
OFFSET SETTING WORK (OPRT)<br />
7 Move the measurement probe to the second measurement point. At<br />
this time, the CNC interlocks the machine to prevent the probe from<br />
moving in the direction in which it was moved so as to touch the<br />
current measurement point. For example, when the probe touched the<br />
measurement point after being moved in the +X direction, movement<br />
of the probe to the next measurement point is allowed only in the –X<br />
direction. Movement in the +X, +Y, or –Y direction is interlocked<br />
until the skip signal is set to 0. Once the probe touches the second<br />
measurement point, follow the same procedure as that for storing the<br />
first measurement point.<br />
8 Once the probe has touched the third measurement point, press soft<br />
key [MEASURE B], then [CENTER]. This calculates the center of<br />
the hole from the coordinates of the three measured points, then sets<br />
the X– and Y–axis workpiece origin offsets. To cancel and restart<br />
measurement at any point, press the RESET key. Pressing the RESET key<br />
clears the coordinates of all stored measurement points.<br />
Definitions 1 and 2, described in ”Definition of tool length offset” in<br />
Explanations for measuring the tool length offset, also apply to the<br />
general concept of the Z–axis workpiece origin offset, as follows:<br />
(1)Definition 1<br />
In definition 1, the Z–axis workpiece origin offset is defined as the<br />
distance from the machine zero point to the origin of the workpiece<br />
coordinate system.
11. SETTING AND DISPLAYING DATA OPERATION<br />
B–63534EN/02<br />
<strong>Machine</strong> zero<br />
point<br />
Workpiece<br />
origin<br />
(G54)<br />
OFSWG54<br />
OFSL<br />
Tool<br />
ZmG54<br />
Workpiece<br />
origin<br />
(G55)<br />
Workpiece (G54)<br />
1070<br />
OFSWG55! ZmG55<br />
Workpiece (G55)<br />
OFSL : Tool length offset for the tool used to measure the workpiece origin offset<br />
ZmG54 : Amount of movement from the machine zero point to the origin of the G54 workpiece<br />
when measured with a tool having a length of OFSL<br />
ZmG55 : Amount of movement from the machine zero point to the origin of the G55 workpiece<br />
when measured with a tool having a length of OFSL<br />
OFSWG54 : Workpiece origin offset for the G54 workpiece<br />
OFSWG55 : Workpiece origin offset for the G55 workpiece<br />
As can be seen from the above figure, the Z–axis workpiece origin<br />
offset can be calculated from the following formula:<br />
OFSW = Zm – OFSL<br />
where<br />
OFSW : Workpiece origin offset<br />
OFSL : Tool length offset for the tool used to measure the<br />
workpiece origin offset<br />
Zm : Amount of movement from the machine zero point to the<br />
workpiece origin when measured with a tool having a<br />
length of OFSL
B–63534EN/02<br />
<strong>Machine</strong><br />
zero point<br />
Workpiece<br />
origin<br />
(G54)<br />
OPERATION<br />
1071<br />
11. SETTING AND DISPLAYING DATA<br />
(2)Definition 2<br />
The tool length offset in definition 2 equals the Z–axis workpiece<br />
origin offset, as described above. Usually in this case, therefore, the<br />
workpiece origin offset need not be set. If, however, the workpiece is<br />
changed after its tool length offset has been measured, or if multiple<br />
workpieces are machined, the workpiece origin coordinates can be set<br />
as follows when assigning workpiece coordinate systems to G54 to<br />
G59, thus eliminating the need to remeasure the tool length offset.<br />
Tool<br />
OFSL<br />
Workpiece (G54)<br />
Workpiece<br />
origin<br />
(G55)<br />
OFSWG55<br />
ZmG55<br />
Workpiece (G55)<br />
OFSL : Tool length offset measured for the G54 workpiece<br />
ZmG55 : Amount of movement from the machine zero point to the origin of the G55 workpiece when<br />
measured with a tool having a length of OFSL<br />
OFSWG55 : Workpiece origin offset for the G55 workpiece (The workpiece origin offset for the G54 work<br />
piece is 0.)<br />
For definition 2, the workpiece origin offset can be calculated using<br />
the same formula as that used for definition 1:<br />
OFSW = Zm – OFSL<br />
where<br />
OFSW : Workpiece origin offset<br />
OFSL : Tool length offset for the tool used to measure the<br />
workpiece origin offset<br />
Zm : Amount of movement from the machine zero point to the<br />
workpiece origin when measured with a tool having a<br />
length of OFSL
11. SETTING AND DISPLAYING DATA OPERATION<br />
B–63534EN/02<br />
X–/Y–axis workpiece<br />
origin offset<br />
+Y<br />
Y–axis workpiece<br />
origin offset<br />
<strong>Machine</strong> zero<br />
point<br />
+X<br />
The X– and Y–axis workpiece origin offsets can be measured regardless<br />
of whether the workpiece origin is located on a surface of the workpiece<br />
or at the center of a hole to be machined.<br />
(1)When the workpiece origin is located on a surface<br />
Workpiece<br />
origin<br />
X–axis workpiece origin offset<br />
1072<br />
Workpiece<br />
In the above case, the workpiece origin is located on a side surface of<br />
the workpiece. The measurement of the X–/Y–axis workpiece origin<br />
offset when the origin is located on a surface of the workpiece is the<br />
same as that for the Z–axis workpiece origin offset, but with the<br />
following exception: The tool length offset for the tool used to<br />
measure the offset is used to calculate the Z–axis workpiece origin<br />
offset, while the cutter compensation value for the tool is used to<br />
calculate the X–/Y–axis workpiece origin offset.
B–63534EN/02<br />
+Z<br />
+X<br />
<strong>Machine</strong><br />
zero point<br />
Tool<br />
OFSR<br />
OPERATION<br />
Xm<br />
OFSW<br />
1073<br />
11. SETTING AND DISPLAYING DATA<br />
Workpiece<br />
origin<br />
Workpiece<br />
OFSR : Cutter compensation value for the tool used to measure the workpiece origin offset<br />
Xm : Amount of movement from the machine zero point to the workpiece origin when<br />
measured with a tool having a length of OFSR<br />
OFSW : Workpiece origin offset<br />
As can be seen from the above figure, the workpiece origin offset can<br />
be calculated from the following formula:<br />
OFSW = Xm – OFSR<br />
Pay particularly careful attention, however, to the sign of the cutter<br />
compensation value OFSR:<br />
The sign of OFSR is – when the measurement surface is located in the<br />
positive (+) direction relative to the tool center.<br />
The sign of OFSR is + when the measurement surface is located in the<br />
negative (–) direction relative to the tool center.
11. SETTING AND DISPLAYING DATA OPERATION<br />
B–63534EN/02<br />
+Y<br />
+X<br />
Y–axis workpiece<br />
origin offset<br />
<strong>Machine</strong><br />
zero point<br />
(2)When the workpiece origin is located at the center of a hole.<br />
X–axis workpiece origin offset<br />
1074<br />
Workpiece<br />
origin<br />
In the above case, the workpiece origin is located at the center of a hole<br />
in the workpiece. A measurement probe having a sensor at its tip is<br />
used to measure the positions of three arbitrary points on the<br />
circumference of the hole. The three points prescribe a unique circle,<br />
the center of which is set as the X–/Y–axis workpiece origin. Set bit<br />
4 (WMH) of parameter No. 5007 to 1 before starting the measurement.<br />
+Z<br />
+Y<br />
+X<br />
+<br />
X<br />
Measurement probe<br />
having a sensor
B–63534EN/02<br />
Using a skip signal<br />
11.4.15<br />
Displaying and Setting<br />
Rotary Table Dynamic<br />
Fixture Offset<br />
<br />
F-ACT<br />
Explanations<br />
OPERATION<br />
1075<br />
11. SETTING AND DISPLAYING DATA<br />
A measurement probe, fitted with a sensor, can also be used to measure<br />
the Z–axis workpiece origin offset or measure the X–/Y–axis workpiece<br />
origin offset based on a surface, in the same way as when measuring the<br />
X–/Y–axis workpiece origin offset based on a hole. By inputting a skip<br />
signal as soon as the probe touches the workpiece surface, feed is<br />
automatically stopped. Subsequently, apply the same procedure as that<br />
for each measurement.<br />
There are the following screens for the fixture offset function: Screen for<br />
checking the currently selected fixture offset value (fixture offset (ACT)<br />
screen) and screen for setting and checking eight groups of fixture offset<br />
values (fixture offset screen).<br />
Procedure for displaying the fixture offset (ACT) screen<br />
Continuous menu key<br />
1 Press function key OFFSET<br />
SETTING .<br />
2 Press continuous menu key several times until [F–ACT]<br />
appears.<br />
3 Press soft key [F–ACT].<br />
The following fixture offset (ACT) screen appears:<br />
FIXTURE OFFSET (ACT)<br />
ACT(P=01)<br />
X 0.000<br />
Y 0.000<br />
Z 0.000<br />
C 0.000<br />
B 0.000<br />
A 0.000<br />
[ ] [ ] [ ] [ ] [ ]<br />
This screen displays the currently selected fixture offset number (P) and<br />
fixture offset vector data.
11. SETTING AND DISPLAYING DATA OPERATION<br />
B–63534EN/02<br />
<br />
Explanations<br />
Procedure for displaying the fixture offset screen and setting data on the screen<br />
F OFFSET<br />
Continuous menu key<br />
Entering numeric values<br />
Number of groups of<br />
fixture offset values<br />
Outputting fixture offset<br />
values<br />
1 Press function key OFFSET<br />
SETTING .<br />
2 Press continuous menu key several times until [F–OFS]<br />
appears.<br />
3 Press soft key [F–OFS].<br />
The following fixture offset screen appears:<br />
FIXTURE OFFSET<br />
NO.01<br />
X 0.000<br />
Y 0.000<br />
Z 0.000<br />
C 0.000<br />
B 0.000<br />
A 0.000<br />
[NO.SRH] [ ] [ PUNCH ] [ +INPUT ] [ INPUT ]<br />
1076<br />
NO.02<br />
X 0.000<br />
Y 0.000<br />
Z 0.000<br />
C 0.000<br />
B 0.000<br />
A 0.000<br />
On this screen, eight groups of fixture offset values can be set and<br />
checked.<br />
Press soft key [(OPRT)] to display the above operation soft keys.<br />
– Use the page and cursor keys, and soft key [NO. SRH] to place the<br />
cursor at a desired item to be set.<br />
– Enter data, then press soft key [INPUT].<br />
– To add a value to already set data, press soft key [+INPUT].<br />
The displayed data is now changed to the set data.<br />
Data can also be set using the INPUT MDI key.<br />
NO. 01 to NO. 08 indicates the number of a group of fixture offset values.<br />
There are eight groups. Soft key [NO. SRH] can be used to search for a<br />
desired group number.<br />
Soft key [PUNCH] can be used to output fixture offset values to an<br />
external device. For details of the output format and how to input data,<br />
see Section II.14.14, “ROTARY TABLE DYNAMIC FIXTURE<br />
OFFSET,” in this manual.
B–63534EN/02<br />
11.5<br />
SCREENS<br />
DISPLAYED BY<br />
FUNCTION KEY<br />
#SYSTEM#<br />
SYSTEM<br />
11.5.1<br />
Displaying and Setting<br />
Parameters<br />
<br />
OPERATION<br />
1077<br />
11. SETTING AND DISPLAYING DATA<br />
When the CNC and machine are connected, parameters must be set to<br />
determine the specifications and functions of the machine in order to fully<br />
utilize the characteristics of the servo motor or other parts.<br />
This chapter describes how to set parameters on the MDI panel.<br />
Parameters can also be set with external input/output devices such as the<br />
Handy File (see III–8).<br />
In addition, pitch error compensation data used for improving the<br />
precision in positioning with the ball screw on the machine can be set or<br />
displayed by the operations under function key SYSTEM .<br />
See III–7 for the diagnostic screens displayed by pressing function key<br />
SYSTEM .<br />
When the CNC and machine are connected, parameters are set to<br />
determine the specifications and functions of the machine in order to fully<br />
utilize the characteristics of the servo motor. The setting of parameters<br />
depends on the machine. Refer to the parameter list prepared by the<br />
machine tool builder.<br />
Normally, the user need not change parameter setting.<br />
Procedure for displaying and setting parameters<br />
1 Set 1 for PARAMETER WRITE to enable writing. See the procedure<br />
for enabling/disabling parameter writing described below.<br />
2 Press function key SYSTEM .<br />
3 Press chapter selection soft key [PARAM] to display the parameter<br />
screen.<br />
PARAMETER (SETTING) O0010 N00002<br />
0000 SEQ INI ISO TVC<br />
0 0 0 0 0 0 0 0<br />
0001 FCV<br />
0 0 0 0 0 0 0 0<br />
0012 MIR<br />
X 0 0 0 0 0 0 0 0<br />
Y 0 0 0 0 0 0 0 0<br />
Z 0 0 0 0 0 0 0 0<br />
0020 I/O CHANNEL 0<br />
0022 0<br />
> _<br />
THND **** *** *** 16:05:59<br />
[ PARAM ] [ DGNOS ] [ PMC ] [ SYSTEM ] [ (OPRT) ]<br />
4 Move the cursor to the parameter number to be set or displayed in<br />
either of the following ways:<br />
Enter the parameter number and press soft key [NO.SRH] .
11. SETTING AND DISPLAYING DATA OPERATION<br />
B–63534EN/02<br />
Explanations<br />
Setting parameters with<br />
external input/output<br />
devices<br />
Move the cursor to the parameter number using the page keys,<br />
PAGE and<br />
PAGE<br />
1078<br />
, and cursor keys, , , , and .<br />
5 To set the parameter, enter a new value with numeric keys and press<br />
soft key [INPUT]. The parameter is set to the entered value and the<br />
value is displayed.<br />
6 Set 0 for PARAMETER WRITE to disable writing.<br />
Procedure for enabling/displaying parameter writing<br />
1 Select the MDI mode or enter state emergency stop.<br />
2 Press function key OFFSET<br />
SETTING .<br />
3 Press soft key [SETING] to display the setting screen.<br />
SETTING (HANDY) O0001 N00000<br />
PARAMETER WRITE = 1 (0:DISABLE 1:ENABLE)<br />
TV CHECK = 0 (0:OFF 1:ON)<br />
PUNCH CODE = 1 (0:EIA 1:ISO)<br />
INPUT UNIT = 0 (0:MM 1:INCH)<br />
I/O CHANNEL = 0 (0–3:CHANNEL NO.)<br />
SEQUENCE NO. = 0 (0:OFF 1:ON)<br />
TAPE FORMAT = 0 (0:NO CNV 1:F10/11)<br />
SEQUENCE STOP = 0 (PROGRAM NO.)<br />
SEQUENCE STOP = 11(SEQUENCE NO.)<br />
> _ S 0 T0000<br />
MDI **** *** *** 16:05:59<br />
[ OFFSET ] [ SETING ] [ WORK ] [ ] [ (OPRT) ]<br />
4 Move the cursor to PARAMETER WRITE using cursor keys.<br />
5 Press soft key [(OPRT)], then press [ON :1] to enable parameter<br />
writing.<br />
At this time, the CNC enters the P/S alarm state (No. 100).<br />
6 After setting parameters, return to the setting screen. Move the cursor<br />
to PARAMETER WRITE and press soft key [(OPRT)] , then press<br />
[OFF :0].<br />
7 Depress the RESET key to release the alarm condition. If P/S alarm No.<br />
000 has occurred, however, turn off the power supply and then turn it<br />
on, otherwise the P/S alarm is not released.<br />
See III–8 for setting parameters with external input/output devices such<br />
as the Handy File.
B–63534EN/02<br />
Parameters that require<br />
turning off the power<br />
Parameter list<br />
<br />
11.5.2<br />
Displaying and Setting<br />
Pitch Error<br />
Compensation Data<br />
OPERATION<br />
1079<br />
11. SETTING AND DISPLAYING DATA<br />
Some parameters are not effective until the power is turned off and on<br />
again after they are set. Setting such parameters causes P/S alarm 000.<br />
In this case, turn off the power, then turn it on again.<br />
Refer to the Parameter Manual (B–63530EN) for the parameter list.<br />
Some parameters can be set on the setting screen if the parameter list<br />
indicates ”Setting entry is acceptable”. Setting 1 for PARAMETER<br />
WRITE is not necessary when three parameters are set on the setting<br />
screen.<br />
If pitch error compensation data is specified, pitch errors of each axis can<br />
be compensated in detection unit per axis.<br />
Pitch error compensation data is set for each compensation point at the<br />
intervals specified for each axis. The origin of compensation is the<br />
reference position to which the tool is returned.<br />
The pitch error compensation data is set according to the characteristics<br />
of the machine connected to the NC. The content of this data varies<br />
according to the machine model. If it is changed, the machine accuracy<br />
is reduced.<br />
In principle, the end user must not alter this data.<br />
Pitch error compensation data can be set with external devices such as the<br />
Handy File (see Chapter III–8). Compensation data can also be written<br />
directly with the MDI panel.<br />
The following parameters must be set for pitch error compensation. Set<br />
the pitch error compensation value for each pitch error compensation<br />
point number set by these parameters.<br />
In the following example, 33 is set for the pitch error compensation point<br />
at the reference position.<br />
Compensation number parameter<br />
for the reference position (No.<br />
3620)<br />
Pitch error compensation value (absolute value)<br />
3<br />
2<br />
1<br />
31 32 33 34 35 36 37<br />
Compensation number parameter<br />
for the compensation<br />
point having the largest<br />
value (No. 3622)<br />
Reference posi-<br />
–1<br />
–2<br />
tion<br />
Compensation magnification<br />
parameter (No. 3623)<br />
Compensation number parameter<br />
for the compensation point having<br />
the smallest value (No. 3621)<br />
Compensation interval<br />
parameter (No. 3624)<br />
Compensation<br />
position number<br />
Compensation<br />
value to be set<br />
31<br />
+3<br />
32<br />
–1<br />
33<br />
–1<br />
34<br />
+1<br />
35<br />
+2<br />
36<br />
–1<br />
37<br />
–3<br />
Number of the pitch error compensation point at the reference position<br />
(for each axis): Parameter 3620<br />
Number of the pitch error compensation point having the smallest<br />
value (for each axis): Parameter 3621
11. SETTING AND DISPLAYING DATA OPERATION<br />
B–63534EN/02<br />
Bidirectional pitch error<br />
compensation<br />
Number of the pitch error compensation point having the largest value<br />
(for each axis): Parameter 3622<br />
Pitch error compensation magnification (for each axis): Parameter<br />
3623<br />
Interval of the pitch error compensation points (for each axis):<br />
Parameter 3624<br />
Travel distance per revolution of pitch error compensation of the<br />
rotary axis type (for each axis): Parameter 3625<br />
The bidirectional pitch error compensation function allows independent<br />
pitch error compensation in different travel directions. (When the movement<br />
is reversed, compensation is automatically carried out as in a backlash.)<br />
To use this function, specify pitch error compensation for each travel<br />
direction, that is, separately for the positive and negative directions of a<br />
movement.<br />
When using bidirectional pitch error compensation (setting the BDP bit<br />
(bit 0 of parameter 3605) to 1), specify the following parameters in<br />
addition to the pitch error compensation parameter.<br />
Number of the pitch error compensation point at the negative end (for<br />
travel in the positive direction, for each axis): Parameter 3620<br />
Number of the pitch error compensation point at the positive end (for<br />
travel in the positive direction, for each axis): Parameter 3621<br />
Number of the pitch error compensation point at the negative end (for<br />
travel in the negative direction, for each axis): Parameter 3626<br />
Number of the pitch error compensation point at the positive end (for<br />
travel in the negative direction, for each axis): Parameter 3627<br />
Procedure for displaying and setting the pitch error compensation data<br />
1 Set the following parameters:<br />
Number of the pitch error compensation point at the reference<br />
position (for each axis): Parameter 3620<br />
Number of the pitch error compensation point having the smallest<br />
value (for each axis): Parameter 3621<br />
Number of the pitch error compensation point having the largest<br />
value (for each axis): Parameter 3622<br />
Pitch error compensation magnification (for each axis): Parameter<br />
3623<br />
Interval of the pitch error compensation points (for each axis):<br />
Parameter 3624<br />
Travel distance per revolution of pitch error compensation of the<br />
rotary axis type (for each axis): Parameter 3625<br />
When using bidirectional pitch error compensation (setting the BDP<br />
bit (bit 0 of parameter 3605) to 1), specify the following parameters<br />
in addition to the pitch error compensation parameter.<br />
Number of the pitch error compensation point at the negative end<br />
(for travel in the positive direction, for each axis): Parameter 3620<br />
1080
B–63534EN/02<br />
<br />
Continuous menu key<br />
OPERATION<br />
1081<br />
11. SETTING AND DISPLAYING DATA<br />
Number of the pitch error compensation point at the positive end<br />
(for travel in the positive direction, for each axis): Parameter 3621<br />
Number of the pitch error compensation point at the negative end<br />
(for travel in the negative direction, for each axis): Parameter 3626<br />
Number of the pitch error compensation point at the positive end<br />
(for travel in the negative direction, for each axis): Parameter 3627<br />
2 Press function key SYSTEM .<br />
3 Press the continuous menu key , then press chapter selection soft<br />
key [PITCH].<br />
The following screen is displayed:<br />
<br />
(X)<br />
NO. DATA<br />
0000 0<br />
0001 0<br />
0002 0<br />
0003 0<br />
0004 0<br />
0005 0<br />
0006 0<br />
0007 0<br />
0008 0<br />
0009 0<br />
NO. DATA<br />
0010 0<br />
0011 0<br />
0012 0<br />
0013 0<br />
0014 0<br />
0015 0<br />
0016 0<br />
0017 0<br />
0018 0<br />
0019 0<br />
NO. DATA<br />
0020 0<br />
0021 0<br />
0022 0<br />
0023 0<br />
0024 0<br />
0025 0<br />
0026 0<br />
0027 0<br />
0028 0<br />
0029 0<br />
> _<br />
MEM **** *** *** 16:05:59<br />
[ NO.SRH ] [ ON:1 ] [ OFF:0 ] [ +INPUT ] [ –INPUT ]<br />
4 Move the cursor to the compensation point number to be set in either<br />
of the following ways:<br />
Enter the compensation point number and press the [NO.SRH] soft<br />
key.<br />
Move the cursor to the compensation point number using the page<br />
, and cursor keys, , , , and<br />
keys, PAGE and PAGE<br />
.<br />
5 Enter a value with numeric keys and press the [INPUT] soft key.
11. SETTING AND DISPLAYING DATA OPERATION<br />
B–63534EN/02<br />
11.6<br />
DISPLAYING THE<br />
PROGRAM NU<strong>MB</strong>ER,<br />
SEQUENCE<br />
NU<strong>MB</strong>ER, AND<br />
STATUS, AND<br />
WARNING<br />
MESSAGES FOR<br />
DATA SETTING OR<br />
INPUT/OUTPUT<br />
OPERATION<br />
11.6.1<br />
Displaying the Program<br />
Number and Sequence<br />
Number<br />
The program number, sequence number, and current CNC status are<br />
always displayed on the screen except when the power is turned on, a<br />
system alarm occurs, or the PMC screen is displayed.<br />
If data setting or the input/output operation is incorrect, the CNC does not<br />
accept the operation and displays a warning message.<br />
This section describes the display of the program number, sequence<br />
number, and status, and warning messages displayed for incorrect data<br />
setting or input/output operation.<br />
The program number and sequence number are displayed at the top right<br />
on the screen as shown below.<br />
PROGRAM<br />
O2000 ;<br />
N100 G92 X0 Y0 Z70. ;<br />
N110 G91 G00 Y–70. ;<br />
N120 Z–70. ;<br />
N130 G42 G39 I–17.5<br />
O2000 N00130<br />
N140 G41 G03 X–17.5 Y17.5 R17.5 ;<br />
N150 G01 X–25. ;<br />
N160 G02 X27.5 Y27.5 R27.5<br />
N170 G01 X20. ;<br />
N180 G02 X45. Y45. R45. ;<br />
> _<br />
EDIT **** *** *** 16:05:59<br />
[ PRGRM ] [ CHECK ] [ CURRNT ] [ NEXT ] [ (OPRT) ]<br />
1082<br />
<br />
<br />
<br />
<br />
The program number and sequence number displayed depend on the<br />
screen and are given below:<br />
On the program screen in the EDIT mode on Background edit screen :<br />
The program No. being edited and the sequence number just prior to the<br />
cursor are indicated.<br />
Other than above screens :<br />
The program No. and the sequence No. executed last are indicated.<br />
Immediately after program number search or sequence number<br />
search :<br />
Immediately after the program No. search and sequence No. search, the<br />
program No. and the sequence No. searched are indicated.
B–63534EN/02<br />
11.6.2<br />
Displaying the Status<br />
and Warning for Data<br />
Setting or Input/Output<br />
Operation<br />
<br />
Description of each display<br />
(1) Current mode<br />
(2) Automatic operation<br />
status<br />
(3) Axis moving<br />
status/dwell status<br />
(4) State in which an<br />
auxiliary function is<br />
being executed<br />
OPERATION<br />
1083<br />
11. SETTING AND DISPLAYING DATA<br />
The current mode, automatic operation state, alarm state, and program<br />
editing state are displayed on the next to last line on the screen allowing<br />
the operator to readily understand the operation condition of the system.<br />
If data setting or the input/output operation is incorrect, the CNC does not<br />
accept the operation and a warning message is displayed on the next to last<br />
line of the screen. This prevents invalid data setting and input/output<br />
errors.<br />
Data is out of range.<br />
(Note) Actually, this is displayed in the area starting from .<br />
(5)<br />
––EMG––<br />
(Note) Actually, 5 is displayed in<br />
the area for and .<br />
(1)<br />
EDIT<br />
(2)<br />
STOP<br />
(3)<br />
MTN<br />
(4)<br />
FIN<br />
(6)<br />
ALM<br />
(7) (8)<br />
hh:mm:ss INPUT<br />
(Display soft keys)<br />
(10)<br />
HEAD1<br />
NOTE<br />
Actually, is displayed at the position where is now<br />
displayed.<br />
MDI : Manual data input, MDI operation<br />
MEM : Automatic operation (memory operation)<br />
RMT : Automatic operation (DNC operation, or such like)<br />
EDIT : Memory editing<br />
HND : Manual handle feed<br />
JOG : Jog feed<br />
TJOG : TEACH IN JOG<br />
THND : TEACH IN HANDLE<br />
INC : Manual incremental feed<br />
REF : Manual reference position return<br />
**** : Reset (When the power is turned on or the state in which<br />
program execution has terminated and automatic operation has<br />
terminated.)<br />
STOP : Automatic operation stop (The state in which one block has<br />
been executed and automatic operation is stopped.)<br />
HOLD : Feed hold (The state in which execution of one block has been<br />
interrupted and automatic operation is stopped.)<br />
STRT : Automatic operation start–up (The state in which the system<br />
operates automatically)<br />
MTN : Indicates that the axis is moving.<br />
DWL : Indicates the dwell state.<br />
*** : Indicates a state other than the above.<br />
FIN : Indicates the state in which an auxiliary function is being<br />
executed. (Waiting for the complete signal from the PMC)<br />
*** : Indicates a state other than the above.
11. SETTING AND DISPLAYING DATA OPERATION<br />
B–63534EN/02<br />
(5) Emergency stop or<br />
reset status<br />
(6) Alarm status<br />
(7) Current time<br />
(8) Program editing status<br />
(9) Warning for data setting<br />
or input/output<br />
operation<br />
Tool post name<br />
(for the two–path<br />
control)<br />
––EMG–– Indicates emergency stop.(Blinks in reversed display.)<br />
––RESET–– Indicates that the reset signal is being received.<br />
ALM : Indicates that an alarm is issued. (Blinks in reversed display.)<br />
BAT : Indicates that the battery is low. (Blinks in reversed display.)<br />
Space : Indicates a state other than the above.<br />
hh:mm:ss – Hours, minutes, and seconds<br />
INPUT : Indicates that data is being input.<br />
OUTPUT : Indicates that data is being output.<br />
SRCH : Indicates that a search is being performed.<br />
EDIT : Indicates that another editing operation is being performed<br />
(insertion, modification, etc.)<br />
LSK : Indicates that labels are skipped when data is input.<br />
RSTR : Indicates that the program is being restarted<br />
Space : Indicates that no editing operation is being performed.<br />
When invalid data is entered (wrong format, value out of range, etc.),<br />
when input is disabled (wrong mode, write disabled, etc.), or when<br />
input/output operation is incorrect (wrong mode, etc.), a warning message<br />
is displayed. In this case, the CNC does not accept the setting or<br />
input/output operation (retry the operation according to the message).<br />
The following are examples of warning messages:<br />
Example 1)<br />
When a parameter is entered<br />
> 1<br />
EDIT WRONG MODE<br />
Example 2)<br />
When a parameter is entered<br />
> 999999999<br />
MDI TOO MANY DIGITS<br />
1084<br />
(Display sof tkeys)<br />
(Display soft keys)<br />
Example 3)<br />
When a parameter is output to an external input/output device<br />
> _<br />
MEM WRONG MODE<br />
(Display soft keys)<br />
PATH1 : Tool post 1 is selected.<br />
PATH2 : Tool post 2 is selected.<br />
Other names can be used depending on the settings of parameters 3141<br />
to 3147.<br />
The tool post name is displayed at the position where is now displayed.<br />
While the program is edited, is displayed.
B–63534EN/02<br />
11.7<br />
SCREENS<br />
DISPLAYED BY<br />
FUNCTION KEY<br />
#MESSAGE#<br />
11.7.1<br />
External Operator<br />
Message History<br />
Display<br />
<br />
MSGHIS<br />
OPERATION<br />
1085<br />
11. SETTING AND DISPLAYING DATA<br />
By pressing the function key MESSAGE , data such as alarms, alarm history<br />
data, and external messages can be displayed.<br />
For information relating to alarm display, see Section III.7.1. For<br />
information relating to alarm history display, see Section III.7.2.<br />
For information relating to external message display, see the relevant<br />
manual supplied by the machine tool builder.<br />
External operator messages can be preserved as history data.<br />
Preserved history data can be displayed on the external operator message<br />
history screen.<br />
Procedure for external operator message history display<br />
Date and Page number<br />
Message nuumber<br />
Explanations<br />
Updating external<br />
operator message<br />
history data<br />
MESSAGE<br />
Continuous menu key<br />
Display range<br />
(Up to 255 characters)<br />
1 Press the MESSAGE function key.<br />
2 Press the continuous menu key , then press the chapter selection<br />
soft key [MSGHIS]. The screen shown below appears.<br />
MESSAGE HISTORY O0000 N00000<br />
01/09/12 17:25:00 PAGE:1<br />
NO. ****<br />
MEM STRT MIN FIN ALM 09:36:48<br />
[ ] [ MSGHIS ] [ ] [ ] [ (OPRT) ]<br />
NOTE<br />
Up to 255 characters can be specified for an external<br />
operator message. By setting MS1 and MS0 (bits 7 and 6<br />
of parameter No. 3113), however, the number of characters<br />
that can be preserved as external operator message history<br />
data can be restricted, and the number of history data items<br />
selected.<br />
When an external operator message number is specified, updating of the<br />
external operator message history data is started; this updating is<br />
continued until a new external operator message number is specified or<br />
deletion of the external operator message history data is specified.
11. SETTING AND DISPLAYING DATA OPERATION<br />
B–63534EN/02<br />
Clearing external<br />
operator message<br />
history data<br />
Limitations<br />
Two–path control<br />
Option<br />
To clear external operator message history data, press the [CLEAR] soft<br />
key. This clears all external operator message history data. (Set MSGCR<br />
(bit 0 of parameter No. 3113) to 1.)<br />
Note that when MS1 and MS0 (bits 7 and 6 of parameter No. 3113), used<br />
to specify the number of external operator message history data items to<br />
be displayed, are changed, all existing external operator message history<br />
data is cleared.<br />
When two–path control is exercised, the external operator messages for<br />
system 1 are displayed. (The external operator messages for system 2 are<br />
not displayed.)<br />
Before this function can be used, the external data input function or<br />
optional external message function must be selected.<br />
1086
B–63534EN/02<br />
11.8<br />
CLEARING THE<br />
SCREEN<br />
11.8.1<br />
Erase Screen Display<br />
<br />
Clearing the screen<br />
Restoring the screen<br />
Limitations<br />
OPERATION<br />
1087<br />
11. SETTING AND DISPLAYING DATA<br />
When screen indication isn’t necessary, the life of the back light for LCD<br />
can be put off by turning off the back light.<br />
The screen can be cleared by pressing specific keys. It is also possible to<br />
specify the automatic clearing of the screen if no keys are pressed during<br />
a period specified with a parameter.<br />
But, the life of the back light may be contracted all the more when the<br />
clearing of screen and re–indication of screen are repeated beyond the<br />
necessity.<br />
This effect can be expected when a screen is cleared for more than one<br />
hour.<br />
Holding down the CAN key and pressing an arbitrary function key clears<br />
the screen.<br />
Procedure for erase screen display<br />
Hold down the CAN key and press an arbitrary function key (such as<br />
POS and PROG ).<br />
Press an arbitrary function key.<br />
Erase screen display function can not be used with the<br />
<strong>160i</strong>/<strong>180i</strong>/<strong>160i</strong>s/<strong>180i</strong>s.
11. SETTING AND DISPLAYING DATA OPERATION<br />
B–63534EN/02<br />
11.8.2<br />
Automatic Erase<br />
Screen Display<br />
Clearing the screen<br />
Restoring the screen<br />
Explanations<br />
The CNC screen is automatically cleared if no keys are pressed during the<br />
period (in minutes) specified with a parameter. The screen is restored by<br />
pressing any key.<br />
Procedure for automatic erase screen display<br />
Clearing the screen<br />
using CAN + function key<br />
Specified period<br />
Alarm for another path<br />
The CNC screen is cleared once the period (minutes) specified with<br />
parameter No. 3123 has elapsed, provided the following conditions are<br />
satisfied:<br />
Conditions for clearing the CNC screen<br />
Parameter No. 3123 is set to other than 0.<br />
None of the following keys have been pressed:<br />
MDI keys<br />
Soft keys<br />
External input keys<br />
No alarm has been issued.<br />
The cleared CNC screen is restored once at least one of the following<br />
conditions is satisfied:<br />
Conditions for restoring the CNC screen<br />
Any of the following keys has been pressed:<br />
MDI keys<br />
Soft keys<br />
Externally input keys<br />
An alarm has been issued.<br />
Some machines feature a special key for restoring the screen. For an<br />
explanation of the location and use of this key, refer to the corresponding<br />
manual, supplied by the machine tool builder.<br />
If parameter No. 3123 is set to 0, clearing of the screen using the CAN key<br />
and a function key (III–11.8.1) is disabled.<br />
The period specified with parameter No. 3123 is valid only for tool post<br />
1.<br />
The screen is not cleared if an alarm is issued for tool post 1 or 2 or the<br />
loader before the specified period elapses.<br />
CAUTION<br />
Pressing any key while the screen is being cleared restores<br />
the screen. In such a case, however, the function assigned<br />
to the pressed key is initiated. Do not press the DELET ,<br />
INSERT<br />
, or ALTER key to restore the screen, therefore.<br />
1088
B–63534EN/02<br />
Limitations<br />
OPERATION<br />
1089<br />
11. SETTING AND DISPLAYING DATA<br />
Automatic erase screen display function can not be used with the<br />
<strong>160i</strong>/<strong>180i</strong>/<strong>160i</strong>s/<strong>180i</strong>s.
12. GRAPHICS FUNCTION OPERATION<br />
B–63534EN/02<br />
12 <br />
<br />
Two graphic functions are available. One is a graphic display function,<br />
and the other is a dynamic graphic display function.<br />
The graphic display function can draw the tool path specified by a<br />
program being executed on a screen. The graphic display function also<br />
allows enlargement and reduction of the display.<br />
The dynamic graphic display function can draw a tool path and machining<br />
profile.<br />
In tool path drawing, automatic scaling and solid drawing are possible.<br />
In machining profile drawing, the status of machining in progress can be<br />
drawn through simulation. Blank figures can also be drawn.<br />
The background drawing function enables drawing to be performed by<br />
one program while machining is performed by another program.<br />
This chapter mainly explains drawing procedures and drawing<br />
parameters for the following:<br />
1. Drawing the tool path specified by a program being executed, with the<br />
graphic display function<br />
2. Drawing the tool path with the dynamic graphic display function<br />
3. Drawing the machining profile with the dynamic graphic display<br />
function<br />
4. Background drawing procedure<br />
1090
B–63534EN/02 OPERATION<br />
12. GRAPHICS FUNCTION<br />
12.1<br />
GRAPHICS DISPLAY<br />
<br />
Graphics display procedure<br />
It is possible to draw the programmed tool path on the screen, which<br />
makes it possible to check the progress of machining, while observing the<br />
path on the screen.<br />
In addition, it is also possible to enlarge/reduce the screen.<br />
Before drawing, graphic parameters must be set.<br />
When the dynamic graphics function is used, the graphics function<br />
described in this section cannot be used. See Section 12.2 for the dynamic<br />
graphics function.<br />
1 Press function key GRAPH . Press CUSTOM<br />
GRAPH for a small MDI unit.<br />
The graphic parameter screen shown below appears. (If this screen<br />
does not appear, press soft key [PARAM].)<br />
GRAPHIC PARAMETER<br />
AXES P= <br />
(XY=0.YZ=1,ZY=2, XZ=3, XYZ=4, ZXY=5)<br />
RANGE (MAX.)<br />
X= 115000 Y= 150000 Z= 0<br />
RANGE (MIN.)<br />
X= 0 Y= 0 Z= 0<br />
SCALE K= 70<br />
GRAPHIC CENTER<br />
X= 57500 Y= 75000 Z= 0<br />
PROGRAM STOP N= 0<br />
AUTO ERASE A= 1<br />
MDI **** *** *** 14 : 23 : 54<br />
GRAPH<br />
1091<br />
O0000 N00000<br />
2 Move the cursor with the cursor keys to a parameter to set.<br />
3 Enter data, then press the INPUT key.<br />
4 Repeat steps 2 and 3 until all required parameters are specified.<br />
5 Press soft key [GRAPH].
12. GRAPHICS FUNCTION OPERATION<br />
B–63534EN/02<br />
Explanation<br />
RANGE<br />
(Actual graphic range)<br />
Setting the graphics<br />
range<br />
6 Automatic operation is started and machine movement is drawn on<br />
the screen.<br />
MEM **** *** *** 14 : 23 : 03<br />
<br />
Z<br />
X Y<br />
1092<br />
<br />
The size of the graphic screen will be as follows:<br />
<br />
72mm<br />
(120)<br />
<br />
0001 00012<br />
X 0.000<br />
Y 0.000<br />
Z 0.000<br />
S 0T<br />
Gc : Center of the screen<br />
72mm<br />
(120)<br />
<br />
Note : ( ) indicate the values for 9.5”/10.4” LCD.<br />
Fig. 12.1 (a) Graphic range<br />
As shown in Fig.12.1 (a), the maximum graphics range is an area of<br />
approx. 144 mm (width) × 90 mm (height) for 7.2″/8.4″ LCD and approx.<br />
240 mm (width) ×150 mm (height) for 9.5″/10.4″ LCD.<br />
To draw a section of the program within the actual graphics range, set the<br />
graphics range using one of the following two methods:<br />
1 . Set the center coordinates of the range and the magnification.<br />
2 . Set the maximum and minimum coordinates for the range in the<br />
program.<br />
Whether 1 or 2 is used depends on which parameters are set last. A<br />
graphics range which has been set is retained when the power is turned<br />
off.
B–63534EN/02 OPERATION<br />
12. GRAPHICS FUNCTION<br />
1. Setting the center<br />
coordinate of the<br />
graphics range and<br />
graphics magnification<br />
Set the center of the graphic range to the center of the screen. If the<br />
drawing range in the program can be contained in the above actual<br />
graphics range, set the magnification to 1 (actual value set is 100).<br />
When the drawing range is larger than the maximum graphics range or<br />
much smaller than the maximum graphics range, the graphics<br />
magnification should be changed. The graphics magnification is 0.01 to<br />
100.00 times, which is usually determined as follows;<br />
Graphics magnification=Graphics magnification (H), or graphics<br />
magnifications (V), whichever is smaller<br />
Graphics magnification H =α/(length on program to horizontal<br />
direction axis)<br />
Graphics magnification V=β/(length on program to vertical<br />
direction axis)<br />
α:144mm (for seven soft key type)<br />
β:90mm (for twelve soft key type)<br />
α:240mm (for seven soft key type)<br />
β:150mm (for twelve soft key type)<br />
The graphics magnification is always based on the center of the screen.<br />
1093<br />
Program<br />
Program<br />
<br />
Gc : Center of screen<br />
Gc<br />
Graphics range after<br />
magnification is applied<br />
Graphics range before<br />
magnification <br />
Graphics range before<br />
magnification <br />
Graphics range after<br />
magnification is applied<br />
Fig. 12.1 (b) Applying graphics magnification (Example of enlargement)
12. GRAPHICS FUNCTION OPERATION<br />
B–63534EN/02<br />
2. Setting the maximum<br />
and minimum<br />
coordinates for the<br />
drawing range in the<br />
program<br />
Work coordinate system<br />
and graphics<br />
(Example)<br />
<br />
Graphics origin<br />
Gc (=30mm, 50mm)<br />
Graphics point<br />
When the actual tool path is not near the center of the screen, method 1<br />
will cause the tool path to be drawn out of the geaphics range if graphics<br />
magnification is not set properly.<br />
To avoid such cases, the following six graphic parameters are prepared;<br />
Graphic range (Max.) X<br />
Graphic range (Max.) Y<br />
Graphic range (Max.) Z<br />
Graphic range (Min.) X<br />
Graphic range (Min.) Y<br />
Graphic range (Min.) Z<br />
With the above parameters, the center of screen (Gcx, Gcy, Gcz) is<br />
determined by the CNC as follows;<br />
Gcx = (X (MAX.) + X (MIN.) ) /2<br />
Gcy = (Y (MAX.) + Y (MIN.) ) /2<br />
Gcz = (Z (MAX.) + Z (MIN.) ) / 2<br />
The unit of the value will be 0.001 mm or 0.0001 inch depending on the<br />
input unit.<br />
Graphics magnification is applied automatically. When the graphics<br />
range is specified, the center coordinates and magnification do not need<br />
to be calculated.<br />
The graphic origin and graphic center point will not be changed even if<br />
the workpiece coordinate origin is changed.<br />
In other words, the workpiece coordinate origin is always consistent with<br />
the graphic origin.<br />
<br />
G92 X60. Y90. ;<br />
After execution<br />
1094<br />
<br />
Graphics point (60mm, 90mm)<br />
Graphics origin=workpiece coordinate origin<br />
As shown in the above example, when the command of G92 is specified, the drawing is moved as indicated<br />
by . The position of the graphics origin or graphics center does not change.<br />
Fig. 12.1 (c) Workpiece coordinate origin and graphics origin<br />
Gc
B–63534EN/02 OPERATION<br />
12. GRAPHICS FUNCTION<br />
Graphics parameter<br />
⋅ AXES<br />
Specify the plane to use for drawing. The user can choose from the<br />
following six coordinate systems.<br />
With two–path control, a different drawing coordinate system can be<br />
selected for each tool post.<br />
<br />
<br />
(1) (2) (3)<br />
X<br />
1095<br />
<br />
(4) (5)<br />
<br />
X X <br />
The rotating angle (horizontal, vertical) for isometric display of 5) and 6) is<br />
fixed at 45°in both cases.<br />
<br />
X<br />
<br />
(6)<br />
Fig. 12.1 (d) Coordinate system<br />
<br />
<br />
= 0 : Select (1)<br />
= 1 : Select (2)<br />
= 2 : Select (3)<br />
= 3 : Select (4)<br />
= 4 : Select (5)<br />
= 5 : Select (6)<br />
⋅ RANGE (Max., Min.)<br />
Set the graphic range displayed on the screen by specifying maximum<br />
and minimum values along each axis.<br />
X=Maximum value X=Minimum value<br />
Y=Maximum value Y=Minimum value<br />
Z=Maximum value Z=Minimum value<br />
Valid range: 0 to 9999999<br />
NOTE<br />
1 The units are 0.001 mm or 0.0001 inch. Note that the<br />
maximum value must be greater than the minimum value for<br />
each axis.<br />
2 When setting the graphics range with the graphics<br />
parameters for the maximum and minimum values, do not<br />
set the parameters for the magnification and screen center<br />
coordinates afterwards. Only the parameters set last are<br />
effective.<br />
⋅ SCALE<br />
Set the graphic magnification<br />
The setting range is 0 to 10000 (unit:0.01 time).
12. GRAPHICS FUNCTION OPERATION<br />
B–63534EN/02<br />
Executing drawing only<br />
Deleting the previous<br />
drawing<br />
Drawing a part of a<br />
program<br />
Drawing using dashed<br />
lines and solid lines<br />
Limitations<br />
Feedrate<br />
Two–path lathe control<br />
⋅ GRAPHIC CENTER<br />
X=<br />
Y=<br />
Z=<br />
Set the coordinate value on the workpiece coordinate system at<br />
graphic center.<br />
NOTE<br />
1 When MAX. and MIN. of RANGE are set, the values will be<br />
set automatically once drawing is executed<br />
2 When setting the graphics range with the graphics<br />
parameters for the magnification and screen center<br />
coordinates, do not set the parameters for the maximum<br />
and minimum values afterward. Only the parameters set<br />
last are effective.<br />
⋅ PROGRAM STOP<br />
N=<br />
Set the sequence No. of the end block when necessary to partially<br />
display.<br />
This value is automatically cancelled and set to –1 once drawing is<br />
executed.<br />
⋅ AUTO ERASE<br />
1 : Erase the previous drawing automatically when the automatic<br />
operation is started under reset condition.<br />
2 : Not erase automatically.<br />
Since the graphic drawing is done when coordinate value is renewed<br />
during automatic operation, etc., it is necessary to start the program by<br />
automatic operation. To execute drawing without moving the machine,<br />
therefore, enter the machine lock state.<br />
When the AUTO operation is started under reset condition, the program<br />
is executed after deleting the previous drawing automatically (Automatic<br />
deleting=1). It is possible not to delete the previous drawing by graphic<br />
parameter (Automatic deleting=0).<br />
When necessary to display a part of a program, search the starting block<br />
to be drawn by the sequence No. search, and set the sequence No. of the<br />
end block to the PROGRAM STOP N= of the graphic parameter before<br />
starting the program under cycle operation mode.<br />
The tool path is shown with a dashed line ( ) for rapid traverse and<br />
with a solid line ( ) for cutting feed.<br />
In case the feed rate is considerably high, drawing may not be executed<br />
correctly, decrease the speed by dry–run, etc. to execute drawing.<br />
For the two–path lathe control, two paths can not be displayed at the same<br />
time.<br />
1096
B–63534EN/02 OPERATION<br />
12. GRAPHICS FUNCTION<br />
12.2<br />
DYNAMIC GRAPHIC<br />
DISPLAY<br />
12.2.1<br />
Path Drawing<br />
1. Drawing plane<br />
2. Drawing rotation<br />
3. Drawing enlargement<br />
and reduction<br />
4. Partial drawing<br />
5. Programmed path<br />
and tool path<br />
drawing<br />
6. Color<br />
7. Automatic scaling<br />
8. Partial enlargement<br />
drawing<br />
9. Indicating the current<br />
tool position with a<br />
mark<br />
10. Indicating the<br />
coordinates of the<br />
current position<br />
There are the following two functions in Dynamic Graphics.<br />
Path graphic<br />
Solid graphic<br />
1097<br />
This is used to draw the path of tool center commanded<br />
by the part program.<br />
This is used to draw the workpiece figure machined by<br />
tool movement commanded by the part program.<br />
The path graphic function is used to precisely check the part program for<br />
drawing the tool path with a line. The solid graphic function is used to<br />
draw the workpiece figure to be machined with a program. Thus, it is easy<br />
to recognize roughly the part program. These two functions can be used<br />
freely by switching them.<br />
The path graphic feature calls a program from memory and draws the tool<br />
path specified by the program. This feature provides the following<br />
functions.<br />
The user can choose the drawing plane from four types of plane views,<br />
two types of isometric projection views, and biplane view.<br />
When an isometric projection view is used, the drawing can be rotated<br />
horizontally and vertically.<br />
A drawing can be enlarged or reduced by specifying a magnification from<br />
0.01 to 100 with respect to the actual size. In addition, a drawing can be<br />
automatically enlarged or reduced by setting maximum and minimum<br />
values.<br />
A range of the program can be drawn by specifying a starting sequence<br />
number and ending sequence number.<br />
The user can specify whether to apply tool length offset and cutter<br />
compensation to drawing. This way, either the actual programmed path<br />
or the tool path can be drawn.<br />
When a tool path is drawn on a screen, the colors used can be chosen from<br />
seven colors including white. The color of the tool path can be changed<br />
according to the T code.<br />
The CNC automatically determines the maximum and minimum drawing<br />
coordinates for each program. This means that drawing can be performed<br />
with a magnification automatically determined according to these<br />
maximum and minimum values.<br />
Except for biplane views the user can enlarge all types of drawings by a<br />
factor of up to 100 while looking at the drawing that has been made.<br />
The current tool position can be displayed on the screen.<br />
The current position can also be indicated using coordinates.
12. GRAPHICS FUNCTION OPERATION<br />
B–63534EN/02<br />
11. Displaying<br />
coordinate axes and<br />
actual size<br />
dimensions lines<br />
Procedure<br />
Path drawing procedure<br />
Coordinate axes and actual size dimension lines are displayed together<br />
with the drawing so that actual size can be referenced.<br />
The first six functions above (1. to 6.) are available by setting the graphic<br />
parameters. The seventh to ninth functions (7. to 9.) are mainly executed<br />
using soft keys after drawing has been setup. The tenth function (10.) is<br />
enabled by setting a parameter. The eleventh function (11.) can be used<br />
at any time.<br />
1 To draw a tool path, necessary data must be set beforehand.<br />
So press the function button GRAPH some times ( CUSTOM<br />
GRAPH for the small<br />
MDI).The “PATH GRAPHIC (PARAMETER)” is displayed.<br />
PATH GRAPHIC (PARAMETER–1) O0000 N00002<br />
AXES P= 4<br />
(XY=0, YZ=1, ZY=2, XZ=3, XYZ=4, ZXY=5, 2P=6)<br />
ANGLE<br />
ROTATION A= 0<br />
TILTING A= 0<br />
SCALE K= 0.00<br />
CENTER OR MAX./MIN.<br />
X=130.000 Y= 110.000 Z= 50.000<br />
I= 0.000 J= –10.000 K= 0.000<br />
START SEQ. NO. N= 0<br />
END SEQ. NO.<br />
NO. A=<br />
N= 0<br />
MDI **** *** *** 14 : 25 : 07<br />
POS<br />
EXEC SCALE<br />
PATH GRAPHIC (PARAMETER–2) O0000 N00001<br />
TOOL. COMP P= <br />
COLOR (0123456)<br />
PATH P= 0<br />
TOOL Q= 0<br />
AUTO CHANGE R= 0<br />
MDI **** *** *** 14 : 25 : 51<br />
EXEC SCALE POS<br />
1098
B–63534EN/02 OPERATION<br />
12. GRAPHICS FUNCTION<br />
2 There are two screens for setting drawing parameters.<br />
Press the page key according to the setting items for selecting<br />
screens.<br />
3 Set the cursor to an item to be set by cursor keys.<br />
4 Input numerics by numeric keys.<br />
5 Press the INPUT key.<br />
The input numerics are set by these operations and the cursor<br />
automatically moves to the next setting items. The set data is held even<br />
after the power is turned off.<br />
6 Set the operation mode to the memory mode, press function key<br />
PROG , and call the part program which should be drawn.<br />
7 Press function key GRAPH ( CUSTOM<br />
GRAPH for a small MDI) several times to<br />
redisplay the PATH GRAPHIC (PARAMETER) screen, then press soft<br />
key [EXEC] to display the PATH GRAPHIC (EXECUTION) screen.<br />
O1126 N01126<br />
MEM **** *** *** 10 : 10 : 40<br />
<br />
1099<br />
Y<br />
25.8<br />
X<br />
<br />
8 Press soft key [(OPRT)], then press soft key [AUTO] or [START].<br />
Pressing [AUTO] enables automatic scaling. See item 7 in<br />
introduction of path drawing and the description of soft key [AUTO]<br />
in Explanations for details. Drawing is now started. During drawing,<br />
the message ”DRAWING” blinks at the lower–right corner of the CRT<br />
screen.<br />
9 Press soft key [STOP] to pause drawing. The indication of “STOP”<br />
blinks at the lower right corner on the CRT screen. Press soft key<br />
[START] to start drawing. In addition, press soft key [REWIND] to<br />
redraw from the top of program before pressing soft key [START].<br />
10 Execute the last of part program (M02/M30) to end drawing. This<br />
will cause, blinking of the “DRAWING” light to turn off. The tool<br />
path view drawn can be retained until the power is turned off<br />
unless a new tool path view is drawn.
12. GRAPHICS FUNCTION OPERATION<br />
B–63534EN/02<br />
Partial enlargement<br />
11 For partial drawing enlargement, display the PATH GRAPHIC<br />
(SCALE) screen by pressing the soft key [ZOOM] on the PATH<br />
GRAPHIC (PARAMETER) screen of step 1 above. The tool path is<br />
displayed. Next, press soft key [(OPRT)].<br />
O1126 N01126<br />
MEM **** *** *** 10 : 10 : 40<br />
← → ↓ ↑<br />
1100<br />
<br />
1.00<br />
Y<br />
X<br />
25.8<br />
12 Perform positioning of marks displayed at the center of the screen<br />
to the center of the part enlarged using soft keys [←], [→], [↓],<br />
and [↑].<br />
13 Set the relative magnification rate for the tool path view which is<br />
being drawn using the address keys “P” and “M”. When you press<br />
address key P or M, the following results:<br />
Address key Function<br />
P The relative magnification rate increases by 0.1.<br />
M The relative magnification rate decreases by 0.1.<br />
The relative magnification rate is continuously changed by keeping<br />
the address keys depressed. It is possible to magnify up to 100<br />
times in reference to the actual dimensions.<br />
14 Press the soft key [EXEC] after setting the relative magnification<br />
rate. Then, the screen automatically changes to “TOOL PATH<br />
(EXECUTION)” and the drawing of set partial enlargement view<br />
starts. The set partial enlargement status is valid until soft key<br />
[AUTO] or [ERASE] is pressed.
B–63534EN/02 OPERATION<br />
12. GRAPHICS FUNCTION<br />
Mark display<br />
Explanations<br />
AXES<br />
Plane view (XY,YZ,ZY,XZ)<br />
15 To display a mark at the current tool position, display the PATH<br />
GRAPHIC (POSITION) screen by pressing soft key [POS] on the<br />
PATH GRAPHIC (PARAMETER) screen of step 1 above. This<br />
mark blinks at the current tool center position on the tool path.<br />
O1126 N01126<br />
MDI **** *** ***<br />
<br />
1101<br />
Y<br />
25.8<br />
X<br />
14 : 27 : 47<br />
<br />
The relationship between the setting value and drawing screen is as shown<br />
below:<br />
Setting value Drawing screen<br />
0 Plane view (XY)<br />
1 Plane view (YZ)<br />
2 Plane view (ZY)<br />
3 Plane view (XZ)<br />
4 Isometric projection (XYZ)<br />
5 Isometric projection (ZXY)<br />
6 Biplane view (XY,XZ)<br />
The following coordinate systems are selected.<br />
Y Z<br />
P=0 P=1<br />
XY X<br />
YZ<br />
Y Z<br />
P=2 P=3<br />
ZY Z<br />
XZ<br />
Fig. 12.1(e) Coordinate systems for the plane view<br />
Y<br />
X
12. GRAPHICS FUNCTION OPERATION<br />
B–63534EN/02<br />
Isometric projection<br />
(XYZ,ZXY)<br />
Biplane view<br />
ANGLE<br />
ROTATION<br />
Projector view by isometric can be drawn.<br />
X<br />
P=4<br />
XYZ<br />
Z Y<br />
1102<br />
Y<br />
P=5<br />
Z<br />
ZXY<br />
Fig. 12.2.1 (a) Coordinate systems for the isometric projection<br />
Y Z<br />
<br />
X<br />
Fig. 12.2.1 (b) Coordinate systems for the biplane view<br />
Biplanes (XY and XZ) can be drawn simultaneously. The maximum and<br />
minimum coordinate values must be set to draw the biplane view. The<br />
maximum and minimum coordinate values can also be set by performing<br />
automatic scaling<br />
The direction of the coordinate axis is set when the isometric projection<br />
is the setting of the drawing screen. The direction is set by horizontal and<br />
vertical rotation angles. The unit is expressed in degrees.<br />
The horizontal rotation angle is set in the range of –180°to +180°in<br />
reference to the vertical axis. Set a positive value for clockwise rotation<br />
of the coordinate axis. Thus, the direction of projection (visual arrow)<br />
becomes counterclockwise.<br />
Fig. 12.2.1 (c) Rotating<br />
X<br />
X<br />
Rotating
B–63534EN/02 OPERATION<br />
12. GRAPHICS FUNCTION<br />
TILTING<br />
SCALE<br />
CENTER OR MAX./MIN.<br />
START SEQ. NO. and<br />
END SEQ. NO.<br />
The tilting angle of the vertical axis is set in the range of –90°to +90°in<br />
reference to the horizontal axis crossing the vertical axis at a right angle.<br />
When a positive value is set, the vertical axis slants to the other side of<br />
the graphic screen. Thus, the projection direction (arrow direction)<br />
becomes the horizontal direction.<br />
1103<br />
Fig. 12.2.1 (d) Tilting<br />
Tilting<br />
Set the magnification rate of drawing from 0.01 to 100.00. When 1.0 is<br />
set, drawing is carried out in actual dimensions. When 0 is set, the<br />
drawing magnification rate is automatically set based on the setting of<br />
maximum and minimum coordinate values of drawing.<br />
When a graphics (drawing) magnification of 0 is set, maximum<br />
coordinates on the X–axis, Y–axis, and Z–axis in the workpiece<br />
coordinate system must be set in addresses X, Y, and Z, and minimum<br />
coordinates must be set in addresses I, J, and K, to specify the graphics<br />
(drawing) range. For biplane view drawing, maximum and minimum<br />
coordinates for drawing must be specified.<br />
When a drawing magnification other than 0 is set, the X, Y, and Z<br />
coordinates of the drawing center in the workpiece coordinate system<br />
must be set in addresses X, Y, and Z. Addresses I, J, and K are not used.<br />
The table below summarizes the setting requirements described above.<br />
Setting the drawing<br />
Setting<br />
magnification rate Address X/Y/Z Address I/J/K<br />
Other than 0<br />
0 or biplane view<br />
drawing<br />
Drawing center coordinate<br />
value of X, Y, and Z axes<br />
Drawing maximum<br />
coordinate value of<br />
X, Y, and Z axes<br />
Ignored<br />
Drawing minimum<br />
coordinate value of<br />
X, Y, and Z axes<br />
Set the start and end sequence numbers of drawing in five digits each. The<br />
part program for drawing is executed from the head and only the part<br />
enclosed by the start sequence and end sequence numbers is drawn. When<br />
0 is commanded as the start sequence number, drawing is performed from<br />
the head of the program. In addition, when 0 is commanded as the end<br />
sequence number, drawing is performed up to the end of program. The<br />
sequence number is referred to regardless of either main program or<br />
subprogram.
12. GRAPHICS FUNCTION OPERATION<br />
B–63534EN/02<br />
TOOL COMP.<br />
COLOR<br />
Soft key functions on the<br />
“PATH GRAPHIC<br />
[EXECUTION]”screen<br />
It is possible to set whether the tool path is drawn by making the tool<br />
length offset or cutter compensation valid or invalid.<br />
Setting value Tool length offset or cutter compensation<br />
0 Perform drawing by making tool compensation valid<br />
(An actual tool path is drawn.)<br />
1 Perform drawing by making tool compensation invalid<br />
(A programmed path is drawn.)<br />
Always set 0 before drawing when indicating the mark of the current tool<br />
position.<br />
Specify the color of the tool path. In the case of monochrome it is not<br />
required to set it. The relationship between the setting value and color is<br />
as shown below:<br />
Setting value Color<br />
0 White<br />
1 Red<br />
2 Green<br />
3 Yellow<br />
4 Blue<br />
5 Purple<br />
6 Light blue<br />
⋅ PATH Specify the color of the tool path.<br />
⋅ TOOL Specify the color of the current position mark of the tool.<br />
⋅ AUTO CHANGE Set if for changing the color of the tool path<br />
automatically according to the T –code command.<br />
Setting value Function<br />
0 The color of the tool path is not changed.<br />
1 The color of the tool path is changed automatically.<br />
When 1 is set, the setting value of the color designation of PATH is<br />
incremented by 1 every time the T code is commanded. At the same time,<br />
the color of the tool path changes. If the setting value exceeds 6, it returns<br />
to 0.<br />
Software key Function<br />
[AUTO] Automatic scaling is performed. Obtain the maximum and<br />
minimum coordinates of the part program before performing<br />
drawing, specify them for the maximum and minimum values of<br />
drawing parameters, and set the drawing magnification rate to<br />
0 before starting drawing. Thus, the tool path view is properly<br />
laid out on the screen.<br />
[START] Drawing starts. When the [START] is pressed while the<br />
drawing is not in STOP, the part program starts from the top of<br />
the part program. Press the [START] while the drawing is in<br />
stop to allow drawing to be carried out continuously.<br />
[STOP] Stop drawing. (Single block stop)<br />
[REWIND] Press this key to start drawing from the top of part program.<br />
Searches for the beginning of a part program.<br />
[ERASE] Erase the tool path view which has been drawn.<br />
1104
B–63534EN/02 OPERATION<br />
12. GRAPHICS FUNCTION<br />
Graphic program<br />
Mark for the tool current<br />
position<br />
Position mark<br />
Display of the coordinate<br />
value<br />
Changing the coordinate<br />
system<br />
Restrictions<br />
Graphic condition<br />
Partial enlargement<br />
Tool current position<br />
Two–path lathe control<br />
No part program which has not been registered in memory can be drawn.<br />
Also, it is necessary that the M02 or M30 should be commanded at the<br />
end of the part program.<br />
The period of mark blinking is short when the tool is moving and becomes<br />
longer when the tool stops.<br />
The mark indicating the current position of tool is displayed on the XY<br />
plane view when the biplane drawing is performed.<br />
Parameter 6501 (CSR, bit 5) is used to specify whether to use or x as<br />
the mark for indicating the current tool position and the center of a<br />
partially enlarged drawing.<br />
Parameter 6500 (DPO, bit 5) is used to specify whether to display the<br />
coordinates of the current position on the tool path drawing screen.<br />
If a program specifies a coordinate system change, parameter 6501 (ORG,<br />
bit 0) is used to specify whether to draw without changing the coordinate<br />
system or to draw by regarding the current drawing position as the current<br />
position in the new coordinate system.<br />
If machine operation is not allowed, no drawing can be carried out. No<br />
drawing can be made during machine operation. The setting data and<br />
switches required for drawing are as shown below:<br />
Setting data and switch Status<br />
Tool offset amount Set it properly when performing drawing<br />
while the tool offset amount becomes valid.<br />
Single block Off<br />
Optional block skip Set it properly.<br />
Feed hold Off<br />
The partial enlargement can be carried out on the plane view and isometric<br />
projection view. No partial enlargement can be made in the drawing of<br />
the biplane view.<br />
In dynamic graphics display, drawing cannot be executed while the<br />
machine is operating even though this is possible in ordinary graphics<br />
display (see III–12.1). However, after drawing is executed, the operator<br />
can see how the tool moves along the tool path by operating the machine<br />
while displaying the mark for the current position of the tool.<br />
It is necessary that the setting data and switches related to the machine<br />
operation should be the same status between drawing operation and<br />
machining operation for properly displaying the current position of tool<br />
on the drawn tool path.<br />
For the two–path lathe control, two paths can not be displayed at the same<br />
time.<br />
1105
12. GRAPHICS FUNCTION OPERATION<br />
B–63534EN/02<br />
12.2.2<br />
Solid Graphics<br />
1. Solid model graphic<br />
2. Blank figure graphics<br />
3. Drawing of machining<br />
progress<br />
4. Drawing of final machined<br />
figure<br />
5. Changing of drawing direction<br />
6. Plane view graphics<br />
7. Triplane view graphic<br />
8. Horizontal hole machining<br />
9. Tool change during machining<br />
The solid graphics draws the figure of a workpieces machined by the<br />
movement of a tool.<br />
The following graphic functions are provided :<br />
Solid model graphic is drawn by surfaces so that the machined figure can<br />
be recognized concretely.<br />
It is possible to draw a blank figure before machining.<br />
A rectangular parallelepiped and a circular column or cylinder can be<br />
drawn. A circular column or cylinder parallel to the X–axis, Y–axis, or<br />
Z–axis can be selected.<br />
It is possible to draw the progress of machining by simulation.<br />
It is possible to draw the final finish machined figure.<br />
The user can choose from four drawing directions and eight tilting angles.<br />
It is possible to draw XY plane views as well as solid model views. Height<br />
of the workpiece is discriminated by color for color or brightness for<br />
monochrome.<br />
In addition to a solid drawing, a triplane view can be drawn. The user can<br />
choose from four types of plane view and side view positions. The user<br />
can freely change the cross–section position of a side view.<br />
It is possible to install tools in the direction which is parallel to the X or<br />
Y axis as well as the Z axis.<br />
It is possible to change tools during machining by the part program<br />
command.<br />
1106
B–63534EN/02 OPERATION<br />
12. GRAPHICS FUNCTION<br />
Procedure<br />
SOLID GRAPHIC<br />
(BLANK)<br />
Solid graphics drawing procedure<br />
1 To draw a machining profile, necessary data must be set beforehand.<br />
So press the function key GRAPH ( CUSTOM<br />
GRAPH for the small MDI).<br />
The screen of ”SOLID GRAPHIC (PARAMETER)” is displayed.<br />
SOLID GRAPHIC (PARAMETER) O0000 N00003<br />
BLANK FORM P=<br />
X= 0.000 Y= 0.000 Z= 0.000<br />
I= 120.000 J= 100.000 K= 40.000<br />
TOOL FORM P= 2<br />
R= 7.500 K= 0.000<br />
PROJECTION P= 3<br />
Q= 1 R= 0<br />
INTENSITY P= 4<br />
(0123456) Q= 2 R= 1<br />
START SEQ.NO. N= 0<br />
END SEQ.NO. N= 0<br />
ANIM. SPEED<br />
<br />
N= 0<br />
MDI **** *** *** 14 : 42 : 17<br />
<br />
1107<br />
<br />
2 Use a cursor key to move the cursor to an item to be set.<br />
3 Input numerics for the item at the cursor using the numeric key.<br />
4 Press the INPUT <br />
Input numerics can be set by these operations and the cursor moves to the<br />
next setting item automatically. The set data is retained even if the power<br />
is turned off.<br />
See Explanations for details on settings.<br />
5 To draw a blank figure, display the SOLID GRAPHIC (BLANK)<br />
screen by pressing soft key [BLANK] on the SOLID GRAPHIC<br />
(PARAMETER) screen of step 1 above.<br />
<br />
MEM **** *** *** 10 : 10 : 40<br />
–<br />
O1126 N1126<br />
Z<br />
Y<br />
X
12. GRAPHICS FUNCTION OPERATION<br />
B–63534EN/02<br />
SOLID GRAPHICS<br />
(EXECUTION)<br />
6 Press soft key [ANEW]. This allows the blank figure drawing to be<br />
performed based on the blank figure data set.<br />
7 Press soft keys [+ROT] [–ROT] [+TILT], and [–TILT], when<br />
performing drawing by changing the drawing directions. Parameters<br />
P and Q for the drawing direction are changed and the figure is<br />
redrawn with the new parameters.<br />
8 Set the operation mode to the memory mode, press function key<br />
PROG , and call the subject part program of drawing.<br />
9 To draw a machining profile, display the SOLID GRAPHIC<br />
(EXECUTION) screen by pressing soft key [EXEC] on the SOLID<br />
GRAPHIC (PARAMETER) screen of step 1 above.<br />
<br />
1108<br />
ÅÅÅÅÅ<br />
ÅÅÅÅÅ<br />
ÅÅÅÅÅÅÅ<br />
ÅÅÅÅÅ<br />
ÅÅÅÅÅÅÅ<br />
ÅÅÅÅÅÅÅ<br />
ÔÔ<br />
ÅÅÅÅÅÅÅ<br />
ÔÔ<br />
ÔÔ ÔÔ<br />
<br />
<br />
<br />
O1126 N01126<br />
Z<br />
Y<br />
X<br />
O1126 N01126<br />
Y<br />
X
B–63534EN/02 OPERATION<br />
12. GRAPHICS FUNCTION<br />
REVIEW<br />
10 Press soft key [(OPRT)] and press either soft key [A.ST] or [F.ST].<br />
When [A.ST] is pressed, the status of machining in progress is drawn<br />
by simulation. When [F.ST] is pressed, the profile during machining<br />
is not drawn. Only the finished profile produced by the program is<br />
drawn. This allows drawing to be started.<br />
When “STOP” is not displayed at the lower right corner of the screen,<br />
the program is executed from its head. “DRAWING” blinks at the<br />
lower right corner of CRT screen during drawing.<br />
11 Press soft key [STOP] to stop drawing temporarily. Drawing is<br />
stopped after drawing the current block and “STOP” blinks at the<br />
lower right corner of CRT screen. Press soft key [A.ST] or [F.ST]<br />
when restarting drawing. Press soft key [REWIND] and then the<br />
[A.ST] or [F.ST] if redrawing from the head. It is possible to continue<br />
drawing after changing the solid graphic parameters in temporary<br />
stop.<br />
12 When the end of program (M02 or M03) is executed, the drawing<br />
ends and the blinking of “DRAWING” stops. Then, the final finish<br />
figure is drawn on the CRT screen. The drawn figure view is retained<br />
until the power is turned off as long as a new machine figure view is<br />
drawn.<br />
13 The color, intensity, or drawing direction of a machining figure which<br />
has been drawn can be changed and the figure redrawn.<br />
To redraw the figure, first change the parameters for the color,<br />
intensity, or drawing direction on the SOLID GRAPHIC<br />
(PARAMETER) screen shown in step 1, then press soft key<br />
[REVIEW] to display the SOLID GRAPHIC (REVIEW) screen.<br />
<br />
1109<br />
ÅÅÅÅÅÅ<br />
ÅÅÅÅÅÅ<br />
ÅÅÅÅÅÅ<br />
ÅÅÅÅÅÅ ÔÔ<br />
ÅÅÅÅÅÅ ÔÔ<br />
ÔÔ<br />
ÔÔ<br />
O1126 N01126<br />
– –<br />
14 Press soft key [(OPRT)], then press soft key [ANEW]. The machining<br />
figure is redrawn with the color, intensity, or drawing direction set in<br />
step 13.<br />
X<br />
Z<br />
Y
12. GRAPHICS FUNCTION OPERATION<br />
B–63534EN/02<br />
Triplane view drawing<br />
15 To redraw the figure in a different mode, press soft key [+ROT],<br />
[–ROT], [+TILT], or [–TILT]. Parameters P and Q for the drawing<br />
direction are changed and the figure is redrawn with the new<br />
paramaters.<br />
16 The machined figure can be drawn on the tri–plane view.<br />
To draw a triplane view, press the rightmost soft key (next–menu key)<br />
on the SOLID GRAPHIC (PARAMETER) screen of step 1 above, then<br />
press soft key [3–PLN] and [(OPRT)]. The SOLID GRAPHIC<br />
(3–PLANE) screen appears.<br />
17<br />
SOLID GRAPHIC (3–PLANE)<br />
1110<br />
01126 N01126<br />
← → ↑ ↓<br />
Each time soft key [ ] is pressed, the side–view drawings displayed<br />
change as follows.<br />
Right view and rear view<br />
Rear view and left view<br />
Left view and front view<br />
Front view and right view<br />
18 The sectional position of side view can be changed by the soft keys<br />
[←], [→], [↑], and [↓].<br />
With the sectional position of the left/right side view, the marks and<br />
indicating the sectional position can be moved using the soft keys<br />
[←] and [→].<br />
With the sectional position of rear/front side view, the marks and <br />
indicating the sectional position can be moved using the soft keys [↑],<br />
and [↓]. Keep the keys depressed to change sectional/views<br />
continuously.
B–63534EN/02 OPERATION<br />
12. GRAPHICS FUNCTION<br />
Explanations<br />
GRAPHICS PARAMETER<br />
BLANK FORM<br />
♦ BLANK FORM (P)<br />
♦ Material positions<br />
(X,Y,Z)<br />
♦ Material dimensions<br />
(I,J,K)<br />
Set the type of blank figure under P. The relationship between the setting<br />
value and figure is as follows:<br />
P Blank figure<br />
0 Rectangular parallelepiped (Cubed)<br />
1 Column or cylinder (parallel to Z–axis)<br />
Set the X–axis, Y–axis, and Z–axis coordinate values of standard point<br />
of materials in workpiece coordinate system to the addresses X, Y, and Z.<br />
The standard point of materials is the corner point in the negative<br />
direction in the case of rectangular parallelepiped blank figure and the<br />
center point of bottom in the case of column and cylinder materials.<br />
Set the dimensions of materials. The relationship between the addresses<br />
I, J, and K and setting value is as shown below:<br />
Material I J K<br />
Rectangular Length in X–axis<br />
direction<br />
1111<br />
Length in Y–axis<br />
direction<br />
Length in Z–axis<br />
direction<br />
Column Radius of circle 0 Length of column<br />
Cylinder Radius of external<br />
circle<br />
K<br />
Z<br />
J<br />
Y<br />
Radius of internal<br />
circle<br />
X<br />
(X,Y,Z) I<br />
J<br />
(X,Y,Z)<br />
K<br />
Length of cylinder<br />
I
12. GRAPHICS FUNCTION OPERATION<br />
B–63534EN/02<br />
TOOL FORM<br />
♦ Machining tool<br />
orientation (P)<br />
♦ Dimensions of tools<br />
(R,K)<br />
PROJECTION<br />
♦ Graphics method<br />
and direction (P)<br />
♦ VERTICAL AXIS (R)<br />
Set the machining direction of tools.<br />
P Machining direction of tools<br />
0,1 Parallel to the Z–axis (perform machining from the + direction)<br />
Set the dimensions of tool. The relationship between the displayed<br />
address and setting value is as shown below:<br />
Address Setting numerics<br />
R Radius of tool<br />
K Distance from the program point to tool tip (normally 0)<br />
Program point<br />
1112<br />
K<br />
<br />
Tip of the tool<br />
The relationship between graphic method and direction and setting value<br />
is as shown below:<br />
P Graphic method and direction<br />
0, 4 Oblique projection view (+ X–axis)<br />
1, 5 Oblique projection view (+ Y–axis)<br />
2, 6 Oblique projection view (– X–axis)<br />
3, 7 Oblique projection view (–Y–axis)<br />
This setting value can also be incremented or decremented by the soft<br />
keys [+ROT] or [– ROT]. In this case, if the setting value exceeds 7, it<br />
returns to 0. If it is smaller than 0, it becomes 7.<br />
Direction of the vertical axis is fixed in Z–axis.
B–63534EN/02 OPERATION<br />
12. GRAPHICS FUNCTION<br />
INTENSITY<br />
Specify the intensity of the drawing screen when performing drawing on<br />
the monochrome, and the color of the drawing screen when performing<br />
drawing on the color screen. The relationship between the setting,<br />
intensity, and color is as shown below:<br />
However, when the plane view is displayed on the monochrome. The<br />
brighter surface, whichever is specified by P or Q becomes the top surface.<br />
Setting value Intensity Color<br />
0 Maximum brightness White<br />
1 Red<br />
2 Dark Green<br />
3 ↓ Yellow<br />
4 Light Blue<br />
5 Purple<br />
6 Light blue<br />
The relationship between the display address, surface, and line on the<br />
machined figure view is as shown below:<br />
Address<br />
Oblique projection<br />
view<br />
1113<br />
Plane view Triplane view<br />
P Upper surface Upper surface Upper/lower surface<br />
Q Side surface Middle surface Left/right surface<br />
R Ridge Ridge Ridge<br />
Remarks The intensity/color of<br />
front surface is<br />
between P and Q<br />
P+Q<br />
Blank<br />
P Q<br />
P<br />
Lower surface<br />
is blank<br />
P<br />
P+Q Q<br />
Q<br />
The intensity/color of<br />
plane view is between<br />
P and Q<br />
Oblique projection view<br />
Plane view<br />
Triplan view
12. GRAPHICS FUNCTION OPERATION<br />
B–63534EN/02<br />
START SEQ. NO. and<br />
END SEQ. NO.<br />
ANIM. SPEED<br />
Soft key functions on the<br />
“SOLID GRAPHIC<br />
(EXECUTION)”screen<br />
Graphics program<br />
Specifying the blank<br />
form and tool form in the<br />
part program<br />
Display of the coordinate<br />
value<br />
Specify the start sequence number and end sequence number of each<br />
drawing in a five–digit numeric. The subject part program is executed<br />
from the head. But only the part enclosed by the start sequence number<br />
and end sequence numeric is drawn. When 0 is commanded as the start<br />
sequence number, the program is drawn from its head. When 0 is<br />
commanded as the end sequence number, the program is drawn to its end.<br />
The comparison of sequence number is performed regardless of main<br />
program and subprogram.<br />
Set interval of animated simulation drawing ranging from 0 to 255.<br />
Every time the machining proceeds by the number set, the drawing is<br />
repeated. If 0 is set, drawing is repeated at every 1 block execution.<br />
Soft key Function<br />
[A.ST] Simulate and draw the progress of machining.<br />
[F.ST]<br />
[STOP]<br />
[REWIND]<br />
1114<br />
No figure during machining is drawn and only the final<br />
finish figure by that program is drawn.<br />
When pressed, stops drawing at the end of block (single<br />
block stop).<br />
Press this key to perform drawing from the head of part<br />
program. Heading is performed automatically after execution<br />
of program end (M02/M30).<br />
No part program which has not been registered in memory can be drawn.<br />
It is also necessary that the M02 or M30 be commanded at the end of the<br />
part program.<br />
It is possible to specify BLANK FORM and TOOL FORM in the part<br />
program. The command format is as shown below. If it is commanded<br />
during execution of drawing, the item corresponding to the screen of<br />
“SOLID GRAPHIC (PARAMETER)” is set and drawing continues with the<br />
set data.<br />
Command of BLANK FORM<br />
G10 L90 P_X_Y_Z_I_J_K_ ;<br />
The command value succeeding the address is the same as the<br />
numeric set to the address being displayed at the item of BLANK<br />
FORM of “SOLID GRAPHIC (PARAMETER)”. If BLANK FORM<br />
is commanded, drawing continues after a new blank figure is<br />
drawn.<br />
Command of TOOL FORM<br />
G10 L91 P_R_K_ ;<br />
The command value succeeding the address is the same as the<br />
numeric set to the address being displayed at the item of TOOL<br />
FORM of screen “SOLID GRAPHIC (PARAMETER)”. If 0 is<br />
commanded with the tool radius value, no machining simulation<br />
is performed thereafter.<br />
Parameter 6500 (DPO, bit 5) is used to specify whether to display the<br />
coordinates of the current position on SOLID GRAPHIC screen.
B–63534EN/02 OPERATION<br />
12. GRAPHICS FUNCTION<br />
TOOL COMP.<br />
Graphic method<br />
Ridge drawing<br />
Display mode<br />
Cross section position<br />
change<br />
In solid graphics, parameter 6501 (TLC, bit 1) is used to specify whether<br />
to apply tool length offset.<br />
Parameter 6501 (3PL, bit 2) is used to select whether to draw a triplane<br />
view with the third–angle or first–angle projection.<br />
Parameter 6501 (RID, bit 3) is used to specify whether to draw ridges in<br />
plane view drawing.<br />
Parameter 6501 (FIM, bit 4) is used to specify whether to display a solid<br />
graphics in the rough mode or in the fine mode. When a solid graphics<br />
is drawn in the fine mode, the drawing speed is slower than when drawn<br />
in the rough mode.<br />
In triplane drawing, a value can be specified for changing the position of<br />
the cross section while the soft key is held down. A value from 0 to 10<br />
can be set. When 0 is specified, a value of 1 is used. (Parameter No. 6515)<br />
1115
12. GRAPHICS FUNCTION OPERATION<br />
B–63534EN/02<br />
Examples<br />
Side view selection in<br />
triplane drawing<br />
Example) The side views of the figure below are illustrated.<br />
Right view and rear view<br />
Left side view<br />
Press [ ]<br />
1116<br />
Rear view and left view<br />
Press [ ]<br />
Press [ ]<br />
Front view and right view Left view and front view<br />
Press [ ]<br />
Rear view<br />
Top view<br />
Front view<br />
In the above figure, the side views displayed are switched as follows.<br />
Right side view
B–63534EN/02 OPERATION<br />
12. GRAPHICS FUNCTION<br />
Cross section position<br />
selection in triplane<br />
drawing<br />
Limitations<br />
<br />
<br />
<br />
Two–path control<br />
Some examples of cross–sectional views are given below for the left view<br />
and front view shown on the previous page.<br />
Sectional view 1<br />
Õ<br />
Õ<br />
Õ<br />
Õ<br />
ÕÕ<br />
ÕÕÕ Õ<br />
Õ ÕÕ<br />
ÕÕÕÕÕ<br />
ÕÕÕÕÕ<br />
ÕÕÕÕÕ<br />
ÕÕÕÕÕ<br />
1117<br />
Sectional view 2<br />
ÕÕÕ<br />
ÕÕÕ<br />
Õ ÕÕ<br />
ÕÕÕ<br />
ÕÕ<br />
ÕÕÕ<br />
ÕÕÕÕÕ<br />
If the machine operation is not enabled, no drawing can be made. No<br />
drawing can be made during operation of machine. The main setting data<br />
and switches needed on drawing are as shown below:<br />
Setting data/switch Status needed for drawing<br />
Tool offset value<br />
Single block Off<br />
Optional block skip Properly set it.<br />
Feed hold Off<br />
It is necessary to set the cutter compensation<br />
value properly. The tool length offset is ignored.<br />
<strong>Tools</strong> which set the tool figure are limited to the cylinder figure<br />
(equivalent to flat end mill).<br />
In solid graphics, paths based on helical interpolation cannot be drawn.<br />
For the two–path control, two paths can not be displayed at the same time.
12. GRAPHICS FUNCTION OPERATION<br />
B–63534EN/02<br />
12.3<br />
BACKGROUND<br />
DRAWING<br />
<br />
O SRH INPUT<br />
Explanations<br />
Program selection<br />
Procedure for Background Drawing<br />
The background drawing function enables the drawing of a figure for one<br />
program while machining a workpiece under the control of another<br />
program.<br />
1 Press the GRAPH function key ( CUSTOM<br />
GRAPH for a small MDI).<br />
2 Press the [PARAM] soft key. The following screen appears:<br />
PATH GRAPHIC (PARAMETER–1) O0001 N00001<br />
AXES P= 0<br />
(XY=0, YZ=1, ZY=2, XZ=3, XYZ=4, ZXY=5, 2P=6)<br />
ANGLE<br />
ROTATION A = 0<br />
TILTING A = 0<br />
SCALE K = 0.00<br />
CENTER OR MAX./MIN.<br />
X= 0.000 X= 0.000 X= 0.00<br />
X= 0.000 X= 0.000 X= 0.00<br />
START SEQ. NO. N= 0<br />
END SEQ. NO.<br />
<br />
N= 0<br />
MDI **** *** *** 21 : 20 : 05 <br />
<br />
1118<br />
EXEC SCALE POS (OPRT)<br />
3 Press the [(OPRT)] soft key.<br />
4 To select the program to be used for drawing, enter the number of that<br />
program, then press the [O SRH] soft key. (The O number at the top<br />
right of the screen indicates the selected program.) Repeatedly<br />
pressing only the [O SRH] soft key selects the registered programs in<br />
turn.<br />
To input a graphic parameter, the [INPUT] soft key can be used<br />
instead of the INPUT MDI key.<br />
5 Press the left–most soft key (return menu key), to return the soft<br />
6<br />
keys to the state existing upon the completion of step 2.<br />
Perform dynamic graphic display, as described in Section III–12.2.<br />
Immediately after entering background drawing mode, the program<br />
which was selected previously remains selected. Any program can be<br />
selected for background drawing, by using the background drawing<br />
screen.<br />
If no program is selected prior to entering background drawing mode, the<br />
program number is set to 0. In such a case, drawing cannot be started until<br />
the program to be used for drawing is specified.
B–63534EN/02 OPERATION<br />
12. GRAPHICS FUNCTION<br />
Tool offsets<br />
Parameters<br />
Workpiece coordinate<br />
offsets<br />
Macro variables<br />
OFFSET SETTING<br />
function key<br />
Separate tool offsets are internally provided for machining and<br />
background drawing. Upon starting drawing or when selecting a program<br />
for drawing, the tool offset data for machining is copied to the tool offset<br />
data for background drawing. Changing a tool offset by using a G10<br />
command during machining does not affect that for background drawing.<br />
Similarly, changing a tool offset by using a G10 command during drawing<br />
does not affect that for machining.<br />
The same parameters are used for both background drawing and actual<br />
machining.<br />
Workpiece coordinate system offsets, part of the parameters, are provided<br />
separately for machining and background drawing. Upon selecting a<br />
program for drawing, the workpiece coordinate system offset data for<br />
machining is copied to the workpiece coordinate system offset data for<br />
background drawing. Changing a workpiece coordinate system offset by<br />
using a G10 command during machining does not affect that for<br />
background drawing. Similarly, changing a workpiece coordinate system<br />
offset by using a G10 command during drawing does not affect that for<br />
machining.<br />
Macro variables are provided separately for machining and background<br />
drawing. Upon selecting a program for drawing, the macro variables for<br />
machining are copied to the macro variables for background drawing.<br />
Changing a macro variable by using a G10 command during machining<br />
does not affect that for background drawing. Similarly, changing a macro<br />
variable using a G10 command during drawing does not affect that for<br />
machining.<br />
When bit 6 (BGOF) of parameter No. 3109 is set to 1, pressing the OFFSET<br />
SETTING<br />
function key on the background drawing screen displays the tool offsets,<br />
workpiece coordinate system offsets, and macro variables for background<br />
drawing. In such a case, BGGRP is displayed at the bottom right of the<br />
screen, to indicate that data for background drawing is being displayed.<br />
1119
12. GRAPHICS FUNCTION OPERATION<br />
B–63534EN/02<br />
Displaying the<br />
coordinates<br />
Bit 5 (DPO) of parameter No. 6500 can be used to specify whether the<br />
coordinates of the current position are to be displayed on the tool path<br />
drawing.<br />
In background drawing mode, modal information F, S, and T is displayed,<br />
together with the current position. If the [POS] soft key has been selected<br />
for dynamic graphic display, however, F, S, and T are not displayed.<br />
CAUTION<br />
Once an alarm is issued during background drawing,<br />
drawing is stopped and the alarm description is displayed<br />
at the bottom right of the screen. To release the alarm state,<br />
RESET<br />
press the CAN MDI key. Note that pressing the key<br />
will also stop foreground machining if currently in progress.<br />
Note, however, that bit 0 (RST) of parameter No. 8100 can<br />
be used to specify that machining will not be stopped if the<br />
RESET key is pressed during background drawing.<br />
1120
B–63534EN/02 OPERATION<br />
13. HELP FUNCTION<br />
13 <br />
Detailed information of<br />
alarms<br />
Operation method<br />
Parameter table<br />
Procedure<br />
<br />
Help Function Procedure<br />
The help function displays on the screen detailed information about<br />
alarms issued in the CNC and about CNC operations. The following<br />
information is displayed.<br />
When the CNC is operated incorrectly or an erroneous machining<br />
program is executed, the CNC enters the alarm state. The help screen<br />
displays detailed information about the alarm that has been issued and<br />
how to reset it. The detailed information is displayed only for a limited<br />
number of P/S alarms. These alarms are often misunderstood and are<br />
rather difficult to understand.<br />
If you are not sure about a CNC operation, refer to the help screen for<br />
information about each operation.<br />
When setting or referring to a system parameter, if you are not sure of the<br />
number of the parameter, the help screen displays a list of parameter Nos.<br />
for each function.<br />
1 Press the HELP key on the MDI. HELP (INITIAL MENU) screen is<br />
displayed.<br />
HELP (INITIAL MENU) O1234 N00001<br />
1121<br />
***** HELP *****<br />
1. ALARM DETAIL<br />
2. OPERATION METHOD<br />
3. PARAMETER TABLE<br />
S 0 T0000<br />
MEM **** *** *** 10:12:25<br />
[ ALM ][ OPR ][ PARA ][ ][ ]<br />
Fig. 13 (a) HELP (INITIAL MENU) Screen<br />
The user cannot switch the screen display from the PMC screen or<br />
CUSTOM screen to the help screen. The user can return to the normal<br />
CNC screen by pressing the HELP key or another function key.
13. HELP FUNCTION OPERATION<br />
B–63534EN/02<br />
ALARM DETAIL screen<br />
2 Press soft key [ALM] on the HELP (INITIAL MENU) screen to display<br />
detailed information about an alarm currently being<br />
raised..<br />
HELP (ALARM DETAIL) O0010 N00001<br />
NU<strong>MB</strong>ER : 027<br />
M‘SAGE : NO AXES COMMANDED IN G43/G44<br />
FUNCTION : TOOL LENGTH COMPENSATION C<br />
ALARM :<br />
IN TOOL LENGTH COMPENSATION TYPE C,<br />
NO AXIS IS DESIGNATED IN G43 & G44<br />
BLOCKS. IN TOOL LENGTH COMPENSATION<br />
TYPE C, IT TRIES TO LATCH ON TO<br />
ANOTHER AXIS WITHOUT OFFSET CANCE–<br />
LING.<br />
>100 S 0 T0000<br />
MEM **** *** *** 10:12:25<br />
[ ALM ][ OPR ][ PARA ][ ][ ]<br />
Fig. 13 (b) ALARM DETAIL Screen when P/S Alarm No. 27 is issued<br />
1122<br />
Alarm No.<br />
Normal explana–<br />
tion on alarm<br />
Function<br />
classification<br />
Alarm details<br />
Note that only details of the alarm identified at the top of the screen<br />
are displayed on the screen.<br />
If the alarms are all reset while the help screen is displayed, the alarm<br />
displayed on the ALARM DETAIL screen is deleted, indicating that no<br />
alarm is issued.<br />
HELP (ALARM DETAIL) O1234 N00001<br />
NU<strong>MB</strong>ER :<br />
M‘SAGE :<br />
FUNCTION :<br />
ALARM :<br />
<br />
ENTER THE DETAIL–REQUIRED ALARM NU<strong>MB</strong>ER,<br />
AND PRESS [SELECT] KEY<br />
>100 S 0 T0000<br />
MEM **** *** *** 10:12:25<br />
[ ALM ][ OPR ][ PARA ][ ][ ]<br />
Fig. 13 (c) ALARM DETAIL Screen when No Alarm is issued
B–63534EN/02 OPERATION<br />
13. HELP FUNCTION<br />
OPERATION METHOD<br />
screen<br />
3 To get details on another alarm number, first enter the alarm number,<br />
then press soft key [SELECT]. This operation is useful for<br />
investigating alarms not currently being raised.<br />
>100 S 0 T0000<br />
MEM **** *** *** 10:12:25<br />
[ ][ ][ ][ ][ SELECT ]<br />
Fig. 13 (d) How to select each ALARM DETAILS<br />
HELP (ALARM DETAIL) O1234 N00001<br />
NU<strong>MB</strong>ER : 100<br />
M‘SAGE : PARAMETER WRITE ENABLE<br />
FUNCTION :<br />
ALARM :<br />
<br />
>100 S 0 T0000<br />
MEM **** *** *** 10:12:25<br />
[ ][ ][ ][ ][ SELECT ]<br />
Fig. 13 (e) ALARM DETAIL Screen when P/S alarm No. 100 is selected<br />
4 To determine an operating procedure for the CNC, press the soft key<br />
[OPR] key on the HELP (INITIAL MENU) screen. The OPERATION<br />
METHOD menu screen is then displayed. (See Fig. 13 (f).)<br />
HELP (OPERATION METHOD) O1234 N00001<br />
1. PROGRAM EDIT<br />
2. SEARCH<br />
3. RESET<br />
4. DATA INPUT WITH MDI<br />
5. DATA INPUT WITH TAPE<br />
6. OUTPUT<br />
7. INPUT WITH FANUC CASSETTE<br />
8. OUTPUT WITH FANUC CASSETTE<br />
9. MEMORY CLEAR<br />
S 0 T0000<br />
MEM **** *** *** 10:12:25<br />
[ ALM ][ OPR ][ PARA ][ ][ ]<br />
Fig. 13 (f) OPERATION METHOD Menu Screen<br />
To select an operating procedure, enter an item No. from the keyboard<br />
then press the [SELECT] key.<br />
1123
13. HELP FUNCTION OPERATION<br />
B–63534EN/02<br />
RETURN MENU key<br />
PARAMETER TABLE<br />
screen<br />
>1 S 0 T0000<br />
MEM **** *** *** 10:12:25<br />
[ ][ ][ ][ ][ SELECT ]<br />
Fig. 13 (g) How to select each OPERATION METHOD screen<br />
When “1. PROGRAM EDIT” is selected, for example, the screen in<br />
Figure 13 (g) is displayed.<br />
On each OPERATION METHOD screen, it is possible to change the<br />
displayed page by pressing the PAGE key. The current page No. is<br />
shown at the upper right corner on the screen.<br />
HELP (OPERATION METHOD) 01234 N00001<br />
> 1/4<br />
*DELETE ALL PROGRAMS<br />
MODE : EDIT<br />
SCREEN : PROGRAM<br />
OPR : (O–9999) – <br />
*DELETE ONE PROGRAM<br />
MODE : EDIT<br />
SCREEN : PROGRAM<br />
OPR : (O+PROGRAM NU<strong>MB</strong>ER) – <br />
>_ S 0 T0000<br />
MEM **** *** *** 10:12:25<br />
[ ALM ][ OPR ][ PARA ][ ][ ]<br />
Fig. 13 (h) Selected OPERATION METHOD screen<br />
1124<br />
Each item<br />
Page/maximum<br />
page<br />
Operation<br />
Set mode<br />
Operation location<br />
Operating<br />
procedure<br />
5 To return to the OPERATION METHOD menu screen, press the<br />
RETURN MENU key to display “[OPR]” again, and then press the<br />
[OPR] key again.<br />
To directly select another OPERATION METHOD screen on the<br />
screen shown in Figure 13 (h), enter an item No. from the keyboard<br />
and press the [SELECT] key.<br />
>3 S 0 T0000<br />
MEM **** *** *** 10:12:25<br />
[ ][ ][ ][ ][ SELECT ]<br />
Fig. 13 (i) How to select another OPERATION METHOD screen<br />
6 If you are not sure of the No. of a system parameter to be set, or to refer<br />
to a system parameter, press the [PARA] key on the HELP (INITIAL<br />
MENU) screen. A list of parameter Nos. for each function is<br />
displayed. (See Figure 13 (j).)<br />
It is possible to change the displayed page on the parameter screen.<br />
The current page No. is shown at the upper right corner on the screen.
B–63534EN/02 OPERATION<br />
13. HELP FUNCTION<br />
Explanation<br />
Configuration of the Help Screen<br />
CNC<br />
screen<br />
HELP<br />
HELP key<br />
or<br />
function key<br />
HELP<br />
key<br />
key<br />
or<br />
function key<br />
HELP (PARAMETER TABLE) 01234 N00001<br />
1/4<br />
* SETTEING (No. 0000∼)<br />
* READER/PUNCHER INTERFACE (No. 0100∼)<br />
* AXIS CONTROL<br />
/SETTING UNIT (No. 1000∼)<br />
* COORDINATE SYSTEM (No. 1200∼)<br />
* STROKE LIMIT (No. 1300∼)<br />
* FEED RATE (No. 1400∼)<br />
* ACCEL/DECELERATION CTRL (No. 1600∼)<br />
* SERVORELATED (No. 1800∼)<br />
* DI/DO (No. 3000∼)<br />
>_ S 0 T0000<br />
MEM **** *** *** 10:12:25<br />
[ ALM ][ OPR ][ PARA ][ ][ ]<br />
1125<br />
Fig. 13 (j) PARAMETER TABLE screen<br />
7 To exit from the help screen, press the HELP key or another function<br />
key.<br />
HELP<br />
INITIAL MENU<br />
screen<br />
[ALAM]<br />
ALARM<br />
DETAIL<br />
screen<br />
(NO.)+[SELECT]<br />
(NO.)+[SELECT]<br />
(NO.)+[SELECT]<br />
OPERATION<br />
METHOD<br />
screen<br />
Each operationinstruction<br />
screen<br />
[OPR] [PARA]<br />
[OPR]<br />
PARAME-<br />
TER TABLE<br />
screen<br />
HELP key<br />
or<br />
function key<br />
PAGE key
14. SCREEN HARDCOPY OPERATION<br />
B–63534EN/02<br />
14 SCREEN<br />
Supplementary<br />
explanation<br />
HARDCOPY<br />
Screen Hardcopy Procedure<br />
The screen hardcopy function outputs the information displayed on the<br />
CNC screen as 640*480–dot bitmap data. This function makes it possible<br />
to produce a hard copy of a still image displayed on the CNC.<br />
The created bitmap data can be displayed on a PC.<br />
1 Check the parameter settings. To use the screen hardcopy function,<br />
set bit 7 (HDC) of parameter 3301 to 1 and parameter 20 (I/O channel<br />
selection) to 4 (memory card I/F). Set other relative parameters (bits<br />
0, 2, and 3 of parameter 3301) as needed. In a multipath system, set<br />
the parameters for each path.<br />
2 Insert a memory card.<br />
3 To start the function, set hardcopy start signal HDREQ to<br />
1. Alternatively, hold down the [SHIFT] key for five seconds.<br />
4 To end the function, press the [CAN] key. Alternatively, set hard<br />
copy stop signal HDABT to 1.<br />
5 While the screen hardcopy operation is in progress, the hardcopy in<br />
progress signal is tied to 1. For several tens of seconds (or<br />
several seconds, for a monochrome LCD) before the hardcopy<br />
operation ends, the screen image stands still.<br />
6 When the screen hardcopy operation is completed, the hardcopy in<br />
progress signal goes 0.<br />
While the screen hardcopy operation is in progress, the screen image<br />
keeps still. This means that the clock displayed on the screen indicates<br />
the beginning and end of the operation. When the clock stops counting<br />
seconds, the hard copy operation starts. The clock resumes counting<br />
seconds when the screen hard copy operation ends.<br />
1126
B–63534EN/02 OPERATION<br />
14. SCREEN HARDCOPY<br />
Limitations<br />
File name<br />
NOTE<br />
1 During the screen hardcopy operation, key input is disabled<br />
for several tens of seconds. Until the screen hardcopy<br />
operation ends, the screen image lies still. During this<br />
period, the hardcopy in progress signal is tied to<br />
1. No other signal is output. Avoid turning off the power<br />
indiscriminately during that period.<br />
2 If the [SHIFT] or [CAN] key is customized by C executor, for<br />
instance, the screen hardcopy operation may disable the<br />
[SHIFT] or [CAN] key.<br />
3 A normal hard copy may not be produced while the screen<br />
image is moving.<br />
A hard copy of the following screens cannot be produced.<br />
1 Screen of the FS–<strong>160i</strong>/<strong>180i</strong>/210i (CNC with personal computer<br />
function)<br />
2 System alarm screen<br />
3 Screen while RS–232–C is being used<br />
4 Screen during automatic or manual operation (A hard copy can be<br />
produced in a rest of the operation.)<br />
Screen hardcopy function can not be used with the <strong>160i</strong>/<strong>180i</strong>/<strong>160i</strong>s/<strong>180i</strong>s.<br />
The bitmap files created by the screen hardcopy function are named as<br />
follows, in order in which they are created after power–up:<br />
‘HDCPY000.BMP’ (Name of the first hardcopy file created after<br />
power–up)<br />
‘HDCPY001.BMP’ (Name of the second hardcopy file created after<br />
power–up)<br />
:<br />
:<br />
‘HDCPY099.BMP’<br />
NOTE<br />
1 A screen hardcopy file produced after the file HDCPY099.<br />
BMP is output will be named as HDCPY000.BMP.<br />
2 If a BMP file output by the screen hardcopy function has the<br />
same name as a file present on a memory card, the file on<br />
the memory card is overwritten unconditionally.<br />
3 When the hardcopy function is carried out after power is<br />
turned off and on again, the first output file is named as<br />
HDCPY000.BMP again. If the inserted memory card has a<br />
file having the same name, the file is unconditionally<br />
overwritten. Note this when continuously producing hard<br />
copies of various screens.<br />
1127
14. SCREEN HARDCOPY OPERATION<br />
B–63534EN/02<br />
Colors of data<br />
VGA card<br />
LCD<br />
hardware<br />
Monochrome<br />
LCD<br />
The number of colors used in created bitmap data depend on the display<br />
control card, the LCD hardware, and the display mode of the CNC screen.<br />
Table 14 (a) indicates the relationships.<br />
Table 14 (a) Colors of BMP data created by the screen hardcopy function<br />
CNC screen<br />
display<br />
mode<br />
Color LCD VGA–comp<br />
atible mode<br />
Data size<br />
Alarm message<br />
Colors<br />
displayed<br />
on CNC<br />
Colors used in created<br />
BMP data<br />
1128<br />
Remarks<br />
— 2 colors 2 colors Shades of gray are not supported.<br />
Character:<br />
16 colors<br />
Graphic:<br />
16 colors<br />
When bit 0 of parameter<br />
3301 is set to 0: 256 colors<br />
When bit 0 of parameter<br />
3301 is set to 1: 16 colors<br />
Most CNC screens use this mode. Note<br />
that colors may not be normally displayed<br />
in the 16–color mode.<br />
VGA mode 256 colors 256 colors A special screen can be prepared by C<br />
executor, for instance.<br />
Table 14 (b) indicates the sizes of bitmap data created by the screen<br />
hardcopy function.<br />
Table 14 (b) Sizes of bitmap data created by the screen hardcopy<br />
function<br />
Bitmap colors File size (bytes)<br />
Monochrome (2 colors) 38,462<br />
Color (16 colors) 153,718<br />
Color (256 colors) 308,278<br />
If bit 2 (HCA) of parameter 3301 is set to 1, an alarm message can be<br />
output when the hardcopy operation ends in failure.<br />
(P/S alarm Nos. 5212 to 5214)<br />
For descriptions of these alarms, see APPENDIX G, “ALARM LIST.”
IV. MAINTENANCE
B–63534EN/02 MAINTENANCE 1. METHOD OF REPLACING BATTERY<br />
1 METHOD<br />
Battery for memory<br />
backup<br />
OF REPLACING BATTERY<br />
This chapter describes how to replace the CNC backup battery and<br />
absolute pulse coder battery. This chapter consists of the following<br />
sections:<br />
1.1 REPLACING BATTERY FOR LCD–MOUNTED TYPE i<br />
SERIES<br />
1.2 REPLACING THE BATTERY FOR STAND–ALONE TYPE i<br />
SERIES<br />
1.3 BATTERY IN THE CNC DISPLAY UNIT WITH PC<br />
FUNCTIONS (3 VDC)<br />
1.4 BATTERY FOR SEPARATE ABSOLUTE PULSE CODERS<br />
(6 VDC)<br />
1.5 BATTERY FOR BUILT–IN ABSOLUTE PULSE CODER<br />
(6 VDC)<br />
Part programs, offset data, and system parameters are stored in CMOS<br />
memory in the control unit. The power to the CMOS memory is backed<br />
up by a lithium battery mounted on the front panel of the control unit.<br />
Therefore, the above data is not lost even if the main battery fails. The<br />
backup battery is installed in the control unit prior to being shipped from<br />
the factory. This battery can provide backup for the memory contents for<br />
about a year.<br />
When the battery voltage falls, alarm message “BAT” blinks on the LCD<br />
display and the battery alarm signal is output to the PMC. When this<br />
alarm is displayed, replace the battery as soon as possible. In general, the<br />
battery can be replaced within one or two weeks of the alarm first being<br />
issued. This, however, depends on the system configuration.<br />
If the battery voltage subsequently drops further, backup of memory can<br />
no longer be provided. Turning on the power to the control unit in this<br />
state causes system alarm 910 (SRAM parity alarm) to be issued because<br />
the contents of memory are lost. Replace the battery, clear the entire<br />
memory, then reenter the data.<br />
Replace the memory backup battery within a few minutes while the<br />
control unit is brought off.<br />
The following two kinds of batteries can be used.<br />
Lithium battery, incorporated into the CNC control unit.<br />
Two alkaline dry cells (size D) in an external battery case.<br />
NOTE<br />
A lithium battery is installed as standard at the factory.<br />
1131
1. METHOD OF REPLACING BATTERY MAINTENANCE<br />
B–63534EN/02<br />
1.1<br />
REPLACING<br />
BATTERY FOR<br />
LCD–MOUNTED<br />
TYPE i SERIES<br />
Replacement procedure<br />
When a lithium battery is used<br />
Prepare a new lithium battery (ordering code: A02B–0200–K102<br />
(FANUC specification: A98L–0031–0012)).<br />
1) Turn on the power to the CNC. After about 30 seconds, turn off the<br />
power.<br />
2) Remove the old battery from the top of the CNC control unit.<br />
First, unplug the battery connector, then take the battery out of its<br />
case.<br />
The battery case of a control unit without option slots is located at the<br />
top end of the unit as shown in the figure of the previous page. The<br />
battery case of a control unit with 2 slots or 4 slots is located in the<br />
central area of the top of the unit (between fans).<br />
3) Insert a new battery and reconnect the connector.<br />
Connector<br />
Lithium battery<br />
A02B–0200–K102<br />
1132<br />
Battery case<br />
WARNING<br />
Using other than the recommended battery may result in the<br />
battery exploding. Replace the battery only with the<br />
specified battery (A02B–0200–K102).
B–63534EN/02 MAINTENANCE 1. METHOD OF REPLACING BATTERY<br />
CAUTION<br />
Steps 1) to 3) should be completed within 30 minutes. Do<br />
not leave the control unit without a battery for any longer<br />
than the specified period. Otherwise, the contents of<br />
memory may be lost.<br />
If steps 1) to 3) may not be completed within 30 minutes,<br />
save all contents of the CMOS memory to the memory card<br />
beforehand. Thus, if the contents of the CMOS memory are<br />
lost, the contents can be restored easily.<br />
For the method of operation, refer to Maintenance manual<br />
(B–63525EN).<br />
When discarding a battery, observe the applicable ordinances or other<br />
rules of your local government. Also, cover the terminals of the battery<br />
with vinyl tape or the like to prevent a short–circuit.<br />
1133
1. METHOD OF REPLACING BATTERY MAINTENANCE<br />
B–63534EN/02<br />
Replacing<br />
commercial alkaline dry<br />
cells (size D)<br />
Connection terminal on the rear<br />
1) Prepare two alkaline dry cells (size D) commercially available.<br />
2) Turn on the power to the <strong>Series</strong> <strong>16i</strong>/<strong>18i</strong>/<strong>160i</strong>/<strong>180i</strong>.<br />
3) Remove the battery case cover.<br />
4) Replace the cells, paying careful attention to their orientation.<br />
5) Reinstall the cover onto the battery case.<br />
Battery case<br />
CAUTION<br />
When replacing the alkaline dry cells while the power is off,<br />
use the same procedure as that for lithium battery<br />
replacement described above.<br />
Mounting hole 4<br />
1134<br />
Alkaline dry cell 2<br />
Cover
B–63534EN/02 MAINTENANCE 1. METHOD OF REPLACING BATTERY<br />
1.2<br />
REPLACING THE<br />
BATTERY FOR<br />
STAND–ALONE TYPE<br />
i SERIES<br />
Replacing the battery<br />
If a lithium battery is used, have A02B–0200–K102 (FANUC internal<br />
code: A98L–0031–0012) handy.<br />
(1)Turn the CNC on. About 30 seconds later, turn the CNC off.<br />
(2)Remove the battery from the top area of the CNC unit.<br />
Disconnect the connector first. Then, remove the battery from the<br />
battery case.<br />
The battery case is provided in the top area of the face plate of the main<br />
CPU board.<br />
(3)Replace the battery, then connect the connector.<br />
Battery case<br />
Lithium battery<br />
A02B–0200–K102<br />
1135<br />
Connector<br />
WARNING<br />
The incorrect mounting of the battery may cause an<br />
explosion. Avoid using any battery other than the one<br />
specified here (A02B–0200–K102).
1. METHOD OF REPLACING BATTERY MAINTENANCE<br />
B–63534EN/02<br />
CAUTION<br />
Complete steps (1) to (3) within 30 minutes.<br />
If the battery is left removed for a long time, the memory<br />
would lose the contents.<br />
If there is a danger that the replacement cannot be<br />
completed within 30 minutes, save the whole contents of the<br />
CMOS memory to a memory card. The contents of the<br />
memory can be easily restored with the memory card in<br />
case the memory loses the contents.<br />
Discard the dead battery, observing appropriate municipal rules and<br />
regulations. When discarding the battery, insulate the terminal with a tape<br />
so that no short–circuit would occur.<br />
1136
B–63534EN/02 MAINTENANCE 1. METHOD OF REPLACING BATTERY<br />
When using commercial<br />
D–size alkaline dry cells<br />
Replacing the battery<br />
Connection terminal<br />
on the back<br />
Case<br />
(1)Have commercial D–size alkaline dry cells handy.<br />
(2)Turn the CNC on.<br />
(3)Remove the lid from the battery case.<br />
(4)Replace the old dry cells with new ones. Mount the dry cells in a<br />
correct orientation.<br />
(5)Replace the lid on the battery case.<br />
CAUTION<br />
In the power–off state, the battery should be replaced as in<br />
the case of the lithium battery, which is descried above.<br />
4 mounting holes<br />
1137<br />
2 dry cells<br />
Lid
1. METHOD OF REPLACING BATTERY MAINTENANCE<br />
B–63534EN/02<br />
1.3<br />
BATTERY IN THE<br />
CNC DISPLAY UNIT<br />
WITH PC FUNCTIONS<br />
(3 VDC)<br />
Replacing the battery<br />
A lithium battery is used to back up BIOS data in the CNC display unit<br />
with PC functions. This battery is factory–set in the CNC display unit<br />
with PC functions. This battery has sufficient capacity to retain BIOS<br />
data for one year.<br />
When the battery voltage becomes low, the LCD screen blinks. (The LCD<br />
screen also blinks if a fan alarm is issued.) If the screen blinks, replace<br />
the battery as soon as possible (within one week). FANUC recommends<br />
that the battery be replaced once per year regardless of whether a battery<br />
alarm is issued.<br />
(1)To guard against the possible loss or destruction of BIOS parameters,<br />
write down the BIOS parameter values.<br />
(2)Obtain a new lithium battery (A02B–0200–K102).<br />
(3)After power has been supplied for at least five seconds, turn off the<br />
power to CNC display unit with PC functions. Remove the intelligent<br />
terminal from the panel so that replacement work can be done from the<br />
rear of the intelligent terminal.<br />
(4)Detach the connector of the lithium battery, and remove the battery<br />
from the battery holder.<br />
(5)Run the cable for the new lithium battery as shown in the Fig. 1.3.<br />
(6)Attach the connector, and place the battery in the battery holder.<br />
(7)Install CNC display unit with PC functions again.<br />
(8)Turn on the power, and check that the BIOS parameters are maintained<br />
(BIOS setup is not activated forcibly).<br />
Between removing an old battery and inserting new battery, no more than<br />
five minutes must be allowed to elapse.<br />
1138
B–63534EN/02 MAINTENANCE 1. METHOD OF REPLACING BATTERY<br />
Lithium battery<br />
A02B–0200–K102<br />
Connector<br />
(BAT1)<br />
1139<br />
Battery holder<br />
Fig. 1.3 Lithium battery connection for CNC display unit with PC functions
1. METHOD OF REPLACING BATTERY MAINTENANCE<br />
B–63534EN/02<br />
1.4<br />
BATTERY FOR<br />
SEPARATE<br />
ABSOLUTE PULSE<br />
CODERS (6 VDC)<br />
Replacing batteries<br />
One battery unit can maintain current position data for six absolute pulse<br />
coders for a year.<br />
When the voltage of the battery becomes low, APC alarms 306 to 308 (+<br />
axis name) are displayed on the CRT display. When APC alarm 3n7 is<br />
displayed, replace the battery as soon as possible. In general, the battery<br />
should be replaced within two or three weeks, however, this depends on<br />
the number of pulse coders used.<br />
If the voltage of the battery becomes any lower, the current positions for<br />
the pulse coders can no longer be maintained. Turning on the power to<br />
the control unit in this state causes APC alarm 300 (reference position<br />
return request alarm) to occur. Return the tool to the reference position<br />
after replacing the battery.<br />
See Section 7.1.3 for details of connecting the battery to separate absolute<br />
pulse coders. The battery for the built–in absolute pulse coder is installed<br />
in the servo amplifier. For an explanation of the replacement procedure,<br />
refer to the FANUC SERVO MOTOR <strong>Series</strong> Maintenance Manual.<br />
Obtain four commercially available alkaline batteries (size D).<br />
(1)Turn on the power to the machine (i <strong>Series</strong> CNC).<br />
(2)Loosen the screws on the battery case connected to the interface unit<br />
of the detector separately installed, and remove the cover.<br />
(3)Replace the dry batteries in the case.<br />
Note the polarity of the batteries as shown in the figure below (orient<br />
two batteries one way and the other two in the opposite direction).<br />
1140<br />
Å<br />
Å<br />
Å<br />
Å Å<br />
Å<br />
Å<br />
ÇÅ<br />
Ç<br />
(4)After installing the new batteries, replace the cover.<br />
(5)Turn off the power to the machine (i <strong>Series</strong> CNC).<br />
ÇÇÅ<br />
ÅÇÇ<br />
Å<br />
Screws<br />
Cover<br />
WARNING<br />
If the batteries are installed incorrectly, an explosion may<br />
occur. Never use batteries other than the specified type<br />
(Size D alkaline batteries).<br />
CAUTION<br />
Replace batteries while the power to the i <strong>Series</strong> CNC is on.<br />
Note that, if batteries are replaced while no power is<br />
supplied to the CNC, the recorded absolute position is lost.
B–63534EN/02 MAINTENANCE 1. METHOD OF REPLACING BATTERY<br />
1.5<br />
BATTERY FOR<br />
BUILT–IN ABSOLUTE<br />
PULSE CODERS<br />
(DC6V)<br />
1.5.1<br />
Method of Replacing<br />
Battery for Servo<br />
Amplifier i series<br />
[Connection scheme 1]<br />
Supplying power from<br />
one battery unit to more<br />
than one SVM<br />
When the battery voltage falls, APC alarms 306 to 308 are displayed on<br />
the screen. When APC alarm 307 is displayed, replace the battery as soon<br />
as possible. In general, the battery should be replaced within one or two<br />
weeks of the alarm first appearing. This, however, depends on the number<br />
of pulse coders being used.<br />
If the battery voltage drops any further, the current positions for the pulse<br />
coders will be lost. Turning on the power to the control unit in this state.<br />
(1)APC alarm 306 (battery zero alarm) and APC alarm 300 (reference<br />
position return request alarm) occur. Return the tool to the reference<br />
position after replacing the battery.<br />
(2)The battery for the built–in absolute pulse coder is connected with the<br />
servo amplifier.<br />
(3)Note that the attachment methods of the battery and ordering<br />
specifications of battery are different from SERVO AMPLIFIER i<br />
series (SVM) to SERVO AMPLIFIER series.<br />
The battery unit for the absolute pulse coder can be connected using<br />
[Connection scheme 1] and [Connection scheme 2] explained below.<br />
Refer to Subsection 9.3.2.6, “Battery” in “FANUC SERVO AMPLIFIER<br />
i series Descriptions (B–63282EN)” for details.<br />
PSM<br />
CXA2A<br />
1141<br />
SVM SVM<br />
CXA2B CXA2B<br />
CXA2A CXA2A<br />
Battery case<br />
A06B–6050–K060<br />
Battery<br />
A06B–6050–K061<br />
Connector<br />
A06B–6110–K211<br />
– If a low battery voltage or a battery voltage of 0 V is indicated by an<br />
APC (absolute pulse coder) alarm, replace the battery.<br />
If a battery voltage of 0 V is indicated, you need to make a zero point<br />
return.<br />
– The absolute pulse coder of the ai series servo motor is incorporated<br />
with a backup capacitor as standard. This backup capacitor enables an<br />
absolute position detection to be continued for about 10 minutes.<br />
Therefore, no zero point return need be performed if the time during<br />
which servo amplifier power is kept off for battery replacement is<br />
within 10 minutes.<br />
– When the replacing of the battery takes more than 10 minutes, replace<br />
the battery after see Item [Caution No.1 for battery replacement].
1. METHOD OF REPLACING BATTERY MAINTENANCE<br />
B–63534EN/02<br />
[Connection scheme 2]<br />
<strong>Inc</strong>orporating each SVM<br />
with batteries<br />
– The service life of the batteries is about two years if they are used in<br />
a six–axis configuration with i series servo motors and one year if<br />
they are used in a six–axis configuration with series servo motors.<br />
FANUC recommends that you replace the batteries periodically<br />
according to the battery service life.<br />
– The battery unit consists of four R20 alkaline batteries. Commercial<br />
batteries can be used in the battery unit. The optional battery offered<br />
by FANUC is A06B–6050–K061.<br />
WARNING<br />
1 Do not connect more than one battery to the same BATL<br />
(B3) line. If the output voltage is different between the<br />
batteries, they may be short–circuited, resulting in the<br />
batteries becoming very hot.<br />
2 Install the battery with correct polarity. If the battery is<br />
installed with incorrect polarity, it may overheat, blow out, or<br />
catch fire.<br />
SVM<br />
Battery case<br />
A06B–6114 –K500<br />
Battery<br />
A06B–6073–K001<br />
1142<br />
CX5X<br />
SVM<br />
Battery case<br />
A06B–6114 –K500<br />
Battery<br />
A06B–6073–K001<br />
CX5X<br />
– If a low battery voltage or a battery voltage of 0 V is indicated by an APC<br />
(absolute pulse coder) alarm, replace the battery(A06B–6073–K001).<br />
If a battery voltage of 0 V is indicated, you need to make a zero point<br />
return.
B–63534EN/02 MAINTENANCE 1. METHOD OF REPLACING BATTERY<br />
– The absolute pulse coder of the i series servo motor is incorporated<br />
with a backup capacitor as standard. This backup capacitor enables an<br />
absolute position detection to be continued for about 10 minutes.<br />
Therefore, no zero point return need be performed if the time during<br />
which servo amplifier power is kept off for battery replacement is<br />
within 10 minutes.<br />
On the contrary, the absolute pulse coder of the standard series servo<br />
motor is not incorporated with a backup capacitor. Be careful when<br />
replacing the battery for this pulse coder. See [Caution No.1 for battery<br />
replacement] at the end of this section for details.<br />
– The service life of the batteries is about two years with i series servo<br />
motors and one year with series servo motors.<br />
FANUC recommends that you replace the batteries periodically<br />
according to the battery service life.<br />
– The built–in batteries are not commercially available. They must be<br />
purchased from FANUC. So, FANUC recommends that you keep<br />
spares.<br />
WARNING<br />
1 When using the built–in batteries (A06B–6073–K001), do<br />
not connect them to the BATL (B3) of connector CXA2A/<br />
CXA2B.<br />
The output voltages from different SVM batteries may be<br />
short–circuited, resulting in the batteries becoming very hot.<br />
2 Do not connect more than one battery to the same BATL<br />
(B3) line. If the output voltage is different between the<br />
batteries, they may be short–circuited, resulting in the<br />
batteries becoming very hot.<br />
3 Install the battery with correct polarity. If the battery is<br />
installed with incorrect polarity, it may overheat, blow out, or<br />
catch fire.<br />
1143
1. METHOD OF REPLACING BATTERY MAINTENANCE<br />
B–63534EN/02<br />
[Caution No.1 for battery<br />
replacement]<br />
[Installation procedure for the battery]<br />
(1)Remove the battery cover from the SVM.<br />
(2)Install the battery in the SVM as shown in the figure below.<br />
(3)Install the battery cover.<br />
(4)Attach the battery connector to CX5X of the SVM.<br />
CX5X<br />
1144<br />
+6 V<br />
0 V<br />
SVM<br />
Battery<br />
Inserting direction<br />
Battery cover<br />
Connector<br />
Cable side<br />
Red: +6V<br />
Black: 0V<br />
CAUTION<br />
1 When the battery is installed in the SVM from the side from<br />
which the cable is drawn, the cable may be stretched tight,<br />
which can lead to a poor contact condition. Therefore, install<br />
the battery so that the cable is not extended tightly.<br />
2 Be careful when handling the connector. See [Caution No.2<br />
for battery replacement] at the end of this section for details.<br />
The pulse coder for the series servo motor is not incorporated with a<br />
backup capacitor as standard. To keep the absolute position information<br />
in the absolute pulse coder, you need to keep the control power turned on<br />
during battery replacement. Follow the procedure explained below.<br />
[Replacing procedure for the battery]<br />
1. Make sure that the power to the SVM is on (the 7–segment LED on<br />
the front of the SVM is on).<br />
2. Make sure that the emergency stop button of the system has been<br />
pressed.<br />
3. Make sure that the motor is not activated.<br />
4. Make sure that the DC link charge LED of the SVM is off.<br />
5. Remove the old battery, and install a new battery.<br />
6. This completes the replacement. You can turn off the power to the<br />
system.
B–63534EN/02 MAINTENANCE 1. METHOD OF REPLACING BATTERY<br />
[Caution No.2 for battery<br />
replacement]<br />
<br />
<br />
<br />
<br />
<br />
10 degrees or less<br />
5 degrees or less<br />
WARNING<br />
1 When replacing the battery, be careful not to touch bare<br />
metal parts in the panel. In particular, be careful not to touch<br />
any high–voltage circuits due to the electric shock hazard.<br />
2 Before replacing the battery, check that the DC link charge<br />
confirmation LED on the front of the servo amplifier is off.<br />
Neglecting this check creates an electric shock hazard.<br />
3 Install the battery with correct polarity. If the battery is<br />
installed with incorrect polarity, it may overheat, blow out, or<br />
catch fire.<br />
4 Avoid a short–circuit between the +6V and 0V lines of a<br />
battery or cable. A short–circuit may lead to a hot battery, an<br />
explosion, or fire.<br />
If an excessive strain is applied to a connector when it is inserted or<br />
removed, a poor contact may result. When inserting and removing the<br />
battery connector, therefore, be careful not to apply an excessive<br />
wrenching force to it; just follow the instructions given in the following<br />
table.<br />
(1)Attaching connectors<br />
1145<br />
Check the attachment position.<br />
Plug the cable connector while raising it<br />
slightly.<br />
Here, the angle of the cable connector to<br />
the horizontal must be 5 degrees or less.<br />
After passing the lock pin, insert the<br />
connector straight.<br />
The attachment of the connector is<br />
completed.
1. METHOD OF REPLACING BATTERY MAINTENANCE<br />
B–63534EN/02<br />
<br />
<br />
<br />
10 degrees or less<br />
5 degrees or less<br />
(2) Detaching the connector<br />
1146<br />
Hold both the sides of the cable insulator<br />
and the cable, and pull them horizontally.<br />
Pull out the cable side while raising it<br />
slightly.<br />
Here, the angle of the cable to the<br />
horizontal must be 5 degrees or less.
B–63534EN/02 MAINTENANCE 1. METHOD OF REPLACING BATTERY<br />
1.5.2<br />
Method of Replacing<br />
Battery for Servo<br />
Amplifier series<br />
The battery is connected in either of 2 ways as follows.<br />
Method 1: Use the battery case (A06B–6050–K060).<br />
Use the battery: A06B–6050–K061 or D–size alkaline battery.<br />
Method 2: Attach the lithium battery to the SVM.<br />
Use the battery: A06B–6093–K001.<br />
Method Item Ordering specification<br />
Method 1 Battery (4 pieces of D–size alkaline<br />
battery)<br />
1147<br />
A06B–6050–K061<br />
Method 2 Battery (Lithium battery) A06B–6093–K001<br />
Replacement of batteries in the battery case. (Method 1)<br />
Replace four D–size alkaline batteries in the battery case installed in<br />
the machine.<br />
[Attachment procedure]<br />
(1)Turn the servo unit (machine) on.<br />
(2)Place the machine in the emergency stop state.<br />
(3)Confirm that the servo motors are not active.<br />
(4)Have four D–size alkaline batteries on hand.<br />
(5)Loosen the screws on the battery case. Remove the cover.<br />
(6)Replace the alkaline batteries in the case. Pay careful attention<br />
to the polarity of the alkaline batteries.<br />
(7)Attach the cover.<br />
Screws<br />
Cover<br />
Attach the lithium battery to the amplifier. (Method 2)<br />
Attach the lithium (A06B–6093–K001) battery to the amplifier.<br />
[Attachment procedure]<br />
(1)Turn the servo unit (machine) on.<br />
(2)Place the machine in the emergency stop state.<br />
(3)Confirm that the servo motors are not active.<br />
(4)In case of SVU–12 or SVU–20, remove the battery cover under<br />
the servo unit grasping its left and right sides. In case of<br />
SVU–40 or SVU–80, remove the cover attached on right side<br />
of the servo unit grasping its upper and lower sides.
1. METHOD OF REPLACING BATTERY MAINTENANCE<br />
B–63534EN/02<br />
(5)Remove the battery from the servo unit.<br />
(6)Replace the battery and connect the battery cable with the<br />
connector CX5X or CX5Y of the servo unit.<br />
(7)Mount the battery cover.<br />
1148<br />
SVU–12, SVU–20<br />
Battery<br />
SVU–40, SVU–80<br />
Battery cover<br />
Pass the battery cable to this slit.<br />
CAUTIONS<br />
The connector of the battery can be connected with either<br />
of CX5X and CX5Y.
B–63534EN/02 MAINTENANCE 1. METHOD OF REPLACING BATTERY<br />
Used batteries<br />
Old batteries should be disposed as “INDUSTRIAL WASTES”<br />
according to the regulations of the country or autonomy where your<br />
machine has been installed.<br />
1149
APPENDIX
B–63534EN/02 APPENDIX<br />
A. TAPE CODE LIST<br />
ATAPE CODE LIST<br />
ISO code EIA code Meaning<br />
Character 8 7 6 5 4 3 2 1 Character 8 7 6 5 4 3 2 1<br />
0 0 Number 0<br />
1 1 Number 1<br />
2 2 Number 2<br />
3 3 Number 3<br />
4 4 Number 4<br />
5 5 Number 5<br />
6 6 Number 6<br />
7 7 Number 7<br />
8 8 Number 8<br />
9 9 Number 9<br />
A a Address A<br />
B b Address B<br />
C c Address C<br />
D d Address D<br />
E e Address E<br />
F f Address F<br />
G g Address G<br />
H h Address H<br />
I i Address I<br />
J j Address J<br />
K k Address K<br />
L l Address L<br />
M m Address M<br />
N n Address N<br />
O o Address O<br />
P p Address P<br />
Q q Address Q<br />
R r Address R<br />
S s Address S<br />
T t Address T<br />
U u Address U<br />
V v Address V<br />
W w Address W<br />
X x Address X<br />
Y y Address Y<br />
Z z Address Z<br />
1153<br />
Without<br />
CUSTOM<br />
MACURO B<br />
With<br />
CUSTOM<br />
MACRO B
A. TAPE CODE LIST APPENDIX<br />
B–63534EN/02<br />
ISO code EIA code Meaning<br />
Character 8 7 6 5 4 3 2 1 Character 8 7 6 5 4 3 2 1<br />
DEL Del Delete<br />
(deleting a mispunch)<br />
NUL Blank No punch. With EIA<br />
code, this code cannot<br />
be used in a significant<br />
information section.<br />
1154<br />
Without With<br />
CUSTOM CUSTOM<br />
MACRO MACRO<br />
B B<br />
× ×<br />
× ×<br />
BS BS Backspace × ×<br />
HT Tab Tabulator × ×<br />
LF or NL CR or EOB End of block<br />
CR Carriage return × ×<br />
SP SP Space <br />
% ER Absolute rewind stop<br />
( (2–4–5) Control out<br />
(start of comment)<br />
) (2–4–7) Control in<br />
(end of comment)<br />
+ + Plus sign ∆<br />
– – Minus sign<br />
: Colon (address O)<br />
/ / Optional block skip<br />
. . Period (decimal point)<br />
# Parameter<br />
(No. 6012)<br />
Sharp<br />
$ Dollar sign ∆ <br />
& & Ampersand ∆ <br />
’ ___ Apostrophe ∆ <br />
* Parameter<br />
(No. 6010)<br />
Asterisk<br />
∆<br />
, , Comma<br />
; Semicolon ∆ ∆<br />
< Left angle bracket ∆ ∆<br />
= Parameter<br />
(No. 6011)<br />
Equal sign<br />
∆<br />
> Right angle bracket ∆ ∆<br />
? Question mark ∆ <br />
@ Commercial at mark ∆ <br />
” Quotation mark ∆ ∆<br />
[ Parameter<br />
(No. 6013)<br />
Left square bracket<br />
∆<br />
] Parameter<br />
(No. 6014)<br />
Right square bracket<br />
∆
B–63534EN/02 APPENDIX<br />
A. TAPE CODE LIST<br />
NOTE<br />
1 The symbols used in the remark column have the following meanings.<br />
(Space) : The character will be registered in memory and has a specific meaning.<br />
It it is used incorrectly in a statement other than a comment, an alarm occurs.<br />
× : The character will not be registered in memory and will be ignored.<br />
∆ : The character will be registered in memory, but will be ignored during program<br />
execution.<br />
: The character will be registered in memory. If it is used in a statement other than<br />
a comment, an alarm occurs.<br />
: If it is used in a statement other than a comment, the character will not be<br />
registered in memory. If it is used in a comment, it will be registered in memory.<br />
2 Codes not in this table are ignored if their parity is correct.<br />
3 Codes with incorrect parity cause the TH alarm. But they are ignored without generating the<br />
TH alarm when they are in the comment section.<br />
4 A character with all eight holes punched is ignored and does not generate TH alarm in EIA code.<br />
1155
B. LIST OF FUNCTIONS AND<br />
TAPE FORMAT APPENDIX<br />
B–63534EN/02<br />
BLIST OF FUNCTIONS AND TAPE FORMAT<br />
Some functions cannot be added as options depending on the model.<br />
In the tables below, I P :presents a combination of arbitrary axis<br />
addresses using X,Y,Z,A,B and C (such as X_Y_Z_A_).<br />
x = 1st basic axis (X usually)<br />
y = 2nd basic axis (Y usually)<br />
z = 3rd basic axis (Z usually)<br />
Functions Illustration Tape format<br />
Positioning (G00)<br />
Linear interpolation (G01)<br />
Circular interpolation<br />
(G02, G03)<br />
Helical interpolation<br />
(G02, G03)<br />
(x, y)<br />
Start point<br />
Start point<br />
Start<br />
point<br />
R<br />
Start<br />
point<br />
R<br />
I<br />
1156<br />
G03<br />
I<br />
Z<br />
J<br />
(xyz)<br />
(x, y)<br />
IP<br />
IP<br />
G02<br />
Start<br />
point<br />
J<br />
(In case of X–Y plane)<br />
(x, y)<br />
G00 IP_<br />
;<br />
G01 IP_<br />
F_;<br />
G17 G02<br />
G03<br />
G18 G02<br />
G03<br />
G19 G02<br />
G03<br />
G17 G02<br />
G03<br />
G18 G02<br />
G03<br />
G19 G02<br />
G03<br />
X_ Y_ R_<br />
I_ J_<br />
X_ Z_ R_<br />
I_ K_<br />
Y_ Z_ R_<br />
J_ K_<br />
X_ Y_ R_<br />
I_ J_<br />
X_ Z_ R_<br />
I_ K_<br />
Y_ Z_ R_<br />
J_ K_<br />
α : Any axis other than circular<br />
interpolation axes.<br />
F_ ;<br />
F_ ;<br />
F_ ;<br />
α_ F_ ;<br />
α_ F_ ;<br />
α_ F_ ;
B–63534EN/02<br />
Dwell (G04)<br />
APPENDIX<br />
1157<br />
B. LIST OF FUNCTIONS AND<br />
TAPE FORMAT<br />
Functions Illustration Tape format<br />
High–speed cycle<br />
machining (G05)<br />
High–speed remote bufferA<br />
(G05)<br />
High–speed remote bufferB<br />
(G05)<br />
High–precision contour<br />
control (G05)<br />
AI high–precision contour<br />
control (G05)<br />
AI nano high–precision<br />
contour control (G05)<br />
See II 19.1<br />
See II 19.3.1<br />
See II 19.3.2<br />
See II 19.8<br />
See II 22.1<br />
See II 22.1<br />
G04 X_<br />
P_<br />
;<br />
G05 P10_L_;<br />
P10_:Number of the machining<br />
cycle to be called first:<br />
(P10001 to P10999)<br />
L_ :Repetition count of the<br />
machining cycle<br />
(L1 to L999/L1 applies when<br />
this parameter is omitted.)<br />
G05: Turns binary input operation<br />
on.<br />
Subsequently, enter data for binary<br />
input operation.<br />
If, in data for binary input operation,<br />
the amounts of travel along all axes<br />
are specified as 0, binary input operation<br />
is turned off.<br />
G05 P01: Turns binary input operation<br />
on.<br />
Subsequently, enter data for binary<br />
input operation.<br />
If, in data for binary input operation,<br />
the amounts of travel along all axes<br />
are specified as 0, binary input operation<br />
is turned off.<br />
G05 P10000; Starts high–precision<br />
contour control mode<br />
G05 P0; Ends high–precision<br />
contour control mode<br />
G05 P10000; Starts AI high–precision<br />
contour control mode<br />
G05 P0; Ends AI high–precision<br />
contour control mode<br />
G05 P10000; Starts AI nano high–<br />
precision contour control mode<br />
G05 P0; Ends AI nano high–<br />
precision contour control mode<br />
(Note)<br />
For all of the high precision contour<br />
control, AI high precision contour<br />
control, and AI nano high precision<br />
contour control functions, the same<br />
command format is used.<br />
(G05P10000)<br />
Which function to apply depends on<br />
the option specification.<br />
AI contour control (G05.1) See II 19.7<br />
G05.1 Q1; AI contour control mode<br />
on<br />
G05.1 Q0; AI contour control mode<br />
off
B. LIST OF FUNCTIONS AND<br />
TAPE FORMAT APPENDIX<br />
B–63534EN/02<br />
Functions Illustration Tape format<br />
AI nano contour control<br />
(G05.1)<br />
Cylindrical interpolation<br />
(G07.1)<br />
Advanced preview control<br />
(G08)<br />
Exact stop (G09)<br />
Change of offset<br />
value by program<br />
(G10)<br />
Polar coordinate<br />
(G15, G16)<br />
Yp<br />
See II 19.7<br />
Velocity<br />
In–position check<br />
Yp<br />
(x y)<br />
Xp<br />
Work coordinate system<br />
1158<br />
Xp<br />
Time<br />
Local coordinate<br />
G05.1 Q1; AI nano contour control<br />
mode on<br />
G05.1 Q0; AI nano contour control<br />
mode off<br />
(Note)<br />
For both of the AI contour control<br />
and AI nano contour control functions,<br />
the same command format is<br />
used. (G05.1 Q1)<br />
Which function to apply depends on<br />
the option specification. If, however,<br />
the AI nano contour control option is<br />
specified, AI contour control can be<br />
issued by appropriately setting NAM<br />
(bit 0 of parameter No. 7503).<br />
G07 IP r ; Cylindrical interpolation<br />
mode on<br />
r : Radius of cylinder<br />
G07 IP 0 ; Cylindrical interpolation<br />
mode off<br />
G08 P1:<br />
Look–ahead control mode on<br />
G08 P0:<br />
Look–ahead control mode off<br />
G01<br />
G09 G02<br />
G03<br />
IP_; Tool offset memory A<br />
G10 L11 P_R_;<br />
Tool offset memory B<br />
G10 L10 P_R_;(Geomerty offset<br />
value)<br />
G10 L11 P_R_;(Wear offset<br />
value)<br />
Tool offset memory C<br />
G10 L10 P_R_;(Geomerty offset<br />
value/H)<br />
G10 L11 P_R_;(Wear offset<br />
value/H)<br />
G10 L12 P_R_;(Geomerty offset<br />
value/D)<br />
G10 L13 P_R_;(Wear offset<br />
value/D)<br />
G17 G16 Xp_ Yp_ . . . ;<br />
G18 G16 Zp_ Xp_ . . . ;<br />
G19 G16 Yp_ Zp_ . . . ;<br />
G15 ; Cancel
B–63534EN/02<br />
APPENDIX<br />
1159<br />
B. LIST OF FUNCTIONS AND<br />
TAPE FORMAT<br />
Functions Illustration Tape format<br />
Plane section<br />
(G17, G18, G19)<br />
<strong>Inc</strong>h/millimeter<br />
conversion (G20, G21)<br />
Stored stroke check<br />
(G22, G23)<br />
Spindle speed<br />
fluctuation detection<br />
(G25, G26)<br />
Reference position return<br />
check (G27)<br />
Reference position return<br />
(G28)<br />
2nd, reference position return<br />
(G30)<br />
Return from reference<br />
position to start point<br />
(G29)<br />
(IJK)<br />
Start point<br />
Reference position<br />
2nd reference<br />
position (G30)<br />
Reference position<br />
Intermediate position<br />
(XYZ)<br />
(G28)<br />
IP<br />
Intermediate position<br />
IP<br />
Start point<br />
IP<br />
G17 ;<br />
G18 ;<br />
G19 ;<br />
G20 ;<br />
G21 ;<br />
G22 X_Y_Z_I_J_K_;<br />
G23 Cancel;<br />
G25;<br />
Spindle speed fluctuation<br />
detection off<br />
G26; P_Q_R;<br />
Spindle speed fluctuation<br />
detection on<br />
G27 IP_<br />
;<br />
G28 IP_<br />
;<br />
G30 IP_<br />
;<br />
G29 IP_<br />
;<br />
<strong>Inc</strong>h input<br />
Millimeter input
B. LIST OF FUNCTIONS AND<br />
TAPE FORMAT APPENDIX<br />
B–63534EN/02<br />
Functions Illustration Tape format<br />
Skip function (G31)<br />
Cutter compensation C<br />
(G40 – G42)<br />
Tool length offset A<br />
(G43, G44, G49)<br />
Tool length offset B<br />
(G43, G44, G49)<br />
Tool length offset C<br />
(G43, G44, G49)<br />
Start point<br />
ÇÇÇ<br />
ÇÇÇ<br />
ÇÇÇ<br />
ÇÇÇ<br />
Z<br />
G40<br />
Tool<br />
1160<br />
Skip signal<br />
ÇÇÇ<br />
ÇÇÇ<br />
G41<br />
G42<br />
ÇÇÇ<br />
ÇÇÇ<br />
IP G31 IP_<br />
F_;<br />
Thread cutting (G33)<br />
F<br />
G33 IP_<br />
F_;<br />
!F : Lead<br />
Normal direction control<br />
(G40.1, G41.1, G42.1)<br />
(G150, G151, G152)<br />
Tool offset<br />
(G45 – G48)<br />
G 45<br />
G 46<br />
G 47<br />
G 48<br />
G17<br />
G18<br />
G19<br />
G43<br />
Offset G44<br />
<br />
<strong>Inc</strong>rease<br />
Decrease<br />
Double<br />
increase<br />
Double<br />
decrease<br />
Offset value<br />
D : Tool offset<br />
G40 : Cancel<br />
G41<br />
G42<br />
Z_ H_ ;<br />
G43<br />
H_ ;<br />
G44<br />
H : Tool offset<br />
G49 : Cancel<br />
G17<br />
G18<br />
G19<br />
G17<br />
G18<br />
G19<br />
H : Tool offset<br />
G49 : Cancel<br />
G43<br />
G44<br />
G43<br />
G44<br />
D_ ;<br />
G41.1 (G151)<br />
Normal direction control Left<br />
G42.1 (G152)<br />
Normal direction control Right<br />
G40.1 (G150)<br />
Normal direction control Cancel<br />
G43<br />
G44<br />
α_ H_ ;<br />
Z_<br />
Y_<br />
X_<br />
H_ ;<br />
α : Address of an arbitrary axis<br />
H : Tool offset<br />
G49 : Cancel<br />
G45<br />
G46<br />
G47<br />
G48<br />
D : Tool offset<br />
_ D_;<br />
<br />
H_ ;
B–63534EN/02<br />
APPENDIX<br />
1161<br />
B. LIST OF FUNCTIONS AND<br />
TAPE FORMAT<br />
Functions Illustration Tape format<br />
Scaling (G50, G51)<br />
P4 P4’ P3’ P3 G51 X_ Y_ Z_<br />
P_<br />
I_ J_ K_<br />
IP<br />
P, I, J, K : Scaling magnification<br />
X, Y, Z : Control position of scaling<br />
P1’ P2’ G50 ; Cancel<br />
P1 P2 Programmable mirror<br />
image (G50.1, G51.1)<br />
Setting of local<br />
coordinate system<br />
(G52)<br />
Command in machine<br />
coordinate system<br />
(G53)<br />
Selection of work<br />
coordinate system<br />
(G54 – G59)<br />
Single direction<br />
positioning (G60)<br />
Cutting mode/Exact<br />
stop mode, Tapping<br />
mode, Automatic<br />
corner override<br />
Custom macro<br />
(G65, G66, G67)<br />
v<br />
v<br />
Work zero<br />
point<br />
offset<br />
G65 P_L _ ;<br />
Mirror<br />
x<br />
Local coordinate<br />
system<br />
IP<br />
y<br />
Work coordinate<br />
system<br />
IP<br />
IP<br />
Work coordinate<br />
system<br />
<strong>Machine</strong> coordinate system<br />
G64<br />
t<br />
G61 t<br />
Macro<br />
O_ ;<br />
M99 ;<br />
G51.1 _ ;<br />
G50.1 ; ……Cancel<br />
G52 IP<br />
_ ;<br />
G53 IP<br />
_ ;<br />
G54<br />
:<br />
G59<br />
G60 IP_<br />
;<br />
IP<br />
<br />
G64_ ; Cutting mode<br />
G61_ ; Exact stop mode<br />
G63_ ; Tapping mode<br />
G62_ ; Automatic corner override<br />
One–shot call<br />
G65 P_ L_<br />
;<br />
P : Program No.<br />
L : Number of repeatition<br />
Modal call<br />
G66 P_L_ ;
B. LIST OF FUNCTIONS AND<br />
TAPE FORMAT APPENDIX<br />
B–63534EN/02<br />
Functions Illustration Tape format<br />
Coordinate system<br />
rotation (G68, G69)<br />
Canned cycles<br />
(G73, G74, G80 – G89)<br />
Absolute/incremental<br />
programming (G90/G91)<br />
Change of workpiece<br />
coordinate system (G92)<br />
Maximum spindle speed<br />
clamp (G92)<br />
Workpiece coordinate<br />
system preset (G92.1)<br />
Feed per minute, Feed<br />
per revolution (G94, G95)<br />
Constant surface speed<br />
control (G96, G97)<br />
Initial point return / R point<br />
return (G98, G99)<br />
Y<br />
(x y)<br />
G99<br />
ÇÇ<br />
ÇÇP I<br />
1162<br />
<br />
(In case of X–Y plane)<br />
Refer to II.14. FUNCTIONS TO<br />
SIMPLIFY PROGRAMMING<br />
mm/min inch/min<br />
mm/rev inch/rev<br />
Surface speed (m/min or<br />
feet/min)<br />
Spindle<br />
speed<br />
N (min –1 )<br />
G98<br />
X<br />
Initial<br />
level<br />
R level<br />
Z point<br />
G68<br />
G90_ ; Absolute command<br />
G91_ ; <strong>Inc</strong>remental command<br />
G90_ G91_ ; Combined use<br />
G92 IP_<br />
; Change of workpiece<br />
coordinate system<br />
G92 S_ ; Constant surface speed<br />
control<br />
Maximum spindle speed<br />
clamp<br />
G92.1 IP<br />
0;<br />
G94 F_ ; Feed per munute<br />
G95 F_ ; Feed per revolution<br />
G96 S_ ; Constant surface speed<br />
control on (surface speed<br />
specification)<br />
G97 S_ ; Constant surface speed<br />
control off (spindle<br />
speed specification)<br />
G98_ ;<br />
G99_ ;<br />
G17 X_ Y_<br />
G18 Z_ X_<br />
G19 Y_ Z_<br />
G69 ; Cancel<br />
G80 ; Cancel<br />
G73<br />
G74<br />
G76<br />
G81<br />
:<br />
G89<br />
R α <br />
X_ Y_ Z_ P_ Q_ R_ F_ K_ ;
B–63534EN/02 APPENDIX<br />
C. RANGE OF COMMAND VALUE<br />
C <br />
Linear axis<br />
In case of millimeter<br />
input, feed screw is<br />
millimeter<br />
<br />
<br />
1163<br />
<strong>Inc</strong>rement system<br />
IS–B IS–C<br />
Least input increment 0.001 mm 0.0001 mm<br />
Least command increment 0.001 mm 0.0001 mm<br />
Max. programmable dimension ±99999.999 mm ±9999.9999 mm<br />
Max. rapid traverse Note 240000 mm/min 100000 mm/min<br />
Feedrate range Note 1 to 240000 mm/min 1 to 100000 mm/min<br />
<strong>Inc</strong>remental feed 0.001, 0.01, 0.1,<br />
1 mm/step<br />
0.0001, 0.001, 0.01,<br />
0.1 mm/step<br />
Tool compensation 0 to ±999.999 mm 0 to ±999.9999 mm<br />
Dwell time 0 to 99999.999 sec 0 to 99999.999 sec<br />
<strong>Inc</strong>rement system<br />
IS–B IS–C<br />
Least input increment 0.0001 inch 0.00001 inch<br />
Least command increment 0.001 mm 0.0001 mm<br />
Max. programmable dimension ±9999.9999 inch ±393.70078 inch<br />
Max. rapid traverse Note 240000 mm/min 100000 mm/min<br />
Feedrate range Note 0.01 to 9600<br />
inch/min<br />
<strong>Inc</strong>remental feed 0.0001, 0.001, 0.01,<br />
0.1 inch/step<br />
0.01 to 4000<br />
inch/min<br />
0.00001, 0.0001,<br />
0.001, 0.01 inch/step<br />
Tool compensation 0 to ±99.9999 inch 0 to ±99.9999 inch<br />
Dwell time 0 to 99999.999 sec 0 to 9999.9999 sec
C. RANGE OF COMMAND VALUE APPENDIX<br />
B–63534EN/02<br />
<br />
<br />
<br />
<br />
1164<br />
<strong>Inc</strong>rement system<br />
IS–B IS–C<br />
Least input increment 0.0001 inch 0.00001 inch<br />
Least command increment 0.0001 inch 0.00001 inch<br />
Max. programmable dimension ±9999.9999 inch ±9999.9999 inch<br />
Max. rapid traverse Note 9600 inch/min 4000 inch/min<br />
Feedrate range Note 0.01 to 9600<br />
inch/min<br />
<strong>Inc</strong>remental feed 0.0001, 0.001, 0.01,<br />
0.1 inch/step<br />
0.01 to 4000<br />
inch/min<br />
0.00001, 0.0001,<br />
0.001, 0.01 inch/step<br />
Tool compensation 0 to ±99.9999 inch 0 to ±99.9999 inch<br />
Dwell time 0 to 99999.999 sec 0 to 9999.9999 sec<br />
<strong>Inc</strong>rement system<br />
IS–B IS–C<br />
Least input increment 0.001 mm 0.0001 mm<br />
Least command increment 0.0001 inch 0.00001 inch<br />
Max. programmable dimension ±99999.999 mm ±9999.9999 mm<br />
Max. rapid traverse Note 9600 inch/min 4000 inch/min<br />
Feedrate range Note 1 to 240000 mm/min 1 to 100000 mm/min<br />
<strong>Inc</strong>remental feed 0.001, 0.01, 0.1, 1<br />
mm/step<br />
0.0001, 0.001, 0.01,<br />
0.1 mm/step<br />
Tool compensation 0 to ±999.999 mm 0 to ±999.9999 mm<br />
Dwell time 0 to 99999.999 sec 0 to 9999.9999 sec
B–63534EN/02 APPENDIX<br />
C. RANGE OF COMMAND VALUE<br />
Rotation axis<br />
1165<br />
<strong>Inc</strong>rement system<br />
IS–B IS–C<br />
Least input increment 0.001 deg 0.0001 deg<br />
Least command increment 0.001 deg 0.0001 deg<br />
Max. programmable dimension ±99999.999 deg ±9999.9999 deg<br />
Max. rapid traverse Note 240000 deg/min 100000 deg/min<br />
Feedrate range Note 1 to 240000 deg/min 1 to 100000 deg/min<br />
<strong>Inc</strong>remental feed 0.001, 0.01, 0.1,<br />
1 deg/step<br />
0.0001, 0.001, 0.01,<br />
0.1 deg/step<br />
NOTE<br />
The feedrate range shown above are limitations depending<br />
on CNC interpolation capacity. As a whole system,<br />
limitations depending on servo system must also be<br />
considered.
D. NOMOGRAPHS APPENDIX<br />
B–63534EN/02<br />
D<br />
1166
B–63534EN/02 APPENDIX<br />
D. NOMOGRAPHS<br />
D.1<br />
INCORRECT<br />
THREADED LENGTH<br />
Explanations<br />
How to determine δ 2<br />
How to determine δ 1<br />
The leads of a thread are generally incorrect in δ1 and δ2, as shown in Fig.<br />
D.1 (a), due to automatic acceleration and deceleration.<br />
Thus distance allowances must be made to the extent of δ1 and δ2 in the<br />
program.<br />
δ <br />
1167<br />
Fig. D.1 (a) <strong>Inc</strong>orrect thread position<br />
2 T1V V 1<br />
60 RL<br />
(mm) . . . . . . . (1)<br />
T1 : Time constant of servo system (sec)<br />
V : Cutting speed (mm/sec)<br />
R : Spindle speed (rpm)<br />
L : Thread feed (mm)<br />
δ<br />
Time constant T 1 (sec) of<br />
the servo system: Usually<br />
0.033 s.<br />
1 {t–T1 T1 exp(– t<br />
)}V<br />
T1 a exp(– t<br />
. . . . . . . (2)<br />
)<br />
. . . . . . . (3)<br />
T1 Time constant T<br />
T1 : Time constant of servo system (sec)<br />
1 (sec) of<br />
the servo system: Usually<br />
V : Cutting speed (mm/sec)<br />
0.033 s.<br />
The lead at the beginning of thread cutting is shorter than the specified<br />
lead L, and the allowable lead error is ∆L. Then as follows.<br />
a L<br />
L<br />
When the value of HαI is determined, the time lapse until the thread<br />
accuracy is attained. The time HtI is substituted in (2) to determine δ1:<br />
Constants V and T1 are determined in the same way as for δ2. Since the<br />
calculation of δ1 is rather complex, a nomography is provided on the<br />
following pages.
D. NOMOGRAPHS APPENDIX<br />
B–63534EN/02<br />
How to use nomograph<br />
First specify the class and the lead of a thread. The thread accuracy, α,<br />
will be obtained at (1), and depending on the time constant of cutting feed<br />
acceleration/ deceleration, the δ1 value when V = 10mm / s will be<br />
obtained at (2). Then, depending on the speed of thread cutting, δ1 for<br />
speed other than 10mm/ s can be obtained at (3).<br />
V=40mm/<br />
sec<br />
δ 1<br />
V=20mm/<br />
sec<br />
(3)<br />
See the graph in reference later in<br />
the manual for an actual example.<br />
1168<br />
δ 1(V=10mm/<br />
sec)<br />
(2)<br />
0<br />
Fig. D.1 (b) Nomograph<br />
(1)<br />
Time constant of<br />
servo system<br />
NOTE<br />
The equations for δ1, and δ2 are for when the acceleration/<br />
deceleration time constant for cutting feed is 0.<br />
T 2<br />
T 1<br />
a<br />
L<br />
L
B–63534EN/02 APPENDIX<br />
D. NOMOGRAPHS<br />
D.2<br />
SIMPLE<br />
CALCULATION OF<br />
INCORRECT THREAD<br />
LENGTH<br />
Explanations<br />
δ<br />
δ<br />
Examples<br />
δ <br />
2 LR<br />
1800 * (mm)<br />
R : Spindle speed (min –1 )<br />
L : Thread lead (mm)<br />
1 LR<br />
1800 * (–1–lna)<br />
2(–1–lna)<br />
1169<br />
Fig. D.2 (a) <strong>Inc</strong>orrect threaded portion<br />
Following a is a permited value of thread.<br />
a –1–lna<br />
0.005 4.298<br />
0.01<br />
0.015<br />
0.02<br />
(mm)<br />
(mm)<br />
R : Spindle speed (min –1 )<br />
L : Thread lead (mm)<br />
R=350rpm<br />
L=1mm<br />
a=0.01 then<br />
2 <br />
350 1<br />
1800<br />
3.605<br />
3.200<br />
2.912<br />
0.194<br />
(mm)<br />
1 2 3.605 0.701 (mm)<br />
δ<br />
* When time constant T of the<br />
servo system is 0.033 s.<br />
* When time constant T of the<br />
servo system is 0.033 s.
D. NOMOGRAPHS APPENDIX<br />
B–63534EN/02<br />
<br />
Fig. D.2 (b) Nomograph for obtaining approach distance δ 1<br />
1170
B–63534EN/02 APPENDIX<br />
D. NOMOGRAPHS<br />
D.3<br />
TOOL PATH AT<br />
CORNER<br />
When servo system delay (by exponential acceleration/deceleration at<br />
cutting or caused by the positioning system when a servo motor is used)<br />
is accompanied by cornering, a slight deviation is produced between the<br />
tool path (tool center path) and the programmed path as shown in Fig. D.3<br />
(a).<br />
Time constant T1 of the exponential acceleration/deceleration is fixed to<br />
0.<br />
θ<br />
V 1<br />
1171<br />
V 2<br />
Programmed path<br />
Tool path<br />
Fig. D.3 (a) Slight deviation between the tool path and<br />
the programmed path<br />
This tool path is determined by the following parameters:<br />
• Feedrate (V1, V2)<br />
• Corner angle ()<br />
• Exponential acceleration / deceleration time constant (T1) at<br />
cutting (T1 = 0)<br />
• Presence or absence of buffer register.<br />
The above parameters are used to theoretically analyze the tool path and<br />
above tool path is drawn with the parameter which is set as an example.<br />
When actually programming, the above items must be considered and<br />
programming must be performed carefully so that the shape of the<br />
workpiece is within the desired precision.<br />
In other words, when the shape of the workpiece is not within the<br />
theoretical precision, the commands of the next block must not be read<br />
until the specified feedrate becomes zero. The dwell function is then used<br />
to stop the machine for the appropriate period.
D. NOMOGRAPHS APPENDIX<br />
B–63534EN/02<br />
Analysis<br />
Description of conditions<br />
and symbols<br />
The tool path shown in Fig. D.3 (b) is analyzed based on the following<br />
conditions:<br />
Feedrate is constant at both blocks before and after cornering.<br />
The controller has a buffer register. (The error differs with the reading<br />
speed of the tape reader, number of characters of the next block, etc.)<br />
V Y1 φ1<br />
V<br />
V X1<br />
V X1 V cos 1<br />
V Y1 V sin 1<br />
V X2 V cos 2<br />
V Y2 V sin 2<br />
1172<br />
θ<br />
V Y2<br />
Fig. D.3 (b) Example of tool path<br />
Z<br />
0<br />
V<br />
φ2 VX2 V : Feedrate at both blocks before and after cornering<br />
V X1 : X–axis component of feedrate of preceding block<br />
V Y1 : Y–axis component of feedrate of preceding block<br />
V X2 : X–axis component of feedrate of following block<br />
V Y2 : Y–axis component of feedrate of following block<br />
θ : Corner angle<br />
φ 1 : Angle formed by specified path direction of preceding block<br />
and X–axis<br />
φ 2 : Angle formed by specified path direction of following block<br />
and X–axis<br />
X
B–63534EN/02 APPENDIX<br />
D. NOMOGRAPHS<br />
Initial value calculation<br />
Analysis of corner tool<br />
path<br />
1173<br />
Y 0<br />
V<br />
X 0<br />
0<br />
Fig. D.3 (c) Initial value<br />
The initial value when cornering begins, that is, the X and Y coordinates<br />
at the end of command distribution by the controller, is determined by the<br />
feedrate and the positioning system time constant of the servo motor.<br />
X 0 V X1(T 1 T 2)<br />
Y 0 V Y1(T 1 T 2)<br />
T 1:Exponential acceleration / deceleration time constant. (T=0)<br />
T 2:Time constant of positioning system (Inverse of position loop gain)<br />
The equations below represent the feedrate for the corner section in<br />
X–axis direction and Y–axis direction.<br />
VX(t) (VX2–V X1)[1– VX1 {T1 exp(–<br />
T1–T2 t<br />
)–T2 exp(–<br />
T1 t<br />
)} V<br />
T<br />
X1]<br />
2<br />
VX2[1– VX1 {T1 exp(–<br />
T1–T2 t<br />
)–T2 exp(–<br />
T1 t<br />
)}]<br />
T2 VY(t) VY1–V Y2<br />
{T1 exp(–<br />
T1–T2 t<br />
)–T2 exp(–<br />
T1 t<br />
)} VY2 T2 Therefore, the coordinates of the tool path at time t are calculated from the<br />
following equations:<br />
X(t) t<br />
0<br />
V X(t)dt–X 0<br />
VX2–V X1 2<br />
{T1 exp(–<br />
t 2<br />
)–T2 exp(–<br />
t<br />
)}–V<br />
T1–T2 T1 T<br />
X2(T1 T2–t) 2<br />
Y(t) t<br />
0<br />
V Y(t)dt–Y 0<br />
VY2–V Y1 2<br />
{T1 exp(–<br />
t 2<br />
)–T2 exp(–<br />
t<br />
)}–V<br />
T1–T2 T1 T<br />
Y2(T1 T2–t) 2
D. NOMOGRAPHS APPENDIX<br />
B–63534EN/02<br />
D.4<br />
RADIUS DIRECTION<br />
ERROR AT CIRCLE<br />
CUTTING<br />
When a servo motor is used, the positioning system causes an error<br />
between input commands and output results. Since the tool advances<br />
along the specified segment, an error is not produced in linear<br />
interpolation. In circular interpolation, however, radial errors may be<br />
produced, sepecially for circular cutting at high speeds.<br />
This error can be obtained as follows:<br />
X<br />
r 1<br />
2 (T 2 2 2<br />
1 T2 (1 ))<br />
V2 r<br />
1174<br />
r<br />
r<br />
Command path<br />
Actual path<br />
Z<br />
. . . . . . .<br />
r : Maximum radius error (mm)<br />
v : Feedrate (mm/s)<br />
r : Circle radius (mm)<br />
T1 : Exponential acceleration/deceleration time constant (sec)<br />
at cutting (T=0)<br />
T2 : Time constant of positoning system (sec).<br />
(Inverse of positon loop gain)<br />
: Feed forward coefficient (%)<br />
In the case of bell–shaped acceleration/deceleration and linear acceleration/<br />
deceleration after cutting feed interpolation, an approximation of this radius<br />
error can be obtained with the following expression:<br />
Linear acceleration/deceleration after cutting feed interpolation<br />
r 1<br />
24 T 2<br />
1 <br />
1<br />
2 T 2 2<br />
2 (1 ) V2 r<br />
Bell–shaped acceleration/deceleration after cutting feed interpolation<br />
r <br />
Thus, the radius error in the case of bell–shaped acceleration/deceleration<br />
and linear acceleration/deceleration after interpolation is smaller than in<br />
case of exponential acceleration/deceleration by a factor of 12, excluding<br />
any error caused by a servo loop time constant.<br />
1<br />
48 T 2<br />
1 <br />
1<br />
2 T 2 2<br />
2 (1 ) V2 r<br />
Since the machining radius r (mm) and allowable error ∆r (mm) of the<br />
workpiece is given in actual machining, the allowable limit feedrate v<br />
(mm /sec) is determined by equation (1).<br />
Since the acceleration/deceleration time constant at cutting which is set<br />
by this equipment varies with the machine tool, refer to the manual issued<br />
by the machine tool builder.<br />
(1)
B–63534EN/02<br />
E <br />
APPENDIX<br />
1175<br />
E. STATUS WHEN TURNING POWER ON,<br />
WHEN CLEAR AND WHEN RESET<br />
<br />
<br />
Parameter CLR (No. 3402#6) is used to select whether resetting the CNC<br />
places it in the cleared state or in the reset state (0: reset state/1: cleared<br />
state).<br />
The symbols in the tables below mean the following :<br />
:The status is not changed or the movement is continued.<br />
×:The status is cancelled or the movement is interrupted.<br />
Item When turning power on Cleared Reset<br />
Setting<br />
data<br />
Offset value <br />
Data set by the MDI<br />
setting operation<br />
<br />
Parameter <br />
Various<br />
data<br />
Programs in memory <br />
Contents in the buffer<br />
× × : MDI mode<br />
storage<br />
× : Other mode<br />
Display of sequence<br />
number<br />
(Note 1) (Note 1)<br />
One shot G code × × ×<br />
Modal G code Initial G codes.<br />
(The G20 and G21 codes return to<br />
the same state they were in when<br />
the power was last turned off.)<br />
Initial G codes.<br />
(G20/G21 are not<br />
changed.)<br />
F Zero Zero <br />
S, T, M × <br />
K (Number of repeats) × × ×<br />
Work coordinate value Zero
E. STATUS WHEN TURNING POWER ON,<br />
WHEN CLEAR AND WHEN RESET APPENDIX<br />
B–63534EN/02<br />
Item When turning power on<br />
Cleared<br />
Reset<br />
Action in Movement × × ×<br />
opera- Dwell × × ×<br />
tion<br />
Issuance of M, S and<br />
T codes<br />
× × ×<br />
Output<br />
signals<br />
Tool length compensation<br />
× Depending on<br />
parameter<br />
LVK(No.5003#6)<br />
1176<br />
: MDI mode<br />
Other modes depend<br />
on parameter<br />
LVK(No.5003#6).<br />
Cutter compensation × × : MDI mode<br />
× : Other modes<br />
Storing called subprogram<br />
number<br />
CNC alarm signal<br />
AL<br />
Reference position<br />
return completion LED<br />
Extinguish if there is no cause for<br />
the alarm<br />
× × (Note 2) : MDI mode<br />
× : Other modes<br />
(Note 2)<br />
Extinguish if there is<br />
no cause for the<br />
alarm<br />
× <br />
(× : Emergency<br />
stop)<br />
S, T and B codes × <br />
M code × × ×<br />
M, S and T strobe signals<br />
Spindle revolution signal<br />
(S analog signal)<br />
CNC ready signal<br />
MA<br />
Servo ready signal<br />
SA<br />
× × ×<br />
× <br />
ON <br />
ON (When other than servo<br />
alarm)<br />
ON (When other<br />
than servo alarm)<br />
Cycle start LED (STL) × × ×<br />
Feed hold LED (SPL) × × ×<br />
Extinguish if there is<br />
no cause for the alarm<br />
<br />
(× : Emergency stop)<br />
ON (When other than<br />
servo alarm)<br />
NOTE<br />
1 When heading is performed, the main program number is displayed.<br />
2 When a reset is performed during execution of a subprogram, control returns the head of main<br />
program.<br />
Execution cannot be started from the middle of the subprogram.
B–63534EN/02<br />
F <br />
APPENDIX<br />
1177<br />
F. CHARACTER–TO–CODES<br />
CORRESPONDENCE TABLE<br />
<br />
Character<br />
Code Comment<br />
Character<br />
Code Comment<br />
A 065 6 054<br />
B 066 7 055<br />
C 067 8 056<br />
D 068 9 057<br />
E 069 032 Space<br />
F 070 ! 033 Exclamation mark<br />
G 071 ” 034 Quotation mark<br />
H 072 # 035 Hash sign<br />
I 073 $ 036 Dollar sign<br />
J 074 % 037 Percent<br />
K 075 & 038 Ampersand<br />
L 076 ’ 039 Apostrophe<br />
M 077 ( 040 Left parenthesis<br />
N 078 ) 041 Right parenthesis<br />
O 079 * 042 Asterisk<br />
P 080 + 043 Plus sign<br />
Q 081 , 044 Comma<br />
R 082 – 045 Minus sign<br />
S 083 . 046 Period<br />
T 084 / 047 Slash<br />
U 085 : 058 Colon<br />
V 086 ; 059 Semicolon<br />
W 087 < 060 Left angle bracket<br />
X 088 = 061 Equal sign<br />
Y 089 > 062 Right angle bracket<br />
Z 090 ? 063 Question mark<br />
0 048 @ 064 HAtI mark<br />
1 049 [ 091 Left square bracket<br />
2 050 ^ 092<br />
3 051 ] 094 Right square bracket<br />
4 052 _ 095 Underscore<br />
5 053
G. ALARM LIST APPENDIX<br />
B–63534EN/02<br />
GALARM LIST<br />
1) Program errors (P/S alarm)<br />
Number Message Contents<br />
000 PLEASE TURN OFF POWER A parameter which requires the power off was input, turn off power.<br />
001 TH PARITY ALARM TH alarm (A character with incorrect parity was input). Correct the tape.<br />
002 TV PARITY ALARM TV alarm (The number of characters in a block is odd). This alarm will<br />
be generated only when the TV check is effective.<br />
003 TOO MANY DIGITS Data exceeding the maximum allowable number of digits was input.<br />
(Refer to the item of max. programmable dimensions.)<br />
004 ADDRESS NOT FOUND A numeral or the sign “ – ” was input without an address at the beginning<br />
of a block. Modify the program .<br />
005 NO DATA AFTER ADDRESS The address was not followed by the appropriate data but was followed<br />
by another address or EOB code. Modify the program.<br />
006 ILLEGAL USE OF NEGATIVE SIGN Sign “ .” input error (Sign “ – ” was input after an address with which it<br />
cannot be used. Or two or more “ – ” signs were input.)<br />
Modify the program.<br />
007 ILLEGAL USE OF DECIMAL POINT Decimal point “ – ” input error (A decimal point was input after an address<br />
with which it can not be used. Or two decimal points were input.)<br />
Modify the program.<br />
009 ILLEGAL ADDRESS INPUT Unusable character was input in significant area.<br />
Modify the program.<br />
010 IMPROPER G–CODE An unusable G code or G code corresponding to the function not provided<br />
is specified. Modify the program.<br />
011 NO FEEDRATE COMMANDED Feedrate was not commanded to a cutting feed or the feedrate was inadequate.<br />
Modify the program.<br />
014 CAN NOT COMMAND G95 A synchronous feed is specified without the option for threading / synchronous<br />
feed.<br />
015 TOO MANY AXES COMMANDED The number of the commanded axes exceeded that of simultaneously<br />
controlled axes.<br />
020 OVER TOLERANCE OF RADIUS In circular interpolation (G02 or G03), difference of the distance between<br />
the start point and the center of an arc and that between the end point<br />
and the center of the arc exceeded the value specified in parameter No.<br />
3410.<br />
021 ILLEGAL PLANE AXIS COMMAN-<br />
DED<br />
An axis not included in the selected plane (by using G17, G18, G19) was<br />
commanded in circular interpolation. Modify the program.<br />
022 NO CIRCULAR RADIUS When circular interpolation is specified, neither R (specifying an arc radius),<br />
nor I, J, and K (specifying the distance from a start point to the center)<br />
is specified.<br />
025 CANNOT COMMAND F0 IN<br />
G02/G03<br />
027 NO AXES COMMANDED IN<br />
G43/G44<br />
F0 (fast feed) was instructed by F1 –digit column feed in circular interpolation.<br />
Modify the program.<br />
No axis is specified in G43 and G44 blocks for the tool length offset type<br />
C.<br />
Offset is not canceled but another axis is offset for the tool length offset<br />
type C. Modify the program.<br />
028 ILLEGAL PLANE SELECT In the plane selection command, two or more axes in the same direction<br />
are commanded.<br />
Modify the program.<br />
1178
B–63534EN/02 APPENDIX<br />
G. ALARM LIST<br />
Number Message<br />
Contents<br />
029 ILLEGAL OFFSET VALUE The offset values specified by H code is too large.<br />
Modify the program.<br />
030 ILLEGAL OFFSET NU<strong>MB</strong>ER The offset values specified by D/H code for tool length offset, cutter compensation<br />
or 3–dimensional cutter compensation is too large. Otherwise,<br />
the number specified by P code for the additional workpiece coordinate<br />
system is too large.<br />
Modify the program.<br />
031 ILLEGAL P COMMAND IN G10 In setting an offset amount by G10, the offset number following address<br />
P was excessive or it was not specified.<br />
Modify the program.<br />
032 ILLEGAL OFFSET VALUE IN G10 In setting an offset amount by G10 or in writing an offset amount by system<br />
variables, the offset amount was excessive.<br />
033 NO SOLUTION AT CRC A point of intersection cannot be determined for cutter compensation C.<br />
Modify the program.<br />
034 NO CIRC ALLOWED IN ST–UP /<br />
EXT BLK<br />
The start up or cancel was going to be performed in the G02 or G03<br />
mode in cutter compensation C. Modify the program.<br />
035 CAN NOT COMMANDED G39 G39 is commanded in cutter compensation B cancel mode or on the<br />
plane other than offset plane. Modify the program.<br />
036 CAN NOT COMMANDED G31 Skip cutting (G31) was specified in cutter compensation mode.<br />
Modify the program.<br />
037 CAN NOT CHANGE PLANE IN CRC G40 is commanded on the plane other than offset plane in cutter compensation<br />
B. The plane selected by using G17, G18 or G19 is changed<br />
in cutter compensation C mode. Modify the program.<br />
038 INTERFERENCE IN CIRCULAR<br />
BLOCK<br />
Overcutting will occur in cutter compensation C because the arc start<br />
point or end point coincides with the arc center.<br />
Modify the program.<br />
041 INTERFERENCE IN CRC Overcutting will occur in cutter compensation C. Two or more blocks<br />
are consecutively specified in which functions such as the auxiliary<br />
function and dwell functions are performed without movement in the cutter<br />
compensation mode. Modify the program.<br />
042 G45/G48 NOT ALLOWED IN CRC Tool offset (G45 to G48) is commanded in cutter compensation. Modify<br />
the program.<br />
044 G27–G30 NOT ALLOWED IN FIXED<br />
CYC<br />
045 ADDRESS Q NOT FOUND<br />
(G73/G83)<br />
046 ILLEGAL REFERENCE RETURN<br />
COMMAND<br />
One of G27 to G30 is commanded in canned cycle mode.<br />
Modify the program.<br />
In canned cycle G73/G83, the depth of each cut (Q) is not specified. Alternatively,<br />
Q0 is specified. Correct the program.<br />
Other than P2, P3 and P4 are commanded for 2nd, 3rd and 4th reference<br />
position return command.<br />
047 ILLEGAL AXIS SELECT For startup of three–dimensional tool compensation or three–dimensional<br />
coordinate conversion, two or more axes were specified in the<br />
same direction (basic and parallel axes.)<br />
048 BASIC 3 AXIS NOT FOUND For startup of three–dimensional tool compensation or three–dimensional<br />
coordinate conversion, the three basic axes used when Xp,Yp, and Zp are omitted were not specified in parameter No. 1022.<br />
049 ILLEGAL OPERATION (G68/G69) The commands for three–dimensional coordinate conversion (G68,<br />
G69) and tool length compensation (G43, G44, G45) are not nested.<br />
Modify the program.<br />
050 CHF/CNR NOT ALLOWED IN THRD<br />
BLK<br />
Chamfering or corner R is commanded in the thread cutting block.<br />
Modify the program.<br />
051 MISSING MOVE AFTER CHF/CNR Improper movement or the move distance was specified in the block<br />
next to the chamfering or corner R block.<br />
Modify the program.<br />
052 CODE IS NOT G01 AFTER CHF/<br />
CNR<br />
The block next to the chamfering or corner R block is not G01,G02,or<br />
G03. Modify the program.<br />
1179
G. ALARM LIST APPENDIX<br />
B–63534EN/02<br />
Number Message<br />
Contents<br />
053 TOO MANY ADDRESS COM-<br />
MANDS<br />
055 MISSING MOVE VALUE IN CHF/<br />
CNR<br />
For systems without the arbitary angle chamfering or corner R cutting,<br />
a comma was specified. For systems with this feature, a comma was followed<br />
by something other than R or C Correct the program.<br />
In the arbitrary angle chamfering or corner R block, the move distance<br />
is less than chamfer or corner R amount.<br />
058 END POINT NOT FOUND In a arbitrary angle chamfering or corner R cutting block, a specified axis<br />
is not in the selected plane. Correct the program.<br />
059 PROGRAM NU<strong>MB</strong>ER NOT FOUND In an external program number search, a specified program number<br />
was not found. Otherwise, a program specified for searching is being<br />
edited in background processing. Alternatively, the program with the<br />
program number specified in a one–touch macro call is not found in<br />
memory. Check the program number and external signal. Or discontinue<br />
the background eiting.<br />
060 SEQUENCE NU<strong>MB</strong>ER NOT FOUND Commanded sequence number was not found in the sequence number<br />
search. Check the sequence number.<br />
070 NO PROGRAM SPACE IN<br />
MEMORY<br />
The memory area is insufficient.<br />
Delete any unnecessary programs, then retry.<br />
071 DATA NOT FOUND The address to be searched was not found. Or the program with specified<br />
program number was not found in program number search.<br />
Check the data.<br />
072 TOO MANY PROGRAMS The number of programs to be stored exceeded 63 (basic), 125 (option),<br />
200 (option), or 400 (option). Delete unnecessary programs and<br />
execute program registeration again.<br />
073 PROGRAM NU<strong>MB</strong>ER ALREADY IN<br />
USE<br />
The commanded program number has already been used.<br />
Change the program number or delete unnecessary programs and<br />
execute program registeration again.<br />
074 ILLEGAL PROGRAM NU<strong>MB</strong>ER The program number is other than 1 to 9999.<br />
Modify the program number.<br />
075 PROTECT An attempt was made to register a program whose number was protected.<br />
076 ADDRESS P NOT DEFINED Address P (program number) was not commanded in the block which<br />
includes an M98, G65, or G66 command. Modify the program.<br />
077 SUB PROGRAM NESTING ERROR The subprogram was called in five folds. Modify the program.<br />
078 NU<strong>MB</strong>ER NOT FOUND A program number or a sequence number which was specified by address<br />
P in the block which includes an M98, M99, M65 or G66 was not<br />
found. The sequence number specified by a GOTO statement was not<br />
found. Otherwise, a called program is being edited in background processing.<br />
Correct the program, or discontinue the background editing.<br />
079 PROGRAM VERIFY ERROR In memory or program collation,a program in memory does not agree<br />
with that read from an external I/O device. Check both the programs in<br />
memory and those from the external device.<br />
080 G37 ARRIVAL SIGNAL NOT AS-<br />
SERTED<br />
081 OFFSET NU<strong>MB</strong>ER NOT FOUND IN<br />
G37<br />
In the automatic tool length measurement function (G37), the measurement<br />
position reach signal (XAE, YAE, or ZAE) is not turned on within<br />
an area specified in parameter 6254 (value ε).<br />
This is due to a setting or operator error.<br />
Tool length automatic measurement (G37) was specified without a H<br />
code. (Automatic tool length measurement function) Modify the program.<br />
082 H–CODE NOT ALLOWED IN G37 H code and automatic tool compensation (G37) were specified in the<br />
same block. (Automatic tool length measurement function) Modify the<br />
program.<br />
083 ILLEGAL AXIS COMMAND IN G37 In automatic tool length measurement, an invalid axis was specified or<br />
the command is incremental. Modify the program.<br />
1180
B–63534EN/02 APPENDIX<br />
G. ALARM LIST<br />
Number Message<br />
Contents<br />
085 COMMUNICATION ERROR When entering data in the memory by using Reader / Puncher interface,<br />
an overrun, parity or framing error was generated. The number of bits<br />
of input data or setting of baud rate or specification No. of I/O unit is incorrect.<br />
086 DR SIGNAL OFF When entering data in the memory by using Reader / Puncher interface,<br />
the ready signal (DR) of reader / puncher was off.<br />
Power supply of I/O unit is off or cable is not connected or a P.C.B. is defective.<br />
087 BUFFER OVERFLOW When entering data in the memory by using Reader / Puncher interface,<br />
though the read terminate command is specified, input is not interrupted<br />
after 10 characters read. I/O unit or P.C.B. is defective.<br />
088 LAN FILE TRANS ERROR<br />
(CHANNEL–1)<br />
089 LAN FILE TRANS ERROR<br />
(CHANNEL–2)<br />
090 REFERENCE RETURN INCOM-<br />
PLETE<br />
091 REFERENCE RETURN INCOM-<br />
PLETE<br />
092 AXES NOT ON THE REFERENCE<br />
POINT<br />
094 P TYPE NOT ALLOWED (COORD<br />
CHG)<br />
095 P TYPE NOT ALLOWED (EXT OFS<br />
CHG)<br />
096 P TYPE NOT ALLOWED (WRK OFS<br />
CHG)<br />
097 P TYPE NOT ALLOWED (AUTO<br />
EXEC)<br />
098 G28 FOUND IN SEQUENCE RE-<br />
TURN<br />
099 MDI EXEC NOT ALLOWED AFT.<br />
SEARCH<br />
File data transfer over the OSI–Ethernet was terminated as a result of<br />
a transfer error.<br />
File data transfer over the OSI–Ethernet was terminated as a result of<br />
a transfer error.<br />
1. The reference position return cannot be performed normally because<br />
the reference position return start point is too close to the reference<br />
position or the speed is too slow. Separate the start point far<br />
enough from the reference position, or specify a sufficiently fast<br />
speed for reference position return.<br />
2. During reference position return with the absolute–position detector,<br />
if this alarm occurs even though condition 1 is satisfied, do the following:<br />
After turning the servo motor for the axis at least one turn, turn the<br />
power off and then on again. Then perform reference position return.<br />
In the automatic operation halt state, manual reference position return<br />
cannot be performed.<br />
The commanded axis by G27 (Reference position return check) did not<br />
return to the reference position.<br />
P type cannot be specified when the program is restarted. (After the automatic<br />
operation was interrupted, the coordinate system setting operation<br />
was performed.) Perform the correct operation according to th operator’s<br />
manual.<br />
P type cannot be specified when the program is restarted. (After the<br />
automatic operation was interrupted, the external workpiece offset<br />
amount changed.)<br />
P type cannot be specified when the program is restarted. (After the automatic<br />
operation was interrupted, the workpiece offset amount<br />
changed.)<br />
P type cannot be directed when the program is restarted. (After power<br />
ON, after emergency stop or P/S alarm 94 to 97 were reset, no<br />
automatic operation is performed.) Perform automatic operation.<br />
A command of the program restart was specified without the reference<br />
position return operation after power ON or emergency stop, and G28<br />
was found during search. Perform the reference position return.<br />
After completion of search in program restart, a move command is given<br />
with MDI.<br />
100 PARAMETER WRITE ENABLE On the PARAMETER(SETTING) screen, PWE(parameter writing enabled)<br />
is set to 1. Set it to 0, then reset the system.<br />
101 PLEASE CLEAR MEMORY The power turned off while rewriting the memory by program edit operation.<br />
If this alarm has occurred, press while pressing<br />
, and only the program being edited will be deleted.<br />
Register the deleted program.<br />
1181
G. ALARM LIST APPENDIX<br />
B–63534EN/02<br />
Number Message<br />
Contents<br />
109 FORMAT ERROR IN G08 A value other than 0 or 1 was specified after P in the G08 code, or no<br />
value was specified.<br />
110 DATA OVERFLOW The absolute value of fixed decimal point display data exceeds the allowable<br />
range. Modify the program.<br />
111 CALCULATED DATA OVERFLOW The result of calculation is out of the allowable range (–1047 to –10 –29 ,<br />
0, and 10 –29 to 1047 ).<br />
112 DIVIDED BY ZERO Division by zero was specified. (including tan 90°)<br />
113 IMPROPER COMMAND A function which cannot be used in custom macro is commanded.<br />
Modify the program.<br />
114 FORMAT ERROR IN MACRO There is an error in other formats than .<br />
Modify the program.<br />
115 ILLEGAL VARIABLE NU<strong>MB</strong>ER A value not defined as a variable number is designated in the custom<br />
macro or in high–speed cycle cutting.<br />
The header contents are improper in a high–speed cycle cutting. This<br />
alarm is given in the following cases:<br />
1. The header corresponding to the specified machining cycle number<br />
called is not found.<br />
2. The cycle connection data value is out of the allowable range<br />
(0 – 999).<br />
3. The number of data in the header is out of the allowable range<br />
(0 – 32767).<br />
4. The start data variable number of executable format data is out of<br />
the allowable range (#20000 – #85535).<br />
5. The storing data variable number of executable format data is out of<br />
the allowable range (#85535).<br />
6. The storing start data variable number of executable format datais<br />
overlapped with the variable number used in the header.<br />
Modify the program.<br />
116 WRITE PROTECTED VARIABLE The left side of substitution statement is a variable whose substitution<br />
is inhibited. Modify the program.<br />
118 PARENTHESIS NESTING ERROR The nesting of bracket exceeds the upper limit (quintuple).<br />
Modify the program.<br />
119 ILLEGAL ARGUMENT The SQRT argument is negative, BCD argument is negative, or other<br />
values than 0 to 9 are present on each line of BIN argument.<br />
Modify the program.<br />
122 QUADRUPLICATE MACRO<br />
MODAL–CALL<br />
123 CAN NOT USE MACRO COMMAND<br />
IN DNC<br />
A total of four macro calls and macro modal calls are nested. Correct<br />
the program.<br />
Macro control command is used during DNC operation.<br />
Modify the program.<br />
124 MISSING END STATEMENT DO – END does not correspond to 1 : 1. Modify the program.<br />
125 FORMAT ERROR IN MACRO format is erroneous. Modify the program.<br />
126 ILLEGAL LOOP NU<strong>MB</strong>ER In DOn, 1 n 3 is not established. Modify the program.<br />
127 NC, MACRO STATEMENT IN SAME<br />
BLOCK<br />
128 ILLEGAL MACRO SEQUENCE<br />
NU<strong>MB</strong>ER<br />
NC and custom macro commands coexist.<br />
Modify the program.<br />
The sequence number specified in the branch command was not 0 to<br />
9999. Or, it cannot be searched. Modify the program.<br />
129 ILLEGAL ARGUMENT ADDRESS An address which is not allowed in is used.<br />
Modify the program.<br />
130 ILLEGAL AXIS OPERATION An axis control command was given by PMC to an axis controlled by<br />
CNC. Or an axis control command was given by CNC to an axis controlled<br />
by PMC. Modify the program.<br />
1182
B–63534EN/02 APPENDIX<br />
G. ALARM LIST<br />
Number Message<br />
Contents<br />
131 TOO MANY EXTERNAL ALARM<br />
MESSAGES<br />
Five or more alarms have generated in external alarm message.<br />
Consult the PMC ladder diagram to find the cause.<br />
132 ALARM NU<strong>MB</strong>ER NOT FOUND No alarm No. concerned exists in external alarm message clear.<br />
Check the PMC ladder diagram.<br />
133 ILLEGAL DATA IN EXT. ALARM<br />
MSG<br />
Small section data is erroneous in external alarm message or external<br />
operator message. Check the PMC ladder diagram.<br />
135 ILLEGAL ANGLE COMMAND The index table indexing positioning angle was instructed in other<br />
than an integral multiple of the value of the minimum angle.<br />
Modify the program.<br />
136 ILLEGAL AXIS COMMAND In index table indexing, another control axis was instructed together<br />
with the B axis.<br />
Modify the program.<br />
138 SUPERIMPOSED DATA<br />
OVERFLOW<br />
139 CAN NOT CHANGE PMC CON-<br />
TROL AXIS<br />
In PMC–based axis control, the increment for pulse distribution on<br />
the CNC and PMC side are too large when the superimposed control<br />
extended function is used.<br />
An axis is selected in commanding by PMC axis control.<br />
Modify the program.<br />
141 CAN NOT COMMAND G51 IN CRC G51 (Scaling ON) is commanded in the tool offset mode.<br />
Modify the program.<br />
142 ILLEGAL SCALE RATE Scaling magnification is commanded in other than 1 – 999999.<br />
Correct the scaling magnification setting (G51 Pp . . or parameter<br />
5411 or 5421).<br />
143 SCALED MOTION DATA OVER-<br />
FLOW<br />
The scaling results, move distance, coordinate value and circular<br />
radius exceed the maximum command value. Correct the program or<br />
scaling mangification.<br />
144 ILLEGAL PLANE SELECTED The coordinate rotation plane and arc or cutter compensation C<br />
plane must be the same. Modify the program.<br />
145 ILLEGAL CONDITIONS IN POLAR<br />
COORDINATE INTERPOLATION<br />
The conditions are incorrect when the polar coordinate interpolation<br />
starts or it is canceled.<br />
1) In modes other than G40, G12.1/G13.1 was specified.<br />
2) An error is found in the plane selection. Parameters No. 5460 and<br />
No. 5461 are incorrectly specified.<br />
Modify the value of program or parameter.<br />
146 IMPROPER G CODE G codes which cannot be specified in the polar coordinate interpolation<br />
mode was specified. See section polar coordinate interpolation<br />
and modify the program.<br />
148 ILLEGAL SETTING DATA Automatic corner override deceleration rate is out of the settable<br />
range of judgement angle. Modify the parameters (No.1710 to<br />
No.1714)<br />
149 FORMAT ERROR IN G10L3 A code other than Q1,Q2,P1 or P2 was specified as the life count<br />
type in the extended tool life management.<br />
150 ILLEGAL TOOL GROUP NU<strong>MB</strong>ER Tool Group No. exceeds the maximum allowable value.<br />
Modify the program.<br />
151 TOOL GROUP NU<strong>MB</strong>ER NOT<br />
FOUND<br />
The tool group commanded in the machining program is not set.<br />
Modify the value of program or parameter.<br />
152 NO SPACE FOR TOOL ENTRY The number of tools within one group exceeds the maximum value<br />
registerable. Modify the number of tools.<br />
153 T–CODE NOT FOUND In the registration of tool life data, a T code was not specified in a<br />
block where it is required. Alternatively, only M06 was specified in a<br />
block for tool change type D. Correct the program.<br />
154 NOT USING TOOL IN LIFE GROUP When the group is not commanded, H99 or D99 was commanded.<br />
Correct the program.<br />
155 ILLEGAL T–CODE IN M06 In the machining program, M06 and T code in the same block do not<br />
correspond to the group in use. Correct the program.<br />
1183
G. ALARM LIST APPENDIX<br />
B–63534EN/02<br />
Number Message<br />
Contents<br />
156 P/L COMMAND NOT FOUND P and L commands are missing at the head of program in which the<br />
tool group is set. Correct the program.<br />
157 TOO MANY TOOL GROUPS The number of tool groups to be set exceeds the maximum allowable<br />
value. See parameter GS1, GS2 (No. 6800 bit 0 and 1). Modify the<br />
program.<br />
158 ILLEGAL TOOL LIFE DATA The tool life to be set is too excessive. Modify the setting value.<br />
159 TOOL DATA SETTING INCOM-<br />
PLETE<br />
During executing a life data setting program, power was turned off.<br />
Set again.<br />
160 G72.1 NESTING ERROR Code G72.1 was specified in a sub–program after the same code<br />
had already been specified for copying with rotation.<br />
161 ILLEGAL P OF WAITING M–CODE<br />
(T series) (three–path control)<br />
169 ILLEGAL TOOL GEOMETRY DATA<br />
(At two–path)<br />
Code G72.2 was specified in a sub–program after the same code<br />
had already been specified for parallel copying.<br />
<strong>Inc</strong>orrect tool figure data in interference check.<br />
Set correct data, or select correct tool figure data.<br />
175 ILLEGAL G107 COMMAND Conditions when performing cylindrical interpolation start or cancel<br />
not correct. To change the mode to the cylindrical interpolation<br />
mode, specify the command in a format of “G07.1 rotation–axis name<br />
radius of cylinder.”<br />
176 IMPROPER G–CODE IN G107 Any of the following G codes which cannot be specified in the cylindrical<br />
interpolation mode was specified.<br />
1) G codes for positioning, such as G28,, G73, G74, G76, G81 – G89,<br />
including the codes specifying the rapid traverse cycle<br />
2) G codes for setting a coordinate system: G52,G92,<br />
3) G code for selecting coordinate system: G53 G54–G59<br />
Modify the program.<br />
177 CHECK SUM ERROR<br />
(G05 MODE)<br />
178 G05 COMMANDED IN G41/G42<br />
MODE<br />
179 PARAM. (PRM NO. 7510) SETTING<br />
ERROR<br />
180 COMMUNICATION ERROR<br />
(REMOTE BUF)<br />
181 FORMAT ERROR IN G81 BLOCK<br />
(gear hobbing machine, EGB)<br />
182 G81 NOT COMMANDED<br />
(gear hobbing machine)<br />
183 DUPLICATE G83 (COMMANDS)<br />
(gear hobbing machine)<br />
184 ILLEGAL COMMAND IN G81<br />
(gear hobbing machine, EGB)<br />
Check sum error<br />
Modify the program.<br />
G05 was commanded in the G41/G42 mode.<br />
Correct the program.<br />
The number of controlled axes set by the parameter 7510 exceeds<br />
the maximum number. Modify the parameter setting value.<br />
Remote buffer connection alarm has generated. Confirm the number<br />
of cables, parameters and I/O device.<br />
G81 block format error (hobbing machine)<br />
1) T (number of teeth) has not been instructed.<br />
2) Data outside the command range was instructed by either T, L, Q or<br />
P.<br />
3) Calculation of the synchronization coefficient has overflowed.<br />
Modify the program.<br />
G83 (C axis servo lag quantity offset) was instructed though synchronization<br />
by G81 has not been instructed. Correct the program. (hobbing<br />
machine)<br />
G83 was instructed before canceled by G82 after compensating for<br />
the C axis servo lag quantity by G83. (hobbing machine)<br />
A command not to be instructed during synchronization by G81 was<br />
instructed. (hobbing machine)<br />
1) A C axis command by G00, G27, G28, G29, G30, etc. was<br />
instructed.<br />
2) <strong>Inc</strong>h/Metric switching by G20, G21 was instructed.<br />
1184
B–63534EN/02 APPENDIX<br />
G. ALARM LIST<br />
Number Message<br />
Contents<br />
185 RETURN TO REFERENCE POINT G81 was instructed without performing reference position return after<br />
power on or emergency stop. (hobbing machine) Perform reference<br />
(gear hobbing machine)<br />
position return.<br />
186 PARAMETER SETTING ERROR Parameter error regarding G81 (hobbing machine)<br />
1) The C axis has not been set to be a rotary axis.<br />
(gear hobbing machine, EGB) 2) A hob axis and position coder gear ratio setting error<br />
190 ILLEGAL AXIS SELECT In the constant surface speed control, the axis specification is wrong.<br />
(See parameter No. 3770.) The specified axis command (P) contains<br />
an illegal value.<br />
Correct the program.<br />
194 SPINDLE COMMAND IN SYN-<br />
CHRO–MODE<br />
197 C–AXIS COMMANDED IN SPINDLE<br />
MODE<br />
A contour control mode, spindle positioning (Cs–axis control) mode,<br />
or rigid tapping mode was specified during the serial spindle<br />
synchronous control mode. Correct the program so that the serial<br />
spindle synchronous control mode is released in advance.<br />
The program specified a movement along the Cs–axis when the signal<br />
CON(DGN=G027#7) was off. Correct the program, or consult the<br />
PMC ladder diagram to find the reason the signal is not turned on.<br />
199 MACRO WORD UNDEFINED Undefined macro word was used. Modify the custom macro.<br />
200 ILLEGAL S CODE COMMAND In the rigid tap, an S value is out of the range or is not specified.<br />
The maximum value for S which can be specified in rigid tapping is<br />
set in parameter (No.5241 to 5243). Change the setting in the<br />
parameter or modify the program.<br />
201 FEEDRATE NOT FOUND IN RIGID<br />
TAP<br />
In the rigid tapping, no F value is specified.<br />
Correct the program.<br />
202 POSITION LSI OVERFLOW In the rigid tapping, spindle distribution value is too large.<br />
203 PROGRAM MISS AT RIGID<br />
TAPPING<br />
In the rigid tapping, position for a rigid M code (M29) or an S<br />
command is incorrect. Modify the program.<br />
204 ILLEGAL AXIS OPERATION In the rigid tapping, an axis movement is specified between the rigid<br />
M code (M29) block and G84 (G74) block. Modify the program.<br />
205 RIGID MODE DI SIGNAL OFF Rigid tapping signal (DGNG 061#1) is not 1 when G84 (G74) is<br />
executed though the rigid M code (M29) is specified.Consult the PMC<br />
ladder diagram to find the reason the DI signal is not turned on.<br />
Modify the program.<br />
206 CAN NOT CHANGE PLANE (RIGID<br />
TAP)<br />
Plane changeover was instructed in the rigid mode.<br />
Correct the program.<br />
207 RIGID DATA MISMATCH The specified distance was too short or too long in rigid tapping.<br />
210 CAN NOT COMAND M198/M99 1) M198 and M99 are executed in the schedule operation. Or M198<br />
is executed in the DNC operation.<br />
2) In a multiple repetitive pocketing canned cycle, an interrupt macro<br />
was specified, and M99 was executed.<br />
212 ILLEGAL PLANE SELECT The arbitrary angle chamfering or a corner R is commanded or the<br />
plane including an additional axis. Correct the program.<br />
213 ILLEGAL COMMAND IN SYN-<br />
CHRO–MODE<br />
Any of the following alarms occurred in the operation with the simple<br />
synchronization control.<br />
1) The program issued the move command to the slave axis.<br />
2) The program issued the manual continuous feed/manual handle<br />
feed/incremental feed command to the slave axis.<br />
3) The program issued the automatic reference position return command<br />
without executing the manual reference position return after<br />
the power was turned on.<br />
4) The difference between the position error amount of the master and<br />
slave axes exceeded the value specified in parameter No. 8313.<br />
1185
G. ALARM LIST APPENDIX<br />
B–63534EN/02<br />
Number Message<br />
Contents<br />
214 ILLEGAL COMMAND IN SYN-<br />
CHRO–MODE<br />
222 DNC OP. NOT ALLOWED IN BG.–<br />
EDIT<br />
Coordinate system is set or tool compensation of the shift type is<br />
executed in the synchronous control. Correct the program.<br />
Input and output are executed at a time in the background edition.<br />
Execute a correct operation.<br />
224 RETURN TO REFERENCE POINT Reference position return has not been performed before the automatic<br />
operation starts. Perform reference position return only when<br />
parameter ZRN X (No.1005#0) is 0.<br />
230 R CODE NOT FOUND<br />
(for grinding machine)<br />
The infeed quantity R has not been instructed for the G161 block. Or<br />
the R command value is negative. Correct the program.<br />
231 ILLEGAL FORMAT IN G10 OR L50 Any of the following errors occurred in the specified format at the<br />
programmable–parameter input.<br />
1) Address N or R was not entered.<br />
2) A number not specified for a parameter was entered.<br />
3) The axis number was too large.<br />
4) An axis number was not specified in the axis–type parameter.<br />
5) An axis number was specified in the parameter which is not an axis<br />
type.<br />
6) An attempt was made to reset bit 4 of parameter 3202 (NE9) or<br />
change parameter 3210 (PSSWD) when they are protected by a<br />
password. Correct the program.<br />
232 TOO MANY HELICAL AXIS COM-<br />
MANDS<br />
Three or more axes (in the normal direction control mode two or more<br />
axes) were specified as helical axes in the helical interpolation mode.<br />
233 DEVICE BUSY When an attempt was made to use a unit such as that connected via<br />
the RS–232–C interface, other users were using it.<br />
239 BP/S ALARM While punching was being performed with the function for controlling<br />
external I/O units ,background editing was performed.<br />
240 BP/S ALARM Background editing was performed during MDI operation.<br />
241 ILLEGAL FORMAT IN G02.2/G03.2 The end point, I , J , K , or R was not specified for involute<br />
interpolation.<br />
242 ILLEGAL COMMAND IN<br />
G02.2/G03.2<br />
An erroneous value was specified for involute interpolation.<br />
The start or end point was specified within the base circle.<br />
The value 0 was specified for I , J, K , or R,.<br />
The start or end point exceeds 100 revolutions from the involute<br />
curve start point.<br />
243 OVER TOLERNCE OF END POINT The end point was not positioned on the involute curve which started<br />
at the start point, and the end point was out of the range specified by<br />
parameter No.5610.<br />
246 During read of an encrypted program, an attempt was made to store the<br />
program with a number exceeding the protection range.<br />
(See parameter Nos. 3222 and 223.)<br />
247 When an encrypted program is output, EIA is set for the punch code.<br />
Specify ISO.<br />
250 Z AXIS WRONG COMMAND (ATC) Movement alogn the Z–axis was specified in a block in which a command<br />
for changing tools (M06 T_)was specified. (Only for the ROBO-<br />
DRILL)<br />
1186
B–63534EN/02 APPENDIX<br />
G. ALARM LIST<br />
Number Message<br />
Contents<br />
251 ATC ERROR An error occurs in the following cases (Only for the ROBODRILL) :<br />
When unusable T code is specified in M06 T_<br />
When the M06 code is specified when the Z coordinate is positive<br />
in the machine coordinate system.<br />
When parameter No. 7810,which specifies the current tool number,<br />
is 0.<br />
When the M06 code is specified in the canned–cycle mode.<br />
When the M06 code is specified in a block in which a reference position<br />
return code, G27,G28, G29, or G30 is specified.<br />
When the M06 code is specified in the tool compensation mode<br />
(G41 to G44).<br />
When the M06 code is specified without any reference position return<br />
after the power is turned on or after the emergency stop is released.<br />
When the machine lock signal or the signal for ignoring the Z–axis<br />
is turned on while the tool is being changed.<br />
When a “prying” condition is detected while the tool is changed.<br />
Refer to diagnosis parameter No. 530 for identifying the situations<br />
above.<br />
252 ATC SPINDLE ALARM An error due to excessive deviation occurs in spindle positioning<br />
during ATC operation. For details, see diagnosis parameter No.531.<br />
(Only for the ROBODRILL)<br />
253 G05 IS NOT AVAIRABLE Binary–input operation with a high–speed remote buffer (G05) or<br />
high–speed cycle machining (G05) has been specified in look–ahead<br />
control mode (G08P1). Before attempting to specify these<br />
commands, first specify G08P0; to cancel look–ahead control mode.<br />
5000 ILLEGAL COMMAND CODE The specified code was incorrect in the high–precision contour control<br />
(HPCC) mode.<br />
5003 ILLEGAL PARAMETER (HPCC) The parameter setting is incorrect.<br />
5004 HPCC NOT READY High–precision contour control is not ready.<br />
5006 TOO MANY WORD IN ONE BLOCK The number of words specified in a block exceeded 26 in the HPCC<br />
mode.<br />
5007 TOO LARGE DISTANCE In the HPCC mode, the machine moved beyond the limit.<br />
5009 PARAMETER ZERO (DRY RUN) The maximum feedrate (parameter No. 1422) or the feedrate in dry<br />
run (parameter No. 1410) is 0 in the HPCC model.<br />
5010 END OF RECORD The end of record (%) was specified.<br />
5011 PARAMETER ZERO(CUT MAX) The maximum cutting feedrate (parameter No. 1422) is 0 in the<br />
HPCC mode.<br />
5012 G05 P10000 ILLEGAL START UP<br />
(HPCC)<br />
5013 HPCC:CRC OFS REMAIN AT<br />
CANCEL<br />
G05 P10000 has been specified in a mode from which HPCC mode<br />
cannot be entered.<br />
G05P0 has been specified in G41/G42 mode or before cancellation<br />
axis is not found.<br />
5014 TRACE DATA NOT FOUND Trace data is not available, preventing transfer from being performed.<br />
5015 NO ROTATION AXIS During tool axis direction handle feed or tool axis normal direction<br />
handle feed, the specified rotation axis cannot be found.<br />
5016 ILLEGAL CO<strong>MB</strong>INATION OF M<br />
CODE<br />
5020 PARAMETER OF RESTART<br />
ERROR<br />
M codes which belonged to the same group were specified in a<br />
block. Alternatively,an M code which must be specified without other<br />
M codes in the block was specified in a block with other M codes.<br />
The parameter for specifying program restart is not set correctly.<br />
5043 TOO MANY G68 NESTING The G68 command for three–dimensional coordinate conversion has<br />
been specified three or more times.<br />
1187
G. ALARM LIST APPENDIX<br />
B–63534EN/02<br />
Number Message<br />
Contents<br />
5044 G68 FORMAT ERROR The G68 block contains a format error. This alarm occurs in the following<br />
cases:<br />
1 One of I, J, and K is not specified in the G68 block (missing option<br />
for coordinate conversion).<br />
2 I, J, and K are 0 in the G68 block.<br />
3 R is not specified in the G68 block.<br />
5046 ILLEGAL PARAMETER (ST.COMP) An illegal parameter has been specified for straightness compensation.<br />
Possible reasons are as follows:<br />
1 There is no axis corresponding to the axis number specified in the<br />
move axis or compensation axis parameter.<br />
2 More than 128 pitch error compensation points are not sequentially<br />
numbered.<br />
3 The straightness compensation points are not sequentially numbered.<br />
4 A specified straightness compensation point is outside the range<br />
between the pitch error compensation points having the maximum<br />
positive and negative coordinates.<br />
5 The compensation value specified for each compensation point is<br />
too large or too small.<br />
6 The settings of parameters Nos. 13881 to 13886 are illegal.<br />
5050 ILL–COMMAND IN CHOPPING<br />
MODE<br />
When the chopping function is used, a move command was specified<br />
for a chopping axis in chopping mode (during reciprocation between<br />
a top dead point and bottom dead point).<br />
5051 M–NET CODE ERROR When the chopping function is used, a move command was specified<br />
for a chopping axis in chopping mode (during reciprocation between<br />
a top dead point and bottom dead point).<br />
5052 M–NET ETX ERROR “ETX” code is abnormal.<br />
5053 M–NET CONNECT ERROR Connection time supervision error (parameter No.175)<br />
5054 M–NET RECEIVE ERROR Boring time supervision error (parameter No.176)<br />
5055 M–NET PRT/FRM ERROR Vertical parity or framing error detection<br />
5057 M–NET BOARD SYSTEM DOWN Transmit time–out error (parameter No. 177)<br />
ROM parity error<br />
CPU interruption detection of not listed above<br />
5060 ILLEGAL PARAMETER IN<br />
G02.3/G03.3<br />
Parameter setting is illegal.<br />
No. 5641 (setting of the linear axis) is not specified.<br />
No. 5641 specifies an axis other than a linear axis.<br />
No. 5642 (setting of the rotation axis) is not specified.<br />
No. 5642 specifies an axis other than a rotation axis.<br />
The CNC cannot control the linear or rotation axis (the value of No.<br />
1010 is exceeded).<br />
5061 ILLEGAL FORMAT IN G02.3/G03.3 The command for exponential interpolation (G02.3/G03.3) contains a<br />
format error.<br />
Address I, J, or K is not specified.<br />
Addresses I, J, and K are 0.<br />
5062 ILLEGAL COMMAND IN<br />
G02.3/G03.3<br />
The command for exponential interpolation (G02.3/G03.3) contains<br />
an illegal value.<br />
The specified value is not suitable for exponential interpolation (for<br />
example, a negative value is subject to ln).<br />
1188
B–63534EN/02 APPENDIX<br />
G. ALARM LIST<br />
Number Message<br />
Contents<br />
5063 IS NOT PRESET AFTER REF. This message is output when the position counter has not been<br />
preset before the start of plate thickness measurement. This alarm is<br />
issued in one of the cases below.<br />
1) When an attempt was made to perform measurement before a reference<br />
position had been established.<br />
2) When, after manual reference position return, an attempt was made<br />
to start measurement without first setting the position counter.<br />
5064 DIFFERRENT AXIS UNIT<br />
(IS–B, IS–C)<br />
5065 DIFFERRENT AXIS UNIT<br />
(PMC AXIS)<br />
5067 G05 PO COMMANDED IN G68/G51<br />
MODE (HPCC)<br />
Circular interpolation was specified for a plane formed by axes using<br />
different increment systems.<br />
In PMC–based axis control, axes using different increment systems<br />
are specified for the same DI/DO group. Modify parameter No. 8010.<br />
HPCC mode cannot be canceled during G51 (scaling) or G68 (coordinate<br />
system rotation).<br />
Correct the program.<br />
5068 G31 P90 FORMAT ERROR The continuous high–speed skip command (G31 P90) has one of the<br />
following errors:<br />
1. The axis along which the tool is moved is not specified.<br />
2. More than one axis is specified as the axis along which the tool is<br />
moved.<br />
Alternatively, the EGB skip command (G31.8) or continuous high–<br />
speed skip command (G31.9) has one of the following errors:<br />
1. A move command is specified for the EGB axis (workpiece axis).<br />
2. More than one axis is specified.<br />
3. P is not specified.<br />
4. The specified Q value exceeds the allowable range.<br />
Correct the program.<br />
5069 WHL–C; ILLEGAL P–DATA The P data, specified for selecting the compensation center for grinding<br />
wheel wear compensation, is invalid.<br />
5073 NO DECIMAL POINT A decimal point is not specified for a command for which a decimal<br />
point must be specified.<br />
5074 ADDRESS DUPLICATION ERROR The same address appears more than once in a block. Alternatively,<br />
a block contains two or more G codes belonging to the same group.<br />
5082 DATA SERVER ERROR Details are displayed on the data server message screen.<br />
5085 SMOOTH IPL ERROR 1 A block for specifying smooth interpolation contains a syntax error.<br />
5096 MISMATCH WAITING M–CODE Different wait codes (M codes) were specified in HEAD1 and HEAD2.<br />
Correct the program.<br />
5110 IMPROPER G–CODE<br />
(G05.1 G1 MODE)<br />
5111 IMPROPER MODAL G–CODE<br />
(G05.1 G1)<br />
5112 G08 CAN NOT BE COMMANDED<br />
(G05.1 G1)<br />
5114 NOT STOP POSITION<br />
(G05.1 Q1)<br />
An illegal G code was specified in simple high–precision contour control<br />
mode.<br />
A command was specified for the index table indexing axis in simple<br />
high–precision contour control mode.<br />
An illegal G code is left modal when simple high–precision contour control<br />
mode was specified.<br />
Look–ahead control (G08) was specified in simple high–precision contour<br />
control mode.<br />
At the time of restart after manual intervention, the coordinates at which<br />
the manual intervention occurred have not been restored.<br />
1189
G. ALARM LIST APPENDIX<br />
B–63534EN/02<br />
Number Message<br />
Contents<br />
5115 SPL : ERROR There is an error in the specification of the rank.<br />
No knot is specified.<br />
The knot specification has an error.<br />
The number of axes exceeds the limits.<br />
Other program errors<br />
5116 SPL : ERROR There is a program error in a block under look–ahead control.<br />
Monotone increasing of knots is not observed.<br />
5117 SPL : ERROR<br />
In NURBS interpolation mode, a mode that cannot be used together is<br />
specified.<br />
The first control point of NURBS is incorrect.<br />
5118 SPL : ERROR After manual intervention with manual absolute mode set to on, NURBS<br />
interpolation was restarted.<br />
5122 ILLEGAL COMMAND IN SPIRAL A spiral interpolation or conical interpolation command has an error.<br />
Specifically, this error is caused by one of the following:<br />
1) L = 0 is specified.<br />
2) Q = 0 is specified.<br />
3) R/, R/, C is specified.<br />
4) Zero is specified as height increment.<br />
5) Three or more axes are specified as the height axes.<br />
6) A height increment is specified when there are two height axes.<br />
7) Conical interpolation is specified when the helical interpolation<br />
function is not selected.<br />
8) Q < 0 is specified when radius difference > 0.<br />
9) Q > 0 is specified when radius difference < 0.<br />
10) A height increment is specified when no height axis is specified.<br />
5123 OVER TOLERANCE OF END<br />
POINT<br />
The difference between a specified end point and the calculated end<br />
point exceeds the allowable range (parameter 3471).<br />
5124 CAN NOT COMMAND SPIRAL A spiral interpolation or conical interpolation was specified in any of the<br />
following modes:<br />
1) Scaling<br />
2) Programmable mirror image<br />
3) Polar coordinate interpolation<br />
5134 FSSB : OPEN READY TIME OUT<br />
In cutter compensation C mode, the center is set as the start point or<br />
end point.<br />
Initialization did not place FSSB in the open ready state.<br />
5135 FSSB : ERROR MODE FSSB has entered error mode.<br />
5136 FSSB : NU<strong>MB</strong>ER OF AMPS IS<br />
SMALL<br />
In comparison with the number of controlled axes, the number of amplifiers<br />
recognized by FSSB is not enough.<br />
5137 FSSB : CONFIGURATION ERROR FSSB detected a configuration error.<br />
5138 FSSB : AXIS SETTING NOT COM-<br />
PLETE<br />
In automatic setting mode, axis setting has not been made yet.<br />
Perform axis setting on the FSSB setting screen.<br />
5139 FSSB : ERROR Servo initialization did not terminate normally.<br />
The optical cable may be defective, or there may be an error in connection<br />
to the amplifier or another module.<br />
Check the optical cable and the connection status.<br />
5155 NOT RESTART PROGRAM BY G05 During servo leaning control by G05, an attempt was made to perform<br />
restart operation after feed hold or interlock. This restart operation cannot<br />
be performed. (G05 leaning control terminates at the same time.)<br />
1190
B–63534EN/02 APPENDIX<br />
G. ALARM LIST<br />
Number Message<br />
Contents<br />
5156 ILLEGAL AXIS OPERATION<br />
(SHPCC)<br />
In simple high–precision contour control (SHPCC) mode, the controlled<br />
axis selection signal (PMC axis control) changes.<br />
In SHPCC mode, the simple synchronous axis selection signal<br />
changes.<br />
5157 PARAMETER ZERO (AICC) Zero is set in the parameter for the maximum cutting feedrate (parameter<br />
No. 1422 or 1432).<br />
Zero is set in the parameter for the acceleration/deceleration before interpolation<br />
(parameter No. 1770 or 1771).<br />
Set the parameter correctly.<br />
5196 ILLEGAL OPERATION (HPCC) Detach operation was performed in HPCC mode. (If detach operation<br />
is performed in HPCC mode, this alarm is issued after the currently<br />
executed block terminates.)<br />
5197 FSSB : OPEN TIME OUT The CNC permitted FSSB to open, but FSSB was not opened.<br />
5198 FSSB : ID DATA NOT READ Temporary assignment failed, so amplifier initial ID information could not<br />
be read.<br />
5199 FINE TORQUE SENSING PARAME- A parameter related to the fine torque sensing function is illegal.<br />
TER<br />
· The storage interval is invalid.<br />
· An invalid axis number is set as the target axis.<br />
Correct the parameter.<br />
5212 SCREEN COPY : PARAMETER ER-<br />
ROR<br />
There is a parameter setting error. Check that 4 is set as the I/O channel.<br />
5213 SCREEN COPY : COMMUNICA-<br />
TION ERROR<br />
5214 SCREEN COPY : DATA TRANSFER<br />
ERROR<br />
5218 ILLEGAL PARAMETER (INCL.<br />
COMP)<br />
The memory card cannot be used. Check the memory card. (Check<br />
whether the memory card is write–protected or defective.)<br />
Data transfer to the memory card failed.<br />
Check whether the memory card space is insufficient and whether the<br />
memory card was removed during data transfer.<br />
There is an inclination compensation parameter setting error.<br />
Cause:<br />
1. The number of pitch error compensation points between the negative<br />
(–) end and positive (+) end exceeds 128.<br />
2. The relationship in magnitude among the inclination compensation<br />
point numbers is incorrect.<br />
3. An inclination compensation point is not located between the negative<br />
(–) end and positive (+) end of the pitch error compensation<br />
points.<br />
4. The amount of compensation per compensation point is too large or<br />
too small.<br />
Correct the parameter.<br />
5219 CAN NOT RETURN Manual intervention or return is not allowed during three–dimensional<br />
coordinate conversion.<br />
5220 REFERENCE POINT ADJUST-<br />
MENT MODE<br />
A parameter for automatically set a reference position is set. (Bit 2 of<br />
parameter No. 1819 = 1)<br />
Perform automatic setting.<br />
(Position the machine at the reference position manually, then perform<br />
manual reference position return.)<br />
Supplementary: Automatic setting sets bit 2 of parameter No. 1819 to<br />
0.<br />
5222 SRAM CORRECTABLE ERROR The SRAM correctable error cannot be corrected.<br />
Cause:<br />
A memory problem occurred during memory initialization.<br />
Action:<br />
Replace the master printed circuit board (SRAM module).<br />
1191
G. ALARM LIST APPENDIX<br />
B–63534EN/02<br />
Number Message<br />
Contents<br />
5227 FILE NOT FOUND A specified file is not found during communication with the built–in<br />
Handy File.<br />
5228 SAME NAME USED There are duplicate file names in the built–in Handy File.<br />
5229 WRITE PROTECTED A floppy disk in the built–in Handy File is write protected.<br />
5231 TOO MANY FILES The number of files exceeds the limit during communication with the<br />
built–in Handy File.<br />
5232 DATA OVER–FLOW There is not enough floppy disk space in the built–in Handy File.<br />
5235 COMMUNICATION ERROR A communication error occurred during communication with the built–in<br />
Handy File.<br />
5237 READ ERROR A floppy disk in the built–in Handy File cannot be read from. The floppy<br />
disk may be defective, or the head may be dirty. Alternatively, the Handy<br />
File is defective.<br />
5238 WRITE ERROR A floppy disk in the built–in Handy File cannot be written to. The floppy<br />
disk may be defective, or the head may be dirty. Alternatively, the Handy<br />
File is defective.<br />
5242 ILLEGAL AXIS NU<strong>MB</strong>ER<br />
(M series)<br />
5243 DATA OUT OF RANGE<br />
(M series)<br />
5244 TOO MANY DI ON<br />
(M series)<br />
5245 OTHER AXIS ARE COMMANDED<br />
(M series)<br />
The axis number of the synchronous master axis or slave axis is incorrect.<br />
(This alarm is issued when flexible synchronization is turned on.)<br />
Alternatively, the axis number of the slave axis is smaller than that of the<br />
master axis.<br />
The gear ratio is not set correctly. (This alarm is issued when flexible<br />
synchronization is turned on.)<br />
Even when an M code was encountered in automatic operation mode,<br />
the flexible synchronization mode signal was not driven on or off.<br />
Check the ladder and M codes.<br />
One of the following command conditions was present during flexible<br />
synchronization or when flexible synchronization was turned on:<br />
1. The synchronous master axis or slave axis is the EGB axis.<br />
2. The synchronous master axis or slave axis is the chopping axis.<br />
3. In reference position return mode<br />
5251 ILLEGAL PARAMETER IN G54.2 A fixture offset parameter (No. 7580 to 7588) is illegal. Correct the parameter.<br />
5252 ILLEGAL P COMMAND IN G54.2 The P value specifying the offset number of a fixture offset is too large.<br />
Correct the program.<br />
5257 G41/G42 NOT ALLOWED IN MDI<br />
MODE<br />
G41/G42 (cutter compensation C: M series, tool–nose radius compensation:<br />
T series) was specified in MDI mode. (Depending on the setting<br />
of bit 4 of parameter No. 5008)<br />
5300 SET ALL OFFSET DATAS AGAIN After the inch/metric automatic conversion function (OIM: Bit 0 of parameter<br />
No. 5006) for tool offset data is enabled or disabled, all the tool<br />
offset data must be reset. This message reminds the operator to reset<br />
the data.<br />
If this alarm is issued, reset all the tool offset data. Operating the machine<br />
without resetting the data will result in a malfunction.<br />
5302 ILLEGAL COMMAND IN G68 MODE A command to set the coordinate system is specified in the coordinate<br />
system rotation mode.<br />
5303 TOUCH PANEL ERROR A touch panel error occurred.<br />
Cause:<br />
1. The touch panel is kept pressed.<br />
2. The touch panel was pressed when power was turned on.<br />
Remove the above causes, and turn on the power again.<br />
5306 MODE CHANGE ERROR In a one–touch macro call, mode switching at the time of activation is not<br />
performed correctly.<br />
1192
B–63534EN/02 APPENDIX<br />
G. ALARM LIST<br />
Number Message<br />
Contents<br />
5307 INTERNAL DATA OVER FLOW In the following function, internal data exceeds the allowable range.<br />
1) Improvement of the rotation axis feedrate<br />
5311 FSSB:ILLEGAL CONNECTION A connection related to FSSB is illegal.<br />
This alarm is issued when either of the following is found:<br />
1. Two axes having adjacent servo axis numbers (parameter No.<br />
1023), odd number and even number, are assigned to amplifiers to<br />
which different FSSB systems are connected.<br />
2. The system does not satisfy the requirements for performing HRV<br />
control, and use of two pulse modules connected to different FSSB<br />
systems having different FSSB current control cycles is specified.<br />
5321 S–COMP. VALUE OVERFLOW The straightness compensation value has exceeded the maximum value<br />
of 32767.<br />
After this alarm is issued, make a manual reference position return.<br />
5400 SPL:ILLEGAL AXIS COMMAND An axis specified for spline interpolation or smooth interpolation is incorrect.<br />
If an axis that is not the spline axis is specified in spline interpolation<br />
mode, this alarm is issued. The spline axis is the axis specified in a block<br />
containing G06.1 or the next block. For smooth interpolation, the axis<br />
specified in G5.1Q2 is incorrect.<br />
5401 SPL:ILLEGAL COMMAND In a G code mode in which specification of G06.1 is not permitted, G06.1<br />
is specified.<br />
5402 SPL:ILLEGAL AXIS MOVING A movement is made along an axis that is not the spline interpolation axis.<br />
For example, in three–dimensional tool compensation mode using an<br />
offset vector of which components are the X–, Y–, and Z–axes, when<br />
two–axis spline interpolation is performed with the two spline axes set<br />
to the X– and Y–axes, a movement along the Z–axis occurs, resulting<br />
in this alarm.<br />
5403 SPL:CAN NOT MAKE VECTOR Three–dimensional tool compensation vectors cannot be generated.<br />
· When a three–dimensional tool compensation vector is created for the<br />
second or subsequent point, that point, previous point, and next point are<br />
on the same straight line, and that straight line and the three–dimensional<br />
tool compensation vector for the previous point are in parallel.<br />
· When a three–dimensional tool compensation vector is created at the<br />
end point of smooth interpolation or spline interpolation, the end point<br />
and the point two points before are the same.<br />
5405 ILLEGAL PARAMETER IN G41.2/ The parameter setting that determines the relationship between the<br />
rotation axis and rotation plane is incorrect.<br />
5406 G41.3/G40 FORMAT ERROR 1) A G41.3 or G40 block contains a move command.<br />
2) A G1.3 block contains a G code or M code for which buffering is suppressed.<br />
5407 ILLEGAL COMMAND IN G41.3 1) A G code that belongs to group 01 except G00 and G01 is specified<br />
in G41.3 mode.<br />
2) An offset command (a G code belonging to group 07) is specified in<br />
G41.3 mode.<br />
3) The block next to G41.3 (startup) contains no movement.<br />
5408 G41.3 ILLEGAL START_UP 1) In a mode of group 01 except G00 and G01, G41.3 (startup) is specified.<br />
2) At startup, the included angle of the tool direction vector and move<br />
direction vector is 0 or 180 degrees.<br />
5409 ILLEGAL PARAMETER IN G41.3 The parameter setting (No. xxxx to xxxx) that determines the relationship<br />
between the rotation axis and rotation plane is incorrect.<br />
5411 NURBS:ILLEGAL ORDER The number of steps is specified incorrectly.<br />
5412 NURBS:NO KNOT COMMAND No knot is specified. Alternatively, in NURBS interpolation mode, a<br />
block not relating to NURBS interpolation is specified.<br />
1193
G. ALARM LIST APPENDIX<br />
B–63534EN/02<br />
Number Message<br />
Contents<br />
5413 NURBS:ILLEGAL AXIS COMMAND An axis not specified with controlled points is specified in the first block.<br />
5414 NURBS:ILLEGAL KNOT The number of blocks containing knots only is insufficient.<br />
5415 NURBS:ILLEGAL CANCEL Although NURBS interpolation is not completed yet, the NURBS interpolation<br />
mode is turned off.<br />
5416 NURBS:ILLEGAL MODE A mode that cannot be used with NURBS interpolation mode is specified<br />
in NURBS interpolation mode.<br />
5417 NURBS:ILLEGAL MULTI–KNOT As many knots as the number of steps are not specified at the start and<br />
end points.<br />
5418 NURBS:ILLEGAL KNOT VALUE Knots do not increase in monotone.<br />
5420 ILLEGAL PARAMETER IN<br />
G43.4/G43.5<br />
A parameter related to pivot tool length compensation is incorrect.<br />
5421 ILLEGAL COMMAND IN G43.4/G43.5 In pivot tool length compensation (type 2) mode, a rotation axis is specified.<br />
5422 EXCESS VELOCITY IN<br />
G43.4/G43.5<br />
As a result of pivot tool length compensation, an attempt was made to<br />
move the tool along an axis at a feedrate exceeding the maximum cutting<br />
feedrate.<br />
5425 ILLEGAL OFFSET VALUE The offset number is incorrect.<br />
5430 ILLEGAL COMMAND IN 3–D CIR In a modal state in which three–dimensional circular interpolation cannot<br />
be specified, a three–dimensional circular interpolation<br />
5432 G02.4/G03.4 FORMAT ERROR<br />
(G02.4/G03.4) is specified. Alternatively, in three–dimensional circular<br />
interpolation mode, a code that cannot be specified is specified.<br />
A three–dimensional circular interpolation command (G02.4/G03.4) is<br />
incorrect.<br />
5433 MANUAL INTERVENTION IN 3–D<br />
CIR<br />
5435 PARAMETER OUT OF RANGE<br />
(TLAC)<br />
5436 PARAMETER SETTING ERROR 1<br />
(TLAC)<br />
5437 PARAMETER SETTING ERROR 2<br />
(TLAC)<br />
5440 ILLEGAL DRILLING AXIS<br />
SELECTED<br />
In three–dimensional circular interpolation mode (G02.4/G03.4), manual<br />
intervention was made when the manual absolute switch was on.<br />
<strong>Inc</strong>orrect parameter setting (set value range)<br />
<strong>Inc</strong>orrect parameter setting (setting of the rotation axis)<br />
<strong>Inc</strong>orrect parameter setting (setting of the tool axis)<br />
The drilling axis specified for the drilling canned cycle is incorrect.<br />
The G code command block of the canned cycle does not specify the<br />
Z point of the drilling axis. When there is a parallel axis with the drilling<br />
axis, the parallel axis is also specified at the same time.<br />
5445 CRC:MOTION IN G39 Corner circular interpolation (G39) of cutter compensation is not specified<br />
alone but is specified with a move command.<br />
5446 CRC:NO AVOIDANCE Because there is no interference evade vector, the interference check<br />
evade function of cutter compensation cannot evade interference.<br />
5447 CRC:DANGEROUS AVOIDANCE The interference check evade function of cutter compensation determines<br />
that an evade operation will lead to danger.<br />
5448 CRC:INTERFERENCE TO AVD. In the interference check evade function of cutter compensation, a further<br />
interference occurs for an already created interference evade vector.<br />
1194
B–63534EN/02 APPENDIX<br />
G. ALARM LIST<br />
Number Message<br />
Contents<br />
5452 IMPROPER G–CODE (5AXIS<br />
MODE)<br />
A G code that cannot be specified is found. (5–axis mode)<br />
This alarm is issued when:<br />
1) Three–dimensional cutter compensation (side–face offset and leading–edge<br />
offset) is applied during cutter compensation, or cutter<br />
compensation is applied during three–dimensional cutter compensation<br />
(side–face offset and leading–edge offset).<br />
2) A leading–edge offset of three–dimensional cutter compensation is<br />
applied during side–face offsetting of three–dimensional cutter compensation,<br />
or a side–face offset of three–dimensional cutter compensation<br />
is applied during leading–edge offsetting of three–dimensional<br />
cutter compensation.<br />
3) Tool axis direction tool length compensation is applied during tool<br />
length compensation, or tool length compensation is applied during<br />
tool axis direction tool length compensation.<br />
4) Tool center point control is provided during tool length compensation,<br />
or tool length compensation is applied during tool center point<br />
control.<br />
5) Tool center point control is provided during tool axis direction tool<br />
length compensation, or tool axis direction tool length compensation<br />
is applied during tool center point control.<br />
If this alarm is issued, cancel the relevant mode, then specify a different<br />
mode.<br />
5453 NOTE: G68 IS CANCELED (HPCC) When bit 2 of parameter No. 5400 is set to 1, and a reset does not cancel<br />
G68, this alarm is issued at the time of program restart.<br />
To release this alarm, press and . Once this operation<br />
is performed, the alarm will not be issued at the next restart.<br />
5455 ILLEGAL ACC. PARAMETER A permissible acceleration parameter for optimum torque acceleration/<br />
deceleration is incorrect. The cause is one of the following:<br />
1) The ratio of the deceleration rate to the acceleration rate is below the<br />
limit.<br />
2) The time required for deceleration to a speed of 0 exceeds the maximum<br />
value.<br />
2) Background edit alarm<br />
NOTE<br />
AICC designates AI contour control.<br />
Number Message Contents<br />
??? BP/S alarm BP/S alarm occurs in the same number as the P/S alarm that occurs in<br />
ordinary program edit.<br />
(P/S alarm No. 070, 071, 072, 073, 074, 085 to 087)<br />
Modify the program.<br />
140 BP/S alarm It was attempted to select or delete in the background a program being<br />
selected in the foreground. (NOTE)<br />
Use background editing correctly.<br />
NOTE<br />
Alarm in background edit is displayed in the key input line of the background edit screen instead<br />
of the ordinary alarm screen and is resettable by any of the MDI key operation.<br />
1195
G. ALARM LIST APPENDIX<br />
B–63534EN/02<br />
3) Absolute pulse coder (APC) alarm<br />
Number Message Contents<br />
300 nth–axis origin return Manual reference position return is required for the nth–axis (n=1 to 8).<br />
301 APC alarm: nth–axis communication nth–axis (n=1 to 8) APC communication error. Failure in data transmission<br />
Possible causes include a faulty APC, cable, or servo interface module.<br />
302 APC alarm: nth–axis over time nth–axis (n=1 to 8) APC overtime error.<br />
Failure in data transmission.<br />
Possible causes include a faulty APC, cable, or servo interface module.<br />
303 APC alarm: nth–axis framing nth–axis (n=1 to 8) APC framing error. Failure in data transmission.<br />
Possible causes include a faulty APC, cable, or servo interface module.<br />
304 APC alarm: nth–axis parity nth–axis (n=1 to 8) APC parity error.<br />
Failure in data transmission.<br />
Possible causes include a faulty APC, cable, or servo interface module.<br />
305 APC alarm: nth–axis pulse error nth–axis (n=1 to 8) APC pulse error alarm.<br />
APC alarm.APC or cable may be faulty.<br />
306 APC alarm: nth–axis battery voltage<br />
0<br />
nth–axis (n=1 to 8) APC battery voltage has decreased to a low level so<br />
that the data cannot be held.<br />
APC alarm. Battery or cable may be faulty.<br />
307 APC alarm: nth–axis battery low 1 nth–axis (n=1 to 8) axis APC battery voltage reaches a level where the<br />
battery must be renewed.<br />
APC alarm. Replace the battery.<br />
308 APC alarm: nth–axis battery low 2 nth–axis (n=1 to 8) APC battery voltage has reached a level where the<br />
battery must be renewed (including when power is OFF).<br />
APC alarm .Replace battery.<br />
309 APC ALARM : n AXIS ZRN<br />
IMPOSSIBL<br />
4) Industosyn alarms<br />
An attempt was made to perform reference position return without rotating<br />
the motor through one or more turns. Rotate the motor through one<br />
or more turns, turn off the power then on again, then perform reference<br />
position return.<br />
No. Message Contents<br />
330 INDUCTOSYN:DATA ALARM The absolute–position data (offset data) from Inductosyn cannot be<br />
detected.<br />
331 INDUCTOSYN:ILLEGAL PRM Parameter No. 1874, 1875, or 1876 is set to 0.<br />
5) Serial pulse coder (SPC) alarms<br />
When either of the following alarms is issued, a possible cause is a faulty serial pulse coder or cable.<br />
No. Message Description<br />
360 n AXIS : ABNORMAL CHECKSUM<br />
(INT)<br />
361 n AXIS : ABNORMAL PHASE DATA<br />
(INT)<br />
362 n AXIS : ABNORMAL REV.DATA<br />
(INT)<br />
A checksum error occurred in the built–in pulse coder.<br />
A phase data error occurred in the built–in pulse coder.<br />
A rotation speed count error occurred in the built–in pulse coder.<br />
363 n AXIS : ABNORMAL CLOCK (INT) A clock error occurred in the built–in pulse coder.<br />
364 n AXIS : SOFT PHASE ALARM (INT) The digital servo software detected invalid data in the built–in pulse<br />
coder.<br />
365 n AXIS : BROKEN LED (INT) An LED error occurred in the built–in pulse coder.<br />
366 n AXIS : PULSE MISS (INT) A pulse error occurred in the built–in pulse coder.<br />
367 n AXIS : COUNT MISS (INT) A count error occurred in the built–in pulse coder.<br />
1196
B–63534EN/02 APPENDIX<br />
G. ALARM LIST<br />
No. Message<br />
Description<br />
368 n AXIS : SERIAL DATA ERROR<br />
(INT)<br />
369 n AXIS : DATA TRANS. ERROR<br />
(INT)<br />
Communication data from the built–in pulse coder cannot be received.<br />
A CRC or stop bit error occurred in the communication data being<br />
received from the built–in pulse coder.<br />
380 n AXIS : BROKEN LED (EXT) The separate detector is erroneous.<br />
381 n AXIS : ABNORMAL PHASE<br />
(EXT LIN)<br />
A phase data error occurred in the separate linear scale.<br />
382 n AXIS : COUNT MISS (EXT) A pulse error occurred in the separate detector.<br />
383 n AXIS : PULSE MISS (EXT) A count error occurred in the separate detector.<br />
384 n AXIS : SOFT PHASE ALARM The digital servo software detected invalid data in the separate de-<br />
(EXT)<br />
tector.<br />
385 n AXIS : SERIAL DATA ERROR<br />
(EXT)<br />
386 n AXIS : DATA TRANS. ERROR<br />
(EXT)<br />
387 n AXIS : ABNORMAL ENCODER<br />
(EXT)<br />
The details of serial<br />
pulse coder alarm<br />
202<br />
#7<br />
#6<br />
CSA<br />
Communication data from the separate detector cannot be received.<br />
A CRC or stop bit error occurred in the communication data being<br />
received from the separate detector.<br />
An error occurs in the separate detector. For details, contact the<br />
manufacturer of the scale.<br />
#5<br />
BLA<br />
1197<br />
#4<br />
PHA<br />
#3<br />
PCA<br />
#2<br />
BZA<br />
#6 (CSA) : Check sum alarm has occurred.<br />
#5 (BLA) : Battery low alarm has occurred.<br />
#4 (PHA) : Phase data trouble alarm has occurred.<br />
#3 (PCA) : Speed count trouble alarm has occurred.<br />
#2 (BZA) : Battery zero alarm has occurred.<br />
#1 (CKA) : Clock alarm has occurred.<br />
#0 (SPH) : Soft phase data trouble alarm has occurred.<br />
203<br />
#7<br />
DTE<br />
#6<br />
CRC<br />
#5<br />
STB<br />
#4<br />
PRM<br />
#1<br />
CKA<br />
#0<br />
SPH<br />
#3 #2 #1 #0<br />
#7 (DTE) : Data error has occurred.<br />
#6 (CRC) : CRC error has occurred.<br />
#5 (STB) : Stop bit error has occurred.<br />
#4 (PRM) : Parameter error alarm has occurred. In this case, a servo parameter error<br />
alarm (No. 417) is also output.
G. ALARM LIST APPENDIX<br />
B–63534EN/02<br />
6) Servo alarms (1/2)<br />
Number Message Contents<br />
401 SERVO ALARM: n–TH AXIS VRDY<br />
OFF<br />
402 SERVO ALARM: SV CARD NOT EX-<br />
IST<br />
403 SERVO ALARM: CARD/SOFT MIS-<br />
MATCH<br />
404 SERVO ALARM: n–TH AXIS VRDY<br />
ON<br />
405 SERVO ALARM: (ZERO POINT RE-<br />
TURN FAULT)<br />
The n–th axis (axis 1–8) servo amplifier READY signal (DRDY) went off.<br />
Refer to procedure of trouble shooting.<br />
The axis control card is not provided.<br />
The combination of the axis control card and servo software is illegal.<br />
The possible causes are as follows:<br />
· A correct axis control card is not provided.<br />
· Correct servo software is not installed on flash memory.<br />
Even though the n–th axis (axis 1–8) READY signal (MCON) went off,<br />
the servo amplifier READY signal (DRDY) is still on. Or, when the power<br />
was turned on, DRDY went on even though MCON was off.<br />
Check that the servo interface module and servo amp are connected.<br />
Position control system fault. Due to an NC or servo system fault in the<br />
reference position return, there is the possibility that reference position<br />
return could not be executed correctly. Try again from the manual reference<br />
position return.<br />
407 SERVO ALARM: EXCESS ERROR The difference in synchronous axis position deviation exceeded the set<br />
value.<br />
Position control system fault. Due to an NC or servo system fault in the<br />
reference position return, there is the possibility that reference position<br />
return could not be executed correctly. Try again from the manual reference<br />
position return.<br />
409 SERVO ALARM: n AXIS TORQUE<br />
ALM<br />
410 SERVO ALARM: n–TH AXIS – EX-<br />
CESS ERROR<br />
411 SERVO ALARM: n–TH AXIS – EX-<br />
CESS ERROR<br />
413 SERVO ALARM: n–th AXIS – LSI<br />
OVERFLOW<br />
415 SERVO ALARM: n–TH AXIS – EX-<br />
CESS SHIFT<br />
Abnormal servo motor load has been detected. Alternatively, abnormal<br />
spindle motor load has been detected in Cs mode.<br />
The position deviation value when the n–th axis (axis 1–8) stops is larger<br />
than the set value.<br />
Refer to procedure of trouble shooting.<br />
The position deviation value when the n–th axis (axis 1–8) moves is<br />
larger than the set value.<br />
Refer to procedure of trouble shooting.<br />
The contents of the error register for the n–th axis (axis 1–8) exceeded<br />
231 power. This error usually occurs as the result of an improperly set<br />
parameters.<br />
A speed higher than 524288000 units/s was attempted to be set in the<br />
n–th axis (axis 1–8). This error occurs as the result of improperly set<br />
CMR.<br />
1198
B–63534EN/02 APPENDIX<br />
G. ALARM LIST<br />
Number Message<br />
Contents<br />
417 SERVO ALARM: n–TH AXIS – PA-<br />
RAMETER INCORRECT<br />
420 SERVO ALARM: n AXIS SYNC<br />
TORQUE<br />
421 SERVO ALARM: n AXIS EXCESS<br />
ER (D)<br />
This alarm occurs when the n–th axis (axis 1–8) is in one of the conditions<br />
listed below. (Digital servo system alarm)<br />
1) The value set in Parameter No. 2020 (motor form) is out of the specified<br />
limit.<br />
2) A proper value (111 or –111) is not set in parameter No.2022 (motor<br />
revolution direction).<br />
3) Illegal data (a value below 0, etc.) was set in parameter No. 2023<br />
(number of speed feedback pulses per motor revolution).<br />
4) Illegal data (a value below 0, etc.) was set in parameter No. 2024<br />
(number of position feedback pulses per motor revolution).<br />
5) Parameters No. 2084 and No. 2085 (flexible field gear rate) have not<br />
been set.<br />
6) A value outside the limit of {1 to the number of control axes} or a non–<br />
continuous value (Parameter 1023 (servo axis number) contains a<br />
value out of the range from 1 to the number of axes, or an isolated<br />
value (for example, 4 not prceded by 3).was set in parameter No.<br />
1023 (servo axisnumber).<br />
During simple synchronous control, the difference between the torque<br />
commands for the master and slave axes exceeded the value set in parameter<br />
No. 2031.<br />
The difference between the errors in the semi–closed loop and closed<br />
loop has become excessive during dual position feedback. Check the<br />
values of the dual position conversion coefficients in parameters No.<br />
2078 and 2079.<br />
422 SERVO ALARM: n AXIS In torque control of PMC axis control, a specified allowable speed<br />
has been exceeded.<br />
423 SERVO ALARM: n AXIS In torque control of PMC axis control, the parameter–set allowable<br />
cumulative travel distance has been exceeded.<br />
430 n AXIS : SV. MOTOR OVERHEAT A servo motor overheat occurred.<br />
431 n AXIS : CNV. OVERLOAD 1) PSM: Overheat occurred.<br />
2) β series SVU: Overheat occurred.<br />
432 n AXIS : CNV. LOWVOLT CON. 1) PSM: The control power supply voltage has dropped.<br />
2) PSMR: The control power supply voltage has dropped.<br />
3) β series SVU: The control power supply voltage has dropped.<br />
433 n AXIS : CNV. LOWVOLT DC LINK 1) PSM: The DC link voltage has dropped.<br />
2) PSMR: The DC link voltage has dropped.<br />
3) α series SVU: The DC link voltage has dropped.<br />
4) β series SVU: The DC link voltage has dropped.<br />
434 n AXIS : INV. LOWVOLT CONTROL SVM: The control power supply voltage has dropped.<br />
435 n AXIS : INV. LOWVOLT DC LINK SVM: The DC link voltage has dropped.<br />
436 n AXIS : SOFTTHERMAL (OVC) The digital servo software detected the soft thermal state (OVC).<br />
437 n AXIS : CNV. OVERCURRENT<br />
POWER<br />
438 n AXIS : INV. ABNORMAL CUR-<br />
RENT<br />
PSM: Overcurrent flowed into the input circuit.<br />
1) SVM: The motor current is too high.<br />
2) α series SVU: The motor current is too high.<br />
3) β series SVU: The motor current is too high.<br />
1199
G. ALARM LIST APPENDIX<br />
B–63534EN/02<br />
Number Message<br />
Contents<br />
439 n AXIS : CNV. OVERVOLT POWER 1) PSM: The DC link voltage is too high.<br />
2) PSMR: The DC link voltage is too high.<br />
3) α series SVU: The C link voltage is too high.<br />
4) β series SVU: The link voltage is too high.<br />
440 n AXIS : CNV. EX DECELERATION 1) PSMR: The regenerative discharge amount is too large.<br />
POW.<br />
2) α series SVU: The regenerative discharge amount is too large. Alternatively,<br />
the regenerative discharge circuit is abnormal.<br />
441 n AXIS : ABNORMAL CURRENT<br />
OFFSET<br />
The digital servo software detected an abnormality in the motor current<br />
detection circuit.<br />
442 n AXIS : CNV. CHARGE FAULT 1) PSM: The spare discharge circuit of the DC link is abnormal.<br />
2) PSMR: The spare discharge circuit of the DC link is abnormal.<br />
443 n AXIS : CNV. COOLING FAN FAIL- 1) PSM: The internal stirring fan failed.<br />
URE<br />
2) PSMR: The internal stirring fan failed.<br />
3) β series SVU: The internal stirring fan failed.<br />
444 n AXIS : INV. COOLING FAN FAIL-<br />
URE<br />
SVM: The internal stirring fan failed.<br />
445 n AXIS : SOFT DISCONNECT<br />
ALARM<br />
The digital servo software detected a broken wire in the pulse coder.<br />
446 n AXIS : HARD DISCONNECT<br />
ALARM<br />
A broken wire in the built–in pulse coder was detected by hardware.<br />
447 n AXIS : HARD DISCONNECT (EXT) A broken wire in the separate detector was detected by hardware.<br />
448 n AXIS : UNMATCHED FEEDBACK<br />
ALARM<br />
The sign of feedback data from the built–in pulse coder differs from<br />
that of feedback data from the separate detector.<br />
449 n AXIS : INV. IPM ALARM 1) SVM: IPM (intelligent power module) detected an alarm.<br />
2) α series SVU: IPM (intelligent power module) detected an alarm.<br />
453 n AXIS : SPC SOFT DISCONNECT Software disconnection alarm of the α pulse coder.<br />
ALARM<br />
Turn off the power to the CNC, then remove and insert the pulse coder<br />
cable. If this alarm is issued again, replace the pulse coder.<br />
456 ILLEGAL CURRENT LOOP The current control cycle settings (parameter No. 2004, bit 0 of parameter<br />
No. 2003, and bit 0 of parameter No. 2013) are incorrect.<br />
Possible problems are as follows.<br />
– For the two axes whose servo axis numbers (settings of parameter<br />
No. 1023) are an odd number followed by an even number (a pair<br />
of axes 1 and 2 or axes 5 and 6, for example), a different current control<br />
cycle is set for each of the axes.<br />
– The requirements for slaves needed for the set current control cycle,<br />
including the number, type, and connection method of them, are not<br />
satisfied.<br />
457 ILLEGAL HI HRV (250US) Use of high–speed HRV is specified although the current control<br />
cycle is 200 s.<br />
458 CURRENT LOOP ERROR The current control cycle setting does not match the actual current<br />
control cycle.<br />
459 HI HRV SETTING ERROR For the two axes whose servo axis numbers (settings of parameter<br />
No. 1023) are an odd number followed by an even number (a pair of<br />
axes 1 and 2 or axes 5 and 6, for example), the SVM for one of the<br />
axes supports high–speed HRV control but the SVM for the other<br />
does not. Refer to the SVM specification.<br />
1200
B–63534EN/02 APPENDIX<br />
G. ALARM LIST<br />
Number Message<br />
Contents<br />
460 n AXIS : FSSB DISCONNECT FSSB communication was disconnected suddenly. The possible<br />
causes are as follows:<br />
1) The FSSB communication cable was disconnected or broken.<br />
2) The power to the amplifier was turned off suddenly.<br />
3) A low–voltage alarm was issued by the amplifier.<br />
461 n AXIS : ILLEGAL AMP INTERFACE The axes of the 2–axis amplifier were assigned to the fast type interface.<br />
462 n AXIS : SEND CNC DATA FAILED Because of an FSSB communication error, a slave could not receive<br />
correct data.<br />
463 n AXIS : SEND SLAVE DATA<br />
FAILED<br />
Because of an FSSB communication error, the servo system could<br />
not receive correct data.<br />
464 n AXIS : WRITE ID DATA FAILED An attempt was made to write maintenance information on the amplifier<br />
maintenance screen, but it failed.<br />
465 n AXIS : READ ID DATA FAILED At power–up, amplifier initial ID information could not be read.<br />
466 n AXIS : MOTOR/AMP CO<strong>MB</strong>INA-<br />
TION<br />
467 n AXIS : ILLEGAL SETTING OF<br />
AXIS<br />
The maximum current rating for the amplifier does not match that for<br />
the motor.<br />
The servo function for the following has not been enabled when an<br />
axis occupying a single DSP (corresponding to two ordinary axes) is<br />
specified on the axis setting screen.<br />
1. Learning control (bit 5 of parameter No. 2008 = 1)<br />
2. High–speed current loop (bit 0 of parameter No. 2004 = 1)<br />
3. High–speed interface axis (bit 4 of parameter No. 2005 = 1)<br />
468 HI HRV SETTING ERROR (AMP) Use of high–speed HRV is specified for a controlled axis of an amplifier<br />
which does not support high–speed HRV.<br />
Details of servo alarm<br />
200<br />
#7<br />
OVL<br />
The details of servo alarm are displayed in the diagnosis display (No. 200<br />
and No.204) as shown below.<br />
#6<br />
LV<br />
#5<br />
OVC<br />
1201<br />
#4<br />
HCA<br />
#3<br />
HVA<br />
#2<br />
DCA<br />
#1<br />
FBA<br />
#0<br />
OFA<br />
#7 (OVL) : An overload alarm is being generated.<br />
#6 (LV) : A low voltage alarm is being generated in servo amp.<br />
#5 (OVC) : A overcurrent alarm is being generated inside of digital servo.<br />
#4 (HCA) : An abnormal current alarm is being generated in servo amp.<br />
#3 (HVA) : An overvoltage alarm is being generated in servo amp.<br />
#2 (DCA) : A regenerative discharge circuit alarm is being generated in servo amp.<br />
#1 (FBA) : A disconnection alarm is being generated.<br />
#0 (OFA) : An overflow alarm is being generated inside of digital servo.<br />
201<br />
#7<br />
ALD<br />
#6 #5 #4<br />
EXP<br />
#3 #2 #1 #0<br />
When OVL equal 1 in diagnostic data No.200 (servo alarm No. 400 is<br />
being generated):<br />
#7 (ALD) 0 : Motor overheating<br />
1 : Amplifier overheating<br />
When FBAL equal 1 in diagnostic data No.200 (servo alarm No. 416 is<br />
being generated):
G. ALARM LIST APPENDIX<br />
B–63534EN/02<br />
204<br />
#7<br />
ALD EXP Alarm details<br />
1 0 Built–in pulse coder disconnection (hardware)<br />
1 1 Separately installed pulse coder disconnection<br />
(hardware)<br />
0 0 Pulse coder is not connected due to software.<br />
#6<br />
OFS<br />
#5<br />
MCC<br />
1202<br />
#4<br />
LDA<br />
#3<br />
PMS<br />
#2 #1 #0<br />
#6 (OFS) : A current conversion error has occured in the digital servo.<br />
#5 (MCC) : A magnetic contactor contact in the servo amplifier has welded.<br />
#4 (LDA) : The LED indicates that serial pulse coder C is defective<br />
#3 (PMS) : A feedback pulse error has occured because the feedback cable is<br />
defective.<br />
7) Over travel alarms<br />
Number Message Contents<br />
500 OVER TRAVEL : +n Exceeded the n–th axis (axis 1 to 8) + side stored stroke limit I.<br />
(Parameter No.1320 or 1326 NOTE)<br />
501 OVER TRAVEL : –n Exceeded the n–th axis (axis 1 to 8) – side stored stroke limit I.<br />
(Parameter No.1321 or 1327 NOTE)<br />
502 OVER TRAVEL : +n Exceeded the n–th axis (axis 1 to 8) + side stored stroke limit II.<br />
(Parameter No.1322 )<br />
503 OVER TRAVEL : –n Exceeded the n–th axis (axis 1 to 8) – side stored stroke limit II.<br />
(Parameter No.1323)<br />
504 OVER TRAVEL : +n Exceeded the n–th axis (axis 1 to 8) – side stored stroke limit III.<br />
(Parameter No.1324)<br />
505 OVER TRAVEL : –n Exceeded the n–th axis (axis 1 to 8) – side stored stroke limit III.<br />
(Parameter No.1325)<br />
506 OVER TRAVEL : +n Exceeded the n–th axis (axis 1 to 8) + side hardware OT.<br />
507 OVER TRAVEL : –n Exceeded the n–th axis (axis 1 to 8) – side hardware OT.<br />
510 OVER TRAVEL : +n A stroke limit check, made before starting movement, found that the end<br />
point of a block falls within the plus (+) side inhibited area along the n–<br />
axis defined by a stroke limit. Correct the program.<br />
511 OVER TRAVEL : –n A stroke limit check, made before starting movement, found that the end<br />
point of a block falls within the minus (–) side inhibited area along the<br />
N–axis defined by a stroke limit. Correct the program.<br />
514 INTERFERENCE : +n The rotation area interference check function found interference on the<br />
plus side of the n axis.<br />
515 INTERFERENCE : –n The rotation area interference check function found interference on the<br />
minus side of the n axis.<br />
NOTE<br />
Parameters 1326 and 1327 are effective when EXLM (stroke limit switch signal) is on.
B–63534EN/02 APPENDIX<br />
G. ALARM LIST<br />
8) Servo alarms (2/2)<br />
Number Message Contents<br />
600 n AXIS : INV. DC LINK OVER CUR-<br />
RENT<br />
DC link current is too large.<br />
601 n AXIS : INV. RADIATOR FAN FAIL-<br />
URE<br />
The external dissipator stirring fan failed.<br />
602 n AXIS : INV. OVERHEAT The servo amplifier was overheated.<br />
603 n AXIS : INV. IPM ALARM (OH) The IPM (intelligent power module) detected an overheat alarm.<br />
604 n AXIS : AMP. COMMUNICATION<br />
ERROR<br />
605 n AXIS : CNV. EX. DISCHARGE<br />
POW.<br />
606 n AXIS : CNV. RADIATOR FAN FAIL-<br />
URE<br />
607 n AXIS : CNV. SINGLE PHASE FAIL-<br />
URE<br />
9) Overheat alarms<br />
Communication between the SVM and the PSM failed.<br />
PSMR: Regenerative power is too large.<br />
PSM: The external dissipator stirring fan failed.<br />
PSMR: The external dissipator stirring fan failed.<br />
PSM: Input voltage is in the open–phase condition.<br />
PSMR: Input voltage is in the open–phase condition.<br />
Number Message Contents<br />
700 OVERHEAT: CONTROL UNIT Control unit overheat<br />
Check that the fan motor operates normally, and clean the air filter.<br />
701 OVERHEAT: FAN MOTOR The fan motor on the top of the cabinet for the contorl unit is overheated.<br />
Check the operation of the fan motor and replace the motor if necessary.<br />
704 OVERHEAT: SPINDLE Spindle overheat in the spindle fluctuation detection<br />
1) If the cutting load is heavy, relieve the cutting condition.<br />
2) Check whether the cutting tool is share.<br />
3) Another posible cause is a faulty spindle amp.<br />
10) Rigid tapping alarm<br />
Number Message Contents<br />
740 RIGID TAP ALARM : EXCESS<br />
ERROR<br />
741 RIGID TAP ALARM : EXCESS<br />
ERROR<br />
742 RIGID TAP ALARM : LSI OVER<br />
FLOW<br />
During rigid tapping, the position deviation of the spindle in the stop<br />
state exceeded the setting.<br />
During rigid tapping, the position deviation of the spindle in the stop<br />
state exceeded the setting.<br />
During rigid tapping, an LSI overflow occurred on the spindle side.<br />
1203
G. ALARM LIST APPENDIX<br />
B–63534EN/02<br />
11) Serial spindle alarms<br />
Number Message Contents<br />
749 S–SPINDLE LSI ERROR It is serial communication error while system is executing after power<br />
supply on. Following reasons can be considered.<br />
1) Optical cable connection is fault or cable is not connected or cable<br />
is cut.<br />
2) MAIN CPU board or option 2 board is fault.<br />
3) Spindle amp. printed board is fault.<br />
4) The spindle amplifier is under an abnormal condition. (The SPM indication<br />
is A, A1, A2, or the like, depending on the type of the abnormality.)<br />
If this alarm occurs when CNC power supply is turned on or when<br />
this alarm can not be cleared even if CNC is reset, turn off the power<br />
supply also turn off the power supply in spindle side.<br />
If the spindle amplifier is under an abnormal condition, check the<br />
SPM indication (A, A1, A2, or the like). Then, refer to the FANUC<br />
SERVO MOTOR i series MAINTENANCE MANUAL (B–65285EN)<br />
or FANUC SERVO MOTOR series MAINTENANCE MANUAL<br />
(B–65165E) to solve the problem.<br />
750 SPINDLE SERIAL LINK START<br />
FAULT<br />
752 FIRST SPINDLE MODE CHANGE<br />
FAULT<br />
754 SPINDLE–1 ABNORMAL TORQUE<br />
ALM<br />
762 SECOND SPINDLE MODE<br />
CHANGE FAULT<br />
764 SPINDLE–2 ABNORMAL TORQUE<br />
ALM<br />
772 SPINDLE–3 MODE CHANGE ER-<br />
ROR<br />
774 SPINDLE–3 ABNORMAL TORQUE<br />
ALM<br />
This alarm is generated when the spindle control unit is not ready for<br />
starting correctly when the power is turned on in the system with the<br />
serial spindle.<br />
The four reasons can be considered as follows:<br />
1) An improperly connected optic cable, or the spindle control unit’s<br />
power is OFF.<br />
2) When the NC power was turned on under alarm conditions other<br />
than SU–01 or AL–24 which are shown on the LED display of the<br />
spindle control unit.<br />
In this case, turn the spindle amplifier power off once and perform<br />
startup again.<br />
3) Other reasons (improper combination of hardware)<br />
This alarm does not occur after the system including the spindle control<br />
unit is activated.<br />
4) The second spindle (when SP2, bit 4 of parameter No. 3701, is 1)<br />
is in one of the above conditions 1) to 3).<br />
See diagnostic display No. 409 for details.<br />
This alarm is generated if the system does not properly terminate a<br />
mode change. The modes include the Cs contouring, spindle positioning,<br />
rigid tapping, and spindle control modes. The alarm is activated if<br />
the spindle control unit does not respond correctly to the mode change<br />
command issued by the NC.<br />
Abnormal first spindle motor load has been detected.<br />
Refer to alarm No. 752.(For 2nd axis)<br />
Same as alarm No. 754 (for the second spindle)<br />
Same as alarm No. 752 (for the third spindle)<br />
Same as alarm No. 754 (for the third spindle)<br />
1204
B–63534EN/02 APPENDIX<br />
G. ALARM LIST<br />
Number Message<br />
Contents<br />
782 SPINDLE–4 MODE CHANGE ER-<br />
ROR<br />
784 SPINDLE–4 ABNORMAL TORQUE<br />
ALM<br />
The details of spindle<br />
alarm No.750<br />
1st and 2nd spindles<br />
409<br />
3rd and 4th spindles<br />
409<br />
#7<br />
Same as alarm number 752 (for the fourth spindle)<br />
Same as alarm number 754 (for the fourth spindle)<br />
#6 #5 #4 #3<br />
SPE<br />
1205<br />
#2<br />
S2E<br />
#1<br />
S1E<br />
#0<br />
SHE<br />
#3 (SPE) 0 : In the spindle serial control, the serial spindle parameters fulfill the<br />
spindle unit startup conditions.<br />
1 : In the spindle serial control, the serial spindle parameters do not fulfill<br />
the spindle unit startup conditions.<br />
#2 (S2E) 0 : The second spindle is normal during the spindle serial control startup.<br />
1 : The second spindle was detected to have a fault during the spindle<br />
serial control startup.<br />
#1 (S1E) 0 : The first spindle is normal during the spindle serial control startup.<br />
1 : The first spindle was detected to have a fault during the spindle axis<br />
serial control startup.<br />
#0 (SHE) 0 : The serial communications module in the CNC is normal.<br />
1 : The serial communications module in the CNC was detected to have a<br />
fault.<br />
#7<br />
The details of spindle alarm No. 750 are displayed in the diagnosis display<br />
(No. 409) as shown below.<br />
#6 #5 #4 #3<br />
SPE<br />
#2<br />
S4E<br />
#1<br />
S3E<br />
#0<br />
SHE<br />
#3 (SPE) 0 : In the spindle serial control, the serial spindle parameters fulfill the<br />
spindle unit startup conditions.<br />
1 : In the spindle serial control, the serial spindle parameters do not fulfill<br />
the spindle unit startup conditions.<br />
#2 (S2E) 0 : The fourth spindle is normal during the spindle serial control startup.<br />
1 : The fourth spindle was detected to have a fault during the spindle<br />
serial control startup.<br />
#1 (S1E) 0 : The third spindle is normal during the spindle serial control startup.<br />
1 : The third spindle was detected to have a fault during the spindle axis<br />
serial control startup.<br />
#0 (SHE) 0 : The serial communications module in the CNC is normal.<br />
1 : The serial communications module in the CNC was detected to have a<br />
fault.
G. ALARM LIST APPENDIX<br />
B–63534EN/02<br />
Alarm List (Serial Spindle)<br />
When a serial spindle alarm occurs, the following number is displayed on<br />
the CNC. n is a number corresponding to the spindle on which an alarm<br />
occurs. (n = 1: First spindle; n = 2: Second spindle; etc.)<br />
NOTE*1<br />
Note that the meanings of the SPM indications differ<br />
depending on which LED, the red or yellow LED, is on.<br />
When the red LED is on, the SPM indicates a 2–digit alarm<br />
number. When the yellow LED is on, the SPM indicates an<br />
error number that designates a sequence problem (for<br />
example, when a rotation command is entered with the<br />
emergency stop state not released).<br />
See Appendix A.4, “Error Codes (Serial Spindle).”<br />
Alarm Numbers and Alarms Displayed on the αi <strong>Series</strong> Spindle Amplifier<br />
No. Message<br />
(750) SPINDLE SERIAL LINK<br />
ERROR<br />
SPM indication(*1)<br />
A0<br />
A<br />
Faulty location and remedy Description<br />
1 Replace the ROM on the SPM<br />
control printed circuit board.<br />
2 Replace the SPM control printed<br />
circuit board.<br />
(749) S–SPINDLE LSI ERROR A1 Replace the SPM control printed circuit<br />
board.<br />
7n01 SPN_n_ : MOTOR OVER-<br />
HEAT<br />
7n02 SPN_n_ : EX SPEED ER-<br />
ROR<br />
7n03 SPN_n_ : FUSE ON DC<br />
LINK BLOWN<br />
7n06 SPN_n_ : THERMAL<br />
SENSOR DIS-<br />
CONNECT<br />
01 1 Check and correct the peripheral<br />
temperature and load status.<br />
2 If the cooling fan stops, replace it.<br />
02 1 Check and correct the cutting<br />
conditions to decrease the load.<br />
2 Correct parameter No. 4082.<br />
03 1 Replace the SPM unit.<br />
2 Check the motor insulation status.<br />
3 Replace the interface cable.<br />
06 1 Check and correct the parameter.<br />
2 Replace the feedback cable.<br />
1206<br />
The program does not start normally.<br />
ROM series error or hardware abnormality<br />
on the SPM control printed<br />
circuit board<br />
An abnormality was detected in the<br />
CPU peripheral circuit of the SPM<br />
control circuit.<br />
The thermostat embedded in the motor<br />
winding operated.<br />
The internal temperature of the motor<br />
exceeds the specified level.<br />
The motor is used in excess of the<br />
continuous rating, or the cooling component<br />
is abnormal.<br />
The motor speed cannot follow a specified<br />
speed.<br />
An excessive motor load torque is detected.<br />
The acceleration/deceleration time in<br />
parameter No. 4082 is insufficient.<br />
The PSM becomes ready (00 is indicated),<br />
but the DC link voltage is too<br />
low in the SPM.<br />
The fuse in the DC link section in the<br />
SPM is blown. (The power device is<br />
damaged or the motor is ground–<br />
fault.)<br />
The JX1A/JX1B connection cable is<br />
abnormal.<br />
The temperature sensor of the motor<br />
is disconnected.
B–63534EN/02 APPENDIX<br />
G. ALARM LIST<br />
No. Message<br />
SPM indication(*1)<br />
Faulty location and remedy<br />
Description<br />
7n07 SPN_n_ : OVERSPEED 07 Check for a sequence error. (For example,<br />
check whether spindle synchronization<br />
was specified when the<br />
spindle could not be turned.)<br />
7n09 SPN_n_ : OVERHEAT<br />
MAIN CIRCUIT<br />
7n11 SPN_n_ : OVERVOLT<br />
POW CIRCUIT<br />
7n12 SPN_n_ : OVERCUR-<br />
RENT POW<br />
CIRCUIT<br />
7n15 SPN_n_ : SP SWITCH<br />
CONTROL<br />
ALARM<br />
09 1 Improve the heat sink cooling status.<br />
2 If the heat sink cooling fan stops,<br />
replace the SPM unit.<br />
11 1 Check the selected PSM.<br />
2 Check the input power voltage and<br />
change in power during motor deceleration.<br />
If the voltage exceeds<br />
253 VAC (for the 200–V system) or<br />
530 VAC (for the 400–V system),<br />
improve the power supply impedance.<br />
12 1 Check the motor insulation status.<br />
2 Check the spindle parameters.<br />
3 Replace the SPM unit.<br />
15 1 Check and correct the ladder sequence.<br />
2 Replace the switching MC.<br />
7n16 SPN_n_ : RAM FAULT 16 Replace the SPM control printed circuit<br />
board.<br />
7n18 SPN_n_ : SUMCHECK<br />
ERROR PGM<br />
DATA<br />
7n19 SPN_n_ : EX OFFSET<br />
CURRENT U<br />
7n20 SPN_n_ : EX OFFSET<br />
CURRENT V<br />
7n21 SPN_n_ : POS SENSOR<br />
POLARITY<br />
ERROR<br />
18 Replace the SPM control printed circuit<br />
board.<br />
1207<br />
The motor speed has exceeded<br />
115% of its rated speed.<br />
When the spindle axis was in position<br />
control mode, positional deviations<br />
were accumulated excessively (SFR<br />
and SRV were turned off during<br />
spindle synchronization.)<br />
Abnormal temperature rise of the<br />
power transistor radiator<br />
Overvoltage of the DC link section of<br />
the PSM was detected. (PSM alarm<br />
indication: 7)<br />
PSM selection error. (The maximum<br />
output specification of the PSM is exceeded.)<br />
The motor output current is abnormally<br />
high.<br />
A motor–specific parameter does not<br />
match the motor model.<br />
Poor motor insulation<br />
The switch sequence in spindle<br />
switch/output switch operation is abnormal.<br />
The switching MC contact status<br />
check signal and command do not<br />
match.<br />
Abnormality in an SPM control circuit<br />
component is detected. (RAM for external<br />
data is abnormal.)<br />
Abnormality in an SPM control circuit<br />
component is detected. (Program<br />
ROM data is abnormal.)<br />
19 Replace the SPM unit. Abnormality in an SPM component is<br />
detected. (The initial value for the U<br />
phase current detection circuit is abnormal.)<br />
20 Replace the SPM unit. Abnormality in an SPM component is<br />
detected. (The initial value of the V<br />
phase current detection circuit is abnormal.)<br />
21 Check and correct the parameters.<br />
(No. 4000#0, 4001#4)<br />
The polarity parameter setting of the<br />
position sensor is wrong.
G. ALARM LIST APPENDIX<br />
B–63534EN/02<br />
No. Message<br />
SPM indication(*1)<br />
Faulty location and remedy<br />
Description<br />
7n24 SPN_n_ : SERIAL<br />
TRANSFER<br />
ERROR<br />
7n26 SPN_n_ : DISCONNECT<br />
C–VELO DE-<br />
TECT<br />
7n27 SPN_n_ : DISCONNECT<br />
POS–CODER<br />
7n28 SPN_n_ : DISCONNECT<br />
C–POS DE-<br />
TECT<br />
7n29 SPN_n_ : SHORTTIME<br />
OVERLOAD<br />
7n30 SPN_n_ : OVERCUR-<br />
RENT POW<br />
CIRCUIT<br />
7n31 SPN_n_ : MOTOR LOCK<br />
OR V–SIG LOS<br />
7n32 SPN_n_ : RAM FAULT<br />
SERIAL LSI<br />
7n33 SPN_n_ : SHORTAGE<br />
POWER<br />
CHARGE<br />
24 1 Place the CNC–to–spindle cable<br />
away from the power cable.<br />
2 Replace the cable.<br />
26 1 Replace the cable.<br />
2 Re–adjust the pre–amplifier.<br />
27 1 Replace the cable.<br />
2 Re–adjust the BZ sensor signal.<br />
28 1 Replace the cable<br />
2 Re–adjust the pre–amplifier.<br />
1208<br />
The CNC power is turned off (normal<br />
power–off or broken cable).<br />
An error is detected in communication<br />
data transferred to the CNC.<br />
The signal amplitude of the detection<br />
signal (connector JY2) on the Cs contour<br />
control motor side is abnormal.<br />
(Unconnected cable, adjustment error,<br />
etc.)<br />
1 The spindle position coder (connector<br />
JY4) signal is abnormal.<br />
2 The signal amplitude (connector<br />
JY2) of the MZ or BZ sensor is abnormal.<br />
(Unconnected cable, adjustment<br />
error, etc.)<br />
The position detection signal (connector<br />
JY5) for Cs contour control is<br />
abnormal.<br />
(Unconnected cable, adjustment error,<br />
etc.)<br />
29 Check and correct the load status. Excessive load has been applied<br />
continuously for a certain period of<br />
time. (This alarm is issued also when<br />
the motor shaft has been locked in the<br />
excitation state.)<br />
30 Check and correct the power supply<br />
voltage.<br />
31 1 Check and correct the load status.<br />
2 Replace the motor sensor cable<br />
(JY2 or JY5).<br />
32 Replace the SPM control printed circuit<br />
board.<br />
33 1 Check and correct the power supply<br />
voltage.<br />
2 Replace the PSM unit.<br />
Overcurrent is detected in PSM main<br />
circuit input. (PSM alarm indication:<br />
1)<br />
Unbalanced power supply.<br />
PSM selection error (The maximum<br />
PSM output specification is exceeded.)<br />
The motor cannot rotate at a specified<br />
speed. (A level not exceeding the<br />
SST level for the rotation command<br />
has existed continuously.)<br />
Abnormality in the speed detection<br />
signal.<br />
Abnormality in an SPM control circuit<br />
component is detected. (The LSI device<br />
for serial transfer is abnormal.)<br />
Charging of direct current power supply<br />
voltage in the power circuit section<br />
is insufficient when the magnetic contractor<br />
in the amplifier is turned on<br />
(such as open phase and defective<br />
charging resistor).
B–63534EN/02 APPENDIX<br />
G. ALARM LIST<br />
No. Message<br />
SPM indication(*1)<br />
Faulty location and remedy<br />
Description<br />
7n34 SPN_n_ : PARAMETER<br />
SETTING ER-<br />
ROR<br />
7n35 SPN_n_ : EX SETTING<br />
GEAR RATIO<br />
7n36 SPN_n_ : OVERFLOW<br />
ERROR<br />
COUNTER<br />
7n37 SPN_n_ : SPEED DE-<br />
TECT PAR. ER-<br />
ROR<br />
7n39 SPN_n_ : 1–ROT Cs SIG-<br />
NAL ERROR<br />
7n40 SPN_n_ : NO 1–ROT Cs<br />
SIGNAL DE-<br />
TECT<br />
7n41 SPN_n_ : 1–ROT POS–<br />
CODER ER-<br />
ROR<br />
7n42 SPN_n_ : NO 1–ROT.<br />
POS–CODER<br />
DETECT<br />
7n43 SPN_n_ : DISCON. PC<br />
FOR DIF. SP.<br />
MODE<br />
7n44 SPN_n_ : CONTROL<br />
CIRCUIT(AD)<br />
ERROR<br />
7n46 SPN_n_ : SCREW<br />
1–ROT POS–<br />
COD. ALARM<br />
34 Correct a parameter value according<br />
to the manual.<br />
If the parameter number is unknown,<br />
connect the spindle check board, and<br />
check the indicated parameter.<br />
35 Correct the value according to the parameter<br />
manual.<br />
36 Check whether the position gain value<br />
is too large, and correct the value.<br />
37 Correct the value according to the parameter<br />
manual.<br />
39 1 Adjust the 1–rotation signal in the<br />
pre–amplifier.<br />
2 Check the cable shield status.<br />
3 Replace the cable.<br />
40 1 Adjust the 1–rotation signal in the<br />
pre–amplifier.<br />
2 Check the cable shield status.<br />
3 Replace the cable.<br />
41 1 Check and correct the parameter.<br />
2 Replace the cable.<br />
3 Re–adjust the BZ sensor signal.<br />
42 1 Replace the cable.<br />
2 Re–adjust the BZ sensor signal.<br />
1209<br />
Parameter data exceeding the allowable<br />
limit is set.<br />
Gear ratio data exceeding the allowable<br />
limit is set.<br />
An error counter overflow occurred.<br />
The setting of the parameter for the<br />
number of pulses in the speed detector<br />
is incorrect.<br />
An incorrect relationship between the<br />
1–rotation signal and the number of<br />
AB phase pulses was detected during<br />
Cs contour control.<br />
The 1–rotation signal is not generated<br />
during Cs contour control.<br />
1 The 1–rotation signal of the<br />
spindle position coder (connector<br />
JY4) is abnormal.<br />
2 The 1–rotation signal (connector<br />
JY2) of the MZ or BZ sensor is abnormal.<br />
3 Parameter setting error<br />
1 The 1–rotation signal of the<br />
spindle position coder (connector<br />
JY4) is disconnected.<br />
2 The 1–rotation signal (connector<br />
JY2) of the MZ or BZ sensor is disconnected.<br />
43 Replace the cable. The differential speed position coder<br />
signal (connector JY8) in SPM type 3<br />
is abnormal.<br />
44 Replace the SPM control printed circuit<br />
board.<br />
46 1 Check and correct the parameter.<br />
2 Replace the cable.<br />
3 Re–adjust the BZ sensor signal.<br />
Abnormality in an SPM control circuit<br />
component was detected (A/D converter<br />
abnormality).<br />
An abnormality equivalent to alarm<br />
41 was detected during thread cutting<br />
operation.
G. ALARM LIST APPENDIX<br />
B–63534EN/02<br />
No. Message<br />
SPM indication(*1)<br />
Faulty location and remedy<br />
Description<br />
7n47 SPN_n_ : POS–CODER<br />
SIGNAL AB-<br />
NORMAL<br />
7n49 SPN_n_ : HIGH CONV.<br />
DIF. SPEED<br />
7n50 SPN_n_ : SPNDL CON-<br />
TROL OVER-<br />
SPEED<br />
7n51 SPN_n_ : LOW VOLT DC<br />
LINK<br />
7n52 SPN_n_ : ITP SIGNAL<br />
ABNORMAL I<br />
7n53 SPN_n_ : ITP SIGNAL<br />
ABNORMAL II<br />
7n54 SPN_n_ : OVERLOAD<br />
CURRENT<br />
7n55 SPN_n_ : POWER LINE<br />
SWITCH ER-<br />
ROR<br />
7n56 SPN_n_ : INNER COOL-<br />
ING FAN STOP<br />
7n57 SPN_n_ : EX DECEL-<br />
ERATION<br />
POWER<br />
47 1 Replace the cable.<br />
2 Re–adjust the BZ sensor signal.<br />
3 Correct the cable layout (vicinity of<br />
the power line).<br />
49 Check whether the calculated differential<br />
speed value exceeds the maximum<br />
motor speed.<br />
50 Check whether the calculated value<br />
exceeds the maximum motor speed.<br />
51 1 Check and correct the power supply<br />
voltage.<br />
2 Replace the MC.<br />
52 1 Replace the SPM control printed<br />
circuit board.<br />
2 Replace the spindle interface<br />
printed circuit board in the CNC.<br />
53 1 Replace the SPM control printed<br />
circuit board.<br />
2 Replace the spindle interface<br />
printed circuit board in the CNC.<br />
1210<br />
1 The A/B phase signal of the<br />
spindle position coder (connector<br />
JY4) is abnormal.<br />
2 The A/B phase signal (connector<br />
JY2) of the MZ or BZ sensor is abnormal.<br />
The relationship between the A/B<br />
phase and 1–rotation signal is incorrect<br />
(Pulse interval mismatch).<br />
In differential speed mode, the speed<br />
of the other spindle converted to the<br />
speed of the local spindle has exceeded<br />
the allowable limit (the differential<br />
speed is calculated by multiplying<br />
the speed of the other spindle by<br />
the gear ratio).<br />
In spindle synchronization, the speed<br />
command calculation value exceeded<br />
the allowable limit (the motor<br />
speed is calculated by multiplying the<br />
specified spindle speed by the gear<br />
ratio).<br />
Input voltage drop was detected.<br />
(PSM alarm indication: 4) (Momentary<br />
power failure or poor MC contact)<br />
NC interface abnormality was detected<br />
(the ITP signal stopped).<br />
NC interface abnormality was detected<br />
(the ITP signal stopped).<br />
54 Review the load state. An overload current was detected.<br />
55 1 Replace the magnetic contactor.<br />
2 Check and correct the sequence.<br />
The power line state signal of the<br />
magnetic contactor for selecting a<br />
spindle or output is abnormal.<br />
56 Replace the SPM unit. The cooling fan in the SPM control circuit<br />
stopped.<br />
57 1 Decrease the acceleration/deceleration<br />
duty.<br />
2 Check the cooling condition (peripheral<br />
temperature).<br />
3 If the cooling fan stops, replace the<br />
resistor.<br />
4 If the resistance is abnormal, replace<br />
the resistor.<br />
An overload was detected in the regenerative<br />
resistance. (PSMR alarm<br />
indication: 8)<br />
Thermostat operation or short–time<br />
overload was detected.<br />
The regenerative resistor was disconnected,<br />
or an abnormal resistance<br />
was detected.
B–63534EN/02 APPENDIX<br />
G. ALARM LIST<br />
No. Message<br />
SPM indication(*1)<br />
Faulty location and remedy<br />
Description<br />
7n58 SPN_n_ : OVERLOAD IN<br />
PSM<br />
7n59 SPN_n_ : COOLING FAN<br />
STOP IN PSM<br />
7n62 SPN_n_ : MOTOR VCMD<br />
OVERLOWED<br />
7n66 SPN_n_ : AMP MODULE<br />
COMMUNICA-<br />
TION<br />
7n73 SPN_n_ : MOTOR SEN-<br />
SOR DISCON-<br />
NECTED<br />
7n74 SPN_n_ : CPU TEST ER-<br />
ROR<br />
58 1 Check the PSM cooling status.<br />
2 Replace the PSM unit.<br />
1211<br />
The temperature of the radiator of the<br />
PSM has increased abnormally.<br />
(PSM alarm indication: 3)<br />
59 Replace the SPM unit. The cooling fan in the PSM stopped.<br />
(PSM alarm indication: 2)<br />
62 Check and correct the parameters.<br />
(No. 4021, 4056 to 4059)<br />
66 1 Replace the cable.<br />
2 Check and correct the connection.<br />
73 1 Replace the feedback cable.<br />
2 Check the shield processing.<br />
3 Check and correct the connection.<br />
4 Adjust the sensor.<br />
74 Replace the SPM control printed–circuit<br />
board.<br />
7n75 SPN_n_ : CRC ERROR 75 Replace the SPM control printed–circuit<br />
board.<br />
7n79 SPN_n_ : INITIAL TEST<br />
ERROR<br />
7n81 SPN_n_ : 1–ROT MO-<br />
TOR SENSOR<br />
ERROR<br />
7n82 SPN_n_ : NO 1–ROT<br />
MOTOR SEN-<br />
SOR<br />
7n83 SPN_n_ : MOTOR SEN-<br />
SOR SIGNAL<br />
ERROR<br />
7n84 SPN_n_ : SPNDL SEN-<br />
SOR DISCON-<br />
NECTED<br />
7n85 SPN_n_ : 1–ROT SPNDL<br />
SENSOR ER-<br />
ROR<br />
7n87 SPN_n_ : SPNDL SEN-<br />
SOR SIGNAL<br />
ERROR<br />
7n88 SPN_n_ : COOLING RA-<br />
DIFAN FAIL-<br />
URE<br />
79 Replace the SPM control printed–circuit<br />
board.<br />
81 1 Check and correct the parameter.<br />
2 Replace the feedback cable.<br />
3 Adjust the sensor.<br />
82 1 Replace the feedback cable.<br />
2 Adjust the sensor.<br />
83 1 Replace the feedback cable.<br />
2 Adjust the sensor.<br />
84 1 Replace the feedback cable.<br />
2 Check the shield processing.<br />
3 Check and correct the connection.<br />
4 Check and correct the parameter.<br />
5 Adjust the sensor.<br />
85 1 Check and correct the parameter.<br />
2 Replace the feedback cable.<br />
3 Adjust the sensor.<br />
87 The one–rotation signal of the spindle<br />
sensor is not generated.<br />
88 Replace the SPM external cooling<br />
fan.<br />
The specified motor speed is too<br />
large.<br />
An error was found in communication<br />
between amplifiers.<br />
The motor sensor feedback signal is<br />
not present.<br />
An error was detected in a CPU test.<br />
An error was detected in a CRC test.<br />
An error was detected in an initial test<br />
operation.<br />
The one–rotation signal of the motor<br />
sensor cannot be correctly detected.<br />
The one–rotation signal of the motor<br />
sensor is not generated.<br />
An irregularity was detected in a motor<br />
sensor feedback signal.<br />
The spindle sensor feedback signal is<br />
not present.<br />
The one–rotation signal of the spindle<br />
sensor cannot be correctly detected.<br />
An irregularity was detected in a<br />
spindle sensor feedback signal.<br />
The external cooling fan stopped.
G. ALARM LIST APPENDIX<br />
B–63534EN/02<br />
No. Message<br />
SPM indication(*1)<br />
Faulty location and remedy<br />
Description<br />
7n97 SPN_n_ : OTHER<br />
SPINDLE<br />
ALARM<br />
7n98 SPN_n_ : OTHER CON-<br />
VERTER<br />
ALARM<br />
9n01 SPN_n_ : MOTOR OVER-<br />
HEAT<br />
9n02 SPN_n_ : EX SPEED ER-<br />
ROR<br />
9n03 SPN_n_ : FUSE ON DC<br />
LINK BLOWN<br />
9n06 SPN_n_ : TERMAL<br />
SENSOR DIS-<br />
CONNECT<br />
97 Replace the SPM. Another irregularity was detected.<br />
98 Check the PSM alarm display. A PSM alarm was detected.<br />
01 1 Check and correct the peripheral<br />
temperature and load status.<br />
2 If the cooling fan stops, replace it.<br />
02 1 Check and correct the cutting<br />
conditions to decrease the load.<br />
2 Correct parameter No. 4082.<br />
03 1 Replace the SPM unit.<br />
2 Check the motor insulation status.<br />
3 Replace the interface cable.<br />
06 1 Check and correct the parameter.<br />
2 Replace the feedback cable.<br />
9n07 SPN_n_ : OVERSPEED 07 Check for a sequence error. (For example,<br />
check whether spindle synchronization<br />
was specified when the<br />
spindle could not be turned.)<br />
9n09 SPN_n_ : OVERHEAT<br />
MAIN CIRCUIT<br />
09 1 Improve the heat sink cooling status.<br />
2 If the heat sink cooling fan stops,<br />
replace the SPM unit.<br />
1212<br />
The thermostat embedded in the motor<br />
winding operated.<br />
The internal temperature of the motor<br />
exceeds the specified level.<br />
The motor is used in excess of the<br />
continuous rating, or the cooling component<br />
is abnormal.<br />
The motor speed cannot follow a specified<br />
speed.<br />
An excessive motor load torque is detected.<br />
The acceleration/deceleration time in<br />
parameter No. 4082 is insufficient.<br />
The PSM becomes ready (00 is indicated),<br />
but the DC link voltage is too<br />
low in the SPM.<br />
The fuse in the DC link section in the<br />
SPM is blown. (The power device is<br />
damaged or the motor is ground–<br />
fault.)<br />
The JX1A/JX1B connection cable is<br />
abnormal.<br />
The temperature sensor of the motor<br />
is disconnected.<br />
The motor speed has exceeded<br />
115% of its rated speed.<br />
When the spindle axis was in position<br />
control mode, positional deviations<br />
were accumulated excessively (SFR<br />
and SRV were turned off during<br />
spindle synchronization.)<br />
Abnormal temperature rise of the<br />
power transistor radiator
B–63534EN/02 APPENDIX<br />
G. ALARM LIST<br />
No. Message<br />
SPM indication(*1)<br />
Faulty location and remedy<br />
Description<br />
9n11 SPN_n_ : OVERVOLT<br />
POW CIRCUIT<br />
9n12 SPN_n_ : OVERCUR-<br />
RENT POW<br />
CIRCUIT<br />
9n15 SPN_n_ : SP SWITCH<br />
CONTROL<br />
ALARM<br />
11 1 Check the selected PSM.<br />
2 Check the input power voltage and<br />
change in power during motor deceleration.<br />
If the voltage exceeds<br />
253 VAC (for the 200–V system) or<br />
530 VAC (for the 400–V system),<br />
improve the power supply impedance.<br />
12 1 Check the motor insulation status.<br />
2 Check the spindle parameters.<br />
3 Replace the SPM unit.<br />
15 1 Check and correct the ladder sequence.<br />
2 Replace the switching MC.<br />
9n16 SPN_n_ : RAM FAULT 16 Replace the SPM control printed circuit<br />
board.<br />
9n18 SPN_n_ : SUMCHECK<br />
ERROR PGM<br />
DATA<br />
9n19 SPN_n_ : EX OFFSET<br />
CURRENT U<br />
9n20 SPN_n_ : EX OFFSET<br />
CURRENT V<br />
9n21 SPN_n_ : POS SENSOR<br />
POLARITY ER-<br />
ROR<br />
9n24 SPN_n_ : SERIAL<br />
TRANSFER<br />
ERROR<br />
9n27 SPN_n_ : DISCONNECT<br />
POS–CODER<br />
18 Replace the SPM control printed circuit<br />
board.<br />
1213<br />
Overvoltage of the DC link section of<br />
the PSM was detected. (PSM alarm<br />
indication: 7)<br />
PSM selection error. (The maximum<br />
output specification of the PSM is exceeded.)<br />
The motor output current is abnormally<br />
high.<br />
A motor–specific parameter does not<br />
match the motor model.<br />
Poor motor insulation<br />
The switch sequence in spindle<br />
switch/output switch operation is abnormal.<br />
The switching MC contact status<br />
check signal and command do not<br />
match.<br />
Abnormality in an SPM control circuit<br />
component is detected. (RAM for external<br />
data is abnormal.)<br />
Abnormality in an SPM control circuit<br />
component is detected. (Program<br />
ROM data is abnormal.)<br />
19 Replace the SPM unit. Abnormality in an SPM component is<br />
detected. (The initial value for the U<br />
phase current detection circuit is abnormal.)<br />
20 Replace the SPM unit. Abnormality in an SPM component is<br />
detected. (The initial value of the V<br />
phase current detection circuit is abnormal.)<br />
21 Check and correct the parameters.<br />
(No. 4000#0, 4001#4)<br />
24 1 Place the CNC–to–spindle cable<br />
away from the power cable.<br />
2 Replace the cable.<br />
27 1 Replace the cable.<br />
2 Re–adjust the BZ sensor signal.<br />
The polarity parameter setting of the<br />
position sensor is wrong.<br />
The CNC power is turned off (normal<br />
power–off or broken cable).<br />
An error is detected in communication<br />
data transferred to the CNC.<br />
1 The spindle position coder (connector<br />
JY4) signal is abnormal.<br />
2 The signal amplitude (connector<br />
JY2) of the MZ or BZ sensor is abnormal.<br />
(Unconnected cable, adjustment<br />
error, etc.)
G. ALARM LIST APPENDIX<br />
B–63534EN/02<br />
No. Message<br />
SPM indication(*1)<br />
Faulty location and remedy<br />
Description<br />
9n29 SPN_n_ : SHORTTIME<br />
OVERLOAD<br />
9n30 SPN_n_ : OVERCUR-<br />
RENT POW<br />
CIRCUIT<br />
9n31 SPN_n_ : MOTOR LOCK<br />
OR V–SIG LOS<br />
9n32 SPN_n_ : RAM FAULT<br />
SERIAL LSI<br />
9n33 SPN_n_ : SHORTAGE<br />
POWER<br />
CHARGE<br />
9n34 SPN_n_ : PARAMETER<br />
SETTING ER-<br />
ROR<br />
9n35 SPN_n_ : EX SETTING<br />
GEAR RATIO<br />
9n36 SPN_n_ : OVERFLOW<br />
ERROR<br />
COUNTER<br />
9n37 SPN_n_ : SPEED DE-<br />
TECT PAR. ER-<br />
ROR<br />
9n41 SPN_n_ : 1–ROT POS–<br />
CODER ER-<br />
ROR<br />
29 Check and correct the load status. Excessive load has been applied<br />
continuously for a certain period of<br />
time. (This alarm is issued also when<br />
the motor shaft has been locked in the<br />
excitation state.)<br />
30 Check and correct the power supply<br />
voltage.<br />
31 1 Check and correct the load status.<br />
2 Replace the motor sensor cable<br />
(JY2 or JY5).<br />
32 Replace the SPM control printed circuit<br />
board.<br />
33 1 Check and correct the power supply<br />
voltage.<br />
2 Replace the PSM unit.<br />
34 Correct a parameter value according<br />
to the manual.<br />
If the parameter number is unknown,<br />
connect the spindle check board, and<br />
check the indicated parameter.<br />
35 Correct the value according to the parameter<br />
manual.<br />
36 Check whether the position gain value<br />
is too large, and correct the value.<br />
37 Correct the value according to the parameter<br />
manual.<br />
41 1 Check and correct the parameter.<br />
2 Replace the cable.<br />
3 Re–adjust the BZ sensor signal.<br />
1214<br />
Overcurrent is detected in PSM main<br />
circuit input. (PSM alarm indication:<br />
1)<br />
Unbalanced power supply.<br />
PSM selection error (The maximum<br />
PSM output specification is exceeded.)<br />
The motor cannot rotate at a specified<br />
speed. (A level not exceeding the<br />
SST level for the rotation command<br />
has existed continuously.)<br />
Abnormality in the speed detection<br />
signal.<br />
Abnormality in an SPM control circuit<br />
component is detected. (The LSI device<br />
for serial transfer is abnormal.)<br />
Charging of direct current power supply<br />
voltage in the power circuit section<br />
is insufficient when the magnetic contractor<br />
in the amplifier is turned on<br />
(such as open phase and defective<br />
charging resistor).<br />
Parameter data exceeding the allowable<br />
limit is set.<br />
Gear ratio data exceeding the allowable<br />
limit is set.<br />
An error counter overflow occurred.<br />
The setting of the parameter for the<br />
number of pulses in the speed detector<br />
is incorrect.<br />
1 The 1–rotation signal of the<br />
spindle position coder (connector<br />
JY4) is abnormal.<br />
2 The 1–rotation signal (connector<br />
JY2) of the MZ or BZ sensor is abnormal.<br />
3 Parameter setting error
B–63534EN/02 APPENDIX<br />
G. ALARM LIST<br />
No. Message<br />
SPM indication(*1)<br />
Faulty location and remedy<br />
Description<br />
9n42 SPN_n_ : NO 1–ROT.<br />
POS–CODER<br />
DETECT<br />
9n43 SPN_n_ : DISCON. PC<br />
FOR DIF. SP.<br />
MODE<br />
9n46 SPN_n_ : SCREW<br />
1–ROT POS–<br />
COD. ALARM<br />
9n47 SPN_n_ : POS–CODER<br />
SIGNAL AB-<br />
NORMAL<br />
9n49 SPN_n_ : HIGH CONV.<br />
DIF. SPEED<br />
9n50 SPN_n_ : SPNDL CON-<br />
TROL OVER-<br />
SPEED<br />
9n51 SPN_n_ : LOW VOLT DC<br />
LINK<br />
9n52 SPN_n_ : ITP SIGNAL<br />
ABNORMAL I<br />
9n53 SPN_n_ : ITP SIGNAL<br />
ABNORMAL II<br />
9n54 SPN_n_ : OVERLOAD<br />
CURRENT<br />
9n55 SPN_n_ : POWER LINE<br />
SWITCH ER-<br />
ROR<br />
42 1 Replace the cable.<br />
2 Re–adjust the BZ sensor signal.<br />
1215<br />
1 The 1–rotation signal of the<br />
spindle position coder (connector<br />
JY4) is disconnected.<br />
2 The 1–rotation signal (connector<br />
JY2) of the MZ or BZ sensor is disconnected.<br />
43 Replace the cable. The differential speed position coder<br />
signal (connector JY8) in SPM type 3<br />
is abnormal.<br />
46 1 Check and correct the parameter.<br />
2 Replace the cable.<br />
3 Re–adjust the BZ sensor signal.<br />
47 1 Replace the cable.<br />
2 Re–adjust the BZ sensor signal.<br />
3 Correct the cable layout (vicinity of<br />
the power line).<br />
49 Check whether the calculated differential<br />
speed value exceeds the maximum<br />
motor speed.<br />
50 Check whether the calculated value<br />
exceeds the maximum motor speed.<br />
51 1 Check and correct the power supply<br />
voltage.<br />
2 Replace the MC.<br />
52 1 Replace the SPM control printed<br />
circuit board.<br />
2 Replace the spindle interface<br />
printed circuit board in the CNC.<br />
53 1 Replace the SPM control printed<br />
circuit board.<br />
2 Replace the spindle interface<br />
printed circuit board in the CNC.<br />
An abnormality equivalent to alarm<br />
41 was detected during thread cutting<br />
operation.<br />
1 The A/B phase signal of the<br />
spindle position coder (connector<br />
JY4) is abnormal.<br />
2 The A/B phase signal (connector<br />
JY2) of the MZ or BZ sensor is abnormal.<br />
The relationship between the A/B<br />
phase and 1–rotation signal is incorrect<br />
(Pulse interval mismatch).<br />
In differential speed mode, the speed<br />
of the other spindle converted to the<br />
speed of the local spindle has exceeded<br />
the allowable limit (the differential<br />
speed is calculated by multiplying<br />
the speed of the other spindle by<br />
the gear ratio).<br />
In spindle synchronization, the speed<br />
command calculation value exceeded<br />
the allowable limit (the motor<br />
speed is calculated by multiplying the<br />
specified spindle speed by the gear<br />
ratio).<br />
Input voltage drop was detected.<br />
(PSM alarm indication: 4) (Momentary<br />
power failure or poor MC contact)<br />
NC interface abnormality was detected<br />
(the ITP signal stopped).<br />
NC interface abnormality was detected<br />
(the ITP signal stopped).<br />
54 Review the load state. An overload current was detected.<br />
55 1 Replace the magnetic contactor.<br />
2 Check and correct the sequence.<br />
The power line state signal of the<br />
magnetic contactor for selecting a<br />
spindle or output is abnormal.
G. ALARM LIST APPENDIX<br />
B–63534EN/02<br />
No. Message<br />
SPM indication(*1)<br />
Faulty location and remedy<br />
Description<br />
9n56 SPN_n_ : INNER COOL-<br />
ING FAN STOP<br />
9n57 SPN_n_ : EX DECEL-<br />
ERATION<br />
POWER<br />
9n58 SPN_n_ : OVERLOAD IN<br />
PSM<br />
9n59 SPN_n_ : COOLING FAN<br />
STOP IN PSM<br />
9n66 SPN_n_ : AMP MODULE<br />
COMMUNICA-<br />
TION<br />
9n73 SPN_n_ : MOTOR SEN-<br />
SOR DISCON-<br />
NECTED<br />
9n74 SPN_n_ : CPU TEST ER-<br />
ROR<br />
56 Replace the SPM unit. The cooling fan in the SPM control circuit<br />
stopped.<br />
57 1 Decrease the acceleration/deceleration<br />
duty.<br />
2 Check the cooling condition (peripheral<br />
temperature).<br />
3 If the cooling fan stops, replace the<br />
resistor.<br />
4 If the resistance is abnormal, replace<br />
the resistor.<br />
58 1 Check the PSM cooling status.<br />
2 Replace the PSM unit.<br />
1216<br />
An overload was detected in the regenerative<br />
resistance. (PSMR alarm<br />
indication: 8)<br />
Thermostat operation or short–time<br />
overload was detected.<br />
The regenerative resistor was disconnected,<br />
or an abnormal resistance<br />
was detected.<br />
The temperature of the radiator of the<br />
PSM has increased abnormally.<br />
(PSM alarm indication: 3)<br />
59 Replace the SPM unit. The cooling fan in the PSM stopped.<br />
(PSM alarm indication: 2)<br />
66 1 Replace the cable.<br />
2 Check and correct the connection.<br />
73 1 Replace the feedback cable.<br />
2 Check the shield processing.<br />
3 Check and correct the connection.<br />
4 Adjust the sensor.<br />
74 Replace the SPM control printed–circuit<br />
board.<br />
9n75 SPN_n_ : CRC ERROR 75 Replace the SPM control printed–circuit<br />
board.<br />
9n79 SPN_n_ : INITIAL TEST<br />
ERROR<br />
9n81 SPN_n_ : 1–ROT MO-<br />
TOR SENSOR<br />
ERROR<br />
9n82 SPN_n_ : NO 1–ROT<br />
MOTOR SEN-<br />
SOR<br />
9n83 SPN_n_ : MOTOR SEN-<br />
SOR SINGNAL<br />
ERROR<br />
9n84 SPN_n_ : SPNDL SEN-<br />
SOR DISCON-<br />
NECTED<br />
9n85 SPN_n_ : 1–ROT SPNDL<br />
SENSOR ER-<br />
ROR<br />
79 Replace the SPM control printed–circuit<br />
board.<br />
81 1 Check and correct the parameter.<br />
2 Replace the feedback cable.<br />
3 Adjust the sensor.<br />
82 1 Replace the feedback cable.<br />
2 Adjust the sensor.<br />
83 1 Replace the feedback cable.<br />
2 Adjust the sensor.<br />
84 1 Replace the feedback cable.<br />
2 Check the shield processing.<br />
3 Check and correct the connection.<br />
4 Check and correct the parameter.<br />
5 Adjust the sensor.<br />
85 1 Check and correct the parameter.<br />
2 Replace the feedback cable.<br />
3 Adjust the sensor.<br />
An error was found in communication<br />
between amplifiers.<br />
The motor sensor feedback signal is<br />
not present.<br />
An error was detected in a CPU test.<br />
An error was detected in a CRC test.<br />
An error was detected in an initial test<br />
operation.<br />
The one–rotation signal of the motor<br />
sensor cannot be correctly detected.<br />
The one–rotation signal of the motor<br />
sensor is not generated.<br />
An irregularity was detected in a motor<br />
sensor feedback signal.<br />
The spindle sensor feedback signal is<br />
not present.<br />
The one–rotation signal of the spindle<br />
sensor cannot be correctly detected.
B–63534EN/02 APPENDIX<br />
G. ALARM LIST<br />
No. Message<br />
SPM indication(*1)<br />
Faulty location and remedy<br />
Description<br />
9n87 SPN_n_ : SPNDL SEN-<br />
SOR SIGNAL<br />
ERROR<br />
9n88 SPN_n_ : COOLING RA-<br />
DIFAN FAIL-<br />
URE<br />
9097 SPN_n_ : OTHER<br />
SPINDLE<br />
ALARM<br />
9098 SPN_n_ : OTHER CON-<br />
VERTER<br />
ALARM<br />
9110 SPN_n_ : AMP COMMU-<br />
NICATION ER-<br />
ROR<br />
9111 SPN_n_ : CONV.LOW<br />
VOLT CON-<br />
TROL<br />
9112 SPN_n_ : CONV.EXDIS-<br />
CHARGE POW.<br />
9113 SPN_n_ : CONV.COOL-<br />
ING FAN FAIL-<br />
URE<br />
9120 SPN_n_ : COMMUNICA-<br />
TION DATA ER-<br />
ROR<br />
9121 SPN_n_ : COMMUNICA-<br />
TION DATA ER-<br />
ROR<br />
9122 SPN_n_ : COMMUNICA-<br />
TION DATA ER-<br />
ROR<br />
87 The one–rotation signal of the spindle<br />
sensor is not generated.<br />
88 Replace the SPM external cooling<br />
fan.<br />
1217<br />
An irregularity was detected in a<br />
spindle sensor feedback signal.<br />
The external cooling fan stopped.<br />
Check the SPM alarm display. Other spindle alarm<br />
Check the PSM alarm display. Other converter alarm<br />
b0 1 Replace the communication cable<br />
between amplifier and module.<br />
2 Replace the SPM or PSM control<br />
printed circuit board.<br />
b1 Replace the PSM control printed circuit<br />
board.<br />
b2 1 Check the regenerative resistance.<br />
2 Check the motor selection.<br />
3 Replace the PSM<br />
Communication error between amplifier<br />
and module<br />
Low converter control power supply<br />
voltage (PSM indication = 6)<br />
Excessive converter regenerative<br />
power (PSM indication = 8)<br />
b3 Replace the cooling fan. Stopped cooling fan of the converter<br />
radiator (PSM indication = A)<br />
C0 1 Replace the communication cable<br />
between CNC and SPM.<br />
2 Replace the SPM control printed<br />
circuit board.<br />
3 Replace the CNC side spindle interface<br />
printed circuit board.<br />
C1 1 Replace the communication cable<br />
between CNC and SPM.<br />
2 Replace the SPM control printed<br />
circuit board.<br />
3 Replace the CNC side spindle interface<br />
printed circuit board.<br />
C2 1 Replace the communication cable<br />
between CNC and SPM.<br />
2 Replace the SPM control printed<br />
circuit board.<br />
3 Replace the CNC side spindle interface<br />
printed circuit board.<br />
Communication data alarm<br />
Communication data alarm<br />
Communication data alarm
G. ALARM LIST APPENDIX<br />
B–63534EN/02<br />
ERROR CODES (SERIAL SPINDLE)<br />
Errors Displayed on the Spindle Amplifier<br />
SPM<br />
indication(*1)<br />
01 Check the *ESP and MRDY sequence. (For MRDY, pay<br />
attention to the parameter setting regarding the use of the<br />
MRDY signal (bit 0 of parameter No. 4001).)<br />
NOTE*1<br />
Note that the meanings of the SPM indications differ<br />
depending on which LED, the red or yellow LED, is on.<br />
When the yellow LED is on, an error code is indicated with<br />
a 2–digit number. The error code is not displayed on the<br />
CNC screen.<br />
When the red LED is on, the SPM indicates the number of<br />
an alarm generated in the serial spindle.<br />
See Item, “Alarm List (Serial Spindle).”<br />
Faulty location and remedy Description<br />
02 Check the spindle motor speed detector parameter (bits<br />
2, 1, and 0 of parameter No. 4011).<br />
03 Check the parameters for the detector for Cs contour<br />
control (bit 5 of parameter No. 4001 and bit 4 of parameter<br />
No. 4018).<br />
04 Check the position coder signal parameter (bit 2 of parameter<br />
No. 4001).<br />
1218<br />
Although neither *ESP (emergency stop signal; there<br />
are two types of signals including the PMC signal and<br />
PSM contact signal(*2)) nor MRDY (machine ready signal)<br />
is input, SFR (forward rotation signal)/SRF (reverse<br />
rotation signal)/ORCM (orientation command) is input.<br />
When the spindle motor has a high–resolution magnetic<br />
pulse coder (Cs sensor) (bits 6 and 5 of parameter<br />
No. 4001 are set to 0 and 1, respectively), 128 /rev is<br />
to be set for the speed detector (bits 2, 1, and 0 of parameter<br />
No. 4011 are set to 0, 0, and 1, respectively).<br />
However, a value other than 128 /rev is set. In this<br />
case, the motor is not excited.<br />
Although use of a high–resolution magnetic pulse coder<br />
(bit 5 of parameter No. 4001 = 1) or use of the Cs contour<br />
control function by the sensor (bit 4 of parameter<br />
No. 4018 = 1) is not set, a Cs control command is input.<br />
In this case, the motor is not excited.<br />
Although use of the position coder signal (bit 2 of parameter<br />
No. 4001 = 1) is not set, a servo mode (rigid tapping,<br />
spindle positioning) or spindle synchronization<br />
command is input. In this case, the motor is not excited.<br />
05 Check the orientation software option. Although the orientation option is not set, an orientation<br />
command (ORCM) is input.<br />
06 Check the spindle output switching software option and<br />
power line status signal (RCH).<br />
Although the output switching option is not set, the low–<br />
speed winding is selected (RCH = 1).<br />
07 Check the sequence (CON, SFR, SRV). Although the Cs contour control mode is specified,<br />
SFR/SRV is not input.<br />
08 Check the sequence (SFR, SRV). Although the servo mode (rigid tapping, spindle positioning)<br />
is specified, SFR/SRV is not input.<br />
09 Check the sequence (SPSYC, SFR, SRV) Although spindle synchronization mode is specified,<br />
SFR/SRV is not input.<br />
10 During execution of the C–axis control command, do not<br />
specify another operation mode. Before entering another<br />
mode, cancel the Cs contour control command.<br />
11 During execution of the servo mode command, do not<br />
specify another operation mode. Before entering another<br />
mode, cancel the servo mode.<br />
Although Cs contour control mode is set, another operation<br />
mode (servo mode, spindle synchronization, or<br />
orientation) is specified.<br />
Although servo mode (rigid tapping, or spindle positioning)<br />
is set, another operation mode (Cs contour control,<br />
spindle synchronization, or orientation) is specified.
B–63534EN/02 APPENDIX<br />
G. ALARM LIST<br />
SPM<br />
indication(*1)<br />
Faulty location and remedy<br />
12 During execution of the spindle synchronization command,<br />
do not specify another operation mode. Before<br />
entering another mode, cancel the spindle synchronization<br />
command.<br />
13 During execution of the orientation command, do not<br />
specify another operation mode. Before entering another<br />
mode, cancel the orientation command.<br />
1219<br />
Description<br />
Although spindle synchronization is being performed,<br />
another operation mode (Cs contour control, servo<br />
mode, or orientation) is specified.<br />
Although the orientation command is being executed,<br />
another operation mode (Cs contour control, servo<br />
mode, or synchronization) is specified.<br />
14 Input the SFT or SRV signal. The SFT and SRV signals are both input at the same<br />
time.<br />
15 Check bit 5 of parameter No. 4000 and PMC signal<br />
(CON).<br />
16 Check bit 5 of parameter No. 4000 and PMC signal<br />
(DEFMD).<br />
When bit 5 of parameter No. 4000 is set to 1 to indicate<br />
the presence of the differential speed mode function,<br />
Cs contour control is specified.<br />
When bit 5 of parameter No. 4000 is set to 0 to indicate<br />
the absence of the differential speed mode function, the<br />
differential speed mode command (DEFMD) is input.<br />
17 Check bits 2, 1, and 0 of parameter No. 4011. Setting of the speed detector parameter (bits 2, 1, and<br />
0 of parameter No. 4011) is invalid. (The corresponding<br />
speed detector is not present.)<br />
18 Check bit 2 of parameter No. 4001 and PMC signal<br />
(ORCM).<br />
19 During execution of the orientation command, do not<br />
specify another operation mode. Before entering another<br />
mode, cancel the orientation command.<br />
20 Check bit 5 of parameter No. 4001, bit 5 of parameter No.<br />
4014, and bit 4 of parameter No. 4018.<br />
21 Input the slave operation mode command (SLV) in normal<br />
operation mode.<br />
22 Input the position control command in normal operation<br />
mode<br />
23 Check bit 5 of parameter No. 4014 and PMC signal<br />
(SLV).<br />
24 Check the PMC signal (INCMD). Perform orientation by<br />
specifying an absolute position first.<br />
25 Check the spindle amplifier specifications and parameter<br />
setting (bit 4 of parameter No. 4018).<br />
Although bits 2 of parameter No. 4001 is set to 0 not to<br />
use the position coder signal, a command for orientation<br />
by a position coder (ORCMA) is input.<br />
Although orientation by a magnetic sensor is being performed,<br />
another operation mode is specified.<br />
When the use of the slave operation mode function is<br />
set (bit 5 of parameter No. 4014 = 1), the use of a high–<br />
resolution magnetic pulse coder (bit 5 of parameter No.<br />
4001 = 1) or the use of the Cs contour control function<br />
by the sensor (bit 4 of parameter No. 4018 = 1) is specified.<br />
These items cannot be set at the same time.<br />
Although position control (such as servo mode or<br />
orientation) is being performed, a slave operation mode<br />
command (SLV) is input.<br />
Although slave operation mode is set (SLVS = 1), a<br />
position control command (such as servo mode or<br />
orientation) is input.<br />
Although bit 5 of parameter No. 4014 is set to 0 not to<br />
use the slave operation mode function, a slave operation<br />
mode command (SLV) is input.<br />
Orientation is performed in incremental operation mode<br />
(INCMD = 1) first, then the absolute position command<br />
(INCMD = 0) is input.<br />
Although the spindle amplifier SPM type 4 is not used,<br />
the use of the Cs contour control function by the sensor<br />
is set (bit 4 of parameter No. 4018 = 1).<br />
NOTE*2<br />
PSM contact signal<br />
Between ESP1 and ESP2 on the PSM Contact open: Emergency stop<br />
Contact closed: Normal operation
G. ALARM LIST APPENDIX<br />
B–63534EN/02<br />
12) System alarms<br />
(These alarms cannot be reset with reset key.)<br />
Number Message Contents<br />
900 ROM PARITY A parity error occurred in the CNC, macro, or servo ROM. Correct<br />
the contents of the flash ROM having the displayed number.<br />
910 SRAM PARITY : (BYTE 0) A RAM parity error occurred in the part program storage RAM. Clear<br />
the RAM, or replace the SRAM module or motherboard. Subse-<br />
911 SRAM PARITY : (BYTE 1) quently, re–set the parameters and all other data.<br />
912 DRAM PARITY : (BYTE 0) A RAM parity error occurred in the DRAM module. Replace the<br />
913 DRAM PARITY : (BYTE 1)<br />
DRAM module.<br />
914 DRAM PARITY : (BYTE 2)<br />
915 DRAM PARITY : (BYTE 3)<br />
916 DRAM PARITY : (BYTE 4)<br />
917 DRAM PARITY : (BYTE 5)<br />
918 DRAM PARITY : (BYTE 6)<br />
919 DRAM PARITY : (BYTE 7)<br />
920 SERVO ALARM (1–4 AXIS) Servo alarm (first to fourth axis). A watchdog alarm condition occurred,<br />
or a RAM parity error occurred in the axis control card.<br />
Replace the axis control card.<br />
921 SERVO ALARM (5–8 AXIS) Servo alarm (fifth to eighth axis). A watchdog alarm condition occurred,<br />
or a RAM parity error occurred in the axis control card.<br />
Replace the axis control card.<br />
926 FSSB ALARM FSSB alarm.<br />
Replace the axis control card.<br />
930 CPU INTERRUPT CPU error (abnormal interrupt).<br />
The motherboard or CPU card may be faulty.<br />
935 SRAM ECC ERROR An error occurred in RAM for part program storage.<br />
Action:<br />
Replace the master printed circuit board (SRAM module), perform<br />
all–clear operation, and set all parameter and other data again.<br />
950 PMC SYSTEM ALARM An error occurred in the PMC.<br />
The PMC control circuit on the motherboard may be faulty.<br />
951 PMC WATCH DOG ALARM An error occurred in the PMC.<br />
(Watchdog alarm)<br />
The motherboard may be faulty.<br />
972 NMI OCCURRED IN OTHER MOD-<br />
ULE<br />
An NMI occurred on a board other than the motherboard.<br />
The option board may be faulty.<br />
973 NON MASK INTERRUPT An NMI occurred as a result of an unknown cause.<br />
974 F–BUS ERROR A bus error occurred on the FANUC bus.<br />
The motherboard or option board may be faulty.<br />
975 BUS ERROR A bus error occurred on the motherboard.<br />
The motherboard may be faulty.<br />
976 L–BUS ERROR A bus error occurred on the local bus.<br />
The motherboard may be faulty.<br />
1220
B–63534EN/02<br />
[Numbers]<br />
3–Dimensional Circular Interpolation, 693<br />
3–Dimensional Cutter Compensation, 668<br />
7.2″/8.4″ LCD–Mounted Type CNC Control Unit, 719<br />
8–Digit Program Number, 182<br />
9.5″/10.4″ LCD–Mounted Type CNC Control Unit,<br />
719<br />
[A]<br />
Absolute and <strong>Inc</strong>remental Programming (G90, G91),<br />
137<br />
Actual Feedrate Display, 1002<br />
Adding Workpiece Coordinate Systems (G54.1 or<br />
G54), 131<br />
Advanced Preview Control (G08), 476<br />
AI Contour Control Function/AI Nano Contour Control<br />
Function, 478<br />
AI High Precision Contour Control/AI Nano High<br />
Precision Contour Control, 607<br />
Alarm and Self–Diagnosis Functions, 862<br />
Alarm Display, 714, 863<br />
Alarm History Display, 865<br />
Alarm List, 1178<br />
Altering a Word, 948<br />
Angular Axis Control/Angular Axis Control, 537<br />
Arithmetic and Logic Operation, 406<br />
Assembling, 841<br />
Automatic Corner Deceleration, 107<br />
Automatic Corner Override, 104<br />
Automatic Erase Screen Display, 1088<br />
Automatic Feedrate Control Function, 613<br />
Automatic Grinding Wheel Diameter Compensation<br />
After Dressing, 241<br />
Automatic Insertion of Sequence Numbers, 977<br />
Automatic Operation, 705, 789<br />
Automatic Override for Inner Corners (G62), 104<br />
Automatic Tool Length Measurement (G37), 273<br />
Auxiliary Function, 162<br />
Auxiliary Function (M Function), 163<br />
Axis Control Functions, 527<br />
Axis Name, 32<br />
i–1<br />
[B]<br />
Index<br />
Back Boring Cycle (G87), 212<br />
Background Drawing, 1118<br />
Background Editing, 967<br />
Battery for Built–In Absolute Pulse Coders (DC6V),<br />
1141<br />
Battery for Separate Absolute Pulse Coders (6 VDC),<br />
1140<br />
Battery in the CNC Display Unit with PC Functions (3<br />
VDC), 1138<br />
Boring Cycle (G85), 208<br />
Boring Cycle (G86), 210<br />
Boring Cycle (G88), 214<br />
Boring Cycle (G89), 216<br />
Branch and Repetition, 412<br />
[C]<br />
Canned Cycle, 186<br />
Canned Cycle Cancel (G80), 218, 230<br />
Canned Grinding Cycle (For Grinding <strong>Machine</strong>), 231<br />
Caution for Using System Variables, 431<br />
Change of the Cutter Compensation Value, 292<br />
Changing Workpiece Coordinate System, 126<br />
Character–to–Codes Correspondence Table, 1177<br />
Characters and Codes to be Used for the Pattern Data<br />
Input Function, 459<br />
Check by Running the <strong>Machine</strong>, 707<br />
Checking by Self–Diagnostic Screen, 866<br />
Checking the Minimum Grinding Wheel Diameter<br />
(For Grinding <strong>Machine</strong>), 241<br />
Chopping Function (G80, G81.1), 539<br />
Circular Interpolation (G02, G03), 48<br />
Clearing the Screen, 1087<br />
Command for <strong>Machine</strong> Operations – Miscellaneous<br />
Function, 24<br />
Compensation Function, 264<br />
Conditional Branch (IF Statement), 412<br />
Connecting PCMCIA Card Attachment, 841<br />
Constant Surface Speed Control (G96, G97), 145<br />
Continuous High–Speed Skip Function (G31), 92<br />
Continuous–Feed Surface Grinding Cycle (G78), 236<br />
Controlled Axes, 30, 31<br />
Conversational Programming with Graphic Function,<br />
982<br />
Coordinate System, 122
Coordinate System on Part Drawing and Coordinate<br />
System Specified by CNC – Coordinate System, 18<br />
Coordinate System Rotation (G68, G69), 367<br />
Coordinate Value and Dimension, 136<br />
Copying a Program Between Two Paths, 595<br />
Copying a Program between Two Paths, 970<br />
Copying an Entire Program, 958<br />
Copying Part of a Program, 959<br />
Corner Circular Interpolation (G39), 354<br />
Corner Deceleration According to the Corner Angle,<br />
107<br />
Corner Deceleration According to the Feedrate Difference<br />
between Blocks Along Each Axis, 110<br />
Corner Offset Circular Interpolation (G39), 289<br />
Creating Programs, 975<br />
Creating Programs in TEACH IN Mode (Playback),<br />
979<br />
Creating Programs Using the MDI Panel, 976<br />
Current Block Display Screen, 1010<br />
Current Position Display, 714<br />
Custom Macro, 392<br />
Cutter Compensation B (G39–G42), 282<br />
Cutter Compensation Cancel (G40), 290<br />
Cutter Compensation Left (G41), 285<br />
Cutter Compensation Right (G42), 287<br />
Cutting Feed, 97<br />
Cutting Feedrate Control, 102<br />
Cutting Speed – Spindle Speed Function, 22<br />
Cylindrical Interpolation (G07.1), 63<br />
Cylindrical Interpolation Cutting Point Control<br />
(G07.1), 633<br />
[D]<br />
Data Input/Output, 716, 869<br />
Data Input/Output on the ALL IO Screen, 897<br />
Data Input/Output Using a Memory Card, 914<br />
Decimal Point Programming, 142<br />
Deleting a Block, 950<br />
Deleting a Word, 949<br />
Deleting All Programs, 955<br />
Deleting Blocks, 950<br />
Deleting Files, 894<br />
Deleting More than One Program by Specifying a<br />
Range, 956<br />
Index B–63534EN/02<br />
i–2<br />
Deleting Multiple Blocks, 951<br />
Deleting One Program, 955<br />
Deleting Programs, 955<br />
Details of Cutter Compensation C, 301<br />
Details of Functions, 442<br />
Details of NC Statements and Macro Statements<br />
Execution, 429<br />
Direct Constant–Dimension Plunge Grinding Cycle<br />
(G77), 234<br />
Direct Input of Measured Workpiece Origin Offsets,<br />
1043<br />
Display, 713<br />
Display of Run Time and Parts Count, 1004<br />
Displaying a Program List for a Specified Group ,<br />
1027<br />
Displaying and Entering Setting Data, 1036<br />
Displaying and Setting Chopping Data, 1058<br />
Displaying and Setting Custom Macro Common Variables,<br />
1045<br />
Displaying and Setting Data, 710<br />
Displaying and Setting Extended Tool Life Management,<br />
1053<br />
Displaying and Setting Parameters, 1077<br />
Displaying and Setting Pitch Error Compensation<br />
Data, 1079<br />
Displaying and Setting Rotary Table Dynamic Fixture<br />
Offset, 1075<br />
Displaying and Setting Run Time, Parts Count, and<br />
Time, 1040<br />
Displaying and Setting the Software Operator’s Panel,<br />
1048<br />
Displaying and Setting the Workpiece Origin Offset<br />
Value, 1042<br />
Displaying and Setting Tool Life Management Data,<br />
1050<br />
Displaying Directory of Floppy Cassette, 888<br />
Displaying Memory Used and a List of Programs,<br />
1024<br />
Displaying Pattern Data and Pattern Menu, 1046<br />
Displaying the Directory, 889<br />
Displaying the Pattern Menu, 451<br />
Displaying the Program Number and Sequence Number,<br />
1082<br />
Displaying the Program Number, Sequence Number,<br />
and Status, and Warning Messages for Data Setting<br />
or Input/Output Operation, 1082<br />
Displaying the Status and Warning for Data Setting or<br />
Input/Output Operation, 1083<br />
Distribution Processing Termination Monitoring Function<br />
for the High–Speed Machining Command<br />
(G05), 472
B–63534EN/02 Index<br />
DNC Operation, 797, 838<br />
DNC Operation with Memory Card, 837<br />
Drilling Cycle Counter Boring Cycle (G82), 198<br />
Drilling Cycle, Spot Drilling (G81), 196<br />
Dry Run, 849<br />
Dwell (G04), 114<br />
Dynamic Graphic Display, 1097<br />
[E]<br />
Editing a Part Program, 709<br />
Editing of Custom Macros, 966<br />
Editing Programs, 942<br />
Electronic Gear Box 2 Pair, 576<br />
Electronic Gear Box Automatic Phase Synchronization,<br />
568<br />
Emergency Stop, 853<br />
Erase Screen Display, 1087<br />
Exact Stop (G09, G61) Cutting Mode (G64) Tapping<br />
Mode (G63), 103<br />
Explanation of the Keyboard, 723<br />
Exponential Interpolation (G02.3, G03.3), 71<br />
Extended Part Program Editing Function, 957<br />
External I/O Devices, 746<br />
External Motion Function (G81), 246<br />
External Operator Message History Display, 1085<br />
External Output Commands, 436<br />
[F]<br />
FANUC Handy File, 748<br />
Feed Functions, 93<br />
Feed– Feed Function, 16<br />
Feedrate Clamping by ARC Radius, 467<br />
Feedrate Override, 847<br />
Figure Copy (G72.1, G72.2), 247<br />
File Deletion, 874<br />
File Search, 872<br />
Files, 870<br />
Fine Boring Cycle (G76), 194<br />
Floating Reference Position Return (G30.1), 121<br />
Function Keys, 726<br />
Function Keys and Soft Keys, 725<br />
Functions to Simplify Programming, 185<br />
i–3<br />
[G]<br />
G53, G28, G30, and G30.1 Commands in Tool Length<br />
Offset Mode, 270<br />
G53, G28, G30, G30.1 and G29 Commands in Cutter<br />
Compensation C Mode, 335<br />
General Flow of Operation of CNC <strong>Machine</strong> Tool, 7<br />
General Screen Operations, 725<br />
Graphic Display, 715<br />
Graphics Display, 1091<br />
Graphics Function, 1090<br />
Grinding Wheel wear Compensation, 380<br />
Grinding–Wheel Wear Compensation by Continuous<br />
Dressing (For Grinding <strong>Machine</strong>), 240<br />
[H]<br />
Heading a Program, 946<br />
Helical Interpolation (G02, G03), 52<br />
Helical Interpolation B (G02, G03), 53<br />
Help Function, 1121<br />
High Speed Cutting Functions, 464<br />
High Speed Skip Signal (G31), 91<br />
High–Precision Contour Control, 500<br />
High–Speed Cycle Cutting, 465<br />
High–Speed Linear Interpolation (G05), 473<br />
High–Speed Peck Drilling Cycle (G73), 190<br />
High–Speed Remote Buffer, 468<br />
High–Speed Remote Buffer A (G05), 468<br />
High–Speed Remote Buffer B (G05), 471<br />
Hobbing <strong>Machine</strong> Function (G80, G81), 545<br />
How to Indicate Command Dimensions for Moving<br />
the Tool – Absolute, <strong>Inc</strong>remental Commands, 21<br />
How to View the Position Display Change without<br />
Running the <strong>Machine</strong>, 708<br />
Hypothetical Axis Interpolation (G07), 84<br />
[I]<br />
In–Feed Grinding Along the Y and Z Axes at the End<br />
of Table Swing (For Grinding <strong>Machine</strong>), 242<br />
<strong>Inc</strong>h/Metric Conversion (G20, G21), 141<br />
<strong>Inc</strong>orrect Threaded Length, 1167<br />
<strong>Inc</strong>rement System, 33<br />
<strong>Inc</strong>remental Feed, 757
Index Table Indexing Function, 261<br />
Input Command from MDI, 334<br />
Inputting a Program, 875<br />
Inputting and Outputting Floppy Files, 909<br />
Inputting and Outputting Offset Data, 906<br />
Inputting and Outputting Parameters, 904<br />
Inputting and Outputting Parameters and Pitch Error<br />
Compensation Data, 882<br />
Inputting and Outputting Programs, 899<br />
Inputting Custom Macro Common Variables, 886<br />
Inputting Offset Data, 880<br />
Inputting Parameters, 882<br />
Inputting Pitch Error Compensation Data, 884<br />
Inputting/Outputting Custom Macro Common Variables,<br />
886<br />
Inserting a Word, 947<br />
Inserting, Altering and Deleting a Word, 943<br />
Interference Check, 326<br />
Intermittent–Feed Surface Grinding Cycle (G79), 238<br />
Internal Circular Cutting Feedrate Change, 106<br />
Interpolation Functions, 41<br />
Interruption Type Custom Macro, 440<br />
Involute Interpolation (G02.2, G03.2), 66<br />
Jog Feed, 755<br />
[J]<br />
[K]<br />
Key Input and Input Buffer, 743<br />
[L]<br />
Leading Edge Offset, 682<br />
Left–Handed Rigid Tapping Cycle (G74), 225<br />
Left–Handed Tapping Cycle (G74), 192<br />
Limitation and Notes, 840<br />
Limitations, 435<br />
Linear Interpolation (G01), 46<br />
List of Function and Tape Format, 1156<br />
Local Coordinate System, 133<br />
Look–ahead Acceleration/Deceleration Before Interpolation,<br />
608<br />
Index B–63534EN/02<br />
i–4<br />
[M]<br />
M Code Group Check Function, 165<br />
<strong>Machine</strong> Coordinate System, 123<br />
<strong>Machine</strong> Lock and Auxiliary Function Lock, 845<br />
Macro Call, 416<br />
Macro Call Using an M Code, 424<br />
Macro Call Using G Code, 423<br />
Macro Statements and NC Statements, 411<br />
Manual Absolute On and Off, 761<br />
Manual Handle Feed, 758<br />
Manual Handle Interruption, 816<br />
Manual Intervention and Return, 835<br />
Manual Linear/Circular Interpolation, 774<br />
Manual Numeric Command, 781<br />
Manual Operation, 702, 752<br />
Manual Reference Position Return, 753<br />
Manual Rigid Tapping, 779<br />
Maximum Stroke, 34<br />
MDI Operation, 793<br />
Memory Common to Path, 594<br />
Memory Operation, 790<br />
Memory Operation Using FS15 Tape Format, 463<br />
Merging a Program, 961<br />
Method of Replacing Battery, 1131<br />
Mirror Image, 819<br />
Modal Call (G66), 421<br />
Moving Part of a Program, 960<br />
Multiple M Commands in a Single Block, 164<br />
Multistage Skip (G31), 90<br />
[N]<br />
Next Block Display Screen, 1011<br />
Nomographs, 1166<br />
Normal Direction Control (G40.1, G41.1, G42.1 or<br />
G150, G151, G152), 373<br />
Notes on Reading this Manual, 9<br />
Notes on Various Kinds of Data, 9<br />
Nurbs Interpolation (G06.2), 79<br />
[O]<br />
Offset Data Input and Output, 880<br />
Operating Monitor Display, 1006
B–63534EN/02 Index<br />
Operational Devices, 717<br />
Operations, 838<br />
Optional Angle Chamfering and Corner Rounding,<br />
243<br />
Outputting a Program, 878<br />
Outputting a Program List for a Specified Group , 896<br />
Outputting Custom Macro Common Variable, 887<br />
Outputting Custom Macro Common Variables, 908<br />
Outputting Offset Data, 881<br />
Outputting Parameters, 883<br />
Outputting Pitch Error Compensation Data, 885<br />
Outputting Programs, 893<br />
Overall Position Display, 999<br />
Overcutting by Cutter Compensation, 331<br />
Overtravel, 854<br />
Overview of Cutter Compensation C (G40–G42), 295<br />
[P]<br />
Parameter, 840<br />
Part Drawing and Tool Movement, 17<br />
Parts Count Display, Run Time Display, 715<br />
Password Function, 968<br />
Path Drawing, 1097<br />
Pattern data display, 455<br />
Pattern Data Input Function, 450<br />
Peck Drilling Cycle (G83), 200<br />
Peck Rigid Tapping Cycle (G84 or G74), 228<br />
Plane Selection, 135<br />
Plunge Grinding Cycle (G75), 232<br />
Polar Coordinate Command (G15, G16), 138<br />
PoLar Coordinate Interpolation (G12.1, G13.1), 59<br />
Position Display in the Relative Coordinate System,<br />
996<br />
Position Display in the Work Coordinate System, 994<br />
Positioning (G00), 42<br />
Positive/Negative Cutter Compensation Value and<br />
Tool Center Path, 293<br />
Power Disconnection, 751<br />
Power On/Off, 749<br />
Preparatory Function (G Function), 35<br />
Presetting the Workpiece Coordinate System, 1001<br />
Processing Macro Statements, 429<br />
Program Check Screen, 1012<br />
i–5<br />
Program Components other than Program Sections,<br />
169<br />
Program Configuration, 25, 167<br />
Program Contents Display, 1009<br />
Program Display, 713<br />
Program Input/Output, 875<br />
Program Number Search, 952<br />
Program Restart, 802<br />
Program Screen for MDI Operation, 1015<br />
Program Section Configuration, 172<br />
Programmable Mirror Image (G50.1, G51.1), 378<br />
Programmable Parameter Entry (G10), 461<br />
[R]<br />
Radius Direction Error at Circle Cutting, 1174<br />
Range of Command Value, 1163<br />
Rapid Traverse, 96<br />
Rapid Traverse Override, 848<br />
Reading Files, 892<br />
Recommended Memory Card, 843<br />
Reference Position, 115<br />
Reference Position (<strong>Machine</strong>–Specific Position), 17<br />
Reference Position Return, 116<br />
Register, Change and Delete of Tool Life Management<br />
Data, 155<br />
Registering Custom Macro Programs, 434<br />
Repetition (While Statement), 413<br />
Replacement of Words and Addresses, 964<br />
Replacing Battery for LCD–Mounted Type i <strong>Series</strong>,<br />
1132<br />
Replacing the Battery for Stand–Alone Type i <strong>Series</strong>,<br />
1135<br />
Restrictions, 622, 688<br />
Retrace Function, 827<br />
Rigid Tapping, 221<br />
Rigid Tapping (G84), 222<br />
Risc Processor, 596<br />
Rotary Axis Control, 532<br />
Rotary Axis Roll–Over, 531<br />
Rotary Table Dynamic Fixture Offset, 384<br />
Safety Functions, 852<br />
Sample Program, 427<br />
[S]
Scaling (G50, G51), 362<br />
Scheduling Function, 809<br />
Screen Displayed at Power–on, 750<br />
Screen Hardcopy, 1126<br />
Screens Displayed by Function Key MESSAGE , 1085<br />
Screens Displayed by Function Key OFFSET<br />
SETTING , 1030<br />
Screens Displayed by Function key POS , 993<br />
Screens Displayed by Function Key PROG (In<br />
Memory Mode or MDI Mode), 1008<br />
Screens Displayed by Function Key PROG (In the<br />
EDIT Mode), 1024<br />
Screens Displayed by Function Key SYSTEM , 1077<br />
Selecting a Workpiece Coordinate System, 125<br />
Selection of Tool Used for Various Machining – Tool<br />
Function, 23<br />
Sequence Number Comparison and Stop, 1038<br />
Sequence Number Search, 953<br />
Setting a Workpiece Coordinate System, 124<br />
Setting and Display Units, 718<br />
Setting and Displaying Data, 986<br />
Setting and Displaying the Tool Offset Value, 1031<br />
Setting Input/Output–Related Parameters, 898<br />
Setting the Floating Reference Position, 1005<br />
Simple Calculation of <strong>Inc</strong>orrect Thread Length, 1169<br />
Simple Call (G65), 417<br />
Simple Electric Gear Box (G80, G81), 551<br />
Simple Synchronous Control, 528<br />
Simultaneous Input/Output, 800<br />
Single Block, 850<br />
Single Direction Positioning (G60), 44<br />
Skip Function (G31), 88<br />
Skip Function for EGB Axis (G31.8), 556<br />
Small–Hole Peck Drilling Cycle (G83), 202<br />
Smooth Interpolation (G05.1), 75<br />
Soft Key Configuration, 745<br />
Soft Keys, 727<br />
Solid Graphics, 1106<br />
Specification, 837<br />
Index B–63534EN/02<br />
i–6<br />
Specification Method, 441<br />
Specification Number, 841<br />
Specifying the Spindle Speed Value Directly (S5–Digit<br />
Command), 144<br />
Specifying the Spindle Speed with a Code, 144<br />
Spindle Electronic Gear Box, 559<br />
Spindle Speed Fluctuation Detection Function (G25,<br />
G26), 148<br />
Spindle Speed Function (S Function), 143<br />
Spiral Interpolation, Conical Interpolation (G02,<br />
G03), 54<br />
Stamping the Machining Time, 1016<br />
Stand–Alone Type 61 Full Key MDI Unit, 722<br />
Stand–Alone Type Small MDI Unit, 720<br />
Stand–Alone Type Standard MDI Unit, 721<br />
Status when Turning Power on, when Clear and when<br />
Reset, 1175<br />
Stored Stroke Check, 855<br />
Stroke Limit Check Prior to Performing Movement,<br />
859<br />
Subprogram (M98, M99), 178<br />
Subprogram Call (M198), 839<br />
Subprogram Call Function (M198), 814<br />
Subprogram Call Using an M Code, 425<br />
Subprogram Calls Using a T Code, 426<br />
Supplementary Explanation for Copying, Moving and<br />
Merging, 962<br />
Switch between Cutter Compensation Left and Cutter<br />
Compensation Right, 291<br />
System Variables, 397<br />
[T]<br />
Tandem Control, 536<br />
Tape Code List, 1153<br />
Tapping Cycle (G84), 206<br />
Test Operation, 844<br />
Testing a Program, 707<br />
The Function List which Can be Used, 625<br />
The Second Auxiliary Functions (B Codes), 166<br />
Thread Cutting (G33), 86<br />
Three–Dimensional Coordinate Conversion (G68,<br />
G69), 254<br />
Three–Dimensional Tool Compensation (G40, G41),<br />
356<br />
Tool Axis Compensation in Tool Axis Direction, 655<br />
Tool Axis Direction Handle Feed, 766
B–63534EN/02 Index<br />
Tool Axis Direction Handle Feed/Tool Axis Direction<br />
Handle Feed B, 766<br />
Tool Axis Normal Direction Handle Feed, 769<br />
Tool Center Point Control, 643<br />
Tool Compensation Values, Number of Compensation<br />
Values, and Entering Values From the Program<br />
(G10), 360<br />
Tool Figure and Tool Motion by Program, 28<br />
Tool Function (T Function), 151<br />
Tool Length Measurement, 1034<br />
Tool Length Offset (G43, G44, G49), 265<br />
Tool Length/Workpiece Origin Measurement B, 1059<br />
Tool Life, 161<br />
Tool Life Management Command in a Machining Program,<br />
158<br />
Tool Life Management Data, 154<br />
Tool Life Management Function, 153<br />
Tool Movement Along Workpiece Parts Figure– Interpolation,<br />
14<br />
Tool Movement by Programing–Automatic Operation,<br />
704<br />
Tool Movement in Offset Mode, 306<br />
Tool Movement in Offset Mode Cancel, 320<br />
Tool Movement in Start–up, 302<br />
Tool Movement Range – Stroke , 29<br />
Tool Offset (G45–G48), 277<br />
i–7<br />
Tool Path at Corner, 1171<br />
Tool Selection Function, 152<br />
Tool Side Compensation, 668<br />
Tool Withdrawal and Return, 821<br />
Tool Withdrawal and Return (G10.6), 533<br />
Turning on the Power, 749<br />
Two–Path Control Function, 590<br />
[U]<br />
Unconditional Branch (GOTO Statement), 412<br />
Variables, 393<br />
[V]<br />
[W]<br />
Waiting for Paths, 592<br />
Warning Messages, 744<br />
Word Search, 944<br />
Workpiece Coordinate System, 124<br />
Workpiece Coordinate System Preset (G92.1), 129
Revision Record<br />
FANUC<strong>Series</strong><strong>16i</strong>/<strong>160i</strong>/<strong>160i</strong>s–<strong>MB</strong>, <strong>18i</strong>/<strong>180i</strong>/<strong>180i</strong>s–<strong>MB</strong>5, <strong>18i</strong>/<strong>180i</strong>/<strong>180i</strong>s–<strong>MB</strong> OPERATOR’S MANUAL (B–63534EN)<br />
Addition of <strong>Series</strong> <strong>160i</strong>s–<strong>MB</strong>, <strong>18i</strong>–<strong>MB</strong>5, <strong>180i</strong>–<strong>MB</strong>5,<br />
<strong>180i</strong>s–<strong>MB</strong>5, and <strong>180i</strong>s–<strong>MB</strong><br />
02 Oct., 2001<br />
Addition of functions<br />
01 Jun., 2001<br />
Edition Date Contents Edition Date Contents
• No part of this manual may be<br />
reproduced in any form.<br />
• All specifications and designs<br />
are subject to change without<br />
notice.