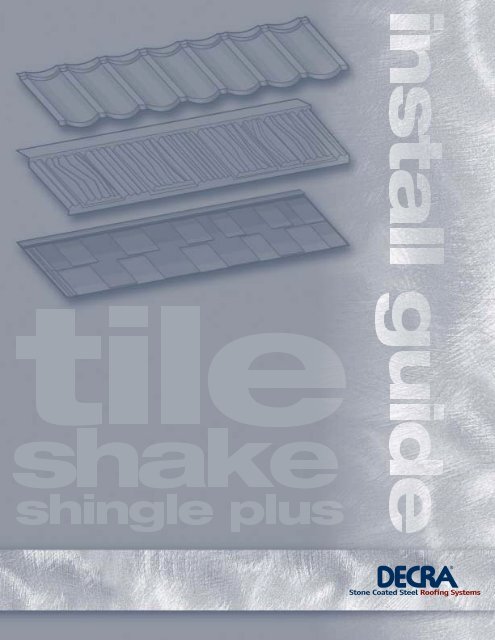
Tile, Shake & Shingle Plus Installation Guide - Decra
Tile, Shake & Shingle Plus Installation Guide - Decra
Tile, Shake & Shingle Plus Installation Guide - Decra

You also want an ePaper? Increase the reach of your titles
YUMPU automatically turns print PDFs into web optimized ePapers that Google loves.
Table of Contents<br />
Introduction .............................2<br />
Safety. ..................................2<br />
Tools. ...................................2<br />
Estimating Sheets ........................2<br />
Codes & Requirements ....................3<br />
Roof Slope. ..............................3<br />
Underlayment ............................3<br />
Deck Preparation .........................3<br />
New Construction . . . . . . . . . . . . . . . . . . . . . . . .3<br />
Roof Tear-off (Solid Deck) . . . . . . . . . . . . . . . . .3<br />
Re-Roof Tear-off (Skip/Spaced Sheathing) . . . . .3<br />
Re-Roof Over Even Surfaces<br />
(i .e . Asphalt <strong>Shingle</strong>s) . . . . . . . . . . . . . . . . . . . . .3<br />
Re-Roof Over Irregular Surfaces<br />
(i .e . Wood <strong>Shake</strong> or Wood <strong>Shingle</strong>s) . . . . . . . . . .3<br />
Measuring, Cutting, Bending Panels .........3<br />
<strong>Installation</strong> with Battens. ..................4<br />
Panels . . . . . . . . . . . . . . . . . . . . . . . . . . . . . . . . . .4<br />
DECRA <strong>Tile</strong>, <strong>Shake</strong>, <strong>Shingle</strong> <strong>Plus</strong><br />
with Battens . . . . . . . . . . . . . . . . . . . . . . . . . . . . .5<br />
Preparation for Panel <strong>Installation</strong> with Battens . .6<br />
Counter Battens and Battens . . . . . . . . . . . . . . .6<br />
Steel Hat Sections . . . . . . . . . . . . . . . . . . . . . . .6<br />
Fascia Metal Flashing . . . . . . . . . . . . . . . . . . . . .6<br />
Panel Layout with Battens . . . . . . . . . . . . . . . . . .7<br />
Fastening Panels with Battens . . . . . . . . . . . . . . .7<br />
Valley Application with Battens . . . . . . . . . . . . . .8<br />
Open Valley . . . . . . . . . . . . . . . . . . . . . . . . . . . .8<br />
Closed Valley . . . . . . . . . . . . . . . . . . . . . . . . . . .9<br />
Rake/Gable with Battens . . . . . . . . . . . . . . . . . . .9<br />
Direct to Deck <strong>Installation</strong><br />
without Battens .........................10<br />
Panels . . . . . . . . . . . . . . . . . . . . . . . . . . . . . . . . .10<br />
DECRA <strong>Shingle</strong> <strong>Plus</strong> without Battens . . . . . . . .11<br />
Preparation for Panel <strong>Installation</strong><br />
without Battens . . . . . . . . . . . . . . . . . . . . . . . . .12<br />
Fascia Metal Flashing . . . . . . . . . . . . . . . . . . . .12<br />
Roof Jacks without Battens . . . . . . . . . . . . . . . .12<br />
Panel Layout without Battens . . . . . . . . . . . . . .12<br />
Fastening Panels without Battens . . . . . . . . . . .13<br />
Valley Application without Battens . . . . . . . . . .13<br />
<strong>Shingle</strong> <strong>Plus</strong> Valley . . . . . . . . . . . . . . . . . . . . .14<br />
Rake/Gable without Battens . . . . . . . . . . . . . . .14<br />
Penetrations .........................15-16<br />
Roof-to-Wall ............................16<br />
Roof to Side Wall w/ J Channel (<strong>Tile</strong> Pan) . . . .16<br />
Roof to Side Wall w/ Side Flashing . . . . . . . . . .17<br />
Chimneys. ..............................17<br />
Short Courses ...........................18<br />
Hip . ...................................18<br />
Ridge ..................................18<br />
Hip & Ridge. ............................19<br />
Ridge Venting Options ....................20<br />
High Wind ..............................20<br />
Freeze/Thaw. ...........................20<br />
Foot Traffic .............................20<br />
Sealants ...............................20<br />
Cleaning & Repairs ......................20<br />
www.decra.com Table of Contents<br />
1
Introduction:<br />
The instructions and drawings included here are intended only as a guide for the installation of<br />
DECRA Roofing Systems’ <strong>Tile</strong>, <strong>Shake</strong> and <strong>Shingle</strong> <strong>Plus</strong> profiles. The materials and methods specified<br />
help maintain the overall integrity of the roofing system. These instructions are not intended to address<br />
all aspects of roofing installation; a quality installation is ultimately dependent upon the workmanship of<br />
the roofing contractor. Information regarding alternative situations not covered in these instructions can<br />
be obtained by contacting DECRA Roofing Systems.<br />
Safety:<br />
Adhere to recommended safe roofing practices. Wear appropriate clothing and use safety equipment, such<br />
as protective eyewear. Light, soft-soled shoes are recommended. Use proper tools and keep the roof clear<br />
of debris as you work .<br />
Tools:<br />
DECRA panels may be cut using a cutter/guillotine, tin or aviation snips, or a circular saw using<br />
metal-cutting blades. A portable brake (combined bender) or hand bender is recommended to bend the<br />
panels for hips, ridges and valleys. Safety equipment should be worn during the installation process.<br />
Estimating Sheets:<br />
Both the DECRA Estimating Sheet (With Battens) and the DECRA Estimating Sheet (Without Battens) are<br />
available at www.decra.com.<br />
2<br />
General <strong>Installation</strong><br />
www.decra.com
Codes & Requirements:<br />
Refer to local codes and/or ICC Reports. A link to DECRA ICC reports is available at www.decra.com .<br />
Roof Slope:<br />
Roof slopes less than 3:12 are considered decorative and panels must be applied over a roof system<br />
complying with local codes.<br />
Underlayment:<br />
Although an underlayment is recommended per local code for most installations, the steel panels described<br />
in these instructions may be installed on roof slopes of 3:12 and greater without an underlayment. In cold<br />
climates, ice and water shield is recommended for valleys, overhangs and at the perimeter, or as required by<br />
local codes . Local code takes precedence over these installation guidelines .<br />
Deck Preparation:<br />
New Construction<br />
Prepare roof deck to meet local building codes.<br />
Roof Tear-off (Solid Deck)<br />
If tearing off old roof, clean and prepare deck to meet local building codes.<br />
Re-Roof Tear-off (Skip/Spaced Sheathing)<br />
There are two options available when skip/spaced sheathing is encountered. Use counter battens and<br />
battens without filling or fill as necessary and install just battens.<br />
Re-Roof Over Even Surfaces (i.e. Asphalt <strong>Shingle</strong>s)<br />
Prepare the asphalt shingles by cutting them back, flush with the fascia or rake, as needed. Remove existing<br />
hip and ridge material. Install either <strong>Shingle</strong> <strong>Plus</strong> without battens or <strong>Tile</strong>, <strong>Shake</strong> or <strong>Shingle</strong> <strong>Plus</strong> with battens.<br />
Re-Roof Over Irregular Surfaces (i.e. Wood <strong>Shake</strong> or Wood <strong>Shingle</strong>s)<br />
When needed, use counter battens to obtain a level surface for battens when installing over an irregular<br />
surface. Additionally, some codes require specified underlayments when roofing over wood shakes.<br />
Prepare the roof deck by removing all existing hip and ridge. Cut the existing overhang back as needed<br />
to install battens and accommodate flashings.<br />
Do not use LEAD or COPPER with this steel roofing system.<br />
Do not use pressure treated lumber i.e. decking or batten.<br />
Measuring, Cutting, Bending Panels:<br />
Measurements are made on the roof, however, the panels are normally<br />
marked, cut and bent on the ground. Panels may be cut with a guillotine,<br />
tin snips, or circular saw with metal cutting blade. A portable brake press<br />
or hand bender is used to bend the cut edge of the panel for hips, ridges,<br />
and valleys .<br />
Measurements should be<br />
taken using front edge of<br />
battens for accuracy.<br />
If you are installing a system with battens, please continue to the next page. If you are<br />
installing a system direct to deck without battens, continue to page 10 of the guide.<br />
www.decra.com General <strong>Installation</strong> 3
<strong>Installation</strong> with Battens:<br />
This section is specific to systems installed with battens. <strong>Installation</strong>s that are direct to deck without battens<br />
are discussed on page 10 of this guide .<br />
Panels<br />
The DECRA panels are formed from corrosion resistant aluminum-zinc alloy coated steel with a protective<br />
coating of ceramic coated stone granules that provide an attractive appearance. The Hip & Ridge used at the<br />
ridge, rake/gable and hip is produced in a similar manner.<br />
DECRA <strong>Tile</strong> (installed on battens)<br />
DECRA <strong>Shake</strong> (installed on battens)<br />
DECRA <strong>Shingle</strong> <strong>Plus</strong> (installed on battens)<br />
4<br />
<strong>Installation</strong> with Battens<br />
Installed Exposure: 14-1/2” x 50”<br />
Panels per Square: 20<br />
Installed Weight: 150 lbs./sq.<br />
Installed Exposure: 12-5/8” x 51”<br />
Panels per Square: 22 .4<br />
Installed Weight: 150 lbs./sq.<br />
Installed Exposure: 14-1/2” x 50”<br />
Panels per Square: 20<br />
Installed Weight: 150 lbs./sq.<br />
www.decra.com
DECRA <strong>Tile</strong>, <strong>Shake</strong>, <strong>Shingle</strong> <strong>Plus</strong> (installed on battens)<br />
<strong>Tile</strong> Panel<br />
<strong>Shake</strong> Panel<br />
<strong>Shingle</strong> <strong>Plus</strong> Panel<br />
<strong>Tile</strong> End Cap<br />
<strong>Shake</strong> End Cap<br />
<strong>Shingle</strong> <strong>Plus</strong><br />
End Cap<br />
<strong>Tile</strong> Hip & Ridge<br />
<strong>Shake</strong> Hip & Ridge <strong>Shingle</strong> <strong>Plus</strong> Hip & Ridge<br />
“W” Style Valley<br />
<strong>Tile</strong> Underpan<br />
<strong>Shake</strong> Underpan<br />
<strong>Shingle</strong> <strong>Plus</strong> Underpan<br />
Side Flashing<br />
3.5” or 5” Fascia Metal<br />
www.decra.com <strong>Installation</strong> with Battens 5
Preparation for Panel <strong>Installation</strong> with Battens<br />
Set the top front edge of the first batten flush at the edge of the fascia board<br />
parallel with the ridge. Install 2 x 2 nominal size battens in standard grade<br />
lumber using a 16d minimum common nail or equivalent at a maximum<br />
of 24” on center into rafters (See diagram 1). Install 2 x 2’s at hips. Batten<br />
spacing will be determined by the panel profile, see chart below.<br />
BATTEN SPACING DECRA PANEL<br />
12-5/8” DECRA <strong>Shake</strong><br />
14-1/2” DECRA <strong>Shingle</strong> <strong>Plus</strong><br />
14-1/2” DECRA <strong>Tile</strong><br />
NOTE: BATTEN SPACING IS MEASURED FROM<br />
FRONT OF BATTEN TO FRONT OF NEXT BATTEN<br />
AS YOU GO UP THE ROOF. SEE DIAGRAMS BELOW.<br />
6<br />
Adjust<br />
placement of<br />
first batten to<br />
accommodate<br />
uneven fascia.<br />
Check batten spacing<br />
for accuracy every few rows with<br />
tape measure.<br />
Note: Additional fasteners are required for battens in high<br />
wind areas per local code.<br />
Steel Hat Sections<br />
As an alternative to wood battens, steel hat section<br />
purlins can be used. Different configurations of lighter<br />
and heavier gauge purlins can be used for various rafter<br />
spans . Fasten steel hat section through to rafters using<br />
minimum two #8 x 2” long screws at each hat section to<br />
rafter intersection. Fasten panels using minimum #8<br />
by 1-1/2” long corrosion resistant screws .<br />
Fascia Metal Flashing<br />
Flashing is required along the fascia to cover the build<br />
up at the first batten. Stone coated Fascia Metal is<br />
available in 3.5” and 5” exposures in all colors.<br />
<strong>Installation</strong> with Battens<br />
Starter Batten must be<br />
parallel with the ridge.<br />
Diagram 1<br />
Diagram 2<br />
Counter Battens and Battens<br />
Use counter battens when installing over an irregular surface or skip/<br />
spaced sheathing (See diagram 2). Position 1 x 4 counter battens over<br />
the framing members (or no more than 24” on center) and secure using<br />
a minimum 16d common nail or equivalent into rafters or through<br />
sheathing 7” on center . Proceed with batten installation as described<br />
above.<br />
20 gauge thick<br />
batten suitable<br />
for rafters up to<br />
4’ on center.<br />
www.decra.com
Panel Layout with Battens<br />
Lay full panels starting with the first full course down from the ridge.<br />
Fasten the first course along back flange. Start laying the panels by<br />
tucking them under the upper panels. DECRA <strong>Tile</strong> panels should<br />
be staggered sideways a minimum of one pan. DECRA <strong>Shake</strong> and<br />
DECRA <strong>Shingle</strong> <strong>Plus</strong> panels should be staggered to create an irregular<br />
appearance . The <strong>Tile</strong> and <strong>Shake</strong> panels can be laid either right to left or<br />
left to right depending on what looks best when viewing the roof . The<br />
<strong>Shingle</strong> <strong>Plus</strong> panels must be laid right to left. The overlapping panel must<br />
cover the overlap channel . After laying three courses, begin fastening<br />
through the nose of the panel, working down the roof . See Fastening<br />
Panels with Battens (Below) .<br />
DO NOT rack panels (DO<br />
NOT line them vertically up<br />
the roof) or use even panel<br />
offsets that will detract from<br />
the appearance of the roof.<br />
Do Not Make A Pattern.<br />
Fastening Panels with Battens<br />
Panels are fastened to wood battens with a minimum of four 8d corrosion resistant common nails or four<br />
minimum #8 corrosion resistant screws (color coordinated) . Screws should be used in freeze/thaw areas .<br />
One fastener is placed near the bottom on the downturn of the panel 1” from the overlapped edge. The<br />
remaining fasteners are evenly spaced across the panel.<br />
Care must be taken while fastening to avoid striking the finished panel surfaces. Damaged surfaces can be<br />
refinished by using a Touch-Up Kit. Apply the acrylic coating to the affected area followed by embedding it<br />
with matching stone granules. Touch-Up Kits are available from DECRA Roofing Systems.<br />
Cover this area<br />
with the panel<br />
to the left.<br />
Apply downward pressure to “seat” panel when fastening.<br />
www.decra.com <strong>Installation</strong> with Battens 7
Valley Application with Battens<br />
All valley metal should be minimum 26 gauge pre-finished aluminum-zinc alloy coated steel. Valley metal<br />
should be a minimum 7” wide.<br />
In new construction, the metal valley flashing must have one layer of Type 30 felt underlayment, 36” wide<br />
or ice and water shield underneath as required by local building code.<br />
Install the valley metal overlapping the valley<br />
pieces a minimum of 6”; secure the valley metal.<br />
After valley flashing has been fit and secured into<br />
the valley area and full panels have been positioned<br />
up to the valley, measure for cut panels. See Open and Closed Valley Sections (Below) . Panels are cut and<br />
bent down into valleys leaving either an open or completely covered (closed) valley. See section on Measuring,<br />
Cutting and Bending (Page 3) .<br />
All measurements need to be taken from the<br />
center of the panel Overlap Channel . Refer to<br />
diagrams in the Panel Section (Page 4) .<br />
See diagrams in Open and Closed Valley Sections (Below) . Cuts are denoted with dashed lines and bends<br />
are denoted with solid lines .<br />
Open Valley<br />
To create an open valley, snap lines to desired<br />
opening . Working on one side of the valley at<br />
a time, measure, cut and bend panels starting at the<br />
bottom of the valley and working up. Bend cut edge<br />
of panels down against the up-stand of the valley<br />
metal as indicated in the drawing.<br />
8<br />
Make sure the ends of the valley<br />
metal extend beyond the fascia or<br />
onto a lower roof area.<br />
<strong>Installation</strong> with Battens<br />
For fast accurate hip and valley angle<br />
measurements, use a T-Bevel, which<br />
can be purchased at your local hardware store.<br />
Make sure the ends of the valley metal extend<br />
beyond the fascia or onto a lower roof area.<br />
Verify batten spacing along the<br />
valley to ensure accuracy.<br />
www.decra.com
Closed Valley<br />
Next, measure, cut and bend panels to fill in<br />
the other side of the valley . Make sure these<br />
panels meet the opposing side of the valley.<br />
The panels from the two sides of the valley<br />
should fit as closely as possible and the line<br />
between them should run straight up the<br />
valley .<br />
Notch nose of panels terminating in<br />
a closed valley to accommodate the<br />
width of the valley.<br />
Find and establish the center of the valley by either<br />
snapping a line or following existing center rib. After<br />
valley flashing has been fit and secured into the valley<br />
area, start on one side of the valley by measuring,<br />
cutting, bending and installing panels as accurately<br />
as possible to create a clean straight line .<br />
Rake/Gable with Battens<br />
When installing <strong>Tile</strong>, <strong>Shake</strong> or <strong>Shingle</strong> <strong>Plus</strong><br />
along the rake/gable and finishing it with Hip & Ridge,<br />
run a 2 x 2 vertically along the rake. Position the 2 x 2 vertically just back from the edge of the rake to<br />
accommodate the proper look and fit of the Hip & Ridge pieces. In a batten installation the 2 x 2 will sit<br />
on top of the battens. Bring the panel up to the 2 x 2 and bend the panel up 1-1/2”. At fascia, cover<br />
the open end of Hip & Ridge with appropriate End Cap. See Hip & Ridge Section (Page 19) .<br />
Please continue to page 15 of the guide to complete the installation of the batten system.<br />
www.decra.com <strong>Installation</strong> with Battens 9
Direct to Deck <strong>Installation</strong> without Battens:<br />
This section is specific to systems installed directly to the deck without battens. Please refer to page 4 of this<br />
guide for information on installation with battens.<br />
Panels<br />
The DECRA panels are formed from corrosion resistant aluminum-zinc alloy coated steel with a protective<br />
coating of ceramic coated stone granules that provide an attractive appearance. The Hip & Ridge used at the<br />
ridge, rake/gable and hip is produced in a similar manner.<br />
DECRA <strong>Shingle</strong> <strong>Plus</strong> (installed direct to deck)<br />
10<br />
<strong>Installation</strong> Direct to Deck without Battens<br />
Installed Exposure: 14-1/2” x 50”<br />
Panels per Square: 20<br />
Installed Weight: 125 lbs./sq.<br />
www.decra.com
DECRA <strong>Shingle</strong> <strong>Plus</strong> without Battens<br />
<strong>Shingle</strong> <strong>Plus</strong> Panel<br />
<strong>Shingle</strong> <strong>Plus</strong><br />
End Cap<br />
<strong>Shingle</strong> Rake/<br />
Gable Channel<br />
(optional for use with<br />
<strong>Shingle</strong> <strong>Plus</strong> only along<br />
the rake/gable)<br />
<strong>Shingle</strong> <strong>Plus</strong><br />
Hip & Ridge<br />
Valley Metal - Min 8”<br />
on either side of center line<br />
(16” total)<br />
<strong>Shingle</strong> Valley & Cap<br />
(optional for use<br />
with <strong>Shingle</strong> <strong>Plus</strong> only)<br />
3.5” or 5” Fascia Metal<br />
<strong>Shingle</strong> <strong>Plus</strong> Underpan<br />
Side Flashing<br />
www.decra.com <strong>Installation</strong> Direct to Deck without Battens 11
Preparation for Panel <strong>Installation</strong> without Battens<br />
Over a prepared deck, position a 1 x 4 flush with fascia<br />
as a starter batten. Install necessary 2 x 2 battens for hips,<br />
ridges and rakes using a 16d minimum common nail or<br />
equivalent at a maximum of 24” on center.<br />
12<br />
Starter Batten must be parallel with the ridge.<br />
Adjust placement of first batten to<br />
accommodate uneven fascia.<br />
Roof Jacks without Battens<br />
In cases where roof jacks will be installed, apply a 1 x 4 to the<br />
bottom of the roof jack (See diagram).<br />
Fasten the front (nose) of the panel when the jack is removed.<br />
Panel Layout without Battens<br />
Panels will be laid out and fastened as you go along starting<br />
at the fascia and working up to the ridge. <strong>Shingle</strong> <strong>Plus</strong> must<br />
be laid right to left. The overlapping panel must cover the<br />
overlap channel . See Fastening Panels without Battens<br />
(Page 13) .<br />
NOTE: BEGIN FASTENING PANELS AS YOU GO.<br />
REFER TO FASTENING SECTION (Page 13) .<br />
<strong>Installation</strong> Direct to Deck without Battens<br />
1 x 4<br />
2 x 2<br />
Fascia Metal Flashing<br />
Flashing is required along the fascia to cover the<br />
build up at the first batten.<br />
Stone coated Fascia Metal is available in 3 .5” and<br />
5” exposures in all colors.<br />
DO NOT rack panels (DO NOT line<br />
them vertically up the roof) or use<br />
even panel offsets that will detract<br />
from the appearance of the roof.<br />
Do Not Make A Pattern<br />
The first course at the eave may be secured<br />
through the top, at the panel highpoints, when<br />
the situation calls for it.<br />
www.decra.com
Fastening Panels without Battens<br />
Panels are fastened using a minimum of eight #8 corrosion resistant screws (color coordinated) . Position<br />
four screws horizontally through the nose of the panel penetrating the back of the panel below. Next, apply<br />
four screws vertically through the back flange of the panel into solid decking, as illustrated in the diagram.<br />
Fasten<br />
the nose of the first panel through the 1 x 4 batten and the back flange as shown. All other panels will be<br />
fastened as shown below .<br />
Valley Application without Battens<br />
Fasten nose prior<br />
to back flange.<br />
Apply downward<br />
pressure to “seat”<br />
panel when fastening.<br />
For fast accurate hip and valley angle<br />
measurements, use a T-Bevel, available<br />
at local hardware store.<br />
All valley metal should be minimum 26 gauge pre-finished aluminum-zinc alloy coated steel. Valley metal<br />
should be a minimum 7” wide.<br />
In new construction, the metal valley flashing must have one layer of Type 30 felt underlayment, 36” wide<br />
or ice and water shield underneath as required by local building code.<br />
Install the valley metal overlapping the valley pieces a minimum of 6”. Secure the valley metal to the<br />
deck every 24” . Make sure the ends of the valley metal extend beyond the fascia or onto a lower roof area.<br />
After valley flashing has been fit and secured into the valley area and full panels have been positioned<br />
up to the valley, measure for cut panels. See diagrams in <strong>Shingle</strong> <strong>Plus</strong> Valley Section (Page 14) . Panels are<br />
cut and bent down into valleys leaving either an open or completely covered (closed) valley. See section on<br />
Measuring, Cutting and Bending (Page 3) .<br />
All measurements need to be taken from the center of the panel overlap. Refer to diagrams in the<br />
Panel Section (Page 10) .<br />
www.decra.com <strong>Installation</strong> Direct to Deck without Battens<br />
13
<strong>Shingle</strong> <strong>Plus</strong> Valley without Battens<br />
DECRA <strong>Shingle</strong>/<strong>Shingle</strong> <strong>Plus</strong> Valley piece is used here to<br />
create the clean look of a closed valley . First, install the<br />
DECRA <strong>Shingle</strong>/<strong>Shingle</strong> <strong>Plus</strong> Valley piece along the center<br />
line of each valley . Fasteners should be positioned outside<br />
the last turn-up on each side of the valley piece . Cut<br />
<strong>Shingle</strong> <strong>Plus</strong> panels to length and fit them into the<br />
valley (See diagrams right). The <strong>Shingle</strong> <strong>Plus</strong> panels<br />
must be laid right to left. To the right of the valley,<br />
lay full panels up to the valley and cut panels to fit into<br />
the valley. On the left side of the valley cut random<br />
length panels (with a “Factory” left edge) to fill in<br />
along the valley . Lay full panels as you work away<br />
from the valley.<br />
Rake/Gable without Battens<br />
When installing <strong>Shake</strong> or <strong>Shingle</strong> <strong>Plus</strong> along the rake/gable and finishing it with Hip & Ridge, run a 2 x 2<br />
vertically along the rake. Position the 2 x 2 vertically just back from the edge of the rake to accommodate<br />
the proper look and fit of the Hip & Ridge pieces. Bring the panel up to the 2 x 2 and bend the panel up<br />
1-1/2”. At fascia, cover the open end of Hip & Ridge with appropriate End Cap. See Hip & Ridge Section<br />
(Page 19) .<br />
DECRA <strong>Shingle</strong> Rake/Gable Channel may be used in place of the 2 x 2 and the <strong>Shingle</strong> <strong>Plus</strong> Hip & Ridge,<br />
when installing the panels without battens . This option is only available for <strong>Shingle</strong> <strong>Plus</strong> .<br />
14<br />
<strong>Installation</strong> Direct to Deck without Battens<br />
www.decra.com
The following information applies to installations both<br />
with battens and direct to deck without battens.<br />
Penetrations:<br />
Roof penetrations are to be flashed with aluminum, galvanized, or aluminum-zinc alloy coated steel,<br />
standard roof jacks and flashings as required by code. DO NOT USE COPPER OR LEAD WITH THIS<br />
ROOFING SYSTEM. Use the correct Underpan for <strong>Tile</strong>, <strong>Shake</strong> or <strong>Shingle</strong> <strong>Plus</strong> to properly flash pipe<br />
penetrations. Cut the Underpan to fit tightly around the plumbing stack. The Underpan must lap over<br />
the lower field panel when positioned around the pipe. Cut the pipe-flashing apron so it will fit onto the<br />
Underpan. Apply sealant on three sides. Finish with field panel by measuring and cutting panel to fit snugly<br />
around pipe flashing. Cut hole according to flashing profile. Align roofing panel and seal around base using<br />
a polyurethane sealant and finish with Touch-Up Kit.<br />
<strong>Shake</strong> and <strong>Shingle</strong> <strong>Plus</strong> installations follow the same procedures.<br />
Care should be taken to adequately weatherproof the flashings and to support them with additional blocking<br />
or roof framing as necessary.<br />
Paint pipes and flashings prior<br />
to installing panels.<br />
www.decra.com General <strong>Installation</strong> 15
Penetrations (Cont.):<br />
Roof-to-Wall:<br />
Roof to Side Wall w/ J Channel (<strong>Tile</strong> Pan)<br />
Slide J Channel under existing sidewall flashing; turn panel down into J Channel (<strong>Tile</strong> Pan). In applications<br />
without battens, turn panel up against the wall 2” underneath the existing sidewall flashing. In either a batten<br />
or a direct to deck without battens installation, if you cannot get the J Channel up under the existing flashing,<br />
slide the Channel up under the existing siding.<br />
16<br />
For larger flashings, an<br />
Underpan is not required.<br />
General <strong>Installation</strong><br />
www.decra.com
Roof to Side Wall w/ Side Flashing<br />
If no existing flashing is present (with or without<br />
battens) turn the panel up 2” and counter flash with<br />
Side Flashing . Seal turn up against the wall and<br />
seal Side Flashing before applying to wall with<br />
polyurethane sealant .<br />
Chimneys:<br />
The following steps detail the procedure<br />
for installation around a chimney. Run full<br />
panels up to the chimney as noted in the<br />
Chimney Illustration. All the open areas<br />
will be filled in with cut panels that have<br />
been bent up 2” toward the chimney.<br />
1<br />
2 3<br />
4<br />
Start by measuring from the full<br />
panel below the chimney up to<br />
the base of the chimney. Cut<br />
panel(s) to fit this area. Add 2”<br />
to all of the measurements<br />
to accommodate for the 2”<br />
bend up .<br />
Panels to fit the left and right sides<br />
of the chimney will be measured<br />
and cut the same way.<br />
Finally, measure the width of the<br />
chimney, cut, conform and install<br />
the chimney saddle to fit above<br />
the chimney. For brick and stucco,<br />
counter flash over the top of the<br />
chimney saddle. For siding, tuck<br />
the chimney saddle up under the<br />
siding .<br />
Add 2” to all<br />
measurements to cover bend up.<br />
www.decra.com General <strong>Installation</strong> 17<br />
2<br />
4<br />
1<br />
3
Short Courses:<br />
In some instances a short course will be<br />
necessary . A short course is needed when a<br />
section of the fascia steps out and is not an<br />
even panel width difference from the main<br />
fascia . Start battening at the fascia with the<br />
longest width (or if installing without<br />
battens start laying panels) and work up<br />
to the course above or down to the course<br />
below the stepped fascia. Next, measure<br />
the first course of the stepped section and<br />
treat it like a ridge . Finish the short course<br />
by measuring the panel from the front and<br />
cutting the excess from the back of the panel.<br />
When installing battens, be sure to allow for a 1”<br />
turn up at the batten .<br />
Hip:<br />
When installing <strong>Tile</strong>, <strong>Shake</strong> or <strong>Shingle</strong> <strong>Plus</strong> run a 2 x 2 vertically<br />
up the battens next to the hip. Bring the panel to the 2 x 2 and turn<br />
the panel up 1-1/2”. Measurements for hip cuts are made much like<br />
the valleys cuts. After cutting the panels, make a 1-1/2” bend that<br />
will run along the 2 x 2 at the hip. <strong>Shake</strong> and <strong>Shingle</strong> <strong>Plus</strong> panels<br />
follow the same procedures.<br />
Ridge:<br />
<strong>Tile</strong>, <strong>Shake</strong> and <strong>Shingle</strong> <strong>Plus</strong> panels use the same procedures.<br />
Measure from the front of the back flange to the front of<br />
the 2 x 2 at the ridge (See diagram right). This will be the<br />
bend line . Bend the panel at the bend line . Add 2” to the<br />
bend line and cut the panel. See Cutting & Bending diagram<br />
below. Install the panels along the ridge one side at a time.<br />
Conform each panel to the ridge and fasten. Next, install the<br />
panels along the other side of the ridge. Keep panels straight<br />
and level along the ridge as this is the foundation for the Hip<br />
& Ridge pieces.<br />
18<br />
“<br />
General <strong>Installation</strong><br />
Bend full panels<br />
before cutting.<br />
www.decra.com
Hip & Ridge:<br />
Panels have been cut and turned up vertically along the hips and ridges. Install Hip & Ridge pieces along<br />
hips, ridges and rakes. Hip & Ridge pieces are overlapped and fastened on both sides along the ridges,<br />
rakes/gables and hip boards with the same fasteners used for securing the panels.<br />
Bend and fold exposed ends of hips and ridges neatly and finish with an End Cap or a piece of similar<br />
material. At the hip and ridge transition, miter into place.<br />
<strong>Tile</strong> Hip & Ridge<br />
<strong>Shake</strong> & <strong>Shingle</strong> <strong>Plus</strong> Hip & Ridge<br />
<strong>Tile</strong> Hip & Ridge End Cap<br />
<strong>Shake</strong> & <strong>Shingle</strong> <strong>Plus</strong> Hip & Ridge End Cap<br />
www.decra.com General <strong>Installation</strong><br />
19
Ridge Venting Options:<br />
This section shows only two of the many methods available for venting a DECRA Roofing System. For<br />
diagram 1, three 2 x 2 battens should be stacked and installed along the length of the ridge. Fasten a<br />
1 x 2 on top of the 2 x 2’s. Use a 1” venting material and fasten along both sides of the battens along the<br />
length of the ridge. Bend the panels up 2” at the ridge. Secure the Hip & Ridge piece through the 1 x 2.<br />
See diagram 2 for alternative using roll ridge venting material.<br />
Diagram 1<br />
Suggestion: Three 2 x 2 Battens for <strong>Tile</strong> & <strong>Shingle</strong> <strong>Plus</strong><br />
Two 2 x 2 Battens for <strong>Shake</strong><br />
High Wind:<br />
In areas prone to hurricanes and high winds, installation must meet local standards and codes. Full panels<br />
on the top three courses and bottom three courses should be fastened with seven fasteners at seven evenly<br />
spaced locations. Also, panels along the perimeter and directly along the hips and gables must be secured at<br />
seven evenly spaced locations .<br />
Freeze/Thaw:<br />
Use ice and water shield as recommended for cold climatic conditions. Fastening panels with minimum<br />
#8 corrosion resistant screws is recommended.<br />
Foot Traffic:<br />
Avoid walking on side laps. Foot traffic on DECRA <strong>Tile</strong> panels should be kept to the tile pans not on the high<br />
points . If installing over battens, walk directly over the battens . See walking instructions at www.decra.com .<br />
Sealants:<br />
Polyurethane based sealant is recommended for use with this roofing system. Where possible, the sealant<br />
should be covered by the roofing system or with matching stone granules. Sealant should not be used to<br />
refinish damaged panel surfaces.<br />
Cleaning & Repairs:<br />
After installation is complete be sure to clean all debris off of the roof, especially any metal shavings.<br />
In cases where it is necessary to touch up or repair a panel, DECRA Touch-Up Kits are available in all of the<br />
colors matching the stone coated panel finishes.<br />
For answers to questions not covered in this guide, call 800-258-9740 or go to www.decra.com .<br />
Architectural Details and Product Specs and Estimating Sheets are available online at www.decra.com .<br />
20<br />
General <strong>Installation</strong><br />
Diagram 2<br />
INSTS0505-04/10<br />
www.decra.com