ADJUSTABLE TENON JIG - Woodsmith Shop
ADJUSTABLE TENON JIG - Woodsmith Shop
ADJUSTABLE TENON JIG - Woodsmith Shop

Create successful ePaper yourself
Turn your PDF publications into a flip-book with our unique Google optimized e-Paper software.
adjustable<br />
tenon jig<br />
© 2010 August Home Publishing Co.
Feature<br />
Project<br />
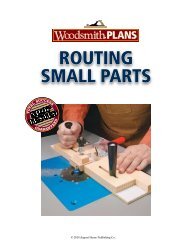
adjustable tenon jig<br />
This jig takes versatility up a notch. It holds a workpiece vertically or at<br />
an angle and adjusts to fit any rip fence.<br />
ost shop-built tenon jigs slip over the rip fence<br />
to cut a tenon on the end of a workpiece. It’s a<br />
simple way to cut smooth, accurate tenon cheeks. The<br />
trouble is once you build the jig, there’s no way to adjust<br />
the fit if changes in humidity make it too loose or too<br />
tight. And you’re locked in to one rip fence.<br />
The tenon jig that’s pictured above solves both of<br />
these problems. It adjusts to fit any fence up to 43 M<br />
⁄4" wide.<br />
And it adds a few other benefits.<br />
{ Separate Stops. The vertical stop can be replaced<br />
to support a workpiece at an angle.<br />
1 www.<strong>Woodsmith</strong>.com © 2010 August Home Publishing Co. All Rights Reserved.
Like most tenon jigs, this one<br />
holds a workpiece vertically so it’s<br />
safe and easy to make a cut. Then<br />
when you need to hold a workpiece<br />
on a 45° angle, to cut a splined miter<br />
for instance, you can add an alternate<br />
angled stop (inset photo on page 1).<br />
With all these features, cutting perfect<br />
tenons is safe and hassle-free.<br />
How it works. The tenon jig isn’t<br />
all that complicated. A front and<br />
back fence ride along the rip fence.<br />
A horizontal support has slots cut<br />
in it and connects the two fences<br />
— making it easy to sandwich the jig<br />
around any rip fence. There are also<br />
a few stops that can be positioned at<br />
various angles. They support your<br />
workpiece for any type of tenon cut.<br />
Front Fence<br />
I started building the jig by cutting a<br />
piece of 3 ⁄4" MDF to size for the front<br />
fence. There’s a bit of work to do to<br />
prepare this piece for the features<br />
that will be added later.<br />
Drill tHe Holes. First, you need to<br />
drill a series of holes to attach a<br />
hold-down in a variety of positions<br />
for different size workpieces.<br />
The other holes you see in Figure<br />
1 will be used to attach the stops<br />
at either 90° or 45°. The locations<br />
need to be precise. So you can drill<br />
2<br />
RIGHT ANGLE<br />
BRACES KEEP<br />
FRONT FENCE<br />
SQUARE<br />
3<br />
1!/2<br />
C<br />
BRACE<br />
(3!/2" x 3!/2")<br />
1!/2 4!/4<br />
1<br />
LOCATE GROOVE<br />
FOR HORIZONTAL<br />
SUPPORT HIGHER<br />
THAN TOP OF<br />
RIP FENCE<br />
!/4"-DIA. HOLES USED TO POSITION<br />
<strong>ADJUSTABLE</strong> STOP ARE DRILLED<br />
AFTER STOPS ARE MADE<br />
!/4"-DIA. HOLES USED TO<br />
POSITION HOLD-DOWN<br />
(FIGURE 4)<br />
A<br />
FRONT FENCE<br />
(8" x 16")<br />
!/4<br />
#/4<br />
3<br />
2!/4<br />
the pivot hole (that’s used for all the<br />
angles) now, but you’ll want to hold<br />
off on drilling the three positioning<br />
holes until the jig is assembled.<br />
Once that’s complete, cut a rabbet<br />
in the bottom edge for dust relief<br />
and a groove on the inside face. The<br />
groove is used to locate and attach<br />
the horizontal support. Just make<br />
sure it’s located high enough to<br />
allow the horizontal support to clear<br />
B<br />
HORIZONTAL<br />
SUPPORT<br />
(6!/2" x 16")<br />
#/4<br />
%/16"-WIDE SLOTS<br />
FOR <strong>ADJUSTABLE</strong><br />
BACK FENCE<br />
C<br />
#8 x 1!/4" Fh<br />
WOODSCREW<br />
NOTE: REFER TO<br />
FIGURE 3 ON PAGE 3<br />
TO BUILD BACK FENCE<br />
2!/4<br />
5#/4<br />
C L<br />
#/16" x #/16" RABBET<br />
CUT IN BOTTOM EDGE<br />
FOR SAWDUST RELIEF<br />
3#/8<br />
!/4"-DIA.<br />
PIVOT<br />
HOLE<br />
2<br />
2<br />
COUNTERSUNK<br />
SHANK HOLES<br />
TO SECURE<br />
BRACES AND<br />
HORIZONTAL<br />
SUPPORT<br />
(FIGURE 2)<br />
NOTE:<br />
FRONT FENCE<br />
MADE OF #/4" MDF<br />
your rip fence. Then, you can finish<br />
up the front fence by knocking off<br />
the top outside corners.<br />
HorIZontAL Support<br />
The next piece to work on is the horizontal<br />
support. Here again, you can<br />
start by cutting a piece of 3 ⁄4" MDF<br />
to final size. Then, you’ll need to cut<br />
the two slots, which make it possible<br />
to adjust the jig for any rip fence up<br />
to 4 3 ⁄4" wide. I took the piece to the<br />
router table to cut the slots.<br />
Assembly. At this point, you’re<br />
ready to glue and screw the horizontal<br />
support in the groove. To ensure<br />
the front fence stays square, I also<br />
added a couple of right angle braces,<br />
as shown in Figure 2.<br />
END VIEW<br />
2 www.<strong>Woodsmith</strong>.com © 2010 August Home Publishing Co. All Rights Reserved.<br />
A<br />
1!/2<br />
C<br />
B<br />
#8 x 1!/4" Fh<br />
WOODSCREW<br />
1!/2<br />
NOTE: ALL PARTS<br />
MADE OF #/4" MDF<br />
a.
{ Install Hanger<br />
Bolts. Lock two nuts<br />
together to make it<br />
easy to drive hanger<br />
bolts into place.<br />
Adjustable Fence & Stops<br />
Once you’ve attached the horizontal<br />
platform to the front fence, you’re<br />
ready to make the back fence and<br />
the stops. These pieces are fairly<br />
simple, but they give the jig all of its<br />
adjustability and accuracy.<br />
ADJuStABLe BAcK Fence<br />
The back fence is just a thick piece<br />
of MDF with a couple of hanger<br />
bolts in it. The hanger bolts fit into<br />
the slots cut in the horizontal support.<br />
This allows you to sandwich<br />
the front and back fences of the jig<br />
around your rip fence.<br />
To make the back fence, start by<br />
gluing up two oversized pieces of<br />
MDF, and then trim them to size, as<br />
you see in Figure 3.<br />
ADD HAnger bolts. Then you’ll need<br />
to locate the pilot holes for the<br />
hanger bolts. The important thing to<br />
keep in mind is that the holes match<br />
up with the spacing of the slots in<br />
the horizontal support. After drilling<br />
a hole in each end, you can install<br />
the hanger bolts. To see how I did<br />
this, take a look at the left margin.<br />
Now the back fence is complete.<br />
So go ahead and put the pieces<br />
together by positioning the hanger<br />
bolts in the slots in the horizontal<br />
support and locking them in place<br />
with washers and knobs.<br />
{ Wide Fence. Slots cut in the horizontal support<br />
allow you to adjust the back fence of the jig to fit<br />
your rip fence for a smooth sliding fit.<br />
3<br />
HANGER BOLTS<br />
AND KNOBS SECURE<br />
BACK FENCE TO<br />
HORIZONTAL SUPPORT<br />
BACK FENCE<br />
IS GLUED UP<br />
FROM TWO<br />
PIECES OF MDF<br />
SLOTS ALLOW EASY<br />
ADJUSTMENT OF<br />
BACK FENCE TO FIT<br />
ANY RIP FENCE<br />
!/4"-20 x 2!/2"<br />
HANGER BOLT<br />
D<br />
BACK FENCE<br />
3 www.<strong>Woodsmith</strong>.com © 2010 August Home Publishing Co. All Rights Reserved.<br />
1!/2<br />
MAKIng tHe StopS<br />
The bulk of the jig is now built, but<br />
there’s a key component left: the<br />
adjustable stops. You’ll need to make<br />
separate stops for each of the angles:<br />
90˚, 45˚ forward, and 45˚ backward.<br />
With the appropriate stop attached<br />
to the front, you’ll be able to support<br />
your workpiece securely.<br />
Each stop is simply a piece of 5 ⁄8"thick<br />
hardwood with a pair of holes<br />
{ Narrow Fence. There’s no need to<br />
build a second jig for a narrower fence.<br />
The jig adjusts to fit them all.<br />
END<br />
VIEW<br />
a.<br />
!/4"-20 WING NUT<br />
AND !/4" FENDER<br />
WASHER<br />
D<br />
16<br />
3<br />
!/4"-20<br />
MACHINE<br />
THREADS ON<br />
UPPER HALF<br />
WOODSCREW<br />
THREADS ON<br />
LOWER HALF<br />
drilled into it. The lower hole will<br />
slip over a hanger bolt, which you’ll<br />
install in the front fence. The upper<br />
hole allows you to position the stop<br />
at the various angles.<br />
tHree stops. When a stop is positioned<br />
on the front fence, its bottom<br />
edge should be just above the surface<br />
of the table. That’s easy when<br />
the stop is in the 90˚ position. But<br />
for the two stops you’re going to use<br />
on the 45˚ angles, you’ll have to cut<br />
a bevel on the bottom — and make<br />
different stops to angle forward and<br />
backward. This provides full support<br />
for the workpiece and prevents<br />
chipout when using the jig.<br />
It’s a good idea to make several<br />
stops for each angle right away.<br />
You’ll find that the extras come in<br />
handy when working with different<br />
blade heights. And they tend to get<br />
chewed up pretty quickly.<br />
Drill tHe Holes. If you haven’t done<br />
so already, drill two holes in each<br />
stop, as shown in Figure 4. Just<br />
make sure the holes are the same<br />
distance apart on each one.
estAblisH Angles. The stops will be<br />
attached to the front fence at the<br />
top with a hex bolt and knob, so<br />
they’re easy to take off and switch<br />
out. But before you can attach any<br />
of the stops, the 90° and 45° angle<br />
positions must be established on the<br />
front fence. The box below shows a<br />
simple way to do this.<br />
Note: To maintain an accurate<br />
angle when making additional stops<br />
(after the holes are drilled in the<br />
front fence), you’ll need to use the<br />
jig to locate the holes.<br />
ADD A HolD-Down. Finally, you’ll<br />
want to ensure your workpiece<br />
stays tight against the stop and front<br />
fence as you make a cut. To do this,<br />
you’ll just need to add a hold-down.<br />
I decided to use a commercial holddown,<br />
which can be bolted to the<br />
front fence with a carriage bolt.<br />
uSIng tHe JIg<br />
Once you’ve added the hold-down,<br />
your tenon jig is ready to be put to<br />
use cutting tenons, making splined<br />
miters, or for other shop tasks.<br />
As I mentioned earlier, you just<br />
need to sandwich the front and back<br />
fences of the jig around your rip<br />
fence so that it will slide smoothly,<br />
and tighten the knobs. Then, your<br />
workpiece can be secured in position<br />
with the hold-down.<br />
Having the stops positioned at a<br />
perfect 90˚ or 45˚ angle is the key to<br />
great results when using this jig. So<br />
it’s important to position and drill the<br />
holes in the front fence accurately.<br />
To do this, set the jig upright on<br />
your table saw and secure the stop<br />
to the front fence with a hanger bolt.<br />
Using a drafting triangle, position<br />
the stop at a 90˚ angle (first photo<br />
at right). Then you can simply drill<br />
through the hole in the stop and<br />
through the front fence.<br />
To locate and drill the holes for<br />
each of the 45˚ positions, switch to a<br />
stop with the appropriate bevel, and<br />
repeat the process, like you see in<br />
the far right photo.<br />
4<br />
!/4"-20 x 3"<br />
CARRIAGE BOLT<br />
ATTACHES<br />
HOLD-DOWN<br />
IN SEVERAL<br />
POSITIONS<br />
HOLD-DOWN KEEPS WORKPIECE<br />
TIGHT AGAINST FRONT FENCE<br />
But before you actually turn on the<br />
saw and start using the jig, there’s<br />
one other thing I’d like to mention.<br />
After completing a cut, you’ll want<br />
to be careful to slide the jig back far<br />
enough from the blade so that when<br />
you release the hold-down, it doesn’t<br />
inadvertently swing down into the<br />
spinning blade. Other than that, you<br />
should be good to go.<br />
This tenon jig is certainly a worthwhile<br />
addition to your shop. With its<br />
two-fold adjustability — both to fit<br />
your rip fence snuggly and to angle<br />
the stop — this jig will have you cutting<br />
top-notch tenons in no time.<br />
SettIng up tHe StopS<br />
HEX BOLT AND WING NUT<br />
USED TO SECURE STOP<br />
!/4"-20 x 2!/2"<br />
HANGER<br />
BOLT<br />
%/8<br />
NOTE: HARDWOOD STOP<br />
SUPPORTS WORKPIECE<br />
VERTICALLY OR ON AN ANGLE<br />
NOTE: ANGLED STOPS<br />
ARE 11" LONG WITH A 45°<br />
MITER ON THE BOTTOM<br />
SECTION<br />
VIEW<br />
!/4"-20 x 2!/2" HEX<br />
BOLT AND WASHER<br />
E<br />
STOP<br />
(%/8" x 1" - 9")<br />
!/4"-20<br />
LOCK NUT<br />
AND WASHER<br />
4 www.<strong>Woodsmith</strong>.com © 2010 August Home Publishing Co. All Rights Reserved.<br />
a.<br />
HANGER BOLT<br />
ACTS AS PIVOT<br />
FOR THE STOPS<br />
E<br />
!/4<br />
#/8<br />
2<br />
4