Phase-Locked Loop Reconfiguration (ALTPLL_RECONFIG ... - Altera
Phase-Locked Loop Reconfiguration (ALTPLL_RECONFIG ... - Altera
Phase-Locked Loop Reconfiguration (ALTPLL_RECONFIG ... - Altera

Create successful ePaper yourself
Turn your PDF publications into a flip-book with our unique Google optimized e-Paper software.
UG-032405-6.0 User Guide<br />
Features<br />
101 Innovation Drive<br />
San Jose, CA 95134<br />
www.altera.com<br />
February 2012 <strong>Altera</strong> Corporation<br />
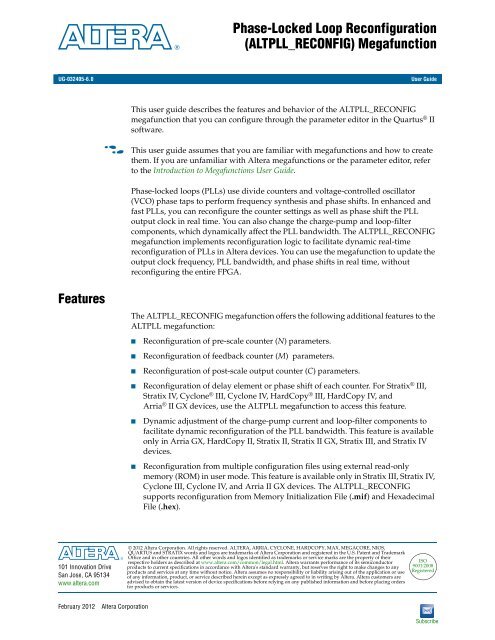
<strong>Phase</strong>-<strong>Locked</strong> <strong>Loop</strong> <strong>Reconfiguration</strong><br />
(<strong>ALTPLL</strong>_<strong>RECONFIG</strong>) Megafunction<br />
This user guide describes the features and behavior of the <strong>ALTPLL</strong>_<strong>RECONFIG</strong><br />
megafunction that you can configure through the parameter editor in the Quartus ® II<br />
software.<br />
f This user guide assumes that you are familiar with megafunctions and how to create<br />
them. If you are unfamiliar with <strong>Altera</strong> megafunctions or the parameter editor, refer<br />
to the Introduction to Megafunctions User Guide.<br />
<strong>Phase</strong>-locked loops (PLLs) use divide counters and voltage-controlled oscillator<br />
(VCO) phase taps to perform frequency synthesis and phase shifts. In enhanced and<br />
fast PLLs, you can reconfigure the counter settings as well as phase shift the PLL<br />
output clock in real time. You can also change the charge-pump and loop-filter<br />
components, which dynamically affect the PLL bandwidth. The <strong>ALTPLL</strong>_<strong>RECONFIG</strong><br />
megafunction implements reconfiguration logic to facilitate dynamic real-time<br />
reconfiguration of PLLs in <strong>Altera</strong> devices. You can use the megafunction to update the<br />
output clock frequency, PLL bandwidth, and phase shifts in real time, without<br />
reconfiguring the entire FPGA.<br />
The <strong>ALTPLL</strong>_<strong>RECONFIG</strong> megafunction offers the following additional features to the<br />
<strong>ALTPLL</strong> megafunction:<br />
■ <strong>Reconfiguration</strong> of pre-scale counter (N) parameters.<br />
■ <strong>Reconfiguration</strong> of feedback counter (M) parameters.<br />
■ <strong>Reconfiguration</strong> of post-scale output counter (C) parameters.<br />
■ <strong>Reconfiguration</strong> of delay element or phase shift of each counter. For Stratix ® III,<br />
Stratix IV, Cyclone ® III, Cyclone IV, HardCopy ® III, HardCopy IV, and<br />
Arria ® II GX devices, use the <strong>ALTPLL</strong> megafunction to access this feature.<br />
■ Dynamic adjustment of the charge-pump current and loop-filter components to<br />
facilitate dynamic reconfiguration of the PLL bandwidth. This feature is available<br />
only in Arria GX, HardCopy II, Stratix II, Stratix II GX, Stratix III, and Stratix IV<br />
devices.<br />
■ <strong>Reconfiguration</strong> from multiple configuration files using external read-only<br />
memory (ROM) in user mode. This feature is available only in Stratix III, Stratix IV,<br />
Cyclone III, Cyclone IV, and Arria II GX devices. The <strong>ALTPLL</strong>_<strong>RECONFIG</strong><br />
supports reconfiguration from Memory Initialization File (.mif) and Hexadecimal<br />
File (.hex).<br />
© 2012 <strong>Altera</strong> Corporation. All rights reserved. ALTERA, ARRIA, CYCLONE, HARDCOPY, MAX, MEGACORE, NIOS,<br />
QUARTUS and STRATIX words and logos are trademarks of <strong>Altera</strong> Corporation and registered in the U.S. Patent and Trademark<br />
Office and in other countries. All other words and logos identified as trademarks or service marks are the property of their<br />
respective holders as described at www.altera.com/common/legal.html. <strong>Altera</strong> warrants performance of its semiconductor<br />
products to current specifications in accordance with <strong>Altera</strong>'s standard warranty, but reserves the right to make changes to any<br />
products and services at any time without notice. <strong>Altera</strong> assumes no responsibility or liability arising out of the application or use<br />
of any information, product, or service described herein except as expressly agreed to in writing by <strong>Altera</strong>. <strong>Altera</strong> customers are<br />
advised to obtain the latest version of device specifications before relying on any published information and before placing orders<br />
for products or services.<br />
ISO<br />
9001:2008<br />
Registered<br />
Subscribe
Page 2 Common Applications<br />
f For more details about these features, refer to the Clock Networks and PLLs chapter of<br />
the respective device handbook.<br />
Common Applications<br />
Use the <strong>ALTPLL</strong>_<strong>RECONFIG</strong> megafunction in designs that must support dynamic<br />
changes in the frequency and phase shift of clocks and other frequency signals. The<br />
megafunction is also useful in prototyping environments because it allows you to<br />
sweep PLL output frequencies and dynamically adjust the output clock phase. For<br />
example, a system generating test patterns is required to generate and transmit<br />
patterns at 50 or 100 MHz, depending on the device under test. Reconfiguring the PLL<br />
components in real-time allows you to switch between two such output frequencies<br />
within a few microseconds. You can also adjust the clock-to-output (tCO) delays in<br />
real-time by changing the output clock phase shift. This approach eliminates the need<br />
to regenerate a configuration file with the new PLL settings.<br />
Reconfigurable PLLs are very useful in DDR 2 and DDR 3 interfaces to implement the<br />
dynamic data path (via the ALTMEMPHY megafunction). The PLL is needed to drive<br />
the DLL used in the dynamic external memory interface operation. This operation<br />
requires dynamic phase-shifting.<br />
f For more information about dynamic phase-shifting in DDR 2 and DDR 3 interfaces,<br />
refer to the ALTMEMPHY Megafunction User Guide.<br />
Device Family Support<br />
In addition, you can dynamically configure Stratix III, Stratix IV, Cyclone III,<br />
Cyclone IV, and Arria II GX PLLs by using multiple configuration files stored on the<br />
external ROM.<br />
The megafunction supports the Stratix series (excluding Stratix V), HardCopy series,<br />
Arria GX series, and Cyclone series devices.<br />
Resource Utilization and Performance<br />
For details about the resource usage and performance of the <strong>ALTPLL</strong>_<strong>RECONFIG</strong><br />
megafunction in various devices, refer to the compilation reports in the Quartus II<br />
software.<br />
To view the compilation reports for the <strong>ALTPLL</strong>_<strong>RECONFIG</strong> megafunction in the<br />
Quartus II software, follow these steps:<br />
1. On the Processing menu, click Start Compilation to run a full compilation.<br />
2. After compiling the design, on the Processing menu, click Compilation Report.<br />
3. In the Table of Contents browser, expand the Fitter folder by clicking the “+” icon.<br />
4. Under Fitter, expand Resource section, and select Resource Usage Summary to<br />
view the resource usage information.<br />
5. Under Fitter, expand Resource section, and select Resource Utilization by Entity<br />
to view the resource utilization information.<br />
<strong>Phase</strong>-<strong>Locked</strong> <strong>Loop</strong> <strong>Reconfiguration</strong> (<strong>ALTPLL</strong>_<strong>RECONFIG</strong>) Megafunction February 2012 <strong>Altera</strong> Corporation
Parameter Settings Page 3<br />
Parameter Settings<br />
February 2012 <strong>Altera</strong> Corporation<br />
<strong>Altera</strong> recommends that you configure the megafunction using the MegaWizard <br />
Plug-In Manager. This section describes the parameters in the <strong>ALTPLL</strong>_<strong>RECONFIG</strong><br />
parameter editor.<br />
Expert users may choose to instantiate and configure the megafunction using the clear<br />
box generator.<br />
Table 1 lists the parameter settings for the <strong>ALTPLL</strong>_<strong>RECONFIG</strong> megafunction.<br />
Table 1. <strong>ALTPLL</strong>_<strong>RECONFIG</strong> Parameter Settings<br />
Parameter<br />
Settings<br />
Page Options Description<br />
Currently Selected<br />
Device Family<br />
Which scan chain<br />
type will you be<br />
using?<br />
Do you want to<br />
specify the initial<br />
value of the scan<br />
chain?<br />
Add ports to write<br />
to the scan chain<br />
from external<br />
ROM during run<br />
time<br />
Specifies the chosen device family.<br />
Scan chain is serial shift register chain that is used to store settings. It acts like a<br />
cache. When you assert the reconfig signal, the PLL is reconfigured with the values<br />
in the cache. The type of scan chain must follow the type of PLL to be reconfigured.<br />
For Arria GX, Stratix II, Stratix II GX, and HardCopy II devices—Specifies the scan<br />
chain type as either Enhanced or Fast.<br />
For Stratix and Stratix GX devices—Specifies the scan chain type as either Long<br />
chain or Short chain.<br />
For Stratix III, Stratix IV, HardCopy III, and HardCopy IV devices—Specifies the<br />
scan chain type as either Top/Bottom or Left/Right. For Cyclone III, Cyclone IV, and<br />
Arria II GX devices—The scan chain type has a default value of Left/Right.<br />
Specifies the initial value of the scan chain. Select No, leave it blank to not specify<br />
a file or select Yes, use this file for the content data to browse for a .hex or .mif<br />
file.<br />
For Arria GX, Arria II GX, Stratix, Stratix GX, Stratix II, Stratix II GX,Stratix III,<br />
Stratix IV, HardCopy II, HardCopy III, and HardCopy IV devices—You can also<br />
choose to initialize from ROM by turning on Do not use pre-initialized RAM -<br />
initialize from ROM instead.<br />
For Cyclone III and Cyclone IV devices—The option to initialize from a ROM is not<br />
available. However, you can choose to add ports to write to the scan chain from an<br />
external ROM during runtime by turning on Add ports to write to the scan chain<br />
from external ROM during run time.<br />
This option is only available for Stratix III, Stratix IV, Cyclone III, Cyclone IV,<br />
HardCopy III, HardCopy IV, and Arria II GX devices. This option takes advantage of<br />
cycling multiple configuration files, which are stored in external ROMs during user<br />
mode. This capability is demonstrated in the functional description section,<br />
“Functional Description—Implementing Multiple <strong>Reconfiguration</strong> Using an<br />
External ROM” on page 6.<br />
<strong>Phase</strong>-<strong>Locked</strong> <strong>Loop</strong> <strong>Reconfiguration</strong> (<strong>ALTPLL</strong>_<strong>RECONFIG</strong>) Megafunction
Page 4 Parameter Settings<br />
Table 1. <strong>ALTPLL</strong>_<strong>RECONFIG</strong> Parameter Settings<br />
EDA<br />
Summary<br />
Page Options Description<br />
Generate netlist<br />
Specifies the libraries needed for functional simulation.<br />
Specifies whether to turn on the option to generate synthesis area and timing<br />
estimation netlist.<br />
Specifies the types of files to be generated. A gray checkmark indicates a file that is<br />
automatically generated; a red checkmark indicates an optional file.<br />
Choose from the following types of files:<br />
■ AHDL Include file (.inc)<br />
■ VHDL component declaration file (.cmp)<br />
■ Quartus II symbol file (.bsf)<br />
■ Instantiation template file (_inst.v or _inst.vhd<br />
■ Verilog HDL block box file (_bb.v)<br />
If Generate netlist option is turned on, the file for that netlist is also available<br />
(_syn.v).<br />
You can open a .mif in a text editor to make use of the comments embedded within<br />
the file. These comments show you the scan chain values and positions based on your<br />
design parameterization (see Figure 1). If you open a .mif in the Quartus II software,<br />
you can regenerate the .mif in the <strong>ALTPLL</strong> parameter editor to restore the comments.<br />
Figure 1. MIF file<br />
f For more information about implementing PLL reconfiguration in the supported<br />
Stratix series, refer to AN 282: Implementing PLL <strong>Reconfiguration</strong> in Stratix & Stratix GX<br />
Devices, AN 367: Implementing PLL <strong>Reconfiguration</strong> in Stratix II Devices and AN 454:<br />
Implementing PLL <strong>Reconfiguration</strong> in Stratix III Devices.<br />
<strong>Phase</strong>-<strong>Locked</strong> <strong>Loop</strong> <strong>Reconfiguration</strong> (<strong>ALTPLL</strong>_<strong>RECONFIG</strong>) Megafunction February 2012 <strong>Altera</strong> Corporation
Checking Design Violations With the Design Assistant Page 5<br />
Checking Design Violations With the Design Assistant<br />
February 2012 <strong>Altera</strong> Corporation<br />
The Design Assistant is a design rule checking tool that allows you to check for design<br />
issues early in the design flow. When you run the Design Assistant in the Quartus II<br />
software for the <strong>ALTPLL</strong>_<strong>RECONFIG</strong> megafunction, you might receive the warning<br />
message shown in Figure 2.<br />
Figure 2. Warning Message in Design Assistant<br />
This message appears because there is a combinational logic in the megafunction that<br />
connects the synchronous signal to the asynchronous external reset signal. To fix the<br />
issue, you must synchronize the external reset signal outside the megafunction.<br />
To synchronize the external reset signal, use the sample Verilog HDL code shown in<br />
Example 1. In the example, the input of sync_reset_dffe1 is connected to the external<br />
reset pin, and the output of sync_reset_dffe2 is connected to the reset input port of<br />
the <strong>ALTPLL</strong>_<strong>RECONFIG</strong> megafunction.<br />
Example 1. Code to Synchronize External Reset Signal<br />
module synch_reg (reset, reconfig_clk, sync_reset_dffe2);<br />
input reset, reconfig_clk;<br />
output sync_reset_dffe2;<br />
reg sync_reset_dffe1, sync_reset_dffe2;<br />
always @(posedge reconfig_clk)<br />
begin<br />
sync_reset_dffe1 = reset;<br />
end<br />
always @(posedge reconfig_clk)<br />
begin<br />
sync_reset_dffe2 = sync_reset_dffe1;<br />
end<br />
endmodule<br />
<strong>Phase</strong>-<strong>Locked</strong> <strong>Loop</strong> <strong>Reconfiguration</strong> (<strong>ALTPLL</strong>_<strong>RECONFIG</strong>) Megafunction
Page 6 Simulation<br />
Simulation<br />
You can perform functional and gate-level timing simulations of the megafunction.<br />
f For more information, refer to the appropriate chapter in the Simulation section in<br />
volume 3 of the Quartus II Handbook.<br />
If phase-shifting occurs after a PLL reconfiguration, use gate-level timing simulation<br />
instead of functional simulation to verify the correct counter settings and phase shifts.<br />
For non-zero PLL phase shifts, the frequency of the output clocks after a<br />
reconfiguration is correct, but the phase may be incorrect. If the phase shift is<br />
significant, use gate-level timing simulation to verify the timing behavior.<br />
Functional Description—Implementing Multiple <strong>Reconfiguration</strong> Using<br />
an External ROM<br />
The <strong>ALTPLL</strong>_<strong>RECONFIG</strong> megafunction allows you to reconfigure the PLL using an<br />
external ROM with multiple configuration files. With this feature, you can perform<br />
the following:<br />
■ Specify an external ROM and feed its content to the <strong>ALTPLL</strong>_<strong>RECONFIG</strong><br />
megafunction.<br />
■ Use the megafunction with multiple PLL configuration settings that are stored in<br />
configuration files during user mode.<br />
■ Use the megafunction with applications that require flexible dynamic-shifting of<br />
PLL settings during user mode.<br />
■ Reconfigure the initial PLL settings from a source other than an embedded<br />
random-access memory (RAM), such as an off-chip flash device, which is useful in<br />
HardCopy-type applications.<br />
1 This feature is available for Stratix III, Stratix IV, Cyclone III, Cyclone IV,<br />
HardCopy III, HardCopy IV, and Arria II GX devices only.<br />
To support reconfiguration from multiple configuration files, the<br />
<strong>ALTPLL</strong>_<strong>RECONFIG</strong> megafunction has three input ports and two output ports:<br />
■ The write_from_rom input port signals the <strong>ALTPLL</strong>_<strong>RECONFIG</strong> megafunction<br />
instantiation to write to the scan cache from the ROM.<br />
■ The rom_data_in input port holds data from the ROM.<br />
■ The reset_rom_address input port lets you restart the read process from the ROM.<br />
The data arrives serially from the ROM, starting from bit 0.<br />
■ The rom_address_out output bus holds the current address of the ROM data to be<br />
written to the scan cache.<br />
■ The write_rom_ena output port enables the intended ROM to be read out.<br />
<strong>Phase</strong>-<strong>Locked</strong> <strong>Loop</strong> <strong>Reconfiguration</strong> (<strong>ALTPLL</strong>_<strong>RECONFIG</strong>) Megafunction February 2012 <strong>Altera</strong> Corporation
Functional Description—Implementing Multiple <strong>Reconfiguration</strong> Using an External ROM Page 7<br />
February 2012 <strong>Altera</strong> Corporation<br />
The input and output ports to support reconfiguration using multiple configuration<br />
files are shown in Figure 3, circled in red.<br />
Figure 3. Ports to Support <strong>Reconfiguration</strong> Using Multiple Configuration Files<br />
inst<br />
<strong>ALTPLL</strong>_<strong>RECONFIG</strong><br />
reconfig<br />
read_param<br />
write_param<br />
data_in[8:0]<br />
counter_type[3:0]<br />
counter_param[2:0]<br />
pll_scandataout<br />
clock<br />
reset<br />
pll_areset_in<br />
write_from_rom<br />
rom_data_in<br />
reset_rom_address<br />
The reconfiguration feature using multiple configuration files allows you to feed data<br />
from multiple ROMs to a multiplexer that feeds the rom_data_in port. Figure 4 shows<br />
a sample design. In this scheme, the write_rom_ena signal feeds back to the ROM as<br />
the enable signal, which allows the ROM to be read out. The rom_address_out bus<br />
provides the intended ROM address, which determines the exact ROM data.<br />
busy<br />
data_out[8:0]<br />
pll_scanclk<br />
pll_scandata<br />
pll_scanaclr<br />
pll_areset<br />
Figure 4. Typical Scheme for Reconfiguring PLLs from External ROMs<br />
ROM<br />
ROM<br />
ROM<br />
M<br />
U<br />
X<br />
rom_address_out<br />
write_rom_ena<br />
write_from_rom<br />
altpll_reconfig<br />
rom_data_in<br />
write_rom_ena<br />
rom_address_out<br />
<strong>Phase</strong>-<strong>Locked</strong> <strong>Loop</strong> <strong>Reconfiguration</strong> (<strong>ALTPLL</strong>_<strong>RECONFIG</strong>) Megafunction
Page 8 Functional Description—Implementing Multiple <strong>Reconfiguration</strong> Using an External ROM<br />
To copy the data from a ROM to the <strong>ALTPLL</strong>_<strong>RECONFIG</strong> megafunction scan cache (a<br />
memory location that stores the PLL reconfiguration settings), you must hold the<br />
write_from_rom signal high for 1 clock cycle. The megafunction asserts the busy<br />
signal on the first rising edge of the clock after the write_from_rom signal goes high.<br />
The busy signal remains asserted until all the bits are written into the scan cache.<br />
On the second rising edge of the clock after the write_from_rom signal goes low<br />
again, the intended ROM address for the write operation appears on the<br />
rom_address_out port. The data of the ROM specified by the intended address on<br />
rom_address_out is fed to the rom_data_in input port of the <strong>ALTPLL</strong>_<strong>RECONFIG</strong><br />
megafunction instantiation. The write_rom_ena signal is also asserted on the second<br />
rising edge of the clock after the write_from_rom signal goes low again (refer to<br />
Figure 5).<br />
Figure 5. Beginning Write to the Scan Cache of the <strong>ALTPLL</strong>_<strong>RECONFIG</strong> Megafunction from the ROM<br />
The writing-to-scan cache process continues until the address reaches the specific size<br />
of the scan cache (234 for Stratix III device top and bottom PLL, 180 for Stratix III<br />
device left and right PLL, and 144 for Cyclone III PLL). This process is completed<br />
when the busy signal is deasserted. This means that the scan cache of the<br />
<strong>ALTPLL</strong>_<strong>RECONFIG</strong> megafunction is written with the intended reconfiguration<br />
settings from the ROM.<br />
<strong>Phase</strong>-<strong>Locked</strong> <strong>Loop</strong> <strong>Reconfiguration</strong> (<strong>ALTPLL</strong>_<strong>RECONFIG</strong>) Megafunction February 2012 <strong>Altera</strong> Corporation
Functional Description—Implementing Multiple <strong>Reconfiguration</strong> Using an External ROM Page 9<br />
February 2012 <strong>Altera</strong> Corporation<br />
After this, the reconfig signal can be asserted for 1 clock cycle to reconfigure the PLL<br />
to the intended settings that have been written to the scan cache of the<br />
<strong>ALTPLL</strong>_<strong>RECONFIG</strong> megafunction (refer to Figure 6).<br />
Figure 6. Completing Write to the Scan Cache of the <strong>ALTPLL</strong>_<strong>RECONFIG</strong> Megafunction from the ROM (1)<br />
Note to Figure 6:<br />
(1) This figure also shows the beginning of the reconfiguration process.<br />
If you assert the reset_rom_address signal, the write_rom_ena signal is deasserted for<br />
1 clock cycle and the rom_address_out signal resets. When the write_rom_ena gets<br />
asserted, the write process then restarts from address 0 (refer to Figure 7).<br />
Figure 7. Asserting the reset_rom_address Signal<br />
<strong>Phase</strong>-<strong>Locked</strong> <strong>Loop</strong> <strong>Reconfiguration</strong> (<strong>ALTPLL</strong>_<strong>RECONFIG</strong>) Megafunction
Page 10 Design Example<br />
Design Example<br />
You can download design examples for this megafunction from the following<br />
locations:<br />
■ On the Documentation: Quartus II Development Software page, in the Using<br />
Megafunctions section under I/O<br />
■ On the Documentation: User Guides webpage, with this user guide<br />
The designs are simulated using the ModelSim ® -<strong>Altera</strong> software to generate a<br />
waveform display of the device behavior. For more information about the ModelSim-<br />
<strong>Altera</strong> software, refer to the ModelSim-<strong>Altera</strong> Software Support page on the <strong>Altera</strong><br />
website. The support page includes links to such topics as installation, usage, and<br />
troubleshooting.<br />
Frequency Division<br />
This design example uses the <strong>ALTPLL</strong>_<strong>RECONFIG</strong> megafunction to change the clock<br />
frequency of an enhanced PLL. This example demonstrates how to reconfigure the c0<br />
counter using the <strong>ALTPLL</strong>_<strong>RECONFIG</strong> megafunction to vary the frequency of this<br />
counter by changing the c value. Figure 8 shows the formula for changing the c value<br />
for different PLL output frequencies.<br />
Figure 8. Frequency Division Formula<br />
Divide-by value = c = (Fin * m)/(Fout * n)<br />
Where:<br />
c value = High time count = Low time count<br />
Fin = Input frequency<br />
m = m modulus value<br />
n = n modulus value<br />
Fout = Required output frequency<br />
This example reconfigures the output frequency of c0 from 100to50MHz by<br />
changing the divide-by value from 3 to 6.<br />
Generating the <strong>ALTPLL</strong> and <strong>ALTPLL</strong>_<strong>RECONFIG</strong> Megafunctions<br />
To generate the <strong>ALTPLL</strong> and <strong>ALTPLL</strong>_<strong>RECONFIG</strong> megafunctions, follow these steps:<br />
1. Open the altpll_reconfig_DesignExample_ex1.zip file and extract<br />
pll_recon_ex1_1.1.qar.<br />
2. In the Quartus II software, open the pll_recon_ex1_1.1.qar file and restore the<br />
archive file into your working directory.<br />
3. On the Tools menu, click MegaWizard Plug-In Manager. Page 1 of the<br />
MegaWizard Plug-In Manager appears.<br />
4. Select Create a new custom megafunction variation.<br />
5. Click Next. Page 2a of the MegaWizard Plug-In Manager appears.<br />
<strong>Phase</strong>-<strong>Locked</strong> <strong>Loop</strong> <strong>Reconfiguration</strong> (<strong>ALTPLL</strong>_<strong>RECONFIG</strong>) Megafunction February 2012 <strong>Altera</strong> Corporation
Design Example Page 11<br />
February 2012 <strong>Altera</strong> Corporation<br />
6. In the MegaWizard Plug-In Manager pages, select or verify the configuration<br />
settings listed in Table 2. Click Next to advance from one page to the next.<br />
Table 2. Configuration Settings for the <strong>ALTPLL</strong> Megafunction (Part 1 of 2)<br />
MegaWizard Plug-In<br />
Manager Page<br />
2a<br />
Parameter Settings<br />
(General/Modes)<br />
Parameter Settings<br />
(Scan/Inputs/Lock)<br />
Output Clocks<br />
(clk c0)<br />
Settings Value<br />
Megafunction Under the I/O category, select <strong>ALTPLL</strong><br />
Which device family will you be using? Stratix<br />
Which type of output file do you want to<br />
create?<br />
VHDL<br />
What name do you want for the output file? reconfig_pll<br />
Return to this page for another create<br />
operation<br />
Turned on<br />
Currently selected device family Stratix<br />
Match project/default Turned on<br />
Which device speed grade will you be<br />
using?<br />
Any<br />
What is the frequency of inclk0 input 100 MHz<br />
Which PLL type will you be using? Enhanced PLL<br />
How will the PLL outputs be generated?<br />
Select Use the feedback path inside the PLL.<br />
Select In normal mode<br />
Which output clock will be compensated<br />
for?<br />
c0<br />
Create optional inputs for dynamic<br />
reconfiguration<br />
Turned on<br />
Long chain: All 6 core and 4 external clocks<br />
are available<br />
Selected<br />
Create an ‘pllena’ input to selectively enable<br />
the PLL<br />
Turned off<br />
Create an ‘areset’ input to asynchronously<br />
reset the PLL<br />
Turned on<br />
Create an ‘pfdena’ input to selectively<br />
enable the phase/frequency detector<br />
Turned off<br />
Create ‘locked’ output Turned on<br />
Create output file(s) using ‘Advanced’ PLL<br />
parameters<br />
Turned off<br />
Use this clock Turned on<br />
Enter output clock frequency 100 MHz<br />
Clock phase shift 0 degrees<br />
Clock duty cycle (%) 50<br />
Create a clock enable input Turned off<br />
EDA Generate netlist Turned off<br />
<strong>Phase</strong>-<strong>Locked</strong> <strong>Loop</strong> <strong>Reconfiguration</strong> (<strong>ALTPLL</strong>_<strong>RECONFIG</strong>) Megafunction
Page 12 Design Example<br />
Table 2. Configuration Settings for the <strong>ALTPLL</strong> Megafunction (Part 2 of 2)<br />
MegaWizard Plug-In<br />
Manager Page<br />
Summary<br />
Settings Value<br />
Variation file Turned on<br />
PinPlanner ports PPF file Turned on<br />
AHDL Include file Turned on<br />
VHDL component declaration file Turned on<br />
Quartus II symbol file Turned on<br />
Instantiation template file Turned on<br />
7. Click Finish. The reconfig_pll module is built.<br />
8. Click OK. The MegaWizard Plug-In Manager resets to page 2a to allow you to<br />
create a new custom megafunction variation.<br />
9. In the MegaWizard Plug-In Manager pages, select or verify the configuration<br />
settings listed in Table 3. Click Next to advance from one page to the next.<br />
Table 3. Configuration Settings for the <strong>ALTPLL</strong>_<strong>RECONFIG</strong> Megafunction<br />
MegaWizard Plug-In<br />
Manager Page<br />
Settings Value<br />
Megafunction<br />
Under the I/O category, select<br />
<strong>ALTPLL</strong>_<strong>RECONFIG</strong><br />
Which device family will you be using? Stratix<br />
2a<br />
Which type of output file do you want to<br />
create?<br />
VHDL<br />
What name do you want for the output file? pll_reconfig<br />
Return to this page for another create<br />
operation<br />
Turned off<br />
Parameter Settings<br />
(General)<br />
Currently selected device family<br />
Match project/default<br />
Which scan chain type will you be using<br />
Stratix<br />
Turned on<br />
Long chain<br />
Parameter Settings<br />
(General 2)<br />
Do you want to specify initial value of the<br />
scan chain?<br />
File name<br />
Do not use pre initialized RAM - initialize<br />
from ROM instead<br />
Select Yes, use this file for the content data<br />
pll_j1__clk0.mif<br />
Turned off<br />
EDA Generate netlist Turned off<br />
Variation file Turned on<br />
AHDL Include file Turned on<br />
Summary VHDL component declaration file Turned on<br />
Quartus II symbol file Turned on<br />
Instantiation template file Turned on<br />
10. Click Finish. The pll_reconfig module is built.<br />
<strong>Phase</strong>-<strong>Locked</strong> <strong>Loop</strong> <strong>Reconfiguration</strong> (<strong>ALTPLL</strong>_<strong>RECONFIG</strong>) Megafunction February 2012 <strong>Altera</strong> Corporation
Design Example Page 13<br />
February 2012 <strong>Altera</strong> Corporation<br />
Compiling the <strong>ALTPLL</strong> and <strong>ALTPLL</strong>_<strong>RECONFIG</strong> Megafunctions<br />
To add the <strong>ALTPLL</strong> megafunction to the <strong>ALTPLL</strong>_<strong>RECONFIG</strong> megafunction, and<br />
then compile the design in the Quartus II software, follow these steps:<br />
1. On the Project menu, click Add/Remove File in Project. The Settings dialog box<br />
appears.<br />
2. In the Category list, select Files.<br />
3. Click Browse (...) after File name and select pll_recon_ex1.vhd from the project<br />
folder. This file is the top-level module that contains the port-mapping between<br />
the pll_reconfig and reconfig_pll instances.<br />
4. Click Add to add the top-level file to the project.<br />
5. Click OK.<br />
6. On the File menu, click Save Project.<br />
The top-level file is added to the project.<br />
7. To compile the design, on the Processing menu, click Start Compilation.<br />
8. When the Full Compilation was successful message box appears, click OK.<br />
You have now created and compiled the complete design file, which can be viewed in<br />
the RTL Viewer (Figure 9). To display the RTL Viewer, in the Tools menu, select<br />
Netlist Viewers, and click on RTL Viewer.<br />
Figure 9. RTL Viewer — Complete Design File<br />
Simulating the Design Example<br />
To simulate the design example using the ModelSim-<strong>Altera</strong> software, follow these<br />
steps:<br />
1. Unzip the altpll_reconfig_ex1_msim.zip file to any working directory on your<br />
PC.<br />
2. Browse to the folder in which you unzipped the files.<br />
3. Open remote_update_ex2.do in a text editor.<br />
4. In line 1 of the altpll_reconfig_ex1_msim.do file, ensure that the directory path of<br />
the library files is correct. For example, C:/Modeltech_ae/altera/verilog/stratix.<br />
5. On the File menu, click Save.<br />
<strong>Phase</strong>-<strong>Locked</strong> <strong>Loop</strong> <strong>Reconfiguration</strong> (<strong>ALTPLL</strong>_<strong>RECONFIG</strong>) Megafunction
Page 14 Design Example<br />
6. Launch the ModelSim-<strong>Altera</strong> software.<br />
7. On the File menu, click Change Directory.<br />
8. Select the folder in which you unzipped the files.<br />
9. Click OK.<br />
10. On the Tools menu, click Execute Macro.<br />
11. Select the altpll_reconfig_ex1_msim.do file and click Open. This is a script file for<br />
ModelSim-<strong>Altera</strong> software to automate all the necessary settings for the<br />
simulation.<br />
12. Verify the results shown in the Wave window.<br />
You can rearrange, remove, and add signals, and change the radix by modifying the<br />
script altpll_reconfig_ex1_msim.do.<br />
Figure 10 and Figure 11 show the expected simulation results in the ModelSim-<strong>Altera</strong><br />
software. Figure 11 shows the change in c0 frequency starting from 12.75 ms.<br />
Figure 10. Simulation Results in the ModelSim-<strong>Altera</strong> Software (8.9 to 9.5 ms)<br />
Figure 11. Simulation Results in the ModelSim-<strong>Altera</strong> Software (9.5 to 13.5 ms)<br />
<strong>Phase</strong>-<strong>Locked</strong> <strong>Loop</strong> <strong>Reconfiguration</strong> (<strong>ALTPLL</strong>_<strong>RECONFIG</strong>) Megafunction February 2012 <strong>Altera</strong> Corporation
Design Example Page 15<br />
Pulse Width Variation<br />
February 2012 <strong>Altera</strong> Corporation<br />
This design example uses the <strong>ALTPLL</strong>_<strong>RECONFIG</strong> megafunction to modify the pulse<br />
width of an enhanced PLL. This example demonstrates how to reconfigure the c1<br />
counter using the <strong>ALTPLL</strong>_<strong>RECONFIG</strong> megafunction to vary the pulse width of this<br />
counter by changing the high-count and low-count values. The formula for changing<br />
the duty cycle is shown in Figure 12.<br />
Figure 12. Changing the Duty Cycle Formula<br />
Duty cycle = (Ch/Ct) % high time count and (Cl/Ct) % low time count<br />
with RSELODD = 0<br />
Where:<br />
Ch = High time count<br />
Cl = Low time count<br />
Ct = Total time<br />
When you set RSELODD = 1, you subtract 0.5 cycles from the high time and<br />
you add 0.5 cycles to the low time.<br />
For example, if:<br />
Ch = 2 cycles<br />
Cl = 1 cycle<br />
(Note: For odd division factors, the larger number is for the<br />
Ch counter; the smaller number is for the CI counter.)<br />
Setting RSELODD = 1 effectively changes the Ch and Cl to:<br />
High time count = 1.5 cycles<br />
Low time count = 1.5 cycles<br />
Duty cycle = (1.5/3) % high time count and (1.5/3) % low time count<br />
In this example, the pulse width is programmed to change from 50% to 25% , and then<br />
to 75% of the duty cycle.<br />
Generating the <strong>ALTPLL</strong> and <strong>ALTPLL</strong>_<strong>RECONFIG</strong> Megafunctions<br />
To generate the <strong>ALTPLL</strong> and <strong>ALTPLL</strong>_<strong>RECONFIG</strong> megafunctions, perform the<br />
following steps:<br />
1. Open <strong>ALTPLL</strong>_<strong>RECONFIG</strong>_DesignExample_ex2.zip and extract<br />
pll_recon_ex2_1.1.qar.<br />
2. In the Quartus II software, open pll_recon_ex2_1.1.qar and restore the archive file<br />
into your working directory.<br />
3. On the Tools menu, click MegaWizard Plug-In Manager. Page 1 of the<br />
MegaWizard Plug-In Manager appears.<br />
4. Select Create a new custom megafunction variation.<br />
5. Click Next. Page 2a of the MegaWizard Plug-In Manager appears.<br />
<strong>Phase</strong>-<strong>Locked</strong> <strong>Loop</strong> <strong>Reconfiguration</strong> (<strong>ALTPLL</strong>_<strong>RECONFIG</strong>) Megafunction
Page 16 Design Example<br />
6. In the MegaWizard Plug-In Manager pages, select or verify the configuration<br />
settings listed in Table 4. Click Next to advance from one page to the next.<br />
Table 4. Configuration Settings for the <strong>ALTPLL</strong> Megafunction (Part 1 of 2)<br />
MegaWizard<br />
Plug-In Manager<br />
Page<br />
2a<br />
Parameter Settings<br />
(General/Modes)<br />
Parameter Settings<br />
(Scan/Inputs/Lock)<br />
Output Clocks<br />
(clk c1)<br />
Settings Value<br />
Megafunction Under the I/O category, select <strong>ALTPLL</strong><br />
Which device family will you be using? Stratix<br />
Which type of output file do you want to<br />
create?<br />
VHDL<br />
What name do you want for the output file? reconfig_pll<br />
Return to this page for another create<br />
operation<br />
Turned on<br />
Currently selected device family Stratix<br />
Match project/default Turned on<br />
Which device speed grade will you be<br />
using?<br />
Any<br />
What is the frequency of inclk0 input 20 MHz<br />
Which PLL type will you be using? Enhanced PLL<br />
How will the PLL outputs be generated?<br />
Select Use the feedback path inside the PLL.<br />
Select In normal mode<br />
Which output clock will be compensated<br />
for?<br />
c1<br />
Create optional inputs for dynamic<br />
reconfiguration<br />
Turned on<br />
Long chain: All 6 core and 4 external clocks<br />
are available<br />
Selected<br />
Create an ‘pllena’ input to selectively enable<br />
the PLL<br />
Turned off<br />
Create an ‘areset’ input to asynchronously<br />
reset the PLL<br />
Turned on<br />
Create an ‘pfdena’ input to selectively<br />
enable the phase/frequency detector<br />
Turned off<br />
Create ‘locked’ output Turned on<br />
Create output file(s) using ‘Advanced’ PLL<br />
parameters<br />
Turned off<br />
Use this clock Turned on<br />
Enter output clock frequency 15 MHz<br />
Clock phase shift 0 degrees<br />
Clock duty cycle (%) 50<br />
Create a clock enable input Turned off<br />
EDA Generate netlist Turned off<br />
<strong>Phase</strong>-<strong>Locked</strong> <strong>Loop</strong> <strong>Reconfiguration</strong> (<strong>ALTPLL</strong>_<strong>RECONFIG</strong>) Megafunction February 2012 <strong>Altera</strong> Corporation
Design Example Page 17<br />
Table 4. Configuration Settings for the <strong>ALTPLL</strong> Megafunction (Part 2 of 2)<br />
MegaWizard<br />
Plug-In Manager<br />
Page<br />
Summary<br />
February 2012 <strong>Altera</strong> Corporation<br />
Settings Value<br />
Variation file Turned on<br />
PinPlanner ports PPF file Turned on<br />
AHDL Include file Turned on<br />
VHDL component declaration file Turned on<br />
Quartus II symbol file Turned on<br />
Instantiation template file Turned on<br />
7. Click Finish. The reconfig_pll module is built.<br />
8. Click OK. The MegaWizard Plug-In Manager resets to page 2a to allow you to<br />
create a new custom megafunction variation.<br />
9. In the MegaWizard Plug-In Manager pages, select or verify the configuration<br />
settings listed in Table 5. Click Next to advance from one page to the next.<br />
Table 5. Configuration Settings for the <strong>ALTPLL</strong>_<strong>RECONFIG</strong> Megafunction<br />
MegaWizard<br />
Plug-In Manager<br />
Page<br />
Settings Value<br />
Megafunction Under the I/O category, select <strong>ALTPLL</strong>_<strong>RECONFIG</strong><br />
Which device family will you be using? Stratix<br />
2a<br />
Which type of output file do you want to<br />
create?<br />
VHDL<br />
What name do you want for the output file? pll_reconfig<br />
Return to this page for another create<br />
operation<br />
Turned off<br />
Parameter Settings<br />
(General)<br />
Currently selected device family<br />
Match project/default<br />
Which scan chain type will you be using<br />
Stratix<br />
Turned on<br />
Long chain<br />
Parameter Settings<br />
(General)<br />
Do you want to specify initial value of the<br />
scan chain?<br />
File name<br />
Do not use pre initialized RAM - initialize<br />
from ROM instead<br />
Select Yes, use this file for the content data<br />
pll_j1__pll.mif<br />
Turned off<br />
EDA Generate netlist Turned off<br />
Variation file Turned on<br />
AHDL Include file Turned on<br />
Summary VHDL component declaration file Turned on<br />
Quartus II symbol file Turned on<br />
Instantiation template file Turned on<br />
10. Click Finish. The pll_reconfig module is built.<br />
<strong>Phase</strong>-<strong>Locked</strong> <strong>Loop</strong> <strong>Reconfiguration</strong> (<strong>ALTPLL</strong>_<strong>RECONFIG</strong>) Megafunction
Page 18 Design Example<br />
Compiling the <strong>ALTPLL</strong> and <strong>ALTPLL</strong>_<strong>RECONFIG</strong> Megafunctions<br />
To add the <strong>ALTPLL</strong> megafunction to the <strong>ALTPLL</strong>_<strong>RECONFIG</strong> megafunction, and<br />
then compile the design in the Quartus II software, follow these steps:<br />
1. On the Project menu, click Add/Remove Files in Project. The Settings dialog box<br />
appears.<br />
2. In the Category list, select Files.<br />
3. Click Browse (...) after File name and from the project folder, select<br />
pll_recon_ex2.vhd. This file is the top-level module that contains the<br />
port-mapping between the pll_reconfig and reconfig_pll instances.<br />
4. To add the top-level file to the project, click Add.<br />
5. Click OK.<br />
6. On the File menu, click Save Project.<br />
The top-level file is added to the project.<br />
7. To compile the design, on the Processing menu, click Start Compilation.<br />
8. When the Full Compilation was successful message box appears, click OK.<br />
You have now created and compiled the complete design file, which can be viewed in<br />
the RTL Viewer (Figure 13). To display the RTL Viewer, in the Tools menu, select<br />
Netlist Viewers, and click on RTL Viewer.<br />
Figure 13. RTL Viewer — Complete Design File<br />
<strong>Phase</strong>-<strong>Locked</strong> <strong>Loop</strong> <strong>Reconfiguration</strong> (<strong>ALTPLL</strong>_<strong>RECONFIG</strong>) Megafunction February 2012 <strong>Altera</strong> Corporation
Design Example Page 19<br />
February 2012 <strong>Altera</strong> Corporation<br />
Simulating the Design Example<br />
To simulate the design example using the ModelSim-<strong>Altera</strong> software, follow these<br />
steps:<br />
1. Unzip the altpll_reconfig_ex2_msim.zip file to any working directory on your<br />
PC.<br />
2. Browse to the folder in which you unzipped the files.<br />
3. Open the remote_update_ex2.do file in a text editor.<br />
4. In line 1 of the altpll_reconfig_ex2_msim.do file, make sure the directory path of<br />
the library files is correct. For example, C:/Modeltech_ae/altera/verilog/stratix.<br />
5. On the File menu, click Save.<br />
6. Launch the ModelSim-<strong>Altera</strong> software.<br />
7. On the File menu, click Change Directory.<br />
8. Select the folder in which you unzipped the files.<br />
9. Click OK.<br />
10. On the Tools menu, click Execute Macro.<br />
11. Select the altpll_reconfig_ex2_msim.do file and click Open. This is a script file for<br />
ModelSim-<strong>Altera</strong> software to automate all of the necessary settings for the<br />
simulation.<br />
12. Verify the results shown in the Wave window.<br />
You can rearrange, remove, and add signals. and change the radix by modifying the<br />
script altpll_reconfig_ex2_msim.do.<br />
Figure 14 through Figure 19 show the expected simulation results in the<br />
ModelSim-<strong>Altera</strong> software. The duty cycle changes from a ratio of 50:50 to 25:75 and<br />
finally to 75:25.<br />
Figure 14. Changing Parameters (2.11 to 7.23 ms)<br />
<strong>Phase</strong>-<strong>Locked</strong> <strong>Loop</strong> <strong>Reconfiguration</strong> (<strong>ALTPLL</strong>_<strong>RECONFIG</strong>) Megafunction
Page 20 Design Example<br />
Figure 15. <strong>Reconfiguration</strong> (6.32 to 26.8 ms)<br />
Figure 16. Pulse Width Changes From 50:50 Ratio to 25:75 Ratio (20 to 26 ms)<br />
<strong>Phase</strong>-<strong>Locked</strong> <strong>Loop</strong> <strong>Reconfiguration</strong> (<strong>ALTPLL</strong>_<strong>RECONFIG</strong>) Megafunction February 2012 <strong>Altera</strong> Corporation
Design Example Page 21<br />
Figure 17. Changing Parameters (91.79 to 96.91 ms)<br />
Figure 18. <strong>Reconfiguration</strong> (96.92 to 117.4 ms)<br />
February 2012 <strong>Altera</strong> Corporation<br />
<strong>Phase</strong>-<strong>Locked</strong> <strong>Loop</strong> <strong>Reconfiguration</strong> (<strong>ALTPLL</strong>_<strong>RECONFIG</strong>) Megafunction
Page 22 Design Example<br />
Figure 19. Pulse Width Changes To 75:25 Ratio (110 to 113 ms)<br />
<strong>Phase</strong>-<strong>Locked</strong> <strong>Loop</strong> <strong>Reconfiguration</strong> (<strong>ALTPLL</strong>_<strong>RECONFIG</strong>) Megafunction February 2012 <strong>Altera</strong> Corporation
Design Example Page 23<br />
PLL <strong>Reconfiguration</strong> with Multiple .mif Files<br />
February 2012 <strong>Altera</strong> Corporation<br />
This design example uses the <strong>ALTPLL</strong>_<strong>RECONFIG</strong> megafunction to reconfigure the<br />
output of the c0 counter based on the PLL settings specified in multiple .mif files from<br />
external ROMs in Stratix III devices. The .mif files specify PLL settings that<br />
reconfigure the output of the c0 counter from 100 to 200 MHz, 300 MHz, 400 MHz,<br />
and 500 MHz, then back to 200 MHz.<br />
Generating the <strong>ALTPLL</strong> and <strong>ALTPLL</strong>_<strong>RECONFIG</strong> Megafunctions<br />
To generate the <strong>ALTPLL</strong> and <strong>ALTPLL</strong>_<strong>RECONFIG</strong> megafunctions, follow these steps:<br />
1. Open the <strong>ALTPLL</strong>_<strong>RECONFIG</strong>_DesignExample_ex3.zip file to any directory on<br />
your PC.<br />
2. Open the <strong>ALTPLL</strong>_<strong>RECONFIG</strong>_rom.qar project file.<br />
3. On the Tools menu, click MegaWizard Plug-In Manager. Page 1 of the<br />
MegaWizard Plug-In Manager appears.<br />
4. Select the Create a new custom megafunction variation option.<br />
5. Click Next. Page 2a of the MegaWizard Plug-In Manager appears.<br />
6. In the MegaWizard Plug-In Manager pages, select or verify the configuration<br />
settings listed in Table 6. Click Next to advance from one page to the next.<br />
Table 6. Configuration Settings for the <strong>ALTPLL</strong> Megafunction (Part 1 of 2)<br />
MegaWizard Plug-In<br />
Manager Page<br />
2a<br />
Parameter Settings<br />
(General/Modes)<br />
Settings Value<br />
Megafunction Under the I/O category, select <strong>ALTPLL</strong><br />
Which device family will you be using? Stratix III<br />
Which type of output file do you want to<br />
create?<br />
Verilog<br />
What name do you want for the output file? the_pll.v<br />
Return to this page for another create<br />
operation<br />
Turned on<br />
Currently selected device family Stratix III<br />
Match project/default Turned on<br />
Which device speed grade will you be<br />
using?<br />
Any<br />
What is the frequency of inclk0 input 50 MHz<br />
Which PLL type will you be using? Top_Bottom PLL<br />
How will the PLL outputs be generated?<br />
Select Use the feedback path inside the PLL.<br />
Select In normal mode<br />
Which output clock will be compensated<br />
for?<br />
c0<br />
<strong>Phase</strong>-<strong>Locked</strong> <strong>Loop</strong> <strong>Reconfiguration</strong> (<strong>ALTPLL</strong>_<strong>RECONFIG</strong>) Megafunction
Page 24 Design Example<br />
Table 6. Configuration Settings for the <strong>ALTPLL</strong> Megafunction (Part 2 of 2)<br />
MegaWizard Plug-In<br />
Manager Page<br />
Parameter Settings<br />
(Scan/Inputs/Lock)<br />
PLL <strong>Reconfiguration</strong><br />
Output Clocks<br />
(clk c0)<br />
Settings Value<br />
Create an ‘pllena’ input to selectively enable<br />
Disabled<br />
the PLL<br />
Create an ‘areset’ input to asynchronously<br />
Turned on<br />
reset the PLL<br />
Create an ‘pfdena’ input to selectively<br />
Turned off<br />
enable the phase/frequency detector<br />
Create ‘locked’ output Turned on<br />
Enable self reset on loss lock Turned off<br />
Create output file(s) using ‘Advanced’ PLL<br />
Turned off<br />
parameters<br />
Create optional inputs for dynamic<br />
Turned on<br />
reconfiguration<br />
the_pll_initial.mif—taking an inclock of<br />
50 MHz and generating c0 of 100 MHz<br />
Initial Configuration File (filename) Ensure that this option shows the correct path of<br />
the .mif file before compiling the design to avoid<br />
scan chain mismatch warnings.<br />
The files are already generated. They are:<br />
■ the_pll_200_mhz.mif—taking an inclock of<br />
50 MHz and generating c0 of 200 MHz<br />
■ the_pll_300_mhz.mif—taking an inclock of<br />
Additional Configuration File (filename) 50 MHz and generating c0 of 300 MHz<br />
■ the_pll_400_mhz.mif—taking an inclock of<br />
50 MHz and generating c0 of 400 MHz<br />
■ the_pll_500_mhz.mif—taking an inclock of<br />
50 MHz and generating c0 of 500 MHz<br />
Create optional inputs for dynamic phase<br />
Turned off<br />
reconfiguration<br />
Use this clock Turned on<br />
Enter output clock frequency 100 MHz<br />
Clock phase shift 0 degrees<br />
Clock duty cycle (%) 50<br />
EDA Generate netlist Turned off<br />
Variation file Turned on<br />
PinPlanner ports PPF file Turned on<br />
AHDL Include file Turned on<br />
Summary<br />
VHDL component declaration file<br />
Quartus II symbol file<br />
Turned on<br />
Turned on<br />
Instantiation template file Turned on<br />
Verilog HDL block box file Turned on<br />
<strong>Reconfiguration</strong> File for altpll_reconfig Turned on<br />
<strong>Phase</strong>-<strong>Locked</strong> <strong>Loop</strong> <strong>Reconfiguration</strong> (<strong>ALTPLL</strong>_<strong>RECONFIG</strong>) Megafunction February 2012 <strong>Altera</strong> Corporation
Design Example Page 25<br />
February 2012 <strong>Altera</strong> Corporation<br />
The <strong>ALTPLL</strong> megafunction allows you to generate additional configuration files<br />
without going through a compilation stage. It allows you to generate as many<br />
unique configuration files as you need without the difficulty of multiple<br />
compilation flows. All you need to do is to set the intended PLL settings, enter the<br />
file name, and click Generate A Configuration File. Use this capability with the<br />
PLL reconfiguration of multiple .mif files via external ROMs in the<br />
<strong>ALTPLL</strong>_<strong>RECONFIG</strong> megafunction.<br />
7. Click Finish. The the_pll.v module is built.<br />
8. Click OK. The MegaWizard Plug-In Manager resets to page 2a so you can create a<br />
new custom function variation.<br />
9. In the MegaWizard Plug-In Manager pages, select or verify the configuration<br />
settings listed in Table 7. Click Next to advance from one page to the next.<br />
Table 7. Configuration Settings for the <strong>ALTPLL</strong>_<strong>RECONFIG</strong> Megafunction<br />
MegaWizard<br />
Plug-In<br />
Manager Page<br />
Settings Value<br />
Megafunction Under the I/O category, select <strong>ALTPLL</strong>_<strong>RECONFIG</strong><br />
Which device family will you be using? Stratix III<br />
2a<br />
Which type of output file do you want to<br />
create?<br />
Verilog<br />
What name do you want for the output file? pll_reconfig_circuit.v<br />
Return to this page for another create<br />
operation<br />
Turned off<br />
Parameter Currently selected device family Stratix III<br />
Settings Match project/default Turned on<br />
(General) Which scan chain type will you be using Top/Bottom<br />
Do you want to specify initial value of the<br />
scan chain?<br />
Select Yes, use this file for the content data<br />
the_pll_initial_mif.mif<br />
Parameter<br />
Settings<br />
(General)<br />
File name<br />
Do not use pre initialized RAM - initialize<br />
from ROM instead<br />
Ensure that this option shows the correct path of the .mif<br />
file before compiling the design to avoid scan chain<br />
mismatch warnings.<br />
Turned off<br />
Add ports to write to the scan chain from<br />
external ROM during run time<br />
Turned on<br />
EDA Generate netlist Turned off<br />
Variation file Turned on<br />
AHDL Include file Turned on<br />
Summary<br />
VHDL component declaration file<br />
Quartus II symbol file<br />
Turned on<br />
Turned on<br />
Instantiation template file Turned on<br />
Verilog HDL block-box file Turned on<br />
10. Click Finish. The pll_reconfig_circuit module is built.<br />
<strong>Phase</strong>-<strong>Locked</strong> <strong>Loop</strong> <strong>Reconfiguration</strong> (<strong>ALTPLL</strong>_<strong>RECONFIG</strong>) Megafunction
Page 26 Design Example<br />
Compiling the <strong>ALTPLL</strong> and <strong>ALTPLL</strong>_<strong>RECONFIG</strong> Megafunctions<br />
To add the <strong>ALTPLL</strong> megafunction to the <strong>ALTPLL</strong>_<strong>RECONFIG</strong> megafunction, and<br />
then compile the design in the Quartus II software, follow these steps:<br />
1. On the Project menu, click Add/Remove Files in Project. The Settings dialog box<br />
appears.<br />
2. In the Category list, select Files.<br />
3. Click Browse (...) after File name and from the project folder, select<br />
<strong>ALTPLL</strong>_<strong>RECONFIG</strong>_rom.v. This file is the top-level module that contains the<br />
port-mapping between the pll_reconfig_circuit and the_pll instances.<br />
4. To add the top-level file to the project, click Add.<br />
5. Click OK.<br />
6. On the File menu, click Save Project.<br />
The top-level file is added to the project.<br />
7. To compile the design, on the Processing menu, click Start Compilation.<br />
8. When the Full Compilation was successful message box appears, click OK.<br />
You have now created and compiled the complete design file, which can be viewed in<br />
the RTL Viewer (Figure 20). To display the RTL Viewer, in the Tools menu, select<br />
Netlist Viewers, and click on RTL Viewer.<br />
Figure 20. Top-Level Design Implementation Using the RTL Viewer<br />
This design consists of eight modules, which are:<br />
1. the_pll:u1—This represents the Stratix III PLL (Top and Bottom PLL) that is to be<br />
reconfigured. The settings are as follows:<br />
■ inclk = 50 MHz<br />
■ c0 = 100 MHz<br />
<strong>Phase</strong>-<strong>Locked</strong> <strong>Loop</strong> <strong>Reconfiguration</strong> (<strong>ALTPLL</strong>_<strong>RECONFIG</strong>) Megafunction February 2012 <strong>Altera</strong> Corporation
Design Example Page 27<br />
February 2012 <strong>Altera</strong> Corporation<br />
2. pll_reconfig_circuit:u2—This represents the PLL reconfiguration circuitry used<br />
by the PLL to reconfigure its settings during user mode. In addition, this circuitry<br />
has a scan-chain cache, which contains the intended PLL settings to be<br />
reconfigured. It also has additional ports to take advantage of cycling multiple<br />
.mif files for reconfiguration from external ROMs. This design example<br />
demonstrates the capability of these ports. The settings are represented by the<br />
the_pll_initial.mif file. The settings are as follows:<br />
■ inclk = 50 MHz<br />
■ c0 = 100 MHz<br />
3. rom_muxer:u3—This represents a 4-to-1 multiplexer used to multiplex serial data<br />
coming from four ROMs to the rom_data_in port of the pll_reconfig_circuit<br />
module. The multiplexer is used because the rom_data_in port is 1 bit in size;<br />
however, it is controlled by a 2-bit selector, hence its ability to multiplex four<br />
signals.<br />
4. rom_1:u4—This represents the external ROM, which contains the intended<br />
reconfiguration settings of the PLL. It has a 1-bit output port (q) because of the<br />
serial nature of writing the intended PLL settings to the scan-chain cache of the<br />
pll_reconfig_circuit module. It has a capacity of 256 words of 1-bit size. The ROM<br />
uses 256 words because that is the closest approximate size of the scan-chain file<br />
for this type of PLL, which is 234 bits. For this ROM, it is represented by the<br />
the_pll_200_mhz.mif file, which is 234 bits. The settings are as follows:<br />
■ inclk = 50 MHz<br />
■ c0 = 200 MHz<br />
5. rom_2:u5—This represents the external ROM, which contains the intended<br />
reconfiguration settings of the PLL. It has a 1-bit output port (q) because of the<br />
serial nature of writing the intended PLL settings to the scan-chain cache of the<br />
pll_reconfig_circuit module. It has a capacity of 256 words of 1-bit size. The ROM<br />
uses 256 words because that is the closest approximate size of the scan-chain file<br />
for this type of PLL, which is 234 bits. For this ROM, it is represented by the<br />
the_pll_300_mhz.mif file, which is 234 bits. The settings are as follows:<br />
■ inclk = 50 MHz<br />
■ c0 = 300 MHz<br />
6. rom_3:u6—This represents the external ROM, which contains the intended<br />
reconfiguration settings of the PLL. It has a 1-bit output port (q) because of the<br />
serial nature of writing the intended PLL settings to the scan-chain cache of the<br />
pll_reconfig_circuit module. It has a capacity of 256 words of 1-bit size. The ROM<br />
uses 256 words because that is the closest approximate size of the scan-chain file<br />
for this type of PLL, which is 234 bits. For this ROM, it is represented by the .mif<br />
file the_pll_400_mhz.mif, which is 234 bits. The settings are as follows:<br />
■ inclk = 50 MHz<br />
■ c0 = 400 MHz<br />
<strong>Phase</strong>-<strong>Locked</strong> <strong>Loop</strong> <strong>Reconfiguration</strong> (<strong>ALTPLL</strong>_<strong>RECONFIG</strong>) Megafunction
Page 28 Design Example<br />
7. rom_4:u7—This represents the external ROM, which contains the intended<br />
reconfiguration settings of the PLL. It is has a 1-bit output port (q) because of the<br />
serial nature of writing the intended PLL settings to the scan-chain cache of the<br />
pll_reconfig_circuit module. It has a capacity of 256 words of 1-bit size. The ROM<br />
uses 256 words because that is the closest approximate size of the scan-chain file<br />
for this type of PLL, which is 234 bits. For this ROM, it is represented by the .mif<br />
file the_pll_500_mhz.mif, which is 234 bits. The settings are as follows:<br />
■ inclk = 50 MHz<br />
■ c0 = 500 MHz<br />
Figure 21. Control_sm Module State Diagram<br />
reset<br />
8. control_sm:u8—This represents the state machine that controls the three main<br />
processes involved in the PLL reconfiguration with multiple .mif files via external<br />
ROMs. The state machine selects the ROM to be reconfigured, initiates the writing<br />
of the ROM content to the scan-chain cache, and initiates the reconfiguration of the<br />
PLL using the written content in the scan-chain cache to the PLL. You can modify<br />
this simple state machine to suit your design needs.<br />
Figure 21 shows the state diagram for the state machine.<br />
state_0 state_1 state_2 state_3 state_4 state_5 state_6<br />
Figure 22 shows the corresponding condition for the state transition.<br />
Figure 22. Control_sm Module State Transition Conditions<br />
<strong>Phase</strong>-<strong>Locked</strong> <strong>Loop</strong> <strong>Reconfiguration</strong> (<strong>ALTPLL</strong>_<strong>RECONFIG</strong>) Megafunction February 2012 <strong>Altera</strong> Corporation
Design Example Page 29<br />
February 2012 <strong>Altera</strong> Corporation<br />
Figure 23 shows how the whole state machine module (control_sm) is being<br />
implemented in the RTL Viewer.<br />
Figure 23. control_sm Design Implementation via the RTL Viewer<br />
Figure 21 through Figure 23 show how the state machine’s control paths and data<br />
paths are implemented. The next section describes the state machine behavior in<br />
detail.<br />
Simulating the Design Example<br />
To simulate the design example using the ModelSim-<strong>Altera</strong> software, follow these<br />
steps:<br />
1. Unzip the altpll_reconfig_ex3_msim.zip file to any directory on your PC.<br />
2. Browse to the folder in which you unzipped the files.<br />
3. Open remote_update_ex2.do file in a text editor.<br />
4. In line 1 of the altpll_reconfig_ex3_msim.do, ensure that the directory path of the<br />
library files is correct. For example, C:/Modeltech_ae/altera/verilog/stratix<br />
5. On the File menu, click Save.<br />
6. Launch the ModelSim-<strong>Altera</strong> software.<br />
7. On the File menu, click Change Directory.<br />
8. Select the folder in which you unzipped the files.<br />
9. Click OK.<br />
10. On the Tools menu, click Execute Macro.<br />
11. Select the altpll_reconfig_ex3_msim.do file and click Open. This is a script file for<br />
the ModelSim-<strong>Altera</strong> software to automate all of the necessary settings for the<br />
simulation.<br />
12. Verify the results shown in the Wave window.<br />
<strong>Phase</strong>-<strong>Locked</strong> <strong>Loop</strong> <strong>Reconfiguration</strong> (<strong>ALTPLL</strong>_<strong>RECONFIG</strong>) Megafunction
Page 30 Design Example<br />
Figure 24 shows the simulation results when writing from ROM 1 to scan cache of the<br />
<strong>ALTPLL</strong>_<strong>RECONFIG</strong> megafunction for the duration of 0 to 250 ns.<br />
Figure 24. Initial Writing from ROM 1 to the Scan Cache of the <strong>ALTPLL</strong>_<strong>RECONFIG</strong> Megafunction (0 to 250 ns)<br />
The simulation begins when the PLL gets locked (refer to Figure 24); the locked signal<br />
is asserted at 90 ns. The PLL output c0 produces a 100 MHz clock. The original<br />
settings of the PLL have an input clock of 50 MHz and generates an output clock of<br />
100 MHz.<br />
1 The output_current_state signal is 0, which shows the current state of the state<br />
machine that controls the PLL reconfiguration process from the external ROMs.<br />
When the state machine is at 0 (indicated by the output_current_state signal), it is<br />
waiting for the assertion of the input_want_to reconfig signal together with the<br />
value of the input_intended_rom [1:0] signal, which is 00. The state machine<br />
remains at this state until the above conditions are satisfied.<br />
At 140 ns, the input_want_to_reconfig signal is asserted for 1 clock cycle and the<br />
input_intended_rom [1:0] signal is set to 00. The input_want_to_reconfig signal<br />
controls the write_from_rom signal of the <strong>ALTPLL</strong>_<strong>RECONFIG</strong> instantiation. This<br />
begins the process of writing the contents of the intended ROM to the scan cache of<br />
the <strong>ALTPLL</strong>_<strong>RECONFIG</strong> megafunction. The input_intended_rom [1:0] signal is<br />
used to control the selector (sel [1:0] signal) of the multiplexer instantiation, which<br />
multiplexes the intended ROM contents (in this case, ROM 1) to the rom_data_in<br />
signal of the <strong>ALTPLL</strong>_<strong>RECONFIG</strong> instantiation.<br />
At 150 ns, the state machine is at 1 (indicated by the output_current_state signal).<br />
This signifies that the input_want_to_reconfig signal has been asserted together with<br />
the value of the input_intended_rom [1:0] signal, which is 00. This causes the<br />
write_from_rom signal of the <strong>ALTPLL</strong>_<strong>RECONFIG</strong> instantiation to be asserted. This<br />
also causes the selector (sel [1:0] signal) of the multiplexer instantiation to<br />
multiplex the intended ROM contents (in this case, ROM 1) to the rom_data_in signal<br />
of the <strong>ALTPLL</strong>_<strong>RECONFIG</strong> instantiation.<br />
<strong>Phase</strong>-<strong>Locked</strong> <strong>Loop</strong> <strong>Reconfiguration</strong> (<strong>ALTPLL</strong>_<strong>RECONFIG</strong>) Megafunction February 2012 <strong>Altera</strong> Corporation
Design Example Page 31<br />
February 2012 <strong>Altera</strong> Corporation<br />
At 170 ns, the state machine is at 2 (indicated by the output_current_state signal). At<br />
this state, the state machine is waiting for the assertion of the tapout_busy signal,<br />
which signifies the busy signal of the <strong>ALTPLL</strong>_<strong>RECONFIG</strong> instantiation. The state<br />
machine tracks the busy signal because whatever operation the <strong>ALTPLL</strong>_<strong>RECONFIG</strong><br />
is in (for example, read_param, write_param, reconfig, or write_from_rom) when<br />
asserted for 1 clock cycle, the busy signal is asserted for a particular duration. This<br />
indicates that the particular operation is being processed by the <strong>ALTPLL</strong>_<strong>RECONFIG</strong><br />
instantiation. In this state, the tapout_busy signal has been asserted, signifying that<br />
the <strong>ALTPLL</strong>_<strong>RECONFIG</strong> instantiation has begun processing the write_from_rom<br />
operation.<br />
At 190 ns, the state machine is at 3 (indicated by the output_current_state signal).<br />
This signifies that the tapout_busy signal has been asserted. At this point the state<br />
machine waits until the tapout_busy signal gets deasserted, to signify that the process<br />
of writing from the ROM to the scan cache of the <strong>ALTPLL</strong>_<strong>RECONFIG</strong> instantiation<br />
has been completed. Observe that the tapout_rom_common_rden signal has been<br />
asserted. This is the probed-out signal of the write_rom_ena signal, which is part of<br />
the <strong>ALTPLL</strong>_<strong>RECONFIG</strong> instantiation. This signal functions as the enable signal to<br />
the ROMs used in this design. Observe that the tapout_rom_common_address [7:0]<br />
signal begins changing value. This is the probed-out signal of the rom_address_out<br />
[7:0], which is part of the <strong>ALTPLL</strong>_<strong>RECONFIG</strong> instantiation. This signal controls<br />
which address of the ROM should be read out to the multiplexer instantiation. When<br />
the tapout_rom_common_rden signal is asserted together with the value of 0 for the<br />
tapout_rom_common_address [7:0] signal, it reads out the data from address 0 of the<br />
ROM 1 to the q port of the ROM, which is connected to the data_0 signal of the<br />
multiplexer. Then the data is multiplexed according to the selector of the multiplexer,<br />
and sent out to the rom_data_in port of the <strong>ALTPLL</strong>_<strong>RECONFIG</strong> instantiation. This<br />
port is probed out and is observed by the tapout_rom_data_in port. Therefore, the<br />
data from the intended ROM can be observed in simulation.<br />
1 The tapout_rom_common_rden signal is asserted 1 clock cycle later, after the<br />
tapout_busy signal is asserted.<br />
Figure 25 shows the simulation results when writing from ROM 1 to the scan cache of<br />
the <strong>ALTPLL</strong>_<strong>RECONFIG</strong> megafunction for the duration of 60 to 580 ns.<br />
Figure 25. Initial Writing from ROM 1 to the Scan Cache of the <strong>ALTPLL</strong>_<strong>RECONFIG</strong> Megafunction (60 to 580 ns)<br />
<strong>Phase</strong>-<strong>Locked</strong> <strong>Loop</strong> <strong>Reconfiguration</strong> (<strong>ALTPLL</strong>_<strong>RECONFIG</strong>) Megafunction
Page 32 Design Example<br />
When data from the ROM is written to the scan cache of the <strong>ALTPLL</strong>_<strong>RECONFIG</strong>, it<br />
is done serially, meaning a 1-by-1 bit per cycle, from address 0 to address 233. You can<br />
observe this via the tapout_rom_data_in signal. The valid data read out from the<br />
ROM is delayed by 2 clock cycles.<br />
When the simulation is at 270 ns, the tapout_rom_common_rden signal is asserted with<br />
the tapout_rom_common_address [7:0] signal with a value of 4. The data read out has<br />
a value of 1 in the .mif file in Figure 25. However, this value only appears when the<br />
tapout_rom_common_rden signal is asserted via the tapout_rom_common_address<br />
[7:0] signal with a value of 6 at 310 ns, implying a 2-clock-cycle delay.<br />
This writing process continues until it has reached address 233. Figure 26 shows the<br />
simulation results of the final process in writing the contents of ROM 1 to the scan<br />
cache of the <strong>ALTPLL</strong>_<strong>RECONFIG</strong> megafunction.<br />
Figure 26. Ending Process of Writing the Contents of ROM 1 to the Scan Cache of the <strong>ALTPLL</strong>_<strong>RECONFIG</strong> Megafunction<br />
(4700 to 5040 ns) (1)<br />
Note to Figure 26:<br />
(1) This figure also shows the initialization of the reconfiguration process.<br />
At 4850 ns, the tapout_rom_common_rden signal is asserted with the<br />
tapout_rom_common_address [7:0] signal with a value of 233. This is the last address<br />
read out from ROM 1.<br />
1 The data is available only 2 clock cycles later on the tapout_rom_data_in signal. The<br />
tapout_rom_common_rden signal and the tapout_busy signal are still asserted. The<br />
output_current_state signal still has a value of 3. It will remain in this state until the<br />
tapout_busy signal is deasserted.<br />
At 4870 ns, the tapout_rom_common_rden signal is deasserted with the<br />
tapout_rom_common_address [7:0] signal with a value of 0. This stops the ROM 1<br />
from reading out data; therefore, the address becomes 0. The tapout_rom_data_in<br />
signal still generates valid output data and the tapout_busy signal is asserted. The<br />
output_current_state signal still has a value of 3.<br />
At 4890 ns, the tapout_rom_common_rden signal remains deasserted with the<br />
tapout_rom_common_address [7:0] signal with a value of 0. Observe that the<br />
tapout_rom_data_in signal generates the last valid output data from ROM 1 (from<br />
address 233). The tapout_busy signal is deasserted and the output_current_state<br />
signal still has a value of 3.<br />
<strong>Phase</strong>-<strong>Locked</strong> <strong>Loop</strong> <strong>Reconfiguration</strong> (<strong>ALTPLL</strong>_<strong>RECONFIG</strong>) Megafunction February 2012 <strong>Altera</strong> Corporation
Design Example Page 33<br />
February 2012 <strong>Altera</strong> Corporation<br />
At 4910 ns, the tapout_rom_common_rden signal remains deasserted with the<br />
tapout_rom_common_address [7:0] signal with a value of 0.<br />
1 The tapout_rom_data_in signal no longer generates valid output data. The<br />
tapout_busy signal remains deasserted. The output_current_state signal changes<br />
value from 3 to 4. In this state, the state machine is initiating the reconfiguration<br />
process.<br />
You can observe this state by the assertion of the tapout_reconfig signal for 1 clock<br />
cycle. This signal controls the reconfig signal of the <strong>ALTPLL</strong>_<strong>RECONFIG</strong><br />
instantiation. When this signal is asserted for 1 clock cycle, the <strong>ALTPLL</strong>_<strong>RECONFIG</strong><br />
instantiation begins the PLL reconfiguration process by using the settings written<br />
from ROM 1 to the scan cache of the <strong>ALTPLL</strong>_<strong>RECONFIG</strong> instantiation.<br />
At 4930 ns, the tapout_reconfig signal is deasserted and the tapout_busy signal is<br />
asserted. This indicates that the state machine tracks the busy signal. The state<br />
machine tracks the busy signal because whatever operation the <strong>ALTPLL</strong>_<strong>RECONFIG</strong><br />
is in (for example read_param, write_param, reconfig, write_from_rom) when<br />
asserted for 1 clock cycle, the busy signal is asserted for a particular duration. This<br />
indicates that the particular operation is being processed by the <strong>ALTPLL</strong>_<strong>RECONFIG</strong><br />
instantiation. The output_current_state signal changes value from 4 to 5. It remains<br />
in this state until the tapout_busy signal is asserted.<br />
At 4950 ns, the tapout_busy signal remains asserted. The output_current_state<br />
signal changes value from 5 to 6. It remains in this state until the tapout_busy signal is<br />
deasserted.<br />
Figure 27 shows the final part of the reconfiguration process.<br />
Figure 27. PLL <strong>Reconfiguration</strong> (10,000 to 10,400 ns) (1)<br />
Note to Figure 27:<br />
(1) From c0 = 100 MHz to c0 = 200 MHz.<br />
At 10,130 ns, the tapout_busy signal remains asserted. The output_current_state<br />
signal remains at a value of 6. Therefore, the state machine is still waiting for the<br />
tapout_busy signal to be deasserted. The c0 signal is still at 100 MHz and the locked<br />
signal remains asserted, which means the PLL is still locked to a 100-MHz signal.<br />
<strong>Phase</strong>-<strong>Locked</strong> <strong>Loop</strong> <strong>Reconfiguration</strong> (<strong>ALTPLL</strong>_<strong>RECONFIG</strong>) Megafunction
Page 34 Design Example<br />
At 10,170 ns, the tapout_busy signal remains asserted. The output_current_state<br />
signal remains at a value of 6. Therefore, the state machine is still waiting for the<br />
tapout_busy signal to be deasserted. The locked signal is deasserted, which means<br />
the PLL has lock loss, and the c0 signal is at a 0 value and not producing a clock pulse.<br />
At 10,190 ns, the tapout_busy signal is deasserted. This means the PLL<br />
reconfiguration process is complete. The output_current_state signal remains at a<br />
value of 6. The locked signal remains deasserted. The c0 signal is an unknown value<br />
and still not producing a clock pulse.<br />
At 10,210 ns, the tapout_busy signal remains deasserted. The output_current_state<br />
signal changes to a value of 0. This is the original state, in which the state machine<br />
waits for the next reconfiguration from an external ROM. The locked signal remains<br />
deasserted. The c0 signal is an unknown value and still does not produce a clock<br />
pulse.<br />
At 10,290 ns, the tapout_busy signal remains deasserted. The output_current_state<br />
signal remains at a value of 0. The locked signal is asserted. The c0 signal now<br />
produces a 200-MHz clock signal, which is the intended setting from ROM 1.<br />
Figure 28 through Figure 30 show the PLL reconfiguration process from the<br />
remaining ROMs (ROM 2, ROM 3, and ROM 4, respectively).<br />
Figure 28. PLL <strong>Reconfiguration</strong> from ROM 2 (20,330 to 20,600 ns) (1)<br />
Note to Figure 28:<br />
(1) From c0 = 200 MHz to c0 = 300 MHz.<br />
<strong>Phase</strong>-<strong>Locked</strong> <strong>Loop</strong> <strong>Reconfiguration</strong> (<strong>ALTPLL</strong>_<strong>RECONFIG</strong>) Megafunction February 2012 <strong>Altera</strong> Corporation
Design Example Page 35<br />
Figure 29. PLL <strong>Reconfiguration</strong> from ROM 3 (30,480 to 30,750 ns) (1)<br />
Note to Figure 29:<br />
(1) From c0 = 300 MHz to c0 = 400 MHz.<br />
Figure 30. PLL <strong>Reconfiguration</strong> from ROM 4 (40,800 to 41,090 ns) (1)<br />
Note to Figure 30:<br />
(1) From c0 = 400 MHz to c0 = 500 MHz.<br />
February 2012 <strong>Altera</strong> Corporation<br />
<strong>Phase</strong>-<strong>Locked</strong> <strong>Loop</strong> <strong>Reconfiguration</strong> (<strong>ALTPLL</strong>_<strong>RECONFIG</strong>) Megafunction
Page 36 Design Example<br />
The next part of the simulation demonstrates the PLL reconfiguration from ROM 1<br />
again, but highlights the ROM address resetting capabilities during writing from an<br />
external ROM to the scan cache of the <strong>ALTPLL</strong>_<strong>RECONFIG</strong> instantiation. The c0<br />
signal is 500 MHz and is reconfigured to 100 MHz. Figure 31 shows the process of<br />
initiating writing the contents of ROM 1 to the <strong>ALTPLL</strong>_<strong>RECONFIG</strong> instantiation.<br />
Figure 31. Initial Writing from ROM 1 to the Scan Cache of the <strong>ALTPLL</strong>_<strong>RECONFIG</strong> Megafunction (41,070 to 41,330 ns)<br />
Figure 32 shows how the reset_rom_address capability is used.<br />
Figure 32. Resetting the Address when Writing from ROM 1 to the Scan Cache of the <strong>ALTPLL</strong>_<strong>RECONFIG</strong> Megafunction<br />
(41,200 to 41,450 ns)<br />
At 41,250 ns, the tapout_rom_common_rden signal is asserted with the<br />
tapout_rom_common_address [7:0] signal with a value of 4. Observe that the<br />
tapout_busy signal is asserted. The output_current_state signal is 3. The normal<br />
writing process from ROM to scan cache of the <strong>ALTPLL</strong>_<strong>RECONFIG</strong> instantiation<br />
continues.<br />
At 41,290 ns, the tapout_rom_common_rden signal is asserted with the<br />
tapout_rom_common_address [7:0] signal with a value of 6. The tapout_rom_data_in<br />
signal contains the valid data from address 4 because of the 2-clock-cycle delay. The<br />
tapout_busy signal is asserted. The output_current_state signal is 3.<br />
At 41,380 ns, the input_main_reset_rom_address is asserted for 1 clock cycle. This<br />
signal controls the reset_rom_address of the <strong>ALTPLL</strong>_<strong>RECONFIG</strong> instantiation. It<br />
resets the address counter in the <strong>ALTPLL</strong>_<strong>RECONFIG</strong> instantiation to 0.<br />
<strong>Phase</strong>-<strong>Locked</strong> <strong>Loop</strong> <strong>Reconfiguration</strong> (<strong>ALTPLL</strong>_<strong>RECONFIG</strong>) Megafunction February 2012 <strong>Altera</strong> Corporation
Specifications Page 37<br />
Specifications<br />
February 2012 <strong>Altera</strong> Corporation<br />
At 41,390 ns, the tapout_rom_common_rden signal is deasserted for 1 clock cycle. The<br />
tapout_rom_common_address [7:0] signal is changed to a value of 0. The<br />
tapout_rom_data_in signal still generates the previous 2-clock-cycle output data<br />
(address 9), which is of value 1. The tapout_busy signal is still asserted. The<br />
output_current_state signal is 3.<br />
At 41,410 ns, the tapout_rom_common_rden signal is reasserted. The<br />
tapout_rom_common_address [7:0] signal is changed to a value of 0. This restarts the<br />
writing of the contents of ROM 1 to the <strong>ALTPLL</strong>_<strong>RECONFIG</strong> scan cache from address<br />
0. The tapout_busy signal is still asserted. The output_current_state signal is 3.<br />
The PLL reconfiguration process continues as normal until the c0 signal is 200 MHz,<br />
as shown in Figure 33.<br />
Figure 33. PLL <strong>Reconfiguration</strong> From ROM1 (40,800 to 41,090 ns) (1)<br />
Note to Figure 33:<br />
(1) From c0 = 500 MHz to c0 = 200 MHz.<br />
You can modify the design to suit your requirements when attempting to reconfigure<br />
the PLL from multiple .mif files via external ROMs.<br />
This section describes the prototypes, component declarations, ports, and parameters<br />
of the <strong>ALTPLL</strong>_<strong>RECONFIG</strong> megafunction. These ports and parameters are available<br />
to customize the <strong>ALTPLL</strong>_<strong>RECONFIG</strong> megafunction according to your application.<br />
Verilog HDL Prototype<br />
The following Verilog HDL prototype is located in the Verilog Design File (.v)<br />
altera_mf.v in the \eda\synthesis directory.<br />
modulealtpll_reconfig<br />
#( parameterintended_device_family = "unused",<br />
parameterinit_from_rom = "NO",<br />
parameterpll_type = "UNUSED",<br />
parameterscan_chain = "UNUSED",<br />
parameterscan_init_file = "UNUSED",<br />
<strong>Phase</strong>-<strong>Locked</strong> <strong>Loop</strong> <strong>Reconfiguration</strong> (<strong>ALTPLL</strong>_<strong>RECONFIG</strong>) Megafunction
Page 38 Specifications<br />
parameteruse_scanclk_sync_register = "NO",<br />
parameterlpm_type = "altpll_reconfig",<br />
parameterlpm_hint = "unused")<br />
( outputwirebusy,<br />
inputwireclock,<br />
inputwire[2:0]counter_param,<br />
inputwire[3:0]counter_type,<br />
inputwire[8:0]data_in,<br />
outputwire[8:0]data_out,<br />
outputwirepll_areset,<br />
inputwirepll_areset_in,<br />
outputwirepll_configupdate,<br />
outputwirepll_scanaclr,<br />
outputwirepll_scanclk,<br />
outputwirepll_scanclkena,<br />
outputwirepll_scandata,<br />
inputwirepll_scandataout,<br />
inputwirepll_scandone,<br />
outputwirepll_scanread,<br />
outputwirepll_scanwrite,<br />
inputwireread_param,<br />
inputwirereconfig,<br />
inputwirereset,<br />
inputwirereset_rom_address,<br />
outputwire[7:0]rom_address_out,<br />
inputwirerom_data_in,<br />
inputwirewrite_from_rom,<br />
inputwirewrite_param,<br />
outputwirewrite_rom_ena)/* synthesis syn_black_box=1 */;<br />
endmodule //altpll_reconfig<br />
VHDL Component Declaration<br />
The following VHDL component declaration is located in the VHDL Design File<br />
(.vhd) altera_mf_components.vhd in the \libraries\vhdl\altera_mf directory.<br />
component altpll_reconfig<br />
generic (<br />
intended_device_family:string := "unused";<br />
init_from_rom:string := "NO";<br />
pll_type:string := "UNUSED";<br />
<strong>Phase</strong>-<strong>Locked</strong> <strong>Loop</strong> <strong>Reconfiguration</strong> (<strong>ALTPLL</strong>_<strong>RECONFIG</strong>) Megafunction February 2012 <strong>Altera</strong> Corporation
Specifications Page 39<br />
February 2012 <strong>Altera</strong> Corporation<br />
scan_chain:string := "UNUSED";<br />
scan_init_file:string := "UNUSED";<br />
use_scanclk_sync_register:string := "NO";<br />
lpm_hint:string := "UNUSED";<br />
lpm_type:string := "altpll_reconfig"<br />
);<br />
port(<br />
busy: out std_logic;<br />
clock: in std_logic;<br />
counter_param:in std_logic_vector(2 downto 0) := (others =><br />
'0');<br />
counter_type:in std_logic_vector(3 downto 0) := (others =><br />
'0');<br />
data_in:in std_logic_vector(8 downto 0) := (others => '0');<br />
data_out:out std_logic_vector(8 downto 0);<br />
pll_areset:out std_logic;<br />
pll_areset_in:in std_logic := '0';<br />
pll_configupdate:out std_logic;<br />
pll_scanaclr:out std_logic;<br />
pll_scanclk:out std_logic;<br />
pll_scanclkena:out std_logic;<br />
pll_scandata:out std_logic;<br />
pll_scandataout:in std_logic := '0';<br />
pll_scandone:in std_logic := '0';<br />
pll_scanread:out std_logic;<br />
pll_scanwrite:out std_logic;<br />
read_param:in std_logic := '0';<br />
reconfig:in std_logic := '0';<br />
reset: in std_logic;<br />
reset_rom_address:in std_logic := '0';<br />
rom_address_out:out std_logic_vector(7 downto 0);<br />
rom_data_in:in std_logic := '0';<br />
write_from_rom:in std_logic := '0';<br />
write_param:in std_logic := '0';<br />
write_rom_ena:out std_logic<br />
);<br />
end component;<br />
<strong>Phase</strong>-<strong>Locked</strong> <strong>Loop</strong> <strong>Reconfiguration</strong> (<strong>ALTPLL</strong>_<strong>RECONFIG</strong>) Megafunction
Page 40 Specifications<br />
Ports and Parameters<br />
This section describes the ports and parameters of the <strong>ALTPLL</strong>_<strong>RECONFIG</strong><br />
megafunction.<br />
Table 8 lists the <strong>ALTPLL</strong>_<strong>RECONFIG</strong> megafunction input ports.<br />
Table 8. <strong>ALTPLL</strong>_<strong>RECONFIG</strong> Megafunction Input Ports (Part 1 of 3)<br />
Port Name Required? Description<br />
Clock input for loading individual parameters. This signal also clocks the PLL during<br />
reconfiguration.<br />
clock Yes The clock input port must be connected to a valid clock.<br />
Refer to the DC and Switching Characteristics chapter of the respective device<br />
handbooks for the clock fMAX. Asynchronous reset input to the megafunction.<br />
reset Yes <strong>Altera</strong> recommends that you reset this megafunction before first use to guarantee that<br />
it is in a valid state. However, it does power up in the reset state. This port must be<br />
connected.<br />
Data input that provides parameter value when writing parameters.<br />
A 9-bit input port that provides the data to be written to the scan cache during a write<br />
operation. The bit width of the counter parameter to be written determines the<br />
data_in[] No number of bits of data_in[] that are read into the cache. For example, the low bit<br />
count of the C0 counter is 8-bit wide, so data_in[7..0] is read to the correct cache<br />
location. The bypass mode for the C0 counter is 1-bit wide, so data_in[0] is read<br />
for the value of this parameter. If omitted, the default value is 0.<br />
Specifies the counter type.<br />
An input port in the form of a 4-bit bus that selects which counter type should be<br />
selected for the corresponding operation (read, write, or reconfig). The following<br />
table specifies the mapping between the counter_type value and the physical<br />
counter to be set. For details, refer to the following tables:<br />
counter_type[] No<br />
■ Table 11 on page 45 counter_type[3..0] settings for Stratix III, Stratix IV, and<br />
Cyclone III devices.<br />
■ Table 13 on page 47 counter_type[3..0] settings for Stratix II, Stratix II GX,<br />
Arria GX and HardCopy II devices.<br />
■ Table 14 on page 49 counter_type[3..0] settings for Stratix and Stratix GX<br />
devices.<br />
Specifies the parameter for the value specified in the counter_type port.<br />
An input port in the form of a 3-bit bus that selects which parameter for the given<br />
counter type should be updated. The mapping to each parameter type and the<br />
corresponding parameter bit-width are defined in the following tables:<br />
counter_param[] No<br />
■ Table 12 on page 46 counter_param[2..0] settings for Stratix III, Stratix IV, and<br />
Cyclone III devices.<br />
■ Table 13 on page 47 counter_param[2..0] settings for Stratix II, Stratix II GX,<br />
Arria GX and HardCopy II devices.<br />
■ Table 14 on page 49 counter_param[2..0] settings for Stratix and Stratix GX<br />
devices.<br />
<strong>Phase</strong>-<strong>Locked</strong> <strong>Loop</strong> <strong>Reconfiguration</strong> (<strong>ALTPLL</strong>_<strong>RECONFIG</strong>) Megafunction February 2012 <strong>Altera</strong> Corporation
Specifications Page 41<br />
Table 8. <strong>ALTPLL</strong>_<strong>RECONFIG</strong> Megafunction Input Ports (Part 2 of 3)<br />
Port Name Required? Description<br />
read_param No<br />
write_param No<br />
reconfig Yes<br />
February 2012 <strong>Altera</strong> Corporation<br />
Reads the parameter specified with the counter_type and counter_param ports<br />
from cache and fed to the data_out[] port.<br />
When asserted, the read_param signal indicates that the scan cache should be read<br />
and fed to data_out[]. The bit location of the scan cache and the number of bits<br />
read and sent to data_out[] depend on the counter_type and counter_param<br />
values. The read_param signal is sampled at the rising clock edge. If it is asserted,<br />
the parameter value is read from the cache. Assert the read_param signal for 1 clock<br />
cycle only to prevent the parameter from being read twice.<br />
The busy signal is asserted on the rising clock edge following the assertion of<br />
read_param. While the parameter is being read, the busy signal remains asserted.<br />
After the busy signal is deasserted, the value on data_out[] is valid and the next<br />
parameter can be loaded. While the busy signal is asserted, the value on<br />
data_out[] is not valid.<br />
When the read_param signal is asserted, the busy signal is only asserted on the<br />
following rising edge of the clock and not on the same clock cycle as read_param.<br />
Writes the parameter specified with the counter_type and counter_param ports to<br />
the cache with the value specified on the data_in[] port.<br />
When asserted, the write_param signal indicates that the value on data_in[]<br />
should be written to the parameter specified by counter_type[] and<br />
counter_param[]. The number of bits read from the data_in[] port depends on<br />
the parameter. The write_param signal is sampled at the rising clock edge. If it is<br />
asserted, the parameter value is written to the cache. Assert the write_param signal<br />
for 1 clock cycle only to prevent the parameter from being written twice.<br />
The busy signal is asserted on the rising clock edge following the assertion of<br />
write_param. While the parameter is being written, the busy signal remains<br />
asserted and input to data_in[] is ignored. After the busy signal is deasserted, the<br />
next parameter can be written.<br />
When the write_param signal is asserted, the busy signal is only asserted on the<br />
following rising edge of the clock and not on the same clock cycle as write_param.<br />
Specifies that the phase-locked loop (PLL) should be reconfigured with the PLL<br />
settings specified in the current cache.<br />
When asserted, the reconfig signal indicates that the PLL should be reconfigured<br />
with the values in the cache. The reconfig signal is sampled at the rising clock edge.<br />
If it is asserted, the cached settings are loaded in the PLL. Assert the reconfig<br />
signal for 1 clock cycle only to prevent reloading the PLL configuration. The busy<br />
signal is asserted on the rising clock edge following the assertion of reconfig. While<br />
the PLL is being loaded, the busy signal remains asserted. After the busy signal is<br />
deasserted, the parameter values can be modified again.<br />
During and after reconfiguration, the scan chain data cache remains unchanged. This<br />
allows you to easily create a new set of reconfiguration settings that differs from the<br />
previous one in only one parameter.<br />
If write_param has not been asserted since the previous assertion of reconfig, in<br />
Stratix II devices, the pll_scanwrite signal is pulsed during reconfiguration. This<br />
feature supports burst-phase stepping. However, in Stratix III, Stratix IV, Cyclone III,<br />
Cyclone IV, and Arria II GX devices, the entire scan chain is shifted in to the PLL<br />
again.<br />
When the reconfig signal is asserted, the busy signal is only asserted on the<br />
following rising edge of the clock and not on the same clock cycle as reconfig.<br />
<strong>Phase</strong>-<strong>Locked</strong> <strong>Loop</strong> <strong>Reconfiguration</strong> (<strong>ALTPLL</strong>_<strong>RECONFIG</strong>) Megafunction
Page 42 Specifications<br />
Table 8. <strong>ALTPLL</strong>_<strong>RECONFIG</strong> Megafunction Input Ports (Part 3 of 3)<br />
Port Name Required? Description<br />
pll_areset_in No<br />
pll_scandone No<br />
pll_scandataout Yes<br />
rom_data_in No<br />
write_from_rom No<br />
reset_rom_address No<br />
Input signal indicating that the PLL should be reset.<br />
When asserted, the pll_areset_in signal indicates the PLL megafunction should<br />
be reset. This port defaults to 0 if left unconnected. When the <strong>ALTPLL</strong>_<strong>RECONFIG</strong><br />
megafunction is used in a design, you cannot reset the PLL in any other way; you<br />
must use this megafunction port to manually reset the PLL.<br />
Input port for the <strong>ALTPLL</strong>_<strong>RECONFIG</strong> megafunction that signals update done from<br />
the PLL module. This port is driven by the PLL's scandone output signal and<br />
determines when the PLL is reconfigured.<br />
For Stratix III and Stratix IV devices, pll_scandone is asserted on most operations,<br />
and deasserted as soon as it detects the assertion of configupdate. Upon the<br />
completion of all PLL reconfiguration updates, scandone is reasserted.<br />
This is different than the scandone signal in older device families, such as Stratix<br />
devices. In Stratix devices, the scandone signal is deasserted most of the time. The<br />
scandone signal is asserted for 1 clock cycle to mark the completion of PLL<br />
reconfiguration.<br />
Input port driven by the scandataout signal from the <strong>ALTPLL</strong> megafunction. It can<br />
be used to read the current configuration of the <strong>ALTPLL</strong> megafunction.<br />
This input port holds the <strong>ALTPLL</strong> megafunction scan data output from the<br />
dynamically reconfigurable bits. The pll_scandataout port must be connected to<br />
the scandataout port of the PLL. The activity on this port can only be observed<br />
when the reconfig signal is asserted.<br />
Serial data input to the PLL from the ROM.<br />
This 1-bit port allows the external ROM to be serially written into the scan cache of<br />
the <strong>ALTPLL</strong>_<strong>RECONFIG</strong> megafunction. The value on this port is valid 2 clock cycles<br />
after the write_rom_ena signal is asserted and remains valid until 2 clock cycles<br />
after the write_rom_ena signal is deasserted. This port is available for Stratix III,<br />
Stratix IV, Cyclone III, Cyclone IV, HardCopy III, HardCopy IV, and Arria II GX devices<br />
only.<br />
Specifies that the scan chain must be written from the external ROM.<br />
When asserted, this signal tells the <strong>ALTPLL</strong> megafunction to write the scan cache<br />
from the external ROM. At the next rising clock edge, the <strong>ALTPLL</strong>_<strong>RECONFIG</strong><br />
megafunction asserts the write_rom_ena signal and begins placing valid ROM<br />
addresses on the rom_address_out port. Assert the write_from_rom signal for<br />
1 clock cycle only. This port is available for Stratix III, Stratix IV, Cyclone III,<br />
Cyclone IV, HardCopy III, HardCopy IV, and Arria II GX devices only.<br />
Resets the ROM address.<br />
When asserted, this signal tells the <strong>ALTPLL</strong> megafunction to restart the read from<br />
ROM at address 0. Assert the reset_rom_address signal for 1 clock cycle only. This<br />
port is available for Stratix III, Stratix IV, Cyclone III, Cyclone IV, HardCopy III,<br />
HardCopy IV, and Arria II GX devices only.<br />
<strong>Phase</strong>-<strong>Locked</strong> <strong>Loop</strong> <strong>Reconfiguration</strong> (<strong>ALTPLL</strong>_<strong>RECONFIG</strong>) Megafunction February 2012 <strong>Altera</strong> Corporation
Specifications Page 43<br />
February 2012 <strong>Altera</strong> Corporation<br />
Table 9 lists the <strong>ALTPLL</strong>_<strong>RECONFIG</strong> megafunction output ports.<br />
Table 9. <strong>ALTPLL</strong>_<strong>RECONFIG</strong> Megafunction Output Ports (Part 1 of 2)<br />
Port Name Required? Description<br />
data_out[] No<br />
busy No<br />
pll_areset Yes<br />
pll_configupdate No<br />
pll_scanclk Yes<br />
pll_scanclkena No<br />
pll_scanaclr Yes<br />
pll_scanread No<br />
pll_scanwrite No<br />
Data read from the cache when read_param is asserted.<br />
9-bit output bus that provides the parameter data to the user. When the read_param<br />
signal is asserted, the values on counter_type[] and counter_param[]determine<br />
the parameter value that is loaded from cache and driven on the data_out[] bus.<br />
When the megafunction deasserts the busy signal, the appropriate bits of the bus<br />
(for example,[0] or [3..0]) hold a valid value.<br />
Indicates when the PLL is reading or writing a parameter to the cache, or is<br />
configuring the PLL.<br />
While the busy signal is asserted, no parameters can be read or written, and no<br />
reconfiguration can be initiated. Changes to the megafunction can be made only<br />
when the busy signal is not asserted. The signal goes high when the read_param,<br />
write_param, or reconfig input port is asserted, and remains high until the<br />
specified operation is complete. In the case of a reconfiguration operation, the busy<br />
signal remains high until the pll_areset signal is asserted and then deasserted.<br />
Drives the areset port on the PLL to be reconfigured.<br />
The pll_areset port must be connected to the areset port of the <strong>ALTPLL</strong><br />
megafunction for the reconfiguration to function correctly. This signal is active high.<br />
pll_areset is asserted when pll_areset_in is asserted, or, after reconfiguration,<br />
at the next rising clock edge after the scandone signal goes high. If you use the<br />
<strong>ALTPLL</strong>_<strong>RECONFIG</strong> megafunction, drive the PLL areset port using the pll_areset<br />
output port.<br />
Drives the configupdate port on the PLL to be reconfigured.<br />
When asserted, the pll_configupdate port loads selected data to PLL<br />
configuration latches. The signal is asserted after the final data bit is sent out. This<br />
port is available for Stratix III, Stratix IV, Cyclone III, Cyclone IV, HardCopy III,<br />
HardCopy IV, and Arria II GX devices only.<br />
Drives the scanclk port on the PLL to be reconfigured.<br />
For information about the maximum scanclk frequency for the various devices,<br />
refer to the respective device handbook.<br />
This acts as a clock enable for the scanclk port on the PLL to be reconfigured.<br />
<strong>Reconfiguration</strong> begins on the first rising edge of pll_scanclk after<br />
pll_scanclkena is asserted. On the first falling edge of pll_scanclk, after the<br />
pll_scanclkena signal is deasserted, the megafunction stops scanning data to the<br />
PLL.<br />
Drives the scanaclr port on the PLL to be reconfigured.<br />
Not available for Stratix II, Stratix III, Stratix IV, Cyclone III, Cyclone IV, HardCopy II,<br />
HardCopy III, HardCopy IV, Arria GX, and Arria II GX devices.<br />
Drives the scanread port on the PLL to be reconfigured.<br />
Not available for Stratix III, Stratix IV, Cyclone III, Cyclone IV, HardCopy III,<br />
HardCopy IV, and Arria II GX devices.<br />
Drives the scanwrite port on the PLL to be reconfigured.<br />
Not available for Stratix III, Stratix IV, Cyclone III, Cyclone IV, HardCopy III,<br />
HardCopy IV, and Arria II GX devices.<br />
<strong>Phase</strong>-<strong>Locked</strong> <strong>Loop</strong> <strong>Reconfiguration</strong> (<strong>ALTPLL</strong>_<strong>RECONFIG</strong>) Megafunction
Page 44 Specifications<br />
Table 9. <strong>ALTPLL</strong>_<strong>RECONFIG</strong> Megafunction Output Ports (Part 2 of 2)<br />
Port Name Required? Description<br />
pll_scandata Yes<br />
rom_address_out No<br />
write_rom_ena No<br />
Drives the scandata port on the PLL to be reconfigured.<br />
This output port from the megafunction holds the scan data input to the PLL for the<br />
dynamically reconfigurable bits. The pll_scandata port sends scandata to the PLL.<br />
Any activity on this port can only be observed when the reconfig signal is asserted.<br />
Specifies the address in ROM from which data is written to the scan chain.<br />
During the write operation, the address increments from address 0 to the size of the<br />
scan cache. The rom_address_out port is valid only while the write_rom_ena port<br />
is asserted. Each address is asserted for 1 clock cycle. This port is available for<br />
Stratix III, Stratix IV, Cyclone III, Cyclone IV, HardCopy III, HardCopy IV, and Arria II<br />
GX devices only.<br />
Enables the ROM.<br />
When the write_rom_ena signal is asserted, the <strong>ALTPLL</strong>_<strong>RECONFIG</strong><br />
megafunctions generates valid addresses on the rom_address_out port. This port<br />
is available for Stratix III, Stratix IV, Cyclone III, Cyclone IV, HardCopy III,<br />
HardCopy IV, and Arria II GX devices only.<br />
Table 10 lists the <strong>ALTPLL</strong>_<strong>RECONFIG</strong> megafunction parameters.<br />
Table 10. <strong>ALTPLL</strong>_<strong>RECONFIG</strong> Megafunction Parameters (Part 1 of 2)<br />
Parameter Type Required? Description<br />
init_from_rom[] String No<br />
pll_type String No<br />
scan_chain String No<br />
Specifies initialization from ROM. Initializes on power-up and not after every<br />
reset (to match RAM .mif file behavior). The available values are YES and<br />
NO. If omitted, the default value is NO.<br />
Specifies the type of PLL to instantiate. For Stratix III, Stratix IV, Cyclone III,<br />
Cyclone IV, Arria II GX, HardCopy III, and HardCopy IV devices, values are<br />
TOP_BOTTOM and LEFT_RIGHT. For Stratix II, Stratix II GX, Arria GX, and<br />
HardCopy II devices, values are ENHANCED and FAST.<br />
Specifies the valid PLL types. Available for Stratix and Stratix GX devices<br />
only. Values are LONG, SHORT, and UNUSED. If omitted, the default value is<br />
UNUSED.<br />
Value Configuration Setting<br />
288-bit scan chain used to control<br />
LONG<br />
PLLs with 12 counters<br />
192-bit scan chain used to control<br />
SHORT<br />
PLLs with 8 counters<br />
<strong>Phase</strong>-<strong>Locked</strong> <strong>Loop</strong> <strong>Reconfiguration</strong> (<strong>ALTPLL</strong>_<strong>RECONFIG</strong>) Megafunction February 2012 <strong>Altera</strong> Corporation
Specifications Page 45<br />
Table 10. <strong>ALTPLL</strong>_<strong>RECONFIG</strong> Megafunction Parameters (Part 2 of 2)<br />
Parameter Type Required? Description<br />
scan_init_file String No<br />
use_scanclk_sync_<br />
register<br />
February 2012 <strong>Altera</strong> Corporation<br />
String No<br />
Specifies the name of the .mif or .hex used as the initial value of the scan<br />
chain cache. Values are and UNUSED. If omitted, the value for<br />
every entry in the cache is 0. You must set the input file as shown in the<br />
following table:<br />
Device Input File Size<br />
Stratix series devices<br />
(except Stratix III and Stratix IV<br />
devices)<br />
Stratix III and Stratix IV Top/Bottom<br />
PLL devices<br />
Stratix III and Stratix IV Right/Left<br />
PLL devices<br />
192 bits or 288 bits depending on<br />
the scan_chain length<br />
234 bits<br />
180 bits<br />
Cyclone III and Cyclone IV devices 144 bits<br />
Arria II GX devices 180 bits<br />
Specifies whether to use the scanclk port for the synchronization mode for<br />
the register. Available for all supported devices except Stratix III, Stratix IV,<br />
Cyclone III, Cyclone IV, HardCopy III, HardCopy IV, and Arria II GX devices.<br />
Values are YES and NO. If omitted, the default value is NO.<br />
Table 11 lists the counter_type settings for Stratix III, Stratix IV, Cyclone III,<br />
Cyclone IV, and Arria II GX devices.<br />
Table 11. counter_type[3..0] Settings for Stratix III, Stratix IV, Cyclone III, Cyclone IV, and<br />
Arria II GX Devices (Part 1 of 2)<br />
Counter Selection Binary Decimal<br />
N 0000 0<br />
M 0001 1<br />
CP/LF 0010 2<br />
VCO 0011 3<br />
C0 (1) 0100 4<br />
C1 (1) 0101 5<br />
C2 (1) 0110 6<br />
C3 (1) 0111 7<br />
C4 (1) 1000 8<br />
C5 (2) 1001 9<br />
C6 (2) 1010 10<br />
C7 (3) 1011 11<br />
C8 (3) 1100 12<br />
C9 (3) 1101 13<br />
Illegal value 1110 14<br />
<strong>Phase</strong>-<strong>Locked</strong> <strong>Loop</strong> <strong>Reconfiguration</strong> (<strong>ALTPLL</strong>_<strong>RECONFIG</strong>) Megafunction
Page 46 Specifications<br />
Table 11. counter_type[3..0] Settings for Stratix III, Stratix IV, Cyclone III, Cyclone IV, and<br />
Arria II GX Devices (Part 2 of 2)<br />
Illegal value 1111 15<br />
Notes to Table 11:<br />
(1) For Stratix III and Stratix IV Top/Bottom PLL, Stratix III and Stratix IV Left/Right PLL, and Cyclone III and<br />
Cyclone IV PLL.<br />
(2) For Stratix III and Stratix IV Top/Bottom PLL, Stratix III and Stratix IV Left/Right PLL, and Arria II GX PLL.<br />
(3) For Stratix III and Stratix IV Top/Bottom PLL only.<br />
Table 12 lists the counter_param settings for Stratix III, Stratix IV, Cyclone III,<br />
Cyclone IV, and Arria II GX devices.<br />
Table 12. counter_param[2..0] Settings for Stratix III, Stratix IV, Cyclone III, Cyclone IV, and<br />
Arria II GX Devices<br />
Counter Type Counter Param Binary Decimal Width (bits)<br />
Regular counters High count 000 0 8<br />
C0-C9: Top-Bottom Low count 001 1 8<br />
Stratix III and Stratix IV<br />
C0-C6: Left-Right<br />
Stratix III and Stratix IV<br />
Bypass 100 4 1<br />
C0-C4: Cyclone III and<br />
Cyclone IV<br />
C0-C6: Arria II GX<br />
Mode (odd/even division) 101 5 1<br />
Charge pump unused 101 5 5<br />
Charge pump current 000 0 3<br />
CP/LF<br />
<strong>Loop</strong> filter unused 100 4 1<br />
<strong>Loop</strong> filter resistor 001 1 5<br />
<strong>Loop</strong> filter capacitance 010 2 2<br />
VCO VCO Post Scale 000 0 1<br />
M/N Counters<br />
Counter Selection Binary Decimal<br />
High count 000 0 8<br />
Low count 001 1 8<br />
Bypass 100 4 1<br />
Mode (odd/even division) 101 5 1<br />
Nominal count 111 7 9<br />
Note to Table 11:<br />
(1) For even nominal count, the counter bits are automatically set as follows:<br />
■ high_count = Nominalcount/2<br />
■ low_count= Nominalcount/2<br />
For odd nominal count, the counter bits are automatically set as follows:<br />
■ high_count = (Nominalcount + 1)/2<br />
■ low_count = Nominalcount - high_count<br />
■ odd/even division bit = 1<br />
For nominal count = 1, Bypass bit = 1.<br />
<strong>Phase</strong>-<strong>Locked</strong> <strong>Loop</strong> <strong>Reconfiguration</strong> (<strong>ALTPLL</strong>_<strong>RECONFIG</strong>) Megafunction February 2012 <strong>Altera</strong> Corporation
Specifications Page 47<br />
February 2012 <strong>Altera</strong> Corporation<br />
Table 13 lists the counter_type and counter_param settings for Stratix II,<br />
Stratix II GX, Arria GX, and HardCopy II devices.<br />
Table 13. counter_type and counter_param Settings for Stratix II, Stratix II GX, Arria GX, and<br />
HardCopy II Devices (Part 1 of 2)<br />
counter_type[]<br />
Counter Settings<br />
4-bit bus that selects which counter type must be updated. The<br />
following mapping determines which counter is specified for each<br />
counter_type value.<br />
counter_type[3..0] Selected Counter<br />
0000 (0x0) N [Enhanced PLL/ Fast PLL]<br />
0001 (0x1) M [Enhanced PLL/ Fast PLL]<br />
0010 (0x2) P/LF [Enhanced PLL/ Fast PLL]<br />
0011 (0x3) (Illegal value)<br />
0100 (0x4) C0 [Enhanced PLL/ Fast PLL]<br />
0101 (0x5) C1 [Enhanced PLL/ Fast PLL]<br />
0110 (0x6) C2 [Enhanced PLL/ Fast PLL]<br />
0111 (0x7) C3 [Enhanced PLL/ Fast PLL]<br />
1000 (0x8) C4 [Enhanced PLL]<br />
1001 (0x9) C5 [Enhanced PLL]<br />
1010 (0xA) (Illegal value)<br />
1011 (0xB) (Illegal value)<br />
1100 (0xC) (Illegal value)<br />
1101 (0xD) (Illegal value)<br />
1110 (0xE) (Illegal value)<br />
1111 (0xF) (Illegal value)<br />
<strong>Phase</strong>-<strong>Locked</strong> <strong>Loop</strong> <strong>Reconfiguration</strong> (<strong>ALTPLL</strong>_<strong>RECONFIG</strong>) Megafunction
Page 48 Specifications<br />
Table 13. counter_type and counter_param Settings for Stratix II, Stratix II GX, Arria GX, and<br />
HardCopy II Devices (Part 2 of 2)<br />
Counter Settings<br />
counter_param[]<br />
Notes to Table 13:<br />
(1) For Enhanced PLL M and N.<br />
(2) For Enhanced PLL C0-C5.<br />
(3) For Fast PLL C0-C3 and M.<br />
(4) For Fast PLL N.<br />
(5) For C0-C5, Fast PLL M.<br />
(6) For CP/LF.<br />
3-bit bus that selects which parameter for the given counter type<br />
should be updated. The mapping to each parameter type and the<br />
corresponding parameter bit-width is defined as follows:<br />
counter_param[2..0] Selected Parameter Width<br />
000 (0x0) nominal count<br />
001 (0x1)<br />
000 (0x0)<br />
001 (0x1)<br />
000 (0x0)<br />
001 (0x1)<br />
000 (0x0)<br />
010 (0x2)<br />
100 (0x4)<br />
101 (0x5)<br />
101 (0x5)<br />
000 (0x0)<br />
001 (0x1)<br />
010 (0x2)<br />
011 (0x3)<br />
110 (0x6)<br />
111 (0x7)<br />
(1)<br />
spread count (1)<br />
high cycles count (2)<br />
low cycles count (2)<br />
high cycles count (3)<br />
low cycles count (3)<br />
nominal count (4)<br />
phase step setting<br />
counter bypass bit<br />
counter odd division bit (5)<br />
spread counter bypass (1)<br />
charge pump current (6)<br />
loop filter resistor (6)<br />
loop filter capacitor (6)<br />
9<br />
9<br />
8<br />
8<br />
4<br />
4<br />
2<br />
2<br />
1<br />
1<br />
1<br />
4<br />
6<br />
2<br />
(illegal value)<br />
—<br />
(illegal value)<br />
—<br />
(illegal value)<br />
—<br />
<strong>Phase</strong>-<strong>Locked</strong> <strong>Loop</strong> <strong>Reconfiguration</strong> (<strong>ALTPLL</strong>_<strong>RECONFIG</strong>) Megafunction February 2012 <strong>Altera</strong> Corporation
Specifications Page 49<br />
February 2012 <strong>Altera</strong> Corporation<br />
Table 14 lists the counter_type and counter_param settings for Stratix and Stratix GX<br />
devices.<br />
Table 14. counter_type and counter_param Settings for Stratix and Stratix GX Devices (Part 1<br />
of 2)<br />
Counter Settings<br />
counter_type[]<br />
4-bit bus that selects which counter type must be updated. The following<br />
mapping determines which counter is specified for each counter_type<br />
value.<br />
counter_type[3..0] Selected Counter (1)<br />
0000 (0x0) M<br />
0001 (0x1) N<br />
0010 (0x2) (Illegal value)<br />
0011 (0x3) (Illegal value)<br />
0100 (0x4) G0<br />
0101 (0x5) G1<br />
0110 (0x6) G2<br />
0111 (0x7) G3<br />
1000 (0x8) L0<br />
1001 (0x9) L1<br />
1010 (0xA) (Illegal value)<br />
1011 (0xB) (Illegal value)<br />
1100 (0xC) E1<br />
1101 (0xD) E2<br />
1110 (0xE) E3<br />
1111 (0xF) E4<br />
<strong>Phase</strong>-<strong>Locked</strong> <strong>Loop</strong> <strong>Reconfiguration</strong> (<strong>ALTPLL</strong>_<strong>RECONFIG</strong>) Megafunction
Page 50 Document Revision History<br />
Table 14. counter_type and counter_param Settings for Stratix and Stratix GX Devices (Part 2<br />
of 2)<br />
counter_param[]<br />
Document Revision History<br />
Counter Settings<br />
3-bit bus that selects which parameter for the given counter type should<br />
be updated. The mapping to each parameter type and the corresponding<br />
parameter bit-width is defined as follows:<br />
counter_param[2..0] (5) Selected Parameter Width<br />
000 (0x0) nominal count<br />
001 (0x1)<br />
000 (0x0)<br />
001 (0x1)<br />
010 (0x2)<br />
011 (0x3)<br />
100 (0x4)<br />
101 (0x5)<br />
110 (0x6)<br />
111 (0x7)<br />
(2)<br />
spread count (2)<br />
high cycles count (3)<br />
low cycles count (3)<br />
delay element setting<br />
(illegal value)<br />
counter bypass bit<br />
counter odd division bit (4)<br />
9<br />
9<br />
9<br />
9<br />
4<br />
—<br />
1<br />
1<br />
(illegal value)<br />
—<br />
(illegal value)<br />
—<br />
Notes to Table 14:<br />
(1) The lower 2 bits indicate the counter number for the G, L, and E counters. Additionally, the Ex counters are only<br />
valid for the LONG scan chain PLLs.<br />
(2) For M and N.<br />
(3) For G, L, and E.<br />
(4) Must be 0 for M or N.<br />
(5) The upper 2 bits determine the width (for example, 00× = 9, 01× = 4, 10× = 1)<br />
Table 15 lists the revision history for this document.<br />
Table 15. Document Revision History (Part 1 of 2)<br />
Date Version Changes<br />
February 2012 6.0<br />
■<br />
■<br />
Added information about nominal count usage in Table 12.<br />
Updated the decimal value in Table 12.<br />
August 2010 5.0 Updated for the Quartus II software version 10.0.<br />
July 2008 4.0<br />
■ Added support for Stratix IV devices.<br />
■ Updated screenshots for “MegaWizard Plug-In Manager Page Descriptions” section.<br />
■ Updated “Features” section.<br />
■ Updated “General Description” section.<br />
■ Added “Simulation” section.<br />
■ Added “Checking Design Violations With the Design Assistant” section<br />
■ Added comment for pll_scanclk port.<br />
■ Added support for new port, pllena.<br />
<strong>Phase</strong>-<strong>Locked</strong> <strong>Loop</strong> <strong>Reconfiguration</strong> (<strong>ALTPLL</strong>_<strong>RECONFIG</strong>) Megafunction February 2012 <strong>Altera</strong> Corporation
Document Revision History Page 51<br />
Table 15. Document Revision History (Part 2 of 2)<br />
Date Version Changes<br />
■ Updated for the Quartus II software version 7.2, including: Added new user-mode<br />
reconfiguration from external ROM.<br />
■ Added three new input ports: rom_data_in, write_from_rom, and reset_rom_address<br />
November 2007 3.2<br />
■<br />
■<br />
Added two new output ports: rom_address_out and write_rom_ena<br />
Updated design example format<br />
■ Updated: Figure 5, Figure 6, Figure 7, Figure 17, Figure 18, Figure 19, Figure 20,<br />
Figure 21, Figure 22<br />
■ Changed altpll_reconfig to <strong>ALTPLL</strong>_<strong>RECONFIG</strong> throughout the document.<br />
March 2007 3.1 Added Cyclone III to list of supported devices.<br />
December 2006 3.0 Updated for Quartus II software version 6.1.<br />
October 2006 2.0 Updated for Quartus II software version 6.0.<br />
April 2005 1.0 Initial release.<br />
February 2012 <strong>Altera</strong> Corporation<br />
<strong>Phase</strong>-<strong>Locked</strong> <strong>Loop</strong> <strong>Reconfiguration</strong> (<strong>ALTPLL</strong>_<strong>RECONFIG</strong>) Megafunction