Configuration and Remote System Upgrades in Cyclone IV ... - Altera
Configuration and Remote System Upgrades in Cyclone IV ... - Altera
Configuration and Remote System Upgrades in Cyclone IV ... - Altera

You also want an ePaper? Increase the reach of your titles
YUMPU automatically turns print PDFs into web optimized ePapers that Google loves.
February 2013<br />
CY<strong>IV</strong>-51008-1.6<br />
CY<strong>IV</strong>-51008-1.6<br />
<strong>Configuration</strong><br />
© 2013 <strong>Altera</strong> Corporation. All rights reserved. ALTERA, ARRIA, CYCLONE, HARDCOPY, MAX, MEGACORE, NIOS, QUARTUS <strong>and</strong> STRATIX words <strong>and</strong> logos<br />
are trademarks of <strong>Altera</strong> Corporation <strong>and</strong> registered <strong>in</strong> the U.S. Patent <strong>and</strong> Trademark Office <strong>and</strong> <strong>in</strong> other countries. All other words <strong>and</strong> logos identified as<br />
trademarks or service marks are the property of their respective holders as described at www.altera.com/common/legal.html. <strong>Altera</strong> warrants performance of its<br />
semiconductor products to current specifications <strong>in</strong> accordance with <strong>Altera</strong>'s st<strong>and</strong>ard warranty, but reserves the right to make changes to any products <strong>and</strong><br />
services at any time without notice. <strong>Altera</strong> assumes no responsibility or liability aris<strong>in</strong>g out of the application or use of any <strong>in</strong>formation, product, or service<br />
described here<strong>in</strong> except as expressly agreed to <strong>in</strong> writ<strong>in</strong>g by <strong>Altera</strong>. <strong>Altera</strong> customers are advised to obta<strong>in</strong> the latest version of device specifications before rely<strong>in</strong>g<br />
on any published <strong>in</strong>formation <strong>and</strong> before plac<strong>in</strong>g orders for products or services.<br />
<strong>Cyclone</strong> <strong>IV</strong> Device H<strong>and</strong>book,<br />
Volume 1<br />
February 2013<br />
8. <strong>Configuration</strong> <strong>and</strong> <strong>Remote</strong> <strong>System</strong><br />
<strong>Upgrades</strong> <strong>in</strong> <strong>Cyclone</strong> <strong>IV</strong> Devices<br />
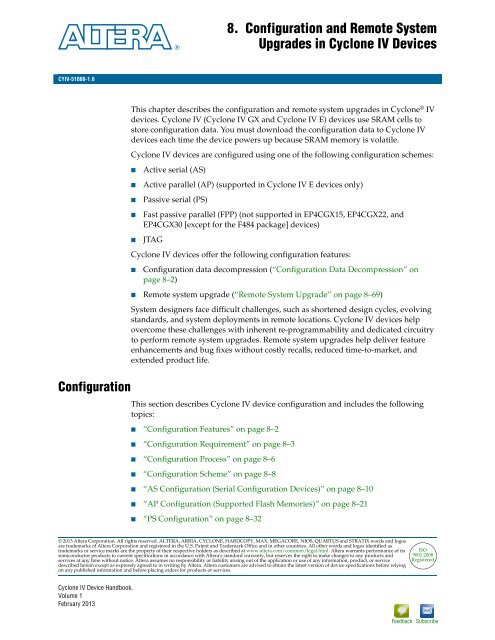
This chapter describes the configuration <strong>and</strong> remote system upgrades <strong>in</strong> <strong>Cyclone</strong> ® <strong>IV</strong><br />
devices. <strong>Cyclone</strong> <strong>IV</strong> (<strong>Cyclone</strong> <strong>IV</strong> GX <strong>and</strong> <strong>Cyclone</strong> <strong>IV</strong> E) devices use SRAM cells to<br />
store configuration data. You must download the configuration data to <strong>Cyclone</strong> <strong>IV</strong><br />
devices each time the device powers up because SRAM memory is volatile.<br />
<strong>Cyclone</strong> <strong>IV</strong> devices are configured us<strong>in</strong>g one of the follow<strong>in</strong>g configuration schemes:<br />
■ Active serial (AS)<br />
■ Active parallel (AP) (supported <strong>in</strong> <strong>Cyclone</strong> <strong>IV</strong> E devices only)<br />
■ Passive serial (PS)<br />
■ Fast passive parallel (FPP) (not supported <strong>in</strong> EP4CGX15, EP4CGX22, <strong>and</strong><br />
EP4CGX30 [except for the F484 package] devices)<br />
■ JTAG<br />
<strong>Cyclone</strong> <strong>IV</strong> devices offer the follow<strong>in</strong>g configuration features:<br />
■ <strong>Configuration</strong> data decompression (“<strong>Configuration</strong> Data Decompression” on<br />
page 8–2)<br />
■ <strong>Remote</strong> system upgrade (“<strong>Remote</strong> <strong>System</strong> Upgrade” on page 8–69)<br />
<strong>System</strong> designers face difficult challenges, such as shortened design cycles, evolv<strong>in</strong>g<br />
st<strong>and</strong>ards, <strong>and</strong> system deployments <strong>in</strong> remote locations. <strong>Cyclone</strong> <strong>IV</strong> devices help<br />
overcome these challenges with <strong>in</strong>herent re-programmability <strong>and</strong> dedicated circuitry<br />
to perform remote system upgrades. <strong>Remote</strong> system upgrades help deliver feature<br />
enhancements <strong>and</strong> bug fixes without costly recalls, reduced time-to-market, <strong>and</strong><br />
extended product life.<br />
This section describes <strong>Cyclone</strong> <strong>IV</strong> device configuration <strong>and</strong> <strong>in</strong>cludes the follow<strong>in</strong>g<br />
topics:<br />
■ “<strong>Configuration</strong> Features” on page 8–2<br />
■ “<strong>Configuration</strong> Requirement” on page 8–3<br />
■ “<strong>Configuration</strong> Process” on page 8–6<br />
■ “<strong>Configuration</strong> Scheme” on page 8–8<br />
■ “AS <strong>Configuration</strong> (Serial <strong>Configuration</strong> Devices)” on page 8–10<br />
■ “AP <strong>Configuration</strong> (Supported Flash Memories)” on page 8–21<br />
■ “PS <strong>Configuration</strong>” on page 8–32<br />
ISO<br />
9001:2008<br />
Registered<br />
Feedback Subscribe
8–2 Chapter 8: <strong>Configuration</strong> <strong>and</strong> <strong>Remote</strong> <strong>System</strong> <strong>Upgrades</strong> <strong>in</strong> <strong>Cyclone</strong> <strong>IV</strong> Devices<br />
<strong>Configuration</strong><br />
■ “FPP <strong>Configuration</strong>” on page 8–40<br />
■ “JTAG <strong>Configuration</strong>” on page 8–45<br />
■ “Device <strong>Configuration</strong> P<strong>in</strong>s” on page 8–62<br />
<strong>Configuration</strong> Features<br />
Table 8–1 lists the configuration methods you can use <strong>in</strong> each configuration scheme.<br />
Table 8–1. <strong>Configuration</strong> Features <strong>in</strong> <strong>Cyclone</strong> <strong>IV</strong> Devices<br />
<strong>Configuration</strong> Scheme <strong>Configuration</strong> Method Decompression <strong>Remote</strong> <strong>System</strong> Upgrade (1)<br />
AS Serial <strong>Configuration</strong> Device v v<br />
AP Supported Flash Memory (2) — v<br />
PS<br />
External Host with Flash Memory v v (3)<br />
Download Cable v —<br />
FPP External Host with Flash Memory — v (3)<br />
JTAG based configuration<br />
Notes to Table 8–1:<br />
External Host with Flash Memory — —<br />
Download Cable — —<br />
(1) <strong>Remote</strong> update mode is supported when you use the <strong>Remote</strong> <strong>System</strong> Upgrade feature. You can enable or disable remote update mode with an<br />
option sett<strong>in</strong>g <strong>in</strong> the Quartus ® II software.<br />
(2) For more <strong>in</strong>formation about the supported device families for the Micron commodity parallel flash, refer to Table 8–9 on page 8–22.<br />
(3) <strong>Remote</strong> update mode is supported externally us<strong>in</strong>g the Parallel Flash Loader (PFL) with the Quartus II software.<br />
<strong>Configuration</strong> Data Decompression<br />
<strong>Cyclone</strong> <strong>IV</strong> devices support configuration data decompression, which saves<br />
configuration memory space <strong>and</strong> time. This feature allows you to store compressed<br />
configuration data <strong>in</strong> configuration devices or other memory <strong>and</strong> send the<br />
compressed bitstream to <strong>Cyclone</strong> <strong>IV</strong> devices. Dur<strong>in</strong>g configuration, <strong>Cyclone</strong> <strong>IV</strong><br />
devices decompress the bitstream <strong>in</strong> real time <strong>and</strong> program the SRAM cells.<br />
1 Compression may reduce the configuration bitstream size by 35 to 55%.<br />
When you enable compression, the Quartus II software generates configuration files<br />
with compressed configuration data. This compressed file reduces the storage<br />
requirements <strong>in</strong> the configuration device or flash memory <strong>and</strong> decreases the time<br />
required to send the bitstream to the <strong>Cyclone</strong> <strong>IV</strong> device. The time required by a<br />
<strong>Cyclone</strong> <strong>IV</strong> device to decompress a configuration file is less than the time required to<br />
send the configuration data to the device. There are two methods for enabl<strong>in</strong>g<br />
compression for the <strong>Cyclone</strong> <strong>IV</strong> device bitstreams <strong>in</strong> the Quartus II software:<br />
■ Before design compilation (through the Compiler Sett<strong>in</strong>gs menu)<br />
■ After design compilation (through the Convert Programm<strong>in</strong>g Files dialog box)<br />
To enable compression <strong>in</strong> the compiler sett<strong>in</strong>gs of the project <strong>in</strong> the Quartus II<br />
software, perform the follow<strong>in</strong>g steps:<br />
1. On the Assignments menu, click Device. The Sett<strong>in</strong>gs dialog box appears.<br />
2. Click Device <strong>and</strong> P<strong>in</strong> Options. The Device <strong>and</strong> P<strong>in</strong> Options dialog box appears.<br />
<strong>Cyclone</strong> <strong>IV</strong> Device H<strong>and</strong>book, February 2013 <strong>Altera</strong> Corporation<br />
Volume 1
Chapter 8: <strong>Configuration</strong> <strong>and</strong> <strong>Remote</strong> <strong>System</strong> <strong>Upgrades</strong> <strong>in</strong> <strong>Cyclone</strong> <strong>IV</strong> Devices 8–3<br />
<strong>Configuration</strong><br />
3. Click the <strong>Configuration</strong> tab.<br />
4. Turn on Generate compressed bitstreams.<br />
5. Click OK.<br />
6. In the Sett<strong>in</strong>gs dialog box, click OK.<br />
You can enable compression when creat<strong>in</strong>g programm<strong>in</strong>g files from the Convert<br />
Programm<strong>in</strong>g Files dialog box. To enable compression, perform the follow<strong>in</strong>g steps:<br />
1. On the File menu, click Convert Programm<strong>in</strong>g Files.<br />
2. Under Output programm<strong>in</strong>g file, select your desired file type from the<br />
Programm<strong>in</strong>g file type list.<br />
3. If you select Programmer Object File (.pof), you must specify the configuration<br />
device <strong>in</strong> the <strong>Configuration</strong> device list.<br />
4. Under Input files to convert, select SOF Data.<br />
5. Click Add File to browse to the <strong>Cyclone</strong> <strong>IV</strong> device SRAM object files (.sof).<br />
6. In the Convert Programm<strong>in</strong>g Files dialog box, select the .pof you added to SOF<br />
Data <strong>and</strong> click Properties.<br />
7. In the SOF File Properties dialog box, turn on the Compression option.<br />
When multiple <strong>Cyclone</strong> <strong>IV</strong> devices are cascaded, you can selectively enable the<br />
compression feature for each device <strong>in</strong> the cha<strong>in</strong>. Figure 8–1 shows a cha<strong>in</strong> of two<br />
<strong>Cyclone</strong> <strong>IV</strong> devices. The first device has compression enabled <strong>and</strong> receives<br />
compressed bitstream from the configuration device. The second device has the<br />
compression feature disabled <strong>and</strong> receives uncompressed data. You can generate<br />
programm<strong>in</strong>g files for this setup <strong>in</strong> the Convert Programm<strong>in</strong>g Files dialog box.<br />
Figure 8–1. Compressed <strong>and</strong> Uncompressed <strong>Configuration</strong> Data <strong>in</strong> the Same <strong>Configuration</strong> File<br />
GND<br />
Decompression<br />
Controller<br />
<strong>Configuration</strong> Requirement<br />
<strong>Cyclone</strong> <strong>IV</strong><br />
Device<br />
nCE<br />
nCEO<br />
This section describes <strong>Cyclone</strong> <strong>IV</strong> device configuration requirement <strong>and</strong> <strong>in</strong>cludes the<br />
follow<strong>in</strong>g topics:<br />
■ “Power-On Reset (POR) Circuit” on page 8–4<br />
■ “<strong>Configuration</strong> File Size” on page 8–4<br />
■ “Power Up” on page 8–6<br />
Serial Data<br />
Compressed Uncompressed<br />
V CC<br />
10 kΩ<br />
Serial <strong>Configuration</strong><br />
Device<br />
nCE<br />
<strong>Cyclone</strong> <strong>IV</strong><br />
Device<br />
nCEO Not Connected (N.C.)<br />
February 2013 <strong>Altera</strong> Corporation <strong>Cyclone</strong> <strong>IV</strong> Device H<strong>and</strong>book,<br />
Volume 1
8–4 Chapter 8: <strong>Configuration</strong> <strong>and</strong> <strong>Remote</strong> <strong>System</strong> <strong>Upgrades</strong> <strong>in</strong> <strong>Cyclone</strong> <strong>IV</strong> Devices<br />
<strong>Configuration</strong><br />
Power-On Reset (POR) Circuit<br />
The POR circuit keeps the device <strong>in</strong> reset state until the power supply voltage levels<br />
have stabilized dur<strong>in</strong>g device power up. After device power up, the device does not<br />
release nSTATUS until V CCINT, V CCA, <strong>and</strong> V CCIO (for I/O banks <strong>in</strong> which the<br />
configuration <strong>and</strong> JTAG p<strong>in</strong>s reside) are above the POR trip po<strong>in</strong>t of the device.<br />
V CCINT <strong>and</strong> V CCA are monitored for brown-out conditions after device power up.<br />
1 V CCA is the analog power to the phase-locked loop (PLL).<br />
In some applications, it is necessary for a device to wake up very quickly to beg<strong>in</strong><br />
operation. <strong>Cyclone</strong> <strong>IV</strong> devices offer the fast POR time option to support fast wake-up<br />
time applications. The fast POR time option has stricter power-up requirements when<br />
compared with the st<strong>and</strong>ard POR time option. You can select either the fast option or<br />
the st<strong>and</strong>ard POR option with the MSEL p<strong>in</strong> sett<strong>in</strong>gs.<br />
1 If your system exceeds the fast or st<strong>and</strong>ard POR time, you must hold nCONFIG low<br />
until all the power supplies are stable.<br />
f For more <strong>in</strong>formation about the POR specifications, refer to the <strong>Cyclone</strong> <strong>IV</strong> Device<br />
Datasheet.<br />
f For more <strong>in</strong>formation about the wake-up time <strong>and</strong> POR circuit, refer to the Power<br />
Requirements for <strong>Cyclone</strong> <strong>IV</strong> Devices chapter.<br />
<strong>Configuration</strong> File Size<br />
Table 8–2 lists the approximate uncompressed configuration file sizes for <strong>Cyclone</strong> <strong>IV</strong><br />
devices. To calculate the amount of storage space required for multiple device<br />
configurations, add the file size of each device together.<br />
Table 8–2. Uncompressed Raw B<strong>in</strong>ary File (.rbf) Sizes for <strong>Cyclone</strong> <strong>IV</strong> Devices (Part 1 of 2)<br />
<strong>Cyclone</strong> <strong>IV</strong> E<br />
Device Data Size (bits)<br />
EP4CE6 2,944,088<br />
EP4CE10 2,944,088<br />
EP4CE15 4,086,848<br />
EP4CE22 5,748,552<br />
EP4CE30 9,534,304<br />
EP4CE40 9,534,304<br />
EP4CE55 14,889,560<br />
EP4CE75 19,965,752<br />
EP4CE115 28,571,696<br />
<strong>Cyclone</strong> <strong>IV</strong> Device H<strong>and</strong>book, February 2013 <strong>Altera</strong> Corporation<br />
Volume 1
Chapter 8: <strong>Configuration</strong> <strong>and</strong> <strong>Remote</strong> <strong>System</strong> <strong>Upgrades</strong> <strong>in</strong> <strong>Cyclone</strong> <strong>IV</strong> Devices 8–5<br />
<strong>Configuration</strong><br />
Table 8–2. Uncompressed Raw B<strong>in</strong>ary File (.rbf) Sizes for <strong>Cyclone</strong> <strong>IV</strong> Devices (Part 2 of 2)<br />
<strong>Cyclone</strong> <strong>IV</strong> GX<br />
Note to Table 8–2:<br />
(1) Only for the F484 package.<br />
Use the data <strong>in</strong> Table 8–2 to estimate the file size before design compilation. Different<br />
configuration file formats, such as Hexadecimal (.hex) or Tabular Text File (.ttf)<br />
formats, have different file sizes. However, for any specific version of the Quartus II<br />
software, any design targeted for the same device has the same uncompressed<br />
configuration file size. If you use compression, the file size varies after each<br />
compilation, because the compression ratio depends on the design.<br />
f For more <strong>in</strong>formation about sett<strong>in</strong>g device configuration options or creat<strong>in</strong>g<br />
configuration files, refer to the Software Sett<strong>in</strong>gs section <strong>in</strong> volume 2 of the<br />
<strong>Configuration</strong> H<strong>and</strong>book.<br />
<strong>Configuration</strong> <strong>and</strong> JTAG P<strong>in</strong> I/O Requirements<br />
EP4CGX15 3,805,568<br />
EP4CGX22 7,600,040<br />
EP4CGX30<br />
7,600,040<br />
22,010,888 (1)<br />
EP4CGX50 22,010,888<br />
EP4CGX75 22,010,888<br />
EP4CGX110 39,425,016<br />
EP4CGX150 39,425,016<br />
<strong>Cyclone</strong> <strong>IV</strong> devices are manufactured us<strong>in</strong>g the TSMC 60-nm low-k dielectric process.<br />
Although <strong>Cyclone</strong> <strong>IV</strong> devices use TSMC 2.5-V transistor technology <strong>in</strong> the I/O<br />
buffers, the devices are compatible <strong>and</strong> able to <strong>in</strong>terface with 2.5, 3.0, <strong>and</strong> 3.3-V<br />
configuration voltage st<strong>and</strong>ards by follow<strong>in</strong>g specific requirements.<br />
All I/O <strong>in</strong>puts must ma<strong>in</strong>ta<strong>in</strong> a maximum AC voltage of 4.1 V. When us<strong>in</strong>g a serial<br />
configuration device <strong>in</strong> an AS configuration scheme, you must connect a 25- series<br />
resistor for the DATA[0] p<strong>in</strong>. When cascad<strong>in</strong>g the <strong>Cyclone</strong> <strong>IV</strong> device family <strong>in</strong> a<br />
multi-device configuration for AS, AP, FPP, <strong>and</strong> PS configuration schemes, you must<br />
connect the repeater buffers between the master <strong>and</strong> slave devices for the DATA <strong>and</strong><br />
DCLK p<strong>in</strong>s. When us<strong>in</strong>g the JTAG configuration scheme <strong>in</strong> a multi-device<br />
configuration, connect 25- resistors on both ends of the TDO-TDI path if the TDO<br />
output driver is a non-<strong>Cyclone</strong> <strong>IV</strong> device.<br />
The output resistance of the repeater buffers <strong>and</strong> the TDO path for all cases must fit the<br />
maximum overshoot equation shown <strong>in</strong> Equation 8–1.<br />
Equation 8–1. (1)<br />
Note to Equation 8–1:<br />
Device Data Size (bits)<br />
0.8ZO RE 1.8ZO<br />
(1) Z O is the transmission l<strong>in</strong>e impedance <strong>and</strong> R E is the equivalent resistance of the output buffer.<br />
February 2013 <strong>Altera</strong> Corporation <strong>Cyclone</strong> <strong>IV</strong> Device H<strong>and</strong>book,<br />
Volume 1
8–6 Chapter 8: <strong>Configuration</strong> <strong>and</strong> <strong>Remote</strong> <strong>System</strong> <strong>Upgrades</strong> <strong>in</strong> <strong>Cyclone</strong> <strong>IV</strong> Devices<br />
<strong>Configuration</strong><br />
<strong>Configuration</strong> Process<br />
This section describes <strong>Cyclone</strong> <strong>IV</strong> device configuration requirements <strong>and</strong> <strong>in</strong>cludes the<br />
follow<strong>in</strong>g topics:<br />
■ “Power Up” on page 8–6<br />
■ “Reset” on page 8–6<br />
■ “<strong>Configuration</strong>” on page 8–6<br />
■ “<strong>Configuration</strong> Error” on page 8–7<br />
■ “Initialization” on page 8–7<br />
■ “User Mode” on page 8–7<br />
f For more <strong>in</strong>formation about the <strong>Altera</strong> ® FPGA configuration cycle state mach<strong>in</strong>e, refer<br />
to the Configur<strong>in</strong>g <strong>Altera</strong> FPGAs chapter <strong>in</strong> volume 1 of the <strong>Configuration</strong> H<strong>and</strong>book.<br />
Power Up<br />
If the device is powered up from the power-down state, V CCINT, V CCA, <strong>and</strong> V CCIO (for<br />
the I/O banks <strong>in</strong> which the configuration <strong>and</strong> JTAG p<strong>in</strong>s reside) must be powered up<br />
to the appropriate level for the device to exit from POR.<br />
Reset<br />
After power up, <strong>Cyclone</strong> <strong>IV</strong> devices go through POR. POR delay depends on the MSEL<br />
p<strong>in</strong> sett<strong>in</strong>gs, which correspond to your configuration scheme. Dur<strong>in</strong>g POR, the device<br />
resets, holds nSTATUS <strong>and</strong> CONF_DONE low, <strong>and</strong> tri-states all user I/O p<strong>in</strong>s (for PS <strong>and</strong><br />
FPP configuration schemes only).<br />
1 To tri-state the configuration bus for AS <strong>and</strong> AP configuration schemes, you must tie<br />
nCE high <strong>and</strong> nCONFIG low.<br />
The user I/O p<strong>in</strong>s <strong>and</strong> dual-purpose I/O p<strong>in</strong>s have weak pull-up resistors, which are<br />
always enabled (after POR) before <strong>and</strong> dur<strong>in</strong>g configuration. When the device exits<br />
POR, all user I/O p<strong>in</strong>s cont<strong>in</strong>ue to tri-state. While nCONFIG is low, the device is <strong>in</strong><br />
reset. When nCONFIG goes high, the device exits reset <strong>and</strong> releases the open-dra<strong>in</strong><br />
nSTATUS p<strong>in</strong>, which is then pulled high by an external 10-k pull-up resistor. After<br />
nSTATUS is released, the device is ready to receive configuration data <strong>and</strong> the<br />
configuration stage starts.<br />
f For more <strong>in</strong>formation about the value of the weak pull-up resistors on the I/O p<strong>in</strong>s<br />
that are on before <strong>and</strong> dur<strong>in</strong>g configuration, refer to the <strong>Cyclone</strong> <strong>IV</strong> Device Datasheet<br />
chapter.<br />
<strong>Configuration</strong><br />
<strong>Configuration</strong> data is latched <strong>in</strong>to the <strong>Cyclone</strong> <strong>IV</strong> device at each DCLK cycle. However,<br />
the width of the data bus <strong>and</strong> the configuration time taken for each scheme are<br />
different. After the device receives all the configuration data, the device releases the<br />
open-dra<strong>in</strong> CONF_DONE p<strong>in</strong>, which is pulled high by an external 10-kpull-up resistor.<br />
A low-to-high transition on the CONF_DONE p<strong>in</strong> <strong>in</strong>dicates that the configuration is<br />
complete <strong>and</strong> <strong>in</strong>itialization of the device can beg<strong>in</strong>.<br />
<strong>Cyclone</strong> <strong>IV</strong> Device H<strong>and</strong>book, February 2013 <strong>Altera</strong> Corporation<br />
Volume 1
Chapter 8: <strong>Configuration</strong> <strong>and</strong> <strong>Remote</strong> <strong>System</strong> <strong>Upgrades</strong> <strong>in</strong> <strong>Cyclone</strong> <strong>IV</strong> Devices 8–7<br />
<strong>Configuration</strong><br />
You can beg<strong>in</strong> reconfiguration by pull<strong>in</strong>g the nCONFIG p<strong>in</strong> low. The nCONFIG p<strong>in</strong> must<br />
be low for at least 500 ns. When nCONFIG is pulled low, the <strong>Cyclone</strong> <strong>IV</strong> device is reset.<br />
The <strong>Cyclone</strong> <strong>IV</strong> device also pulls nSTATUS <strong>and</strong> CONF_DONE low <strong>and</strong> all I/O p<strong>in</strong>s are<br />
tri-stated. When nCONFIG returns to a logic-high level <strong>and</strong> nSTATUS is released by the<br />
<strong>Cyclone</strong> <strong>IV</strong> device, reconfiguration beg<strong>in</strong>s.<br />
<strong>Configuration</strong> Error<br />
If an error occurs dur<strong>in</strong>g configuration, <strong>Cyclone</strong> <strong>IV</strong> devices assert the nSTATUS signal<br />
low, <strong>in</strong>dicat<strong>in</strong>g a data frame error <strong>and</strong> the CONF_DONE signal stays low. If the<br />
Auto-restart configuration after error option (available <strong>in</strong> the Quartus II software <strong>in</strong><br />
the General tab of the Device <strong>and</strong> P<strong>in</strong> Options dialog box) is turned on, the<br />
<strong>Cyclone</strong> <strong>IV</strong> device releases nSTATUS after a reset time-out period (a maximum of<br />
230 s), <strong>and</strong> retries configuration. If this option is turned off, the system must monitor<br />
nSTATUS for errors <strong>and</strong> then pulse nCONFIG low for at least 500 ns to restart<br />
configuration.<br />
Initialization<br />
In <strong>Cyclone</strong> <strong>IV</strong> devices, the <strong>in</strong>itialization clock source is either the <strong>in</strong>ternal oscillator or<br />
the optional CLKUSR p<strong>in</strong>. By default, the <strong>in</strong>ternal oscillator is the clock source for<br />
<strong>in</strong>itialization. If you use the <strong>in</strong>ternal oscillator, the device provides itself with enough<br />
clock cycles for proper <strong>in</strong>itialization. When us<strong>in</strong>g the <strong>in</strong>ternal oscillator, you do not<br />
have to send additional clock cycles from an external source to the CLKUSR p<strong>in</strong> dur<strong>in</strong>g<br />
the <strong>in</strong>itialization stage. Additionally, you can use the CLKUSR p<strong>in</strong> as a user I/O p<strong>in</strong>.<br />
You also have the flexibility to synchronize <strong>in</strong>itialization of multiple devices or to<br />
delay <strong>in</strong>itialization with the CLKUSR option. The CLKUSR p<strong>in</strong> allows you to control<br />
when your device enters user mode for an <strong>in</strong>def<strong>in</strong>ite amount of time. You can turn on<br />
the Enable user-supplied start-up clock (CLKUSR) option <strong>in</strong> the Quartus II software<br />
<strong>in</strong> the General tab of the Device <strong>and</strong> P<strong>in</strong> Options dialog box. When you turn on the<br />
Enable user supplied start-up clock option (CLKUSR) option, the CLKUSR p<strong>in</strong> is the<br />
<strong>in</strong>itialization clock source. Supply<strong>in</strong>g a clock on the CLKUSR p<strong>in</strong> does not affect the<br />
configuration process. After the configuration data is accepted <strong>and</strong> CONF_DONE goes<br />
high, <strong>Cyclone</strong> <strong>IV</strong> devices require 3,192 clock cycles to <strong>in</strong>itialize properly <strong>and</strong> enter<br />
user mode.<br />
1 If you use the optional CLKUSR p<strong>in</strong> <strong>and</strong> the nCONFIG p<strong>in</strong> is pulled low to restart<br />
configuration dur<strong>in</strong>g device <strong>in</strong>itialization, ensure that the CLKUSR p<strong>in</strong> cont<strong>in</strong>ues to<br />
toggle when nSTATUS is low (a maximum of 230 s).<br />
User Mode<br />
An optional INIT_DONE p<strong>in</strong> is available, which signals the end of <strong>in</strong>itialization <strong>and</strong> the<br />
start of user mode with a low-to-high transition. The Enable INIT_DONE Output<br />
option is available <strong>in</strong> the Quartus II software <strong>in</strong> the General tab of the Device <strong>and</strong> P<strong>in</strong><br />
Options dialog box. If you use the INIT_DONE p<strong>in</strong>, it is high due to an external 10-k<br />
pull-up resistor when nCONFIG is low <strong>and</strong> dur<strong>in</strong>g the beg<strong>in</strong>n<strong>in</strong>g of configuration. After<br />
the option bit to enable INIT_DONE is programmed <strong>in</strong>to the device (dur<strong>in</strong>g the first<br />
frame of configuration data), the INIT_DONE p<strong>in</strong> goes low. When <strong>in</strong>itialization is<br />
complete, the INIT_DONE p<strong>in</strong> is released <strong>and</strong> pulled high. This low-to-high transition<br />
signals that the device has entered user mode. In user mode, the user I/O p<strong>in</strong>s<br />
function as assigned <strong>in</strong> your design <strong>and</strong> no longer have weak pull-up resistors.<br />
February 2013 <strong>Altera</strong> Corporation <strong>Cyclone</strong> <strong>IV</strong> Device H<strong>and</strong>book,<br />
Volume 1
8–8 Chapter 8: <strong>Configuration</strong> <strong>and</strong> <strong>Remote</strong> <strong>System</strong> <strong>Upgrades</strong> <strong>in</strong> <strong>Cyclone</strong> <strong>IV</strong> Devices<br />
<strong>Configuration</strong><br />
<strong>Configuration</strong> Scheme<br />
A configuration scheme with different configuration voltage st<strong>and</strong>ards is selected by<br />
driv<strong>in</strong>g the MSEL p<strong>in</strong>s either high or low, as shown <strong>in</strong> Table 8–3, Table 8–4, <strong>and</strong><br />
Table 8–5.<br />
1 Hardwire the MSEL p<strong>in</strong>s to V CCA or GND without pull-up or pull-down resistors to<br />
avoid problems detect<strong>in</strong>g an <strong>in</strong>correct configuration scheme. Do not drive the MSEL<br />
p<strong>in</strong>s with a microprocessor or another device.<br />
Table 8–3. <strong>Configuration</strong> Schemes for <strong>Cyclone</strong> <strong>IV</strong> GX Devices (EP4CGX15, EP4CGX22, <strong>and</strong> EP4CGX30 [except for F484<br />
Package])<br />
<strong>Configuration</strong> Scheme MSEL2 MSEL1 MSEL0 POR Delay <strong>Configuration</strong> Voltage St<strong>and</strong>ard (V) (1)<br />
AS<br />
PS<br />
1 0 1 Fast 3.3<br />
0 1 1 Fast 3.0, 2.5<br />
0 0 1 St<strong>and</strong>ard 3.3<br />
0 1 0 St<strong>and</strong>ard 3.0, 2.5<br />
1 0 0 Fast 3.3, 3.0, 2.5<br />
1 1 0 Fast 1.8, 1.5<br />
0 0 0 St<strong>and</strong>ard 3.3, 3.0, 2.5<br />
JTAG-based configuration (2) (3) (3) (3) Notes to Table 8–3:<br />
— —<br />
(1) <strong>Configuration</strong> voltage st<strong>and</strong>ard applied to the VCCIO supply of the bank <strong>in</strong> which the configuration p<strong>in</strong>s reside.<br />
(2) JTAG-based configuration takes precedence over other configuration schemes, which means the MSEL p<strong>in</strong> sett<strong>in</strong>gs are ignored.<br />
(3) Do not leave the MSEL p<strong>in</strong>s float<strong>in</strong>g. Connect them to VCCA or GND. These p<strong>in</strong>s support the non-JTAG configuration scheme used <strong>in</strong> production.<br />
<strong>Altera</strong> recommends connect<strong>in</strong>g the MSEL p<strong>in</strong>s to GND if your device is only us<strong>in</strong>g JTAG configuration.<br />
Table 8–4. <strong>Configuration</strong> Schemes for <strong>Cyclone</strong> <strong>IV</strong> GX Devices (EP4CGX30 [only for F484 package], EP4CGX50,<br />
EP4CGX75, EP4CGX110, <strong>and</strong> EP4CGX150) (Part 1 of 2)<br />
<strong>Configuration</strong> Scheme MSEL3 MSEL2 MSEL1 MSEL0 POR Delay <strong>Configuration</strong> Voltage St<strong>and</strong>ard (V) (1)<br />
AS<br />
PS<br />
FPP<br />
1 1 0 1 Fast 3.3<br />
1 0 1 1 Fast 3.0, 2.5<br />
1 0 0 1 St<strong>and</strong>ard 3.3<br />
1 0 1 0 St<strong>and</strong>ard 3.0, 2.5<br />
1 1 0 0 Fast 3.3, 3.0, 2.5<br />
1 1 1 0 Fast 1.8, 1.5<br />
1 0 0 0 St<strong>and</strong>ard 3.3, 3.0, 2.5<br />
0 0 0 0 St<strong>and</strong>ard 1.8, 1.5<br />
0 0 1 1 Fast 3.3, 3.0, 2.5<br />
0 1 0 0 Fast 1.8, 1.5<br />
0 0 0 1 St<strong>and</strong>ard 3.3, 3.0, 2.5<br />
0 0 1 0 St<strong>and</strong>ard 1.8, 1.5<br />
<strong>Cyclone</strong> <strong>IV</strong> Device H<strong>and</strong>book, February 2013 <strong>Altera</strong> Corporation<br />
Volume 1
Chapter 8: <strong>Configuration</strong> <strong>and</strong> <strong>Remote</strong> <strong>System</strong> <strong>Upgrades</strong> <strong>in</strong> <strong>Cyclone</strong> <strong>IV</strong> Devices 8–9<br />
<strong>Configuration</strong><br />
Table 8–4. <strong>Configuration</strong> Schemes for <strong>Cyclone</strong> <strong>IV</strong> GX Devices (EP4CGX30 [only for F484 package], EP4CGX50,<br />
EP4CGX75, EP4CGX110, <strong>and</strong> EP4CGX150) (Part 2 of 2)<br />
<strong>Configuration</strong> Scheme MSEL3 MSEL2 MSEL1 MSEL0 POR Delay <strong>Configuration</strong> Voltage St<strong>and</strong>ard (V) (1)<br />
JTAG-based configuration<br />
(2)<br />
Notes to Table 8–4:<br />
(3) (3) (3) (3) — —<br />
(1) <strong>Configuration</strong> voltage st<strong>and</strong>ard applied to the VCCIO supply of the bank <strong>in</strong> which the configuration p<strong>in</strong>s reside.<br />
(2) JTAG-based configuration takes precedence over other configuration schemes, which means the MSEL p<strong>in</strong> sett<strong>in</strong>gs are ignored.<br />
(3) Do not leave the MSEL p<strong>in</strong>s float<strong>in</strong>g. Connect them to VCCA or GND. These p<strong>in</strong>s support the non-JTAG configuration scheme used <strong>in</strong> production.<br />
<strong>Altera</strong> recommends connect<strong>in</strong>g the MSEL p<strong>in</strong>s to GND if your device is only us<strong>in</strong>g JTAG configuration.<br />
1 Smaller <strong>Cyclone</strong> <strong>IV</strong> E devices or package options (E144 <strong>and</strong> F256 packages) do not<br />
have the MSEL[3]p<strong>in</strong>. The AS Fast POR configuration scheme at 3.0- or 2.5-V<br />
configuration voltage st<strong>and</strong>ard <strong>and</strong> the AP configuration scheme are not supported <strong>in</strong><br />
<strong>Cyclone</strong> <strong>IV</strong> E devices without the MSEL[3]p<strong>in</strong>. To configure these devices with other<br />
supported configuration schemes, select MSEL[2..0]p<strong>in</strong>s accord<strong>in</strong>g to the MSEL<br />
sett<strong>in</strong>gs <strong>in</strong> Table 8–5.<br />
Table 8–5. <strong>Configuration</strong> Schemes for <strong>Cyclone</strong> <strong>IV</strong> E Devices<br />
<strong>Configuration</strong> Scheme MSEL3 MSEL2 MSEL1 MSEL0 POR Delay <strong>Configuration</strong> Voltage St<strong>and</strong>ard (V) (1)<br />
AS<br />
AP<br />
PS<br />
FPP<br />
JTAG-based configuration<br />
(2)<br />
Notes to Table 8–5:<br />
1 1 0 1 Fast 3.3<br />
0 1 0 0 Fast 3.0, 2.5<br />
0 0 1 0 St<strong>and</strong>ard 3.3<br />
0 0 1 1 St<strong>and</strong>ard 3.0, 2.5<br />
0 1 0 1 Fast 3.3<br />
0 1 1 0 Fast 1.8<br />
0 1 1 1 St<strong>and</strong>ard 3.3<br />
1 0 1 1 St<strong>and</strong>ard 3.0, 2.5<br />
1 0 0 0 St<strong>and</strong>ard 1.8<br />
1 1 0 0 Fast 3.3, 3.0, 2.5<br />
0 0 0 0 St<strong>and</strong>ard 3.3, 3.0, 2.5<br />
1 1 1 0 Fast 3.3, 3.0, 2.5<br />
1 1 1 1 Fast 1.8, 1.5<br />
(3) (3) (3) (3) — —<br />
(1) <strong>Configuration</strong> voltage st<strong>and</strong>ard applied to the VCCIO supply of the bank <strong>in</strong> which the configuration p<strong>in</strong>s reside.<br />
(2) JTAG-based configuration takes precedence over other configuration schemes, which means the MSEL p<strong>in</strong> sett<strong>in</strong>gs are ignored.<br />
(3) Do not leave the MSEL p<strong>in</strong>s float<strong>in</strong>g. Connect them to VCCA or GND. These p<strong>in</strong>s support the non-JTAG configuration scheme used <strong>in</strong> production.<br />
<strong>Altera</strong> recommends connect<strong>in</strong>g the MSEL p<strong>in</strong>s to GND if your device is only us<strong>in</strong>g JTAG configuration.<br />
February 2013 <strong>Altera</strong> Corporation <strong>Cyclone</strong> <strong>IV</strong> Device H<strong>and</strong>book,<br />
Volume 1
8–10 Chapter 8: <strong>Configuration</strong> <strong>and</strong> <strong>Remote</strong> <strong>System</strong> <strong>Upgrades</strong> <strong>in</strong> <strong>Cyclone</strong> <strong>IV</strong> Devices<br />
<strong>Configuration</strong><br />
1 For <strong>Cyclone</strong> <strong>IV</strong> E devices, the Quartus II software prohibits you from us<strong>in</strong>g the LVDS<br />
I/O st<strong>and</strong>ard <strong>in</strong> I/O Bank 1 when the configuration device I/O voltage is not 2.5 V. If<br />
you need to assign LVDS I/O st<strong>and</strong>ard <strong>in</strong> I/O Bank 1, navigate to<br />
Assignments>Device>Sett<strong>in</strong>gs>Device <strong>and</strong> P<strong>in</strong> Option><strong>Configuration</strong> to change<br />
the <strong>Configuration</strong> Device I/O voltage to 2.5 V or Auto.<br />
AS <strong>Configuration</strong> (Serial <strong>Configuration</strong> Devices)<br />
In the AS configuration scheme, <strong>Cyclone</strong> <strong>IV</strong> devices are configured with a serial<br />
configuration device. These configuration devices are low-cost devices with<br />
non-volatile memories that feature a simple four-p<strong>in</strong> <strong>in</strong>terface <strong>and</strong> a small form factor.<br />
These features make serial configuration devices the ideal low-cost configuration<br />
solution.<br />
f For more <strong>in</strong>formation about serial configuration devices, refer to the Serial<br />
<strong>Configuration</strong> Devices (EPCS1, EPCS4, EPCS16, EPCS64, <strong>and</strong> EPCS128) Datasheet <strong>in</strong><br />
volume 2 of the <strong>Configuration</strong> H<strong>and</strong>book.<br />
Serial configuration devices provide a serial <strong>in</strong>terface to access the configuration data.<br />
Dur<strong>in</strong>g device configuration, <strong>Cyclone</strong> <strong>IV</strong> devices read the configuration data through<br />
the serial <strong>in</strong>terface, decompress the data if necessary, <strong>and</strong> configure their SRAM cells.<br />
This scheme is referred to as the AS configuration scheme because the device controls<br />
the configuration <strong>in</strong>terface.<br />
1 If you want to ga<strong>in</strong> control of the EPCS p<strong>in</strong>s, hold the nCONFIG p<strong>in</strong> low <strong>and</strong> pull the<br />
nCE p<strong>in</strong> high to cause the device to reset <strong>and</strong> tri-state the AS configuration p<strong>in</strong>s.<br />
S<strong>in</strong>gle-Device AS <strong>Configuration</strong><br />
The four-p<strong>in</strong> <strong>in</strong>terface of serial configuration devices consists of the follow<strong>in</strong>g p<strong>in</strong>s:<br />
■ Serial clock <strong>in</strong>put (DCLK)<br />
■ Serial data output (DATA)<br />
■ Active-low chip select (nCS)<br />
■ AS data <strong>in</strong>put (ASDI)<br />
<strong>Cyclone</strong> <strong>IV</strong> Device H<strong>and</strong>book, February 2013 <strong>Altera</strong> Corporation<br />
Volume 1
Chapter 8: <strong>Configuration</strong> <strong>and</strong> <strong>Remote</strong> <strong>System</strong> <strong>Upgrades</strong> <strong>in</strong> <strong>Cyclone</strong> <strong>IV</strong> Devices 8–11<br />
<strong>Configuration</strong><br />
This four-p<strong>in</strong> <strong>in</strong>terface connects to <strong>Cyclone</strong> <strong>IV</strong> device p<strong>in</strong>s, as shown <strong>in</strong> Figure 8–2.<br />
Figure 8–2. S<strong>in</strong>gle-Device AS <strong>Configuration</strong><br />
Notes to Figure 8–2:<br />
DATA<br />
DCLK<br />
nCS<br />
ASDI<br />
10 kΩ<br />
V CCIO (1)<br />
V CCIO (1)<br />
Serial <strong>Configuration</strong><br />
10 kΩ<br />
Device <strong>Cyclone</strong> <strong>IV</strong> Device<br />
25 Ω (5)<br />
V CCIO (1)<br />
nSTATUS<br />
CONF_DONE<br />
nCONFIG<br />
nCE<br />
DATA[0]<br />
DCLK<br />
nCSO (6)<br />
ASDO (6)<br />
(1) Connect the pull-up resistors to the VCCIO supply of the bank <strong>in</strong> which the p<strong>in</strong> resides.<br />
(2) <strong>Cyclone</strong> <strong>IV</strong> devices use the ASDO-to-ASDI path to control the configuration device.<br />
(3) The nCEO p<strong>in</strong> is left unconnected or used as a user I/O p<strong>in</strong> when it does not feed the nCE p<strong>in</strong> of another device.<br />
(4) The MSEL p<strong>in</strong> sett<strong>in</strong>gs vary for different configuration voltage st<strong>and</strong>ards <strong>and</strong> POR time. To connect the MSEL p<strong>in</strong>s,<br />
refer to Table 8–3 on page 8–8, Table 8–4 on page 8–8, <strong>and</strong> Table 8–5 on page 8–9. Connect the MSEL p<strong>in</strong>s directly<br />
to VCCA or GND.<br />
(5) Connect the series resistor at the near end of the serial configuration device.<br />
(6) These p<strong>in</strong>s are dual-purpose I/O p<strong>in</strong>s. The nCSO p<strong>in</strong> functions as FLASH_nCE p<strong>in</strong> <strong>in</strong> AP mode. The ASDO p<strong>in</strong> functions<br />
as the DATA[1] p<strong>in</strong> <strong>in</strong> AP <strong>and</strong> FPP modes.<br />
(7) Only <strong>Cyclone</strong> <strong>IV</strong> GX devices have an option to select CLKUSR (40 MHz maximum) as the external clock source for<br />
DCLK.<br />
1 To tri-state the configuration bus for AS configuration schemes, you must tie nCE high<br />
<strong>and</strong> nCONFIG low.<br />
1 The 25- resistor at the near end of the serial configuration device for DATA[0] works<br />
to m<strong>in</strong>imize the driver impedance mismatch with the board trace <strong>and</strong> reduce the<br />
overshoot seen at the <strong>Cyclone</strong> <strong>IV</strong> device DATA[0] <strong>in</strong>put p<strong>in</strong>.<br />
In the s<strong>in</strong>gle-device AS configuration, the maximum board load<strong>in</strong>g <strong>and</strong> board trace<br />
length between the supported serial configuration device <strong>and</strong> the <strong>Cyclone</strong> <strong>IV</strong> device<br />
must follow the recommendations <strong>in</strong> Table 8–6 on page 8–18.<br />
The DCLK generated by the <strong>Cyclone</strong> <strong>IV</strong> device controls the entire configuration cycle<br />
<strong>and</strong> provides tim<strong>in</strong>g for the serial <strong>in</strong>terface. <strong>Cyclone</strong> <strong>IV</strong> devices use an <strong>in</strong>ternal<br />
oscillator or an external clock source to generate the DCLK. For <strong>Cyclone</strong> <strong>IV</strong> E devices,<br />
you can use a 40-MHz <strong>in</strong>ternal oscillator to generate the DCLK <strong>and</strong> for <strong>Cyclone</strong> <strong>IV</strong> GX<br />
devices you can use a slow clock (20 MHz maximum) or a fast clock<br />
(40 MHz maximum) from the <strong>in</strong>ternal oscillator or an external clock from CLKUSR to<br />
generate the DCLK. There are some variations <strong>in</strong> the <strong>in</strong>ternal oscillator frequency<br />
because of the process, voltage, <strong>and</strong> temperature (PVT) conditions <strong>in</strong> <strong>Cyclone</strong> <strong>IV</strong><br />
February 2013 <strong>Altera</strong> Corporation <strong>Cyclone</strong> <strong>IV</strong> Device H<strong>and</strong>book,<br />
Volume 1<br />
(2)<br />
10 kΩ<br />
GND<br />
nCEO<br />
CLKUSR (7)<br />
MSEL[ ]<br />
N.C. (3)<br />
(4)
8–12 Chapter 8: <strong>Configuration</strong> <strong>and</strong> <strong>Remote</strong> <strong>System</strong> <strong>Upgrades</strong> <strong>in</strong> <strong>Cyclone</strong> <strong>IV</strong> Devices<br />
<strong>Configuration</strong><br />
devices. The <strong>in</strong>ternal oscillator is designed to ensure that its maximum frequency is<br />
guaranteed to meet EPCS device specifications. <strong>Cyclone</strong> <strong>IV</strong> devices offer the option to<br />
select CLKUSR as the external clock source for DCLK. You can change the clock source<br />
option <strong>in</strong> the Quartus II software <strong>in</strong> the <strong>Configuration</strong> tab of the Device <strong>and</strong> P<strong>in</strong><br />
Options dialog box.<br />
1 EPCS1 does not support <strong>Cyclone</strong> <strong>IV</strong> devices because of its <strong>in</strong>sufficient memory<br />
capacity.<br />
In configuration mode, the <strong>Cyclone</strong> <strong>IV</strong> device enables the serial configuration device<br />
by driv<strong>in</strong>g the nCSO output p<strong>in</strong> low, which connects to the nCS p<strong>in</strong> of the configuration<br />
device. The <strong>Cyclone</strong> <strong>IV</strong> device uses the DCLK <strong>and</strong> DATA[1]p<strong>in</strong>s to send operation<br />
comm<strong>and</strong>s <strong>and</strong> read address signals to the serial configuration device. The<br />
configuration device provides data on its DATA p<strong>in</strong>, which connects to the DATA[0]<br />
<strong>in</strong>put of the <strong>Cyclone</strong> <strong>IV</strong> device.<br />
All AS configuration p<strong>in</strong>s (DATA[0], DCLK, nCSO, <strong>and</strong> DATA[1]) have weak <strong>in</strong>ternal pullup<br />
resistors that are always active. After configuration, these p<strong>in</strong>s are set as <strong>in</strong>put tristated<br />
<strong>and</strong> are driven high by the weak <strong>in</strong>ternal pull-up resistors.<br />
The tim<strong>in</strong>g parameters for AS mode are not listed here because the t CF2CD, t CF2ST0, t CFG,<br />
t STATUS, t CF2ST1, <strong>and</strong> t CD2UM tim<strong>in</strong>g parameters are identical to the tim<strong>in</strong>g parameters<br />
for PS mode shown <strong>in</strong> Table 8–11 on page 8–36.<br />
<strong>Cyclone</strong> <strong>IV</strong> Device H<strong>and</strong>book, February 2013 <strong>Altera</strong> Corporation<br />
Volume 1
Chapter 8: <strong>Configuration</strong> <strong>and</strong> <strong>Remote</strong> <strong>System</strong> <strong>Upgrades</strong> <strong>in</strong> <strong>Cyclone</strong> <strong>IV</strong> Devices 8–13<br />
<strong>Configuration</strong><br />
Multi-Device AS <strong>Configuration</strong><br />
Figure 8–3. Multi-Device AS <strong>Configuration</strong><br />
DATA<br />
Notes to Figure 8–3:<br />
DCLK<br />
nCS<br />
ASDI<br />
You can configure multiple <strong>Cyclone</strong> <strong>IV</strong> devices with a s<strong>in</strong>gle serial configuration<br />
device. When the first device captures all its configuration data from the bitstream, it<br />
drives the nCEO p<strong>in</strong> low, enabl<strong>in</strong>g the next device <strong>in</strong> the cha<strong>in</strong>. If the last device <strong>in</strong> the<br />
cha<strong>in</strong> is a <strong>Cyclone</strong> <strong>IV</strong> device, you can leave the nCEO p<strong>in</strong> of the last device<br />
unconnected or use it as a user I/O p<strong>in</strong> after configuration. The nCONFIG, nSTATUS,<br />
CONF_DONE, DCLK, <strong>and</strong> DATA[0] p<strong>in</strong>s of each device <strong>in</strong> the cha<strong>in</strong> are connected together<br />
(Figure 8–3).<br />
V CCIO (1)<br />
V CCIO (1)<br />
10 kΩ 10 kΩ 10 kΩ<br />
Serial <strong>Configuration</strong><br />
Device <strong>Cyclone</strong> <strong>IV</strong> Master Device<br />
<strong>Cyclone</strong> <strong>IV</strong> Slave Device<br />
(10)<br />
25 Ω (5)<br />
(10)<br />
50 Ω (5), (7)<br />
V CCIO (1)<br />
GND<br />
nSTATUS<br />
CONF_DONE<br />
nCONFIG<br />
nCE<br />
DATA[0]<br />
DCLK<br />
nCSO (8)<br />
ASDO (8)<br />
50 Ω (7)<br />
Buffers (6)<br />
nCEO<br />
V CCIO (2)<br />
nSTATUS<br />
CONF_DONE<br />
nCONFIG<br />
nCE<br />
(1) Connect the pull-up resistors to the VCCIO supply of the bank <strong>in</strong> which the p<strong>in</strong> resides.<br />
(2) Connect the pull-up resistor to the VCCIO supply voltage of I/O bank <strong>in</strong> which the nCE p<strong>in</strong> resides.<br />
(3) You can leave the nCEO p<strong>in</strong> unconnected or use it as a user I/O p<strong>in</strong> when it does not feed the nCE p<strong>in</strong> of another device.<br />
(4) The MSEL p<strong>in</strong> sett<strong>in</strong>gs vary for different configuration voltage st<strong>and</strong>ards <strong>and</strong> POR time. You must set the master device of the <strong>Cyclone</strong> <strong>IV</strong> device<br />
<strong>in</strong> AS mode <strong>and</strong> the slave devices <strong>in</strong> PS mode. To connect the MSEL p<strong>in</strong>s for the master device <strong>in</strong> AS mode <strong>and</strong> slave devices <strong>in</strong> PS mode, refer to<br />
Table 8–3 on page 8–8, Table 8–4 on page 8–8, <strong>and</strong> Table 8–5 on page 8–9. Connect the MSEL p<strong>in</strong>s directly to VCCA or GND.<br />
(5) Connect the series resistor at the near end of the serial configuration device.<br />
(6) Connect the repeater buffers between the master <strong>and</strong> slave devices of the <strong>Cyclone</strong> <strong>IV</strong> device for DATA[0] <strong>and</strong> DCLK. All I/O <strong>in</strong>puts must ma<strong>in</strong>ta<strong>in</strong><br />
a maximum AC voltage of 4.1 V. The output resistance of the repeater buffers must fit the maximum overshoot equation outl<strong>in</strong>ed <strong>in</strong> “<strong>Configuration</strong><br />
<strong>and</strong> JTAG P<strong>in</strong> I/O Requirements” on page 8–5.<br />
(7) The 50- series resistors are optional if the 3.3-V configuration voltage st<strong>and</strong>ard is applied. For optimal signal <strong>in</strong>tegrity, connect these 50- series<br />
resistors if the 2.5- or 3.0-V configuration voltage st<strong>and</strong>ard is applied.<br />
(8) These p<strong>in</strong>s are dual-purpose I/O p<strong>in</strong>s. The nCSO p<strong>in</strong> functions as FLASH_nCE p<strong>in</strong> <strong>in</strong> AP mode. The ASDO p<strong>in</strong> functions as DATA[1] p<strong>in</strong> <strong>in</strong> AP <strong>and</strong><br />
FPP modes.<br />
(9) Only <strong>Cyclone</strong> <strong>IV</strong> GX devices have an option to select CLKUSR (40 MHz maximum) as the external clock source for DCLK.<br />
(10) For multi-devices AS configuration us<strong>in</strong>g <strong>Cyclone</strong> <strong>IV</strong> E with 1,0 V core voltage, the maximum board trace-length from the serial configuration<br />
device to the junction-split on both DCLK <strong>and</strong> Data0 l<strong>in</strong>e is 3.5 <strong>in</strong>ches.<br />
February 2013 <strong>Altera</strong> Corporation <strong>Cyclone</strong> <strong>IV</strong> Device H<strong>and</strong>book,<br />
Volume 1<br />
10 kΩ<br />
CLKUSR (9)<br />
DATA[0]<br />
DCLK<br />
nCEO<br />
MSEL[ ] (4) MSEL[ ]<br />
N.C. (3)<br />
(4)
8–14 Chapter 8: <strong>Configuration</strong> <strong>and</strong> <strong>Remote</strong> <strong>System</strong> <strong>Upgrades</strong> <strong>in</strong> <strong>Cyclone</strong> <strong>IV</strong> Devices<br />
<strong>Configuration</strong><br />
The first <strong>Cyclone</strong> <strong>IV</strong> device <strong>in</strong> the cha<strong>in</strong> is the configuration master <strong>and</strong> it controls the<br />
configuration of the entire cha<strong>in</strong>. Other <strong>Altera</strong> devices that support PS configuration<br />
can also be part of the cha<strong>in</strong> as configuration slaves.<br />
1 In the multi-device AS configuration, the board trace length between the serial<br />
configuration device <strong>and</strong> the master device of the <strong>Cyclone</strong> <strong>IV</strong> device must follow the<br />
recommendations <strong>in</strong> Table 8–6 on page 8–18.<br />
The nSTATUS <strong>and</strong> CONF_DONE p<strong>in</strong>s on all target devices are connected together with<br />
external pull-up resistors, as shown <strong>in</strong> Figure 8–3 on page 8–13. These p<strong>in</strong>s are<br />
open-dra<strong>in</strong> bidirectional p<strong>in</strong>s on the devices. When the first device asserts nCEO (after<br />
receiv<strong>in</strong>g all its configuration data), it releases its CONF_DONE p<strong>in</strong>. However, the<br />
subsequent devices <strong>in</strong> the cha<strong>in</strong> keep this shared CONF_DONE l<strong>in</strong>e low until they receive<br />
their configuration data. When all target devices <strong>in</strong> the cha<strong>in</strong> receive their<br />
configuration data <strong>and</strong> release CONF_DONE, the pull-up resistor drives a high level on<br />
CONF_DONE l<strong>in</strong>e <strong>and</strong> all devices simultaneously enter <strong>in</strong>itialization mode.<br />
1 Although you can cascade <strong>Cyclone</strong> <strong>IV</strong> devices, serial configuration devices cannot be<br />
cascaded or cha<strong>in</strong>ed together.<br />
If the configuration bitstream size exceeds the capacity of a serial configuration<br />
device, you must select a larger configuration device, enable the compression feature,<br />
or both. When configur<strong>in</strong>g multiple devices, the size of the bitstream is the sum of the<br />
<strong>in</strong>dividual device’s configuration bitstream.<br />
Configur<strong>in</strong>g Multiple <strong>Cyclone</strong> <strong>IV</strong> Devices with the Same Design<br />
Certa<strong>in</strong> designs require that you configure multiple <strong>Cyclone</strong> <strong>IV</strong> devices with the same<br />
design through a configuration bitstream, or a .sof. You can do this through the<br />
follow<strong>in</strong>g methods:<br />
■ Multiple .sof<br />
■ S<strong>in</strong>gle .sof<br />
1 For both methods, the serial configuration devices cannot be cascaded or cha<strong>in</strong>ed<br />
together.<br />
Multiple SRAM Object Files<br />
Two copies of the .sof are stored <strong>in</strong> the serial configuration device. Use the first copy<br />
to configure the master device of the <strong>Cyclone</strong> <strong>IV</strong> device <strong>and</strong> the second copy to<br />
configure all rema<strong>in</strong><strong>in</strong>g slave devices concurrently. All slave devices must have the<br />
same density <strong>and</strong> package. The setup is similar to Figure 8–3 on page 8–13.<br />
To configure four identical <strong>Cyclone</strong> <strong>IV</strong> devices with the same .sof, you must set up the<br />
cha<strong>in</strong> similar to the example shown <strong>in</strong> Figure 8–4. The first device is the master device<br />
<strong>and</strong> its MSEL p<strong>in</strong>s must be set to select AS configuration. The other three slave devices<br />
are set up for concurrent configuration <strong>and</strong> their MSEL p<strong>in</strong>s must be set to select PS<br />
configuration. The nCEO p<strong>in</strong> from the master device drives the nCE <strong>in</strong>put p<strong>in</strong>s on all<br />
three slave devices, as well as the DATA <strong>and</strong> DCLK p<strong>in</strong>s that connect <strong>in</strong> parallel to all<br />
<strong>Cyclone</strong> <strong>IV</strong> Device H<strong>and</strong>book, February 2013 <strong>Altera</strong> Corporation<br />
Volume 1
Chapter 8: <strong>Configuration</strong> <strong>and</strong> <strong>Remote</strong> <strong>System</strong> <strong>Upgrades</strong> <strong>in</strong> <strong>Cyclone</strong> <strong>IV</strong> Devices 8–15<br />
<strong>Configuration</strong><br />
four devices. Dur<strong>in</strong>g the first configuration cycle, the master device reads its<br />
configuration data from the serial configuration device while hold<strong>in</strong>g nCEO high. After<br />
complet<strong>in</strong>g its configuration cycle, the master device drives nCE low <strong>and</strong> sends the<br />
second copy of the configuration data to all three slave devices, configur<strong>in</strong>g them<br />
simultaneously.<br />
The advantage of the setup <strong>in</strong> Figure 8–4 is that you can have a different .sof for the<br />
master device. However, all the slave devices must be configured with the same .sof.<br />
You can either compress or uncompress the .sof <strong>in</strong> this configuration method.<br />
1 You can still use this method if the master <strong>and</strong> slave devices use the same .sof.<br />
February 2013 <strong>Altera</strong> Corporation <strong>Cyclone</strong> <strong>IV</strong> Device H<strong>and</strong>book,<br />
Volume 1
8–16 Chapter 8: <strong>Configuration</strong> <strong>and</strong> <strong>Remote</strong> <strong>System</strong> <strong>Upgrades</strong> <strong>in</strong> <strong>Cyclone</strong> <strong>IV</strong> Devices<br />
<strong>Configuration</strong><br />
Figure 8–4. Multi-Device AS <strong>Configuration</strong> <strong>in</strong> Which Devices Receive the Same Data with Multiple .sof<br />
Serial <strong>Configuration</strong><br />
Device<br />
DATA<br />
DCLK<br />
nCS<br />
ASDI<br />
Notes to Figure 8–4:<br />
(10)<br />
V CCIO (1) V CCIO (1)<br />
GND<br />
nSTATUS<br />
CONF_DONE<br />
nCONFIG<br />
nCE<br />
DATA[0]<br />
DCLK<br />
nCSO (8)<br />
ASDO (8)<br />
V CCIO (1) V CCIO (2)<br />
10 kΩ 10 kΩ 10 kΩ 10 kΩ<br />
25 Ω (5)<br />
(10)<br />
50 Ω (5), (7)<br />
<strong>Cyclone</strong> <strong>IV</strong> Master Device<br />
50 Ω (7)<br />
Buffers (6)<br />
nCEO<br />
CLKUSR (9)<br />
MSEL[ ]<br />
nSTATUS<br />
CONF_DONE<br />
nCONFIG<br />
nCE<br />
DATA[0]<br />
DCLK<br />
<strong>Cyclone</strong> <strong>IV</strong> Slave Device<br />
nSTATUS<br />
CONF_DONE<br />
nCONFIG<br />
nCE<br />
DATA[0]<br />
DCLK<br />
(4) MSEL[ ]<br />
nSTATUS<br />
CONF_DONE<br />
nCONFIG<br />
nCE<br />
DATA[0]<br />
DCLK<br />
nCEO N.C. (3)<br />
MSEL[ ]<br />
<strong>Cyclone</strong> <strong>IV</strong> Slave Device<br />
<strong>Cyclone</strong> <strong>IV</strong> Slave Device<br />
(1) Connect the pull-up resistors to the VCCIO supply of the bank <strong>in</strong> which the p<strong>in</strong> resides.<br />
(2) Connect the pull-up resistor to the VCCIO supply voltage of the I/O bank <strong>in</strong> which the nCE p<strong>in</strong> resides.<br />
(3) The nCEO p<strong>in</strong> is left unconnected or used as a user I/O p<strong>in</strong> when it does not feed the nCE p<strong>in</strong> of another device.<br />
(4) The MSEL p<strong>in</strong> sett<strong>in</strong>gs vary for different configuration voltage st<strong>and</strong>ards <strong>and</strong> POR time. You must set the master device <strong>in</strong> AS mode <strong>and</strong> the slave<br />
devices <strong>in</strong> PS mode. To connect the MSEL p<strong>in</strong>s for the master device <strong>in</strong> AS mode <strong>and</strong> the slave devices <strong>in</strong> PS mode, refer to Table 8–3 on page 8–8,<br />
Table 8–4 on page 8–8, <strong>and</strong> Table 8–5 on page 8–9. Connect the MSEL p<strong>in</strong>s directly to VCCA or GND.<br />
(5) Connect the series resistor at the near end of the serial configuration device.<br />
(6) Connect the repeater buffers between the master <strong>and</strong> slave devices for DATA[0] <strong>and</strong> DCLK. All I/O <strong>in</strong>puts must ma<strong>in</strong>ta<strong>in</strong> a maximum AC voltage<br />
of 4.1 V. The output resistance of the repeater buffers must fit the maximum overshoot equation outl<strong>in</strong>ed <strong>in</strong> “<strong>Configuration</strong> <strong>and</strong> JTAG P<strong>in</strong> I/O<br />
Requirements” on page 8–5.<br />
(7) The 50- series resistors are optional if the 3.3-V configuration voltage st<strong>and</strong>ard is applied. For optimal signal <strong>in</strong>tegrity, connect these 50- series<br />
resistors if the 2.5- or 3.0-V configuration voltage st<strong>and</strong>ard is applied.<br />
(8) These p<strong>in</strong>s are dual-purpose I/O p<strong>in</strong>s. The nCSO p<strong>in</strong> functions as FLASH_nCE p<strong>in</strong> <strong>in</strong> AP mode. The ASDO p<strong>in</strong> functions as DATA[1] p<strong>in</strong> <strong>in</strong> AP <strong>and</strong><br />
FPP modes.<br />
(9) Only <strong>Cyclone</strong> <strong>IV</strong> GX devices have an option to select CLKUSR (40 MHz maximum) as the external clock source for DCLK.<br />
(10) For multi-devices AS configuration us<strong>in</strong>g <strong>Cyclone</strong> <strong>IV</strong> E with 1,0 V core voltage, the maximum board trace-length from the serial configuration<br />
device to the junction-split on both DCLK <strong>and</strong> Data0 l<strong>in</strong>e is 3.5 <strong>in</strong>ches.<br />
<strong>Cyclone</strong> <strong>IV</strong> Device H<strong>and</strong>book, February 2013 <strong>Altera</strong> Corporation<br />
Volume 1<br />
(4)<br />
nCEO N.C. (3)<br />
nCEO<br />
MSEL[ ]<br />
(4)<br />
N.C. (3)<br />
(4)
Chapter 8: <strong>Configuration</strong> <strong>and</strong> <strong>Remote</strong> <strong>System</strong> <strong>Upgrades</strong> <strong>in</strong> <strong>Cyclone</strong> <strong>IV</strong> Devices 8–17<br />
<strong>Configuration</strong><br />
S<strong>in</strong>gle SRAM Object File<br />
The second method configures both the master device <strong>and</strong> slave devices with the<br />
same .sof. The serial configuration device stores one copy of the .sof. You must set up<br />
one or more slave devices <strong>in</strong> the cha<strong>in</strong>. All the slave devices must be set up <strong>in</strong> the<br />
same way (Figure 8–5).<br />
Figure 8–5. Multi-Device AS <strong>Configuration</strong> <strong>in</strong> Which Devices Receive the Same Data with a S<strong>in</strong>gle .sof<br />
Serial <strong>Configuration</strong><br />
Device<br />
DATA<br />
DCLK<br />
nCS<br />
ASDI<br />
(9)<br />
Notes to Figure 8–5:<br />
25 Ω (4)<br />
(9)<br />
(4),(6)<br />
50 Ω<br />
V CCIO (1) V CCIO (1) V CCIO (1)<br />
10 kΩ 10 kΩ 10 kΩ<br />
<strong>Cyclone</strong> <strong>IV</strong> Master Device<br />
nSTATUS<br />
CONF_DONE<br />
nCONFIG<br />
nCE<br />
DATA[0]<br />
DCLK<br />
nCSO (7)<br />
ASDO (7)<br />
nCEO<br />
N.C. (2)<br />
nSTATUS<br />
CONF_DONE<br />
nCONFIG<br />
nCE<br />
DATA[0]<br />
DCLK<br />
nCEO N.C. (2)<br />
GND GND<br />
GND<br />
50 Ω(7)<br />
CLKUSR (9)<br />
<strong>Cyclone</strong> <strong>IV</strong> Slave Device 2<br />
nSTATUS<br />
CONF_DONE<br />
nCONFIG<br />
nCE<br />
nCEO N.C. (2)<br />
(1) Connect the pull-up resistors to the VCCIO supply of the bank <strong>in</strong> which the p<strong>in</strong> resides.<br />
(2) The nCEO p<strong>in</strong> is left unconnected or used as a user I/O p<strong>in</strong> when it does not feed the nCE p<strong>in</strong> of another device.<br />
(3) The MSEL p<strong>in</strong> sett<strong>in</strong>gs vary for different configuration voltage st<strong>and</strong>ards <strong>and</strong> POR time. You must set the master device of the <strong>Cyclone</strong> <strong>IV</strong> device<br />
<strong>in</strong> AS mode <strong>and</strong> the slave devices <strong>in</strong> PS mode. To connect the MSEL p<strong>in</strong>s for the master device <strong>in</strong> AS mode <strong>and</strong> slave devices <strong>in</strong> PS mode, refer to<br />
Table 8–3 on page 8–8, Table 8–4 on page 8–8, <strong>and</strong> Table 8–5 on page 8–9. Connect the MSEL p<strong>in</strong>s directly to VCCA or GND.<br />
(4) Connect the series resistor at the near end of the serial configuration device.<br />
(5) Connect the repeater buffers between the master <strong>and</strong> slave devices for DATA[0] <strong>and</strong> DCLK. All I/O <strong>in</strong>puts must ma<strong>in</strong>ta<strong>in</strong> a maximum AC voltage<br />
of 4.1 V. The output resistance of the repeater buffers must fit the maximum overshoot equation outl<strong>in</strong>ed <strong>in</strong> “<strong>Configuration</strong> <strong>and</strong> JTAG P<strong>in</strong> I/O<br />
Requirements” on page 8–5.<br />
(6) The 50- series resistors are optional if the 3.3-V configuration voltage st<strong>and</strong>ard is applied. For optimal signal <strong>in</strong>tegrity, connect these 50- series<br />
resistors if the 2.5- or 3.0-V configuration voltage st<strong>and</strong>ard is applied.<br />
(7) These p<strong>in</strong>s are dual-purpose I/O p<strong>in</strong>s. The nCSO p<strong>in</strong> functions as FLASH_nCE p<strong>in</strong> <strong>in</strong> AP mode. The ASDO p<strong>in</strong> functions as DATA[1] p<strong>in</strong> <strong>in</strong> AP <strong>and</strong><br />
FPP modes.<br />
(8) Only <strong>Cyclone</strong> <strong>IV</strong> GX devices have an option to select CLKUSR (40 MHz maximum) as the external clock source for DCLK.<br />
(9) For multi-devices AS configuration us<strong>in</strong>g <strong>Cyclone</strong> <strong>IV</strong> E with 1,0 V core voltage, the maximum board trace-length from the serial configuration<br />
device to the junction-split on both DCLK <strong>and</strong> Data0 l<strong>in</strong>e is 3.5 <strong>in</strong>ches.<br />
In this setup, all the <strong>Cyclone</strong> <strong>IV</strong> devices <strong>in</strong> the cha<strong>in</strong> are connected for concurrent<br />
configuration. This reduces the AS configuration time because all the <strong>Cyclone</strong> <strong>IV</strong><br />
devices are configured <strong>in</strong> one configuration cycle. Connect the nCE <strong>in</strong>put p<strong>in</strong>s of all the<br />
<strong>Cyclone</strong> <strong>IV</strong> devices to GND. You can either leave the nCEO output p<strong>in</strong>s on all the<br />
<strong>Cyclone</strong> <strong>IV</strong> devices unconnected or use the nCEO output p<strong>in</strong>s as normal user I/O p<strong>in</strong>s.<br />
The DATA <strong>and</strong> DCLK p<strong>in</strong>s are connected <strong>in</strong> parallel to all the <strong>Cyclone</strong> <strong>IV</strong> devices.<br />
February 2013 <strong>Altera</strong> Corporation <strong>Cyclone</strong> <strong>IV</strong> Device H<strong>and</strong>book,<br />
Volume 1<br />
DATA[0]<br />
DCLK<br />
MSEL[ ] (3) MSEL[ ] (3)<br />
MSEL[ ]<br />
Buffers (5)<br />
<strong>Cyclone</strong> <strong>IV</strong> Slave Device 1<br />
(3)
8–18 Chapter 8: <strong>Configuration</strong> <strong>and</strong> <strong>Remote</strong> <strong>System</strong> <strong>Upgrades</strong> <strong>in</strong> <strong>Cyclone</strong> <strong>IV</strong> Devices<br />
<strong>Configuration</strong><br />
<strong>Altera</strong> recommends putt<strong>in</strong>g a buffer before the DATA <strong>and</strong> DCLK output from the master<br />
device to avoid signal strength <strong>and</strong> signal <strong>in</strong>tegrity issues. The buffer must not<br />
significantly change the DATA-to-DCLK relationships or delay them with respect to other<br />
AS signals (ASDI <strong>and</strong> nCS). Also, the buffer must only drive the slave devices to ensure<br />
that the tim<strong>in</strong>g between the master device <strong>and</strong> the serial configuration device is<br />
unaffected.<br />
This configuration method supports both compressed <strong>and</strong> uncompressed .sof.<br />
Therefore, if the configuration bitstream size exceeds the capacity of a serial<br />
configuration device, you can enable the compression feature <strong>in</strong> the .sof or you can<br />
select a larger serial configuration device.<br />
Guidel<strong>in</strong>es for Connect<strong>in</strong>g a Serial <strong>Configuration</strong> Device to <strong>Cyclone</strong> <strong>IV</strong><br />
Devices for an AS Interface<br />
For s<strong>in</strong>gle- <strong>and</strong> multi-device AS configurations, the board trace length <strong>and</strong> load<strong>in</strong>g<br />
between the supported serial configuration device <strong>and</strong> <strong>Cyclone</strong> <strong>IV</strong> device must follow<br />
the recommendations listed <strong>in</strong> Table 8–6.<br />
Table 8–6. Maximum Trace Length <strong>and</strong> Load<strong>in</strong>g for AS <strong>Configuration</strong><br />
<strong>Cyclone</strong> <strong>IV</strong><br />
Device AS P<strong>in</strong>s<br />
Maximum Board Trace Length from a<br />
<strong>Cyclone</strong> <strong>IV</strong> Device to a Serial <strong>Configuration</strong><br />
Device (Inches) Maximum Board Load (pF)<br />
<strong>Cyclone</strong> <strong>IV</strong> E <strong>Cyclone</strong> <strong>IV</strong> GX<br />
DCLK 10 6 15<br />
DATA[0] 10 6 30<br />
nCSO 10 6 30<br />
ASDO<br />
Note to Table 8–6:<br />
10 6 30<br />
(1) For multi-devices AS configuration us<strong>in</strong>g <strong>Cyclone</strong> <strong>IV</strong> E with 1,0 V core voltage, the maximum board trace-length<br />
from the serial configuration device to the junction-split on both DCLK <strong>and</strong> Data0 l<strong>in</strong>e is 3.5 <strong>in</strong>ches.<br />
Estimat<strong>in</strong>g AS <strong>Configuration</strong> Time<br />
AS configuration time is dom<strong>in</strong>ated by the time it takes to transfer data from the serial<br />
configuration device to the <strong>Cyclone</strong> <strong>IV</strong> device. This serial <strong>in</strong>terface is clocked by the<br />
<strong>Cyclone</strong> <strong>IV</strong> device DCLK output (generated from a 40-MHz <strong>in</strong>ternal oscillator for<br />
<strong>Cyclone</strong> <strong>IV</strong> E devices, a 20- or 40-MHz <strong>in</strong>ternal oscillator, or an external CLKUSR of up<br />
to 40 MHz for <strong>Cyclone</strong> <strong>IV</strong> GX devices).<br />
Equation 8–2 <strong>and</strong> Equation 8–3 show the configuration time calculations.<br />
Equation 8–2.<br />
maximum DCLK period<br />
Size ---------------------------------------------------------------- <br />
1 bit <br />
= estimated maximum configuration ti<br />
Equation 8–3.<br />
50 ns<br />
9,600,000 bits ------------ <br />
1 bit <br />
=<br />
480 ms<br />
<strong>Cyclone</strong> <strong>IV</strong> Device H<strong>and</strong>book, February 2013 <strong>Altera</strong> Corporation<br />
Volume 1
Chapter 8: <strong>Configuration</strong> <strong>and</strong> <strong>Remote</strong> <strong>System</strong> <strong>Upgrades</strong> <strong>in</strong> <strong>Cyclone</strong> <strong>IV</strong> Devices 8–19<br />
<strong>Configuration</strong><br />
Table 8–7 provides the configuration time for AS configuration.<br />
Table 8–7. AS <strong>Configuration</strong> Time for <strong>Cyclone</strong> <strong>IV</strong> Devices (1)<br />
Symbol Parameter <strong>Cyclone</strong> <strong>IV</strong> E <strong>Cyclone</strong> <strong>IV</strong> GX Unit<br />
tSU Setup time 10 8 ns<br />
tH Hold time 0 0 ns<br />
tCO Clock-to-output time 4 4 ns<br />
Note to Table 8–7:<br />
(1) For the AS configuration tim<strong>in</strong>g diagram, refer to the Serial <strong>Configuration</strong> (EPCS) Devices Datasheet.<br />
Enabl<strong>in</strong>g compression reduces the amount of configuration data that is sent to the<br />
<strong>Cyclone</strong> <strong>IV</strong> device, which also reduces configuration time. On average, compression<br />
reduces configuration time by 50%.<br />
Programm<strong>in</strong>g Serial <strong>Configuration</strong> Devices<br />
Serial configuration devices are non-volatile, flash memory-based devices. You can<br />
program these devices <strong>in</strong>-system with the USB-Blaster or ByteBlaster II download<br />
cables. Alternatively, you can program them with the <strong>Altera</strong> Programm<strong>in</strong>g Unit<br />
(APU), supported third-party programmers, or a microprocessor with the SRunner<br />
software driver.<br />
You can perform <strong>in</strong>-system programm<strong>in</strong>g of serial configuration devices through the<br />
AS programm<strong>in</strong>g <strong>in</strong>terface. Dur<strong>in</strong>g <strong>in</strong>-system programm<strong>in</strong>g, the download cable<br />
disables device access to the AS <strong>in</strong>terface by driv<strong>in</strong>g the nCE p<strong>in</strong> high. <strong>Cyclone</strong> <strong>IV</strong><br />
devices are also held <strong>in</strong> reset by a low level on nCONFIG. After programm<strong>in</strong>g is<br />
complete, the download cable releases nCE <strong>and</strong> nCONFIG, allow<strong>in</strong>g the pull-down <strong>and</strong><br />
pull-up resistors to drive V CC <strong>and</strong> GND, respectively.<br />
To perform <strong>in</strong>-system programm<strong>in</strong>g of a serial configuration device through the AS<br />
programm<strong>in</strong>g <strong>in</strong>terface, you must place the diodes <strong>and</strong> capacitors as close as possible<br />
to the <strong>Cyclone</strong> <strong>IV</strong> device. You must ensure that the diodes <strong>and</strong> capacitors ma<strong>in</strong>ta<strong>in</strong> a<br />
maximum AC voltage of 4.1 V (Figure 8–6).<br />
1 If you want to use the setup shown <strong>in</strong> Figure 8–6 to perform <strong>in</strong>-system programm<strong>in</strong>g<br />
of a serial configuration device <strong>and</strong> s<strong>in</strong>gle- or multi-device AS configuration, you do<br />
not require a series resistor on the DATA l<strong>in</strong>e at the near end of the serial configuration<br />
device. The exist<strong>in</strong>g diodes <strong>and</strong> capacitors are sufficient.<br />
<strong>Altera</strong> has developed the Serial FlashLoader (SFL), a JTAG-based <strong>in</strong>-system<br />
programm<strong>in</strong>g solution for <strong>Altera</strong> serial configuration devices. The SFL is a bridge<br />
design for the <strong>Cyclone</strong> <strong>IV</strong> device that uses its JTAG <strong>in</strong>terface to access the EPCS JIC<br />
(JTAG Indirect <strong>Configuration</strong> Device Programm<strong>in</strong>g) file <strong>and</strong> then uses the AS<br />
<strong>in</strong>terface to program the EPCS device. Both the JTAG <strong>in</strong>terface <strong>and</strong> AS <strong>in</strong>terface are<br />
bridged together <strong>in</strong>side the SFL design.<br />
f For more <strong>in</strong>formation about implement<strong>in</strong>g the SFL with <strong>Cyclone</strong> <strong>IV</strong> devices, refer to<br />
AN 370: Us<strong>in</strong>g the Serial FlashLoader with the Quartus II Software.<br />
February 2013 <strong>Altera</strong> Corporation <strong>Cyclone</strong> <strong>IV</strong> Device H<strong>and</strong>book,<br />
Volume 1
8–20 Chapter 8: <strong>Configuration</strong> <strong>and</strong> <strong>Remote</strong> <strong>System</strong> <strong>Upgrades</strong> <strong>in</strong> <strong>Cyclone</strong> <strong>IV</strong> Devices<br />
<strong>Configuration</strong><br />
f For more <strong>in</strong>formation about the USB-Blaster download cable, refer to the USB-Blaster<br />
Download Cable User Guide. For more <strong>in</strong>formation about the ByteBlaster II download<br />
cable, refer to the ByteBlaster II Download Cable User Guide.<br />
Figure 8–6 shows the download cable connections to the serial configuration device.<br />
Figure 8–6. In-<strong>System</strong> Programm<strong>in</strong>g of Serial <strong>Configuration</strong> Devices<br />
Notes to Figure 8–6:<br />
Serial<br />
<strong>Configuration</strong> Device<br />
DATA<br />
DCLK<br />
nCS<br />
ASDI<br />
V CCIO (1) V CCIO (1) V CCIO (1)<br />
10 kΩ 10 kΩ 10 kΩ<br />
10 kΩ<br />
GND<br />
10 pf<br />
(5)<br />
3.3 V 3.3 V<br />
3.3 V<br />
3.3 V<br />
(5)<br />
GND<br />
GND<br />
10 pf<br />
GND<br />
GND<br />
10 pf<br />
<strong>Cyclone</strong> <strong>IV</strong> Device<br />
nSTATUS<br />
CONF_DONE<br />
nCONFIG<br />
nCE<br />
nCEO<br />
DATA[0] (6)<br />
DCLK (6)<br />
nCSO (7)<br />
ASDO (7)<br />
3.3 V (3)<br />
MSEL[ ] (4)<br />
(1) Connect these pull-up resistors to the VCCIO supply of the bank <strong>in</strong> which the p<strong>in</strong> resides.<br />
(2) The nCEO p<strong>in</strong> is left unconnected or used as a user I/O p<strong>in</strong> when it does not feed the nCE p<strong>in</strong> of another device.<br />
(3) Power up the VCC of the ByteBlaster II or USB-Blaster download cable with the 3.3-V supply.<br />
(4) The MSEL p<strong>in</strong> sett<strong>in</strong>gs vary for different configuration voltage st<strong>and</strong>ards <strong>and</strong> POR time. To connect the MSEL p<strong>in</strong>s, refer to Table 8–3 on page 8–8,<br />
Table 8–4 on page 8–8, <strong>and</strong> Table 8–5 on page 8–9. Connect the MSEL p<strong>in</strong>s directly to VCCA or GND.<br />
(5) The diodes <strong>and</strong> capacitors must be placed as close as possible to the <strong>Cyclone</strong> <strong>IV</strong> device. You must ensure that the diodes <strong>and</strong> capacitors ma<strong>in</strong>ta<strong>in</strong><br />
a maximum AC voltage of 4.1 V. The external diodes <strong>and</strong> capacitors are required to prevent damage to the <strong>Cyclone</strong> <strong>IV</strong> device AS configuration<br />
<strong>in</strong>put p<strong>in</strong>s due to possible overshoot when programm<strong>in</strong>g the serial configuration device with a download cable. <strong>Altera</strong> recommends us<strong>in</strong>g the<br />
Schottky diode, which has a relatively lower forward diode voltage (VF) than the switch<strong>in</strong>g <strong>and</strong> Zener diodes, for effective voltage clamp<strong>in</strong>g.<br />
(6) When cascad<strong>in</strong>g <strong>Cyclone</strong> <strong>IV</strong> devices <strong>in</strong> a multi-device AS configuration, connect the repeater buffers between the master <strong>and</strong> slave devices for<br />
DATA[0] <strong>and</strong> DCLK. All I/O <strong>in</strong>puts must ma<strong>in</strong>ta<strong>in</strong> a maximum AC voltage of 4.1 V. The output resistance of the repeater buffers must fit the<br />
maximum overshoot equation outl<strong>in</strong>ed <strong>in</strong> “<strong>Configuration</strong> <strong>and</strong> JTAG P<strong>in</strong> I/O Requirements” on page 8–5.<br />
(7) These p<strong>in</strong>s are dual-purpose I/O p<strong>in</strong>s. The nCSO p<strong>in</strong> functions as FLASH_nCE p<strong>in</strong> <strong>in</strong> AP mode. The ASDO p<strong>in</strong> functions as DATA[1] p<strong>in</strong> <strong>in</strong> AP <strong>and</strong><br />
FPP modes.<br />
(8) Only <strong>Cyclone</strong> <strong>IV</strong> GX devices have an option to select CLKUSR (40 MHz maximum) as the external clock source for DCLK.<br />
<strong>Cyclone</strong> <strong>IV</strong> Device H<strong>and</strong>book, February 2013 <strong>Altera</strong> Corporation<br />
Volume 1<br />
10 pf<br />
P<strong>in</strong> 1<br />
GND<br />
GND<br />
ByteBlaster II or USB Blaster<br />
10-P<strong>in</strong> Male Header<br />
N.C. (2)<br />
CLKUSR (8)
Chapter 8: <strong>Configuration</strong> <strong>and</strong> <strong>Remote</strong> <strong>System</strong> <strong>Upgrades</strong> <strong>in</strong> <strong>Cyclone</strong> <strong>IV</strong> Devices 8–21<br />
<strong>Configuration</strong><br />
You can use the Quartus II software with the APU <strong>and</strong> the appropriate configuration<br />
device programm<strong>in</strong>g adapter to program serial configuration devices. All serial<br />
configuration devices are offered <strong>in</strong> an 8- or 16-p<strong>in</strong> small outl<strong>in</strong>e <strong>in</strong>tegrated circuit<br />
(SOIC) package.<br />
In production environments, serial configuration devices are programmed us<strong>in</strong>g<br />
multiple methods. <strong>Altera</strong> programm<strong>in</strong>g hardware or other third-party programm<strong>in</strong>g<br />
hardware is used to program blank serial configuration devices before they are<br />
mounted onto PCBs. Alternatively, you can use an on-board microprocessor to<br />
program the serial configuration device <strong>in</strong>-system by port<strong>in</strong>g the reference C-based<br />
SRunner software driver provided by <strong>Altera</strong>.<br />
A serial configuration device is programmed <strong>in</strong>-system by an external microprocessor<br />
with the SRunner software driver. The SRunner software driver is a software driver<br />
developed for embedded serial configuration device programm<strong>in</strong>g, which is easily<br />
customized to fit <strong>in</strong> different embedded systems. The SRunner software driver is able<br />
to read a Raw Programm<strong>in</strong>g Data (.rpd) file <strong>and</strong> write to serial configuration devices.<br />
The serial configuration device programm<strong>in</strong>g time, us<strong>in</strong>g the SRunner software<br />
driver, is comparable to the programm<strong>in</strong>g time with the Quartus II software.<br />
f For more <strong>in</strong>formation about the SRunner software driver, refer to AN 418: SRunner:<br />
An Embedded Solution for Serial <strong>Configuration</strong> Device Programm<strong>in</strong>g <strong>and</strong> the source code<br />
at the <strong>Altera</strong> website.<br />
AP <strong>Configuration</strong> (Supported Flash Memories)<br />
The AP configuration scheme is only supported <strong>in</strong> <strong>Cyclone</strong> <strong>IV</strong> E devices. In the AP<br />
configuration scheme, <strong>Cyclone</strong> <strong>IV</strong> E devices are configured us<strong>in</strong>g commodity 16-bit<br />
parallel flash memory. These external non-volatile configuration devices are <strong>in</strong>dustry<br />
st<strong>and</strong>ard microprocessor flash memories. The flash memories provide a fast <strong>in</strong>terface<br />
to access configuration data. The speed up <strong>in</strong> configuration time is ma<strong>in</strong>ly due to the<br />
16-bit wide parallel data bus, which is used to retrieve data from the flash memory.<br />
Some of the smaller <strong>Cyclone</strong> <strong>IV</strong> E devices or package options do not support the AP<br />
configuration scheme. Table 8–8 lists the supported AP configuration scheme for each<br />
<strong>Cyclone</strong> <strong>IV</strong> E devices.<br />
Table 8–8. Supported AP <strong>Configuration</strong> Scheme for <strong>Cyclone</strong> <strong>IV</strong> E Devices<br />
Package Options<br />
Device<br />
E144 M164 M256 U256 F256 U484 F484 F780<br />
EP4CE6 — — — — — — — —<br />
EP4CE10 — — — — — — — —<br />
EP4CE15 — — — — — — v —<br />
EP4CE22 — — — — — — — —<br />
EP4CE30 — — — — — — v v<br />
EP4CE40 — — — — — v v v<br />
EP4CE55 — — — — — v v v<br />
EP4CE75 — — — — — v v v<br />
EP4CE115 — — — — — — v v<br />
February 2013 <strong>Altera</strong> Corporation <strong>Cyclone</strong> <strong>IV</strong> Device H<strong>and</strong>book,<br />
Volume 1
8–22 Chapter 8: <strong>Configuration</strong> <strong>and</strong> <strong>Remote</strong> <strong>System</strong> <strong>Upgrades</strong> <strong>in</strong> <strong>Cyclone</strong> <strong>IV</strong> Devices<br />
<strong>Configuration</strong><br />
Dur<strong>in</strong>g device configuration, <strong>Cyclone</strong> <strong>IV</strong> E devices read configuration data us<strong>in</strong>g the<br />
parallel <strong>in</strong>terface <strong>and</strong> configure their SRAM cells. This scheme is referred to as the AP<br />
configuration scheme because the device controls the configuration <strong>in</strong>terface. This<br />
scheme contrasts with the FPP configuration scheme, where an external host controls<br />
the <strong>in</strong>terface.<br />
AP <strong>Configuration</strong> Supported Flash Memories<br />
The AP configuration controller <strong>in</strong> <strong>Cyclone</strong> <strong>IV</strong> E devices is designed to <strong>in</strong>terface with<br />
two <strong>in</strong>dustry-st<strong>and</strong>ard flash families—the Micron P30 Parallel NOR flash family <strong>and</strong><br />
the Micron P33 Parallel NOR flash family. Unlike serial configuration devices, both of<br />
the flash families supported <strong>in</strong> AP configuration scheme are designed to <strong>in</strong>terface<br />
with microprocessors. By configur<strong>in</strong>g from an <strong>in</strong>dustry st<strong>and</strong>ard microprocessor flash<br />
which allows access to the flash after enter<strong>in</strong>g user mode, the AP configuration<br />
scheme allows you to comb<strong>in</strong>e configuration data <strong>and</strong> user data (microprocessor boot<br />
code) on the same flash memory.<br />
The Micron P30 flash family <strong>and</strong> the P33 flash family support a cont<strong>in</strong>uous<br />
synchronous burst read mode at 40 MHz DCLK frequency for read<strong>in</strong>g data from the<br />
flash. Additionally, the Micron P30 <strong>and</strong> P33 flash families have identical p<strong>in</strong>-out <strong>and</strong><br />
adopt similar protocols for data access.<br />
1 <strong>Cyclone</strong> <strong>IV</strong> E devices use a 40-MHz oscillator for the AP configuration scheme. The<br />
oscillator is the same oscillator used <strong>in</strong> the <strong>Cyclone</strong> <strong>IV</strong> E AS configuration scheme.<br />
Table 8–9 lists the supported families of the commodity parallel flash for the AP<br />
configuration scheme.<br />
Table 8–9. Supported Commodity Flash for AP <strong>Configuration</strong> Scheme for <strong>Cyclone</strong> <strong>IV</strong> E<br />
Devices (1)<br />
Flash Memory Density Micron P30 Flash Family (2) Micron P33 Flash Family (3)<br />
Notes to Table 8–9:<br />
64 Mbit v v<br />
128 Mbit v v<br />
256 Mbit v v<br />
(1) The AP configuration scheme only supports flash memory speed grades of 40 MHz <strong>and</strong> above.<br />
(2) 3.3- , 3.0-, 2.5-, <strong>and</strong> 1.8-V I/O options are supported for the Micron P30 flash family.<br />
(3) 3.3-, 3.0- <strong>and</strong> 2.5-V I/O options are supported for the Micron P33 flash family.<br />
Configur<strong>in</strong>g <strong>Cyclone</strong> <strong>IV</strong> E devices from the Micron P30 <strong>and</strong> P33 family 512-Mbit flash<br />
memory is possible, but you must properly drive the extra address <strong>and</strong> FLASH_nCE<br />
p<strong>in</strong>s as required by these flash memories.<br />
f To check for supported speed grades <strong>and</strong> package options, refer to the respective flash<br />
datasheets.<br />
The AP configuration scheme <strong>in</strong> <strong>Cyclone</strong> <strong>IV</strong> E devices supports flash speed grades of<br />
40 MHz <strong>and</strong> above. However, AP configuration for all these speed grades must be<br />
capped at 40 MHz. The advantage of faster speed grades is realized when your design<br />
<strong>in</strong> the <strong>Cyclone</strong> <strong>IV</strong> E devices accesses flash memory <strong>in</strong> user mode.<br />
<strong>Cyclone</strong> <strong>IV</strong> Device H<strong>and</strong>book, February 2013 <strong>Altera</strong> Corporation<br />
Volume 1
Chapter 8: <strong>Configuration</strong> <strong>and</strong> <strong>Remote</strong> <strong>System</strong> <strong>Upgrades</strong> <strong>in</strong> <strong>Cyclone</strong> <strong>IV</strong> Devices 8–23<br />
<strong>Configuration</strong><br />
f For more <strong>in</strong>formation about the operation of the Micron P30 Parallel NOR <strong>and</strong> P33<br />
Parallel NOR flash memories, search for the keyword “P30” or “P33” on the Micron<br />
website (www.micron.com) to obta<strong>in</strong> the P30 or P33 family datasheet.<br />
S<strong>in</strong>gle-Device AP <strong>Configuration</strong><br />
The follow<strong>in</strong>g groups of <strong>in</strong>terface p<strong>in</strong>s are supported <strong>in</strong> Micron P30 <strong>and</strong> P33 flash<br />
memories:<br />
■ Control p<strong>in</strong>s<br />
■ Address p<strong>in</strong>s<br />
■ Data p<strong>in</strong>s<br />
The follow<strong>in</strong>g control signals are from the supported parallel flash memories:<br />
■ CLK<br />
■ active-low reset (RST#)<br />
■ active-low chip enable (CE#)<br />
■ active-low output enable (OE#)<br />
■ active-low address valid (ADV#)<br />
■ active-low write enable (WE#)<br />
The supported parallel flash memories output a control signal (WAIT) to <strong>Cyclone</strong> <strong>IV</strong> E<br />
devices to <strong>in</strong>dicate when synchronous data is ready on the data bus. <strong>Cyclone</strong> <strong>IV</strong> E<br />
devices have a 24-bit address bus connect<strong>in</strong>g to the address bus (A[24:1]) of the flash<br />
memory. A 16-bit bidirectional data bus (DATA[15..0]) provides data transfer between<br />
the <strong>Cyclone</strong> <strong>IV</strong> E device <strong>and</strong> the flash memory.<br />
The follow<strong>in</strong>g control signals are from the <strong>Cyclone</strong> <strong>IV</strong> E device to flash memory:<br />
■ DCLK<br />
■ active-low hard rest (nRESET)<br />
■ active-low chip enable (FLASH_nCE)<br />
■ active-low output enable for the DATA[15..0] bus <strong>and</strong> WAIT p<strong>in</strong> (nOE)<br />
■ active-low address valid signal <strong>and</strong> is used to write data <strong>in</strong>to the flash (nAVD)<br />
■ active-low write enable <strong>and</strong> is used to write data <strong>in</strong>to the flash (nWE)<br />
February 2013 <strong>Altera</strong> Corporation <strong>Cyclone</strong> <strong>IV</strong> Device H<strong>and</strong>book,<br />
Volume 1
8–24 Chapter 8: <strong>Configuration</strong> <strong>and</strong> <strong>Remote</strong> <strong>System</strong> <strong>Upgrades</strong> <strong>in</strong> <strong>Cyclone</strong> <strong>IV</strong> Devices<br />
<strong>Configuration</strong><br />
Figure 8–7 shows the <strong>in</strong>terface for the Micron P30 flash memory <strong>and</strong> P33 flash<br />
memory to the <strong>Cyclone</strong> <strong>IV</strong> E device p<strong>in</strong>s.<br />
Figure 8–7. S<strong>in</strong>gle-Device AP <strong>Configuration</strong> Us<strong>in</strong>g Micron P30 <strong>and</strong> P33 Flash Memory<br />
Notes to Figure 8–7:<br />
CLK<br />
RST#<br />
CE#<br />
OE#<br />
ADV#<br />
WE#<br />
WAIT<br />
DQ[15:0]<br />
A[24:1]<br />
Micron P30/P33 Flash<br />
GND<br />
VCCIO (1) VCCIO (1) VCCIO (1)<br />
10k<br />
nCE<br />
DCLK<br />
nRESET<br />
FLASH_nCE<br />
nOE<br />
nAVD<br />
nWE<br />
I/O (4)<br />
DATA[15..0]<br />
PADD[23..0]<br />
10k 10k<br />
(1) Connect the pull-up resistors to the VCCIO supply of the bank <strong>in</strong> which the p<strong>in</strong> resides.<br />
(2) The nCEO p<strong>in</strong> is left unconnected or used as a user I/O p<strong>in</strong> when it does not feed the nCE p<strong>in</strong> of another device.<br />
(3) The MSEL p<strong>in</strong> sett<strong>in</strong>gs vary for different configuration voltage st<strong>and</strong>ards <strong>and</strong> POR time. To connect MSEL[3..0], refer to Table 8–5 on page 8–9.<br />
Connect the MSEL p<strong>in</strong>s directly to VCCA or GND.<br />
(4) AP configuration ignores the WAIT signal dur<strong>in</strong>g configuration mode. However, if you are access<strong>in</strong>g flash dur<strong>in</strong>g user mode with user logic, you<br />
can optionally use normal I/O to monitor the WAIT signal from the Micron P30 or P33 flash.<br />
1 To tri-state the configuration bus for AP configuration schemes, you must tie nCE high<br />
<strong>and</strong> nCONFIG low.<br />
1 In a s<strong>in</strong>gle-device AP configuration, the maximum board load<strong>in</strong>g <strong>and</strong> board trace<br />
length between supported parallel flash <strong>and</strong> <strong>Cyclone</strong> <strong>IV</strong> E devices must follow the<br />
recommendations listed <strong>in</strong> Table 8–10 on page 8–28.<br />
1 If you use the AP configuration scheme for <strong>Cyclone</strong> <strong>IV</strong> E devices, the V CCIO of I/O<br />
banks 1, 6, 7, <strong>and</strong> 8 must be 3.3, 3.0, 2.5, or 1.8 V. <strong>Altera</strong> does not recommend us<strong>in</strong>g the<br />
level shifter between the Micron P30 or P33 flash <strong>and</strong> the <strong>Cyclone</strong> <strong>IV</strong> E device <strong>in</strong> the<br />
AP configuration scheme.<br />
<strong>Cyclone</strong> <strong>IV</strong> Device H<strong>and</strong>book, February 2013 <strong>Altera</strong> Corporation<br />
Volume 1<br />
nCONFIG<br />
nSTATUS<br />
CONF_DONE<br />
<strong>Cyclone</strong> <strong>IV</strong> E Device<br />
nCEO<br />
MSEL[3..0] (3)<br />
N.C. (2)
Chapter 8: <strong>Configuration</strong> <strong>and</strong> <strong>Remote</strong> <strong>System</strong> <strong>Upgrades</strong> <strong>in</strong> <strong>Cyclone</strong> <strong>IV</strong> Devices 8–25<br />
<strong>Configuration</strong><br />
1 There are no series resistors required <strong>in</strong> AP configuration mode for <strong>Cyclone</strong> <strong>IV</strong> E<br />
devices when us<strong>in</strong>g the Micron flash at 2.5-, 3.0-, <strong>and</strong> 3.3-V I/O st<strong>and</strong>ard. The output<br />
buffer of the Micron P30 IBIS model does not overshoot above 4.1 V. Thus, series<br />
resistors are not required for the 2.5-, 3.0-, <strong>and</strong> 3.3-V AP configuration option.<br />
However, if there are any other devices shar<strong>in</strong>g the same flash I/Os with <strong>Cyclone</strong> <strong>IV</strong> E<br />
devices, all shared p<strong>in</strong>s are still subject to the 4.1-V limit <strong>and</strong> may require series<br />
resistors.<br />
Default read mode of the supported parallel flash memory <strong>and</strong> all writes to the<br />
parallel flash memory are asynchronous. Both the parallel flash families support a<br />
synchronous read mode, with data supplied on the positive edge of DCLK.<br />
The serial clock (DCLK) generated by <strong>Cyclone</strong> <strong>IV</strong> E devices controls the entire<br />
configuration cycle <strong>and</strong> provides tim<strong>in</strong>g for the parallel <strong>in</strong>terface.<br />
Multi-Device AP <strong>Configuration</strong><br />
You can configure multiple <strong>Cyclone</strong> <strong>IV</strong> E devices us<strong>in</strong>g a s<strong>in</strong>gle parallel flash. You can<br />
cascade multiple <strong>Cyclone</strong> <strong>IV</strong> E devices us<strong>in</strong>g the chip-enable (nCE) <strong>and</strong><br />
chip-enable-out (nCEO) p<strong>in</strong>s. The first device <strong>in</strong> the cha<strong>in</strong> must have its nCE p<strong>in</strong><br />
connected to GND. You must connect its nCEO p<strong>in</strong> to the nCE p<strong>in</strong> of the next device <strong>in</strong><br />
the cha<strong>in</strong>. Use an external 10-k pull-up resistor to pull the nCEO signal high to its<br />
V CCIO level to help the <strong>in</strong>ternal weak pull-up resistor. When the first device captures<br />
all its configuration data from the bitstream, it drives the nCEO p<strong>in</strong> low, enabl<strong>in</strong>g the<br />
next device <strong>in</strong> the cha<strong>in</strong>. You can leave the nCEO p<strong>in</strong> of the last device unconnected or<br />
use it as a user I/O p<strong>in</strong> after configuration if the last device <strong>in</strong> the cha<strong>in</strong> is a<br />
<strong>Cyclone</strong> <strong>IV</strong> E device. The nCONFIG, nSTATUS, CONF_DONE, DCLK, DATA[15..8], <strong>and</strong><br />
DATA[7..0] p<strong>in</strong>s of each device <strong>in</strong> the cha<strong>in</strong> are connected (Figure 8–8 on page 8–26<br />
<strong>and</strong> Figure 8–9 on page 8–27).<br />
The first <strong>Cyclone</strong> <strong>IV</strong> E device <strong>in</strong> the cha<strong>in</strong>, as shown <strong>in</strong> Figure 8–8 on page 8–26 <strong>and</strong><br />
Figure 8–9 on page 8–27, is the configuration master device <strong>and</strong> controls the<br />
configuration of the entire cha<strong>in</strong>. You must connect its MSEL p<strong>in</strong>s to select the AP<br />
configuration scheme. The rema<strong>in</strong><strong>in</strong>g <strong>Cyclone</strong> <strong>IV</strong> E devices are used as configuration<br />
slaves. You must connect their MSEL p<strong>in</strong>s to select the FPP configuration scheme. Any<br />
other <strong>Altera</strong> device that supports FPP configuration can also be part of the cha<strong>in</strong> as a<br />
configuration slave.<br />
The follow<strong>in</strong>g are the configurations for the DATA[15..0] bus <strong>in</strong> a multi-device AP<br />
configuration:<br />
■ Byte-wide multi-device AP configuration<br />
■ Word-wide multi-device AP configuration<br />
February 2013 <strong>Altera</strong> Corporation <strong>Cyclone</strong> <strong>IV</strong> Device H<strong>and</strong>book,<br />
Volume 1
8–26 Chapter 8: <strong>Configuration</strong> <strong>and</strong> <strong>Remote</strong> <strong>System</strong> <strong>Upgrades</strong> <strong>in</strong> <strong>Cyclone</strong> <strong>IV</strong> Devices<br />
<strong>Configuration</strong><br />
Byte-Wide Multi-Device AP <strong>Configuration</strong><br />
The simpler method for multi-device AP configuration is the byte-wide multi-device<br />
AP configuration. In the byte-wide multi-device AP configuration, the LSB of the<br />
DATA[7..0]p<strong>in</strong> from the flash <strong>and</strong> master device (set to the AP configuration scheme)<br />
is connected to the slave devices set to the FPP configuration scheme, as shown <strong>in</strong><br />
Figure 8–8.<br />
Figure 8–8. Byte-Wide Multi-Device AP <strong>Configuration</strong><br />
Notes to Figure 8–8:<br />
CLK<br />
RST#<br />
CE#<br />
OE#<br />
ADV#<br />
WE#<br />
WAIT<br />
DQ[15:0]<br />
A[24:1]<br />
Micron P30/P33 Flash<br />
GND<br />
V CCIO (1)<br />
10 kΩ<br />
nCONFIG<br />
nCE<br />
DCLK<br />
nRESET<br />
FLASH_nCE<br />
nOE<br />
nAVD<br />
nWE<br />
I/O (5)<br />
DATA[15..0]<br />
PADD[23..0]<br />
VCCIO (1)<br />
VCCIO (1)<br />
10 kΩ<br />
Buffers (6)<br />
nSTATUS<br />
10 kΩ<br />
(1) Connect the pull-up resistors to the VCCIO supply of the bank <strong>in</strong> which the p<strong>in</strong> resides.<br />
(2) Connect the pull-up resistor to the VCCIO supply voltage of the I/O bank <strong>in</strong> which the nCE p<strong>in</strong> resides.<br />
(3) The nCEO p<strong>in</strong> is left unconnected or used as a user I/O p<strong>in</strong> when it does not feed the nCE p<strong>in</strong> of another device.<br />
(4) The MSEL p<strong>in</strong> sett<strong>in</strong>gs vary for different configuration voltage st<strong>and</strong>ards <strong>and</strong> POR time. You must set the master device <strong>in</strong> AP mode <strong>and</strong> the slave<br />
devices <strong>in</strong> FPP mode. To connect MSEL[3..0] for the master device <strong>in</strong> AP mode <strong>and</strong> the slave devices <strong>in</strong> FPP mode, refer to Table 8–5 on<br />
page 8–9. Connect the MSEL p<strong>in</strong>s directly to VCCA or GND.<br />
(5) The AP configuration ignores the WAIT signal dur<strong>in</strong>g configuration mode. However, if you are access<strong>in</strong>g flash dur<strong>in</strong>g user mode with user logic,<br />
you can optionally use the normal I/O to monitor the WAIT signal from the Micron P30 or P33 flash.<br />
(6) Connect the repeater buffers between the <strong>Cyclone</strong> <strong>IV</strong> E master device <strong>and</strong> slave devices for DATA[15..0] <strong>and</strong> DCLK. All I/O <strong>in</strong>puts must ma<strong>in</strong>ta<strong>in</strong><br />
a maximum AC voltage of 4.1 V. The output resistance of the repeater buffers must fit the maximum overshoot equation outl<strong>in</strong>ed <strong>in</strong> “<strong>Configuration</strong><br />
<strong>and</strong> JTAG P<strong>in</strong> I/O Requirements” on page 8–5.<br />
Word-Wide Multi-Device AP <strong>Configuration</strong><br />
CONF_DONE<br />
nCEO nCE<br />
nCEO<br />
nCE<br />
nCEO N.C. (3)<br />
MSEL[3..0]<br />
<strong>Cyclone</strong> <strong>IV</strong> E<br />
Master Device<br />
V CCIO (2) V CCIO (2)<br />
10 kΩ 10 kΩ<br />
(4)<br />
MSEL[3..0] (4)<br />
DQ[7..0]<br />
DATA[7..0]<br />
DCLK<br />
DQ[7..0]<br />
The more efficient setup is one <strong>in</strong> which some of the slave devices are connected to the<br />
LSB of the DATA[7..0]<strong>and</strong> the rema<strong>in</strong><strong>in</strong>g slave devices are connected to the MSB of<br />
the DATA[15..8]. In the word-wide multi-device AP configuration, the nCEO p<strong>in</strong> of the<br />
master device enables two separate daisy cha<strong>in</strong>s of slave devices, allow<strong>in</strong>g both<br />
cha<strong>in</strong>s to be programmed concurrently, as shown <strong>in</strong> Figure 8–9.<br />
<strong>Cyclone</strong> <strong>IV</strong> Device H<strong>and</strong>book, February 2013 <strong>Altera</strong> Corporation<br />
Volume 1<br />
nCONFIG<br />
nSTATUS<br />
CONF_DONE<br />
<strong>Cyclone</strong> <strong>IV</strong> E Slave Device<br />
nCONFIG<br />
DATA[7..0]<br />
DCLK<br />
nSTATUS<br />
CONF_DONE<br />
MSEL[3..0]<br />
<strong>Cyclone</strong> <strong>IV</strong> E Slave Device<br />
(4)
Chapter 8: <strong>Configuration</strong> <strong>and</strong> <strong>Remote</strong> <strong>System</strong> <strong>Upgrades</strong> <strong>in</strong> <strong>Cyclone</strong> <strong>IV</strong> Devices 8–27<br />
<strong>Configuration</strong><br />
Figure 8–9. Word-Wide Multi-Device AP <strong>Configuration</strong><br />
Notes to Figure 8–9:<br />
CLK<br />
RST#<br />
CE#<br />
OE#<br />
ADV#<br />
WE#<br />
WAIT<br />
DQ[15:0]<br />
A[24:1]<br />
Micron P30/P33 Flash<br />
GND<br />
VCCIO (1) VCCIO (1)<br />
VCCIO (1)<br />
10 k<br />
nCONFIG<br />
nCE<br />
10 k<br />
nSTATUS<br />
DCLK<br />
nRESET<br />
FLASH_nCE<br />
nOE<br />
nAVD<br />
nWE<br />
I/O (5)<br />
DATA[15..0]<br />
PADD[23..0]<br />
Buffers (6)<br />
10 k<br />
CONF_DONE<br />
nCEO nCE<br />
nCEO<br />
nCE<br />
nCEO N.C. (3)<br />
MSEL[3..0]<br />
<strong>Cyclone</strong> <strong>IV</strong> E<br />
Master Device<br />
V CCIO (2)<br />
10 k<br />
DQ[15..8]<br />
(4)<br />
DQ[7..0]<br />
DATA[7..0]<br />
DCLK<br />
(1) Connect the pull-up resistors to the VCCIO supply of the bank <strong>in</strong> which the p<strong>in</strong> resides.<br />
(2) Connect the pull-up resistor to the VCCIO supply voltage of the I/O bank <strong>in</strong> which the nCE p<strong>in</strong> resides.<br />
(3) The nCEO p<strong>in</strong> is left unconnected or used as a user I/O p<strong>in</strong> when it does not feed the nCE p<strong>in</strong> of another device.<br />
(4) The MSEL p<strong>in</strong> sett<strong>in</strong>gs vary for different configuration voltage st<strong>and</strong>ards <strong>and</strong> POR time. You must set the master device <strong>in</strong> AP mode <strong>and</strong> the slave<br />
devices <strong>in</strong> FPP mode. To connect MSEL[3..0] for the master device <strong>in</strong> AP mode <strong>and</strong> the slave devices <strong>in</strong> FPP mode, refer to Table 8–5 on<br />
page 8–9. Connect the MSEL p<strong>in</strong>s directly to VCCA or GND.<br />
(5) The AP configuration ignores the WAIT signal dur<strong>in</strong>g configuration mode. However, if you are access<strong>in</strong>g flash dur<strong>in</strong>g user mode with user logic,<br />
you can optionally use the normal I/O p<strong>in</strong> to monitor the WAIT signal from the Micron P30 or P33 flash.<br />
(6) Connect the repeater buffers between the <strong>Cyclone</strong> <strong>IV</strong> E master device <strong>and</strong> slave devices for DATA[15..0] <strong>and</strong> DCLK. All I/O <strong>in</strong>puts must ma<strong>in</strong>ta<strong>in</strong><br />
a maximum AC voltage of 4.1 V. The output resistance of the repeater buffers must fit the maximum overshoot equation outl<strong>in</strong>ed <strong>in</strong> “<strong>Configuration</strong><br />
<strong>and</strong> JTAG P<strong>in</strong> I/O Requirements” on page 8–5.<br />
1 In a multi-device AP configuration, the board trace length between the parallel flash<br />
<strong>and</strong> the master device must follow the recommendations listed <strong>in</strong> Table 8–10.<br />
February 2013 <strong>Altera</strong> Corporation <strong>Cyclone</strong> <strong>IV</strong> Device H<strong>and</strong>book,<br />
Volume 1<br />
nCONFIG<br />
nSTATUS<br />
CONF_DONE<br />
MSEL[3..0] (4)<br />
DQ[7..0]<br />
<strong>Cyclone</strong> <strong>IV</strong> E Slave Device<br />
nCONFIG<br />
nCE<br />
DATA[7..0]<br />
DCLK<br />
nSTATUS<br />
V CCIO (2)<br />
10 k<br />
CONF_DONE<br />
nCEO<br />
MSEL[3..0]<br />
<strong>Cyclone</strong> <strong>IV</strong> E Slave Device<br />
V CCIO (1)<br />
10 k<br />
(4)<br />
DQ[15..8]<br />
nCONFIG<br />
DATA[7..0]<br />
DCLK<br />
nSTATUS<br />
CONF_DONE<br />
MSEL[3..0]<br />
<strong>Cyclone</strong> <strong>IV</strong> E Slave Device<br />
nCONFIG<br />
nCE<br />
DATA[7..0]<br />
DCLK<br />
nSTATUS<br />
CONF_DONE<br />
nCEO<br />
MSEL[3..0]<br />
<strong>Cyclone</strong> <strong>IV</strong> E Slave Device<br />
(4)<br />
N.C. (3)<br />
(4)
8–28 Chapter 8: <strong>Configuration</strong> <strong>and</strong> <strong>Remote</strong> <strong>System</strong> <strong>Upgrades</strong> <strong>in</strong> <strong>Cyclone</strong> <strong>IV</strong> Devices<br />
<strong>Configuration</strong><br />
The nSTATUS <strong>and</strong> CONF_DONE p<strong>in</strong>s on all target devices are connected together with<br />
external pull-up resistors, as shown <strong>in</strong> Figure 8–8 on page 8–26 <strong>and</strong> Figure 8–9 on<br />
page 8–27. These p<strong>in</strong>s are open-dra<strong>in</strong> bidirectional p<strong>in</strong>s on the devices. When the first<br />
device asserts nCEO (after receiv<strong>in</strong>g all its configuration data), it releases its CONF_DONE<br />
p<strong>in</strong>. However, the subsequent devices <strong>in</strong> the cha<strong>in</strong> keep this shared CONF_DONE l<strong>in</strong>e<br />
low until they receive their configuration data. When all target devices <strong>in</strong> the cha<strong>in</strong><br />
receive their configuration data <strong>and</strong> release CONF_DONE, the pull-up resistor drives a<br />
high level on this l<strong>in</strong>e <strong>and</strong> all devices simultaneously enter <strong>in</strong>itialization mode.<br />
Guidel<strong>in</strong>es for Connect<strong>in</strong>g Parallel Flash to <strong>Cyclone</strong> <strong>IV</strong> E Devices for an AP<br />
Interface<br />
For s<strong>in</strong>gle- <strong>and</strong> multi-device AP configuration, the board trace length <strong>and</strong> load<strong>in</strong>g<br />
between the supported parallel flash <strong>and</strong> <strong>Cyclone</strong> <strong>IV</strong> E devices must follow the<br />
recommendations listed <strong>in</strong> Table 8–10. These recommendations also apply to an AP<br />
configuration with multiple bus masters.<br />
Table 8–10. Maximum Trace Length <strong>and</strong> Load<strong>in</strong>g for AP <strong>Configuration</strong><br />
<strong>Cyclone</strong> <strong>IV</strong> E AP P<strong>in</strong>s<br />
Maximum Board Trace Length from<br />
<strong>Cyclone</strong> <strong>IV</strong> E Device to Flash Device<br />
(<strong>in</strong>ches)<br />
Configur<strong>in</strong>g With Multiple Bus Masters<br />
Maximum Board Load (pF)<br />
DCLK 6 15<br />
DATA[15..0] 6 30<br />
PADD[23..0] 6 30<br />
nRESET 6 30<br />
Flash_nCE 6 30<br />
nOE 6 30<br />
nAVD 6 30<br />
nWE 6 30<br />
I/O (1) 6 30<br />
Note to Table 8–10:<br />
(1) The AP configuration ignores the WAIT signal from the flash dur<strong>in</strong>g configuration mode. However, if you are<br />
access<strong>in</strong>g flash dur<strong>in</strong>g user mode with user logic, you can optionally use the normal I/O to monitor the WAIT signal<br />
from the Micron P30 or P33 flash.<br />
Similar to the AS configuration scheme, the AP configuration scheme supports<br />
multiple bus masters for the parallel flash. For another master to take control of the<br />
AP configuration bus, the master must assert nCONFIG low for at least 500 ns to reset<br />
the master <strong>Cyclone</strong> <strong>IV</strong> E device <strong>and</strong> override the weak 10-k pull-down resistor on<br />
the nCE p<strong>in</strong>. This resets the master <strong>Cyclone</strong> <strong>IV</strong> E device <strong>and</strong> causes it to tri-state its AP<br />
configuration bus. The other master device then takes control of the AP configuration<br />
bus. After the other master device is done, it releases the AP configuration bus, then<br />
releases the nCE p<strong>in</strong>, <strong>and</strong> f<strong>in</strong>ally pulses nCONFIG low to restart the configuration.<br />
In the AP configuration scheme, multiple masters share the parallel flash. Similar to<br />
the AS configuration scheme, the bus control is negotiated by the nCE p<strong>in</strong>.<br />
<strong>Cyclone</strong> <strong>IV</strong> Device H<strong>and</strong>book, February 2013 <strong>Altera</strong> Corporation<br />
Volume 1
Chapter 8: <strong>Configuration</strong> <strong>and</strong> <strong>Remote</strong> <strong>System</strong> <strong>Upgrades</strong> <strong>in</strong> <strong>Cyclone</strong> <strong>IV</strong> Devices 8–29<br />
<strong>Configuration</strong><br />
Figure 8–10 shows the AP configuration with multiple bus masters.<br />
Figure 8–10. AP <strong>Configuration</strong> with Multiple Bus Masters<br />
Notes to Figure 8–10:<br />
CLK<br />
RST#<br />
CE#<br />
OE#<br />
ADV#<br />
WE#<br />
WAIT<br />
DQ[15:0]<br />
A[24:1]<br />
Micron P30/P33 Flash<br />
Other Master Device (6)<br />
CLK<br />
RST#<br />
CE#<br />
OE#<br />
ADV#<br />
WE#<br />
WAIT<br />
DQ[15:0]<br />
A[24:1]<br />
I/O (7)<br />
nCONFIG (8)<br />
DCLK (5)<br />
nRESET<br />
FLASH_nCE<br />
nOE<br />
nAVD<br />
MSEL[3..0]<br />
nWE<br />
I/O (4)<br />
DATA[15..0] (5)<br />
PADD[23..0]<br />
(1) Connect the pull-up resistors to the VCCIO supply of the bank <strong>in</strong> which the p<strong>in</strong> resides.<br />
(2) The nCEO p<strong>in</strong> is left unconnected or used as a user I/O p<strong>in</strong> when it does not feed the nCE p<strong>in</strong> of another device.<br />
(3) The MSEL p<strong>in</strong> sett<strong>in</strong>gs vary for different configuration voltage st<strong>and</strong>ards <strong>and</strong> POR time. To connect MSEL[3..0], refer to Table 8–5 on page 8–9.<br />
Connect the MSEL p<strong>in</strong>s directly to VCCA or GND.<br />
(4) The AP configuration ignores the WAIT signal dur<strong>in</strong>g configuration mode. However, if you are access<strong>in</strong>g flash dur<strong>in</strong>g user mode with user logic,<br />
you can optionally use the normal I/O to monitor the WAIT signal from the Micron P30 or P33 flash.<br />
(5) When cascad<strong>in</strong>g <strong>Cyclone</strong> <strong>IV</strong> E devices <strong>in</strong> a multi-device AP configuration, connect the repeater buffers between the master device <strong>and</strong> slave<br />
devices for DATA[15..0] <strong>and</strong> DCLK. All I/O <strong>in</strong>puts must ma<strong>in</strong>ta<strong>in</strong> a maximum AC voltage of 4.1 V. The output resistance of the repeater buffers<br />
must fit the maximum overshoot equation outl<strong>in</strong>ed <strong>in</strong> “<strong>Configuration</strong> <strong>and</strong> JTAG P<strong>in</strong> I/O Requirements” on page 8–5.<br />
(6) The other master device must fit the maximum overshoot equation outl<strong>in</strong>ed <strong>in</strong> “<strong>Configuration</strong> <strong>and</strong> JTAG P<strong>in</strong> I/O Requirements” on page 8–5.<br />
(7) The other master device can control the AP configuration bus by driv<strong>in</strong>g the nCE to high with an output high on the I/O p<strong>in</strong>.<br />
(8) The other master device can pulse nCONFIG if it is under system control <strong>and</strong> not tied to VCCIO. February 2013 <strong>Altera</strong> Corporation <strong>Cyclone</strong> <strong>IV</strong> Device H<strong>and</strong>book,<br />
Volume 1<br />
10 k<br />
10 k<br />
GND<br />
V CCIO (1)<br />
nCONFIG<br />
nCE<br />
10 k<br />
V CCIO (1)<br />
nSTATUS<br />
10 k<br />
<strong>Cyclone</strong> <strong>IV</strong> E<br />
Master Device<br />
V CCIO (1)<br />
CONF_DONE<br />
nCEO<br />
(2)<br />
(3)
8–30 Chapter 8: <strong>Configuration</strong> <strong>and</strong> <strong>Remote</strong> <strong>System</strong> <strong>Upgrades</strong> <strong>in</strong> <strong>Cyclone</strong> <strong>IV</strong> Devices<br />
<strong>Configuration</strong><br />
Figure 8–11 shows the recommended balanced star rout<strong>in</strong>g for multiple bus master<br />
<strong>in</strong>terfaces to m<strong>in</strong>imize signal <strong>in</strong>tegrity issues.<br />
Figure 8–11. Balanced Star Rout<strong>in</strong>g<br />
Notes to Figure 8–11:<br />
(1) <strong>Altera</strong> recommends that M does not exceed 6 <strong>in</strong>ches, as listed <strong>in</strong> Table 8–10 on page 8–28.<br />
(2) <strong>Altera</strong> recommends us<strong>in</strong>g a balanced star rout<strong>in</strong>g. Keep the N length equal <strong>and</strong> as short as possible to m<strong>in</strong>imize<br />
reflection noise from the transmission l<strong>in</strong>e. The M length is applicable for this setup.<br />
Estimat<strong>in</strong>g AP <strong>Configuration</strong> Time<br />
AP configuration time is dom<strong>in</strong>ated by the time it takes to transfer data from the<br />
parallel flash to <strong>Cyclone</strong> <strong>IV</strong> E devices. This parallel <strong>in</strong>terface is clocked by the<br />
<strong>Cyclone</strong> <strong>IV</strong> E DCLK output (generated from an <strong>in</strong>ternal oscillator). The DCLK m<strong>in</strong>imum<br />
frequency when us<strong>in</strong>g the 40-MHz oscillator is 20 MHz (50 ns). In word-wide cascade<br />
programm<strong>in</strong>g, the DATA[15..0] bus transfers a 16-bit word <strong>and</strong> essentially cuts<br />
configuration time to approximately 1/16 of the AS configuration time. Equation 8–4<br />
<strong>and</strong> Equation 8–5 show the configuration time calculations.<br />
Equation 8–4.<br />
Equation 8–5.<br />
DCLK<br />
<strong>Cyclone</strong> <strong>IV</strong> E<br />
Master Device<br />
External<br />
Master Device<br />
Micron Flash<br />
maximum DCLK period<br />
Size ---------------------------------------------------------------- <br />
16 bits per DCLK cycle <br />
= estimated maximum configuration time<br />
<strong>Cyclone</strong> <strong>IV</strong> Device H<strong>and</strong>book, February 2013 <strong>Altera</strong> Corporation<br />
Volume 1<br />
M (1)<br />
50 ns<br />
9,600,000 bits ------------- =<br />
30 ms<br />
16 bit<br />
N (2)<br />
N (2)
Chapter 8: <strong>Configuration</strong> <strong>and</strong> <strong>Remote</strong> <strong>System</strong> <strong>Upgrades</strong> <strong>in</strong> <strong>Cyclone</strong> <strong>IV</strong> Devices 8–31<br />
<strong>Configuration</strong><br />
Programm<strong>in</strong>g Parallel Flash Memories<br />
Supported parallel flash memories are external non-volatile configuration devices.<br />
They are <strong>in</strong>dustry st<strong>and</strong>ard microprocessor flash memories. For more <strong>in</strong>formation<br />
about the supported families for the commodity parallel flash, refer to Table 8–9 on<br />
page 8–22.<br />
<strong>Cyclone</strong> <strong>IV</strong> E devices <strong>in</strong> a s<strong>in</strong>gle- or multiple-device cha<strong>in</strong> support <strong>in</strong>-system<br />
programm<strong>in</strong>g of a parallel flash us<strong>in</strong>g the JTAG <strong>in</strong>terface with the flash loader<br />
megafunction. The board <strong>in</strong>telligent host or download cable uses the four JTAG p<strong>in</strong>s<br />
on <strong>Cyclone</strong> <strong>IV</strong> E devices to program the parallel flash <strong>in</strong> system, even if the host or<br />
download cable cannot access the configuration p<strong>in</strong>s of the parallel flash.<br />
f For more <strong>in</strong>formation about us<strong>in</strong>g the JTAG p<strong>in</strong>s on <strong>Cyclone</strong> <strong>IV</strong> E devices to program<br />
the parallel flash <strong>in</strong>-system, refer to AN 478: Us<strong>in</strong>g FPGA-Based Parallel Flash Loader<br />
(PFL) with the Quartus II Software.<br />
In the AP configuration scheme, the default configuration boot address is 0×010000<br />
when represented <strong>in</strong> 16-bit word address<strong>in</strong>g <strong>in</strong> the supported parallel flash memory<br />
(Figure 8–12). In the Quartus II software, the default configuration boot address is<br />
0×020000 because it is represented <strong>in</strong> 8-bit byte address<strong>in</strong>g. <strong>Cyclone</strong> <strong>IV</strong> E devices<br />
configure from word address 0×010000, which is equivalent to byte address 0×020000.<br />
1 The Quartus II software uses byte address<strong>in</strong>g for the default configuration boot<br />
address. You must set the start address field to 0×020000.<br />
February 2013 <strong>Altera</strong> Corporation <strong>Cyclone</strong> <strong>IV</strong> Device H<strong>and</strong>book,<br />
Volume 1
8–32 Chapter 8: <strong>Configuration</strong> <strong>and</strong> <strong>Remote</strong> <strong>System</strong> <strong>Upgrades</strong> <strong>in</strong> <strong>Cyclone</strong> <strong>IV</strong> Devices<br />
<strong>Configuration</strong><br />
PS <strong>Configuration</strong><br />
The default configuration boot address allows the system to use special parameter<br />
blocks <strong>in</strong> the flash memory map. Parameter blocks are at the top or bottom of the<br />
memory map. Figure 8–12 shows the configuration boot address <strong>in</strong> the AP<br />
configuration scheme. You can change the default configuration default boot address<br />
0×010000 to any desired address us<strong>in</strong>g the APFC_BOOT_ADDR JTAG <strong>in</strong>struction. For<br />
more <strong>in</strong>formation about the APFC_BOOT_ADDR JTAG <strong>in</strong>struction, refer to “JTAG<br />
Instructions” on page 8–57.<br />
Figure 8–12. <strong>Configuration</strong> Boot Address <strong>in</strong> AP Flash Memory Map<br />
<strong>Cyclone</strong> <strong>IV</strong> E<br />
Default<br />
Boot<br />
Address<br />
x010000 (1)<br />
x00FFFF<br />
x000000<br />
Note to Figure 8–12:<br />
Bottom Parameter Flash Memory Top Parameter Flash Memory<br />
Other data/code<br />
<strong>Configuration</strong><br />
Data<br />
128-Kbit<br />
parameter area<br />
16-bit word<br />
bit[15] bit[0]<br />
<strong>Cyclone</strong> <strong>IV</strong> E<br />
Default<br />
Boot<br />
Address<br />
x010000 (1)<br />
x00FFFF<br />
128-Kbit<br />
parameter area<br />
Other data/code<br />
<strong>Configuration</strong><br />
Data<br />
Other data/code<br />
x000000<br />
16-bit word<br />
bit[15] bit[0]<br />
(1) The default configuration boot address is x010000 when represented <strong>in</strong> 16-bit word address<strong>in</strong>g.<br />
You can perform PS configuration on <strong>Cyclone</strong> <strong>IV</strong> devices with an external <strong>in</strong>telligent<br />
host, such as a MAX ® II device, microprocessor with flash memory, or a download<br />
cable. In the PS scheme, an external host controls the configuration. <strong>Configuration</strong><br />
data is clocked <strong>in</strong>to the target <strong>Cyclone</strong> <strong>IV</strong> device through DATA[0] at each ris<strong>in</strong>g edge<br />
of DCLK.<br />
If your system already conta<strong>in</strong>s a common flash <strong>in</strong>terface (CFI) flash memory, you can<br />
use it for <strong>Cyclone</strong> <strong>IV</strong> device configuration storage as well. The MAX II PFL feature<br />
provides an efficient method to program CFI flash memory devices through the JTAG<br />
<strong>in</strong>terface <strong>and</strong> the logic to control the configuration from the flash memory device to<br />
the <strong>Cyclone</strong> <strong>IV</strong> device.<br />
f For more <strong>in</strong>formation about the PFL, refer to AN 386: Us<strong>in</strong>g the Parallel Flash Loader<br />
with the Quartus II Software.<br />
1 <strong>Cyclone</strong> <strong>IV</strong> devices do not support enhanced configuration devices for PS<br />
configuration.<br />
<strong>Cyclone</strong> <strong>IV</strong> Device H<strong>and</strong>book, February 2013 <strong>Altera</strong> Corporation<br />
Volume 1
Chapter 8: <strong>Configuration</strong> <strong>and</strong> <strong>Remote</strong> <strong>System</strong> <strong>Upgrades</strong> <strong>in</strong> <strong>Cyclone</strong> <strong>IV</strong> Devices 8–33<br />
<strong>Configuration</strong><br />
PS <strong>Configuration</strong> Us<strong>in</strong>g an External Host<br />
In the PS configuration scheme, you can use an <strong>in</strong>telligent host such as a MAX II<br />
device or microprocessor that controls the transfer of configuration data from a<br />
storage device, such as flash memory, to the target <strong>Cyclone</strong> <strong>IV</strong> device. You can store<br />
the configuration data <strong>in</strong> .rbf, .hex, or .ttf format.<br />
Figure 8–13 shows the configuration <strong>in</strong>terface connections between a <strong>Cyclone</strong> <strong>IV</strong><br />
device <strong>and</strong> an external host device for s<strong>in</strong>gle-device configuration.<br />
Figure 8–13. S<strong>in</strong>gle-Device PS <strong>Configuration</strong> Us<strong>in</strong>g an External Host<br />
Notes to Figure 8–13:<br />
ADDR<br />
Memory<br />
External Host<br />
(MAX II Device or<br />
Microprocessor)<br />
DATA[0]<br />
V CCIO (1) V CCIO (1)<br />
10 kΩ 10 kΩ<br />
MSEL[ ]<br />
CONF_DONE<br />
nSTATUS<br />
nCE nCEO<br />
(1) Connect the pull-up resistor to a supply that provides an acceptable <strong>in</strong>put signal for the device. VCC must be high<br />
enough to meet the VIH specification of the I/O on the device <strong>and</strong> the external host.<br />
(2) The nCEO p<strong>in</strong> is left unconnected or used as a user I/O p<strong>in</strong> when it does not feed the nCE p<strong>in</strong> of another device.<br />
(3) The MSEL p<strong>in</strong> sett<strong>in</strong>gs vary for different configuration voltage st<strong>and</strong>ards <strong>and</strong> POR time. To connect the MSEL p<strong>in</strong>s,<br />
refer to Table 8–3 on page 8–8, Table 8–4 on page 8–8, <strong>and</strong> Table 8–5 on page 8–9. Connect the MSEL p<strong>in</strong>s directly<br />
to VCCA or GND.<br />
(4) All I/O <strong>in</strong>puts must ma<strong>in</strong>ta<strong>in</strong> a maximum AC voltage of 4.1 V. DATA[0] <strong>and</strong> DCLK must fit the maximum overshoot<br />
outl<strong>in</strong>ed <strong>in</strong> Equation 8–1 on page 8–5.<br />
To beg<strong>in</strong> the configuration, the external host device must generate a low-to-high<br />
transition on the nCONFIG p<strong>in</strong>. When nSTATUS is pulled high, the external host device<br />
must place the configuration data one bit at a time on DATA[0]. If you use<br />
configuration data <strong>in</strong> .rbf, .ttf, or .hex, you must first send the LSB of each data byte.<br />
For example, if the .rbf conta<strong>in</strong>s the byte sequence 02 1B EE 01 FA, the serial bitstream<br />
you must send to the device is:<br />
0100-0000 1101-1000 0111-0111 1000-0000 0101-1111<br />
<strong>Cyclone</strong> <strong>IV</strong> devices receive configuration data on DATA[0] <strong>and</strong> the clock is received on<br />
DCLK. Data is latched <strong>in</strong>to the device on the ris<strong>in</strong>g edge of DCLK. Data is cont<strong>in</strong>uously<br />
clocked <strong>in</strong>to the target device until CONF_DONE goes high <strong>and</strong> the device enters<br />
<strong>in</strong>itialization state.<br />
1 Two DCLK fall<strong>in</strong>g edges are required after CONF_DONE goes high to beg<strong>in</strong> the<br />
<strong>in</strong>itialization of the device.<br />
INIT_DONE is released <strong>and</strong> pulled high when <strong>in</strong>itialization is complete. The external<br />
host device must be able to detect this low-to-high transition which signals the device<br />
has entered user mode. When <strong>in</strong>itialization is complete, the device enters user mode.<br />
In user mode, the user I/O p<strong>in</strong>s no longer have weak pull-up resistors <strong>and</strong> function as<br />
assigned <strong>in</strong> your design.<br />
February 2013 <strong>Altera</strong> Corporation <strong>Cyclone</strong> <strong>IV</strong> Device H<strong>and</strong>book,<br />
Volume 1<br />
GND<br />
DATA[0] (4)<br />
nCONFIG<br />
DCLK (4)<br />
<strong>Cyclone</strong> <strong>IV</strong><br />
Device<br />
(3)<br />
N.C. (2)
8–34 Chapter 8: <strong>Configuration</strong> <strong>and</strong> <strong>Remote</strong> <strong>System</strong> <strong>Upgrades</strong> <strong>in</strong> <strong>Cyclone</strong> <strong>IV</strong> Devices<br />
<strong>Configuration</strong><br />
To ensure DCLK <strong>and</strong> DATA[0] are not left float<strong>in</strong>g at the end of configuration, the<br />
MAX II device must drive them either high or low, whichever is convenient on your<br />
board. The DATA[0] p<strong>in</strong> is available as a user I/O p<strong>in</strong> after configuration. In the PS<br />
scheme, the DATA[0] p<strong>in</strong> is tri-stated by default <strong>in</strong> user mode <strong>and</strong> must be driven by<br />
the external host device. To change this default option <strong>in</strong> the Quartus II software,<br />
select the Dual-Purpose P<strong>in</strong>s tab of the Device <strong>and</strong> P<strong>in</strong> Options dialog box.<br />
The configuration clock (DCLK) speed must be below the specified system frequency to<br />
ensure correct configuration. No maximum DCLK period exists, which means you can<br />
pause configuration by halt<strong>in</strong>g DCLK for an <strong>in</strong>def<strong>in</strong>ite amount of time.<br />
The external host device can also monitor CONF_DONE <strong>and</strong> INIT_DONE to ensure<br />
successful configuration. The CONF_DONE p<strong>in</strong> must be monitored by the external device<br />
to detect errors <strong>and</strong> to determ<strong>in</strong>e when programm<strong>in</strong>g is complete. If all configuration<br />
data is sent, but CONF_DONE or INIT_DONE has not gone high, the external device must<br />
reconfigure the target device.<br />
Figure 8–14 shows how to configure multiple devices us<strong>in</strong>g an external host device.<br />
This circuit is similar to the PS configuration circuit for a s<strong>in</strong>gle device, except that<br />
<strong>Cyclone</strong> <strong>IV</strong> devices are cascaded for multi-device configuration.<br />
Figure 8–14. Multi-Device PS <strong>Configuration</strong> Us<strong>in</strong>g an External Host<br />
ADDR<br />
Memory<br />
DATA[0]<br />
External Host<br />
(MAX II Device or<br />
Microprocessor)<br />
Notes to Figure 8–14:<br />
V CCIO (1) V CCIO (1)<br />
10 k<br />
10 k<br />
GND<br />
<strong>Cyclone</strong> <strong>IV</strong> Device 1<br />
CONF_DONE<br />
nSTATUS<br />
nCE nCEO<br />
DATA[0] (5)<br />
nCONFIG<br />
DCLK (5)<br />
Buffers (5)<br />
MSEL[ ]<br />
V CCIO (2)<br />
CONF_DONE<br />
nSTATUS<br />
nCE nCEO N.C. (3)<br />
DATA[0] (5)<br />
nCONFIG<br />
DCLK (5)<br />
(1) The pull-up resistor must be connected to a supply that provides an acceptable <strong>in</strong>put signal for all devices <strong>in</strong> the<br />
cha<strong>in</strong>. VCC must be high enough to meet the VIH specification of the I/O on the device <strong>and</strong> the external host.<br />
(2) Connect the pull-up resistor to the VCCIO supply voltage of the I/O bank <strong>in</strong> which the nCE p<strong>in</strong> resides.<br />
(3) The nCEO p<strong>in</strong> is left unconnected or used as a user I/O p<strong>in</strong> when it does not feed the nCE p<strong>in</strong> of another device.<br />
(4) The MSEL p<strong>in</strong> sett<strong>in</strong>gs vary for different configuration voltage st<strong>and</strong>ards <strong>and</strong> POR time. To connect the MSEL p<strong>in</strong>s,<br />
refer to Table 8–3 on page 8–8, Table 8–4 on page 8–8, <strong>and</strong> Table 8–5 on page 8–9. Connect the MSEL p<strong>in</strong>s directly<br />
to VCCA or GND.<br />
(5) All I/O <strong>in</strong>puts must ma<strong>in</strong>ta<strong>in</strong> a maximum AC voltage of 4.1 V. DATA[0] <strong>and</strong> DCLK must fit the maximum overshoot<br />
outl<strong>in</strong>ed <strong>in</strong> Equation 8–1 on page 8–5.<br />
<strong>Cyclone</strong> <strong>IV</strong> Device H<strong>and</strong>book, February 2013 <strong>Altera</strong> Corporation<br />
Volume 1<br />
(4)<br />
10 k<br />
<strong>Cyclone</strong> <strong>IV</strong> Device 2<br />
MSEL[ ] (4)
Chapter 8: <strong>Configuration</strong> <strong>and</strong> <strong>Remote</strong> <strong>System</strong> <strong>Upgrades</strong> <strong>in</strong> <strong>Cyclone</strong> <strong>IV</strong> Devices 8–35<br />
<strong>Configuration</strong><br />
After the first device completes configuration <strong>in</strong> a multi-device configuration cha<strong>in</strong>,<br />
its nCEO p<strong>in</strong> drives low to activate the nCE p<strong>in</strong> of the second device, which prompts the<br />
second device to beg<strong>in</strong> configuration. The second device <strong>in</strong> the cha<strong>in</strong> beg<strong>in</strong>s<br />
configuration <strong>in</strong> one clock cycle. Therefore, the transfer of data dest<strong>in</strong>ations is<br />
transparent to the external host device. nCONFIG, nSTATUS, DCLK, DATA[0], <strong>and</strong><br />
CONF_DONE configuration p<strong>in</strong>s are connected to every device <strong>in</strong> the cha<strong>in</strong>. To ensure<br />
signal <strong>in</strong>tegrity <strong>and</strong> prevent clock skew problems, configuration signals may require<br />
buffer<strong>in</strong>g. Ensure that DCLK <strong>and</strong> DATA l<strong>in</strong>es are buffered. All devices <strong>in</strong>itialize <strong>and</strong> enter<br />
user mode at the same time because all CONF_DONE p<strong>in</strong>s are tied together.<br />
If any device detects an error, configuration stops for the entire cha<strong>in</strong> <strong>and</strong> you must<br />
reconfigure the entire cha<strong>in</strong> because all nSTATUS <strong>and</strong> CONF_DONE p<strong>in</strong>s are tied together.<br />
For example, if the first device flags an error on nSTATUS, it resets the cha<strong>in</strong> by pull<strong>in</strong>g<br />
its nSTATUS p<strong>in</strong> low. This behavior is similar to a s<strong>in</strong>gle device detect<strong>in</strong>g an error.<br />
You can have multiple devices that conta<strong>in</strong> the same configuration data <strong>in</strong> your<br />
system. To support this configuration scheme, all device nCE <strong>in</strong>puts are tied to GND,<br />
while the nCEO p<strong>in</strong>s are left float<strong>in</strong>g. nCONFIG, nSTATUS, DCLK, DATA[0], <strong>and</strong> CONF_DONE<br />
configuration p<strong>in</strong>s are connected to every device <strong>in</strong> the cha<strong>in</strong>. To ensure signal<br />
<strong>in</strong>tegrity <strong>and</strong> prevent clock skew problems, configuration signals may require<br />
buffer<strong>in</strong>g. Ensure that the DCLK <strong>and</strong> DATA l<strong>in</strong>es are buffered. Devices must be of the<br />
same density <strong>and</strong> package. All devices start <strong>and</strong> complete configuration at the same<br />
time.<br />
Figure 8–15 shows a multi-device PS configuration when both <strong>Cyclone</strong> <strong>IV</strong> devices are<br />
receiv<strong>in</strong>g the same configuration data.<br />
Figure 8–15. Multi-Device PS <strong>Configuration</strong> When Both Devices Receive the Same Data<br />
ADDR<br />
Memory<br />
External Host<br />
(MAX II Device or<br />
Microprocessor)<br />
DATA[0]<br />
Notes to Figure 8–15:<br />
V CCIO (1) V CCIO (1)<br />
10 k<br />
10 k<br />
GND<br />
<strong>Cyclone</strong> <strong>IV</strong> Master Device<br />
MSEL[ ]<br />
CONF_DONE<br />
nSTATUS<br />
nCE nCEO<br />
DATA[0] (4)<br />
nCONFIG<br />
DCLK (4)<br />
Buffers (4)<br />
N.C. (2)<br />
<strong>Cyclone</strong> <strong>IV</strong> Slave Device<br />
CONF_DONE<br />
nSTATUS<br />
nCE nCEO N.C. (2)<br />
GND<br />
DATA[0] (4)<br />
nCONFIG<br />
DCLK (4)<br />
(1) You must connect the pull-up resistor to a supply that provides an acceptable <strong>in</strong>put signal for all devices <strong>in</strong> the cha<strong>in</strong>.<br />
VCC must be high enough to meet the VIH specification of the I/O on the device <strong>and</strong> the external host.<br />
(2) The nCEO p<strong>in</strong>s of both devices are left unconnected or used as user I/O p<strong>in</strong>s when configur<strong>in</strong>g the same configuration<br />
data <strong>in</strong>to multiple devices.<br />
(3) The MSEL p<strong>in</strong> sett<strong>in</strong>gs vary for different configuration voltage st<strong>and</strong>ards <strong>and</strong> POR time. To connect the MSEL p<strong>in</strong>s,<br />
refer to Table 8–3 on page 8–8, Table 8–4 on page 8–8, <strong>and</strong> Table 8–5 on page 8–9. Connect the MSEL p<strong>in</strong>s directly<br />
to VCCA or GND.<br />
(4) All I/O <strong>in</strong>puts must ma<strong>in</strong>ta<strong>in</strong> a maximum AC voltage of 4.1 V. DATA[0] <strong>and</strong> DCLK must fit the maximum overshoot<br />
outl<strong>in</strong>ed <strong>in</strong> Equation 8–1 on page 8–5.<br />
February 2013 <strong>Altera</strong> Corporation <strong>Cyclone</strong> <strong>IV</strong> Device H<strong>and</strong>book,<br />
Volume 1<br />
(3)<br />
MSEL[ ]<br />
(3)
8–36 Chapter 8: <strong>Configuration</strong> <strong>and</strong> <strong>Remote</strong> <strong>System</strong> <strong>Upgrades</strong> <strong>in</strong> <strong>Cyclone</strong> <strong>IV</strong> Devices<br />
<strong>Configuration</strong><br />
PS <strong>Configuration</strong> Tim<strong>in</strong>g<br />
A PS configuration must meet the setup <strong>and</strong> hold tim<strong>in</strong>g parameters <strong>and</strong> the<br />
maximum clock frequency. When us<strong>in</strong>g a microprocessor or another <strong>in</strong>telligent host<br />
to control the PS <strong>in</strong>terface, ensure that you meet these tim<strong>in</strong>g requirements.<br />
Figure 8–16 shows the tim<strong>in</strong>g waveform for PS configuration when us<strong>in</strong>g an external<br />
host device.<br />
Figure 8–16. PS <strong>Configuration</strong> Tim<strong>in</strong>g Waveform (1)<br />
nCONFIG<br />
nSTATUS (2)<br />
CONF_DONE (3)<br />
DCLK (4)<br />
DATA[0]<br />
User I/O<br />
INIT_DONE<br />
Notes to Figure 8–16:<br />
t CFG<br />
t CF2CD<br />
t CF2ST1<br />
t CF2CK<br />
t CF2ST0<br />
t ST2CK<br />
t STATUS<br />
t CLK<br />
t CH t CL<br />
Bit 0<br />
tDH Bit 1 Bit 2 Bit 3 Bit n<br />
t DSU<br />
Tri-stated with <strong>in</strong>ternal pull-up resistor<br />
(1) The beg<strong>in</strong>n<strong>in</strong>g of this waveform shows the device <strong>in</strong> user mode. In user mode, nCONFIG, nSTATUS, <strong>and</strong> CONF_DONE<br />
are at logic-high levels. When nCONFIG is pulled low, a reconfiguration cycle beg<strong>in</strong>s.<br />
(2) After power up, the <strong>Cyclone</strong> <strong>IV</strong> device holds nSTATUS low dur<strong>in</strong>g POR delay.<br />
(3) After power up, before <strong>and</strong> dur<strong>in</strong>g configuration, CONF_DONE is low.<br />
(4) In user mode, drive DCLK either high or low when us<strong>in</strong>g the PS configuration scheme, whichever is more convenient.<br />
When us<strong>in</strong>g the AS configuration scheme, DCLK is a <strong>Cyclone</strong> <strong>IV</strong> device output p<strong>in</strong> <strong>and</strong> must not be driven externally.<br />
(5) Do not leave the DATA[0]p<strong>in</strong> float<strong>in</strong>g after configuration. Drive the DATA[0]p<strong>in</strong> high or low, whichever is more<br />
convenient.<br />
Table 8–11 lists the PS configuration tim<strong>in</strong>g parameters for <strong>Cyclone</strong> <strong>IV</strong> devices.<br />
Table 8–11. PS <strong>Configuration</strong> Tim<strong>in</strong>g Parameters For <strong>Cyclone</strong> <strong>IV</strong> Devices (Part 1 of 2)<br />
Symbol Parameter<br />
t CF2CD<br />
t CF2ST0<br />
t CFG<br />
t STATUS<br />
nCONFIG low to<br />
CONF_DONE low<br />
nCONFIG low to<br />
nSTATUS low<br />
nCONFIG low pulse<br />
width<br />
nSTATUS low pulse<br />
width<br />
<strong>Cyclone</strong> <strong>IV</strong> Device H<strong>and</strong>book, February 2013 <strong>Altera</strong> Corporation<br />
Volume 1<br />
t CD2UM<br />
M<strong>in</strong>imum Maximum<br />
(5)<br />
User Mode<br />
<strong>Cyclone</strong> <strong>IV</strong> (1) <strong>Cyclone</strong> <strong>IV</strong> E (2) <strong>Cyclone</strong> <strong>IV</strong> (1) <strong>Cyclone</strong> <strong>IV</strong> E (2)<br />
Unit<br />
— 500 ns<br />
— 500 ns<br />
500 — ns<br />
45 230 (3) µs
Chapter 8: <strong>Configuration</strong> <strong>and</strong> <strong>Remote</strong> <strong>System</strong> <strong>Upgrades</strong> <strong>in</strong> <strong>Cyclone</strong> <strong>IV</strong> Devices 8–37<br />
<strong>Configuration</strong><br />
Table 8–11. PS <strong>Configuration</strong> Tim<strong>in</strong>g Parameters For <strong>Cyclone</strong> <strong>IV</strong> Devices (Part 2 of 2)<br />
t CF2ST1<br />
t CF2CK<br />
t ST2CK<br />
t DH<br />
Symbol Parameter<br />
t CD2UM<br />
t CD2CU<br />
t CD2UMC<br />
nCONFIG high to<br />
nSTATUS high<br />
nCONFIG high to first<br />
ris<strong>in</strong>g edge on DCLK<br />
nSTATUS high to first<br />
ris<strong>in</strong>g edge of DCLK<br />
Data hold time after<br />
ris<strong>in</strong>g edge on DCLK<br />
CONF_DONE high to<br />
user mode (5)<br />
CONF_DONE high to<br />
CLKUSR enabled<br />
CONF_DONE high to<br />
user mode with<br />
CLKUSR option on<br />
PS <strong>Configuration</strong> Us<strong>in</strong>g a Download Cable<br />
M<strong>in</strong>imum Maximum<br />
<strong>Cyclone</strong> <strong>IV</strong> (1) <strong>Cyclone</strong> <strong>IV</strong> E (2) <strong>Cyclone</strong> <strong>IV</strong> (1) <strong>Cyclone</strong> <strong>IV</strong> E (2)<br />
— 230 (4) µs<br />
230 (3) — µs<br />
2 — µs<br />
0 — ns<br />
300 650 µs<br />
4 × maximum DCLK period — —<br />
t CD2CU + (3,192 × CLKUSR period) — —<br />
tDSU Data setup time before<br />
ris<strong>in</strong>g edge on DCLK<br />
5 8 — — ns<br />
tCH DCLK high time 3.2 6.4 — — ns<br />
t CL DCLK low time 3.2 6.4 — — ns<br />
t CLK DCLK period 7.5 15 — — ns<br />
fMAX DCLK frequency (6) — — 133 66 MHz<br />
Notes to Table 8–11:<br />
(1) Applicable for <strong>Cyclone</strong> <strong>IV</strong> GX <strong>and</strong> <strong>Cyclone</strong> <strong>IV</strong> E devices with 1.2-V core voltage.<br />
(2) Applicable for <strong>Cyclone</strong> <strong>IV</strong> E devices with 1.0-V core voltage.<br />
(3) This value is applicable if you do not delay configuration by extend<strong>in</strong>g the nCONFIG or nSTATUS low pulse width.<br />
(4) This value is applicable if you do not delay configuration by externally hold<strong>in</strong>g the nSTATUS low.<br />
(5) The m<strong>in</strong>imum <strong>and</strong> maximum numbers apply only if you choose the <strong>in</strong>ternal oscillator as the clock source for start<strong>in</strong>g the device.<br />
(6) <strong>Cyclone</strong> <strong>IV</strong> E devices with 1.0-V core voltage have slower FMAX when compared with <strong>Cyclone</strong> <strong>IV</strong> GX devices with 1.2-V core voltage.<br />
In this section, the generic term “download cable” <strong>in</strong>cludes the <strong>Altera</strong> USB-Blaster<br />
USB port download cable, MasterBlaster serial <strong>and</strong> USB communications cable,<br />
ByteBlaster II parallel port download cable, the ByteBlasterMV parallel port<br />
download cable, <strong>and</strong> the EthernetBlaster communications cable.<br />
In the PS configuration with a download cable, an <strong>in</strong>telligent host (such as a PC)<br />
transfers data from a storage device to the <strong>Cyclone</strong> <strong>IV</strong> device through the download<br />
cable.<br />
February 2013 <strong>Altera</strong> Corporation <strong>Cyclone</strong> <strong>IV</strong> Device H<strong>and</strong>book,<br />
Volume 1<br />
Unit
8–38 Chapter 8: <strong>Configuration</strong> <strong>and</strong> <strong>Remote</strong> <strong>System</strong> <strong>Upgrades</strong> <strong>in</strong> <strong>Cyclone</strong> <strong>IV</strong> Devices<br />
<strong>Configuration</strong><br />
The programm<strong>in</strong>g hardware or download cable then places the configuration data<br />
one bit at a time on the DATA[0] p<strong>in</strong> of the device. The configuration data is clocked<br />
<strong>in</strong>to the target device until CONF_DONE goes high. The CONF_DONE p<strong>in</strong> must have an<br />
external 10-k pull-up resistor for the device to <strong>in</strong>itialize.<br />
When you use a download cable, sett<strong>in</strong>g the Auto-restart configuration after error<br />
option does not affect the configuration cycle because you must manually restart<br />
configuration <strong>in</strong> the Quartus II software if an error occurs. Additionally, the Enable<br />
user-supplied start-up clock (CLKUSR) option has no effect on device <strong>in</strong>itialization,<br />
because this option is disabled <strong>in</strong> the .sof when programm<strong>in</strong>g the device with the<br />
Quartus II Programmer <strong>and</strong> download cable. Therefore, if you turn on the CLKUSR<br />
option, you do not have to provide a clock on CLKUSR when you configure the device<br />
with the Quartus II Programmer <strong>and</strong> a download cable.<br />
Figure 8–17 shows PS configuration for <strong>Cyclone</strong> <strong>IV</strong> devices with a download cable.<br />
Figure 8–17. PS <strong>Configuration</strong> Us<strong>in</strong>g a Download Cable<br />
10 kΩ<br />
(2)<br />
V CCA (1)<br />
V CCA (1)<br />
(2)<br />
Notes to Figure 8–17:<br />
10 kΩ<br />
V CCA (1)<br />
10 kΩ<br />
GND<br />
<strong>Cyclone</strong> <strong>IV</strong> Device<br />
MSEL[ ] (5)<br />
nCE<br />
DCLK<br />
DATA[0]<br />
nCONFIG<br />
CONF_DONE<br />
nSTATUS<br />
VCCA (1)<br />
VCCA (1)<br />
10 kΩ<br />
10 kΩ<br />
Download Cable 10-P<strong>in</strong> Male<br />
Header (Top View)<br />
V CCA (6)<br />
(1) You must connect the pull-up resistor to the same supply voltage as the VCCA supply.<br />
(2) The pull-up resistors on DATA[0] <strong>and</strong> DCLK are only required if the download cable is the only configuration scheme<br />
used on your board. This is to ensure that DATA[0] <strong>and</strong> DCLK are not left float<strong>in</strong>g after configuration. For example,<br />
if you also use a configuration device, the pull-up resistors on DATA[0] <strong>and</strong> DCLK are not required.<br />
(3) P<strong>in</strong> 6 of the header is a VIO reference voltage for the MasterBlaster output driver. VIO must match the VCCA of the<br />
device. For this value, refer to the MasterBlaster Serial/USB Communications Cable User Guide. With the USB-Blaster,<br />
ByteBlaster II, ByteBlaster MV, <strong>and</strong> EthernetBlaster, this p<strong>in</strong> is a no connect.<br />
(4) The nCEO p<strong>in</strong> is left unconnected or used as a user I/O p<strong>in</strong> when it does not feed the nCE p<strong>in</strong> of another device.<br />
(5) The MSEL p<strong>in</strong> sett<strong>in</strong>gs vary for different configuration voltage st<strong>and</strong>ards <strong>and</strong> POR time. To connect the MSEL p<strong>in</strong>s,<br />
refer to Table 8–3 on page 8–8, Table 8–4 on page 8–8, <strong>and</strong> Table 8–5 on page 8–9 for PS configuration schemes.<br />
Connect the MSEL p<strong>in</strong>s directly to VCCA or GND.<br />
(6) Power up the VCC of the ByteBlaster II, USB-Blaster, or ByteBlasterMV cable with a 2.5-V supply from VCCA. Third-party programmers must switch to 2.5 V. P<strong>in</strong> 4 of the header is a VCC power supply for the MasterBlaster cable.<br />
The MasterBlaster cable can receive power from either 5.0- or 3.3-V circuit boards, DC power supply, or 5.0 V from<br />
the USB cable. For this value, refer to the MasterBlaster Serial/USB Communications Cable User Guide.<br />
<strong>Cyclone</strong> <strong>IV</strong> Device H<strong>and</strong>book, February 2013 <strong>Altera</strong> Corporation<br />
Volume 1<br />
nCEO<br />
N.C. (4)<br />
P<strong>in</strong> 1<br />
Shield<br />
GND<br />
GND<br />
V IO (3)
Chapter 8: <strong>Configuration</strong> <strong>and</strong> <strong>Remote</strong> <strong>System</strong> <strong>Upgrades</strong> <strong>in</strong> <strong>Cyclone</strong> <strong>IV</strong> Devices 8–39<br />
<strong>Configuration</strong><br />
You can use a download cable to configure multiple <strong>Cyclone</strong> <strong>IV</strong> device configuration<br />
p<strong>in</strong>s. nCONFIG, nSTATUS, DCLK, DATA[0], <strong>and</strong> CONF_DONE are connected to every device <strong>in</strong><br />
the cha<strong>in</strong>. All devices <strong>in</strong> the cha<strong>in</strong> utilize <strong>and</strong> enter user mode at the same time<br />
because all CONF_DONE p<strong>in</strong>s are tied together.<br />
In addition, the entire cha<strong>in</strong> halts configuration if any device detects an error because<br />
the nSTATUS p<strong>in</strong>s are tied together. Figure 8–18 shows the PS configuration for<br />
multiple <strong>Cyclone</strong> <strong>IV</strong> devices us<strong>in</strong>g a MasterBlaster, USB-Blaster, ByteBlaster II, or<br />
ByteBlasterMV cable.<br />
Figure 8–18. Multi-Device PS <strong>Configuration</strong> Us<strong>in</strong>g a Download Cable<br />
10 kΩ<br />
10 kΩ<br />
(2)<br />
V CCA (1)<br />
V CCA (1)<br />
Notes to Figure 8–18:<br />
V CCIO (4)<br />
10 kΩ<br />
GND<br />
<strong>Cyclone</strong> <strong>IV</strong> Device 1<br />
CONF_DONE<br />
nSTATUS<br />
DCLK<br />
MSEL[ ] (6)<br />
nCE<br />
DATA[0]<br />
nCONFIG<br />
<strong>Cyclone</strong> <strong>IV</strong> Device 2<br />
CONF_DONE<br />
nSTATUS<br />
MSEL[ ] DCLK<br />
(6)<br />
nCE<br />
DATA[0]<br />
nCONFIG<br />
(1) You must connect the pull-up resistor to the same supply voltage as the VCCA supply.<br />
(2) The pull-up resistors on DATA[0] <strong>and</strong> DCLK are only required if the download cable is the only configuration scheme<br />
used on your board. This ensures that DATA[0] <strong>and</strong> DCLK are not left float<strong>in</strong>g after configuration. For example, if you<br />
also use a configuration device, the pull-up resistors on DATA[0] <strong>and</strong> DCLK are not required.<br />
(3) P<strong>in</strong> 6 of the header is a VIO reference voltage for the MasterBlaster output driver. VIO must match the VCCA of the<br />
device. For this value, refer to the MasterBlaster Serial/USB Communications Cable User Guide. When us<strong>in</strong>g the<br />
ByteBlasterMV download cable, this p<strong>in</strong> is a no connect. When us<strong>in</strong>g USB-Blaster, ByteBlaster II, <strong>and</strong> EthernetBlaster<br />
cables, this p<strong>in</strong> is connected to nCE when it is used for AS programm<strong>in</strong>g. Otherwise, it is a no connect.<br />
(4) Connect the pull-up resistor to the VCCIO supply voltage of the I/O bank <strong>in</strong> which the nCE p<strong>in</strong> resides.<br />
(5) The nCEO p<strong>in</strong> of the last device <strong>in</strong> the cha<strong>in</strong> is left unconnected or used as a user I/O p<strong>in</strong>.<br />
(6) The MSEL p<strong>in</strong> sett<strong>in</strong>gs vary for different configuration voltage st<strong>and</strong>ards <strong>and</strong> POR time. To connect MSEL for PS<br />
configuration schemes, refer to Table 8–3 on page 8–8, Table 8–4 on page 8–8, <strong>and</strong> Table 8–5 on page 8–9. Connect<br />
the MSEL p<strong>in</strong>s directly to VCCA or GND.<br />
(7) Power up the VCC of the ByteBlaster II, USB-Blaster, or ByteBlasterMV cable with a 2.5 V supply from VCCA. Third-party<br />
programmers must switch to 2.5 V. P<strong>in</strong> 4 of the header is a VCC power supply for the MasterBlaster cable. The<br />
MasterBlaster cable can receive power from either 5.0- or 3.3-V circuit boards, DC power supply, or 5.0 V from the<br />
USB cable. For this value, refer to the MasterBlaster Serial/USB Communications Cable User Guide.<br />
February 2013 <strong>Altera</strong> Corporation <strong>Cyclone</strong> <strong>IV</strong> Device H<strong>and</strong>book,<br />
Volume 1<br />
nCEO<br />
nCEO<br />
VCCA (1)<br />
10 kΩ<br />
(2)<br />
10 kΩ<br />
VCCA (1)<br />
N.C. (5)<br />
10 kΩ<br />
V CCA (1)<br />
Download Cable<br />
10-P<strong>in</strong> Male Header<br />
(Passive Serial Mode)<br />
P<strong>in</strong> 1<br />
GND<br />
V CCA (7)<br />
GND<br />
VIO (3)
8–40 Chapter 8: <strong>Configuration</strong> <strong>and</strong> <strong>Remote</strong> <strong>System</strong> <strong>Upgrades</strong> <strong>in</strong> <strong>Cyclone</strong> <strong>IV</strong> Devices<br />
<strong>Configuration</strong><br />
FPP <strong>Configuration</strong><br />
The FPP configuration <strong>in</strong> <strong>Cyclone</strong> <strong>IV</strong> devices is designed to meet the <strong>in</strong>creas<strong>in</strong>g<br />
dem<strong>and</strong> for faster configuration time. <strong>Cyclone</strong> <strong>IV</strong> devices are designed with the<br />
capability of receiv<strong>in</strong>g byte-wide configuration data per clock cycle.<br />
You can perform FPP configuration of <strong>Cyclone</strong> <strong>IV</strong> devices with an <strong>in</strong>telligent host,<br />
such as a MAX II device or microprocessor with flash memory. If your system already<br />
conta<strong>in</strong>s a CFI flash memory, you can use it for the <strong>Cyclone</strong> <strong>IV</strong> device configuration<br />
storage as well. The MAX II PFL feature <strong>in</strong> MAX II devices provides an efficient<br />
method to program CFI flash memory devices through the JTAG <strong>in</strong>terface <strong>and</strong> the<br />
logic to control configuration from the flash memory device to the <strong>Cyclone</strong> <strong>IV</strong> device.<br />
f For more <strong>in</strong>formation about the PFL, refer to AN 386: Us<strong>in</strong>g the Parallel Flash Loader<br />
with the Quartus II Software.<br />
1 FPP configuration is supported <strong>in</strong> EP4CGX30 (only for F484 package), EP4CGX50,<br />
EP4CGX75, EP4CGX110, EP4CGX150, <strong>and</strong> all <strong>Cyclone</strong> <strong>IV</strong> E devices.<br />
1 The FPP configuration is not supported <strong>in</strong> E144 package of <strong>Cyclone</strong> <strong>IV</strong> E devices.<br />
1 <strong>Cyclone</strong> <strong>IV</strong> devices do not support enhanced configuration devices for FPP<br />
configuration.<br />
FPP <strong>Configuration</strong> Us<strong>in</strong>g an External Host<br />
FPP configuration us<strong>in</strong>g an external host provides a fast method to configure<br />
<strong>Cyclone</strong> <strong>IV</strong> devices. In the FPP configuration scheme, you can use an external host<br />
device to control the transfer of configuration data from a storage device, such as flash<br />
memory, to the target <strong>Cyclone</strong> <strong>IV</strong> device. You can store configuration data <strong>in</strong> an .rbf,<br />
.hex, or .ttf format. When us<strong>in</strong>g the external host, a design that controls the<br />
configuration process, such as fetch<strong>in</strong>g the data from flash memory <strong>and</strong> send<strong>in</strong>g it to<br />
<strong>Cyclone</strong> <strong>IV</strong> Device H<strong>and</strong>book, February 2013 <strong>Altera</strong> Corporation<br />
Volume 1
Chapter 8: <strong>Configuration</strong> <strong>and</strong> <strong>Remote</strong> <strong>System</strong> <strong>Upgrades</strong> <strong>in</strong> <strong>Cyclone</strong> <strong>IV</strong> Devices 8–41<br />
<strong>Configuration</strong><br />
the device, must be stored <strong>in</strong> the external host device. Figure 8–19 shows the<br />
configuration <strong>in</strong>terface connections between the <strong>Cyclone</strong> <strong>IV</strong> devices <strong>and</strong> an external<br />
device for s<strong>in</strong>gle-device configuration.<br />
Figure 8–19. S<strong>in</strong>gle-Device FPP <strong>Configuration</strong> Us<strong>in</strong>g an External Host<br />
Notes to Figure 8–19:<br />
ADDR<br />
External Host<br />
(MAX II Device or<br />
Microprocessor)<br />
Memory<br />
DATA[7..0]<br />
V CCIO (1) V CCIO (1)<br />
<strong>Cyclone</strong> <strong>IV</strong> Device<br />
CONF_DONE<br />
nSTATUS<br />
nCE nCEO<br />
(1) Connect the pull-up resistor to a supply that provides an acceptable <strong>in</strong>put signal for the device. VCC must be high<br />
enough to meet the VIH specification of the I/O on the device <strong>and</strong> the external host.<br />
(2) The nCEO p<strong>in</strong> is left unconnected or used as a user I/O p<strong>in</strong> when it does not feed the nCE p<strong>in</strong> of another device.<br />
(3) The MSEL p<strong>in</strong> sett<strong>in</strong>gs vary for different configuration voltage st<strong>and</strong>ards <strong>and</strong> POR time. To connect the MSEL p<strong>in</strong>s,<br />
refer to Table 8–4 on page 8–8 <strong>and</strong> Table 8–5 on page 8–9. Connect the MSEL p<strong>in</strong>s directly to VCCA or GND.<br />
(4) All I/O <strong>in</strong>puts must ma<strong>in</strong>ta<strong>in</strong> a maximum AC voltage of 4.1 V. DATA[7..0] <strong>and</strong> DCLK must fit the maximum overshoot<br />
outl<strong>in</strong>ed <strong>in</strong> Equation 8–1 on page 8–5.<br />
After nSTATUS is released, the device is ready to receive configuration data <strong>and</strong> the<br />
configuration stage beg<strong>in</strong>s. When nSTATUS is pulled high, the external host device<br />
places the configuration data one byte at a time on the DATA[7..0]p<strong>in</strong>s.<br />
<strong>Cyclone</strong> <strong>IV</strong> devices receive configuration data on the DATA[7..0] p<strong>in</strong>s <strong>and</strong> the clock is<br />
received on the DCLK p<strong>in</strong>. Data is latched <strong>in</strong>to the device on the ris<strong>in</strong>g edge of DCLK.<br />
Data is cont<strong>in</strong>uously clocked <strong>in</strong>to the target device until CONF_DONE goes high. The<br />
CONF_DONE p<strong>in</strong> goes high one byte early <strong>in</strong> FPP configuration mode. The last byte is<br />
required for serial configuration (AS <strong>and</strong> PS) modes.<br />
1 Two DCLK fall<strong>in</strong>g edges are required after CONF_DONE goes high to beg<strong>in</strong> <strong>in</strong>itialization<br />
of the device.<br />
Supply<strong>in</strong>g a clock on CLKUSR does not affect the configuration process. After the<br />
CONF_DONE p<strong>in</strong> goes high, CLKUSR is enabled after the time specified as t CD2CU. After<br />
this time period elapses, <strong>Cyclone</strong> <strong>IV</strong> devices require 3,192 clock cycles to <strong>in</strong>itialize<br />
properly <strong>and</strong> enter user mode. For more <strong>in</strong>formation about the supported CLKUSR f MAX<br />
value for <strong>Cyclone</strong> <strong>IV</strong> devices, refer to Table 8–12 on page 8–44.<br />
The INIT_DONE p<strong>in</strong> is released <strong>and</strong> pulled high when <strong>in</strong>itialization is complete. The<br />
external host device must be able to detect this low-to-high transition, which signals<br />
the device has entered user mode. When <strong>in</strong>itialization is complete, the device enters<br />
user mode. In user mode, the user I/O p<strong>in</strong>s no longer have weak pull-up resistors <strong>and</strong><br />
function as assigned <strong>in</strong> your design.<br />
February 2013 <strong>Altera</strong> Corporation <strong>Cyclone</strong> <strong>IV</strong> Device H<strong>and</strong>book,<br />
Volume 1<br />
10 k<br />
10 k<br />
GND<br />
MSEL[3..0]<br />
DATA[7..0] (4)<br />
nCONFIG<br />
DCLK (4)<br />
(3)<br />
N.C. (2)
8–42 Chapter 8: <strong>Configuration</strong> <strong>and</strong> <strong>Remote</strong> <strong>System</strong> <strong>Upgrades</strong> <strong>in</strong> <strong>Cyclone</strong> <strong>IV</strong> Devices<br />
<strong>Configuration</strong><br />
To ensure that DCLK <strong>and</strong> DATA[0] are not left float<strong>in</strong>g at the end of the configuration,<br />
the MAX II device must drive them either high or low, whichever is convenient on<br />
your board. The DATA[0] p<strong>in</strong> is available as a user I/O p<strong>in</strong> after configuration. When<br />
you choose the FPP scheme <strong>in</strong> the Quartus II software, the DATA[0] p<strong>in</strong> is tri-stated by<br />
default <strong>in</strong> user mode <strong>and</strong> must be driven by the external host device. To change this<br />
default option <strong>in</strong> the Quartus II software, select the Dual-Purpose P<strong>in</strong>s tab of the<br />
Device <strong>and</strong> P<strong>in</strong> Options dialog box.<br />
The DCLK speed must be below the specified system frequency to ensure correct<br />
configuration. No maximum DCLK period exists, which means you can pause<br />
configuration by halt<strong>in</strong>g DCLK for an <strong>in</strong>def<strong>in</strong>ite amount of time.<br />
The external host device can also monitor the CONF_DONE <strong>and</strong> INIT_DONE p<strong>in</strong>s to ensure<br />
successful configuration. The CONF_DONE p<strong>in</strong> must be monitored by the external device<br />
to detect errors <strong>and</strong> to determ<strong>in</strong>e when programm<strong>in</strong>g is complete. If all configuration<br />
data is sent, but CONF_DONE or INIT_DONE has not gone high, the external device must<br />
reconfigure the target device.<br />
Figure 8–20 shows how to configure multiple devices with a MAX II device. This<br />
circuit is similar to the FPP configuration circuit for a s<strong>in</strong>gle device, except the<br />
<strong>Cyclone</strong> <strong>IV</strong> devices are cascaded for multi-device configuration.<br />
Figure 8–20. Multi-Device FPP <strong>Configuration</strong> Us<strong>in</strong>g an External Host<br />
Memory<br />
ADDR DATA[7..0]<br />
External Host<br />
(MAX II Device or<br />
Microprocessor)<br />
Notes to Figure 8–20:<br />
V CCIO (1) V CCIO (1)<br />
10 k<br />
10 k<br />
GND<br />
Buffers (5)<br />
<strong>Cyclone</strong> <strong>IV</strong> Device 1<br />
MSEL[3..0]<br />
CONF_DONE<br />
nSTATUS<br />
nCE nCEO<br />
DATA[7..0] (5)<br />
nCONFIG<br />
DCLK (5)<br />
VCCIO (2)<br />
<strong>Cyclone</strong> <strong>IV</strong> Device 2<br />
10 k<br />
CONF_DONE<br />
nSTATUS<br />
nCE nCEO N.C. (3)<br />
DATA[7..0] (5)<br />
nCONFIG<br />
DCLK (5)<br />
(1) The pull-up resistor must be connected to a supply that provides an acceptable <strong>in</strong>put signal for all devices <strong>in</strong> the<br />
cha<strong>in</strong>. VCC must be high enough to meet the VIH specification of the I/O on the device <strong>and</strong> the external host.<br />
(2) Connect the pull-up resistor to the VCCIO supply voltage of the I/O bank <strong>in</strong> which the nCE p<strong>in</strong> resides.<br />
(3) The nCEO p<strong>in</strong> is left unconnected or used as a user I/O p<strong>in</strong> when it does not feed the nCE p<strong>in</strong> of another device.<br />
(4) The MSEL p<strong>in</strong> sett<strong>in</strong>gs vary for different configuration voltage st<strong>and</strong>ards <strong>and</strong> POR time. To connect the MSEL p<strong>in</strong>s,<br />
refer to Table 8–4 on page 8–8 <strong>and</strong> Table 8–5 on page 8–9. Connect the MSEL p<strong>in</strong>s directly to VCCA or GND.<br />
(5) All I/O <strong>in</strong>puts must ma<strong>in</strong>ta<strong>in</strong> a maximum AC voltage of 4.1 V. DATA[7..0] <strong>and</strong> DCLK must fit the maximum overshoot<br />
outl<strong>in</strong>ed <strong>in</strong> Equation 8–1 on page 8–5.<br />
After the first device completes configuration <strong>in</strong> a multi-device configuration cha<strong>in</strong>,<br />
its nCEO p<strong>in</strong> drives low to activate the nCE p<strong>in</strong> of the second device, which prompts the<br />
second device to beg<strong>in</strong> configuration. The second device <strong>in</strong> the cha<strong>in</strong> beg<strong>in</strong>s<br />
configuration <strong>in</strong> one clock cycle; therefore, the transfer of data dest<strong>in</strong>ations is<br />
transparent to the MAX II device. All other configuration p<strong>in</strong>s (nCONFIG, nSTATUS,<br />
<strong>Cyclone</strong> <strong>IV</strong> Device H<strong>and</strong>book, February 2013 <strong>Altera</strong> Corporation<br />
Volume 1<br />
(4)<br />
MSEL[3..0]<br />
(4)
Chapter 8: <strong>Configuration</strong> <strong>and</strong> <strong>Remote</strong> <strong>System</strong> <strong>Upgrades</strong> <strong>in</strong> <strong>Cyclone</strong> <strong>IV</strong> Devices 8–43<br />
<strong>Configuration</strong><br />
DCLK, DATA[7..0], <strong>and</strong> CONF_DONE) are connected to every device <strong>in</strong> the cha<strong>in</strong>.<br />
<strong>Configuration</strong> signals may require buffer<strong>in</strong>g to ensure signal <strong>in</strong>tegrity <strong>and</strong> prevent<br />
clock skew problems. Ensure that the DCLK <strong>and</strong> DATA l<strong>in</strong>es are buffered. All devices<br />
<strong>in</strong>itialize <strong>and</strong> enter user mode at the same time, because all device CONF_DONE p<strong>in</strong>s are<br />
tied together.<br />
All nSTATUS <strong>and</strong> CONF_DONE p<strong>in</strong>s are tied together <strong>and</strong> if any device detects an error,<br />
configuration stops for the entire cha<strong>in</strong> <strong>and</strong> the entire cha<strong>in</strong> must be reconfigured. For<br />
example, if the first device flags an error on nSTATUS, it resets the cha<strong>in</strong> by pull<strong>in</strong>g its<br />
nSTATUS p<strong>in</strong> low. This behavior is similar to a s<strong>in</strong>gle device detect<strong>in</strong>g an error.<br />
Figure 8–21 shows multi-device FPP configuration when both <strong>Cyclone</strong> <strong>IV</strong> devices are<br />
receiv<strong>in</strong>g the same configuration data. <strong>Configuration</strong> p<strong>in</strong>s (nCONFIG, nSTATUS, DCLK,<br />
DATA[7..0], <strong>and</strong> CONF_DONE) are connected to every device <strong>in</strong> the cha<strong>in</strong>. <strong>Configuration</strong><br />
signals may require buffer<strong>in</strong>g to ensure signal <strong>in</strong>tegrity <strong>and</strong> prevent clock skew<br />
problems. Ensure that the DCLK <strong>and</strong> DATA l<strong>in</strong>es are buffered. Devices must be of the<br />
same density <strong>and</strong> package. All devices start <strong>and</strong> complete configuration at the same<br />
time.<br />
Figure 8–21. Multi-Device FPP <strong>Configuration</strong> Us<strong>in</strong>g an External Host When Both Devices Receive<br />
the Same Data<br />
ADDR<br />
Memory<br />
DATA[7..0]<br />
External Host<br />
(MAX II Device or<br />
Microprocessor)<br />
Notes to Figure 8–21:<br />
V CCIO (1) V CCIO (1)<br />
10 k 10 k<br />
GND<br />
<strong>Cyclone</strong> <strong>IV</strong> Device 1<br />
CONF_DONE<br />
nSTATUS<br />
nCE nCEO<br />
DATA[7..0] (4)<br />
nCONFIG<br />
DCLK (4)<br />
Buffers (4)<br />
(3)<br />
MSEL[3..0] MSEL[3..0]<br />
N.C. (2)<br />
<strong>Cyclone</strong> <strong>IV</strong> Device 2<br />
CONF_DONE<br />
nSTATUS<br />
nCE nCEO N.C. (2)<br />
DATA[7..0] (4)<br />
nCONFIG<br />
DCLK (4)<br />
(1) You must connect the pull-up resistor to a supply that provides an acceptable <strong>in</strong>put signal for all devices <strong>in</strong> the cha<strong>in</strong>.<br />
VCC must be high enough to meet the VIH specification of the I/O on the device <strong>and</strong> the external host.<br />
(2) The nCEO p<strong>in</strong>s of both devices are left unconnected or used as user I/O p<strong>in</strong>s when configur<strong>in</strong>g the same configuration<br />
data <strong>in</strong>to multiple devices.<br />
(3) The MSEL p<strong>in</strong> sett<strong>in</strong>gs vary for different configuration voltage st<strong>and</strong>ards <strong>and</strong> POR time. To connect the MSEL p<strong>in</strong>s,<br />
refer to Table 8–4 on page 8–8 <strong>and</strong> Table 8–5 on page 8–9. Connect the MSEL p<strong>in</strong>s directly to VCCA or GND.<br />
(4) All I/O <strong>in</strong>puts must ma<strong>in</strong>ta<strong>in</strong> a maximum AC voltage of 4.1 V. DATA[7..0] <strong>and</strong> DCLK must fit the maximum overshoot<br />
outl<strong>in</strong>ed <strong>in</strong> Equation 8–1 on page 8–5.<br />
You can use a s<strong>in</strong>gle configuration cha<strong>in</strong> to configure <strong>Cyclone</strong> <strong>IV</strong> devices with other<br />
<strong>Altera</strong> devices that support FPP configuration. To ensure that all devices <strong>in</strong> the cha<strong>in</strong><br />
complete configuration at the same time or that an error flagged by one device starts<br />
reconfiguration <strong>in</strong> all devices, tie all the CONF_DONE <strong>and</strong> nSTATUS p<strong>in</strong>s together.<br />
f For more <strong>in</strong>formation about configur<strong>in</strong>g multiple <strong>Altera</strong> devices <strong>in</strong> the same<br />
configuration cha<strong>in</strong>, refer to Configur<strong>in</strong>g Mixed <strong>Altera</strong> FPGA Cha<strong>in</strong>s <strong>in</strong> volume 2 of the<br />
<strong>Configuration</strong> H<strong>and</strong>book.<br />
February 2013 <strong>Altera</strong> Corporation <strong>Cyclone</strong> <strong>IV</strong> Device H<strong>and</strong>book,<br />
Volume 1<br />
GND<br />
(3)
8–44 Chapter 8: <strong>Configuration</strong> <strong>and</strong> <strong>Remote</strong> <strong>System</strong> <strong>Upgrades</strong> <strong>in</strong> <strong>Cyclone</strong> <strong>IV</strong> Devices<br />
<strong>Configuration</strong><br />
FPP <strong>Configuration</strong> Tim<strong>in</strong>g<br />
Figure 8–22 shows the tim<strong>in</strong>g waveform for the FPP configuration when us<strong>in</strong>g an<br />
external host.<br />
Figure 8–22. FPP <strong>Configuration</strong> Tim<strong>in</strong>g Waveform (1)<br />
nCONFIG<br />
nSTATUS (2)<br />
CONF_DONE (3)<br />
DCLK<br />
DATA[7..0]<br />
User I/O<br />
INIT_DONE<br />
Notes to Figure 8–22:<br />
t CFG<br />
t CF2CD<br />
t CF2ST1<br />
t CF2CK<br />
t CF2ST0<br />
t ST2CK<br />
t STATUS<br />
t CLK<br />
t CH t CL<br />
Byte 0<br />
tDH Byte 1 Byte 2 Byte 3 Byte n-1 Byte n<br />
t DSU<br />
Tri-stated with <strong>in</strong>ternal pull-up resistor<br />
(1) The beg<strong>in</strong>n<strong>in</strong>g of this waveform shows the device <strong>in</strong> user mode. In user mode, nCONFIG, nSTATUS, <strong>and</strong> CONF_DONE<br />
are at logic-high levels. When nCONFIG is pulled low, a reconfiguration cycle beg<strong>in</strong>s.<br />
(2) After power up, the <strong>Cyclone</strong> <strong>IV</strong> device holds nSTATUS low dur<strong>in</strong>g POR delay.<br />
(3) After power up, before <strong>and</strong> dur<strong>in</strong>g configuration, CONF_DONE is low.<br />
(4) Do not leave DCLK float<strong>in</strong>g after configuration. It must be driven high or low, whichever is more convenient.<br />
(5) DATA[7..0] is available as a user I/O p<strong>in</strong> after configuration; the state of the p<strong>in</strong> depends on the dual-purpose p<strong>in</strong><br />
sett<strong>in</strong>gs.<br />
Table 8–12 lists the FPP configuration tim<strong>in</strong>g parameters for <strong>Cyclone</strong> <strong>IV</strong> devices.<br />
Table 8–12. FPP Tim<strong>in</strong>g Parameters for <strong>Cyclone</strong> <strong>IV</strong> Devices (Part 1 of 2)<br />
Symbol Parameter<br />
t CF2CD<br />
t CF2ST0<br />
t CFG<br />
t STATUS<br />
t CF2ST1<br />
t CF2CK<br />
nCONFIG low to<br />
CONF_DONE low<br />
nCONFIG low to<br />
nSTATUS low<br />
nCONFIG low pulse<br />
width<br />
nSTATUS low pulse<br />
width<br />
nCONFIG high to<br />
nSTATUS high<br />
nCONFIG high to<br />
first ris<strong>in</strong>g edge on<br />
DCLK<br />
<strong>Cyclone</strong> <strong>IV</strong> Device H<strong>and</strong>book, February 2013 <strong>Altera</strong> Corporation<br />
Volume 1<br />
t CD2UM<br />
M<strong>in</strong>imum Maximum<br />
(5)<br />
(4)<br />
User Mode<br />
User Mode<br />
<strong>Cyclone</strong> <strong>IV</strong> (1) <strong>Cyclone</strong> <strong>IV</strong> E (2) <strong>Cyclone</strong> <strong>IV</strong> (1) <strong>Cyclone</strong> <strong>IV</strong> E (2)<br />
— 500 ns<br />
— 500 ns<br />
500 — ns<br />
45 230 (3) µs<br />
— 230 (4) µs<br />
Unit<br />
230 (3) — µs
Chapter 8: <strong>Configuration</strong> <strong>and</strong> <strong>Remote</strong> <strong>System</strong> <strong>Upgrades</strong> <strong>in</strong> <strong>Cyclone</strong> <strong>IV</strong> Devices 8–45<br />
<strong>Configuration</strong><br />
Table 8–12. FPP Tim<strong>in</strong>g Parameters for <strong>Cyclone</strong> <strong>IV</strong> Devices (Part 2 of 2)<br />
t ST2CK<br />
t DH<br />
t CD2UM<br />
t CD2CU<br />
t CD2UMC<br />
t DSU<br />
Symbol Parameter<br />
nSTATUS high to<br />
first ris<strong>in</strong>g edge of<br />
DCLK<br />
Data hold time after<br />
ris<strong>in</strong>g edge on<br />
DCLK<br />
CONF_DONE high to<br />
user mode (5)<br />
CONF_DONE high to<br />
CLKUSR enabled<br />
CONF_DONE high to<br />
user mode with<br />
CLKUSR option on<br />
Data setup time<br />
before ris<strong>in</strong>g edge<br />
on DCLK<br />
JTAG <strong>Configuration</strong><br />
2 — µs<br />
0 — ns<br />
300 650 µs<br />
4 × maximum DCLK period — —<br />
t CD2CU + (3,192 × CLKUSR period) — —<br />
5 8 — — ns<br />
t CH DCLK high time 3.2 6.4 — — ns<br />
t CL DCLK low time 3.2 6.4 — — ns<br />
t CLK DCLK period 7.5 15 — — ns<br />
f MAX DCLK frequency (6) — — 133 66 MHz<br />
Notes to Table 8–12:<br />
M<strong>in</strong>imum Maximum<br />
<strong>Cyclone</strong> <strong>IV</strong> (1) <strong>Cyclone</strong> <strong>IV</strong> E (2) <strong>Cyclone</strong> <strong>IV</strong> (1) <strong>Cyclone</strong> <strong>IV</strong> E (2)<br />
(1) Applicable for <strong>Cyclone</strong> <strong>IV</strong> GX <strong>and</strong> <strong>Cyclone</strong> <strong>IV</strong> E with 1.2-V core voltage.<br />
(2) Applicable for <strong>Cyclone</strong> <strong>IV</strong> E with 1.0-V core voltage.<br />
(3) This value is applicable if you do not delay configuration by extend<strong>in</strong>g the nCONFIG or nSTATUS low pulse width.<br />
(4) This value is applicable if you do not delay configuration by externally hold<strong>in</strong>g the nSTATUS low.<br />
(5) The m<strong>in</strong>imum <strong>and</strong> maximum numbers apply only if you choose the <strong>in</strong>ternal oscillator as the clock source for start<strong>in</strong>g the device.<br />
(6) <strong>Cyclone</strong> <strong>IV</strong> E devices with 1.0-V core voltage have slower FMAX when compared with <strong>Cyclone</strong> <strong>IV</strong> GX devices with 1.2-V core voltage.<br />
JTAG has developed a specification for boundary-scan test<strong>in</strong>g (BST). The BST<br />
architecture offers the capability to efficiently test components on PCBs with tight<br />
lead spac<strong>in</strong>g. The BST architecture can test p<strong>in</strong> connections without us<strong>in</strong>g physical<br />
test probes <strong>and</strong> capture functional data while a device is normally operat<strong>in</strong>g. You can<br />
also use the JTAG circuitry to shift configuration data <strong>in</strong>to the device. The Quartus II<br />
software automatically generates .sof for JTAG configuration with a download cable<br />
<strong>in</strong> the Quartus II software Programmer.<br />
f For more <strong>in</strong>formation about the JTAG boundary-scan test<strong>in</strong>g, refer to the JTAG<br />
Boundary-Scan Test<strong>in</strong>g for <strong>Cyclone</strong> <strong>IV</strong> Devices chapter.<br />
February 2013 <strong>Altera</strong> Corporation <strong>Cyclone</strong> <strong>IV</strong> Device H<strong>and</strong>book,<br />
Volume 1<br />
Unit
8–46 Chapter 8: <strong>Configuration</strong> <strong>and</strong> <strong>Remote</strong> <strong>System</strong> <strong>Upgrades</strong> <strong>in</strong> <strong>Cyclone</strong> <strong>IV</strong> Devices<br />
<strong>Configuration</strong><br />
Table 8–13. Dedicated JTAG P<strong>in</strong>s<br />
JTAG <strong>in</strong>structions have precedence over any other configuration modes. Therefore,<br />
JTAG configuration can take place without wait<strong>in</strong>g for other configuration modes to<br />
complete. For example, if you attempt JTAG configuration <strong>in</strong> <strong>Cyclone</strong> <strong>IV</strong> devices<br />
dur<strong>in</strong>g PS configuration, PS configuration term<strong>in</strong>ates <strong>and</strong> JTAG configuration beg<strong>in</strong>s.<br />
If the MSEL p<strong>in</strong>s are set to AS mode, the <strong>Cyclone</strong> <strong>IV</strong> device does not output a DCLK<br />
signal when JTAG configuration takes place.<br />
The four required p<strong>in</strong>s for a device operat<strong>in</strong>g <strong>in</strong> JTAG mode are TDI, TDO, TMS, <strong>and</strong> TCK.<br />
All the JTAG <strong>in</strong>put p<strong>in</strong>s are powered by the V CCIO p<strong>in</strong> <strong>and</strong> support the LVTTL I/O<br />
st<strong>and</strong>ard only. All user I/O p<strong>in</strong>s are tri-stated dur<strong>in</strong>g JTAG configuration. Table 8–13<br />
expla<strong>in</strong>s the function of each JTAG p<strong>in</strong>.<br />
P<strong>in</strong> Name P<strong>in</strong> Type Description<br />
TDI<br />
TDO<br />
TMS<br />
TCK<br />
Test data<br />
<strong>in</strong>put<br />
Test data<br />
output<br />
Test mode<br />
select<br />
Test clock<br />
<strong>in</strong>put<br />
Serial <strong>in</strong>put p<strong>in</strong> for <strong>in</strong>structions as well as test <strong>and</strong> programm<strong>in</strong>g data. Data shifts <strong>in</strong> on the<br />
ris<strong>in</strong>g edge of TCK. If the JTAG <strong>in</strong>terface is not required on the board, the JTAG circuitry is<br />
disabled by connect<strong>in</strong>g this p<strong>in</strong> to V CC. TDI p<strong>in</strong> has weak <strong>in</strong>ternal pull-up resistors (typically 25<br />
k).<br />
Serial data output p<strong>in</strong> for <strong>in</strong>structions as well as test <strong>and</strong> programm<strong>in</strong>g data. Data shifts out on<br />
the fall<strong>in</strong>g edge of TCK. The p<strong>in</strong> is tri-stated if data is not be<strong>in</strong>g shifted out of the device. If the<br />
JTAG <strong>in</strong>terface is not required on the board, the JTAG circuitry is disabled by leav<strong>in</strong>g this p<strong>in</strong><br />
unconnected.<br />
Input p<strong>in</strong> that provides the control signal to determ<strong>in</strong>e the transitions of the TAP controller<br />
state mach<strong>in</strong>e. Transitions <strong>in</strong> the state mach<strong>in</strong>e occur on the ris<strong>in</strong>g edge of TCK. Therefore,<br />
TMS must be set up before the ris<strong>in</strong>g edge of TCK. TMS is evaluated on the ris<strong>in</strong>g edge of TCK.<br />
If the JTAG <strong>in</strong>terface is not required on the board, the JTAG circuitry is disabled by connect<strong>in</strong>g<br />
this p<strong>in</strong> to V CC. TMS p<strong>in</strong> has weak <strong>in</strong>ternal pull-up resistors (typically 25 k).<br />
The clock <strong>in</strong>put to the BST circuitry. Some operations occur at the ris<strong>in</strong>g edge, while others<br />
occur at the fall<strong>in</strong>g edge. If the JTAG <strong>in</strong>terface is not required on the board, the JTAG circuitry<br />
is disabled by connect<strong>in</strong>g this p<strong>in</strong> to GND. The TCK p<strong>in</strong> has an <strong>in</strong>ternal weak pull-down resistor.<br />
You can download data to the device through the USB-Blaster, MasterBlaster,<br />
ByteBlaster II, or ByteBlasterMV download cable, or the EthernetBlaster<br />
communications cable dur<strong>in</strong>g JTAG configuration. Configur<strong>in</strong>g devices with a cable is<br />
similar to programm<strong>in</strong>g devices <strong>in</strong>-system. Figure 8–23 <strong>and</strong> Figure 8–24 show the<br />
JTAG configuration of a s<strong>in</strong>gle <strong>Cyclone</strong> <strong>IV</strong> device.<br />
<strong>Cyclone</strong> <strong>IV</strong> Device H<strong>and</strong>book, February 2013 <strong>Altera</strong> Corporation<br />
Volume 1
Chapter 8: <strong>Configuration</strong> <strong>and</strong> <strong>Remote</strong> <strong>System</strong> <strong>Upgrades</strong> <strong>in</strong> <strong>Cyclone</strong> <strong>IV</strong> Devices 8–47<br />
<strong>Configuration</strong><br />
For device us<strong>in</strong>g V CCIO of 2.5, 3.0, <strong>and</strong> 3.3 V, refer to Figure 8–23. All I/O <strong>in</strong>puts must<br />
ma<strong>in</strong>ta<strong>in</strong> a maximum AC voltage of 4.1 V because JTAG p<strong>in</strong>s do not have the <strong>in</strong>ternal<br />
PCI clamp<strong>in</strong>g diodes to prevent voltage overshoot when us<strong>in</strong>g V CCIO of 2.5, 3.0, <strong>and</strong><br />
3.3 V. You must power up the V CC of the download cable with a 2.5-V supply from<br />
V CCA. For device us<strong>in</strong>g V CCIO of 1.2, 1.5, <strong>and</strong> 1.8 V, refer to Figure 8–24. You can power<br />
up the V CC of the download cable with the supply from V CCIO.<br />
Figure 8–23. JTAG <strong>Configuration</strong> of a S<strong>in</strong>gle Device Us<strong>in</strong>g a Download Cable (2.5, 3.0, <strong>and</strong> 3.3-V<br />
V CCIO Power<strong>in</strong>g the JTAG P<strong>in</strong>s)<br />
V CCIO (1)<br />
10 kΩ<br />
Notes to Figure 8–23:<br />
V CCIO (1)<br />
10 kΩ<br />
GND<br />
N.C. (5)<br />
(2)<br />
(2)<br />
(2)<br />
(2)<br />
<strong>Cyclone</strong> <strong>IV</strong> Device<br />
nCE (4) TCK<br />
TDO<br />
nCEO<br />
nSTATUS<br />
CONF_DONE<br />
nCONFIG<br />
MSEL[ ]<br />
DATA[0]<br />
DCLK<br />
(1) Connect these pull-up resistors to the VCCIO supply of the bank <strong>in</strong> which the p<strong>in</strong> resides.<br />
(2) Connect the nCONFIG <strong>and</strong> MSEL p<strong>in</strong>s to support a non-JTAG configuration scheme. If you only use JTAG<br />
configuration, connect the nCONFIG p<strong>in</strong> to logic-high <strong>and</strong> the MSEL p<strong>in</strong>s to GND. In addition, pull DCLK <strong>and</strong> DATA[0]<br />
to either high or low, whichever is convenient on your board.<br />
(3) P<strong>in</strong> 6 of the header is a VIO reference voltage for the MasterBlaster output driver. VIO must match the device’s VCCA. For this value, refer to the MasterBlaster Serial/USB Communications Cable User Guide. When us<strong>in</strong>g the USB-Blaster,<br />
ByteBlaster II, ByteBlasterMV, <strong>and</strong> EthernetBlaster cables, this p<strong>in</strong> is a no connect.<br />
(4) The nCE p<strong>in</strong> must be connected to GND or driven low for successful JTAG configuration.<br />
(5) The nCEO p<strong>in</strong> is left unconnected or used as a user I/O p<strong>in</strong> when it does not feed the nCE p<strong>in</strong> of another device.<br />
(6) Power up the VCC of the EthernetBlaster, ByteBlaster II, USB-Blaster, or ByteBlasterMV cable with a 2.5-V supply from<br />
VCCA. Third-party programmers must switch to 2.5 V. P<strong>in</strong> 4 of the header is a VCC power supply for the MasterBlaster<br />
cable. The MasterBlaster cable can receive power from either 5.0- or 3.3-V circuit boards, DC power supply, or 5.0 V<br />
from the USB cable. For this value, refer to the MasterBlaster Serial/USB Communications Cable User Guide.<br />
(7) Resistor value can vary from 1 k to 10 k..<br />
February 2013 <strong>Altera</strong> Corporation <strong>Cyclone</strong> <strong>IV</strong> Device H<strong>and</strong>book,<br />
Volume 1<br />
TMS<br />
TDI<br />
(7)<br />
V CCA<br />
V CCA<br />
(7)<br />
1 kΩ<br />
GND<br />
Download Cable 10-P<strong>in</strong> Male<br />
Header (Top View)<br />
P<strong>in</strong> 1<br />
GND<br />
V CCA (6)<br />
GND<br />
V IO (3)
8–48 Chapter 8: <strong>Configuration</strong> <strong>and</strong> <strong>Remote</strong> <strong>System</strong> <strong>Upgrades</strong> <strong>in</strong> <strong>Cyclone</strong> <strong>IV</strong> Devices<br />
<strong>Configuration</strong><br />
Figure 8–24. JTAG <strong>Configuration</strong> of a S<strong>in</strong>gle Device Us<strong>in</strong>g a Download Cable (1.5-V or 1.8-V V CCIO<br />
Power<strong>in</strong>g the JTAG P<strong>in</strong>s)<br />
V CCIO (1)<br />
10 kΩ<br />
Notes to Figure 8–24:<br />
V CCIO (1)<br />
10 kΩ<br />
GND<br />
N.C. (5)<br />
(2)<br />
(2)<br />
(2)<br />
(2)<br />
<strong>Cyclone</strong> <strong>IV</strong> Device<br />
nCE (4) TCK<br />
TDO<br />
nCEO<br />
nSTATUS<br />
CONF_DONE<br />
nCONFIG<br />
MSEL[ ]<br />
DATA[0]<br />
DCLK<br />
(1) Connect these pull-up resistors to the VCCIO supply of the bank <strong>in</strong> which the p<strong>in</strong> resides.<br />
(2) Connect the nCONFIG <strong>and</strong> MSEL p<strong>in</strong>s to support a non-JTAG configuration scheme. If you only use JTAG<br />
configuration, connect the nCONFIG p<strong>in</strong> to logic-high <strong>and</strong> the MSEL p<strong>in</strong>s to GND. In addition, pull DCLK <strong>and</strong> DATA[0]<br />
to either high or low, whichever is convenient on your board.<br />
(3) In the USB-Blaster <strong>and</strong> ByteBlaster II cables, this p<strong>in</strong> is connected to nCE when it is used for AS programm<strong>in</strong>g;<br />
otherwise it is a no connect.<br />
(4) The nCE must be connected to GND or driven low for successful JTAG configuration.<br />
(5) The nCEO p<strong>in</strong> is left unconnected or used as a user I/O p<strong>in</strong> when it does not feed the nCE p<strong>in</strong> of another device.<br />
(6) Power up the VCC of the EthernetBlaster, ByteBlaster II or USB-Blaster cable with supply from VCCIO. The<br />
Ethernet-Blaster, ByteBlaster II, <strong>and</strong> USB-Blaster cables do not support a target supply voltage of 1.2 V. For the target<br />
supply voltage value, refer to the ByteBlaster II Download Cable User Guide, the USB-Blaster Download Cable User<br />
Guide, <strong>and</strong> the EthernetBlaster Communications Cable User Guide.<br />
(7) Resistor value can vary from 1 k to 10 k.<br />
To configure a s<strong>in</strong>gle device <strong>in</strong> a JTAG cha<strong>in</strong>, the programm<strong>in</strong>g software places all<br />
other devices <strong>in</strong> bypass mode. In bypass mode, devices pass programm<strong>in</strong>g data from<br />
the TDI p<strong>in</strong> to the TDO p<strong>in</strong> through a s<strong>in</strong>gle bypass register without be<strong>in</strong>g affected<br />
<strong>in</strong>ternally. This scheme enables the programm<strong>in</strong>g software to program or verify the<br />
target device. <strong>Configuration</strong> data driven <strong>in</strong>to the device appears on the TDO p<strong>in</strong> one<br />
clock cycle later.<br />
The Quartus II software verifies successful JTAG configuration after completion. At<br />
the end of configuration, the software checks the state of CONF_DONE through the JTAG<br />
port. When Quartus II generates a .jam for a multi-device cha<strong>in</strong>, it conta<strong>in</strong>s<br />
<strong>in</strong>structions so that all the devices <strong>in</strong> the cha<strong>in</strong> are <strong>in</strong>itialized at the same time. If<br />
CONF_DONE is not high, the Quartus II software <strong>in</strong>dicates that configuration has failed.<br />
If CONF_DONE is high, the software <strong>in</strong>dicates that configuration was successful. After<br />
the configuration bitstream is serially sent us<strong>in</strong>g the JTAG TDI port, the TCK port<br />
clocks an additional clock cycles to perform device <strong>in</strong>itialization.<br />
<strong>Cyclone</strong> <strong>IV</strong> Device H<strong>and</strong>book, February 2013 <strong>Altera</strong> Corporation<br />
Volume 1<br />
TMS<br />
TDI<br />
(7)<br />
V CCIO<br />
V CCIO<br />
(7)<br />
1 kΩ<br />
GND<br />
Download Cable 10-P<strong>in</strong> Male<br />
Header (Top View)<br />
P<strong>in</strong> 1<br />
GND<br />
V CCIO (6)<br />
GND<br />
V IO (3)
Chapter 8: <strong>Configuration</strong> <strong>and</strong> <strong>Remote</strong> <strong>System</strong> <strong>Upgrades</strong> <strong>in</strong> <strong>Cyclone</strong> <strong>IV</strong> Devices 8–49<br />
<strong>Configuration</strong><br />
You can perform JTAG test<strong>in</strong>g on <strong>Cyclone</strong> <strong>IV</strong> devices before, dur<strong>in</strong>g, <strong>and</strong> after<br />
configuration. <strong>Cyclone</strong> <strong>IV</strong> devices support the BYPASS, IDCODE, <strong>and</strong> SAMPLE<br />
<strong>in</strong>structions dur<strong>in</strong>g configuration without <strong>in</strong>terrupt<strong>in</strong>g configuration. All other JTAG<br />
<strong>in</strong>structions can only be issued by first <strong>in</strong>terrupt<strong>in</strong>g configuration <strong>and</strong><br />
reprogramm<strong>in</strong>g I/O p<strong>in</strong>s with the ACT<strong>IV</strong>E_DISENGAGE <strong>and</strong> CONFIG_IO <strong>in</strong>structions.<br />
The CONFIG_IO <strong>in</strong>struction allows you to configure the I/O buffers through the JTAG<br />
port <strong>and</strong> <strong>in</strong>terrupts configuration when issued after the ACT<strong>IV</strong>E_DISENGAGE<br />
<strong>in</strong>struction. This <strong>in</strong>struction allows you to perform board-level test<strong>in</strong>g prior to<br />
configur<strong>in</strong>g the <strong>Cyclone</strong> <strong>IV</strong> device or wait<strong>in</strong>g for a configuration device to complete<br />
configuration. Prior to issu<strong>in</strong>g the CONFIG_IO <strong>in</strong>struction, you must issue the<br />
ACT<strong>IV</strong>E_DISENGAGE <strong>in</strong>struction. This is because <strong>in</strong> <strong>Cyclone</strong> <strong>IV</strong> devices, the CONFIG_IO<br />
<strong>in</strong>struction does not hold nSTATUS low until reconfiguration, so you must disengage<br />
the active configuration mode controller when active configuration is <strong>in</strong>terrupted.<br />
The ACT<strong>IV</strong>E_DISENGAGE <strong>in</strong>struction places the active configuration mode controllers <strong>in</strong><br />
an idle state prior to JTAG programm<strong>in</strong>g. Additionally, the ACT<strong>IV</strong>E_ENGAGE <strong>in</strong>struction<br />
allows you to re-engage a disengaged active configuration mode controller.<br />
1 You must follow a specific flow when execut<strong>in</strong>g the ACT<strong>IV</strong>E_DISENGAGE, CONFIG_IO,<br />
<strong>and</strong> ACT<strong>IV</strong>E_ENGAGE JTAG <strong>in</strong>structions <strong>in</strong> <strong>Cyclone</strong> <strong>IV</strong> devices.<br />
The chip-wide reset (DEV_CLRn) <strong>and</strong> chip-wide output enable (DEV_OE) p<strong>in</strong>s <strong>in</strong><br />
<strong>Cyclone</strong> <strong>IV</strong> devices do not affect JTAG boundary-scan or programm<strong>in</strong>g operations.<br />
Toggl<strong>in</strong>g these p<strong>in</strong>s do not affect JTAG operations (other than the usual<br />
boundary-scan operation).<br />
When design<strong>in</strong>g a board for JTAG configuration of <strong>Cyclone</strong> <strong>IV</strong> devices, consider the<br />
dedicated configuration p<strong>in</strong>s. Table 8–14 describes how you must connect these p<strong>in</strong>s<br />
dur<strong>in</strong>g JTAG configuration.<br />
Table 8–14. Dedicated <strong>Configuration</strong> P<strong>in</strong> Connections Dur<strong>in</strong>g JTAG <strong>Configuration</strong><br />
Signal Description<br />
On all <strong>Cyclone</strong> <strong>IV</strong> devices <strong>in</strong> the cha<strong>in</strong>, nCE must be driven low by connect<strong>in</strong>g it to GND, pull<strong>in</strong>g it low<br />
nCE<br />
through a resistor, or driv<strong>in</strong>g it by some control circuitry. For devices that are also <strong>in</strong> multi-device AS, AP,<br />
PS, or FPP configuration cha<strong>in</strong>s, you must connect the nCE p<strong>in</strong>s to GND dur<strong>in</strong>g JTAG configuration or<br />
JTAG configured <strong>in</strong> the same order as the configuration cha<strong>in</strong>.<br />
nCEO On all <strong>Cyclone</strong> <strong>IV</strong> devices <strong>in</strong> the cha<strong>in</strong>, nCEO is left float<strong>in</strong>g or connected to the nCE of the next device.<br />
MSEL<br />
These p<strong>in</strong>s must not be left float<strong>in</strong>g. These p<strong>in</strong>s support whichever non-JTAG configuration that you used<br />
<strong>in</strong> production. If you only use JTAG configuration, tie these p<strong>in</strong>s to GND.<br />
nCONFIG<br />
Driven high by connect<strong>in</strong>g to the VCCIO supply of the bank <strong>in</strong> which the p<strong>in</strong> resides <strong>and</strong> pull<strong>in</strong>g up through<br />
a resistor or driven high by some control circuitry.<br />
nSTATUS<br />
Pull to the VCCIO supply of the bank <strong>in</strong> which the p<strong>in</strong> resides through a 10-k resistor. When configur<strong>in</strong>g<br />
multiple devices <strong>in</strong> the same JTAG cha<strong>in</strong>, each nSTATUS p<strong>in</strong> must be pulled up to the VCCIO <strong>in</strong>dividually.<br />
Pull to the VCCIO supply of the bank <strong>in</strong> which the p<strong>in</strong> resides through a 10-k resistor. When configur<strong>in</strong>g<br />
CONF_DONE<br />
multiple devices <strong>in</strong> the same JTAG cha<strong>in</strong>, each CONF_DONE p<strong>in</strong> must be pulled up to VCCIO supply of the<br />
bank <strong>in</strong> which the p<strong>in</strong> resides <strong>in</strong>dividually. CONF_DONE go<strong>in</strong>g high at the end of JTAG configuration<br />
<strong>in</strong>dicates successful configuration.<br />
DCLK Must not be left float<strong>in</strong>g. Drive low or high, whichever is more convenient on your board.<br />
February 2013 <strong>Altera</strong> Corporation <strong>Cyclone</strong> <strong>IV</strong> Device H<strong>and</strong>book,<br />
Volume 1
8–50 Chapter 8: <strong>Configuration</strong> <strong>and</strong> <strong>Remote</strong> <strong>System</strong> <strong>Upgrades</strong> <strong>in</strong> <strong>Cyclone</strong> <strong>IV</strong> Devices<br />
<strong>Configuration</strong><br />
When programm<strong>in</strong>g a JTAG device cha<strong>in</strong>, one JTAG-compatible header is connected<br />
to several devices. The number of devices <strong>in</strong> the JTAG cha<strong>in</strong> is limited only by the<br />
drive capability of the download cable. When four or more devices are connected <strong>in</strong> a<br />
JTAG cha<strong>in</strong>, <strong>Altera</strong> recommends buffer<strong>in</strong>g the TCK, TDI, <strong>and</strong> TMS p<strong>in</strong>s with an on-board<br />
buffer.<br />
JTAG-cha<strong>in</strong> device programm<strong>in</strong>g is ideal when the system conta<strong>in</strong>s multiple devices,<br />
or when test<strong>in</strong>g your system with JTAG BST circuitry. Figure 8–25 <strong>and</strong> Figure 8–26<br />
show multi-device JTAG configuration.<br />
For devices us<strong>in</strong>g 2.5-, 3.0-, <strong>and</strong> 3.3-V V CCIO supply, you must refer to Figure 8–25. All<br />
I/O <strong>in</strong>puts must ma<strong>in</strong>ta<strong>in</strong> a maximum AC voltage of 4.1 V because JTAG p<strong>in</strong>s do not<br />
have the <strong>in</strong>ternal PCI clamp<strong>in</strong>g diodes to prevent voltage overshoot when us<strong>in</strong>g 2.5-,<br />
3.0-, <strong>and</strong> 3.3- V V CCIO supply. You must power up the V CC of the download cable with<br />
a 2.5-V V CCA supply. For device us<strong>in</strong>g V CCIO of 1.2, 1.5 V, <strong>and</strong> 1.8 V, refer to<br />
Figure 8–26. You can power up the V CC of the download cable with the supply from<br />
V CCIO.<br />
Figure 8–25. JTAG <strong>Configuration</strong> of Multiple Devices Us<strong>in</strong>g a Download Cable (2.5, 3.0, <strong>and</strong> 3.3-V V CCIO Power<strong>in</strong>g the<br />
JTAG P<strong>in</strong>s)<br />
Download Cable<br />
10-P<strong>in</strong> Male Header<br />
P<strong>in</strong> 1<br />
VCCA (5) VCCA (6)<br />
VIO<br />
(3)<br />
1 kΩ<br />
Notes to Figure 8–25:<br />
V CCA<br />
(6)<br />
VCCIO(1)<br />
VCCIO(1)<br />
nSTATUS<br />
(2) DATA[0]<br />
(2) DCLK<br />
(2) nCONFIG CONF_DONE<br />
(2) MSEL[ ]<br />
(2) nCEO<br />
nCE (4)<br />
TDI TDO<br />
TMS TCK<br />
VCCIO(1) nSTATUS<br />
(2) DATA[0]<br />
(2) DCLK<br />
(2) nCONFIG CONF_DONE<br />
(2) MSEL[ ]<br />
(2) nCEO<br />
nCE (4)<br />
TDI TDO<br />
TMS TCK<br />
VCCIO(1) VCCIO(1) VCCIO(1) 10 kΩ <strong>Cyclone</strong> <strong>IV</strong> Device<br />
10 kΩ<br />
10 kΩ <strong>Cyclone</strong> <strong>IV</strong> Device 10 kΩ 10 kΩ <strong>Cyclone</strong> <strong>IV</strong> Device 10 kΩ<br />
nSTATUS<br />
(2) DATA[0]<br />
(2) DCLK<br />
(2) nCONFIG CONF_DONE<br />
(2) MSEL[ ]<br />
(2) nCEO<br />
nCE (4)<br />
TDI TDO<br />
TMS TCK<br />
(1) Connect these pull-up resistors to the VCCIO supply of the bank <strong>in</strong> which the p<strong>in</strong> resides.<br />
(2) Connect the nCONFIG <strong>and</strong> MSEL p<strong>in</strong>s to support a non-JTAG configuration scheme. If you only use a JTAG configuration, connect the nCONFIG<br />
p<strong>in</strong> to logic-high <strong>and</strong> the MSEL p<strong>in</strong>s to GND. In addition, pull DCLK <strong>and</strong> DATA[0] to either high or low, whichever is convenient on your board.<br />
(3) P<strong>in</strong> 6 of the header is a VIO reference voltage for the MasterBlaster output driver. VIO must match the VCCA of the device. For this value, refer to the<br />
MasterBlaster Serial/USB Communications Cable User Guide. In the ByteBlasterMV cable, this p<strong>in</strong> is a no connect. In the USB-Blaster <strong>and</strong><br />
ByteBlaster II cables, this p<strong>in</strong> is connected to nCE when it is used for AS programm<strong>in</strong>g, otherwise it is a no connect.<br />
(4) You must connect the nCE p<strong>in</strong> to GND or driven low for successful JTAG configuration.<br />
(5) Power up the VCC of the ByteBlaster II, USB-Blaster, or ByteBlasterMV cable with a 2.5-V supply from VCCA. Third-party programmers must switch<br />
to 2.5 V. P<strong>in</strong> 4 of the header is a VCC power supply for the MasterBlaster cable. The MasterBlaster cable can receive power from either 5.0- or 3.3-V<br />
circuit boards, DC power supply, or 5.0 V from the USB cable. For this value, refer to the MasterBlaster Serial/USB Communications Cable User<br />
Guide.<br />
(6) Resistor value can vary from 1 k to 10 k.<br />
<strong>Cyclone</strong> <strong>IV</strong> Device H<strong>and</strong>book, February 2013 <strong>Altera</strong> Corporation<br />
Volume 1
Chapter 8: <strong>Configuration</strong> <strong>and</strong> <strong>Remote</strong> <strong>System</strong> <strong>Upgrades</strong> <strong>in</strong> <strong>Cyclone</strong> <strong>IV</strong> Devices 8–51<br />
<strong>Configuration</strong><br />
Figure 8–26. JTAG <strong>Configuration</strong> of Multiple Devices Us<strong>in</strong>g a Download Cable (1.2, 1.5, <strong>and</strong> 1.8-V V CCIO Power<strong>in</strong>g the<br />
JTAG P<strong>in</strong>s)<br />
Download Cable VCCIO VCCIO VCCIO (1) VCCIO (1)<br />
VCCIO(1) VCCIO(1) VCCIO (1)<br />
10-P<strong>in</strong> Male Header<br />
P<strong>in</strong> 1<br />
VCCIO (5)<br />
VCCIO(1) (6)<br />
(6)<br />
(2)<br />
(2)<br />
(2)<br />
(2)<br />
10 kΩ <strong>Cyclone</strong> <strong>IV</strong> Device<br />
nSTATUS<br />
DATA[0]<br />
DCLK<br />
nCONFIG CONF_DONE<br />
MSEL[ ]<br />
10 kΩ<br />
(2)<br />
(2)<br />
(2)<br />
(2)<br />
10 kΩ <strong>Cyclone</strong> <strong>IV</strong> Device<br />
nSTATUS<br />
DATA[0]<br />
DCLK<br />
nCONFIG CONF_DONE<br />
MSEL[ ]<br />
10 kΩ<br />
(2)<br />
(2)<br />
(2)<br />
(2)<br />
10 kΩ<br />
<strong>Cyclone</strong> <strong>IV</strong> Device<br />
nSTATUS<br />
DATA[0]<br />
DCLK<br />
nCONFIG CONF_DONE<br />
MSEL[ ]<br />
10 kΩ<br />
VIO<br />
(3)<br />
(2) nCEO<br />
nCE (4)<br />
(2) nCEO<br />
nCE (4)<br />
(2) nCEO<br />
nCE (4)<br />
1 kΩ<br />
Notes to Figure 8–26:<br />
TDI TDO<br />
TMS TCK<br />
TDI TDO<br />
TMS TCK<br />
TDI TDO<br />
TMS TCK<br />
(1) Connect these pull-up resistors to the VCCIO supply of the bank <strong>in</strong> which the p<strong>in</strong> resides.<br />
(2) Connect the nCONFIG <strong>and</strong> MSEL p<strong>in</strong>s to support a non-JTAG configuration scheme. If you only use a JTAG configuration, connect the nCONFIG<br />
p<strong>in</strong> to logic-high <strong>and</strong> the MSEL p<strong>in</strong>s to GND. In addition, pull DCLK <strong>and</strong> DATA[0] to either high or low, whichever is convenient on your board.<br />
(3) In the USB-Blaster <strong>and</strong> ByteBlaster II cable, this p<strong>in</strong> is connected to nCE when it is used for AS programm<strong>in</strong>g, otherwise it is a no connect.<br />
(4) You must connect the nCE p<strong>in</strong> to GND or driven low for successful JTAG configuration.<br />
(5) Power up the VCC of the ByteBlaster II or USB-Blaster cable with supply from VCCIO. The ByteBlaster II <strong>and</strong> USB-Blaster cables do not support a<br />
target supply voltage of 1.2 V. For the target supply voltage value, refer to the ByteBlaster II Download Cable User Guide <strong>and</strong> the USB-Blaster<br />
Download Cable User Guide.<br />
(6) Resistor value can vary from 1 k to 10 k.<br />
1 If a non-<strong>Cyclone</strong> <strong>IV</strong> device is cascaded <strong>in</strong> the JTAG-cha<strong>in</strong>, TDO of the non-<strong>Cyclone</strong> <strong>IV</strong><br />
device driv<strong>in</strong>g <strong>in</strong>to TDI of the <strong>Cyclone</strong> <strong>IV</strong> device must fit the maximum overshoot<br />
outl<strong>in</strong>ed <strong>in</strong> Equation 8–1 on page 8–5.<br />
The CONF_DONE <strong>and</strong> nSTATUS signals are shared <strong>in</strong> multi-device AS, AP, PS, <strong>and</strong> FPP<br />
configuration cha<strong>in</strong>s to ensure that the devices enter user mode at the same time after<br />
configuration is complete. When the CONF_DONE <strong>and</strong> nSTATUS signals are shared among<br />
all the devices, you must configure every device when JTAG configuration is<br />
performed.<br />
If you only use JTAG configuration, <strong>Altera</strong> recommends that you connect the circuitry<br />
as shown <strong>in</strong> Figure 8–25 or Figure 8–26, <strong>in</strong> which each of the CONF_DONE <strong>and</strong> nSTATUS<br />
signals are isolated so that each device can enter user mode <strong>in</strong>dividually.<br />
After the first device completes configuration <strong>in</strong> a multi-device configuration cha<strong>in</strong>,<br />
its nCEO p<strong>in</strong> drives low to activate the nCE p<strong>in</strong> of the second device, which prompts the<br />
second device to beg<strong>in</strong> configuration. Therefore, if these devices are also <strong>in</strong> a JTAG<br />
cha<strong>in</strong>, ensure that the nCE p<strong>in</strong>s are connected to GND dur<strong>in</strong>g JTAG configuration or<br />
that the devices are JTAG configured <strong>in</strong> the same order as the configuration cha<strong>in</strong>. As<br />
long as the devices are JTAG configured <strong>in</strong> the same order as the multi-device<br />
configuration cha<strong>in</strong>, the nCEO of the previous device drives the nCE p<strong>in</strong> of the next<br />
device low when it has successfully been JTAG configured. You can place other <strong>Altera</strong><br />
devices that have JTAG support <strong>in</strong> the same JTAG cha<strong>in</strong> for device programm<strong>in</strong>g <strong>and</strong><br />
configuration.<br />
February 2013 <strong>Altera</strong> Corporation <strong>Cyclone</strong> <strong>IV</strong> Device H<strong>and</strong>book,<br />
Volume 1
8–52 Chapter 8: <strong>Configuration</strong> <strong>and</strong> <strong>Remote</strong> <strong>System</strong> <strong>Upgrades</strong> <strong>in</strong> <strong>Cyclone</strong> <strong>IV</strong> Devices<br />
<strong>Configuration</strong><br />
1 JTAG configuration allows an unlimited number of <strong>Cyclone</strong> <strong>IV</strong> devices to be cascaded<br />
<strong>in</strong> a JTAG cha<strong>in</strong>.<br />
f For more <strong>in</strong>formation about configur<strong>in</strong>g multiple <strong>Altera</strong> devices <strong>in</strong> the same<br />
configuration cha<strong>in</strong>, refer to the Configur<strong>in</strong>g Mixed <strong>Altera</strong> FPGA Cha<strong>in</strong>s chapter <strong>in</strong><br />
volume 2 of the <strong>Configuration</strong> H<strong>and</strong>book.<br />
Figure 8–27 shows JTAG configuration with a <strong>Cyclone</strong> <strong>IV</strong> device <strong>and</strong> a<br />
microprocessor.<br />
Figure 8–27. JTAG <strong>Configuration</strong> of a S<strong>in</strong>gle Device Us<strong>in</strong>g a Microprocessor<br />
Notes to Figure 8–27:<br />
ADDR<br />
Memory<br />
Microprocessor<br />
DATA<br />
N.C.<br />
<strong>Cyclone</strong> <strong>IV</strong> Device<br />
nCE(3)<br />
nCONFIG<br />
DATA[0]<br />
DCLK<br />
TDI (4)<br />
TCK (4)<br />
TDO<br />
TMS (4) nSTATUS<br />
CONF_DONE<br />
(1) You must connect the pull-up resistor to a supply that provides an acceptable <strong>in</strong>put signal for all devices <strong>in</strong> the cha<strong>in</strong>.<br />
(2) Connect the nCONFIG <strong>and</strong> MSEL p<strong>in</strong>s to support a non-JTAG configuration scheme. If you only use a JTAG<br />
configuration, connect the nCONFIG p<strong>in</strong> to logic-high <strong>and</strong> the MSEL p<strong>in</strong>s to GND. In addition, pull DCLK <strong>and</strong> DATA[0]<br />
to either high or low, whichever is convenient on your board.<br />
(3) You must connect the nCE p<strong>in</strong> to GND or driven low for successful JTAG configuration.<br />
(4) All I/O <strong>in</strong>puts must ma<strong>in</strong>ta<strong>in</strong> a maximum AC voltage of 4.1 V. Signals driv<strong>in</strong>g <strong>in</strong>to TDI, TMS, <strong>and</strong> TCK must fit the<br />
maximum overshoot outl<strong>in</strong>ed <strong>in</strong> Equation 8–1 on page 8–5.<br />
Configur<strong>in</strong>g <strong>Cyclone</strong> <strong>IV</strong> Devices with Jam STAPL<br />
(2)<br />
VCCIO (1)<br />
VCCIO (1)<br />
10 kΩ<br />
10 kΩ<br />
Jam STAPL, JEDEC st<strong>and</strong>ard JESD-71, is a st<strong>and</strong>ard file format for <strong>in</strong>-system<br />
programmability (ISP) purposes. Jam STAPL supports programm<strong>in</strong>g or configuration<br />
of programmable devices <strong>and</strong> test<strong>in</strong>g of electronic systems, us<strong>in</strong>g the IEEE 1149.1<br />
JTAG <strong>in</strong>terface. Jam STAPL is a freely licensed open st<strong>and</strong>ard. The Jam Player<br />
provides an <strong>in</strong>terface for manipulat<strong>in</strong>g the IEEE Std. 1149.1 JTAG TAP state mach<strong>in</strong>e.<br />
f For more <strong>in</strong>formation about JTAG <strong>and</strong> Jam STAPL <strong>in</strong> embedded environments, refer<br />
to AN 425: Us<strong>in</strong>g Comm<strong>and</strong>-L<strong>in</strong>e Jam STAPL Solution for Device Programm<strong>in</strong>g. To<br />
download the Jam Player, visit the <strong>Altera</strong> website (www.altera.com).<br />
Configur<strong>in</strong>g <strong>Cyclone</strong> <strong>IV</strong> Devices with the JRunner Software Driver<br />
The JRunner software driver allows you to configure <strong>Cyclone</strong> <strong>IV</strong> devices through the<br />
ByteBlaster II or ByteBlasterMV cables <strong>in</strong> JTAG mode. The supported programm<strong>in</strong>g<br />
<strong>in</strong>put file is <strong>in</strong> .rbf format. The JRunner software driver also requires a Cha<strong>in</strong><br />
Description File (.cdf) generated by the Quartus II software. The JRunner software<br />
driver is targeted for embedded JTAG configuration. The source code is developed for<br />
the W<strong>in</strong>dows NT operat<strong>in</strong>g system (OS). You can customize the code to make it run<br />
on your embedded platform.<br />
<strong>Cyclone</strong> <strong>IV</strong> Device H<strong>and</strong>book, February 2013 <strong>Altera</strong> Corporation<br />
Volume 1<br />
(2)<br />
(2)<br />
(2)<br />
nCEO<br />
MSEL[ ]
Chapter 8: <strong>Configuration</strong> <strong>and</strong> <strong>Remote</strong> <strong>System</strong> <strong>Upgrades</strong> <strong>in</strong> <strong>Cyclone</strong> <strong>IV</strong> Devices 8–53<br />
<strong>Configuration</strong><br />
1 The .rbf used by the JRunner software driver cannot be a compressed .rbf because the<br />
JRunner software driver uses JTAG-based configuration. Dur<strong>in</strong>g JTAG-based<br />
configuration, the real-time decompression feature is not available.<br />
f For more <strong>in</strong>formation about the JRunner software driver, refer to AN 414: JRunner<br />
Software Driver: An Embedded Solution for PLD JTAG <strong>Configuration</strong> <strong>and</strong> the source files<br />
on the <strong>Altera</strong> website at (www.altera.com).<br />
Comb<strong>in</strong><strong>in</strong>g JTAG <strong>and</strong> AS <strong>Configuration</strong> Schemes<br />
You can comb<strong>in</strong>e the AS configuration scheme with the JTAG-based configuration<br />
(Figure 8–28). This setup uses two 10-p<strong>in</strong> download cable headers on the board. One<br />
download cable is used <strong>in</strong> JTAG mode to configure the <strong>Cyclone</strong> <strong>IV</strong> device directly<br />
through the JTAG <strong>in</strong>terface. The other download cable is used <strong>in</strong> AS mode to program<br />
the serial configuration device <strong>in</strong>-system through the AS programm<strong>in</strong>g <strong>in</strong>terface. If<br />
you try configur<strong>in</strong>g the device us<strong>in</strong>g both schemes simultaneously, JTAG<br />
configuration takes precedence <strong>and</strong> AS configuration term<strong>in</strong>ates.<br />
February 2013 <strong>Altera</strong> Corporation <strong>Cyclone</strong> <strong>IV</strong> Device H<strong>and</strong>book,<br />
Volume 1
8–54 Chapter 8: <strong>Configuration</strong> <strong>and</strong> <strong>Remote</strong> <strong>System</strong> <strong>Upgrades</strong> <strong>in</strong> <strong>Cyclone</strong> <strong>IV</strong> Devices<br />
<strong>Configuration</strong><br />
Figure 8–28. Comb<strong>in</strong><strong>in</strong>g JTAG <strong>and</strong> AS <strong>Configuration</strong> Schemes<br />
Serial<br />
10kΩ<br />
<strong>Configuration</strong><br />
Device GND<br />
P<strong>in</strong> 1<br />
DATA<br />
DCLK<br />
nCS<br />
ASDI<br />
Notes to Figure 8–28:<br />
VCCIO (1) VCCIO (1) VCCIO (1)<br />
10 kΩ<br />
3.3 V (2)<br />
Download Cable<br />
(AS Mode)<br />
10-P<strong>in</strong> Male Header<br />
10 kΩ<br />
10 pf<br />
(6)<br />
(6)<br />
10 kΩ<br />
3.3 V 3.3 V<br />
3.3 V 3.3 V<br />
GND<br />
GND<br />
10 pf<br />
GND<br />
10 pf GND<br />
<strong>Cyclone</strong> <strong>IV</strong> Device<br />
nSTATUS<br />
VCCA CONF_DONE nCEO<br />
nCONFIG<br />
nCE CLKUSR<br />
MSEL[ ]<br />
N.C.<br />
(4)<br />
VCCA (9)<br />
(8)<br />
(8)<br />
(1) Connect these pull-up resistors to the VCCIO supply of the bank <strong>in</strong> which the p<strong>in</strong> resides.<br />
(2) Power up the VCC of the EthernetBlaster, ByteBlaster II, or USB-Blaster cable with the 3.3-V supply.<br />
(3) P<strong>in</strong> 6 of the header is a VIO reference voltage for the MasterBlaster output driver.The VIO must match the VCCA of the<br />
device. For this value, refer to the MasterBlaster Serial/USB Communications Cable User Guide. When us<strong>in</strong>g the<br />
ByteBlasterMV download cable, this p<strong>in</strong> is a no connect. When us<strong>in</strong>g the USB-Blaster <strong>and</strong> ByteBlaster II cables, this<br />
p<strong>in</strong> is connected to nCE when it is used for AS programm<strong>in</strong>g, otherwise it is a no connect.<br />
(4) The MSEL p<strong>in</strong> sett<strong>in</strong>gs vary for different configuration voltage st<strong>and</strong>ards <strong>and</strong> POR time. To connect MSEL for AS<br />
configuration schemes, refer to Table 8–3 on page 8–8, Table 8–4 on page 8–8, <strong>and</strong> Table 8–5 on page 8–9. Connect<br />
the MSEL p<strong>in</strong>s directly to VCCA or GND.<br />
(5) Power up the VCC of the EthernetBlaster, ByteBlaster II, USB-Blaster, or ByteBlasterMV cable with a 2.5-V VCCA supply.<br />
Third-party programmers must switch to 2.5 V. P<strong>in</strong> 4 of the header is a VCC power supply for the MasterBlaster cable.<br />
The MasterBlaster cable can receive power from either 5.0- or 3.3-V circuit boards, DC power supply, or 5.0 V from<br />
the USB cable. For this value, refer to the MasterBlaster Serial/USB Communications Cable User Guide.<br />
(6) You must place the diodes <strong>and</strong> capacitors as close as possible to the <strong>Cyclone</strong> <strong>IV</strong> device. <strong>Altera</strong> recommends us<strong>in</strong>g<br />
the Schottky diode, which has a relatively lower forward diode voltage (VF) than the switch<strong>in</strong>g <strong>and</strong> Zener diodes, for<br />
effective voltage clamp<strong>in</strong>g.<br />
(7) These p<strong>in</strong>s are dual-purpose I/O p<strong>in</strong>s. The nCSO p<strong>in</strong> functions as FLASH_nCE p<strong>in</strong> <strong>in</strong> AP mode. The ASDO p<strong>in</strong> functions<br />
as DATA[1] p<strong>in</strong> <strong>in</strong> AP <strong>and</strong> FPP modes.<br />
(8) Resistor value can vary from 1 k to 10 k..<br />
(9) Only <strong>Cyclone</strong> <strong>IV</strong> GX devices have an option to select CLKUSR (40 MHz maximum) as the external clock source for<br />
DCLK.<br />
<strong>Cyclone</strong> <strong>IV</strong> Device H<strong>and</strong>book, February 2013 <strong>Altera</strong> Corporation<br />
Volume 1<br />
10 pf<br />
DATA[0]<br />
DCLK<br />
nCSO (7)<br />
ASDO (7)<br />
TCK<br />
TDO<br />
TMS<br />
TDI<br />
1 kΩ<br />
GND<br />
Download Cable<br />
(JTAG Mode)<br />
10-P<strong>in</strong> Male Header<br />
(top view)<br />
P<strong>in</strong> 1<br />
V CCA (5)<br />
V IO (3)
Chapter 8: <strong>Configuration</strong> <strong>and</strong> <strong>Remote</strong> <strong>System</strong> <strong>Upgrades</strong> <strong>in</strong> <strong>Cyclone</strong> <strong>IV</strong> Devices 8–55<br />
<strong>Configuration</strong><br />
Programm<strong>in</strong>g Serial <strong>Configuration</strong> Devices In-<strong>System</strong> with the JTAG Interface<br />
<strong>Cyclone</strong> <strong>IV</strong> devices <strong>in</strong> a s<strong>in</strong>gle- or multiple-device cha<strong>in</strong> support <strong>in</strong>-system<br />
programm<strong>in</strong>g of a serial configuration device with the JTAG <strong>in</strong>terface through the SFL<br />
design. The <strong>in</strong>telligent host or download cable of the board can use the four JTAG p<strong>in</strong>s<br />
on the <strong>Cyclone</strong> <strong>IV</strong> device to program the serial configuration device <strong>in</strong> system, even if<br />
the host or download cable cannot access the configuration p<strong>in</strong>s (DCLK, DATA, ASDI, <strong>and</strong><br />
nCS p<strong>in</strong>s).<br />
The SFL design is a JTAG-based <strong>in</strong>-system programm<strong>in</strong>g solution for <strong>Altera</strong> serial<br />
configuration devices. The SFL is a bridge design for the <strong>Cyclone</strong> <strong>IV</strong> device that uses<br />
their JTAG <strong>in</strong>terface to access the EPCS JTAG Indirect <strong>Configuration</strong> Device<br />
Programm<strong>in</strong>g (.jic) file <strong>and</strong> then uses the AS <strong>in</strong>terface to program the EPCS device.<br />
Both the JTAG <strong>in</strong>terface <strong>and</strong> AS <strong>in</strong>terface are bridged together <strong>in</strong>side the SFL design.<br />
In a multiple device cha<strong>in</strong>, you must only configure the master device that controls<br />
the serial configuration device. Slave devices <strong>in</strong> the multiple device cha<strong>in</strong> that are<br />
configured by the serial configuration device do not have to be configured when<br />
us<strong>in</strong>g this feature. To successfully use this feature, set the MSEL p<strong>in</strong>s of the master<br />
device to select the AS configuration scheme (Table 8–3 on page 8–8, Table 8–4 on<br />
page 8–8, <strong>and</strong> Table 8–5 on page 8–9). The serial configuration device <strong>in</strong>-system<br />
programm<strong>in</strong>g through the <strong>Cyclone</strong> <strong>IV</strong> device JTAG <strong>in</strong>terface has three stages, which<br />
are described <strong>in</strong> the follow<strong>in</strong>g sections:<br />
■ “Load<strong>in</strong>g the SFL Design”<br />
■ “ISP of the <strong>Configuration</strong> Device” on page 8–56<br />
■ “Reconfiguration” on page 8–57<br />
Load<strong>in</strong>g the SFL Design<br />
The SFL design is a design <strong>in</strong>side the <strong>Cyclone</strong> <strong>IV</strong> device that bridges the JTAG<br />
<strong>in</strong>terface <strong>and</strong> AS <strong>in</strong>terface with glue logic.<br />
The <strong>in</strong>telligent host uses the JTAG <strong>in</strong>terface to configure the master device with a SFL<br />
design. The SFL design allows the master device to control the access of four serial<br />
configuration device p<strong>in</strong>s, also known as the Active Serial Memory Interface (ASMI)<br />
p<strong>in</strong>s, through the JTAG <strong>in</strong>terface. The ASMI p<strong>in</strong>s are serial clock <strong>in</strong>put (DCLK), serial<br />
data output (DATA), AS data <strong>in</strong>put (ASDI), <strong>and</strong> active-low chip select (nCS) p<strong>in</strong>s.<br />
February 2013 <strong>Altera</strong> Corporation <strong>Cyclone</strong> <strong>IV</strong> Device H<strong>and</strong>book,<br />
Volume 1
8–56 Chapter 8: <strong>Configuration</strong> <strong>and</strong> <strong>Remote</strong> <strong>System</strong> <strong>Upgrades</strong> <strong>in</strong> <strong>Cyclone</strong> <strong>IV</strong> Devices<br />
<strong>Configuration</strong><br />
If you configure a master device with an SFL design, the master device enters user<br />
mode even though the slave devices <strong>in</strong> the multiple device cha<strong>in</strong> are not be<strong>in</strong>g<br />
configured. The master device enters user mode with a SFL design even though the<br />
CONF_DONE signal is externally held low by the other slave devices <strong>in</strong> cha<strong>in</strong>.<br />
Figure 8–29 shows the JTAG configuration of a s<strong>in</strong>gle <strong>Cyclone</strong> <strong>IV</strong> device with a SFL<br />
design.<br />
Figure 8–29. Programm<strong>in</strong>g Serial <strong>Configuration</strong> Devices In-<strong>System</strong> Us<strong>in</strong>g the JTAG Interface<br />
Serial <strong>Configuration</strong><br />
Device VCCIO (1)<br />
DATA<br />
DCLK<br />
nCS<br />
ASDI<br />
Notes to Figure 8–29:<br />
V CCIO (1)<br />
10 kΩ<br />
V CCIO (1)<br />
10 kΩ<br />
25 Ω (7)<br />
10 kΩ<br />
GND<br />
N.C. (5)<br />
(2)<br />
<strong>Cyclone</strong> <strong>IV</strong> Device<br />
nCE (4)<br />
TCK<br />
TDO<br />
nSTATUS<br />
CONF_DONE<br />
nCONFIG<br />
MSEL[ ]<br />
DATA[0]<br />
DCLK<br />
nCSO (8)<br />
ASDO (8)<br />
(1) Connect the pull-up resistors to the VCCIO supply of the bank <strong>in</strong> which the p<strong>in</strong> resides.<br />
(2) The MSEL p<strong>in</strong> sett<strong>in</strong>gs vary for different configuration voltage st<strong>and</strong>ards <strong>and</strong> POR time. To connect MSEL for AS<br />
configuration schemes, refer to Table 8–3 on page 8–8, Table 8–4 on page 8–8, <strong>and</strong> Table 8–5 on page 8–9. Connect<br />
the MSEL p<strong>in</strong>s directly to VCCA or GND.<br />
(3) P<strong>in</strong> 6 of the header is a VIO reference voltage for the MasterBlaster output driver. The VIO must match the VCCA of the<br />
device. For this value, refer to the MasterBlaster Serial/USB Communications Cable User Guide. When us<strong>in</strong>g the<br />
ByteBlasterMV download cable, this p<strong>in</strong> is a no connect. When us<strong>in</strong>g USB-Blaster, ByteBlaster II, <strong>and</strong> EthernetBlaster<br />
cables, this p<strong>in</strong> is connected to nCE when it is used for AS programm<strong>in</strong>g, otherwise it is a no connect.<br />
(4) You must connect the nCE p<strong>in</strong> to GND or driven low for successful JTAG configuration.<br />
(5) The nCEO p<strong>in</strong> is left unconnected or used as a user I/O p<strong>in</strong> when it does not feed the nCE p<strong>in</strong> of another device.<br />
(6) Power up the VCC of the EthernetBlaster, ByteBlaster II, USB-Blaster, or ByteBlasterMV cable with a 2.5- V VCCA supply.<br />
Third-party programmers must switch to 2.5 V. P<strong>in</strong> 4 of the header is a VCC power supply for the MasterBlaster cable.<br />
The MasterBlaster cable can receive power from either 5.0- or 3.3-V circuit boards, DC power supply, or 5.0 V from<br />
the USB cable. For this value, refer to the MasterBlaster Serial/USB Communications Cable User Guide.<br />
(7) Connect the series resistor at the near end of the serial configuration device.<br />
(8) These p<strong>in</strong>s are dual-purpose I/O p<strong>in</strong>s. The nCSO p<strong>in</strong> functions as FLASH_nCE p<strong>in</strong> <strong>in</strong> AP mode. The ASDO p<strong>in</strong> functions<br />
as DATA[1] p<strong>in</strong> <strong>in</strong> AP <strong>and</strong> FPP modes.<br />
(9) Resistor value can vary from 1 k to 10 k.<br />
(10) Only <strong>Cyclone</strong> <strong>IV</strong> GX devices have an option to select CLKUSR (40 MHz maximum) as the external clock source for<br />
DCLK.<br />
ISP of the <strong>Configuration</strong> Device<br />
In the second stage, the SFL design <strong>in</strong> the master device allows you to write the<br />
configuration data for the device cha<strong>in</strong> <strong>in</strong>to the serial configuration device with the<br />
<strong>Cyclone</strong> <strong>IV</strong> device JTAG <strong>in</strong>terface. The JTAG <strong>in</strong>terface sends the programm<strong>in</strong>g data<br />
for the serial configuration device to the <strong>Cyclone</strong> <strong>IV</strong> device first. The <strong>Cyclone</strong> <strong>IV</strong><br />
device then uses the ASMI p<strong>in</strong>s to send the data to the serial configuration device.<br />
<strong>Cyclone</strong> <strong>IV</strong> Device H<strong>and</strong>book, February 2013 <strong>Altera</strong> Corporation<br />
Volume 1<br />
nCEO<br />
TMS<br />
TDI<br />
Serial<br />
Flash<br />
Loader<br />
CLKUSR<br />
(9)<br />
V CCA<br />
(10)<br />
V CCA<br />
(9)<br />
1 kΩ<br />
GND<br />
Download Cable 10-P<strong>in</strong> Male<br />
Header (Top View)<br />
P<strong>in</strong> 1<br />
GND<br />
V CCA (6)<br />
GND<br />
V IO (3)
Chapter 8: <strong>Configuration</strong> <strong>and</strong> <strong>Remote</strong> <strong>System</strong> <strong>Upgrades</strong> <strong>in</strong> <strong>Cyclone</strong> <strong>IV</strong> Devices 8–57<br />
<strong>Configuration</strong><br />
Reconfiguration<br />
After the configuration data is successfully written <strong>in</strong>to the serial configuration<br />
device, the <strong>Cyclone</strong> <strong>IV</strong> device does not automatically start reconfiguration. The<br />
<strong>in</strong>telligent host issues the PULSE_NCONFIG JTAG <strong>in</strong>struction to <strong>in</strong>itialize the<br />
reconfiguration process. Dur<strong>in</strong>g reconfiguration, the master device is reset <strong>and</strong> the<br />
SFL design no longer exists <strong>in</strong> the <strong>Cyclone</strong> <strong>IV</strong> device <strong>and</strong> the serial configuration<br />
device configures all the devices <strong>in</strong> the cha<strong>in</strong> with the user design.<br />
f For more <strong>in</strong>formation about the SFL, refer to AN 370: Us<strong>in</strong>g the Serial FlashLoader with<br />
Quartus II Software.<br />
JTAG Instructions<br />
f For more <strong>in</strong>formation about the JTAG b<strong>in</strong>ary <strong>in</strong>struction code, refer to the JTAG<br />
Boundary-Scan Test<strong>in</strong>g for <strong>Cyclone</strong> <strong>IV</strong> Devices chapter.<br />
I/O Reconfiguration<br />
Use the CONFIG_IO <strong>in</strong>struction to reconfigure the I/O configuration shift register<br />
(IOCSR) cha<strong>in</strong>. This <strong>in</strong>struction allows you to perform board-level test<strong>in</strong>g prior to<br />
configur<strong>in</strong>g the <strong>Cyclone</strong> <strong>IV</strong> device or wait<strong>in</strong>g for a configuration device to complete<br />
configuration. After the configuration is <strong>in</strong>terrupted <strong>and</strong> JTAG test<strong>in</strong>g is complete,<br />
you must reconfigure the part through the PULSE_NCONFIG JTAG <strong>in</strong>struction or by<br />
puls<strong>in</strong>g the nCONFIG p<strong>in</strong> low.<br />
You can issue the CONFIG_IO <strong>in</strong>struction any time dur<strong>in</strong>g user mode.<br />
You must meet the follow<strong>in</strong>g tim<strong>in</strong>g restrictions when us<strong>in</strong>g the CONFIG_IO<br />
<strong>in</strong>struction:<br />
■ The CONFIG_IO <strong>in</strong>struction cannot be issued when the nCONFIG p<strong>in</strong> is low<br />
■ You must observe a 230 s m<strong>in</strong>imum wait time after any of the follow<strong>in</strong>g<br />
conditions:<br />
■ nCONFIG p<strong>in</strong> goes high<br />
■ Issu<strong>in</strong>g the PULSE_NCONFIG <strong>in</strong>struction<br />
■ Issu<strong>in</strong>g the ACT<strong>IV</strong>E_ENGAGE <strong>in</strong>struction, before issu<strong>in</strong>g the CONFIG_IO <strong>in</strong>struction<br />
■ You must wait 230 s after power up, with the nCONFIG p<strong>in</strong> high before issu<strong>in</strong>g the<br />
CONFIG_IO <strong>in</strong>struction (or wait for the nSTATUS p<strong>in</strong> to go high)<br />
February 2013 <strong>Altera</strong> Corporation <strong>Cyclone</strong> <strong>IV</strong> Device H<strong>and</strong>book,<br />
Volume 1
8–58 Chapter 8: <strong>Configuration</strong> <strong>and</strong> <strong>Remote</strong> <strong>System</strong> <strong>Upgrades</strong> <strong>in</strong> <strong>Cyclone</strong> <strong>IV</strong> Devices<br />
<strong>Configuration</strong><br />
Use the ACT<strong>IV</strong>E_DISENGAGE <strong>in</strong>struction with the CONFIG_IO <strong>in</strong>struction to <strong>in</strong>terrupt<br />
configuration. Table 8–15 lists the sequence of <strong>in</strong>structions to use for various<br />
CONFIG_IO usage scenarios.<br />
Table 8–15. JTAG CONFIG_IO (without JTAG_PROGRAM) Instruction Flows (1)<br />
JTAG Instruction<br />
<strong>Configuration</strong> Scheme <strong>and</strong> Current State of the <strong>Cyclone</strong> <strong>IV</strong> Device<br />
Prior to User Mode<br />
(Interrupt<strong>in</strong>g <strong>Configuration</strong>)<br />
User Mode Power Up<br />
PS FPP AS AP PS FPP AS AP PS FPP AS AP<br />
ACT<strong>IV</strong>E_DISENGAGE O O O 0 O O O 0 — — — —<br />
CONFIG_IO<br />
JTAG Boundary Scan<br />
R R R R R R R R NA NA NA NA<br />
Instructions (no<br />
JTAG_PROGRAM)<br />
O O O 0 O O O 0 — — — —<br />
ACT<strong>IV</strong>E_ENGAGE<br />
R (2) R (2)<br />
R (2) R (2) — — — —<br />
PULSE_NCONFIG A A A A A<br />
(3) A (3) O 0 — — — —<br />
Pulse nCONFIG p<strong>in</strong> A (3) A (3) O 0 — — — —<br />
JTAG TAP Reset R R R R R R R R — — — —<br />
Notes to Table 8–15:<br />
(1) You must execute “R” <strong>in</strong>dicates that the <strong>in</strong>struction before the next <strong>in</strong>struction, “O” <strong>in</strong>dicates the optional <strong>in</strong>struction, “A” <strong>in</strong>dicates<br />
that the <strong>in</strong>struction must be executed, <strong>and</strong> “NA” <strong>in</strong>dicates that the <strong>in</strong>struction is not allowed <strong>in</strong> this mode.<br />
(2) Required if you use ACT<strong>IV</strong>E_DISENGAGE.<br />
(3) Neither of the <strong>in</strong>struction is required if you use ACT<strong>IV</strong>E_ENGAGE.<br />
The CONFIG_IO <strong>in</strong>struction does not hold nSTATUS low until reconfiguration. You must<br />
disengage the AS or AP configuration controller by issu<strong>in</strong>g the ACT<strong>IV</strong>E_DISENGAGE <strong>and</strong><br />
ACT<strong>IV</strong>E_ENGAGE <strong>in</strong>structions when active configuration is <strong>in</strong>terrupted. You must issue<br />
the ACT<strong>IV</strong>E_DISENGAGE <strong>in</strong>struction alone or prior to the CONFIG_IO <strong>in</strong>struction if the<br />
JTAG_PROGRAM <strong>in</strong>struction is to be issued later (Table 8–16). This puts the active<br />
configuration controllers <strong>in</strong>to the idle state. The active configuration controller is reengaged<br />
after user mode is reached through JTAG programm<strong>in</strong>g (Table 8–16).<br />
1 While execut<strong>in</strong>g the CONFIG_IO <strong>in</strong>struction, all user I/Os are tri-stated.<br />
If reconfiguration after <strong>in</strong>terruption is performed us<strong>in</strong>g configuration modes (rather<br />
than us<strong>in</strong>g JTAG_PROGRAM), it is not necessary to issue the ACT<strong>IV</strong>E_DISENGAGE<br />
<strong>in</strong>struction prior to CONFIG_IO. You can start reconfiguration by either pull<strong>in</strong>g nCONFIG<br />
low for at least 500 ns or issu<strong>in</strong>g the PULSE_NCONFIG <strong>in</strong>struction. If the<br />
ACT<strong>IV</strong>E_DISENGAGE <strong>in</strong>struction was issued <strong>and</strong> the JTAG_PROGRAM <strong>in</strong>struction fails to<br />
enter user mode, you must issue the ACT<strong>IV</strong>E_ENGAGE <strong>in</strong>struction to reactivate the active<br />
configuration controller. Issu<strong>in</strong>g the ACT<strong>IV</strong>E_ENGAGE <strong>in</strong>struction also triggers<br />
reconfiguration <strong>in</strong> configuration modes; therefore, it is not necessary to pull nCONFIG<br />
low or issue the PULSE_NCONFIG <strong>in</strong>struction.<br />
<strong>Cyclone</strong> <strong>IV</strong> Device H<strong>and</strong>book, February 2013 <strong>Altera</strong> Corporation<br />
Volume 1
Chapter 8: <strong>Configuration</strong> <strong>and</strong> <strong>Remote</strong> <strong>System</strong> <strong>Upgrades</strong> <strong>in</strong> <strong>Cyclone</strong> <strong>IV</strong> Devices 8–59<br />
<strong>Configuration</strong><br />
ACT<strong>IV</strong>E_DISENGAGE<br />
The ACT<strong>IV</strong>E_DISENGAGE <strong>in</strong>struction places the active configuration controller (AS <strong>and</strong><br />
AP) <strong>in</strong>to an idle state prior to JTAG programm<strong>in</strong>g. The two purposes of plac<strong>in</strong>g the<br />
active controller <strong>in</strong> an idle state are:<br />
■ To ensure that it is not try<strong>in</strong>g to configure the device dur<strong>in</strong>g JTAG programm<strong>in</strong>g<br />
■ To allow the controllers to properly recognize a successful JTAG programm<strong>in</strong>g<br />
that results <strong>in</strong> the device reach<strong>in</strong>g user mode<br />
The ACT<strong>IV</strong>E_DISENGAGE <strong>in</strong>struction is required before JTAG programm<strong>in</strong>g regardless<br />
of the current state of the <strong>Cyclone</strong> <strong>IV</strong> device if the MSEL p<strong>in</strong>s are set to an AS or AP<br />
configuration scheme. If the ACT<strong>IV</strong>E_DISENGAGE <strong>in</strong>struction is issued dur<strong>in</strong>g a passive<br />
configuration scheme (PS or FPP), it has no effect on the <strong>Cyclone</strong> <strong>IV</strong> device. Similarly,<br />
the CONFIG_IO <strong>in</strong>struction is issued after an ACT<strong>IV</strong>E_DISENGAGE <strong>in</strong>struction, but is no<br />
longer required to properly halt configuration. Table 8–16 lists the required,<br />
recommended, <strong>and</strong> optional <strong>in</strong>structions for each configuration mode. The order<strong>in</strong>g<br />
of the required <strong>in</strong>structions is a hard requirement <strong>and</strong> must be met to ensure<br />
functionality.<br />
Table 8–16. JTAG Programm<strong>in</strong>g Instruction Flows (1)<br />
JTAG Instruction<br />
<strong>Configuration</strong> Scheme <strong>and</strong> Current State of the <strong>Cyclone</strong> <strong>IV</strong> Device<br />
Prior to User Mode (Interrupt<strong>in</strong>g<br />
<strong>Configuration</strong>)<br />
User Mode Power Up<br />
PS FPP AS AP PS FPP AS AP PS FPP AS AP<br />
ACT<strong>IV</strong>E_DISENGAGE O O R R O O O R O O R R<br />
CONFIG_IO Rc Rc O O O O O 0 NA NA NA NA<br />
Other JTAG <strong>in</strong>structions O O O O O O O 0 O O O 0<br />
JTAG_PROGRAM R R R R R R R R R R R R<br />
CHECK_STATUS Rc Rc Rc Rc Rc Rc Rc Rc Rc Rc Rc Rc<br />
JTAG_STARTUP R R R R R R R R R R R R<br />
JTAG TAP Reset/other<br />
<strong>in</strong>struction<br />
R R R R R R R R R R R R<br />
Note to Table 8–16:<br />
(1) “R” <strong>in</strong>dicates that the <strong>in</strong>struction must be executed before the next <strong>in</strong>struction, “O” <strong>in</strong>dicates the optional <strong>in</strong>struction, “Rc” <strong>in</strong>dicates the<br />
recommended <strong>in</strong>struction, <strong>and</strong> “NA” <strong>in</strong>dicates that the <strong>in</strong>struction is not allowed <strong>in</strong> this mode.<br />
In the AS or AP configuration scheme, the ACT<strong>IV</strong>E_DISENGAGE <strong>in</strong>struction puts the<br />
active configuration controller <strong>in</strong>to idle state. If a successful JTAG programm<strong>in</strong>g is<br />
executed, the active controller is automatically re-engaged after user mode is reached<br />
through JTAG programm<strong>in</strong>g. This causes the active controller to transition to their<br />
respective user mode states.<br />
If JTAG programm<strong>in</strong>g fails to get the <strong>Cyclone</strong> <strong>IV</strong> device to enter user mode <strong>and</strong><br />
re-engage active programm<strong>in</strong>g, there are available methods to achieve this:<br />
■ In AS configuration scheme, you can re-engage the AS controller by mov<strong>in</strong>g the<br />
JTAG TAP controller to the reset state or by issu<strong>in</strong>g the ACT<strong>IV</strong>E_ENGAGE <strong>in</strong>struction.<br />
February 2013 <strong>Altera</strong> Corporation <strong>Cyclone</strong> <strong>IV</strong> Device H<strong>and</strong>book,<br />
Volume 1
8–60 Chapter 8: <strong>Configuration</strong> <strong>and</strong> <strong>Remote</strong> <strong>System</strong> <strong>Upgrades</strong> <strong>in</strong> <strong>Cyclone</strong> <strong>IV</strong> Devices<br />
<strong>Configuration</strong><br />
■ In AP configuration scheme, the only way to re-engage the AP controller is to issue<br />
the ACT<strong>IV</strong>E_ENGAGE <strong>in</strong>struction. In this case, assert<strong>in</strong>g the nCONFIG p<strong>in</strong> does not reengage<br />
either active controller.<br />
ACT<strong>IV</strong>E_ENGAGE<br />
The ACT<strong>IV</strong>E_ENGAGE <strong>in</strong>struction allows you to re-engage a disengaged active controller.<br />
You can issue this <strong>in</strong>struction any time dur<strong>in</strong>g configuration or user mode to reengage<br />
an already disengaged active controller, as well as trigger reconfiguration of<br />
the <strong>Cyclone</strong> <strong>IV</strong> device <strong>in</strong> the active configuration scheme.<br />
The ACT<strong>IV</strong>E_ENGAGE <strong>in</strong>struction functions as the PULSE_NCONFIG <strong>in</strong>struction when the<br />
device is <strong>in</strong> the PS or FPP configuration schemes. The nCONFIG p<strong>in</strong> is disabled when<br />
the ACT<strong>IV</strong>E_ENGAGE <strong>in</strong>struction is issued.<br />
1 <strong>Altera</strong> does not recommend us<strong>in</strong>g the ACT<strong>IV</strong>E_ENGAGE <strong>in</strong>struction, but it is provided as<br />
a fail-safe <strong>in</strong>struction for re-engag<strong>in</strong>g the active configuration controller (AS <strong>and</strong> AP).<br />
Overrid<strong>in</strong>g the Internal Oscillator<br />
This feature allows you to override the <strong>in</strong>ternal oscillator dur<strong>in</strong>g the active<br />
configuration scheme. The AS <strong>and</strong> AP configuration controllers use the <strong>in</strong>ternal<br />
oscillator as the clock source. You can change the clock source to CLKUSR through the<br />
JTAG <strong>in</strong>struction.<br />
The EN_ACT<strong>IV</strong>E_CLK <strong>and</strong> DIS_ACT<strong>IV</strong>E_CLK JTAG <strong>in</strong>structions toggle on or off whether<br />
or not the active clock is sourced from the CLKUSR p<strong>in</strong> or the <strong>in</strong>ternal configuration<br />
oscillator. To source the active clock from the CLKUSR p<strong>in</strong>, issue the EN_ACT<strong>IV</strong>E_CLK<br />
<strong>in</strong>struction. This causes the CLKUSR p<strong>in</strong> to become the active clock source. When us<strong>in</strong>g<br />
the EN_ACT<strong>IV</strong>E_CLK <strong>in</strong>struction, you must enable the <strong>in</strong>ternal oscillator for the clock<br />
change to occur. By default, the configuration oscillator is disabled after configuration<br />
<strong>and</strong> <strong>in</strong>itialization is complete as well as the device has entered user mode.<br />
However, the <strong>in</strong>ternal oscillator is enabled <strong>in</strong> user mode by any of the follow<strong>in</strong>g<br />
conditions:<br />
■ A reconfiguration event (for example, driv<strong>in</strong>g the nCONFIG p<strong>in</strong> to go low)<br />
■ <strong>Remote</strong> update is enabled<br />
■ Error detection is enabled<br />
1 When us<strong>in</strong>g the EN_ACT<strong>IV</strong>E_CLK <strong>and</strong> DIS_ACT<strong>IV</strong>E_CLK JTAG <strong>in</strong>structions to override<br />
the <strong>in</strong>ternal oscillator, you must clock the CLKUSR p<strong>in</strong> at two times the expected DCLK<br />
frequency. The CLKUSR p<strong>in</strong> allows a maximum frequency of 40 MHz (40 MHz DCLK).<br />
Normally, a test <strong>in</strong>strument uses the CLKUSR p<strong>in</strong> when it wants to drive its own clock<br />
to control the AS state mach<strong>in</strong>e.<br />
To revert the clock source back to the configuration oscillator, issue the<br />
DIS_ACT<strong>IV</strong>E_CLK <strong>in</strong>struction. After you issue the DIS_ACT<strong>IV</strong>E_CLK <strong>in</strong>struction, you<br />
must cont<strong>in</strong>ue to clock the CLKUSR p<strong>in</strong> for 10 clock cycles. Otherwise, even toggl<strong>in</strong>g the<br />
nCONFIG p<strong>in</strong> does not revert the clock source <strong>and</strong> reconfiguration does not occur. A<br />
POR reverts the clock source back to the configuration oscillator. Toggl<strong>in</strong>g the nCONFIG<br />
p<strong>in</strong> or driv<strong>in</strong>g the JTAG state mach<strong>in</strong>e to reset state does not revert the clock source.<br />
<strong>Cyclone</strong> <strong>IV</strong> Device H<strong>and</strong>book, February 2013 <strong>Altera</strong> Corporation<br />
Volume 1
Chapter 8: <strong>Configuration</strong> <strong>and</strong> <strong>Remote</strong> <strong>System</strong> <strong>Upgrades</strong> <strong>in</strong> <strong>Cyclone</strong> <strong>IV</strong> Devices 8–61<br />
<strong>Configuration</strong><br />
EN_ACT<strong>IV</strong>E_CLK<br />
The EN_ACT<strong>IV</strong>E_CLK <strong>in</strong>struction causes the CLKUSR p<strong>in</strong> signal to replace the <strong>in</strong>ternal<br />
oscillator as the clock source. When us<strong>in</strong>g the EN_ACT<strong>IV</strong>E_CLK <strong>in</strong>struction, you must<br />
enable the <strong>in</strong>ternal oscillator for the clock change to occur. After this <strong>in</strong>struction is<br />
issued, other JTAG <strong>in</strong>structions can be issued while the CLKUSR p<strong>in</strong> signal rema<strong>in</strong>s as<br />
the clock source. The clock source is only reverted back to the <strong>in</strong>ternal oscillator by<br />
issu<strong>in</strong>g the DIS_ACT<strong>IV</strong>E_CLK <strong>in</strong>struction or a POR.<br />
DIS_ACT<strong>IV</strong>E_CLK<br />
The DIS_ACT<strong>IV</strong>E_CLK <strong>in</strong>struction breaks the CLKUSR enable latch set by the<br />
EN_ACT<strong>IV</strong>E_CLK <strong>in</strong>struction <strong>and</strong> causes the clock source to revert back to the <strong>in</strong>ternal<br />
oscillator. After the DIS_ACT<strong>IV</strong>E_CLK <strong>in</strong>struction is issued, you must cont<strong>in</strong>ue to clock<br />
the CLKUSR p<strong>in</strong> for 10 clock cycles.<br />
Chang<strong>in</strong>g the Start Boot Address of the AP Flash<br />
In the AP configuration scheme (for <strong>Cyclone</strong> <strong>IV</strong> E devices only), you can change the<br />
default configuration boot address of the parallel flash memory to any desired<br />
address us<strong>in</strong>g the APFC_BOOT_ADDR JTAG <strong>in</strong>struction.<br />
APFC_BOOT_ADDR<br />
The APFC_BOOT_ADDR <strong>in</strong>struction is for <strong>Cyclone</strong> <strong>IV</strong> E devices only <strong>and</strong> allows you to<br />
def<strong>in</strong>e a start boot address for the parallel flash memory <strong>in</strong> the AP configuration<br />
scheme.<br />
This <strong>in</strong>struction shifts <strong>in</strong> a start boot address for the AP flash. When this <strong>in</strong>struction<br />
becomes the active <strong>in</strong>struction, the TDI <strong>and</strong> TDO p<strong>in</strong>s are connected through a 22-bit<br />
active boot address shift register. The shifted-<strong>in</strong> boot address bits get loaded <strong>in</strong>to the<br />
22-bit AP boot address update register, which feeds <strong>in</strong>to the AP controller. The content<br />
of the AP boot address update register can be captured <strong>and</strong> shifted-out of the active<br />
boot address shift register from TDO.<br />
The boot address <strong>in</strong> the boot address shift register <strong>and</strong> update register are shifted to<br />
the right (<strong>in</strong> the LSB direction) by two bits versus the <strong>in</strong>tended boot address. The<br />
reason for this is that the two LSB of the address are not accessible. When this boot<br />
address is fed <strong>in</strong>to the AP controller, two 0s are attached <strong>in</strong> the end as LSB, thereby<br />
push<strong>in</strong>g the shifted-<strong>in</strong> boot address to the left by two bits, which become the actual<br />
AP boot address the AP controller gets.<br />
If you have enabled the remote update feature, the APFC_BOOT_ADDR <strong>in</strong>struction sets<br />
the boot address for the factory configuration only.<br />
1 The APFC_BOOT_ADDR <strong>in</strong>struction is reta<strong>in</strong>ed after reconfiguration while the system<br />
board is still powered on. However, you must reprogram the <strong>in</strong>struction whenever<br />
you restart the system board.<br />
February 2013 <strong>Altera</strong> Corporation <strong>Cyclone</strong> <strong>IV</strong> Device H<strong>and</strong>book,<br />
Volume 1
8–62 Chapter 8: <strong>Configuration</strong> <strong>and</strong> <strong>Remote</strong> <strong>System</strong> <strong>Upgrades</strong> <strong>in</strong> <strong>Cyclone</strong> <strong>IV</strong> Devices<br />
<strong>Configuration</strong><br />
Device <strong>Configuration</strong> P<strong>in</strong>s<br />
Table 8–17 through Table 8–20 describe the connections <strong>and</strong> functionality of all the<br />
configuration related p<strong>in</strong>s on <strong>Cyclone</strong> <strong>IV</strong> devices. Table 8–17 <strong>and</strong> Table 8–18 list the<br />
device p<strong>in</strong> configuration for the <strong>Cyclone</strong> <strong>IV</strong> GX <strong>and</strong> <strong>Cyclone</strong> <strong>IV</strong> E, respectively.<br />
Table 8–17. <strong>Configuration</strong> P<strong>in</strong> Summary for <strong>Cyclone</strong> <strong>IV</strong> GX Devices<br />
Bank Description Input/Output Dedicated Powered By <strong>Configuration</strong> Mode<br />
8 Data[4:2] Input — VCCIO FPP<br />
3 Data[7:5] Input — VCCIO FPP<br />
9 nCSO (2) Output — V CCIO AS<br />
3 CRC_ERROR Output — V CCIO/Pull-up (1) Optional, all modes<br />
9 DATA[0] (2) Input Yes V CCIO PS, FPP, AS<br />
9 DATA[1]/ASDO (2)<br />
Input<br />
Output<br />
—<br />
VCCIO VCCIO FPP<br />
AS<br />
3 INIT_DONE Output — Pull-up Optional, all modes<br />
3 nSTATUS Bidirectional Yes Pull-up All modes<br />
9 nCE Input Yes VCCIO All modes<br />
9 DCLK (2)<br />
Input<br />
Output<br />
Yes<br />
VCCIO VCCIO PS, FPP<br />
AS<br />
3 CONF_DONE Bidirectional Yes Pull-up All modes<br />
9 TDI Input Yes VCCIO JTAG<br />
9 TMS Input Yes VCCIO JTAG<br />
9 TCK Input Yes VCCIO JTAG<br />
9 nCONFIG Input Yes VCCIO All modes<br />
8 CLKUSR Input — VCCIO Optional<br />
3 nCEO Output — VCCIO Optional, all modes<br />
3 MSEL Input Yes VCCINT All modes<br />
9 TDO Output Yes VCCIO JTAG<br />
6 DEV_OE Input — VCCIO Optional<br />
6 DEV_CLRn Input — VCCIO Optional<br />
Notes to Table 8–17:<br />
(1) The CRC_ERROR p<strong>in</strong> is a dedicated open-dra<strong>in</strong> output or an optional user I/O p<strong>in</strong>. Active high signal <strong>in</strong>dicates that the error detection circuit has<br />
detected errors <strong>in</strong> the configuration SRAM bits. This p<strong>in</strong> is optional <strong>and</strong> is used when the CRC error detection circuit is enabled <strong>in</strong> the Quartus II<br />
software from the Error Detection CRC tab of the Device <strong>and</strong> P<strong>in</strong> Options dialog box. When us<strong>in</strong>g this p<strong>in</strong>, connect it to an external 10-k<br />
pull-up resistor to an acceptable voltage that satisfies the <strong>in</strong>put voltage of the receiv<strong>in</strong>g device.<br />
(2) To tri-state AS configuration p<strong>in</strong>s <strong>in</strong> the AS configuration scheme, turn on the Enable <strong>in</strong>put tri-state on active configuration p<strong>in</strong>s <strong>in</strong> user mode<br />
option from the Device <strong>and</strong> P<strong>in</strong> Options dialog box. This tri-states DCLK, nCSO, Data[0], <strong>and</strong> Data[1]/ASDO p<strong>in</strong>s. Dual-purpose p<strong>in</strong>s sett<strong>in</strong>gs<br />
for these p<strong>in</strong>s are ignored. To set these p<strong>in</strong>s to different sett<strong>in</strong>gs, turn off the Enable <strong>in</strong>put tri-state on active configuration p<strong>in</strong>s <strong>in</strong> user mode<br />
option <strong>and</strong> set the desired sett<strong>in</strong>g from the Dual-purpose P<strong>in</strong>s Sett<strong>in</strong>g menu.<br />
Table 8–18. <strong>Configuration</strong> P<strong>in</strong> Summary for <strong>Cyclone</strong> <strong>IV</strong> E Devices (Part 1 of 3)<br />
Bank Description Input/Output Dedicated Powered By <strong>Configuration</strong> Mode<br />
1<br />
nCSO (1)<br />
FLASH_nCE (2) Output — VCCIO AS, AP<br />
6 CRC_ERROR (3) Output — VCCIO/Pull-up (4) Optional, all modes<br />
<strong>Cyclone</strong> <strong>IV</strong> Device H<strong>and</strong>book, February 2013 <strong>Altera</strong> Corporation<br />
Volume 1
Chapter 8: <strong>Configuration</strong> <strong>and</strong> <strong>Remote</strong> <strong>System</strong> <strong>Upgrades</strong> <strong>in</strong> <strong>Cyclone</strong> <strong>IV</strong> Devices 8–63<br />
<strong>Configuration</strong><br />
Table 8–18. <strong>Configuration</strong> P<strong>in</strong> Summary for <strong>Cyclone</strong> <strong>IV</strong> E Devices (Part 2 of 3)<br />
Bank Description Input/Output Dedicated Powered By <strong>Configuration</strong> Mode<br />
1 DATA[0]<br />
(1), (2)<br />
1 DATA[1] (2) /ASDO (1)<br />
8 DATA[7..2] (2)<br />
Input<br />
VCCIO PS, FPP, AS<br />
Yes<br />
Bidirectional VCCIO AP<br />
Input<br />
VCCIO FPP<br />
Output —<br />
VCCIO AS<br />
Bidirectional VCCIO AP<br />
Input<br />
Bidirectional<br />
—<br />
VCCIO VCCIO FPP<br />
AP<br />
8 DATA[15..8] (2) Bidirectional — V CCIO AP<br />
6 INIT_DONE Output — Pull-up Optional, all modes<br />
1 nSTATUS Bidirectional Yes Pull-up All modes<br />
1 nCE Input Yes VCCIO All modes<br />
1 DCLK (1), (2)<br />
Input<br />
Output<br />
Yes<br />
VCCIO VCCIO PS, FPP<br />
AS, AP<br />
6 CONF_DONE Bidirectional Yes Pull-up All modes<br />
1 TDI Input Yes VCCIO JTAG<br />
1 TMS Input Yes VCCIO JTAG<br />
1 TCK Input Yes VCCIO JTAG<br />
1 nCONFIG Input Yes VCCIO All modes<br />
6 CLKUSR Input — VCCIO Optional<br />
6 nCEO Output — VCCIO Optional, all modes<br />
6 MSEL[] Input Yes VCCINT All modes<br />
1 TDO Output Yes VCCIO JTAG<br />
7 PADD[14..0] Output — VCCIO AP<br />
8 PADD[19..15] Output — VCCIO AP<br />
6 PADD[23..20] Output — VCCIO AP<br />
1 nRESET Output — VCCIO AP<br />
6 nAVD Output — VCCIO AP<br />
6 nOE Output — VCCIO AP<br />
6 nWE Output — VCCIO AP<br />
5 DEV_OE Input — VCCIO Optional, AP<br />
February 2013 <strong>Altera</strong> Corporation <strong>Cyclone</strong> <strong>IV</strong> Device H<strong>and</strong>book,<br />
Volume 1
8–64 Chapter 8: <strong>Configuration</strong> <strong>and</strong> <strong>Remote</strong> <strong>System</strong> <strong>Upgrades</strong> <strong>in</strong> <strong>Cyclone</strong> <strong>IV</strong> Devices<br />
<strong>Configuration</strong><br />
Table 8–18. <strong>Configuration</strong> P<strong>in</strong> Summary for <strong>Cyclone</strong> <strong>IV</strong> E Devices (Part 3 of 3)<br />
Bank Description Input/Output Dedicated Powered By <strong>Configuration</strong> Mode<br />
5 DEV_CLRn Input — V CCIO Optional, AP<br />
Notes to Table 8–18:<br />
(1) To tri-state AS configuration p<strong>in</strong>s <strong>in</strong> the AS configuration scheme, turn-on the Enable <strong>in</strong>put tri-state on active configuration p<strong>in</strong>s <strong>in</strong> user mode<br />
option from the Device <strong>and</strong> P<strong>in</strong> Options dialog box. This tri-states DCLK, nCSO, Data[0], <strong>and</strong> Data[1]/ASDO p<strong>in</strong>s. Dual-purpose p<strong>in</strong>s sett<strong>in</strong>gs<br />
for these p<strong>in</strong>s are ignored. To set these p<strong>in</strong>s to different sett<strong>in</strong>gs, turn off the Enable <strong>in</strong>put tri-state on active configuration p<strong>in</strong>s <strong>in</strong> user mode<br />
option <strong>and</strong> set the desired sett<strong>in</strong>g from the Dual-purpose P<strong>in</strong>s Sett<strong>in</strong>g menu.<br />
(2) To tri-state AP configuration p<strong>in</strong>s <strong>in</strong> the AP configuration scheme, turn-on the Enable <strong>in</strong>put tri-state on active configuration p<strong>in</strong>s <strong>in</strong> user mode<br />
option from the Device <strong>and</strong> P<strong>in</strong> Options dialog box. This tri-states DCLK, Data[0..15], FLASH_nCE, <strong>and</strong> other AP p<strong>in</strong>s. Dual-purpose p<strong>in</strong>s<br />
sett<strong>in</strong>gs for these p<strong>in</strong>s are ignored. To set these p<strong>in</strong>s to different sett<strong>in</strong>gs, turn off the Enable <strong>in</strong>put tri-state on active configuration p<strong>in</strong>s <strong>in</strong><br />
user mode option <strong>and</strong> set the desired sett<strong>in</strong>g from the Dual-purpose P<strong>in</strong>s Sett<strong>in</strong>g menu.<br />
(3) The CRC_ERROR p<strong>in</strong> is not available <strong>in</strong> <strong>Cyclone</strong> <strong>IV</strong> E devices with 1.0-V core voltage.<br />
(4) The CRC_ERROR p<strong>in</strong> is a dedicated open-dra<strong>in</strong> output or an optional user I/O p<strong>in</strong>. Active high signal <strong>in</strong>dicates that the error detection circuit has<br />
detected errors <strong>in</strong> the configuration SRAM bits. This p<strong>in</strong> is optional <strong>and</strong> is used when the CRC error detection circuit is enabled <strong>in</strong> the Quartus II<br />
software from the Error Detection CRC tab of the Device <strong>and</strong> P<strong>in</strong> Options dialog box. When us<strong>in</strong>g this p<strong>in</strong>, connect it to an external 10-k<br />
pull-up resistor to an acceptable voltage that satisfies the <strong>in</strong>put voltage of the receiv<strong>in</strong>g device.<br />
Table 8–19 describes the dedicated configuration p<strong>in</strong>s. You must properly connect<br />
these p<strong>in</strong>s on your board for successful configuration. You may not need some of<br />
these p<strong>in</strong>s for your configuration schemes.<br />
Table 8–19. Dedicated <strong>Configuration</strong> P<strong>in</strong>s on the <strong>Cyclone</strong> <strong>IV</strong> Device (Part 1 of 4)<br />
P<strong>in</strong> Name User Mode<br />
<strong>Configuration</strong><br />
Scheme<br />
MSEL N/A All Input<br />
nCONFIG N/A All Input<br />
nSTATUS N/A All<br />
P<strong>in</strong> Type Description<br />
Bidirectional<br />
open-dra<strong>in</strong><br />
<strong>Configuration</strong> <strong>in</strong>put that sets the <strong>Cyclone</strong> <strong>IV</strong> device<br />
configuration scheme. You must hardwire these p<strong>in</strong>s to<br />
V CCA or GND. The MSEL p<strong>in</strong>s have <strong>in</strong>ternal 9-k pull-down<br />
resistors that are always active.<br />
<strong>Configuration</strong> control <strong>in</strong>put. Pull<strong>in</strong>g this p<strong>in</strong> low with<br />
external circuitry dur<strong>in</strong>g user mode causes the <strong>Cyclone</strong> <strong>IV</strong><br />
device to lose its configuration data, enter a reset state, <strong>and</strong><br />
tri-state all I/O p<strong>in</strong>s. Return<strong>in</strong>g this p<strong>in</strong> to a logic-high level<br />
starts a reconfiguration.<br />
The <strong>Cyclone</strong> <strong>IV</strong> device drives nSTATUS low immediately<br />
after power-up <strong>and</strong> releases it after the POR time.<br />
■ Status output—if an error occurs dur<strong>in</strong>g configuration,<br />
nSTATUS is pulled low by the target device.<br />
■ Status <strong>in</strong>put—if an external source (for example,<br />
another <strong>Cyclone</strong> <strong>IV</strong> device) drives the nSTATUS p<strong>in</strong> low<br />
dur<strong>in</strong>g configuration or <strong>in</strong>itialization, the target device<br />
enters an error state.<br />
Driv<strong>in</strong>g nSTATUS low after configuration <strong>and</strong> <strong>in</strong>itialization<br />
does not affect the configured device. If you use a<br />
configuration device, driv<strong>in</strong>g nSTATUS low causes the<br />
configuration device to attempt to configure the device, but<br />
because the device ignores transitions on nSTATUS <strong>in</strong> user<br />
mode, the device does not reconfigure. To start a<br />
reconfiguration, you must pull nCONFIG low.<br />
<strong>Cyclone</strong> <strong>IV</strong> Device H<strong>and</strong>book, February 2013 <strong>Altera</strong> Corporation<br />
Volume 1
Chapter 8: <strong>Configuration</strong> <strong>and</strong> <strong>Remote</strong> <strong>System</strong> <strong>Upgrades</strong> <strong>in</strong> <strong>Cyclone</strong> <strong>IV</strong> Devices 8–65<br />
<strong>Configuration</strong><br />
Table 8–19. Dedicated <strong>Configuration</strong> P<strong>in</strong>s on the <strong>Cyclone</strong> <strong>IV</strong> Device (Part 2 of 4)<br />
P<strong>in</strong> Name User Mode<br />
CONF_DONE N/A All<br />
Bidirectional<br />
open-dra<strong>in</strong><br />
nCE N/A All Input<br />
nCEO<br />
nCSO,<br />
FLASH_nCE<br />
(1)<br />
N/A if<br />
option is on.<br />
I/O if option<br />
is off.<br />
<strong>Configuration</strong><br />
Scheme<br />
All<br />
Output<br />
open-dra<strong>in</strong><br />
I/O AS, AP (2) Output<br />
P<strong>in</strong> Type Description<br />
■ Status output—the target <strong>Cyclone</strong> <strong>IV</strong> device drives the<br />
CONF_DONE p<strong>in</strong> low before <strong>and</strong> dur<strong>in</strong>g configuration.<br />
After all the configuration data is received without error<br />
<strong>and</strong> the <strong>in</strong>itialization cycle starts, the target device<br />
releases CONF_DONE.<br />
■ Status <strong>in</strong>put—after all the data is received <strong>and</strong><br />
CONF_DONE goes high, the target device <strong>in</strong>itializes <strong>and</strong><br />
enters user mode. The CONF_DONE p<strong>in</strong> must have an<br />
external 10-k pull-up resistor <strong>in</strong> order for the device to<br />
<strong>in</strong>itialize.<br />
Driv<strong>in</strong>g CONF_DONE low after configuration <strong>and</strong> <strong>in</strong>itialization<br />
does not affect the configured device. Do not connect bus<br />
holds or ADC to CONF_DONE p<strong>in</strong>.<br />
Active-low chip enable. The nCE p<strong>in</strong> activates the <strong>Cyclone</strong><br />
<strong>IV</strong> device with a low signal to allow configuration. You must<br />
hold nCE p<strong>in</strong> low dur<strong>in</strong>g configuration, <strong>in</strong>itialization, <strong>and</strong><br />
user-mode. In a s<strong>in</strong>gle-device configuration, you must tie<br />
the nCE p<strong>in</strong> low. In a multi-device configuration, nCE of the<br />
first device is tied low while its nCEO p<strong>in</strong> is connected to<br />
nCE of the next device <strong>in</strong> the cha<strong>in</strong>. You must hold the nCE<br />
p<strong>in</strong> low for successful JTAG programm<strong>in</strong>g of the device.<br />
Output that drives low when configuration is complete. In a<br />
s<strong>in</strong>gle-device configuration, you can leave this p<strong>in</strong> float<strong>in</strong>g<br />
or use it as a user I/O p<strong>in</strong> after configuration. In a multidevice<br />
configuration, this p<strong>in</strong> feeds the nCE p<strong>in</strong> of the next<br />
device. The nCEO of the last device <strong>in</strong> the cha<strong>in</strong> is left<br />
float<strong>in</strong>g or used as a user I/O p<strong>in</strong> after configuration.<br />
If you use the nCEO p<strong>in</strong> to feed the nCE p<strong>in</strong> of the next<br />
device, use an external 10-k pull-up resistor to pull the<br />
nCEO p<strong>in</strong> high to the VCCIO voltage of its I/O bank to help the<br />
<strong>in</strong>ternal weak pull-up resistor.<br />
If you use the nCEO p<strong>in</strong> as a user I/O p<strong>in</strong> after configuration,<br />
set the state of the p<strong>in</strong> on the Dual-Purpose P<strong>in</strong> sett<strong>in</strong>gs.<br />
Output control signal from the <strong>Cyclone</strong> <strong>IV</strong> device to the<br />
serial configuration device <strong>in</strong> AS mode that enables the<br />
configuration device. This p<strong>in</strong> functions as nCSO <strong>in</strong> AS<br />
mode <strong>and</strong> FLASH_nCE <strong>in</strong> AP mode.<br />
Output control signal from the <strong>Cyclone</strong> <strong>IV</strong> device to the<br />
parallel flash <strong>in</strong> AP mode that enables the flash. Connects to<br />
the CE# p<strong>in</strong> on the Micron P30 or P33 flash. (2)<br />
This p<strong>in</strong> has an <strong>in</strong>ternal pull-up resistor that is always<br />
active.<br />
February 2013 <strong>Altera</strong> Corporation <strong>Cyclone</strong> <strong>IV</strong> Device H<strong>and</strong>book,<br />
Volume 1
8–66 Chapter 8: <strong>Configuration</strong> <strong>and</strong> <strong>Remote</strong> <strong>System</strong> <strong>Upgrades</strong> <strong>in</strong> <strong>Cyclone</strong> <strong>IV</strong> Devices<br />
<strong>Configuration</strong><br />
Table 8–19. Dedicated <strong>Configuration</strong> P<strong>in</strong>s on the <strong>Cyclone</strong> <strong>IV</strong> Device (Part 3 of 4)<br />
P<strong>in</strong> Name User Mode<br />
DCLK (1) N/A<br />
DATA[0] (1) I/O<br />
DATA[1]/<br />
ASDO (1)<br />
I/O<br />
<strong>Configuration</strong><br />
Scheme<br />
PS, FPP, AS,<br />
AP (2)<br />
PS, FPP, AS,<br />
AP (2)<br />
FPP, AS, AP<br />
(2)<br />
P<strong>in</strong> Type Description<br />
Input (PS,<br />
FPP). Output<br />
(AS, AP) (2)<br />
Input (PS,<br />
FPP, AS).<br />
Bidirectional<br />
(AP) (2)<br />
Input (FPP).<br />
Output (AS).<br />
Bidirectional<br />
(AP) (2)<br />
In PS <strong>and</strong> FPP configuration, DCLK is the clock <strong>in</strong>put used<br />
to clock data from an external source <strong>in</strong>to the target<br />
<strong>Cyclone</strong> <strong>IV</strong> device. Data is latched <strong>in</strong>to the device on the<br />
ris<strong>in</strong>g edge of DCLK.<br />
In AS mode, DCLK is an output from the <strong>Cyclone</strong> <strong>IV</strong> device<br />
that provides tim<strong>in</strong>g for the configuration <strong>in</strong>terface. It has<br />
an <strong>in</strong>ternal pull-up resistor (typically 25 k) that is always<br />
active.<br />
In AP mode, DCLK is an output from the <strong>Cyclone</strong> <strong>IV</strong> E device<br />
that provides tim<strong>in</strong>g for the configuration <strong>in</strong>terface. (2)<br />
In AS or AP configuration schemes, this p<strong>in</strong> is driven <strong>in</strong>to<br />
an <strong>in</strong>active state after configuration completes.<br />
Alternatively, <strong>in</strong> active schemes, you can use this p<strong>in</strong> as a<br />
user I/O dur<strong>in</strong>g user mode. In PS or FPP schemes that use<br />
a control host, you must drive DCLK either high or low,<br />
whichever is more convenient. In passive schemes, you<br />
cannot use DCLK as a user I/O <strong>in</strong> user mode. Toggl<strong>in</strong>g this<br />
p<strong>in</strong> after configuration does not affect the configured<br />
device.<br />
Data <strong>in</strong>put. In serial configuration modes, bit-wide<br />
configuration data is presented to the target <strong>Cyclone</strong> <strong>IV</strong><br />
device on the DATA[0] p<strong>in</strong>.<br />
In AS mode, DATA[0] has an <strong>in</strong>ternal pull-up resistor that<br />
is always active. After AS configuration, DATA[0] is a<br />
dedicated <strong>in</strong>put p<strong>in</strong> with optional user control.<br />
After PS or FPP configuration, DATA[0] is available as a<br />
user I/O p<strong>in</strong>. The state of this p<strong>in</strong> depends on the<br />
Dual-Purpose P<strong>in</strong> sett<strong>in</strong>gs.<br />
After AP configuration, DATA[0]is a dedicated bidirectional<br />
p<strong>in</strong> with optional user control. (2)<br />
The DATA[1] p<strong>in</strong> functions as the ASDO p<strong>in</strong> <strong>in</strong> AS mode.<br />
Data <strong>in</strong>put <strong>in</strong> non-AS mode. Control signal from the<br />
<strong>Cyclone</strong> <strong>IV</strong> device to the serial configuration device <strong>in</strong> AS<br />
mode used to read out configuration data.<br />
In AS mode, DATA[1] has an <strong>in</strong>ternal pull-up resistor that<br />
is always active. After AS configuration, DATA[1] is a<br />
dedicated output p<strong>in</strong> with optional user control.<br />
In a PS configuration scheme, DATA[1] functions as a user<br />
I/O p<strong>in</strong> dur<strong>in</strong>g configuration, which means it is tri-stated.<br />
After FPP configuration, DATA[1] is available as a user I/O<br />
p<strong>in</strong> <strong>and</strong> the state of this p<strong>in</strong> depends on the Dual-Purpose<br />
P<strong>in</strong> sett<strong>in</strong>gs.<br />
In an AP configuration scheme, for <strong>Cyclone</strong> <strong>IV</strong> E devices<br />
only, the byte-wide or word-wide configuration data is<br />
presented to the target <strong>Cyclone</strong> <strong>IV</strong> E device on DATA[7..0]<br />
or DATA[15..0], respectively. After AP configuration,<br />
DATA[1]is a dedicated bidirectional p<strong>in</strong> with optional user<br />
control. (2)<br />
<strong>Cyclone</strong> <strong>IV</strong> Device H<strong>and</strong>book, February 2013 <strong>Altera</strong> Corporation<br />
Volume 1
Chapter 8: <strong>Configuration</strong> <strong>and</strong> <strong>Remote</strong> <strong>System</strong> <strong>Upgrades</strong> <strong>in</strong> <strong>Cyclone</strong> <strong>IV</strong> Devices 8–67<br />
<strong>Configuration</strong><br />
Table 8–19. Dedicated <strong>Configuration</strong> P<strong>in</strong>s on the <strong>Cyclone</strong> <strong>IV</strong> Device (Part 4 of 4)<br />
P<strong>in</strong> Name User Mode<br />
DATA[7..2] I/O FPP, AP (2)<br />
Inputs (FPP).<br />
Bidirectional<br />
(AP) (2)<br />
DATA[15..8] I/O AP (2) Bidirectional<br />
PADD[23..0] I/O AP (2) Output<br />
nRESET I/O AP (2) Output<br />
nAVD I/O AP (2) Output<br />
nOE I/O AP (2) Output<br />
nWE I/O AP (2) Output<br />
Note to Table 8–19:<br />
<strong>Configuration</strong><br />
Scheme<br />
P<strong>in</strong> Type Description<br />
In an AS or PS configuration scheme, DATA[7..2]<br />
function as user I/O p<strong>in</strong>s dur<strong>in</strong>g configuration, which<br />
means they are tri-stated.<br />
After FPP configuration, DATA[7..2] are available as user<br />
I/O p<strong>in</strong>s <strong>and</strong> the state of these p<strong>in</strong> depends on the<br />
Dual-Purpose P<strong>in</strong> sett<strong>in</strong>gs.<br />
In an AP configuration scheme, for <strong>Cyclone</strong> <strong>IV</strong> E devices<br />
only, the byte-wide or word-wide configuration data is<br />
presented to the target <strong>Cyclone</strong> <strong>IV</strong> E device on DATA[7..0]<br />
or DATA[15..0], respectively. After AP configuration,<br />
DATA[7..2]are dedicated bidirectional p<strong>in</strong>s with optional<br />
user control. (2)<br />
Data <strong>in</strong>puts. Word-wide configuration data is presented to<br />
the target <strong>Cyclone</strong> <strong>IV</strong> E device on DATA[15..0].<br />
In a PS, FPP, or AS configuration scheme, DATA[15:8]<br />
function as user I/O p<strong>in</strong>s dur<strong>in</strong>g configuration, which<br />
means they are tri stated.<br />
After AP configuration, DATA[15:8]are dedicated<br />
bidirectional p<strong>in</strong>s with optional user control.<br />
In AP mode, it is a 24-bit address bus from the <strong>Cyclone</strong> <strong>IV</strong> E<br />
device to the parallel flash. Connects to the A[24:1]bus on<br />
the Micron P30 or P33 flash.<br />
Active-low reset output. Driv<strong>in</strong>g the nRESET p<strong>in</strong> low resets<br />
the parallel flash. Connects to the RST# p<strong>in</strong> on the Micron<br />
P30 or P33 flash.<br />
Active-low address valid output. Driv<strong>in</strong>g the nAVD p<strong>in</strong> low<br />
dur<strong>in</strong>g read or write operation <strong>in</strong>dicates to the parallel flash<br />
that a valid address is present on the PADD[23..0]address<br />
bus. Connects to the ADV# p<strong>in</strong> on the Micron P30 or P33<br />
flash.<br />
Active-low output enable to the parallel flash. Dur<strong>in</strong>g the<br />
read operation, driv<strong>in</strong>g the nOE p<strong>in</strong> low enables the parallel<br />
flash outputs (DATA[15..0]). Connects to the OE# p<strong>in</strong> on<br />
the Micron P30 or P33 flash.<br />
Active-low write enable to the parallel flash. Dur<strong>in</strong>g the<br />
write operation, driv<strong>in</strong>g the nWE p<strong>in</strong> low <strong>in</strong>dicates to the<br />
parallel flash that data on the DATA[15..0]bus is valid.<br />
Connects to the WE# p<strong>in</strong> on the Micron P30 or P33 flash.<br />
(1) If you are access<strong>in</strong>g the EPCS device with the ALTASMI_PARALLEL megafunction or your own user logic <strong>in</strong> user mode, <strong>in</strong> the Device <strong>and</strong> P<strong>in</strong><br />
Options w<strong>in</strong>dow of the Quartus II software, <strong>in</strong> the Dual-Purpose P<strong>in</strong>s category, select Use as regular I/O for this p<strong>in</strong>.<br />
(2) The AP configuration scheme is for <strong>Cyclone</strong> <strong>IV</strong> E devices only.<br />
February 2013 <strong>Altera</strong> Corporation <strong>Cyclone</strong> <strong>IV</strong> Device H<strong>and</strong>book,<br />
Volume 1
8–68 Chapter 8: <strong>Configuration</strong> <strong>and</strong> <strong>Remote</strong> <strong>System</strong> <strong>Upgrades</strong> <strong>in</strong> <strong>Cyclone</strong> <strong>IV</strong> Devices<br />
<strong>Configuration</strong><br />
Table 8–20. Optional <strong>Configuration</strong> P<strong>in</strong>s<br />
Table 8–20 lists the optional configuration p<strong>in</strong>s. If you do not enable these optional<br />
configuration p<strong>in</strong>s <strong>in</strong> the Quartus II software, they are available as general-purpose<br />
user I/O p<strong>in</strong>s. Therefore, dur<strong>in</strong>g configuration, these p<strong>in</strong>s function as user I/O p<strong>in</strong>s<br />
<strong>and</strong> are tri-stated with weak pull-up resistors.<br />
P<strong>in</strong> Name User Mode P<strong>in</strong> Type Description<br />
CLKUSR<br />
INIT_DONE<br />
DEV_OE<br />
DEV_CLRn<br />
N/A if option is on.<br />
I/O if option is off.<br />
N/A if option is on.<br />
I/O if option is off.<br />
N/A if option is on.<br />
I/O if option is off.<br />
N/A if option is on.<br />
I/O if option is off.<br />
Input<br />
Output<br />
open-dra<strong>in</strong><br />
Input<br />
Input<br />
Optional user-supplied clock <strong>in</strong>put synchronizes the<br />
<strong>in</strong>itialization of one or more devices. This p<strong>in</strong> is enabled by<br />
turn<strong>in</strong>g on the Enable user-supplied start-up clock (CLKUSR)<br />
option <strong>in</strong> the Quartus II software.<br />
In AS configuration for <strong>Cyclone</strong> <strong>IV</strong> GX devices, you can use this<br />
p<strong>in</strong> as an external clock source to generate the DCLK by<br />
chang<strong>in</strong>g the clock source option <strong>in</strong> the Quartus II software <strong>in</strong><br />
the <strong>Configuration</strong> tab of the Device <strong>and</strong> P<strong>in</strong> Options dialog<br />
box.<br />
Status p<strong>in</strong> is used to <strong>in</strong>dicate when the device has <strong>in</strong>itialized <strong>and</strong><br />
is <strong>in</strong> user-mode. When nCONFIG is low, the INIT_DONE p<strong>in</strong> is<br />
tri-stated <strong>and</strong> pulled high due to an external 10-k pull-up<br />
resistor dur<strong>in</strong>g the beg<strong>in</strong>n<strong>in</strong>g of configuration. After the option<br />
bit to enable INIT_DONE is programmed <strong>in</strong>to the device (dur<strong>in</strong>g<br />
the first frame of configuration data), the INIT_DONE p<strong>in</strong> goes<br />
low. When <strong>in</strong>itialization is complete, the INIT_DONE p<strong>in</strong> is<br />
released <strong>and</strong> pulled high <strong>and</strong> the device enters user mode.<br />
Thus, the monitor<strong>in</strong>g circuitry must be able to detect a low-tohigh<br />
transition. This p<strong>in</strong> is enabled by turn<strong>in</strong>g on the Enable<br />
INIT_DONE output option <strong>in</strong> the Quartus II software.<br />
The functionality of this p<strong>in</strong> changes if the Enable OCT_DONE<br />
option is enabled <strong>in</strong> the Quartus II software. This option<br />
controls whether the INIT_DONE signal is gated by the<br />
OCT_DONE signal, which <strong>in</strong>dicates the power-up on-chip<br />
term<strong>in</strong>ation (OCT) calibration is complete. If this option is<br />
turned off, the INIT_DONE signal is not gated by the OCT_DONE<br />
signal.<br />
Optional p<strong>in</strong> that allows you to override all tri-states on the<br />
device. When this p<strong>in</strong> is driven low, all I/O p<strong>in</strong>s are tri-stated;<br />
when this p<strong>in</strong> is driven high, all I/O p<strong>in</strong>s behave as<br />
programmed. This p<strong>in</strong> is enabled by turn<strong>in</strong>g on the Enable<br />
device-wide output enable (DEV_OE) option <strong>in</strong> the Quartus II<br />
software.<br />
Optional p<strong>in</strong> that allows you to override all clears on all device<br />
registers. When this p<strong>in</strong> is driven low, all registers are cleared;<br />
when this p<strong>in</strong> is driven high, all registers behave as<br />
programmed. You can enable this p<strong>in</strong> by turn<strong>in</strong>g on the Enable<br />
device-wide reset (DEV_CLRn) option <strong>in</strong> the Quartus II<br />
software.<br />
<strong>Cyclone</strong> <strong>IV</strong> Device H<strong>and</strong>book, February 2013 <strong>Altera</strong> Corporation<br />
Volume 1
Chapter 8: <strong>Configuration</strong> <strong>and</strong> <strong>Remote</strong> <strong>System</strong> <strong>Upgrades</strong> <strong>in</strong> <strong>Cyclone</strong> <strong>IV</strong> Devices 8–69<br />
<strong>Remote</strong> <strong>System</strong> Upgrade<br />
<strong>Remote</strong> <strong>System</strong> Upgrade<br />
<strong>Cyclone</strong> <strong>IV</strong> devices support remote system upgrade <strong>in</strong> AS <strong>and</strong> AP configuration<br />
schemes. You can also implement remote system upgrade with advanced <strong>Cyclone</strong> <strong>IV</strong><br />
features such as real-time decompression of configuration data <strong>in</strong> the AS<br />
configuration scheme.<br />
1 <strong>Remote</strong> system upgrade is not supported <strong>in</strong> a multi-device configuration cha<strong>in</strong> for<br />
any configuration scheme.<br />
Functional Description<br />
The dedicated remote system upgrade circuitry <strong>in</strong> <strong>Cyclone</strong> <strong>IV</strong> devices manages<br />
remote configuration <strong>and</strong> provides error detection, recovery, <strong>and</strong> status <strong>in</strong>formation.<br />
A Nios ® II processor or a user logic implemented <strong>in</strong> the <strong>Cyclone</strong> <strong>IV</strong> device logic array<br />
provides access to the remote configuration data source <strong>and</strong> an <strong>in</strong>terface to the<br />
configuration memory.<br />
1 <strong>Configuration</strong> memory refers to serial configuration devices (EPCS) or supported<br />
parallel flash memory, depend<strong>in</strong>g on the configuration scheme that is used.<br />
The remote system upgrade process of the <strong>Cyclone</strong> <strong>IV</strong> device consists of the follow<strong>in</strong>g<br />
steps:<br />
1. A Nios II processor (or user logic) implemented <strong>in</strong> the <strong>Cyclone</strong> <strong>IV</strong> device logic<br />
array receives new configuration data from a remote location. The connection to<br />
the remote source is a communication protocol, such as the transmission control<br />
protocol/Internet protocol (TCP/IP), peripheral component <strong>in</strong>terconnect (PCI),<br />
user datagram protocol (UDP), universal asynchronous receiver/transmitter<br />
(UART), or a proprietary <strong>in</strong>terface.<br />
2. The Nios II processor (or user logic) writes this new configuration data <strong>in</strong>to a<br />
configuration memory.<br />
3. The Nios II processor (or user logic) starts a reconfiguration cycle with the new or<br />
updated configuration data.<br />
4. The dedicated remote system upgrade circuitry detects <strong>and</strong> recovers from any<br />
error that might occur dur<strong>in</strong>g or after the reconfiguration cycle <strong>and</strong> provides error<br />
status <strong>in</strong>formation to the user design.<br />
Figure 8–30 shows the steps required for perform<strong>in</strong>g remote configuration updates<br />
(the numbers <strong>in</strong> Figure 8–30 co<strong>in</strong>cide with steps 1–3).<br />
Figure 8–30. Functional Diagram of <strong>Cyclone</strong> <strong>IV</strong> Device <strong>Remote</strong> <strong>System</strong> Upgrade<br />
Development<br />
Location<br />
1<br />
Data<br />
Data<br />
<strong>Cyclone</strong> <strong>IV</strong><br />
Device<br />
Control Module<br />
Device <strong>Configuration</strong><br />
February 2013 <strong>Altera</strong> Corporation <strong>Cyclone</strong> <strong>IV</strong> Device H<strong>and</strong>book,<br />
Volume 1<br />
Data<br />
2<br />
3<br />
<strong>Configuration</strong><br />
Memory
8–70 Chapter 8: <strong>Configuration</strong> <strong>and</strong> <strong>Remote</strong> <strong>System</strong> <strong>Upgrades</strong> <strong>in</strong> <strong>Cyclone</strong> <strong>IV</strong> Devices<br />
<strong>Remote</strong> <strong>System</strong> Upgrade<br />
Figure 8–31 shows the block diagrams to implement remote system upgrade <strong>in</strong><br />
<strong>Cyclone</strong> <strong>IV</strong> devices.<br />
Figure 8–31. <strong>Remote</strong> <strong>System</strong> Upgrade Block Diagrams for AS <strong>and</strong> AP <strong>Configuration</strong> Schemes<br />
The MSEL p<strong>in</strong> sett<strong>in</strong>g <strong>in</strong> the remote system upgrade mode is the same as the st<strong>and</strong>ard<br />
configuration mode. St<strong>and</strong>ard configuration mode refers to normal <strong>Cyclone</strong> <strong>IV</strong> device<br />
configuration mode with no support for remote system upgrades (the remote system<br />
upgrade circuitry is disabled). When us<strong>in</strong>g remote system upgrade <strong>in</strong> <strong>Cyclone</strong> <strong>IV</strong><br />
devices, you must enable the remote update mode option sett<strong>in</strong>g <strong>in</strong> the Quartus II<br />
software.<br />
Enabl<strong>in</strong>g <strong>Remote</strong> Update<br />
You can enable or disable remote update for <strong>Cyclone</strong> <strong>IV</strong> devices <strong>in</strong> the Quartus II<br />
software before design compilation (<strong>in</strong> the Compiler Sett<strong>in</strong>gs menu). To enable remote<br />
update <strong>in</strong> the compiler sett<strong>in</strong>gs of the project, perform the follow<strong>in</strong>g steps:<br />
1. On the Assignments menu, click Device. The Sett<strong>in</strong>gs dialog box appears.<br />
2. Click Device <strong>and</strong> P<strong>in</strong> Options. The Device <strong>and</strong> P<strong>in</strong> Options dialog box appears.<br />
3. Click the <strong>Configuration</strong> tab.<br />
4. From the <strong>Configuration</strong> Mode list, select <strong>Remote</strong>.<br />
5. Click OK.<br />
6. In the Sett<strong>in</strong>gs dialog box, click OK.<br />
<strong>Configuration</strong> Image Types<br />
Serial <strong>Configuration</strong> Device Parallel Flash Memory<br />
<strong>Cyclone</strong> <strong>IV</strong> Device<br />
Nios Processor or User Logic<br />
<strong>Cyclone</strong> <strong>IV</strong> E Device<br />
Nios Processor or User Logic<br />
Serial <strong>Configuration</strong> Device Supported Parallel Flash<br />
When us<strong>in</strong>g remote system upgrade, <strong>Cyclone</strong> <strong>IV</strong> device configuration bitstreams are<br />
classified as factory configuration images or application configuration images. An<br />
image, also referred to as a configuration, is a design loaded <strong>in</strong>to the device that<br />
performs certa<strong>in</strong> user-def<strong>in</strong>ed functions. Each device <strong>in</strong> your system requires one<br />
factory image or with addition of one or more application images. The factory image<br />
is a user-def<strong>in</strong>ed fall-back or safe configuration <strong>and</strong> is responsible for adm<strong>in</strong>ister<strong>in</strong>g<br />
remote updates with the dedicated circuitry. Application images implement<br />
user-def<strong>in</strong>ed functionality <strong>in</strong> the target <strong>Cyclone</strong> <strong>IV</strong> device. You can <strong>in</strong>clude the default<br />
application image functionality <strong>in</strong> the factory image.<br />
<strong>Cyclone</strong> <strong>IV</strong> Device H<strong>and</strong>book, February 2013 <strong>Altera</strong> Corporation<br />
Volume 1
Chapter 8: <strong>Configuration</strong> <strong>and</strong> <strong>Remote</strong> <strong>System</strong> <strong>Upgrades</strong> <strong>in</strong> <strong>Cyclone</strong> <strong>IV</strong> Devices 8–71<br />
<strong>Remote</strong> <strong>System</strong> Upgrade<br />
<strong>Remote</strong> <strong>System</strong> Upgrade Mode<br />
In remote update mode, <strong>Cyclone</strong> <strong>IV</strong> devices load the factory configuration image after<br />
power up. The user-def<strong>in</strong>ed factory configuration determ<strong>in</strong>es the application<br />
configuration to be loaded <strong>and</strong> triggers a reconfiguration cycle. The factory<br />
configuration can also conta<strong>in</strong> application logic.<br />
When used with configuration memory, the remote update mode allows an<br />
application configuration to start at any flash sector boundary. Additionally, the<br />
remote update mode features a user watchdog timer that can detect functional errors<br />
<strong>in</strong> an application configuration.<br />
<strong>Remote</strong> Update Mode<br />
In AS configuration scheme, when a <strong>Cyclone</strong> <strong>IV</strong> device is first powered up <strong>in</strong> remote<br />
update, it loads the factory configuration located at address<br />
boot_address[23:0] = 24b'0. <strong>Altera</strong> recommends stor<strong>in</strong>g the factory configuration<br />
image for your system at boot address 24b'0, which corresponds to the start address<br />
location 0×000000 <strong>in</strong> the serial configuration device. A factory configuration image is<br />
a bitstream for the <strong>Cyclone</strong> <strong>IV</strong> device <strong>in</strong> your system that is programmed dur<strong>in</strong>g<br />
production <strong>and</strong> is the fall-back image when an error occurs. This image is stored <strong>in</strong><br />
non-volatile memory <strong>and</strong> is never updated or modified us<strong>in</strong>g remote access.<br />
When you use the AP configuration <strong>in</strong> <strong>Cyclone</strong> <strong>IV</strong> E devices, the <strong>Cyclone</strong> <strong>IV</strong> E device<br />
loads the default factory configuration located at the follow<strong>in</strong>g address after device<br />
power-up <strong>in</strong> remote update mode:<br />
boot_address[23:0] = 24'h010000 = 24'b1 0000 0000 0000 0000.<br />
You can change the default factory configuration address to any desired address us<strong>in</strong>g<br />
the APFC_BOOT_ADDR JTAG <strong>in</strong>struction. The factory configuration image is stored <strong>in</strong><br />
non-volatile memory <strong>and</strong> is never updated or modified us<strong>in</strong>g remote access. This<br />
corresponds to the default start address location 0×010000 represented <strong>in</strong> 16-bit word<br />
address<strong>in</strong>g (or the updated address if the default address is changed) <strong>in</strong> the<br />
supported parallel flash memory. For more <strong>in</strong>formation about the application of the<br />
APFC_BOOT_ADDR JTAG <strong>in</strong>struction <strong>in</strong> AP configuration scheme, refer to the “JTAG<br />
Instructions” on page 8–57.<br />
The factory configuration image is user-designed <strong>and</strong> conta<strong>in</strong>s soft logic (Nios II<br />
processor or state mach<strong>in</strong>e <strong>and</strong> the remote communication <strong>in</strong>terface) to:<br />
■ Process any errors based on status <strong>in</strong>formation from the dedicated remote system<br />
upgrade circuitry<br />
■ Communicate with the remote host <strong>and</strong> receive new application configurations<br />
<strong>and</strong> store the new configuration data <strong>in</strong> the local non-volatile memory device<br />
■ Determ<strong>in</strong>e the application configuration to be loaded <strong>in</strong>to the <strong>Cyclone</strong> <strong>IV</strong> device<br />
■ Enable or disable the user watchdog timer <strong>and</strong> load its time-out value (optional)<br />
■ Instruct the dedicated remote system upgrade circuitry to start a reconfiguration<br />
cycle<br />
February 2013 <strong>Altera</strong> Corporation <strong>Cyclone</strong> <strong>IV</strong> Device H<strong>and</strong>book,<br />
Volume 1
8–72 Chapter 8: <strong>Configuration</strong> <strong>and</strong> <strong>Remote</strong> <strong>System</strong> <strong>Upgrades</strong> <strong>in</strong> <strong>Cyclone</strong> <strong>IV</strong> Devices<br />
<strong>Remote</strong> <strong>System</strong> Upgrade<br />
Figure 8–32 shows the transitions between the factory configuration <strong>and</strong> application<br />
configuration <strong>in</strong> remote update mode.<br />
Figure 8–32. Transitions Between <strong>Configuration</strong>s <strong>in</strong> <strong>Remote</strong> Update Mode<br />
Power Up<br />
<strong>Configuration</strong><br />
Error<br />
Factory<br />
<strong>Configuration</strong><br />
After power up or a configuration error, the factory configuration logic writes the<br />
remote system upgrade control register to specify the address of the application<br />
configuration to be loaded. The factory configuration also specifies whether or not to<br />
enable the user watchdog timer for the application configuration <strong>and</strong>, if enabled,<br />
specifies the timer sett<strong>in</strong>g.<br />
1 Only valid application configurations designed for remote update mode <strong>in</strong>clude the<br />
logic to reset the timer <strong>in</strong> user mode. For more <strong>in</strong>formation about the user watchdog<br />
timer, refer to the “User Watchdog Timer” on page 8–79.<br />
If there is an error while load<strong>in</strong>g the application configuration, the remote system<br />
upgrade status register is written by the dedicated remote system upgrade circuitry of<br />
the <strong>Cyclone</strong> <strong>IV</strong> device to specify the cause of the reconfiguration.<br />
The follow<strong>in</strong>g actions cause the remote system upgrade status register to be written:<br />
■ nSTATUS driven low externally<br />
■ Internal cyclical redundancy check (CRC) error<br />
■ User watchdog timer time-out<br />
<strong>Configuration</strong> Error<br />
Set Control Register<br />
<strong>and</strong> Reconfigure<br />
Reload a Different Application<br />
Reload a Different Application<br />
Set Control Register<br />
<strong>and</strong> Reconfigure<br />
<strong>Configuration</strong> Error<br />
Application 1<br />
<strong>Configuration</strong><br />
Application n<br />
<strong>Configuration</strong><br />
■ A configuration reset (logic array nCONFIG signal or external nCONFIG p<strong>in</strong> assertion)<br />
The <strong>Cyclone</strong> <strong>IV</strong> device automatically loads the factory configuration when an error<br />
occurs. This user-designed factory configuration reads the remote system upgrade<br />
status register to determ<strong>in</strong>e the reason for reconfiguration. Then the factory<br />
configuration takes the appropriate error recovery steps <strong>and</strong> writes to the remote<br />
system upgrade control register to determ<strong>in</strong>e the next application configuration to be<br />
loaded.<br />
<strong>Cyclone</strong> <strong>IV</strong> Device H<strong>and</strong>book, February 2013 <strong>Altera</strong> Corporation<br />
Volume 1
Chapter 8: <strong>Configuration</strong> <strong>and</strong> <strong>Remote</strong> <strong>System</strong> <strong>Upgrades</strong> <strong>in</strong> <strong>Cyclone</strong> <strong>IV</strong> Devices 8–73<br />
<strong>Remote</strong> <strong>System</strong> Upgrade<br />
When <strong>Cyclone</strong> <strong>IV</strong> devices successfully load the application configuration, they enter<br />
user mode. In user mode, the soft logic (the Nios II processor or state mach<strong>in</strong>e <strong>and</strong> the<br />
remote communication <strong>in</strong>terface) assists the <strong>Cyclone</strong> <strong>IV</strong> device <strong>in</strong> determ<strong>in</strong><strong>in</strong>g when a<br />
remote system update is arriv<strong>in</strong>g. When a remote system update arrives, the soft logic<br />
receives the <strong>in</strong>com<strong>in</strong>g data, writes it to the configuration memory device <strong>and</strong> triggers<br />
the device to load the factory configuration. The factory configuration reads the<br />
remote system upgrade status register, determ<strong>in</strong>es the valid application configuration<br />
to load, writes the remote system upgrade control register accord<strong>in</strong>gly, <strong>and</strong> starts<br />
system reconfiguration.<br />
February 2013 <strong>Altera</strong> Corporation <strong>Cyclone</strong> <strong>IV</strong> Device H<strong>and</strong>book,<br />
Volume 1
8–74 Chapter 8: <strong>Configuration</strong> <strong>and</strong> <strong>Remote</strong> <strong>System</strong> <strong>Upgrades</strong> <strong>in</strong> <strong>Cyclone</strong> <strong>IV</strong> Devices<br />
<strong>Remote</strong> <strong>System</strong> Upgrade<br />
Dedicated <strong>Remote</strong> <strong>System</strong> Upgrade Circuitry<br />
This section describes the implementation of the <strong>Cyclone</strong> <strong>IV</strong> device remote system<br />
upgrade dedicated circuitry. The remote system upgrade circuitry is implemented <strong>in</strong><br />
hard logic. This dedicated circuitry <strong>in</strong>terfaces with the user-def<strong>in</strong>ed factory<br />
application configurations implemented <strong>in</strong> the <strong>Cyclone</strong> <strong>IV</strong> device logic array to<br />
provide the complete remote configuration solution. The remote system upgrade<br />
circuitry conta<strong>in</strong>s the remote system upgrade registers, a watchdog timer, <strong>and</strong> state<br />
mach<strong>in</strong>es that control those components. Figure 8–33 shows the data path of the<br />
remote system upgrade block.<br />
Figure 8–33. <strong>Remote</strong> <strong>System</strong> Upgrade Circuit Data Path (1)<br />
Previous<br />
State<br />
Register 2<br />
Bit[30..0]<br />
Notes to Figure 8–33:<br />
Status Register (SR)<br />
Previous<br />
State<br />
Register 1<br />
Bit[30..0]<br />
d<strong>in</strong><br />
Logic<br />
Bit [40..39]<br />
Current<br />
State<br />
Logic<br />
Bit[31..0]<br />
Shift Register<br />
dout<br />
d<strong>in</strong><br />
Control Register<br />
Bit [38..0]<br />
Logic<br />
Update Register<br />
Bit [38..0] update<br />
dout<br />
Bit [38..0]<br />
capture<br />
clkout capture update<br />
Logic clk<strong>in</strong><br />
Internal Oscillator/<br />
CLKUSR<br />
RU_DIN RU_SHIFTnLD RU_CAPTnUPDT RU_CLK (2) RU_DOUT RU_nCONFIG RU_nRSTIMER<br />
Logic Array<br />
RSU<br />
Master<br />
State<br />
Mach<strong>in</strong>e<br />
RSU<br />
Reconfiguration<br />
State<br />
Mach<strong>in</strong>e<br />
User<br />
Watchdog<br />
Timer<br />
(1) The RU_DOUT, RU_SHIFTnLD, RU_CAPTnUPDT, RU_CLK, RU_DIN,RU_nCONFIG, <strong>and</strong> RU_nRSTIMER signals are <strong>in</strong>ternally controlled<br />
by the ALTREMOTE_UPDATE megafunction.<br />
(2) The RU_CLK refers to the ALTREMOTE_UPDATE megafunction block "clock" <strong>in</strong>put. For more <strong>in</strong>formation, refer to the <strong>Remote</strong> Update Circuitry<br />
(ALTREMOTE_UPDATE) Megafunction User Guide.<br />
<strong>Cyclone</strong> <strong>IV</strong> Device H<strong>and</strong>book, February 2013 <strong>Altera</strong> Corporation<br />
Volume 1<br />
timeout
Chapter 8: <strong>Configuration</strong> <strong>and</strong> <strong>Remote</strong> <strong>System</strong> <strong>Upgrades</strong> <strong>in</strong> <strong>Cyclone</strong> <strong>IV</strong> Devices 8–75<br />
<strong>Remote</strong> <strong>System</strong> Upgrade<br />
<strong>Remote</strong> <strong>System</strong> Upgrade Registers<br />
The remote system upgrade block conta<strong>in</strong>s a series of registers that stores the<br />
configuration addresses, watchdog timer sett<strong>in</strong>gs, <strong>and</strong> status <strong>in</strong>formation. Table 8–21<br />
lists these registers.<br />
Table 8–21. <strong>Remote</strong> <strong>System</strong> Upgrade Registers<br />
Register Description<br />
Shift<br />
register<br />
Control<br />
register<br />
Update<br />
register<br />
Status<br />
register<br />
This register is accessible by the logic array <strong>and</strong> allows the update, status, <strong>and</strong> control registers to be written<br />
<strong>and</strong> sampled by user logic. Write access is enabled <strong>in</strong> remote update mode for factory configurations to allow<br />
writ<strong>in</strong>g to the update register. Write access is disabled for all application configurations <strong>in</strong> remote update<br />
mode.<br />
This register conta<strong>in</strong>s the current configuration address, the user watchdog timer sett<strong>in</strong>gs, one option bit for<br />
check<strong>in</strong>g early CONF_DONE, <strong>and</strong> one option bit for select<strong>in</strong>g the <strong>in</strong>ternal oscillator as the startup state mach<strong>in</strong>e<br />
clock. Dur<strong>in</strong>g a read operation <strong>in</strong> an application configuration, this register is read <strong>in</strong>to the shift register. When<br />
a reconfiguration cycle is started, the contents of the update register are written <strong>in</strong>to the control register.<br />
This register conta<strong>in</strong>s data similar to that <strong>in</strong> the control register. However, it can only be updated by the factory<br />
configuration by shift<strong>in</strong>g data <strong>in</strong>to the shift register <strong>and</strong> issu<strong>in</strong>g an update operation. When a reconfiguration<br />
cycle is triggered by the factory configuration, the control register is updated with the contents of the update<br />
register. Dur<strong>in</strong>g a read <strong>in</strong> a factory configuration, this register is read <strong>in</strong>to the shift register.<br />
This register is written by the remote system upgrade circuitry on every reconfiguration to record the cause of<br />
the reconfiguration. This <strong>in</strong>formation is used by the factory configuration to determ<strong>in</strong>e the appropriate action<br />
follow<strong>in</strong>g a reconfiguration. Dur<strong>in</strong>g a capture cycle, this register is read <strong>in</strong>to the shift register.<br />
The control <strong>and</strong> status registers of the remote system upgrade are clocked by the<br />
10-MHz <strong>in</strong>ternal oscillator (the same oscillator that controls the user watchdog timer)<br />
or the CLKUSR. However, the shift <strong>and</strong> update registers of the remote system upgrade<br />
are clocked by the maximum frequency of 40-MHz user clock <strong>in</strong>put (RU_CLK). There is<br />
no m<strong>in</strong>imum frequency for RU_CLK.<br />
<strong>Remote</strong> <strong>System</strong> Upgrade Control Register<br />
The remote system upgrade control register stores the application configuration<br />
address, the user watchdog timer sett<strong>in</strong>gs, <strong>and</strong> option bits for a application<br />
configuration. In remote update mode for the AS configuration scheme, the control<br />
register address bits are set to all zeros (24'b0) at power up to load the AS factory<br />
configuration. In remote update mode for the AP configuration scheme, the control<br />
register address bits are set to 24'h010000 (24'b1 0000 0000 0000 0000) at power up to<br />
load the AP default factory configuration. However, for the AP configuration scheme,<br />
you can change the default factory configuration address to any desired address us<strong>in</strong>g<br />
the APFC_BOOT_ADDR JTAG <strong>in</strong>struction. Additionally, a factory configuration <strong>in</strong> remote<br />
update mode has write access to this register.<br />
February 2013 <strong>Altera</strong> Corporation <strong>Cyclone</strong> <strong>IV</strong> Device H<strong>and</strong>book,<br />
Volume 1
8–76 Chapter 8: <strong>Configuration</strong> <strong>and</strong> <strong>Remote</strong> <strong>System</strong> <strong>Upgrades</strong> <strong>in</strong> <strong>Cyclone</strong> <strong>IV</strong> Devices<br />
<strong>Remote</strong> <strong>System</strong> Upgrade<br />
Figure 8–34 shows the control register bit positions. Table 8–22 def<strong>in</strong>es the control<br />
register bit contents. The numbers <strong>in</strong> Figure 8–34 show the bit position of a sett<strong>in</strong>g <strong>in</strong> a<br />
register. For example, bit number 35 is the enable bit for the watchdog timer.<br />
Figure 8–34. <strong>Remote</strong> <strong>System</strong> Upgrade Control Register<br />
Table 8–22. <strong>Remote</strong> <strong>System</strong> Upgrade Control Register Contents<br />
38 37 36 35 34 33 12 11 0<br />
Rsv2 Cd_early Osc_<strong>in</strong>t Wd_en Rsv1 Ru_address[21..0] Wd_timer[11..0]<br />
Control Register Bit Value Def<strong>in</strong>ition<br />
Wd_timer[11..0] 12'b000000000000<br />
User watchdog time-out value (most significant 12 bits of<br />
29-bit count value:<br />
{Wd_timer[11..0],17'b1000})<br />
Ru_address[21..0] 22'b0000000000000000000000<br />
<strong>Configuration</strong> address (most significant 22 bits of 24-bit<br />
boot address value:<br />
boot_address[23:0] = {Ru_address[21..0],2'b0})<br />
Rsv1 1'b0 Reserved bit<br />
Wd_en 1'b1 User watchdog timer enable bit<br />
Osc_<strong>in</strong>t (1) 1'b1 Internal oscillator as startup state mach<strong>in</strong>e clock enable bit<br />
Cd_early (1) 1'b1 Early CONF_DONE check<br />
Rsv2 1'b1 Reserved bit<br />
Note to Table 8–22:<br />
(1) Option bit for the application configuration.<br />
When enabled, the early CONF_DONE check (Cd_early) option bit ensures that there is a<br />
valid configuration at the boot address specified by the factory configuration <strong>and</strong> that<br />
it is of the proper size. If an <strong>in</strong>valid configuration is detected or the CONF_DONE p<strong>in</strong> is<br />
asserted too early, the device resets <strong>and</strong> then reconfigures the factory configuration<br />
image. The <strong>in</strong>ternal oscillator (as the startup state mach<strong>in</strong>e clock [Osc_<strong>in</strong>t] option bit)<br />
ensures a functional startup clock to elim<strong>in</strong>ate the hang<strong>in</strong>g of startup. When all option<br />
bits are turned on, they provide complete coverage for the programm<strong>in</strong>g <strong>and</strong> startup<br />
portions of the application configuration. <strong>Altera</strong> recommends turn<strong>in</strong>g on both the<br />
Cd_early <strong>and</strong> Osc_<strong>in</strong>t option bits.<br />
1 The Cd_early <strong>and</strong> Osc_<strong>in</strong>t option bits for the application configuration must be<br />
turned on by the factory configuration.<br />
<strong>Remote</strong> <strong>System</strong> Upgrade Status Register<br />
The remote system upgrade status register specifies the reconfiguration trigger<br />
condition. The various trigger <strong>and</strong> error conditions <strong>in</strong>clude:<br />
■ Cyclical redundancy check (CRC) error dur<strong>in</strong>g application configuration<br />
■ nSTATUS assertion by an external device due to an error<br />
■ <strong>Cyclone</strong> <strong>IV</strong> device logic array triggers a reconfiguration cycle, possibly after<br />
download<strong>in</strong>g a new application configuration image<br />
<strong>Cyclone</strong> <strong>IV</strong> Device H<strong>and</strong>book, February 2013 <strong>Altera</strong> Corporation<br />
Volume 1
Chapter 8: <strong>Configuration</strong> <strong>and</strong> <strong>Remote</strong> <strong>System</strong> <strong>Upgrades</strong> <strong>in</strong> <strong>Cyclone</strong> <strong>IV</strong> Devices 8–77<br />
<strong>Remote</strong> <strong>System</strong> Upgrade<br />
■ External configuration reset (nCONFIG) assertion<br />
■ User watchdog timer time out<br />
Table 8–23 lists the contents of the current state logic <strong>in</strong> the status register, when the<br />
remote system upgrade master state mach<strong>in</strong>e is <strong>in</strong> factory configuration or<br />
application configuration access<strong>in</strong>g the factory <strong>in</strong>formation or application<br />
<strong>in</strong>formation, respectively. The status register bit <strong>in</strong> Table 8–23 lists the bit positions <strong>in</strong><br />
a 32-bit logic.<br />
Table 8–23. <strong>Remote</strong> <strong>System</strong> Upgrade Current State Logic Contents In Status Register<br />
<strong>Remote</strong> <strong>System</strong> Upgrade<br />
Master State Mach<strong>in</strong>e<br />
Factory <strong>in</strong>formation (1)<br />
Application <strong>in</strong>formation 1 (2)<br />
Application <strong>in</strong>formation 2 (2)<br />
Notes to Table 8–23:<br />
Status<br />
Register Bit<br />
31:30<br />
Def<strong>in</strong>ition Description<br />
Master state mach<strong>in</strong>e<br />
current state<br />
The current state of the remote system upgrade<br />
master state mach<strong>in</strong>e<br />
29:24 Reserved bits Padd<strong>in</strong>g bits that are set to all 0’s<br />
23:0 Boot address<br />
31:30<br />
29<br />
28:0<br />
31:30<br />
Master state mach<strong>in</strong>e<br />
current state<br />
User watchdog timer<br />
enable bit<br />
User watchdog timer<br />
time-out value<br />
Master state mach<strong>in</strong>e<br />
current state<br />
The current 24-bit boot address that was used by<br />
the configuration scheme as the start address to<br />
load the current configuration.<br />
The current state of the remote system upgrade<br />
master state mach<strong>in</strong>e<br />
The current state of the user watchdog enable,<br />
which is active high<br />
The current entire 29-bit watchdog time-out<br />
value.<br />
The current state of the remote system upgrade<br />
master state mach<strong>in</strong>e<br />
29:24 Reserved bits Padd<strong>in</strong>g bits that are set to all 0’s<br />
23:0 Boot address<br />
(1) The remote system upgrade master state mach<strong>in</strong>e is <strong>in</strong> factory configuration.<br />
(2) The remote system upgrade master state mach<strong>in</strong>e is <strong>in</strong> application configuration.<br />
The current 24-bit boot address that was used as<br />
the start address to load the current configuration<br />
The previous two application configurations are available <strong>in</strong> the previous state<br />
registers (previous state register 1 <strong>and</strong> previous state register 2), but only for<br />
debugg<strong>in</strong>g purposes.<br />
February 2013 <strong>Altera</strong> Corporation <strong>Cyclone</strong> <strong>IV</strong> Device H<strong>and</strong>book,<br />
Volume 1
8–78 Chapter 8: <strong>Configuration</strong> <strong>and</strong> <strong>Remote</strong> <strong>System</strong> <strong>Upgrades</strong> <strong>in</strong> <strong>Cyclone</strong> <strong>IV</strong> Devices<br />
<strong>Remote</strong> <strong>System</strong> Upgrade<br />
Table 8–24 lists the contents of previous state register 1 <strong>and</strong> previous state register 2 <strong>in</strong><br />
the status register. The status register bit <strong>in</strong> Table 8–24 shows the bit positions <strong>in</strong> a<br />
3-bit register. The previous state register 1 <strong>and</strong> previous state register 2 have the same<br />
bit def<strong>in</strong>itions. The previous state register 1 reflects the current application<br />
configuration <strong>and</strong> the previous state register 2 reflects the previous application<br />
configuration.<br />
Table 8–24. <strong>Remote</strong> <strong>System</strong> Upgrade Previous State Register 1 <strong>and</strong> Previous State Register 2 Contents <strong>in</strong> Status<br />
Register<br />
Status Register Bit Def<strong>in</strong>ition Description<br />
30<br />
29<br />
nCONFIG source<br />
CRC error source<br />
One-hot, active-high field that describes the reconfiguration source<br />
that caused the <strong>Cyclone</strong> <strong>IV</strong> device to leave the previous application<br />
28 nSTATUS source<br />
configuration. If there is a tie, the higher bit order <strong>in</strong>dicates<br />
27<br />
26<br />
User watchdog timer source<br />
<strong>Remote</strong> system upgrade<br />
nCONFIG source<br />
precedence. For example, if nCONFIG <strong>and</strong> remote system upgrade<br />
nCONFIG reach the reconfiguration state mach<strong>in</strong>e at the same time,<br />
the nCONFIG precedes the remote system upgrade nCONFIG.<br />
25:24<br />
Master state mach<strong>in</strong>e<br />
current state<br />
The state of the master state mach<strong>in</strong>e dur<strong>in</strong>g reconfiguration causes<br />
the <strong>Cyclone</strong> <strong>IV</strong> device to leave the previous application configuration.<br />
23:0 Boot address<br />
The address used by the configuration scheme to load the previous<br />
application configuration.<br />
If a capture is <strong>in</strong>appropriately done while captur<strong>in</strong>g a previous state before the system<br />
has entered remote update application configuration for the first time, a value outputs<br />
from the shift register to <strong>in</strong>dicate that the capture is <strong>in</strong>correctly called.<br />
<strong>Remote</strong> <strong>System</strong> Upgrade State Mach<strong>in</strong>e<br />
The remote system upgrade control <strong>and</strong> update registers have identical bit<br />
def<strong>in</strong>itions, but serve different roles (Table 8–21 on page 8–75). While both registers<br />
can only be updated when the device is loaded with a factory configuration image,<br />
the update register writes are controlled by the user logic, <strong>and</strong> the control register<br />
writes are controlled by the remote system upgrade state mach<strong>in</strong>e.<br />
In factory configurations, the user logic should send the option bits (Cd_early <strong>and</strong><br />
Osc_<strong>in</strong>t), the configuration address, <strong>and</strong> watchdog timer sett<strong>in</strong>gs for the next<br />
application configuration bit to the update register. When the logic array<br />
configuration reset (RU_nCONFIG) goes high, the remote system upgrade state mach<strong>in</strong>e<br />
updates the control register with the contents of the update register <strong>and</strong> starts system<br />
reconfiguration from the new application page.<br />
1 To ensure the successful reconfiguration between the pages, assert the RU_nCONFIG<br />
signal for a m<strong>in</strong>imum of 250 ns. This is equivalent to strob<strong>in</strong>g the reconfig <strong>in</strong>put of<br />
the ALTREMOTE_UPDATE megafunction high for a m<strong>in</strong>imum of 250 ns.<br />
If there is an error or reconfiguration trigger condition, the remote system upgrade<br />
state mach<strong>in</strong>e directs the system to load a factory or application configuration (based<br />
on mode <strong>and</strong> error condition) by sett<strong>in</strong>g the control register accord<strong>in</strong>gly.<br />
Table 8–25 lists the contents of the control register after such an event occurs for all<br />
possible error or trigger conditions.<br />
<strong>Cyclone</strong> <strong>IV</strong> Device H<strong>and</strong>book, February 2013 <strong>Altera</strong> Corporation<br />
Volume 1
Chapter 8: <strong>Configuration</strong> <strong>and</strong> <strong>Remote</strong> <strong>System</strong> <strong>Upgrades</strong> <strong>in</strong> <strong>Cyclone</strong> <strong>IV</strong> Devices 8–79<br />
<strong>Remote</strong> <strong>System</strong> Upgrade<br />
The remote system upgrade status register is updated by the dedicated error<br />
monitor<strong>in</strong>g circuitry after an error condition, but before the factory configuration is<br />
loaded.<br />
Table 8–25. Control Register Contents After an Error or Reconfiguration Trigger Condition<br />
Reconfiguration Error/Trigger Control Register Sett<strong>in</strong>g In <strong>Remote</strong> Update<br />
User Watchdog Timer<br />
nCONFIG reset All bits are 0<br />
nSTATUS error All bits are 0<br />
CORE triggered reconfiguration Update register<br />
CRC error All bits are 0<br />
Wd time out All bits are 0<br />
The user watchdog timer prevents a faulty application configuration from <strong>in</strong>def<strong>in</strong>itely<br />
stall<strong>in</strong>g the device. The system uses the timer to detect functional errors after an<br />
application configuration is successfully loaded <strong>in</strong>to the <strong>Cyclone</strong> <strong>IV</strong> device.<br />
The user watchdog timer is a counter that counts down from the <strong>in</strong>itial value loaded<br />
<strong>in</strong>to the remote system upgrade control register by the factory configuration. The<br />
counter is 29 bits wide <strong>and</strong> has a maximum count value of 2 29 . When specify<strong>in</strong>g the<br />
user watchdog timer value, specify only the most significant 12 bits. The remote<br />
system upgrade circuitry appends 17'b1000 to form the 29-bits value for the watchdog<br />
timer. The granularity of the timer sett<strong>in</strong>g is 2 17 cycles. The cycle time is based on the<br />
frequency of the 10-MHz <strong>in</strong>ternal oscillator or CLKUSR (maximum frequency of<br />
40 MHz).<br />
Table 8–26 lists the operat<strong>in</strong>g range of the 10-MHz <strong>in</strong>ternal oscillator.<br />
Table 8–26. 10-MHz Internal Oscillator Specifications<br />
M<strong>in</strong>imum Typical Maximum Unit<br />
5 6.5 10 MHz<br />
The user watchdog timer beg<strong>in</strong>s count<strong>in</strong>g after the application configuration enters<br />
device user mode. This timer must be periodically reloaded or reset by the application<br />
configuration before the timer expires by assert<strong>in</strong>g RU_nRSTIMER. If the application<br />
configuration does not reload the user watchdog timer before the count expires, a<br />
time-out signal is generated by the remote system upgrade dedicated circuitry. The<br />
time-out signal tells the remote system upgrade circuitry to set the user watchdog<br />
timer status bit (Wd) <strong>in</strong> the remote system upgrade status register <strong>and</strong> reconfigures the<br />
device by load<strong>in</strong>g the factory configuration.<br />
1 To allow the remote system upgrade dedicated circuitry to reset the watchdog timer,<br />
you must assert the RU_nRSTIMER signal active for a m<strong>in</strong>imum of 250 ns. This is<br />
equivalent to strob<strong>in</strong>g the reset_timer <strong>in</strong>put of the ALTREMOTE_UPDATE<br />
megafunction high for a m<strong>in</strong>imum of 250 ns.<br />
Errors dur<strong>in</strong>g configuration are detected by the CRC eng<strong>in</strong>e. Functional errors must<br />
not exist <strong>in</strong> the factory configuration because it is stored <strong>and</strong> validated dur<strong>in</strong>g<br />
production <strong>and</strong> is never updated remotely.<br />
February 2013 <strong>Altera</strong> Corporation <strong>Cyclone</strong> <strong>IV</strong> Device H<strong>and</strong>book,<br />
Volume 1
8–80 Chapter 8: <strong>Configuration</strong> <strong>and</strong> <strong>Remote</strong> <strong>System</strong> <strong>Upgrades</strong> <strong>in</strong> <strong>Cyclone</strong> <strong>IV</strong> Devices<br />
Document Revision History<br />
1 The user watchdog timer is disabled <strong>in</strong> factory configurations <strong>and</strong> dur<strong>in</strong>g the<br />
configuration cycle of the application configuration. It is enabled after the application<br />
configuration enters user mode.<br />
Quartus II Software Support<br />
Implementation <strong>in</strong> your design requires a remote system upgrade <strong>in</strong>terface between<br />
the <strong>Cyclone</strong> <strong>IV</strong> device logic array <strong>and</strong> remote system upgrade circuitry. You must also<br />
generate configuration files for production <strong>and</strong> remote programm<strong>in</strong>g of the system<br />
configuration memory. The Quartus II software provides these features.<br />
The two implementation options, ALTREMOTE_UPDATE megafunction <strong>and</strong> remote<br />
system upgrade atom, are for the <strong>in</strong>terface between the remote system upgrade<br />
circuitry <strong>and</strong> the device logic array <strong>in</strong>terface. Us<strong>in</strong>g the megafunction block <strong>in</strong>stead of<br />
creat<strong>in</strong>g your own logic saves design time <strong>and</strong> offers more efficient logic synthesis<br />
<strong>and</strong> device implementation.<br />
f For more <strong>in</strong>formation about the ALTREMOTE_UPDATE megafunction, refer to the<br />
<strong>Remote</strong> Update Circuitry (ALTREMOTE_UPDATE) Megafunction User Guide.<br />
Document Revision History<br />
Table 8–27 lists the revision history for this chapter.<br />
Table 8–27. Document Revision History (Part 1 of 2)<br />
Date Version Changes<br />
February 2013 1.6 Updated Table 8–8 to add new device options <strong>and</strong> packages.<br />
October 2012 1.5<br />
November 2011 1.4<br />
December 2010 1.3<br />
July 2010 1.2<br />
■ Updated “AP <strong>Configuration</strong> Supported Flash Memories”, “<strong>Configuration</strong> Data<br />
Decompression”, <strong>and</strong> “Overrid<strong>in</strong>g the Internal Oscillator” sections.<br />
■ Updated Figure 8–3, Figure 8–4, Figure 8–5, Figure 8–7, Figure 8–8, Figure 8–9,<br />
Figure 8–10, <strong>and</strong> Figure 8–11.<br />
■ Updated Table 8–2, Table 8–7, Table 8–11, Table 8–12, Table 8–17, <strong>and</strong> Table 8–18.<br />
■ Added <strong>in</strong>formation about how to ga<strong>in</strong> control of EPCS p<strong>in</strong>s.<br />
■ Updated “Reset”, “S<strong>in</strong>gle-Device AS <strong>Configuration</strong>”, “S<strong>in</strong>gle-Device AP<br />
<strong>Configuration</strong>”, <strong>and</strong> “Overrid<strong>in</strong>g the Internal Oscillator” sections.<br />
■ Added Table 8–7.<br />
■ Updated Table 8–6 <strong>and</strong> Table 8–19.<br />
■ Updated Figure 8–3, Figure 8–4, <strong>and</strong> Figure 8–5.<br />
■ Updated for the Quartus II software version 10.1 release.<br />
■ Added <strong>Cyclone</strong> <strong>IV</strong> E new device package <strong>in</strong>formation.<br />
■ Updated Table 8–7, Table 8–10, <strong>and</strong> Table 8–11.<br />
■ M<strong>in</strong>or text edits.<br />
Updated for the Quartus II software 10.0 release:<br />
■ Updated “Power-On Reset (POR) Circuit”, “<strong>Configuration</strong> <strong>and</strong> JTAG P<strong>in</strong> I/O<br />
Requirements”, <strong>and</strong> “Reset” sections.<br />
■ Updated Figure 8–10.<br />
■ Updated Table 8–16 <strong>and</strong> Table 8–17.<br />
<strong>Cyclone</strong> <strong>IV</strong> Device H<strong>and</strong>book, February 2013 <strong>Altera</strong> Corporation<br />
Volume 1
Chapter 8: <strong>Configuration</strong> <strong>and</strong> <strong>Remote</strong> <strong>System</strong> <strong>Upgrades</strong> <strong>in</strong> <strong>Cyclone</strong> <strong>IV</strong> Devices 8–81<br />
Document Revision History<br />
Table 8–27. Document Revision History (Part 2 of 2)<br />
Date Version Changes<br />
Updated for the Quartus II software 9.1 SP1 release:<br />
■ Added “Overrid<strong>in</strong>g the Internal Oscillator” <strong>and</strong> “AP <strong>Configuration</strong> (Supported Flash<br />
Memories)” sections.<br />
■ Updated “JTAG Instructions” section.<br />
February 2010 1.1 ■ Added Table 8–6.<br />
■ Updated Table 8–2, Table 8–3, Table 8–4, Table 8–6, Table 8–11, Table 8–13,<br />
Table 8–14, Table 8–15, <strong>and</strong> Table 8–18.<br />
■ Updated Figure 8–4, Figure 8–5, Figure 8–6, Figure 8–13, Figure 8–14,<br />
Figure 8–15, Figure 8–17, Figure 8–18, Figure 8–23, Figure 8–24, Figure 8–25,<br />
Figure 8–26, Figure 8–27, Figure 8–28, <strong>and</strong> Figure 8–29.<br />
November 2009 1.0 Initial release.<br />
February 2013 <strong>Altera</strong> Corporation <strong>Cyclone</strong> <strong>IV</strong> Device H<strong>and</strong>book,<br />
Volume 1
8–82 Chapter 8: <strong>Configuration</strong> <strong>and</strong> <strong>Remote</strong> <strong>System</strong> <strong>Upgrades</strong> <strong>in</strong> <strong>Cyclone</strong> <strong>IV</strong> Devices<br />
Document Revision History<br />
<strong>Cyclone</strong> <strong>IV</strong> Device H<strong>and</strong>book, February 2013 <strong>Altera</strong> Corporation<br />
Volume 1