Building iPhone Apps with HTML, CSS, and ... - Cdn.oreilly.com
Building iPhone Apps with HTML, CSS, and ... - Cdn.oreilly.com
Building iPhone Apps with HTML, CSS, and ... - Cdn.oreilly.com
Create successful ePaper yourself
Turn your PDF publications into a flip-book with our unique Google optimized e-Paper software.
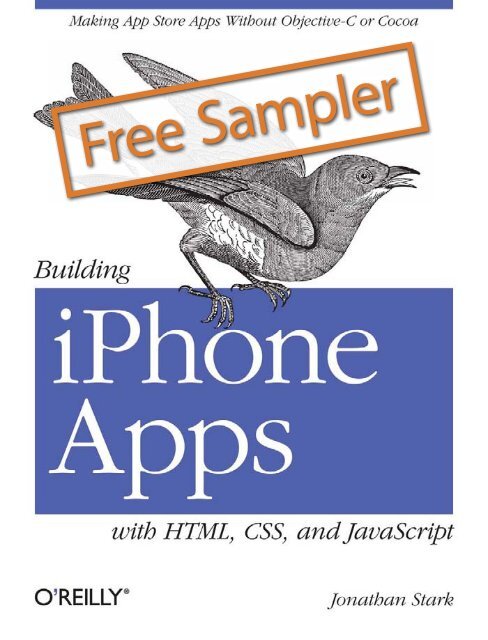
Free Sampler
O’Reilly Ebooks—Your bookshelf on your devices!<br />
When you buy an ebook through <strong>oreilly</strong>.<strong>com</strong>, you get lifetime access to the book, <strong>and</strong><br />
whenever possible we provide it to you in four, DRM-free file formats—PDF, .epub,<br />
Kindle-<strong>com</strong>patible .mobi, <strong>and</strong> Android .apk ebook—that you can use on the devices of<br />
your choice. Our ebook files are fully searchable <strong>and</strong> you can cut-<strong>and</strong>-paste <strong>and</strong> print<br />
them. We also alert you when we’ve updated the files <strong>with</strong> corrections <strong>and</strong> additions.<br />
Learn more at http://<strong>oreilly</strong>.<strong>com</strong>/ebooks/<br />
You can also purchase O’Reilly ebooks through iTunes,<br />
the Android Marketplace, <strong>and</strong> Amazon.<strong>com</strong>.
<strong>Building</strong> <strong>iPhone</strong> <strong>Apps</strong> <strong>with</strong> <strong>HTML</strong>, <strong>CSS</strong>, <strong>and</strong> JavaScript<br />
by Jonathan Stark<br />
Copyright © 2010 Jonathan Stark. All rights reserved.<br />
Printed in the United States of America.<br />
Published by O’Reilly Media, Inc., 1005 Gravenstein Highway North, Sebastopol, CA 95472.<br />
O’Reilly books may be purchased for educational, business, or sales promotional use. Online editions<br />
are also available for most titles (http://my.safaribooksonline.<strong>com</strong>). For more information, contact our<br />
corporate/institutional sales department: (800) 998-9938 or corporate@<strong>oreilly</strong>.<strong>com</strong>.<br />
Editor: Brian Jepson<br />
Production Editor: Sumita Mukherji<br />
Copyeditor: Emily Quill<br />
Proofreader: Sada Preisch<br />
Printing History:<br />
January 2010: First Edition.<br />
Indexer: Fred Brown<br />
Cover Designer: Karen Montgomery<br />
Interior Designer: David Futato<br />
Illustrator: Robert Romano<br />
Nutshell H<strong>and</strong>book, the Nutshell H<strong>and</strong>book logo, <strong>and</strong> the O’Reilly logo are registered trademarks of<br />
O’Reilly Media, Inc. <strong>Building</strong> <strong>iPhone</strong> <strong>Apps</strong> <strong>with</strong> <strong>HTML</strong>, <strong>CSS</strong>, <strong>and</strong> JavaScript, the image of a bluebird, <strong>and</strong><br />
related trade dress are trademarks of O’Reilly Media, Inc.<br />
Many of the designations used by manufacturers <strong>and</strong> sellers to distinguish their products are claimed as<br />
trademarks. Where those designations appear in this book, <strong>and</strong> O’Reilly Media, Inc., was aware of a<br />
trademark claim, the designations have been printed in caps or initial caps.<br />
While every precaution has been taken in the preparation of this book, the publisher <strong>and</strong> author assume<br />
no responsibility for errors or omissions, or for damages resulting from the use of the information contained<br />
herein.<br />
This work is licensed under a Creative Commons Attribution-Non<strong>com</strong>mercial-No Derivative Works 3.0<br />
United States License.<br />
TM<br />
This book uses RepKover, a durable <strong>and</strong> flexible lay-flat binding.<br />
ISBN: 978-0-596-80578-4<br />
[M]<br />
1262957633
Table of Contents<br />
Preface . . . . . . . . . . . . . . . . . . . . . . . . . . . . . . . . . . . . . . . . . . . . . . . . . . . . . . . . . . . . . . . . . . . . . xi<br />
1. Getting Started . . . . . . . . . . . . . . . . . . . . . . . . . . . . . . . . . . . . . . . . . . . . . . . . . . . . . . . . . 1<br />
Web <strong>Apps</strong> Versus Native <strong>Apps</strong> 1<br />
What Is a Web App? 1<br />
What Is a Native App? 1<br />
Pros <strong>and</strong> Cons 2<br />
Which Approach Is Right for You? 2<br />
Web Programming Crash Course 3<br />
Intro to <strong>HTML</strong> 3<br />
Intro to <strong>CSS</strong> 6<br />
Intro to JavaScript 9<br />
2. Basic <strong>iPhone</strong> Styling . . . . . . . . . . . . . . . . . . . . . . . . . . . . . . . . . . . . . . . . . . . . . . . . . . . . 13<br />
First Steps 14<br />
Preparing a Separate <strong>iPhone</strong> Stylesheet 16<br />
Controlling the Page Scaling 17<br />
Adding the <strong>iPhone</strong> <strong>CSS</strong> 19<br />
Adding the <strong>iPhone</strong> Look <strong>and</strong> Feel 21<br />
Adding Basic Behavior <strong>with</strong> jQuery 23<br />
What You’ve Learned 28<br />
3. Advanced <strong>iPhone</strong> Styling . . . . . . . . . . . . . . . . . . . . . . . . . . . . . . . . . . . . . . . . . . . . . . . . 29<br />
Adding a Touch of Ajax 29<br />
Traffic Cop 29<br />
Simple Bells <strong>and</strong> Whistles 34<br />
Roll Your Own Back Button 40<br />
Adding an Icon to the Home Screen 46<br />
Full Screen Mode 48<br />
Changing the Status Bar 48<br />
Providing a Custom Startup Graphic 49<br />
vii
What You’ve Learned 50<br />
4. Animation . . . . . . . . . . . . . . . . . . . . . . . . . . . . . . . . . . . . . . . . . . . . . . . . . . . . . . . . . . . . 51<br />
With a Little Help from Our Friend 51<br />
Sliding Home 51<br />
Adding the Dates Panel 55<br />
Adding the Date Panel 56<br />
Adding the New Entry Panel 58<br />
Adding the Settings Panel 60<br />
Putting It All Together 62<br />
Customizing jQTouch 64<br />
What You’ve Learned 67<br />
5. Client-Side Data Storage . . . . . . . . . . . . . . . . . . . . . . . . . . . . . . . . . . . . . . . . . . . . . . . . 69<br />
localStorage <strong>and</strong> sessionStorage 69<br />
Saving User Settings to localStorage 70<br />
Saving the Selected Date to sessionStorage 73<br />
Client-Side Database 74<br />
Creating a Database 75<br />
Inserting Rows 78<br />
Selecting Rows <strong>and</strong> H<strong>and</strong>ling Result Sets 82<br />
Deleting Rows 86<br />
What You’ve Learned 89<br />
6. Going Offline . . . . . . . . . . . . . . . . . . . . . . . . . . . . . . . . . . . . . . . . . . . . . . . . . . . . . . . . . . 91<br />
The Basics of the Offline Application Cache 91<br />
Online Whitelist <strong>and</strong> Fallback Options 94<br />
Creating a Dynamic Manifest File 98<br />
Debugging 102<br />
The JavaScript Console 103<br />
The Application Cache Database 107<br />
What You’ve Learned 113<br />
7. Going Native . . . . . . . . . . . . . . . . . . . . . . . . . . . . . . . . . . . . . . . . . . . . . . . . . . . . . . . . . 115<br />
Intro to PhoneGap 115<br />
Using the Screen’s Full Height 121<br />
Customizing the Title <strong>and</strong> Icon 123<br />
Creating a Startup Screen 130<br />
Installing Your App on the <strong>iPhone</strong> 131<br />
Controlling the <strong>iPhone</strong> <strong>with</strong> JavaScript 136<br />
Beep, Vibrate, <strong>and</strong> Alert 136<br />
Geolocation 140<br />
Accelerometer 146<br />
viii | Table of Contents
What You’ve Learned 150<br />
8. Submitting Your App to iTunes . . . . . . . . . . . . . . . . . . . . . . . . . . . . . . . . . . . . . . . . . . 151<br />
Creating an <strong>iPhone</strong> Distribution Provisioning Profile 151<br />
Installing the <strong>iPhone</strong> Distribution Provisioning Profile 153<br />
Renaming the Project 155<br />
Prepare the Application Binary 156<br />
Submit Your App 157<br />
While You Wait 159<br />
Further Reading 159<br />
Index . . . . . . . . . . . . . . . . . . . . . . . . . . . . . . . . . . . . . . . . . . . . . . . . . . . . . . . . . . . . . . . . . . . . . 161<br />
Table of Contents | ix
CHAPTER 1<br />
Getting Started<br />
Before we dive in <strong>and</strong> start building applications for the <strong>iPhone</strong>, I’d like to quickly<br />
establish the playing field. In this chapter, I’ll define key terms, <strong>com</strong>pare the pros <strong>and</strong><br />
cons of the two most <strong>com</strong>mon development approaches, <strong>and</strong> present a crash course in<br />
the three core web technologies that are used in this book.<br />
Web <strong>Apps</strong> Versus Native <strong>Apps</strong><br />
First, I’ll define what I mean by “web app” <strong>and</strong> “native app” <strong>and</strong> consider the pros <strong>and</strong><br />
cons of each.<br />
What Is a Web App?<br />
To me, a web app is basically a website that is specifically optimized for the <strong>iPhone</strong>.<br />
The site can be anything from a st<strong>and</strong>ard small-business brochure site to a mortgage<br />
calculator to a daily calorie tracker—the content is irrelevant. The defining characteristics<br />
of a web app are that the user interface is built <strong>with</strong> web-st<strong>and</strong>ard technologies,<br />
it is available at a URL (public, private, or behind a login), <strong>and</strong> it is optimized for the<br />
specifics of the <strong>iPhone</strong>. A web app is not installed on the phone, is not available in the<br />
iTunes App Store, <strong>and</strong> is not written <strong>with</strong> Objective-C.<br />
What Is a Native App?<br />
In contrast, native apps are installed on the <strong>iPhone</strong>, have access to the hardware (speakers,<br />
accelerometer, camera, etc.), <strong>and</strong> are written <strong>with</strong> Objective-C. The defining characteristic<br />
of a native app, however, is that it’s available in the iTunes App Store—a<br />
feature that has captured the imagination of hordes of software entrepreneurs worldwide,<br />
myself included.<br />
1
Pros <strong>and</strong> Cons<br />
Different applications have different requirements. Some apps are a better fit <strong>with</strong> web<br />
technologies than others. Knowing the pros <strong>and</strong> cons of each approach will help you<br />
make the right decision about which path is appropriate for your situation.<br />
Here are the pros of native app development:<br />
• Millions of registered credit card owners are one click away.<br />
• Xcode, Interface Builder, <strong>and</strong> the Cocoa Touch framework constitute a pretty<br />
sweet development environment.<br />
• You can access all the cool hardware features of the device.<br />
Here are the cons of native app development:<br />
• You have to pay to be<strong>com</strong>e an Apple developer.<br />
• You are at the mercy of the Apple approval process.<br />
• You have to develop using Objective-C.<br />
• You have to develop on a Mac.<br />
• You can’t release bug fixes in a timely fashion.<br />
• The development cycle is slow, <strong>and</strong> the testing cycle is constrained by the App<br />
Store’s limitations.<br />
Here are the pros of web app development:<br />
• Web developers can use their current authoring tools.<br />
• You can use your current web design <strong>and</strong> development skills.<br />
• You are not limited to developing on the Mac OS.<br />
• Your app will run on any device that has a web browser.<br />
• You can fix bugs in real time.<br />
• The development cycle is fast.<br />
Here are the cons of web app development:<br />
• You cannot access the all cool hardware features of the phone.<br />
• You have to roll your own payment system if you want to charge for the app.<br />
• It can be difficult to achieve sophisticated UI effects.<br />
Which Approach Is Right for You?<br />
Here’s where it gets exciting. The always-online nature of the <strong>iPhone</strong> creates an environment<br />
in which the lines between a web app <strong>and</strong> a native app get blurry. There are<br />
even some little-known features of the <strong>iPhone</strong> that allow you to take a web app offline<br />
if you want (see Chapter 6). What’s more, several third-party projects—of which<br />
2 | Chapter 1: Getting Started
PhoneGap is the most notable—are actively developing solutions that allow web developers<br />
to take a web app <strong>and</strong> package it as a native app for the <strong>iPhone</strong> <strong>and</strong> other<br />
mobile platforms.<br />
For me, this is the perfect blend. I can write in my native language, release a product<br />
as a pure web app (for the <strong>iPhone</strong> <strong>and</strong> any other devices that have a modern browser)<br />
<strong>with</strong>out going through Apple’s approval process, <strong>and</strong> use the same codebase to create<br />
an enhanced native version that can access the device hardware <strong>and</strong> potentially be sold<br />
in the App Store. And if Apple rejects it? No big deal, because I still have my online<br />
version. I can keep working on the native version while customers use the web app.<br />
Web Programming Crash Course<br />
The three main technologies we are going to use to build web apps are <strong>HTML</strong>, <strong>CSS</strong>,<br />
<strong>and</strong> JavaScript. I’d like to quickly cover each to make sure we’re all on the same page<br />
before plowing into the fancy stuff.<br />
Intro to <strong>HTML</strong><br />
When you’re browsing the Web, the pages that you are viewing are just text documents<br />
sitting on someone else’s <strong>com</strong>puter. The text in a typical web page is wrapped in <strong>HTML</strong><br />
tags, which tell your browser about the structure of the document. With this information,<br />
the browser can decide how to display the information in a way that makes sense.<br />
Consider the web page snippet shown in Example 1-1. On the first line, the string Hi<br />
there! is wrapped in a pair of h1 tags. (Notice that the open tag <strong>and</strong> the close tag are<br />
slightly different: the close tag has a slash as the second character, while the open tag<br />
does not.)<br />
Wrapping some text in h1 tags tells the browser that the words enclosed are a heading,<br />
which will cause it to be displayed in large bold text on its own line. There are also<br />
h2, h3, h4, h5, <strong>and</strong> h6 heading tags. The lower the number, the more important the<br />
header, so text wrapped in an h6 tag will be smaller (i.e., less important-looking) than<br />
text wrapped in an h3 tag.<br />
After the h1 tag in Example 1-1 are two lines wrapped in p tags. These are called paragraph<br />
tags. Browsers will display each paragraph on its own line. If the paragraph is<br />
long enough to exceed the width of the browser window, the text will bump down <strong>and</strong><br />
continue on the next line. In either case, a blank line will be inserted after the paragraph<br />
to separate it from the next item on the page.<br />
Example 1-1. <strong>HTML</strong> snippet<br />
Hi there!<br />
Thanks for visiting my web page.<br />
I hope you like it.<br />
Web Programming Crash Course | 3
You can also put <strong>HTML</strong> tags inside of other <strong>HTML</strong> tags. Example 1-2 shows an unordered<br />
list (ul) tag that contains three list items (li). In a browser, this would show<br />
up as a bulleted list, <strong>with</strong> each item on its own line. When you have a tag or tags inside<br />
of another tag, the inner tags are called child elements, or children, of the parent tag.<br />
So in this example, the lis are children of the ul parent.<br />
Example 1-2. Unordered list<br />
<br />
Pizza<br />
Beer<br />
Dogs<br />
<br />
The tags I’ve covered so far are all block tags. The defining characteristic of a block tag<br />
is that it is displayed on a line of its own, <strong>with</strong> no elements to its left or right. That is<br />
why headings, paragraphs, <strong>and</strong> list items progress down the page instead of across it.<br />
The opposite of a block tag is an inline tag, which, as the name implies, can appear in<br />
a line. The emphasis tag (em) is an example of an inline tag, <strong>and</strong> it looks like this:<br />
I really hope you like it.<br />
The gr<strong>and</strong>daddy of the inline tags—<strong>and</strong> arguably the coolest feature of <strong>HTML</strong>—is the<br />
a tag. The a st<strong>and</strong>s for anchor, but I’ll also refer to the tag as a link or hyperlink. Text<br />
wrapped in an anchor tag be<strong>com</strong>es clickable, such that clicking on it causes your<br />
browser to load a new <strong>HTML</strong> page.<br />
In order to tell the browser what new page to load, we have to add what’s called an<br />
attribute to the tag. Attributes are named values that are inserted into an open tag. In<br />
an anchor tag, you use the href attribute to specify the location of the target page. Here’s<br />
a link to Google’s home page:<br />
Google<br />
That might look like a bit of a jumble if you are not used to reading <strong>HTML</strong>, but you<br />
should be able to pick out the URL for the Google home page. You’ll be seeing a lot of<br />
a tags <strong>and</strong> hrefs throughout the book, so take a minute to get your head around this if<br />
it doesn’t make sense at first glance.<br />
4 | Chapter 1: Getting Started<br />
There are a couple of things to keep in mind regarding attributes. Different<br />
<strong>HTML</strong> tags allow different attributes. You can add multiple attributes<br />
to an open tag by separating them <strong>with</strong> spaces. You never add<br />
attributes to a closing tag. There are hundreds of possible <strong>com</strong>binations<br />
of attributes <strong>and</strong> tags, but don’t sweat it. We only have to worry about<br />
a dozen or so in this book.
The <strong>HTML</strong> snippet that we’ve been looking at would normally reside in the body section<br />
of a <strong>com</strong>plete <strong>HTML</strong> document. An <strong>HTML</strong> document is made up of two sections: the<br />
head <strong>and</strong> the body. The body is where you put all the content that you want users to<br />
see. The head contains information about the page, most of which is invisible to the<br />
user.<br />
The body <strong>and</strong> head are always wrapped in an html element. Example 1-3 shows the<br />
snippet in the context of a proper <strong>HTML</strong> document. For now the head section contains<br />
a title element, which tells the browser what text to display in the title bar of the<br />
window.<br />
Example 1-3. A proper <strong>HTML</strong> document<br />
<br />
<br />
My Awesome Page<br />
<br />
<br />
Hi there!<br />
Thanks for visiting my web page.<br />
I hope you like it.<br />
<br />
Pizza<br />
Beer<br />
Dogs<br />
<br />
<br />
<br />
Normally, when you are using your web browser you are viewing pages that are hosted<br />
on the Internet. However, browsers are perfectly good at displaying <strong>HTML</strong> documents<br />
that are on your local machine as well. To see what I mean, crack open a text editor<br />
<strong>and</strong> type up Example 1-3. When you are done, save it to your desktop as test.html <strong>and</strong><br />
then open it <strong>with</strong> Safari by either dragging the file onto the Safari application icon or<br />
opening Safari <strong>and</strong> selecting File→Open File. Double-clicking test.html might work as<br />
well, but it could open in your text editor or another browser depending on your<br />
settings.<br />
Even if you aren’t running Mac OS X, you should use Safari when testing<br />
your <strong>iPhone</strong> web apps on a desktop web browser, because Safari is the<br />
closest desktop browser to the <strong>iPhone</strong>’s Mobile Safari. Safari for Windows<br />
is available from http://www.apple.<strong>com</strong>/safari/.<br />
Web Programming Crash Course | 5
Intro to <strong>CSS</strong><br />
Some text editors are bad for authoring <strong>HTML</strong>. In particular, you want<br />
to avoid editors that support rich text editing, like Microsoft Word or<br />
TextEdit. These types of editors can save their files in formats other than<br />
plain text, which will break your <strong>HTML</strong>. If you are in the market for a<br />
good text editor, my favorite by far on the Mac is TextMate (http://<br />
macromates.<strong>com</strong>/), <strong>and</strong> I hear that there is a clone version for Windows<br />
called E Text Editor (http://www.e-texteditor.<strong>com</strong>/). If free is your thing,<br />
you can download Text Wrangler for Mac (http://www.barebones.<strong>com</strong>/<br />
products/TextWrangler/) or use the built-in Notepad on Windows.<br />
As you’ve seen, browsers render certain <strong>HTML</strong> elements <strong>with</strong> distinct styles (headings<br />
are large <strong>and</strong> bold, paragraphs are followed by a blank line, etc.). These styles are very<br />
basic <strong>and</strong> are primarily intended to help the reader underst<strong>and</strong> the structure <strong>and</strong> meaning<br />
of the document.<br />
To go beyond this simple structure-based rendering, you can use Cascading Style Sheets<br />
(<strong>CSS</strong>). <strong>CSS</strong> is a stylesheet language that is used to define the visual presentation of an<br />
<strong>HTML</strong> document. You can use <strong>CSS</strong> to define simple things like the text color, size, <strong>and</strong><br />
style (bold, italic, etc.), or <strong>com</strong>plex things like page layout, gradients, opacity, <strong>and</strong> much<br />
more.<br />
Example 1-4 shows a <strong>CSS</strong> rule that instructs the browser to display any text in the body<br />
element using the color red. In this example, body is the selector (what is affected by the<br />
rule) <strong>and</strong> the curly braces enclose the declaration (the rule itself). The declaration includes<br />
a set of properties <strong>and</strong> their values. In this example, color is the property, <strong>and</strong><br />
red is the value of the property.<br />
Example 1-4. A simple <strong>CSS</strong> rule<br />
body { color: red; }<br />
Property names are predefined in the <strong>CSS</strong> specification, which means that you can’t<br />
just make them up. Each property expects an appropriate value, <strong>and</strong> there can be lots<br />
of appropriate values <strong>and</strong> value formats for a given property.<br />
For example, you can specify colors <strong>with</strong> predefined keywords like red, or by using<br />
<strong>HTML</strong> color code notation. This uses a hexadecimal notation: three pairs of hexadecimal<br />
digits (0–F) representing (from left to right) Red, Green, <strong>and</strong> Blue values. Properties<br />
that expect measurements can accept values like 10px, 75%, <strong>and</strong> 1em. Example 1-5<br />
shows some <strong>com</strong>mon declarations. (The color code shown for background-color corresponds<br />
to the <strong>CSS</strong> “gray”.)<br />
Example 1-5. Some <strong>com</strong>mon <strong>CSS</strong> declarations<br />
body {<br />
color: red;<br />
background-color: #808080;<br />
6 | Chapter 1: Getting Started
}<br />
font-size: 12px;<br />
font-style: italic;<br />
font-weight: bold;<br />
font-family: Arial;<br />
Selectors <strong>com</strong>e in a variety of flavors. If you wanted all of your hyperlinks (the a element)<br />
to display in italics, you would add the following to your stylesheet:<br />
a { font-style: italic; }<br />
If you wanted to be more specific <strong>and</strong> only italicize the hyperlinks that were contained<br />
somewhere <strong>with</strong>in an h1 tag, you would add the following to your stylesheet:<br />
h1 a { font-style: italic; }<br />
You can also define your own custom selectors by adding id <strong>and</strong>/or class attributes to<br />
your <strong>HTML</strong> tags. Consider the following <strong>HTML</strong> snippet:<br />
Hi there!<br />
Thanks for visiting my web page.<br />
I hope you like it.<br />
<br />
Pizza<br />
Beer<br />
Dogs<br />
<br />
If I added .loud { font-style: italic; } to the <strong>CSS</strong> for this <strong>HTML</strong>, Hi there! <strong>and</strong><br />
Pizza would show up italicized because they both have the loud class. The dot in front<br />
of the .loud selector is important. It’s how the <strong>CSS</strong> knows to look for <strong>HTML</strong> tags <strong>with</strong><br />
a class of loud. If you omit the dot, the <strong>CSS</strong> would look for a loud tag, which doesn’t<br />
exist in this snippet (or in <strong>HTML</strong> at all, for that matter).<br />
Applying <strong>CSS</strong> by id is similar. To add a yellow background fill to the highlight paragraph<br />
tag, you’d use this rule:<br />
#highlight { background-color: yellow; }<br />
Here, the # symbol tells the <strong>CSS</strong> to look for an <strong>HTML</strong> tag <strong>with</strong> the id highlight.<br />
To recap, you can opt to select elements by tag name (e.g., body, h1, p), by class name<br />
(e.g., .loud, .subtle, .error), or by id (e.g., #highlight, #login, #promo). And you can<br />
get more specific by chaining selectors together (e.g., h1 a, body ul .loud).<br />
There are differences between class <strong>and</strong> id. class attributes should be<br />
used when you have more than one item on the page <strong>with</strong> the same<br />
class value. Conversely, id values have to be unique to a page.<br />
When I first learned this, I figured I’d just always use class attributes<br />
so I wouldn’t have to worry about whether I was duping an id value.<br />
However, selecting elements by id is much faster than selecting them<br />
by class, so you can hurt your performance by overusing class selectors.<br />
Web Programming Crash Course | 7
So now you underst<strong>and</strong> the basics of <strong>CSS</strong>. But how do you apply a style sheet to an<br />
<strong>HTML</strong> page? It’s actually quite simple. You just link to the stylesheet in the head of the<br />
<strong>HTML</strong> document, as seen in Example 1-6. The href attribute in this example is a relative<br />
path, meaning that it points to a text file named screen.css in the same directory as the<br />
<strong>HTML</strong> page. You can also specify absolute links, such as:<br />
http://example.<strong>com</strong>/screen.css<br />
Example 1-6. Linking to a <strong>CSS</strong> stylesheet<br />
<br />
<br />
My Awesome Page<br />
<br />
<br />
<br />
Hi there!<br />
Thanks for visiting my web page.<br />
I hope you like it.<br />
<br />
Pizza<br />
Beer<br />
Dogs<br />
<br />
<br />
<br />
Example 1-7 shows the contents of screen.css. You should save this file in the same<br />
location as the <strong>HTML</strong> file.<br />
Example 1-7. A simple stylesheet<br />
body {<br />
font-size: 12px;<br />
font-weight: bold;<br />
font-family: Arial;<br />
}<br />
a { font-style: italic; }<br />
h1 a { font-style: italic; }<br />
.loud { font-style: italic; }<br />
#highlight { background-color: yellow; }<br />
It’s worth pointing out that it’s possible to link to stylesheets that are<br />
hosted on domains other than the one hosting the <strong>HTML</strong> document.<br />
However, it’s considered very rude to link to someone else’s stylesheets<br />
<strong>with</strong>out permission, so please only link to your own.<br />
For a quick <strong>and</strong> thorough crash course in <strong>CSS</strong>, I highly re<strong>com</strong>mend <strong>CSS</strong> Pocket<br />
Reference by Eric Meyer (O’Reilly). Eric has the last word when it <strong>com</strong>es to <strong>CSS</strong>, <strong>and</strong><br />
this particular book is short enough to read during the typical morning carpool. Unless<br />
8 | Chapter 1: Getting Started
you are the person driving, in which case it could take considerably longer (did I say<br />
“crash” course?).<br />
Intro to JavaScript<br />
At this point you should know how to structure a document <strong>with</strong> <strong>HTML</strong> <strong>and</strong> how to<br />
modify its visual presentation <strong>with</strong> <strong>CSS</strong>. Now we’ll add some JavaScript to make it do<br />
stuff.<br />
JavaScript is a scripting language that can be added to an <strong>HTML</strong> page to make it more<br />
interactive <strong>and</strong> convenient for the user. For example, you can write some JavaScript<br />
that will inspect the values typed in a form to make sure they are valid. Or you can have<br />
JavaScript show or hide elements of a page depending on where the user clicks.<br />
JavaScript can even contact the web server to execute database changes <strong>with</strong>out refreshing<br />
the current web page.<br />
Like any modern scripting language, JavaScript has variables, arrays, objects, <strong>and</strong> all<br />
the typical control structures (if, while, for, <strong>and</strong> so on). Example 1-8 shows a snippet<br />
of JavaScript that illustrates several core concepts of the language.<br />
Example 1-8. Basic JavaScript syntax<br />
var foods = ['Apples', 'Bananas', 'Oranges'];<br />
for (var i in foods) {<br />
if (foods[i] == 'Apples') {<br />
alert(foods[i] + ' are my favorite!');<br />
} else {<br />
alert(foods[i] + ' are okay.');<br />
}<br />
}<br />
Here’s an explanation of what’s happening here:<br />
Define an array named foods that contains three elements.<br />
Open a for loop that defines a variable named i that will contain the index of each<br />
element of the array during the loop.<br />
A garden-variety if checks to see if the current element of the array is equal to Apples.<br />
This is displayed if the current element of the array is equal to Apples.<br />
This is displayed if the current element of the array is not equal to Apples.<br />
Here are some points about JavaScript’s syntax that are worth noting:<br />
• Statements are terminated <strong>with</strong> semicolons.<br />
• Code blocks are enclosed in curly braces.<br />
• Variables are declared using the var keyword.<br />
• Array elements can be accessed <strong>with</strong> square bracket notation.<br />
Web Programming Crash Course | 9
• Array keys are assigned beginning at 0.<br />
• The single equals sign is the assignment operator.<br />
• The double equals sign is the equivalence logical operator.<br />
• The plus sign is the string concatenation operator.<br />
For our purposes, the most important feature of JavaScript is that it can interact <strong>with</strong><br />
the elements of an <strong>HTML</strong> page (the cool kids call this “manipulating the DOM”).<br />
Example 1-9 shows a simple bit of JavaScript that changes some text on the page when<br />
the user clicks on the h1.<br />
DOM st<strong>and</strong>s for Document Object Model, <strong>and</strong> in this context it represents<br />
the browser’s underst<strong>and</strong>ing of an <strong>HTML</strong> page. You can read more<br />
about the Document Object Model here: http://en.wikipedia.org/wiki/<br />
Document_Object_Model.<br />
Example 1-9. Simple OnClick h<strong>and</strong>ler<br />
<br />
<br />
My Awesome Page<br />
<br />
function sayHello() {<br />
document.getElementById('foo').inner<strong>HTML</strong> = 'Hi there!';<br />
}<br />
<br />
<br />
<br />
Click me!<br />
<br />
<br />
Here’s an explanation:<br />
I’ve added a script block to the head of the <strong>HTML</strong> document.<br />
Inside the script block, I’ve defined a single JavaScript function named sayHello().<br />
The sayHello() function contains a single statement, which tells the browser to “look<br />
through the document for an element that has the id ‘foo’, <strong>and</strong> set its inner<strong>HTML</strong><br />
contents to ‘Hi there!.’” The effect of this in the browser is that the text “Click me!”<br />
will be replaced <strong>with</strong> “Hi there!” when the user clicks on the h1 element.<br />
End of the sayHello() function.<br />
End of the script block.<br />
The onclick attribute of the h1 element tells the browser to do something when the<br />
user clicks on the h1, namely, to run the sayHello() function.<br />
10 | Chapter 1: Getting Started
Back in the bad old days of web development, different browsers had different support<br />
for JavaScript. This meant that your code might run in Safari 2 but not in Internet<br />
Explorer 6. You had to take great pains to test each browser (<strong>and</strong> even different versions<br />
of the same browser) in order to make sure your code would work for everyone. As the<br />
number of browsers <strong>and</strong> browser versions grew, it became impossible to test <strong>and</strong> maintain<br />
your JavaScript code for every environment. At that time, web programming <strong>with</strong><br />
JavaScript was hell.<br />
Enter jQuery. jQuery is a relatively small JavaScript library that allows you to write<br />
your JavaScript code in a way that will work the same in a wide variety of browsers.<br />
What’s more, it greatly simplifies a number of <strong>com</strong>mon web development tasks. For<br />
these reasons, I use jQuery in most of my web development work, <strong>and</strong> I’ll be using it<br />
for the JavaScript examples in this book. Example 1-10 is a jQuery rewrite of Example<br />
1-9.<br />
Example 1-10. jQuery OnClick h<strong>and</strong>ler<br />
<br />
<br />
My Awesome Page<br />
<br />
<br />
function sayHello() {<br />
$('#foo').text('Hi there!');<br />
}<br />
<br />
<br />
<br />
Click me!<br />
<br />
<br />
Here, I include the jquery.js library. I’ve used a relative path, meaning that the file<br />
exists in the same directory as the page that is using it, but I could have included it<br />
directly from a variety of places where it’s available.<br />
Notice the reduction in the amount of code we need to write to replace the text in<br />
the h1 element. This might not seem like a big deal in such a trivial example, but I<br />
can assure you that it’s a lifesaver in <strong>com</strong>plex solutions.<br />
We’ll be seeing plenty of real-world jQuery examples later on, so I’m going to leave it<br />
at that for the moment.<br />
jQuery downloads, documentation, <strong>and</strong> tutorials are available at http:<br />
//jquery.<strong>com</strong>. To use jQuery, you will need to download it from the<br />
website, rename the file you downloaded (such as jquery-1.3.2.min.js)<br />
to jquery.js, <strong>and</strong> put a copy of it in the same directory as your <strong>HTML</strong><br />
document.<br />
Web Programming Crash Course | 11
Want to read more?<br />
You can find this book at <strong>oreilly</strong>.<strong>com</strong><br />
in print or ebook format.<br />
It’s also available at your favorite book retailer,<br />
including iTunes, the Android Market, Amazon,<br />
Spreading the knowledge of innovators<br />
<strong>and</strong> Barnes & Noble.<br />
<strong>oreilly</strong>.<strong>com</strong>


